

makaofox
-
Posts
256 -
Joined
-
Last visited
-
Days Won
3
Content Type
Profiles
Forums
Blogs
Events
Gallery
Downloads
Store
Posts posted by makaofox
-
-
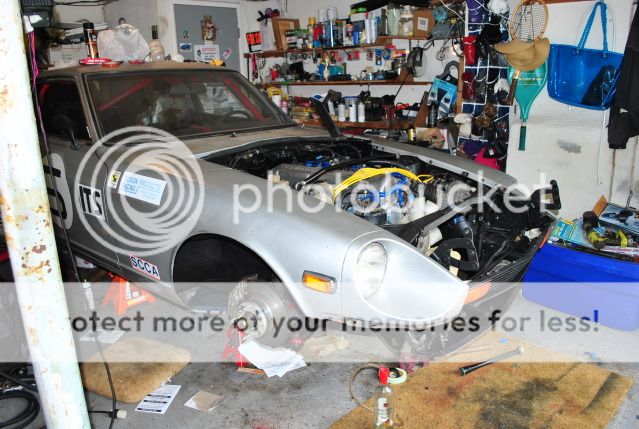
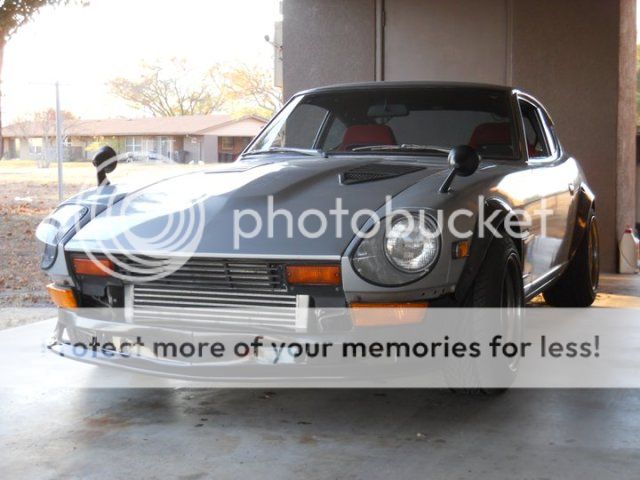
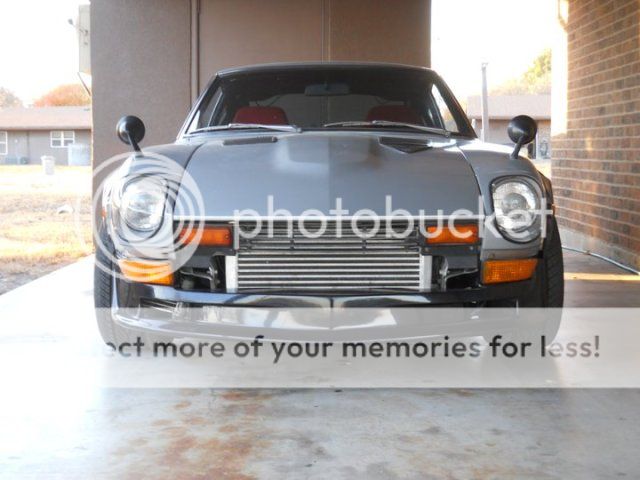
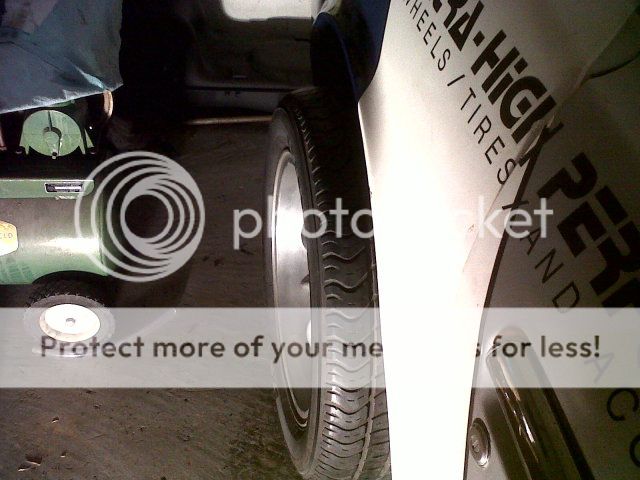
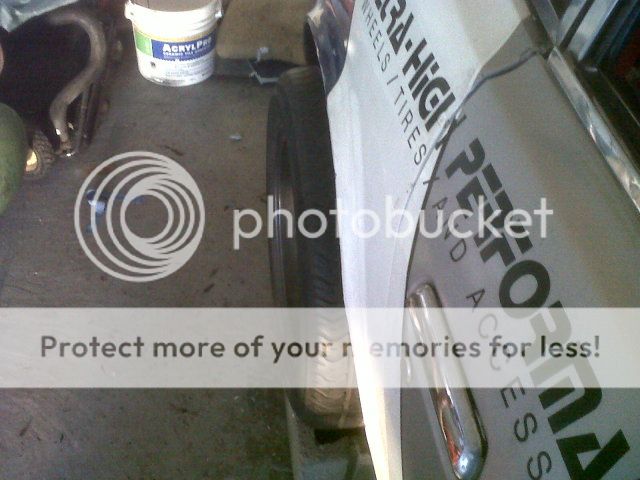
Well took her outside for the first time in 7 months. I really dont recall the z being THIS low. Not even joking, it has to be 3in lower than my TT was and that was sitting on eibach springs. Sitting in it and driving to the driveway (as short as it was) The car seems to engage well. Ebrake functions well, but might have to adjust my brakes from the proportioning valve. I need an exhaust asap howerever lol.
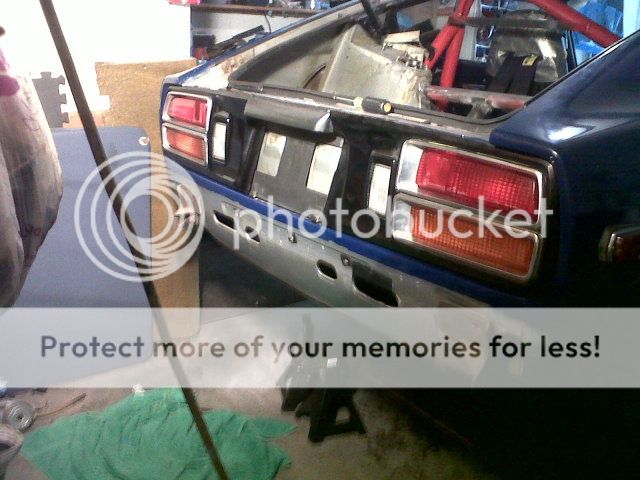
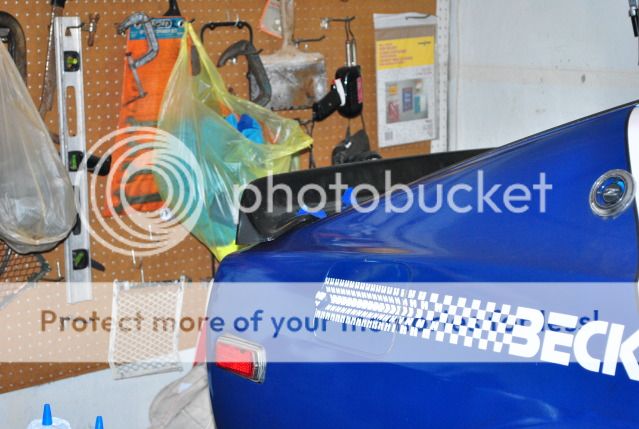
Dont mind the tape on the quarter panel, thats where I want my zg flare to go. Looking at it I dont know if I want to go with the flares or not. Also my front bumper isnt hooked on so its just sagging. I need to make some brackets for it. Dont mind hte tape on the headlights either lol ^_________^
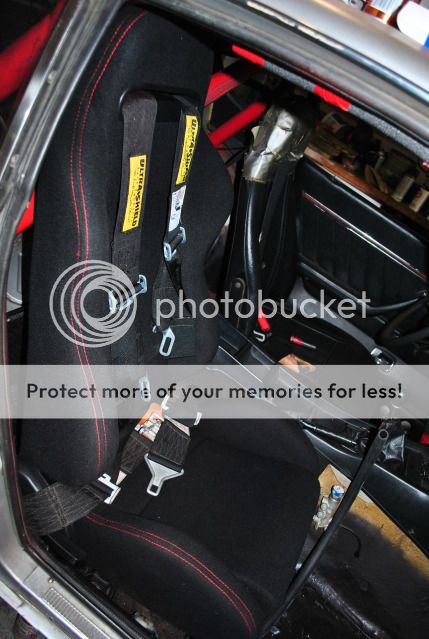
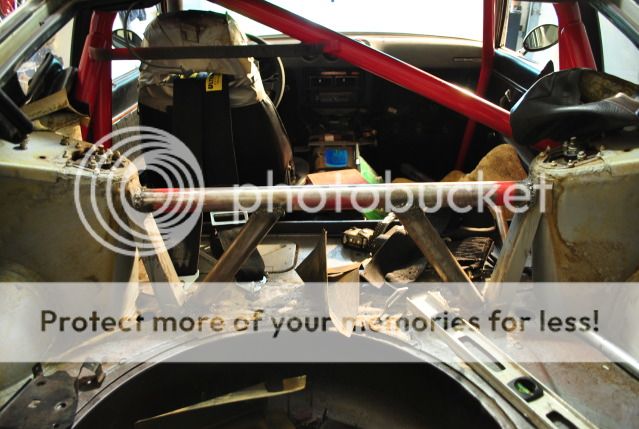
The seats are uber comfy! For being so low I thought it would be a hassle getting out like my z32, but DEAR LORD I love it lol. Getting in and out is great, only thing is im a 5'10 guy and the roll cage is a bit tight.

^ Euro tails <3
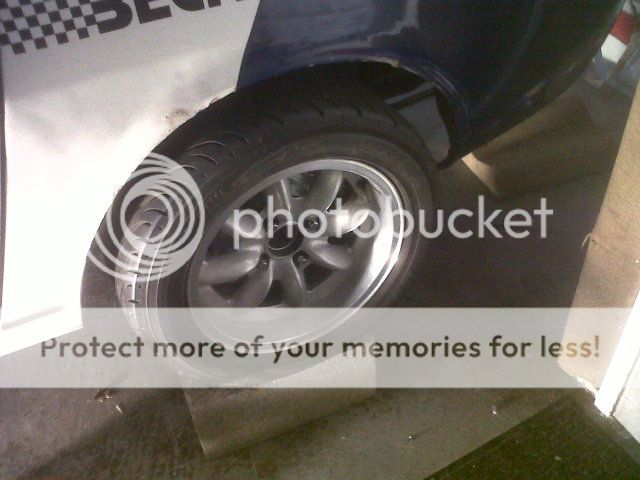
^ Camber is maxed out, I need new coilovers for moar lows!
^ Might get new spark plugs as these went through hell.
^ Got to get me some 240z directionals!
^Saggy bumper is sagging...
^ SCCA!
^fits by a kunts hair LOL
-
Update: Well got her running! Basically covered it all, bleed the brakes and clutch all I need is an exhaust and thermostat! So basically first vid z idles BEAUTIFULLY at 800rpm for 5min. second vid, gave it the slightest gas and BOOM bounces between 2.5k and 3k nonstop. Shut her and was stumped. Today went out there tightened the crap out of the intake and mani bolts, turned out it was a vacuum leak for sure. Tinkered with the tps a bit and now idles and revs amazingly at 900 rpm. She kind of varies wandering from 850-1000 but its steady. Temp at first rose almost overheating! Filled her up with more water and she was golden. But im still going to replace the thermostat. I think it still remains stuck once the car is off, becasue the upper rad hose is pressurized. The rad and hoses are VERY hot as well. Im going to drain the water and put 50/50 with the new stat tomorrow and see what happens. I want it to stay cool to the touch not burn my hand off lol.
Runs great now
Now to get it on the road soon! -
Hmm excuse my noobness but what is the benefit to that? I think im going to check into that though. Looking at the pump itself the black and green wire are there and not spliced, so going to check on the relay for any wires that are most likely spliced.
-
^ It was a race car in the 80's so I wouldnt be surprised. But the thing is I wouldnt know becasue it doesnt scream 'aftermarket'. Everything looks stock, if anything they deleted more than they added or enhanced. Blu do you know exactly what they changed?
-
I have the efi bible, and a download of the fsm. I assume what you say is true, because I have read it several times. Im starting to think the wiring is changed. I went through a bit of the fsm, I have to go through more obviously. I just needed a direction as to why it does what it does. So its NOT normal for the original afm to prime the fuel pump and hear buzzing? So the other afm's I have might not be so faulty. Like I said I am going to check hem today and see what I can do. I just needed some input, thanks guys. Sorry for the thread jack, it was a similar topic, I found no use in starting a whole new thread.
-
Well first if the plugs are black means its running rich. If your timing is bad, does it back fire when you try to start it? Backfiring from intake or exhaust is a clue your timing is off. The distributor should have the firing order of 1,5,3,6,2,4. One you have that check the oilpump shaft and see where it is. Put the motor on TDC "top dead center" Verify that it is at tdc via the cam timing mark. Once it is at tdc check the oil pump shaft. The skinny part must be on the left at 11:25, other wise you will be off timing. I had this issue, im actually exeriencing a bit of the problems you are. Check to see if your gasket is the proper gasket. I ordered one and it was wrong, didnt have the inector cutout on the gasket! Also once you know timing is right, hopefully you switched your fuel filter to a new one as that can cause issues. You NEED a gauge to really know if you fuel pressure is 'too high'. Should be between 30-45psi, just hook it up on the out line. Which is the easiest place would be on the fuel filter, hook it up somewhere there, you should get he same reading. Since you have a new harness, switch it out, no sense in using the chewed up one. I hope some of this helps, if anyone sees fault in what I say please correct me!
-
^ Really appreciate that info. I have seen the write-up to do what you describe with the afm. Im sorry to confuse you, as I am still confused on the situation lol. Basically what I mean by prime is the key is in the on position the fuel pump buzzes aka priming the system and does not stop until the engine turns over. So you get that part, and now I understand its actually only supposed to last 3-5 seconds for a s130. On a s30 it wouldnt be audible? But the thing is when the key is off the battery is not drained its fine, the pump does turn off. It's just when its on the ON position it stays on until you start the car. The car DID idle, so long as you had the flap in the afm held open. I still have to test the continuity, but I see where you are getting at. Could be a bad relay? I havent checked if it was functioning, however I looked at it to see if everything was connected.
-
So what im saying is my current afm primes the fuel pump and DOES NOT stop, it keeps going until the car turns on. The other 3 afm's that I put in dont prime the fuel pump at all, no buzzing sound. Being that it was a track car, im not entirely sure what they did, but from my understanding you arent the first to tell me my 76 shouldnt have the fuel pump prime and hear it. But I never had a car where you didnt hear it prime? That's how I know things are working? To me I think somewhere down the line something is not wired right, or its corroded? I only would return it, if in fact it is faulty.
-
Im curious. I just brought an AFM from thezstore and looks great. However my situation is odd? I tried 2 other afm's both from a 77 and of course the zster afm that is for my 76. But none of them prime the fuel pump like my original afm does? Im currently fixing the z, but before the car would start and not hold idle, and removing the afm plug, it would run better but still stall out. Im guessing something somewhere a connection is bad? I mean its odd how the original afm primes the fuel pump but the other 2 afms dont, including the afm for my z. Any idea's? Im holding onto the afm before I return it to the zstore and end up eating the $580 -____-.
-
Nice! Yea mine is a tight fit. Even with the stock seats the cage is so tight I would still bang my head lol. I plan too do the same once they poop out, although they are only 2months old.
-
What seats are those? I have those exact seats, brought them from a z32 owner for $100 for the pair. I just want to know the brand because they look really awesome in our z's. I love mine and they are comfy as hell. Had to convert the z32 rails to 280z rails, wasnt that tough but wasnt the a cake walk either. Got them to fit in way better than I thought. Only thing is my cage is so dam tight, the seat would possiblly cause my passanger to bang their head on it lol no biggie. Hope you wont have that issue. Looking good by the way
-
^ Thanks! And so did I
But the design of the panasports wouldnt fit over the larger calipers. The XXR have more of a flatter design and even then they BARELY fit. The panasports had no chance of fitting. But I am still happy and I sold them to a fellow z member in california, who is putting them on his 240z. So to me its a win win -
So pretty much its all coming together. All that is left is to get some gas and double check some wiring and hope she cooperates.
Been busy working on the ebrake, its great. Three clicks and shes good!
Probably once the car is running, I will give her one good bleeding for the clutch and brakes.
Stock radiator was leaking and a bit rusted, so ordered a new one from ebay. So might just use the old one to just run the car, but I will hawk my temp gauge for the slighest movement.
It's been so long I almost forgot what she looked like lol.
^Wilwood 1in MC
^ Dam pole!
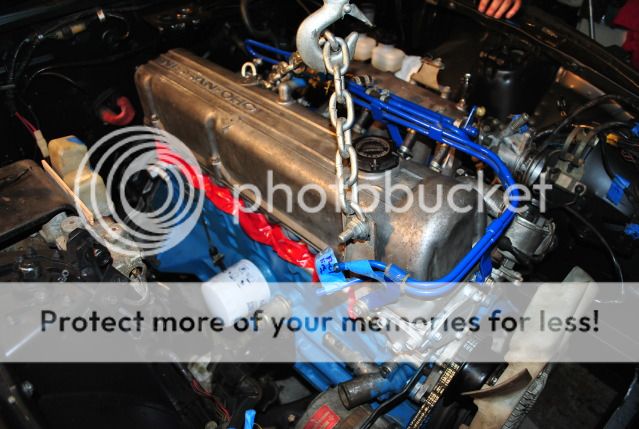
^I like the red on silver, looks nice. JDS Motoring is the shop that worked on my motor.
^ Got these pair of seats for $100, YES $100 for BOTH! Was a great deal. A guy with a z32TT brought another pair so he gave me these for dirt cheap. I love them and me and my dad made custom brackets that give it the PERFECT fit ment.
^ Euro tails.
^ 5+ hp!
^ Stock steering wheel, eww. Hope to change that some day. For now its good and isnt broken or warped.
^ Love my seats. Oh i still have to put in the driver side. I have just been busy with other parts of the car. Hope to get that in this weekend.
Love my red cage lol.
^ Sexy shaveed antenna
Who needs a radio anyway? -
The guy that took it apart to clean it and bore it must have removed them to clean the block and didnt notice the difference. I never knew it was different until we couldnt line it up. That is what I used the gallon with the hand pump. My friend suggested if I ever had a spare drive shaft that goes into that part of the trans, just stick it in there and it wont leak. But now I know better lol.
-
^ Thanks
Btw love your zed. My theme would have been white on pink but sakura's didnt come in 15x9 T_T and they didnt have pink spray paint for the roll cage lol. -
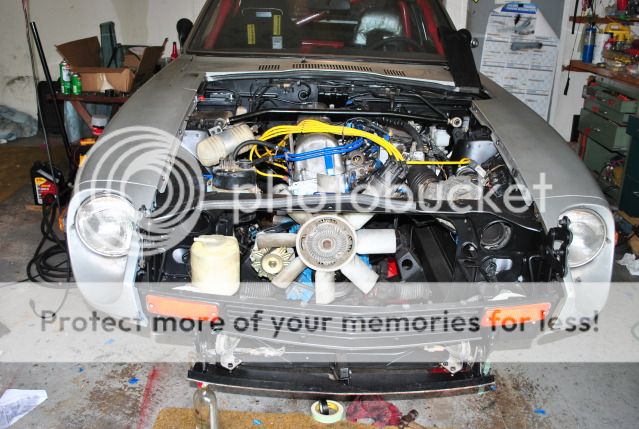
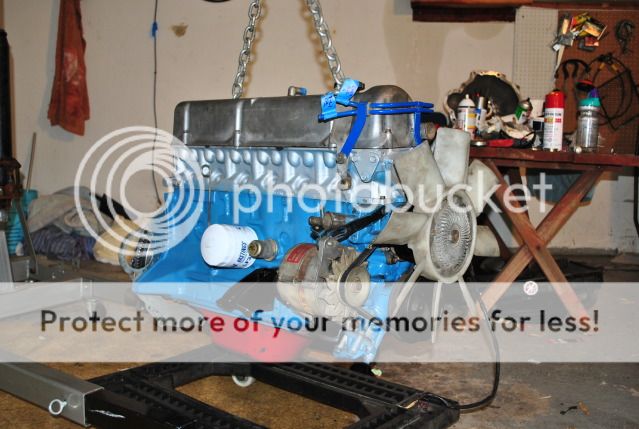
Welp got my motor yesterday 6/1 and after a 6month long wait, I was eager to swap it in that day. Pretty much it was straight forward, with all the goofing around and lolz we had still only took us 12hrs to do. Now all that is left is to get a starter, perhaps and alternator because I would assume it would be stot as well and maybe (but im really hoping not) a distributor. If it turns out my alt is bad I think im going to upgrade to the 86-94 maxima 90amp alternators, just to have that extra 30amp coverage.
Now today just have to wire it up, bleed the brakes and then see what breaks lol.
Oh warning and I learned my lesson: Do not fill the trans BEFORE you install her, she WILL leak all over the place! I learned the hard way thinking 'Oh should be so much easier since its out the car' NOPE! All I did was make a huge mess 4x! Had to put serveral gloves to save myself from slipping and dying -___-. Lesson well learned its easier just to do it and suffer under the car lol.
ANOTHER LESSON: THE MOTOR MOUNTS HAVE A SPECIFIC LOCATION. The driver side with the intake and exhaust manifold has the longer mount while the passanger side with the spark plugs has the shorter mount. DO NOT CONFUSE THEM. Lucky we caught it early on and didnt suffer to much, but it was a pain to switch them.
peekchure time!:
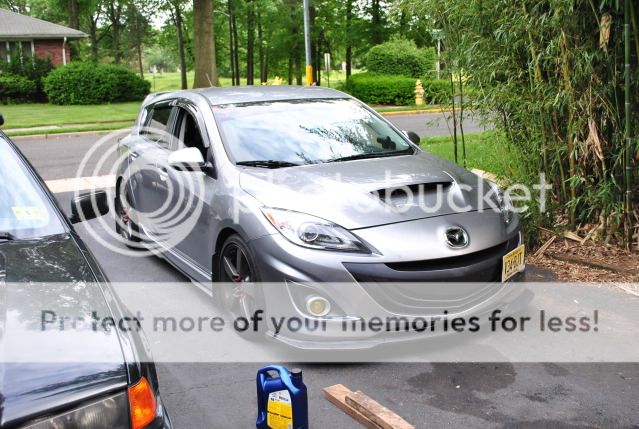
^ My friend jon's 2012 speed3, fully bolted and big turbo. Pretty did it all at my house lol. Thing is a pain in the ass, I like the z better.
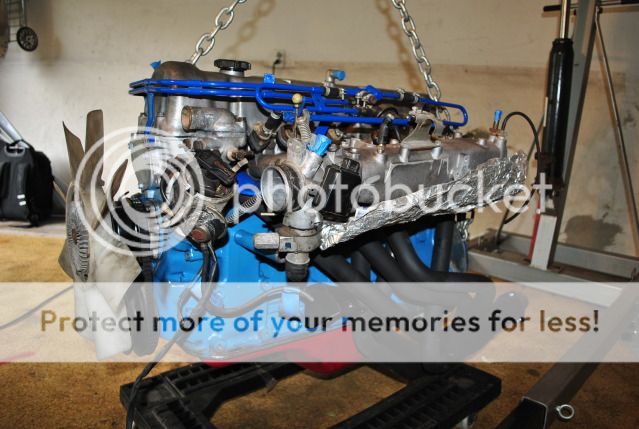
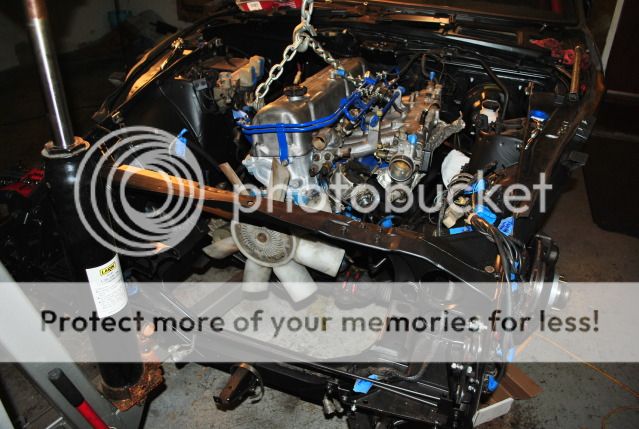
^ we were scared the headers would get in the way of the trans, but it cleared. I love the headers, still dont have an exhaust though.
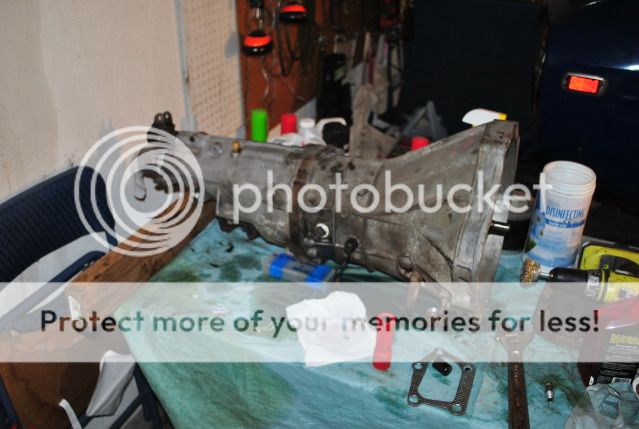
^ 5speed trans.
^ Both mated together.
^ The mounts DONT MIX THEM UP. As you can see the difference.
^ Almost seated!
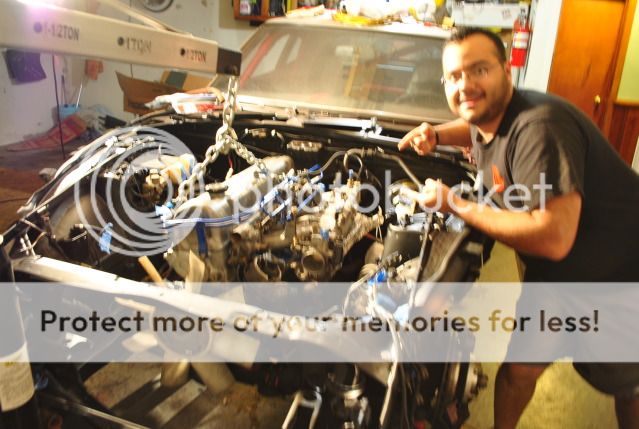
^ Shes staying that way! Open headers!
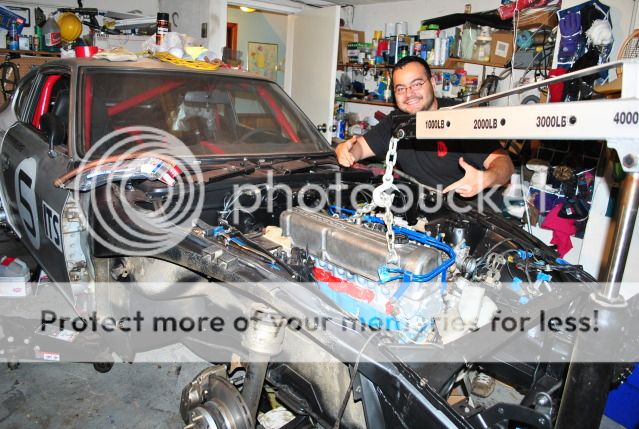
^ Shes in!
^ Jon is happy its in, after a 6 month long wait for this dam motor lol.
^ Now to finish it up and get it running soon for the June 17th Nissan meet here in middletown,nj :thumbsup:
-
I wouldnt go for it. $1500 is a bit more. I understand that for convenience you are will to pay more but over here I can get a 280zx turbo car running for 2k. Which of course will have everything already since its the whole car already running. I would stay at $1500, but it is your choice and the convenience of having a straight swap is enticing.
-
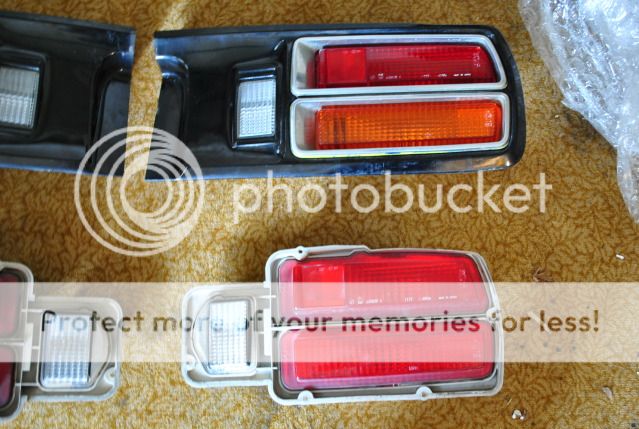
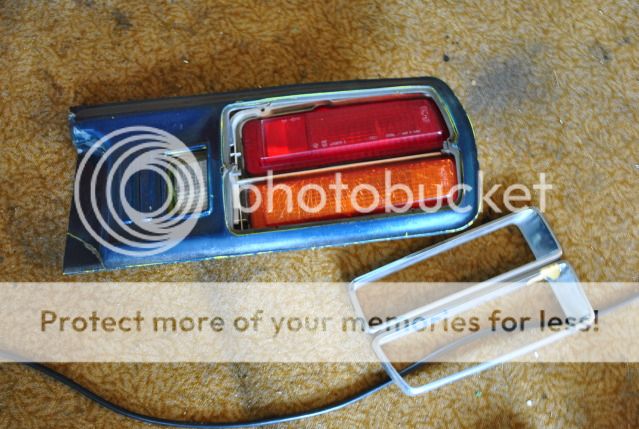
I brought some euro tail lights for the z and installed them today. I love the euro tails, they give it a bit more of a modern touch
Enjoy:v stockies are for sale $200 + 12 shipping.
What I added better pic:
euro tail also for sale, not the best condition:
-
Thanks man, yea I like to work fast, but its not fast enough! It is a very clean car to start with, I took my time looking for the right body to start with and im very please with this one. I did lower it with the new wheels and it looked low but not stupid low. However, the motor wasnt in the bay so thats a few hundred pounds off the car so I wasn't going to see how low it really is. I have the flares ready to be fitted but I think I'll drive it and see if I want to put them on yet. I sold the panasports to a fellow z member, all the way out in CA. Would have loved to keep them but they just wouldnt have worked, the xxr's barely fit as is.
-
LOL! Yea sorry about the long read. I was doing all this work since october. But thanks man
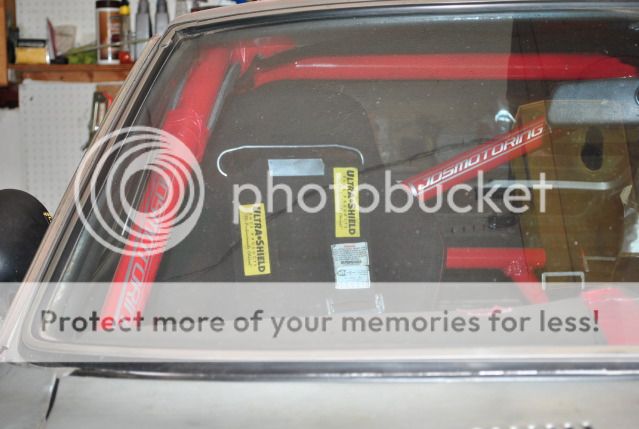
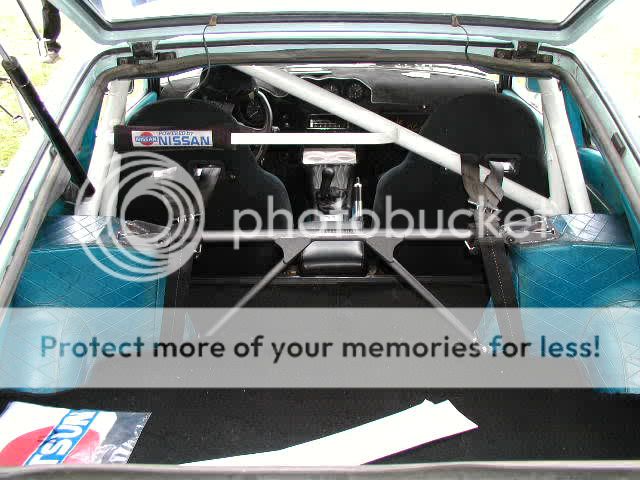
I guess in the 80's the positioning of the seatbelts didnt matter? I plan on moving them to the strutbar. Now im going to have 4 holes in the chassis to plug up, but atleast I know if anything were to happen I would be safe.
-
Well been waiting forever for my motor and its STILL not here!
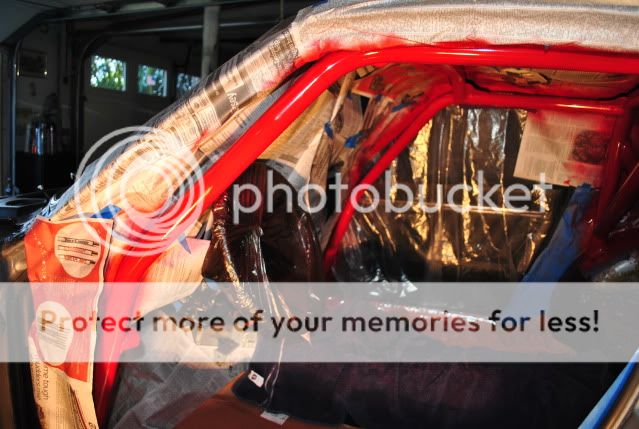
So in the mean time' date=' I shaved my front passenger rotor which had a very high spot. Paid like $11 to fix that at a shop and they did a good job, it has a high spot still but nothing crazy, Its alot more manageable. Still gotta bleed my brakes but think ill do that once the motor is in.
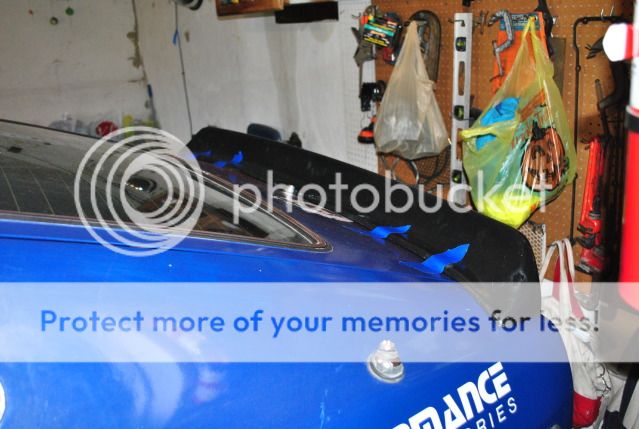
Put some foam on the roll cage as I KNOW I will be hitting it a few times lol.
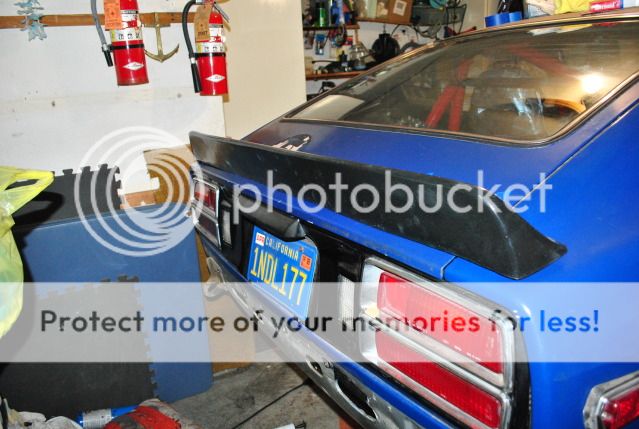
Then my air dam, spoiler and zg flares came in. Mocked up the flares and spoiler today.
[img']http://i604.photobucket.com/albums/tt124/makaofox/280z%20pics/IMG00094-20120328-1308.jpg[/img]
240z xenon urethane airdam. Didnt have the fenders bolted up but it came with all the hardware, so thats going to be a blast to try and fit. I think ill have to reinforce the bottom too as it looks to me in high speed it will be flimsy. So I might just make an aluminum splitter just to prevent it from flexing. Still on the lookout for a decent pair of 240z turn signals. I think im going to keep the 280z grill and turn signals for awhile not sure yet. Here is a pic to help you see what I mean..
Mocked up the spoiler that was easy, doesnt fit 100% but I dont expect it too. Not sure if I should give it that space from the edge of the hatch or get it right up against the hatch? Opinions??
^ Gap or no gap?
Got 4 zg flares from ebay made from fiber glass. They dont fit 100% either and I didnt expect them too but they look nice. I think im going to paint them black, along with the spoiler. I still need the rubber welting. it came with the hardware to bolt it up. I think they will look great with the wheels but I dont want to do the flares just yet. I think Im going to wait until the winter to do them.
^ They are taped and I already maked the area of which to drill. I still need to mark where to cut and then I would have to weld them back together. Again I taped it but I think I will hold off on doing them, not sure 100%. It depends how the motor goes in and how anxious I am to drive lol.
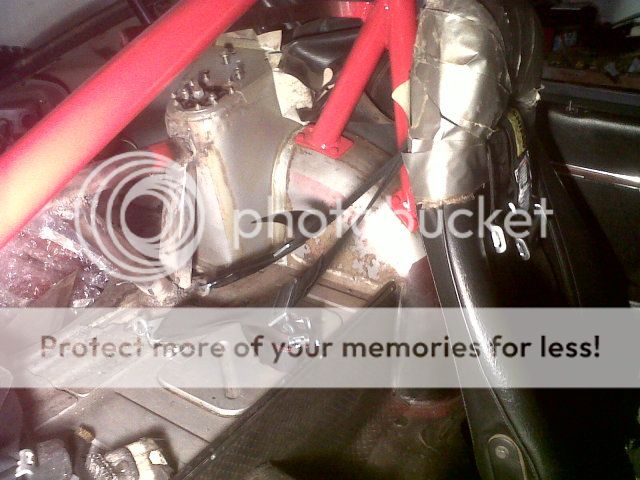
Well went to the shop that is doing my motor' date=' and all it needs are 6 stupid little springs T_T. They are really retainer clips and a few gaskets and then she can be done. If the part arrives next week itll be done next week.Here is a pic of it so far, the block is going to be painted silver:
[img']http://i604.photobucket.com/albums/tt124/makaofox/280z%20pics/IMG00139-20120510-1333.jpg[/img]
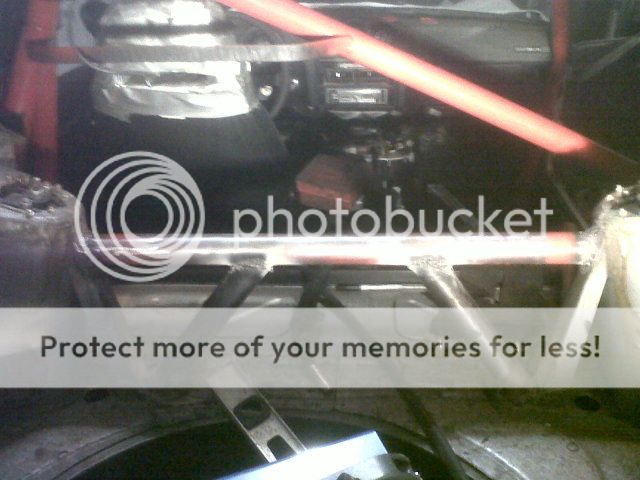
In the mean time me and my buddy wanted to do something to make the car stiffer. So We welded a strut tower bar in the far to look like this:
And here is our result, its still not done, need to grind it down reweld a smother bead and paint it.
I have a question about my seatbelt position. Is this an OK SAFE set up? To mee it looks safe and it came like this when I brought it.
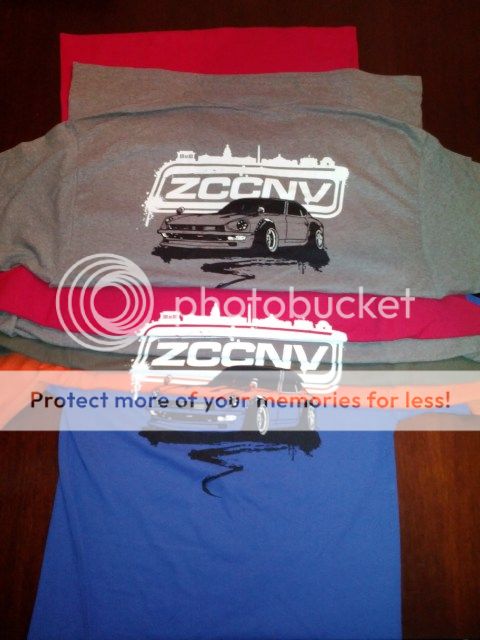
Last but not least ordered me a red ZCCNV shirt
To add to my z collection. -
Hey guys small update:
Still waiting on my motor' date=' going either tomorrow or tuesday to talk price as he is assembling it.
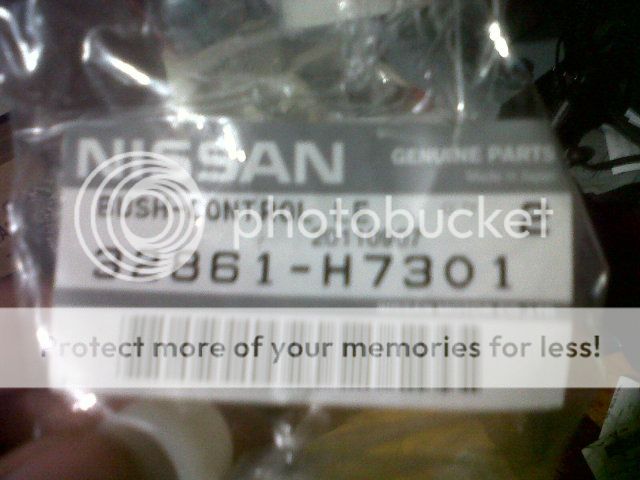
Working on all the bushing I did the Front control arms, radius rod (found that it was already upgraded to a ball and socket upgrade so only needed to use one poly bushing), I did the mustache bar, trans mount and im waiting to see if I should do the sway bar end links. Since I have a different set up might not even use it. The whole bushing install went smoothly but its tiresome!
Some pics of the mustache bar
[img']http://i604.photobucket.com/albums/tt124/makaofox/280z%20pics/IMG00059-20120219-1751.jpg[/img]
and then when I cleaned it up:
Im thinking about getting a diff mount the GM one, I heard they were like $20.
Prepared some of the parts I took out and painted them.
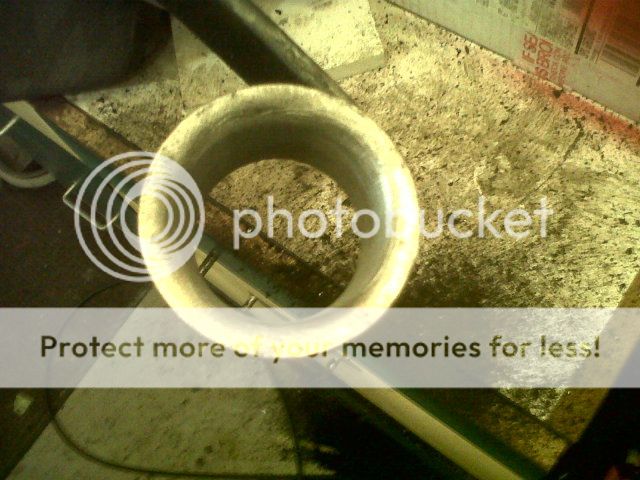
I got a 5sp from a local guy and its pretty nice, I brought brass bushings for it:
^ $5 for though and one fits like a glove and this
Is the nylon piece, mine looked worn so I replaced it for $15.
After installing the bushing and the nylon piece I put it on the trans and DEAR LORD the transformation is night and day! I cant drive the z yet but I know she will feel good while shifting, none of that typical sloppiness.
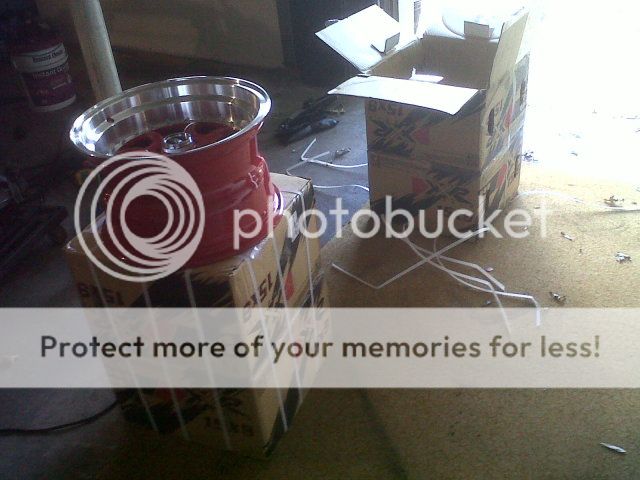
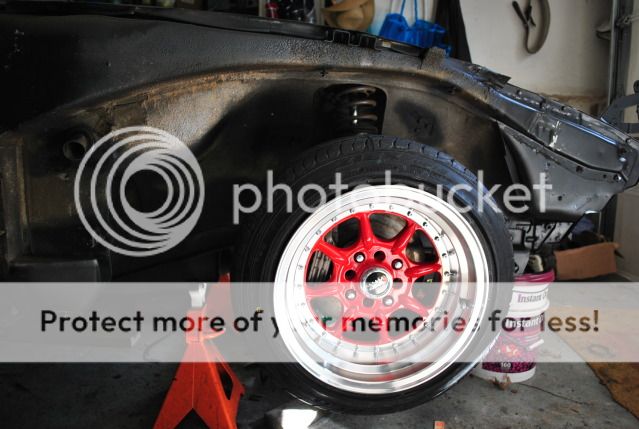
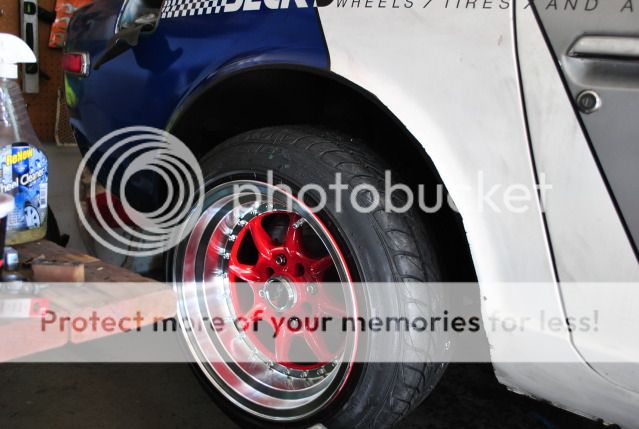
What she looks like with the spacers and wheels. Plan on getting xxr 002 15x9 all around to hold me over. I might sell these panasports.
All thats left at this moment is adjust my MC (wilwood 1in mc) bleed the brakes, add fluid to the diff and tranny, and drop in the motor.
Update:Well super excited my motor got back from being professionally hi-temp painted and should be in assembly this week in time for my spring break next week!
What have I been doing thus far is learning that my z used to be a automatic' date=' that they swapped over to a manual. Which means I have the smaller diff an R180. Cracking that open I learned that it is infact a welded diff. So fo now I put some oil in it a blend of lucus oil (Which is thick as a mother!) and a generic blend of 75w-140. I am putting the same blen into my 5sp tranny, once I replace the output shaft seal.
I Ordered a crap load of stuff!
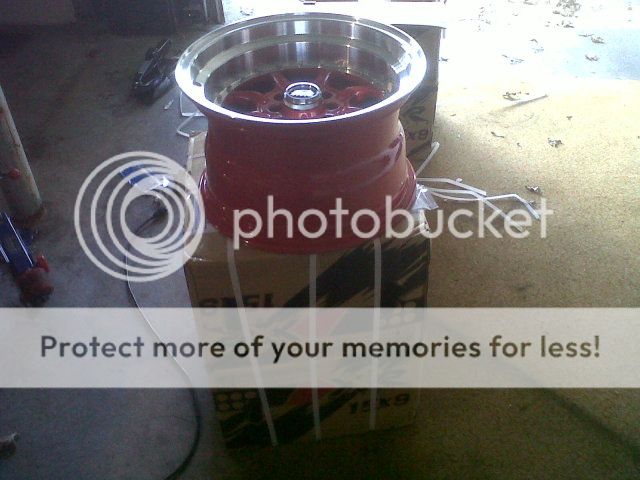
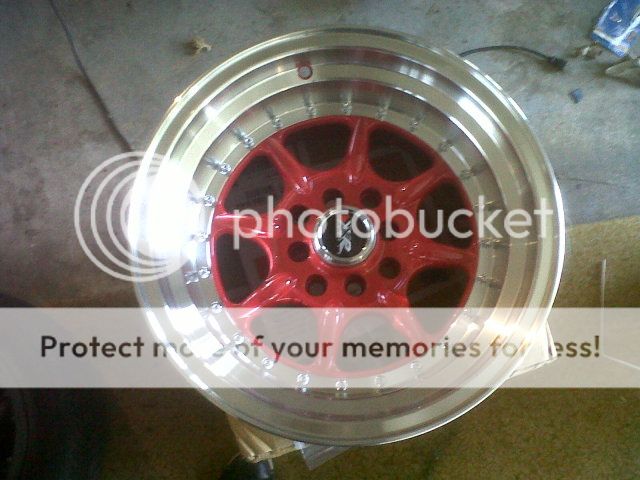
Wheels: XXR 002 in red 15x9 all around, 0+ offset.
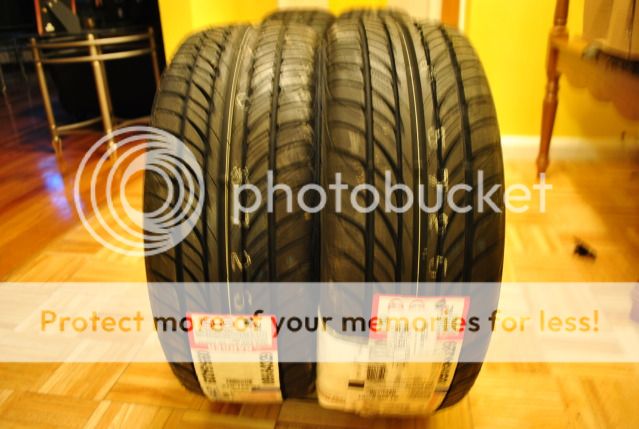
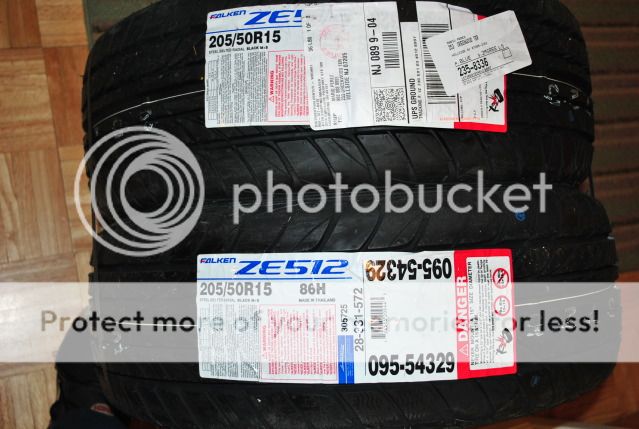
Tires: FALKEN ZIEX ZE-512 205/50/15 all around (has a nice stretch too them, nothing crazy)
zg fender flares
bre style spoiler
front spacers: 15mm
Rolled all 4 fenders and what a PAIN in the toosh that was! Paint chipped even though the heat gun was applied properly. Its ok and then a chunk fell off because it had bondo. Im not mad, just painted it black for now to prevent it from rusting.
Now onto the pics!
[img']http://i604.photobucket.com/albums/tt124/makaofox/280z%20pics/DSC_0514.jpg[/img]
^ Tires new that I ordered from ebay. Not a bad deal.
^ Looks SO much better than what I had thought, it really compliments the cage.
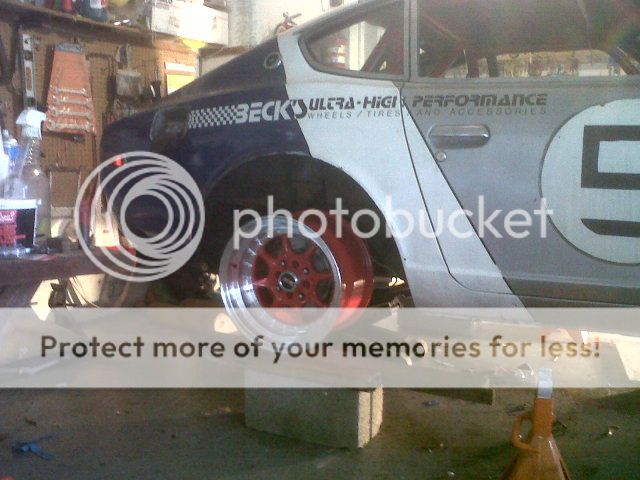
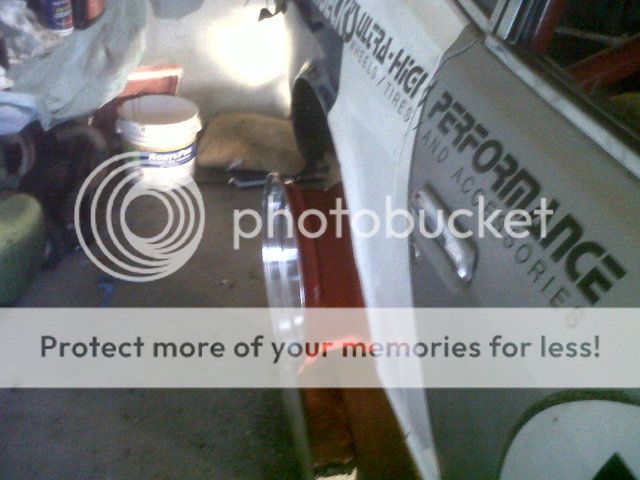
^ Thats the reason why I need a 15mm spacer lol! 15 is a bit excessive but I need something with studs. It should push it out a nice bit and will look great with the zg flares.
^ The area where the bondo came off. Looks like the tire ripped into it and totally Fed it up lol. They did good covering it up.
^ Cant wait till she is on the ground!
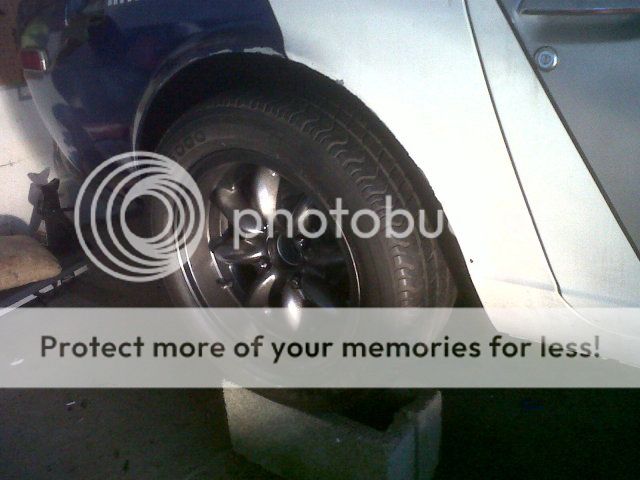
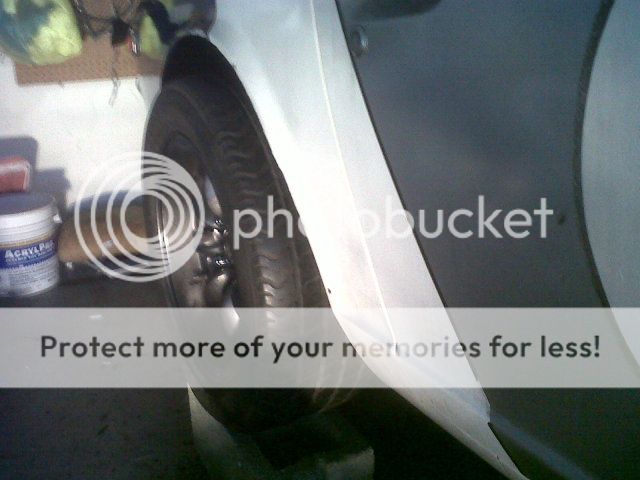
Here are some of the old panasports, still trying to sell them. I had a few bites.
I loved the old wheels but compared to the panasports the xxr's are so much nicer and surprisingly so much lighter! 16lbs each!!
Now what's left is to
Find a front air dam like the 240z style thats urethane.
Find 240z turn signals.
Buy muffler and make a 3in exhaust setup.
Im sure I will find out more things as the motor comes in.
-
Well I jut noticed I didnt update about my brakes so here is the whole write up I did.
This is a write up I made' date=' I was given permission by edan to post this.
Silver Mine Motors Rear Conversion Kit
This kit includes everything you will need to install into your z. Some situations might need some modification that will be on, [b']YOU[/b], the owner.
Edan is the owner of Silver Mine Motors, which produces fabulous products for the s30 chassis as well as other models. He mostly sells brake products but also sells some suspension components. His products are cheapest and he does his best to keep it that way. If you happen to find a brake kit cheaper, send him the link and he will match it! Edan has amazing customer service and responds to his emails/calls quickly. Check out his website to order your kit!
http://www.silverminemotors.com/main.sc
Facts about this kit:
-You should really upgrade to a 15/16 master cylinder OR the more available 1inch master cylinder. This is important if you already upgraded your front brakes. You should also consider a proportioning valve.
-My 15inch panasport wheels (15x6) WILL NOT FIT. The minimum is a 15inch wheel HOWEVER it will depend on the WIDTH and OFFSET of the wheel. In consideration is also the design of the wheel. Some spoke design might be to concave, and hit against the caliper. Too much of an inward design will hit the caliper, be sure to test fit the wheels.
-First things first, I have a 76 280z so other years might differ slightly.
Tools you will need:
19mm: wrench.
17mm: wrench.
14mm: wrench.
10mm: wrench.
Sawzall: cut backing plate.
Screw driver.
Cotter pins: Have a couple. They don’t need to be large, medium or smaller ones work fine.
Rubber mallet or 5lb mallet: Optional to beat out your drums.
PB Blaster: This is your friend use this A LOT.
Needle nose plier.
Getting started:
1-First off, more than likely your drums are stuck onto your car. So use the mallet to beat the drum off the stub axel. If it breaks off (the drum) it is ok, the parts are not going to be used any more.
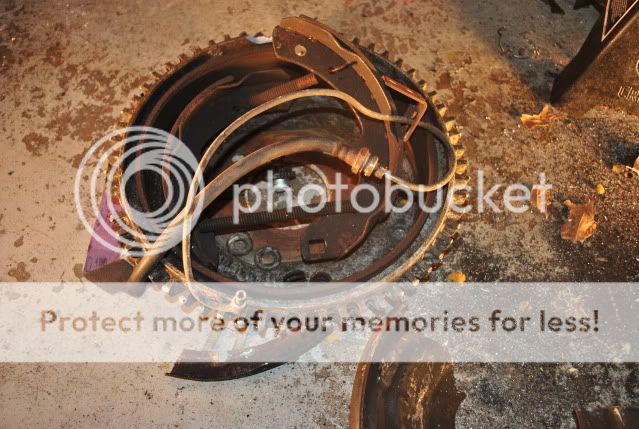
2-Once the drum is off, you will be looking at the brake shoes and springs, as well as the cylinder holding the parking brake cable.
3-Behind the backing plate are the hard lines for the parking brake. These are no longer needed and must be removed. The only line needed is the hardline from the main braking system. Be careful removing the parking brake hard lines, and then remove the parking brake cable, save the bolt that holds it in place. Push the cable aside, as it will be needed later on.
4-With the screw driver or needle nose, remove the springs carefully of the brake shoes and it will come off.
5-Once the brake shoes are off you will be able to see 4 bolts that are holding the backing plate in place. Remove those carefully. They are not in the best position, so they will be prone to stripping if you aren’t careful.
6-Once the backing plate is loose it is now ready to cut. If it isn’t loose, hit it a few times with the mallet until it is loose.
7-Once loosed, CAREFULLY use the sawzall to cut the backing plate in two sections. It is best to cut in a “V†shape on both sides and bend the plate repeatedly to snap off. If done carefully, you should hit nothing and it should come off fairly easily. Again be CAREFUL not to hit the stub axel or the parking brake cable, or even your brake line hose.
8-After the backing plate is removed, you should have all the pieces of the old braking system in a pile and ready for the new kit to go in.
9-The kit is very easy to install, I recommend ordering the stainless steel brake lines.
10-The mounting bracket should have the “silver mine†logo facing toward the differential and should be mounted opposite of your strut assembly. Use the 3 bolts with lock washers and bolt it in place with the 17mm wrench.
11-With the bracket in place, put the rotor on and use the lug nuts to hold it in place.
12-Put the caliper in place with the pads in it already and use the 2 bolts to bolt in the caliper, 19mm wrench. If you have the stainless steel line, screw that into the caliper before you bolt it in the bracket. Then screw it into the hardline.
13-Now the parking cable is ready to be installed. The cable is held on a bracket to avoid rubbing against the driveshaft. If necessary, remove the bracket to obtain proper length and install the parking brake cable, using the previous bolt to hold it in with a cotter pin.
-With all that done, you are ready to drive! Go to an open area with no traffic to test it out.
Special thanks to Edan at Silver Mine Motors for providing a great kit and pictures. Also a special thanks to David Palermo for providing great pictures.
Pictures now:
My Silvermine motors rear calipers: Mustang 05-10 calipers. DO AT EVERY BRAKE PAD CHANGE.
Here it is: http://www.stangmafia.com/forum/f59/replacing-rear-brake-pads-6541/
Here is how I replaced the rear brake pads on my 2007 GT500.
Here is a list of tools and supplies used for the install:
1. 3/8" drive ratchet handle with extensions as needed
2. Metric Sockets: 13mm standard
3. Torque Wrench - 3/8" drive
4. Brake caliper tool
Notes: Prior to starting I had washed the wheels to reduce the dust and wore a particle mask to avoid breathing in the dust (nasty stuff).
I also released the parking brake prior to starting.
Remove the two guide pin bolts with a 13mm socket. Then remove and secure the caliper with a short bungee cord. See the fifth picture below for a suggested anchor point.
I understand you don't need to remove the lower bolt to replace the pads; perhaps just loosen enough to allow the caliper to swing out. This way the caliper is more stable when resetting the piston. But I removed both bolts when I replaced my pads.
Here is the caliper tool I used to reset the piston; got it at Harbor Freight for about $20. I used the #5 adapter plate, whose pins fit the keyed notches on the piston surface.
You have to turn the piston in a clockwise direction while applying forward pressure with the tool. The backing plate on the tool pushes against the opposite side of the caliper while turning the handle. It can take substantial force to turn the pistons; wearing mechanics gloves while turning the handle helps. My hands are still aching.
Here's what the piston looks like when compressed back into the caliper.
The piston must be oriented so the key slots are as shown here to fit into an alignment pin on the back of the inboard brake pad (the pin is circled on the outboard pad below).
Remove the old brake pads and spring clips.
Assemble in reverse with new pads and spring clips then replace the caliper and snug down the guide pin bolts. See notes below on the application of caliper grease.
There is a flat spot on the opening of the guide pins that must be aligned with a flat edge on the caliper mounting flange as shown here.
Torque down the guide pin bolts to 24 lb-ft in the following order:
* RH caliper - tighten top bolt and then the bottom bolt
* LH caliper - tighten bottom bolt and then the top bolt
Here's what the rear brake looks like all assembled.
I didn't apply any caliper grease at the time, but I intend to go back and apply some synthetic caliper grease to the areas of the pads (back surface only) that come into contact with the caliper and piston.
Caution: After servicing the brakes, be sure to pump the brakes as many times as needed to make sure they are firm and effective before putting the car into gear.
-
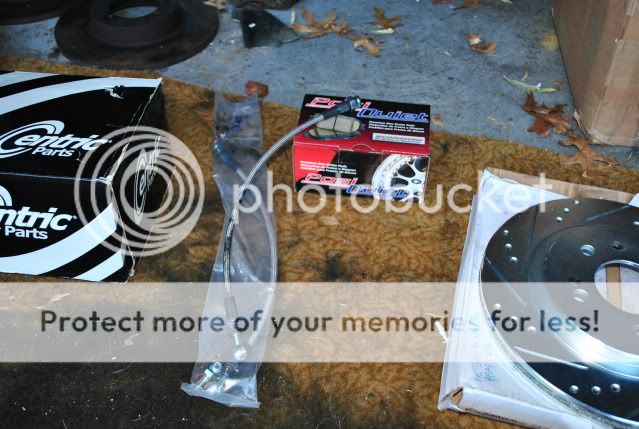
Update!
Well its been awhile' date=' sent out my motor to be built by JDS Motoring in port reading, New Jersey. He is a really good friend of mine and he is doing the work for a great price, so I couldnt resist building up the motor to a respectable status. All I really wanted were 280zx flat tops the rest 280z parts, so 200hp should be within my expected output in the end.
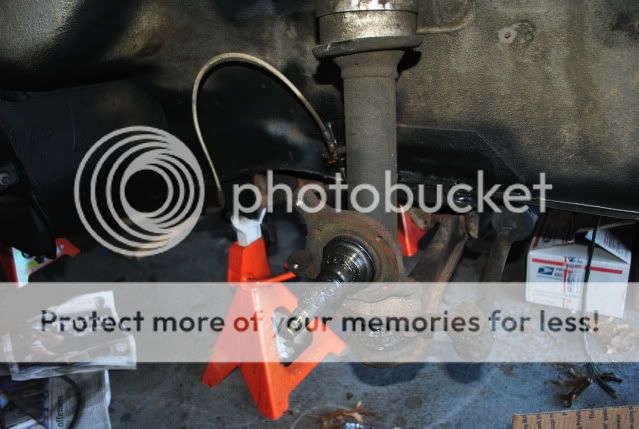
Brought a silver mine rear disk kit and some pieces for the front to complete it like ss lines and the spacers. Finished the driver side front and that was cake. Got to the passenger side and the disk needs to be surfaced as it has a high point -____-. The front is basically done, the rear isnt going to be hard but its a a pain with the parking brake lol.
[img']http://i604.photobucket.com/albums/tt124/makaofox/280z%20pics/001-4.jpg[/img]
^ Driver side, looks soo pretty.
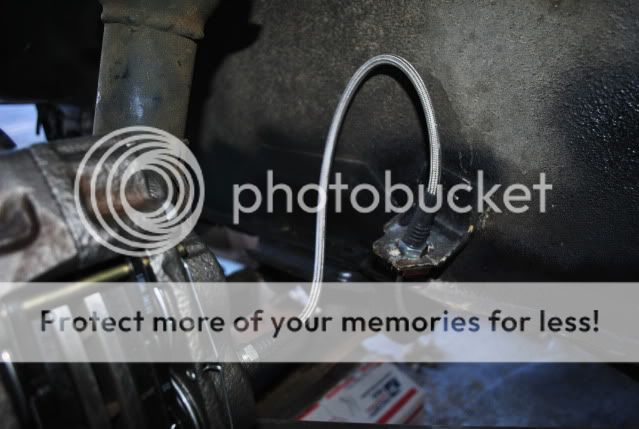
^ SS line is serious business!
^ Passenger side, with the disk that needs to be cut a bit to even it out.
^ Passenger side, it already had ss lines but they were weak sauce for the new set up.
^ The old icky front brakes. Gotta say they are pretty nice, but they dont compare to the 4x4 calipers and z31 vented disks.
^ The devils work lol. This sucker has to be cut in order to fit the rear disks. It wasnt that bad.
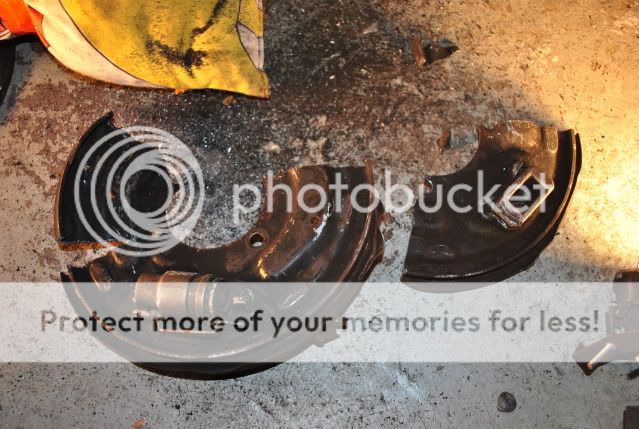
^ All the nonsense of the driver side rear. Those drum covers put up a SERIOUS ass battle! I hammered the driver side so hard it split in half! The passenger side came off like butter.
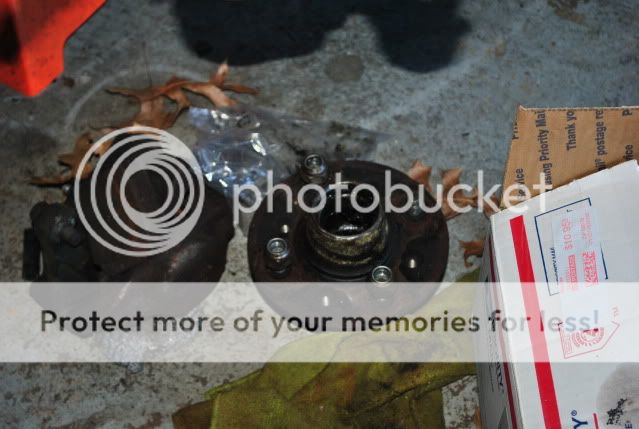
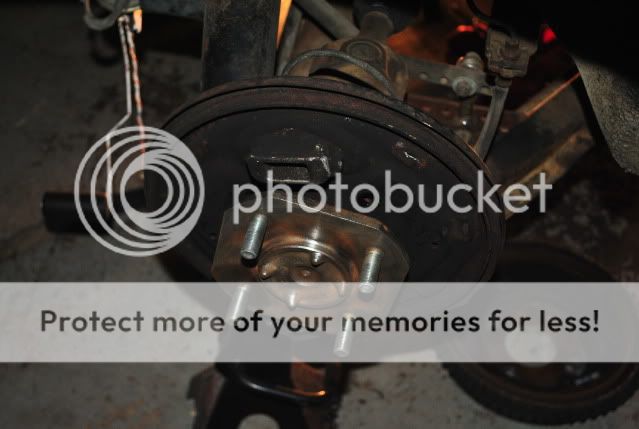
^ Passenger side hub, with the back plate still on it. Hammer it a few times to loosen it off the hub and then cut away with a sawzal VERY CAREFULLY.
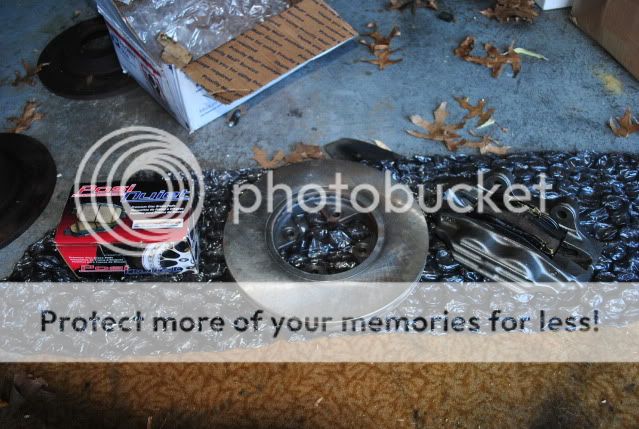
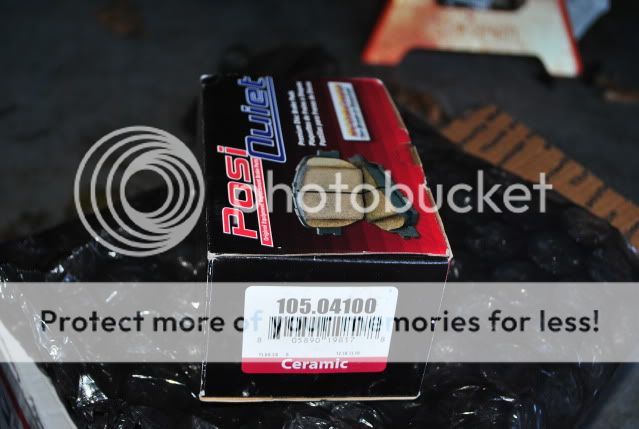
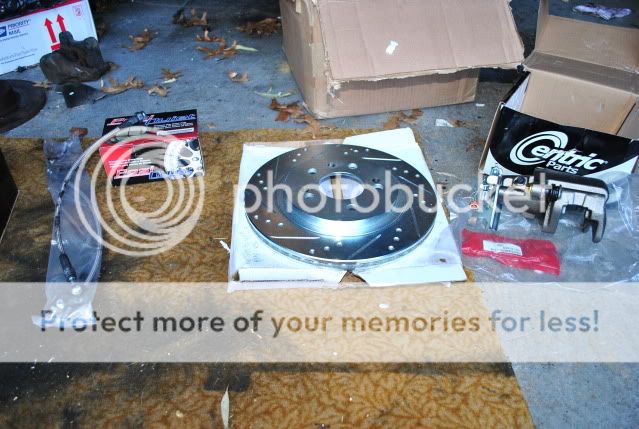
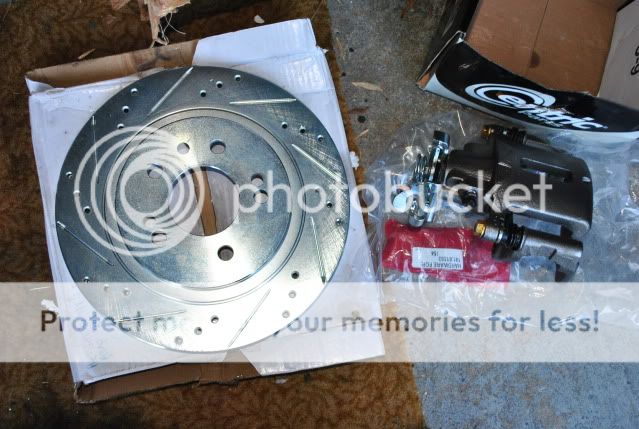
^ The rear goodies! This kit is serious. Its expensive but worth it! Edan is a very good guy. (messed up my order though :/ I wanted NO drilled/slotted disks just regular. But its all good, I dont intend to track the z yet.
^ Calipers come off a ford cobra I think, the year is 2010?
^ss brake lines, my rubber ones were shot!
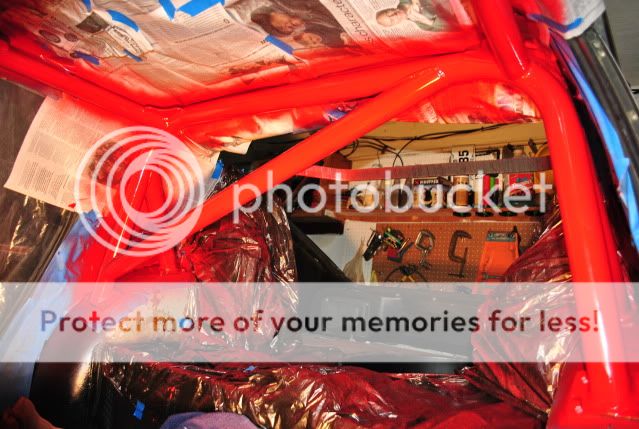
Painted my cage, its REALLY hard with it still in the car. So hard I have drips galore lol. I dont care though, as long as it doesnt rust again. Im going to sand it and give it another coat and then clean up everything else. Since part of the interior is now red lol. Some area's of the cage are ON the body of the car, I cant even get a thin piece of paper between the body and the cage. This was a nice cage but man did they do a tight job.
These guys are still waiting to be united with their best bud mr.L28 T___T. Hopefully I get the motor in January, as by then I'll have the brakes all done, and the gas tank back up. All I need is a hose for the gas tank and a master cylinder from a 79-81 280zx. I can get one but its almost impossible to get another or even a rebuild kit!
This is how she sits now, waiting...


Post pics of your z's here!!
in Non Tech Board
Posted
^ Sexy! What side mirror's are those? They look cool, weird but cool lol.