

New-to-240z
-
Posts
235 -
Joined
-
Last visited
Content Type
Profiles
Forums
Blogs
Events
Gallery
Downloads
Store
Posts posted by New-to-240z
-
-
Does anyone know the color for this car? I am falling in love more and more by the day! Any information on this car would be awesome!
-
Ok . . . I'm one of those @-holes who keeps asking.
 That whole list is awesome, but I still have a very hard time determining the difference between the . .
 Type 1 Ducted Fiberglass ducts
and
Urethane Air Dam with ducts
both for 70 - 74.
I just want to make sure I get the right one before purchasing. You can look at the picture I posted like 2 topics down. Its just too hard for me to see the difference between them, and hopefully you will be able to clear that up for me.
-
Just wondering if someone could please tell me what air dam this is. The MSA site, with its crappy pictures, makes it hard to discern between them. I want this air dam! Also, does anyone know where u can find those clear turn signals? MSA says they are no longer available, but does anyone else sell them?
-
hey everyone, I was wondering . . . what air dam is that in the first pic of this post? That look is basically exactly what I'm going for . .
Can someone tell me what air dam that is from MSA?
-
was just wondering . . . did you do any sanding prior to the paint? Or did you just really clean up the pieces with soap and water?
I'm actually thinking of doing this as well to my interior panels. I really like the way they came out too! GREAT JOB!!
-
that looks extremly good. Do you think you could give a item # so i can see if they have it in other colors? I have an ikea about 20 min from me.
-
Yes sir I did.
I got some clipers from home depot, and during the hot months, I left them on the dash with the glove box open and it formed pretty well to my dash. I will say . . . not perfectly, as there are gaps here and there. But for the most part it turned out allright.
I haven't glued anything down yet, as I am still up in the air on what I am planning on doing. I'm getting my car painted soon, and putting in some Evo 8 seats as well. So, I'm just making sure I'm not going further and replacing the entire dash as well.
-
Luckily I live in on the West coast in CA so it RARELY rains. So, for me I'll be removing the undercoating, fixing any rust, and then prepping with the POR sprays, and then coating with POR-15. I've heard nothing but good things for this stuff. I'm not worried about weather conditions, seeing as I only drive my car when its not raining, and it is garaged throughout the year.
Good luck to ya . . . I've heard its a PIA to remove the undercoating! I'm not really looking forward to it, but its got to happen sooner or later!
-
Heres a few of mine, aluminum stock and c-channel construction which mimics the factory design.
Hey RS, was wondering how you cut the front bumper and made it look soo smooth? I am going to be getting my Z painted soon and I had that exact idea, but couldn't figure out how to do it.
-
Anyone feel like helping a fellow Z member out? I got a garage to do it in, just need some extra hands to get it done faster. I am sending her in for paint soon, and want to get some other things taken care of before I do that. This is one of them. (I also want to do the underbody coating, but I'm pretty sure no-one wants to help with that... hell, I don't even want to do that!! haha)
-
The Evo 8 and 9 seats are indeed Recaro's and are very comfortable. I sold a pair of mint evo 8's after I scored some 9's in great condition. I have yet to install, but it has been done with some minor modification. Here is a link to that install.....
You rock man!! Thank you soo much for the help. Going to be a little bit more expensive then I had hoped for, but quality usually costs.
-
Hey guys,
I just got word I can grab a almost brand new pair of Evo 8 (I believe they are Recaro) seats from a friend of mine for $500 with rails. I don't have the dimensions yet, but was just wondering if anyone had fit these into a 240Z? They are pretty damn nice, and for the price I just had to inquire on here!
-
I think I know those hills in the background . . . is that by the 241 toll road?
I used to live in Orange,caBy the way, I'm down for a test fit if needed. I have 73 240Z. Tell you the truth, are you the guy I sold my engine and trans to?
Brought it over in a white truck. -
I was wondering. Should I consider using the paint stripper rather then just sanding mine off? My car has 1 paintjob on top of the original paint and it isn't extremely bad. There are faded parts all over the hood and so forth. But, its not like it has 4 paintjobs on it. This is going to be my first paint/prep work I've ever done, so any input is helpful . (sorry to thread jack)
-
I'm guessing you have had bodywork experience? I'm really close to just doing all the work myself, but am afraid I'm going to mess it all up and end up wasting 6 months of my time in the end.
I wish I had a friend that painted or did bodywork that could just teach me how to do the basics. I guess we aren't all lucky right. -
Any news on the strength of this setup? I am thinking of doing this sometime down the line, once I get ahold of a Q45 VLSD. Shouldn't be too long. I have heard rumors of needing to re-inforce the front diff mount that is welded to the car. Has anyone here done this or not done this and noticed and problems?
-
Oh, I just went on Nismoparts.com and they have the part for $21, but I don't know about if they have it in stock. I'll be calling them on Monday.
-
If you are unable to acquire the tool you can use a hydraulic press as well, it just requires removal of the A-arm/Control arm along with the strut assembly and probably a second person's assistance to balance things while setting up the press. I have found that a large socket 1/2" drive works to support the bottom of it, and you will want several dowels approximately the diameter of the spindle pin in 1" increments from 1-6" to use on the top to press the spindle out. If anyone wants I can take a few pictures when I do the other side.
Please do. I don't have a press but I'm sure if I take pictures they will be able to do it no problem at the shop I goto.
-
I am interested in this as well. I will be doing a full rebuild of my rear end and need this tool in the coming months. Anyone know where this can be purchased or if the loaner is still floating around?
-
I tried the full circle but it's too much. I also tried just the top half. The bottom half give the best reflections inside the bucket. It makes the glass lens and reflector of the headlight really sparkle.
I am working on wiring them to the side markers. Running the thin wires back through the headlight case.
Yes, I might be guilty of "bling" but I am also doing it for safety.
If you end up doing the wiring please post up a quick how to. I have been waiting to do something like this for some time now, and this would work out perfectly!!! Nice setup by the way!
-
Here is a link to their page regarding the TTT TC rods . .
http://www.technotoytuning.com/productdetail.php?p=668
Here is some picstures of them . .
They look pretty beefy if you ask me, and from what I hear they have great customer service. I have yet to buy from them tho . . . I'm waiting to make my decision on the rear end conversion they make.
(Sorry to thread jack:hijack: if that's what I did.)
-
They were also sold by the above mentioned company.
Before installing a set of TechnoToy TC rods, I replaced my teflon TC sets once a year due to failure of the ball.
They may seem to still be working but once you look under the cover you'll find a chewed up piece of teflon.
Was wondering . . . do those put a lot of strain on your frame rails? I've heard of the rails cracking because there is no give between the TC rods and the frame rail connections.
I used to have the same setup on my 240sx and LOVED the feel, and plus you can adjust the wheel back or forward a little bit as well. ( Great for our Z's cause some peoples wheels hit the front air dam !!)
-
Damn, I would love to meet up but that's the day I'm moving!!! Maybe next month.
-
There are some photos in my HybridZ gallery in my sig with the TTT kit installed. I used an Armada diff instead of the Q45 or Z32 diff and had a mounting cradle welded into the car for the front mount from above ...
Regards,
Mike
Was the kit worth it in your opionon? I'm really interested in purchasing this when I get the extra $$ together. My question to you is, how much did it cost to have that front diff mount created and welded into place? I know everyone's different in price, but a general idea is better then nothing.
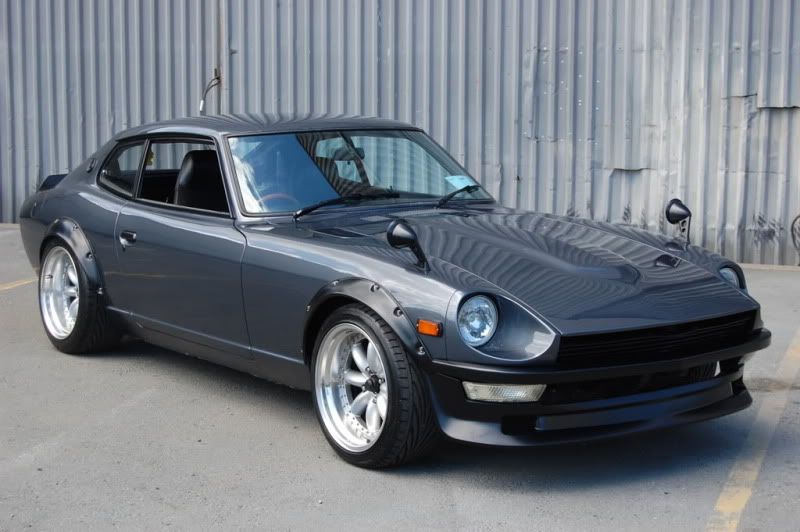


What air dam is this?
in Body Kits & Paint
Posted
Sorry for asking so much, I'm just trying to figure out everything asap, cause I'm getting my car painted soon and need to get all info possible.