jojothemonkey
-
Posts
34 -
Joined
-
Last visited
Content Type
Profiles
Forums
Blogs
Events
Gallery
Downloads
Store
Everything posted by jojothemonkey
-

Confused on wiring Distributor and Coil
jojothemonkey replied to jojothemonkey's topic in MegaSquirt
That makes sense to have the coil positive and negative all in the same circuit. But I still do not understand why there should be two separate sources of 12v going to the distributor. I see that by connecting the resistor it should drop the voltage down to around 5v. But where is the main 12v wire suppose to connect to. This is an 83 distributor. This is frustrating as this is pretty much the last thing to figure out before I can attempt to start the car and before I move to Houston next week and have no where to work on the car. -
I have Megasquirt II PCB 3, with the direct coil drive installed. I am also using a relay board. Distributor with the three wires Black is ground - goes to frame or engine White is trigger - goes to Tach on the relay board Red is 12v - goes to ??? Coil Negative terminal - S5 on relay board Positive - Depends on what relay board diagram I have looked at ties in with the fuel pump power supply or ignition switch Now if I look at this diagram Terminal #5 shows the positive side of the coil being connected to the fuel pump. Why not my ignition switch? Terminal 15 shows the white wire on the distributor being tied in with a switch 12v. WHY? As stated above the red wire on the distributor is 12v then why does the Tach wire require 12v also? The way I see the distributor wires is ground, power, and signal. Then if I look at this diagram It shows the O2 sensor is tied into the fuel pump. The positive side of the coil goes directly to a switched 12v source. This post may not make a lot of sense. But I am confused as heck as to why things are wired like they are. One more thing, what size fuses should be used for the fuel injectors, 5amp or 7.5amp?
-
Ahhh I need to replace this oil junction
jojothemonkey replied to biohazard53188's topic in Nissan L6 Forum
I believe you are looking for something like this. The block and oil sending unit is 1/8 BSPT, British standard pipe thread. This fitting has a male BSPT that goes into the block and a female BSPT for the sending unit. In the middle it has two 1/8 NPT. In this thread there are a couple of sites listed. The first site has turbo oil line kits. I bought mine from stealthmodeperformance which is the same product from tunertoyz just a couple of dollars cheaper. http://forums.hybridz.org/showthread.php?t=120784&highlight=oil+feed+line -
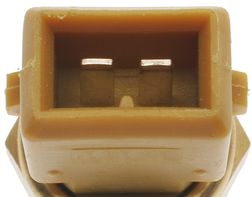
Coolant sensor electrical connection part #
jojothemonkey replied to jojothemonkey's topic in Miscellaneous Tech
I just pick one up at autozone along with my new coolant sensor. Thanks for the input guys. -
Coolant sensor electrical connection part #
jojothemonkey replied to jojothemonkey's topic in Miscellaneous Tech
That is perfect! I just checked it out on my old harness and plugs in no problem, now I just need to find one that is not busted up. Thanks!! -
Does anyone have a part number for the electrical connection that goes to this coolant sensor? For some reason I cant find the female plug on the old wiring harness or any part store web sites.

-
Questions on rewiring my 260z
jojothemonkey replied to jojothemonkey's topic in Ignition and Electrical
Nope. But I don't think it will matter. I am just going to connect cable and lights and see what happens. -
Questions on rewiring my 260z
jojothemonkey replied to jojothemonkey's topic in Ignition and Electrical
I guess it will either be grounding point or a connection somewhere. I really don't know what to look for as all of this is new to me. Here is a link to service manual. You can use this to try and trace out the electrical connections. http://carfiche.com/fiche009/s30/ -
Questions on rewiring my 260z
jojothemonkey replied to jojothemonkey's topic in Ignition and Electrical
Odds are you have and electrical problem. Pulling the lever towards you should activate high beams not turn your lights off. You may want to check your fuses and mabey even some of the connections on the turn switch. Look for a white wire with a yellow stripe that will be for high beams, at least thats what is on mine. -
Questions on rewiring my 260z
jojothemonkey replied to jojothemonkey's topic in Ignition and Electrical
I'm not sure if it did originally. On the harness I am installing it has a separate wire for high beam indicators. -
Questions on rewiring my 260z
jojothemonkey replied to jojothemonkey's topic in Ignition and Electrical
I knew it was mechanical but didn't really think about that until you pointed it out. Mabey it was just those wires throwing me off. Hmm mabey the wires are something for the ecu? -
Ok, so like the genius that I am I pulled the all the electrical out and didn't make any notes. I am currently installing a 22 circuit EZ2Wire harness. I have the rest of the gauges figured out, except the tach and speedo. Also these gauges could be 280z (not sure if there is any difference between 260z and 280z gauges) because one of the previous owners swapped in an L28 and 280z dash along with a major hack job on the electrical. On the Tach there are three posts. The larger one I figure is the tach signal and the two smaller ones are gauge power and gauge ground On the speedo I am sure that the red wire is gauge power. However there is a little circuit board with three wires one green, green red, and red that does not go into gauge itself but is just screwed on. I dont know what that is. I have tried to trace things out on the electrical diagrams that I have but I still cant figure out whats what.
-
So close to being done... er well getting the engine running. Last few things to do. Finish up the exhaust and all of the wiring and all the little details that i'm sure that i have forgotten about. Installed some Corbeau seats that I got from Craigslist. Since they were used I swap the seats around passenger to driver side and vice versa Moved the seats inward so that the side bolster doesnt interfere with the door closing I bought a T3 wastegate adapter from ebay and then in an unrelated search here found that it wasnt plug and play. So I said the heck with it and welded it on to my manifold which already had a broken stud that I tried to fix. Not to sure how well the welding will hold up but it will work for now and I have another for back up that I literally dug out of the ground at a junk yard. I was going to redo the setup but decided against it as I would had to have remake my down pipe and a couple of other things. Made the downpipe from a 4" v flange, 4" 45 degree pipe and a 4" to 3" transition Broke my vise bending the @#*! pedal so I could install a throttle cable. What a pain in my @$$ it took about two hours of bending just to get it right. Eh what can ya do? All better Well hopefully I will have it running by next week.
-
You should be fine with the gas tank in the car. If you really worried about it you can always drain it. There should be a plug on the underside. And no you dont have to worry about being shocked while welding. Make sure you measure and trial fit as many times as you can. Also do as much practice welds as you can. Good luck!
-
What is this? (Part of the cooling system)
jojothemonkey replied to jojothemonkey's topic in Nissan L6 Forum
Thanks for the input. It dawned on me a few hours after I had posted a reply to do a search on what others have done for this and Proxlamus has a thread going on with a bunch of good info in it ( http://forums.hybridz.org/showthread.php?t=121590 ). What I have found is that one of three things happen. People put an air filter on it, run a catch can or do some sort of pcv setup. I think just for now I will put an air filter on it and continue to focus on getting the car running. -
What is this? (Part of the cooling system)
jojothemonkey replied to jojothemonkey's topic in Nissan L6 Forum
That kinda clears things up. Then that should be routed back into the intake manifold with the pcv valve. Is pcv valve required? I have removed the fuel rail and everything else. Now all that is on there is just a pallnet fuel rail and fittings for the vacuum lines. -
Ok so I know this has something to do with the coolant in the engine block. But with all of the pics I had taken of the engine prior to pulling it apart I don't have one of what this goes to. From what I can gather it may be coolant bypass or recirculation line. I'm not sure. I will not be running ac/heater and already have the two hole plugged on the passenger side. This is at the front in between the exhaust manifold and where the ac compressor would go. When I pulled it out, found that it is not threaded and I don't really want to thread the hole to plug it.
-
You can pick that up at part store like auto zone, advanced auto parts, etc. It should be red or black tube of silicone gasket maker.
-
Lex, what size exhaust will you be running, 3 or 4 inch?
-
When I bought this turbo it did not come with the downpipe elbow. This turbo has a 4" diameter on the exhaust housing. I'm trying to go from the 4" to 3" for the downpipe. Heres what I have tried so far. Bought a reducing cone but it was to long and it did not go well when I tried to cut it down. I can not find anyone who sells a smaller length cone. Last week I went to a dodge dealer and ordered the down pipe but it does not reduce to 3" so I returned it. Last week I ordered an HX35 - HX40 downpipe adapter. When I had spoken to the company that made it they told me it is a 4" to 3" reducer. Got it in this morning and it is 4" to 3" outer diameter at the v clamp part which means I'm still **** and need to returned it. So I'm getting pretty frustrated here and was about to say the heck with it and stick the stock turbo on... but I do not really want to do that. So what I would like to know is what others have used for a reducer to get there exhaust to a 3"?
-
I didnt realize it would cost that much to probably get it done. I'll look on ebay and else where to see what I can find. Thanks for the input.
-
Forgot to mention this will be for an Ford EDIS setup
-
So I plan to take this in on Monday to be done. It will be made of aluminum, 1/8 thick and the teeth will stick out at 1/4 past the dampener. The missing tooth will be aligned with the TDC groove in the dampener. But of course I have a couple of questions. Should I have the wheel mounted to the outer part of the dampener or to the inner part as indicated by the four holes? The top of the teeth should be flat not curved right? Also no matter what measurements of adjustments I take the teeth are still a different size than the space between them. Will that make a difference as long as all the teeth are the same size? Or should I just tell the them to make the teeth .25 wide, space between .25 and the missing tooth area .75?
-
Forgot to add this last night. Also mocked up the boost gauge using the clock housing. Then i moved the other gauges around. Also got in my 22 circuit ez2wire kit in looks pretty good we'll see how it goes installation wise. oh yeah forgot about this... trust me it is not fun to be laying under the car with just barley any room for your head and the welding helmet to kinda look down and see that your on fire (its about a 3 in hole). Did I mention that I hate bodywork???
-
So yeah nothing but fun. Lets see replaced the passenger side floor pan (of course it didnt go as i had planed, but its done), patched a couple of spots on the drivers side and the big surprise found a nice large hole under the battery tray so had to replace that too. eh its done and over and i hate body work. But on a happier note. I reinstalled the engine with out any problems and mocked up the holset turbo and down pipe to be fabbed. Not to sure about the intercooler, more than likely buy a bigger one to replace it.