

PerformanceVH
-
Posts
77 -
Joined
-
Last visited
Content Type
Profiles
Forums
Blogs
Events
Gallery
Downloads
Store
Posts posted by PerformanceVH
-
-
Made some more progress today, fabricated the lower radiator mounts, made some poly insulators and started on the hood pin layout. I'll be either painting these hood pins to match or I'll get some white ones.

-
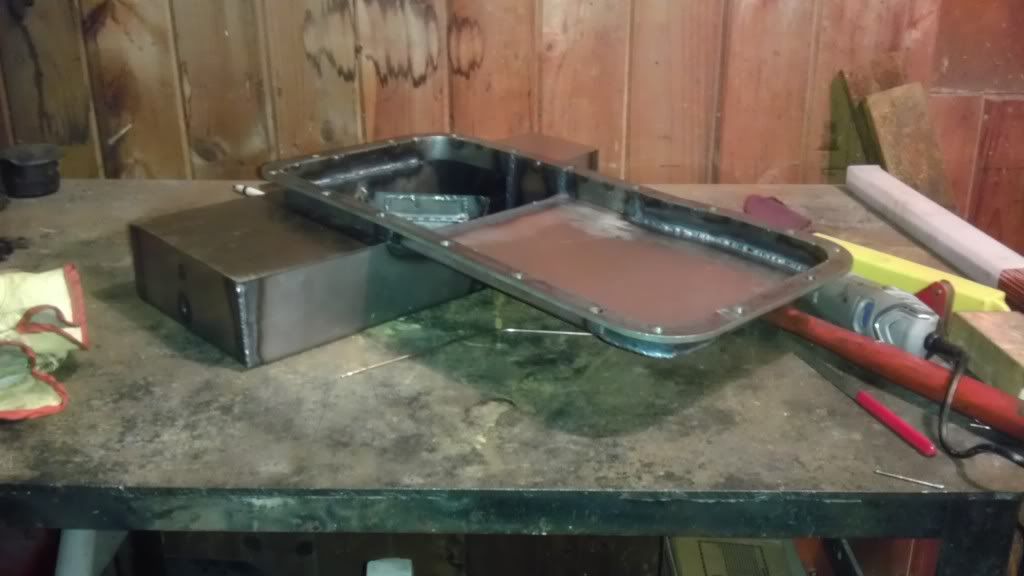
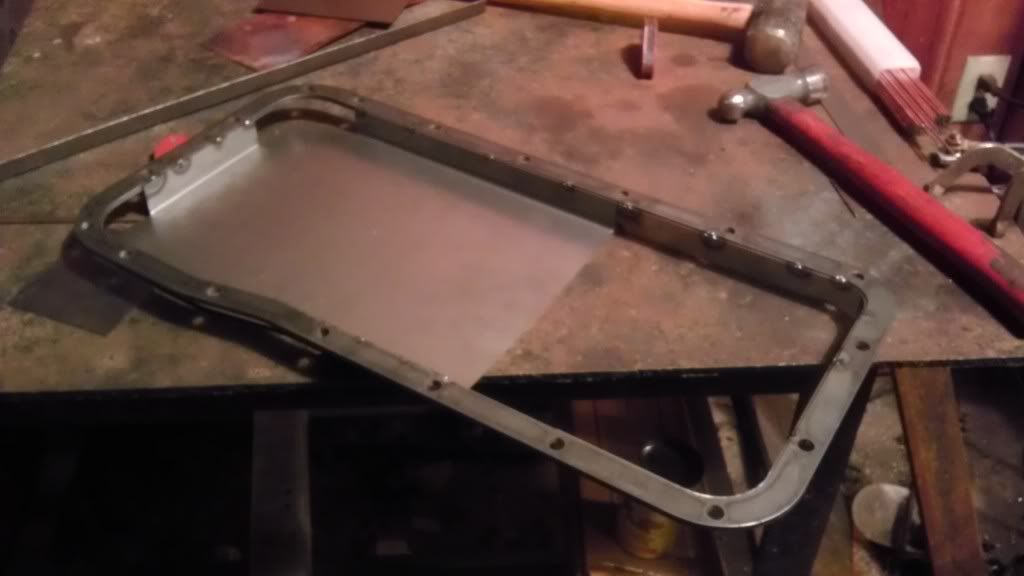
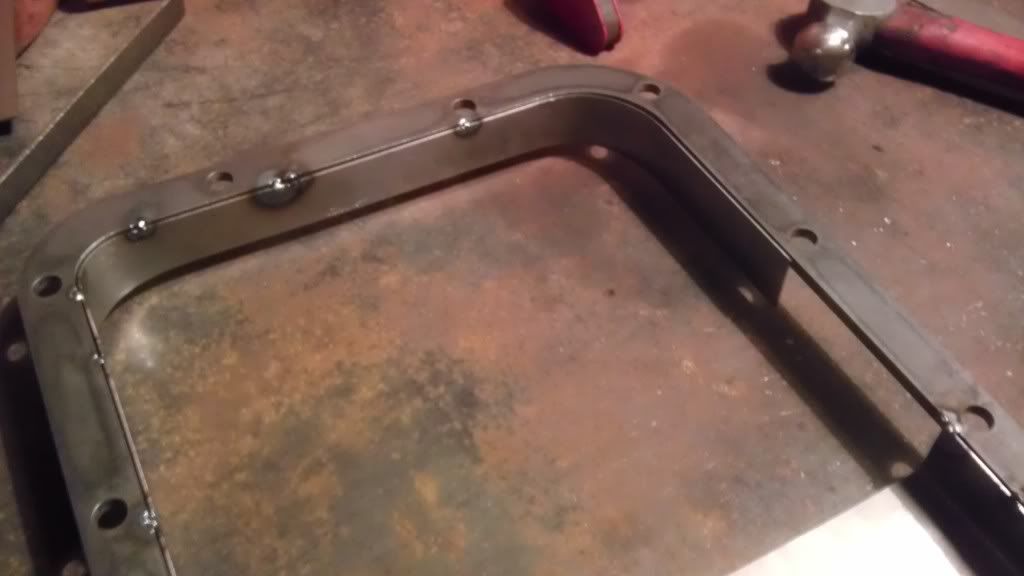
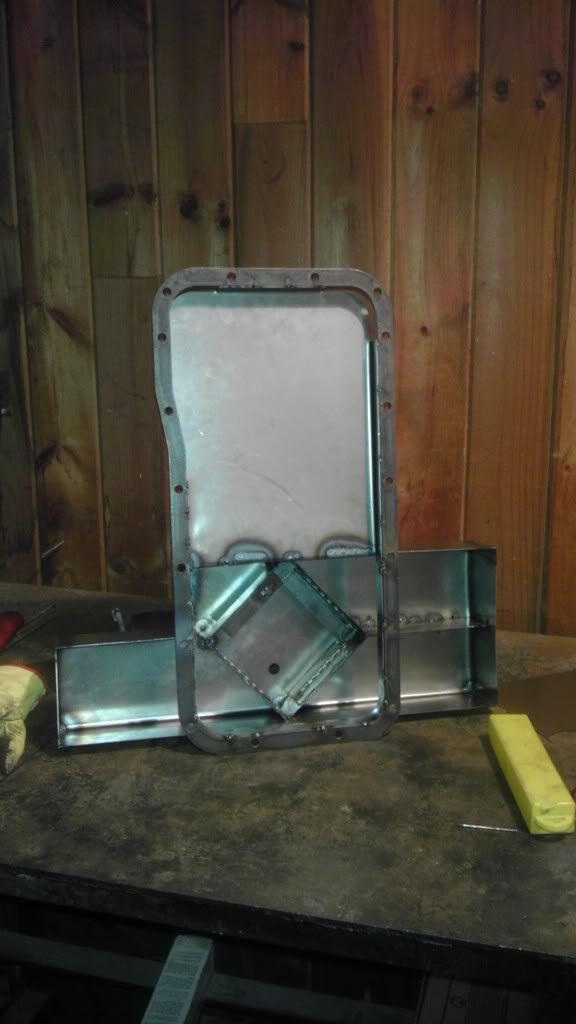
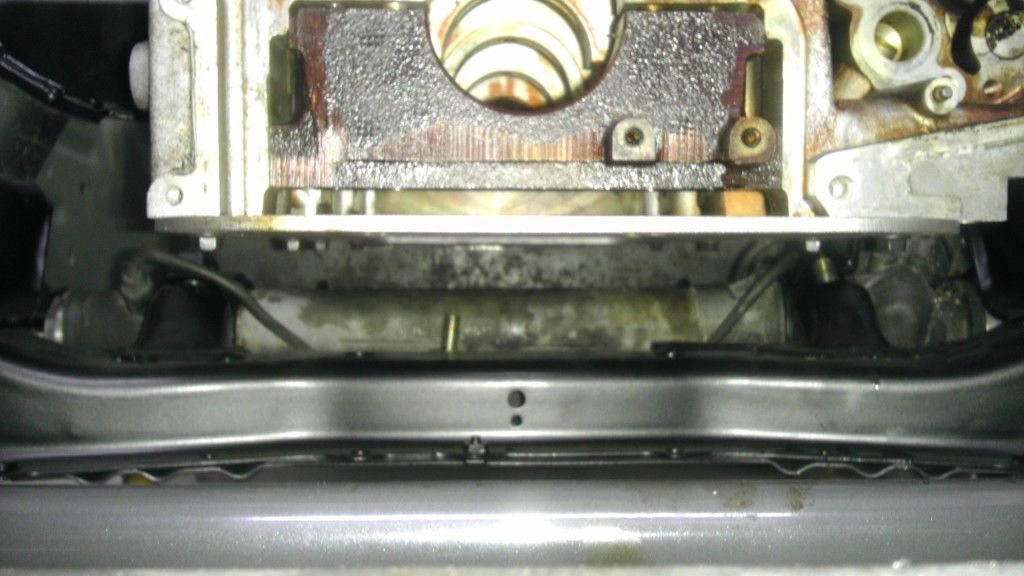
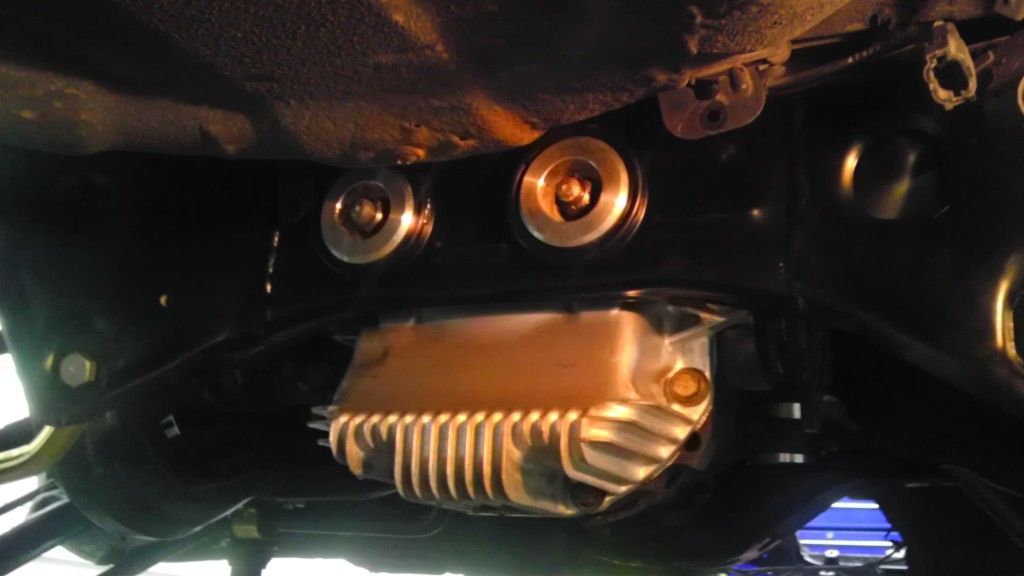
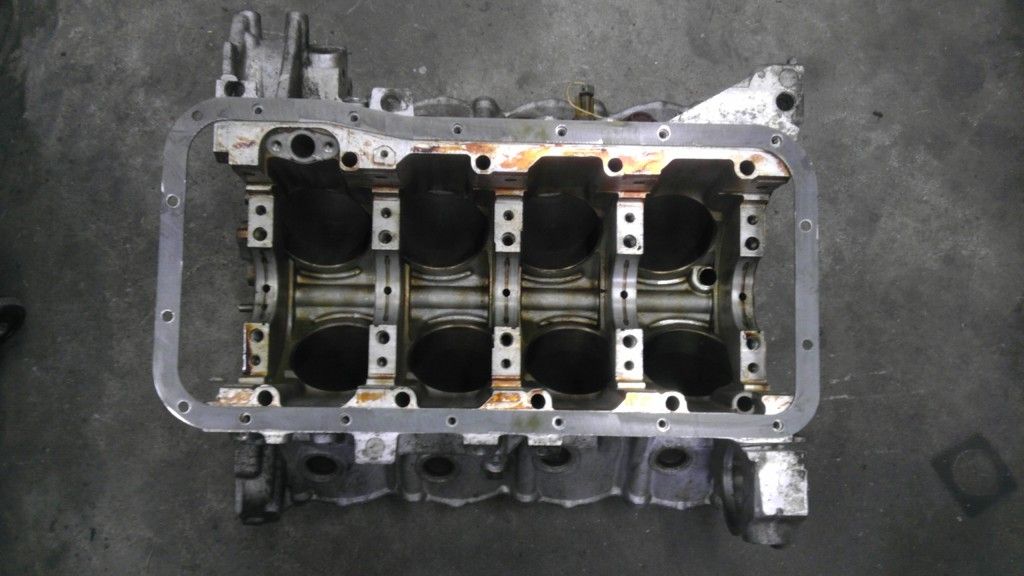
I finished up the oil pan. I've been working on fabricating up 3 more sets of engine mounts and oil pans. As well as poly engine mounts. Going to the bodyshop this week! Can't wait!
-
Alrighty this is the run down! Eagle Rods must be modified (-$100 if you want your machine shop to modify the connecting rods)8.3:1 CR = MUST CONSULT YOUR ENGINE BUILDER TO MAKE SURE THESE WILL WORK FOR YOUR BUILD 694mm Wiseco Pistons + modified H-beam Eagle Rods & ACL Rod Bearings = $1850.00 +shipping/paypal fees(-$100 if you want your machine shop to modify the connecting rods)8.9:1 CR = MUST CONSULT YOUR ENGINE BUILDER TO MAKE SURE THESE WILL WORK FOR YOUR BUILD 1093mm, 93.5mm, 94mm Diamond Pistons + modified H-beam Eagle Rods & ACL Rod Bearings=$1950.00 +shipping/paypal fees9.3:1 CR = MUST CONSULT YOUR ENGINE BUILDER TO MAKE SURE THESE WILL WORK FOR YOUR BUILD 693mm, 93.5mm, 94mm Diamond Pistons + modified H-beam Eagle Rods & ACL Rod Bearings=$1950.00 +shipping/paypal fees93mm, 93.5mm, 94mm Diamond Pistons used with OEM rods=$900.00 +shipping/paypal fees9.4:1 CR = MUST CONSULT YOUR ENGINE BUILDER TO MAKE SURE THESE WILL WORK FOR YOUR BUILD 693mm, 93.5mm, 94mm Diamond Pistons used with OEM rods=$900.00 +shipping/paypal fees10.5:1 CR =MUST CONSULT YOUR ENGINE BUILDER TO MAKE SURE THESE WILL WORK FOR YOUR BUILD! 1.793mm, 93.5mm, 94mm Diamond Pistons + modified H-beam Eagle Rods & ACL Rod Bearings=$1950.00 +shipping/paypal fees93mm, 93.5mm, 94mm Diamond Pistons used with OEM rods=$900.00 +shipping/paypal fees10.9:1 CR = MUST CONSULT YOUR ENGINE BUILDER TO MAKE SURE THESE WILL WORK FOR YOUR BUILD! 593mm Diamond Pistons + modified H-beam Eagle Rods & ACL Rod Bearings= $1950.00 +shipping/paypal fees93mm Diamond Pistons used with OEM rods= $900.00 +shipping/paypal fees11.5:1 CR = MUST CONSULT YOUR ENGINE BUILDER TO MAKE SURE THESE WILL WORK FOR YOUR BUILD! 893mm Diamond Pistons + modified H-beam Eagle Rods & ACL Rod Bearings= $1950.00 +shipping/paypal fees93mm Diamond Pistons used with OEM rods= $900.00 +shipping/paypal feesPlease note prices all prices are a rough estimate! Let me know what bore size, compression ratio you are looking for and I will give you an accurate price. Best way to contact me is at info@performancevh.com!
-
Yes, it will fit the 2+2. Thanks! It really has exceeded my expectations i had from my imagination! I'm slowly getting everything uploaded onto the website. The oil pan isn't listed yet.
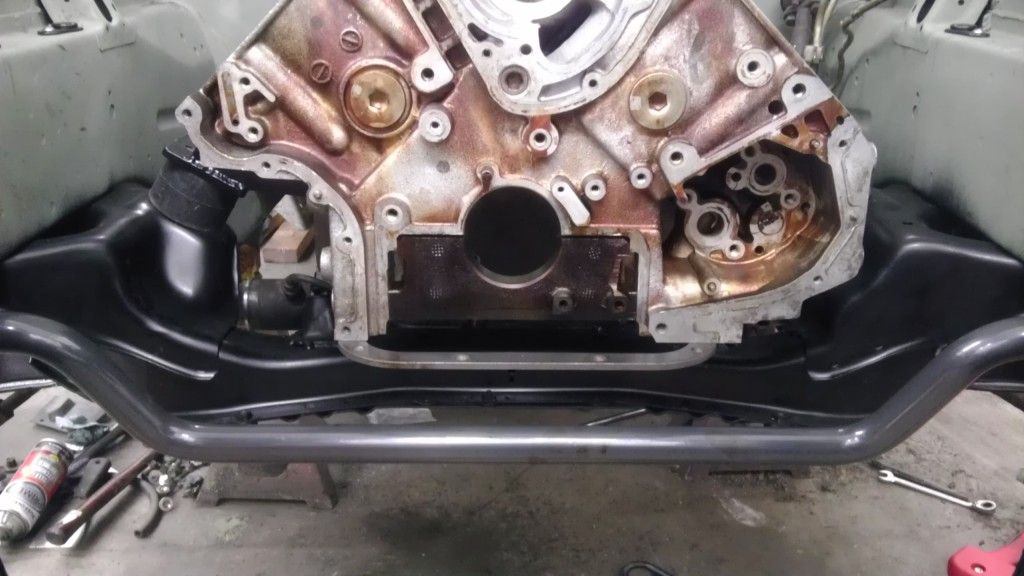
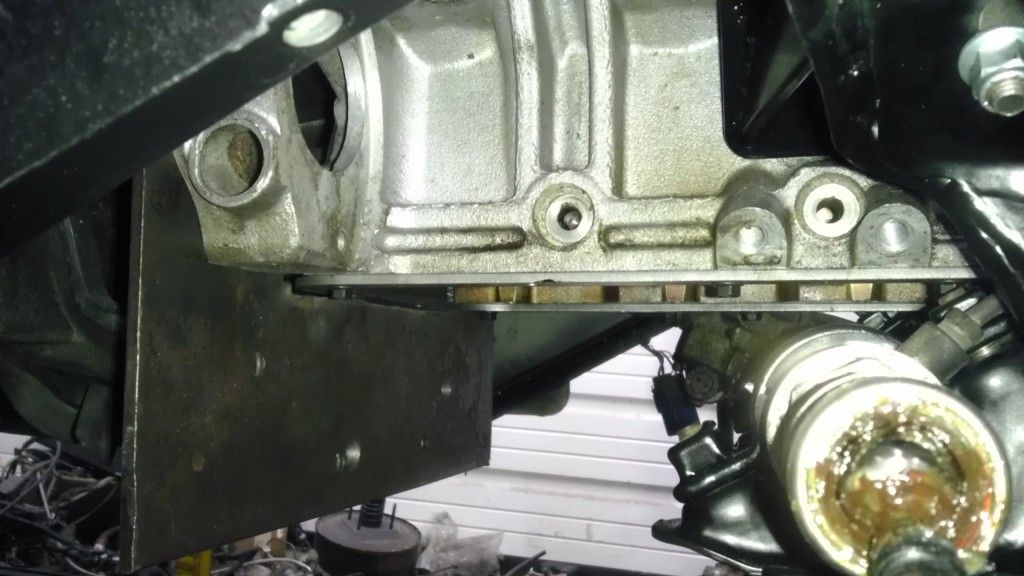
It's a tight fit, You need to install the oil pan with the engine out, install the engine in the car and then bolt the transmission from under the car. The oil pan will not clear the sub-frame when installing if the transmission is attached. I rotated the transmission mount 180 degrees to move the transmission and engine towards the fire wall by about an inch. You can still use the OEM driveshaft. You will have to shorten the shifter linkage. With the engine being pulled back 1" it is centered over the front subframe. There is plenty of room for the radiator. I am relocating the radiator to keep everything hidden, and for room when I go turbo'ed.
-
The intake will not clear the hood unfortunately, The only way it will clear the hood is with a spaced sub-frame I believe. Definitely a no-no in my book! lol Just my opinion. No AC or powersteering. I may add power steering in the future... in the form of a Opel Astra electric pump.
-
Thanks guys! Yeah, I'm shaving my antenna too, as well as the hole for the rear wiper.
Yeah a slick top VH is the way to go! My buddy is going with a VH swap in his slicky. I absolutely love the VH platform and I intend to do a lot of testing/documentation with this engine.
-
-
Thanks! They do make wider front fenders but it's the whole fender. Haha yeah, I'm 1000 miles over the exemption limit this year... good thing I know people!
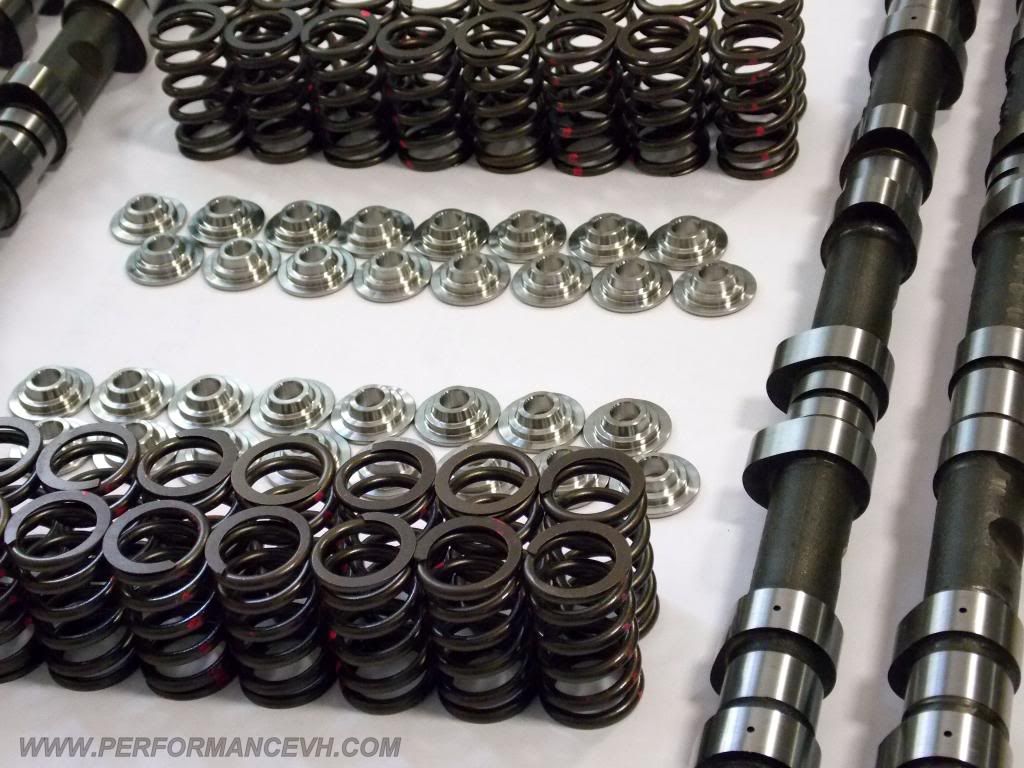
UPDATE!!!! Love getting new products in!Camshaft regrinds, heavy-duty valvesprings, Ti Retainers!- PVH Stage 1.236" Lobe Lift178 @ 50 DurationValve Lift: .378"- PVH Stage 2.246" Lobe Lift187 @ 50 DurationValve Lift: .398"Check out the website for more info
-
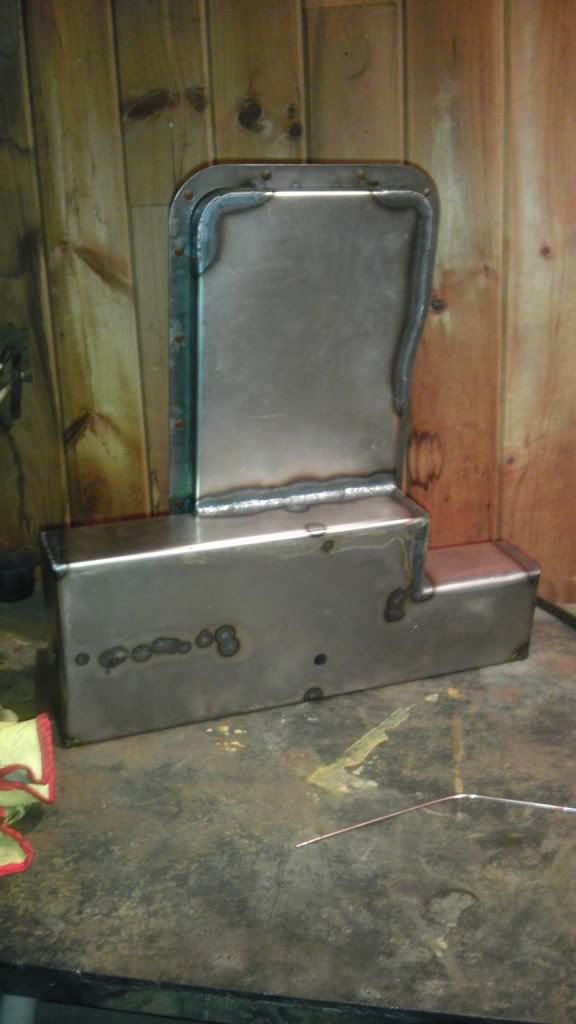
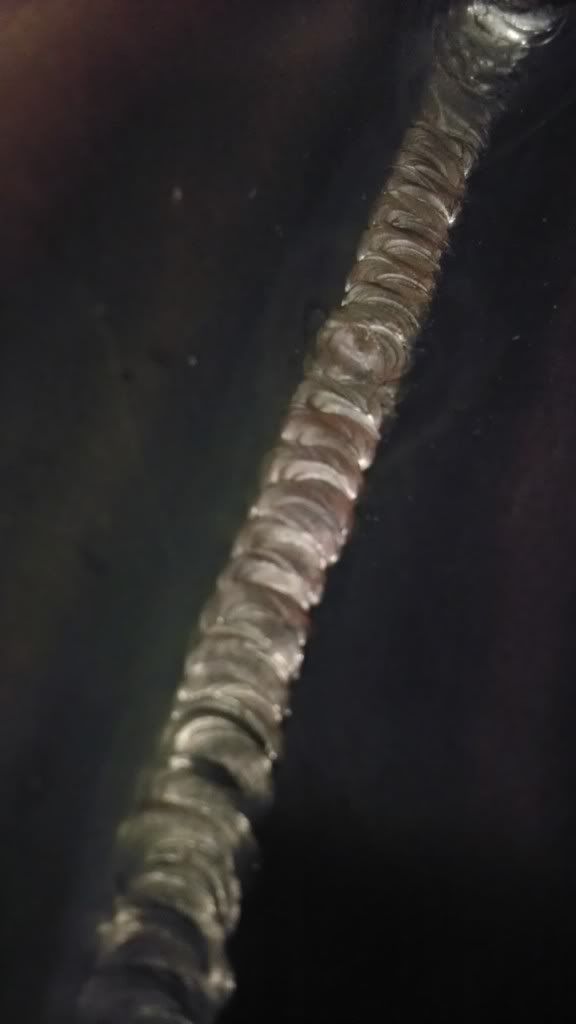
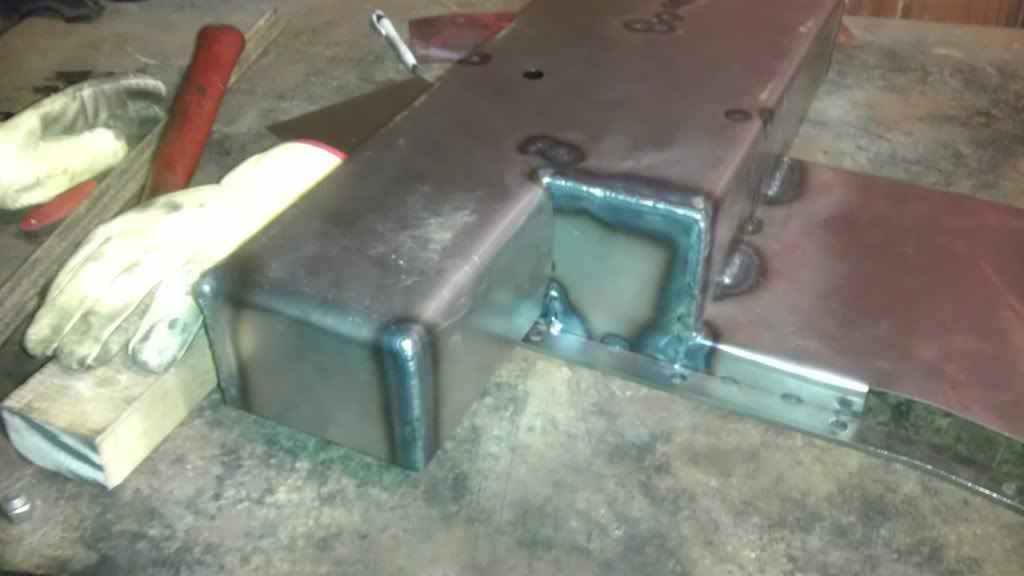
More welding progress tonight. All I have to do is bolt the flange down and weld around the perimeter of the flange. Weld the tops on the wings.My best bead laid I've come a long way!
-
Sorry, moved those pictures... Here are the updated linksQuick update:Wheel spacers came in today for the rear.Well, I finally got the flat patterns in for the oil pan! No time to waste! Start welding!----------------------------------------------------------Made some more progress on the pan tonight.
-
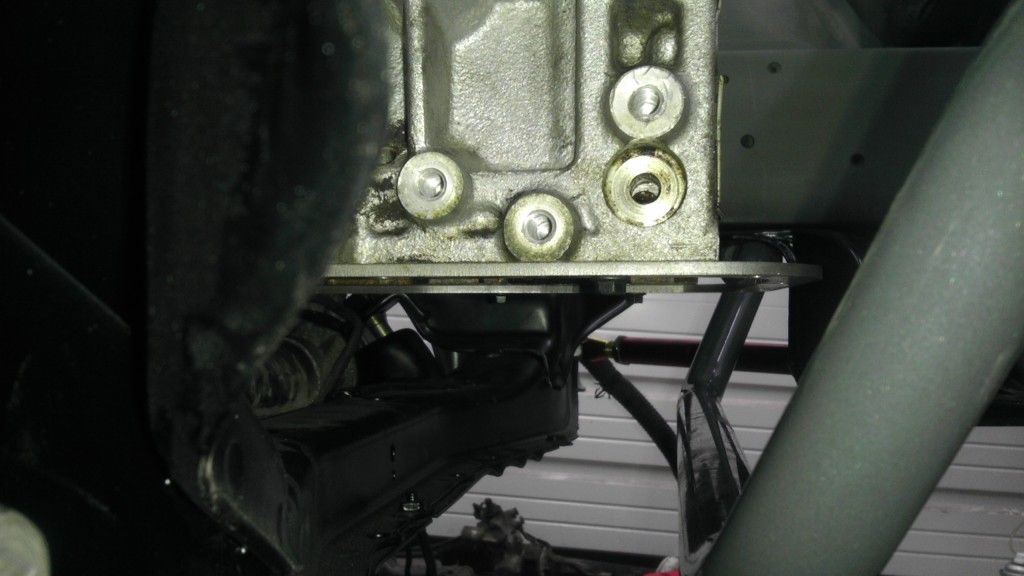
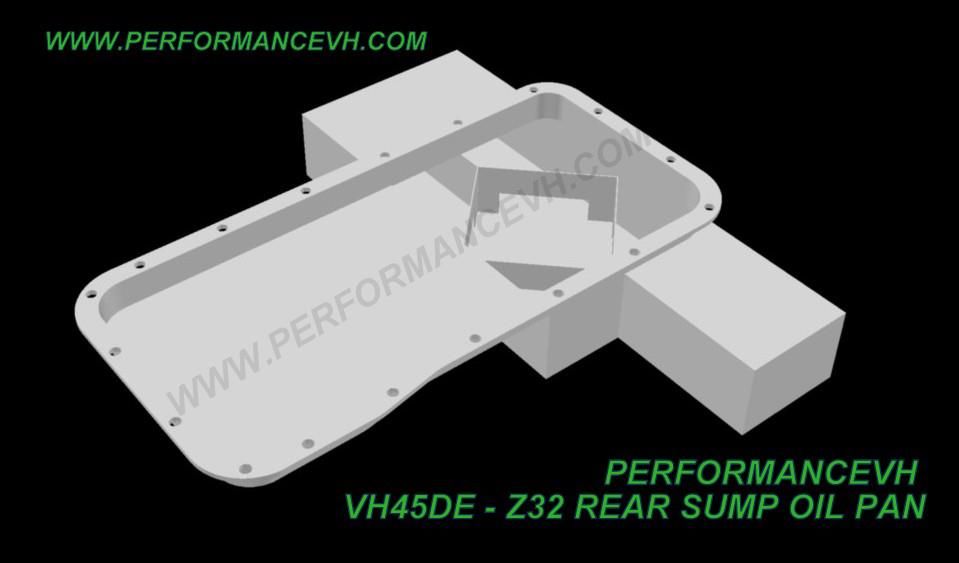
I installed the mock up block in the car again to get measurements for the oil pan. I was able to keep a quart capacity of 5.5 without dropping below the sub-frame, and leaving plenty of space for exhaust.I got everything drawn up last night and ready for production!
-
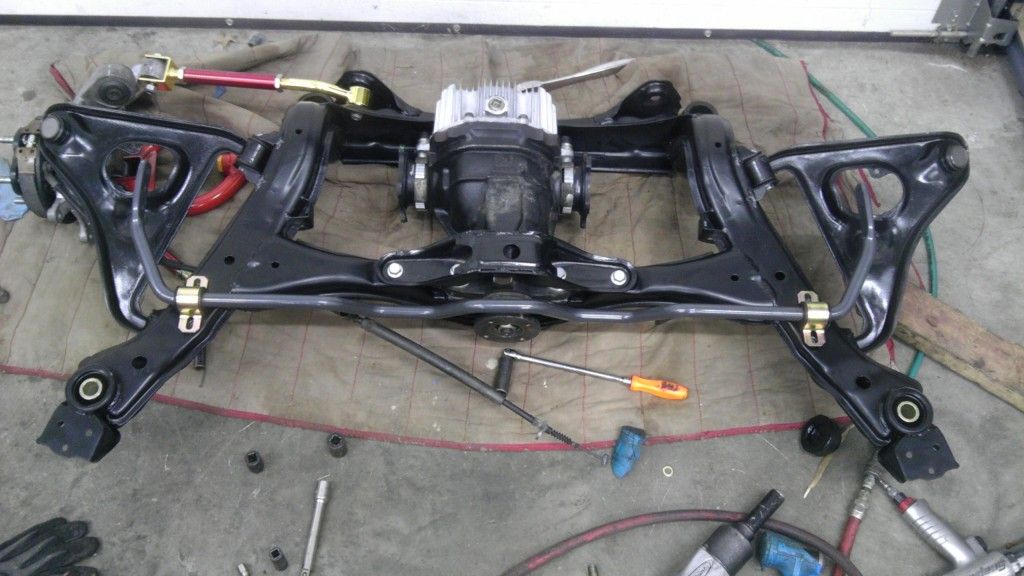
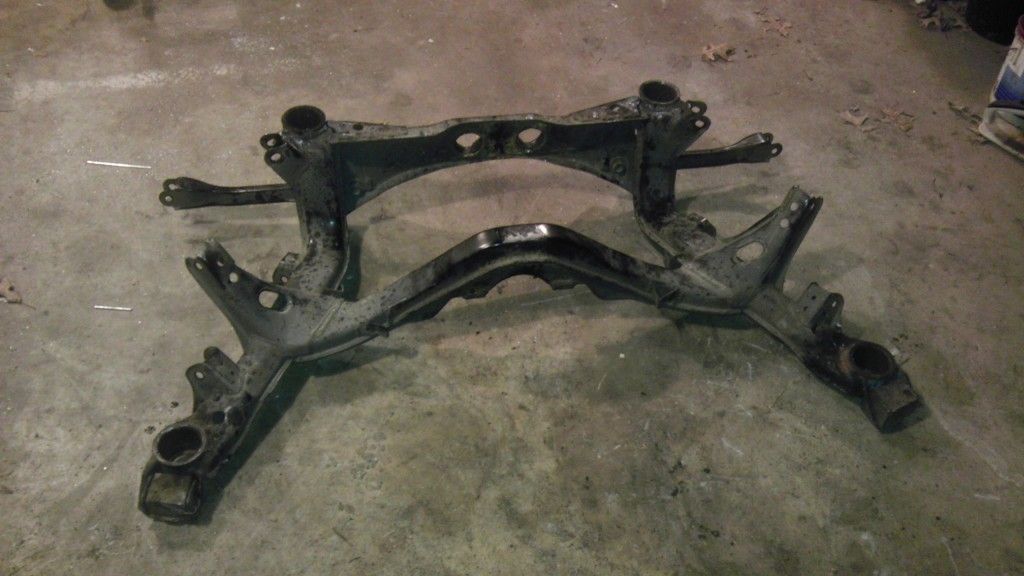
I was able to install the subframe assembly tonight... It's a lot easier coming down than going up! Starting to wrap things up in the rear... suspension wise.
-
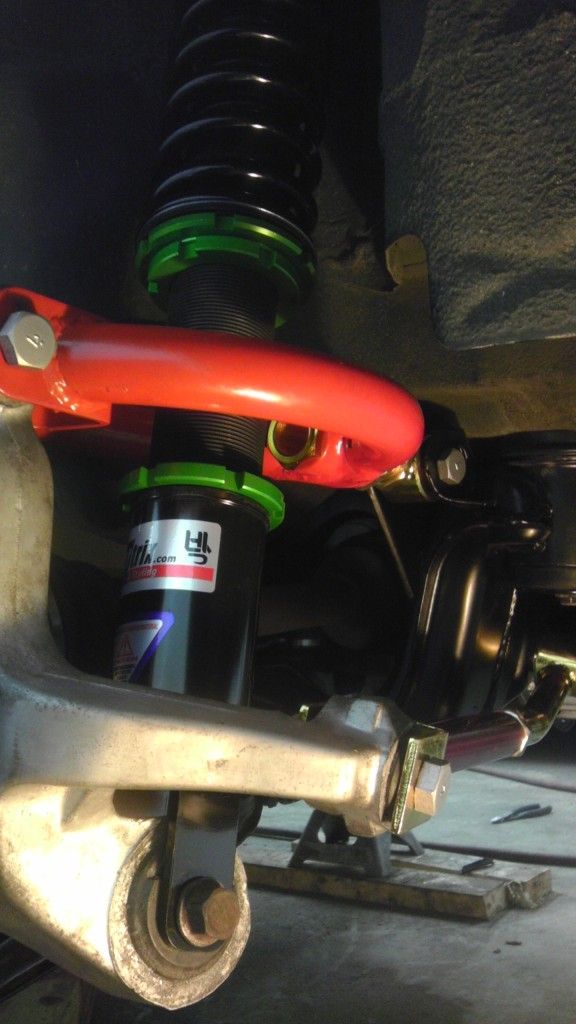
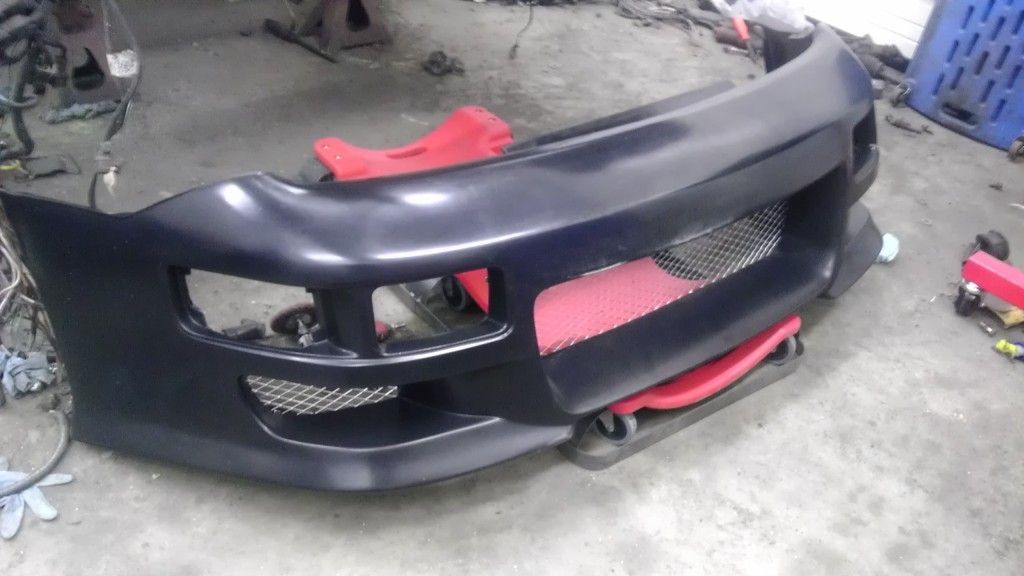
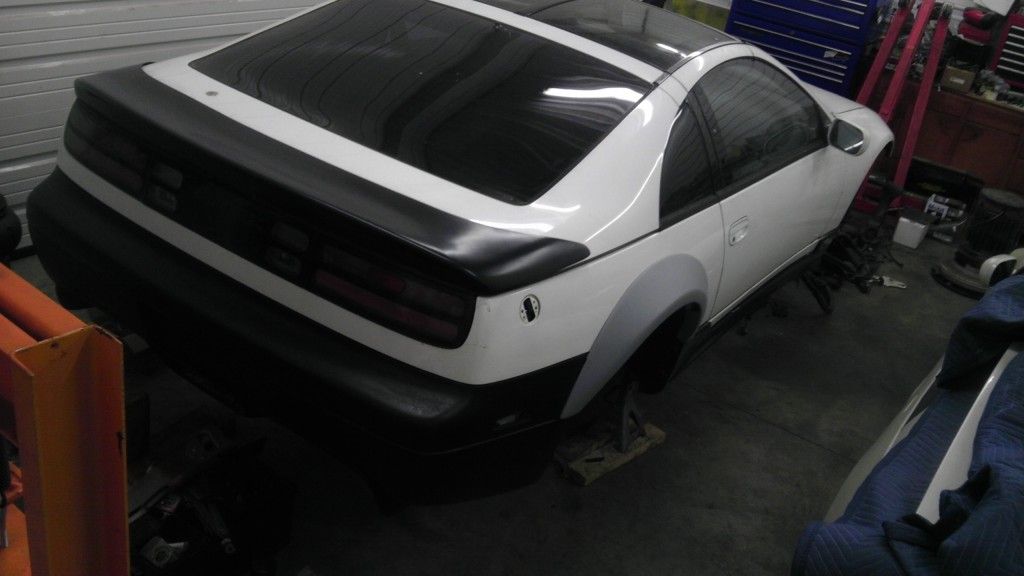
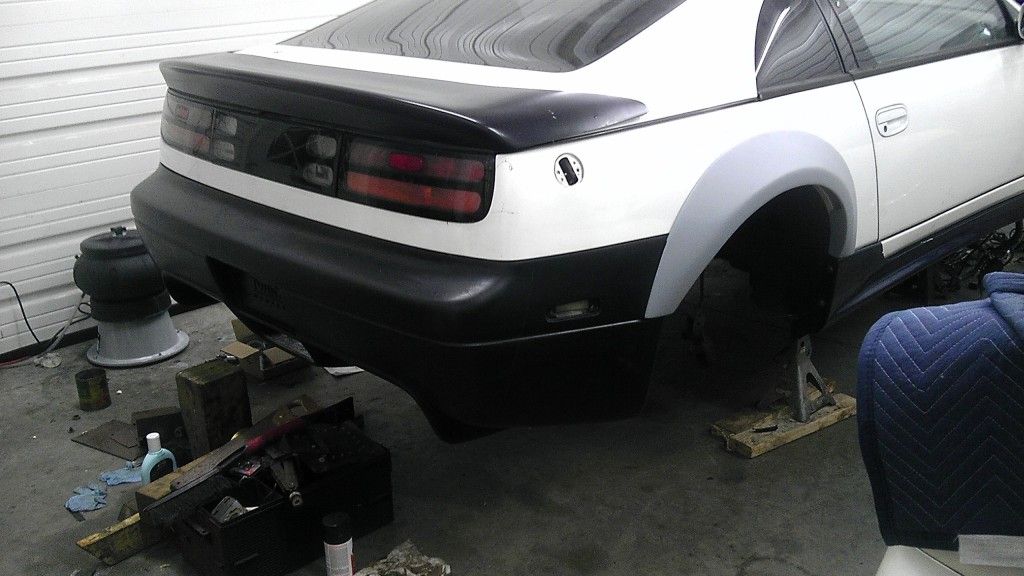
Updates:Solid diff. bushings installedY33 w/ Z32 yoke diff. installedGodspeed Suspension ArmsStillen Sway BarEvery bushing replaced ES. BushingsNew lower ball jointsGot my Wings West Urethane bumper in today. Just waiting on the TwinZ roof spoiler, then I will have all the exterior pieces.Next, bolt the suspension back on, sit the engine in, mock up the rear sump oil pan...
-
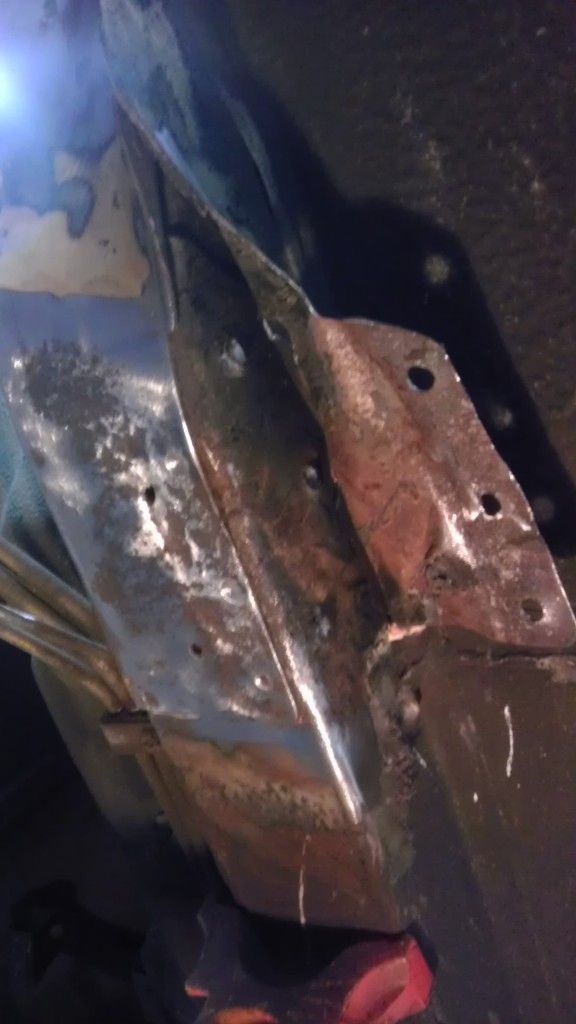
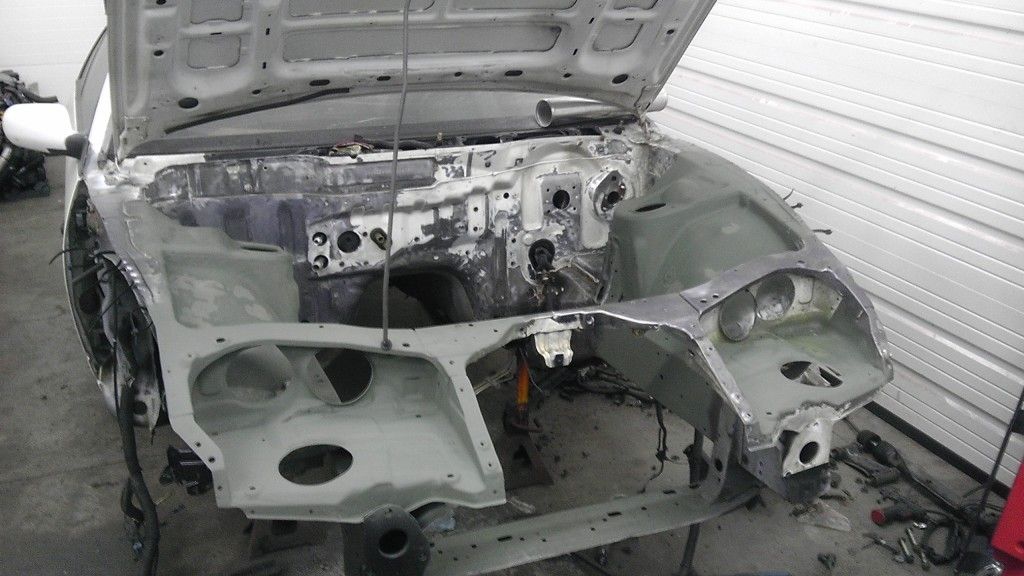
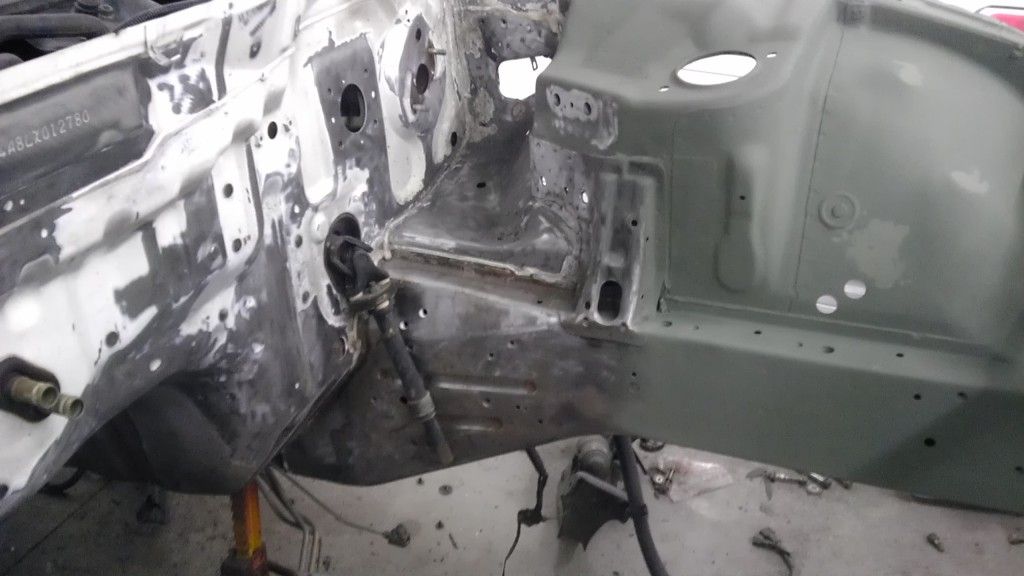
Thanks guys! Got more progress made this weekend. Engine bay is 99% complete. Just need to finish the lower radiator support. Got the driver side wheel well treated and painted. Used a can of Eastwood internal frame coating on the passenger side frame rail, have to re-weld the frame rail since the rust has been treated.
Got the solid rear bushings installed on the subframe, and installed the diff. More pictures soon! Got my WW urethane bumper in today! So excited to get home and unwrap it! The Z is soon ready to be hauled off to the bodyshop!
-
Got the subframes back from powder coat yesterday! Working on throwing everything back on.I also got the oil pan flanges from my waterjet guy! Perrrfect!
-
You can use the Z32 or Z33 transmission. There are adapters available for both. It's up for you to decide what works best for you. I also used the y33 rear with 3.69 gears. Welders are an indispensable asset, I know I couldn't live with out it!
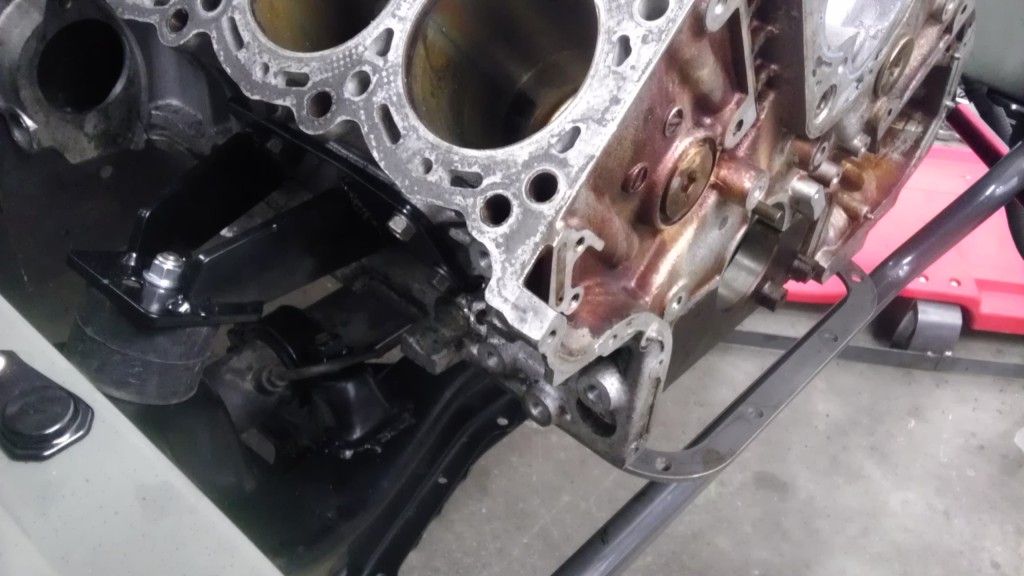
I worked from the transmission forward. I bolted the transmission to the engine, installed the driveshaft and then blocked up the engine off the subframe to where I wanted it. Then I tacked my engine mounts together. I actually flipped my transmission mount 180* to set the engine and transmission back about 1". I'm not sure what the s30 transmission mount looks like so you'll probably have to make a custom one. Since I'm not a vendor I can't promote my own products here, but you can google different options for custom engine mounts.
-
Well this weekend I was able to get the passenger side wheel well refinished and undercoated, also made some progress with the engine bay. Removing paint, and rust. Got all the rust removed and surfaces treated. Just have to remove a little more paint on the firewall and the engine bay will be ready for paint!It's such a tedious process! I can't wait until the body work is done!
-
Working on it!
Should have the pan flanges in 1-2 weeks. -
Got some stuff in the mail today. Rear fender flares from zshop.ca. I'm so excited about this! The last thing I need to get is the wingswest urethane front bumper, and then I have everything for the exterior.Crappy cell pictures, Sorry!
-
Yeah yeah! Beautiful car man! You should hop on V8nissans.com!
-
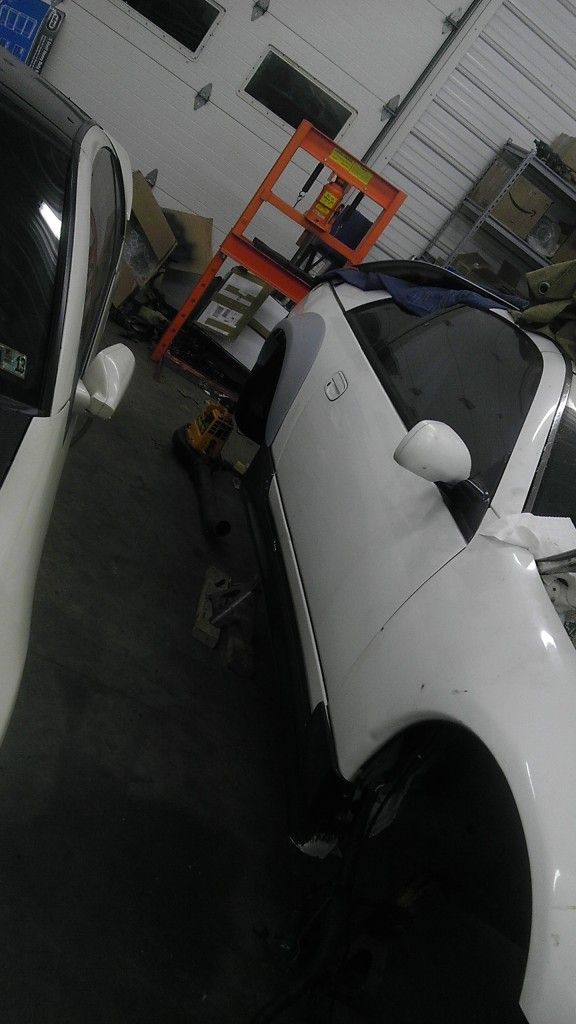
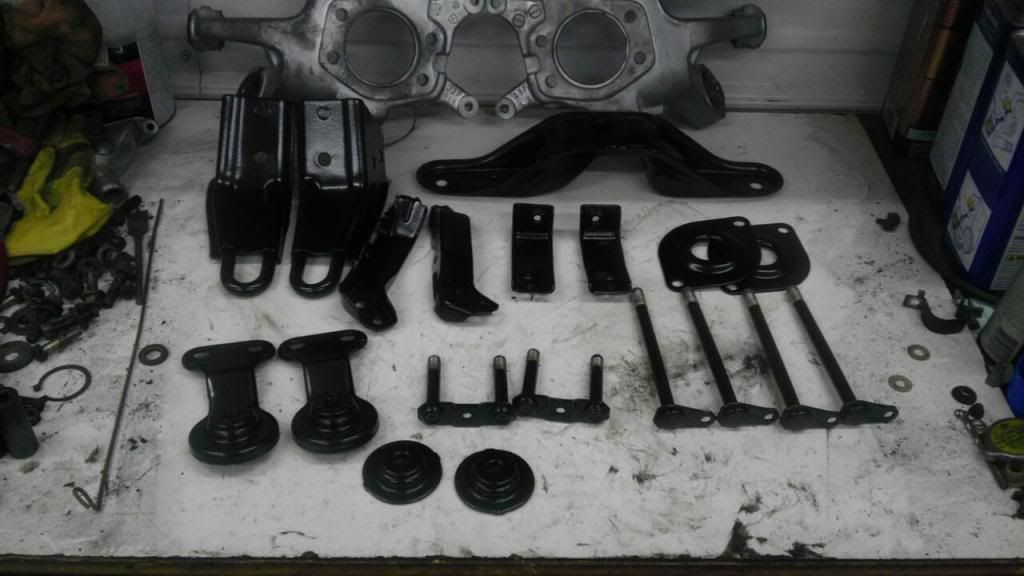
Update!Got all the rubber bushings pushed out of the spindles, rear sub frame, and the arms I'm going to be reusing. Sending everything out to be powdercoated this week. Got some misc brackets back from powdercoating as well. Once I have everything back I can get the front and rear suspension back together. Then off to my buddies bodyshop to finish shaving the engine bay and paint!
-
Thank's mate, I think there should be a Nissan engine section for "pure bred" Z's lol not just "others"
It doesn't bother me any though, no worries, more updates to come! Right now I'm knee deep in refurbishing the rear subframe assembly, Swapping in a 97 Q45 rear diff (3.69) All new suspension arms, poly bushings replacing every piece of rubber. Also moving my front calipers to the rear to clamp down on some 370z Nismo rotors. More pictures soon!
-
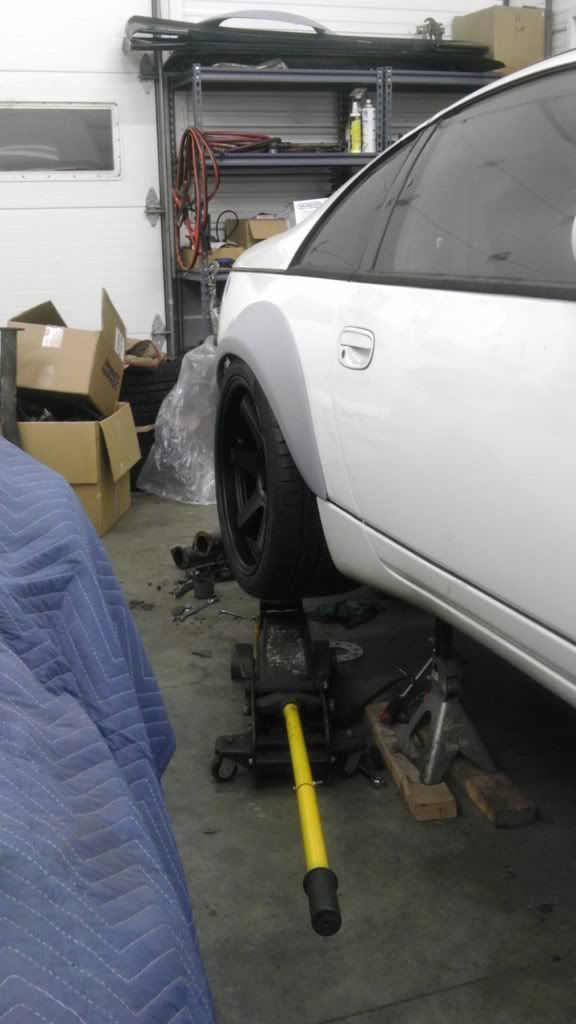
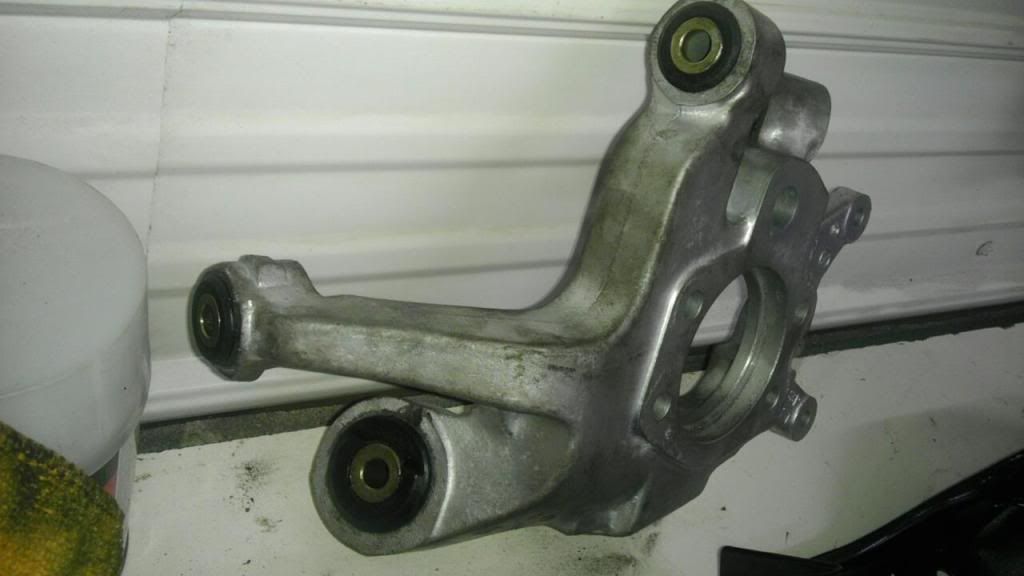
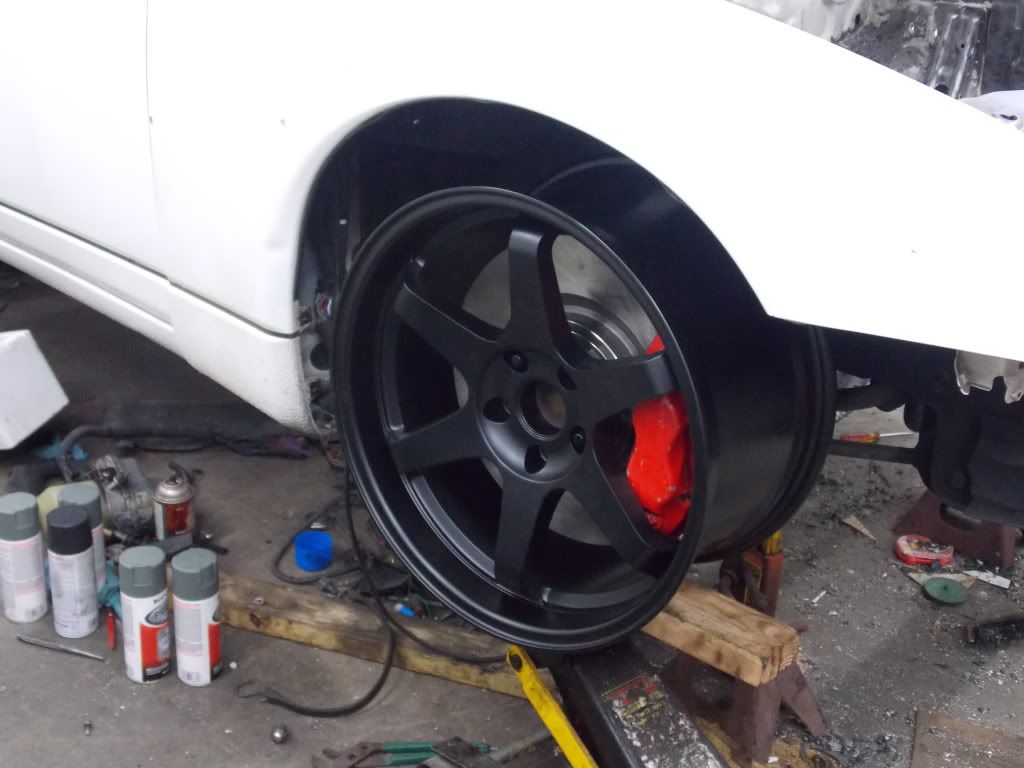
Test fit the front wheels with the brake calipers bolted up. I have to space the wheel out 5mm to get the spokes to clear the caliper. Still will be able to keep the stock fenders without modification or camber. Just a slightly narrower tire. I'll get some Nismo wheel studs then.Next I'm going to start disassembling the rear subframe.
-
Thanks mate, you can do it!


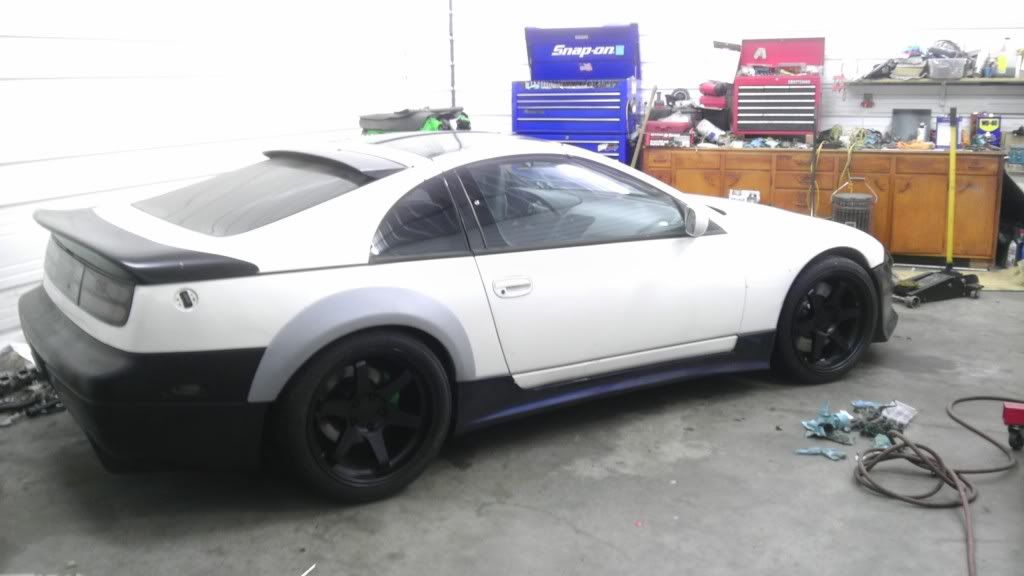


My not so Fairlady Z...VH Swap
in Other V8Z Tech Board
Posted