

zclubhouse
-
Posts
71 -
Joined
-
Last visited
Content Type
Profiles
Forums
Blogs
Events
Gallery
Downloads
Store
Posts posted by zclubhouse
-
-
DRW's prices are about 1/2 of what they actually charge you. They just haven't updated their website pricing... ever.
I tried another supplier for my first set of circle track wheels about 10 years ago. I bought wheels from Paulsen, and they were just HEAVY. So be careful that you don't get some extra rotating weight to save a bit of cash.
I did not know that Diamond was more expensive than their website, that's unfortunate.
I understand the issue with the extra weight and that certainly is a dilemma for me. However in my circumstance, sometimes building a car for performance also means picking the best 'band for your buck' performance rather than just what would be the ultimate choice given all the options. For the sake of discussion, any idea on the weight differences between a 15x8 DRW and a 15x10?
Painting or powdercoating would certainly be a reasonable option for the MRT wheels if the grey doesn't float the boat. Even the extra cost involved with powdercoating still balances in favor of the MRT wheels if DRW selection really is more than their posted info.
-
Just added them to my list... To bad you cant get a different rim pattern but for 15x10 thats not bad at all.
Yeah I'm partial to Diamond Racing's D-Window pattern compared to MRT'S design. The grey might take some getting used to, but I can get used to the price!
-
I have been looking around the circle track community to find a set of 15x10" wheels on the cheap. Of course everyone is familiar with Diamond Racing and I understand that many members here have had positive experiences with their products and that is what I have been leaning towards so far. However, I found a company named Marsh Racing Technologies and I am looking for any input or information about them? Any experiences with the company? The 'lightweight ultra star racing wheels' look pretty good, and at a price of $85 bucks with a 4x114 bolt pattern, it seems like a deal. 21 lbs for the 15x10 version which I believe is similar to Diamond racing. Any thoughts? Thanks in advance.
Here is a link to their wheel selection.
-
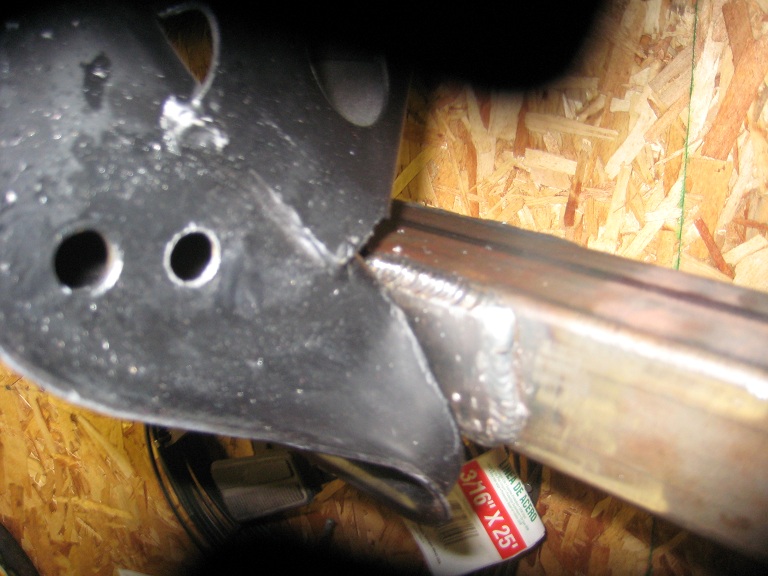
Its not completely on on side but I probably could have done that one better.
You may want to try a series of spot welds instead of trying to lay a bead on 20ga. Start an inch apart and then alternate filling in the middle (ie 1" - 0.5"- .25" etc..) till it appears you have a continuous weld. Through my personal experience I have learned that the speed required to not blow throw thin metal leads me to missing the desired weld area. Taking your time with lots of spot welds gives you a chance to aim at the joint a bit better, and reduces the risk of warping the piece or blowing through. It does however require a very tight fit and as always, a clean piece to weld to.
Good luck!
-
I don't think you would have to change your sway bar. Maybe modify it a little but, it shouldn't be that difficult considering you made those control arms yourself. If I were to do it I would have an adjustable rod with rod ends on both ends that bolted to the strut housing and sway bar with adjustable mounting points.
here's what most bimmers look like

Very interesting! Thanks for the input and provided example, now I can better visualize what you were talking about. I like your idea of the adjustable link. I'll have to chew on that idea a bit, see if I should go that direction with my set up. Thanks again.
-
1" sway bar has an effective rate of 300-something lbs/in. Its in Dan's (74_5.0L_Z) sticky thread in this forum.
Attaching the sway bar to the strut housing is a good way to go if you can figure it all out. I looked at it for about 5 minutes and then made a more traditional sway bar setup.
I wasn't talking about the stiffness of the sway bar, I meant to describe the offset of the sway bar bracket as the "lever" that would allow the sway bar action to apply twist to the control arm. I think I will avoid the method of attaching it to the strut housing, as I want to keep the sway bar I already have and I cannot see how I would be able to perform this modification without purchasing a different sway bar?
-
How much force do you guys think I will be dealing with in regards to the twisting of the control arm from the sway bar? This is some seat-o-the pants hillbilly physics talking here, but I figure that a 2000lb car cornering at 1G putting sway bar torque motion through a 1 inch effective "lever" (sway bar bracket) doesn't add up to enough to harm the radius rod by twisting it. Or are you guys thinking that not mounting the bar in the middle of the control arm will load the suspension in some adverse manner, causing the car to be a handful when turning? Thanks again for the input.
doublexl, thanks for the pictures. Interesting design. Definitely interested in your progress, its a cool project.
-
I hope this is the general idea?!Sway bar mount is not drilled yet, but will be in center. Not trying to highjack.
That looks good, I like the idea of reusing the stock ball joint attachment points but changing the rest of the design. I also really liked seeing your chassis work so far. That approach crossed my mind but lack of time, space and talent persuaded me otherwise! Do you mind sending me some pictures of the top shock mounting area? I'm curious to see your approach given the tube frame idea. Thanks
-
I think you have too many degrees of freedom in your lower control arm / TC rod. The rod end at the junction between the control arm and TC rod needs to be a solid end and not a spherical bearing. Otherwise, the effective length of your TC rod will change as the control arm rotates about its long axis.
Oops, BJhines beat me to it...
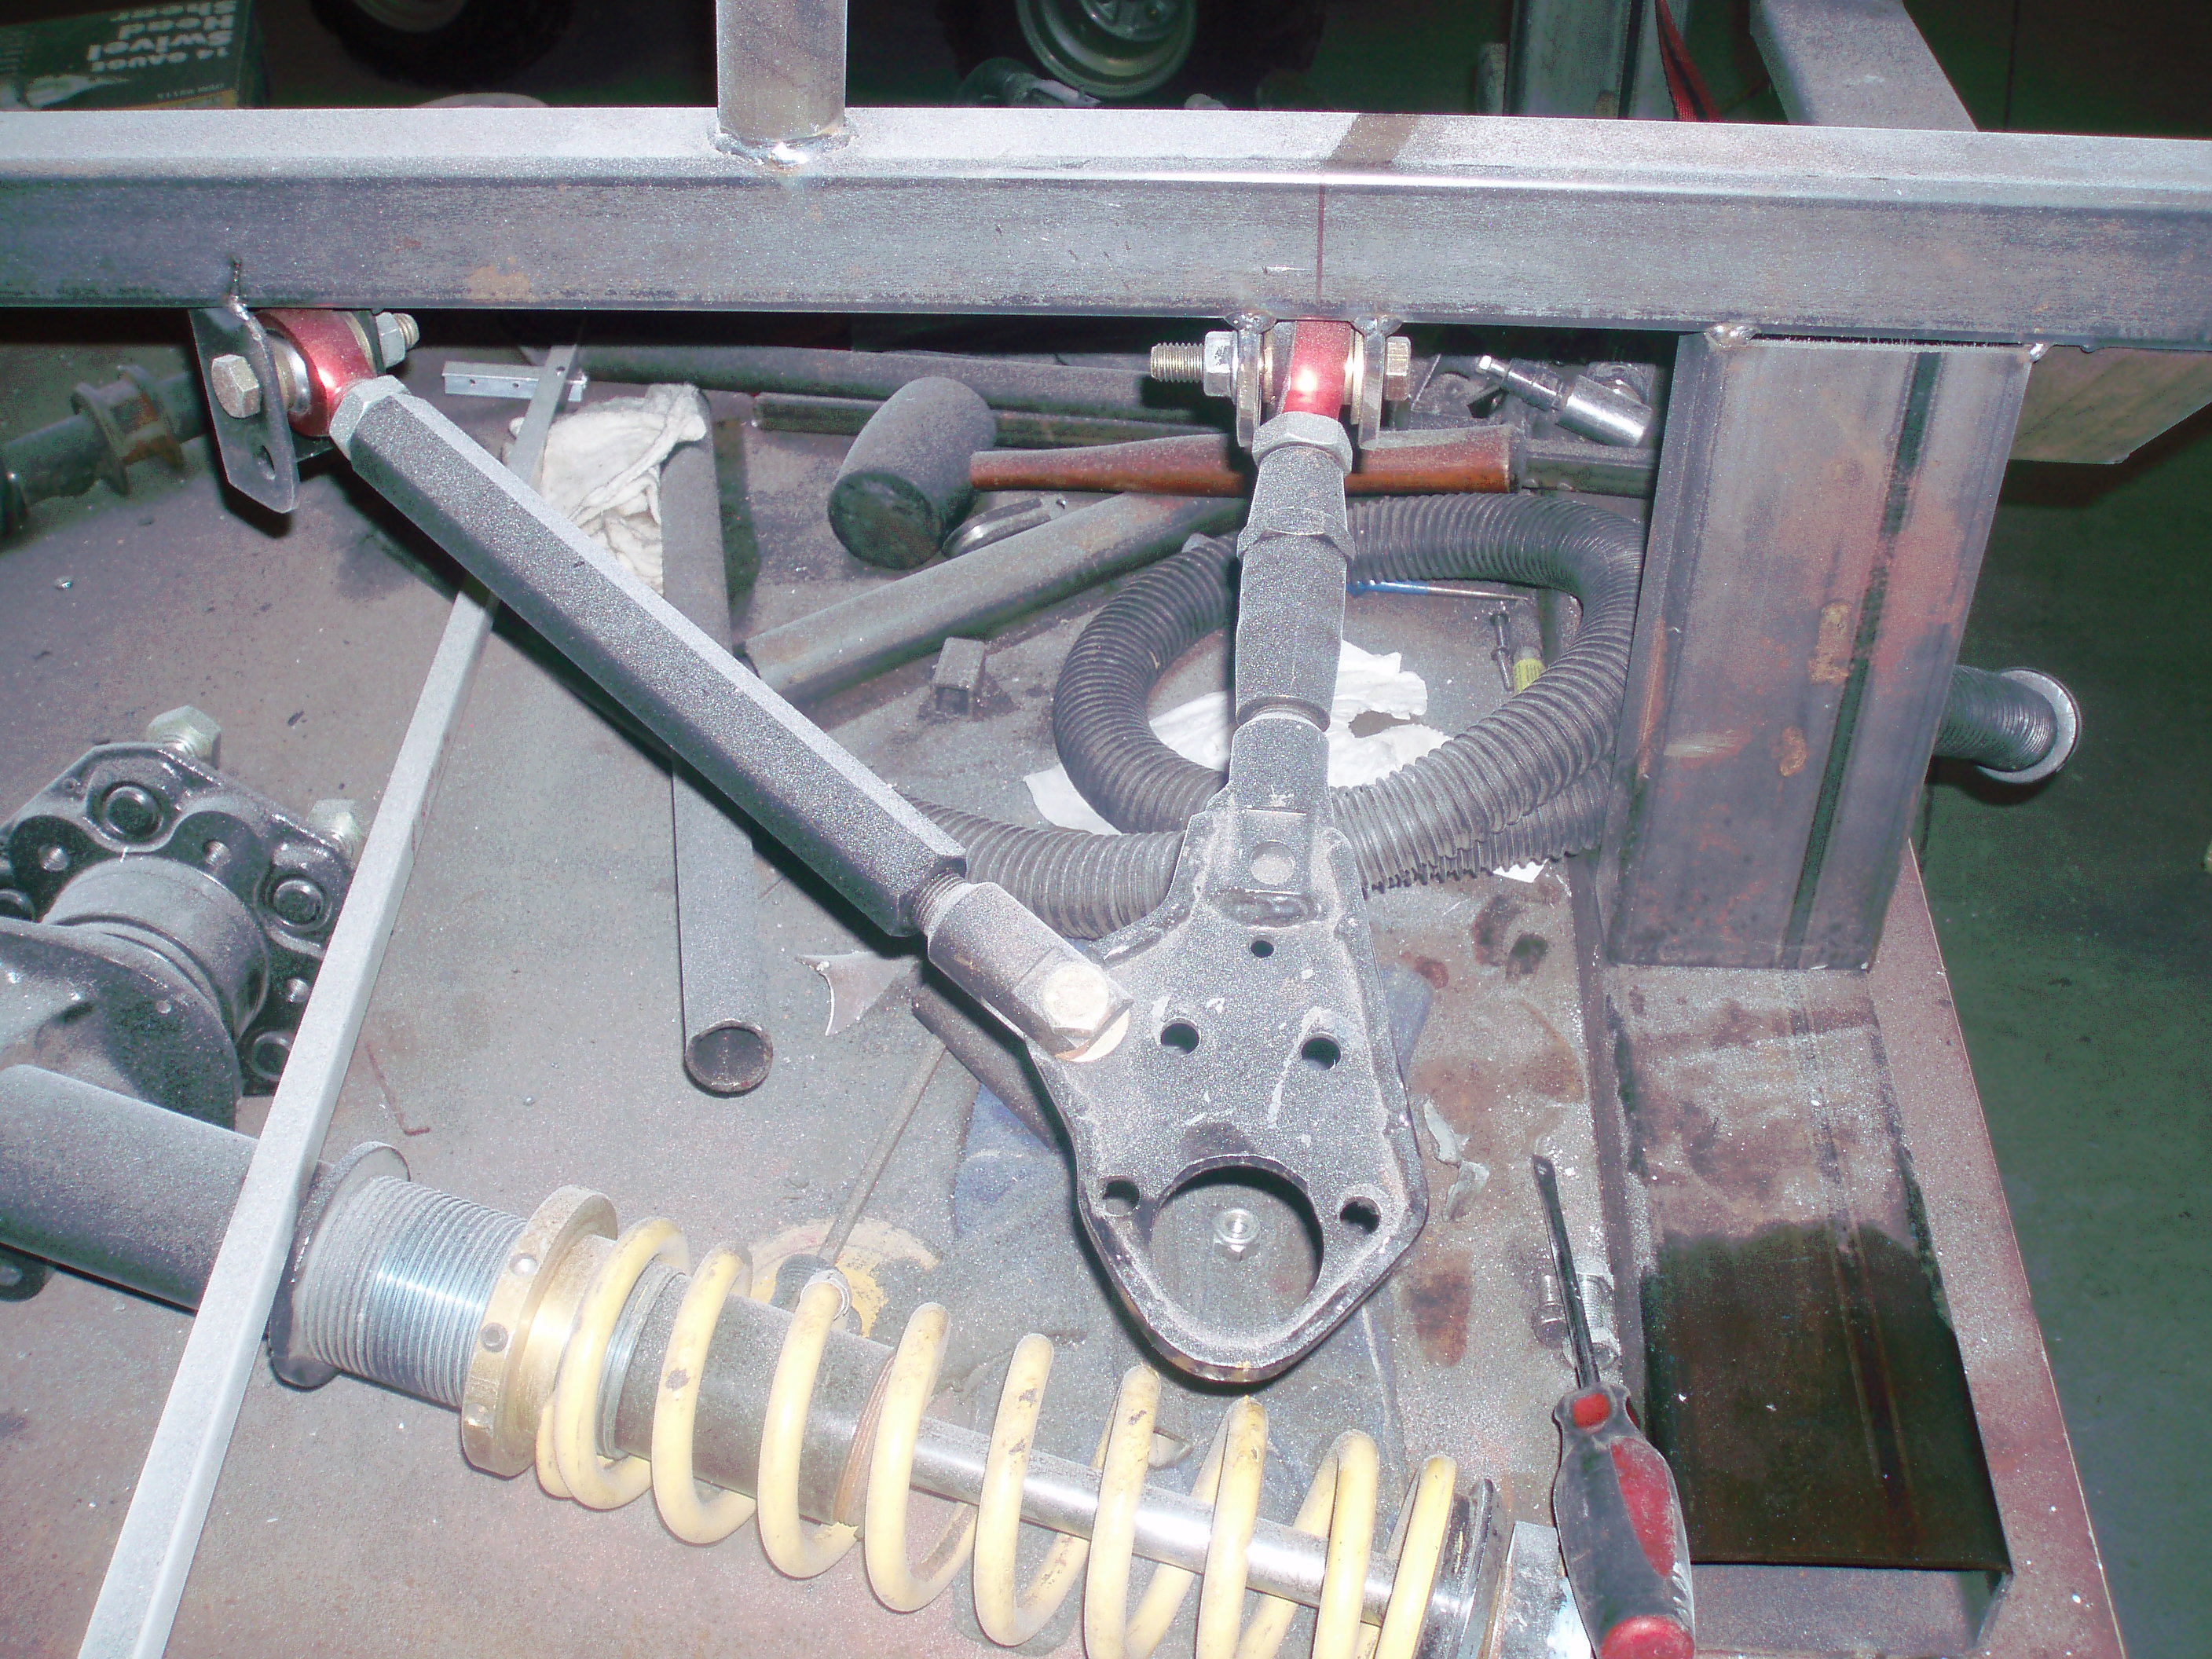
I apologize I did not describe the design properly. The LCA/TC rod junction is effectively a solid rod eye. I used a forged rod end for the pull strength and thread application, but I have machined spacers that sit flush against the rod end housing, therefore it acts like a solid joint. This eliminates any sway bar "twisting" and limits the functional motion to the frame/crossmember attached pivots only (with the exception of the ball joint itself.)
I hope this clears it up, otherwise I certainly missed something major?! Thanks for the input guys.
-
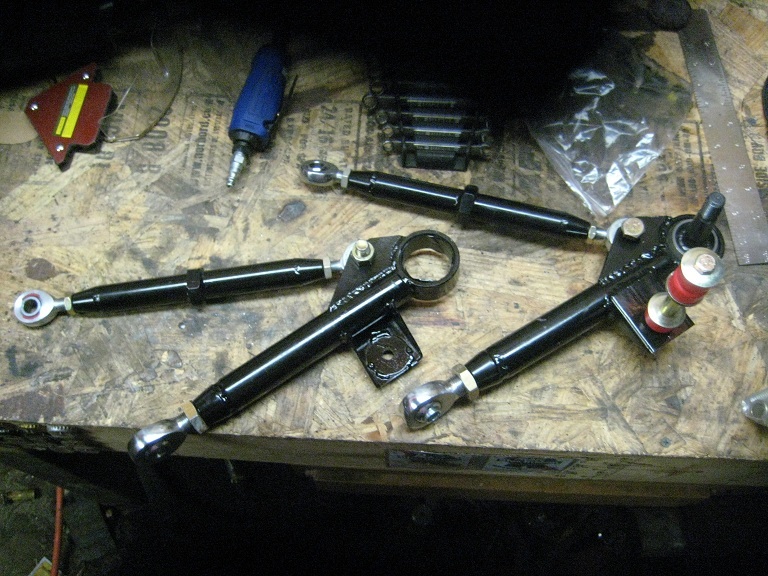
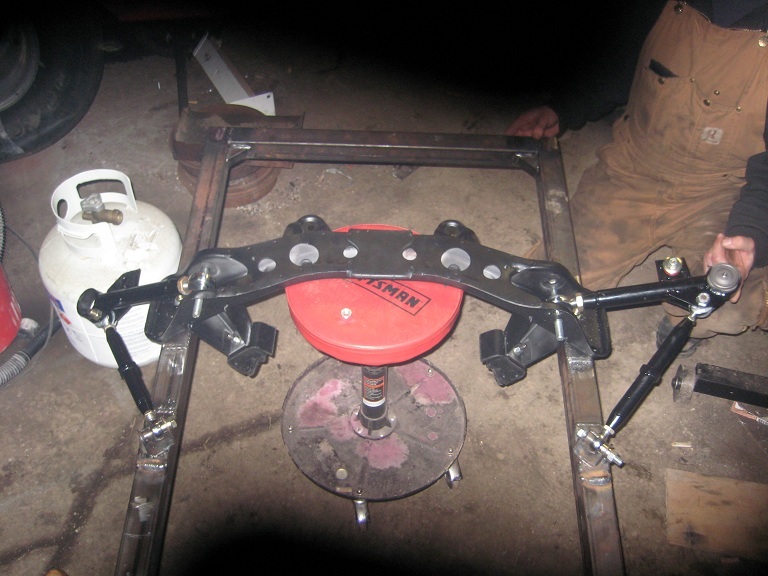
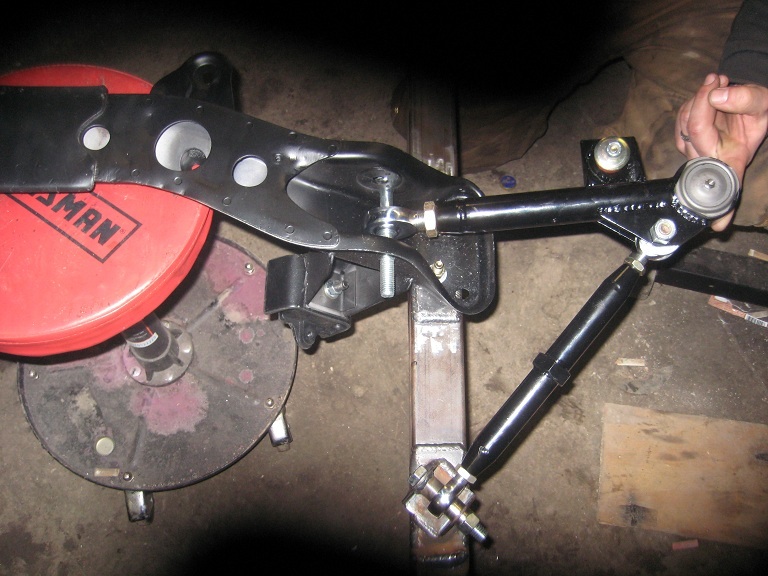
I finally took the plunge this winter and cut out my rusting away front frame. I built a replacement front frame and thought it was a good time to modify the suspension for my needs. After spending hours on here researching different approaches, I decided to explore the blank slate I had to start from and try something different from stock. I kept the factory crossmember but changed the pivot point as many have done here. I scrapped the radius arm/tension control rod bucket concept and instead used a shock mounting tab. The reasoning behind this idea was to use rod ends at both pivots and have the bracket in shear instead of tension. Its welded to a reinforcement plate to spread out any forces applied to it. I also changed how the cross member attaches to the subframe. I drilled a new set of holes and welded two sandwich style plates on the frame so that I could bolt it directly through the frame instead of hanging it from a tab.
The control arms are made from DOM tubing, QA-1 rod ends and circle track style screw in ball joints. I have order military spec bolts for installation, however for mockup purposes they were held together with any old thing laying around, so dont worry! I am having a local machine shop make a piece similar in appearance to the AZC steering knuckles which will serve the purpose of adapting this larger taper to the strut housing. I will update further as I complete the install. Let me know what you guys think, I appreciate any feedback. Thanks.
-
Heres a picture of the model/vintage of welder I am trying to describe. This is not the exact welder in question, merely a picture for description purposes.
-
If your only welding steel 18 to 7 ga, then a decent mig is all you need. But, sure as shiz, theres going to be times when you need the tig for stainless or aluminum. Does the Miller come with a torch and ground cable? How about some tungsten's?
Yes the miller comes with a torch, foot pedal, ground cable and a holder for the stick welder lead. He said he would throw in some tungsten and filler rods to get me started, along with a couple different size tungsten holder tips for the torch.
can you post a clear picture, theres been several welders by that discription, and in most cases they were all good welders but knowing exactly what your refering to will helpbtw Im using a miller TIG from the 1980s and it runs just fine
I will try and get a picture but I don't one readily available. I know there are a few with that basic description, sorry I can't be more helpful. I am pretty sure this welder is also from the early 80's
Thank you both for the help
-
No opinions? Any help appreciated
-
I* am looking at purchasing a decent welder in the near future and a friend has a Miller Dialarc HF AC/DC TIG/arc unit with a foot control pedal. I think its 200amp 100% duty cycle. He wants to get $650 out of the machine without a bottle or regulator. I know it is good operating condition and have seen it used. What do you guys think about this model of welder? Price? Thoughts?
*My background- Proficient MIG welder, using a Clarke 140 unit right now. I have never TIG welded before. Im looking to get a more serious (ie high quality) welding set up but I do not want to spend more than $1000 total. I understand this puts me at either a complete used TIG setup or a brand new really nice MIG set up. I will not get anything except single phase 220v. I would be using the welder a few times a month mostly for basic mild steel fabrication (18gauge to 3/16").TIG appeals to me but I am open to suggestions or advice from those wiser and more experienced than myself. Thank you in advance.
-
Do you have a part number for the book, is that available through Nissan?
I got mine off of amazon. Pretty good resource, not a detailed how to, but a great read for the overall theory and basic applications broken down by category. Worth having in my opinion
-
(Never ran in a time attack but heres my experience/witness.) I tried using a set of R6 for Autox which was a poor idea for individual run performance, but they did last me a good while. However a few friends ran an rx7 with the A6 compound in a time attack style format at BlackHawk and had nothing but good things to report. My best guess is that the A6 would offer you better performance in a hot lapping scenario than anything other than a full slick. You shouldn't have alot of trouble getting them up to temp on a shorter circuit as I have seen plenty of people were getting reasonable pyrometer readings after just an 1 minute parking lot thrashabout.
-
These suggestions are more for general metal fab than solely panel replacement--I find that a copper backing plate is super handy for filling in holes with weld. Also the little magnetic weld holders can do alot of things that vice grips/c-clamps cannot. trwebb26-- you hit it dead on with the angle grinder comment, one of the most versatile and often used tools in my shop. I like to keep three handy at all times (the el-cheapo harbor freight ones do just fine) so I can have one loaded with a cutting wheel, one with a grinding wheel and the other with a wire wheel or flap sand disc. Saves so much time and aggravation switching back and forth and back again. A straight up old school bench grinder does the trick for alot of things too. The drill press is another one I wouldn't want to do without. In reference to drilling holes, going a little undersize and finishing with a ream avoids the oval hole effect those of us without mills are forever running into.
-
Are there anything like miniature CV joints that can be used instead of U-joints in case you need to go more than 30 degrees? I'm just asking out of curiosity.
IF you are willing to fork over the coin...
http://www.pegasusautoracing.com/productselection.asp?Product=1490
-
YES! Thank you sir!
-
Have you checked your timing?
-
Great for the hard to find or race application stuff.
http://www.pegasusautoracing.com/advcat.asp?CategoryID=HARDWARE
-
Its main purpose is to reduce vapor buildup inside the tank, which significantly reduces the chance of explosion.
quote]
Possibly along the same lines, I thought the theory behind the foam was that thousands of small pockets of semi-separated fuel won't burn like one larger mass? I understand that vapor is more volatile than the liquid state of fuel, but is vapor control the only reason for foam?
-
....I plan on lifting tires, and going high 9's low 10's in the 1/4.... I also want to track the car, like on a road course. quote]
Disclamier: Please do not take this the wrong way, I promise I am not breaking your balls.
I'm curious how you plan to hook to run 9's and still go roadracing with the same car/suspension etc? It would be quite the feat, Ive just never seen cars that are that specialized for the quarter try to pull double duty. Whats the plan?
-
Just like wrought aluminum, cast aluminum has weldable a none weldable forms. Typically 4043 filler is used for 300 and 400 series cast aluminum and 5356 for 500 and 700 series.
Is there any way to tell which is weldable and which is not before you try welding? For example, a nissan valvecover is what series of cast aluminum? Out of curiousity, which of the above series are weldable and why? Thanks for the info so far.


Marsh Racing Technologies Wheels?
in Brakes, Wheels, Suspension and Chassis
Posted
Let me know what you think once you get them. I'll be ordering a set from MRT or DRW in the next few weeks. Diamond quoted me 114 a wheel in 15x10 with 4.5"bs 4x114. D window procomp or whatever their .095 wall lighter 20lb wheel is. So it looks like MRT is certainly cheaper