

Dan_Austin
-
Posts
223 -
Joined
-
Last visited
-
Days Won
2
Content Type
Profiles
Forums
Blogs
Events
Gallery
Downloads
Store
Posts posted by Dan_Austin
-
-
Ztrix.com, formerly Reaction Research has a kit that can be had in coupe form. Looks expensive on a price sheet, but is top notch quality.
-
The CS130 that I installed as part of this write-up died last month. Sadly the local rebuilder I used
is no longer in business. I found another who was closer, and who seemed well reviewed.
It took several tries to get a workable alternator from them, with most issues being they did not follow
instructions about clocking or mount location/spacing. When we got past those issues the results were
quite positive, with less voltage swing from idle to higher RPMs. One thing they did get right on the first try
was my request for a smaller pulley. I went from a 2.75" to a 2.375", which resulted in charging voltage
kicking in between 600 and 650 RPM, so no more dimming headlights while idling at a stop
-
I was able to install the VR kit and qualify for an SB100 build, so no more smog tests for me.
I ended up with a string of unfortunate events with test stations before I was directed to a STAR
station. None had the right adapters to test the evap/gas tank. A couple marked it as not tested,
others wanted to refuse the test (one wanted to fail it). In the end not a single station ever tested
the evap. On the second test after I bought it the tech could tell it was going to fail, so he aborted
the test a couple times. That did not hurt my status, but also masked the test results, so I could not
tell what was failing, and as a result did not know what needed fixing. The car was running well,
mileage was reasonable and had new plugs and a recently replaced cat.
Perhaps foolishly, I asked the tech to run the test to completion so I could identify the culprit. He did,
which pointed to a slightly rich situation, which turned out to be a very slightly mis-adjustment on the
TPS, which I had not been touched since I bought it, and had passed testing in the past. A few minutes
with the FSM and all was well, and I passed at the same shop the same day as I failed, but that got me
flagged for all future tests to be performed at STAR stations.
The final straw that pushed me to go for the SB100, was even if I bought a beater to qualify for
classic insurance, not a single shop I spoke to was familiar with that set of rules. I am glad to hear that
some shop owners are aware if it and make sure their techs are as well. That can only be good news
for Z owners in their area.
-
Depending on the family age ranges it might be worth reminding them that Yosemite is a national park
and not a petting zoo. The critters are used to the visitors, but not tame.
That and bring more water than you think you should need.
-
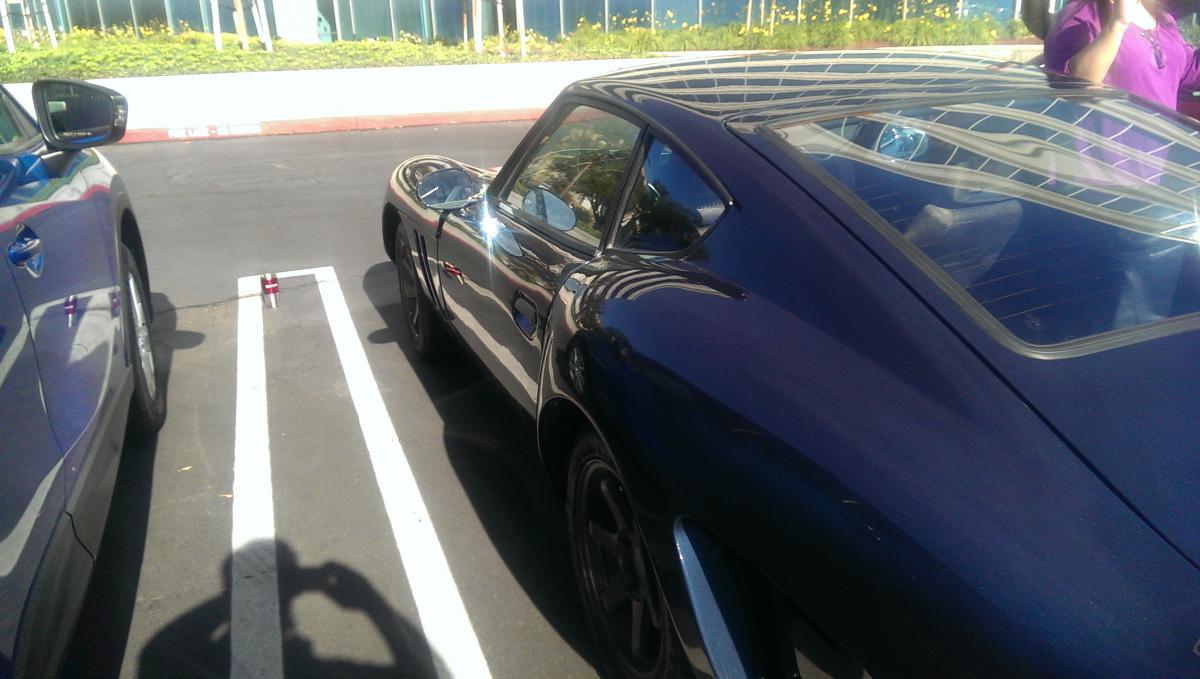
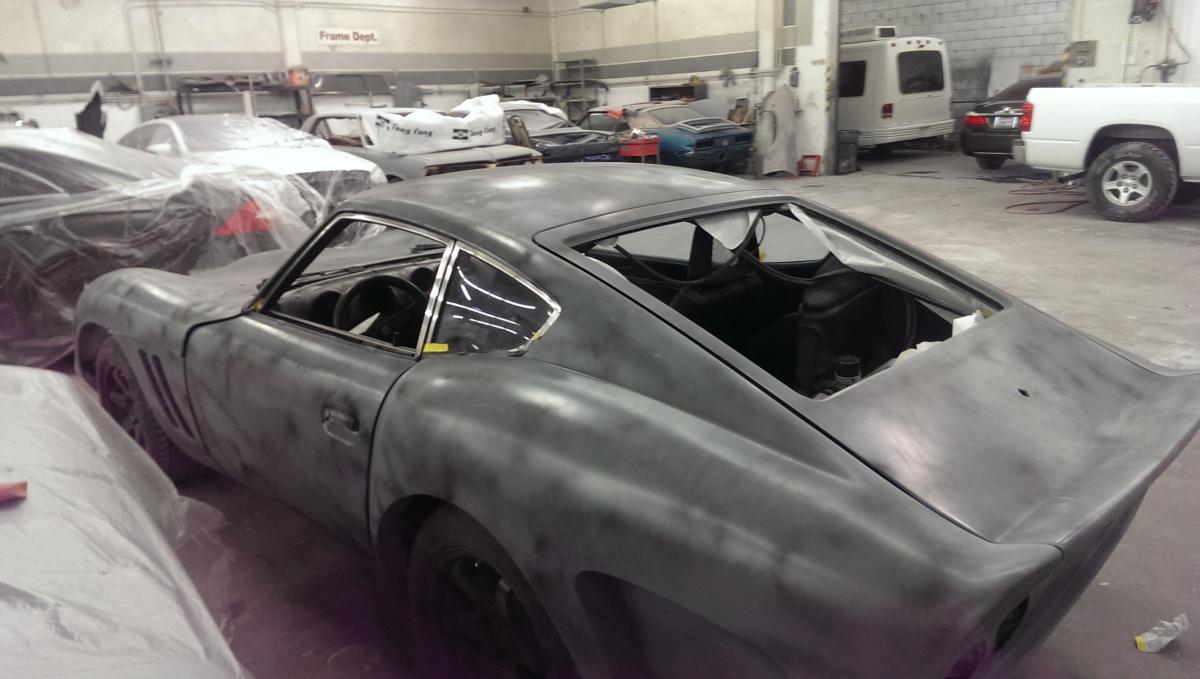
The mirrors are Miata manual units. The looked fairly good with the original body lines
and quite good on the VR. I mounted them about an inch too far forward and did not
catch that until after all body work and paint was done. That does not impact the drivers
but made the passenger side have limited usable range. I would not hesitate to
install them again, especially if I could find a new pair at a good price.
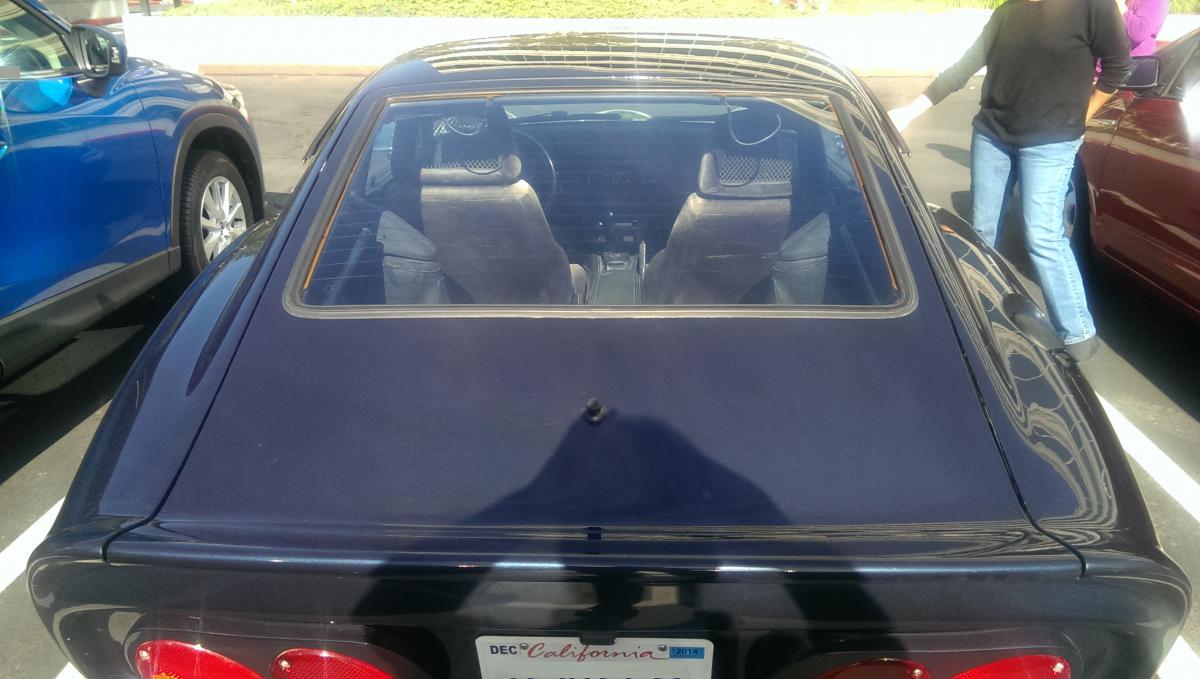
I daily drive it and could not tolerate losing any visibility, so keeping the windows was
a purely practical decision, but I do like the way it looks with the blacked out window frames.
I catch people staring at it several times a week, usually with appreciating nods, thumbs-up and
a lot of 'what the heck is that?'
-
I have one in San Jose, CA. It came off a 76 and was clean at the time. It has been sitting
behind my garage for a couple years. Shipping would be a pain, so if SJ is not too far to
go to pick it up, I will pull it out and make sure it is still solid.
-
Funny you mention using multiple sensors, as that is actually what the DIY Auto Tune
wheel does. it just happens that both sensors are in the dizzy housing. The outer ring
of slots is two groups of 11 (looking like a 12-1 wheel to the ECU), the inner ring is a single
larger slot that indicates the engine is in the first half of the cycle.
Mounting a hunk of metal on the front of one cam gear that covers 180 degrees could be
read by a HALL effect sensor and relatively tolerant in alignment, certainly within the
range the valve cover would vary. The truly pedantic could install pins between the cover
and head to encourage consistency. This half-moon CAM wheel with a 36-1 crank wheel
(a-la EDIS) would be 3X as accurate as the DIY wheel and less prone to valve train slop
issues.
If the hardest part of installing the head is figuring out how to mount a cam sensor, assuming
the CAS no longer fit, I'd be a happy camper.
-
Yes is stock 280ZX turbo 'distributor'. The only change was the 50mm optical gate wheel was
replaced with one from DIYautotune.com for use with a MS Sequencer.
I do have a cap on it, but only to keep crud out. I've since acquired a mill and lathe, and really should
come up with a cleaner solution, but I enjoy watching the double take when someone looks under the
hood...
-
No distributor for me, but I do have a Turbo CAS with a DIY custom chopper
disk that looks like a 12-1 crank and single tooth cam wheel for full sequential...
-
I am surprised Miata mirrors have not been mentioned yet. Door mounted with
a very similar curve to the door where they mount. I choose a manual set for
easier install, and my only complaint is people whacking them in parking lots.
Not old school classic looks, but not hideous and very functional.
-
Hoover, on 26 Feb 2015 - 06:37 AM, said:
This is my latest project-
I designed it on paper, full tube frame chassis and should have it on the race track in 3 months.....
Heck yeah! I stumbled across that last year when looking into a Rossion/Noble.
Looking forward to what you do with the Z projects and the HVR
-
The Frost Fighter grid is delivered on sheets much like wax paper and has an adhesive
on the grid itself. By its nature it is a universal fit with the intent that you would trim the
width to fit.
On one of my hatches I used a razor blade to remove the lingering remnants of the original
grid and then cut the FF grid into individual strips. That way I could carefully apply the grid
lines directly over the original, which had stained the glass, so even scrapping could not
fully remove them.
The kit also includes new bus bars to distribute power to the grid. The manufacture does
not recommend using the factory bus, but it may be possible if additional resistance is added.
The result was fairly good, and much better than nothing. I plan to do it again and may try
adding a dab of solder to the joint between the individual grid lines and the bus bar, as a
couple of the lines worked poorly compared to the others.
-
I've run into other reports like FricFrac's, so I was why I was asking here.
After fixing the TPS side pigtail The results are much better, but not perfect. I will
recheck the connections near the TPS, although it may be good enough and I
am being too fussy.
-
I had a quick peek at your new website and noted a LS2/T56 swap project in the works, so I feel less
odd asking, but what about the same concept using the T56? A custom friction disk would be required,
and perhaps a pilot bushing, both of which can be sourced far easier than a custom bell housing or
adapter for the L6 (unless someone with the right skill is interested).
-
Not sure what the Painless jumper wire is, but it is not uncommon to
connect the Sense pin to the battery lug. As for the exciter, that would
likely go to the lamp pin. Do you have a photo of the alternator connections?
I don't think you should connect anything to the stator lug (assuming it is a lug)
-
I am still wondering what folks are seeing for a their TPS calibrations, but I think
I fixed the signal drop out. I decided to start with the only connector in the harness
that I did not terminate and assemble myself, the TPS pigtail on the 'new' TPS.
I was thinking maybe bondo dust or moisture snuck in while it was at the paint shop.
Well as soon as I started to unplug it I noticed the TPS signal pin was pulled out
of the connector. The first inspection showed the pin lock had not been pressed out
far enough, but after fixing the simple little tang, I determined that either the connector
was mis-aligned or the lock catch damaged in the 'new' TPS, since every time I
put the ends together the pin pushed back out.
After addressing the floppy pin I have not been able to reproduce any off the issues, and
as an extra perk I think it solved a problem that appeared to be a failing fuel pump relay.
I only have a couple miles on the repair, but the problems had been easily occurring multiple
times in the same span before the repair, so hopes are high.
-
I don't think I have noise, as the pattern is constant, either at idle or part throttle cruise the signal
will drop below zero for a fraction of a second, triggering decel fuel cut and then AE when the expected
signal returns. At idle the result is a stall and while cruising a 'hiccup'
I did not get a chance to work on it this weekend, and I will consider adding shielding, but I suspect
the recent issue is crud in the sensor. Longer term I was hoping to find a better TPS unit, unless
other installs using this unit had different results. The lack of resolution (250~ish ADC between idle
and WOT), and the fact that calibration drifts has me unimpressed. I've tried two of the 204SX sensors
and one was new, with consistent results, but a sample size of two less than compelling.
-
Twelve weeks back I dropped off a well running car to the body shop for paint.
What I got back is less well running. I don't blame the shop, I suspect based
on a data log that show TPS dropping well below zero and stalls or near stalls
when the drops occur, that dust from the sanding process got in the TPS.
I still need to pop the cover and clean it, but I have been confounded by trying
to calibrate the TPS. There are two issues, one I have found referenced here,
but not solved, and not reference to the second. The first is that the calibration
drifts, and the running ADC values can be 8~10% below the off values, which
matters only that trying to calibrate with the engine running causes a stall.
The second issue which compounds the first is that the calibrated range seems
limited, from around 750 to 1000. I plan to investigate the connections and
measure the TPS signal, but I wonder if other installations of this TPS have
seen similar limit signal range. If it is normal for this model TPS, I can consider
trying to adapt a different model TPS (assuming I can find one known to
support a wide ADC range)
Also worth mentioning is that all sensors, TPS, CLT, MAP, IAT are all located
within six inches of each other and connected to the common leads (sensor ground
and VREF) at the same point next to the sensors, and no other sensor is exhibiting
noise or odd readings. The way I twisted, soldered and crimped the weatherpak
connector pins would make is unlikely that just the TPS has a faulty connection, but
I will check for that.
-
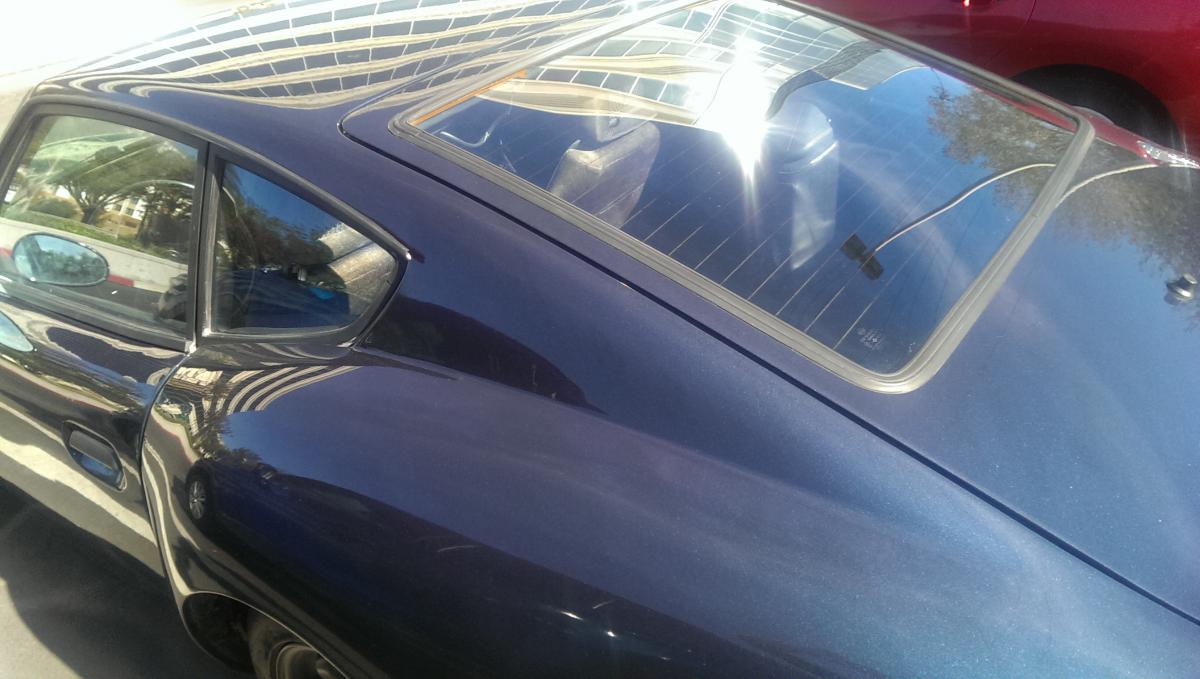
A few more shots with natural lighting-

Now for some boost tuning and hunting for a pair of Varstoen 17X9.5 0 offset for the rear, since the
16X8 wheels are tiny in the rear arches...
-
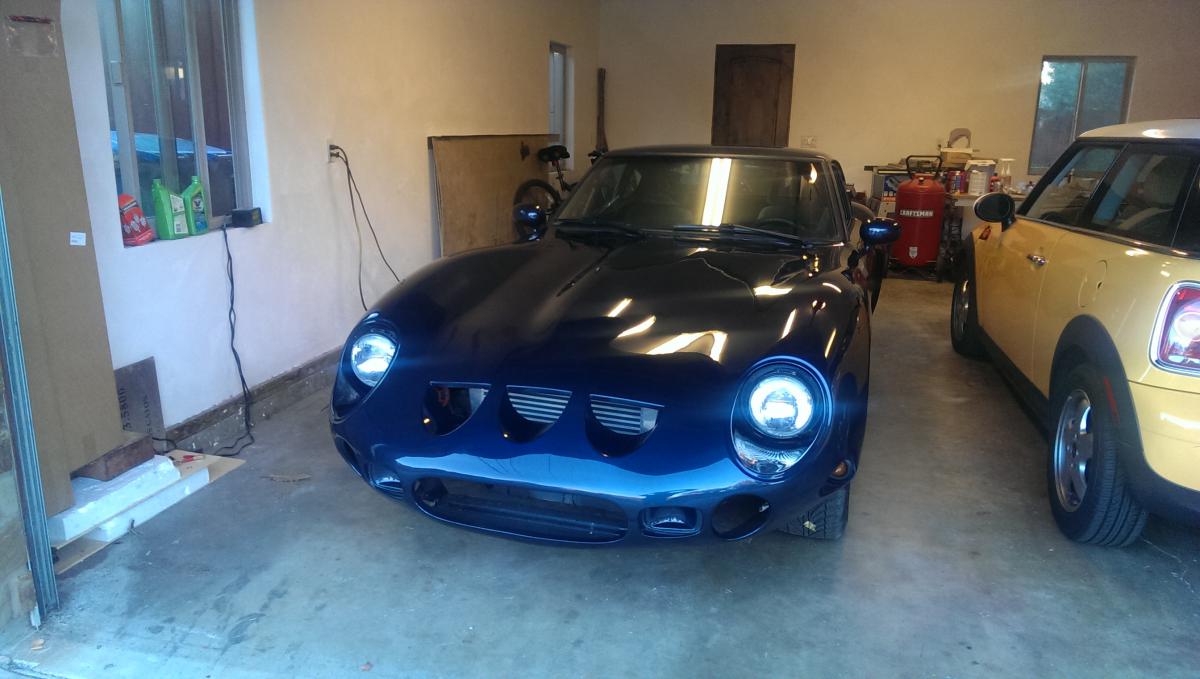
After a couple weeks of 'it will be ready tomorrow', she finally came home.
I had hoped to take delivery on Saturday to make the BBQ on Sunday, but that
did not happen. It was finally ready yesterday, and I only found a couple minor
tweaks that they agreed to tackle at a later date. Sadly they had left the lights
on at some point and my 2 year old red top would not take a charge. So I asked
them to address the small items and try an overnight charge.
The charge failed, and the O'Reillys next door could not find the warranty when
I called and when the paint guy tried to swap it. Luckily they did find it when I
took the battery in, so I could actually use the car when I got home.
Sadly I lost the light by time I got home, so these poorly light garage shots are the
best I can do for now-
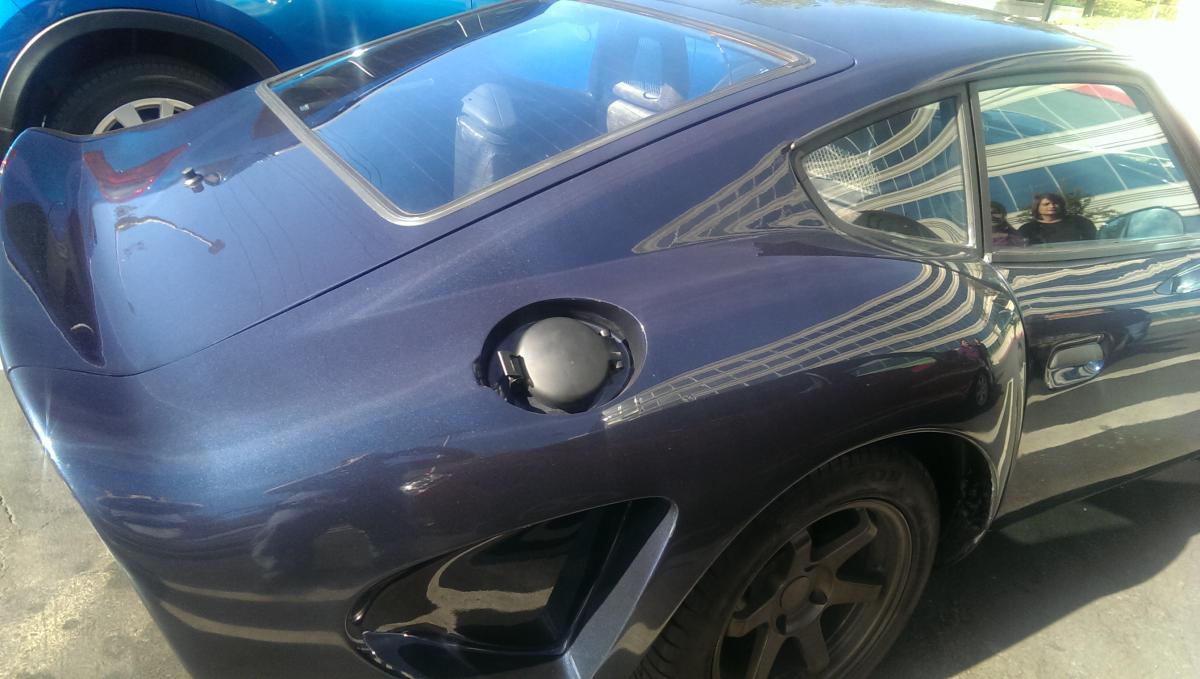
All exposed trim was painted matte black While happy with how most of it looks,
I loved how the LeMans cap turned out.
-
Clearly my lack of Honda knowledge was biting me. That trims the cost a bit.
Hopefully a chat with Ron Iskenderian can help trim it a bit more
I have a feeling that once you have a full parts list/cost and a running 'prototype' the orders
will follow. I am a mouse fart away from listing my beloved RZ500 to send money your
way...
-
I've been trying to figure out the small parts list to finish the head. I was surprised to
see new stock exhaust rockers are more than a performance set. Based on that, if
one of the Honda specialists could be persuaded to put together a 6 cylinder kit it
looks like another $2k for the valve train, not counting the cams.
The price ends up higher than I hoped and lower than I feared. I'm still interested,
but it has slide into the realm of selling other toys to justify the purchase to
She-who-controls-the-retirement-accounts.
Keep the updates coming, some of us fence sitters may not need much of a push...
Oh, and I suspect this might go over real well with Z owners in Japan. My experience
with the Japanese is that they will pay top dollar with no haggling IF the finished
product is a known quality. That may bump the volume enough for the frugal
crowd in the U.S.
-
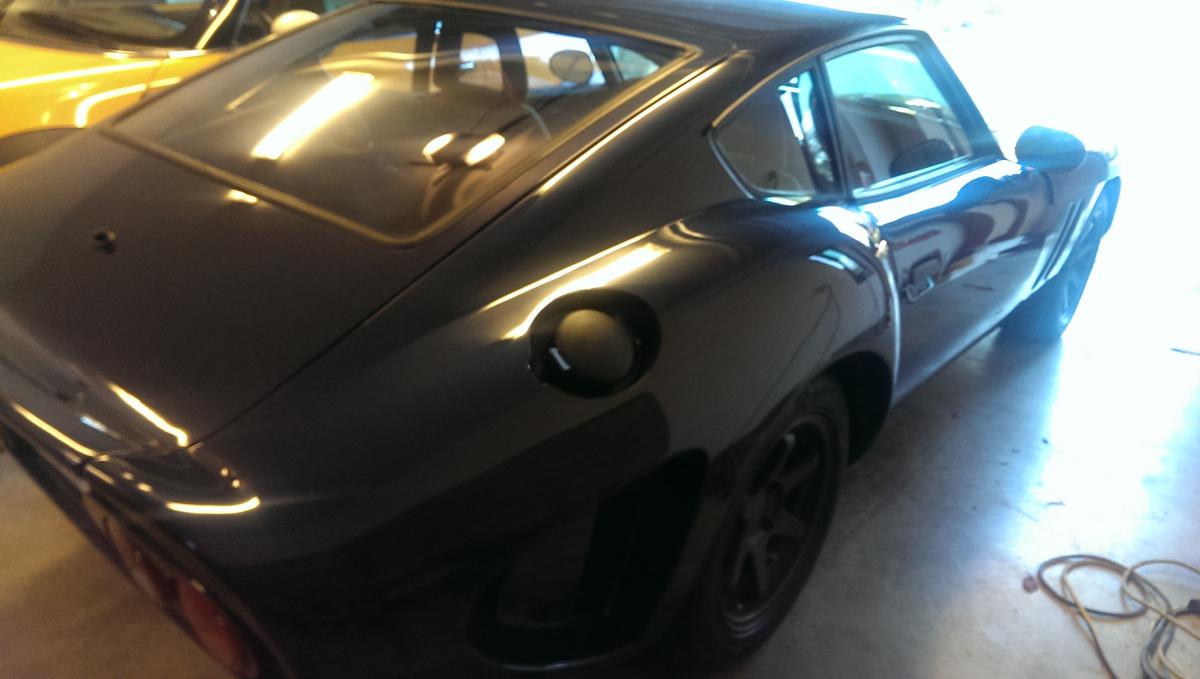
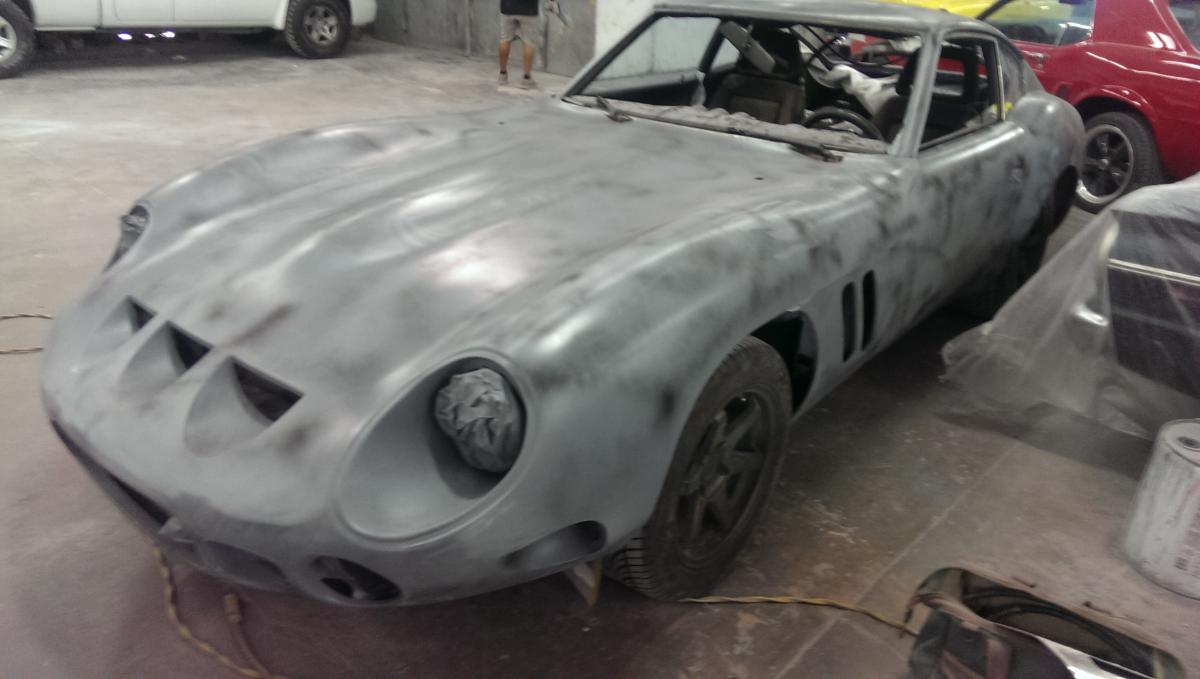
I've made a couple trips to check progress. The first was not picture worthy but today's was.
I am still a week away from picking it up, and I suspect I will need at least one more visit to
check the small parts to confirm all the polished bits get painted black.
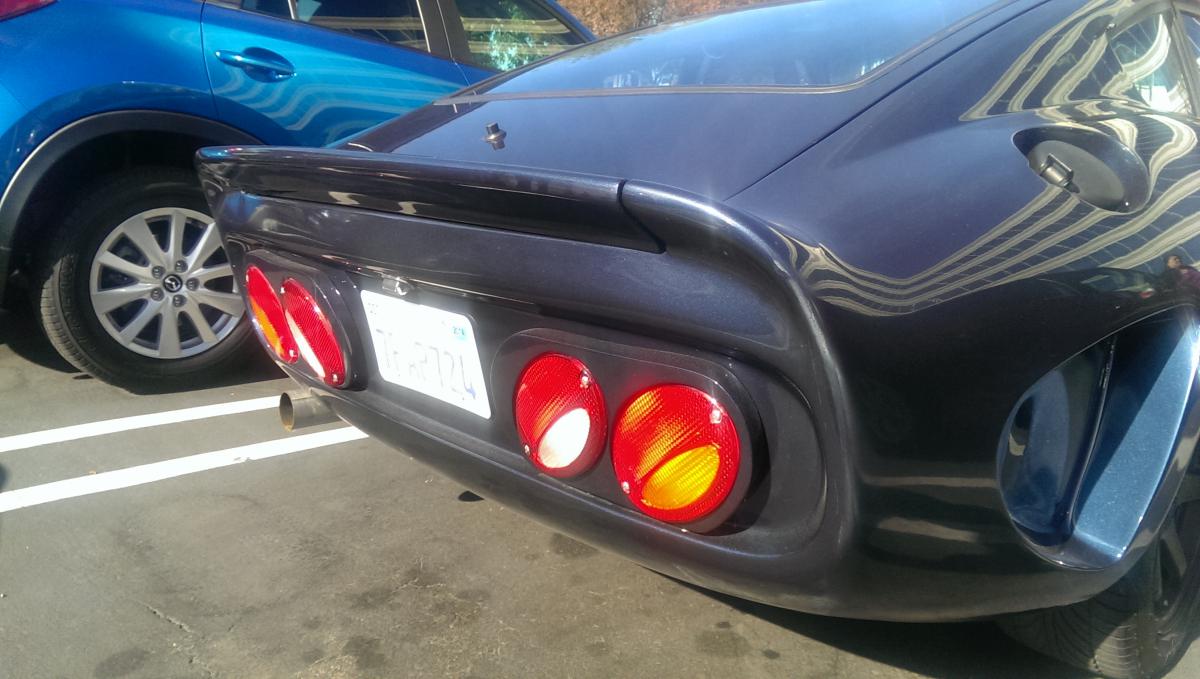
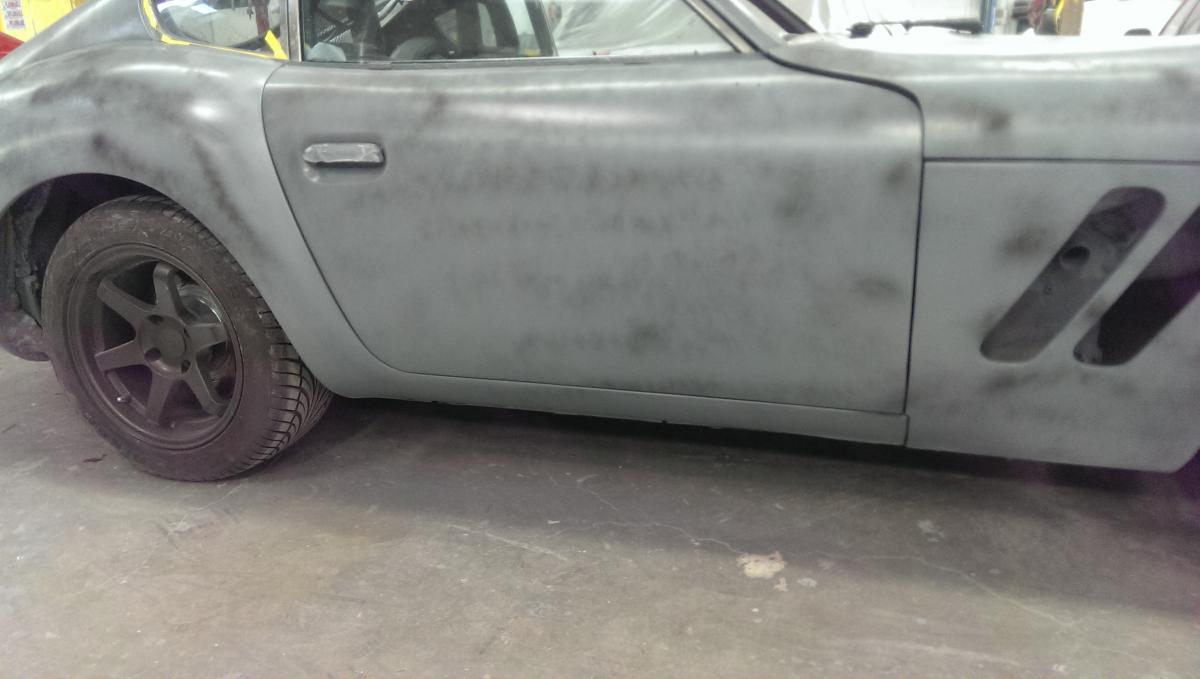
I asked them to build up the rockers to blend the tub, door skins and the cheek panels, which
I think they nailed:
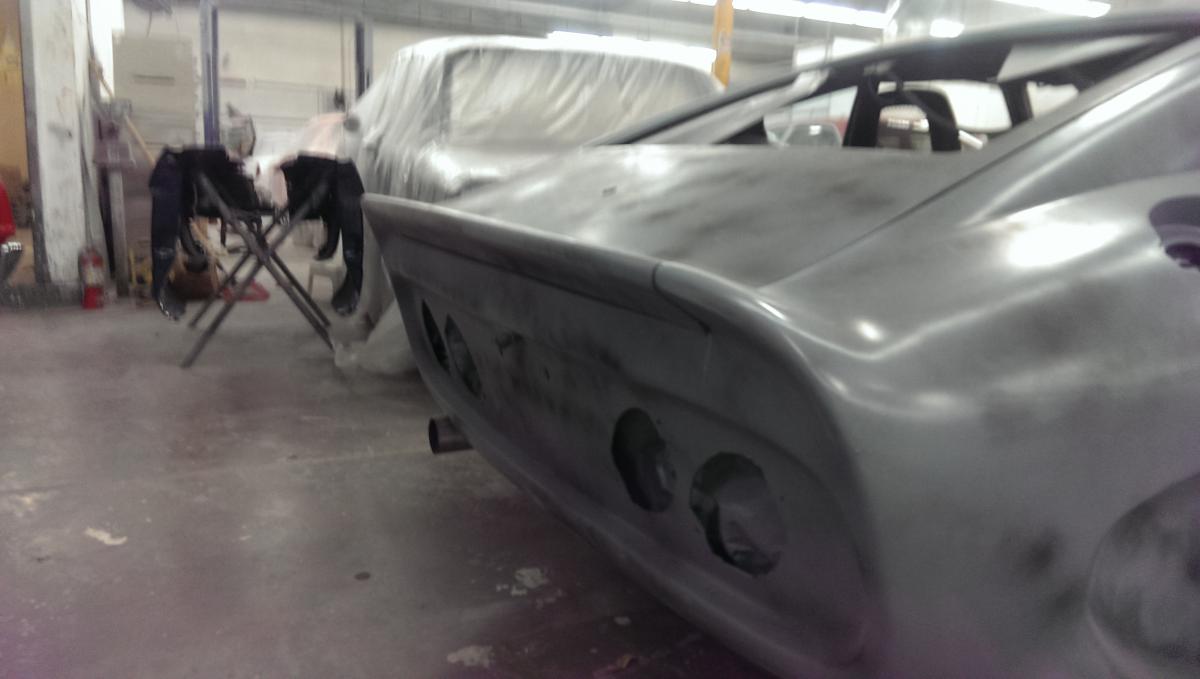
I went over the spoiler and tub looking for seams and uneven transitions, and was pleased
I could not tell where metal meet glass...
-
I took the body work as far as I could and dropped it off for paint six weeks ago.
The plan was four weeks in the shop while I was travelling for work, but the
schedule slipped. I hope to pick it up by the end of this week.
The shop agreed to create new rocker panels to blend the front and rear
fenders, and to clean up my tail light pods. They also will be etching and
painting black all the polished trim and door handles.
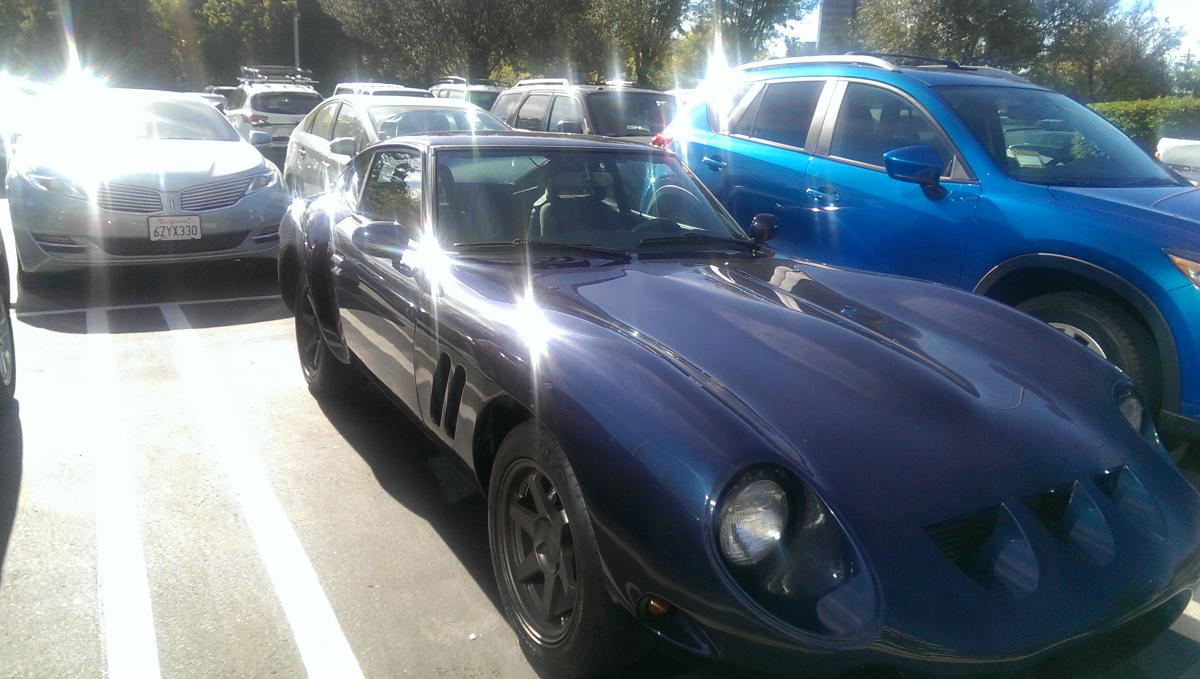
I negotiated colors with the missus and we agreed on Ferrari Pozzi Blue.
I wanted to downplay the Ferrari connection, but that is one sweet color.
Near black in low light and shifting shades of blue in sunlight, which should
look good with blacked out trim.
If the shop does not finish up as planned I will be al least doing a progress
inspection and grabbing photos at that time.


250 GTO Owners Thread
in Body Kits & Paint
Posted
The site is new and completely different from when I bought a kit, but I did see a coupe rear tub. You can always give them a call, which you'd want to do before ordering anyways. Too many details to work out to just click 'Buy it Now'