

Dan_Austin
-
Posts
223 -
Joined
-
Last visited
-
Days Won
2
Content Type
Profiles
Forums
Blogs
Events
Gallery
Downloads
Store
Posts posted by Dan_Austin
-
-
Great info. I had learned the vin tag tip from your thread. How did you tackle
the dash tag? Long flat head screwdriver and a bit'o violence? I can throw a
cordless drill in the trunk for the door jamb. Did they also take the bolt on
plate in the engine bay?
I actually planned my headlights fairly well. The main bucket is bolted to the
rear of the pocket and the floating bucket is in front with notches in the fiberglass
for the adjusters. I was between 5 and 10 degrees off from vertical, so I tweaked
the adjustable bucket to allow for a bit more leeway in the bulb placement.
A quick check in the driveway looks like I will be fine.
-
She is a young '76 so she still has to pass sniffer and visual. Sniffer no prob, visual
now way no how. I thought to use the other loop hole for vintage/classic cars, but
I do not own a second qualifying vehicle, so no carrier would issue the appropriate
insurance. Not one of them cared that my weekly commute was only 12.5 miles.
So a VR kit and the SB100 route keeps her on the road without resorting to tracking
down 35+ year old parts to meet the visual requirement.
I may be too naïve and optimistic, but since I've owned the car and major parts for
years as a registered vehicle I do not expect major issues with the DMV or CHP.
The brakes were rebuilt earlier this year, so that should be an easy pass. Which
leaves lights, and the one check that gives me pause. If the shop checking is
particular, the housings are ECE and not DOT. I also did not plan to install marker
lights, which I have read can be an issue for some shops.
-
Started at 8:00 since my extra hands for the big day had to leave early.
I had laid out the tub and had already prepared the body. Neither I nor
my buddy had worked with body filler before, so we did not recognize
that the cream hardener had separated sitting on the shelf at the parts
store. After 40 minutes we guessed the problem, pulled the tub and
mixed a second batch. That one setup very fast, but after the 'dry' run
we had plenty of time.
With the tub on my buddy departed, and I started looking at the door skins.
I figured I would start the passenger side, so if I screwed it up I would not
be looking at it on a daily basis. Well I did not screw it up, but after the
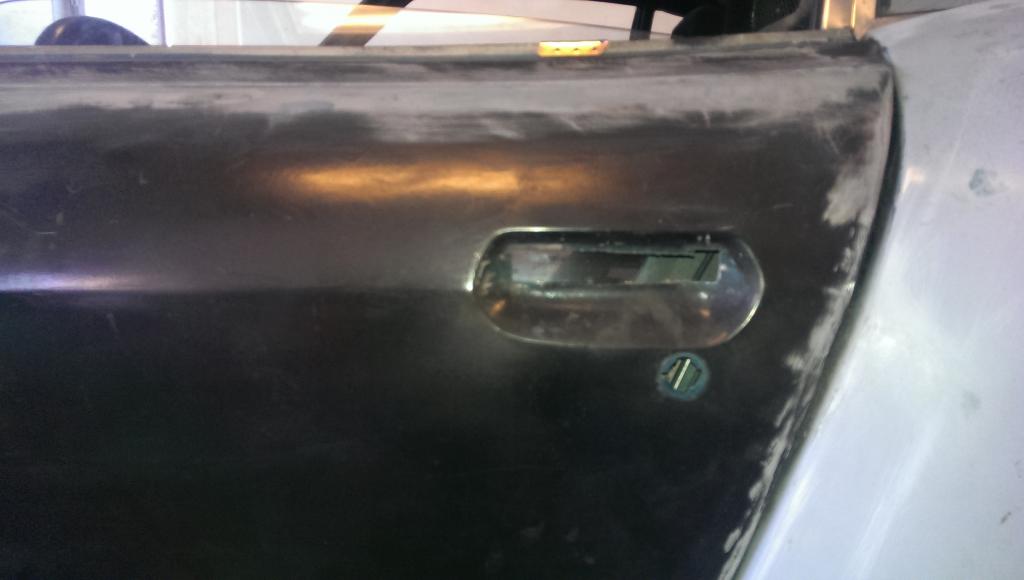
bonding set I realized plan to not cut the handle pocket was not a good on.
The handle fit perfect, and even the mount bolts just slipped right in, but were
not long enough to put a nut on. So I ended up pulling the window and regulator
to make enough room to reach in with a 4" angle grinder and cut off wheel to
cut the pocket. It worked, and was drama free, but boy did it suck putting the
window back in my self. This is what I should have done and what I did on
the drivers side-

With the doors on she is basically complete. I need front turn signals and to
mount the license plate, then I can start the DMV process.
I have one panel left to bond, and that is the spoiler, which has to wait until I can
pickup a bit of strapping long enough to span the deck for clamping-
One bit that does not show up well in a photo but I am pleased with is the door edges.
I was able to feather and smooth out the filler to dress the 3/8" gap on the rear and
smaller gap on the front-
-
A few more small items knocked off the list. I borrowed a welder and
finished tacking the trimmed rear wheel arches. I also welded in the
hood stop. The welds look better than the photo, and I really did not
care to make them pretty.
While I have the front end apart I finished mounting the idle valve and
plumbing it and the valve cover breather into the cold air intake track.
I found my headlights were canted a bit, despite trying to ensure the buckets
went in level. Instead of cutting up the fiberglass I opened up the notches
the buckets. Not that I have the lights in I can see that I did have the
relay wire up correctly, so that is another item crossed off.
The one other item handled so far is cutting in the Quik Latch Minis.
I ran a 1/4-20 tap down the original hood bumper mounts and used
a 3"4 hole saw (very slowly to avoid splintering) The nut for the latch
did not feel right when tightened on the fiberglass, so I cut out a couple
of 1.5"X3" tin strips and drilled those to be large washers. The latches
are nice and tight, and if they do not hold well enough, I can also step up
to the full size Quick Latch, I just wish they have a size in between the mini
and full.
I picked up a gallon of Kevlar reinforced body putty and will be bonding the tub
tomorrow morning. If that goes well I may do the doors too. I am debating removing
the doors and laying them flat to make the panel easier to install, although that will
make it harder to tweak the panel alignment, so maybe they will be bonded on the
car...
-
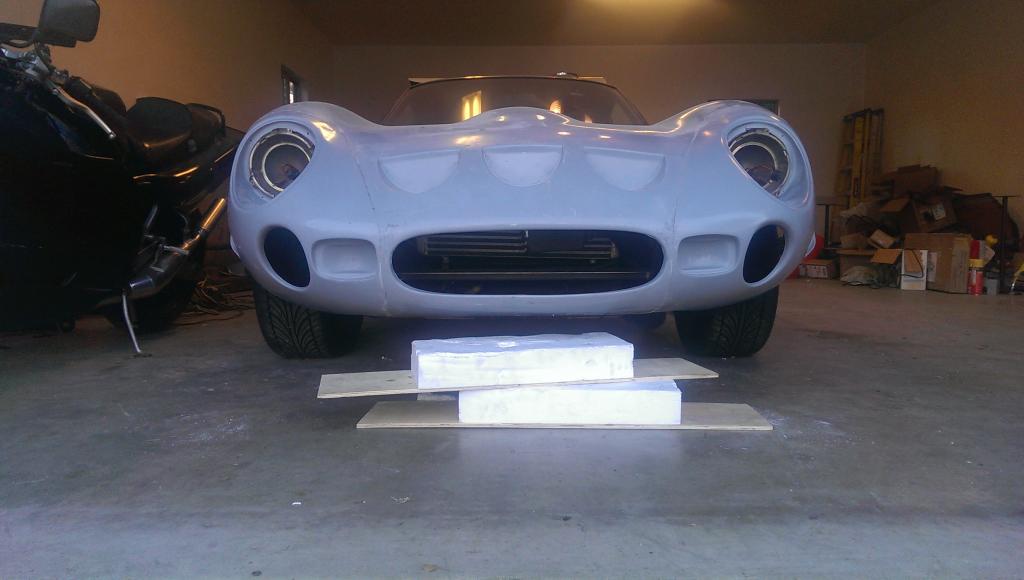
The hood is mounted and the headlight buckets installed, mostly. I need to pick
up some specialty bolts to finish, but the cutting and sanding is done.
I also finished rerouting my cold air intake since the tilt nose hit it hard in the
original location.
Need to install a pair of Quik Latch mini hood pins and cut in the washer nozzles,
and start bonding panels. Next weekend maybe...
-
The hinge arrived on Thursday, but I have not even opened the box yet. I moved our corporate
HQ last weekend and the local Telco managed to bork my WAN and internet deliveries., so
no free time to play. Those problems were resolved yesterday, so the hood goes on tomorrow
and bonding is likely next weekend.
I am fairly happy with the pods. If the local TAP Plastics is done remodeling I will pick up some
3oz fabric and try my hand at covering them, otherwise I plan to see if a local custom stereo
shop that makes enclosures will accept a non-stereo job.
-
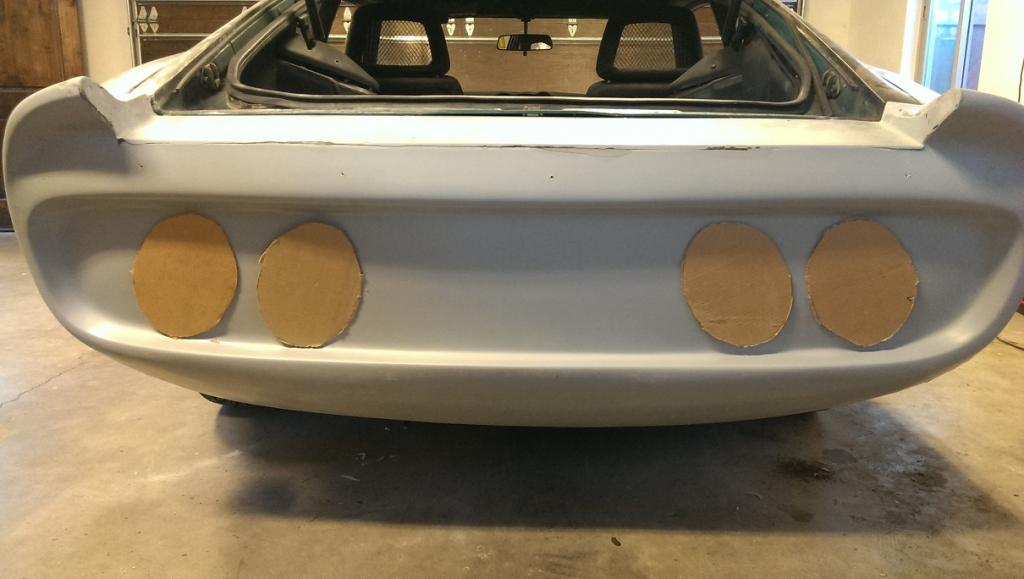
Still waiting for my hood bracket, so I spent the week shaping the tail light
pods.
Mid-week I placed the shaped, but not sealed/glassed pods and
marked out my cuts, last night I took a deep breath and made my initial
cuts. The good news is that the pods will completely solve my
clearance issues on the passenger side. The bad news is driver
side has seen repairs in the past, and is not quite square. I needed
to trim the lower valance to make room for the right side turn signal.
I have not bonded the tub yet and can remove it to make adjustments
for clearance, so this is actually working out nicely. The tub looks
intimidating, but I can easily place it and remove it by myself.
My first attempt at glassing my pods was just short of a disaster.
The shop I bought my epoxy resin from was remodeling and could
not cut my desired 3oz woven e-glass, and offered a 'comperable'
tape. It did not want to hold a curve and kept pulling away from
my carefully carved pods. The 'just short of' was achieved by removing
the misbehaving glass before the resin fully hardened.
I am now attempting to just resin coat the foam so it is not fragile, and
revisit the need to glass it later.
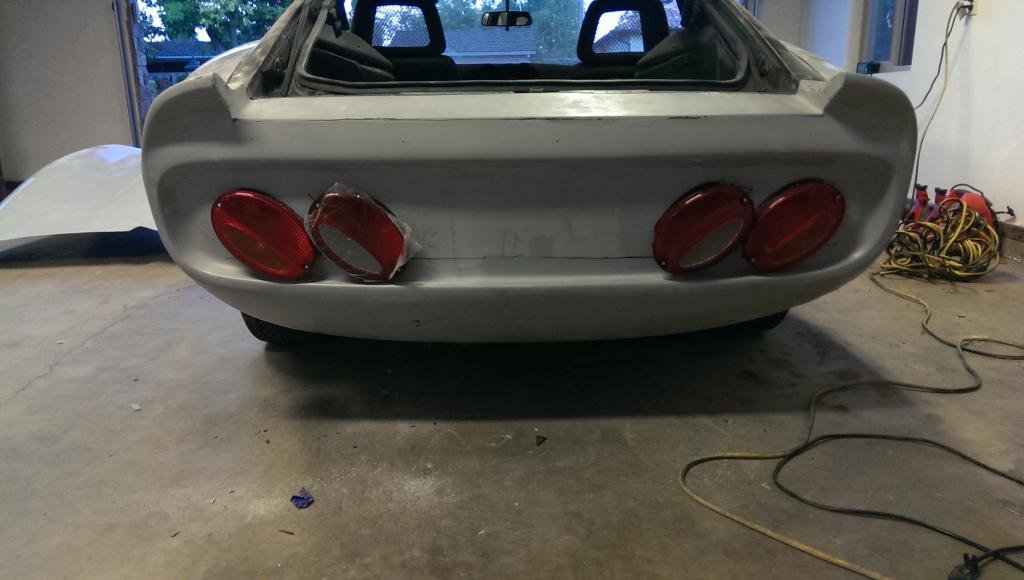
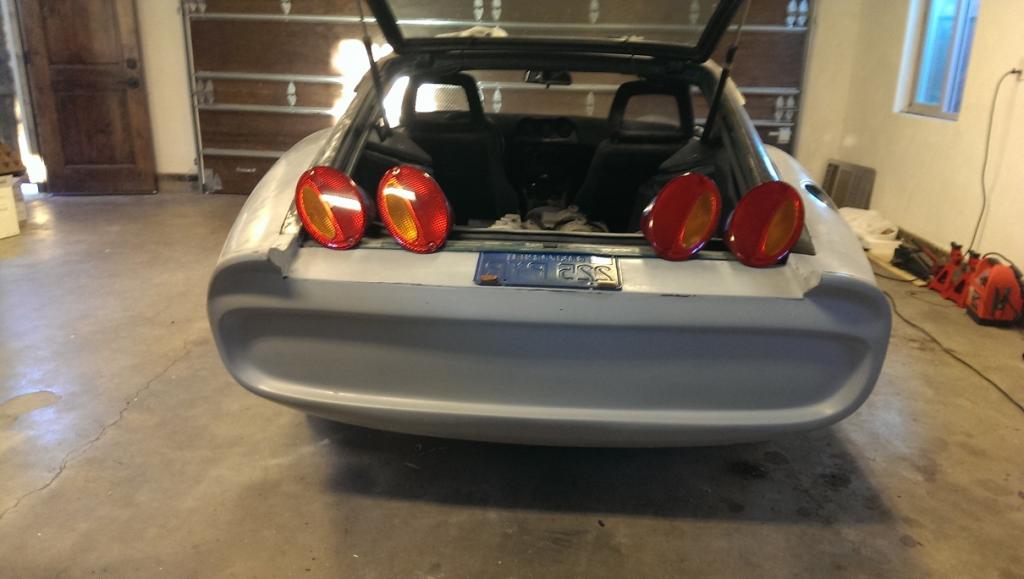
Not wanting to end the day on a downer, I finished soldering the tail light
harnesses and mounted the lights without the pods-
Once I figure out how to finish the pods I can be confident in bonding
the tub.
-
Which wideband are you using, and do you have a separate gauge for it? Your descriptions
sounds like you have a calibrated sensor, but TS is using the wrong calibration curve.
I have no experience with the Extra code, so I may be talking out my lower orifice. On
the B&G code I know I needed to identify the sensor in the project properties, calibrate
it in the sensor tools and I seem to recall needing to tweak something in VEAL, but I do not
have my tuning PC handy so I am not sure about the third location.
-
Headlight relay harness complete. The high density foam cuts easy with
a fine tooth hacksaw blade and I was able to make curved cuts to follow
the lens housing shape. Not as nice as a coping saw, but close enough,
and the foam sands nicely.
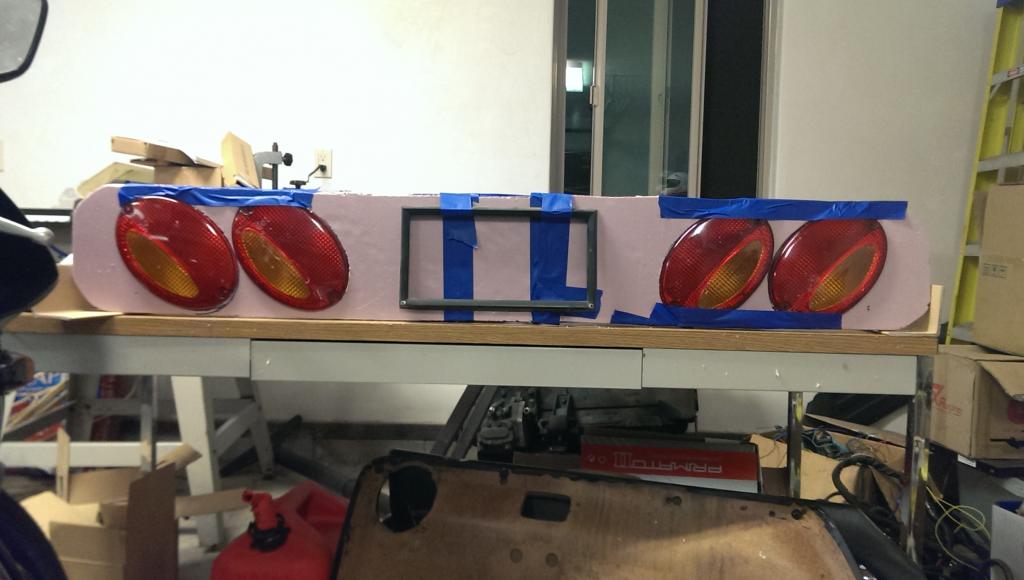
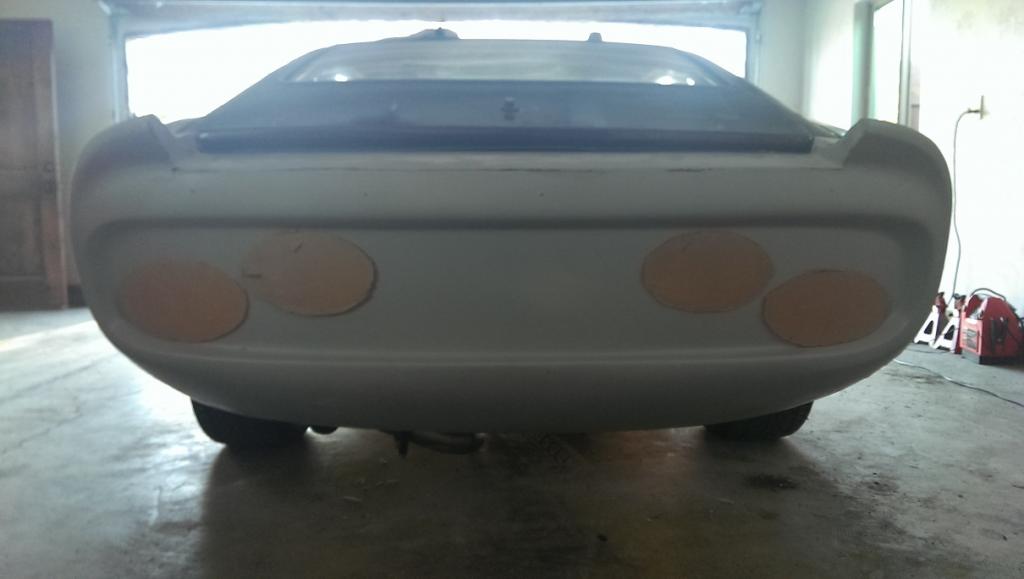
I started by mocking up a full valance to see what it would look like:
I like, but do not want to completely fill the void in the valance, so I
cut up a couple more 8" high panels, copied the lens holes to the
smaller pieces and started shaping the pod curves. I may end up
removing a bit of the outer edge to make the pods symmetrical, or
maybe not. Once I decide that I need to tackle my first glassing project
and cover the foam pods.
The pods will solve, or at least greatly improve the clearance issue.
Edit- I just notice the tape on the left pod sagged before I got around to
taking the picture. That will be corrected before I make any cuts on the
tub.
-
Still waiting on a bracket and a few lights, so not much progress to be made. So I
picked up some 2'X2'X1" high density foam panels to sculpt the taillight pods.
That project starts tomorrow, after I finish building the headlight relay harness.
It has been on my list for a long time, and it made sense to tackle with the front
end apart.
-
My clear euro tail lights arrived yesterday so last night I cut the sockets
off one of the factory stub harness and wired up the tail/turn/backup
lights and confirmed the wiring scheme.
I need to hit the junk yard again for two more tail/brake light pigtails to
wire up the second set.
-
The rear tub is requiring some trimming at the rear to get the front
to set down and align with the rocker and door jamb. I just about
have it where I think it needs to be, although the arch is covering
part of the quarter window trim.
I also mocked up a couple more light options-
Staggered:
Angled out:
I really like the staggered, but clearance will be hard, the angled out
arrangement is growing on me. I also like it with a slightly shallower
angle on the outer lenses, say 30~35 degrees on the outer and 45
degrees on the inner.
Finally I placed the lights inside the valance in the angled out setting:
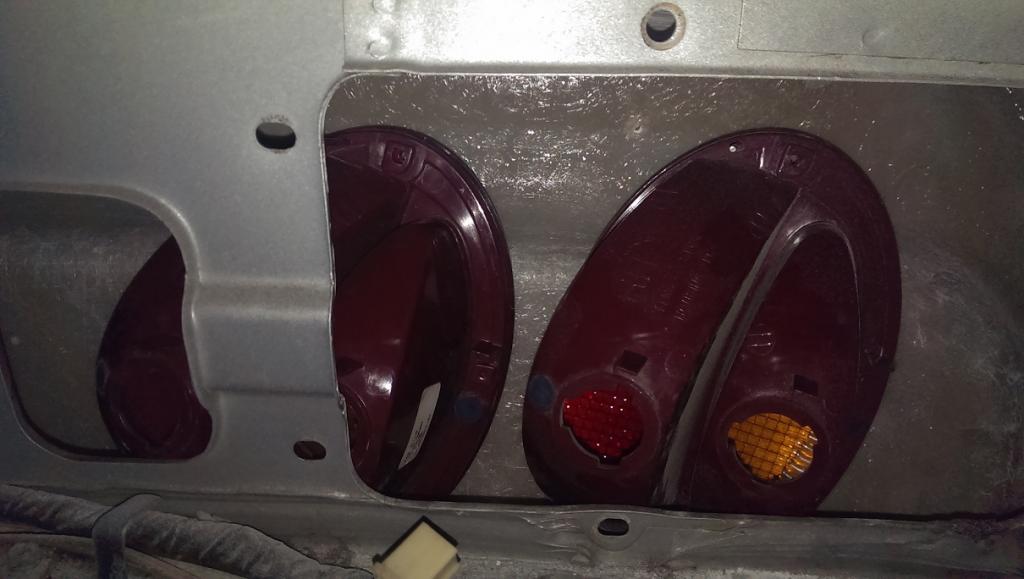
This was interesting, although hard to see in the photo, the lights are
sitting about 3" too high. The lenses are curved and the peak is about
1/2" to 5/8" from the mount surface, combined with the steep curve in
the reflector and the 1/8" thick pocket suggests I will be much close
to getting the inside clearance I want. If notching the valance does not
yield enough space, I can then move on to relatively short pedestals.
-
The first delivery of the C5 lights arrived. I found a used set at quite a savings,
cheap enough that I only planned to use 2, with 2 spares or two to sell. I have
ordered two more with a clear insert that will be my backup lights, which have
not been delivered yet
I need to decide if I want the secondary lenses on the bottom, top, facing
each other or apart.
I am thinking that I am on the right track with the angled install. I chopped up
a box with the basic shape of the lens, and taped them in place. The missus
was calling for dinner, so this was just an eye-balled spacing and tilt.
The lenses do not separate from the housing, otherwise I would tape them in
place to test the visual appeal. I do tend to think that the angle works better
with the tops leaning in, accentuating the wide hips.
-
That is a little more aggressive than I planned, but it is an option. The housings
are fairly shallow, with the central socket 3.5" deep from the mount surface.
I had another layout in mind ( _ -- plate --_ ), but that would definitely cause
a depth issue. Since I have not bonded my tub yet, I will pick the style I like,
install the lights and check the fit. At that point I can decide if I want to do
more cutting or make small pedestals.
-
Another one with missing nub-ins and springs. Pharaohabq has a thread about
3D printing bits we need for these old cars, http://forums.hybridz.org/topic/113544-240z-horn-button-refab/
If that does not work, I may need to study up on plastic casting, there is clearly demand.
Not sure where to find the itty-bitty springs, maybe a hobby shop that has a R/C focus.
-
The lights are scheduled to arrive tomorrow, and I will be checking that very closely.
The lights are between 2.5" and 4" deep from memory. I'm playing with a couple
designs, the lights a slightly oval, so am thinking to mount them on an angle, which
would move their center up ( / / Plate \ \ ) or the basic ( - - plate - - ). A big goal is to
maintain access to the bulb sockets from inside, but that seems more and more unlikely.
-
The quarter windows stay. This is to be my daily driver, and with the way the locals drive,
I want to see them coming...
The kit does have optional panels to cover them, so I can always change my mind.
-
I ordered a coupe kit from Reaction Research 10 days ago and lucked out that
John had business in the area yesterday, so I saved I pile on the delivery.
Since I knew it was coming, I stripped her down last weekend
I could only take a couple of hours for the delivery, so we had to rush the
pointers, but I still felt OK to jump in today. John pointed I needed to trim
a few brackets, so I had to call a buddy to borrow his angle grinder. He showed
up at 2:00 and we shot the breeze for 45 minutes when another friend stopped
by unexpected to show the project to his kids.
Once every one was gone I got the cheek panels mounted. I managed to get
the drivers side right on the first try, but had the passenger set back 5/16" of an
inch, which was easy enough to fix.
The rear tub was a adventure by my self, but I have it in place as a dry fit, and the
door skins taped in place to get a look at the end game.
I have just less than four hours in the assembly, which is not a bad start. I need to
pick up some duraglass next week and work on wiring harnesses. The bonnet is
just resting in place since the hinge did not make it on the truck., so that is a task for
after labor day
-
My ECU limits my choices to multiples of 80. I found suggestions
of 300 to 320 HZ. I tried 160 to 960 and found that 320 seemed
to be the best balance between noise (too much when the HZ was
too low) and response/resolution (40 RPM at temp per 1~2% duty cycle)
One addition thing to watch with the Bosch/VW IAC is that the ports
are large. The in port my is about 17mm and the out port about 25mm,
making hose connections an adventure.
-
Zip tied to the remnants of the AFM bracket. I need to make a better mount,
but before that I want to get a 16mm hose nipple on the cold air pipe so I can
connect the IAC to it and ditch the small filter I put on the IAC.
-
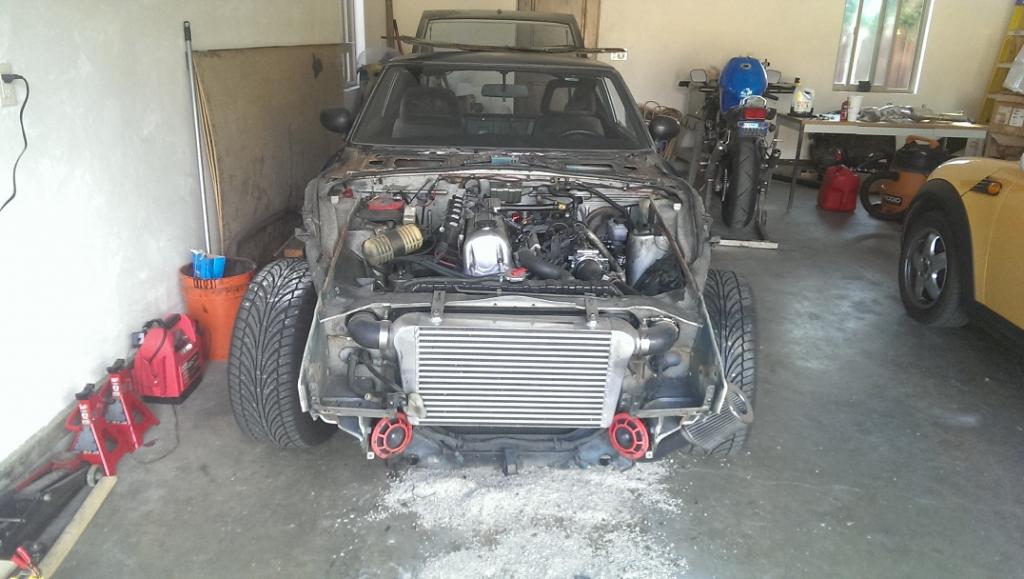
I've had the Z for about 5 years, after purchasing it to be my daily driver.
All the mechanicals have been refreshed or updated-
83 ZX Turbo w/large ebay intercooler and 3" mandrel bent exhaust
81 Wide ratio 5 speed
Obx helical diff w/3.90 gearing & RT diff mount
Wilwood Forged superlights in front and Silvermine Stage 4 in the back, 1" Wilwood master
Full urethane bushings swap
Eibach springs and Tokico blue strut inserts
CS130 alternator swap
The cosmetics have always been the least of my concerns, but the missus finds it ugly.
The turbo swap happened after having major issues with the stock 76 setup passing, not for
numbers but the visual, so I decided to go whole hog with the SB100. The wife surprised
me by liking the VR kit, so the project went from fantasy to real very quickly.
I stripped the front end and all lights last weekend. I choose the bolt on cheek panels, and
hope that I can have the nose mounted this weekend, with the doors and rear tub to follow
the following weekend (but may drag out). I've ordered a set C5 euro spec tail lights and
collected the pigtails to build the proper harness, which might happen after work next week.
I cut the rear fenders two weeks back in anticipation of starting (look honey, I cannot change
my mind now, it is even uglier....)
I am hoping to remember to take photos, but I often get engrossed in the work and forget to
eat or drink, much less record the progress. Before, mid-way and after happens to be my
typical build log.
-
That is an excellent read, thanks for that. It is also great to know that sequence
numbers are still available. I have an aggressive install schedule, but I can relax
a bit about starting the paperwork.
-
He is making the delivery which saved me enough for the tail lights and
other small bits.
I've never worked with glass before either, so I'm glad you documented your
challenges. It was part inspiration and motivation for me jump in. BTW, would
you object to sharing where your SPCN fell in the range of 1 to 500? I'm trying
to decide if I go into the DMV next week or if I need to wait until January.
-
Everyone has to start somewhere, but this is really basic stuff. You only have one battery
ground, which is the first photo, provided it connects to the battery's negative terminal.
The cable on the smaller cylinder (solenoid) should be connected to your positive terminal.
As long as both are connected to the correct terminal, then the main connections are correct.
There are smaller (10~12 guage) wires from the battery, one from the positive terminal to the
chassis harness and one from the negative to a chassis ground, which would normally be only
a few inches from the battery itself.


5 lug front drag wheels
in Brakes, Wheels, Suspension and Chassis
Posted
The second gen Camaro (and many others) used the same A2/A6 bearings as the S30.
If you measure the stock hub to get the distance between the outer edges of the bearings
you can then spend time on the Wilwood web site checking out their aluminum hubs to find
one with the correct bearing spacing using the A2/A6 combo. Many are drilled in both
5x4.5 and 5x4.75
You would need to then figure out the rotor hat height and caliper bracket, but if
you've back-halved the Z already you can likely handle that part.