walkerbk
-
Posts
227 -
Joined
-
Last visited
-
Days Won
10


walkerbk's Achievements
")


-
Yet another LS 260z swap :)
walkerbk replied to christianmoller's topic in Gen III & IV Chevy V8Z Tech Board
I got to ask, how does the LSA fit? I have a built LQ4 with long tube headers and want to go super charger but dont want to spend the $7-10K on a Magnuson super charger (could go with a corvette pro charger but that would screw up my AC system as it would push my compressor into my engine mounts). My understanding was the LSA wouldnt fit under the hood. -
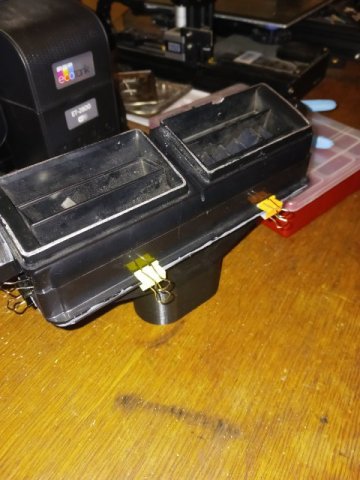
@Zetsaz Maybe its just a slight design change but mine does not have that problem. That being said, I could add a diverter down the center of it to "split" the air around the center of the vent.
-
It's very even with the side vents. I did this to get some more air on my hands during cold mornings.
-
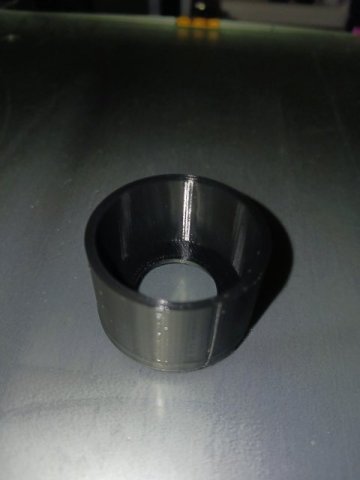
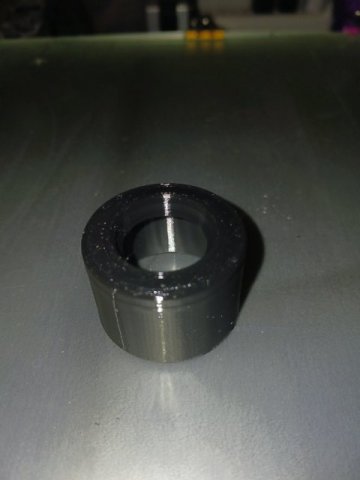
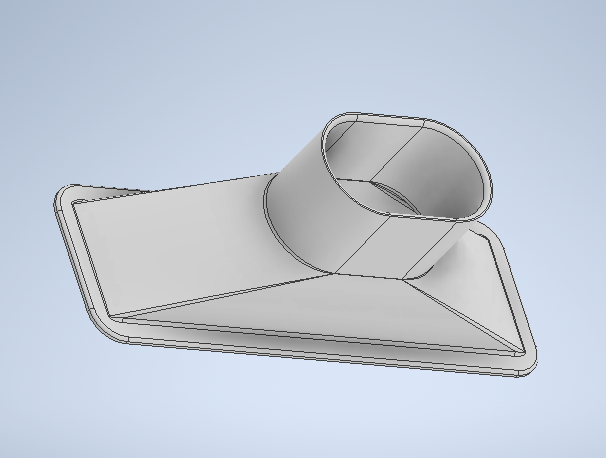
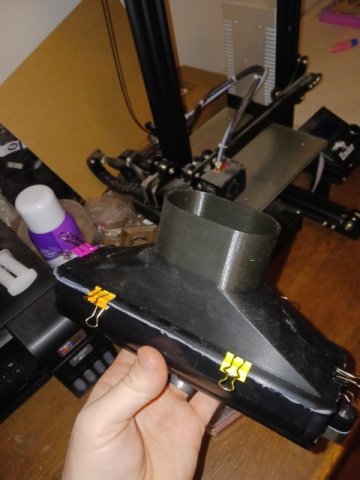
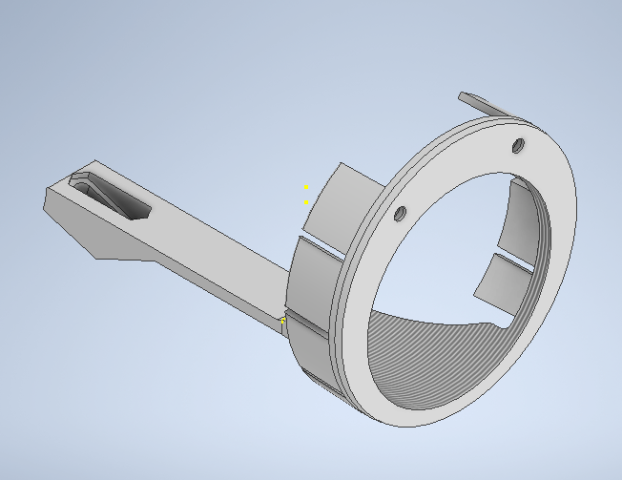
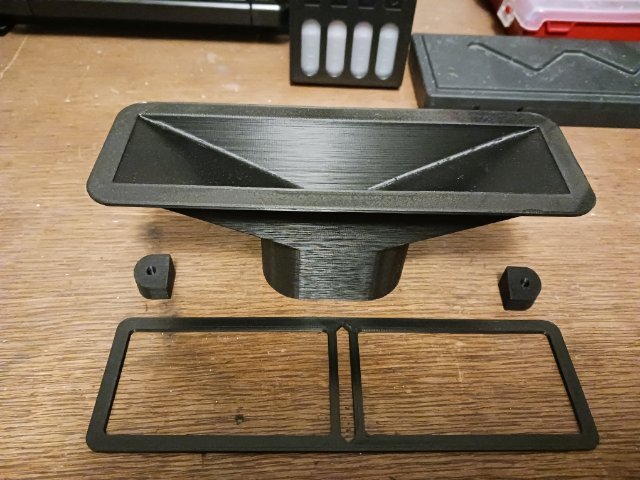
Hey everyone. I developed and 3d printed an adapter to go from the vintage air mini gen II tube to the center vent on the 280z and figured others might want to utilize it as well. I'm figuring $20 and it's shipped to your door (U.S., I don't know about international shipping). for mine I mounted it in a carbon fiber center section so I also can include the stands to offset the air vent and a cut template to utilize.

-
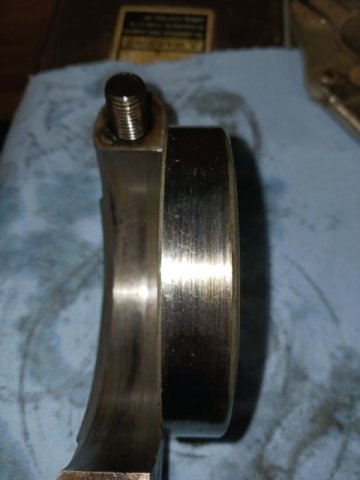
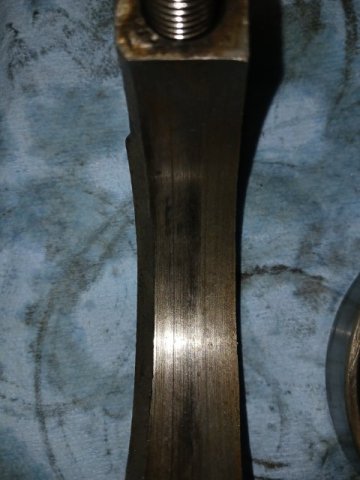
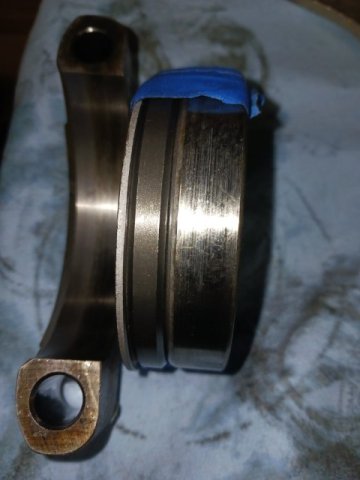
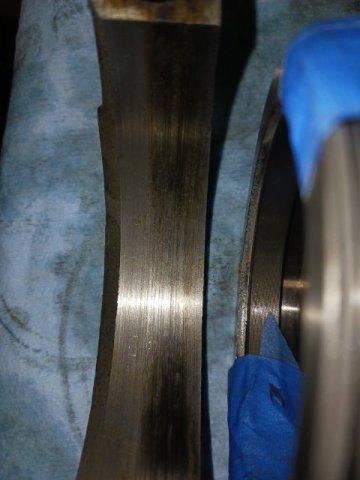
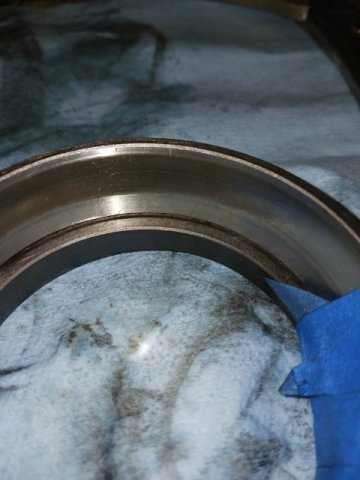
So I swapped in a OBX Lsd a few years ago and it has sense been a little louder so I decided to disassemble everything, clean it up and check clearances. In opening up the diff there was a lot of metal in the oil from the OBX unit (every tooth has some kind of minor damage) which I'm not to concerned about but looking at my carrier bearings I wanted to see what yall thought. Running my figer nail over everything there is little to no groves (the case feels like they are factory machined a little rougher) and there is no distortion on the bearings or bearing races. They do however look like they were spinning in the case. I put the race back in the diff and it almost "snaps" into place (very tight, definitely an interference fit). As I don't remember what they looked like the first time I rebuilt it I just wanted to get some opinions before putting it back together. P.s. all bearings are still O.E. with about 200k miles (20 of which was with an LS).
-
Bushing for emergency brake control lever.
walkerbk replied to LooseRocks's topic in Brakes, Wheels, Suspension and Chassis
So this is the finished product if anyone else is interested. It is made out TPU which is very flexible (and hard to print). I have used TPU to create plugs for my floors, wiring grommets and other such.
-
Bushing for emergency brake control lever.
walkerbk replied to LooseRocks's topic in Brakes, Wheels, Suspension and Chassis
Ok, so i think i have a working prototype for you to try out. I did a stepped lip on the side that buts up against the brake actuator and then did a minor fillet on the side that goes against the car. The inside diameter of the bushing is 28mm instead of 28.5 just to give it a tight seal against the metal "cup that it fits over. I just printed one off and will make a second one that is a little longer (21mm instead of 17 because i figure with the stepped lip it will slip up the shaft that it is sealing against). Again, i do not know how TPU filament is going handle some of the road debris and grease but it does handle heat just fine. I have made all the grommets for my engine bay out of this stuff and it still looks new after two years. If you want me to ship these to you, send me an address in a private message.
-
Bushing for emergency brake control lever.
walkerbk replied to LooseRocks's topic in Brakes, Wheels, Suspension and Chassis
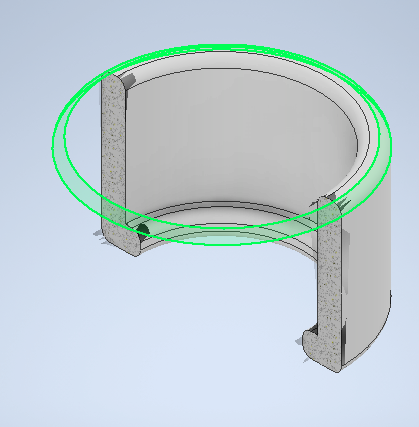
@foosman below is what I came up with based on what you gave me. based on the design of the Datsun I am assuming that this part is a seal used to keep out road grim and such (if that is the case, I would change up some of it to prevent water intrusion). With that in mind, the dimensions of that which it seals up against would be just as important if not more. I have TPU filament which is a Composed of polyurethane and rubber but Im not sure how well it would hold up under a vehicle.
-
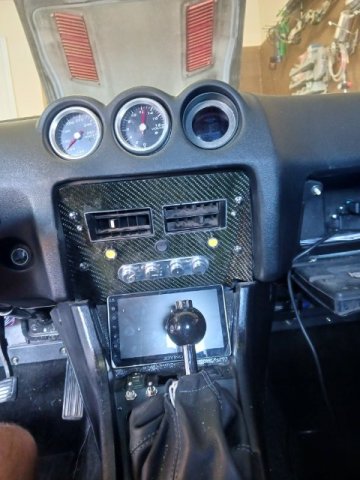
Forgive the dust, cutting carbon fiber is very messy. Here is the finished product installed. After about 3 hours of dry time for the epoxy, it took all of 5 minutes to install. It was mounted with a pair of 5mm stainless steel button head screws that I polished to match my existing hardware. my set up is unique and very different than other peoples but I couldn't find a vent to use that I liked for the center area.
-
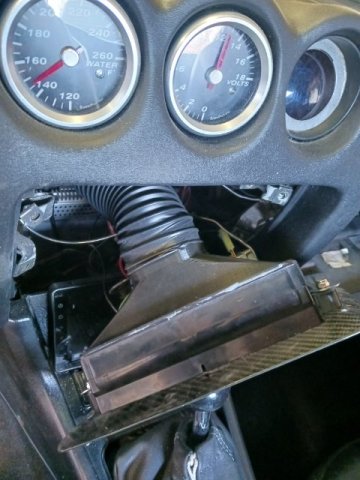
I dont know what everyone else is doing about the transition from the vintage AC 2.5in hose to the Datsun 280z center vent but below is what I have come up with. If I am not mistaken the original dash vent just butts up against the original AC housing and there is no tubing. I designed this adapter to be glued to the back of the dash vent which would allow the 2.5in hose to plug into the backside. my set up will be installed into a custom carbon fiber dash insert. This allows me to mount the vent, new LED lights, my vintage AC controls, and potentially another gauge over the vent (I'm looking at a digital fuel pressure gauge). There is also a little overlap from my double din radio. Ill post more pictures once the glue dries and I get it installed. Let me know what yall think
-
I installed mine on the driver side kick panel and then installed my ls ecu on the passenger kick panel.
-
What do yall think of my new 3D Printed gauge mount?
-
Bushing for emergency brake control lever.
walkerbk replied to LooseRocks's topic in Brakes, Wheels, Suspension and Chassis
No they did not. -
Bushing for emergency brake control lever.
walkerbk replied to LooseRocks's topic in Brakes, Wheels, Suspension and Chassis
If you want to get me dimensions, I can 3D print whatever you would like and sent it to you for the cost of postage. Wont take but 20 minutes to print I'm sure. -
I have a set of chromoly stub shafts on my 77 2+2 280z. I am having a lot of problems with the wheel studs not seating/cutting into their holes though. I have tried both ARP and autozone stock ones but every time, the knurl "flattens" out and doesn't bite into the stub shaft. This in turn allows the wheel stud to turn. I have just installed another set with red locktite and am hoping that will do the trick but am not holding my breath. The only other thing I can think of would be to put a little tack weld on the backside to keep them from spinning. Am I the only one with this problem?
.jpeg.aa78fccfb6c574d34e794a62e943ef3e.jpeg)
.jpeg.361520edbf5843c936d0f0268adf91a2.jpeg)
.jpg.ad9ec0b2919337f34a6355fbaaf2b798.jpg)