
jdmjunkies.ch
-
Posts
261 -
Joined
-
Last visited
-
Days Won
7
Content Type
Profiles
Forums
Blogs
Events
Gallery
Downloads
Store
Posts posted by jdmjunkies.ch
-
-
On 1.10.2017 at 7:26 PM, jpndave said:
I agree with Derek on what it seems you are after finish wise. Unless you coat the parts a vibratory polish/burnish is going to be the way to do. I would be careful with soda. I haven't used it but I have a good friend that is in high end paint for custom cars and he is adamant against it. Definitely more delicate at removal of rust and paint while not damaging the surface it can leave residue.
Have you considered a really high quality clear coat? The bead blasted parts won't stay that clean color and texture. Aluminum will corrode over the years unless it is somehow coated or anodized. You could also clear anodize which might be a good choice. I'm not sure how much corrosion resistance if any the vibratory media would provide and how much residue is left preventing an anodize or paint. With as much work as you have put into this project I would certainly want it to stay that way.
I am chemically stripping my car then blasting what that misses. Aluminum will be bead blasted for texture then probably clear coated or anodized to prevent corrosion. If I had access (meaning reasonably priced without having to send it out at full shop rate) to the Vibratory finish Derek is showing I would really consider that option. I have two blasters in my shop both a cabinet and pressure pot and a compressor large enough to run either all day long. I just can't justify paying for something I can do here. I don't mind the dull finish as long as it is clean and even and protected from corrosion.
The rifle project I mentioned is going to get a nickel boron plate after engraving trying to get as close to the stainless barrel as possible. That finish is outstanding at corrosion resistance and lubricity but is really expensive to have done. OK on small parts but would be obscene overkill for car part castings, at least for covers and housings.
that clear annodization is maybe a cool idea. have to think about it...
-
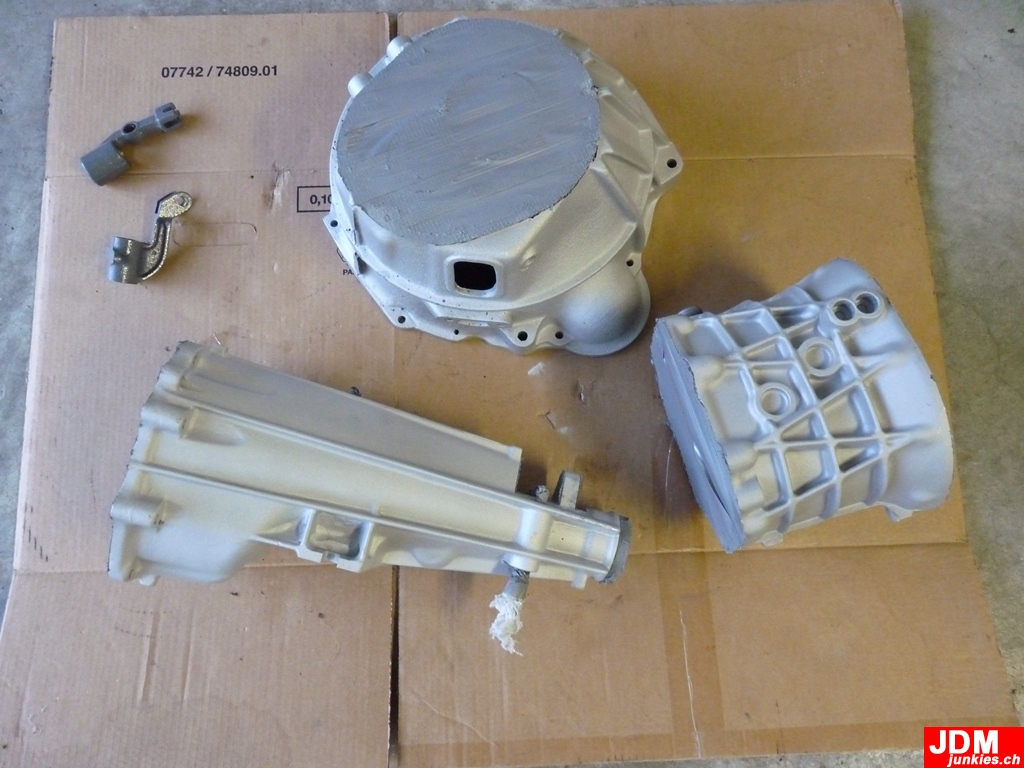
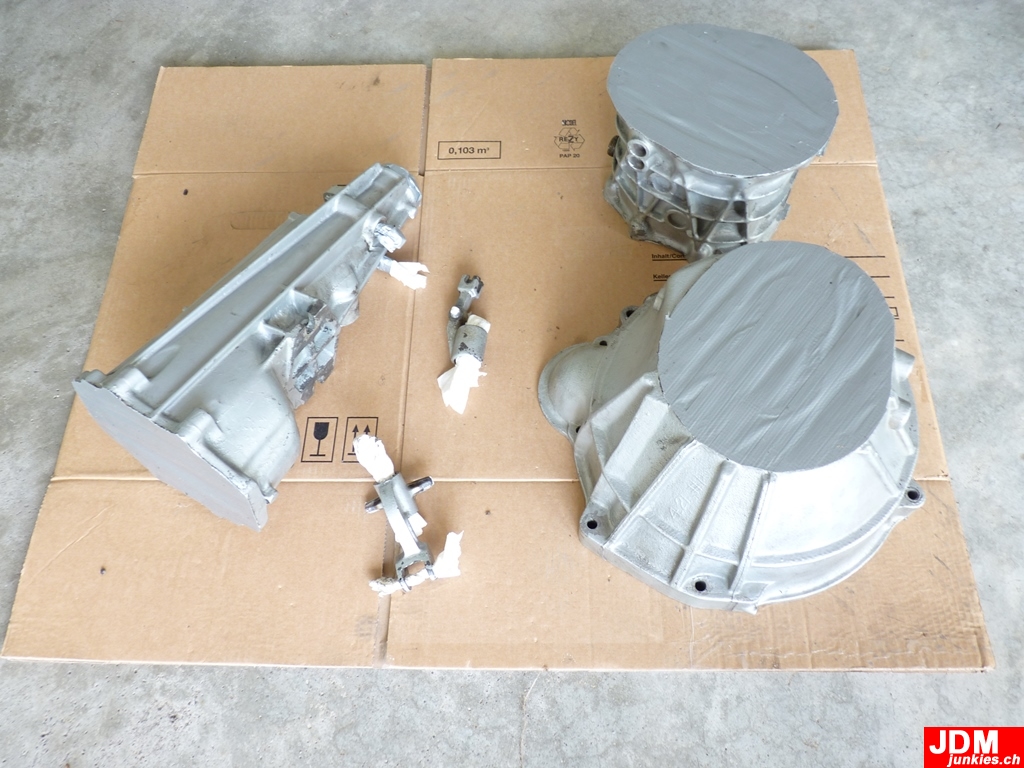
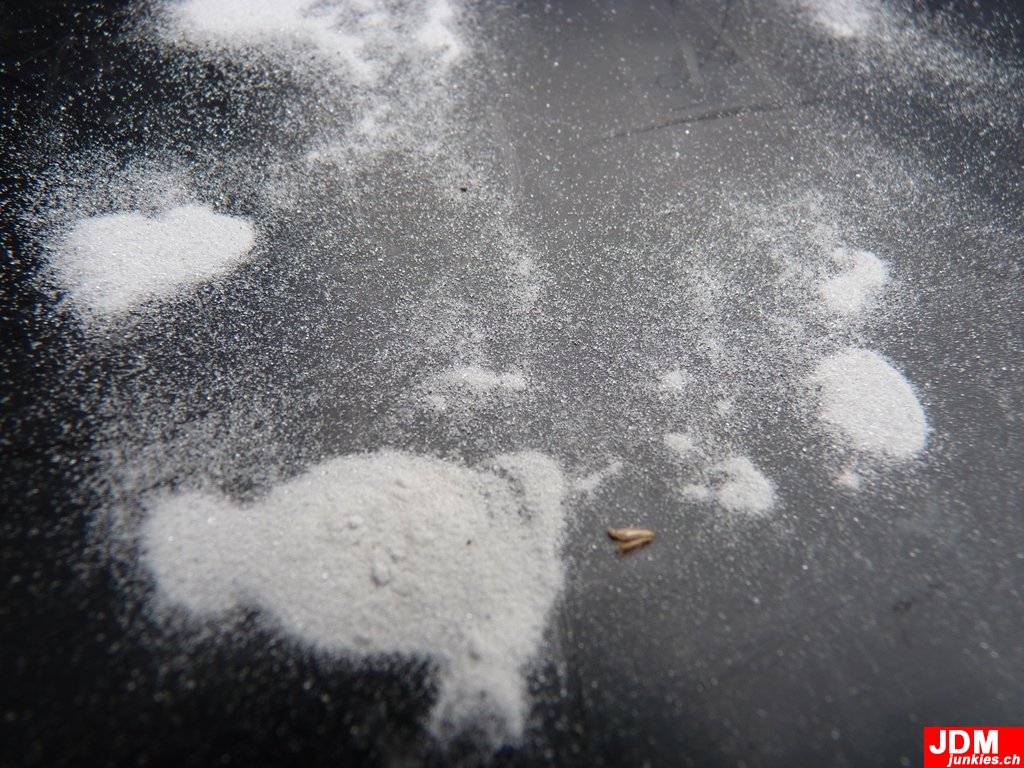
In my last post, i wrote about the fact that the transmission looked wrong after the "glass bead blasting". Many readers pointed out it seems to have been just sandblasted. I contacted the blasting company again and asked what happened. He excused himself a hundred times and told me that his guy somhow missunderstoud somthing and that it was only blasted. but not sand blasted as you thought, but blasted with "broken glass". this is softer and won't attack the surface of the Aluminum. It's less corrosive than regular silicat-sand used for blasting. At least that was good news. He promised me to immediately fix that. Today i was able to pick it up again:

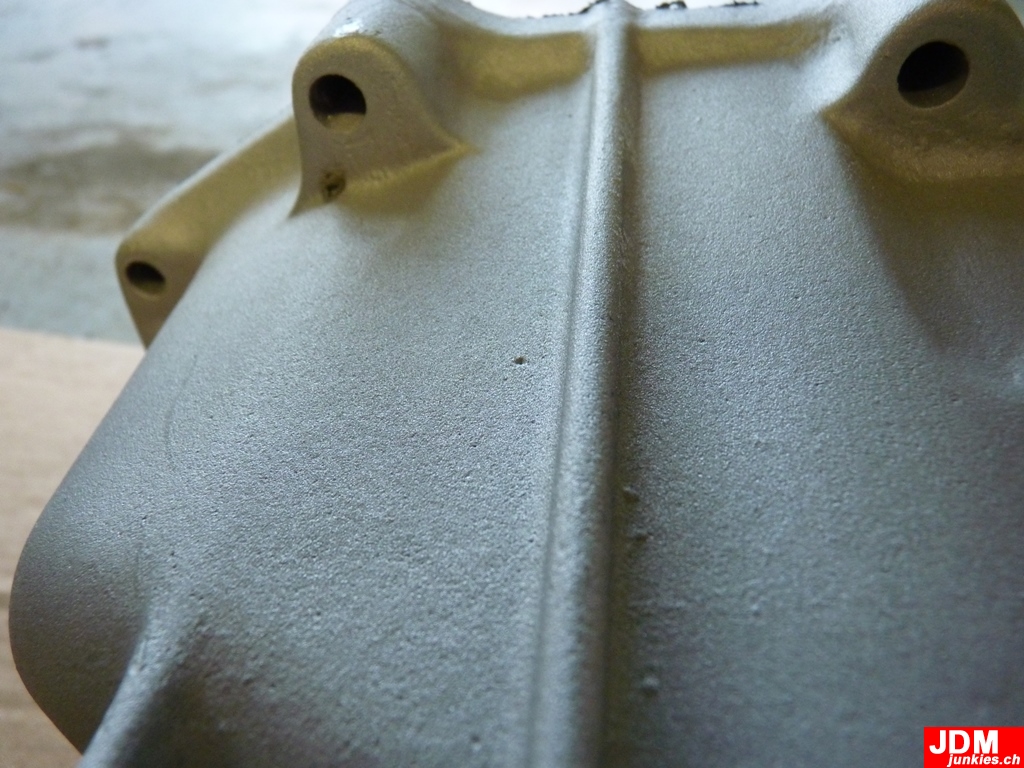
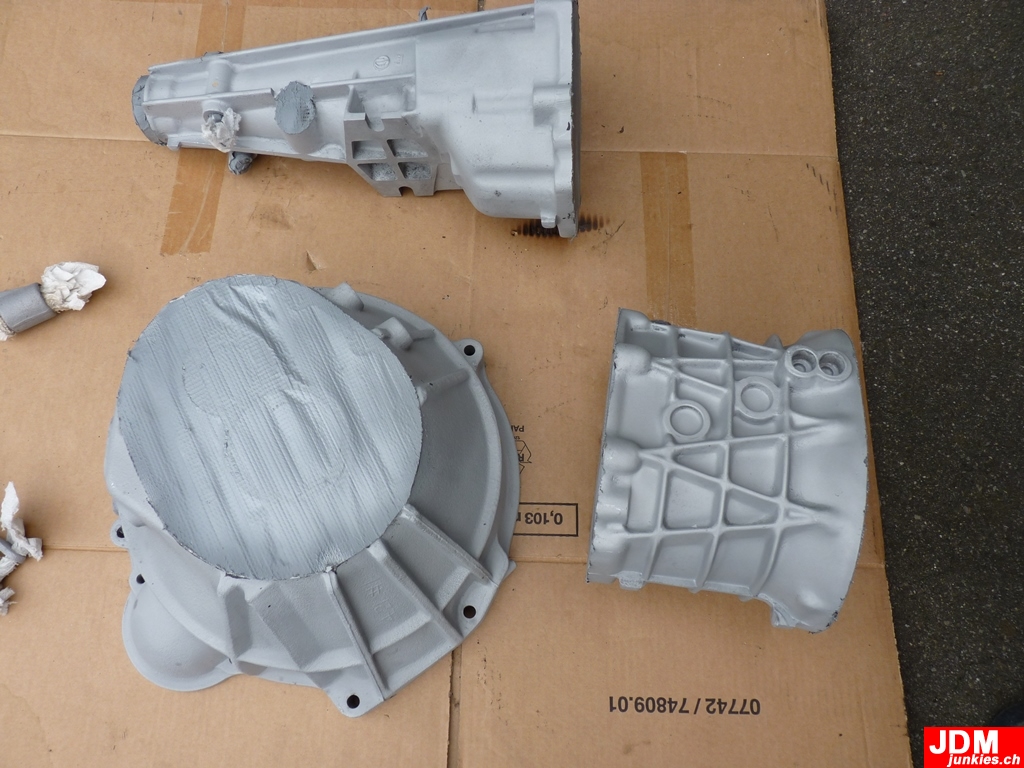
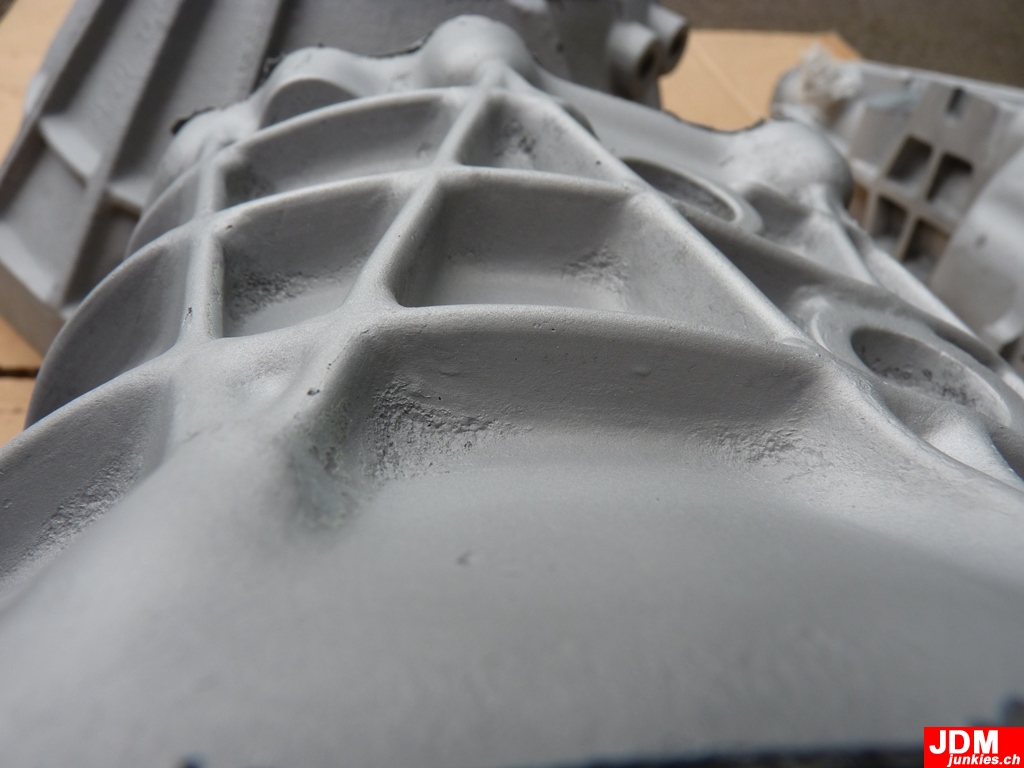
They glass-bead blasted everything and the surface now looks and feels a lot smoother and got this slight "satin gloss" finish. just as it should be. The sense of Glass bead blasting is to improve the surface density of aluminium. Like that it's much stronger and will keep the appearance for a longer time when used unpainted in a car.
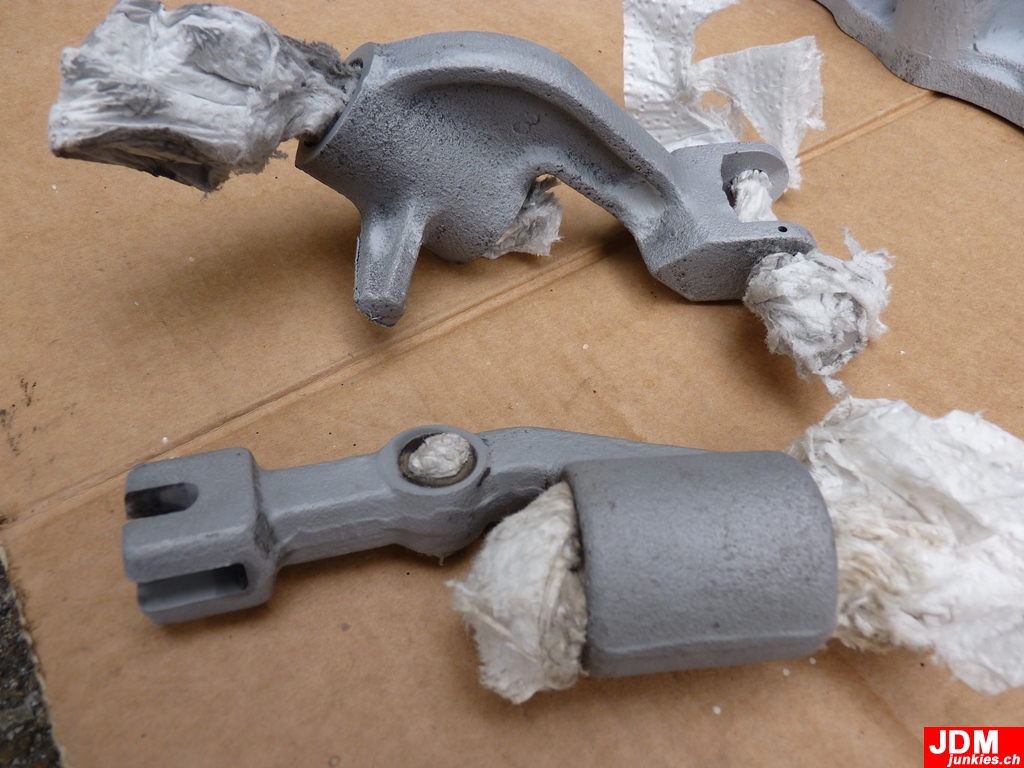
While it doesn't have the super-glossy OEM-like finish it's what i was aiming for. I got told for the glossy finish it should be soda/vapour/fluid blasted. But for me it's perfect as it is. it's not going to be a concours build anyway and it seems much fresher again. Also they clearcoated the cast-iron bits as promised, to protect it from corrosion:
This is how the gear selector looks after the protective tape was removed. Still needs a bit of cleaning though but looks perfect. just as i wanted it
Super happy with the result. and while it took me a few extra hours to bring it back again and pick it up. the good thing is they felt so sorry that the extra-work was for free. They only charged me for the first part of the work. which is awesome and came out on a budget
-
thanks for the input. makes sense somehow. I contacted the blasting company again and let's see what they come up with.
As far as it goes i got some other replies in other forums, claiming that hydro/vapour/soda blasting is the thing to go when looking for the glossy OEM finish on raw aluminum. sounds promising but let's see what the current blaster replies and what solution i can come up with.
I'm not happy with the current finnish. although it would definitively work. it's just not what i was looking for.. -
On 19.9.2017 at 10:50 PM, rturbo 930 said:
Looking good. But I can't help but find it a little funny (or a little scary) that a business in Switzerland has an English business name. Talk about foreign influence, lol.
Haha that's quite normal. Little switzerland is going international.
Also i guess "Chäfig-buäb" would sound a little strange -
Last week i brought my transmission housing parts and some smaller bits to the local blasting company. The guy made a serious appearance and explained how Aluminum parts like these normally will be treated with class-triangles to break-up old paint and remove it. and then treated with glass-beads (pearls) to increase the surface density. He even told me he's gonna paint the cast-iron parts with a clearcoat to prevent it from rust...
This is how it looked before:
Clearly old silver paint peeling off is visible:
Today i picked it up. and the first thing i noticed how "raw" and rough everything looked. It reminded me of sandblasted items. Sand-blasting is corrosive and will remove small spots in the surface of aluminum (like the transmission part) and give it a rough feel.
While the aluminum is thick enough to handle it, it just doesn't look as smooth as a factory-fresh unpainted transmission should look in my opinion:
But since i don't have a lot of experience, i returned home. What made me even more curious was the fact that sand came out of various spots of the transmission. Its clearly not glass-bead, nor is it any other glassy. I guess this is the "sand" they use for sand-blasting..
The guy even told me how hard it was to remove the paint from the previous owner. so i guess they switched to sand at some point.
While i'm all fine with that, i guess they didn't glass-bead blast if after that. Somehow it gets a bit more shiny / glossy after glassbead-treatment and this sure looks like just sandblasted to me.
Also the cast-iron small pieces didn't get the promised clearcoat...
Not sure yet. Don't want to blamy anybody and it would clearly do the job. but i want to have it perfect. Either i bring it back or i bring it to another company to have it checked and re-done... have to think about it.
Or maybe it's just me and the "gloss" will come back once it's slightly corroded? not sure... -
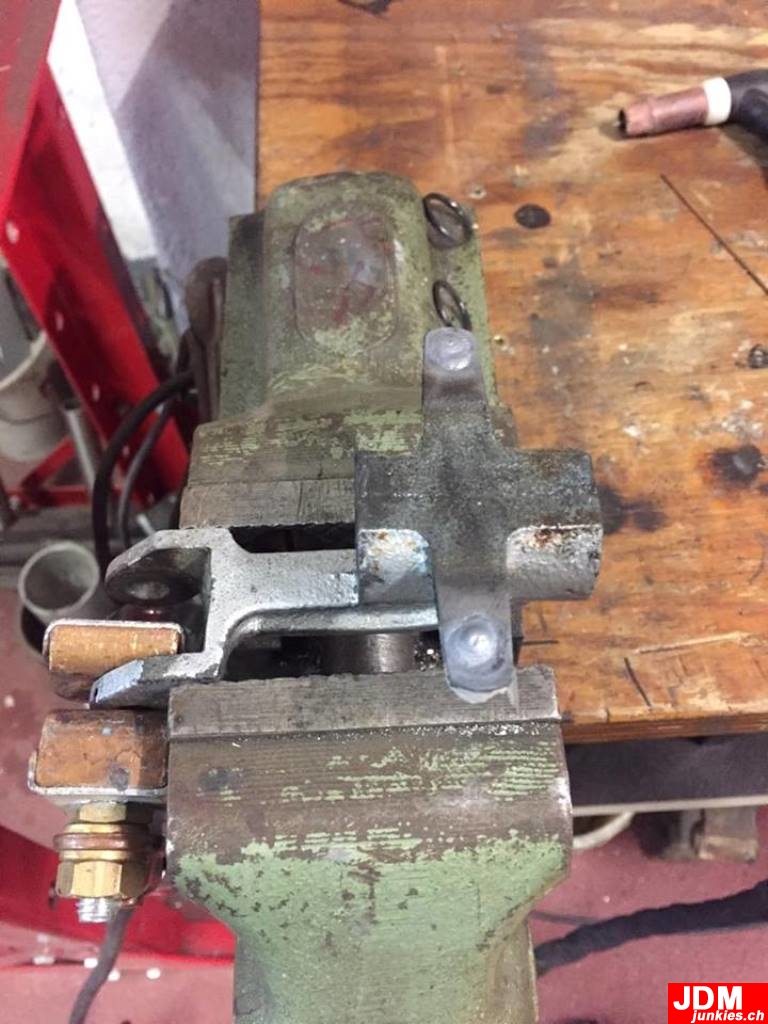
In my last post about the 240Z you could easy see how the gear selector was worn out and had some concave marks where the balls meet the selector.
Since it's a Cast iron item it's a bit tricky to weld. And if you've been following me for a while you know there's only one superhero for me when it comes to metal and welding:
My buddy Stefan Schär - who own's an awesome little collection of beautiful Nissan's and Datsun's by the way - So i sent him that thing to fix it:
Before (Clearly some "holes" visible):
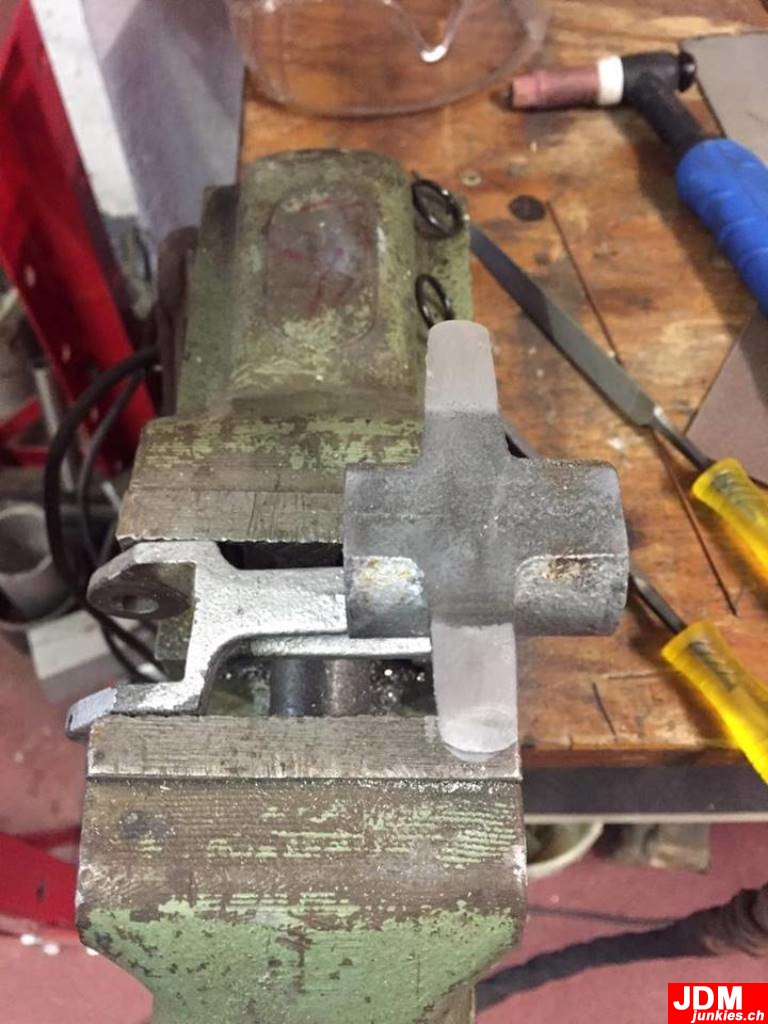
After some pre-treatment and cleaning the holes got welded up:
and then ground back to originale flatness:
Surface is way smoother than it was from factory. Now those shifts should be direct as New again. Maybe even better
Next it's going off to Glass-bead blasting, then the transmission is ready for assembly again
For Stefan, he opened up his own business "Cagedude" lately, specializing in rollcages, but doin' basically anything that involves some metal and welding (and cars maybe)
Check out his facebook page : https://www.facebook.com/cagedude/ for some examples.
His stuff is really work of art, and i have the highest praises for all the stuff he's done for me so far. And he's a super nice guy too, with a lovely little family. Check it out and support Stefan / Cagedude, you won't regret it -
Today finally some progress on the Z from my side as well
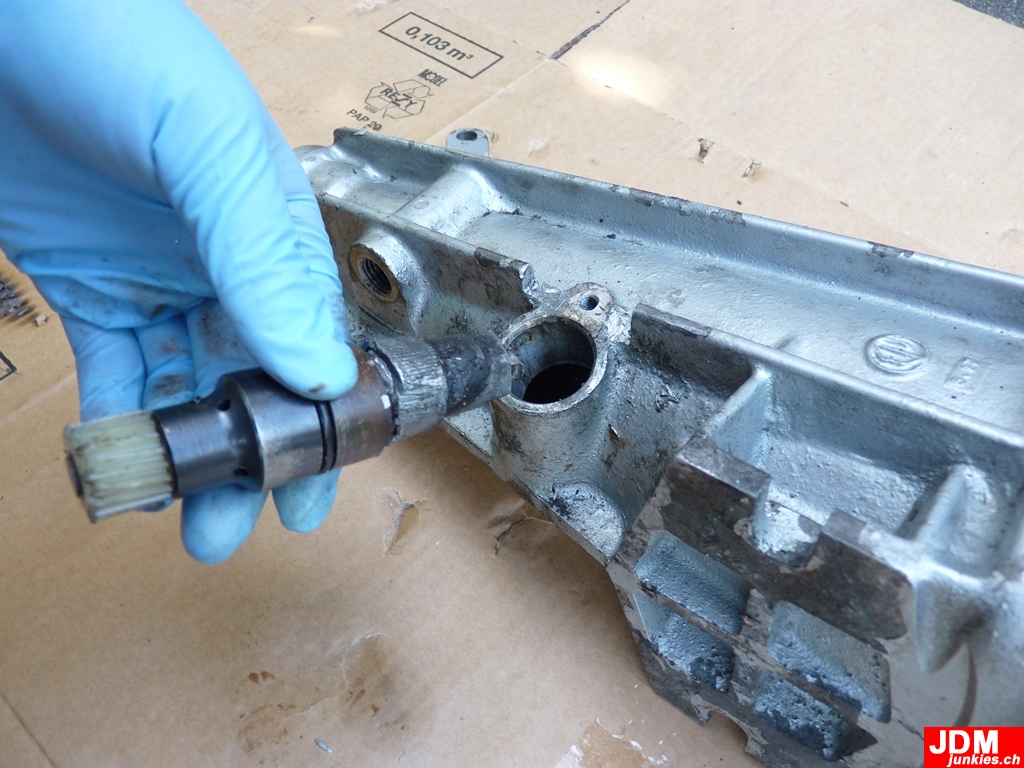
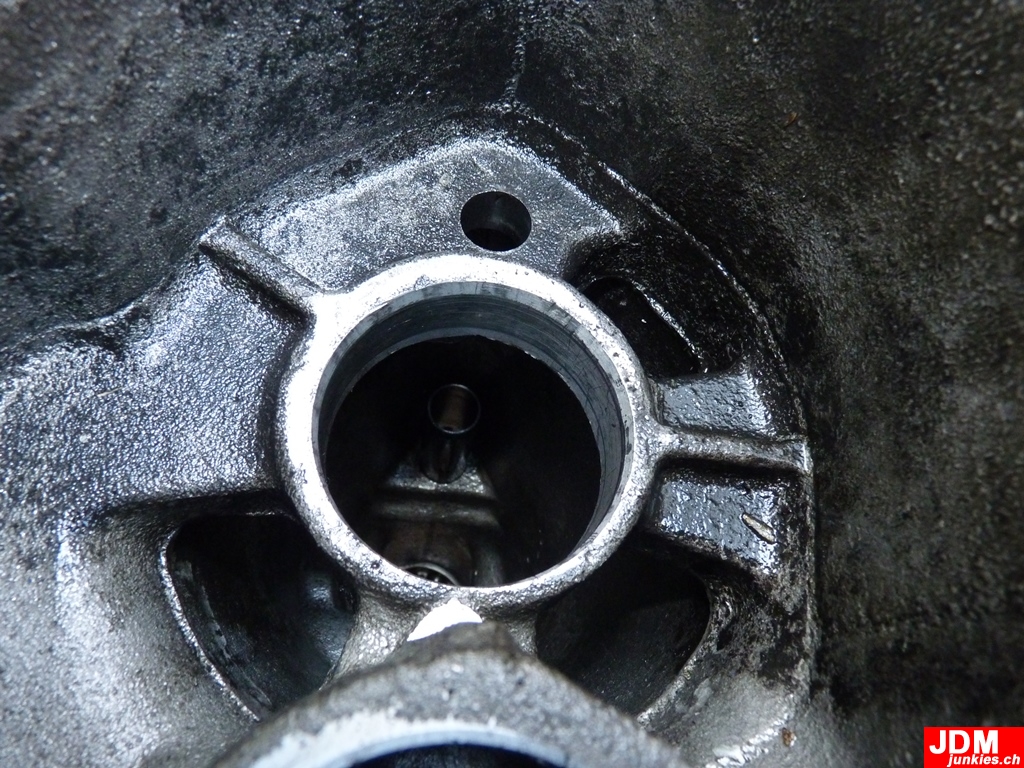
After removing the Breather vent:
I had serious trouble to get out the speedo pinion carrier from the transmission. Thanks to my close friend Stefan and some brute force, it finally gave up and came out nicely:He also managed to move the "tube" that holds the gear selector in place, intwards the transmissino housing:
So i was able to remove the gear selector.
It's currently at my other buddy Stefan for some rework (more on that soon)
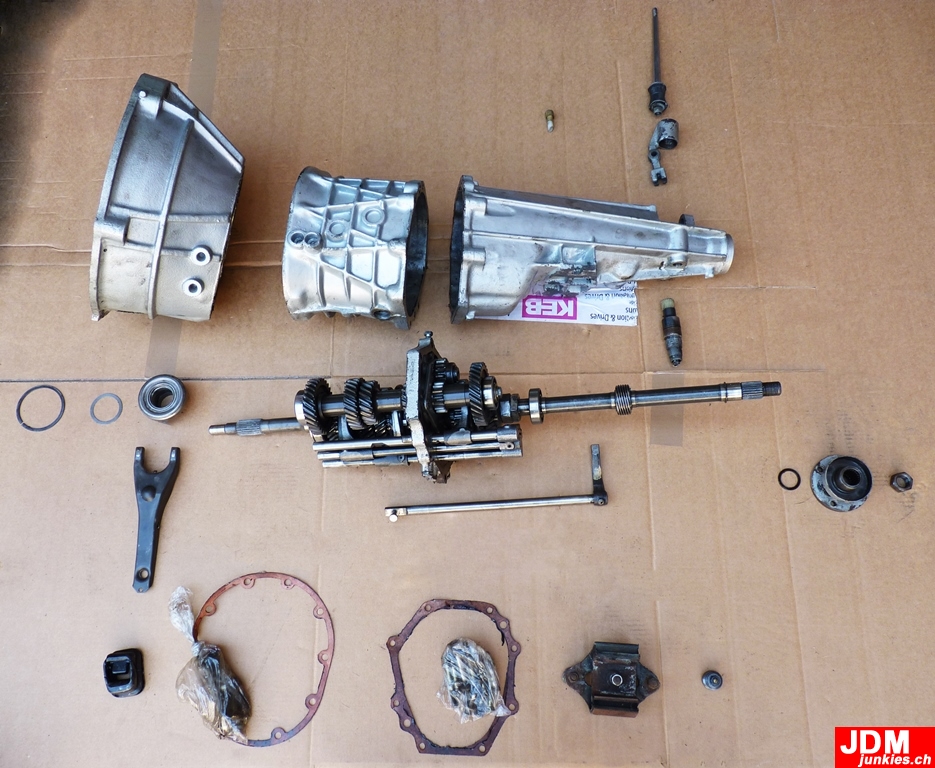
After i finally have disassembled the transmission as far as i want to go myself, i had to make an "exploded" view shot, just for fun's sake
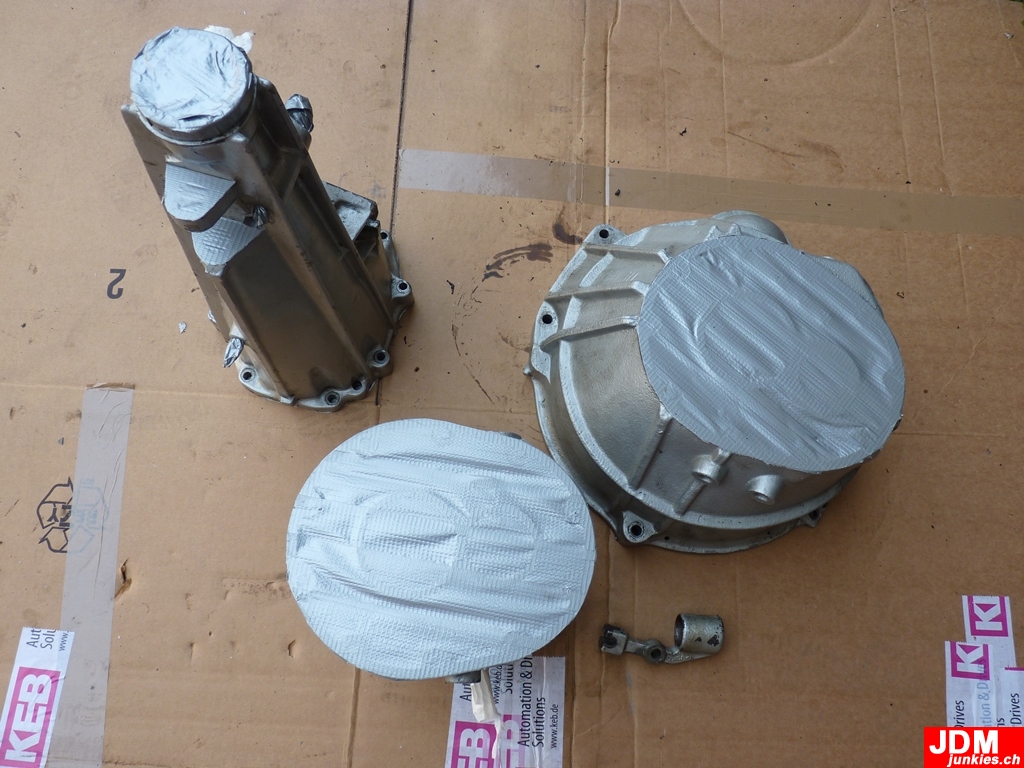
Next step was masking the transmission housing parts with duct tape for glass-bead-blasting and to prevent glass beads ending up in the transmission..
The previous owner once decided to paint it all in silver, but i will get rid of the peeling-off paint again and have it back in all it's original aluminum glory. Now only waiting for that one part back from rework, then will have it all blasted. All the other parts are ready
-
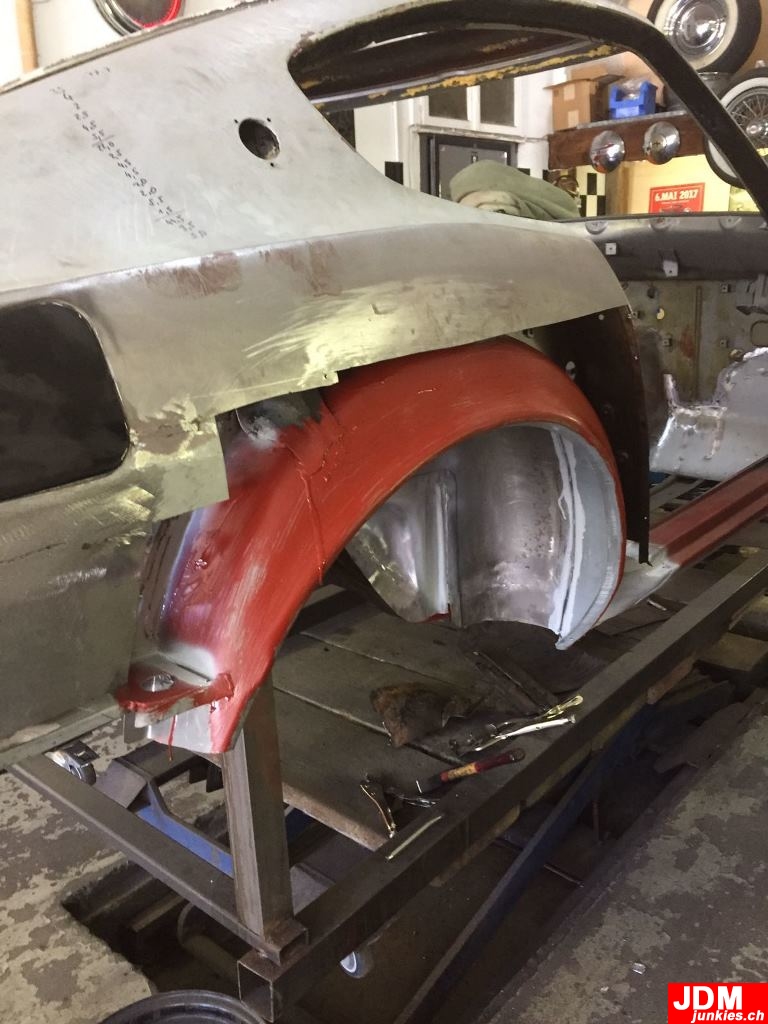
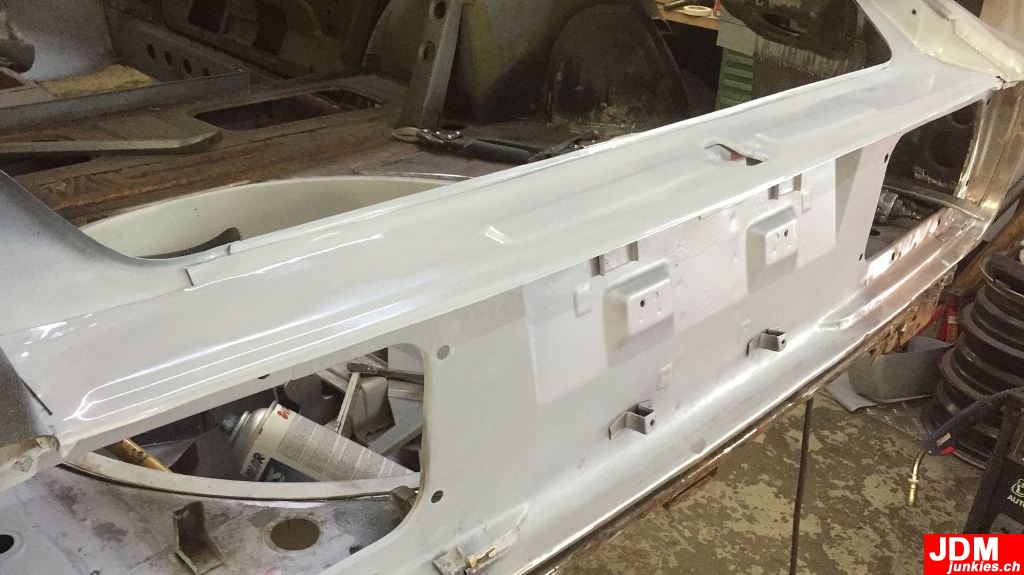
Today is a short update with a single pic, but a big Impact on the overall appearance of the car: The RH Tabco rear quarter panel is welded in place. I guess there is still a lot of work to make the fitment perfect and all, but at least there isn't a big hole anymore
-
It has been a while, since i updated the 240Z project here. It's not dead at all, i'm just super busy with some once-in-a-lifetime projects that have to be adressed first.
I was a bit bummed that my bodyshop guy was so busy as well and couldn't work on it either. However yesterday and today i got some updates totally unexpected and was more than happy
1) Tabco rear inner wheel well was finally welded in and painted in some protective paint:
The wheel arches are coming along nicely...
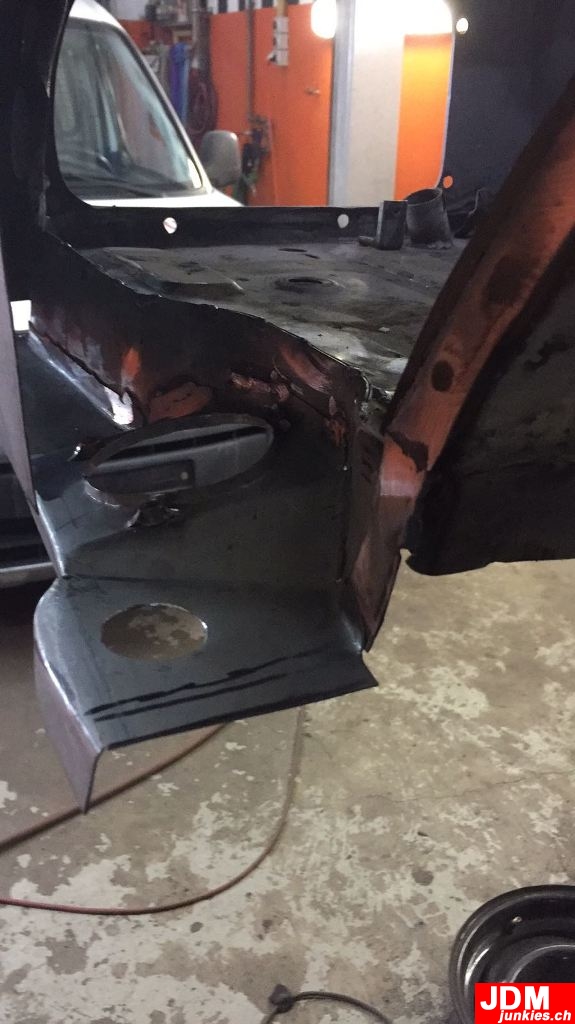
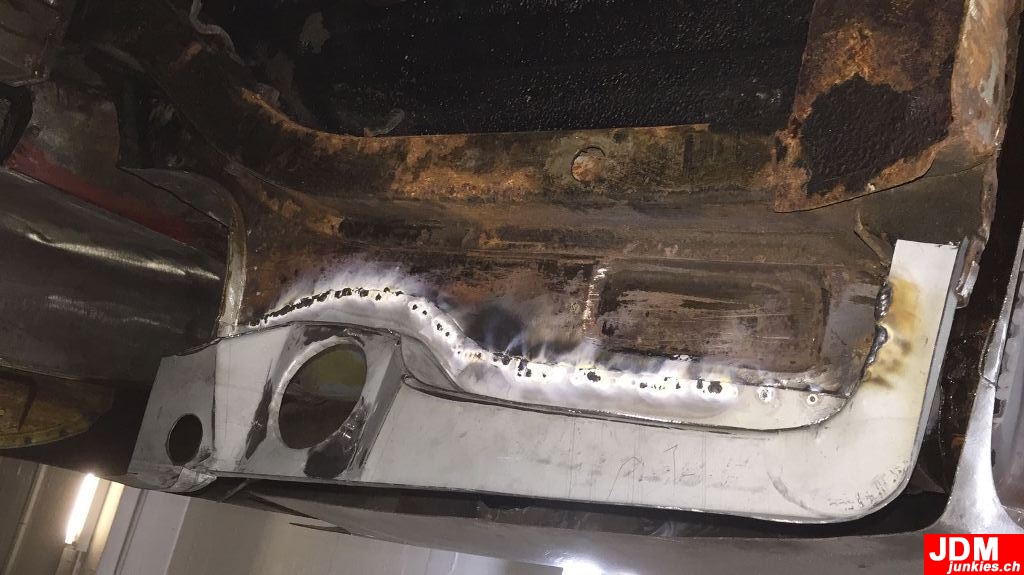
Todays update contained the rear lower piece of the RH side lower door sill area. Before:
After:Let's see what's up next
-
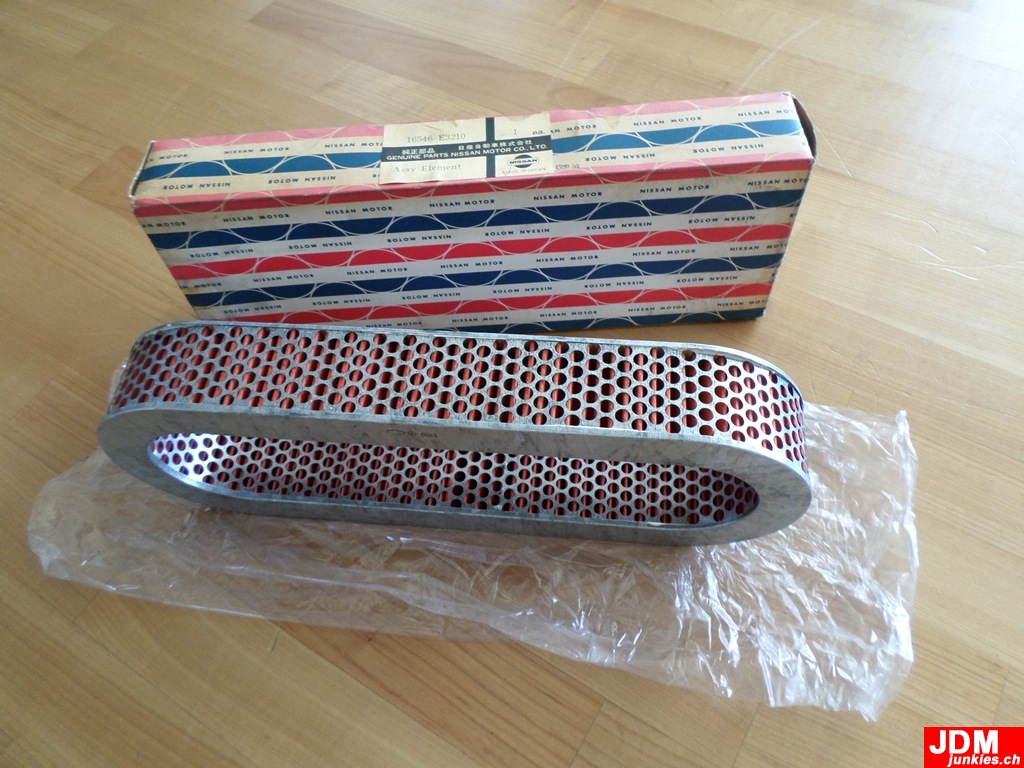
Nothing big, but at the recent Japanclassic.ch show i met my buddy Stefan who had a little gift for me: A NOS Air filter complete with factory boxing. I love this kind of stuff and another piece in the puzzle
-
While i consider the 240Z quite a common classic (compared to other cars) around the world, it can get hard to find good quality spare-parts - especially for the parts that where installed in markets outside america only. As it is the case with the 5-speed transmission (only optional and rare in the USA). And then even more specially in the case of the early FS5C71A transmission, which i happen to have.
This means a lot of reasearch and sometimes going to the other side of the world and as far as Australia to find some quality parts.
In this case i have to thank the guys at www.SWMotorsport.com.au for providing me with the right parts for my Transmission.
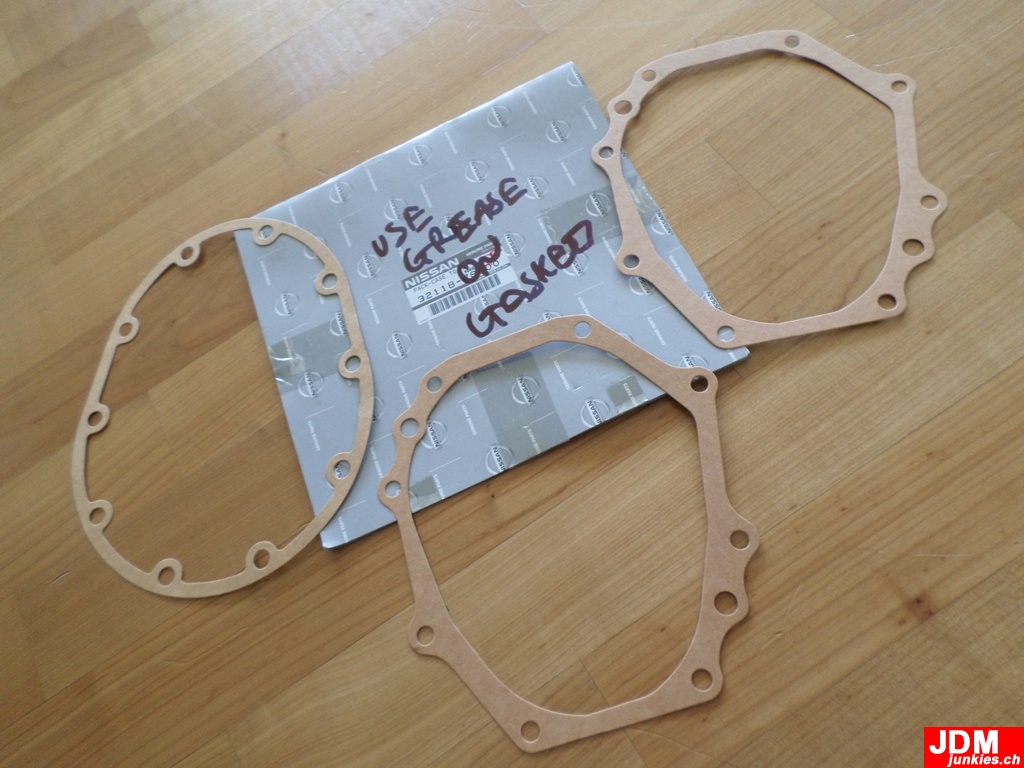
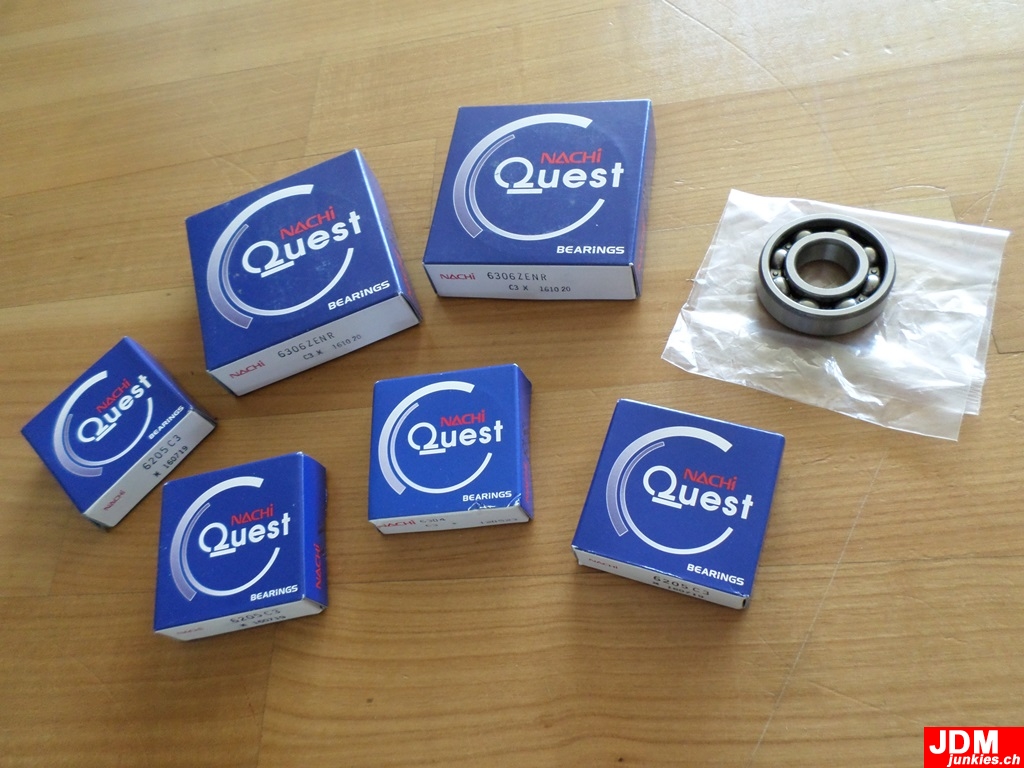
Today i finally got a delivery of:
- Bearing kit
- Front Seal
- Rear Seal
- 1x Front & 2x Center gaskets
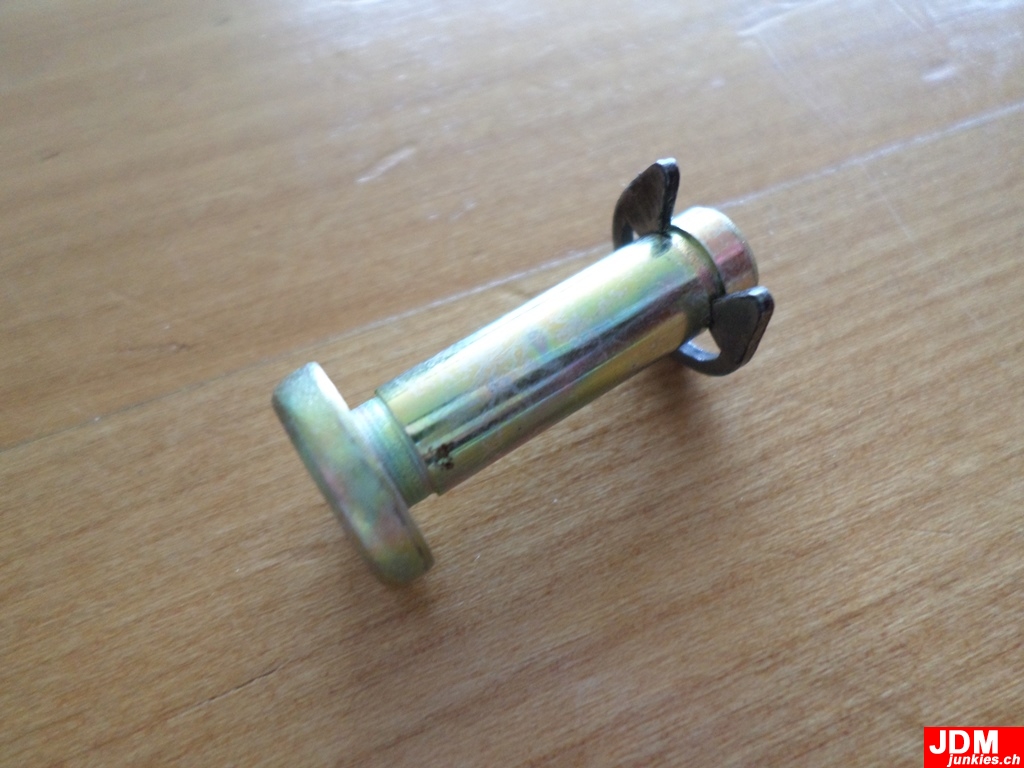
- Gear lever Pin & Clip
- Roll Pin
- Speedo drive Seal
- Striker shaft sealAnd all for a decent price and fast shippin too! Thank you so much for the great service. Nice to still have those small shops able to provide the market with the stuff we need
-
I forget if I've already said this, but I think this may end up being among the very nicest of S30s on the planet when it's done. I bet all those little pieces are adding up fast though. This is why I'll never do a proper restoration haha.
Thanks mate, appreciate your kind words. However i guess there will be nicer Z's around than mine, even when completed
I guess the parts costs do add up, but honestly money doesn't count. It's not like i have a lot, but whenever i have a few dollers left i buy something small. I've been working on this project for more than 7 years now and i guess it will take me a few more so who cares about it all. I have an idea and i want to get there, no matter how long it will take me to save the money
-
One of t hose lucky days again where i get several deliveries at the same time
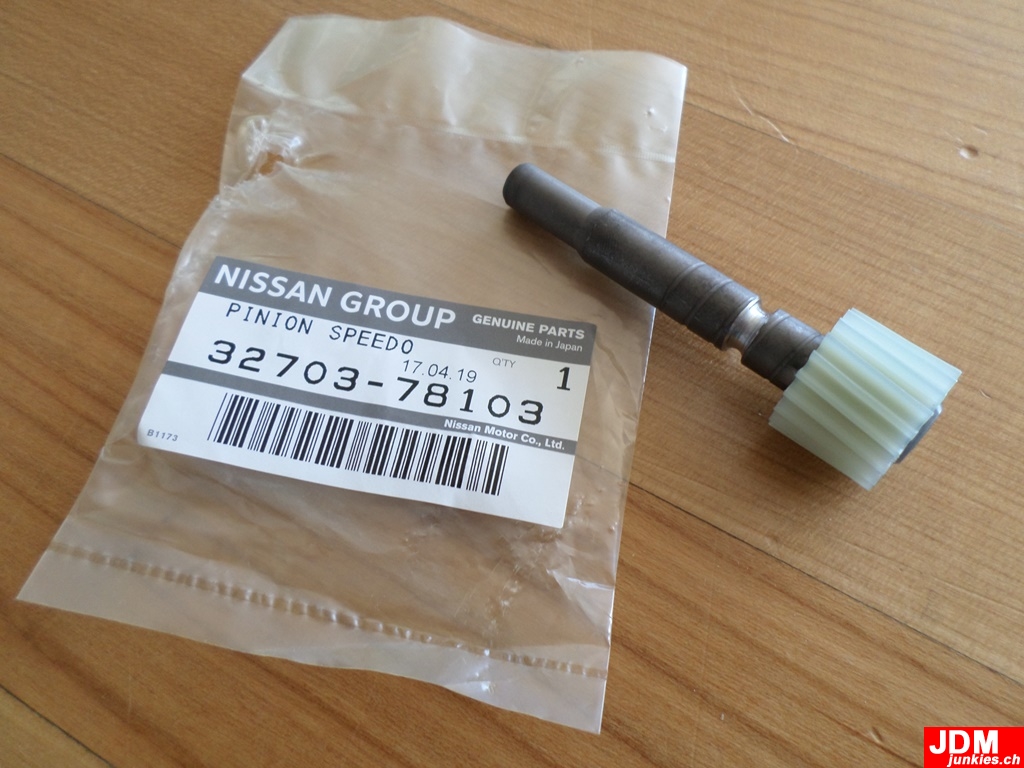
One was an Ebay buy, A NOS Transmission breather vent:The second one was a New Speedo pinion Gear, which was available through Nissan Japan:
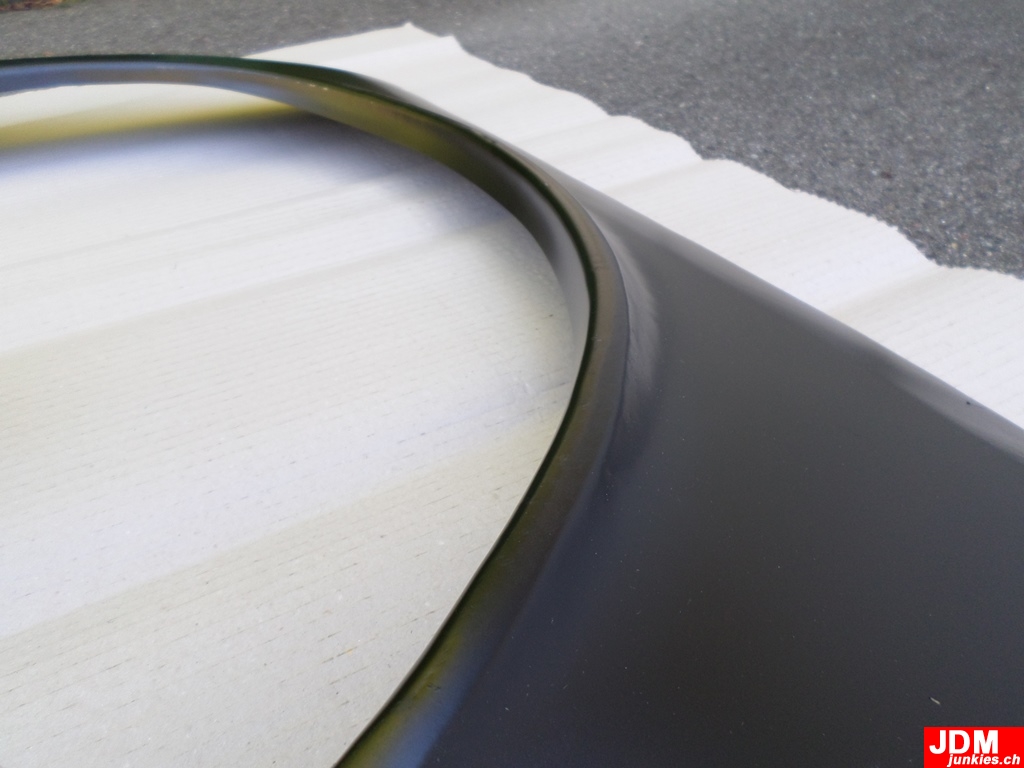
Then, thanks to some tips of nice people in the community, i was able to purchase these Rear quarter panels.
I promised to not tell the source. It's a Last stock and one of the people that gave me the tip wants to buy the rest of the stock and sell it.I have the feeling they are better than the tabco ones. with sharper edges.
When i have time i will make a direct comparison between tabco and these. Big thanks to the people who supported me with buying these.
-
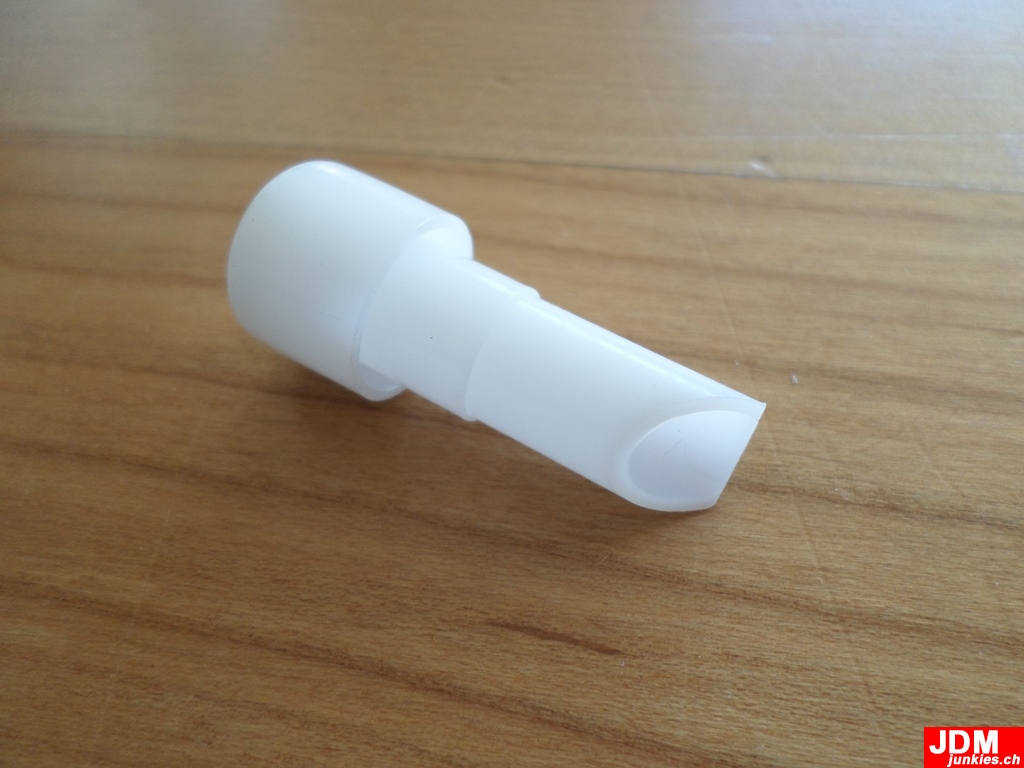
Nothing big here, just got another missing Piece of the transmission puzzle today:
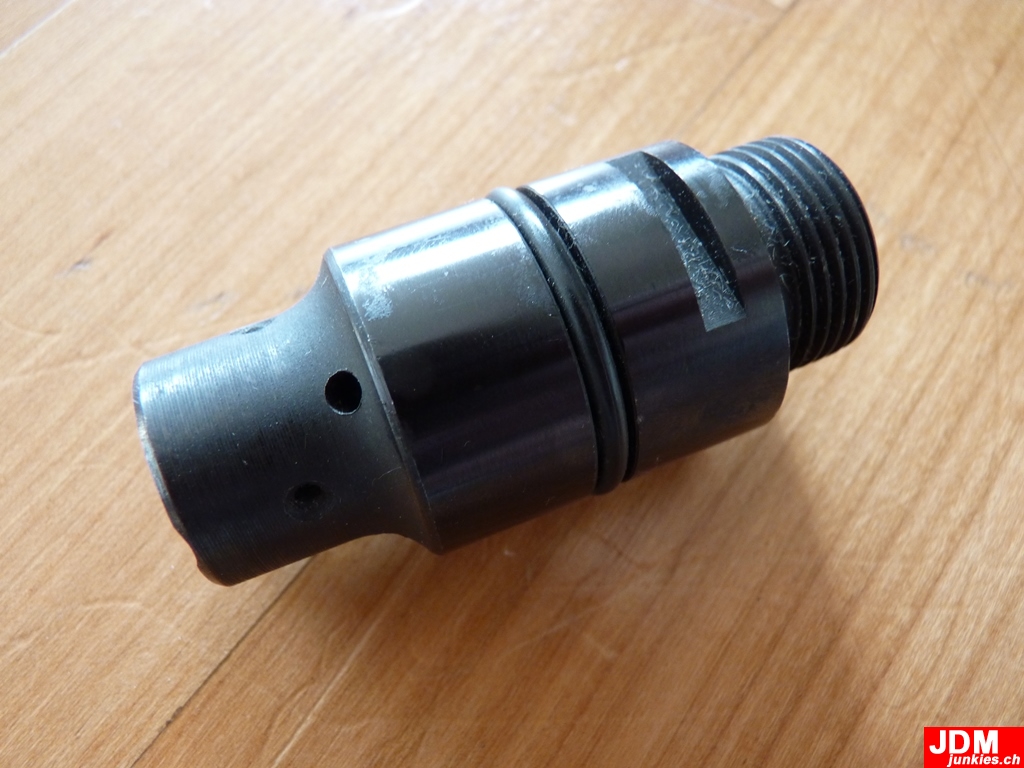
The speedo pinion gear sleeve assembly: -
Here we go
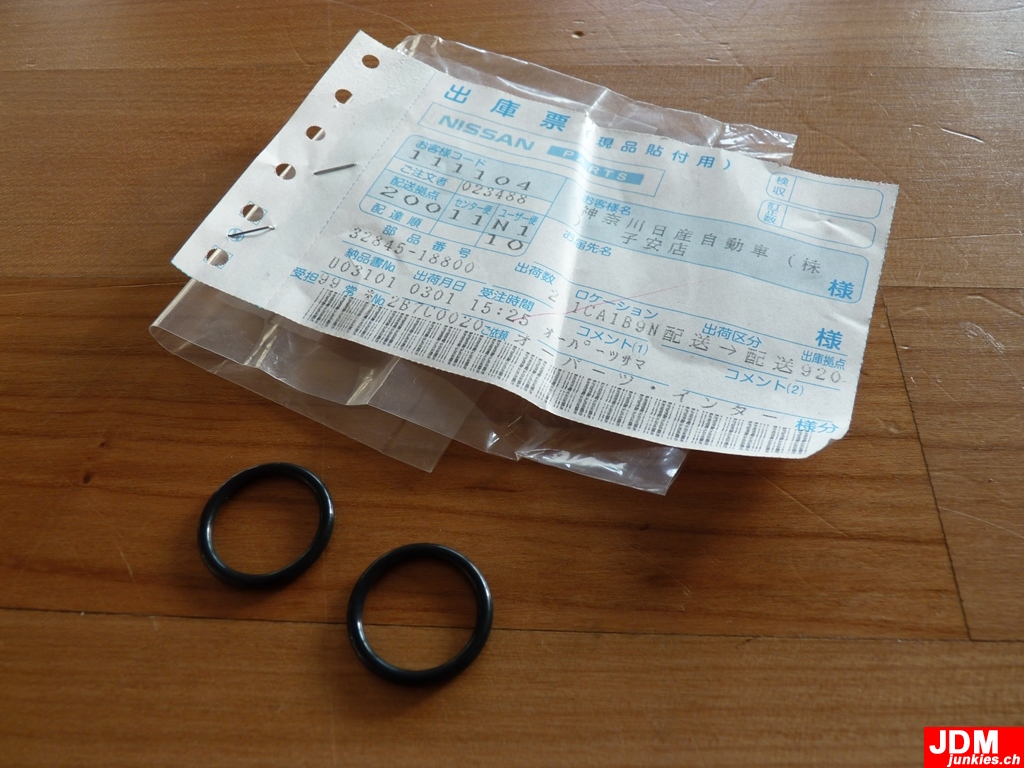
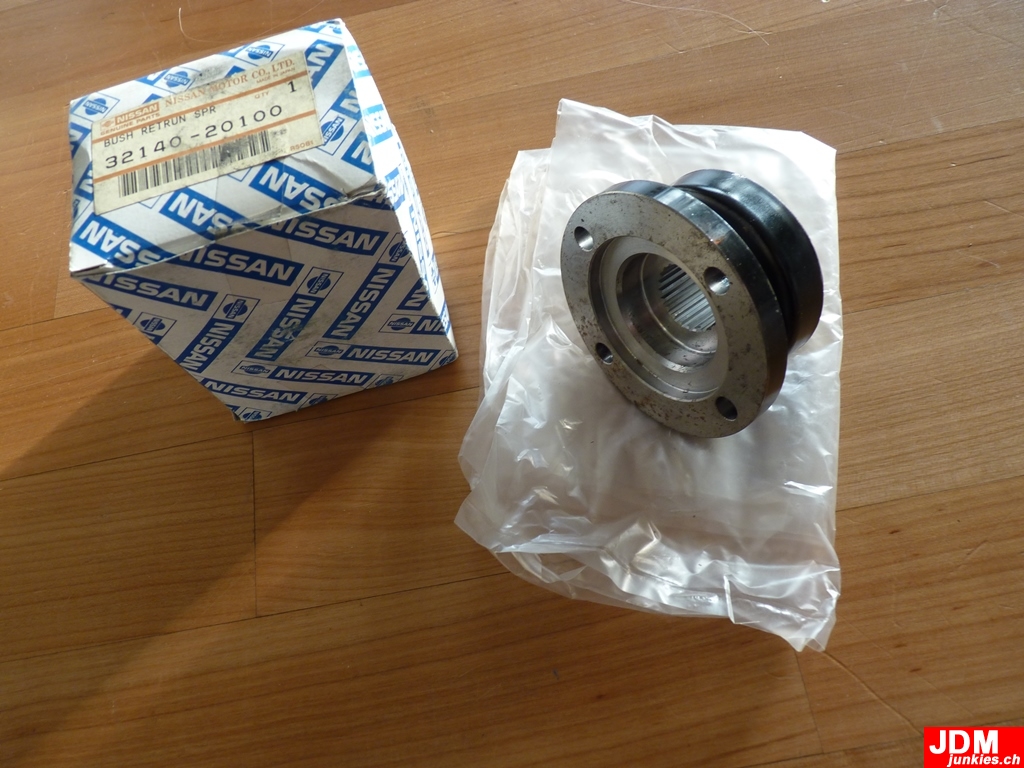
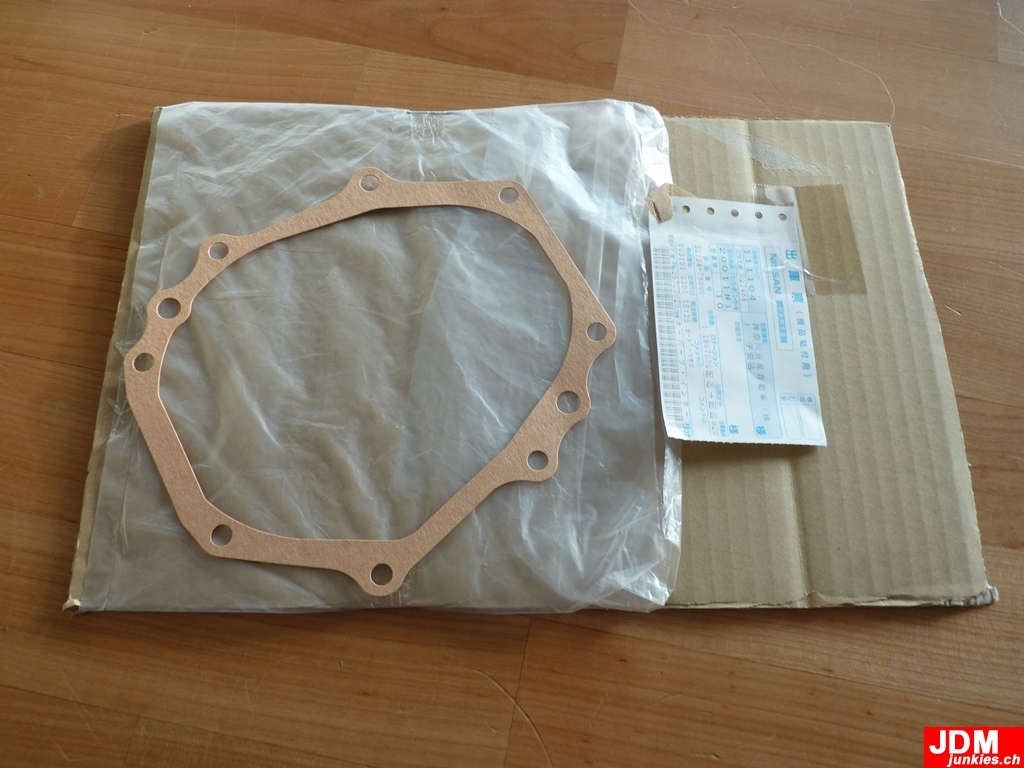
Got another parts delivery from the land of the rising sun. All needed transmission parts which were still available in Japan:
Seals:
Rear hub:
Front seal gasket:
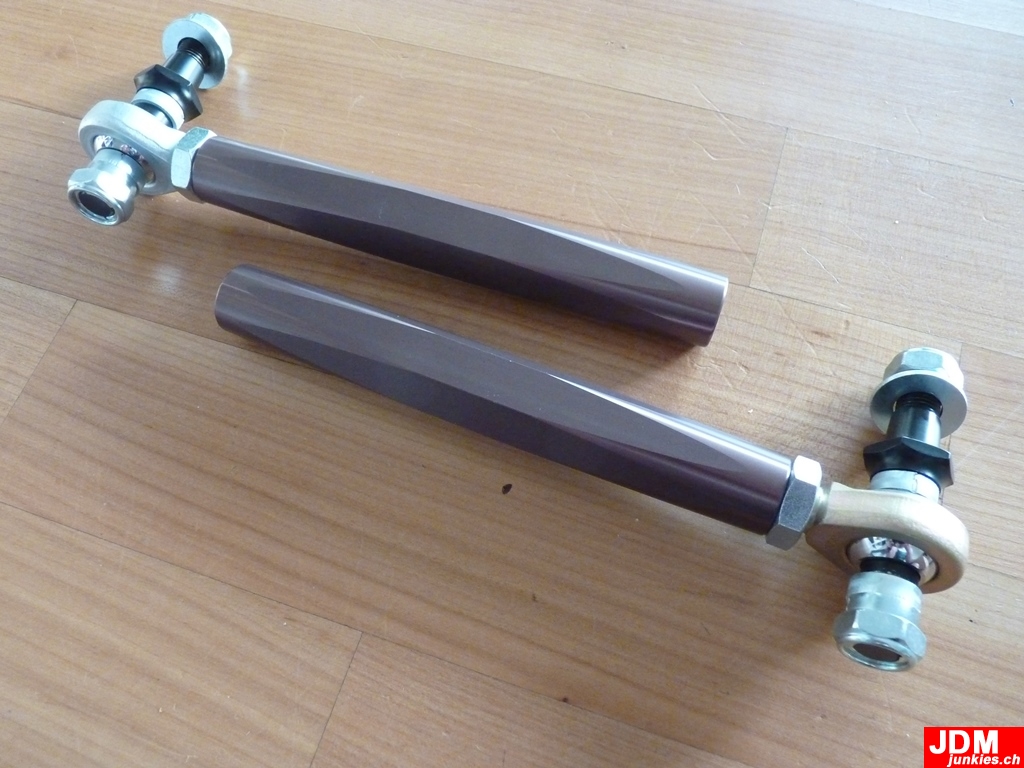
Then a friend of mine asked me to help him import some Nagisa Auto motor sports Part for his 240Z: Front adjustable tierod end-links:
And adjustable Doglegs. Really beautiful parts. seems like they changed their annodizing procedure, sinec the parts i have have a different colour. anyhow. Nice pieces. The Colour is more gunmetal in reality. the white-balance on my cam was a bit off...
-
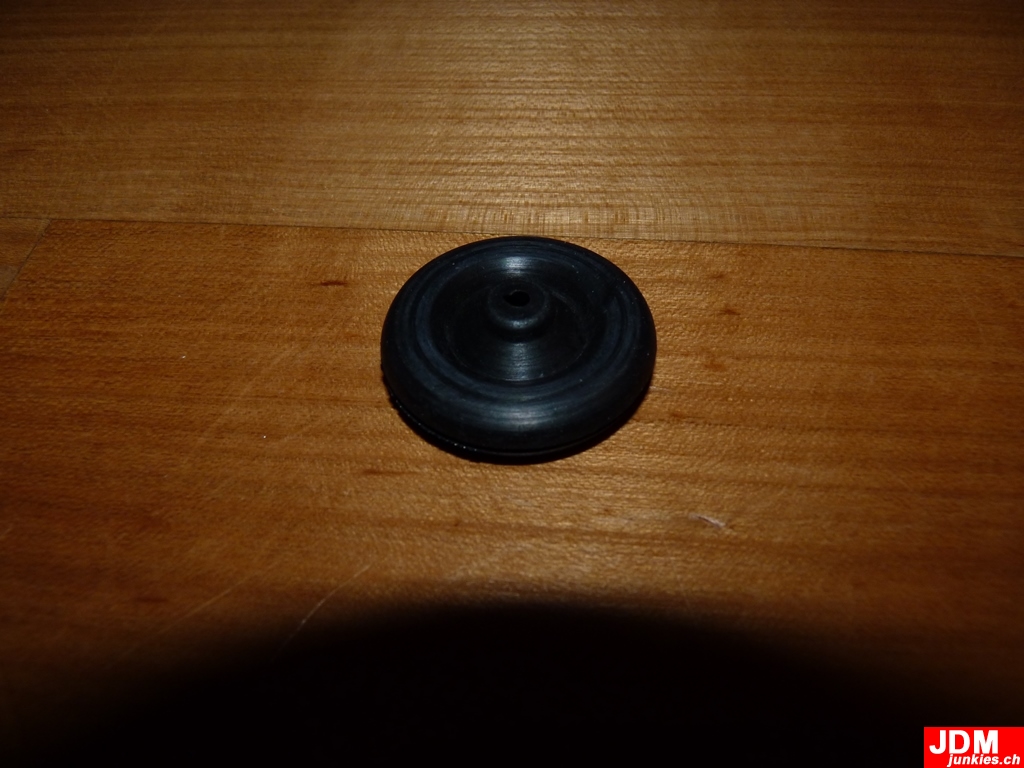
Yeah, a few weeks ago i was browsing the internet for some usable parts for my transmission restauration when i found this ebay seller from Thailand. Usually i'm not a big fan of Cheap Asian stuff. Only real deal Japanese OEM or Aftermarket. However when i found these parts and they seemed to be either Japanese-made or high-quality but for a good price, i thought i'd give it a go. so here's what i got: Transmission / Clutch fork rubber boot. Made by Thailand company Turtlerubber / SPI-Goodrubber:
Firewall grommet. Unknown brand, but i assume the same as above:
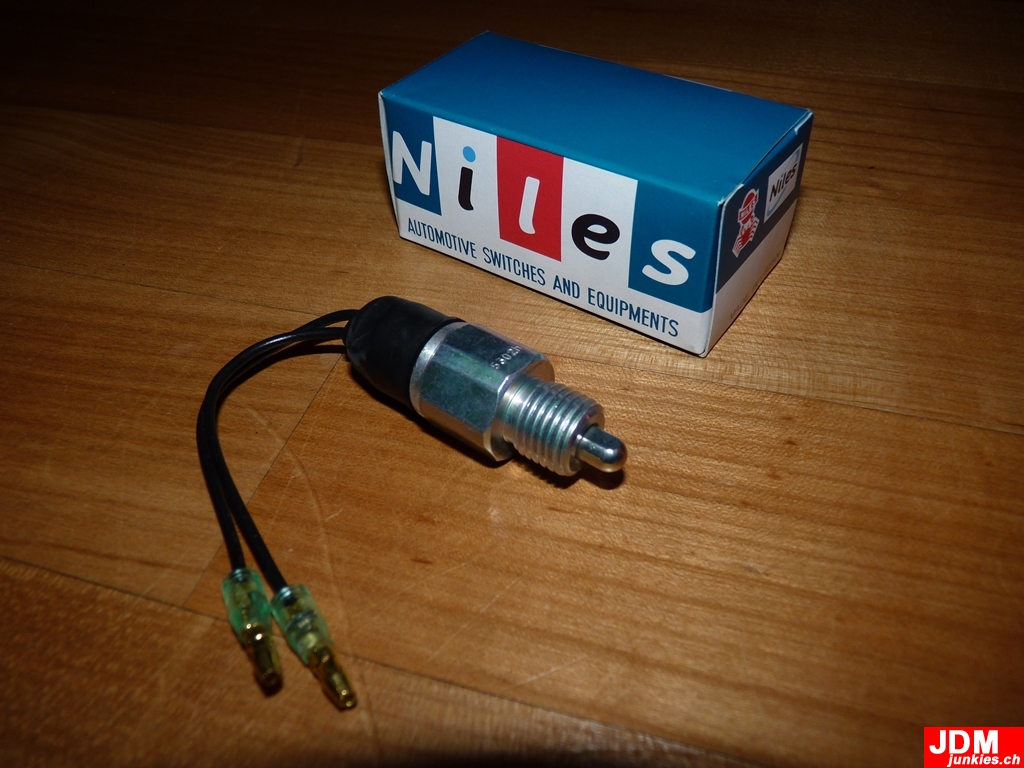
Niles (Japan) Reverse light switch. Niles is the original Supplier of nissan so i guess it's an Original part:
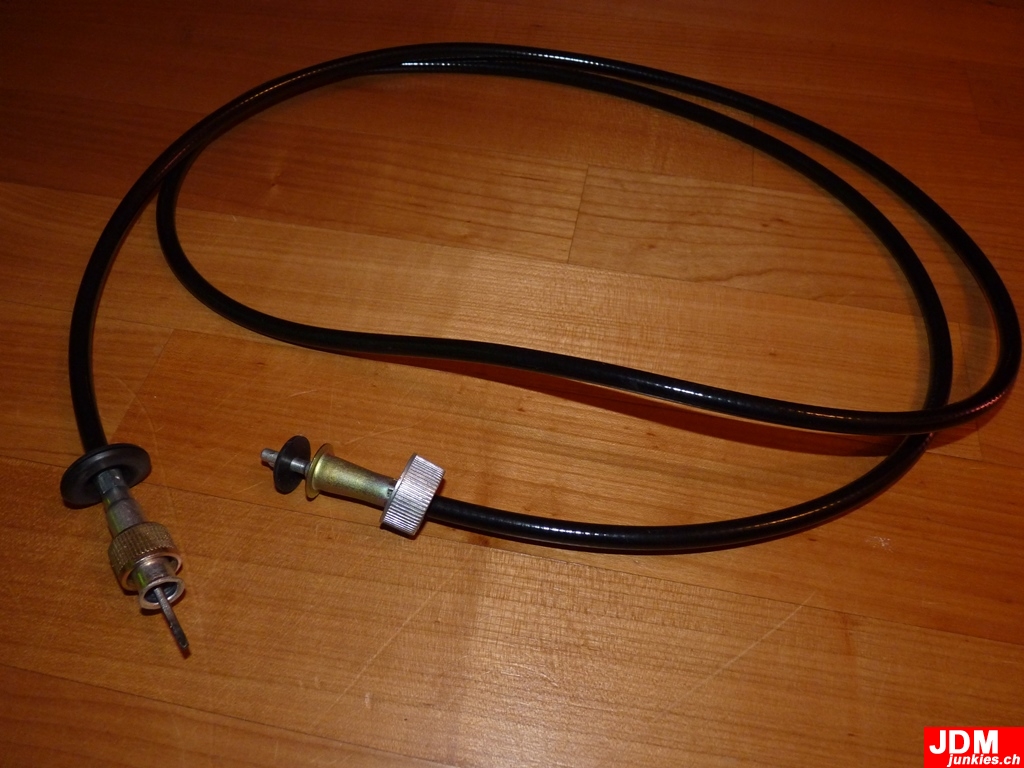
Unknown brand Speedo cable:
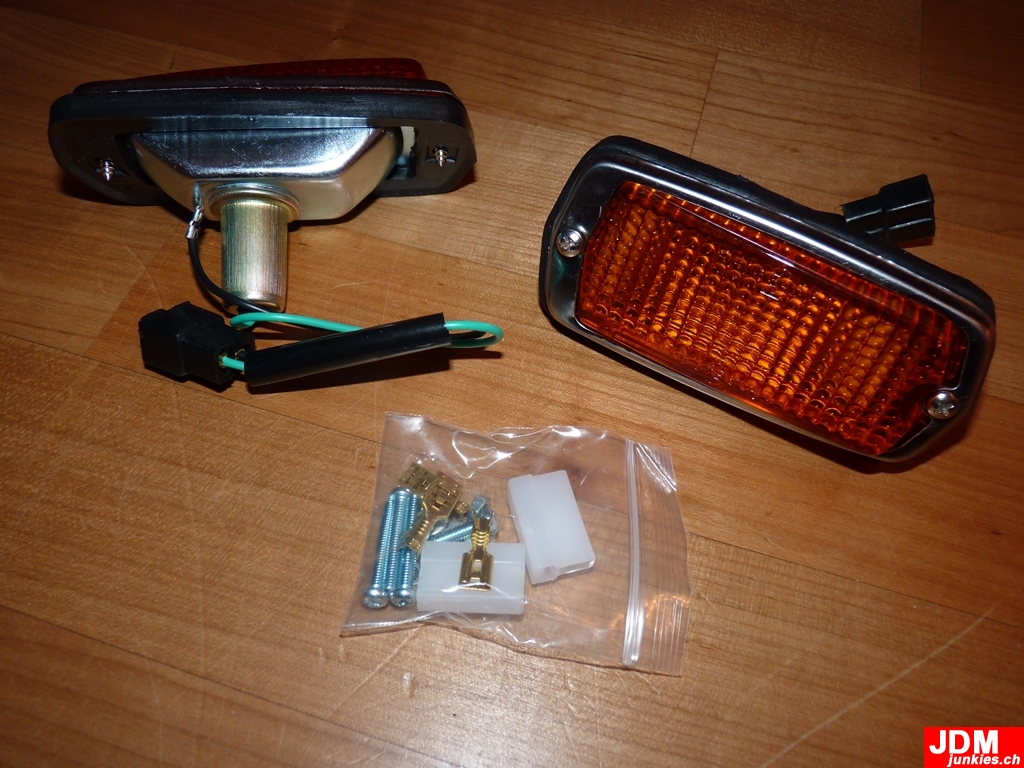
Unknown brand Side marker (front) lamps:
DENSO (japan) Horn's, 66dB:
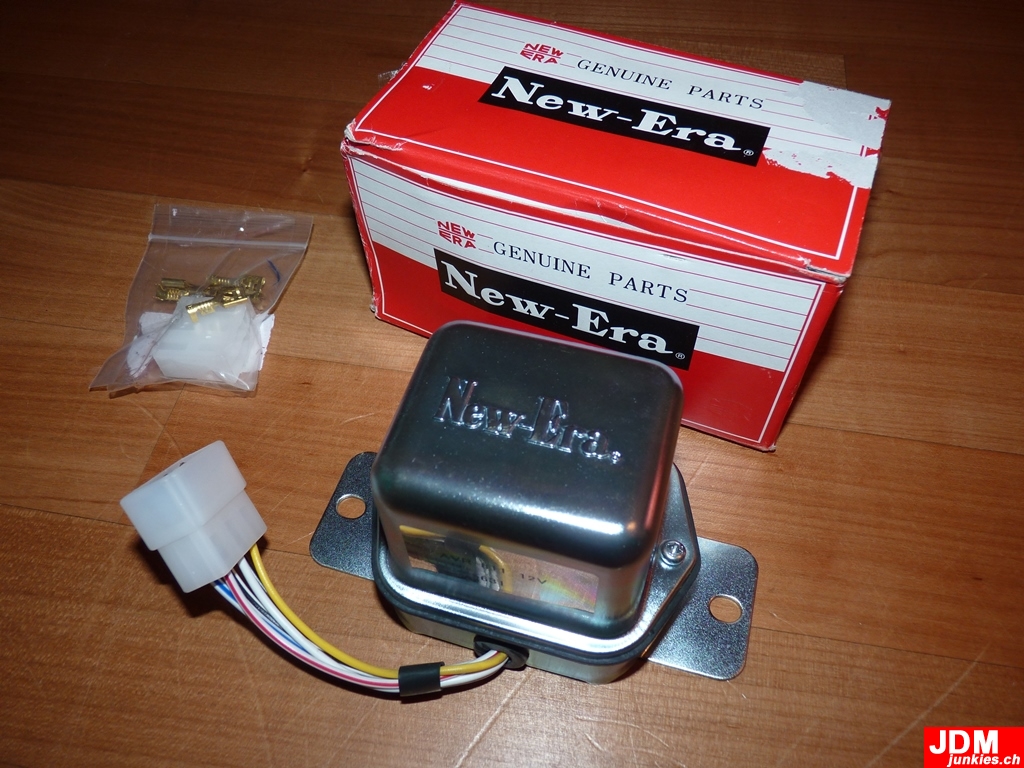
New-Era (Japan, Aftermarket supplier) Voltage regulator:
Not sure how all the parts fit and if they will end up in the car, but they were cheap and looked nice so i thought i buy them in a package deal. Looking good so far
More parts coming soon -
Dear readers, sorry for the lack of updates during the last weeks. I was very busy with some other big things, one of them beeing marrying my wife
Yesterday i got back to work in the garage. while it's still freezing cold outside i got some stuff done on the transmission. I found a local glass-bead blasting company and i'm preparing the transmission to be blasted soon. So i had to remove all bits and pieces:
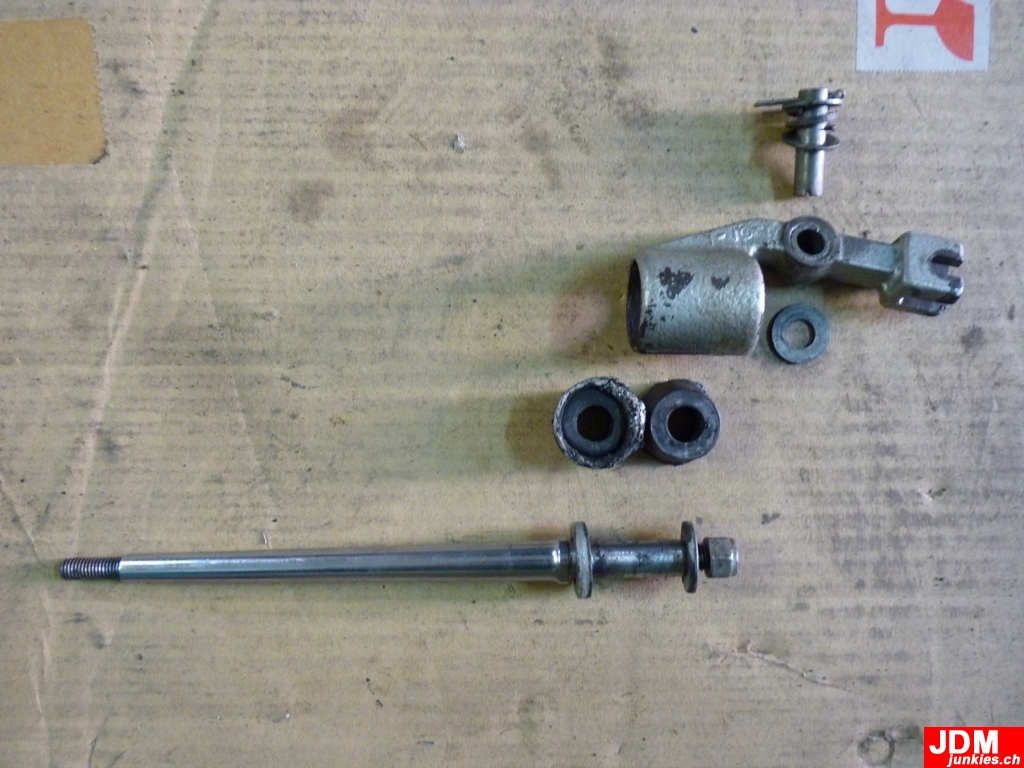
Shifter lever Bracket removed:Removed the shifter bushings from the brackets and had all laid-out:
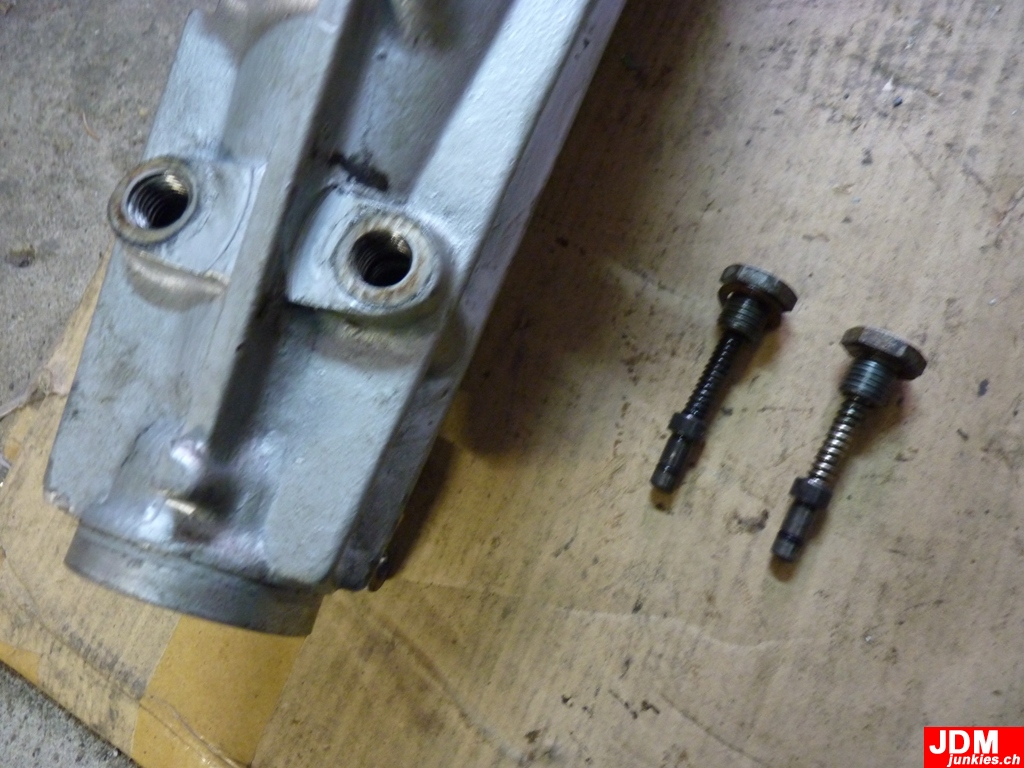
Removed the control arm springs and "plugs"
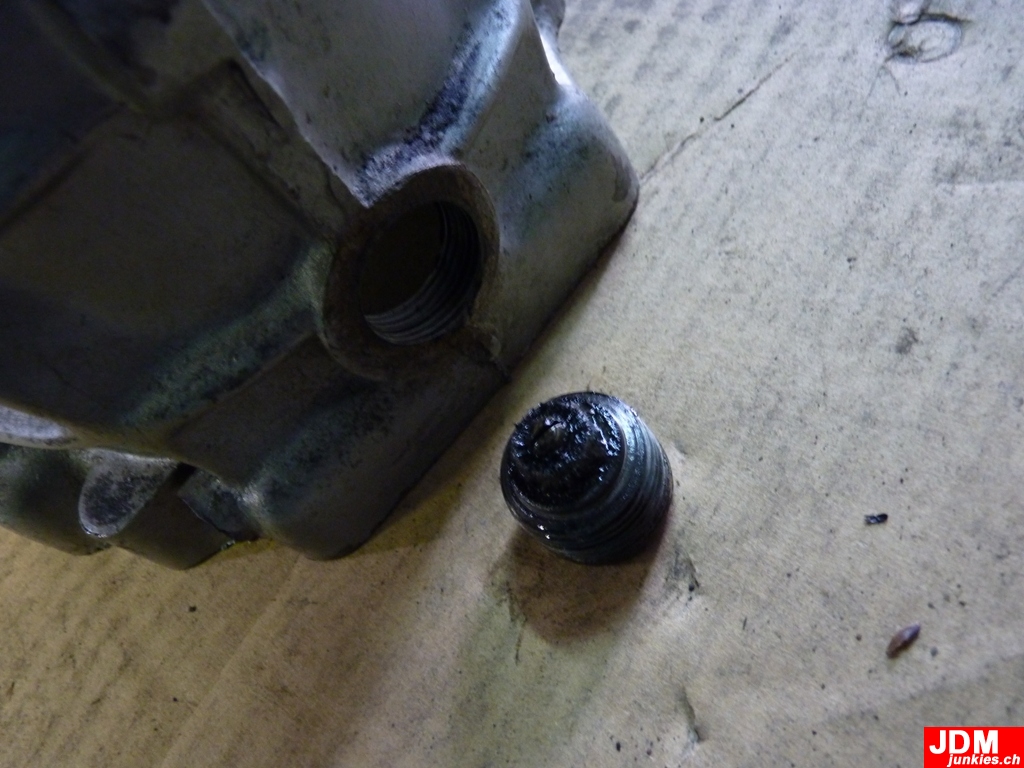
Tried to remove this plug, but after trying hard and not beoing able to get it out, decided to leave it there for blasting
Removed the oil filler plug
And the speedo sensor (still in place here):
Still need to figure out how to remove the speedo sensor complete, the plastic vents and then i'm ready to get it blasted
-
Your build is not my style in the sense you are going so JDM. However the work you are doing and the attention to detail can not be overlooked. Great job. I almost don't want to start my build thread because of the rust I will find.
Thanks for the kind words. I undesrtand that "JDM" ist not everyones style and i have to admit i changed the plan slightly. and guess i won't install any overfenders and so on so it's basically just bolt-on parts which can be reversed back to original parts easy. But we'll see. And yeah, always have to laugh when someone writes "rust-free Z for sale" or something like that. that just doesn't exist. even in sunny california or so. except it has recently undergone an extensive restauration, of course
-
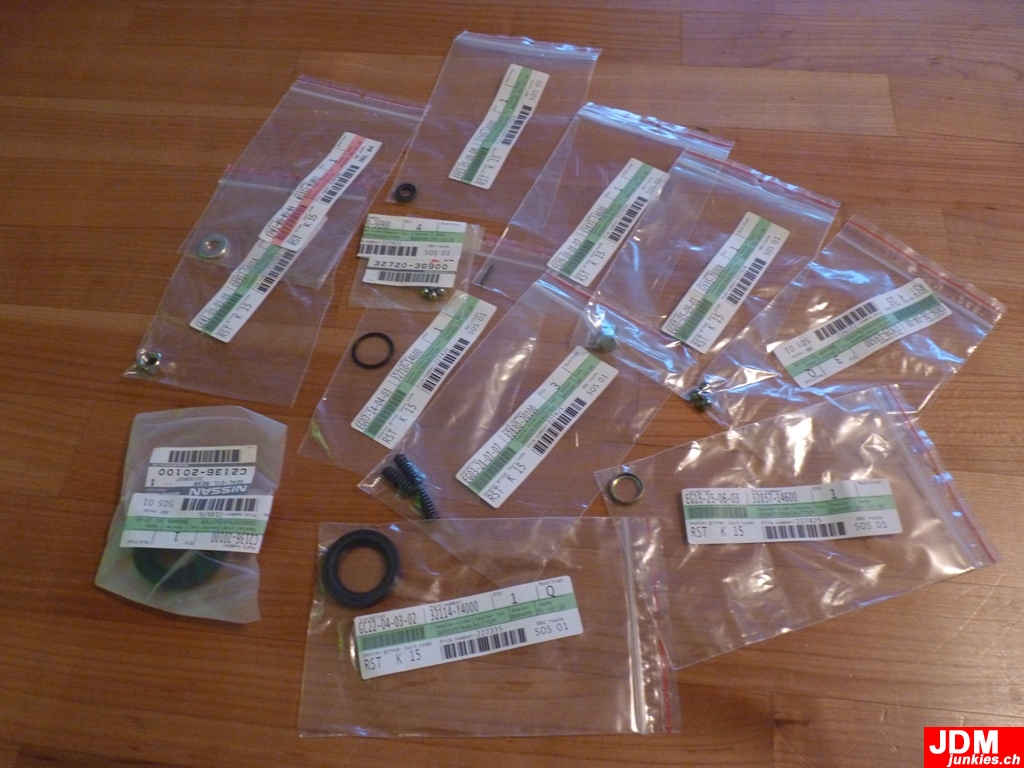
No big update, but today i got a phone call from the local Nissan dealership that my order had arrived, so i went there and picked up my order: All the refurbishment parts which ar still available at Nissan for the 5-speed FS5C71A 5-speed early type factory transmission.
The order contained some oil seals, snap rings, Balls, springs and so on. still need a lot of parts and will order the rest elsewere. this was just the easy part of the whole thing -
My Panelbeater asked for some Budget to continue his work, and since it's really going on nicely lately i happily brought hime some of my savings
While there i had a look at the latest work, of course. You have to make sure you're money is well invested After inspecting the recently completed upper end of the rear he showed me a mock-up of the right side rear inner wheel wells and some problem areas.
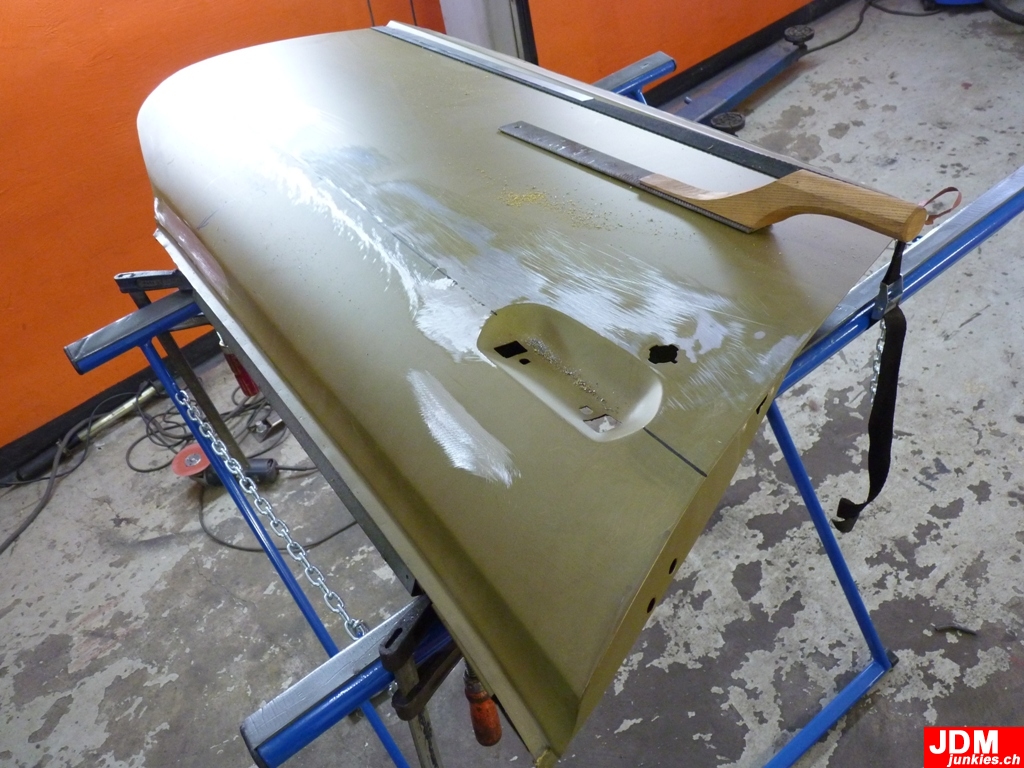
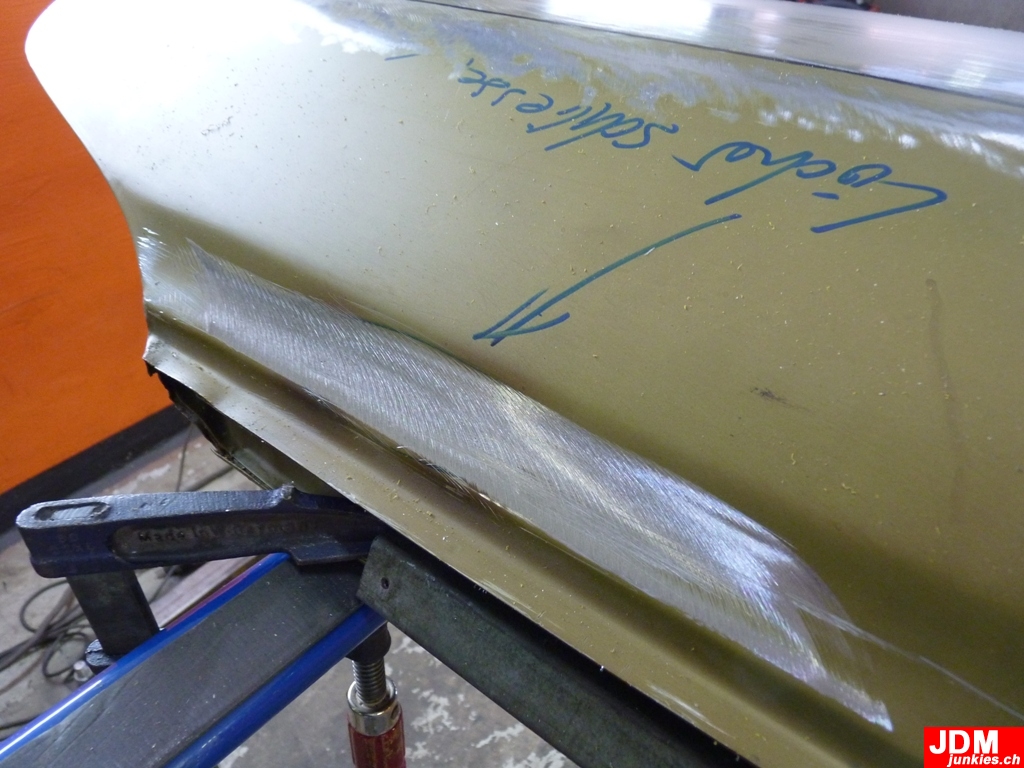
The tabco pieces really do not fit very well, but he will make them fit. I've seen worseAnd while there he was preparing the door to fit them back to the car for future fitment testing of his work around the right side. You can see the thin line on the door? he noticed that little line (edge) was gone due to some previous repairs and straightened everything and made sure the thin line is back in t he door. Most people wouldn't even notice.
And then he closed the holes of the original door mirrors, because i'll go with fender mirrors
-
Just for reference, here is that same panel NOS from Nissan, looks like your guy nailed it.
Whoa, that looks indeed like he built a perfect panel. thanks for the reference pix. awesome
-
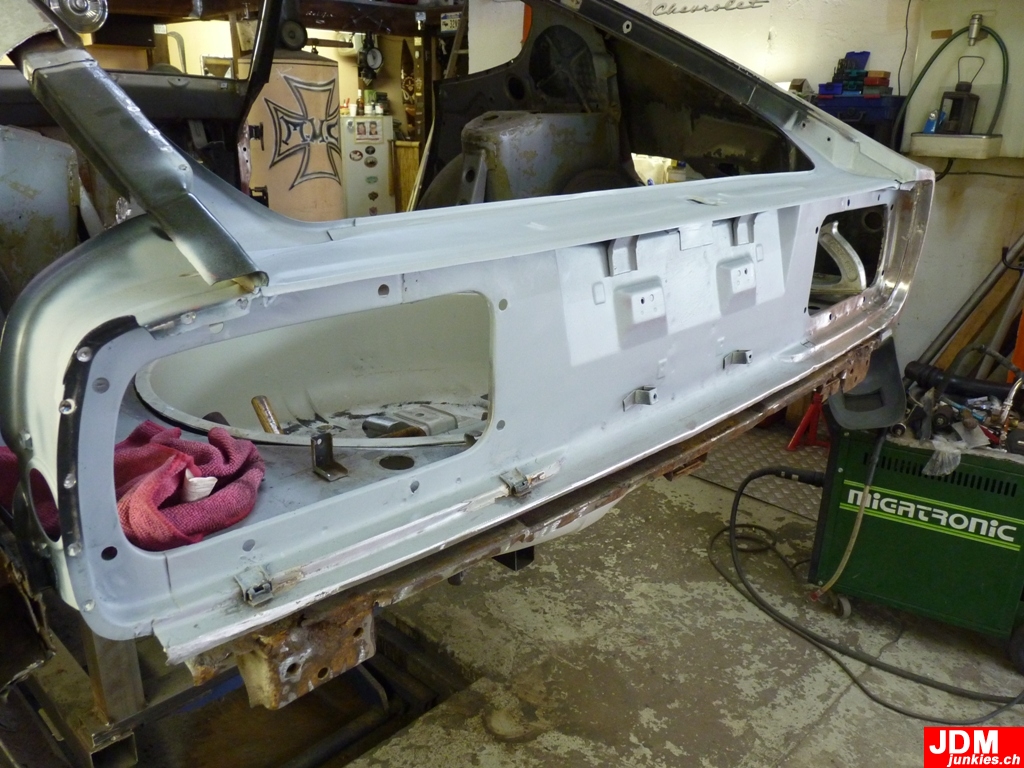
Lately i really appreciate the updates from the bodyshop. And If things go right i will visit him and my car again on monday. However here are the latest pictures i got
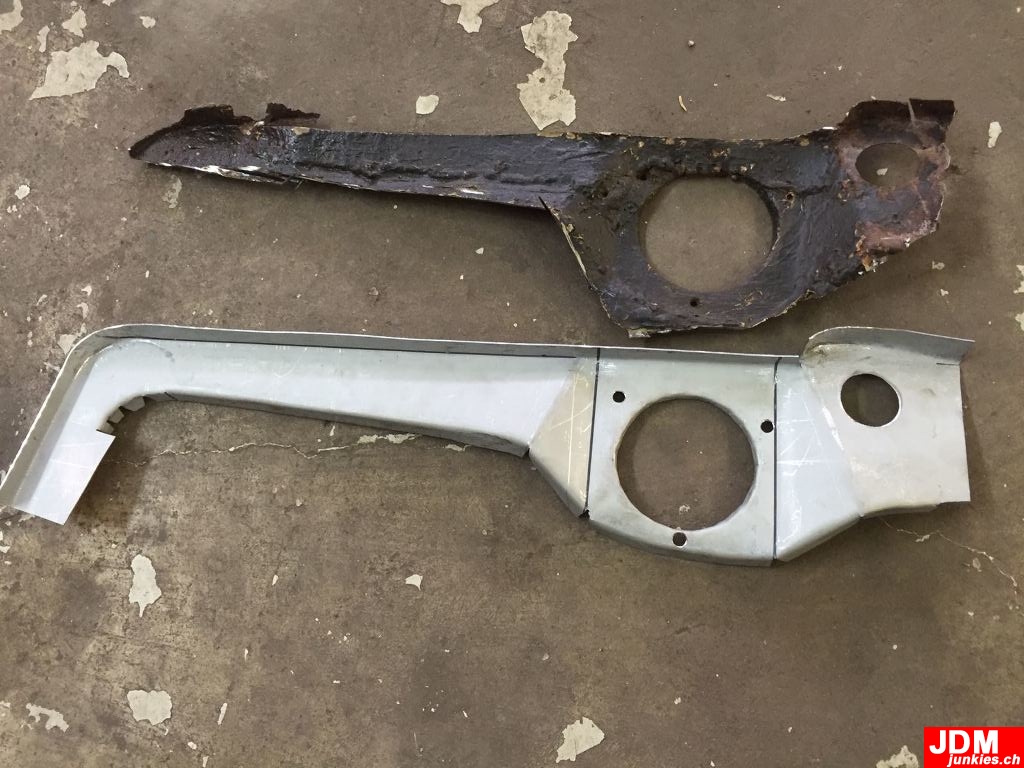
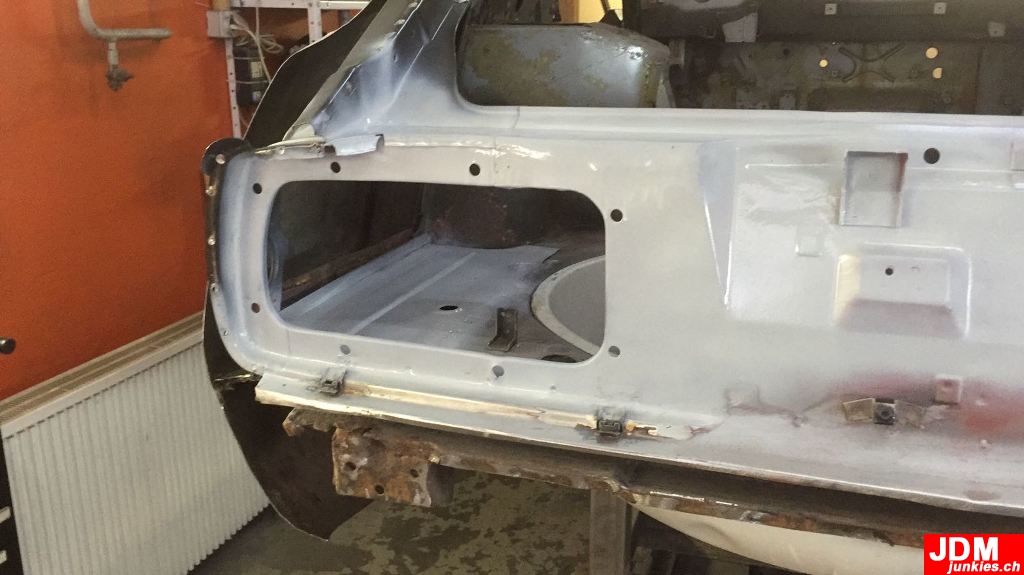
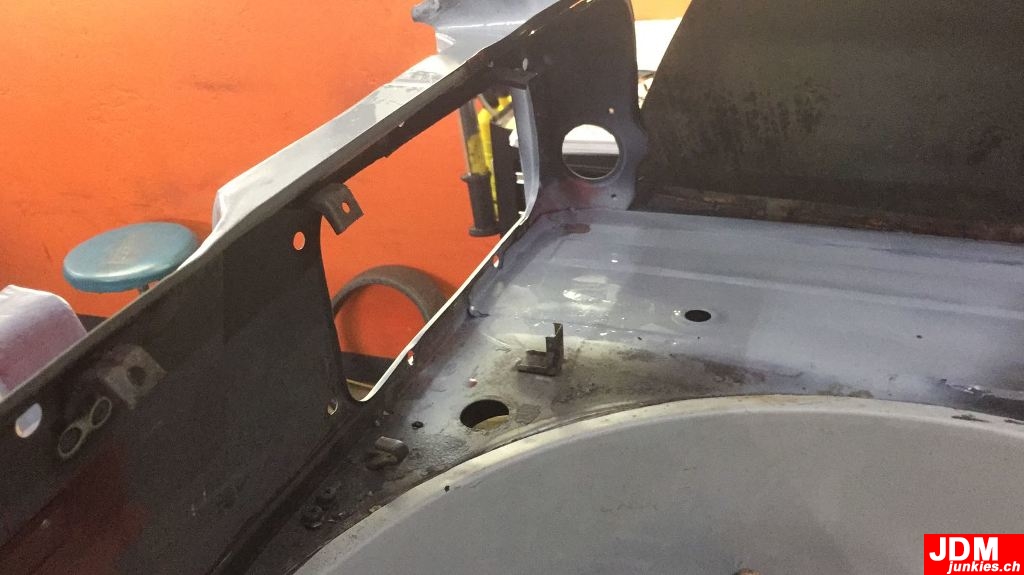
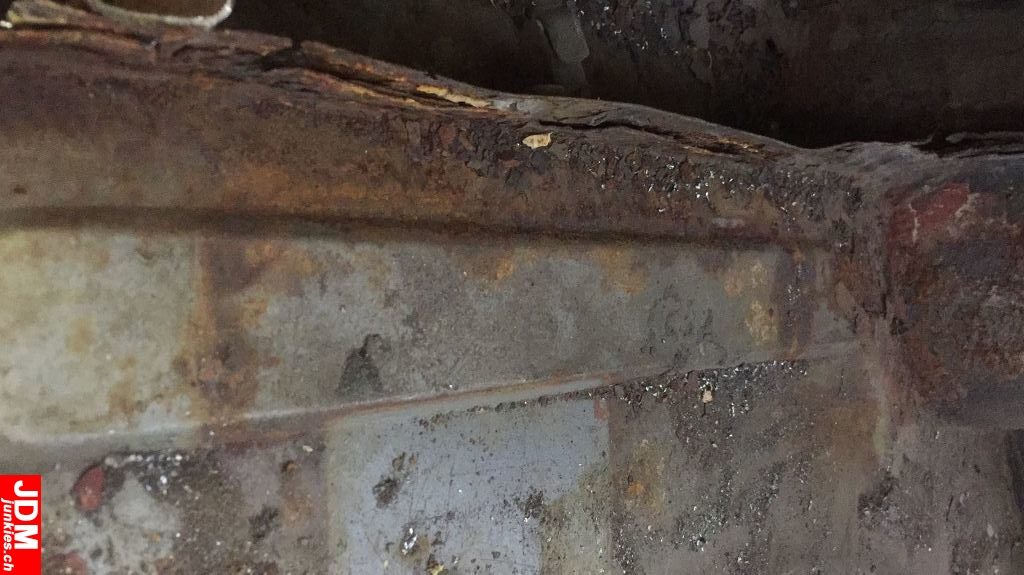
What you see here is the inner rear right quarter panel piecte between the trunk floor and the Fender. it contins the hole where the fuel filler hose goes through. As you can see the original pieces was totally rusted and he created a new one from scratch:Here it's installed test-wise:
View from the outside:
View from the bottom. As usual: Work of art. May look a bit rough now, but once it has some primer on it it will be like it was from factory
-
Finally another part of the body which can be called "completed". My panelbeater sent me another update with the rear upper hatch panel welded back and the whole area coated in some protective primer. Without top hatch panel installed:
Primered inside as well:
New Top hatch panel welded back. Well done
-
Got a little update from the bodyshop. he started work on the LH inner hatch area.
Before:
After (Custom made panel from sheet metal):
Welds and corners still need to be smoothened out but otherwise it looks like OEM
Oh and got this book a few days ago:


Swiss two-become-one 240Z Ground up restauration / JDM mods
in S30 Series - 240z, 260z, 280z
Posted
Nothing big here. just spent two hours cleaning all the transmission parts after the glass bead blasting. Removed some leftovers from the masking tape and blew away all the leftovers from the blasting from all the small corners, etc. Since i forgot my cam at home you only get some crappy mobile-phone shots:


When done i started going through the small parts and decided i could clean them too. so the trusty green scotch-n-brite came in handy again to clean all the small pieces:
Then decided to make a little test-assembly with the new PU shifter bushings (red), since the old ones were quite worn-out (black):
This is how it all goes together:
And this is the result. quite happy. Will remove it all again, grease the rubber with some bushing-grease from the energy-bushings kit and have the washers and nuts zinc-plated alongside all the other nuts and bolts from the transmission before the final assembly: