
Litman
-
Posts
81 -
Joined
-
Last visited
-
Days Won
3
Content Type
Profiles
Forums
Blogs
Events
Gallery
Downloads
Store
Posts posted by Litman
-
-
Hey guys,
looking to buy an 82/83 turbo ECU
 let me know what you've got!
Jordan
PM sent
-
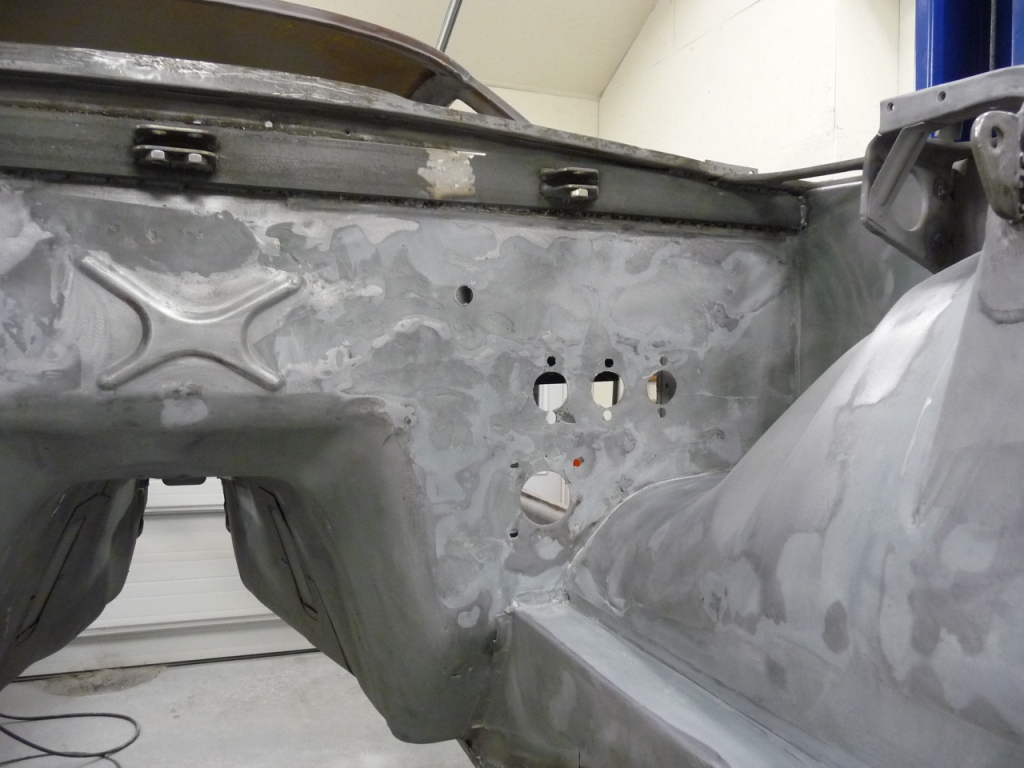
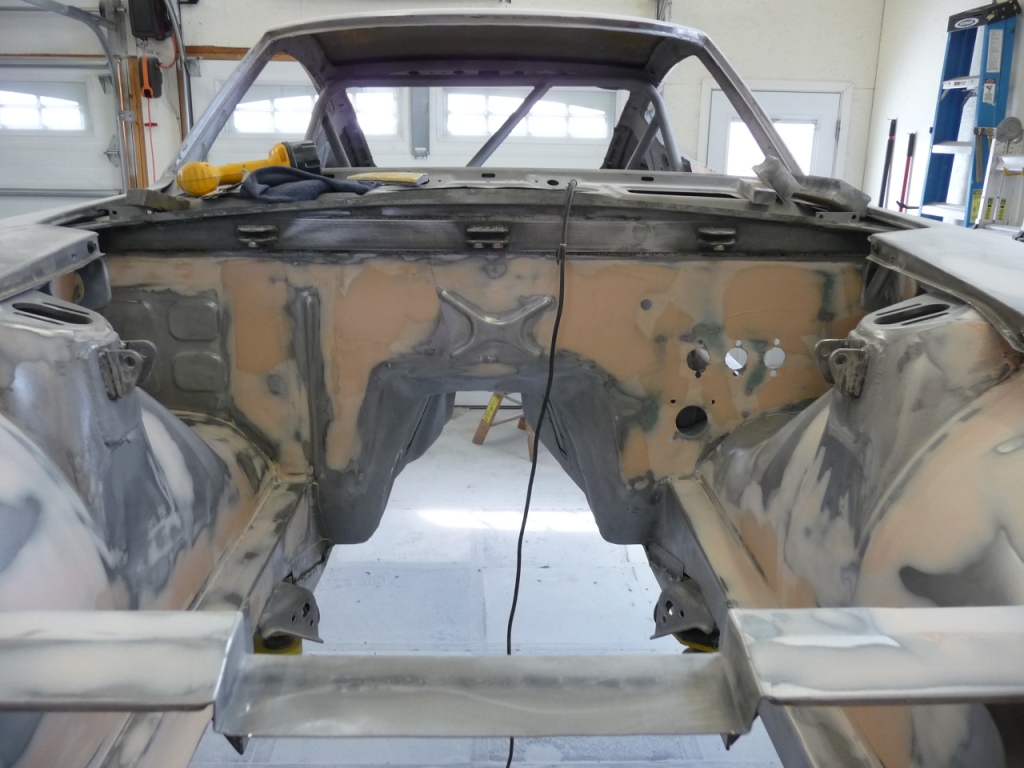
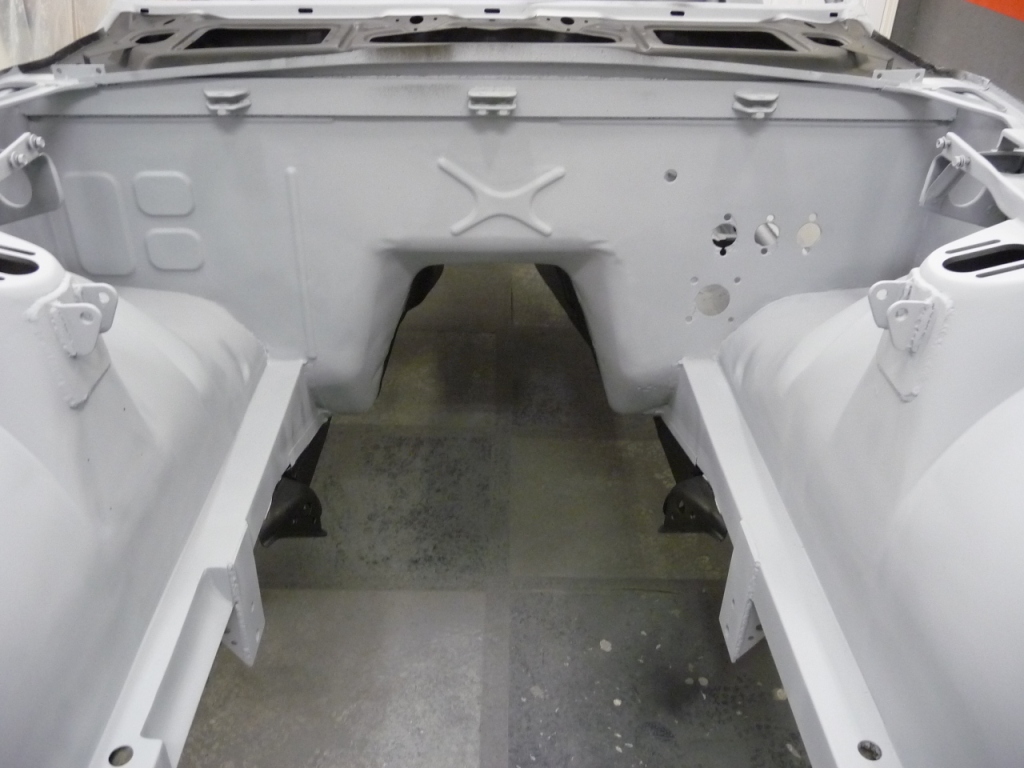
I certainly hope so. I have done this and am currently in the high build primer sanding phase. I have no practical experience as to whether or not it will crack however various forms of fillers are used on a very regular basis. Based on advice from my local auto paint supply shop I can tell you the approach I have taken.
I too used backing fill plates in some locations and flush welded plates in others. Flush is always better but backside works too. For those areas that had a backside plate, and any other moderately deep defect, I used a fiberglass filled compound such as Pro-Glas. It has a lot more strength and should better resist cracking. After lots of sanding this was followed by the standard filler such as Feather Rite. After copious hours of sanding it was catalyzed sealer followed by high build primer and, you guessed it, a lot more sanding. Depending on the level of perfection you want in the engine bay be prepared for a lot of filling and smoothing. The pictures below so my progression.
-
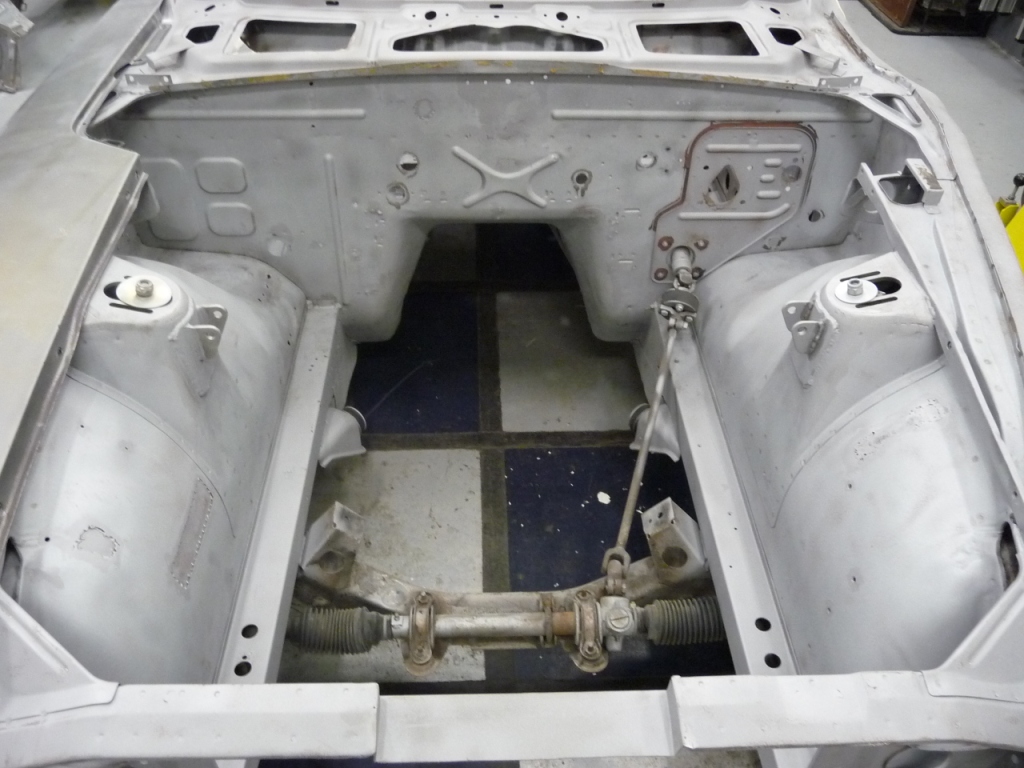
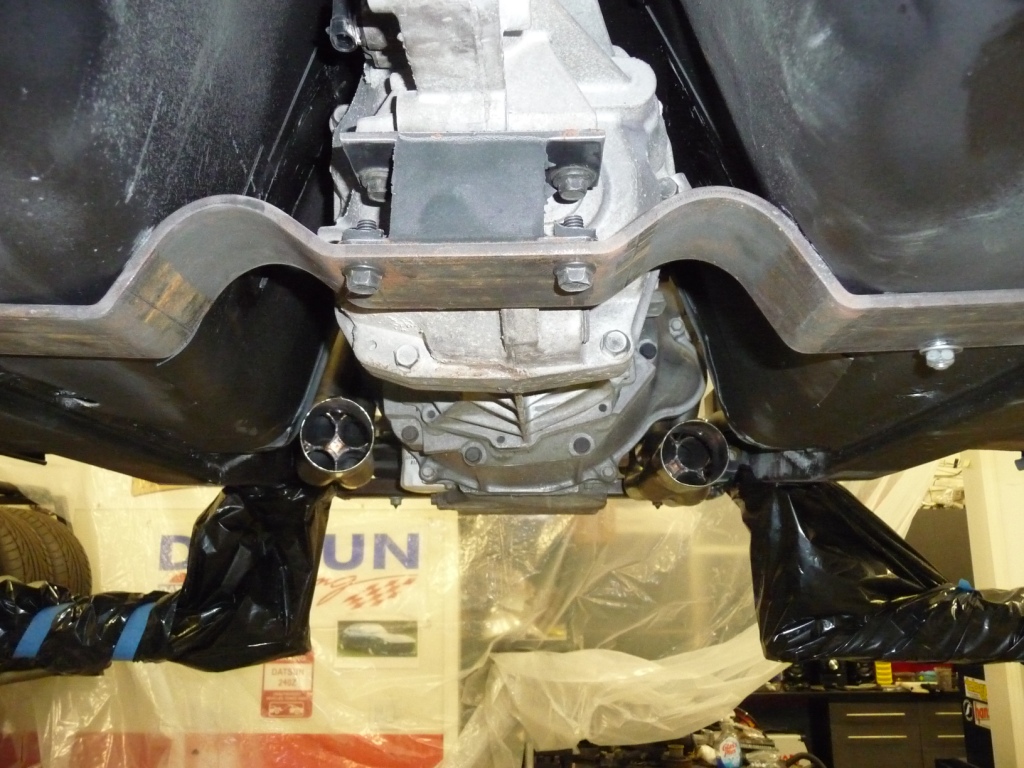
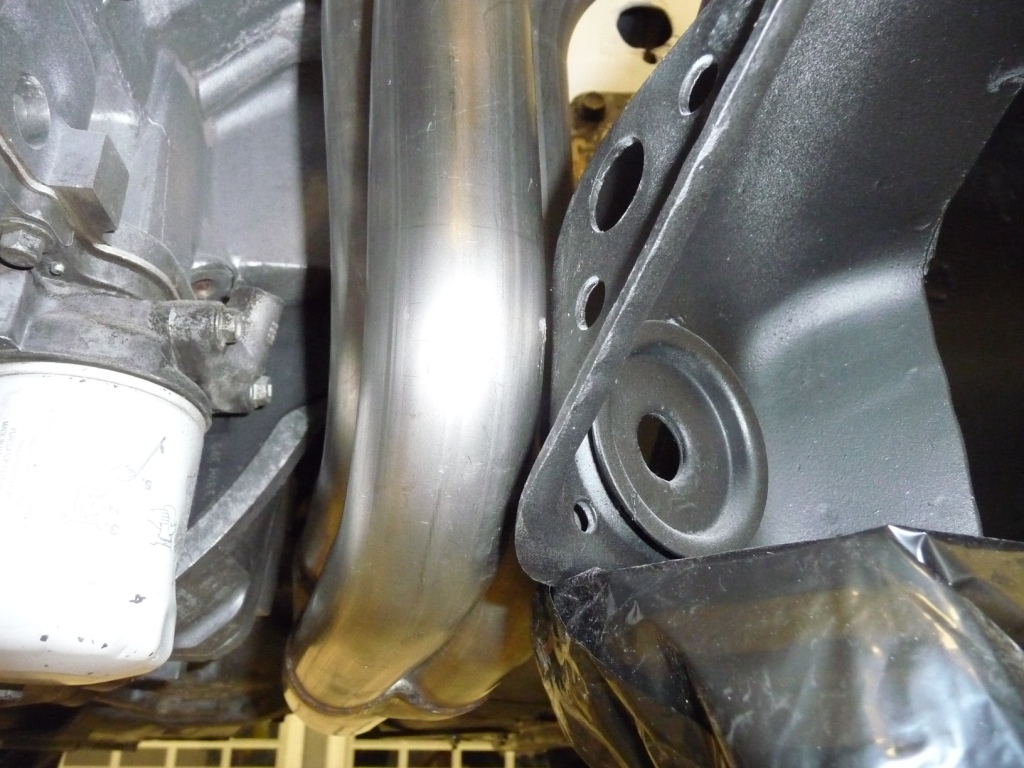
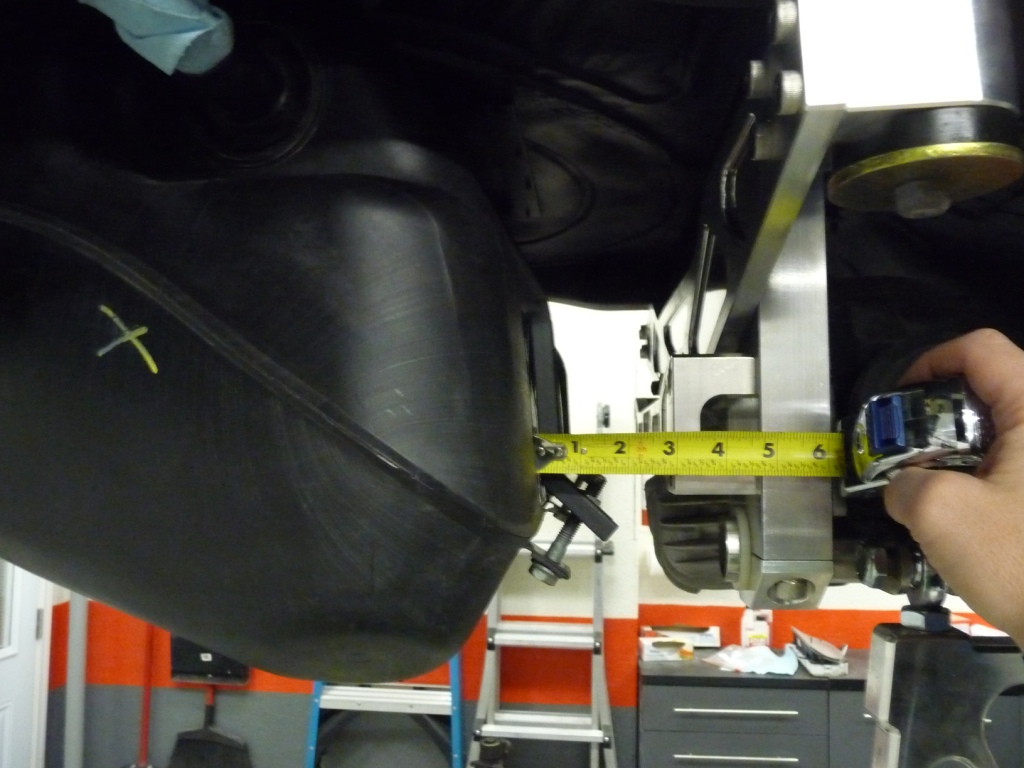
For how tight the fit is I offer these pictures. I can't provide any advice on installation as my situation is unique. The car is using my custom made Corvette C5 motor mount approach and is still in the primered shell phase. I am able to insert the motor from the bottom with the driver's side header installed then drop the passenger side header in from the top. It is a tight fit though. Currently my driver's side collector hits the underbody. The driver's side is also VERY close to the tension rod bucket. I am a little concerned about motor movement under torque causing impact. The other unknown is how much closer these tolerances become upon thermal expansion. All this being said I absolutely love them.
-
Craig can you just snap a pic of the top side (from the hatch area) so I can get an idea of space there is to maybe go forward with the f body tank. I am sure it is tight and would make sense to try to wrap around the tank.
Clive,
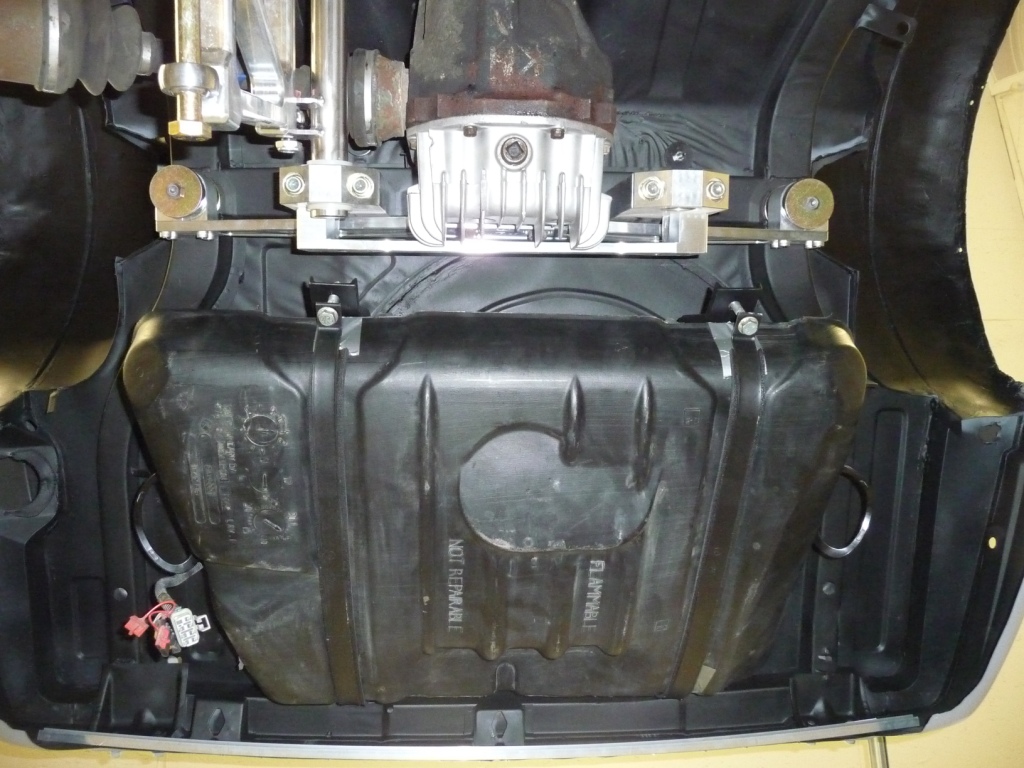
Attached are some images for you to use in your planning. As you can see I have the AZC stuff in place with the R200 diff. Looks like you could inch the tank a little bit closer to the diff but it still might not provide enough room behind to tuck pipes and a 90deg bend for center outlet. My hatch area (topside) is still basically complete so you can't see much from that side apart from the cute little trap door I made.
-
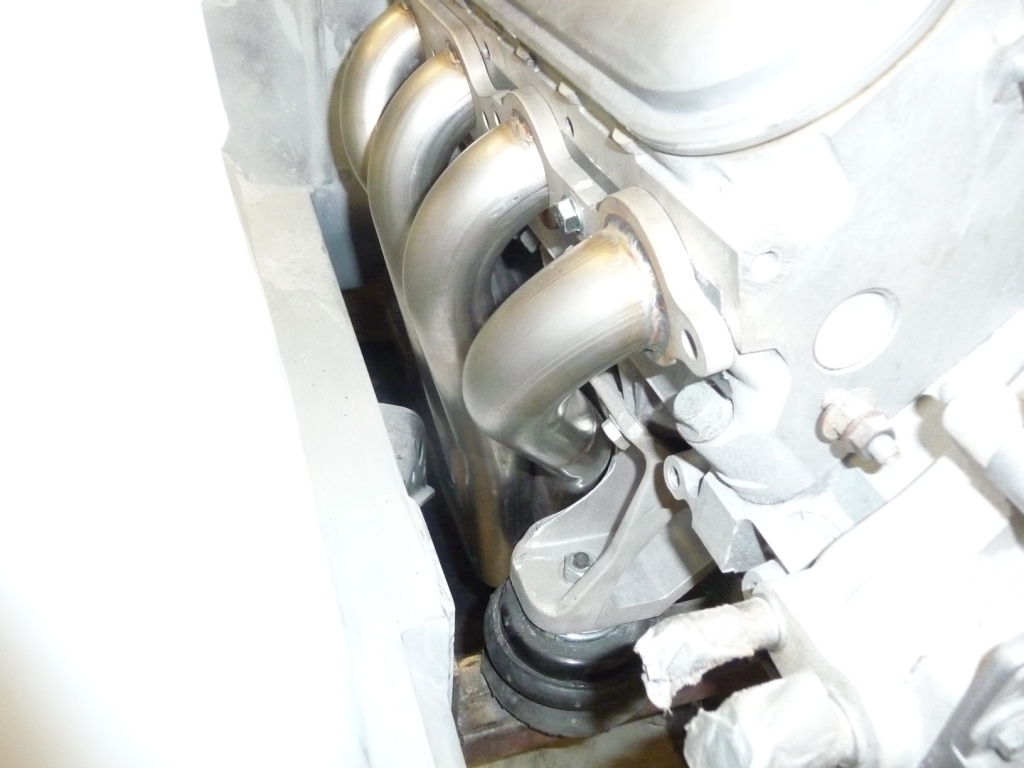
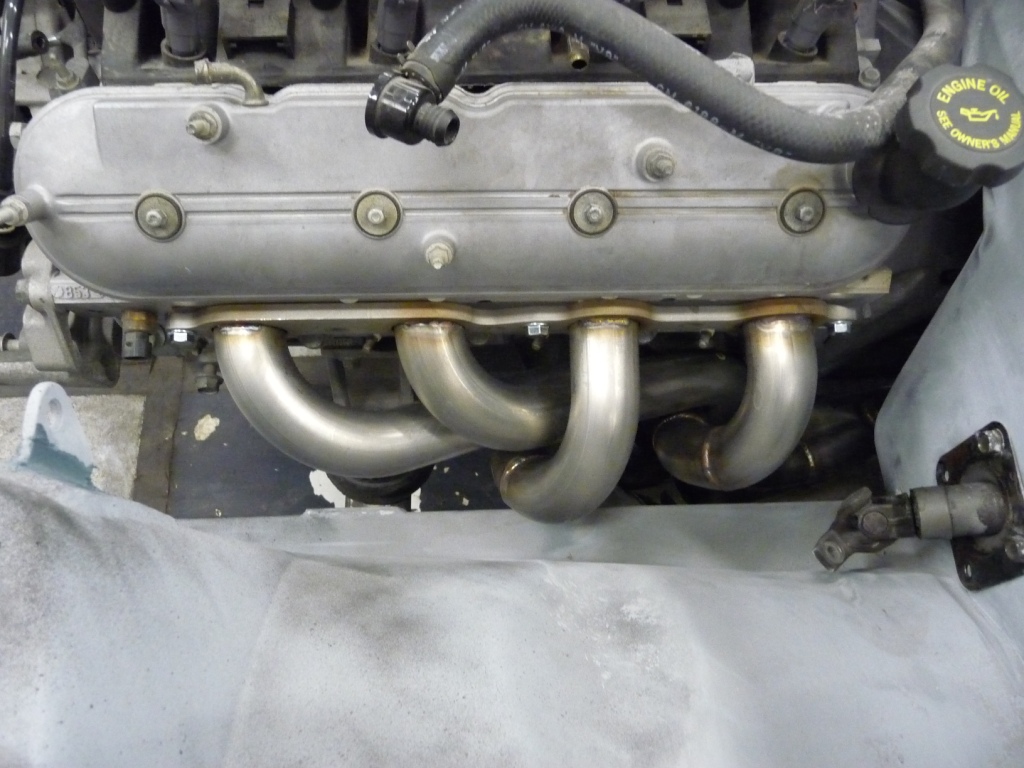
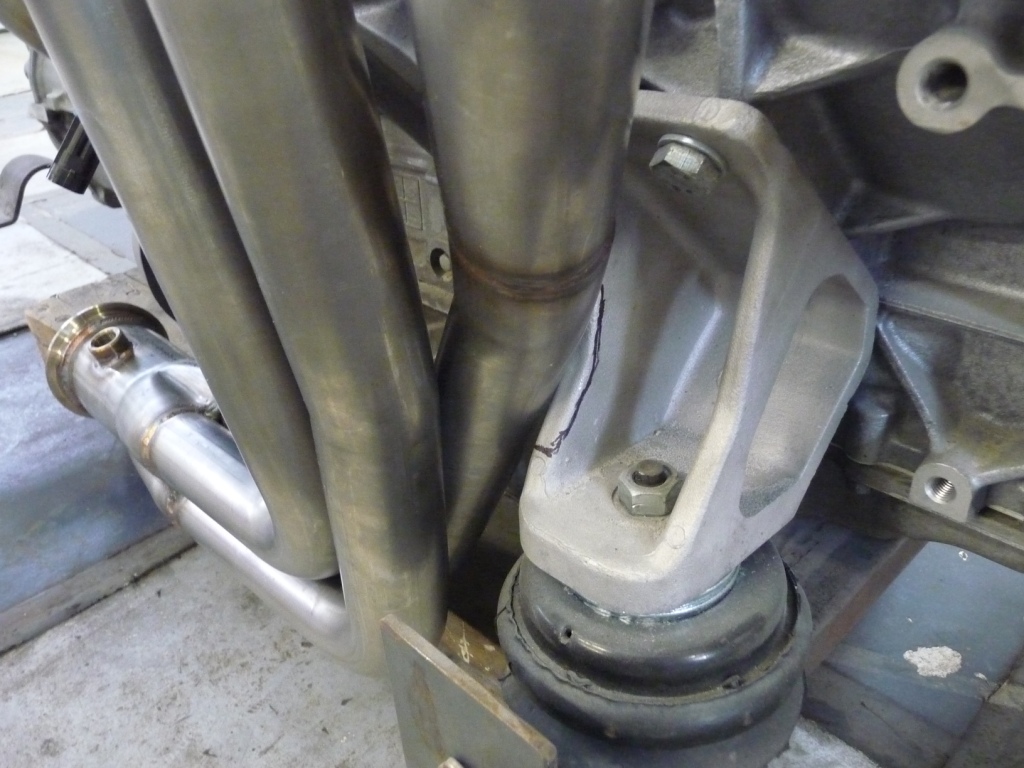
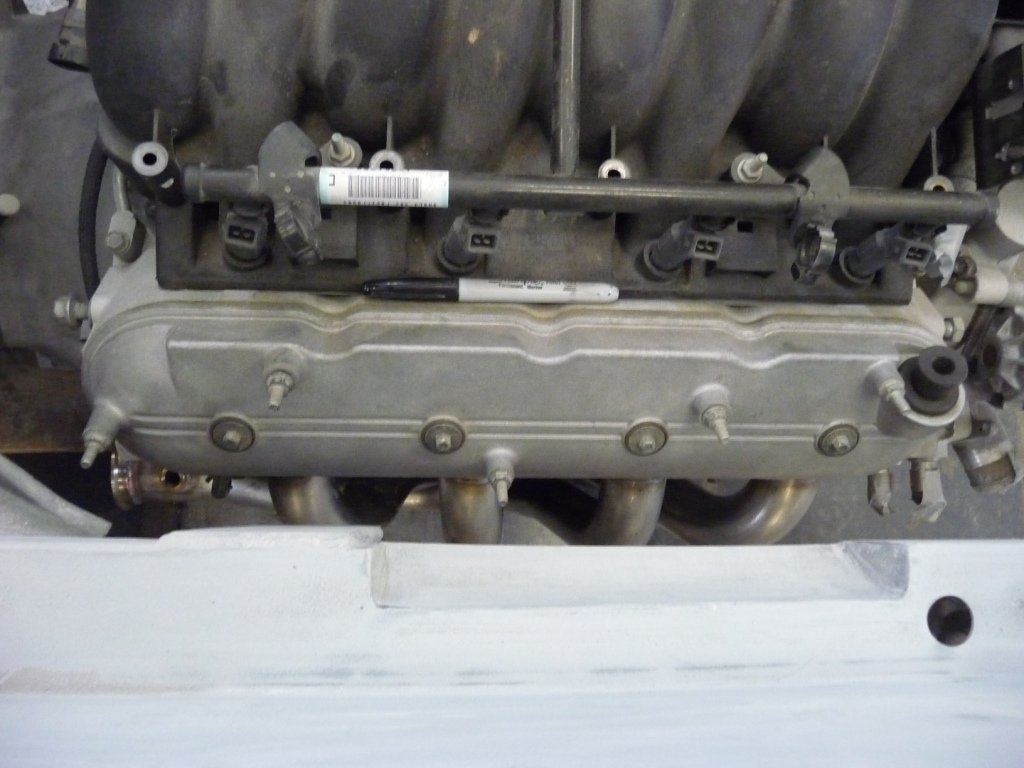
Managed to reduce my nerves a bit today. David was kind enough to tote his LT headers along en route to my area and pass them off so I could do a test fit. Mine have yet to arrive so this at least gives me an indication if I would have to plan on selling mine upon arrival. Good news is they fit with my C5 Corvette motor mount approach. There is a small amount of the passenger side mount that will need to be gound away but this little bit of material doesn't concern me too much. The other thing I wanted to see was if it would be possible to insert the motor from the bottom with headers attached. That's a no go but I will be able to do this with one side mounted and do the other one once the motor is in place. All in all I am pleased and relieved. Now I just need mine to get here.
-
Clive,
I think it will be difficult to position the F-body fuel tank to allow center exhaust. Wish you had asked this question last week. You could have stopped by to try it on my car. The attached picture may not show much but I can mount the tank and take more images from your requested angles. I have the tank fipped 180 degrees to put the fat end near the diff and and the fuel fill on the correct side.
-
-
I have a very nice panel from an 88 although it is not all black. Let me know if you are interested.
-
Thanks for the updates! I didn't prepay shipping so I'll be looking for an e-mail first. I'm guessing Blake is going down the list and I'm towards the end.
Not sure your position on the list dictates order of shipping. I was fourth in and one of the earliest to pay however no word yet. Originally mine were to ship with David's to save on shipping cost so I'm not certain where I stand.
-
PM sent
-
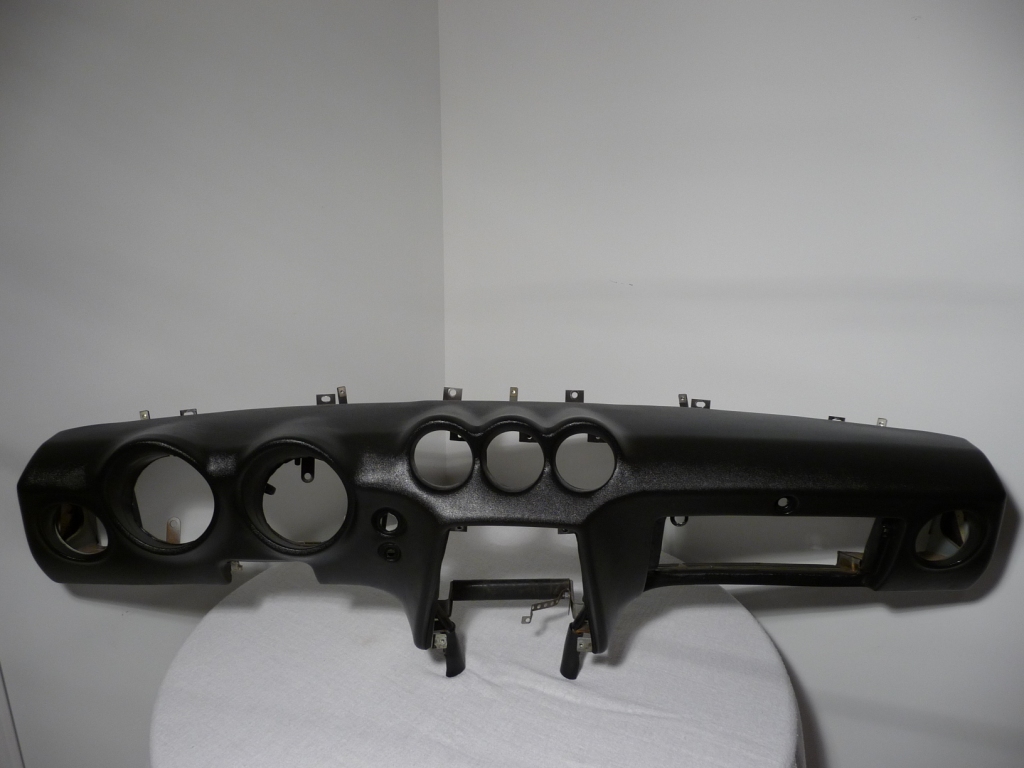
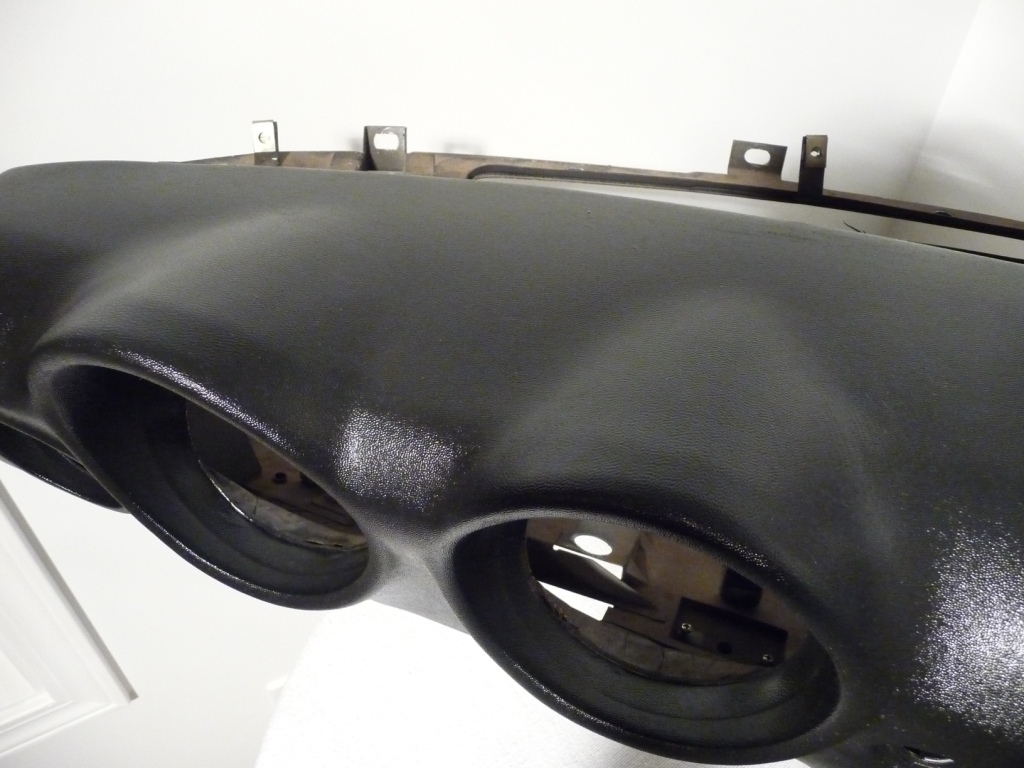
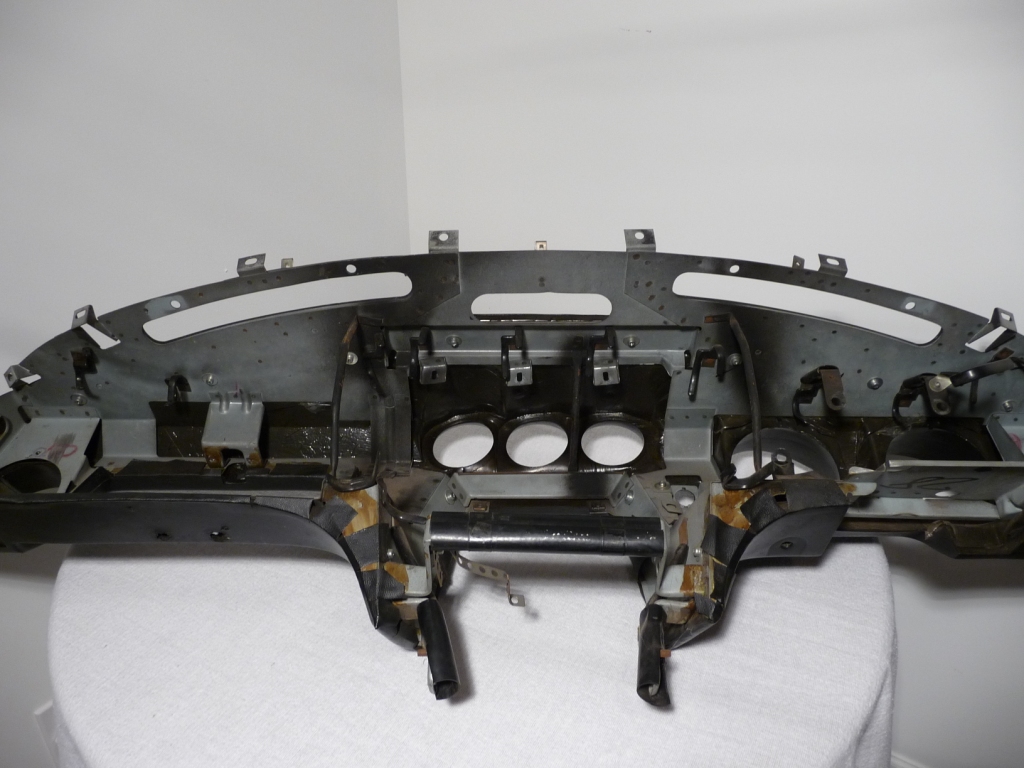
Which style dash are you looking for? 70-71 or 72-73? I have a very nice Series 2 (72-73) dash that is crack free and rust free. It has been out of its donor vehicle for the past four years, kept inside and periodically rubbed lovingly with saddle soap. Shipping would be somewhat expensive being that you really need to build an exoskeleton to protect the dash from cracking in transit.
-
My z is getting a woodie!
Albeit a small one as the Z is parked in a very cold garage. And I thought most cars were females. What kind of freakish car do you have Dave?
-
Don't give up hope looking in the Northeast. Perhaps I am the exception to the rule but I was able to find a '71 in Upstate NY for $2000 that was in very good condition. Upon soda blasting the entire car I found only the rocker panel dog legs on both sides and one small area on the passenger side fender to contain rust that required attention. Two patch panels and a small home cut patch and it is as good as new. I would say I lucked into this one by word of mouth but it was out there waiting for a new owner. Your time searching the internet and spreading the word is cheaper than the cost to ship a car across the United States. Give that a shot first. My $.02. Or have Clive do the searching. He found three good candidates in short order.
-
Ok guys, this is what I found:
- Distance from the seat surface to the roof = 38". This was taken right where your keister would be but without compressing the seat. Also note I have no headliner at this point so that might offset anything you get from compressing the seat with your weight.
- Clearance (total of both sides) at the front thigh bolsters = 2 1/2"
- Clearance (again total) at the recline mechanism = 1 3/4". Note that my seats are switched side to side causing the recline lever to be inboard for each seat. This needed to be done to gain a little more rearward travel given the interference with the roll bar lower mount points.
- This was at a distance of 28 1/4" front of seat to firewall just below the steering column
The height of the seat mounts are 1 3/4" front (versus 3 3/4" stock) and 1/8" in the rear (versus 2 3/4" stock)
I can't comment on clearance to the door panel as my doors haven't been on the car for over a year. The diagonal door bars pictured in my original response are well inside the inner line of the door and clear the seats ok.
In response to your other question I am using the Corbeau 5-point harnesses. This car will see some HPDE events so I went the harness route. One thing I noted with these specific Corbeau seats is the low harness pass through. It is fine for me as I have a somewhat short upper body. At your height I might be concerned about the angle of the harnesses over your shoulders.
Hope this information is useful.
Cheers,
Craig
-
Surpip & Boyracer,
Sorry for the lack of response. I was in Daytona doing Rolex Grand Am testing. Once I return home this evening I will take additional pictures and measure distances from seat surface to roof, left & right side clearance, seat bottom height from floor pan and distance from firewall. Hopefully with these measures and additional images you will get a good basis for your direction. If there are any other measurements or specific angles for images you would like please let me know.
Cheers,
Craig
-
I have the standard LG1 seats with Corbeau Z sliders in my project car. It is a 240Z so take this information for what it is worth. I found the seats to be very comfortable although all I have done thus far is test fitting and periodic sitting. The standard width is perfect for me (5' 10", 175). There isn't a lot of side to side room so it might be a little bit of a concern with the wide seat. For me this was exacerbated by the fact that I removed the OE seat mounts and fabricated mounts that are almost 2" lower. I personally felt the thickness of the LG1 seat bottom caused me to sit far too high in the car. At 6' 2" this may be another issue for consideration by you.
-
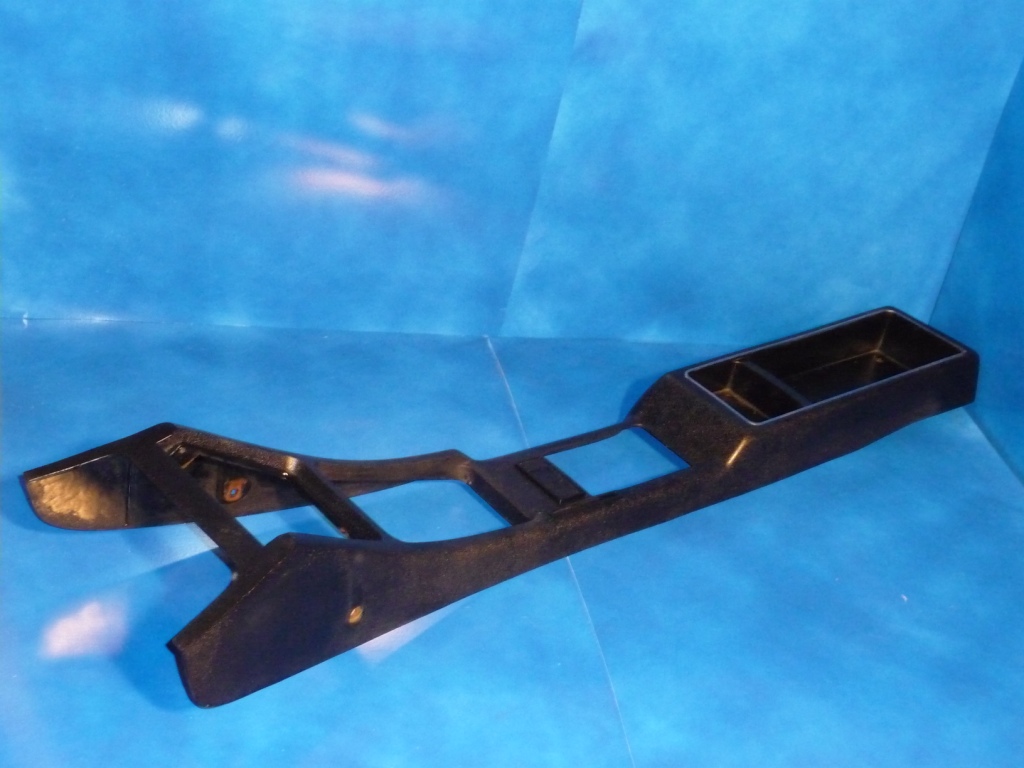
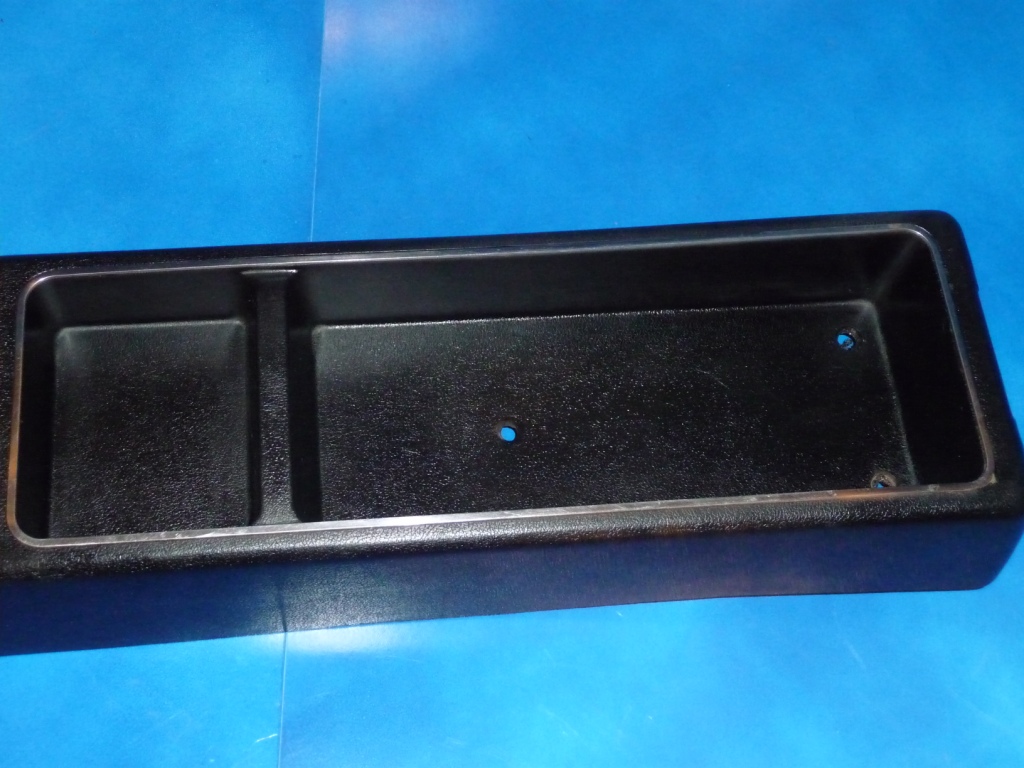
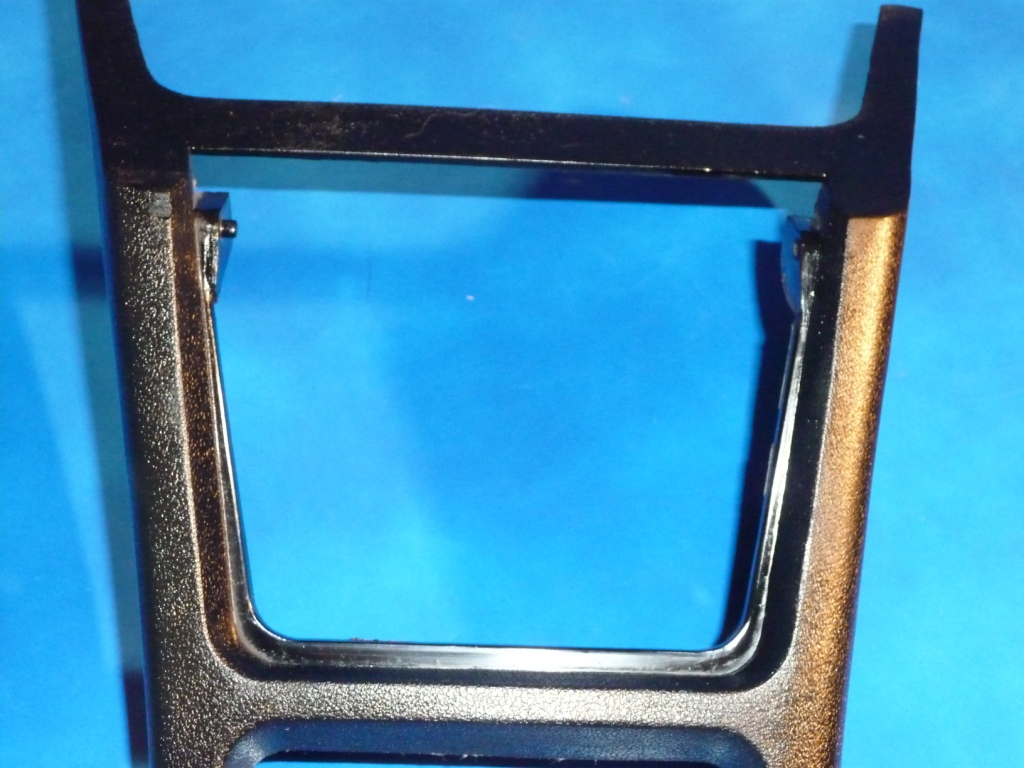
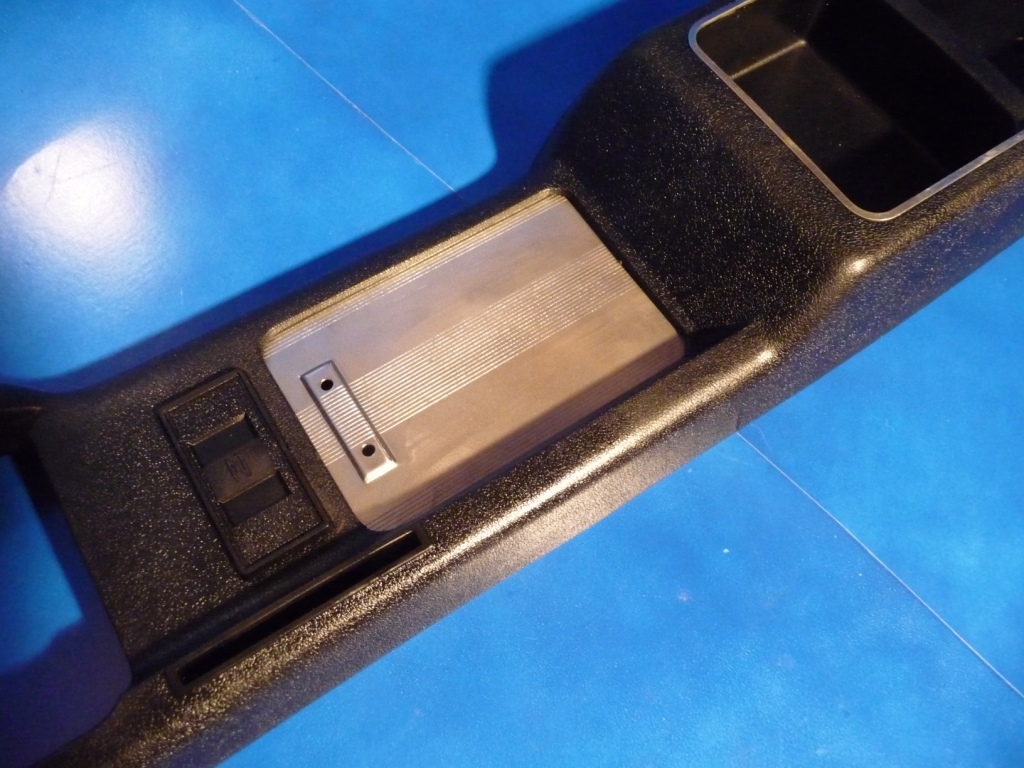
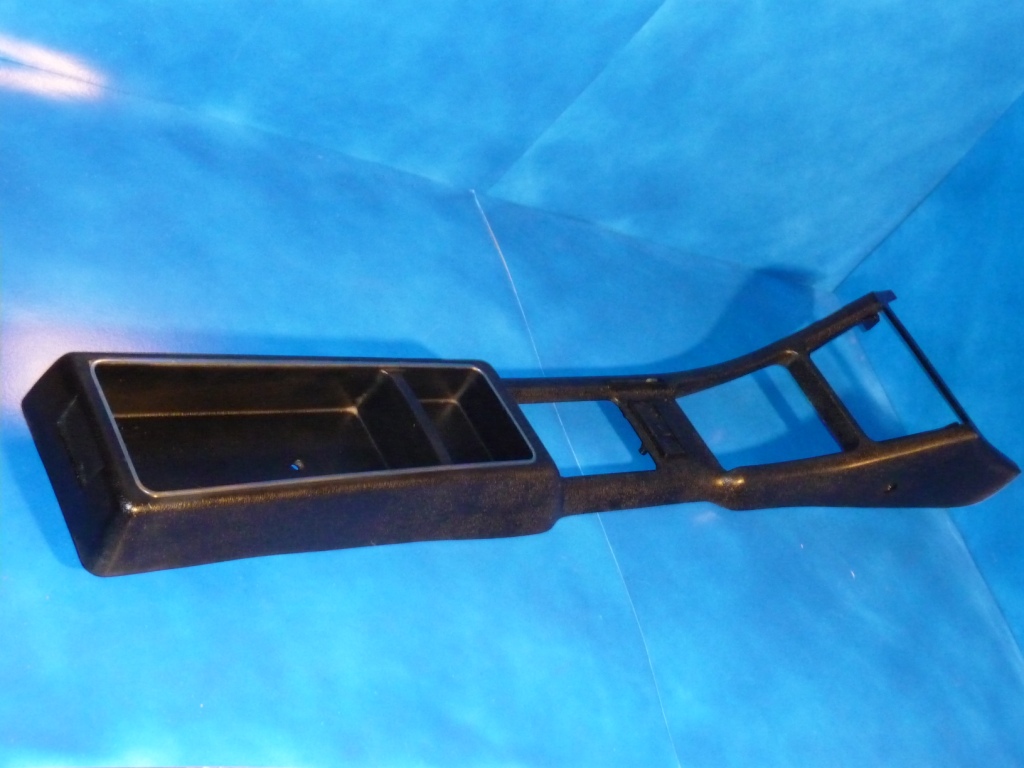
Also have a series two (72-73) center console in excellent condition. One tab for the fuse box cover is broken but this is a fairly simple item to repair. Item is ready for shipment.
-
If you aren't looking for an OEM armrest I have an aftermarket one with cupholders that fits 70-78 Z cars. It was used for one summer season. The cupholder feature is nice as the stock Z car is lacking this one, fairly necessary feature.
Motorsport Auto sells them for $100 (which is where this one came from). It can be yours for $75 + shipping.
-
WTB 1970-72 [no 73] 240z front bumper. Plan is to install it on my 73 using the 72 and earlier brackets. Current bumper is painted, so condition of chrome is not top priority. Would like it to be straight and pretty much rust free and...inexpensive.
pm or email me if you have one please.
palermodavid13@gmail dot com
Email sent
-
I'd be interested provided Jimmy is not planning on buying a new Z with the proceeds from my purchase.
-
Guess I need to add this to the list of things I want from Jimmy
-
Mind if I ask how you attached your bedding posts to the bottom plate?
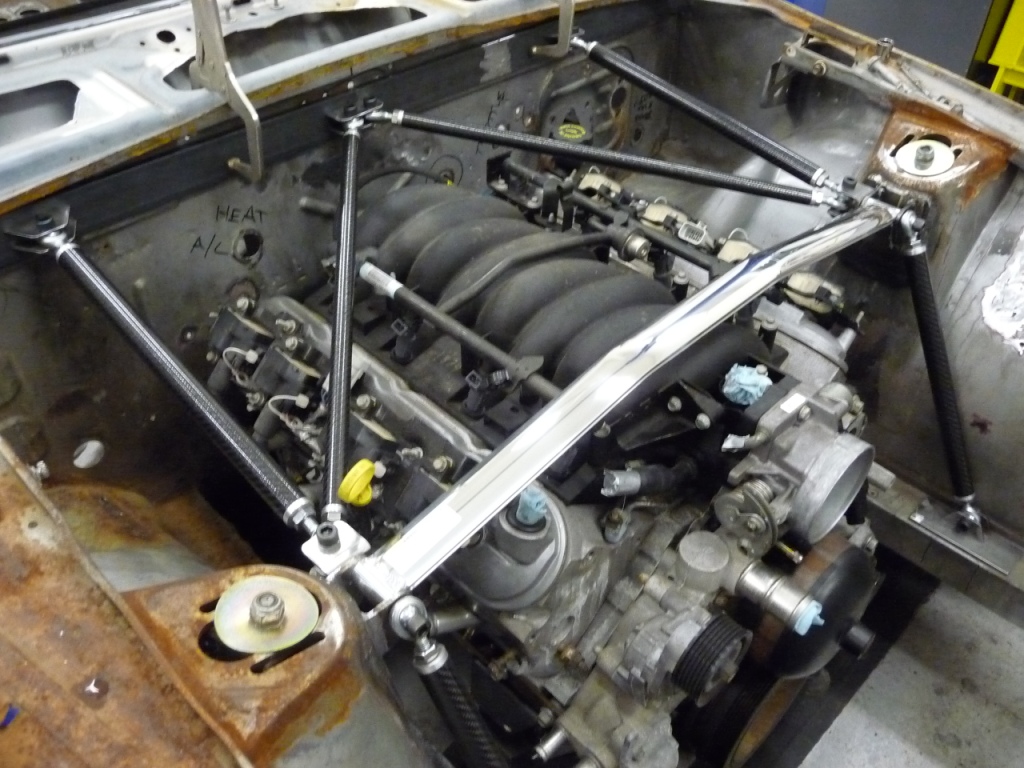
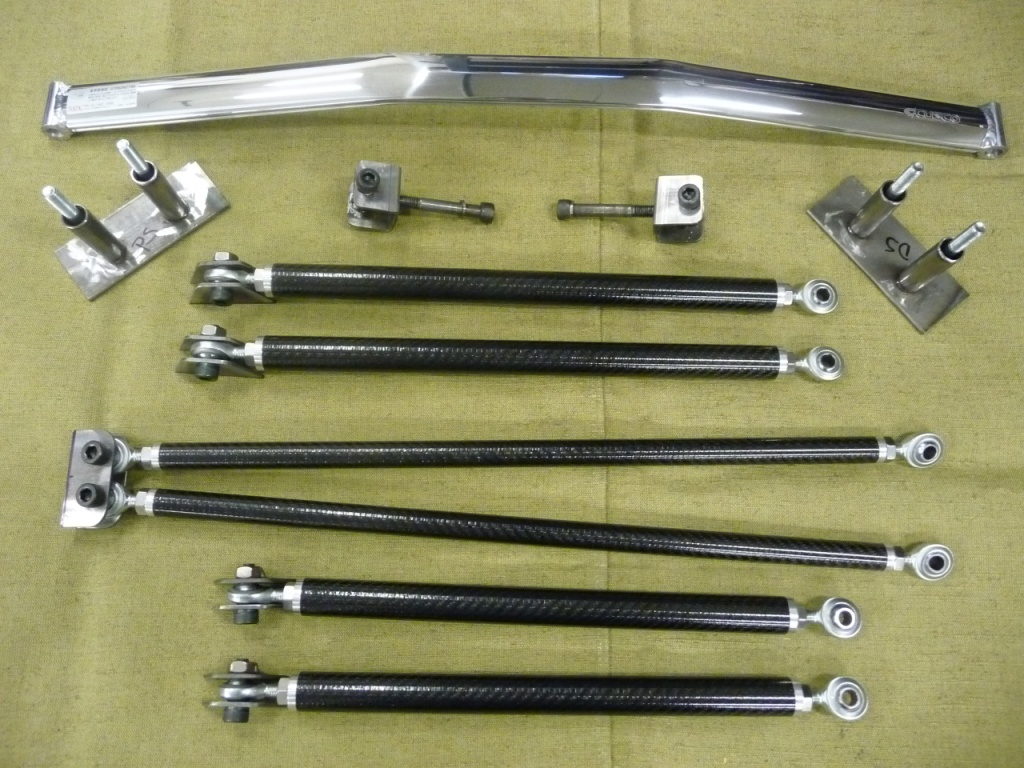
Thanks for the comments. I am pretty proud of my creation. The design is nothing radical but I believe the use of CF tubing is.
My design has the bedding posts flush with the underside of the frame rail. The sway bar top plate and clamp rests against the bottom of the bedding posts therefore the posts take all of the clamping force. The threaded centers protrude from the frame rail and plates enough to get a nut and lock washer affixed. Unfortunately I do not have an image captured from the underside to show this.
-
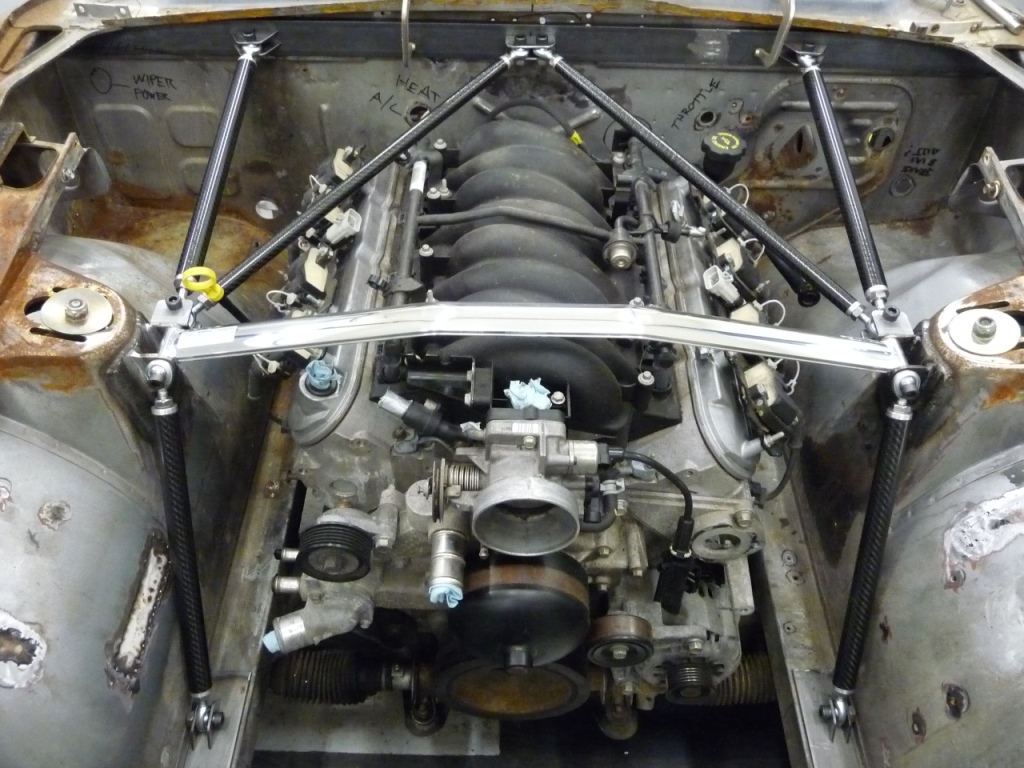
If I had to guess I would say that is a diagonal brace between the strut tower and front sway bar mounting point. I fabricated something similar on my project car.
-
 1
1
-
-
Logan,
Many thanks for the response. I am running the exact same rim/tire combination as you so the real world feedback is helpful. I cut and flared my rear wheel arch in the hopes of avoiding tire rub. Sounds like I should be in the clear if you are not having any issues.


82-83 280zx cluster ( ANALOG )
in Parts Wanted
Posted
Digital or analog?