Dat73z
Members-
Posts
851 -
Joined
-
Last visited
-
Days Won
8
Content Type
Profiles
Forums
Blogs
Events
Gallery
Downloads
Store
Everything posted by Dat73z
-
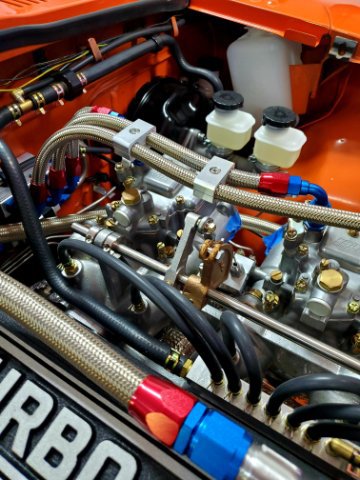
For the first batch of machined parts I had some SS braided line separators made which were more legitimate than the zip ties I had prior. These also add support to the lines to keep them from moving around and eating everything around them.
-
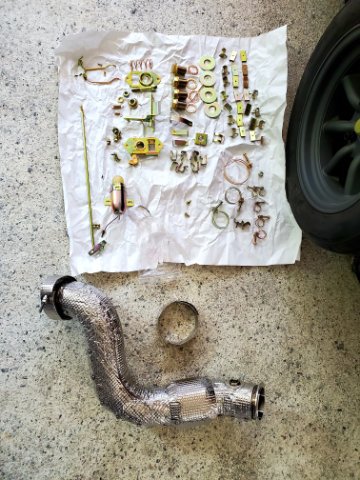
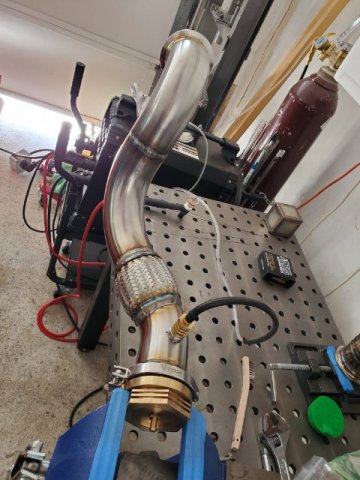
Been a while since the last update but I had to take a 2 week break from the build for a nice vacation. Before heading out it was a frenzy of parts prep and fabrication before sending a bunch of parts and drawings off to have a few items machined and worked on while I was away. I've just received back my downpipe from inconel shielding and some parts from zinc coating. At this point I'm just waiting for a few items for final assembly. Hopefully I'll be back on the road this month if nothing else gets delayed
-
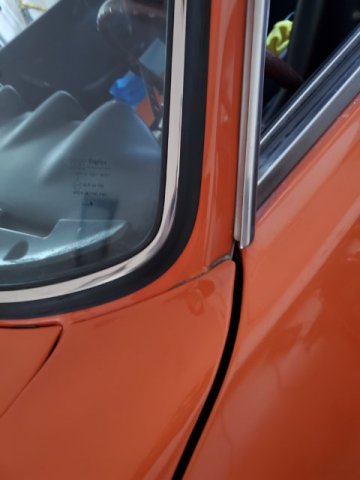
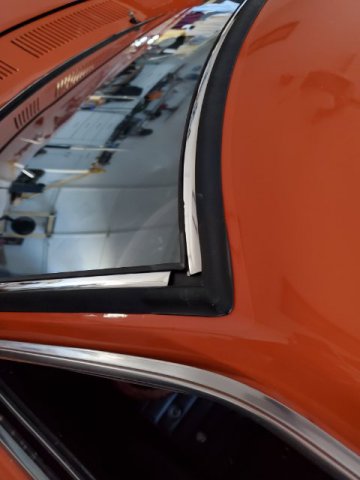
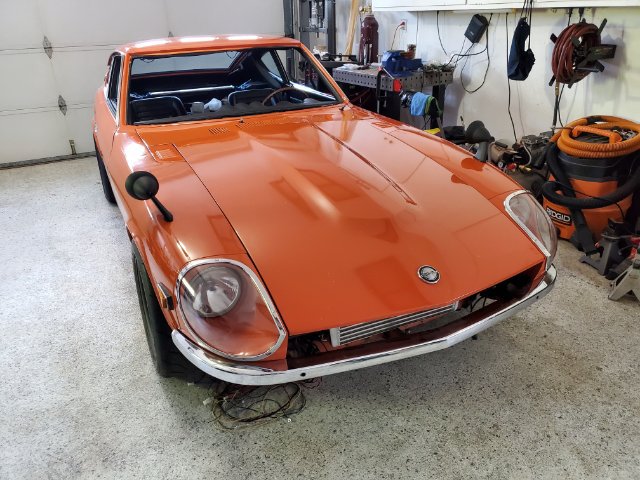
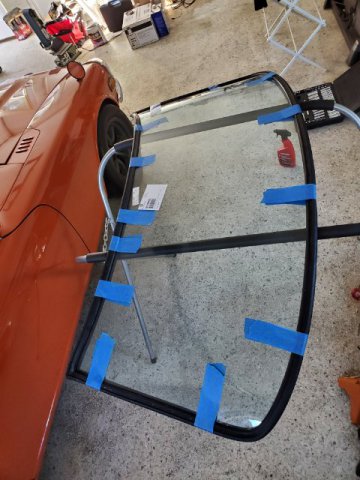
One year later I got the windshield glass back in. I used the vintage rubber seal and it fit perfectly all around with no gaps like I've seen on other cars. I still need to install the corner and bottom small trim pieces but I don't think that will be an issue with this seal, it's really pliable. Hopefully this helps someone
-
240z SCCA vintage race car, restoration
Dat73z replied to AydinZ71's topic in S30 Series - 240z, 260z, 280z
Are you limited by rules on tire sizes and/or how wide you can go? Looks great. Almost looks like you could fit those tires by trimming your existing sheet metal without flares -
The price seems pretty steep. Bear in mind headlight buckets and trim rings will vary in dimensional tolerances. I wouldn't worry too much about the seals, your headlight bucket area isn't airtight anyways. Use some common foam rubber type adhesive seal. The typical non-trim ring headlight covers just use a strip of channeled rubber around. For the mounting some people just ditch the OE type mounting hardware and run rivnuts. For an outward OE look you can get the oval head type screws as well although I doubt most would notice. Here's a pic of my later ones while I was waiting for paint to dry Edit: just took a look at their page and btw not sure what they mean by "fits more flush". Honestly the fit looks worse from their pics than the later versions on a well matched headlight bucket. On 3 different headlight buckets my headlight cover trim fits completely differently but I guess that's just how our cars and parts were made back then
-
A musician's therapist (The $300 Z)
Dat73z replied to Zetsaz's topic in S30 Series - 240z, 260z, 280z
After more than a few dozen trips to the hardware store over the years I finally bit the bullet and started doing large orders from belmetric. I think I probably saved $$$ overall compared to Home Depot/lowes/Ace/Fastenal even after shipping. They usually have the correct lengths and thread pitches I need although the head/nut sizes are usually different 👍 -
Only when I've needed to have the part sit flush with the surface, and I can't counterbore the part have I gone through the hassle of welding nuts. For something like flares, you'll probably be running some fender welting right? As indicated above imo I'd rather due rivnuts here as you can easily remove them with a countersink etc. and replace if they get damaged
-
A musician's therapist (The $300 Z)
Dat73z replied to Zetsaz's topic in S30 Series - 240z, 260z, 280z
Dude that is so sick! Looks like it pulls hard Yeah def check the spring. Also not sure if you'll run into this but with the ultimate internal wastegate my engine was seeing boost creep on the dyno so the port on the hot side got hogged out and I took out a bit more just to be sure. What're you running for your rear end? 3.54? By creep I mean with a 10lb spring it was getting up to 15+ by redline I believe but on a 3.2 -
Yeah I don't know why but I really struggled with drilling the o2 sensor hole so I definitely don't envy 2. The SS tube is ridiculous. I first tried a milwaukee hole saw and the blades flattened out and only scratched the surface within seconds. I ended up using a high quality carbide burr at high speed to wallow out the hole
-
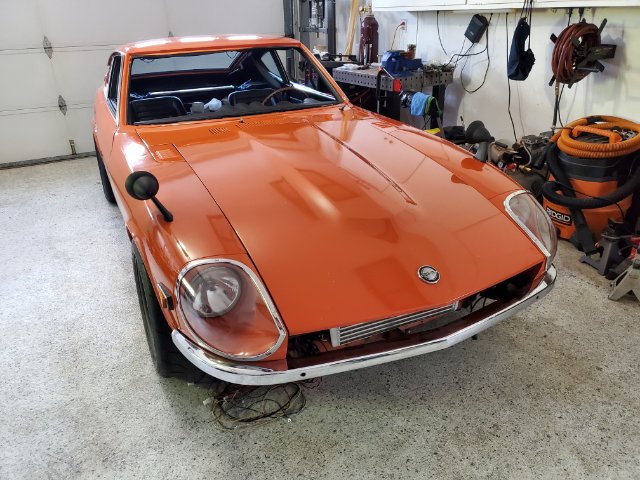
It's been a busy month so far but I managed to squeeze a few hours into this build. Unfortunately most of the past couple weeks was spent wrapping up rust repair welding, bodywork, and paint. On the turbo build it sounds like my zinc coated parts are done, custom radiator is done, and some random brackets I had machined are done. So final assembly when those come in. Also welded on my o2 bung and will be sending the downpipe off for inconel shielding tomorrow. Little by little, day by day
-
A musician's therapist (The $300 Z)
Dat73z replied to Zetsaz's topic in S30 Series - 240z, 260z, 280z
@Zetsaz I'm sure it'll be a lot of fun once you get it all sorted. You have some good mods and the compression to crank the boost 😁. Post up some videos once you get it dialed in! -
A musician's therapist (The $300 Z)
Dat73z replied to Zetsaz's topic in S30 Series - 240z, 260z, 280z
Looks great! How are you liking the turbo versus na? 😁 -
240z SCCA vintage race car, restoration
Dat73z replied to AydinZ71's topic in S30 Series - 240z, 260z, 280z
I'm prepping some pieces (louvered inspection lids, front grille, etc.) to shoot some epoxy today over bare metal. I've removed the rust and dolly'd it all out as straight as I can get. I'm going to try the strategy of epoxy over bare metal, filler within 24 hours, primer and guide coat blocking over that, thin coat of sealer e.g. epoxy, then single stage on top. In the past I've always done filler over bare metal then epoxy and everything over that but figured I'd change it up. At the end of the day, imo you just want to ensure all of your work is sealed and you get a combination of both mechanical and chemical adhesion. Which is why following the mfg instructions for cure/coat times is important. -
'82 280zx Turbo max boost without an intercooler
Dat73z replied to cpan's topic in S130 Series - 280ZX
Yeah I'm sure if you called GRW and asked them or incorporate a BOV they would be more than happy to accommodate. They do all sorts of builds and fab work -
'82 280zx Turbo max boost without an intercooler
Dat73z replied to cpan's topic in S130 Series - 280ZX
Depending on how much you care, if you get the CX kit you may need to modify the brackets. I thought the brackets would save me time but they didn't fit the s30 chassis well at all so I ended up tig welding and reshaping them a bit then making new holes. I should've just made them from scratch because I probably spent a few hours and $10 of welding gas just redoing them alone. Maybe they'll fit the s130 a bit better I know GRW works on s130s and are fairly knowledgeable/helpful so I'd give them a call and ask your Qs. They'd be able to let you know how well their in-house intercooler/bracket kit would work on the s130 as well -
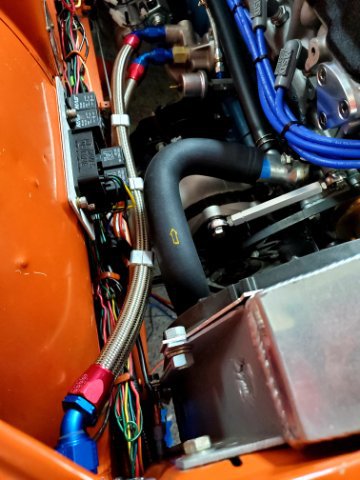
Thanks guys. I ended up proceeding with the straight lower outlet on the 240z sized radiator. I figure it'll give me more options if I need to clock the lower hose since clearances are so tight
-
A musician's therapist (The $300 Z)
Dat73z replied to Zetsaz's topic in S30 Series - 240z, 260z, 280z
If you're in need/interested in stainless hardline clamps I can give you the contact information of the guy who did mine. I was really impressed with the precision and quality. He's making some more clamps for my braided line now. I think they were like $20 per clamp -
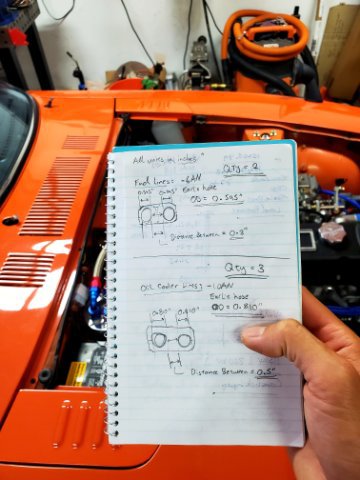
Thanks some quick mesurements would be super helpful! Btw, Wizard saves all these drawings so once we've figured it out you can just call them and get the same setup in the future 😁 Here's a pic of what I'm describing. I'm worried if the 280z lower outlet is physically lower then I'd need to run a non-OE hose or trim the vertical portion of the hose to get to the 240z outlet. Either way I could make it work, but since this is a custom order if I need to do that I'd rather have Wizard alter the design so I can just run a 240z hose with no mods necessary.
-
Thanks @Zetsaz. Do you recall if the lower outlet location (the straight portion before it bends) on the mishimoto is about the same as the 280z radiator? If yes, then it sounds like I can run the OE 280z hose without much trouble. I was concerned because the 280z radiator is taller, the lower outlet location would be lower or much different than the 280z.
-
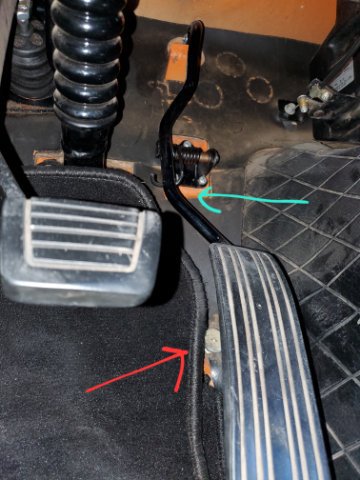
And here is what I am referring to. The pedl stop screw looks to be the red arrow and I was thinking of accentuating the bend a bit around the green arrow
-
Hello HBZ, I got my gas pedal hooked up last night to my triple carbs via throttle cable. I'd forgotten how much lower my gas pedal has always been relative to the brake and clutch pedals. I think for the gas pedal, there is an adjustment stop at the floor which lets me get more throw/pull on the cable if I need to adjust for the butterflies to all hit WOT. However, is there a way to adjust the pedal towards the driver more to get it more level with the brake and clutch? I was thinking of putting it in a vice and smacking it around with a hammer for a bit, but I figured I'd ask if there were other solutions before going down that path... Thank you
-
Hello HBZ, I'm currently having a radiator and fan bracket built right now and the question of the lower radiator hose/outlet came up. I don't know too much about the 280z but I think the radiator is maybe dimensionally longer due to the longer core support. I do know based on seeing pictures of the "late" OE hose that the outlet is straight out versus angled up like the 240z. The radiator builder (Wizard Cooling) has the option of the straight or angled fitting. My preference is to run the OE 240z lower radiator hose as the OE routing clears all of my fans and turbo cooler packaging just right. I've attached some drawings they had sent over to visualize. We're still sorting out the details but does anyone know if the 280z lower radiator hose will fit a 240z dimensional lower radiator outlet that is straight out without trimming? I was thinking maybe but I'm not sure if the 280z lower hose vertical length is dimensionally longer if the 280z radiator is dimensionally longer. If the 280z lower hose requires trimming how is the fit/is there an aftermarket hose that fits well and runs similarly to the 240z lower hose (but enters the radiator straight)? Thank you!
-
240z SCCA vintage race car, restoration
Dat73z replied to AydinZ71's topic in S30 Series - 240z, 260z, 280z
On the 1/4 panels with the exposed seam I'd use stranded filler. For the other areas you'll be ok using regular filler. Ideally you'd take that all down and rework the metal but I can understand why you wouldn't want to do that. Make sure you follow the mfg specs for sanding grits and prep exactly -
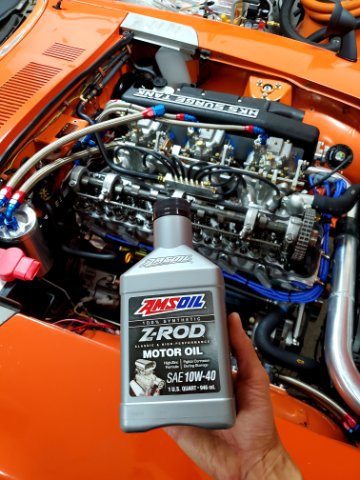
Thanks @AydinZ71. I'm not at the point where I'm rewiring the car yet but good resources for reference. Really just want to clean up all the accesories that somehow ended up on my battery terminals over the years. Got busy today making up for lost time with the wife. I went a bit overboard this last couple of days with the exhaust fabrication. Took it easy as started filling fluids. I'm going to try this Amsoil zrod 10w40. I don't recall if Rebello recommended any oil, I think he just told me to make sure I change it often and warm it up fully before beating on it. I'll probably dump all this out after a few hundred miles anyways as I shake the car down.
-
240z SCCA vintage race car, restoration
Dat73z replied to AydinZ71's topic in S30 Series - 240z, 260z, 280z
I was thinking you had some areas with pinholes, etc. maybe ok metal but not cut out and patched. Generally I would use stranded filler for any areas with gouges or pinholes, areas which require reinforcement. But best practice is to cut out and replace those areas, dolly, or pull them out as good as possible. You don't really want to be layering on the body filler thick on any area, just a skim coat which mostly gets block off. Your prep work sounds about right. Personally I'd go single stage non-metallic fleet color for easy match when things inevitably need touch up on a racecar. But since you already have the base/clear I'd stick with it. I think nowadays people prefer to epoxy to seal then filler over that. Whatever you do absolutely 100% follow the mfg instructions for prep, time, compatibility, etc. Your prep work will dictate the outcome. You can easily spend weeks guide coating and blocking the whole car multiple times over It's probably been 15 years since I did any serious bodywork. I was working on the mechanic side and moved over to help prep whole cars, repair rust and collision damage when things got slow
