-
Posts
64 -
Joined
-
Last visited
Content Type
Profiles
Forums
Blogs
Events
Gallery
Downloads
Store
Everything posted by 4.8240z
-
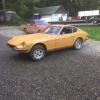
How I Fixed My Battery Tray and Frame Rail
4.8240z replied to 4.8240z's topic in Fabrication / Welding
Sorry about the bad quality guys last time I could not get the pictures onto the site because I emailed them to myself too large so this time I went small. When I get access to my girlfriends computer again this weekend I will re post the pictures. -

How I Fixed My Battery Tray and Frame Rail
4.8240z replied to 4.8240z's topic in Fabrication / Welding
Thank you seattlejester . I feel it is also worth mentioning to anyone getting ready to attempt this that my car was on a home built chassis jig i fabled up prior to this when all these repairs were done. I am sure it could be done just as easily if the car was straight and level and well supported on jack stands, just keep flex, sag and twist in mind as you set up and work. -
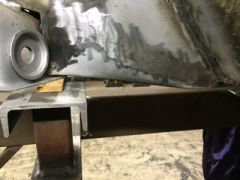
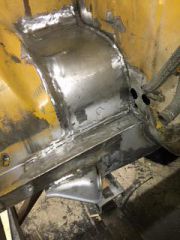
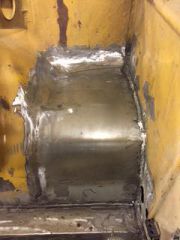
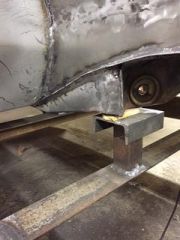
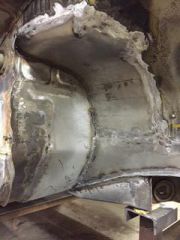
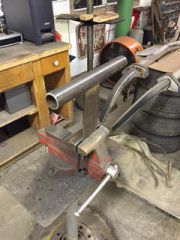
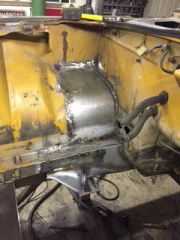
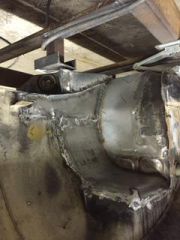
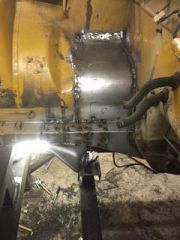
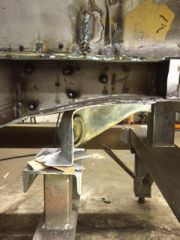
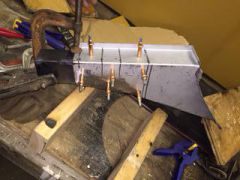
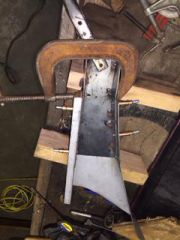
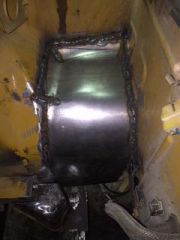
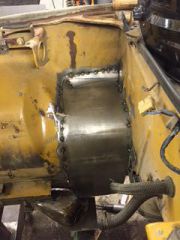
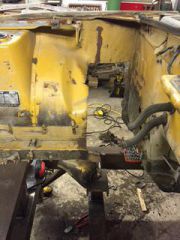
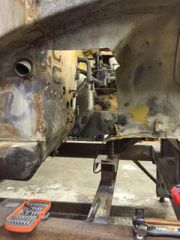
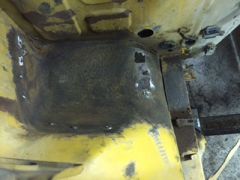
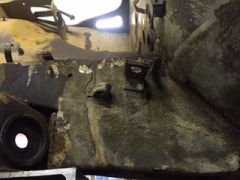
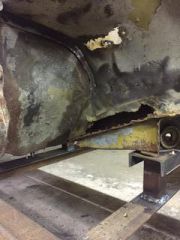
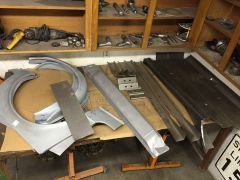
I finally got my firewall/battery tray/frame rail repairs all done and i figured it may benefit someone down the road who is sitting where i was a month ago wondering how the heck to go about it. This is my first patch panel i have ever done besides the floor pan i did prior to this so any constructive criticism is welcomed. I patched the firewall before i even started the battery tray but did not photograph it at all next time i will take significantly more photos. My methods of patching the firewall were quite simple however. i cut out all the rust in one big piece, i then took that piece flattened it out. Then the sheet was placed on a sheet of 20ga sheet metal where i traced it out i then cut it out on the outside of my sharpie lines leaving me 1/8 or so to work with. From there i patiently trimmed down the top half portion of it till the piece fit in the opening. I found a piece of scrap pipe that matched the oem curve in the firewall simply made the bend with my hands then tacked it in. from there i trimmed the bottom half in place with a cutoff wheel and pneumatic reciprocating saw till it fit snugly and tacked it in. after that i tapped the bottom 1" around the front of the new floor pan using a dolly to caress it some used some zip screws to pull it all together and spot welded the flange then welded the rest of the patch panel up, don't forget to drill your floor pan for spot welds prior tot his step. If your doing this go VERY SLOWLY with the welding. I knew this and still ended up with a considerable amount of warpage i had to hammer and dolly out at a later date. Also if you are not going to be able to get to a area at a later date such as areas between flanges or inside frame rails spray it with some sort of weld through primer prior to welding it in. When all this was done i started cutting out the battery tray and the frame rail till there was no more pitting in the metals and i had some nice metal to weld too. Here is what i was left with. At this point i was a little nervous having never made a patch panel from scratch but i went for it anyways. Attempt one was on a buddy's slip roll and we got the main bend down good, but when we tried to english wheel in the top compound curves we oil canned it severely. if nothing else it was a good excuse to use a english wheel for the first time. Attempt two we made a cardboard template transferred to plywood routered it to a rounded 3/4" edge and used body hammers to shape it around the curve while cutting relief cuts in the corner where the curve meets to get it to all shape accordingly. For the big bend that tapers down to the frame rail on this one we continued to use the slip roll. This patch panel would have worked but was not as aesthetically appealing as i would have liked so i cut off the compound curves and started over. Here is the trick to my final success a home made T dolly made in 20 minutes out of some scrap flat stock and pipe all cleaned up with a wire wheel. I then used the template i had made by tracing the line i had cut at the topmost two compound curves of the battery tray. This may sound confusing but i simply took a square piece of cardboard pushed it up where a flat piece of sheet metal would have fit in the hole i cut out and traced the topmost part of the removed section. Once i had it traced i added 2 inches out from that line to compensate for the bend i was yet to make, then i made sure it all lined up somewhat with the bigger radius i had already made on the slip roll, added a little excess to that cut as well and trimmed it all out. After this i shaped it with a T dolly and hand dollys, while trimming consistently for quite some time. I did not replace the flange to the fire wall as i figured a consistent weld would suffice. Here is the panel tacked in place. Here is the panel welded in place. I trimmed a little more off of the frame rail from the picture above so that the seam of the sheet metal weld and the frame rail weld would be staggered in hopes of not causing a weak link. I then cut the replacement frame rail from Zedd Findings to the length of the section i had removed making sure that all my cuts were very square and straight. When i test fit the section it did not contact the tc rod box as much as the original rail did so i cut the bottom most section of the frame rail free from the side pushed it down around the tc rod box till it fit how i liked while the replacement piece was clamped in place and then tacked it with some small scraps of sheet metal to span the gap. Down the road i trimmed a piece of 16 ga to fit that opening after tracing it onto a cardboard template then to metal. I then welded it all in ensuring great penetration then smoothed it all out. After this i built a insert that extends back into the replacement section of the rail extending all the way past where i had to cut it to form around the tc rod box. Leaving 3" out the front to slip into the original rail in the car. I figured this would give me peace of mind about the but weld and the modifications i made to make it fit around the tc rod box. Here are some pictures to help make sense of this. After this i drilled a good amount of spot weld holes in the original frame rail where the insert would go and in the replacement section where the insert would go and did a test fit. I used a level along the length of the existing rail on top to keep that line nice and straight, and a string line along the side to line it all up while measuring off the driver side frame rail to double check. When it all fit nicely and i got all my welds and drilled holes cleaned up for a nice fit i welded it all together and heres what i got. All my welds may not be apparent in the picture because i would weld and smooth in somewhat of a pattern to allow cooling time. After this the backside of the frame rail was still open so i cut the bottom of my welded in battery tray replacement panel so the whole cut line was centered on the backside of the top flange of my frame rail replacement. I then made a template of the missing piece, cut it oversized, then trim fit repeat over and over again till it fit snug. Don't rush this you don't want to get the the end and be disappointed with the final product. Here is what i had when i was done. I did construct my own tc rod box as well from 16ga sheet metal but this post has already gotten far too long so maybe i will do another write up at a later date. I apologize for the lengthy wording and lack of pictures, i did not plan to turn this into a write up till i got more into hybridz halfway through the process, so i will be more prepared next time.
-
It's a dang shame that parts car is in such rough shape the body lines looked incredible. I'm sure when it was in its prime that car looked incredible.
-

Installing Quick Time SFI Bellhousing with T56.
4.8240z replied to RebekahsZ's topic in Gen III & IV Chevy V8Z Tech Board
Perfect thank you I will shoot you over a text here very shortly. That makes sense with the certification I guess doing a window mod myself would make it pointless to get a steel bell housing in the first place then. I do definitely see where the benefit of the window comes in though and I really do want one so I may have to go about it the same way you are. Anyways I will text you here shortly thanks again for all the help.

