
mclark999
-
Posts
104 -
Joined
-
Last visited
Content Type
Profiles
Forums
Blogs
Events
Gallery
Downloads
Store
Posts posted by mclark999
-
-
Anyone here used this power steering for their Z or another power steering like it?
http://www.ezpowersteering.nl/index.php?lang=uk
They don't have a distributor/installer in the US, so I don't know if it's an option for me. Seems a lot more practical than adding Ford or Subaru power steering racks.
Comments?
-
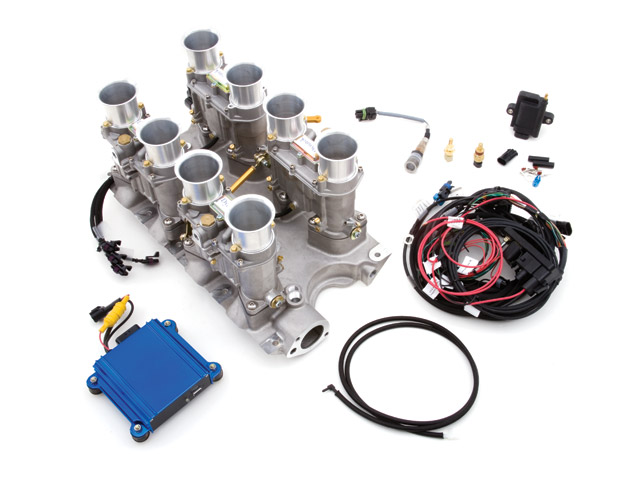
And if you're looking for a more original weber carb look add these throttle bodies.
They're manufactured by ENGL Production.
Sweet!
Thought about putting this efi on my V8 to make it look more proper, but at $6000, maybe not.

-
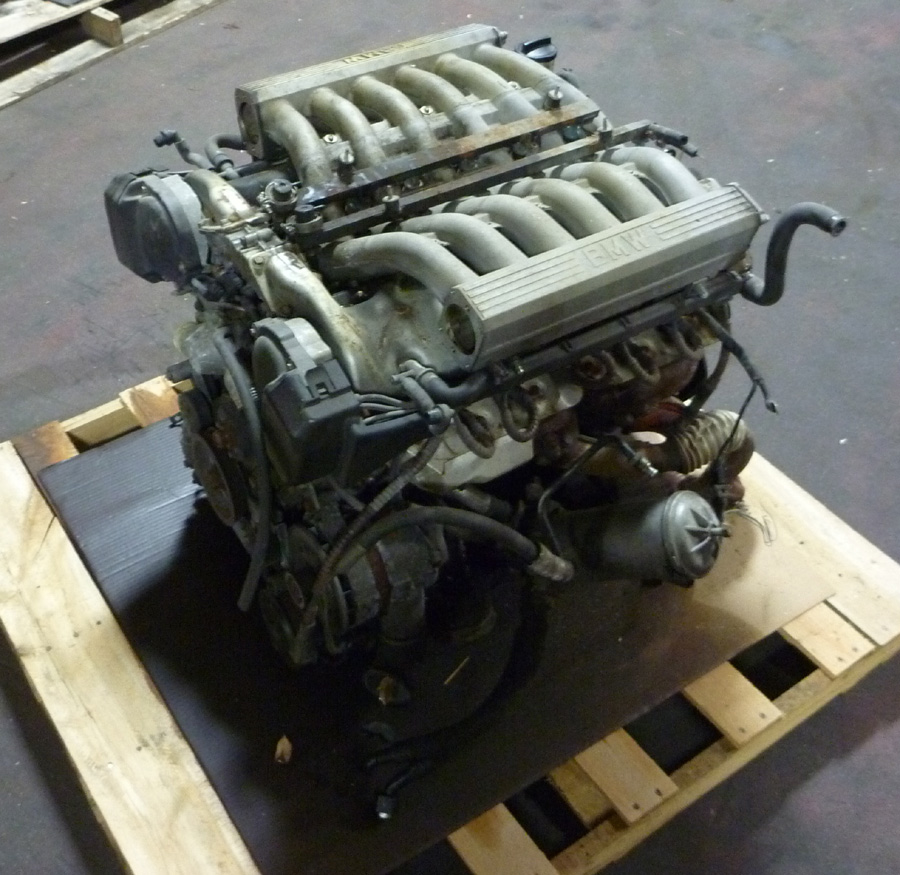
If you want a V12 for your car, here's the deal of the day at ebay. BMW V12 for $650. Just like Chelle has.
-
Rod - I'm on the East Coast but unfortunately a different continent! Thank you for posting the pages from the article they will be most helpfull when I start on the bodywork next year.
Just a little bit of encouragement for those still building their kits - Mine has just been taken off the rotisserie after nearly two and a half years, with the project now getting close to five years in total. Like most others I have other commitments and I treat this very much as a hobby. I enjoy each little milestone without worrying about when it will be on the road.
Are you making a custom intake manifold? I've never seen this one before.
-
Haven't posted in a while. Even forgot my password to the forum
Great to see everyone is working away and posting pics of thier progress.
They all look great!!
Had a chance to take mine out back in Sept.
Here's a pic.
Cheers to all and welcome to the new guys.
When I see how beautiful your car is, kind of makes me wish I'd done a coupe instead of the spyder. I have to say yours looks even better than the black one in Vanilla Sky.
-
Here's a GTO on ebay for sale.
Buy it now is only $4500. I paid more than that for my body kit.
-
Here's a GTO on ebay for sale.
Buy it now is only $4500. I paid more than that for my body kit.
-
As winter sets in (which for me means more time in the garage and less time on the bicycle) I start in with silly season.
So - Has anyone out there weighed their GTOs? If so, can you fill in the following on a reply?
Donor car (240, 260, 280)
Year
Kit type (Velo Rossa, McBurnie, Scorpion, etc)
Engine and transmission
Engine mounting type if V8(MSA, JTR, Scarab)
Total weight
Front weight
Rear weight
If you have all 4 corners weighed, that would be awesome!
If you haveen't done this, its a great excuse to get out their and drive your car. While you are out for a drive, stop by your local scales. Here's what one guy says about where to go to get this done cheaply. "I have weighed my car in two places in Washington and think that they
should hold true in Calif.
Any feed mill that has truck of train shipping will have scales. If they
charge at all it will be under $10
Also I have weighed my truck and trailer and my my car at the state weigh
stations.. If not busy, scale not open sign out but occupied they will
generally weigh you.. I have also pulled into a closed unit and put my car
on the scale and was able to read the weight thru the window. The charge to
weigh a truck is only about 5 bucks."
I would add your local recycling center for junk metal, copper, etc.
Please reply when you can. Hope this adds to our winter reading!
Mikey
-
Thanks for the scans.
Unfortunately, there is an earlier magazine article, from 1983, IIRC. I was in college, and that's the aerticle that got me interested, and I bought the mag. It has about 30 pictures of the build process, and a chart with some comparisons to a real 250 GTO.
It has since been pilfered after several moves.
thxZ
That's the article that got me exciteda about these cars too!. Funny, because I always loved that Shelby beat these cars with a mostly home made hot rod. At least, that's the shallow story. Actually took the Shelby coupe to compete successfully against the GTOs.
Anyway - in 2003 - 20 years later, I bought my Vello Rosa kit. I'm about 3/4 complete and very excited about getting it out for a test drive. Just tightened rear suspension (new springs, shocks, and bushings) last night. If you treat this as a hobby and keep at it, the building process can be quite enjoyable.
If you find a copy of that article, please pass it on.
Mikey
-
Doesn't look like anyone ever discovered what the actual strut model is?
I have a couple of other questions.
How is the shock held in the strut tube?
If the strut ever goes bad and the manufacturer quits making them, could you use a different strut?
I am thinking of these just because the installation is easier than sectioning struts. I'm worried if I section my own struts they won't be straight or the right length or something else. With the AZ kit that doesn't seem to be an issue. Am I right about that?
-
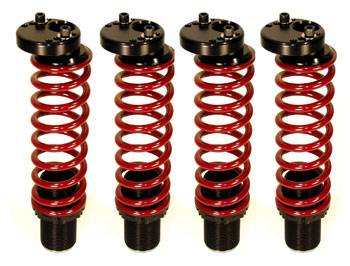
I have a suspension question. I posted this in the GTO forum as well. Hope I don't lose heaven points for that. I am completing my Velo Rosa buils and for our GTO kits we have to lower the front 2-3 inches to get the right look. I am going to go the coil over route to get the drop. The only question I have is what camber plate kit to use.
My main consideration is ride quality, noise, and clunks. Just to be clear, I don't care about performance other than tire wear. I am assuming I need camber adjustment to keep the tires from wearing horribly after I lower the car 2 - 3 inches. If that is not correct, let me know and I won't bother with camber kits. Again, my needs are ride quality and good tire wear.
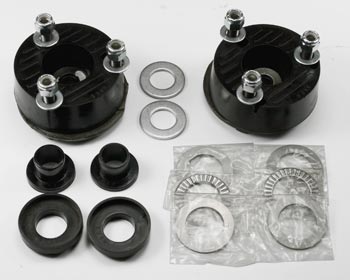
The Z store sells this kit that replaces the stock rubber mount with polyurethane. http://www.thezstore.../PSDC15/23-4188
Beta Motorsports has this one with a mono-ball bearing. It's mounted metal on metal. http://www.thezstore.../PSDC15/23-4188
Arizona Z car and ground control have other metal to metal mounts.
And of course I could use the original rubber mount, but would have limited camber adjustment. Not good with that much lowering.
IF you used the solid mount, does the car rattle or clunk over potholes?
Thanks,
Michael
-
I have a suspension question. I know I could post this in the suspension forum, but I want to hear specifically from the other GTO owners about their experience from moving to coilovers in the front and using a camber plate. For our GTO kits we have to lower the front 2-3 inches to get the right look. I am going to go the coilover route. The only question I have is what camber plate kit to use.
My main consideration is ride quality, noise, and clunks.
The Z store sells this kit that replaces the stock rubber mount with polyurethane. http://www.thezstore.com/page/TZS/PROD/PSDC15/23-4188
Beta Motorsports has this one with a mono-ball bearing. It's mounted metal on metal. http://www.thezstore.com/page/TZS/PROD/PSDC15/23-4188
Arizona Z car and ground control have other metal to metal mounts.
And of course I could use the original rubber mount, but would have limited camber adjustment. Not good with that much lowering.
What have other GTO owners done and how do you like it? IF you used the solid mount, does the car rattle or clunk over potholes?
Thanks,
Michael
-
Well, I did a little of all the suggestions.
The scissor jack only got me about 1/16th of an inch. The jack just wasn't open far enough to get enough leverage to spread the LCA any more. The jack was bending and would have broken if I pushed it any harder.
Then I trimmed about 1/16 off each bushing. Then I got the bfh and muscle and wedged it all together.
Getting the spindle pin in was a piece of cake. Here's why. I happen to have a really larger screwdriver that has a wide spot that is almost identical to the inside diameter of the LCA. I wedge the screwdriver through the passage way and twist it around until I get the LCA and strut perfectly lined up. Then I put in the spindle and tap it through. I imagine getting the spindle through the second bushing could be much harder if the LCA is bent out of shape.
So thank you all for your suggestions. Looks like the boys will have a merry Christmas and I'll have a pool table in the garage.
Happy Holidays everyone!
Michael
-
Pulled apart rear suspension. Got out old bushings, pressed in new polyurethane bushings and now.....
can't get the LCA back on the strut. The space between the bushings is now about 1/8th too narrow to fit over the strut. The bushings appear to be pushed all the way in.
Is there some trick to wedging the LCA back over the strut?
Santa is coming with a pool table and the wheels have to go back on so I can get the car out of the garage!!! Ho ho help!!!
-
I have no experience with the VR trunk Lid, but.....
With the 1st generation GTO nose, "long hood" there is only 1 1/2 inches between the Sugar Scoops and the leading edge of the hood.
I had always noticed how wavy other cars were right there.
Someone must have suggested, can't remember, but I
bonded a long strip of 1/8th inch steal under that thin strip of body.
I had drilled and pre-tapped 4 holes spaced from the ends and between the scoops.
With another tapped strip bonded to the inside bottom of the nose, I installed 4 turn-buckles. My hood to nose
alignment is always perfect !! Adjustable
I don't know if you have room to bond a "stiffener" to your Trunk Lid.
Just a thought
The trunk lid is really stout/stiff, but I might be able to put a stiffener in the tub and use that to hump it a little. I think I'll try that and then do a little grinding and filling as needed.
Thanks,
Michael
-
Hi everyone,
Steadily making progress on the VR. When I put the trunk lid on, I can see that its quite humped in the middle on the right and left sides. It's not that I don't have the lid supported properly. If I make the front and rear even with the tub, the middle is buldged. See the pics. I'll either have to grind it down even with the rear tub or fill in the rear tub to match.
I think I'm going to grind it down to the tub unless anyone warns me away from this.
I did use the Finish Line trunk hinges instead of the RX7 hinges that a lot of guys use. I like the look and chrome finish.
-
Has anyone had a custom car cover made for their Velo Rossa or GTO coupe? I'll be moving my car outside and want to protect it from rain, etc.
Any ideas on how I go about getting a custom car cover that fits well and looks good. I don't want it to look like a tent or a tarp.
Thanks,
Michael
-
I wanted to chime in and recommend John for the puller rental/purchase. I purchased one this weekend. I sent payment via Paypal on Saturday and the puller arrived on Monday! That's great service!
Haven't used it yet, but I can tell from the design it will work great. I will be glad to have it as I'm building my GTO/ Velo Rossa, I'll likely pull the spindles a few times getting the ride height and spring rate correct.
Thank you John.
Michael
-
-
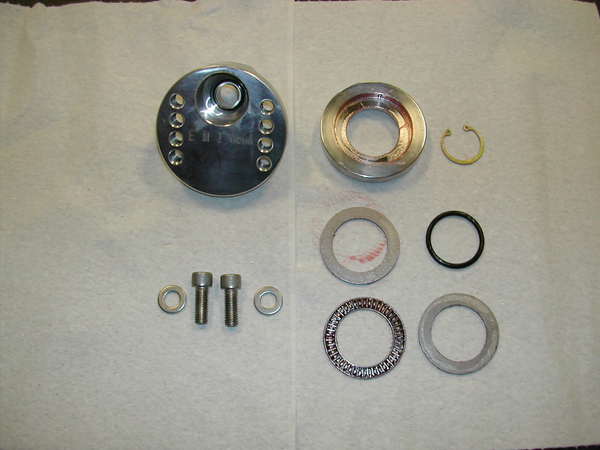
I need to buy bolts for my 77 280Z R200
I think that's what they are called. Picture below.
I rounded off several thread getting them out and cut them off.
They have a raised shoulder, fine thread and I can't find a place to buy them.
Any ideas?
-
If you've built a Velo Rossa, please post some pics and explanation of how you did the trunk latch, especially the striker plate. The manual says there is a backing plate built in, but mine has nothing.
I'm using the locking VW Beetle engine compartment latch.
Thank you,
Michael
-
Just depends on how bad you want the look. I've found the SRT fuel door new for around $500. It looks really cool, but is it worth it?
You can get the one below - not as racy looking - at summitracing for $50.
-
Hi everyone,
I'm considering going with a more modern look and putting on a cap like the ones pictured. I've also thought about just taking the easy way out and using the fiberglass door that John Washington includes with the Velo Rossa. It would be great if everyone would post a close up picture of their gas cap along with a 3/4 rear view of the car with the gas cap for comparison.
Ciao for now,
Michael
-
Hi everyone,
I'm doing a Vello Rossa body conversion (I may post this in that forum as well) and am wondering how much the reduced weight of the kit and cutting off the top of the car has raised the height of my car. I wish I had measured before I cut.
Can anyone give me a good way of comparing my frame height front and rear to a stock 280z?
For example could you measure from the floor to the jacking points or some other easy to reference point?
THanks,
Michael


250 GTO Owners Thread
in Body Kits & Paint
Posted
I had these two pictures up on my computer and my girlfriend walked by and said, "That bottom car gorgeous!" Which got me thinking all over again. Why doesn't anyone like Factory Five make a GTO kit car from the frame up that is dimensionally accurate to the original GTOs? I've heard Ferrari sues the pants off anyone that tries it, but since they were supposed to make 500 to really be homologated, and they made less than 50, then it seems like someone else ought to be able to make the remaining 450 or so.
Anyway, thanks for the pics! Keep using up the bandwidth. This forum is finally getting really interesting. For now, my goal is to get the car done with the VR body as it came. Once its on the road, I'll think about upgrades. Front suspension work continues this weekend.