Search the Community
Showing results for tags 'X-Pipe'.
-
One of the few things that I ever paid someone else to do on my car was the exhaust system. Eleven years ago, I bolted on my Dynomax block huggers and drove to the local muffler shop to have an exhaust system built. It was made of crush bent 14 gage aluminized steel and had a pair of Flowmaster mufflers at the back. I was never happy with it. It sounded alright, but the poorly made headers and even more poorly made exhaust were not something I was proud of. So last year I decided to do something about it: I removed the old exhaust and cut it into pieces so that I could not possibly reinstall it, then I built myself a set of custom long tube, stainless steel headers. The process was a serious pain in the rear, but it is now finished. To start the process, I carefully measured the front of my chassis and the engine to determine where all of the important features are in relation to the engine. I established a coordinate system with 0,0,0 at the back of the block, the x axis aligned with the centerline of the crank, the y axis to the driver side, and z up. In the process of taking measurements, I determined the critical dimensions necessary to route the primary tubes from the exhaust ports to the collectors without contacting the steering shaft, block, frame, driveshaft tunnel, and other things that get in the way. The critical dimensions include the position and orientation of each of the exhaust ports relative to the crank centerline. The dimensions were used to generate a SolidWorks model of the headers. Here are some images of the SolidWorks models of the chassis and headers. The routing of the tubes was calculated using a computer program that I wrote which takes the following parameters as input and gives the following values as output: Input: L1 Length of first straight section of tube exiting port S Desired length of Header tube Xp X Position of port relative to centerline of crank Yp Y Position of port relative to centerline of crank Zp Z Position of port relative to centerline of crank Orientation of port Xc X Position of collector entry relative to centerline of crank Yc Y Position of collector entry relative to centerline of crank Zc Z Position of collector entry relative to centerline of crank Orientation of collector entry Bend radius of mandrel bends used to make header. Output: Lengths of straight sections and degree and orientation of bent section required to route the header. The calculated header dimensions were put into the SolidWorks model. Many iterations were tried until I had models with which I was satisfied. Once satisfied, I made a fixture to build the headers using a junk engine on an engine stand. The fixture allowed me to rigidly place the flanges and collectors into their prescribed positions and to assemble the pieces into position for welding. The images below show the passenger side header pieces assembled and ready to weld. The hose clamps were used to hold things together for tack welding. The headers are now complete and installed, but here are some more pictures of the assembly on the garage floor prior to installation. I now have an exhaust that is all mine and of which I am not ashamed.
-
From the album: Creation of New Headers
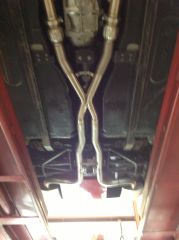
Installed picture of back portion of exhaust from underside

