Search the Community
Showing results for tags 'vented'.
-
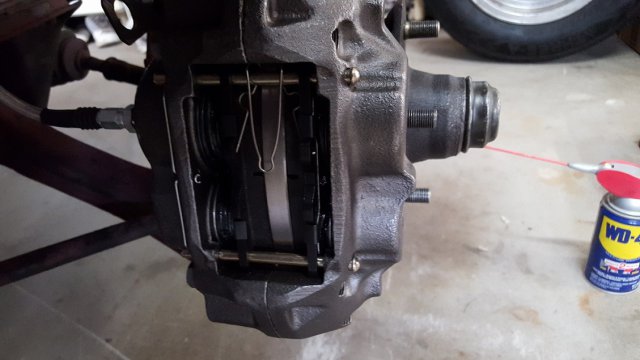
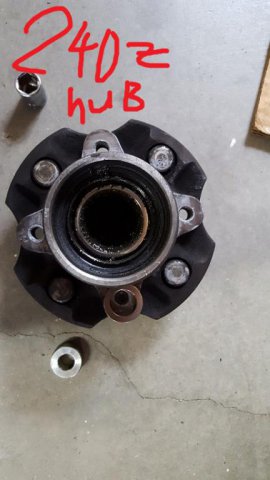
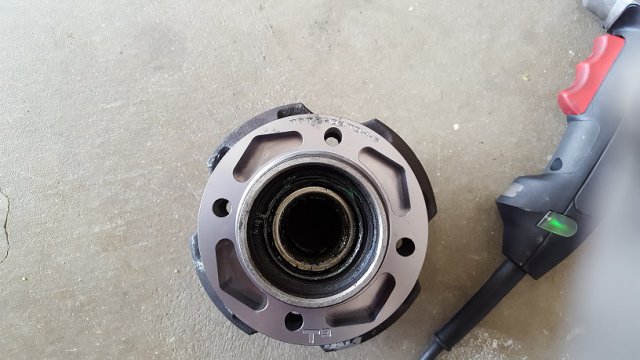
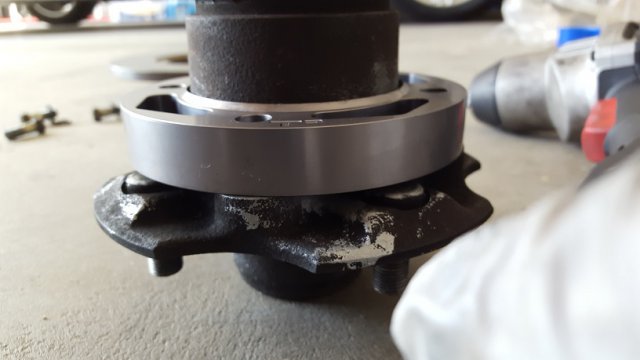
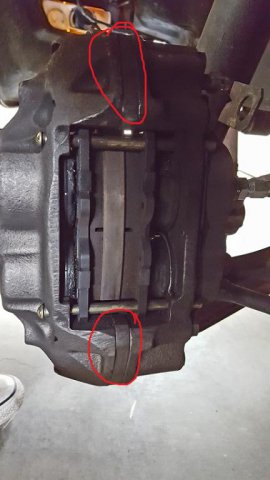
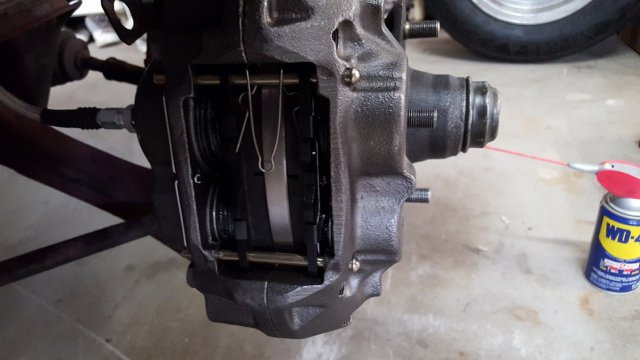
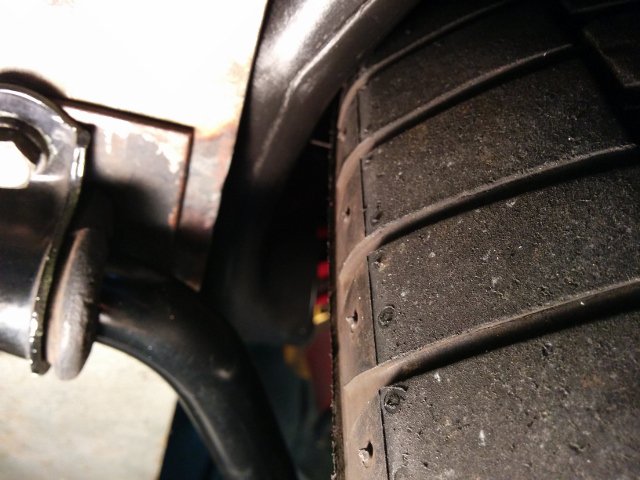
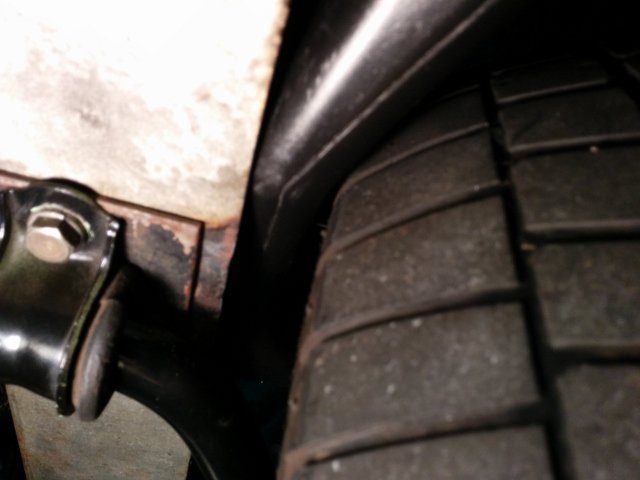
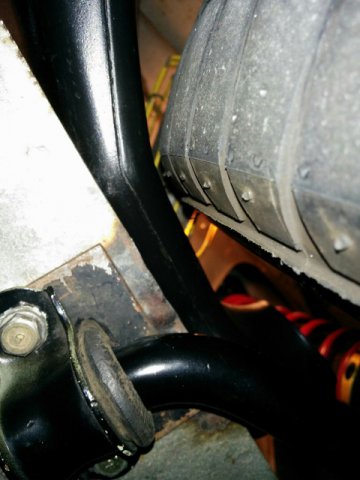
I wanted to try to upgrade my brakes mainly the S12+8 caliper. However, I ran into so many problems because I tried to piece it together with parts from friends and things I could find on a budget. After a long time of trouble shooting here are my problems that I ran into. All parts needed will be highlighted. 1. The 240z stock brakes S line. These won't fit any set of calipers you get from sumitomo/toyota ones. You will need to bend them but I just chose to delete it. I bought myself some braided brake hose with AN-3 leads and M10x1.0 FEMALE adapters since that's the thread and shape s12w, 12+8, stock etc use. (2) Brake hose -3AN straight to straight M10x1.0 female inverted to AN-3 male AN-3 male to M10x1.0 male inverted 2. What calipers did my friend just give me !!!! I was given some S12+8 VENTED calipers. This lead to ALL of my headaches. Thanks Man!!! Some people say that the (S12+8 vented) and (s12+8 non vented) are the same casting but I think that they are slightly different. What that means, simply, the calipers poke out more than your stock ones and the non-vented s12. This made me need wheel spacers because I am running the 14x6 0 offset slotted mag wheels. (Depends) Wheel Spacers for fitment 3. I ran stock 240z rotors (I have the stock hubs *they are finned*). BUT and this is a big full bodied BUTT. My dumb butt was reading the wrong build. So I had this horrible pad to rotor clearance. I could drive it but the pistons on the calipers were almost popping out. LOOK AT ATTACHMENT ONE AND TWO. 4. S12+8 vented needed different rotors and those rotors needed a spacer. So basically I am forced to upgrade to vented rotors... oh what a shame . I ordered some TechnoToyTuning spacers. This is a warning for (S12+8 Vented) people, if you buy the (S12+8vented) you are now doing the same build as s12W guys. Brake Hub Spacers 300zx rotors 1984 model LOOK AT ATTACHMENT 3 AND 4. ANITSIEZE the SH*T out of surfaces that touch The bolts provided with the Techo spacers where way too short. So had to buy new hub bolts. The thread for the hub bots are M10x1.25 length of depends. I got 40mm. 5. Interesting fact about S12+8 calipers. So some say that the castings are the same THEY ARE NOT!!!! Look in the attachments. I have pics showing what I mean. I have mixed calipers. Attachment 5 is considered a (S12+8vented) caliper and this shares the same casting as the (NONvented12+8) but notice the metal spacer in between the two sided(circled in red). This means that the caliper will stick out more and may interfere with your wheels and stock rotors will not work well. Attachment 6 shows a caliper without the spacer but it is also an S12+8 vented. This means the castings although are stamped the same they are different. 6. LASTLY........... You will need washers to put behind the caliper mounting brackets about 2mm (depends on clearance) (4) Washers to space out caliper TOTAL COST 250$ AND A HUGE HEADACHE
-

New Set Up for Cooling Front Brakes
inline6 posted a topic in Brakes, Wheels, Suspension and Chassis
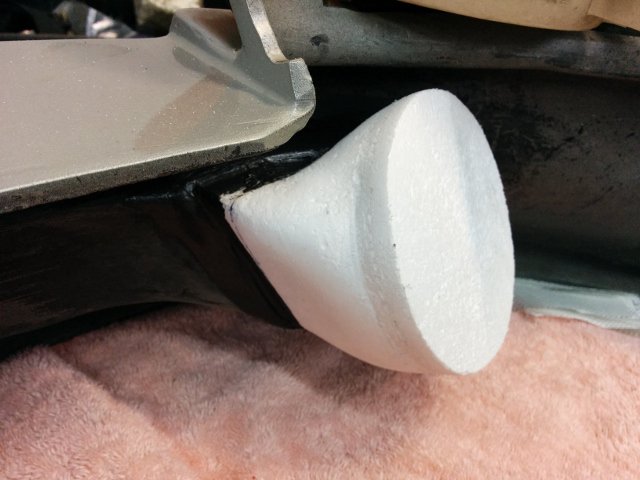
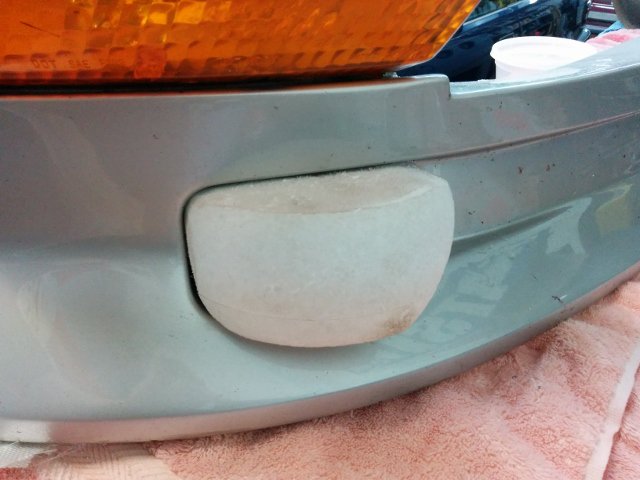
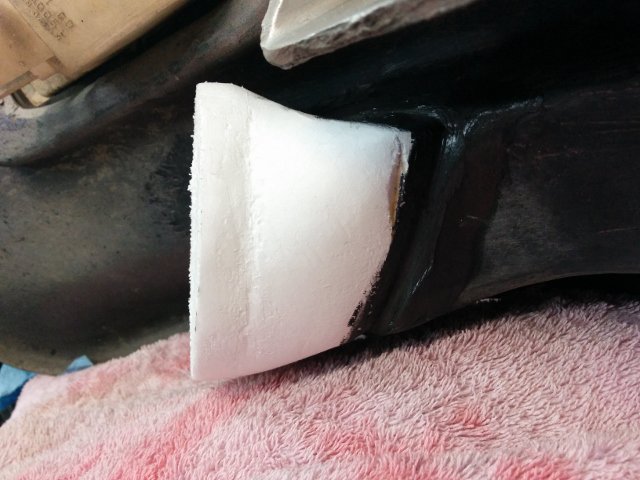
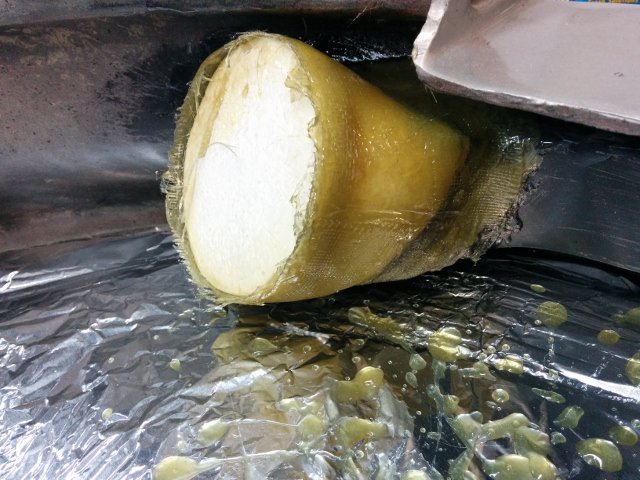
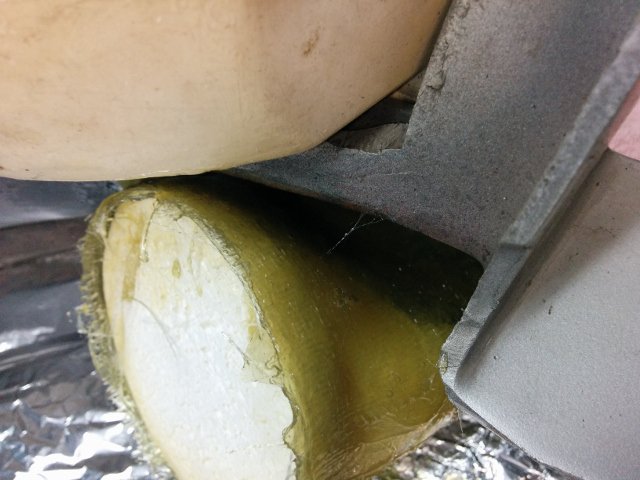
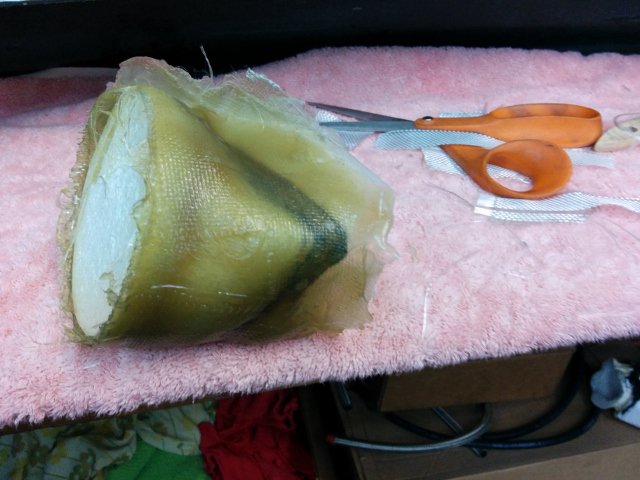
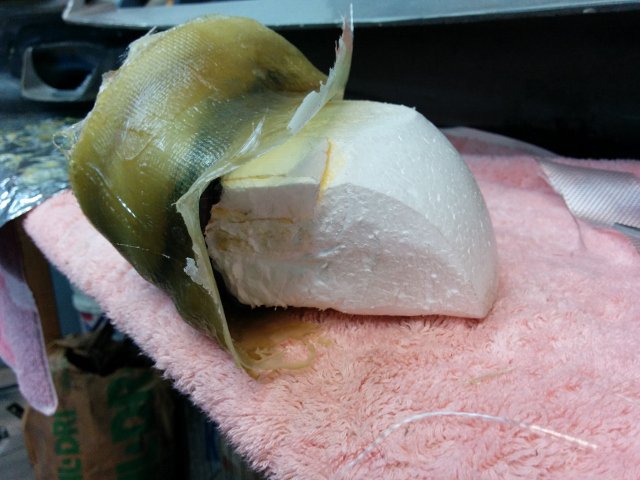
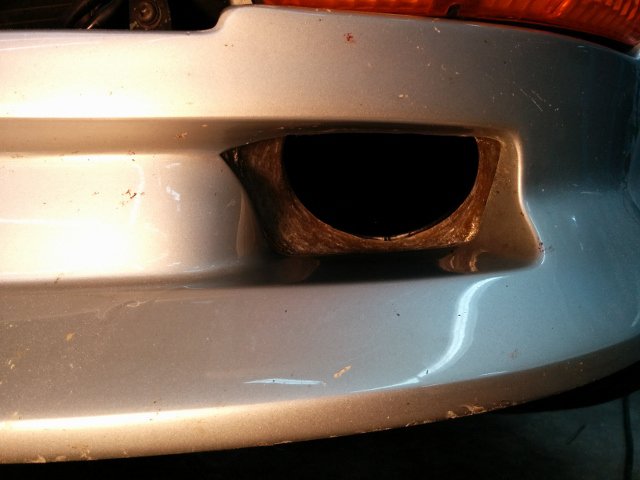
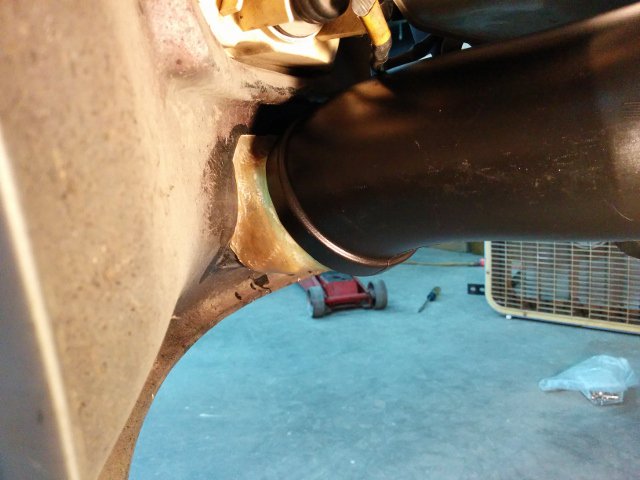
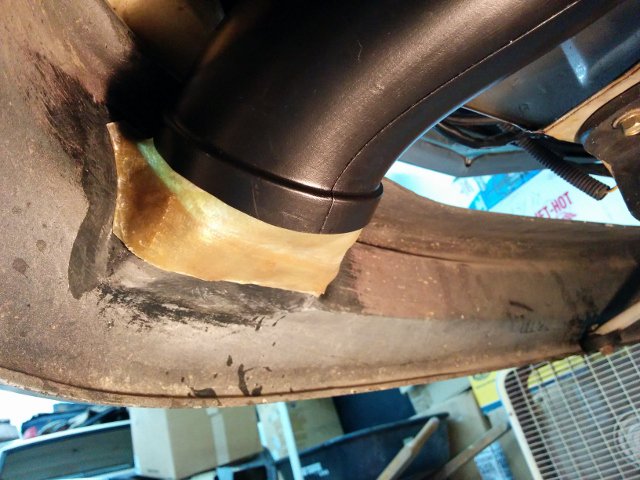
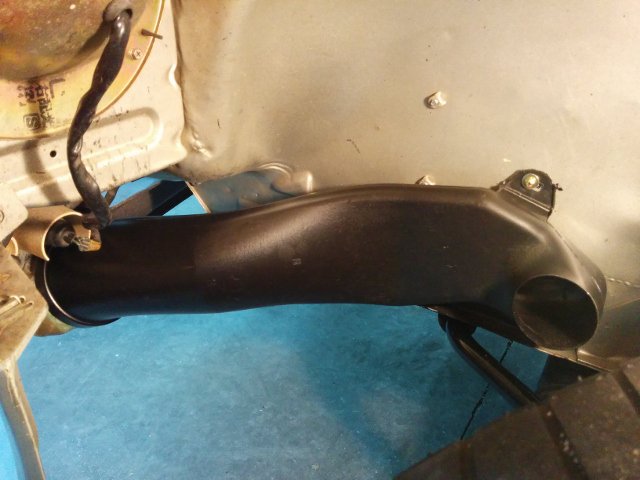
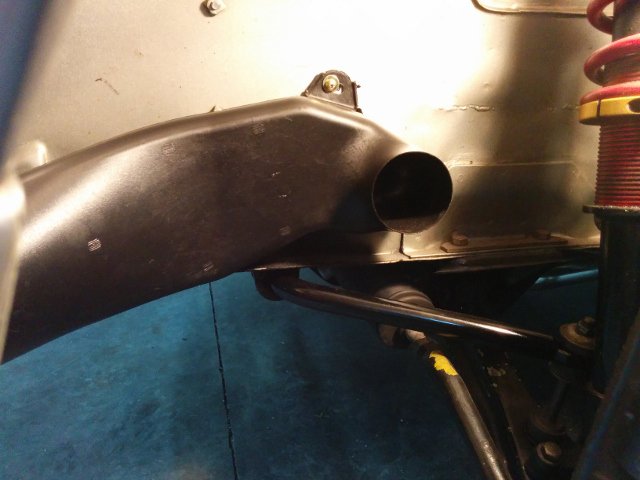
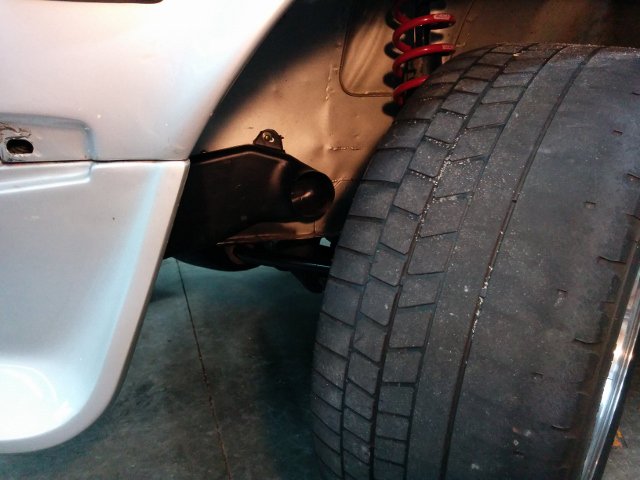
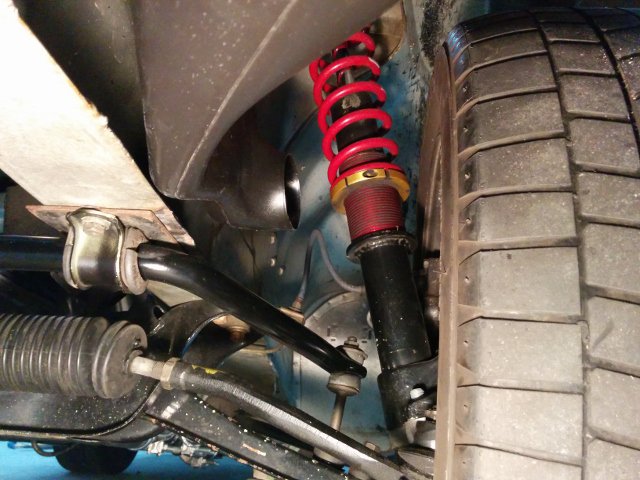
I've been working on installing some new brake ducts. I am running the common Xenon Urethane air dam. I was looking at my C6 Corvette Z06 brake ducts a while back and they looked like they might be good for the Z (240 that is). So I took one side off and mocked it up on the Datsun. It fit pretty well, so I ordered a pair. They are about $30 a piece if I remember correctly. I have had them a while, but finally got serious about putting them on because I am getting the car ready for a track event. To fit them, I made some styrofoam forms... One thing I did not know, as this is my first time making fiberglass parts - styrofoam is made from polystyrene. And, standard fiberglass resin is made of some type of styrene as well. That is not good, as the resin reacts with the foam - it "eats" it. Halfway through putting on two layers of cloth, my form was disintegrating. Luckily, I did them one at a time. And for this second one: I bought a can of spray "polyurethane". 6 coats of that on my second form put a layer of "urethane" between the resin and the styrofoam. The second form did not react with the resin. The black you see inside the fiberglass is some high temp silicone that I had on hand to seal the gap between the foam and the air dam - this kept resin from seeping through to the front side of the air dam. It was easy to remove after the resin cured. A bit of laquer thinner poured into the center of the foam and it melted away leaving the fiberglass part. After some clean up with my little air powered belt sander, it was ready for fitment: Not sure yet if I can go full lock on both sides without rubbing, but it looks like I have a chance:
