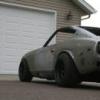
slammed_s30 Posted November 16, 2012 Share Posted November 16, 2012 (edited) Well If been working on my project for little over a year now and havent started a build thread here yet, so I just post everything I have from my local car club forum. Some of the posts may contain reference to local events or activites accuse those in advance.So quick intro since this is about the car and not me, Im Evan, full time college student studing geology and working part time at an auto parts store. So not alot of time for the car....This cover from Feb 20, 2012 up to presentAnyways I bought the z from a guy named Chris in Burlington WI, in October of 2010. He had purchased the car in Arizona and trailed it up here, but had run out of funding for the project. On the trip home from purchasing I began to smell the scent of burning oil, I called my dad who was towing the car and we only thought it was the old ford we where using to pull it, couldnt find any problems with the truck so we moved on. 20 miles down the road outside Lake geneva the rear diff of the Datsun locked up, broke all of the old bolts attached to the axles. Pulling over, he found that the rear diff was bone dry, not even a bolt in the drain hole. Would have loved to no it was empty before we left. We then had to do a road side repair so we could continue the trip home. We jacked up the car, used the tools we had to disconnect the axles and luckily made it home with no other problems. I know some of you are going to think why didn't you just pull it with the front wheels dragging, but the car didn't have steering rack arms so this wasn't an option. Heres a bad photo of the damage:^the passenger side axle connector bent and the lower control arms on both sides ended up getting deep gouges in them dew to the bolt snapping.This was very frustrating having this happen so early into the project, I located a used r200 on ebay for almost nothing because of a spelling error about a month later. By the time I got the rear end it was the middle of december the temp in 2010 was ridiculously cold to work outside but it had to get done. I dropped the blown rear end out of the car, and swapped in the new one over a weekend. At this point I had no need for a parts car other then to steal the motor and trans. I picked up a car in kenosha, wi from a army lady for 500, the motor/trans were strong and came with a 5 speed.The condition of the motor for my project car was unknown we I bought it, we had no luck to get it to turn over due to a bad stater. Once home and with a parts car I swapped the starter to this one and poured some gas in the fuel line before the injector and the old motor fired right up. Smoke and knocked like a SOB. Jumping ahead to the following spring the weather cleared up and I began working on my project. I started pulling the wiring harness's from the parts car and labeled each one, repaired any wiring "fix's" from the previous owner. And slowly over the coarse of March I gutted the entire parts car, labeled and boxed everything up and moved it to a storage unit about a mile or two away from my house. Some time in april my brother finished putting a mustang II front cross member into his 51' Chevy pickup, so his truck moved to the storage unit and I acquired a space in the garage. I pulled the motor and wiring harnesses over the coarse of that weekend, put the l28 from the parts car in, rewired everything, And it didnt start. I looked over everything, and found the ecu's had gotten' switch around and the motor wasn't getting the right codes to start. Changed it over and it purs like a lion. This bring the project somewhere in mid may. I had just complete my first year of college and was ready to start working all summer on my car, until my parent told us that the company my dad works for in osseo is demanding we move after working their for four years. We settled on a house and began getting ready for the move, putting a huge stop in my project. About a month before the move I was able to get a job were my dad works, he set me up working in the factory that produces his divisions material. From early june until a week before school started I worked as much as I wanted, the factory had a huge demand for overtime and I was loving the pay checks. I worked as much as I physically could, 84 hours weeks from june 20th until school started. 12 hours days stole all of my time and energy for working on my car, but it funded my school fees so it was well worth it. Once school started I was able to start work on my car again. The new shop was built and I had huge dreams of getting the car on the road by Halloween . I was able to drive it but the car just wasnt want I wanted it to be. Over the coarse of this time period I put in the spare tire well that was missing because the guy I bought it from was planning to put a fuel cell in it. Removed the oil based sound deadening to see what condition the floor pans were it, rust free. Along with countless small projects that had to get done. This puts it around October when I found this group. I had yet to touch the suspension, let alone the body work. Over winter break I removed the front and rear suspension components, repainted them and installed poly-urethane bushings everywhere. The car looked like any typical 70's stock datsun, with huge wheel gaps and soft 150k mile suspension. To fix this I decided on keeping the stock style suspension, but just to cut the perches that the springs sit on and lower the car this way. I installed tokico illumina shocks and springs front and rear, I have plans to do function form type 2 coil overs for a TEG or a pair of megan coils for a 240sx along with a different pair of rims for every day driving, but thats after this summer of work. The current wheels are diamond racing 15x10 -4.5 backspacing they will then become my autox wheels with slicks. Ive left out a lot of small jobs and semi-pointless ones to keep from boring you to death.Anyways here's how she sits today(feb 20th,2012):This last weekend I patched some issue areas, and fixed my gas filler tube hole. The hole was about twice the size it needed to be because of the previous owners plans to do a fuel cell.Heres some pics of last weekend:^had my brother man the camera, I used a piece of copper to back the metal to prevent having to grid the back side of the weld.^pre-grinding and drilling.^forgive the crappy quality camera, im not going to bring my dslr into the shop Edited February 27, 2014 by slammed_s30 Quote Link to comment Share on other sites More sharing options...
slammed_s30 Posted November 16, 2012 Author Share Posted November 16, 2012 I’m going to be replacing the roof on my car over the next couple weeks. Reason being the car had one of those classy dealer installed moon roofs from the 80's. I patched the hole sometime last year but the contour just is not right, I could put a small layer of bondo on it and it would be perfect, but I personally hate bondo, I’m shooting for a almost bondo free car. I have an extra roof from my old parts car, and I plan to take the skin off the extra roof and then swap the skins. Shouldn't be too hard of a job; just labor intensive separating the skins spot welds from both roofs. Still in the process of separating the skins. ^at the time I didn’t want to get into all the work of replacing the roof, my skills weren’t what they are today and I was not up for the challenge I knew it would be. The roof sample I used came from a 54 chevy farm truck which was sitting at a farm house that everything had to be scraped or burned due to the property being sold to a limestone quarry.. The shape was very close to the original roof so I trim it to fit and welded it in. ^as it sits tonight, the roof has a couple high and low spots dew to warping when I welded it. This results in the roof being like a drum. ^ This is what im working with for my extra roof. I should have taken pics before I started attacking it but I was excited to get to work. ^I’m using a harbor freight rotary spot weld bit, these things work wonders for only $5. With the assistance of my plasma cutter I was able to cut through the sub frame for the roof fairly close to the seams. Should have the skin off with about 5 more hours of drilling and cutting, then to repeat the process on the car. Quote Link to comment Share on other sites More sharing options...
slammed_s30 Posted November 16, 2012 Author Share Posted November 16, 2012 Right after the meeting I started working in the shop and I just got done at 12:45am removing the last of the spot weld for the replacement skin, worked a few hours past the time I wanted to . Removing the one on the car wont be nearly as much work since it dont have to cut through all the subframe for the roof. Id say 3 hours of cutting 1-3 hours of fitting and adjusting and 2 hours of welding and ill be all done with this. but first I have to wait for harbor freight to get more spot weld bits in, things break like tooth picks. Quote Link to comment Share on other sites More sharing options...
slammed_s30 Posted November 16, 2012 Author Share Posted November 16, 2012 (edited) Well after 7 hours on the road I got home and started to disassemble some of the parts, along with sanding down the door to see what I was working with. To my surprise the door had no bondo in the upper section, just alot of paint from two resprays, one small dent and a few deep scratches from some one grinding with to rough of paper. The lower half was as bad as I suspected. Its all the way through the lower lip and has one other large hole as well as peeling of the lips along the entire bottom section.I also ripped apart the turn signals, one of them the bolts just spun so I had to cut off the end of it. I then began to remove the lenses to clean under them, also to replace the bolt I cut. Well two screws holding on the lenses were very rusty resulting in the screw snapping off inside the lenses. I used every resource I had to try to get these out without breaking them, including my dad, no luck. Ill get them out, I got a few ideas. The black tray is the factory nissan battery cover, still flexible and the tube is in great condition, got that for free.I bought this perfect steering wheel for almost nothing compared to what one of equal condition goes for on ebay.Finally the cheapest item of the day, the rear chrome. By far the nicest item of the trip. No pitting/dents/deep scratches Edited February 27, 2014 by slammed_s30 Quote Link to comment Share on other sites More sharing options...
slammed_s30 Posted November 16, 2012 Author Share Posted November 16, 2012 So quick update on the project. I worked on the door tonight for a few hours, got all of it done but the welding. Overall I was very pleased with the outcome. I know everyone loves pictures so I took alot. Here's some pictures of the before: So I started by making some paper templates, grabbed some scrap 20 gauge and began. I used some 10 gauge pieces to make a straight, tight bend. Hammered it over the edge and flattened it out : I repeated the above process for the upper corner edge: I then started to address the back side of the door: Some before and afters. And here's the final product before welding, Ill finish it up tomorrow: Quote Link to comment Share on other sites More sharing options...
slammed_s30 Posted November 16, 2012 Author Share Posted November 16, 2012 I only had about an hour to work tonight dew to school work, I was able to get the pieces finished and tacked on the door, its almost a dead copy of the other two doors, Ill final weld once I have to time. Its about a 3 1/4 foot section so its going to take a good amount of a night to finish this up. I mounted it on the car to checked the curves and they all look good. Im going to have to spend some time adjusting/shimming it and get the gaps perfect on both sides so ignore those. More to come soon. Pics: Quote Link to comment Share on other sites More sharing options...
slammed_s30 Posted November 16, 2012 Author Share Posted November 16, 2012 I had a small amount of time today to do some work, I was worried about the turn signal lenses I recently bought so a went at them to attempt to get the broken screws out. I ended up being able to grab one with a small long nose vise grip and used some pb blaster, the other two I used a small drill bit on the press and slowly drilled them out. I still have one in because the screw decided to screw itself all the way to the bottom because of my right hand drill bits. Im going to pick up some left hand bits tomorrow and try to get it out. I cleaned them up (their covered in undercoating) and started polishing the lenses, should completely change the look of the car. Quote Link to comment Share on other sites More sharing options...
slammed_s30 Posted November 16, 2012 Author Share Posted November 16, 2012 Polished up my turn signal lenses covers, they came out looking like new. I used some 2000 grid wet sand paper to get any scratches out of them, then used a set of foam buffing pads along with some polishing compound. I also was able to get one of the female sockets soldered on the car, tested and the turn signal lights up. I have a common low beam/running light problem im going to have to address in order to get my running lights to work, once fixed ill post a pic with everything lit up. Quote Link to comment Share on other sites More sharing options...
slammed_s30 Posted November 16, 2012 Author Share Posted November 16, 2012 Heres the pics of the door I promised Quote Link to comment Share on other sites More sharing options...
slammed_s30 Posted November 16, 2012 Author Share Posted November 16, 2012 Still havent gotten a video worth posting, but I do have some other news, bled my master cylinder again since it felt like their was still a small amount of air in the lines. Holy **** this thing stops hard, cant imagine how hard it will stop once I upgrade the brakes. Put the new door on, lines up good. Anyways not much else I can do until the weather warms up as far as body work. Quote Link to comment Share on other sites More sharing options...
slammed_s30 Posted November 16, 2012 Author Share Posted November 16, 2012 Alright today I start to address one of the few problems left on my car. Some time in the past someone used a frame rail to jack up the entire driver side. Only problem is, the frame rails like the rest of the metal on this car are paper thin. This resulted in a huge crease, and bend in the middle of the rail. To fix this issue I have to use some back yard engineering. I brought home some metal to use from the factory. The plan was to use a long steel square tube, two jacks and some homemade items. I made a plate with a chain attached to it, the chain would then be attached to the square tubing. The plate was fixed to the frame rail at the point which needed to be moved. The square tube would be placed under the two jacks, I would then use these two jacks to push the car up and at the same time keep the square tube plant to the ground, as the car would rise the chain would slowly pull the rail down. Once the rail was in place I used a body hammer to hit the rail, this will realign the molecules within the metal. The easy way to describe it is that metal has "memory" and if you dont try to change that memory the rail will slowly change shape and will no longer be straight. ^ What was used to attach to the rail Quote Link to comment Share on other sites More sharing options...
slammed_s30 Posted November 16, 2012 Author Share Posted November 16, 2012 (edited) Built my adjust lower control arms(lca). Took alittle bit of time but the result was what I expected. I started by building this jig for the stock lca, The nuts hold it in place and are cheaper and more expendable to me then a piece a raw steel. The jig allows me to reconstruct the modified lca exactly the same way the factory had built them. I originally planed to build completely custom lca's but found it was pointless and to time consuming to just look cool. So what I did was measure and trim the ends off the stock lca's. Welded the bungs in while on the jig and the end result looks like this. Test fit it on the car then torn it back off, shot it with some paint and slapped it back on. I spent alittle time messing around with a few ridiculous camber angles and then started to dial it in to a more stock reading, still need to spend alittle more time getting it right where I want it, but Im very pleased with how they look, and I only spent about $30.00 on the whole project. Looking forward to attacking the a set of rear lca maybe some adjustable tension control rods and then putin' some coil overs. Next up is the rear quarter panel, patch a few trim holes, re-skin the roof, do some body work paint and windows then Ill be on the road. Anyone know of a shop in the area that does roll cages? Edited November 16, 2012 by slammed_s30 Quote Link to comment Share on other sites More sharing options...
slammed_s30 Posted November 16, 2012 Author Share Posted November 16, 2012 (edited) Removed the roof, only took two hours I was surprised. Found a "Park and Ride" receipt under the roof ski of all places, from a lot in Huntington Beach, Cal. which explains why the car is so rust free. Edited November 16, 2012 by slammed_s30 Quote Link to comment Share on other sites More sharing options...
slammed_s30 Posted November 16, 2012 Author Share Posted November 16, 2012 flare test fit.... Quote Link to comment Share on other sites More sharing options...
slammed_s30 Posted November 16, 2012 Author Share Posted November 16, 2012 So I havent posted **** for weeks, time to give you guys a little update(no photos, my bad). So I started work monday working 3:30pm to 2am mon-thurs with a high chance of overtime every friday, maybe Saturday come july so getting work done on the week days wont amount to much. Today I didnt work to hard, mainly soldered and extended wires to try to finish up the wire tuck. I have all the body harness tucked away but haven't worried about any engine wiring since I plan to swap something in and dont see the point. Im about 75% of the way finished with the body tuck just need to find a place to put a few random wires and connect all the wires to their corresponding sensors. Not sure how much Ill will get done next weekend since I plan to go to back to the 50's at least one of the days if not both. Quick question for those of you who know autocross rules, what class would a car with a different engine be placed under? Major things to do to get it on the road (Goal, End of July, 5 weekends to finish not counting next weekend) Finish Wiring Reinstall Radiator and Fan Replace drivers side quarter (Optional if time allows) Do some kinda of a roll cage, either just a rear crash bar or go with a 12 point cage Re-skin roof Patch rear side turn signals Paint Prep Paint Glass/Seals Install and polish all Stainless Steel trim pieces Interior Send registration to madison Double check all suspension bolts, re-torque to correct specs Check/Fill fluids Front Wheel alignment Adjust rear brakes to stop rubbing Wait for plates Quote Link to comment Share on other sites More sharing options...
slammed_s30 Posted November 16, 2012 Author Share Posted November 16, 2012 Just a quickie; went to "Back to the Fifties" today absolutely awesome. Got home around 9ish then got to work, I finished soldering and plugging in the remaining wires, everything turns on, but my battery was somewhat dead and it just clicks. Put the charger on it over night, tomorrow we'll see if it fires or if I need to go hunting for bad connections :fingers crossed: Along with getting it running and driving tomorrow I hope to get the rear hatch, along with under the hood sand blasted then primed. Also going to try to replace the bad portion of the rear quarter panel. If I have time Im going to mock fit my roof for a future date, maybe place the front and side glass into place and take some photos then send the registration off, I should be ok with a partial paint job right? Quote Link to comment Share on other sites More sharing options...
slammed_s30 Posted November 16, 2012 Author Share Posted November 16, 2012 (edited) Little progress today, sandblasting took forever with all the tight corners and creases. Turned out looking great tho, now all I need to do is fill the hole that were drilled for a spoiler and the factory emblem holes then I can apply a then layer of bondo and paint. I decided not to work on my wiring today since I have a couple thing in mind for my interior. Also helped sandblast the inside of my dads 32', that was a real chore. Also helped build a electrolysis bath for stripping wheels and other small items as opposed to sandblasting. If anyone is interested just ask and Ill do a post on how it works and what you need. If you like metal shaping check out the link below. (32' Ford build thread here: http://www.jalopyjou... ... 78&page=18) I substituted my time and addressed the worst remaining body work on the entire car, the lower radiator support beam. I cut it out at the areas which require the work the remaining section is perfectly fine. I have the part curing in a molasses bath right now to remove all that rust. Ill be at iola saturday, so sunday hopefully I can get the beam fixed and back in and maybe start on the rear quarter damage which should just be a cut and paste job. Then attack the interior and see If i cant get a dash box built at work over the coarse of a few breaks. Edited November 16, 2012 by slammed_s30 Quote Link to comment Share on other sites More sharing options...
slammed_s30 Posted November 16, 2012 Author Share Posted November 16, 2012 Pulled the front beam out of the molasses, rust is all gone. Few more days and the paint would all be off but Im not worried about that. Should be able to work on it sunday when I get back from Iola. Quote Link to comment Share on other sites More sharing options...
slammed_s30 Posted November 16, 2012 Author Share Posted November 16, 2012 (edited) Just post this in case anyone interested... Electrolysis is a technique used mostly for removing rust but it take all the paint off as well as any oxidation which may have occurred. Be careful not to use with on any pot/exotic metals as it will quickly erode them away, same goes for molasses these techniques are strictly for Steel and Iron. Do not cover, hydrogen is produced which is extremely flammable. Also this will kill grass completely, as in some times never coming back due to so much Fe in the soil. Here's What you need: A plastic tub; an iron electrode, water and washing soda (Arm & Hammer, for example) and a battery charger. About a tablespoon of soda to a gallon of water . If you have trouble locating the washing soda. Also household lye will work just fine.You might want to wear gloves. NOTE: It is the current that cleans, not the solution; nothing is gained by making a more concentrated solution but do try to stay close to a 1:1 ratio -- DON'T!THE POLARITY IS CRUCIAL!! The iron or stainless electrode is connected to the positive (red) terminal. The object being cleaned, to the negative(black). Submerge the object, making sure you have good contact, which can be difficult with heavily rusted objects. Get it backwards and your object will be relentlessly eaten away! Make connections on a part of your electrode that protrudes out of the solution, or your clamps will erode rapidly. How do I know if it is working? Turn on the power. If your charger has a meter, be sure some current is flowing. Again, on heavily rusted objects, good electrical contact may be hard to make-it is essential. Multi-part objects may not have good electrical connections between them. Try to use a heavy guage wire to send the current, I have matched the gauge of the wire coming form the battery charger. In the above post you can see I was using welding wire, I have since replaced that with 3 strips of fence wire spun together with a drill, fray the end and connect in three different spot to help ensure a better connection. Fine bubbles will slowly begin to rise from the object when cleaning is in progress, takes anywhere from 15-30mins. Use the 10amp setting on your charger the ideal setting is 6. something but 10 works just fine. How long do I leave it? The time depends on the size of the object and of the iron electrode, and on the amount of rust. You will have to test the object by trying to wipe off the rust. If it is not completely clean, try again. Typical cleaning time for moderately rusted objects is a few hours. Heavily rusted objects can be left over night. If your objective is to remove baked on paint from say a pair of wheels it may a day or two. How do I get the rust off after I remove the object? Rub the object under running water. A paper towel will help. For heavily rusted/ painted objects, a plastic/brass pot scrubber can be used, carefully. Depending on the amount of original rust, you may have to re-treat. The amount of mechanical action will depend on the fragility of the object. Use your discretion. My object is too big to fit. Can I clean part of it? Yes. You can clean one end and then the other. Lap marks should be minimal if the cleaning was thorough. This process is "line of sight", In other words, if the rust is on the bottom side there has to be an electrode on the bottom side. I had a pic of my bath but I cant use this type of image extension it says... My bath 36"x48" 36" deep, steel re-bar, and non galvanized fence wire. I used some 4ply plastic from work and just tripled it up to prevent any leaks. I filled it with 5 gallon buckets to keep track on the number of gallons so my washing soda concentration was correct. -------------------------------------------------------------------------------------------------------------------------------- Molasses is what I use on item where I cant get to the side with electrolysis like the beam. You may choose to cover or leave this uncovered, covering does cause fermentation which will speed up the process but does cause a strong smell. Youve been warned. Here's What you need: Liquid feed grade molasses(blains)2.5 gallon, water, plastic container; glove are recommended once again. You may want to increase the amount of solution you produce if you are cleaning rims or a large panel. You can either just increase the amount of water or add equal portions of molasses and water. Molasses does run about $15 for 2.5 gallons, but it cleans for an entire summer so its a one time expense. Unlike electrolysis which requires power 24/7. What do I do? Mix about 2 gallon of water in with 2 gallon of molasses, mix thoroughly. You may choose to use a less concentrated mix but I recommend this as it works fast and is easy to get off. How do I know if it is working? You wont, you just have to be patient. But it will work, just give it some time. How long do I leave it? The time depends on the size of the object. You will have to test the object by trying to wipe off the rust. If it is not completely clean, try again. Typical cleaning time for moderately rusted objects is over night. Heavily rusted/painted objects can be left for a day or more until the paint is flaking and can be removed with a fingernail. b]How do I get the rust off after I remove the object?[/b] Rub the object under running water. A paper towel will help. For heavily rusted/ painted objects, a plastic/brass pot scrubber can be used, carefully. Depending on the amount of original rust, you may have to re-treat. The amount of mechanical action will depend on the fragility of the object. Use your discretion. My object is too big to fit. Can I clean part of it? Yes. You can clean one end and then the other. Lap marks should be minimal if the cleaning was thorough. Any other questions just ask. Each process has its advantages for certain items. Plus side to molasses is deer, squirrel love it so you can just pour it out(not on grass) once finished with it. Edited November 16, 2012 by slammed_s30 Quote Link to comment Share on other sites More sharing options...
slammed_s30 Posted November 16, 2012 Author Share Posted November 16, 2012 Spent a few hours of the day working on the beam, tomorrow Ill patch the holes and final weld the beam back into place. Before: After: Quote Link to comment Share on other sites More sharing options...
Recommended Posts
Join the conversation
You can post now and register later. If you have an account, sign in now to post with your account.