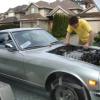
mtnickel Posted December 6, 2013 Share Posted December 6, 2013 Now perhaps this solution is obvious and need not be documented, but I thought I'd throw some pictures up to show that it's possible anyways. Sorry there aren't more pictures, I wanted to get it done and the camera sat at the wayside. Step 1) Cut off pan close to the flange. Now you can cut parallel to the block, but that will result in a reverse pan tilt when it goes back on backwards. I opted to cut parallel to the bottom of the pan. This means taking off about an inch more on one side. Here's the flange once that's done: Step 2) Cut out the baffling step 3) Measure approxiamate sump height from engine block. I believe I used 3 pieces of wood I had lying around (2 the same height sitting on the block lip. step 4) Cut sump off. Use a tubing cutter if you can to avoid blasting any media down into the screen if using an angle grinder. You could also use some sort of plug and shove it in past the point where you are going to cut the tube. Step 5) Using your measurement you made above rotate the sump and tack it when it's about the same pan depth. You can even go a little bit deeper if you want, but your pan will be a touch deeper too if you do so. You can use your imagination for this step. You can be lazy and make 1 tack, then bend it till it sits where you want it. If you do that you'll have to fill a gap when welding. OR Hold the sump where you want it and try and make note of how the angle needs to be changed if at all in order for the flanges to meet perfectly. Then shave down one side till they sit nice and flush. Tack, then weld er' up. Also make sure this does not leak. I slathered mine with jb weld but was already pretty confident they were solid welds. Step 6) Prep baffle. Since the baffle was originally facing the other direction, the louvers are now the wrong direction relative to the windage in the engine. I assumed they were faced a certain way for a reason. I may be wrong on this, and they were stamped like that randomly, but I didn't want to chance it. So i just took a large screwdriver and bent all the louvers in the opposite direction. I'm OCD like that. You also need to notch out the tube portion of the baffle so that the pan can be installed easily. step 7) Tack up the baffle where you want it to the flange. Rotate the engine to make sure it doesn't interfere. This is why it's redneck style in that i used 4 plastic bags to seal the engine bay while tacking. Plastic = dumb. There was only a couple burn holes in the bottom layer during this step, but that means a few nuggets of metal down in there somewhere. I eventually rotated the engine over and did a full flushing with a solvent and air wand. More on that later. Ideally you'd want some sort of leather or flame proof fabric. Woven fibreglass perhaps? Alternatively you could secure it with 1 minute epoxy, then remove it and weld, or even use a few angle brackets and screws. Step 8) Setting up the pickup-pan clearance. This part is mildly difficult, but again just requires a little creativity and ingenuity. You'll find that with the pan flipped it will not meet all edges on the flange side. It will actually require a 1" strip or so on the side closest to the pickup (see photo in following step). To set the gap I simply used a 1/8" spacer sitting on the pickup as a guide. The pan will sit on the backside edge aprox flush, but it will otherwise float in mid air and rest on the pickup so you know your pickup height is close. tack weld the backside edge and tack a few brackets on the front to hold everything in place. Step 10) Remove the flange from the engine. Screw it down something sturdy (old piece of countertop or maybe a piece of 2x12 would be wide enough). Step 11) Tack weld the backside edge every inch or so and you can use a mallet to bring to two pieces close together. Here it is back on the engine. I used some clay on the pickup this time to make sure it was still sitting close. Step 12) cut a filler piece for the gap on the short side and weld ER UP! Step 13) Check for leaks, or if lazy just slather all welds with JB weld. Step 14) Thoroughly rinse pan with solvent or whatever else you want to clean it. Then blast with air to assure no welding bits in there. Step 15) Paint and enjoy! I'll try and post some better closeups of the pan on it's own. For now, here's a mess of my garage and the RB awaiting Test fit. Red Wrinkle paint valve covers and all. Engine and Freddy Manifold: Quote Link to comment Share on other sites More sharing options...
mtnickel Posted December 6, 2013 Author Share Posted December 6, 2013 (edited) note that you will have to either modify or not use the support brackets that support the bottom of the transmission. The passenger side one will likely need very little modification, but the other side will likely need to be slimmed down quite a bit and then perhaps reinforced. Edited December 16, 2013 by mtnickel Quote Link to comment Share on other sites More sharing options...
mtnickel Posted December 7, 2013 Author Share Posted December 7, 2013 On another note. Since I was lazy/careless and had the possibility of weld particles dropping into my engine as I said earlier, I rotated it upright and blasted the heck out of all the crevaces with an engine cleaning gun. Valve covers off and everything inspected. After that there was a chance the oil had been washed out of journals, so I primed the engine as follows: 1) Pull spark plugs (compression would be bad for bearings and maybe damage stuff) 2) remove pan and sump 3) Flip engine upside down 4) put funnel in sump hole 5) Crank by hand till oil pump, filter, cooler, and system is primed. Should see oil start to ooze from main/crank/cam/and hydrolic lifter spaces. Quote Link to comment Share on other sites More sharing options...
Recommended Posts
Join the conversation
You can post now and register later. If you have an account, sign in now to post with your account.