KAZU Posted May 7, 2015 Author Share Posted May 7, 2015 Probably here.... http://www.rhdjapan.com/search/?q=Marugen%20Shoukai Basically identical to them. Mine were from Yahoo auction. Quote Link to comment Share on other sites More sharing options...
Sovereign Z Posted May 8, 2015 Share Posted May 8, 2015 (edited) I apologize. i'm looking for fenders like the OP posted above for the US spec front end, i beleive that kit on RHDJapan is for the GNose but the standard kit will work for the standard nose. thank you Edited May 8, 2015 by Sovereign Z Quote Link to comment Share on other sites More sharing options...
KAZU Posted May 21, 2015 Author Share Posted May 21, 2015 Finally I'm back to the road course! I bought QuickJack BL3500 and the up-down controler was replaced with a wireless control. Mine has a DC motor and a 8-cell LiFePO4 Ballistic motorcycle battery. It works fine. On the way to or back from the road course, my car occasionally stopped running and called the road service. The wiring was unreliable because my priority had been to let the car run. A pair of 37-pin CPC connectors are added on the bulkhead and the ECU was relocated under the passenger side airbag lid. Dash is Mercedes C-class. Rear wing is for road course run only. E36M3 spindles will be the last modification of this project. A/C stopped working. The compressor is toast. All components has been replaced. Quote Link to comment Share on other sites More sharing options...
KAZU Posted June 20, 2015 Author Share Posted June 20, 2015 Ran off the track and hit the guardrail at Autopolis circuit. Too much power for me. Quote Link to comment Share on other sites More sharing options...
Sovereign Z Posted June 20, 2015 Share Posted June 20, 2015 Didn't you just do go off road last year? I think high hp sounds good, but really in this chassis, only 250-300hp is all you need. Hopefully you get her back on track soon. Quote Link to comment Share on other sites More sharing options...
KAZU Posted June 20, 2015 Author Share Posted June 20, 2015 Didn't you just do go off road last year? I think high hp sounds good, but really in this chassis, only 250-300hp is all you need. Hopefully you get her back on track soon. Correct.This is my first high hp motor which easily lose tire grip by right foot pedal. I need some skill-up training to drive it. Quote Link to comment Share on other sites More sharing options...
KAZU Posted July 25, 2015 Author Share Posted July 25, 2015 Both sides of front frame have bent. I decided to replace rectangular tubes. Advantage is that this is good opportunity for me to put the BMW front suspension. Also, I have realized that the steering feedback was weak. I found and bought correct spline u-joints for Z4 rack and Suzuki EPS column from Framing River. Quote Link to comment Share on other sites More sharing options...
RebekahsZ Posted July 25, 2015 Share Posted July 25, 2015 (edited) I've always wondered how the heck you can control the power when boost comes on coming out of a corner?? Edited July 25, 2015 by RebekahsZ Quote Link to comment Share on other sites More sharing options...
KAZU Posted July 25, 2015 Author Share Posted July 25, 2015 I've always wondered how the heck you can control the power when boost comes on coming out of a corner? I looked in-car video and logging data. My understanding is that the counter-steer was too late and not enough. So the most effective solution may be joining some drifting training events with low grip tires. At the hair-pin exit (around 4'40") http://www.youtube.com/watch?v=UR9oIHBrDSE 1 Quote Link to comment Share on other sites More sharing options...
KAZU Posted August 30, 2015 Author Share Posted August 30, 2015 (edited) Update. Flaming River U-joints, 16.5mm-36-spline to "3/4 DD and "3/4-48-spline to "1 DD fit onto Suzuki EPS column and Z4 rack, respectively. The 16.5mm-36-spline actually is not for Suzuki but for Mustang. Also the other spline is not for BMW but for American oval/dirt components. Reinforcement plates were welded near the engine mounting bolt holes. Well known to be prone to cracking. Cross member of E46 has positioning bosses at the rear mounting bolts. I fabricated reinforcements/nut fixtures and let them slipped into the frames and welded. Test fit. Internal distance is wider than stock so that Genuine BMW engine mount rubbers can be used. Frame are not horizontal, but raised at the front. The angle from horizontal was around 3 degree. I've gotten Bimmerworld bump steer kit. The tie rod end almost bind near the 1 G height and the bump steer adjusting range is limited. I ordered two pairs of the high misalignment rod ends from QA1 and a pair of "1 longer bump steer studs from Allstar. The frame rails and cross member are placed up side down. I tried to figure out how I fabricate the TC-rod bracket. I'm considering the heim bolt to be placed vertical for anti-dive adjustment. Edited August 31, 2015 by KAZU Quote Link to comment Share on other sites More sharing options...
KAZU Posted October 3, 2015 Author Share Posted October 3, 2015 (edited) To make new engine mount brackets I had to remove front turbocharger. I decided to disassemble the engine. I've not checked the internal after the event, rear of the stock bnr32 turbine wheel blades had been disappeared. As expected, they went back to the combastion chambers. Also there are scratches on the rear three cylinder walls. I found some rust above the turbine oil feed hole, well known prone to be cracked area. Preventive treatment of JB Weld seems useless. I doubt this block. Reliable solution may be ordering a new N1 block but it'll take more than half year. So I am thinking to get used RB25NEO6. Anyway the block and oil pan went back into the car to finalize the flame repair/modification. Modified the PZ31 engine mount brackets. Laser indicates chassis center line. Measured the suspension geometry. Shock shaft is located outside the stock strut tower. The tie rod was horizontal. Steering rack should be raised because there is not enough room for bump steer adjustment in the 18 inch wheel. I've gotten longer bump steer studs and corresponding taper reamer BEFORE checking the wheel clearance. Modified steering rack mount. Raised and the steering shaft tilted. The rack shaft angle is steep in BMW 3 series and Z4 because their distance from steering rack to steering wheel is shorter and steering wheel is located higher than S30. Oil pan has already got recessed for rack. Edited October 10, 2015 by KAZU Quote Link to comment Share on other sites More sharing options...
KAZU Posted October 10, 2015 Author Share Posted October 10, 2015 (edited) I tested the taper reamer on the S30 stock steering arm tierod hole. Now I can adjust the bump steer with the S30 strut. I decided to keep BMW spindles for future project. Reassembled the S30 strut with the tricky roll center / bump steer / high caster spacer. The BMW stud is temporarily in because the "1 longer stud did not fit in the "17 rim. I ordered the shorter studs. Wheel is located inward than the BMW set. I am happier than before because I do not want to do fiberglass job at this time. Edited October 10, 2015 by KAZU Quote Link to comment Share on other sites More sharing options...
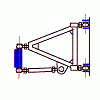
KAZU Posted October 12, 2015 Author Share Posted October 12, 2015 I modified S30 lower arms and the ZCC TC-rod dog legs. It took my whole weekend. Quote Link to comment Share on other sites More sharing options...
KAZU Posted October 25, 2015 Author Share Posted October 25, 2015 (edited) I've gotten a RB25DET NEO6. Compared to RB26, NEO6 are dirt cheap and reliable. I removed the automatic crank bushing by z-ya's method. Automatic crankshaft does not have flywheel dowel pin. The big washer may be used with aluminum flywheel. Anyway, I don't want to put aluminum flywheel. I took off both Intake and exhaust. More to be removed. I'll put a pair of rb26 turbochargers on it. Two of the 6 manifold studs are different location. Edited October 25, 2015 by KAZU Quote Link to comment Share on other sites More sharing options...
KAZU Posted October 27, 2015 Author Share Posted October 27, 2015 Oil pan and oil to coolant heat exchanger have been removed. The oil pressure relief hole of this engine does not pass through the main oil gallery. So all I need to do to convert the dry sump system is put a 12AN to M18-1.5 adapter with Loctite. I don't need oil block adapter anymore. Quote Link to comment Share on other sites More sharing options...
KAZU Posted November 3, 2015 Author Share Posted November 3, 2015 Dry sump oil pan has been replaced on the RB25 block. Two of 12 exhaust manifold studs of RB25 head have been replaced with shorter M8 studs. Two of 6 manifold flanges of RB26 have been modified. Also some stud holes which were too small for M10 studs have been enlarged. RB25 block has two turbocharger oil return holes. Front of them had been plugged and identical placement with RB26. Another is located center of the RB25 block, which interfares the RB26 front turbine down pipe. I'll fabricate adapter to solve the problem. Quote Link to comment Share on other sites More sharing options...
KAZU Posted November 29, 2015 Author Share Posted November 29, 2015 Rear turbine oil return pipe. FReddy (China copy of GReddy) has arrived. I thought there is a cast die defect but when I trimmed the meat, perforated to the water passage. Repaired by welding. The fuel rail (China copy of HKS) cannot be used with either RB25NEO or RB26 injectors. I can put the RB26 injectors and fuel rail with 1" spacers. The knock sensors are different between them. I tighten 1/4"PT plug and cut M8-1.25 thread. Quote Link to comment Share on other sites More sharing options...
KAZU Posted November 29, 2015 Author Share Posted November 29, 2015 The engine had been waiting for a throttle body from China. Some of Ebay sellers sell items without stocking items on their shelf. The 80 mm throttle body fits on FReddy surge tank without modification. Throttle position sensor and cable bracket are another stories. RB26 TPS fits the D-shaped driving boss of the throttle body but with too much play. RB25NEO TPS is drived by a tab and has return spring in it, so I removed the boss from the throttle body and drill and put a suitable pin through the shaft. The throttle cable will route across above the engine. Back to the chassis work. Front frame rails have been welded to the body. Quote Link to comment Share on other sites More sharing options...
Leon Posted November 29, 2015 Share Posted November 29, 2015 I looked in-car video and logging data. My understanding is that the counter-steer was too late and not enough. So the most effective solution may be joining some drifting training events with low grip tires. At the hair-pin exit (around 4'40") http://www.youtube.com/watch?v=UR9oIHBrDSE FWIW, the spin was caused by lifting the throttle once the car started sliding. The throttle lift sent weight to the front tires, they suddenly gained grip while the rear lost even more causing an instant spin. Stay on the throttle as you make the steering correction so as not to further upset the chassis! Nice job on rebuilding the car, your perseverance is impressive. Quote Link to comment Share on other sites More sharing options...
KAZU Posted November 30, 2015 Author Share Posted November 30, 2015 Thank you for your input. Yes, I released my right foot from the gas pedal after the first slide ended. Quote Link to comment Share on other sites More sharing options...
Recommended Posts
Join the conversation
You can post now and register later. If you have an account, sign in now to post with your account.