
The Woj
-
Posts
96 -
Joined
-
Last visited
-
Days Won
1
Content Type
Profiles
Forums
Blogs
Events
Gallery
Downloads
Store
Posts posted by The Woj
-
-
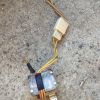
Could be the BCDD 10 mph switch.
I think we have a winner, wasn't sure how this would be the answer on a carb'ed car but this post seems to confirm NewZed's answer.
http://forums.hybridz.org/topic/77476-speedometer-question/
I guess it was just a thing for the Hitachi carb'ed cars, as it seems the 70-72's didn't have this box and the 280z's had a similar box with different wiring.
-
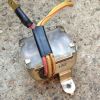
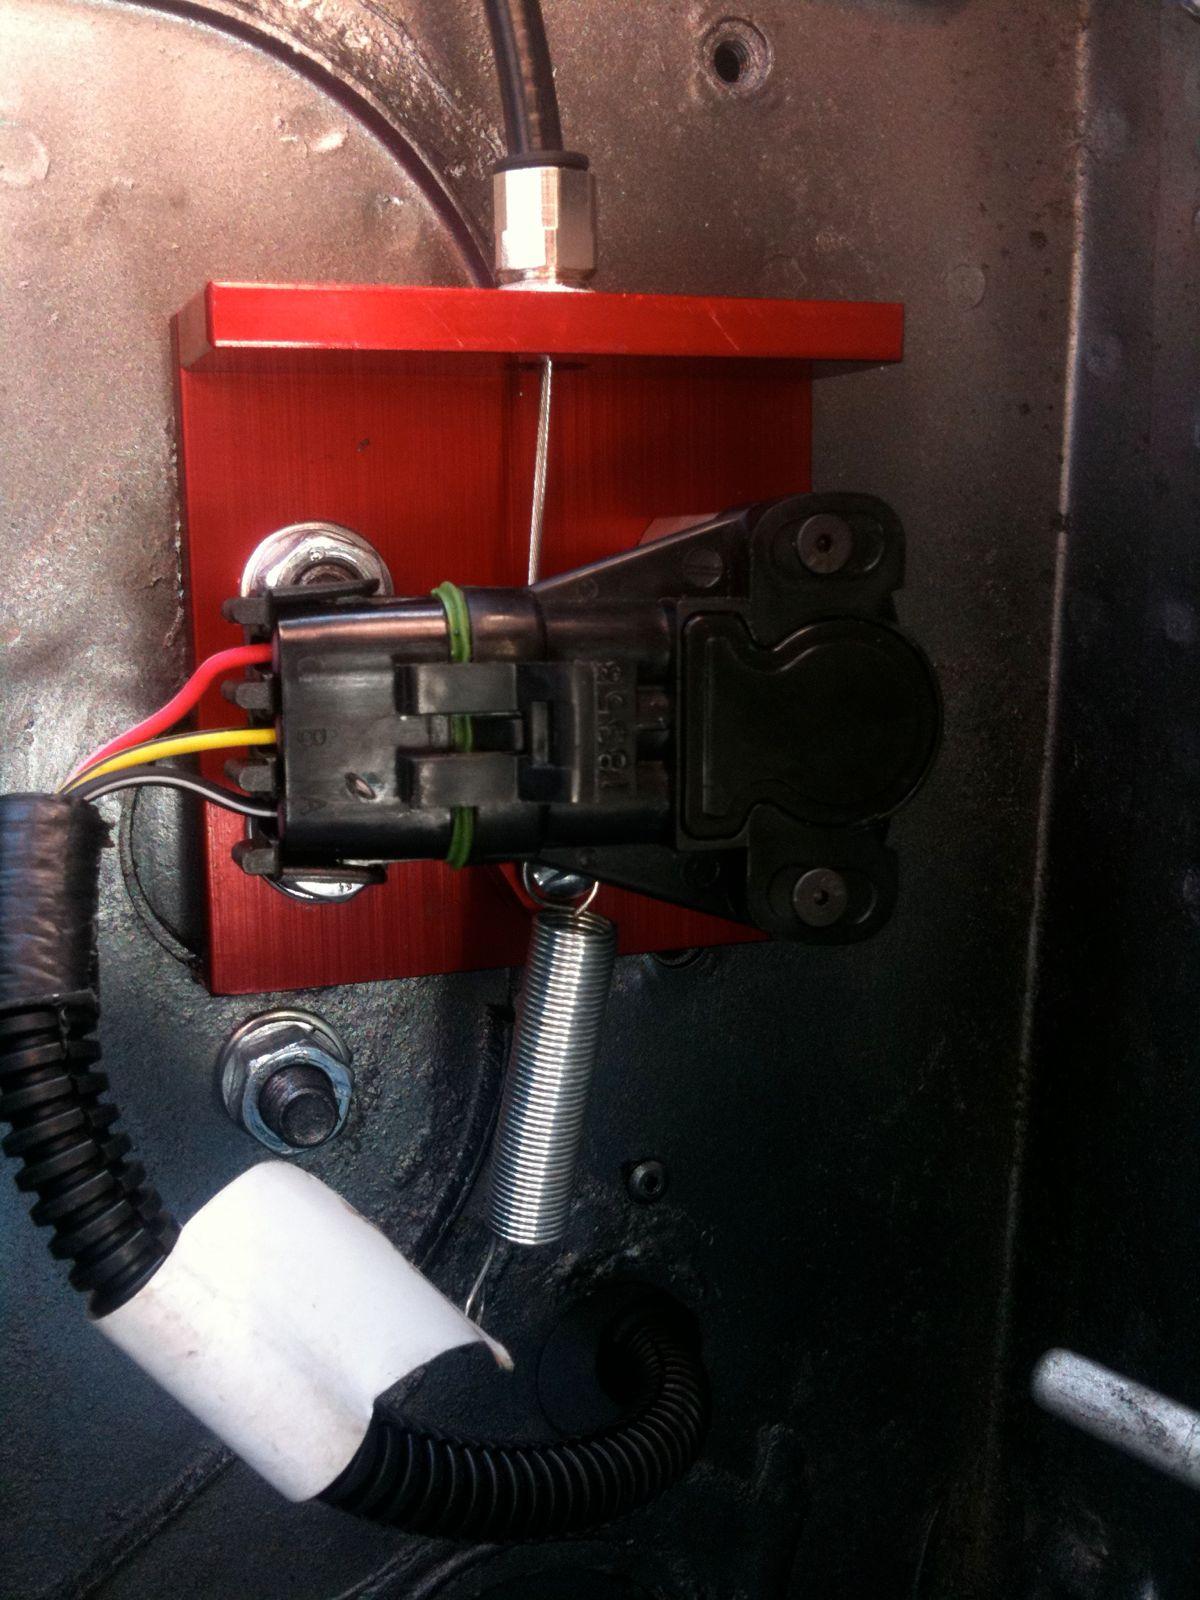
Forgot to mention this is on a 73 240Z.
-
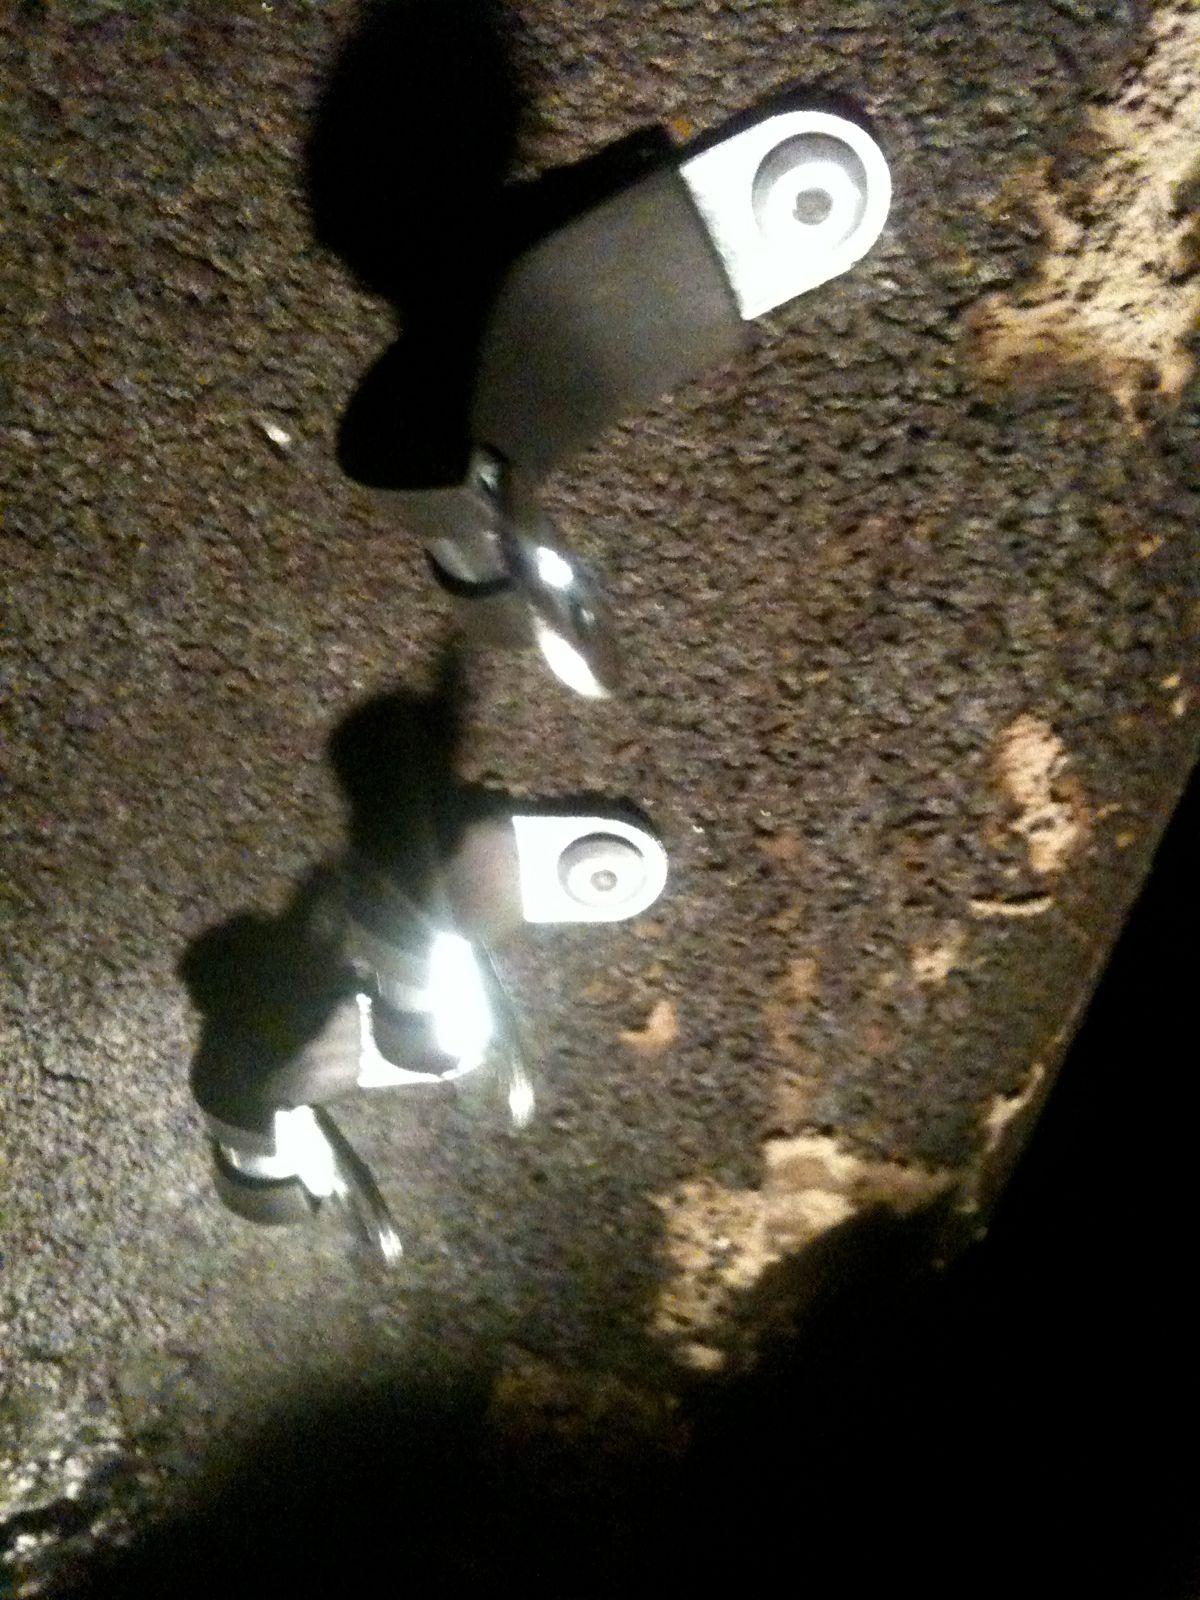
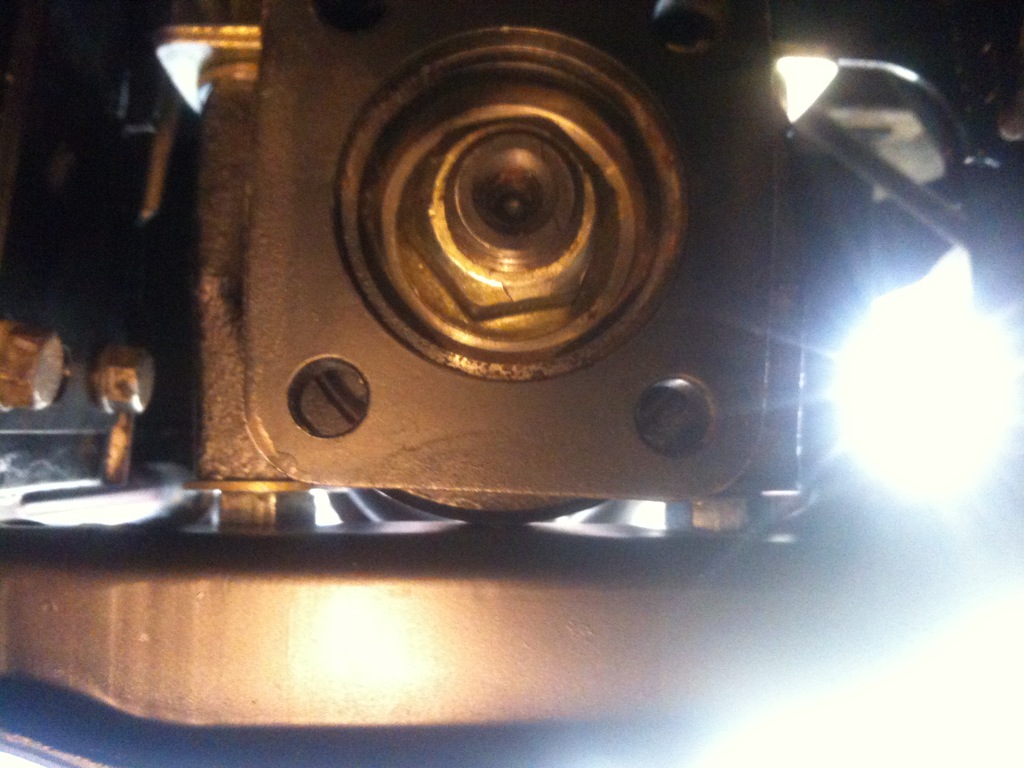
Does anyone know what this is? It is a small box mounted to the back of the speedo. The red wire goes into the speedo next to the high beam indicator light, and I don't know where the yellow wires went as I pig tailed them a long time ago. The outside of the box says "132", inside the clear top I can read "XP-34". The FSM refers to it as a "Switch Element", I am not sure what the heck that means.

Thanks!
-
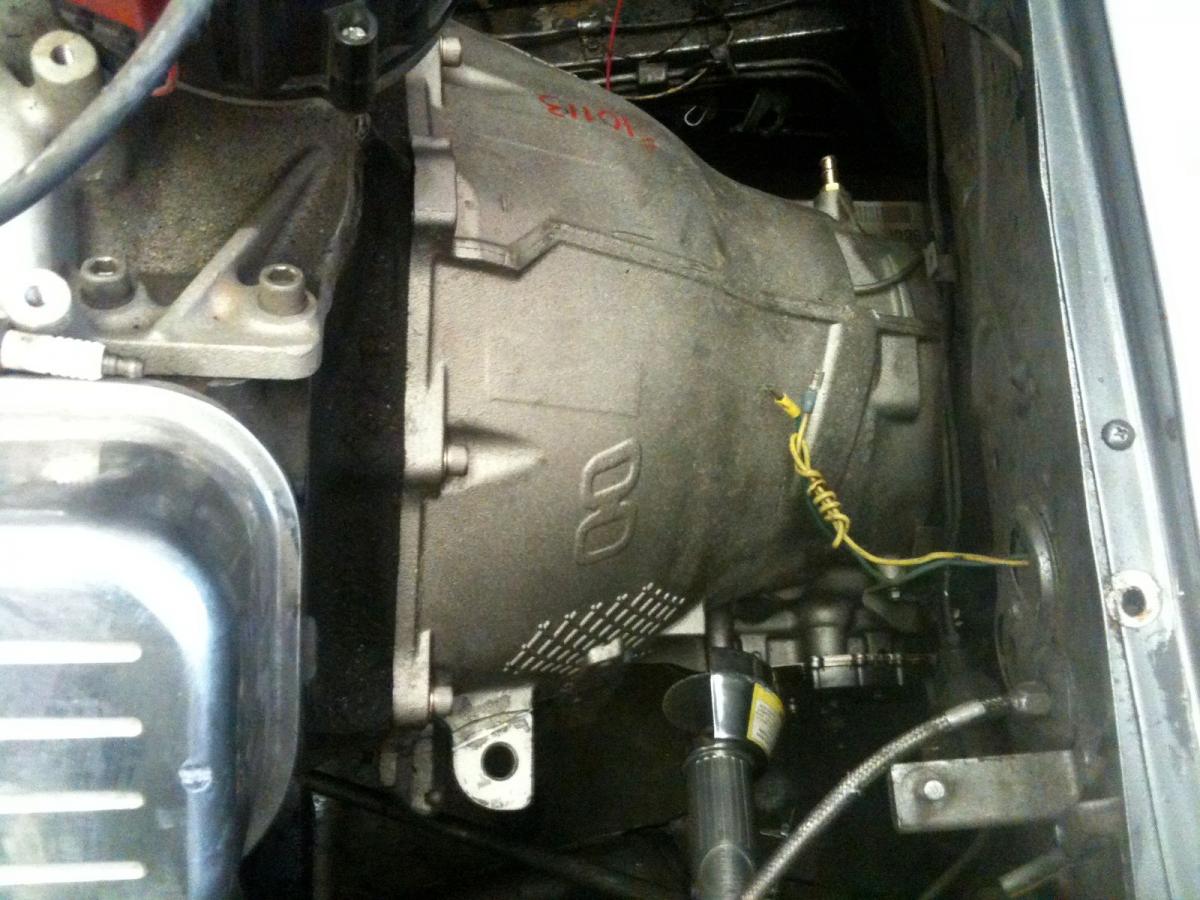
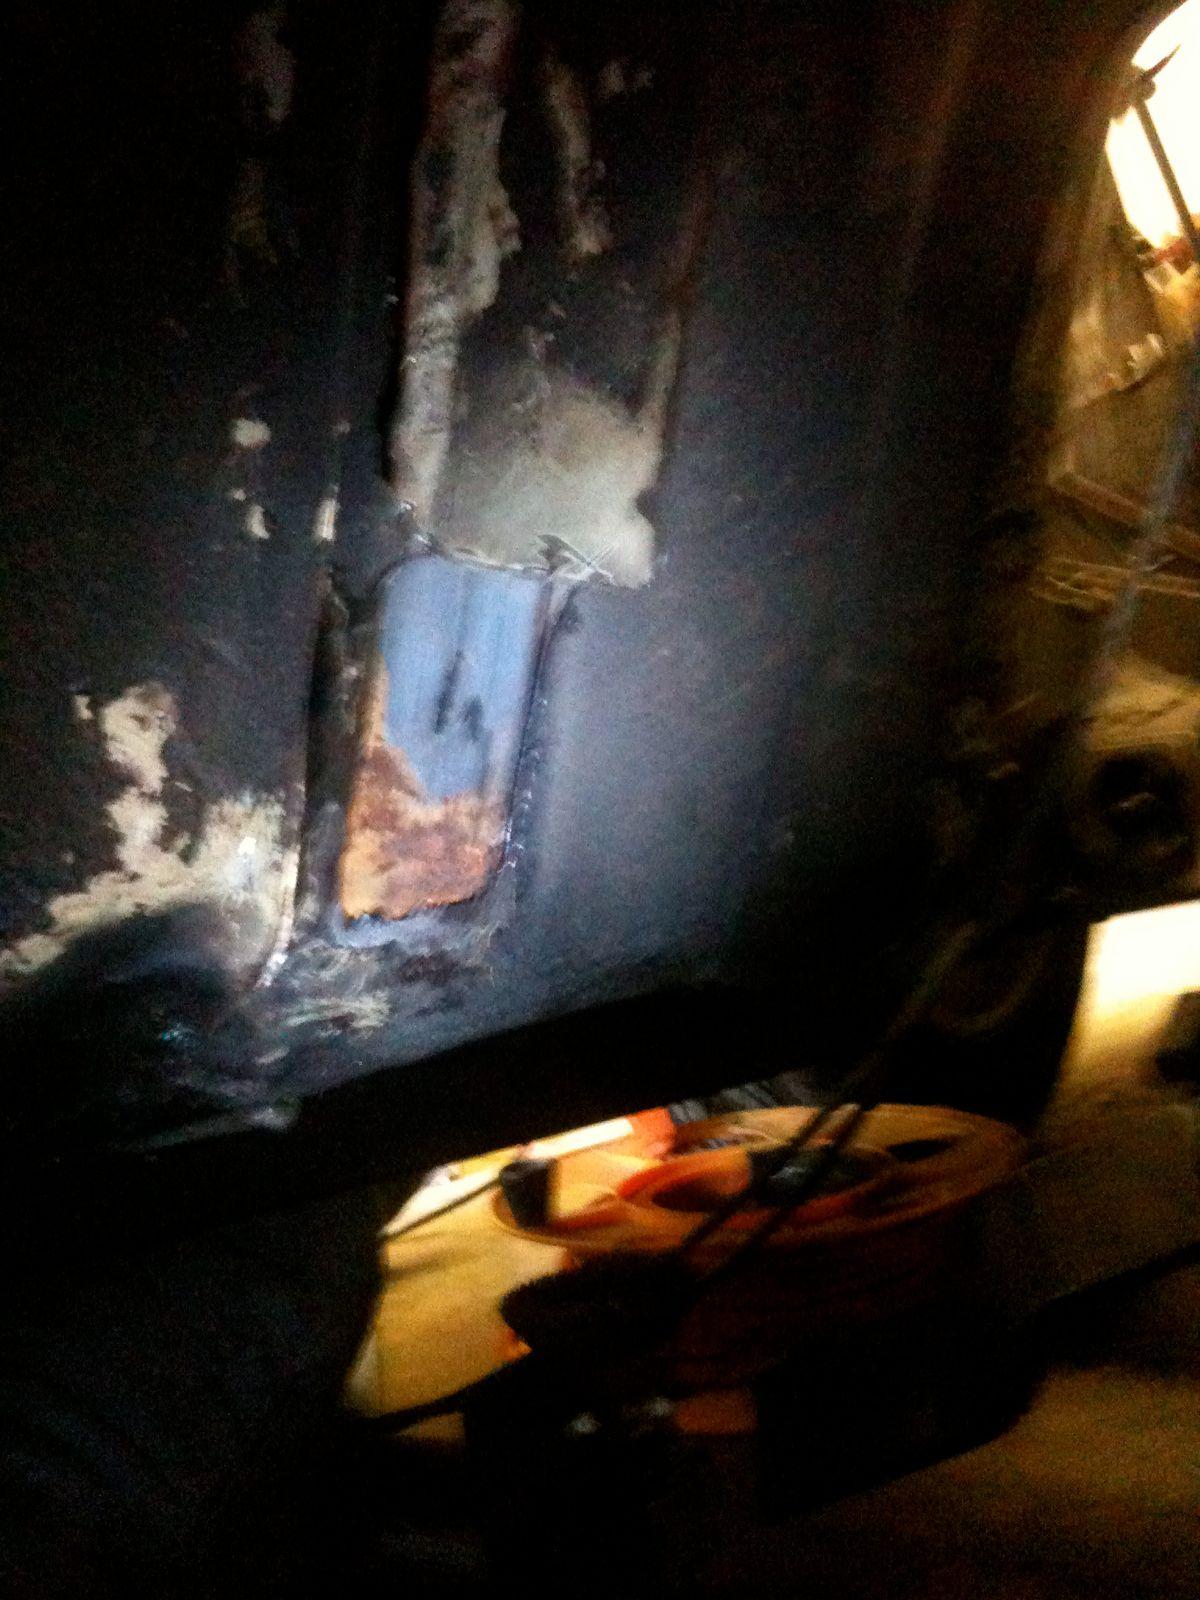
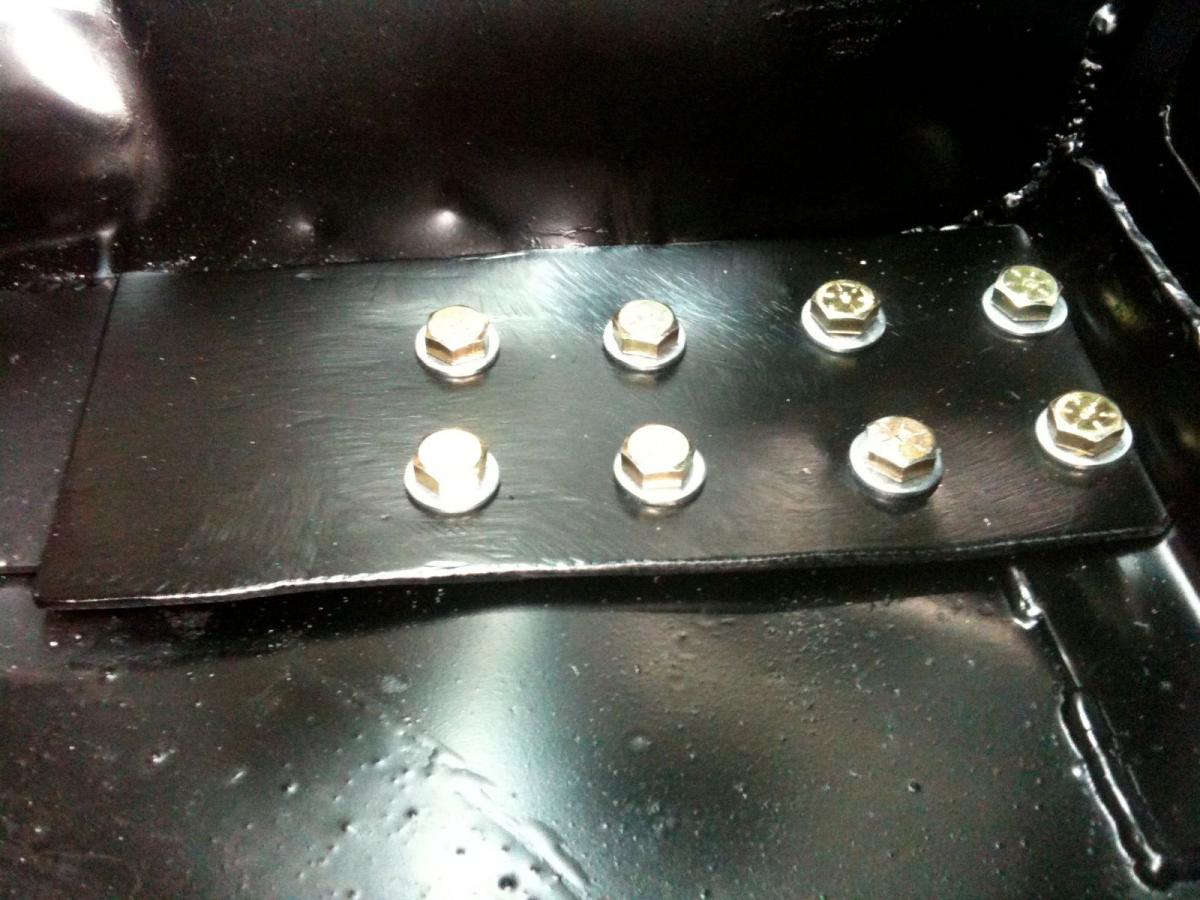
Well we got her in this past weekend, cut the ears off like you mentioned. My friend is a wizard with hard lines, used 3/8 brake line and away he went with his bender. We made a temporary mount for the 4L80E and will fab a mount for it this week/weekend. I'll have to pull it one more time to do a little clearancing on the drivers side for the socket/plug, it is too tight for my liking. Will post more pic's soon.
Mike
Yeah, I forgot to mention that I clearanced a bit for the plug on the drivers side.
Just to reiterate, make sure you use the rear cooler fitting that came with the transmission, otherwise you will be doing a tranny rebuild shortly down the road.
-
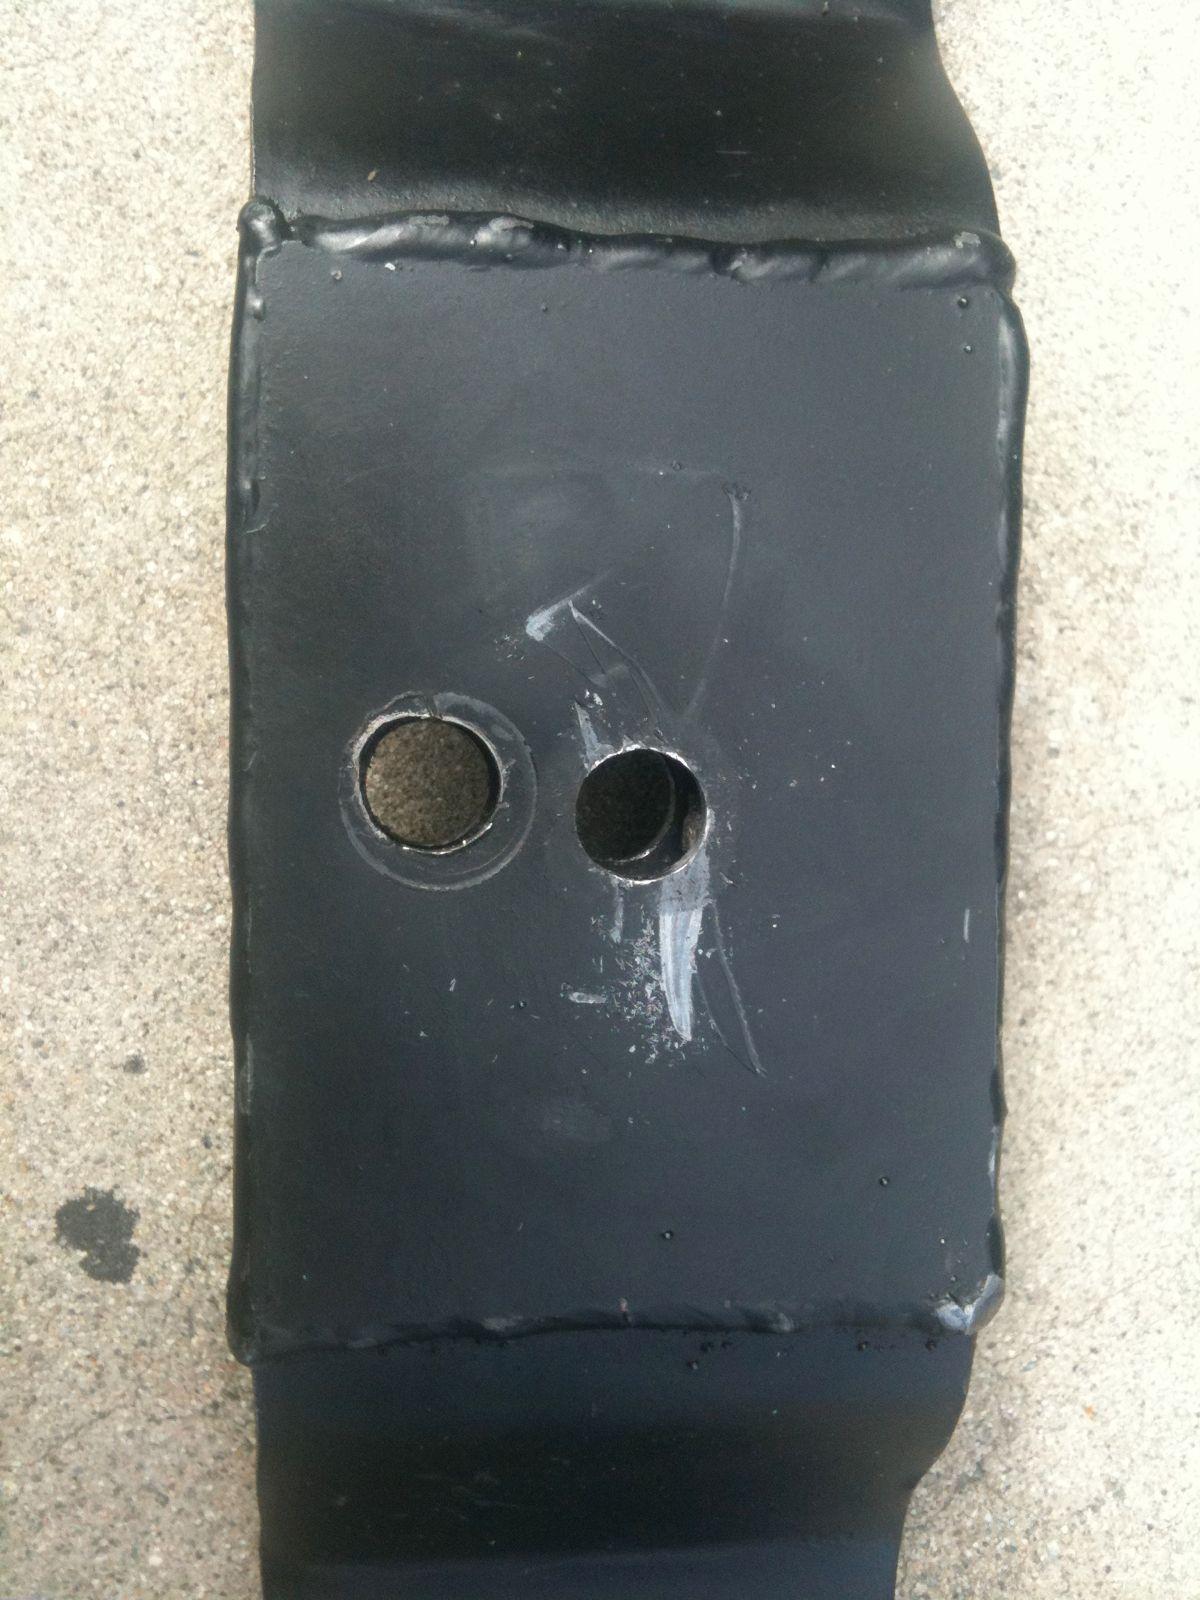
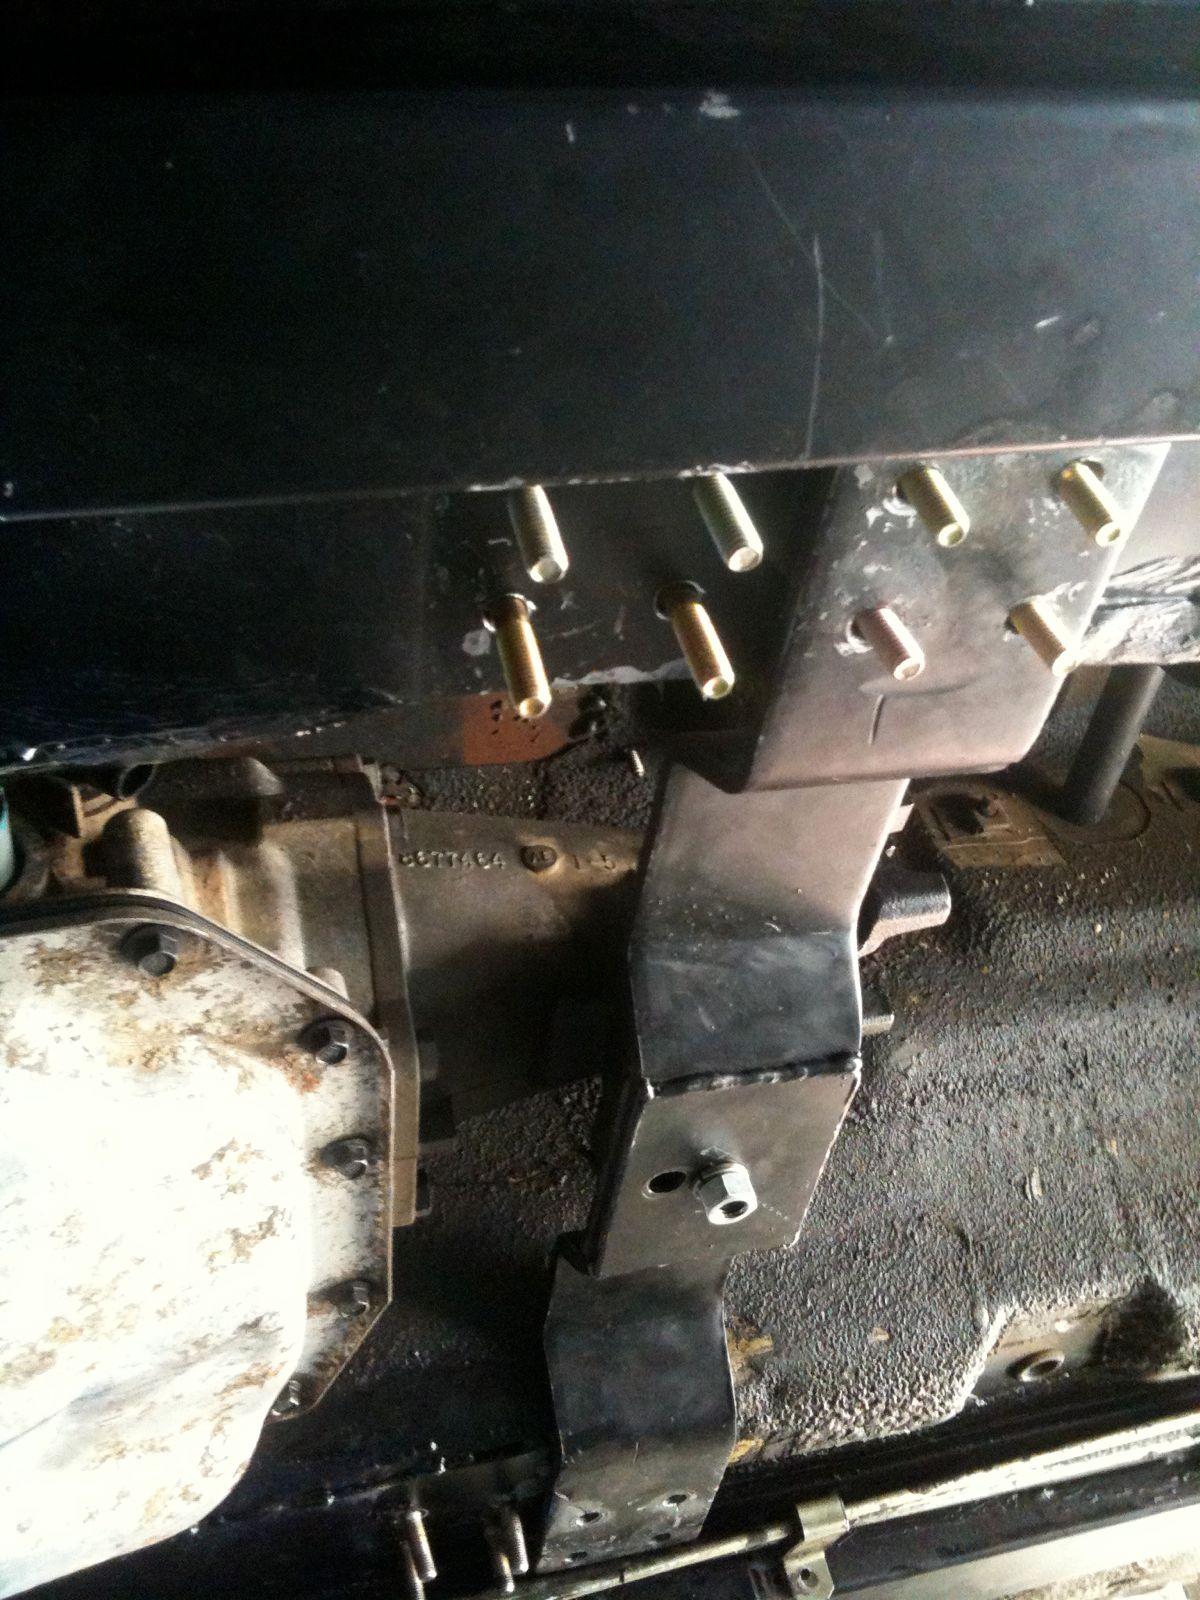
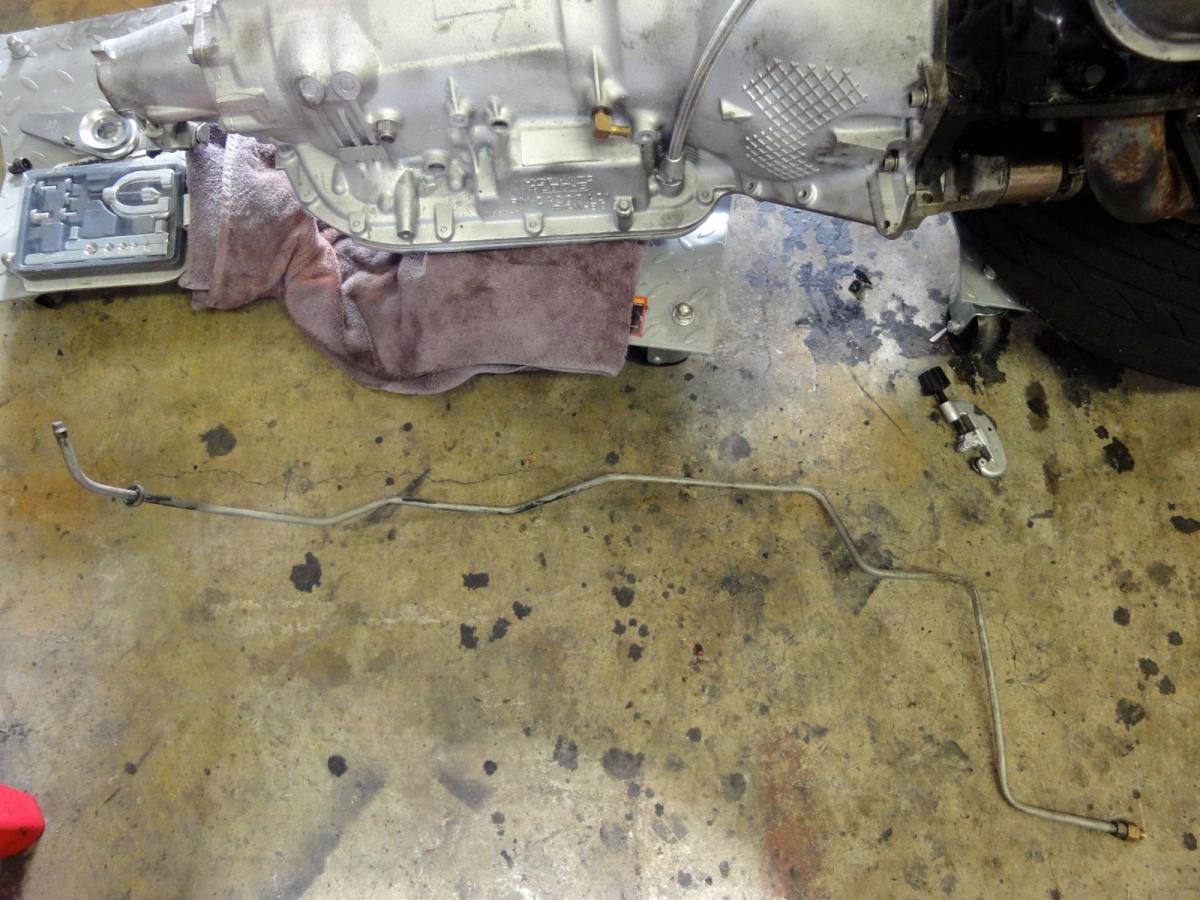
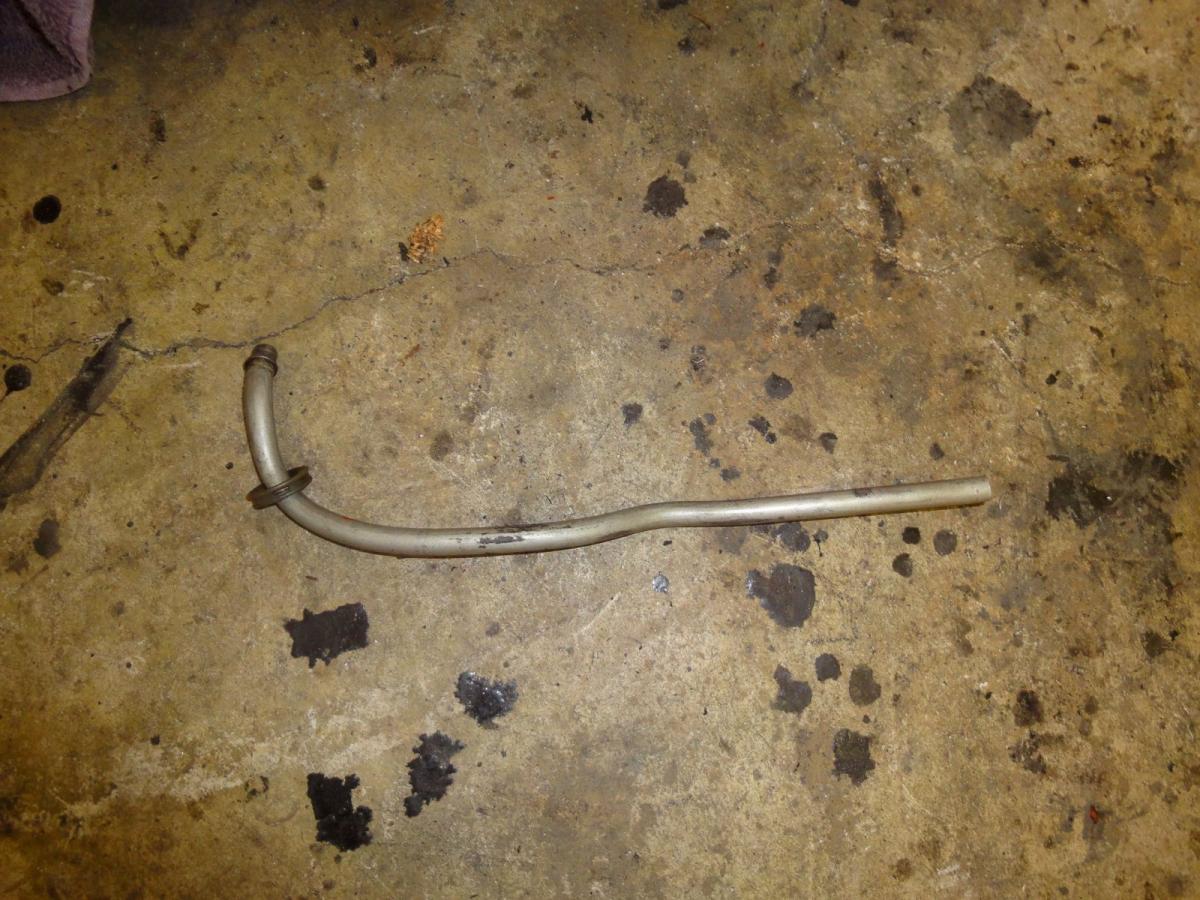
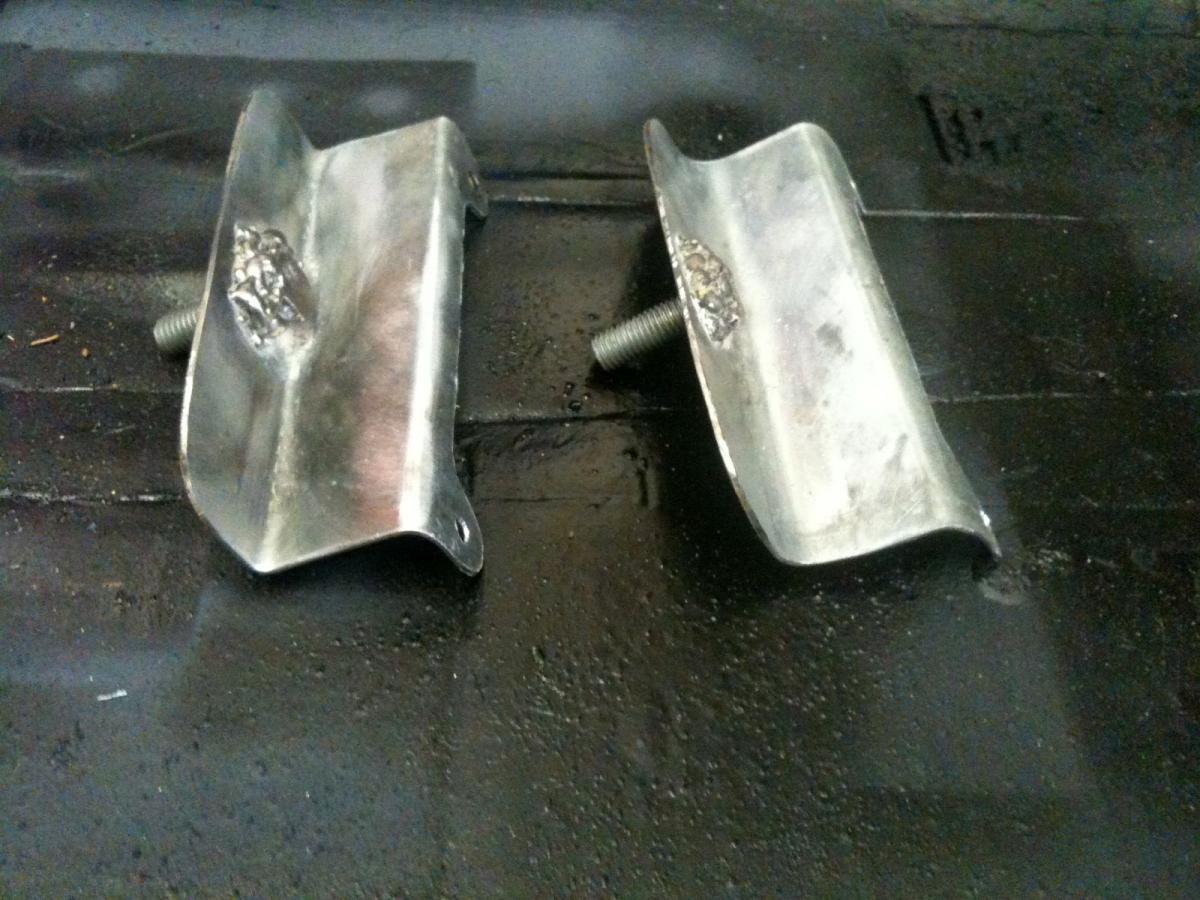
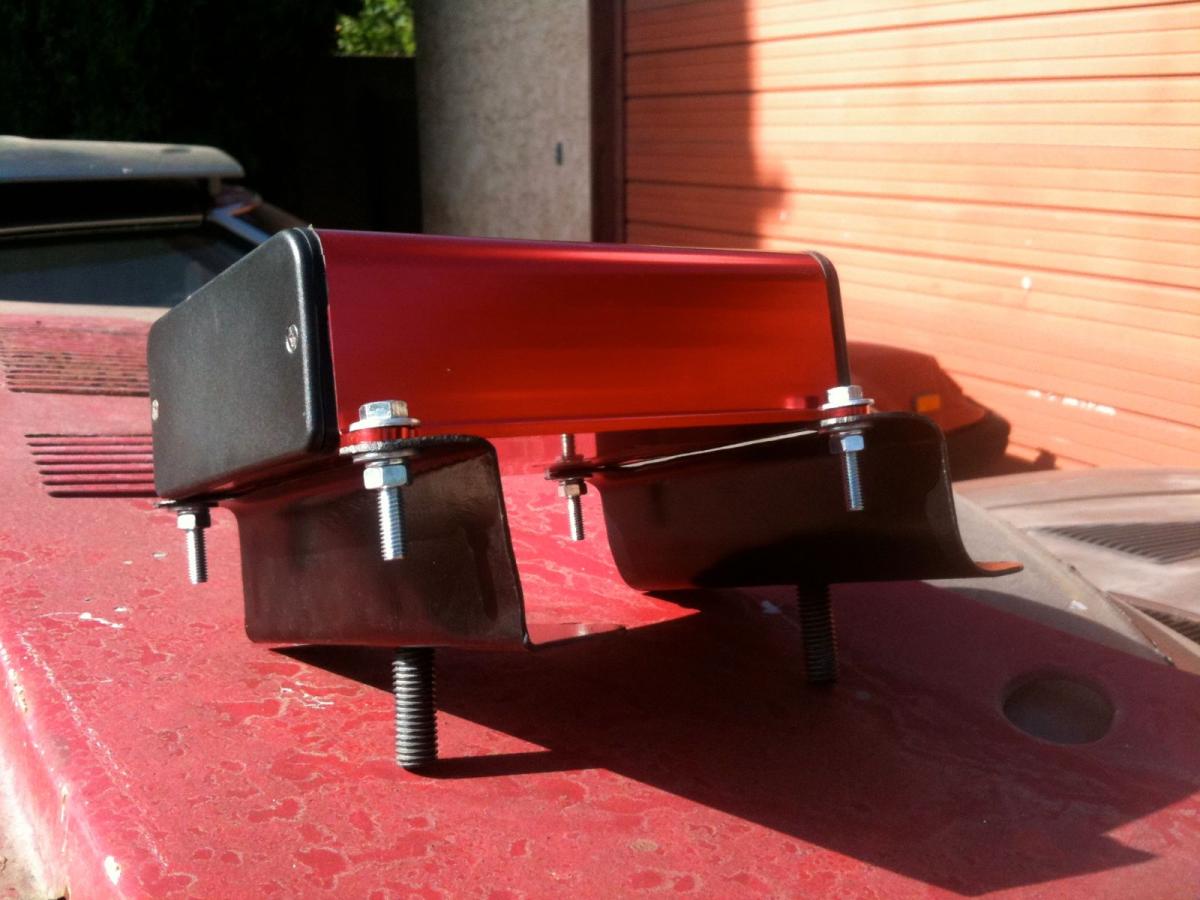
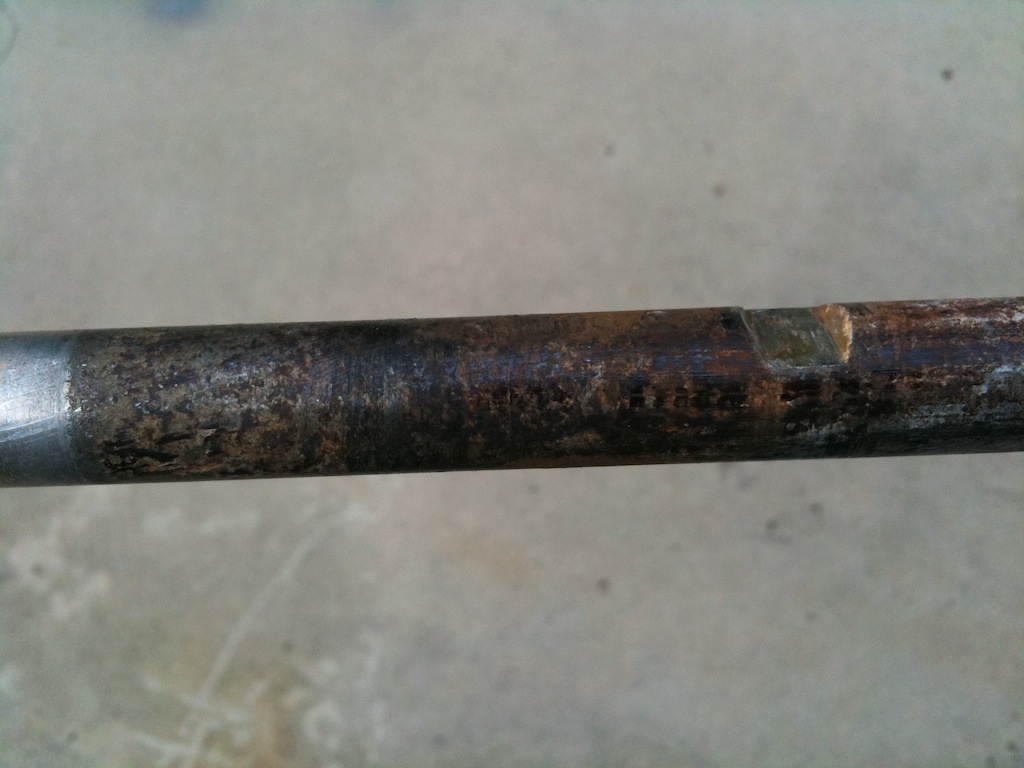
I was the one that purchased the Cable's old BBC-powered 280Z. I initially replaced the TH350 with a 200-4R but quickly asploded my cheap eBay transmission. After talking with Cable, he convinced me to purchase a 4L80E (and got me a hookup from a friend on the actual transmission) and I went to town fitting it. I did not move the engine mounting location at all when installing the transmission, but the transmission mount had to go back several inches. If you look at my mounting plates, I believe the crossmember was on the middle set of bolts and the transmission mount was going through the offset hole rather than the centered one. The only clearencing I remember doing was where the main computer plug goes into the transmission - it sticks out kind of far so I had to add a little room with a hammer in order to plug and unplug the tranny. Additionally, I nixed the front transmission coolant line and went with a brass fitting from the parts store. This screws in and doesn't leak, though technically it's the wrong thread. I was using a brass fitting on the back of the transmission also, but ended up burning up the rear of the transmission and doing a $1000 rebuild because the stock fitting has a pipe in it that drops the fluid onto wear items, which the brass fitting does not. I have included pictures of my cut down and bent piece of stock cooler line that I ended up putting in.
So, to summarize pictures:
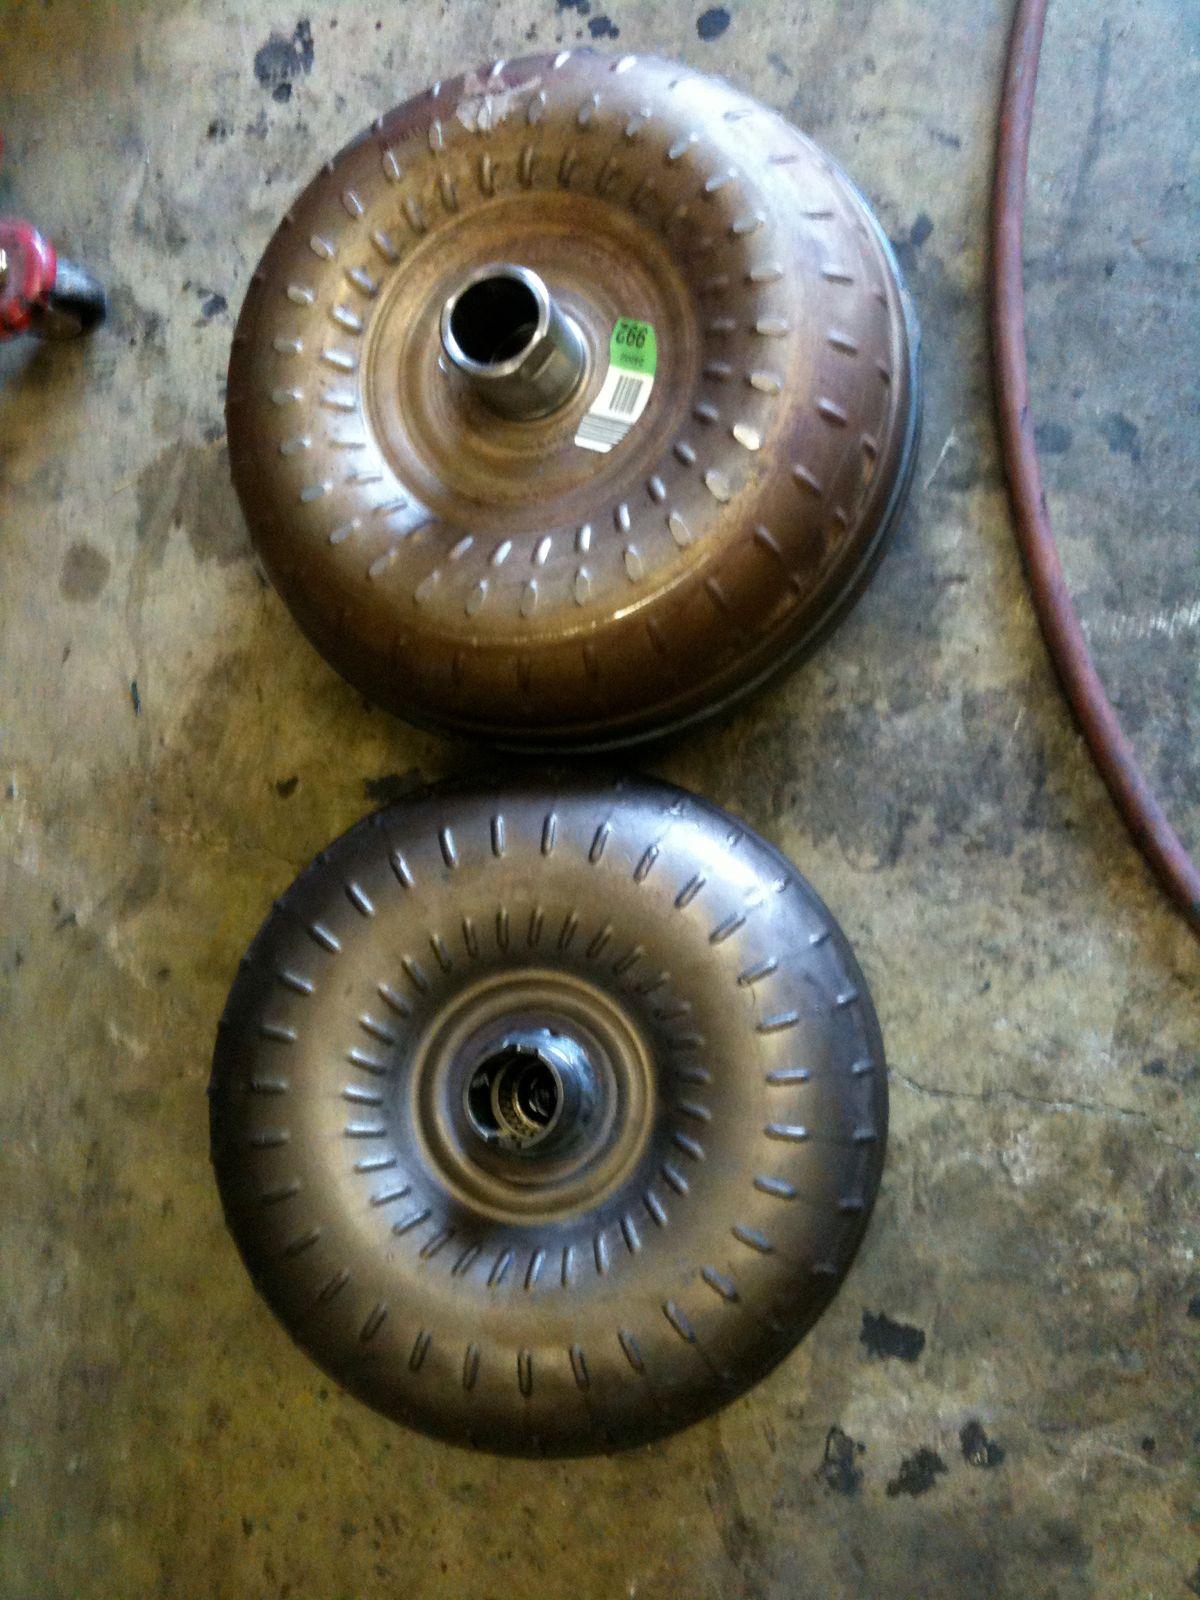
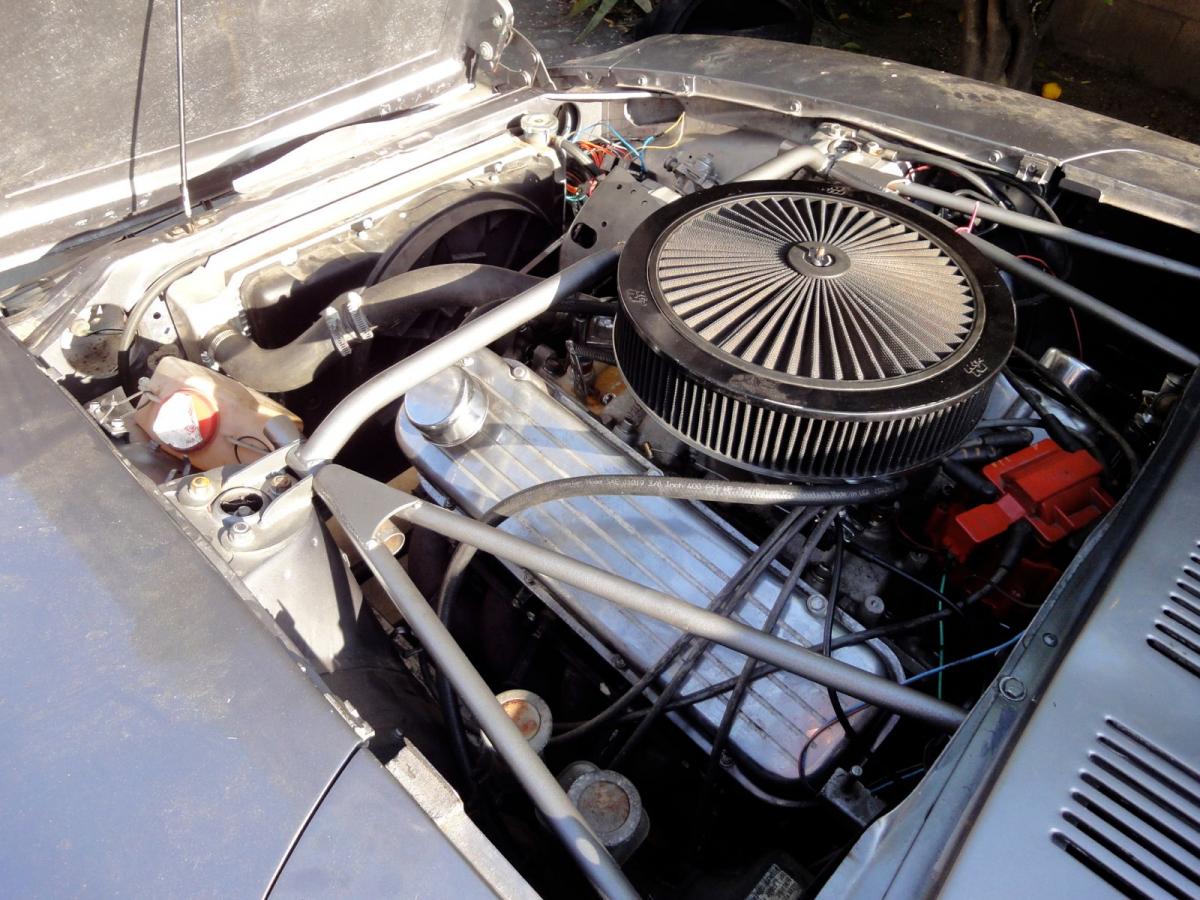
1. Torque converter size difference between 4L80E and 200-4R (I never put the trannies next to each other, only in a line which isn't a very telling picture).2. The ear on the transmission that has to be cut in order for it to fit in the tranny tunnel. It is in the bottom left of the pic and has a line cut across it already.3. Part of the original mounts in the tranny tunnel that had to be cut off.4. The top of the transmission crossmember showing the mounting hole dead center.5. The mounts on the car from the bottom of the car.6. The mounts as they are inside the car.7. The hard line I pulled from Pick-a-part.8. The cut down hard line (before being flared)9. The engine as it sits in the engine bay, showing proximity to firewall.The remaining pics show the TCU I used, and how I mounted it and the wiring for it.
If you have anymore questions or I glossed over anything let me know.
-
Without searching, I swear this has been discussed here before.
Mainly because I remember a short discussion of this car (not realizing up until that point how the exhaust was routed):
-
Get me 2 and ill buy em from u.
They ship to the states...
-
-
Bump!!!
I am going to make one of these bars to mount 5 pt harnesses in my car until which point I decide to put a cage in. I noticed that the OP used .25" plates for the mounting points, I only have .12" and .33" stock on hand. I spent 1.5 hours making a 14" cut in the .33" steel with a 3" cut off wheel before I decided it was way too thick. It seems to me that .12" would be a good thickness for these mounting plates, especially since they are only mounting to 20ish gauge body steel.
Am out of line? Does anyone disagree?
-
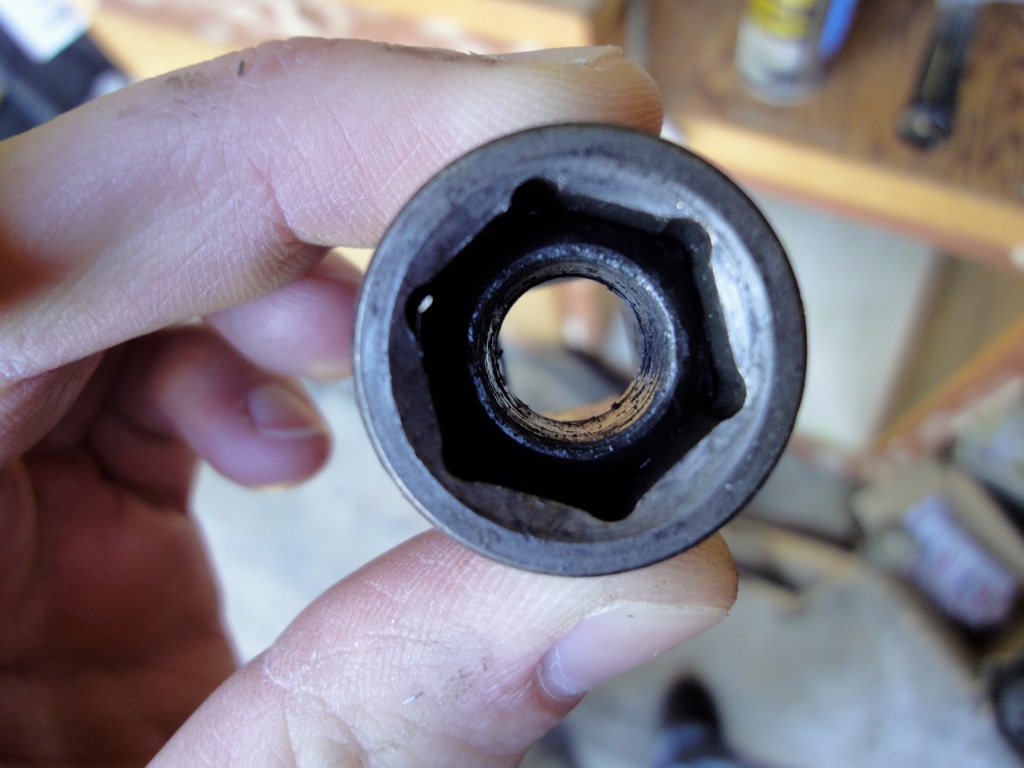
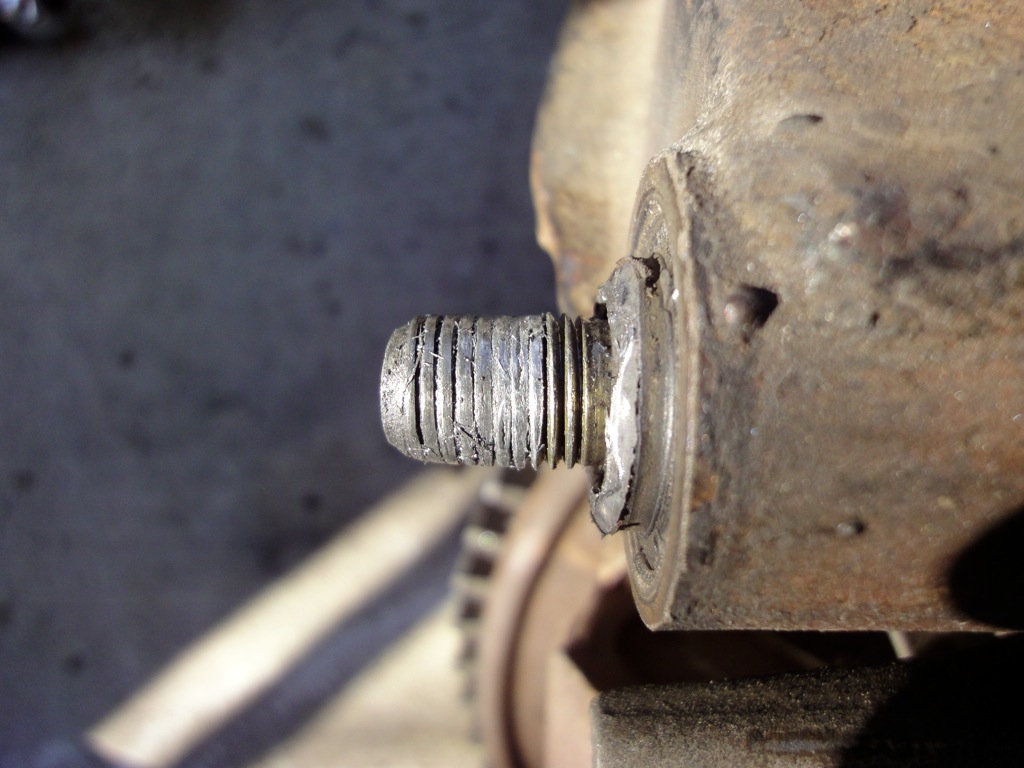
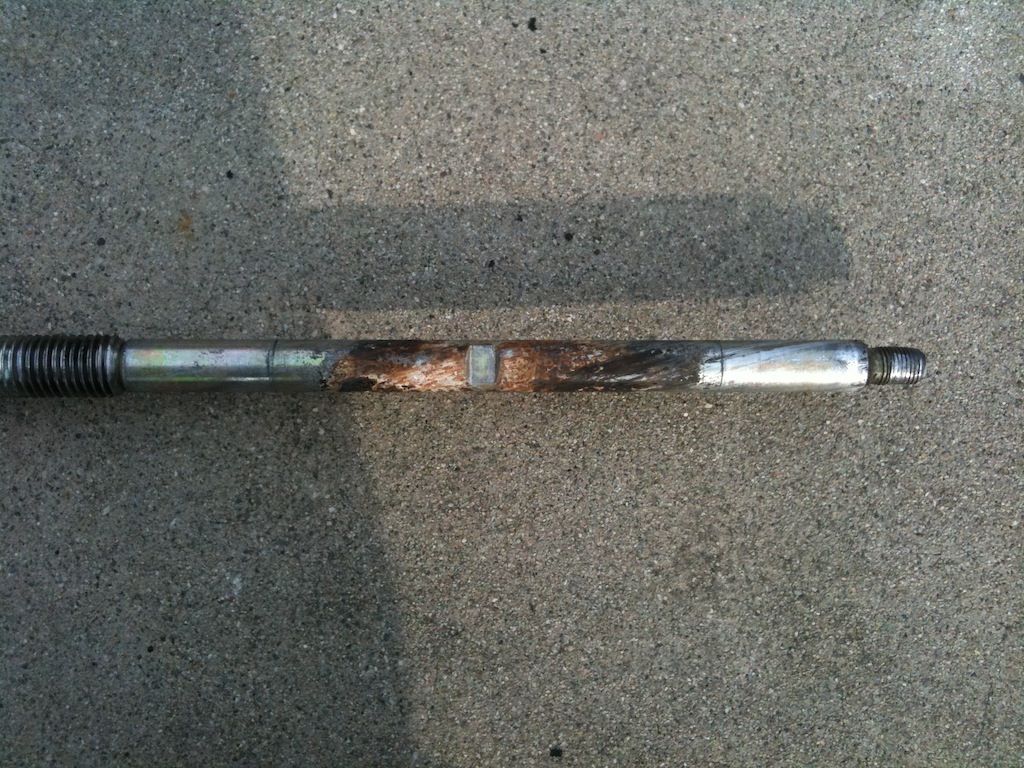
Back when I was doing this, I tried to thread on a nut and pound it with a 5lb sledge to get the spindle moving, here were the results:
Ruined my 1/2" 17mm impact socket too
I then broke down and bought a puller, here's how the pins came out:
I didn't bother trying to unscrew them from the puller, I did the therapeutic thing and just threw the whole thing away to block it from my memories.
-
While digging some more I found this:
No more discount codes. I spoke with a summit rep. and he said people were taking advantage of them. Really sucks. That is why they have summit bucks now.Oh well, the prices are fair anyways.
-
All of the codes I found were from Christmas time, and were thus expired. I read some threads in other forums of people-turned-coupon-beggars and the threads were saying that of late Summit has been more frugal with their discounts of late.
-
I was wondering if anyone had a Summit coupon code they weren't planning on using? I just figured out that I had turned off their emails to avoid spam, and in so doing was not receiving coupon codes either. I have about $800 in misc. stuff (mostly -AN fittings for 2 fuel systems) and would prefer to save some money if possible. I have had their emails enabled for upwards of a week now hoping I would get something, but I would prefer to pull the trigger sooner rather than later.
Please PM me if you have a spare code.
Thanks!
-
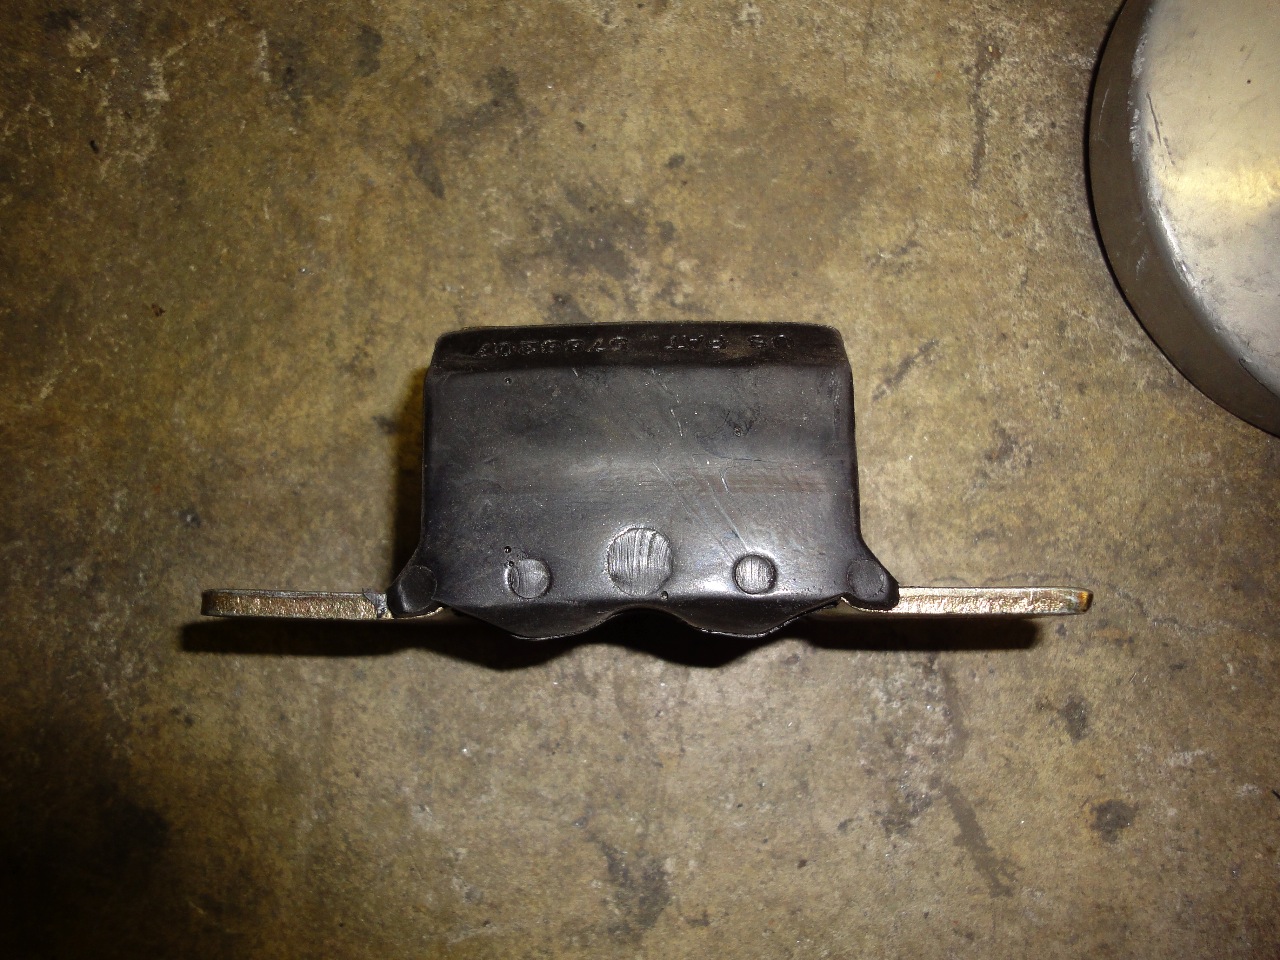
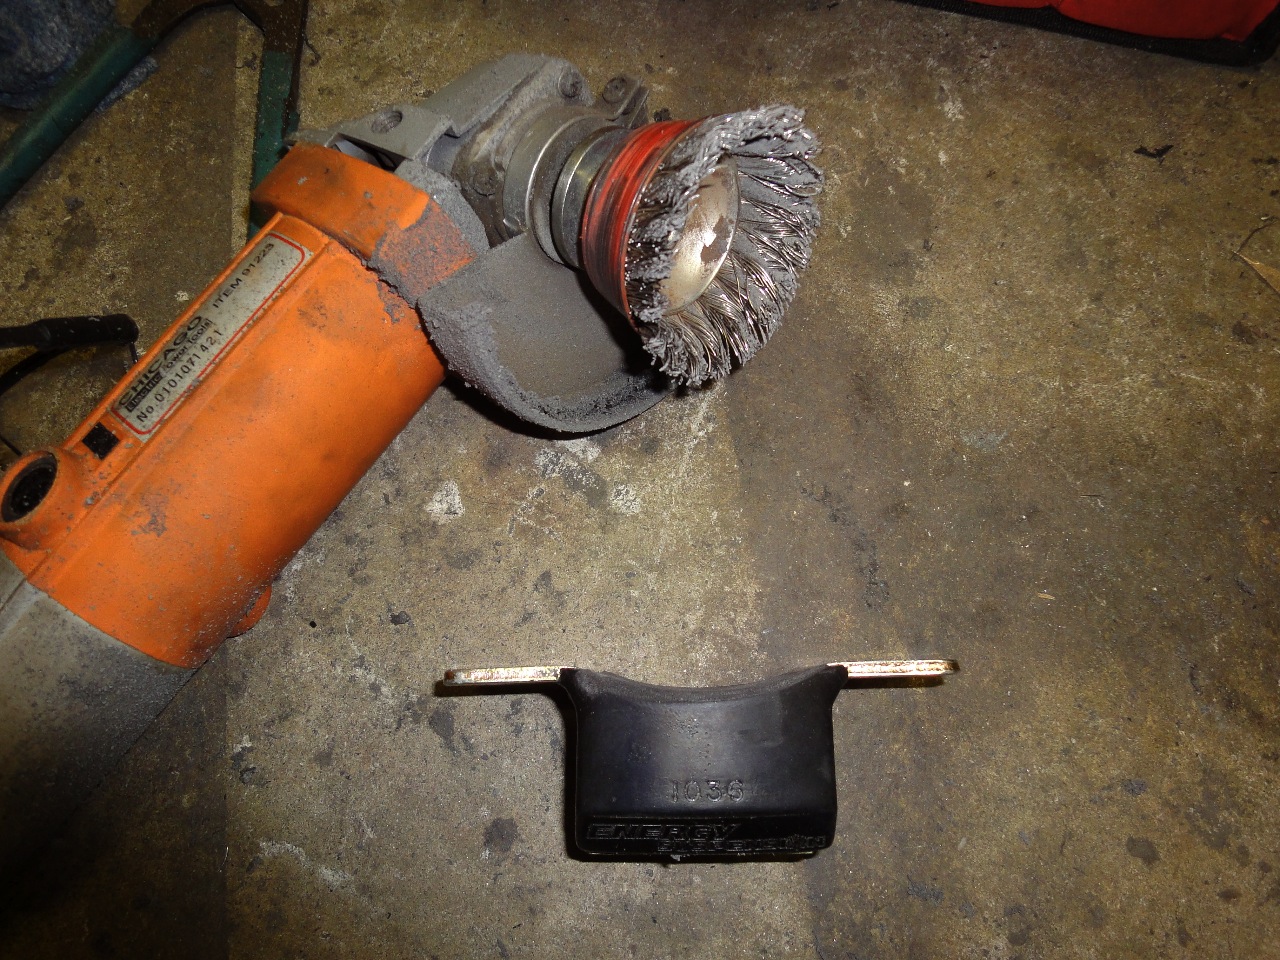
As a followup on the above issue.
I removed my ES mount:
Pulled out my trusty orange HF angle grinder and did this:
And, I have lifted the nose of my diff this much:
-
I have the RT mount in my Series 1 240z, Mounted it with the bolt head on the bottom, washers on both ends of the bolt and no clearance problem with the stock xmember.
I also ground down the poly to fit the R200 nose as was described above.
G
It sounds like the solution to my problems is to drop the diff and grind the center out of my ES mount, then. I guess I need to line up my drivetrain first though.
-
Thanks for the info on the car. Looks interesting.
I had a faint memory about an old Roostmonkey post so searched and found his Vendor's Forum thread. A lot of what's been discussed here was talked about then. Worth a browse - http://forums.hybridz.org/index.php/topic/85384-rt-mounts-are-ready-for-shipping/
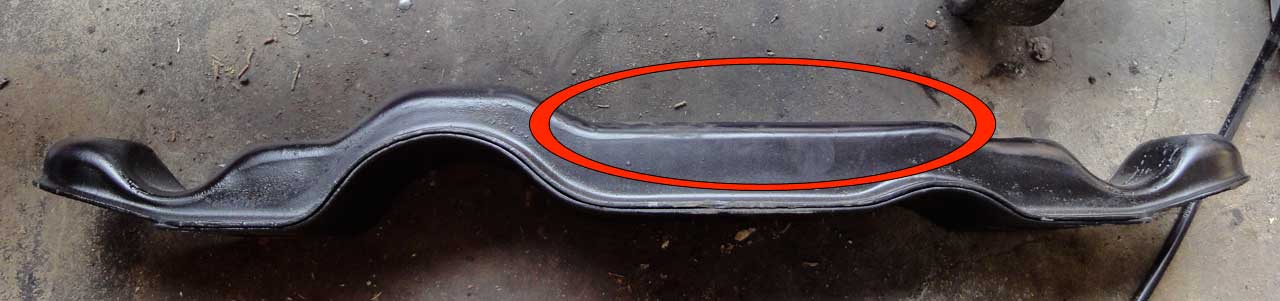
After reading this thread, I have realized that the pinion snubber is not going to accomplish what I want it to - which is doing away with the stock rubber mount. But, he does mention that the ES mount needs to be sanded in order to contour it to the top of the diff, which I did not do. This seems to be inline with what dsommer did also, though I still hold that dsommer's crossmember (from an earlier 240z?) is lower than mine - perhaps finding an earlier crossmember might help?
Dsommer: any idea what year your crossmember was from and whether or not it was flat across the top or had the ridge that is circled here:
-
Thoughts and questions - did you make the mount yourself or buy it? And to confirm, you have a 280? And you're running the stock L6 and transmission? Just wondering, I'm not even sure what car you have. Might be some good feedback to the builder, maybe 280s are slightly different.
The original RT mount design was for the V8 conversion, I believe, and it was designed to lower the front of the diff to get the pinion shaft on the same plane as the transmission shaft, if I recall correctly. So the comments about getting your angles right are pointed at avoiding vibration when you're done, your shafts won't be on the same plane anymore.
What some people have done (quite a few over on Classiczcars.com) is to keep the lower mount,then use a pinion snubber on the RT mount instead of the ES 3-1108. Typically they trim the snubber so that it barely touches or has a slight gap. This avoids tying the diff in too tight and getting vibration. It seems to work for those that have used it, and lets you keep the original pinion shaft angle, but accomplishes the goal of holding the nose of the diff down. Plus you you don't have to worry about grinding your cross member.
This is Roostmonkey's mount, which I purchased about a year ago. It is a '73 240Z which is going to be running a Ford 5.0 with a T5 someday.
I have not even mocked the engine or tranny, though the mounts have already been fabricated (by the infamous JohnC no less!) - so I am not sure what the angles are going to look like.
Perhaps I will look into this pinion snubber, I was actually looking at the first picture I posted and it appears that the diff in that one is also touching the mount.
-
Is it me or does the RT mount bolts on dsommer's 240 look higher than on Woj's 280? If it's true then that could be the difference.
I don't know about that, but what I did just notice is that his diff crossmember is different than mine. It does not appear to have a hump in the tranny tunnel area (that sounded really weird). This is on my 240Z, it's a late '73 though.
-
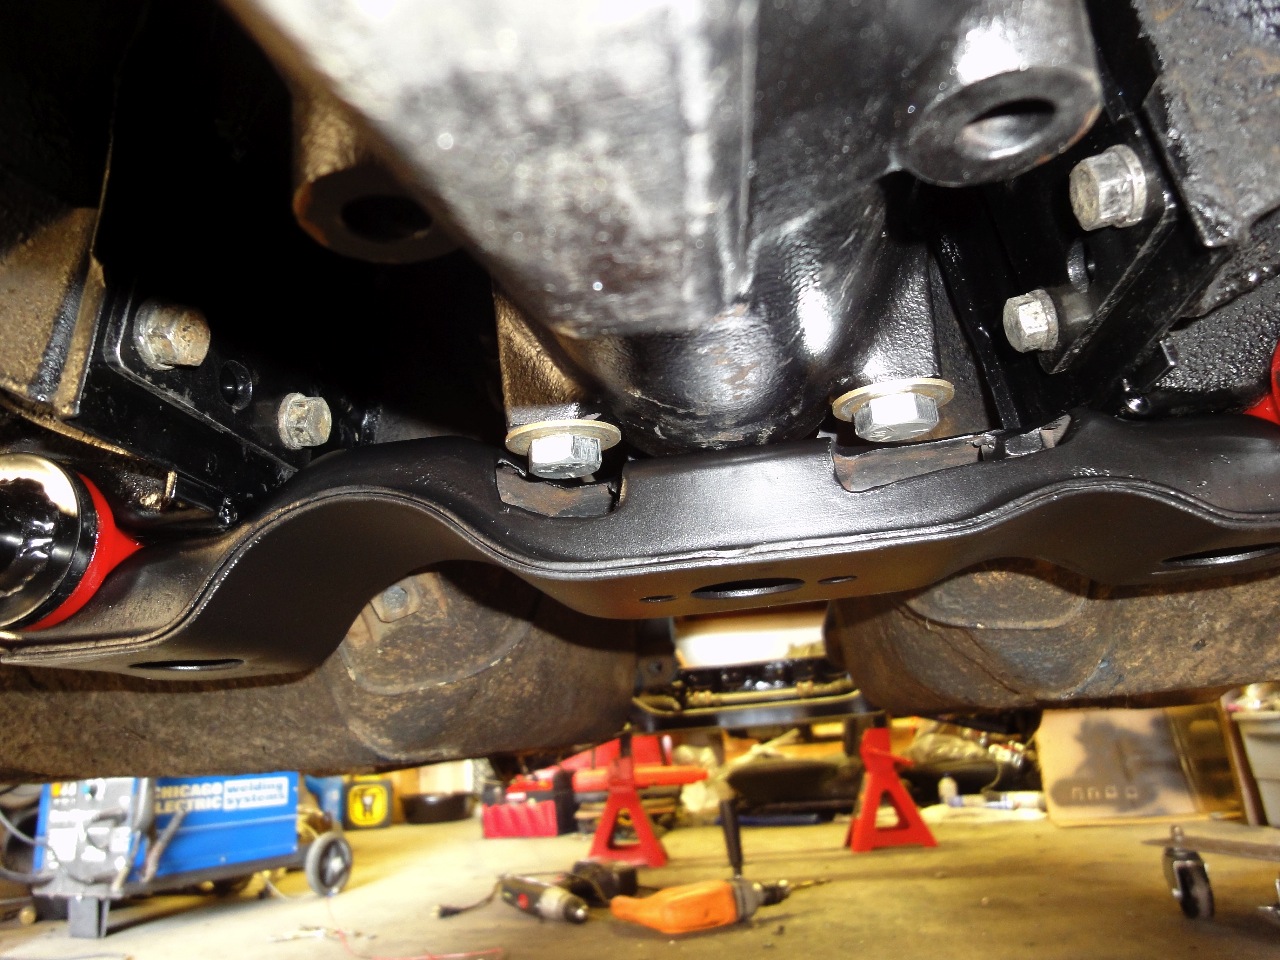
Woj it looks great. Drive it around for a while. The nose of the diff moves about some between shifts and transitions from brake to power to brake. You may find you need a little more clearance. Put a little paint on the bolts and crossmember where they are close and see if any gets knocked off.
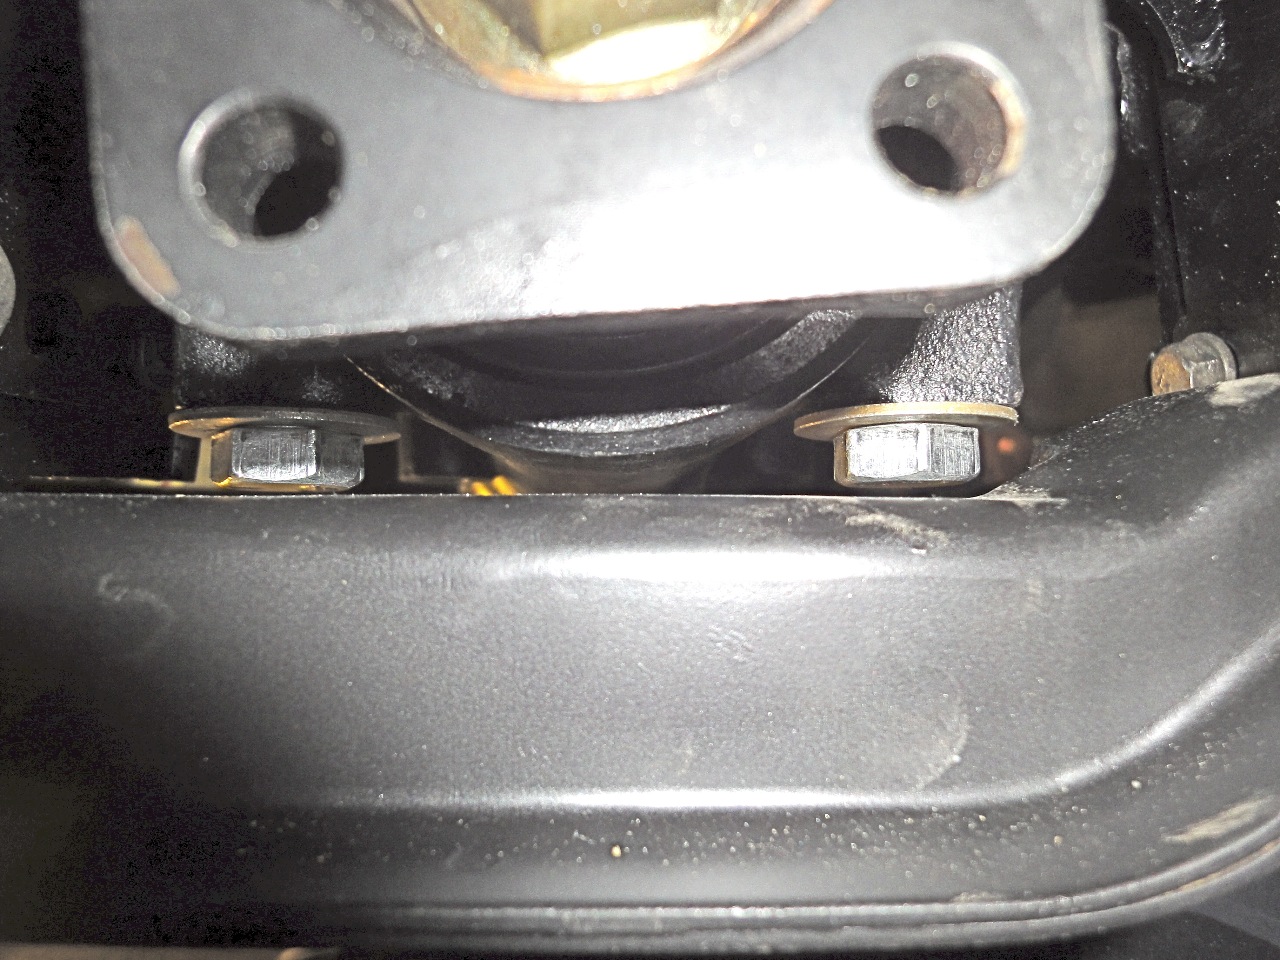
I don't think I am going to need to do that. I bolted everything in, did some inspecting and found that the snout of the diff is actually resting on the crossmember now. I think I am going to need to grind material off the mount so the diff fits in it better and lose the 2 washers. I still have no idea how you got that to fit dsommer, perhaps your RT mount is higher than mine? The stock mount is something like 3/4" tall, I don't think I could remove that much material from my mount.
Here is a picture to illustrate my problem:
-
You're talking concave pieces of metal to fill the holes in the opposite direction?
-
So here's the carnage. I may have gotten a bit over-zealous, but I think I left enough metal to ensure integrity. I misinterpreted my markings on the piece and accidentally cut the wrong area on the passenger side, so that's why so much is missing on that side.
-
I think I'll grind the crossmember, I still have a decent amount of work left to do on the car before mocking engine/tranny fitment and I want to be able to put wheels on it to roll around. If it really becomes an issue, I'm sure I can find a used crossmember on the cheap.
-
Most people run the Energy Suspension 3-1108 - http://www.jegs.com/i/Energy+Suspension/355/3-1108G/10002/-1
Maybe it's not as tall as the GM 3201 that you say you're using. That would lift the nose of the diff up. I did a quick browse but can't find a 3201 on the internet to compare to the 3-1108.
My bad, I was just going by the number stamped into the mount. I am pretty sure 3-1108 is what I bought, though all I can find in my records is a PayPal payment for 33.16 to ES (over a year ago), which sounds about right.
-
Yes.
Cool, thanks.
Any idea how dsommer did it, as evidenced in the 2nd picture I posted stolen from this thread (56k beware!):
Also, what is the best way to cut it to retain structural integrity?


4L80E Question
in Gen III & IV Chevy V8Z Tech Board
Posted
Sorry about the very late response, I don't come around here very often anymore.
I don't know what year my 4L80E is, I am pretty sure I was told it was off of a 3/4 ton truck and it was sitting behind a 454 (which made it a bolt on in my car).
I am using the Lokar firewall mount dip-stick for the 4L80E.
The cooler fitting should be apparent in it's intended function when you pull it out, mine had a tube that was several inches long reaching into the transmission.