

nix240z
-
Posts
110 -
Joined
-
Last visited
Content Type
Profiles
Forums
Blogs
Events
Gallery
Downloads
Store
Posts posted by nix240z
-
-
I must ask for what reason?
Steve
-
I did the original roof from the top and donor from the bottom. There is about 93-96 spot welds per roof, if I remember correctly.
I used a spotweld remover for both skins.
Steve
-
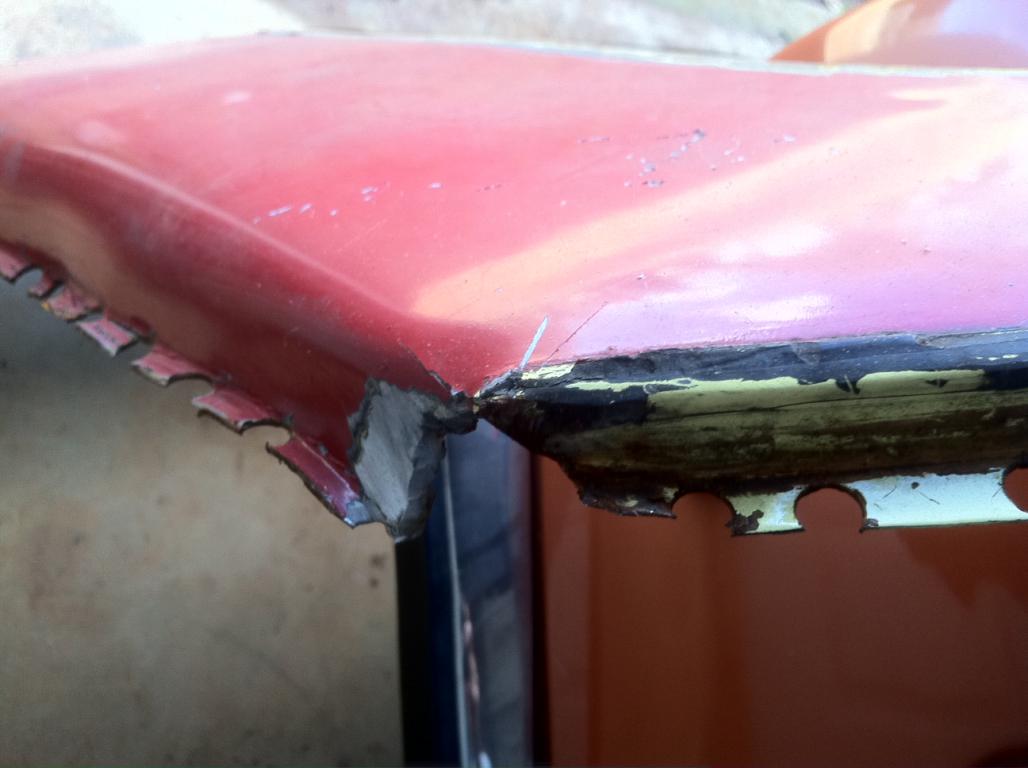
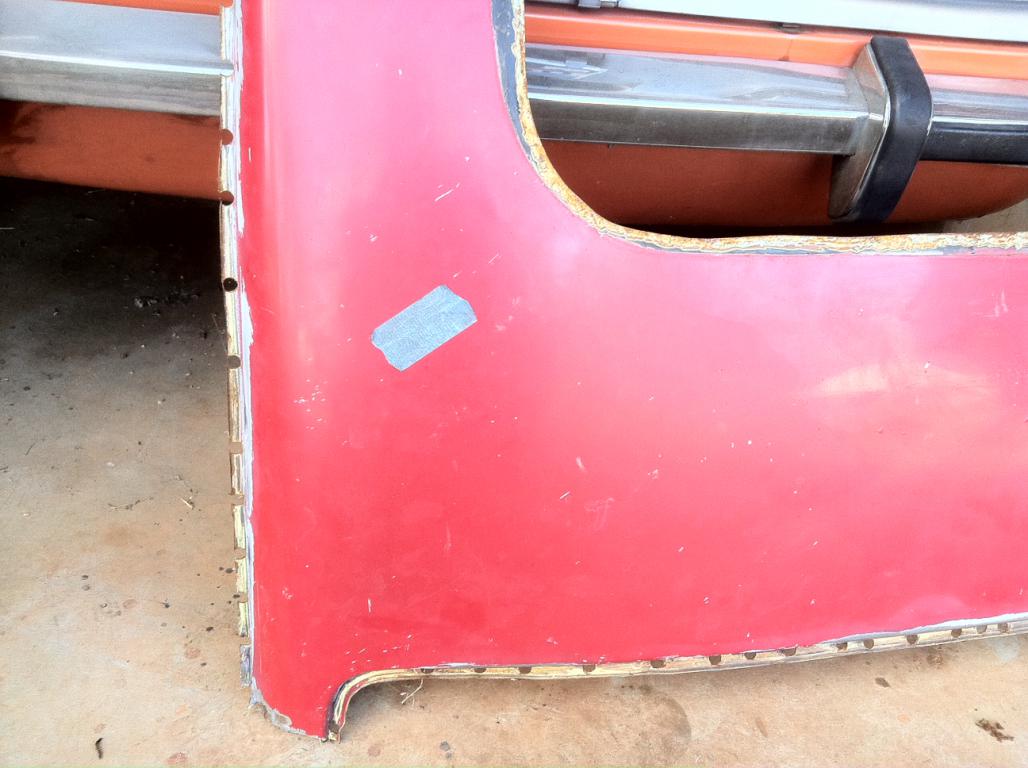
a few pics of when I did my roof.
Red original with sunroof
Gold is the donor roof.

-
This is definitely a great build. a inspiration actually!
Would you mind showing me the car if i'm ever in the greenville SC area? or if you ever drive it to the charlotte NC area.
i will be sure to source some 240z parts from your site.
Thanks.
Thanks, if you come to my area let me know.
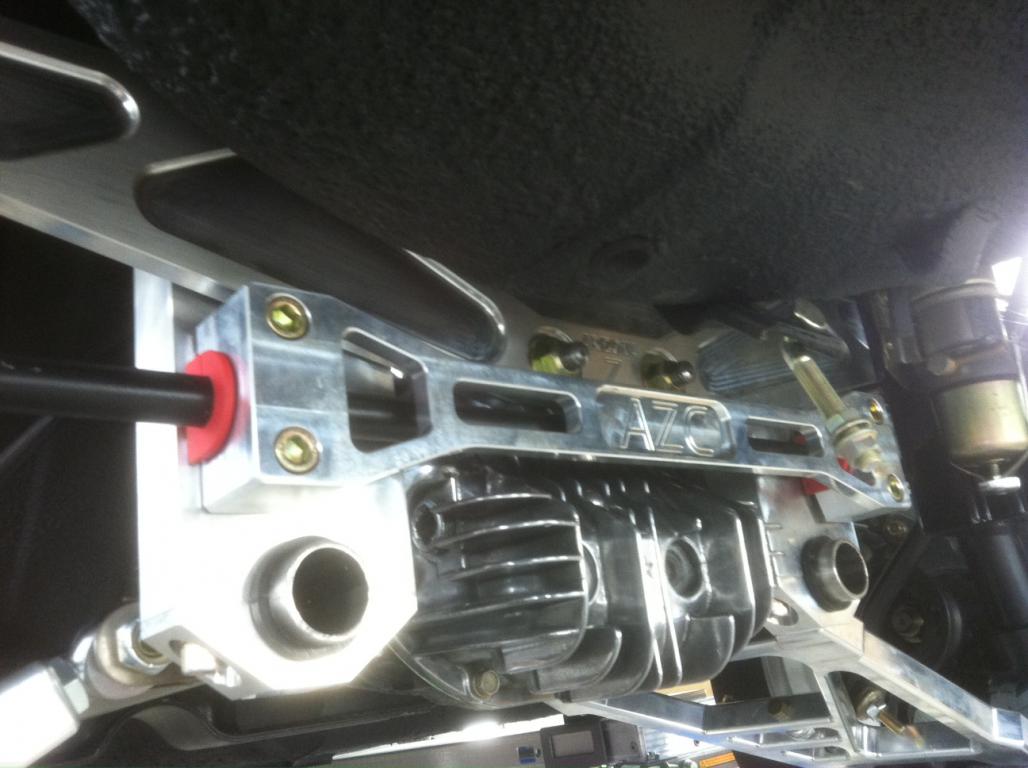
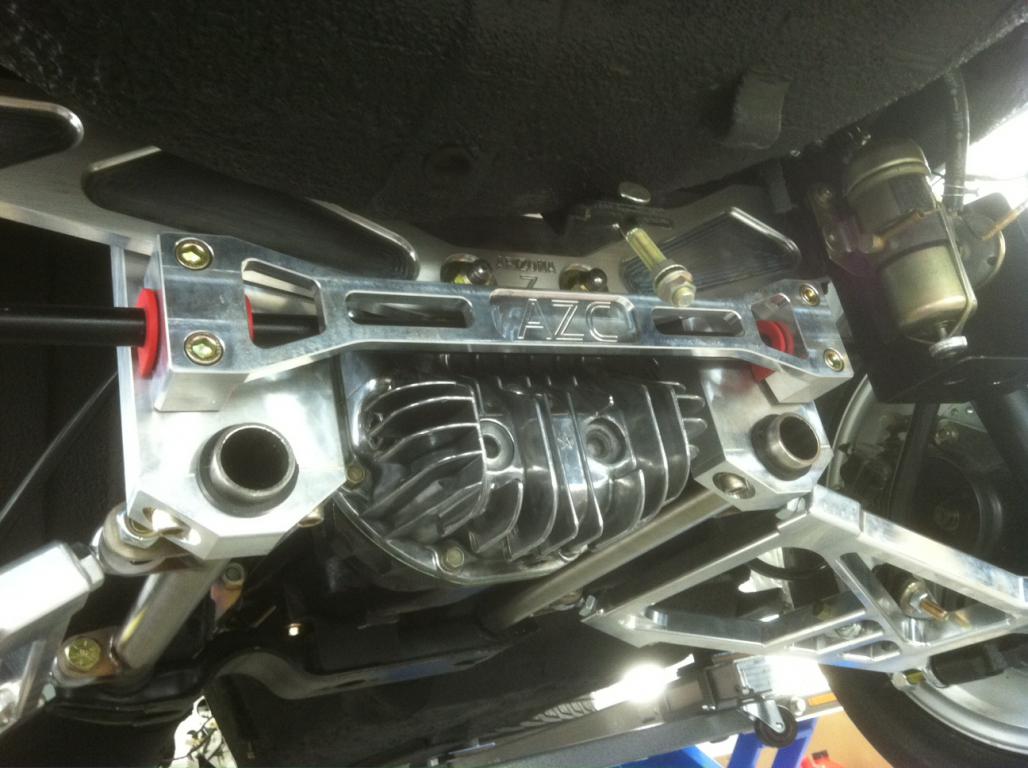
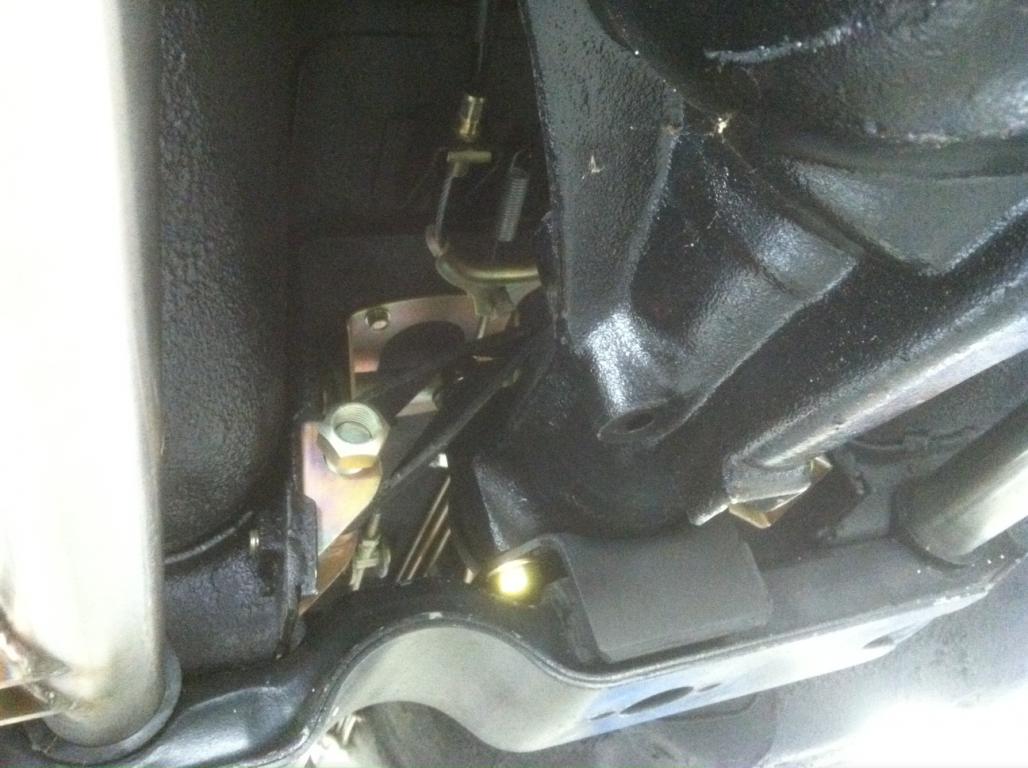
I now have the R200 LSD in the car after replacing the seals, replating the hardware and installing a new differential mount.
-
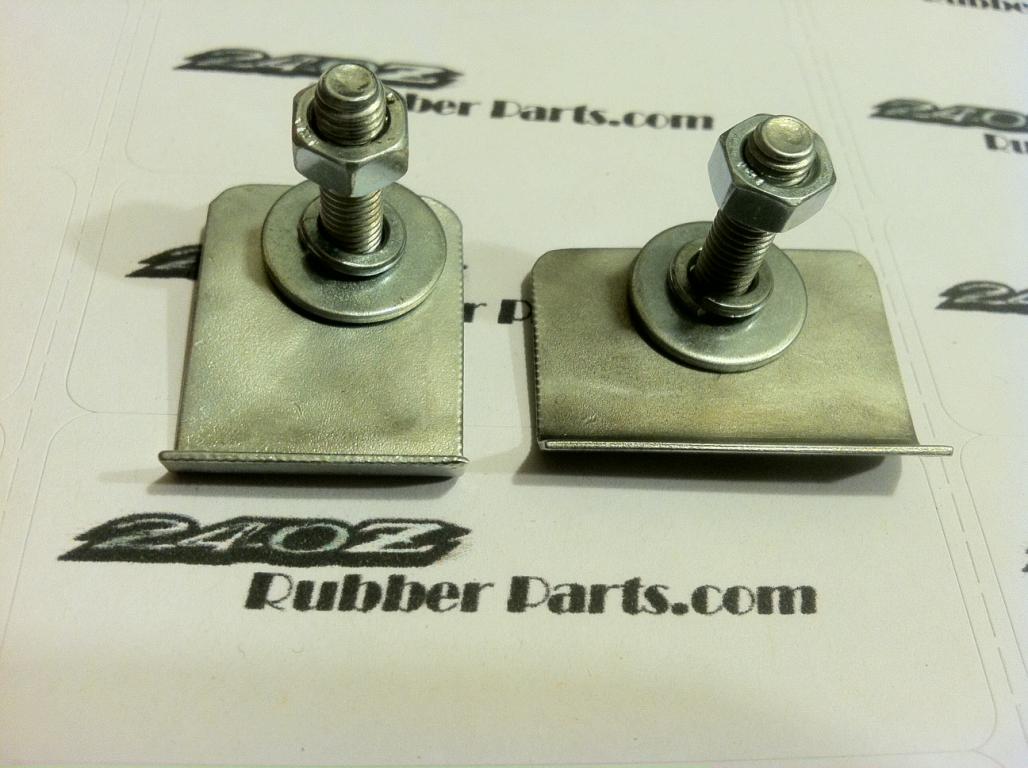
Where did you get those swaybar saddles (super sweet!)? Also, you need to have a spacer made to move the swaybar about 1/2" off the frame, or your swaybar will kiss the frame rail, kink the sheetmetal and wreck your paint. To check to see if this is the case, loosen your strut collar all the way and jack up a front control arm till it is level. Then check sway bar to frame clearance. Then raise the control arm a couple inches more to simulate a hard bump. If the swaybar stays clear of the frame rail, disregard this discussions.
Thanks for the heads up, I will fabricate a spacer.
Steve
-
Very well done build. Good attention to detail. You make me want to build another one.
Where in up state S.C.?
Greenville
Amazing build! Definitely one of the cleanest builds there is. I'd be afraid to drive it around.
What is your profession btw? That garage is super clean too
Irrigation contractor, back flow tester, palm tree farmer and owner @ 240zrubberparts.com
Wow nice! How far off the floor can you get the car now?
nice sway bar bushings, by the way.
Found these on ebay.
-
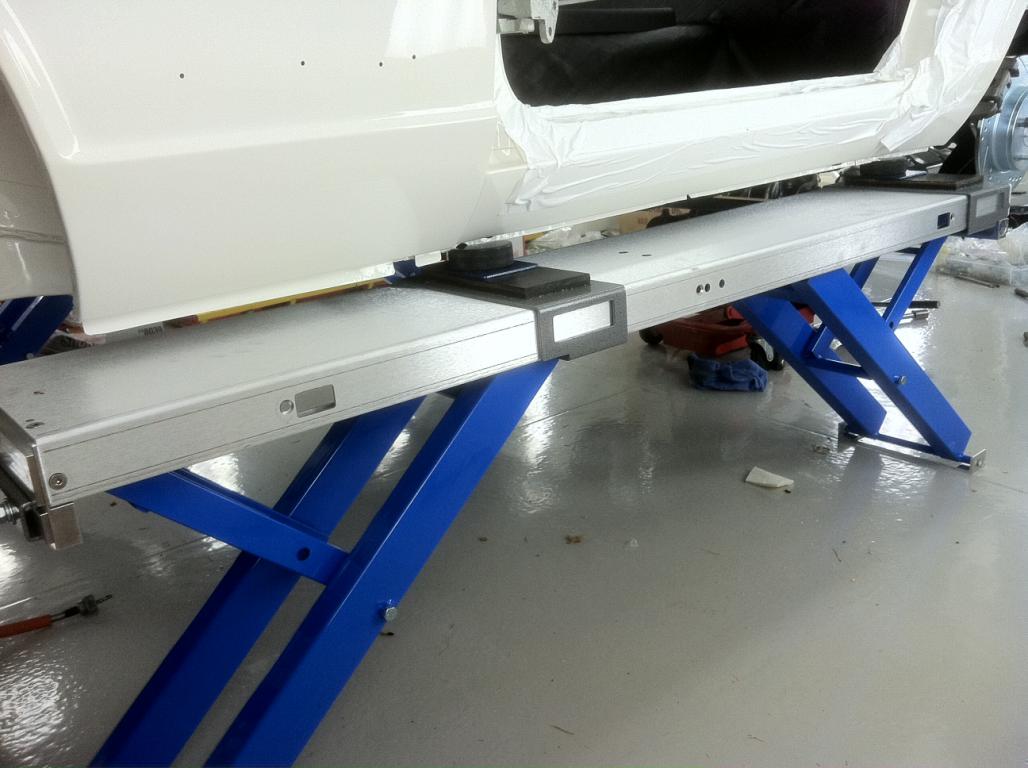
The ezcarlift was delivered yesterday via Fedex. It was shipped in two very well packed boxes, each weighing 75 pounds each. The lift was very easy to assemble with nice instructions, with pictures.
All I can say is WOW, this lift is very nice and is put together very well.
The lift is very smooth and very stable, I pushed on the car and it did not move.
z owners will need to order the hockey pucks.
A few pictures of the lift at about 1/2 the lifting height.
I have the lift in a position right now, so I can install the R200LSD,
NEW 1" Suspension Techniques Front Swaybar
-
ordered a ezcarlfit and new tires, so I can get the car off the dolly.
Then I can install the Rebello 3.2L.
-
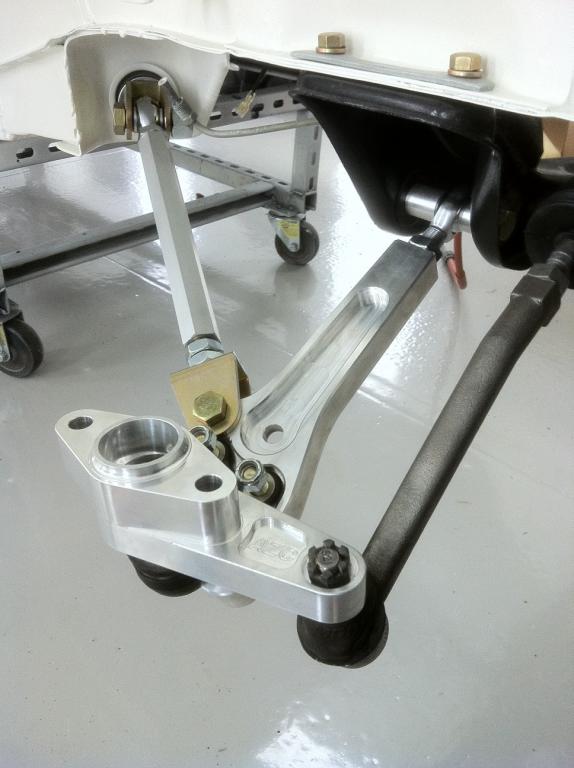
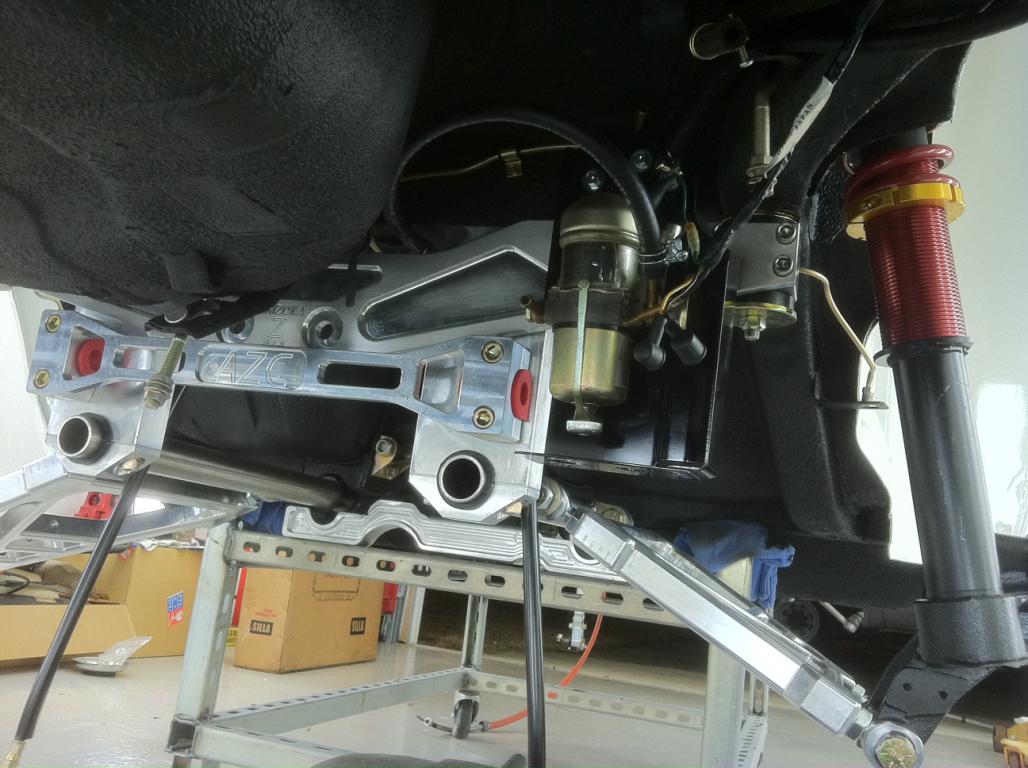
That AZC setup looks really sharp on there! I like the jig you made. Smart way to get the alignment close on the 1st try.
I'm actually surprised that you went with the track suspension, after all your attention to factory-correctness everywhere else. Not a criticism, BTW. That's exactly what I would do.
Amazing work, sir. Truly humbling.
Thanks.
My goal is for factory look but with upgraded suspension, brakes and drive train.
I still have all the original parts for the suspension and brakes;however, the original motor was swapped out in 1984.
I also have a 72 that will get the factory correctness since it still has the original engine.
-
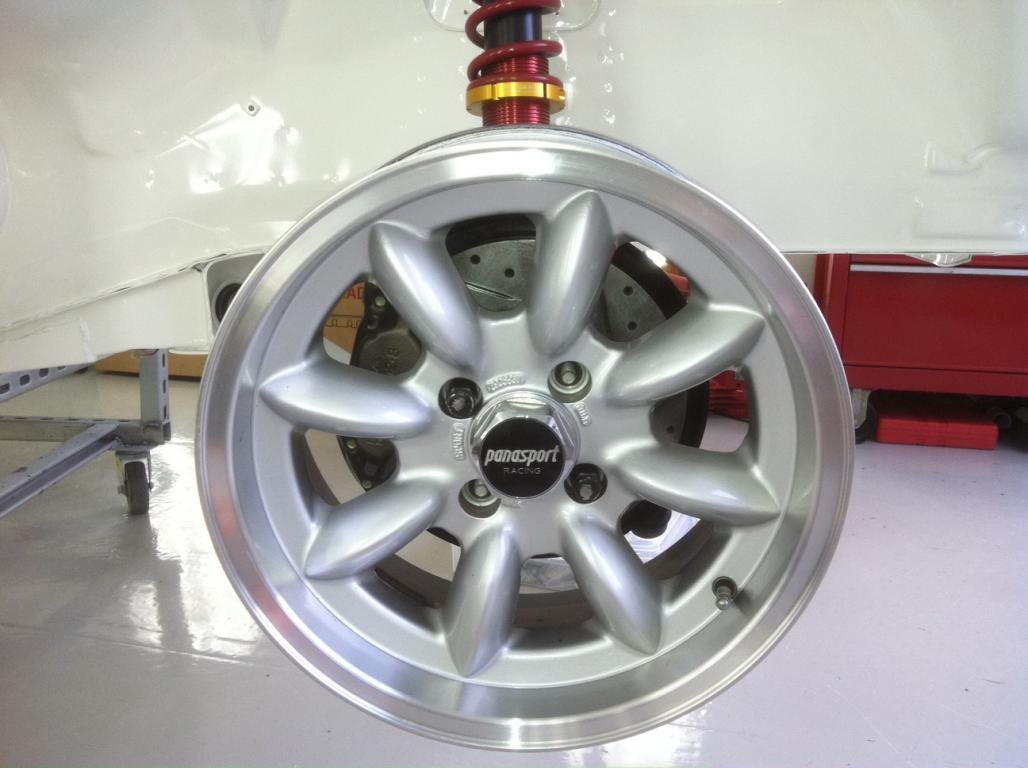
Amazing work! What are you running for wheels?
Thanks, watching your project got me back moving again on mine.
I was pumped watching your Rebello engine video.
16" Panasports.....
-
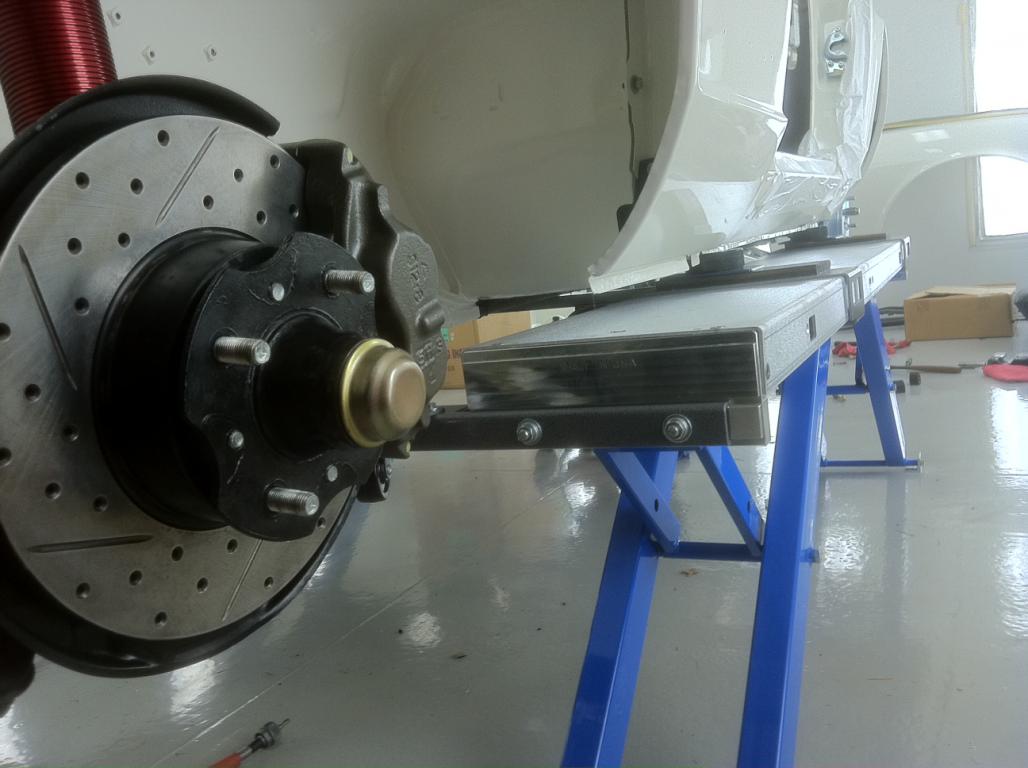
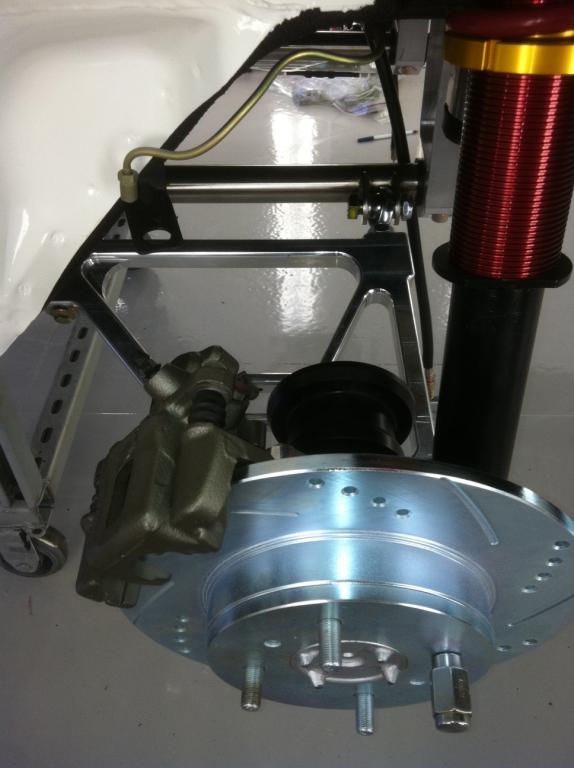
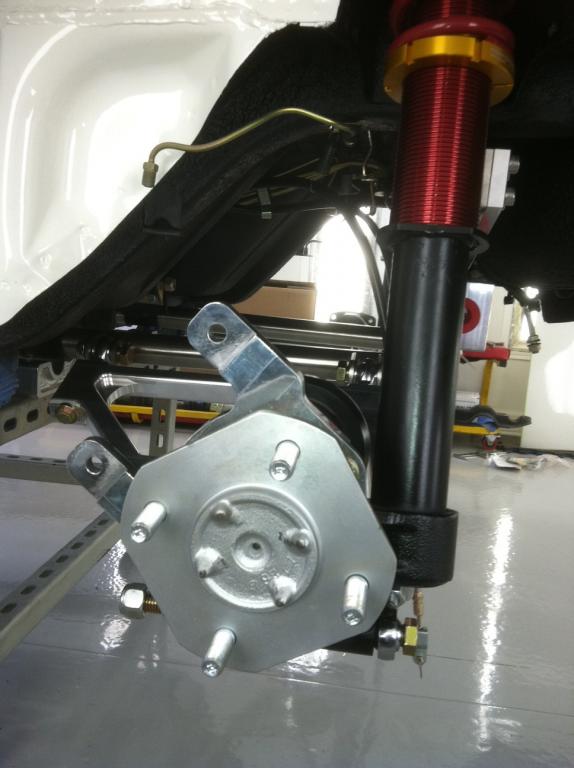
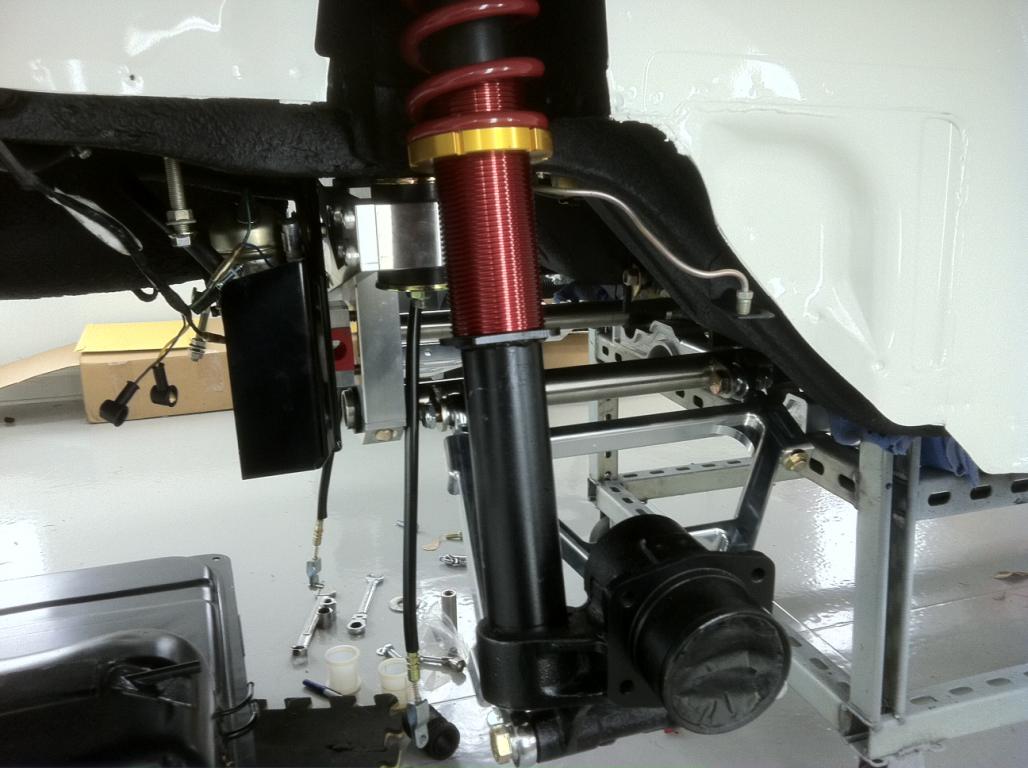
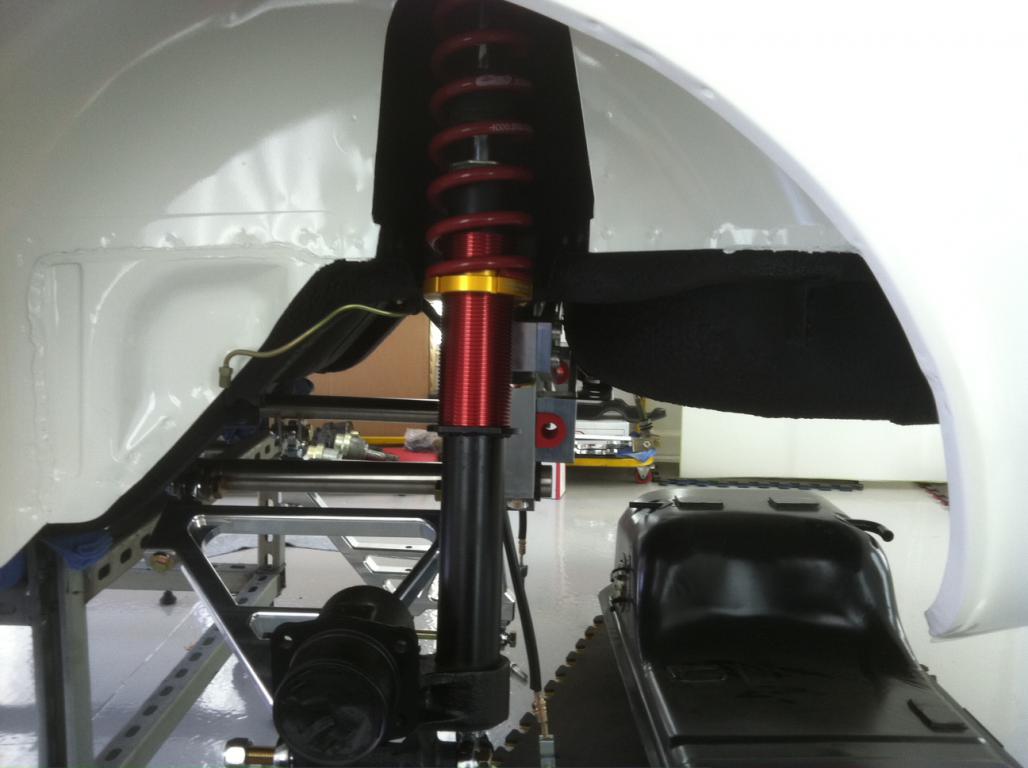
Rears today with Arizona Z car rear end, coilovers and Tokico Illuminas.
Refurbished 280z stub axles with 280zx turbo companion flange adapters.
New bearings, seals, rotors, calipers and plated hardware.
-
That is so super AWESOME.
Thanks.... I will be working on the rear today, once done this will be the first time back on the ground since 2011.
Steve
-
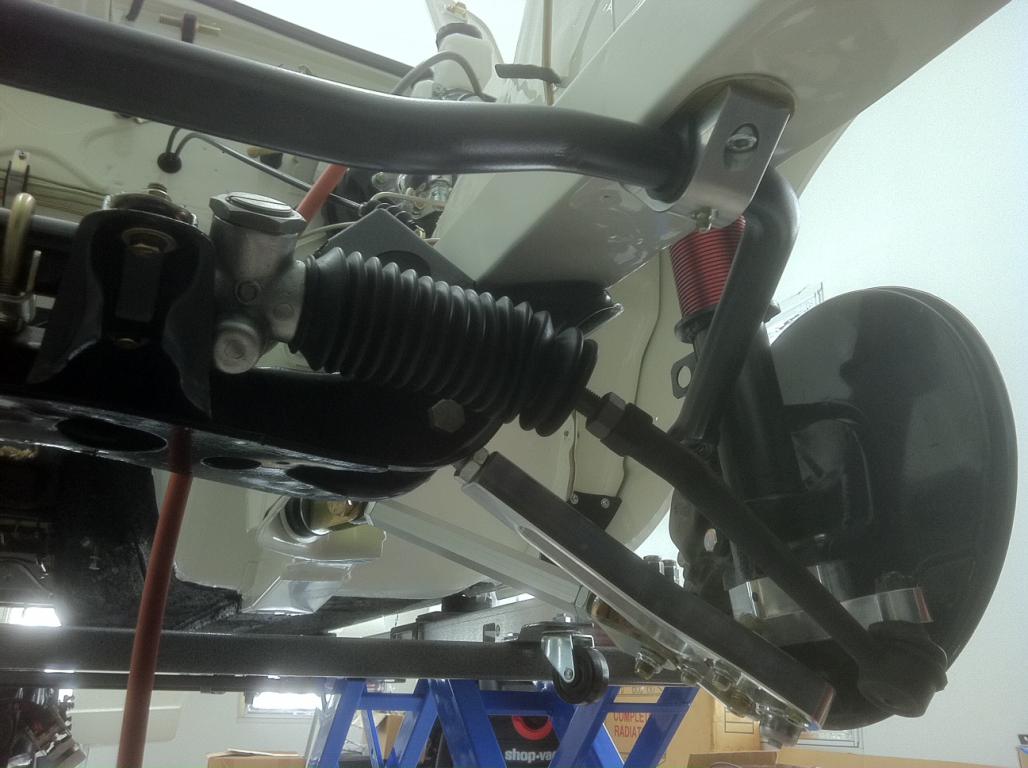
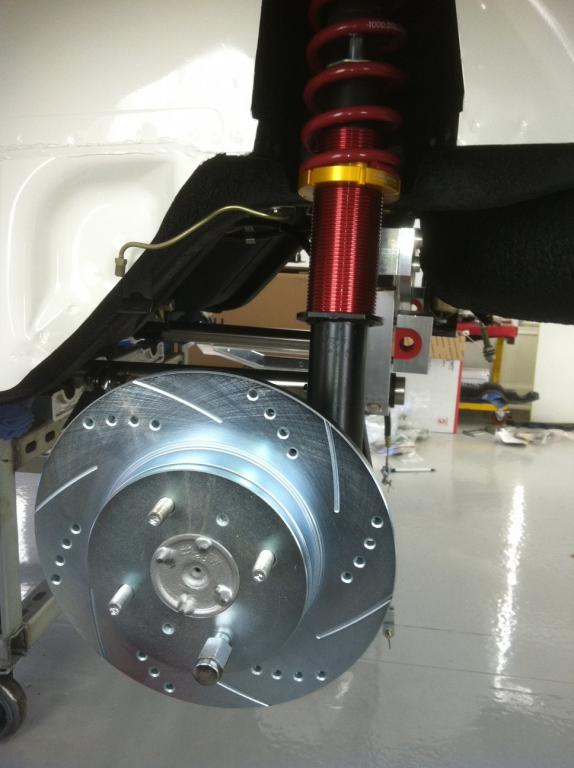
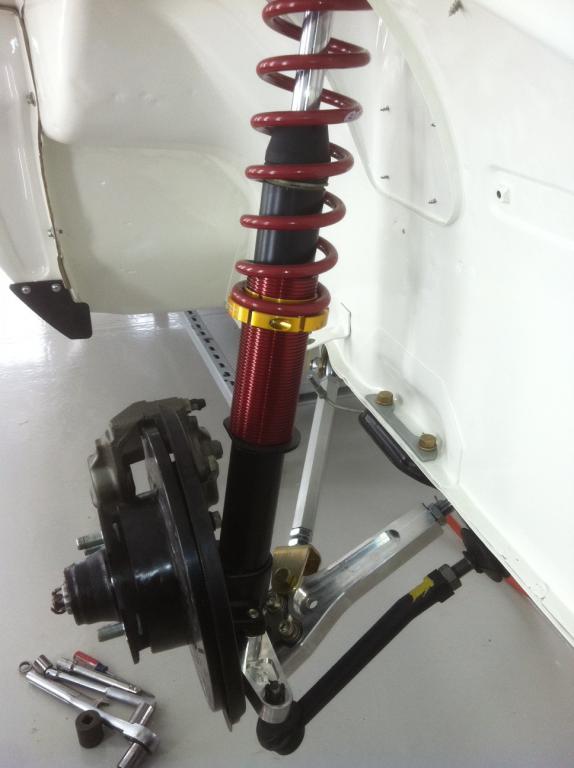
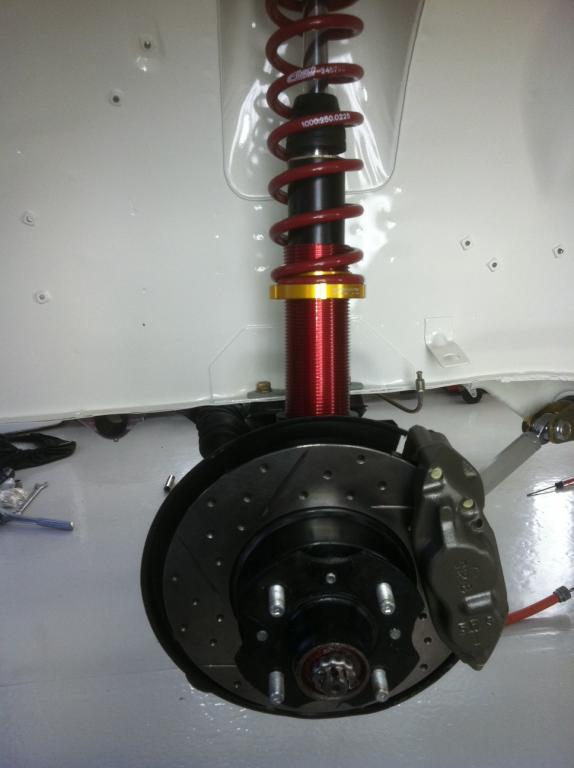
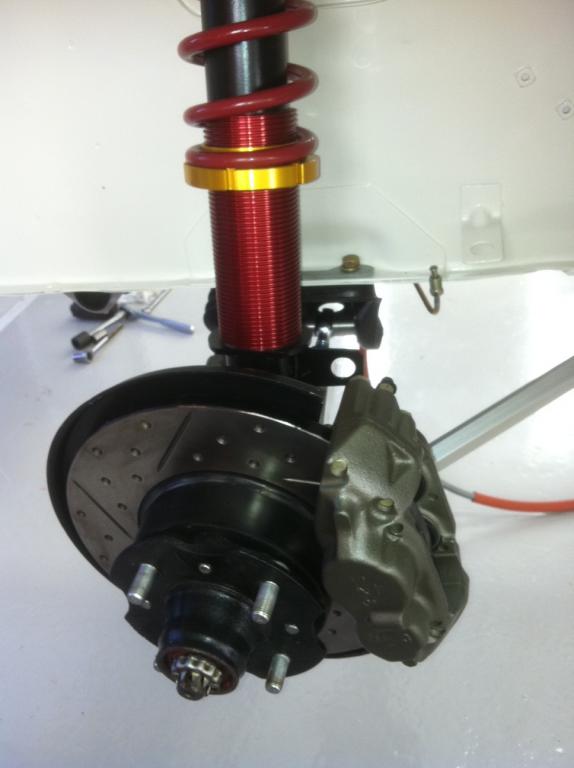
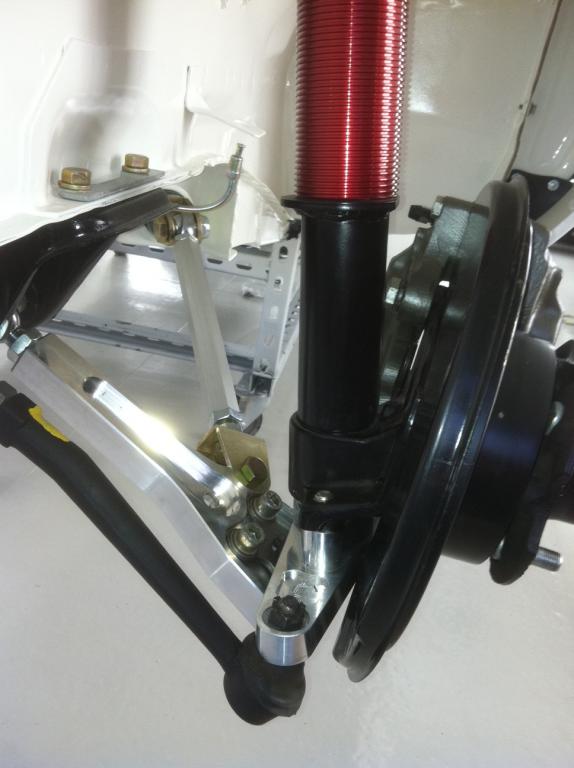
Finished up the front end. All new parts, bearings, seals, rotors, tie rod ends, ball joints, brake calipers, Arizona Z car suspension and all the hardware has been replated.
-
today projects.
Working on Arizona Z car front suspension.
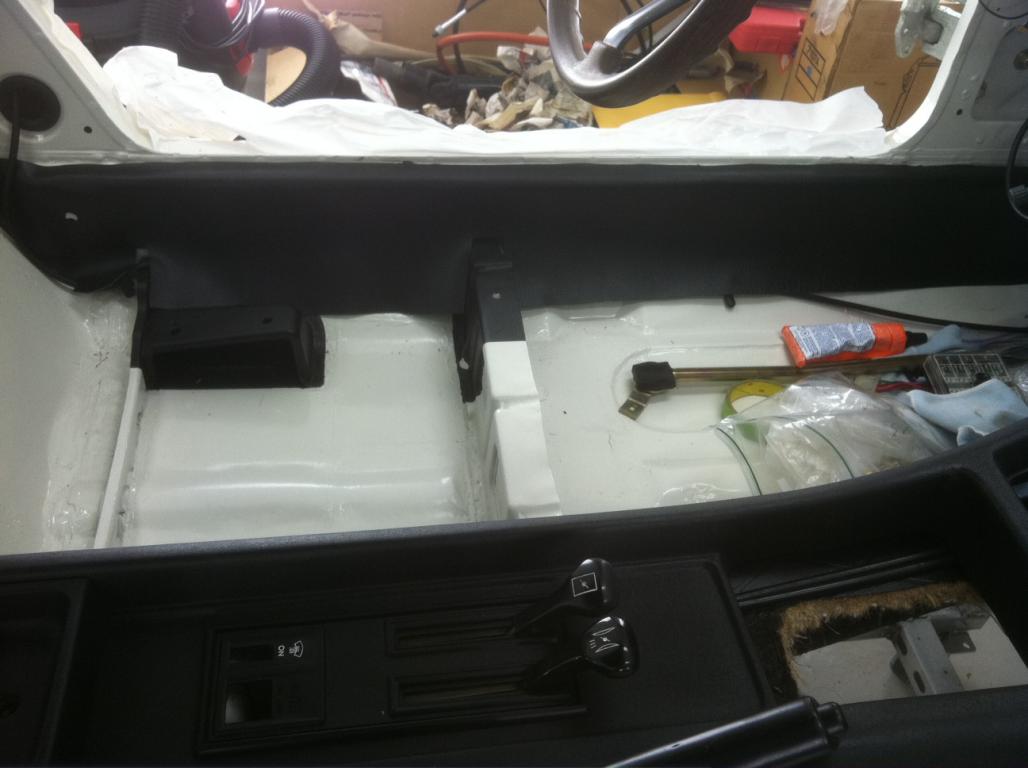
continued working on interior.
-
Yes, I ship and sell parts all over the world.
Shipping a complete set of insulators to Austria in the morning.
Steve
But still not selling overseas?
Regardless awesome work continues
-
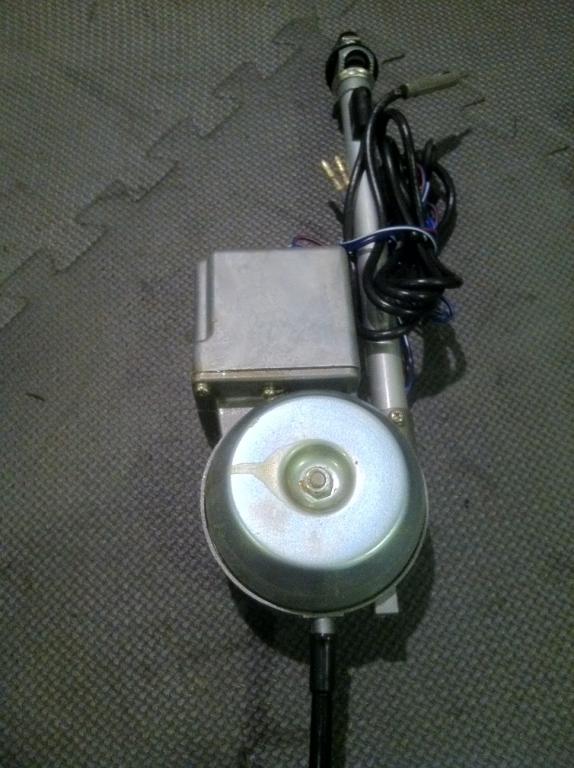
NOS antenna with all new rubber.
-
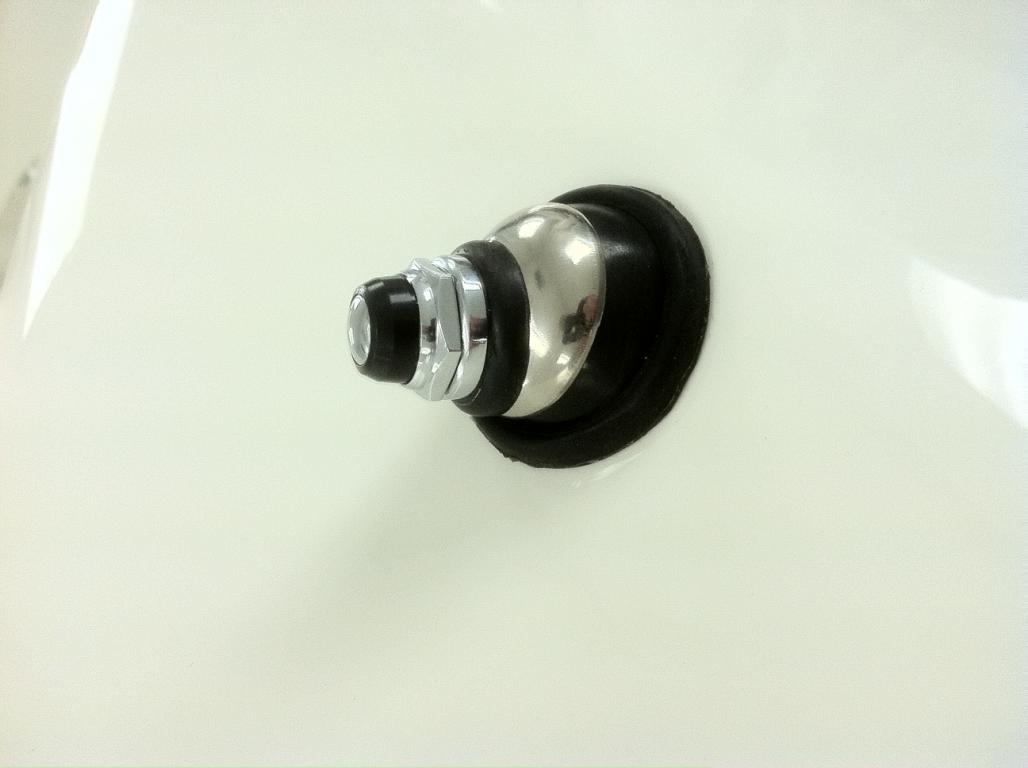
A few more pictures of some of the small detail work on the car.
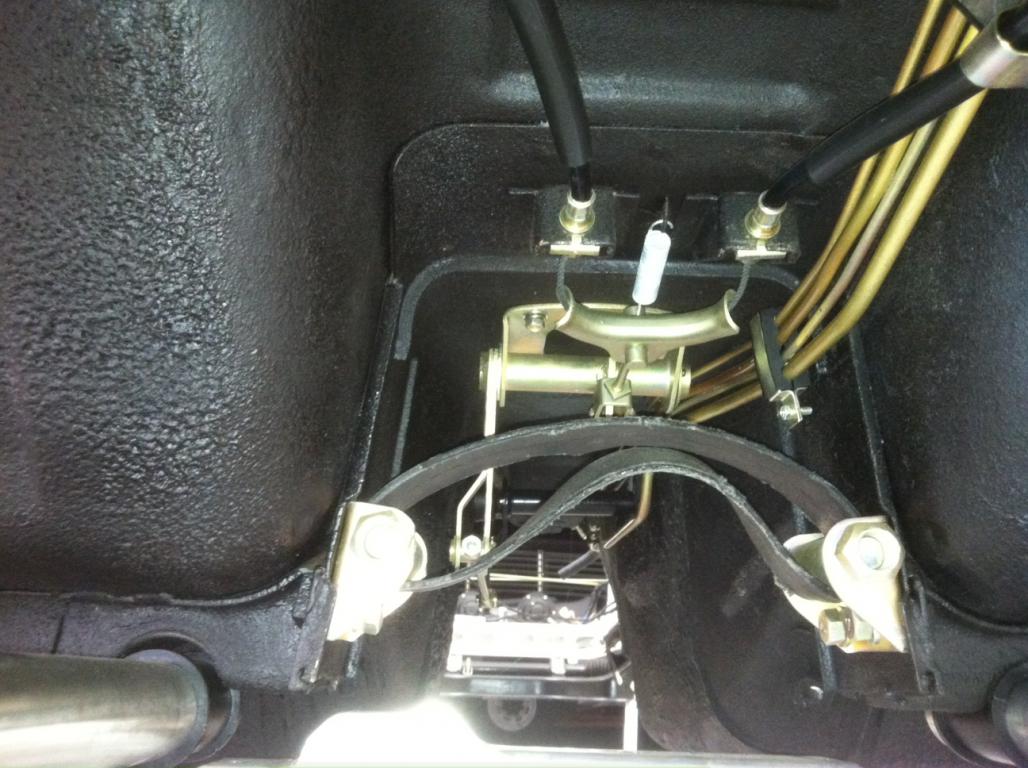
handbrake assembly replated with hardware
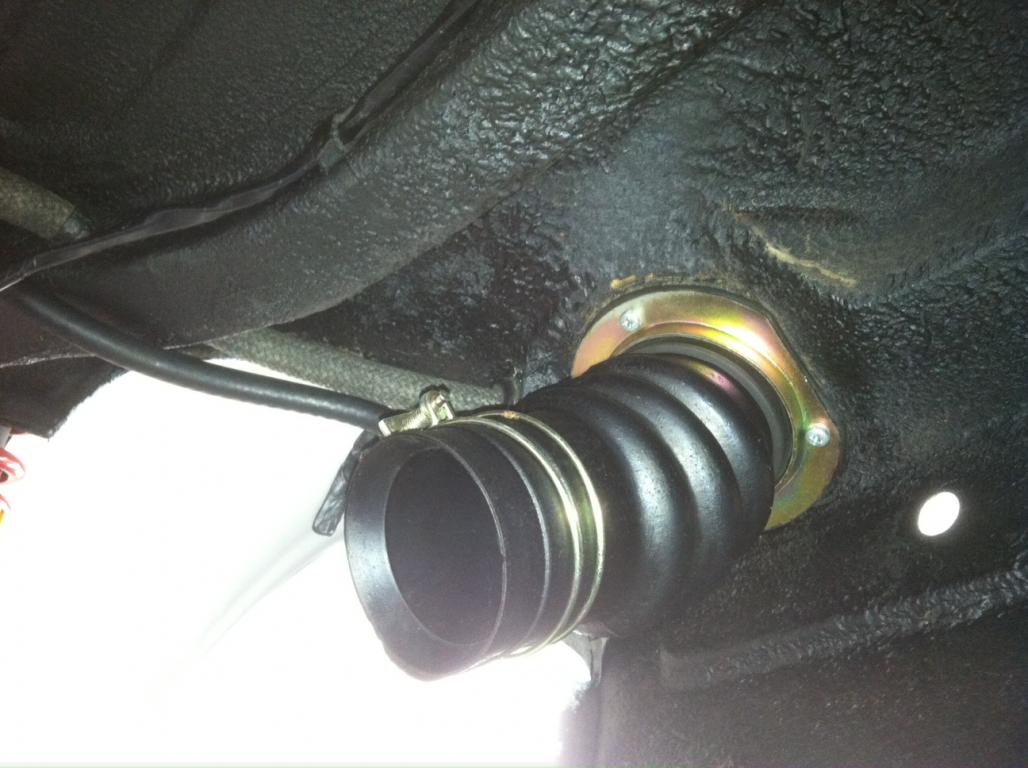
new gas filler tube with plated clamp.
Arizona Z car.
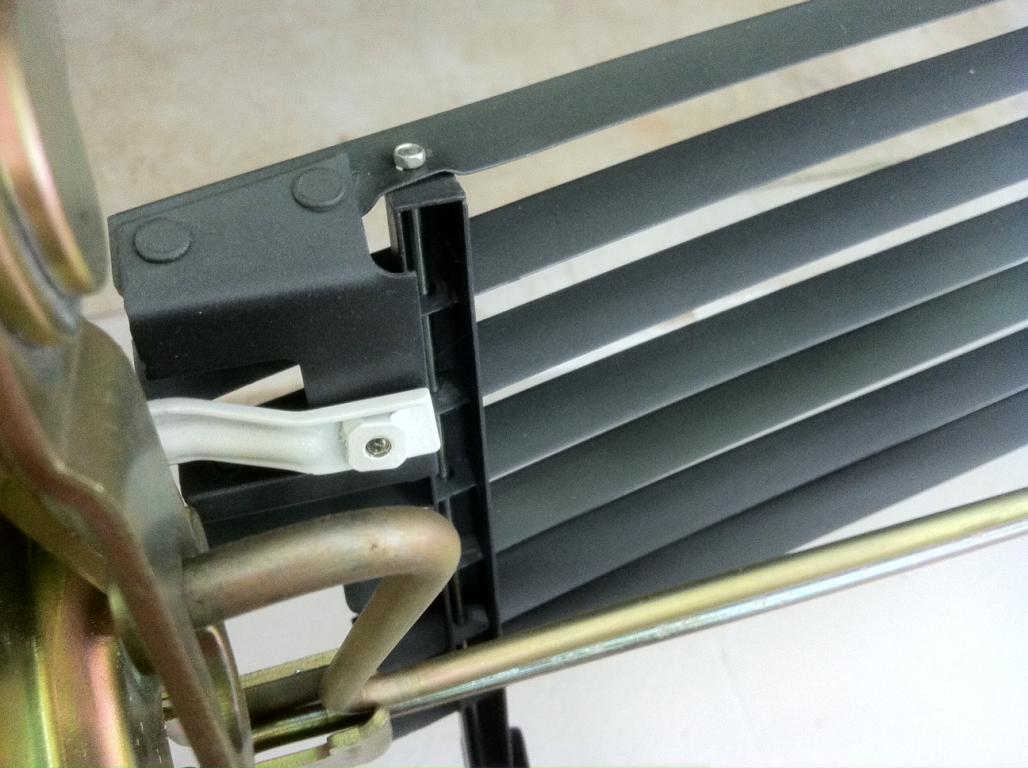
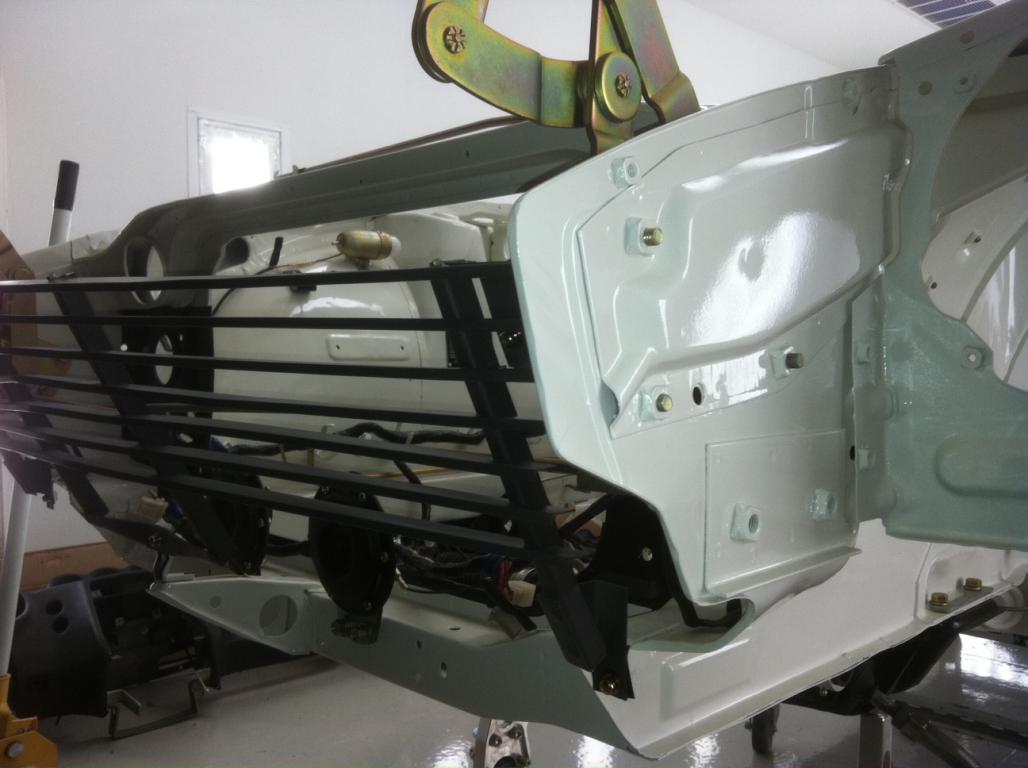
refinished grill with all the connecting hardware plated.
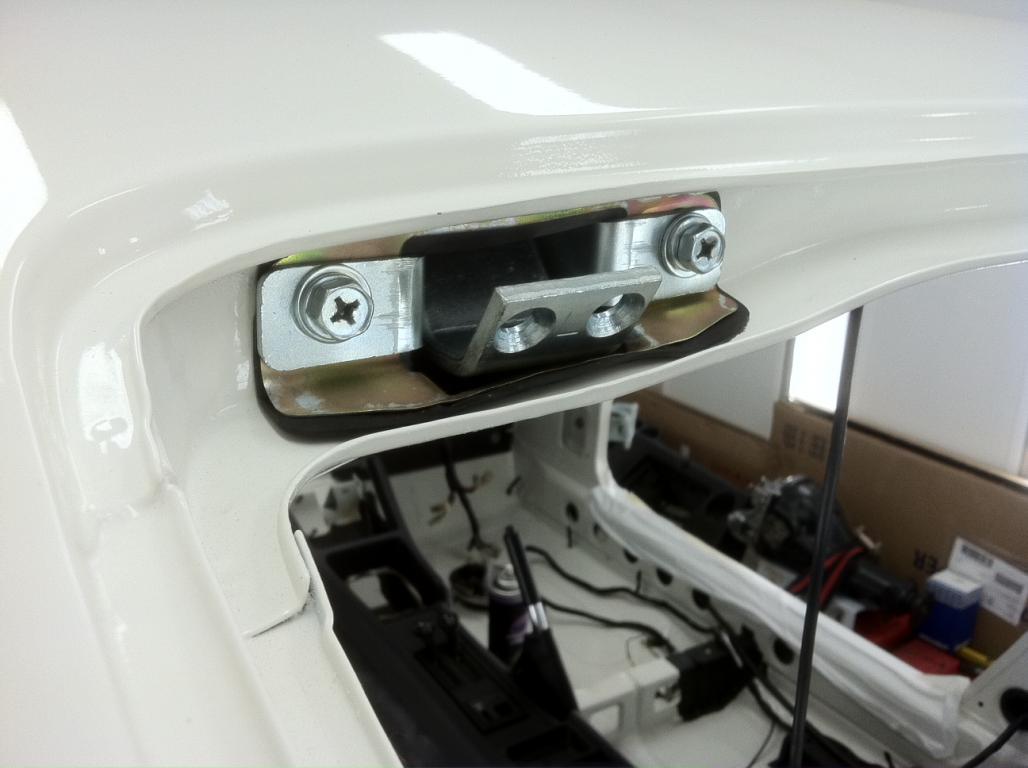
new hinge rubber boots with plated hardware
-
That looks like a 73... some parts do not crossover into the 70-72 cars...seems kind of high but believe it or not that is the going price in the south on the eastcoast.
-
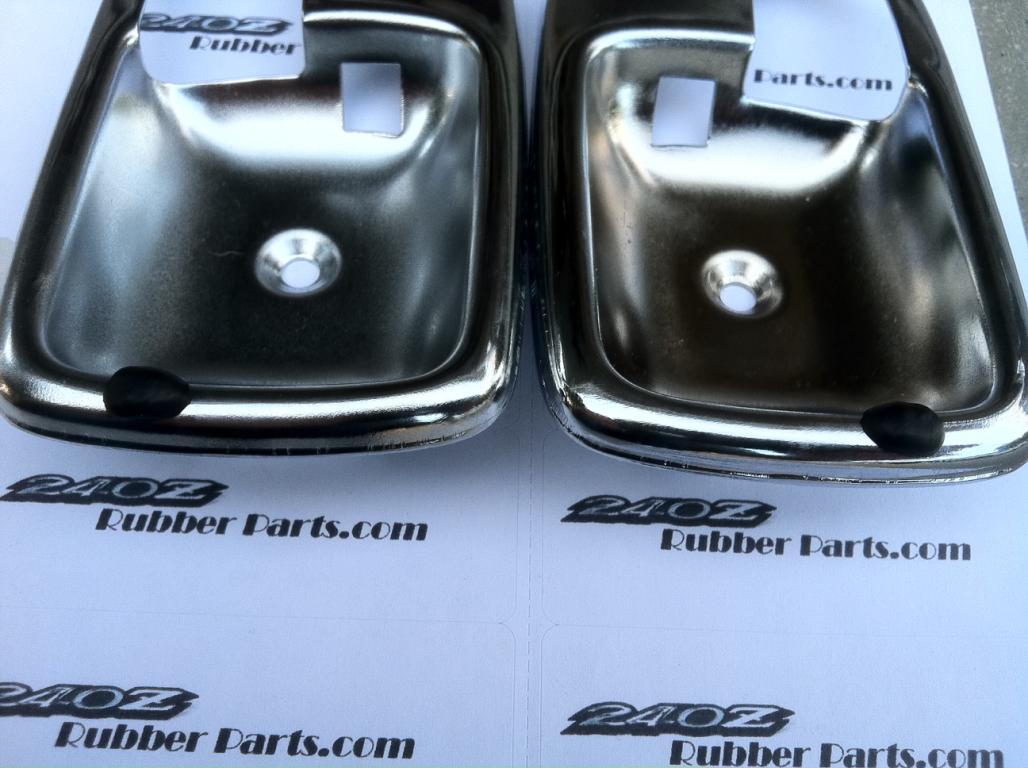
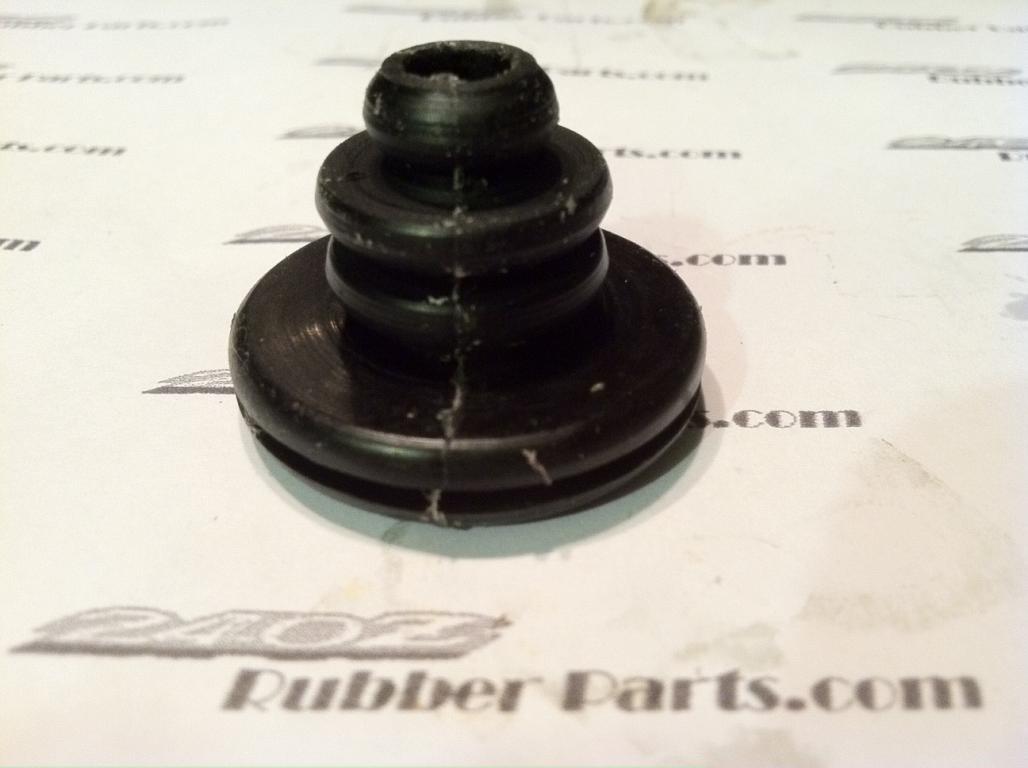
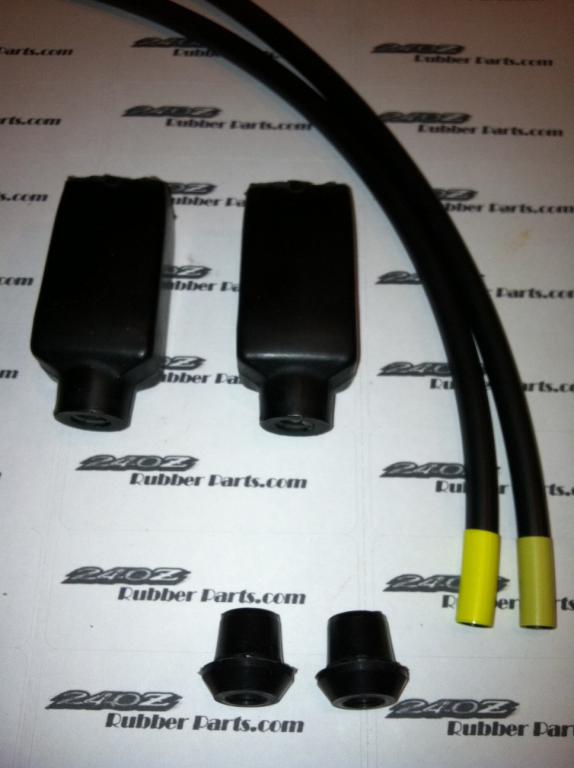
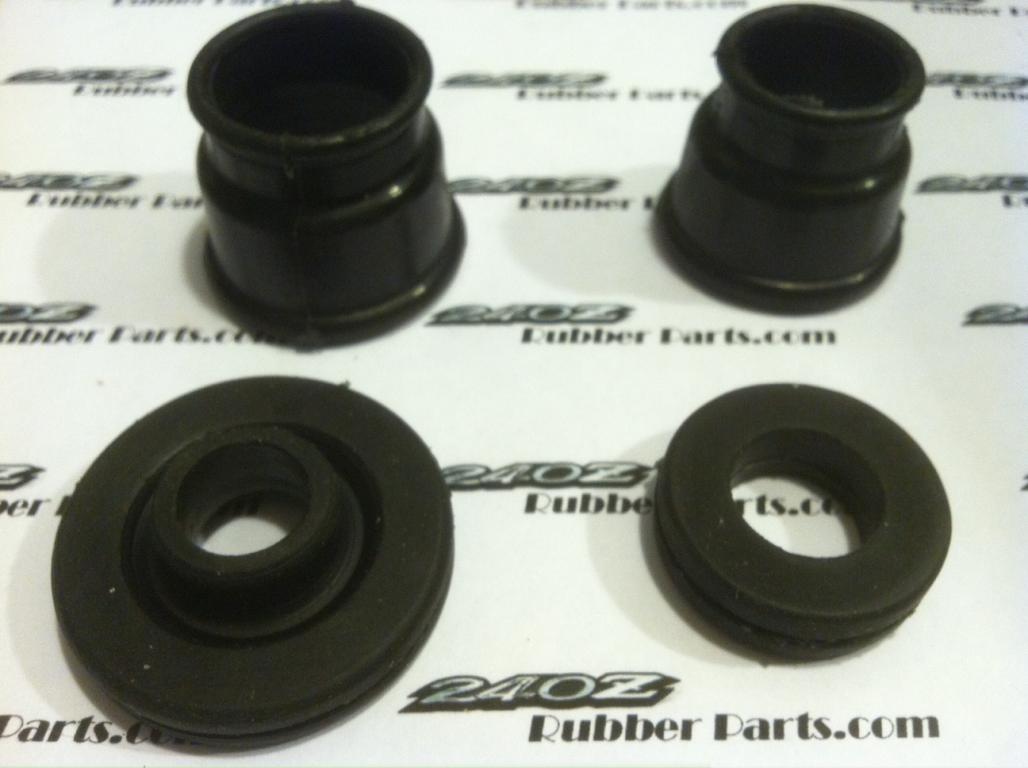
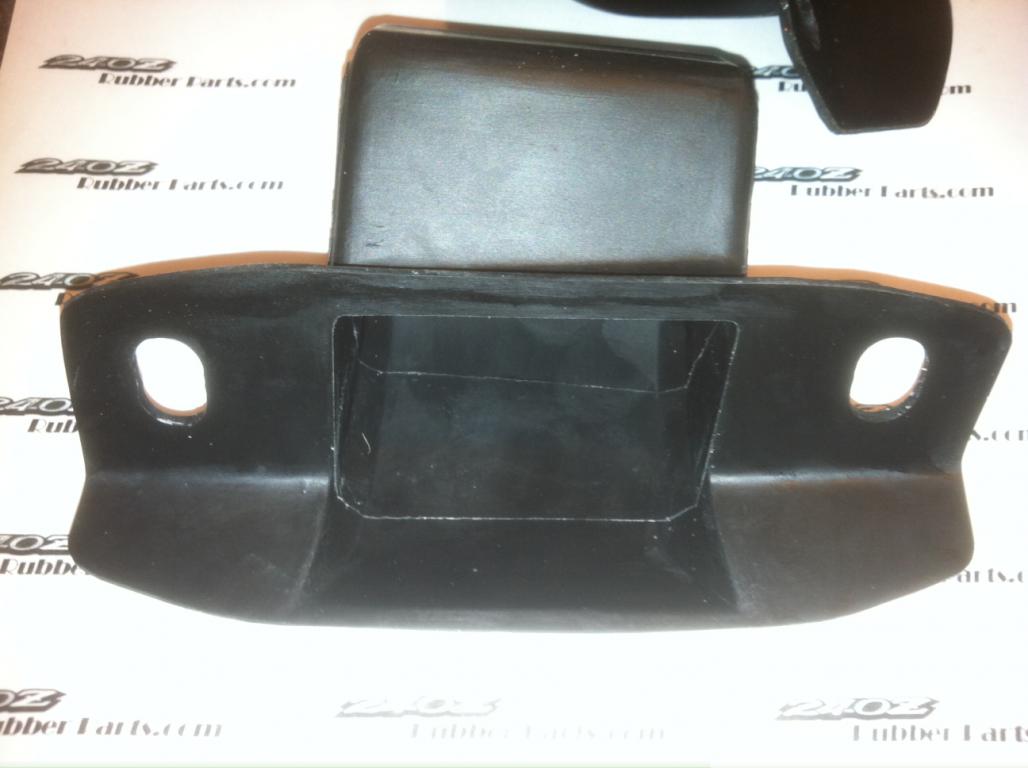
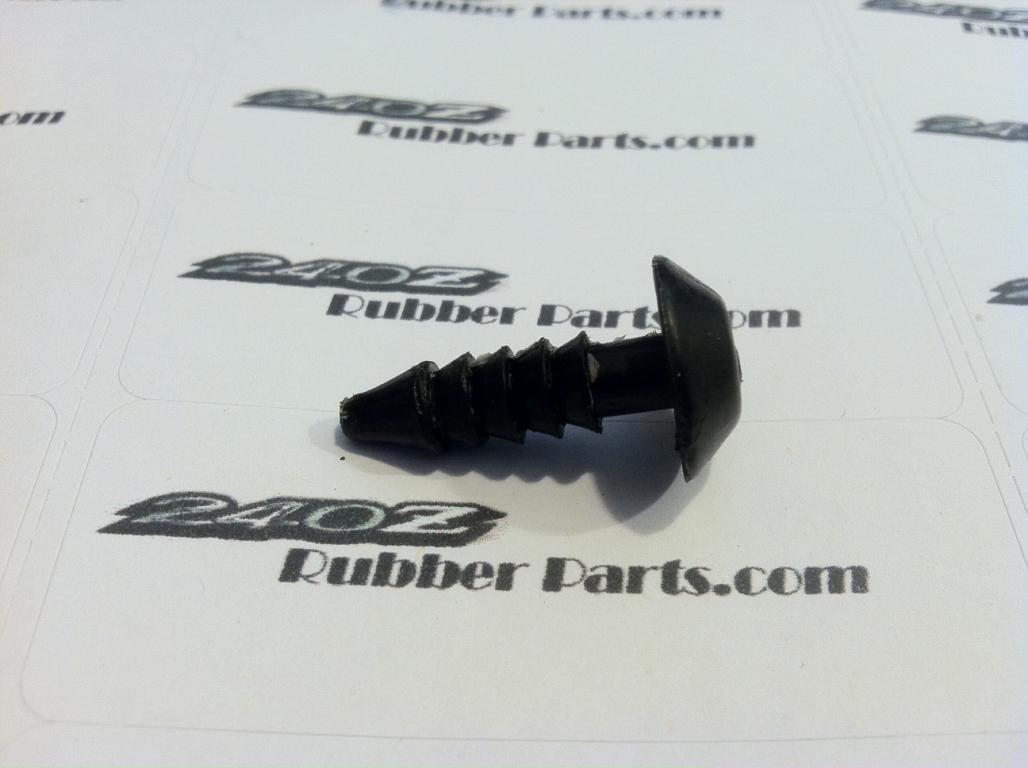
Projects within a project is how I roll, so a few pictures of the items I reproduce for my build.
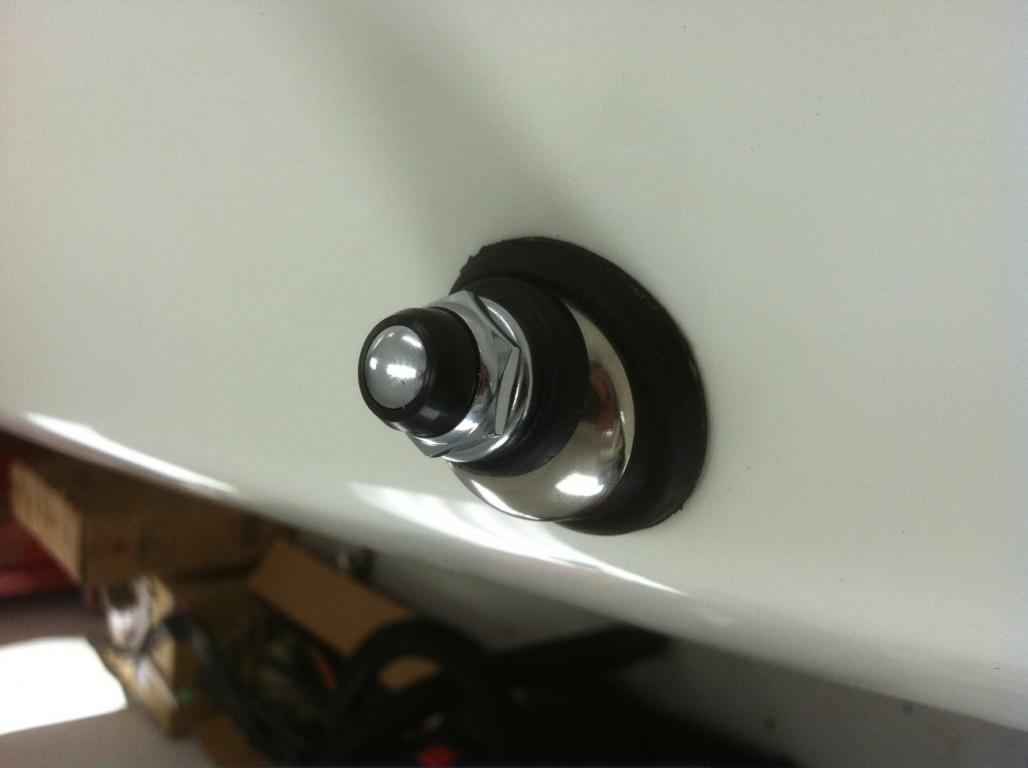
Door Escutcheon rubber, look at yours and you will see a hole. This is for this little rubber bumper.
Antenna Drain Tube
Strut cap
Radiator wire pass through
Turn signal wire rebuild kit
Headlight wire rebuild kit
Turn signal hardware
Vent hose boots
Hatch hinge boots
kick panel clips
-
Ground Control Coilovers with Tokico Illumina Adjustables on Arizona Z Car control arms.
Steve, remind us which coilover you're using please.
-
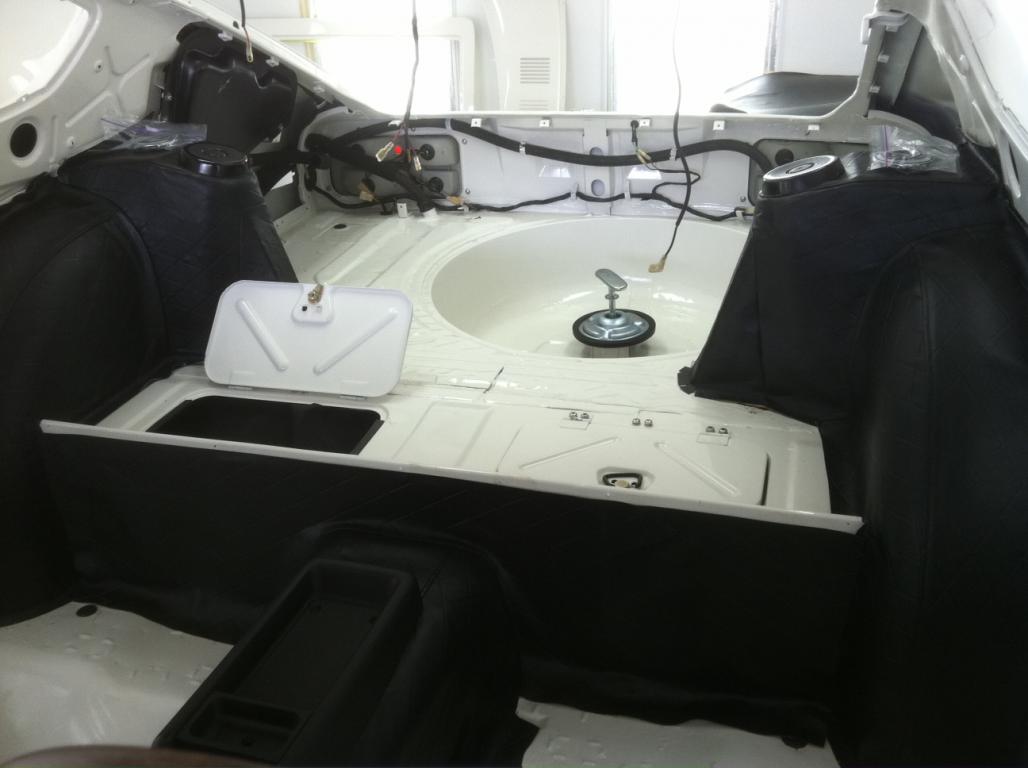
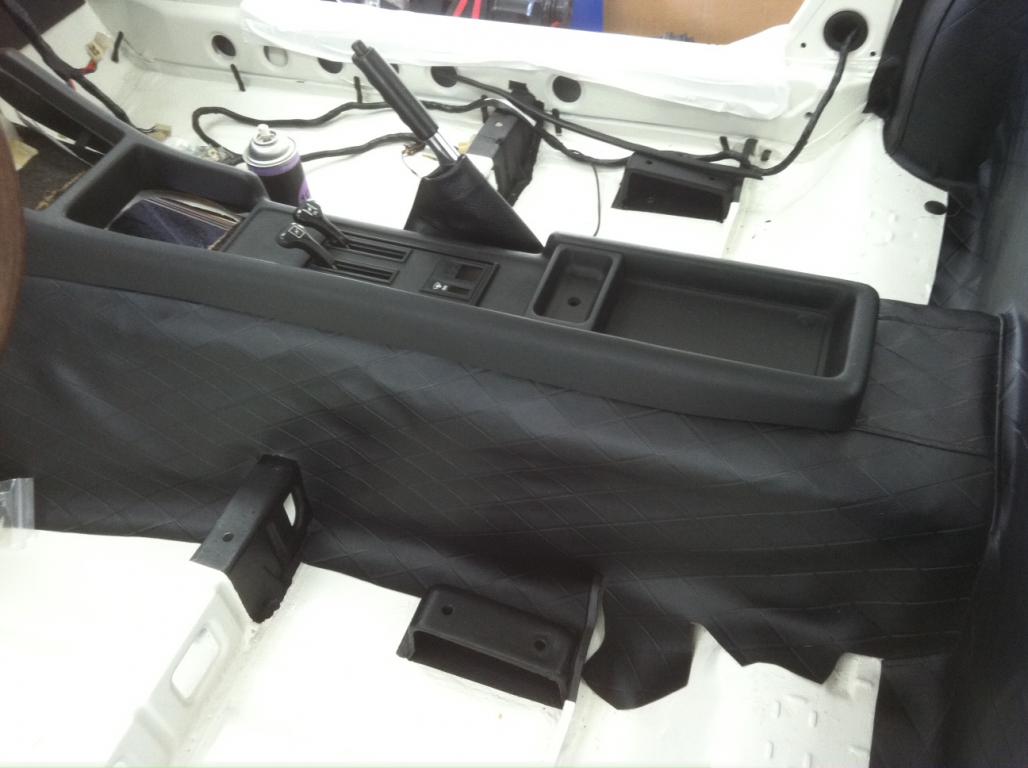
After almost a year of not working on my car because all my spare time was taken up with www.240zrubberparts.com. I am now back working on my car, the good thing is that the car now has entirely new rubber everywhere.
Started installing the interior and working on suspension.
-
looks like a r200 short 240sx rear end...
-
I have had the the Harbor Freight 60 gal. 5 HP 165 PSI Two Stage Air Compressor since 2011 and use it every day. I added a cooling fan blowing on the compressor head, added a 1/4" ball valve as the drain, mounted it to the floor on hockey pucks and use the 220 breaker switch as the cut on and cut off and leave the pressure/ on and off switch alone( always on).
I am Very happy with Compressor, I can sand blast, run air tools and painted my car.
Steve
-
Located the linkage needed.


71 240z 18 months of work.
in S30 Series - 240z, 260z, 280z
Posted
Been a while since I updated my build and I am still working on small details of the car.
Suspension and brakes are done and some of the interior is in back in the car.
Made new main wiring harness rubber tad holders
Dash in car now.