

z240
-
Posts
397 -
Joined
-
Last visited
-
Days Won
4
Content Type
Profiles
Forums
Blogs
Events
Gallery
Downloads
Store
Posts posted by z240
-
-
The charge light is a nice to have, but knowing the voltage is all you need to determine if you are charging or discharging. A fully charged battery is at 12.6-12.8 volts, your alternator should be able to produce 13.8 - 14.2 volts, you'll see it when you first fire up what's "normal" for your alternator. Then if the voltage falls below 12.8, you're discharging. Anything above 12.8 and you're charging. That's the beauty of the voltmeter. Running voltage PLUS knowledge of charge/dis-charge.
As to connecting a thin wire to the splice where the two white connect, just tuck the bare end of your new thin wire under the nut/washer you're using to connect the white wire ring terminals. Wrap it clockwise, the same direction as you tighten the nut. Better yet, crimp a ring terminal on the end of the thin wire. Chose a size with the same hole size as the white wire ring terminal and join them all with the same bolt.
-
sure enough, black wire with red band = +12, other black is ground.
The pin is the one top left, looking at the gauge connector with the pins facing you.
-
Ah good, you have a gauge.
Easy to tell which of the two black wires is for +12 and which is for ground. Just hook them up to a battery, first one way then the other. When the gauge reads +12, you have it right. Then hook up that black to the thick white old ammeter wires. You may have to connect the other black wire to ground.
Ah, just went and looked at a gauge. There is one black wire with a red band around it need the connector. Dollars to donuts that's the +12 wire. I'll go do the battery test myself to confirm
-
Yup, that's right! EZPZ.
Connect them with a short 5mm or 10-24 bolt and nut and insulate VERY well. Use a big piece of shrink tubing ideally. Connect in a short piece of 18 guage red wire with ring terminal and connect that to the voltmeter. There is also a ground wire on the volt guage. Lots of plain black wires in the harness in with the guages that you can use.
Tricky part is finding the volt fuel gauge from a 280 and swapping its guts into the 240 Amp/Fuel housing. Actually its simple. The swap, not the finding...
-
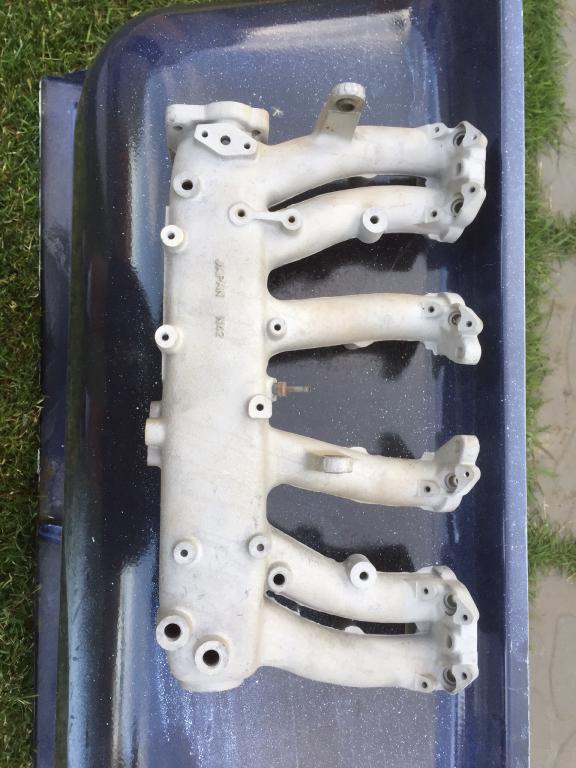
Finest Japanese engineering. Same part, both sides, by design.
-
Thanks! That's help to visualize it. Ithe screen looks smaller than I envisioned. I agree it should be higher than you have it in the picture. I even thought of angling the face upward but that complicates the installation
-
Give us a picture of your console with the 2-DIN stereo pls. I'm thinking of doing that too.
-
That has to be Oliver at Z Specialties. No concerns at all about this business, everyone, help him out!
-
I have the finisher and a really nice plate light for $50 CDN over here in Calgary if you need it. send me an email to z240@shaw.ca for some pics.
-
Still looking for a fuel gauge? PM me or email to z240@shaw.ca
-
Stick with steel. Would you get the entire thing made in aluminum if you when that way?
-
The z club out here is not organized but the 510 team is. Come out to the show and shine today in shipbuilders park North van. Lots of z's and 510 and roadster and meet the locals. Check the510realm.com Events for details.
http://www.the510realm.com/viewforum.php?f=12&sid=6df7449cdaf60046bc4c8f94a51d506d
-
You bet. Will do it as soon as the rain stops!
finally stopped, pictures sent of wet but happy cover
-
I was expecting worse. I know what happened. She got so fed up with the automatic tranny that she drove it in the lake, but never managed to get out in time.
-
I can offer you a stock smooth R200 cover. I'm coming to the Vancouver Datsun show and shine this weekend (sunday) at ship builders park if you want to meet me there. Yah, road trip....
-
I'm just a hoarder. Time to share the hoard.
As it often goes, someone dropped off some parts yesterday (dang hoarder enablers, love 'em!) and what should be there but a very very good condition wiper motor and linkage from a 77.
-
Yup, use your local resources first. Oliver should have some wiper stuff.
Let me know if you need something you can't find at z240@shaw.ca
-
Decent micro-fiche and parts numbers here:
http://carpartsmanual.com/datsunS30/DatsunZIndex.aspx
The page with the "picture"
Something tells me your dealer isn't going to have much in the wiper parts available. I may be able to help.
-
Steve at 240 rubber parts makes repo sets of the rubber insulators. The brackets aren't so easy to find.
-
I have an early N42 non egr manifold in western Canada. $125 USD postal shipped to you. Contact me at z240@shaw.ca to carry on with this.

-
The 77-78 doors have a different little bracket on the back of the door lock cylinders but other than that they are the same across the 70-78. Well ignoring the single sided/double sided key difference on the very early ones. And I suppose the two different key cross sections (mirror images) between the early and later (roughly 240/280 boundary?)...
The 280 steering column is "different", but the diameter where the ignition lock assembly is located is the same as 240.
-
Rear main seal leaks can be tricky to see. Mine dripped a line of oil from the base of the seal down the block and to the area at the back of the pan behind the plate. The trans bellhousing was clean and dry, none made it into that area, it went straight down, THEN it spread all over the bottom of the car from there. Great rust proofing.
The seal was leaking alright, when I went to "pick" it out, expecting a bit of a fight, well the dang thing was loose. It was spinning in place. It came off in my hands. How that happens (maybe 50K miles on the rebuild) is anyone's guess. The leak was not between the crank and the seal lip, it was around the seal and the block!
-
Can you read the part numbers on the harness white tags? 24013- ?????
-
I hate problems that just "go away". So hard to diagnose.
Vacuum leaks (air entering after the carb throttle plates) and ignition timing also affect engine speed.
Anyone in the Seattle area willing to build me a new wiring harness for 240z
in Ignition and Electrical
Posted · Edited by z240
There is nothing to be gained by completely changing the harness. With no electrical or car wiring experience, you will have the the same or more issues trying to adapt a generic harness to your Z verses just learning with what you have. Spend your time learning the stock harness as you replace it in the car, then upgrade it a piece at a time, as needed.
There is plenty of discussion here about upgrading the harness. Headlight relays, ignition improvement, better fuse blocks are common areas of concern.