rigez
-
Posts
156 -
Joined
-
Last visited
Content Type
Profiles
Forums
Blogs
Events
Gallery
Downloads
Store
Everything posted by rigez
-
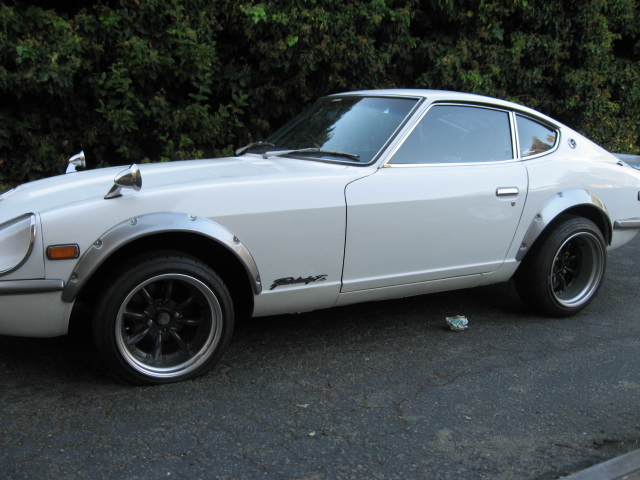
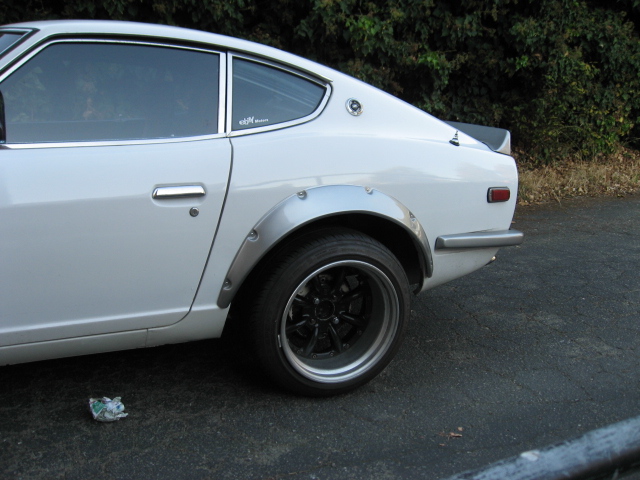
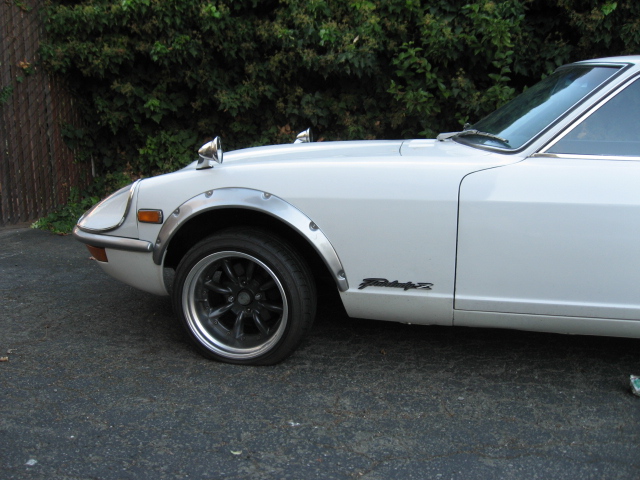
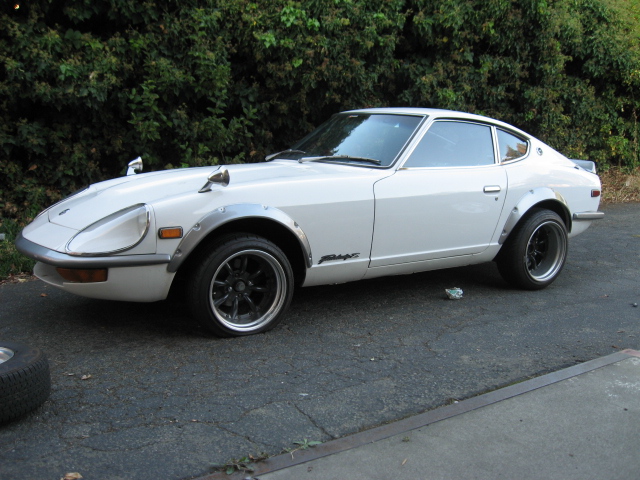
Can you guess the offset on these Watanabes?
rigez replied to rigez's topic in S30 Series - 240z, 260z, 280z
Yah the air pressure didn't seem low when the wheeel and tire was just sitting on the ground. The tires were already mounted when I went to go check out the set. The height is right on for the chop. -
So I went to test fit a set of Watanabe RS8s. I wasn't sure how bad it was going to be. The offset is more than the standard that most are getting for the 16 inch. The front seems to fit fine but, the rears will need a wider fender or flares. I didn't check the clearance for the suspension. I don't think i will have to worry about it. One last thing before the pics. Could someone with photoshop give a try at lowering the 4x4?

-
I was driving a Lexus IS250 the other day when I had my I had my GS in for service. The pic doesn't look like it will fit but from sitting inside inside it is a pretty good fit. The only thing that I see being a problem is having to do a little trimming to access the hand brake. You also get 2 integrated cup holders with the deal.
-
[quote=I have not spent more than $1000 for ANY of the FOUR RHD Z-Cars sitting in my stable at the moment. I wish had spotted one of those deals when I went and bought mine. What condition were the Fairlady Zs when you bought them? Also curious about the model years. I have yet to see any go for less than $1K. I paid over $7k for my 70 and 74 Fairlady Zs
-
Looks similar to the Camry setup that is pictured in this thread http://forums.hybridz.org/showthread.php?t=124899&highlight=camry+power+windows. That thread should help you sort out how to make it work.
-
Thanks for the replies. I like the last 2 options as they keep everything in plain sight.
-
I think I would probably lean towards gregkrings option as it keeps the turn indicators in a easier viewing area.
-
Oh I forgot this is in regards to 240/260/ S30s.
-
For those of you that have replaced the oem tach with aftermarket gauges. What was your solution for the turn signal indicator placement and how did you do it. Also are there there aftermarket guages that intgrate the turn signal indicator like the stock one?
-
Ok, getting desperate on fairlady mirrors
rigez replied to 1 fast z's topic in S30 Series - 240z, 260z, 280z
What year are you looking for? I have a set of used ones from a 74 Fairlady and a NIB set for the first gen in black. PM me if you are interested. -
Not sure how you have your cage set up... but, here is a suggestion. If you the bars connected to a hoop for the top section you could: Measure the location for the bars and transfer that to the dash Cut out the bars going to the floor. cut holes in dash where the bars come down and reinstall dash slide bars back into place thru the holes you cut weld and you are done This is assuming that you did all the work on the cage yourself. Just some ideas from watching Spike TV and all their car and truck shows.
-
I saw that post....unfortunately I want to go the rb25 route. I'd rather not have to pay for the shipping cost from the east coast to west coast. Plenty of resources for parts out here in cali. Thanks though.
-
Did I search but couldn't find anything referencing anyone or any company that sell rb swap kits. Partial or Full...not having to do it from scratch is always easier. Does anybody have any leads? If so comments on the quality is helpful also.
-
That is the sweetest setup for a rear bumber imho. Good Job!!!
-
Very nice! Where did you get the door mirrors?
-
Z Car Garage in San Jose. http://www.zcargarage.com. All they do is z cars and they have experience with doing rb swaps. Talk to Rob Fuller.
-
Ok I found that guy. Here is is userid zswitchman. He has some newly refurbished switches listed right now http://cgi.ebay.com/ebaymotors/74-75-76-DATSUN-240Z-TURN-SIGNAL-HIGH-BEAM-SW-BEAUTIFUL_W0QQcmdZViewItemQQcategoryZ50459QQihZ011QQitemZ320206494912QQrdZ1QQsspagenameZWDVWw
-
Not sure how far you want to go on the fix but, there is a guy on ebay that does complete refurbs for the headlight and turn signal switches for Z cars. Usually fixes all of the problems you are seeing. If you do a search for head light switch problems I believe you will find that most of the problems you see are related to the headlight switch and/or the turn signal switch. I can't remember his userid but if you should be able to find him if you do a search on 240z headlight switches. I emailed him once in the past. Ended up using headlight switch from grab bag of replacement parts and it fixed some similar lighting problems that I had.
-
I went with the msa a/c unit in my 74 Fairlady. I can honestly say its not worth the trouble of installing it. Go with a aftermarket from Vintage Air or Hotrod Air. I will be using the Hotrod Air because they have an option to use the OEM heating/ac panel. Even with the fan upgrade it doesn't get cold enough.
-
That's the one I was looking at although it was in a different thread. Thanks
-
Guys, The other night was looking for pics of Zs with black paint jobs. I found one with a gnose, zg headlight covers, molded flares and what looked like a modified spook spoiler. Anybody know what thread that pic is in or have a copy of it? I have a white Fairlady with gnose and flares that I'm considering changing to black. -Warren-
-
I think this guy is too humble from the pics it looks awesome!
-
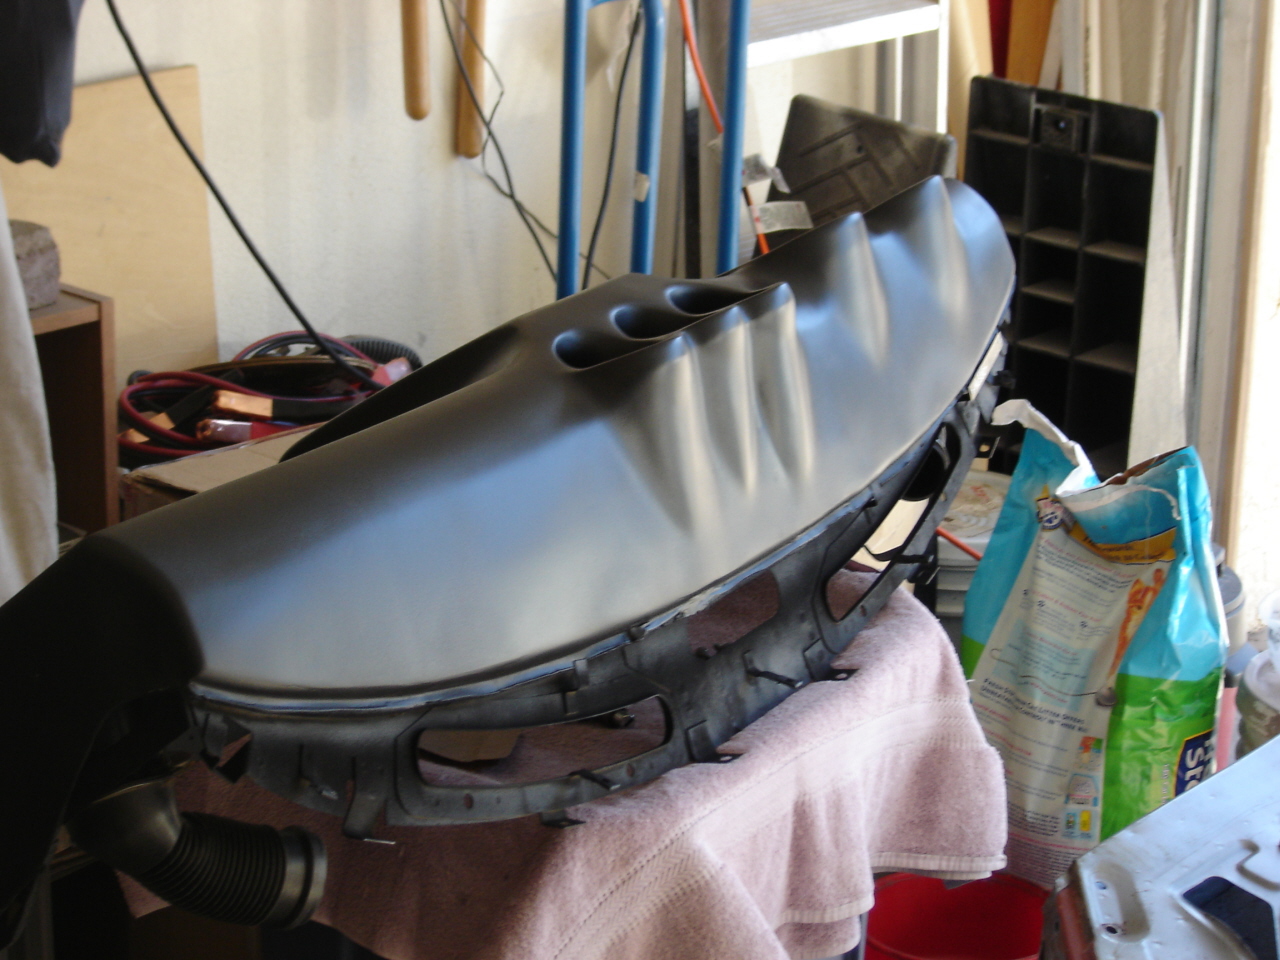
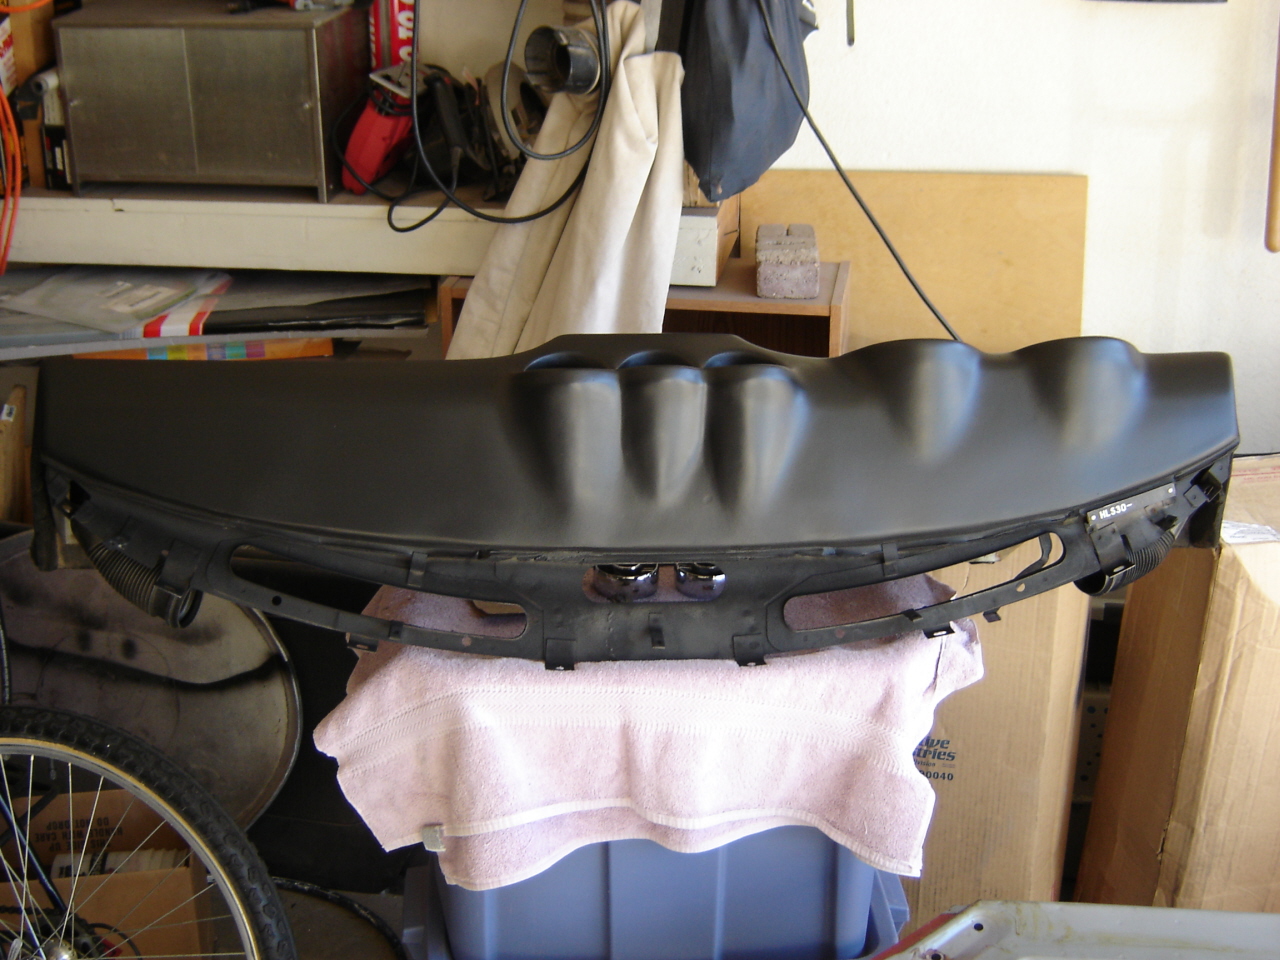
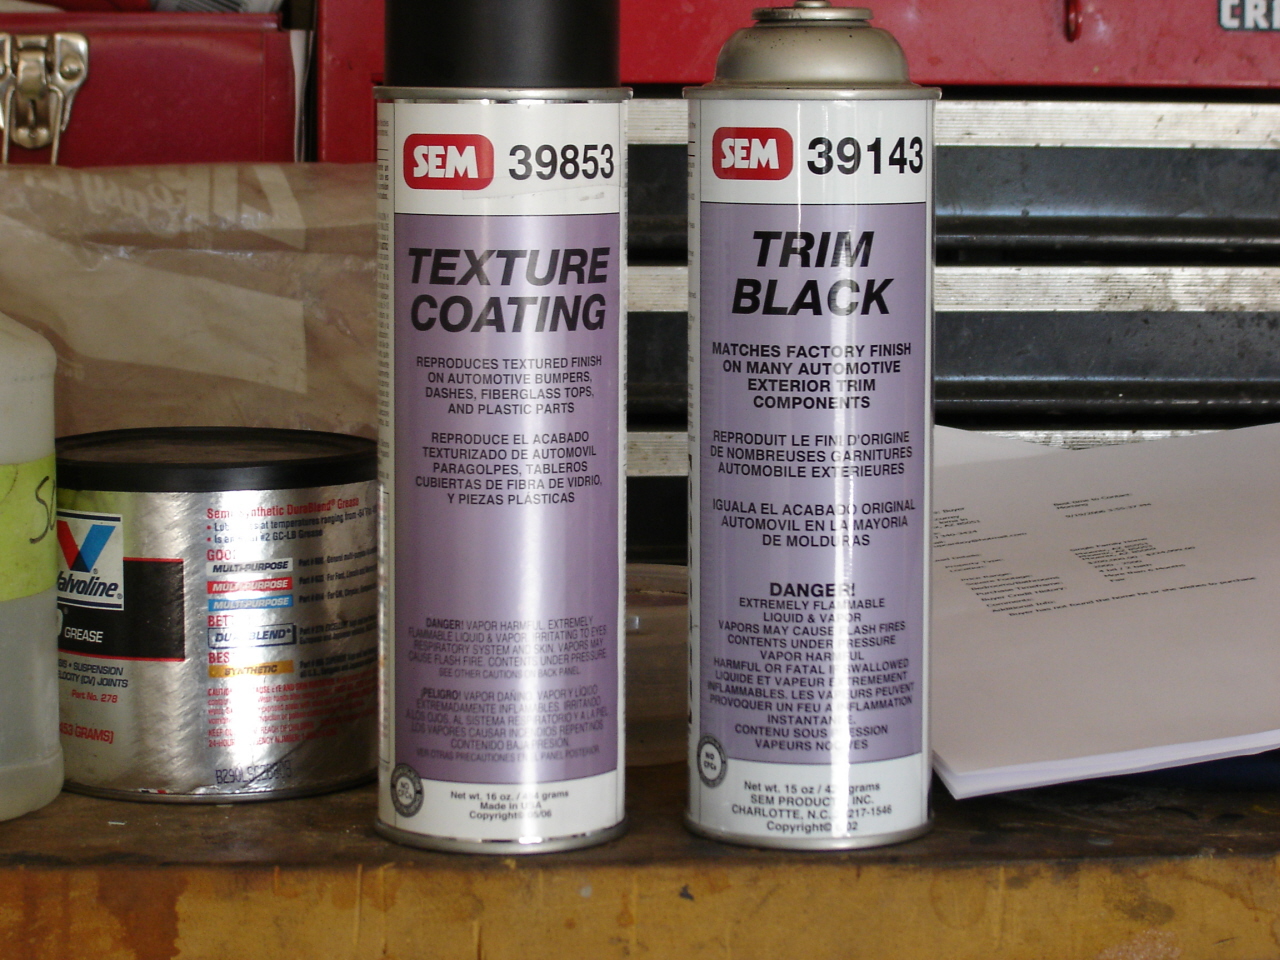
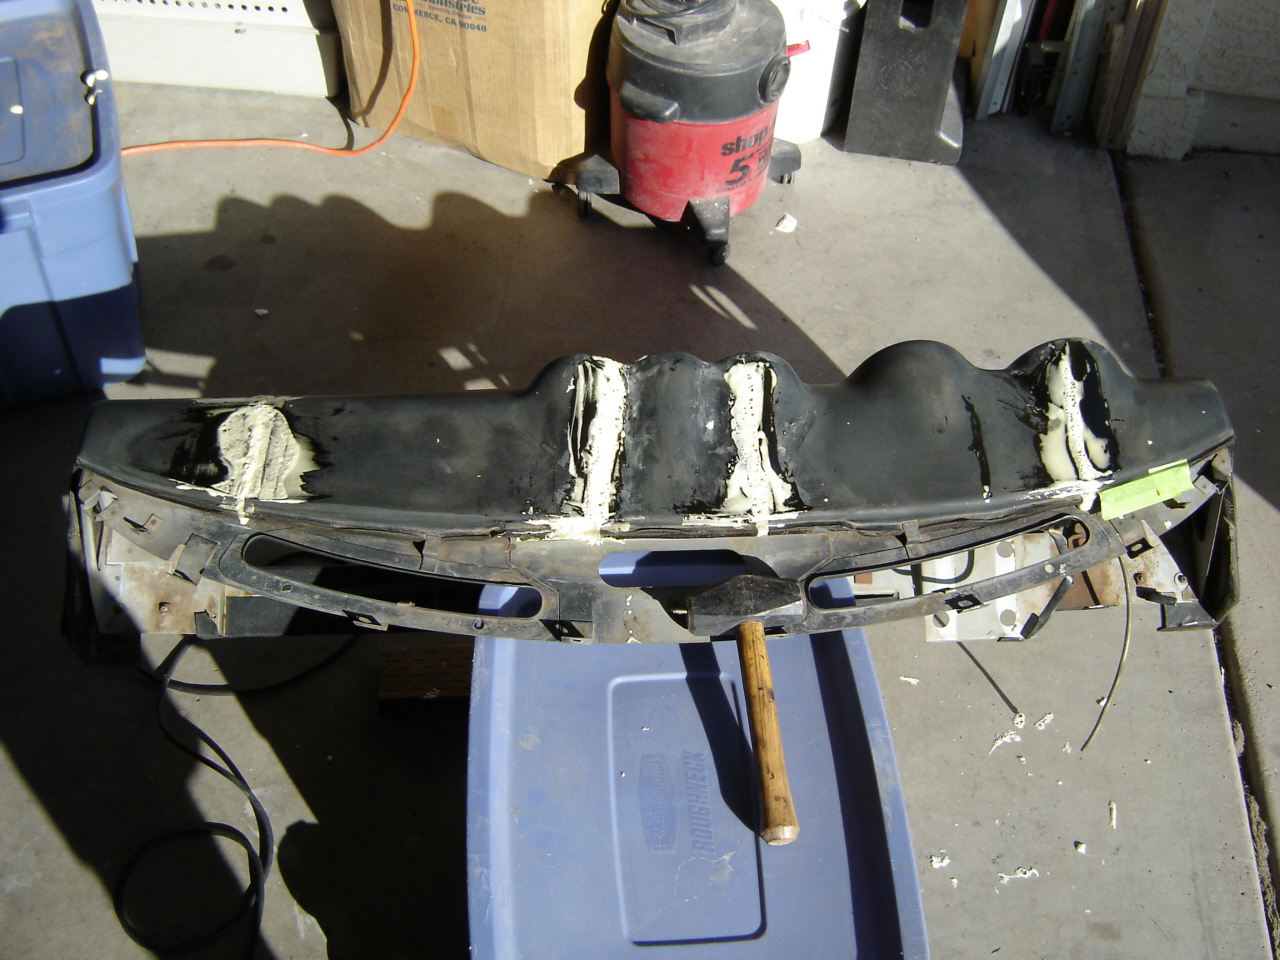
I have left out the other comments and just copied the text and posting that apply enjoy: "After the repair areas were finish sanded, I scuff sanded the rest of the dash with 220 grit paper and cleaned the surface with SEM plastic/leather prep. After that, I sprayed the complete dash with SEM's texture coating. I followed the directions on the can. I kept the spray nozzle approximately 20 inches from the surface and when the coating was finger dry, I knocked down the texture with scotch-brite. I let the dash dry for 24 hours and then lightly scuffed the complete surface. I cleaned again with the plastic/leather prep and then applied two wet coats of SEM's Trim Black for my finish coat. Here's some pictures of the finished product, it isn't perfect but it exceeded my expectations. I don't think I would have attempted this repair if the dash was in the car. Total cost was approximately $60 and maybe five hours of labor total."
-
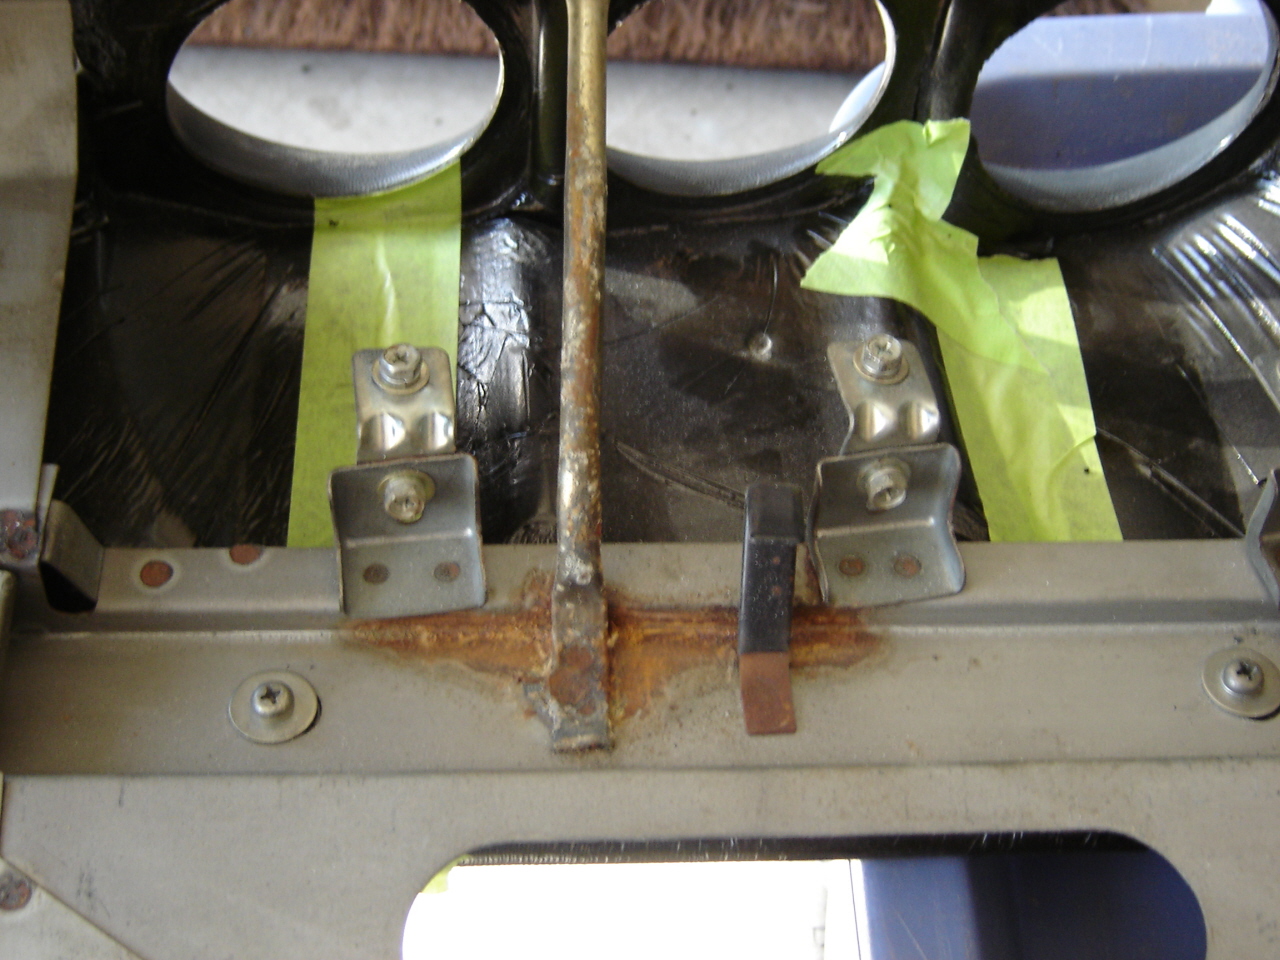
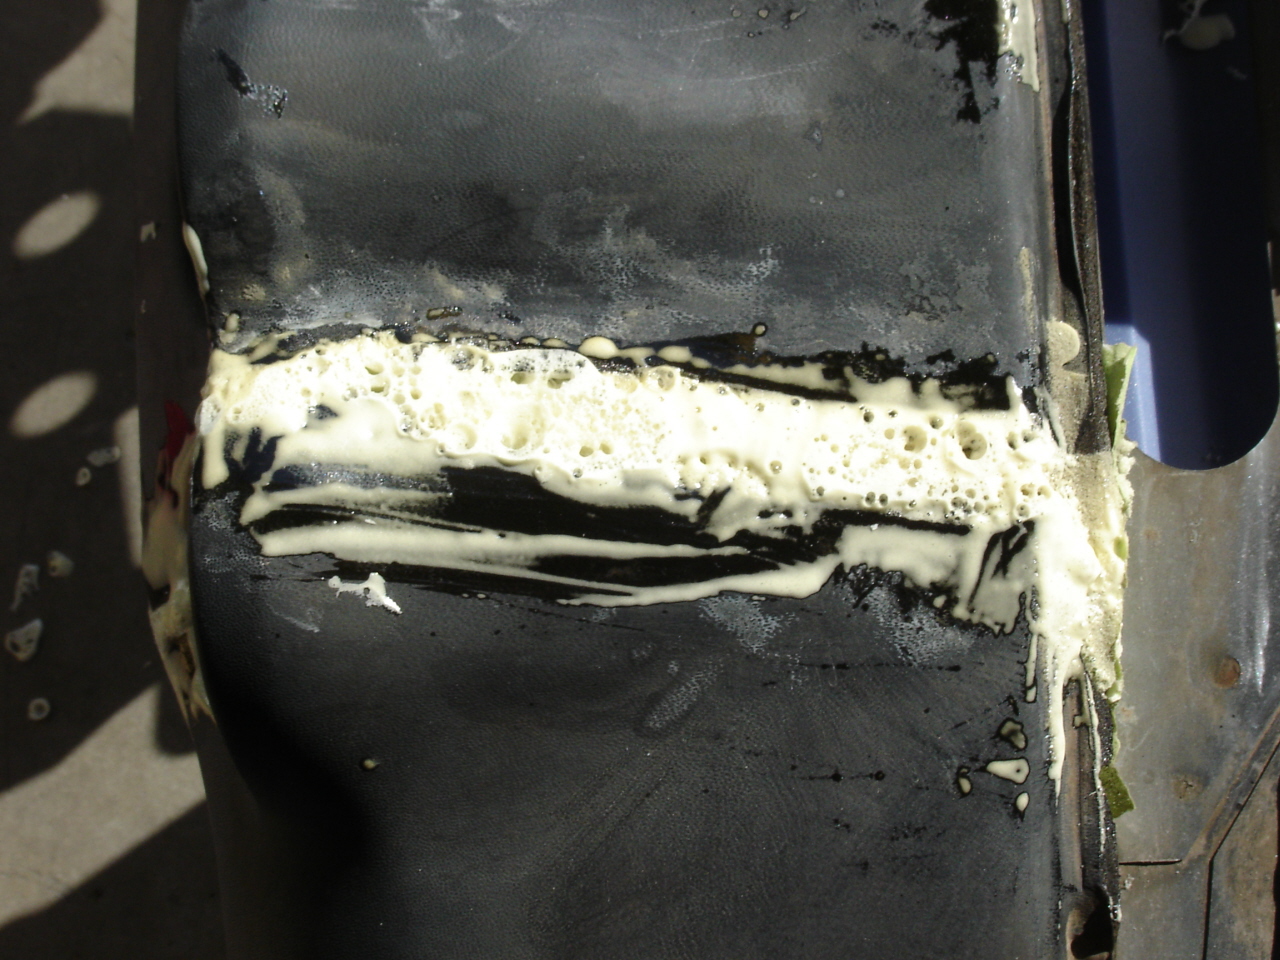
I beveled the edges of the cracks on both sides, this would enable the filling materials to get underneath the crack and have something to hold on to. I backed the cracks with simple masking tape and filled the cracks with Great Stuff, insulating foam sealant, available at Ace Hardware of course. Here's a picture of the cracks after I sliced down the foam and the materials I used. I was concerned with all the voids in the foam. I had expected something solid but realized all those open holes would provide an excellent base for the SEM plasticized bumper repair which was applied next. I had to apply two coats of the bumper repair plastic. It was easy to work with and feather edged nicely.
-
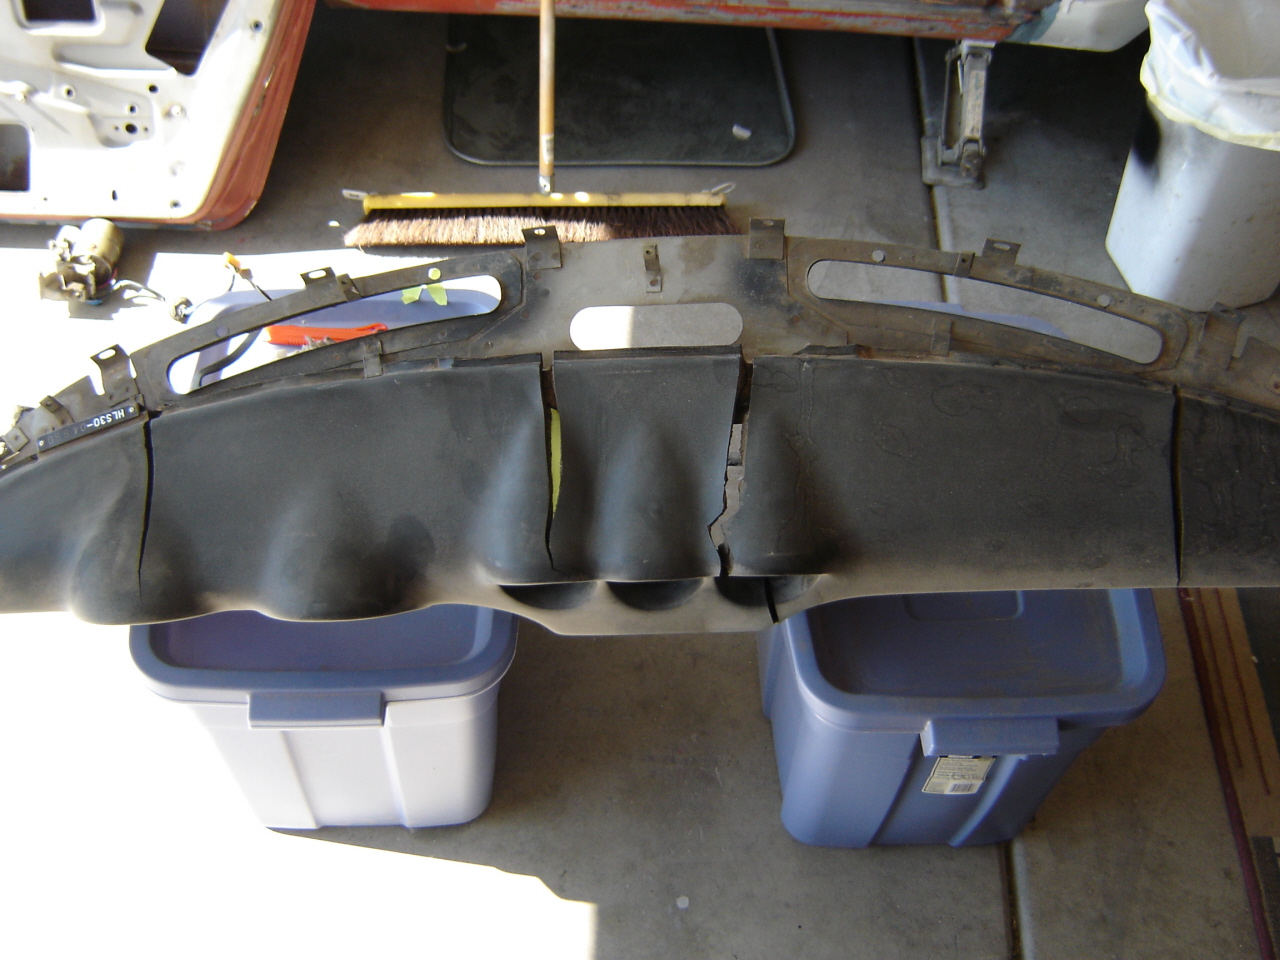
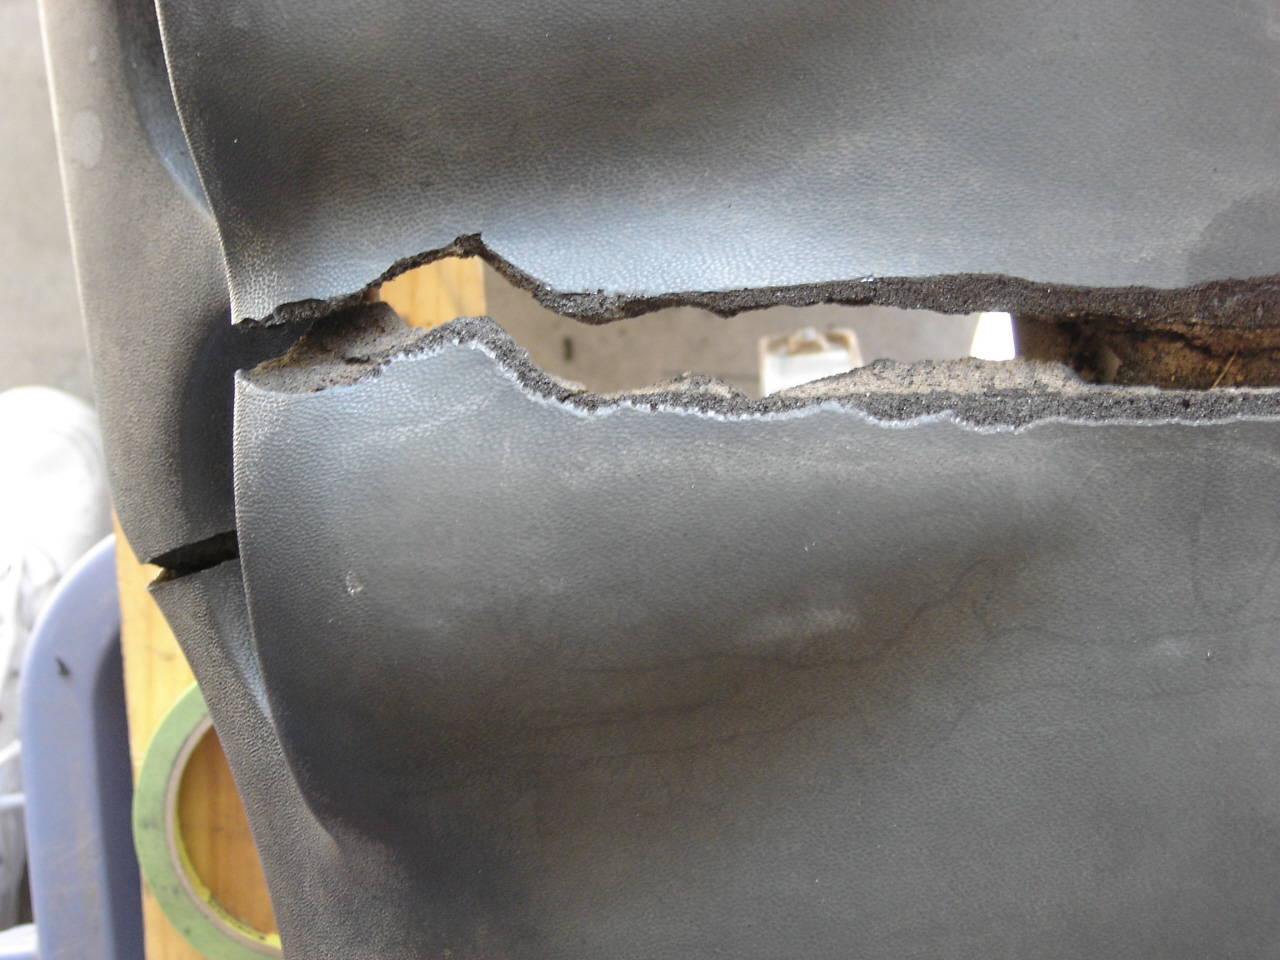
Lets see if this works here is the text and pics: Dash Repair Process/Pictures The dashboard in my car had some serious cracks along the top but I couldn't pull the trigger to send it off for rework because of the cost. I wanted to try to repair it somehow though, I had to try something! Here's a few pictures of the cracks.