

slammed_s30
-
Posts
69 -
Joined
-
Last visited
Content Type
Profiles
Forums
Blogs
Events
Gallery
Downloads
Store
Everything posted by slammed_s30
-
I got the mounts all finished up today, turned out good. Saved myself over 500 dollar in exchange for 8 hours of work. Now onto the oil pan... I apologize for the crappy pics.. Ill replace these with better photos tomorrow.
-
Havent updated for awhile, finals and work consumed all of my time. Got the engine, started installing. I started by removing the stock 280z trans mounts, and converted them to a style similar to the 240's had. Photos arent great but they'll do for now. Bolts attach to the bottom. The engine is in its final place just waiting to make mounts need to double check measurements, I plan to do a variation of the stock and mckinney mounts. Still trying to decide if I should use the datsun rubber mounts or get urethane biscuits for this.
-
RB25's bought and paid for, should be here between tuesday and thursday of next week...
-
This is what I did, Im on a tight budget, so hired help isnt an option, I used the HF sand baster and dried out play sand from menards. Stuffs cheap but needs to be filtered because its got some pebbles in it that clog the blaster. My results weren't perfect but I can get the remainder of paint off with a wire wheel, and sand paper
-
Project: SteeZee - 1973 Datsun 240Z LQ9 V8 Build
slammed_s30 replied to Aaj2k5's topic in S30 Series - 240z, 260z, 280z
Nice shop, and cool build thus far. -
-
-

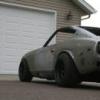
From the album: Slammed's 280z
-
Talked to an engine supplier, settled on a price, just waiting for leakdown numbers and photos should receive them monday afternoon, then about 6-7 working days before the engine arrives.
-
How does the RB25 trans fit in a 280z?
slammed_s30 replied to natedagreat92's topic in Nissan RB Forum
Not trying to be "that guy" but searching will be your best friend, you'll find alot more information much faster then waiting for others to provide it for you. Good luck with your project. I too plan to put a rb25 in my 280 this winter, Im going to build my own mounts for engine and transmission. I dont have the motorset to look at as of right now to design one off of so I cant help any more then that. -
I used to live just north of Rockford, IL in Rockton up until a year ago, are you in northern iL? -------------------------------------------------------------------------------------------------- So as some of you may have read in the posts, the car was slightly out of square by about 1/4 front to rear. Which caused a slight tracking then the car was driven, today I attempted to tackle that problem. A previous owner at one point had put it on a frame machine as I can see evidence of the clamps along the passenger frame rail near the front suspension. Although Im sure they greatly helped the damage they did not completely fix the problem. I had my dad help me today with this as this is the first time I have ever attempted to repair a frame, he used a frame machine hundreds of times so I had faith. He told me what to do and how to imitate a frame machine. I used a couple of cable come-alongs and some chain boomers(binders) attached to both the f-150 and the saab's trailer hitches. My dad lined the cars up in the correct spot to simulate a frame machines towers. Put some tension on the car and then used a porta-power to push the frame back into shape. Ill have to pull the car behind the truck and have a couple friend help to see if it still tracks or it I fixed the problem. Its within a 1/32 of an inch now which im sure is about how much these were off when they were new. Sorry no pictures as there wasnt much to photograph. So now that thats all done I can order an rb25 hopefully next week...
-
Thats everything up to date, Ill post anything new as it comes up. Plan to order the engine before thanksgiving just awaiting on a couple of things before I do so.
-
Removed all the bracket and wires hold downs in the picture above, also finally finished grinding down the lower radiator brace. Try to get some bondo on the thing tomorrow before work, sand and prime with in the next week. Final paint once the engine mounts and radiator/intercooler are in place but I need an engine first...
-
Before and After..
-
Pulled the engine, ready for the swap
-
Got a few days off from work, going to clean out the gas tank this weekend, seems to be a little rusty, drained a few ounces and it was a golden amber color with chunks floating around and that was new gas 4 weeks ago so... thats why the old pump failed . Ill have to change the inline fuel filter with something a little better then install my new walbro 255, maybe then I can take it for a ride if everything goes as planed. If I get it going Ill post a video up, then Im going to get my windshield installed, and get photos taken for the dmv maybe I can get them before snow falls? Probably not.
-
Went for a ride in my brothers truck, did some sweet rolling burnouts lol Motor came out of a 83 el camino, previous owner claimed the engine has about 400hp. I dont know about that but it smokes the tires with no effort. I know its only one wheel, he plans to get a 12 bolt and put posi in it. Sorry about the quality the noise was messing with the camera as you can see with the warping towards the end. [media] [/media]
-
So I worked on getting the roof on my car yesterday. Turned out very nice. Also got my A/C and Heater back in, as well as my wiring harness. Just need to plug in a few more wires and should be back on the road.
-
Finished welding up the front beam, next to put some bondo on it and prime it. I also repaired all the problems on the drivers quarter panel. Still have a little grinding to done on the front most patch. Before: After:
-
Front support beam is welded into place, fits great. About an hour more of welding and grinding and it should be finished, then a bit of body filler and paint and its finished. Should be able to get the drivers side quarter panel repaired this weekend maybe some dents pulled. Oh yeah, talked to an engine supplier, settled on a price. Very friendly, should be ready to order soon...
-
Spent a few hours of the day working on the beam, tomorrow Ill patch the holes and final weld the beam back into place. Before: After:
-
Just post this in case anyone interested... Electrolysis is a technique used mostly for removing rust but it take all the paint off as well as any oxidation which may have occurred. Be careful not to use with on any pot/exotic metals as it will quickly erode them away, same goes for molasses these techniques are strictly for Steel and Iron. Do not cover, hydrogen is produced which is extremely flammable. Also this will kill grass completely, as in some times never coming back due to so much Fe in the soil. Here's What you need: A plastic tub; an iron electrode, water and washing soda (Arm & Hammer, for example) and a battery charger. About a tablespoon of soda to a gallon of water . If you have trouble locating the washing soda. Also household lye will work just fine.You might want to wear gloves. NOTE: It is the current that cleans, not the solution; nothing is gained by making a more concentrated solution but do try to stay close to a 1:1 ratio -- DON'T!THE POLARITY IS CRUCIAL!! The iron or stainless electrode is connected to the positive (red) terminal. The object being cleaned, to the negative(black). Submerge the object, making sure you have good contact, which can be difficult with heavily rusted objects. Get it backwards and your object will be relentlessly eaten away! Make connections on a part of your electrode that protrudes out of the solution, or your clamps will erode rapidly. How do I know if it is working? Turn on the power. If your charger has a meter, be sure some current is flowing. Again, on heavily rusted objects, good electrical contact may be hard to make-it is essential. Multi-part objects may not have good electrical connections between them. Try to use a heavy guage wire to send the current, I have matched the gauge of the wire coming form the battery charger. In the above post you can see I was using welding wire, I have since replaced that with 3 strips of fence wire spun together with a drill, fray the end and connect in three different spot to help ensure a better connection. Fine bubbles will slowly begin to rise from the object when cleaning is in progress, takes anywhere from 15-30mins. Use the 10amp setting on your charger the ideal setting is 6. something but 10 works just fine. How long do I leave it? The time depends on the size of the object and of the iron electrode, and on the amount of rust. You will have to test the object by trying to wipe off the rust. If it is not completely clean, try again. Typical cleaning time for moderately rusted objects is a few hours. Heavily rusted objects can be left over night. If your objective is to remove baked on paint from say a pair of wheels it may a day or two. How do I get the rust off after I remove the object? Rub the object under running water. A paper towel will help. For heavily rusted/ painted objects, a plastic/brass pot scrubber can be used, carefully. Depending on the amount of original rust, you may have to re-treat. The amount of mechanical action will depend on the fragility of the object. Use your discretion. My object is too big to fit. Can I clean part of it? Yes. You can clean one end and then the other. Lap marks should be minimal if the cleaning was thorough. This process is "line of sight", In other words, if the rust is on the bottom side there has to be an electrode on the bottom side. I had a pic of my bath but I cant use this type of image extension it says... My bath 36"x48" 36" deep, steel re-bar, and non galvanized fence wire. I used some 4ply plastic from work and just tripled it up to prevent any leaks. I filled it with 5 gallon buckets to keep track on the number of gallons so my washing soda concentration was correct. -------------------------------------------------------------------------------------------------------------------------------- Molasses is what I use on item where I cant get to the side with electrolysis like the beam. You may choose to cover or leave this uncovered, covering does cause fermentation which will speed up the process but does cause a strong smell. Youve been warned. Here's What you need: Liquid feed grade molasses(blains)2.5 gallon, water, plastic container; glove are recommended once again. You may want to increase the amount of solution you produce if you are cleaning rims or a large panel. You can either just increase the amount of water or add equal portions of molasses and water. Molasses does run about $15 for 2.5 gallons, but it cleans for an entire summer so its a one time expense. Unlike electrolysis which requires power 24/7. What do I do? Mix about 2 gallon of water in with 2 gallon of molasses, mix thoroughly. You may choose to use a less concentrated mix but I recommend this as it works fast and is easy to get off. How do I know if it is working? You wont, you just have to be patient. But it will work, just give it some time. How long do I leave it? The time depends on the size of the object. You will have to test the object by trying to wipe off the rust. If it is not completely clean, try again. Typical cleaning time for moderately rusted objects is over night. Heavily rusted/painted objects can be left for a day or more until the paint is flaking and can be removed with a fingernail. b]How do I get the rust off after I remove the object?[/b] Rub the object under running water. A paper towel will help. For heavily rusted/ painted objects, a plastic/brass pot scrubber can be used, carefully. Depending on the amount of original rust, you may have to re-treat. The amount of mechanical action will depend on the fragility of the object. Use your discretion. My object is too big to fit. Can I clean part of it? Yes. You can clean one end and then the other. Lap marks should be minimal if the cleaning was thorough. Any other questions just ask. Each process has its advantages for certain items. Plus side to molasses is deer, squirrel love it so you can just pour it out(not on grass) once finished with it.
-
Pulled the front beam out of the molasses, rust is all gone. Few more days and the paint would all be off but Im not worried about that. Should be able to work on it sunday when I get back from Iola.
-
Little progress today, sandblasting took forever with all the tight corners and creases. Turned out looking great tho, now all I need to do is fill the hole that were drilled for a spoiler and the factory emblem holes then I can apply a then layer of bondo and paint. I decided not to work on my wiring today since I have a couple thing in mind for my interior. Also helped sandblast the inside of my dads 32', that was a real chore. Also helped build a electrolysis bath for stripping wheels and other small items as opposed to sandblasting. If anyone is interested just ask and Ill do a post on how it works and what you need. If you like metal shaping check out the link below. (32' Ford build thread here: http://www.jalopyjou... ... 78&page=18) I substituted my time and addressed the worst remaining body work on the entire car, the lower radiator support beam. I cut it out at the areas which require the work the remaining section is perfectly fine. I have the part curing in a molasses bath right now to remove all that rust. Ill be at iola saturday, so sunday hopefully I can get the beam fixed and back in and maybe start on the rear quarter damage which should just be a cut and paste job. Then attack the interior and see If i cant get a dash box built at work over the coarse of a few breaks.
-
Just a quickie; went to "Back to the Fifties" today absolutely awesome. Got home around 9ish then got to work, I finished soldering and plugging in the remaining wires, everything turns on, but my battery was somewhat dead and it just clicks. Put the charger on it over night, tomorrow we'll see if it fires or if I need to go hunting for bad connections :fingers crossed: Along with getting it running and driving tomorrow I hope to get the rear hatch, along with under the hood sand blasted then primed. Also going to try to replace the bad portion of the rear quarter panel. If I have time Im going to mock fit my roof for a future date, maybe place the front and side glass into place and take some photos then send the registration off, I should be ok with a partial paint job right?
-
So I havent posted **** for weeks, time to give you guys a little update(no photos, my bad). So I started work monday working 3:30pm to 2am mon-thurs with a high chance of overtime every friday, maybe Saturday come july so getting work done on the week days wont amount to much. Today I didnt work to hard, mainly soldered and extended wires to try to finish up the wire tuck. I have all the body harness tucked away but haven't worried about any engine wiring since I plan to swap something in and dont see the point. Im about 75% of the way finished with the body tuck just need to find a place to put a few random wires and connect all the wires to their corresponding sensors. Not sure how much Ill will get done next weekend since I plan to go to back to the 50's at least one of the days if not both. Quick question for those of you who know autocross rules, what class would a car with a different engine be placed under? Major things to do to get it on the road (Goal, End of July, 5 weekends to finish not counting next weekend) Finish Wiring Reinstall Radiator and Fan Replace drivers side quarter (Optional if time allows) Do some kinda of a roll cage, either just a rear crash bar or go with a 12 point cage Re-skin roof Patch rear side turn signals Paint Prep Paint Glass/Seals Install and polish all Stainless Steel trim pieces Interior Send registration to madison Double check all suspension bolts, re-torque to correct specs Check/Fill fluids Front Wheel alignment Adjust rear brakes to stop rubbing Wait for plates