

wrcbonk
-
Posts
195 -
Joined
-
Last visited
Content Type
Profiles
Forums
Blogs
Events
Gallery
Downloads
Store
Posts posted by wrcbonk
-
-
Pat,
I don't check this forum very much, I am focused on the Rb forum b/c of my current swap. Your 1JZ swap is clean clean. I can't wait until I get to day the day when I can use the word "cake" when talking about an engine swap. Looking forward to your next project.
Bill
-
Voltron,
My first thought was to do what you suggested. That is what I am going to try first before cutting anything.
Thanks
-
Mack,
Considering the good deal I got on the plenum, your suggestion is a very good solution.
Thanks
Bonk
-
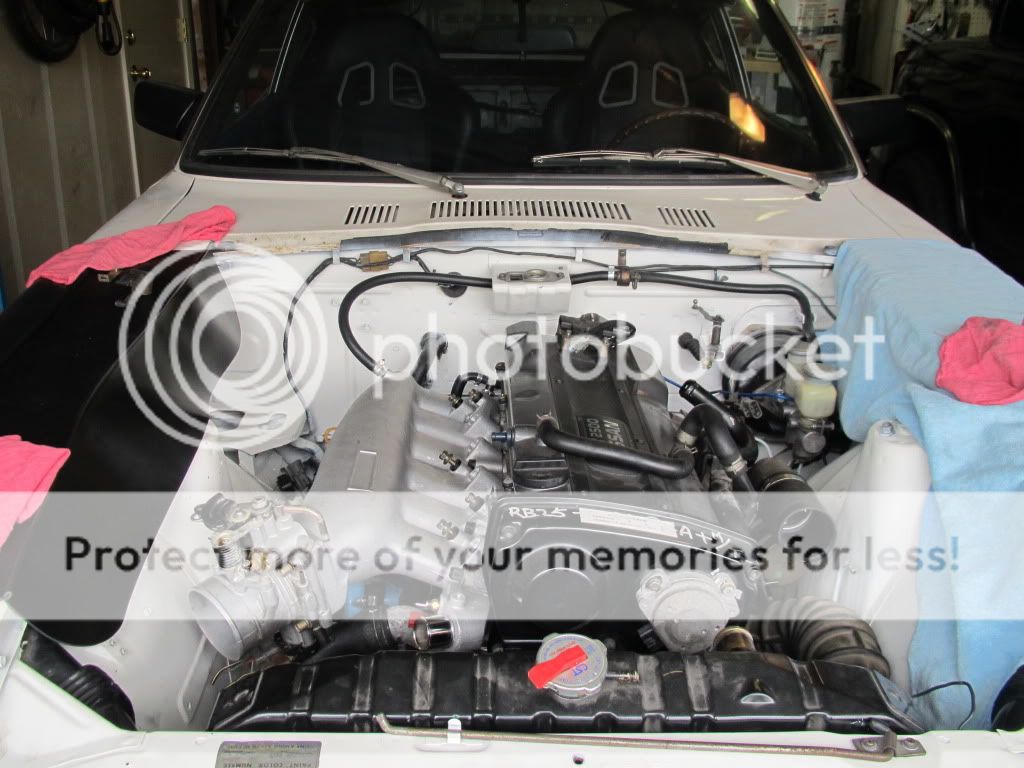
I am asking an old question, but wanted to update folks on my progress as well. So I decided to pull the trigger and get a Freddy front facing plenum. I also decided to order a oem Q45 throttle body. Included below are pics of the setup. My question is as follows. Based on your experiences, can I find connectors that will allow me to connect the intercooler piping to the throttle body while clearing the inside front quarter panel? I was planing to run my intercoller piping through the lower hole in the front frame cross member, see pics below.

Thanks
Bonk
-
So still working on this. I welded up the thicker wall (1/8-inch) one and a half inch box tubing I had. To get the trans up and reduce my driveline angle I added some large washers to the trans mount. I am still at just over 3 degrees and I want 2.5 to match my diff. One more washer may do. Not excited about all the moment arms in this design. I will have to monitor things carefully once torque is added to the mix.
Bonk
-
ZT-R,
I wanted to ask what you did the stock fuel liquid/vapor vent line that runs from the Driver's side of the engine bay back to the hard part of the filler. In the pics below, it is the hardline with all the white overspray on it next to the the open turbo coupler. Did you incorporate this line into your RB system or do a delete?
Your system looks great!
Bill
-
After the euphoria of getting the engine and trans in the car (http://forums.hybridz.org/index.php/topic/99467-finally-some-progress/), I realized the passenger side of the oil pan was resting on the steering rack bushing collar. So back with the hoist and a rachet strap. I loosened the nuts on the tops of the mount brackets (Rick's brackets). I took the weight off the mounts and hooked the intake side of the motor to the hoist and started cranking I was able to get a gap to open up between the solid mount and the poly mount. I cut open two thick washers and slipped them between the two.
I now have about a half a centimeter between the rack and the pan. Would like more, but it will do.
Made a first draft of the trans mount. Used some 12-13 gage box tubing. Its easy to work with. I bought some nice 1/8-inch thick box tubing as well. When I think I have got the design down I will start cutting up that.
Now for the Sunday riddle, with the height of the top of the shifter assembly about 1/2 an inch below the hole in the sheet metal;
the output angle of the trans is 4 degrees towards the floor.
The angle of the diff is a fat 2 degrees pointed towards the sky. And the final detail, the center of the trans output is half an inch higher than the the diff. I am measuring heights from the garaget floor. I think the height measurements are pretty solid because the chassis trans mount wings measure level front to back.
Let me know where you think my setup needs tweaking. Thanks
Bill
-
Daz,
I will definitely keep you posted on how my in tank fuel pump design works, I am as interested as you are with how it performs.
Bill
-
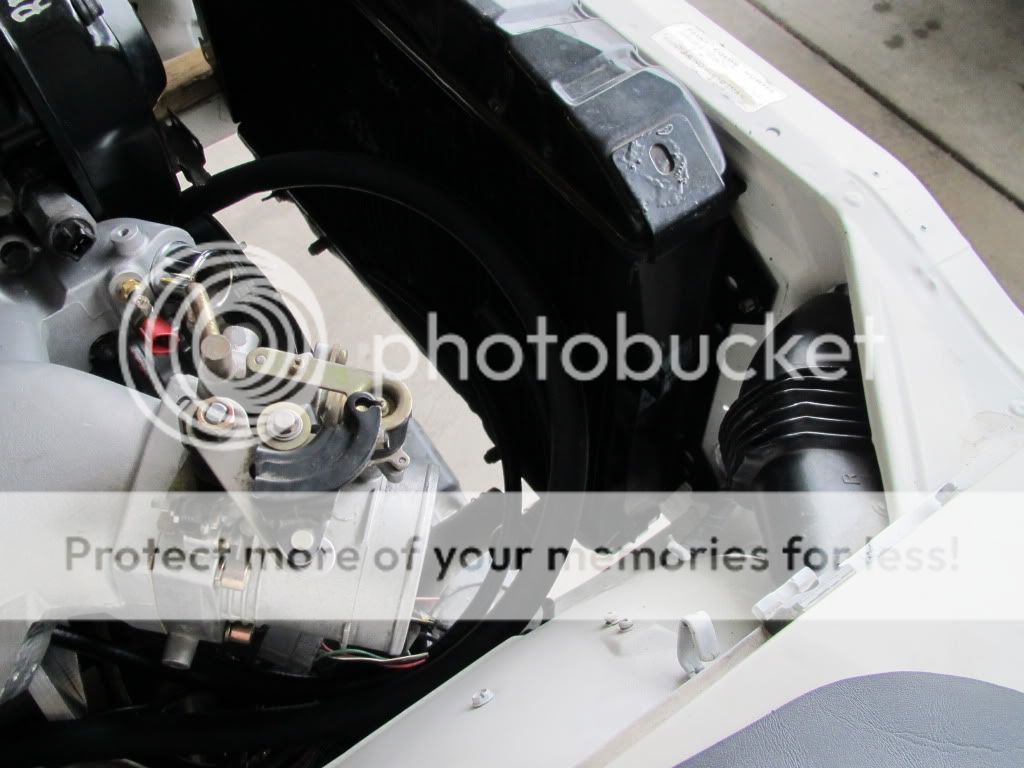
ZT-R,
The PO put in those fans for added cooling in the summer (I live in Sacramento). I don't know what car he pulled them out of. They sit in front of the radiator. If they still fit with the intercooler I plan to keep them and run them off the same switch as the ones I put in the normal position between the engine. The next time I have the radiator off I can take some more pics. The mounting is home made but very sturdy.
Bill
-
I bought this Series 1 R33 RB25 just over a year ago. I replaced most of the gaskets and timing parts, new clutch, modified oil pan. I used Rick Wong's mounts. I will be attacking the transmission mount next. For more pics check here http://forums.hybridz.org/index.php/topic/88888-another-rb-into-an-s30-what-next/page__p__844501__fromsearch__1#entry844501
-
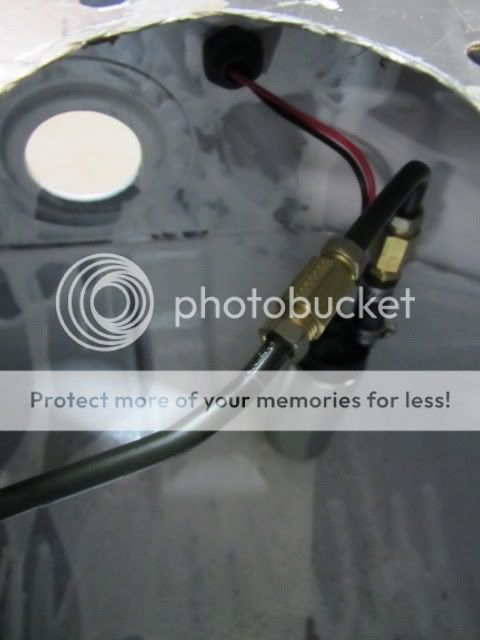
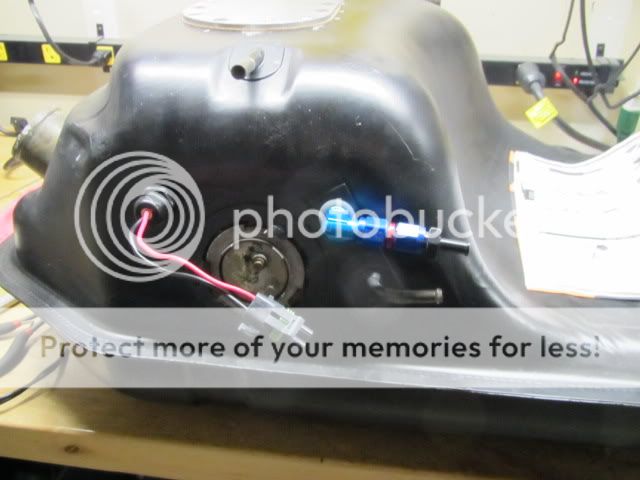
I finally finished my intank fuel pump project. I canned the homemade nut ring to secure the access plate. I was able to find a local machinist who made me one for a reasonable price:)
Hoping to mount my RB25 early in April.
Bonk
-
Got it, thanks! Love adding Hybrid performance parts to my engine bay.
-
Gary,
I sent you $25 for a throttle cable bracket on PayPal. Under the name wrcbonk.
Thanks
Bill
-
I lived in Colorado for several years and spent time in Ft Collins. Ft. Collins gets really cold like the kind of cold that snaps interior/exterior plastic pieces. After a huge dump of snow over night, I left a friends house in the morning and jumped on the highway. I was flying along at highway speeds when POP, like a gun shot, The dashboard of my integra snapped right down the middle from the heat gradient. Plan on replacing your windshield at least once from flying rock chips or until you do what the locals do and rock the crazy cracked up windshield. I don't want to go on and on. I will just say Ft. Collins is no place for a nice old z IMO.
Bonk
-
Dude, huge pickup thanks! My old harness has issues and my newer JDM harness is Jacked up as well.
Bonk
-
I just got done going through the same issue. I installed a R200 using the R/T mount into my 1971 240. I ended up notching my cross member as well. I ended up with a gap between the bottom of the diff and the top of the cross member of about 1/2-inch. I did as others and filed down the bottom of the poly isolator to conform to the shape of the front of the diff. I will be installing a RB25 transmission, hopefully my angles are good. If not I will have to space things differently.
Bonk
-
Guys, I made a video. Thought I would share where I am with my swap.
Bonk
-
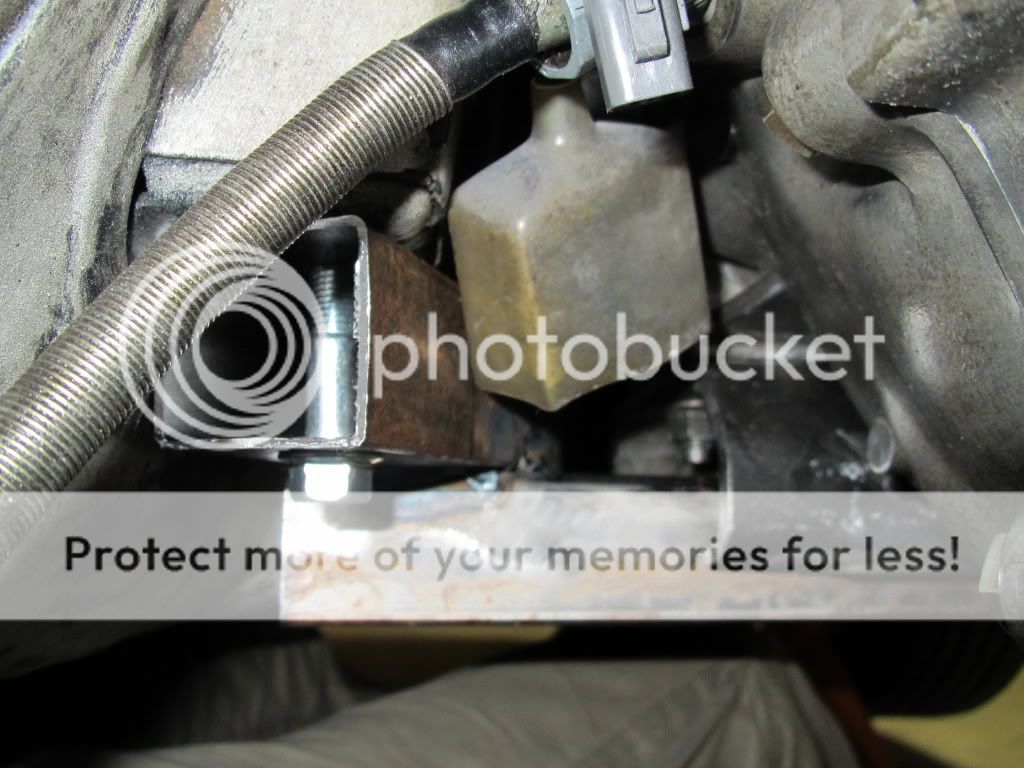
I put on the turbo and hooked up the lines. I also tried installing the alternator. Found out things don't quite line up with the new waterpump. The bolt that is suppose to go through the harden steel bracket is hitting the bracket just above the opening. Has anyone run into this? I will need a pretty hard bit to open the bracket up.
Bonk
-
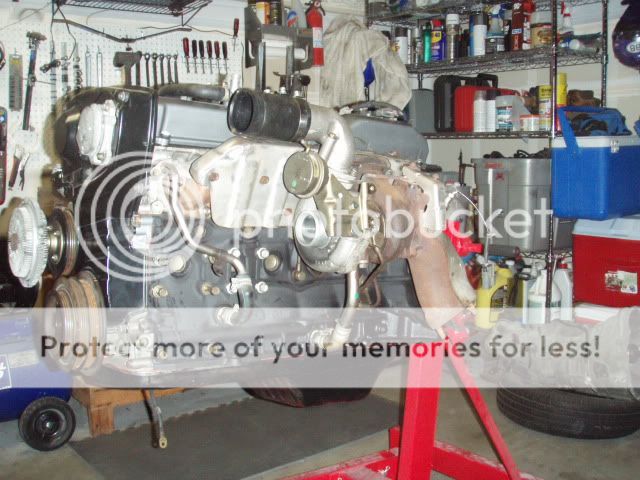
Wanted to post an update of my RB25 build. This is my first engine project so the progress has been painfully slow. I wanted to get a look at the intake and exhaust side of the head to see if there appeared to be any problems. Didn't see anything that lead me to believe I need to pull the head. I also wanted to paint the block, so I took everything off the sides and replaced any gaskets needed. Planning to save pulling the head for when I need to replace the head gasket. I am going to be running almost a completely stock setup, stock plenum, turbo, fuel management.
Need to order the mount kit from McKinney, clutch, install accessories, and begin getting serious about wiring. Here is where it's going.
-
Phil,
I am working on getting an RB25 into my S30 this spring. I can't wait to "NisTune that *****!" Looking forward to updates.
Bonk
-
Bryce,
From the one image you attached, the car looks very clean. Please post more pics if you can, we would like to see the rest of the car. If you research this site to death you will find everything you need. I am doing an RB25 swap and without hybrid it would not have been possible. As far as your clutch question, I have similar horse power goals and car purpose goals. I am going with the ACT HD clutch with organic disc. They cost around $300 with shipping. Hopefully you can get a similar quality product for less b/c your trans is US domestic.
Bonk
-
Looks excellent, well worth the effort in the long run.
Bonk
-
The R33 FSM (Factory Service Manual for R33 generation RB series motors) shows using Nissan liquid gasket for the Waterpump. I will be putting a new waterpump back on my RB25det soon and had not planned to deviate from the FSM. My gasket kit did include a tube of Nissan liquid gasket. Not sure what the stand alone price is, but probably worth it. Is it worth standing line at your local Nissan dealership while the peria try to auction off the vehicle you drove in with and sell you a new Nissan, maybe not, thus the miracle of the internet and PayPal.
Bonk's 2cents
-
TimZ,
Thanks for the find. Which emitting color did you choose for your dome light? And have you guys found an LED replacement bulb for the map light? You would need something with lower lumins so as not to be blinding?
Bonk


RB lockar throttle cable
in Nissan RB Forum
Posted · Edited by RB26powered74zcar
Repaired broken link
Figured I better post some pics of my throttle cable installation. I used the Lockar Hi-Tech throttle cable kit. The kit comes with attaching hardware, but I ended up going down to Ace and buying a little adjustable cable stop. I found the cable stop in the hardware area in a box marked lawn mower control hardware. The cable stop fit nice and snug in where the factory cable end had gone on the throttle body. To make this work I had to drill a small hole for the end of the cable to terminate through on the throttle body side. Use the hole in the cable stop as a guide and its pretty easy.


I routed the lockar cable underneath the Freddy.
The cable stop will work on the stock throttle body as well. I happen to be using a Q45 throttle body. To make the throttle cable function and be routed straight I ended up modifying the throttle body spring a lot. To get the cable housing to pass underneath the Freddy and actuate cleanly, I drilled out a plate to position the "forked" stop.
The pretty stainless housing stop bracket on the firewall side is available through a member here on the Vendor Forum.
http://forums.hybridz.org/topic/77002-throttle-cable-setup-lockar-custom-bracket/
I did have to modify the goofy stock throttle bracket that is actuated by the peddle. The arm connected to the peddle side of the cable was previously above the top of the shank. Using my bench vise and a Big F'ing Hammer I made it be what I wanted. I Also had to drill out the old stock ball that fixed to the old mechanical throttle linkage.
If you need more detail or more detailed images let me know. My camera battery died while taking these.
Oh yeah I threw in a pic of my radiator. To make the hoses fit better I had a radiator shop in Sacramento move the inlet over. It cost more ($100) and took longer than I expected so I am not sure I can recommend them, but the execution was great.
Location of inlet before relocation.
Bonk