

inline6
-
Posts
453 -
Joined
-
Last visited
-
Days Won
3
Content Type
Profiles
Forums
Blogs
Events
Gallery
Downloads
Store
Posts posted by inline6
-
-
I bought a Tomei 1mm for my build, but didn't end up using it. I think they are still available... Here is the gasket at the Tomei site:
Interestingly, Motorsport Auto is showing a "temporary replacement" for the 1 mm gasket that is 1.2mm...
Here is recent thread where a guy bought a Kameari and a Tomei and they turned out to be identical.
I don't need the 1 mm Tomei I bought. I'll sell it for $285 plus shipping. You can pm me if you are interested.
Garrett
-
I have a Nismo HG that is well used and it is starting to leak a bit until the car is warm. I have been looking for one to replace it but have not been able to find a source.. Anyone know if any places still sell these for the good ole L28ET?
I was able to get a Nismo recently (.6mm) for a normally aspirated motor recently. Also, Tomei are still available.
-
Looks really nice.
Who are you using for your machine shop?
Thanks. When I started this project about two years ago, I was living in VA. I took a couple of attempts to find someone good - both recommendations came from folks on HybridZ. The guy that built it is out of Martinsville, VA - so not in this area.
He's done lots of work on NASCAR engines and picked up this project on the side because work had dropped off at his employer.
I hear there is a place around here though. Near Kinetic SunBelt from what I understand. Can't find them on Google though...
-
The arguments could go on forever as far as what's better, single ,dual, but I vote duals- IMHO
Well, the first exhaust I put on the car was an old Nissan Comp set up and the Clifford Research header. The pipes were dual 1 and 3/4" with 4 glasspacks - 2 small and 2 larger.

I absolutely loved the sound especially above 4000 RPM. When the glasspacks had burned up many years lateer, it got too loud, and I was getting pulled by cops too much. Since, I had taken the glasspacks off and put a straight pipe on at a track event once, and noticed how much more power I had, when I redid the exhaust, I went with two 2" pipes. That is about the equivalent of a single 2.75" pipe flow-wise. I put a lot of time and effort into it. It has two stainless Magnaflow 4" round resonators in the driveshaft tunnel and two aluminized Magnaflow 5" X 7" oval mufflers (flipped and staggered) in the back. I put some nice stainless tips on the end. Here are some pics:
I didn't like the sound as much, but it wasn't bad. Here is a dyno run...
A part of me thinks that pipes that are too big in diameter for a given engine hurts sound quality, and that with the new motor, my existing pipes will sound better. I think what I'll do is go ahead and buy what I need and fab as necessary to hook up to the existing pipes... then dyno it and see how it sounds. If I am thrilled with the sound, I'll probably keep it a while, but if not, I'll move to the three inch and try to get a good merge collector or whatever the terminology is in there too.
-
John, I'm running two 2" pipes off a Nissan Motorsports header and have been considering going to a single 3". I don't trust an exhaust shop to make a "proper" secondary collector and I know that Nissan used to make them to go along with the header. Do you know if there is still a way to get those 2-1 collectors or must it be custom fabbed?
Hi Leon,
I see from previous posts, John has mentioned "SPD, Burns, and others"... You might want to look at this:
Is your car race only or on the street? I have a nice dual 2" system on the car right now... What is the reason you are thinking about going to 3" from your dual 2's?
-
Yes. And I suggest Swain over Jet Hot.
John, I'm struggling a bit with the thought of extending 3 cylinders about 6 inches more than the other three... I mean, if equal length primaries are important, it can't be good to run one half of the header an extra 6 inches or so than the other and then merge... What is the best way to deal with this? It's probably really tight in that area of the tunnel, so running some kind of S pipe off of the one collector and a laser straight one off of the other and then trying to merge where they become equal distance is not looking possible... plus the distance to the merge is then lengthened considerably... Thoughts?
-
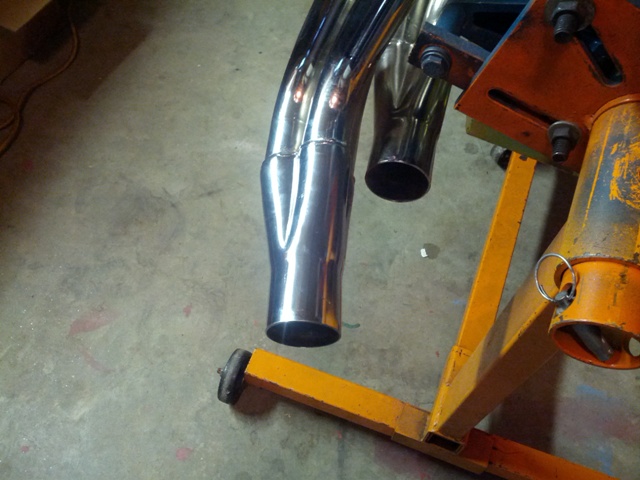
So, I have my engine back from the builder, and now am working on getting it back in the car. I bought this Nissan Motorsport header off of ebay for it. It has the 1.75" primaries.
I'm looking at the outlets and wondering what the best way to go from there is. They are 2.5" OD.
I've been searching the forums and reading about merge collectors... I guess my question is how do you incorporate merge collector(s) with this header? The outlets are offset from each other so that the exit for one is quite a bit further back than the exit for the other.
Do I run some 2.5" pipe off of the one to get to the same location as the other, and then "y" down to a single pipe?
I was running a Clifford Research header and two completely separate 2" pipes - and those pipes are still in the car. I've read many of the posts comparing one exhaust vs. two... I guess, going with an all new exhaust is an option, but I like the existing 2" pipes quite a bit. If I want to stay with two, 2" pipes for now, should I just skip the merge collector?
Having owned one of these chrome plated headers for my 510 years ago, I know the chrome isn't going to last. In fact, there are a couple of tiny rust spots on the back of this one already.
I'm going to ship it off to Jet Hot, where they will strip the chrome and ceramic coat it. In preparation for that, I bolted it on the motor today to check fit. I'm glad I did, as I needed to grind on the flange reinforcement bar that goes under the primary inlets so it would clear the block where the vent is. I also need to determine what kind of hook up I am going to use from the collector to the next piece. And I need to weld in some oxygen sensor bungs before shipping the header off to be coated...
Garrett
-
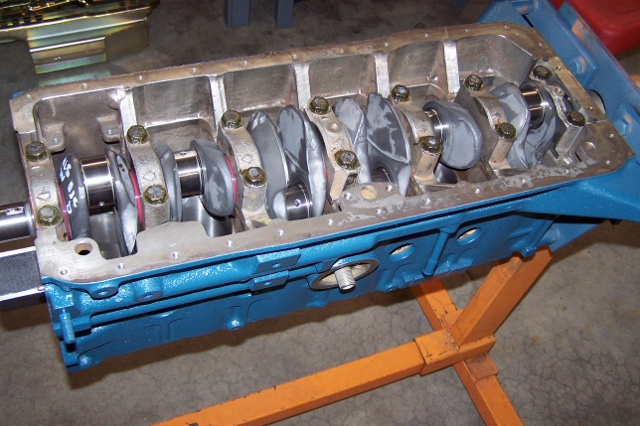
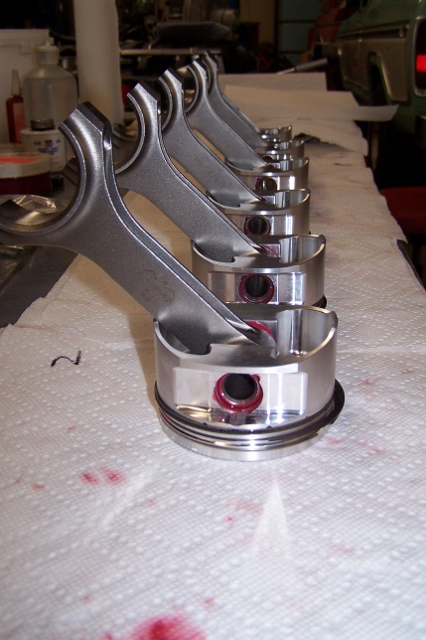
So, the rods in this motor are Toyota 3SGTE (89 and later Celica All-trac, 91-97 MR2 Turbo) with 3/8" ARP 2000 Bolts. Haven't mentioned this fact yet: The rod bearings are those of a Toyota Camry 2VZ-FE 2.5 V6... they are narrower than the 4 cyl rod big ends. They are centered as in this pic (not my motor):
Less friction supposedly frees up power - I wonder if it is more than 1 hp!
Both mains and rods are Clevite 77 with Calico coatings.
Orig Post containing the pic above:
-
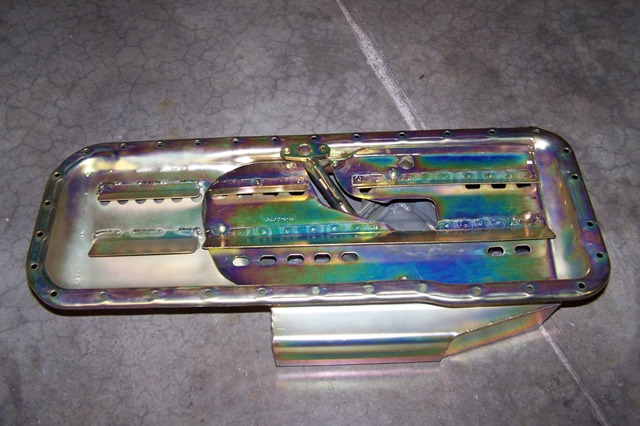
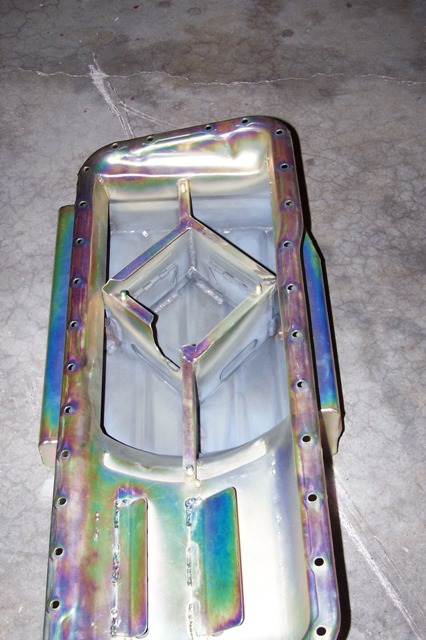
Nice build so far. I have an almost identical oil pan, so far I have put 8.3 Litres into it and oil level is still under the low mark. Do you know the recommended oil capacity?
I thought it was 8 quarts, but you already have more in it than that!
-
This is a very interesting build with a lot of work being done. Well done mate. A quick question, did you consider using ARP main studs on this engine or did I miss that bit?
I considered them, but I recall my machinist being surprised by how low the torque setting was on them... and he didn't feel the ARP would provide any improvement. So, we reused the stock main bolts. He said that when he final torqued them, there was no stretch. No stretch translates to no need to replace for the most part... unless you want to get crazy and think about how much wear they had from being installed and removed several times during mock-up/pre-assembly. Evidently, he can easily detect stretch when torquing typical "stretch" bolts to spec.
If I recall correctly, they are only like 40 lb-ft. or is it ft-lb?
-
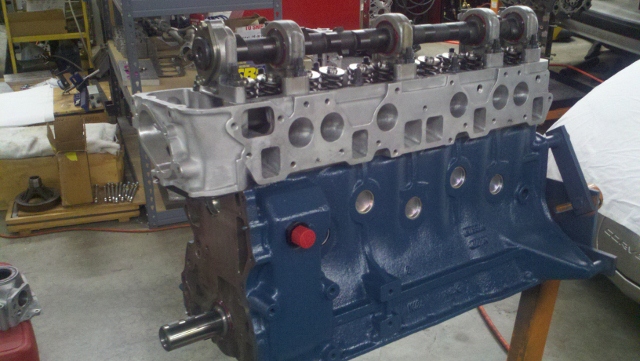
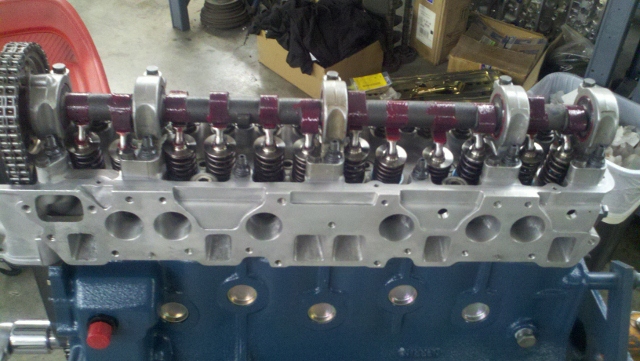
I picked up the engine yesterday. Here are some assembly pics:
-
I have a question for you about the pistons. Can you tell me what your final valve pocket depth ended up being? I am having some custom pistons made right now and I want to compare numbers, maybe I can save myself from having to depen the pockets like your machinist did. It's funny how similar your engine setup is to mine, my head is way cut down, and our cams are very close too.
I looked back through emails going back and forth with him... The aluminum slug we started with -- the dish was .148 deep. If memory serves correctly, JE pretty much ignored that dimension and we decided to cut the dishes further ourselves after we had them in hand from JE. Then, we had to cut the intake another .065 (probably at the angle the of the valve) and another .038 on the exhaust. So, that is going to be ballpark. But, obviously, you'll want to measure your engine to account for your unique situation.
-
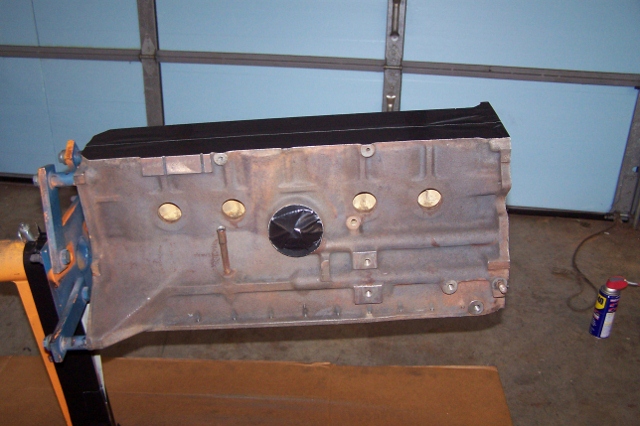
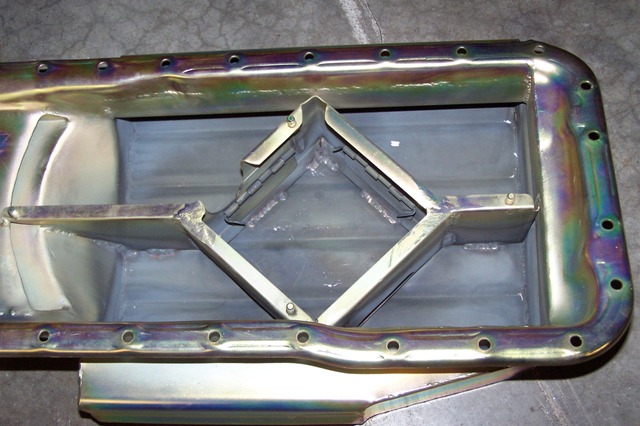
Comp oil pan from Design Products has come in.
Also, the pistons were modified in yet another round as the PTV wasn't sufficient on mock-up. The note from Bryan was:
"After cutting the valve pockets deeper; the pocket edges were radiused with 100 and 120 grit cartridge rolls. I then re-polished the whole dish area with the 120 grit rolls.
After this the pistons were masked with duct tape except for the tops and then the tops glass beaded at very low pressure. Then the tops were soda blasted."
Looking sweet, I must say
It's crunch time now... I go to pick up the motor on Sunday. Looking forward to it.
-
Were are in no hurry just let me know when you can get it apart. If you get to it befor the weekend of May 18-20 I hope to be at the race at road atlanta so I will be in your neck of the woods and will take the whole diff if you have it, if not the R+P will be fine. Just let me know.
The diff is in GA now. 30115 is the zip. Let me know if you still have interest.
Garrett
-
Nice build. What's the numbers it produces?
Not together yet. Hopefully not too much longer.
-
Did you ever find any leftover Glyptal? I have some. All my blocks are done and I have about a third of a quart left. Should be enough to do your motor. PM if needed. I'm probably too late though.
I'll check with my engine builder. As recent as a week ago, final assembly hadn't been started, so I may still be able to use it.
Garrett
-
Well, this engine build thread has been going on a long time, so it is fitting that we take a short ""vacation" to France before getting back to work. Thanks for the info.
-
I'm reading thru your build-very nice-but was curious about your Nismo head gasket. I installed a Nismo on my build and it was .047/1.25mm thick I believe. My head is also a E-88
Looks like there are a couple available:
Page 14:
http://www.nissanusa.com/nismo-web/Nismo-Motorsports-Catalog-2010.pdf
11044-E4620 ALL 1 NISMO composite head gasket for L-Series. 85mm bore, 1.2mm
compressed thickness.
11044-E4621 ALL 1 Head gasket for use with O-ring type head sealing above. L-Series 6-cylinder.
11044-E4623 ALL 1 NISMO head gasket for L-Series 91mm bore, 0.6mm compressed thickness
I've got the E4623 version.
G
-
I've just rebuilt my engine this winter with machine work done on crank, pistons, block, etc. It was my first engine! (and not the last, I loved it)
So I know a little how it is done, so I appreciate the work done! Mine is now roaring under the hood, it is quite a good feeling
Very cool. I see you are in Paris, France. Can't help but think your 240z is extremely rare there. I bet you have some interesting stories to tell... about how you got possession/delivery of the car, about Parisians reaction to it, etc.
Yes? -
Thanks for the compliment. Almost every last bit of credit goes to Bryan, my engine builder. I do research... decide what I want, and then pay the bills. He has been the one to point out several of the mods and the one making everything fit together. From swapping around engine bearing shells to achieve optimal bearing clearances, to further machining the pistons to achieve the correct, desired compression ratio and to provide adequate PTV (taking into consideration the adjustment available via the adjustable cam gear), to determining how much the pistons stick up out of the bores when "rocking" them, and oil flow modifications, cooling flow modifications, the additional coolant holes above exhaust ports #5 and #6, machining the vent hole in the block for a fitting, etc. etc. etc.
He is doing a stellar job. I wish I could have been present in his shop to learn even more than I have via phone calls from working with him.
-
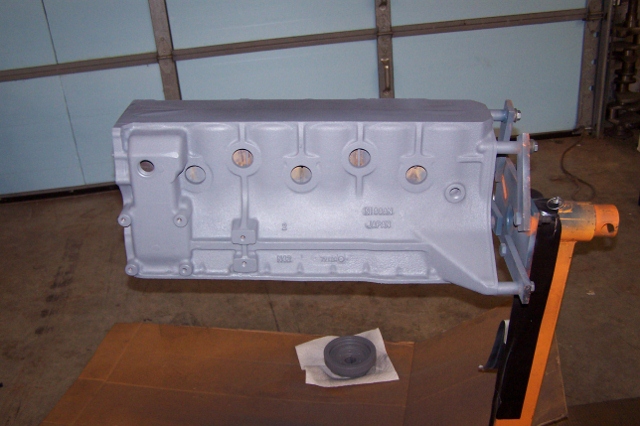
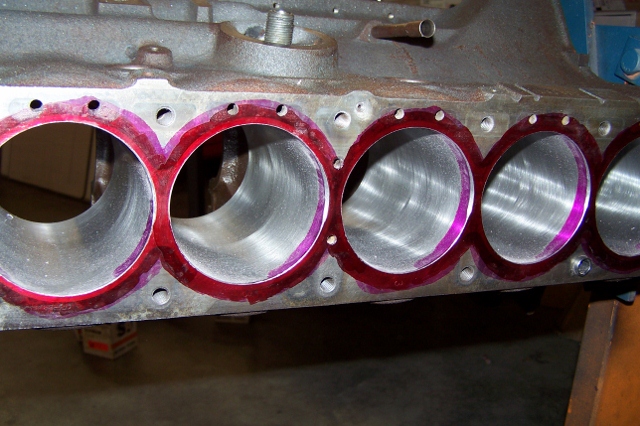
Some more progress to report...
My head gasket has a 91mm bore on it if I recall correctly. The cylinder head mods I did brought the chamber edge to the bore edge of the gasket. However, the bore size ended up being 88mm instead of 89mm, as the sonic testing indicated we shouldn't go that big. So, here, the top edge of the bores is being modded to get rid of the "shelf" or lip that would otherwise be present and obstructing intake charge flow.
As part of the documentation that came with the tensioner, they said that it could be modded to increase the mounting bolt size and get a bit more adjustment if desired. Doing that here. The holes in the head were drilled and tapped for 8mm bolts.
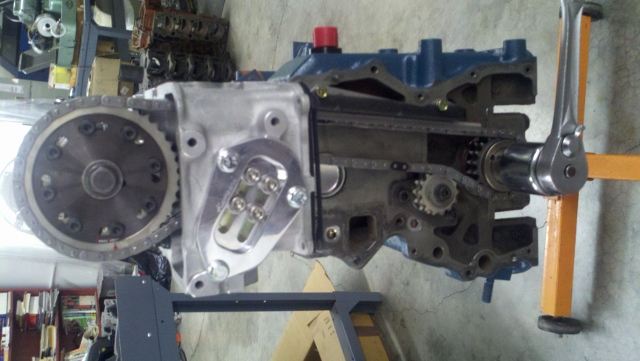
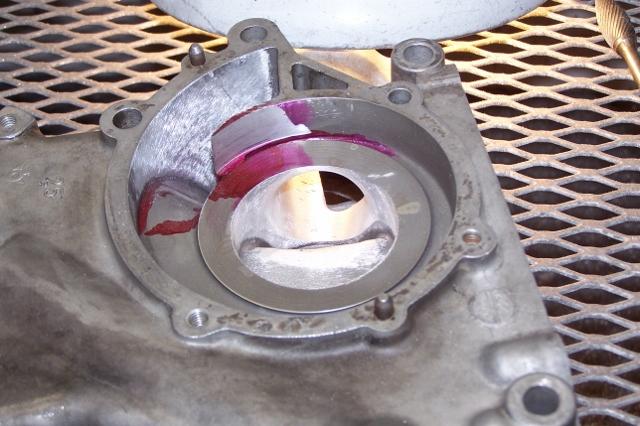
And, some mods to the front cover to make the diesel water pump work well and to increase flow for both cooling and oil:
-
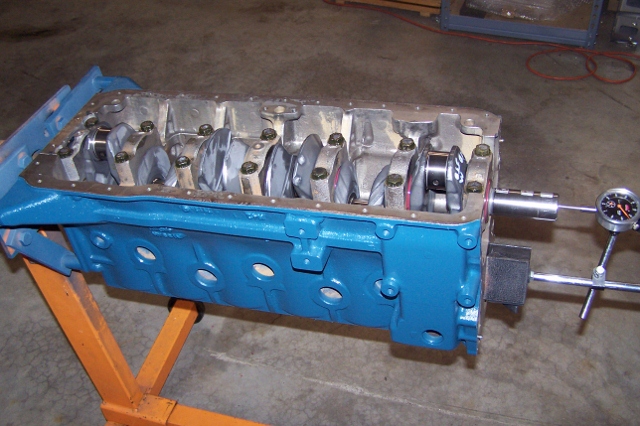
Kind of bizarre and interesting. An L-28 on an engine stand with various sections removed... you can see crank turning, cam turning, valves operating.
-
Wow that is an incredibly light seat pressure! You're not worried about sealing issues or anything? My double springs seat at 125lbs and are 270lbs at .500. You will have much less valve train resistance than I will for sure.
As for the Ti retainers that is a must with pressure that light. I know Schneider cams makes a set for the L series. Not cheap by any means though. http://schneidercams.com/7titaniumretainer-73006.aspx
Yep, those are the ones I bought and they will be at the engine builder's tomorrow. They have to be turned in a lathe a touch for the springs I am using with the cam. Here's hoping that it all works and I get a bunch more hp than I otherwise would have as a result (of the light spring pressure).
-
Thanks John. I picked one up off of ebay. Appreciate your input.
Garrett


Are nismo or HKS head gaskets still around?
in Nissan L6 Forum
Posted
Not sure why the Tomei and evidently the old HKS (there is a thread that shows they are identical) are this way unless everyone in Japan was building off the N42 block as the foundation? I haven't compared with an N42 block, but I bet that one has no issues with these gaskets. Either way, what is to keep someone from clamping some scrap eighth inch plate on both sides of the gasket and simply drilling those two locations? The new holes will be perfect. I'll do that to mine soon and put it in the for sale section.
Garrett