
Kevin.pk
-
Posts
586 -
Joined
-
Last visited
-
Days Won
1
Content Type
Profiles
Forums
Blogs
Events
Gallery
Downloads
Store
Posts posted by Kevin.pk
-
-
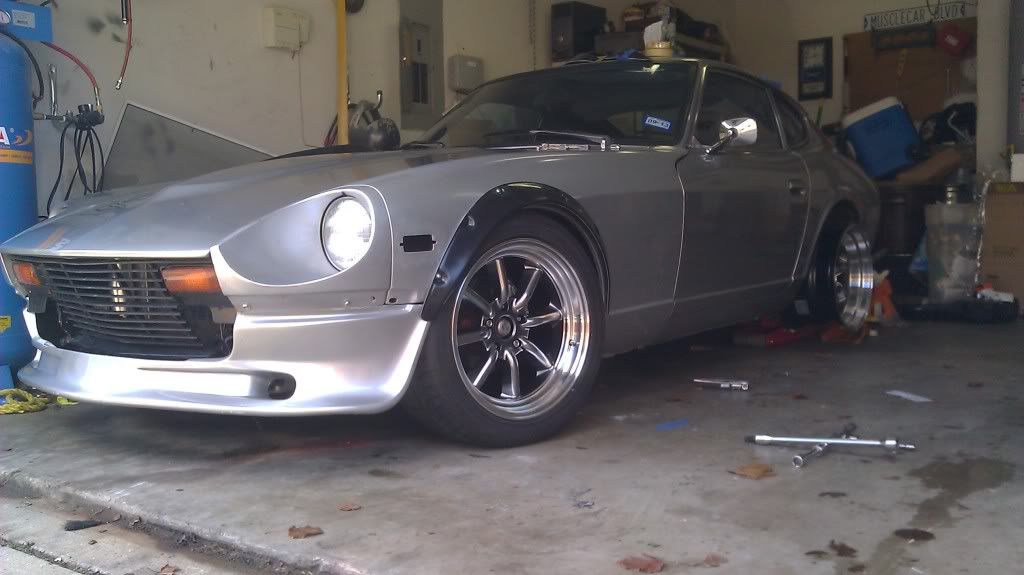
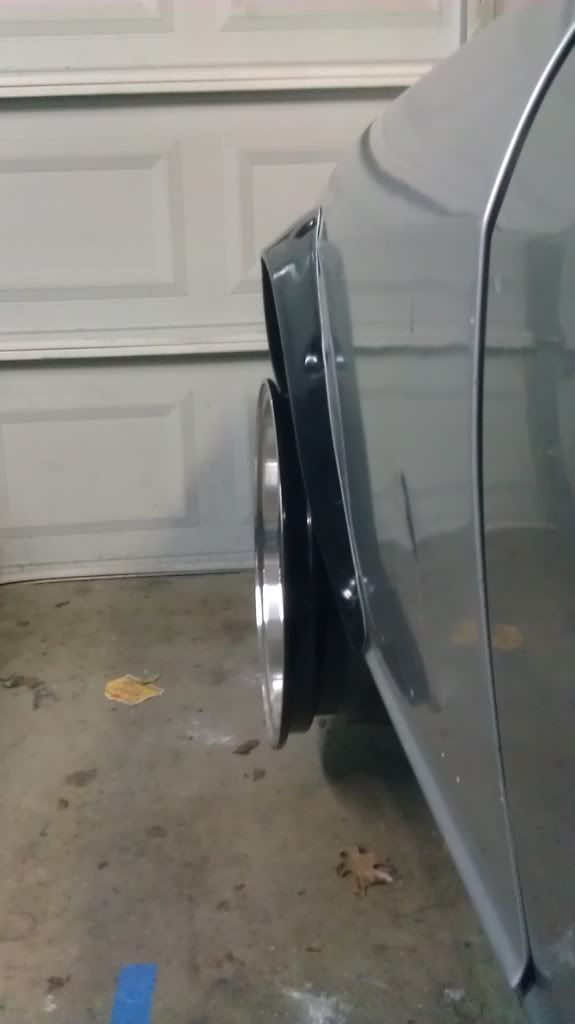
Front Tire mounted for mock up.... time to start cutting. this is the 255/40/17

Are you going to the next cars and coffee? Im fairly certain my new engine will be in my Z by then.
I should be there. Hope you get it done and see ya out there.
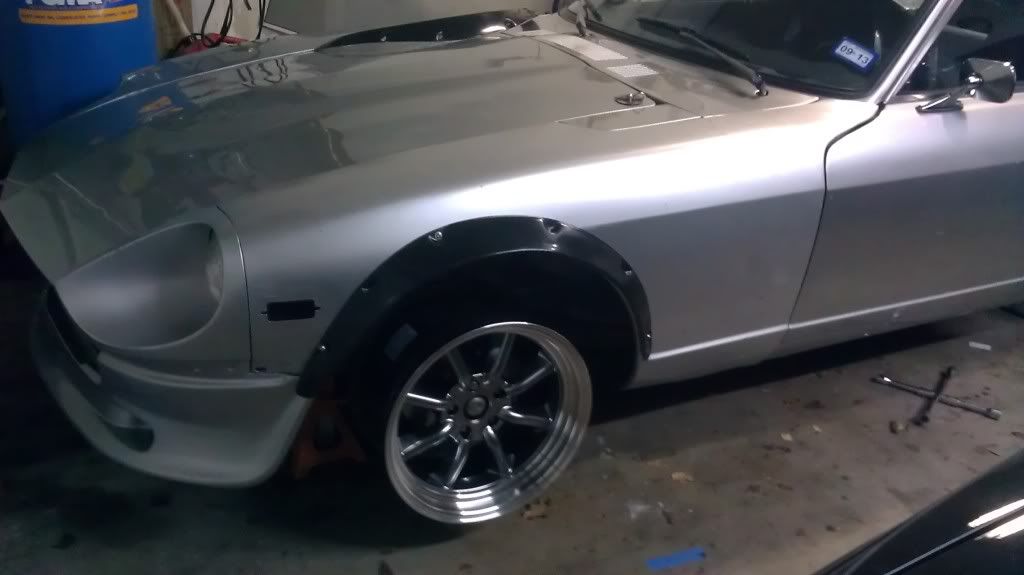
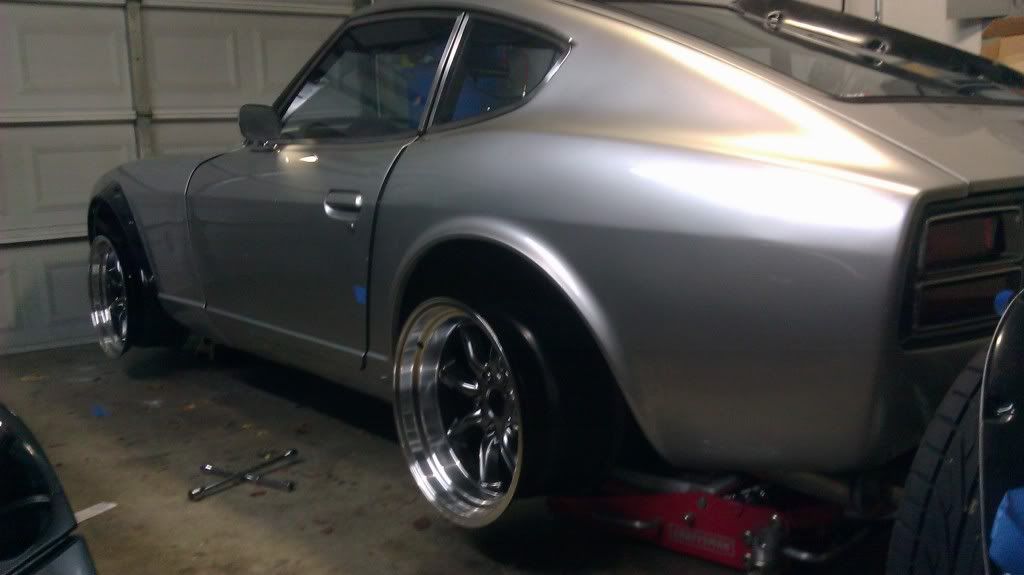
That's a gorgeous color combo! Sure looks sweet before cutting the body though... Have you thought of doing the ZG's body color?
Either / or, it's going to be sharp!!
There is just no way these wheels and the tire widths i want would fit without cutting up the body and doing flares or i'd probably entertain that idea.
I've got paint left over from when I did the engine bay, so that is part of the reason for painting the flares that color. The entire car needs to be repainted, so I might look into matching the silver body color with the flares at that point. That's probably a year away from happening though... having too much fun with the car to put it in paint jail.
-
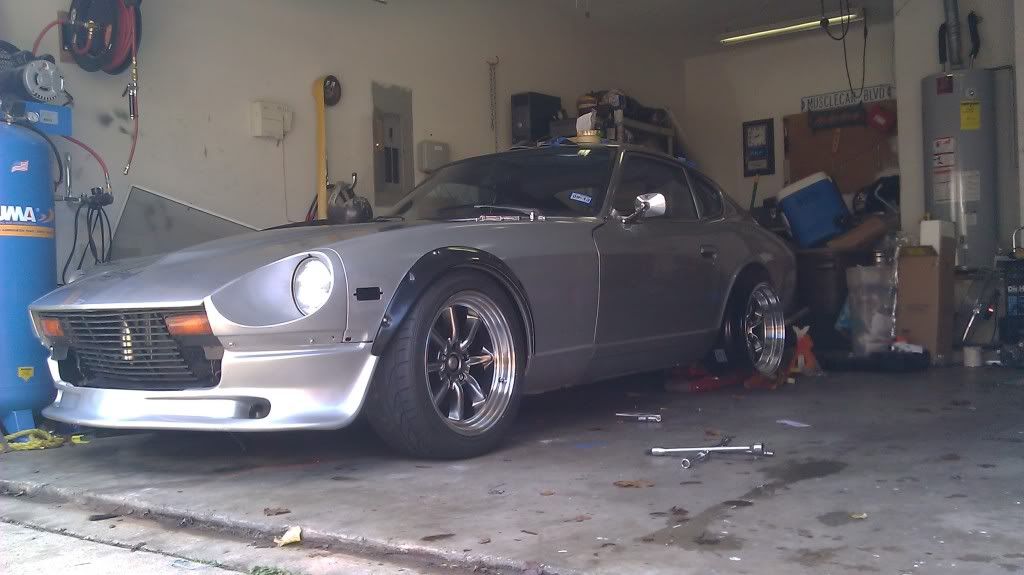
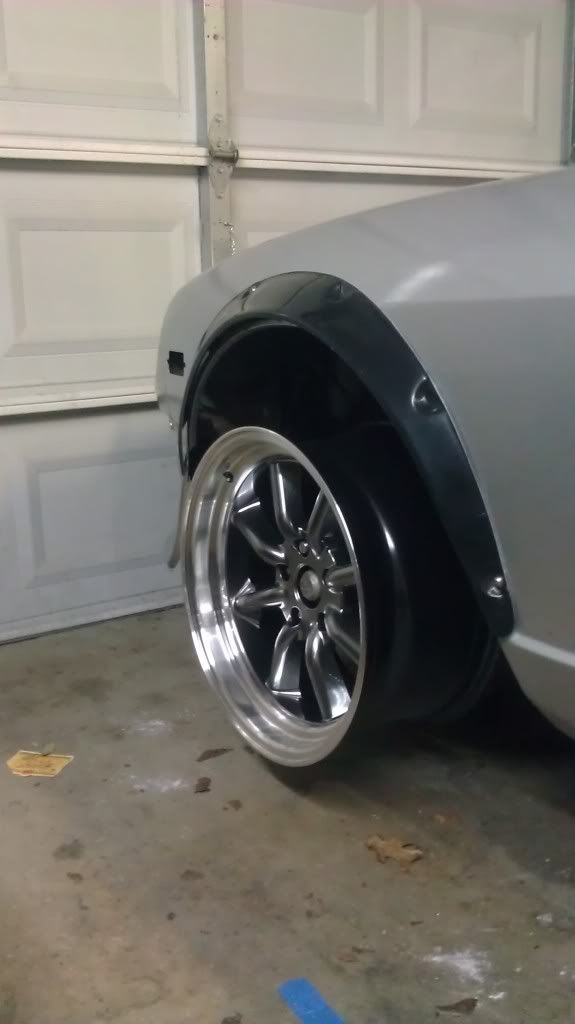
Wheels came in.... tires and fender cutting coming this weekend
Plan is to paint the flares the same color as the engine bay.
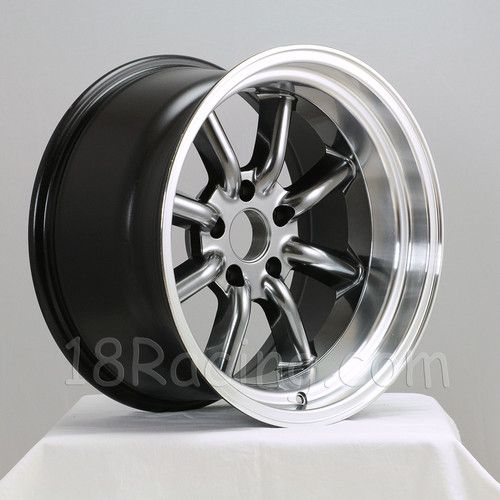
Rota RK-R
5 lug
Front- 17x8.5 0 offset
Rear- 17x9.5 -20 offset
-
Just got these today...
Rota RK-R
5 lug
Front- 17x8.5 0 offset
Rear- 17x9.5 -20 offset
-
....just ordered some ZG flares and these......
-
Front struts sectioned and MR2 tokico inserts done.
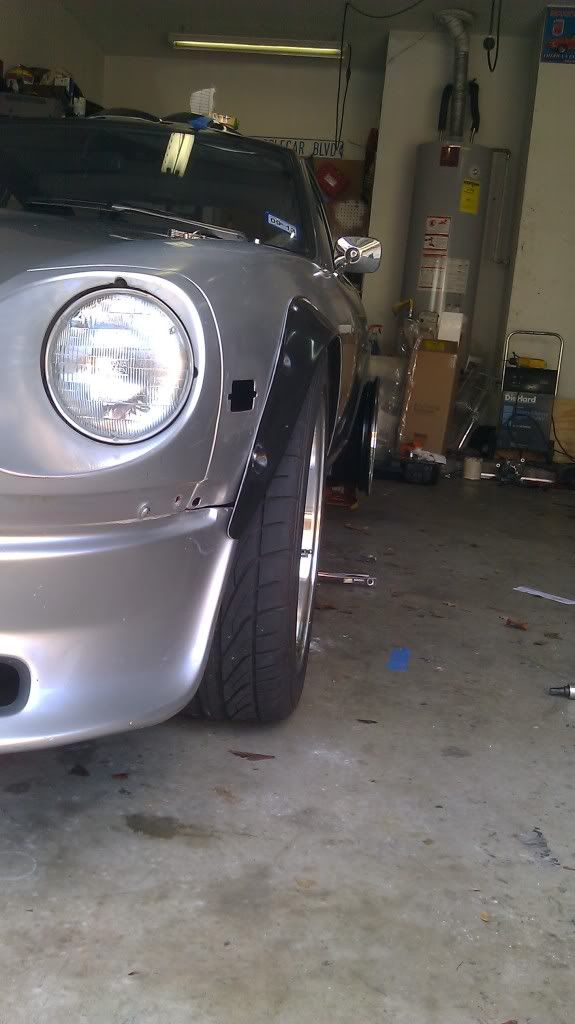
Current ride height with the 245/45/17 yokohomas moved up front (need replaced). clearance is tight....rubs on corners. going to either raise it up a bit or roll the fender (fender was previously rolled but this is the "new" replacement one)
New tires in the rear, 255/40/17 dunlop direzza dz101 with room to spare. I can actually hook in second now.
-
I used a psi conversions harness. Worked great. And i actually managed to mount the PCM in the stock location.
-
a little more info/pics in the following thread but nothing as far as contact info.
http://forums.hybridz.org/index.php/topic/57062-header-design-in-grassroots-motorsports-article/
-
I love the progress on your build thus far, keep it up man!
May I ask, where you bought the sunroof from? I love the one in my car, but one of the forward piviots are broken forcing the sunroof to stay closed.
Thanks
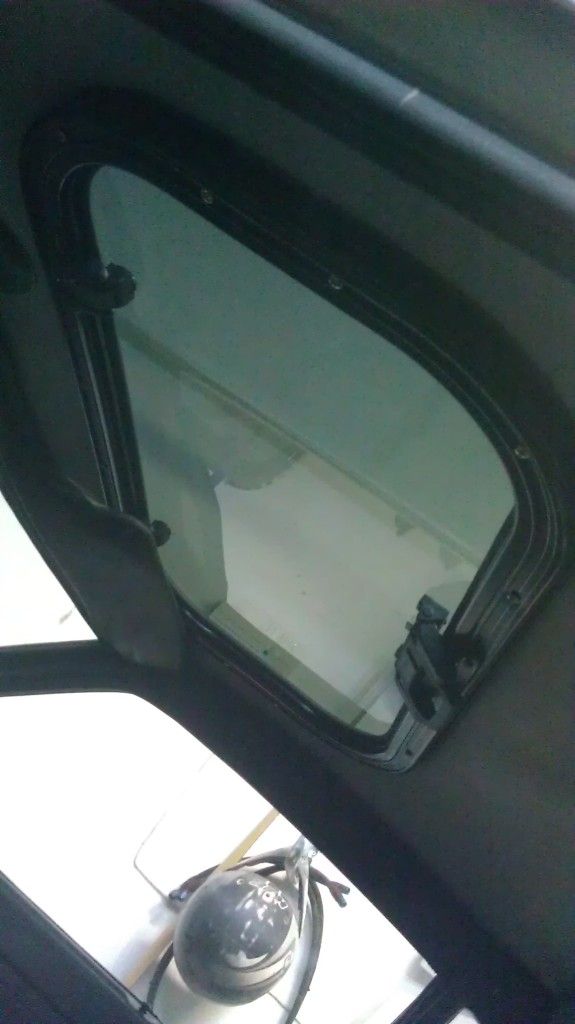
I got the sunroof off amazon. It was a drop in perfect fit for the original dealer installed one. Mine measured 15" by 30"
CR Laurence AP1530B5H Autoport Sunroof
-
Still waiting for you to take me on a ride in this beast.
Anytime. Let me know the next time you are in Plano.
---------------------------------------------------------------------
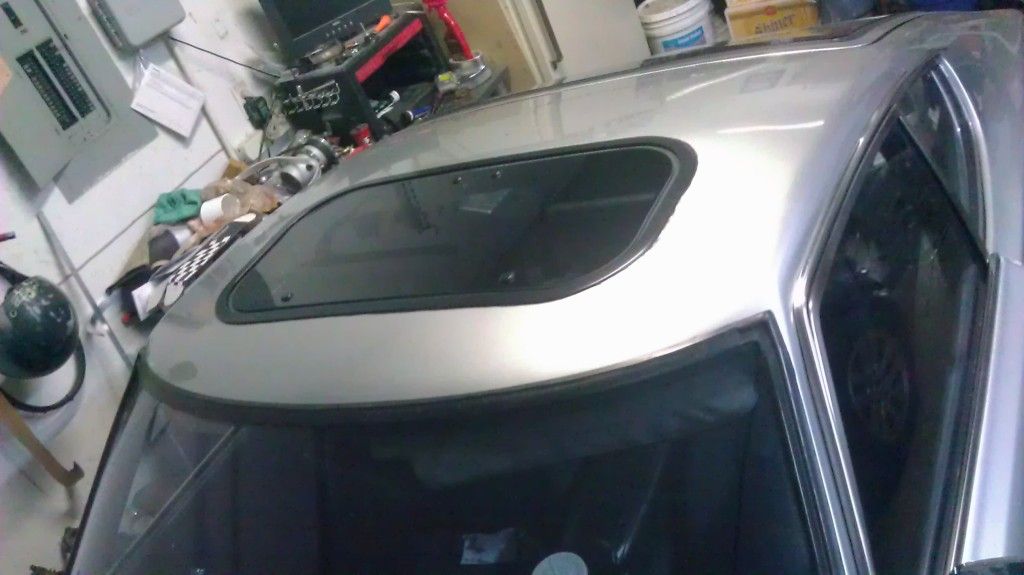
New sunroof installed. Ideally I wouldn't have any sunroof but as least this one doesn't leak.
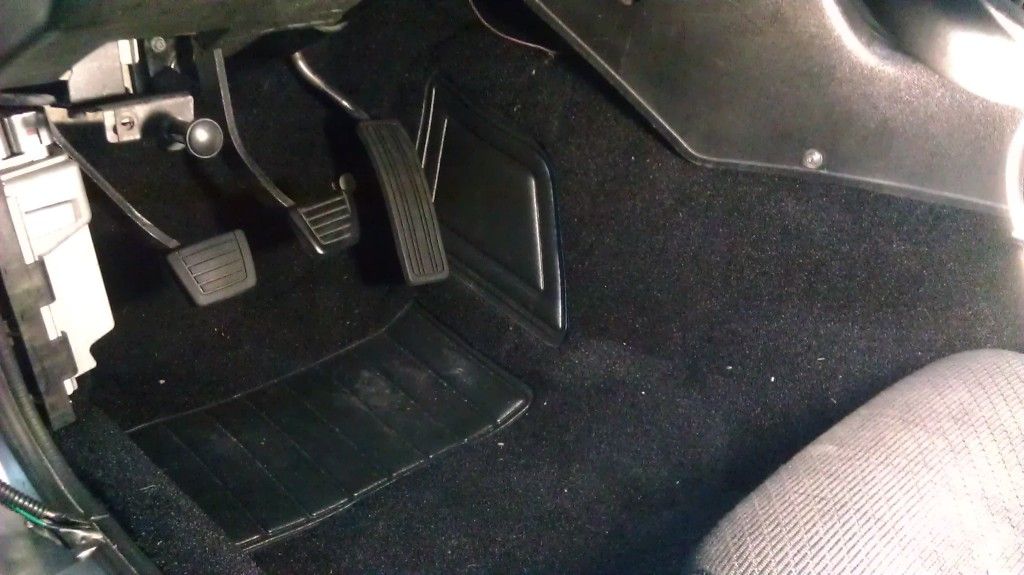
MSA Carpet kit- first time in 9 years of ownership that I have had legitimate carpet in the car. Also new pads on the Gas pedal and clutch, still need to install the brake pad in this pic.
-
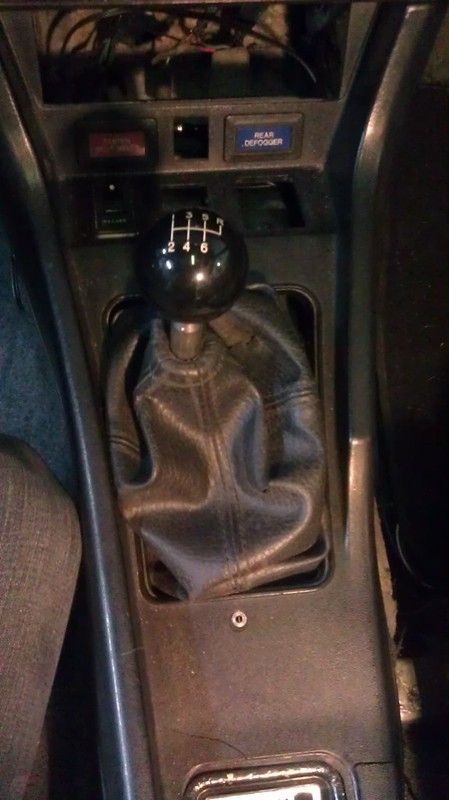
New shift knob and old stock shift boot installed
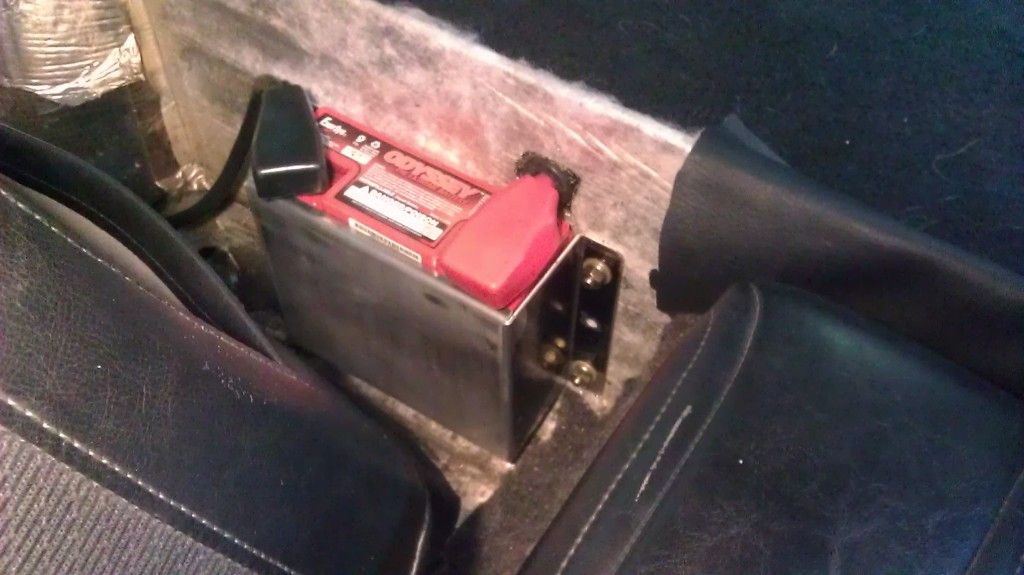
Odyssey PC680 battery mounted and wired
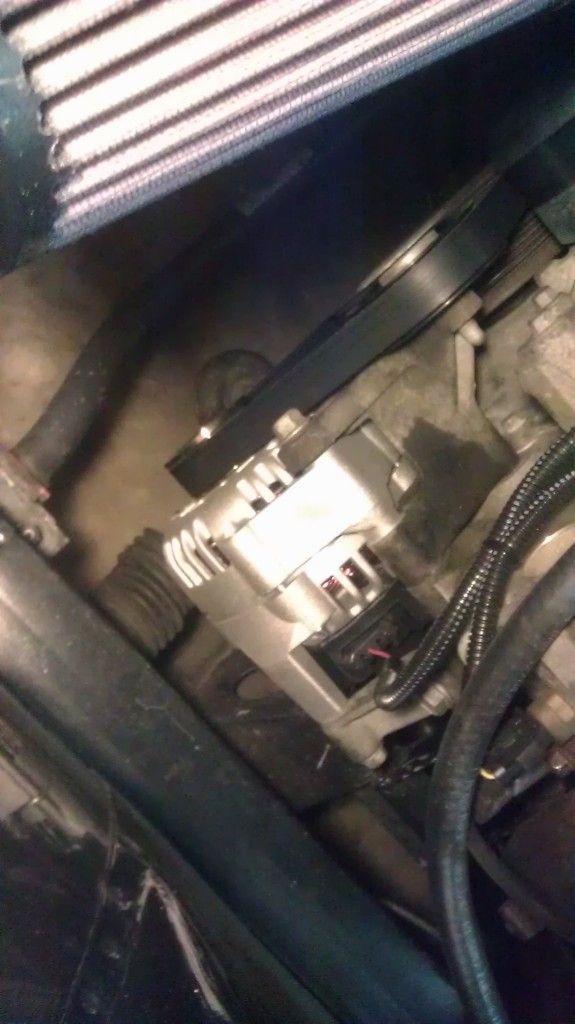
First actual repair after the swap.... New Alternator.
New replacement sunroof should be here Thursday.
Tokico BZ3099 struts are ordered.
-
Kevin.. thanks for the ride. If that was you this past saturday.
Yep, that was me. Anytime. I lost your card, so I'm glad you found me on here.
-
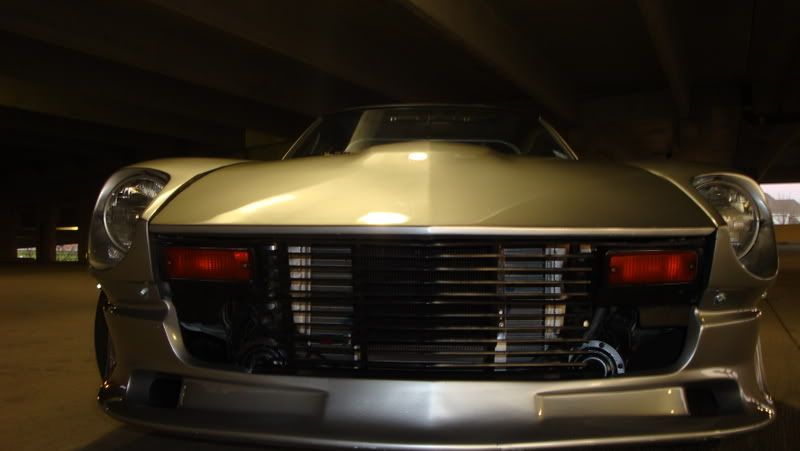
two stock 280z grilles welded together.
-
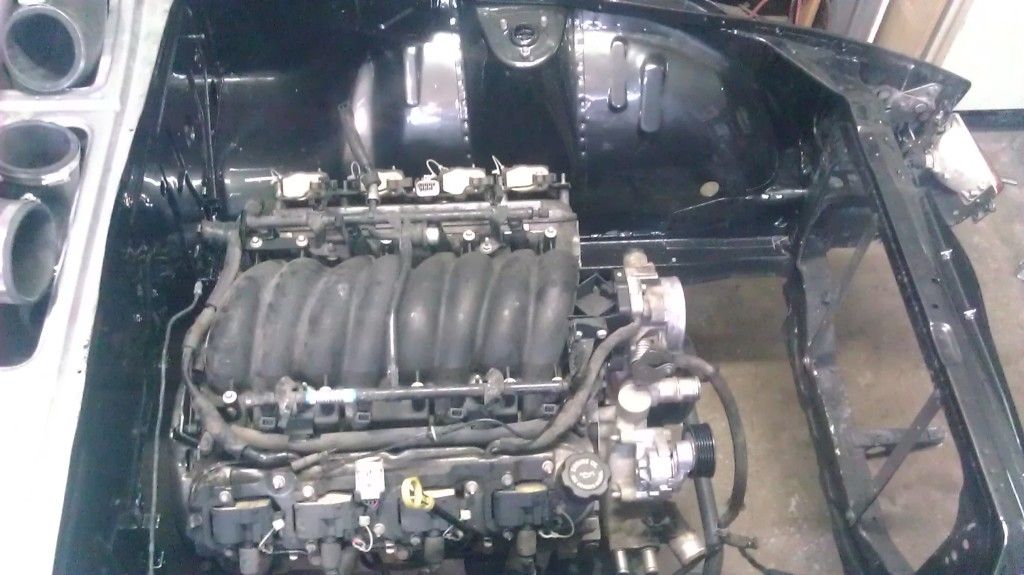
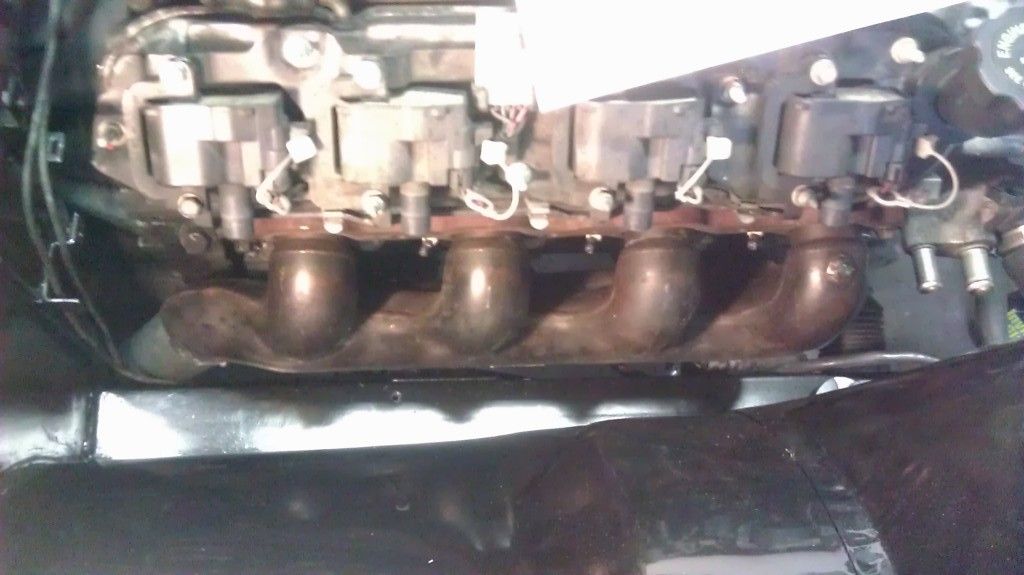
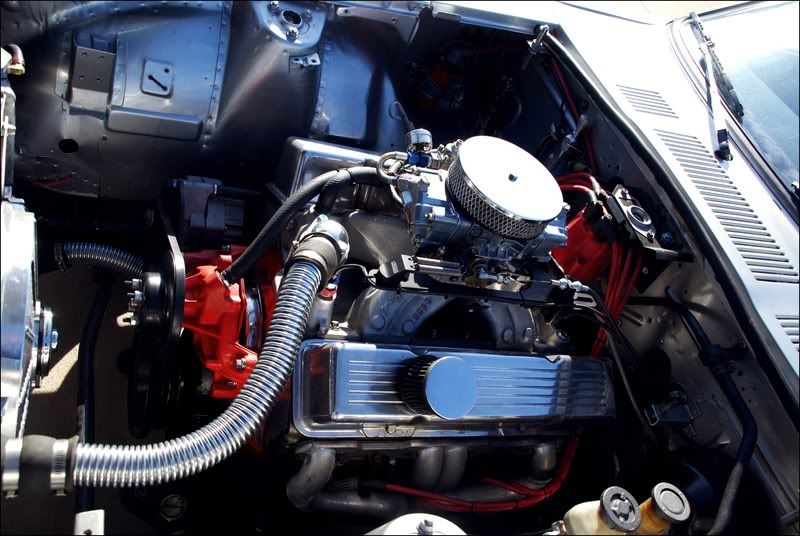
1. Bone stock 01 LS1
2. T56
3. Custom mounts. Sits basically in the same position as JCI.
4. PSI wiring harness. Ls1 fuel tank
5. Got the engine on August 24 and finished/drove the car on October 7th.
6.Other mods:
-
- MGW short throw shifter
- Coilovers on sectioned struts.
- Converted to 5 lug.
- Mustang bullitt wheels.
- Z31 vented brakes with Toyota 4x4 caliper.
- Stock modified LS1 manifolds
- Afco radiator
- Taurus Fan
- Smoothed out/welded holes in engine bay
- Odyssey pc680 battery
- F-body Gas tank
Optional:
-
-
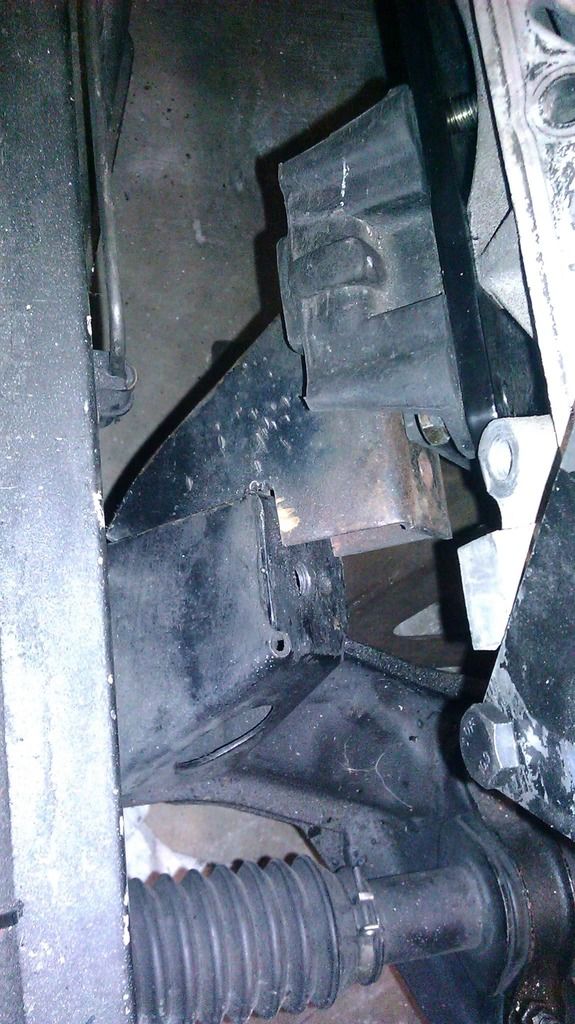
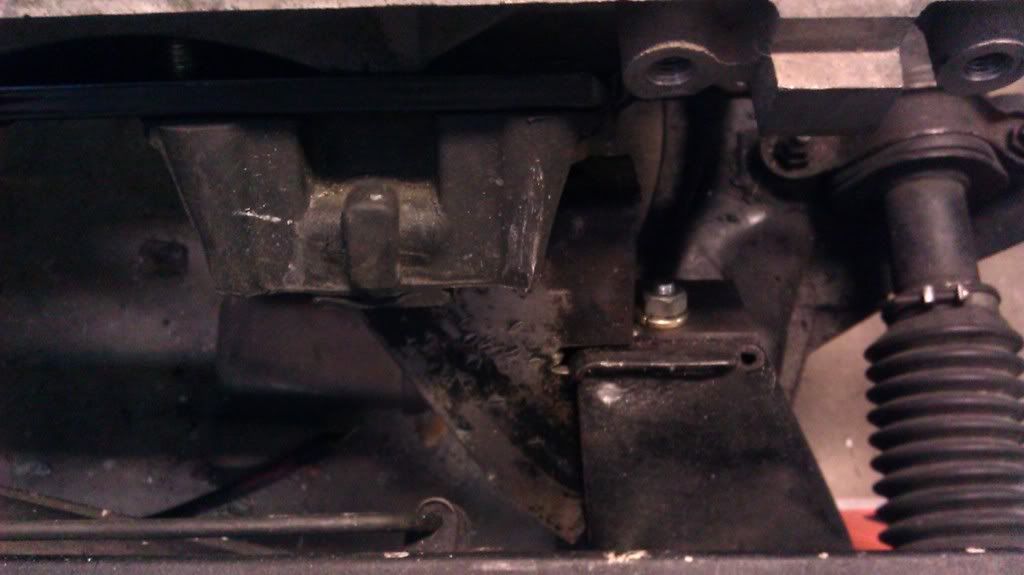
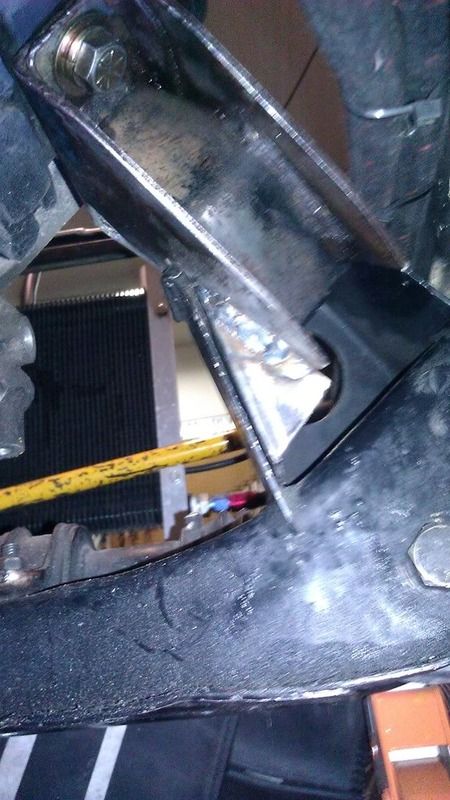
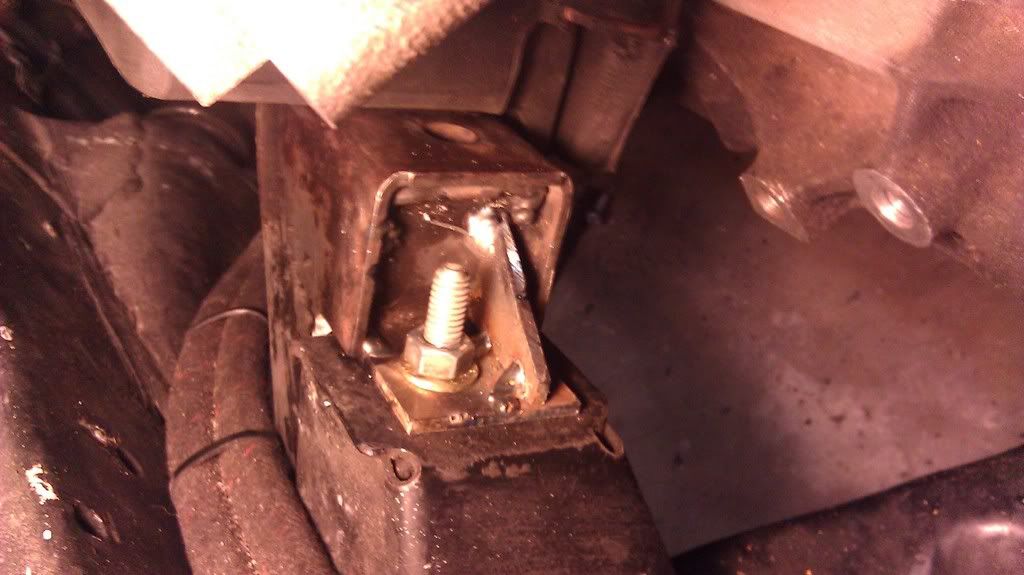
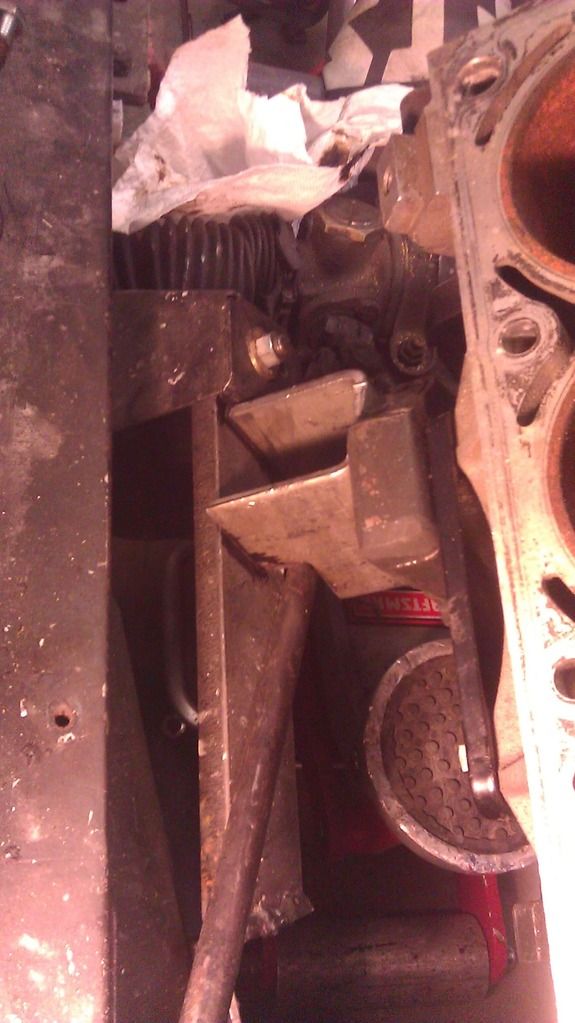
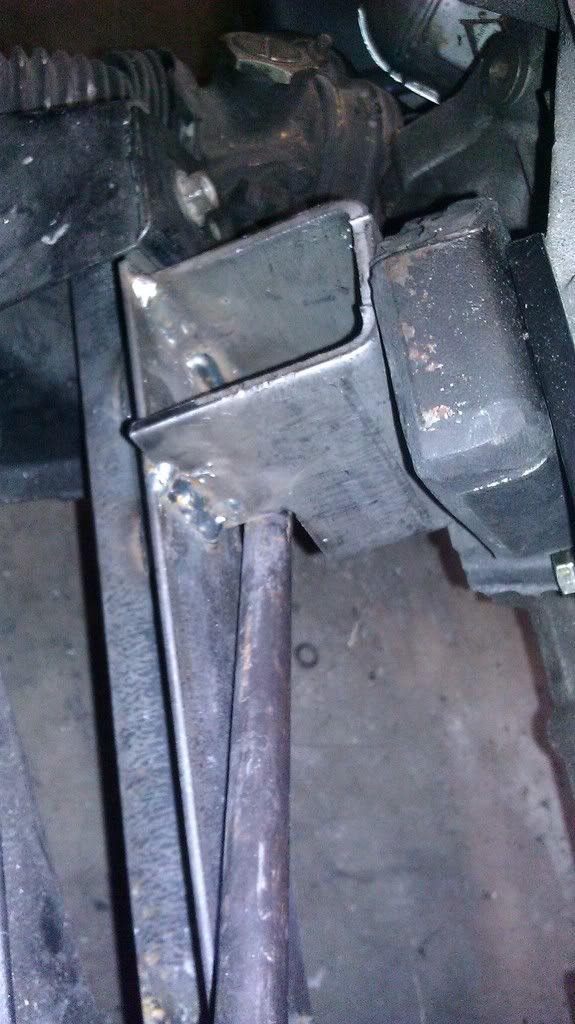
I used some generic mounting plates that convert the 4 bolt ls1 to standard sbc mount pattern from ebay and then built some mounts to that. Other than that i used what i had.... some scrap metal, a stock datsun mount and the rubber mounts left over from my previous JTR swap. I've had it running for the past month and the engine hasn't fallen out once!!!!
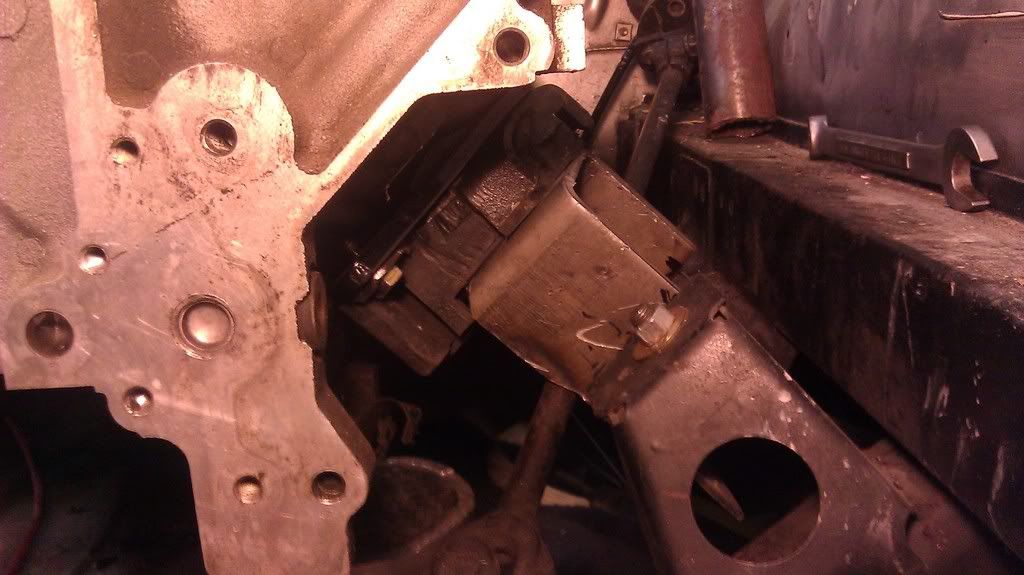
passenger side(modified stock datsun mount):
Driver's side mount:
and this gives you an idea of the mounting position
-
You're right. I had a brain fart. 98-99 manifolds
-
I used stock 98-99 Z28 manifolds. I had to cut off the flanges and weld an extension on to the end but they work.
I built my own mounts but my engine placement is very close to where the JCI kit puts the engine.
edit: listed the wrong years
-
Check the previous page. Its posted in its entirety there and also a link to it in pdf.
-
Thanks!
Random thoughts...
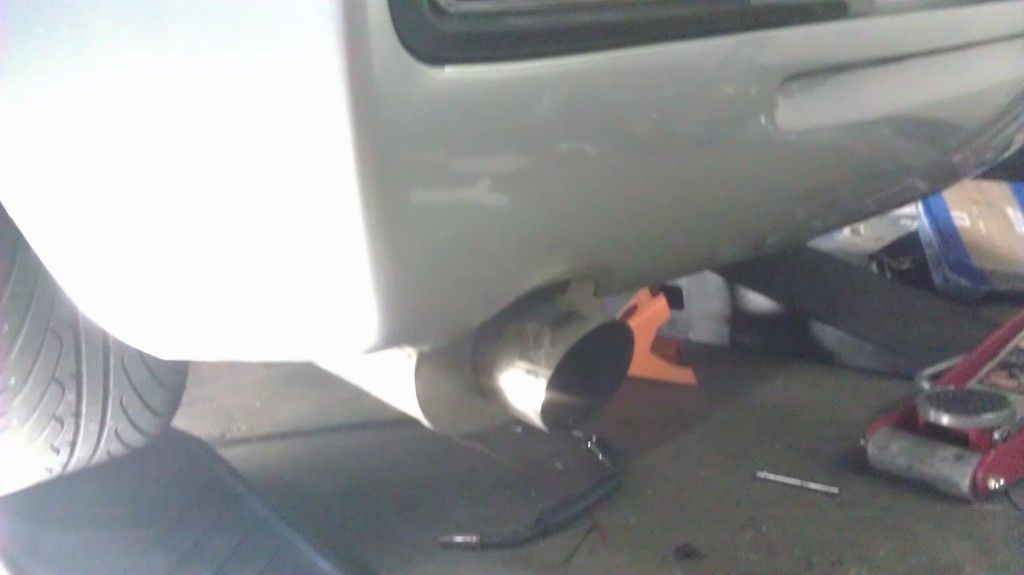
I think the exhaust actually came out quieter than the old setup, at least at idle(very quiet). It's essentially a stock motor so its very subdued even with just the one muffler out back.
Having an in-tank mounted pump is wonderful. I used to be able to hear the holley blue fuel pump over the sound of the engine/exhaust.
I installed the MGW shifter the other day. It is light years better than the garbage that was on there before.
I need tires. 7 year old Yokohama tires aren't going to cut it. First gear is almost unusable at anything close to half throttle.
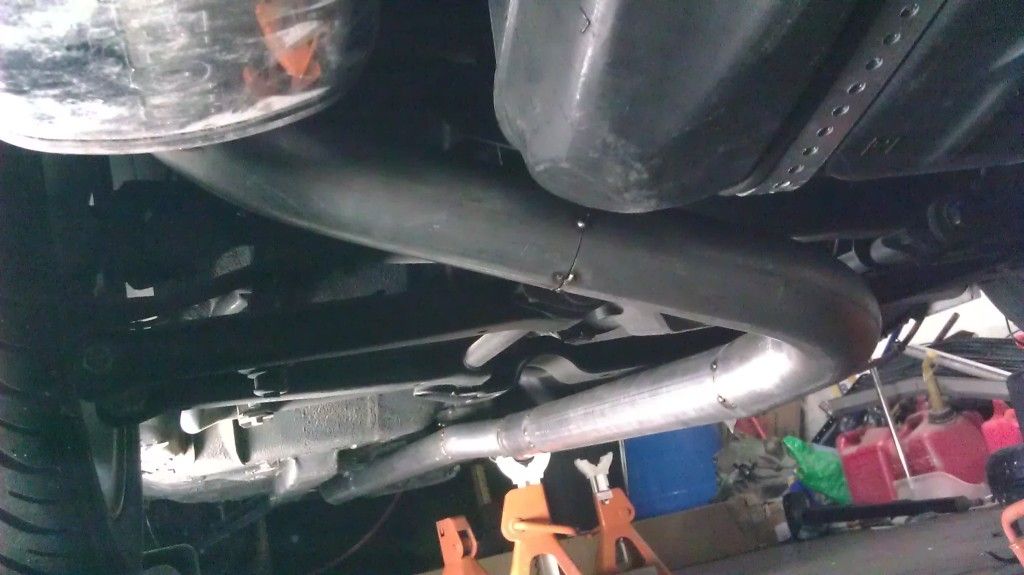
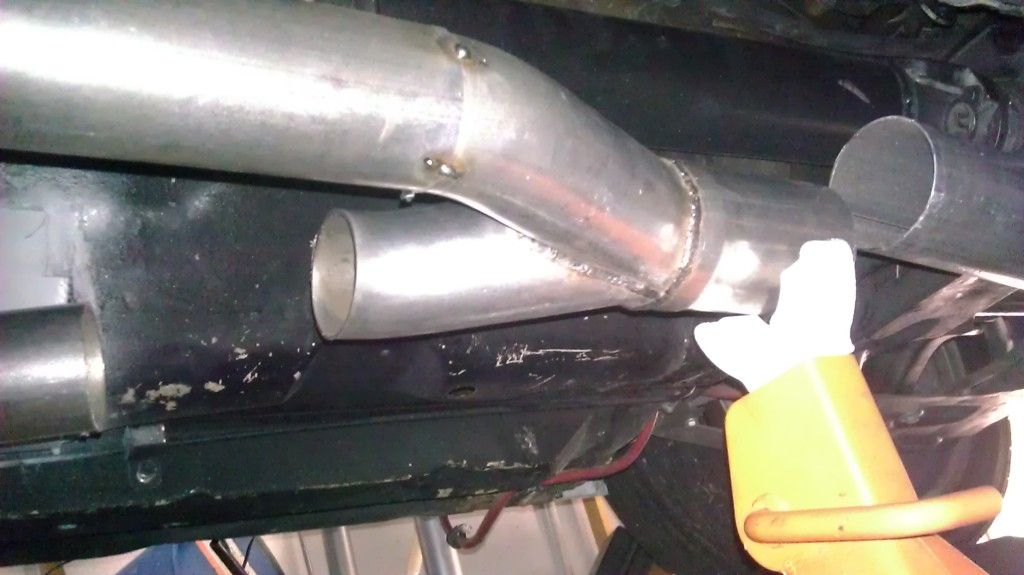
Need to get oval exhaust tubing to go under the differential. I've already scraped the crap out of it a handful of times. ground clearance isn't horrible... around 3"-4" but there are a couple intersections I went through at speed and sent out a shower of sparks.
-
Sounds good Kevin. Congrats on hitting that job yourself. Looks like a good job. I ended up doing two resonators to the Y and a dynomax superturbo in the rear. Mine is much more subdued sounding, but definitely not stock.
The exhaust actually came out really quiet after i finished welding it up, at least at idle. Almost too quiet. So it sounds like you're fully road worthy, we'll have to meet up sometime...
Got the car insured and registered on Friday.
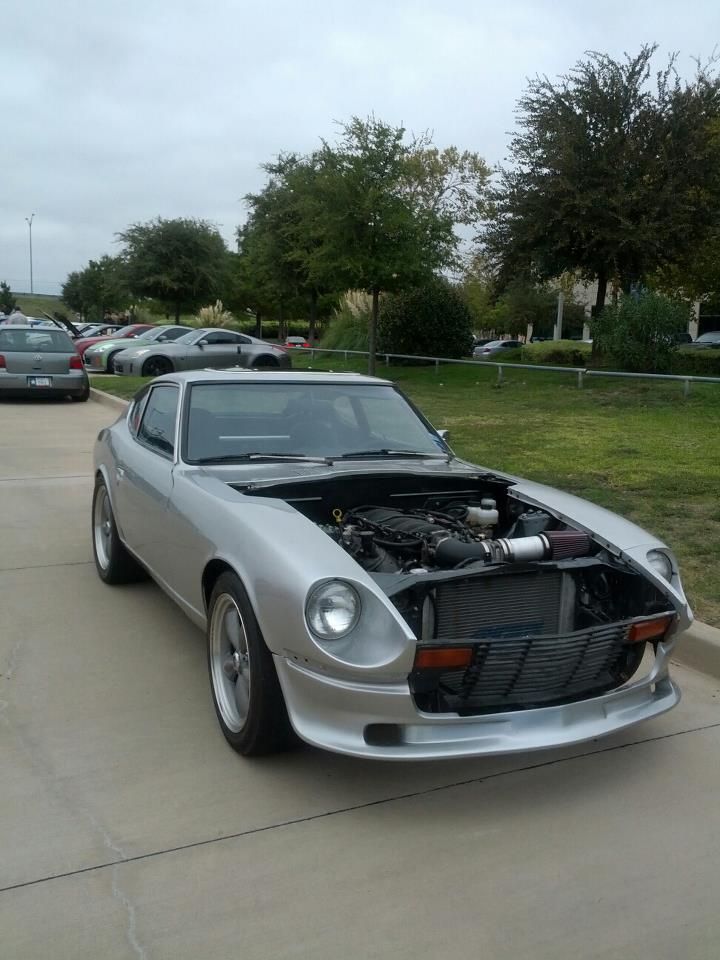
Drove it up to Dallas Cars and Coffee this morning... still need to work out some small things but felt great to finally get this thing on the road.
Drove ~100 miles today and not a single issue other than the realization that I need to section my front struts and order shocks for all 4 corners.... it never ends.
-
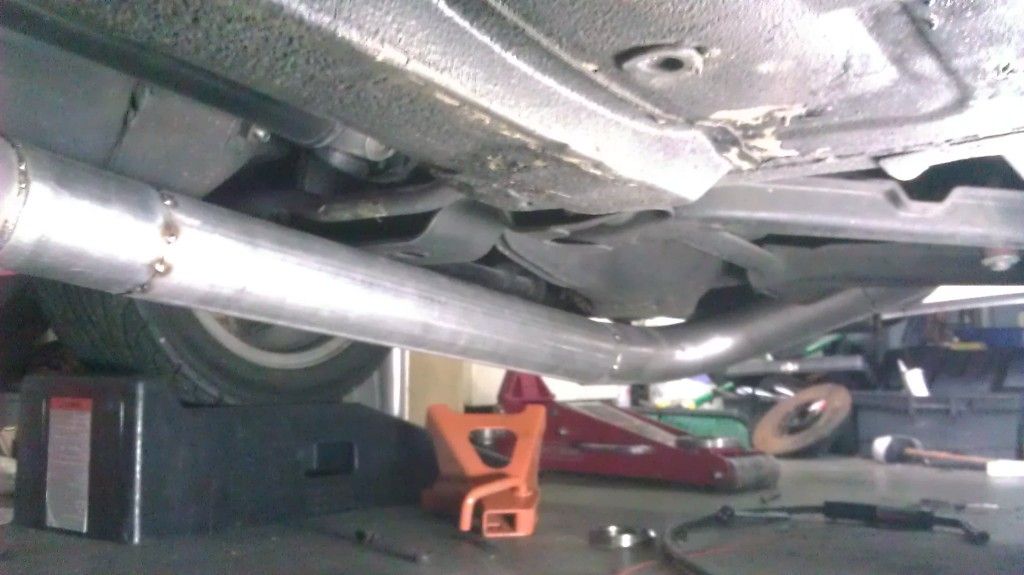
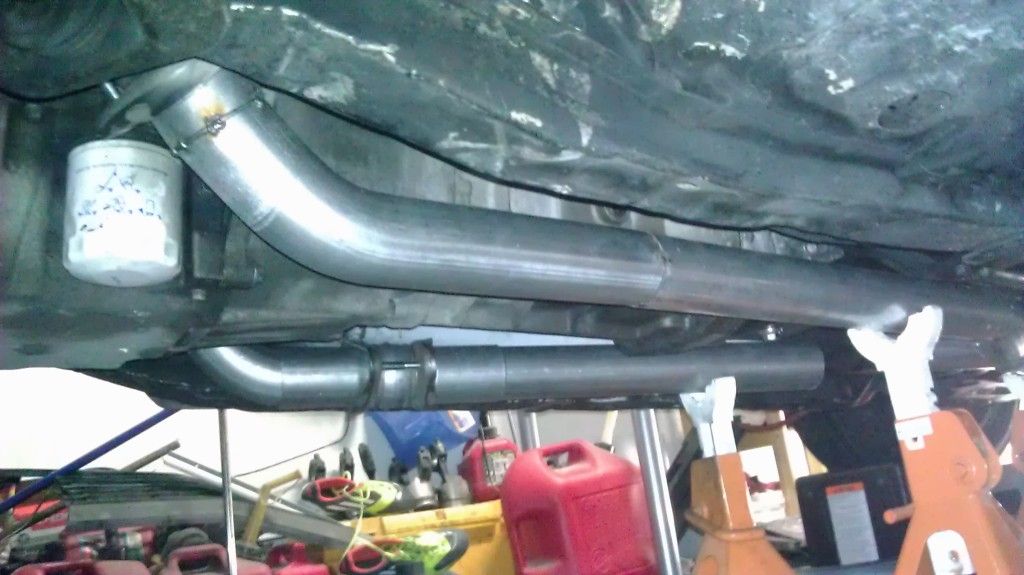
Front section finished.
Just need to pull it back down to finish welding the rear section in place...
The rear section is only tacked in place, so there are definitely leaks but here's a quick vid. Mind you its a bone stock ls1... not that exciting sounding..
bad quality video...
-
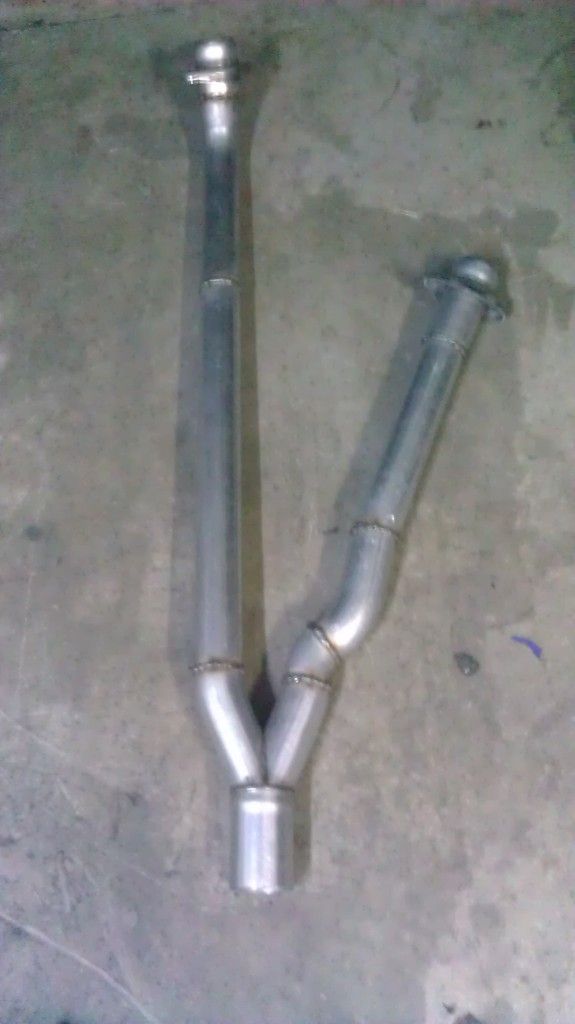
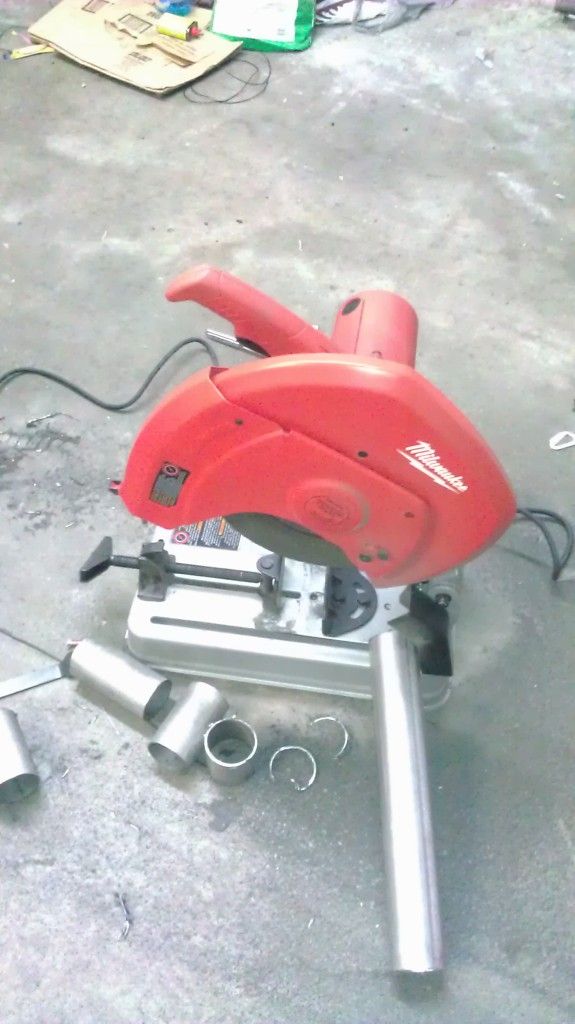
well as you'll see in this post... I decided to tackle the exhaust myself.
Bought a chop saw around 8 tonight....
Exhaust bends came in today and got straight to work.
Started on the front section of the exhaust....
at the y-pipe... need to cut the passenger side pipe down a couple inches and then squeeze a bend in there to get it to the y-pipe.
I'll hopefully have everything up to the y-pipe finished tomorrow and then i'll finish out the back half.
-
First time in 21 months that the car has moved under its own power.....
washed it and drove it around the block today.
ordered mandrel bends for exhaust the other day. Also ordered MGW shifter because I don't trust the shifter that is in there (saw the current shifter on ebay for $30 shipped... new)
-
Looks good!
I just picked up the same battery for my ls1 swap and was looking to mount it in the same spot. I modified my battery tray area when I did rust removal and welded up all the holes in engine bay, but may try and mount it in wheelwell still.
-
almost two years ago... finishing ls1 swap now.


Wheel Show! Post your pics of you wheels
in Brakes, Wheels, Suspension and Chassis
Posted
I got mine off ebay, from user "wheelbay". Which is really just 18racing.com
My size options were a little different since I converted to 5x114.3
Mine are Royal hyper black... which really just looks like a fancy silver/graphite.
one tire mounted....