Bob_260
-
Posts
24 -
Joined
-
Last visited
Content Type
Profiles
Forums
Blogs
Events
Gallery
Downloads
Store
Everything posted by Bob_260
-
Good point 240zDan". I did installed adjustable TC rods when I did the Coilovers upgrades & big brake upgrade about a year ago. I don't remember where we set the caster angle when we did the final alignment. I'll have to go back through my records.
-
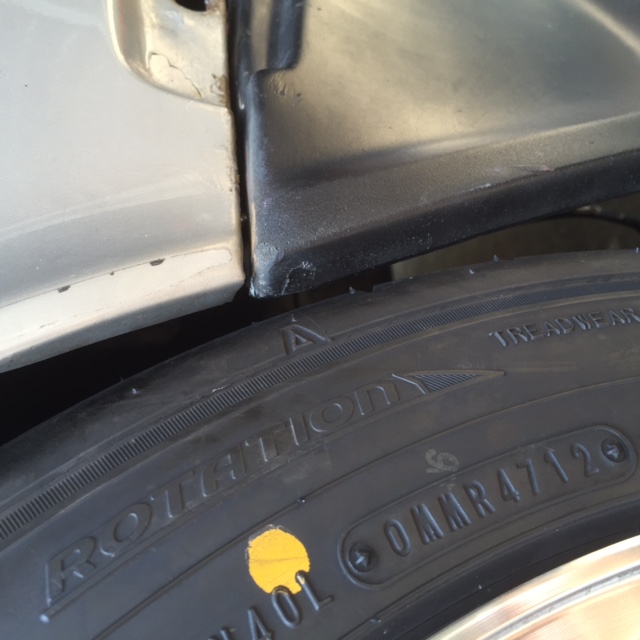
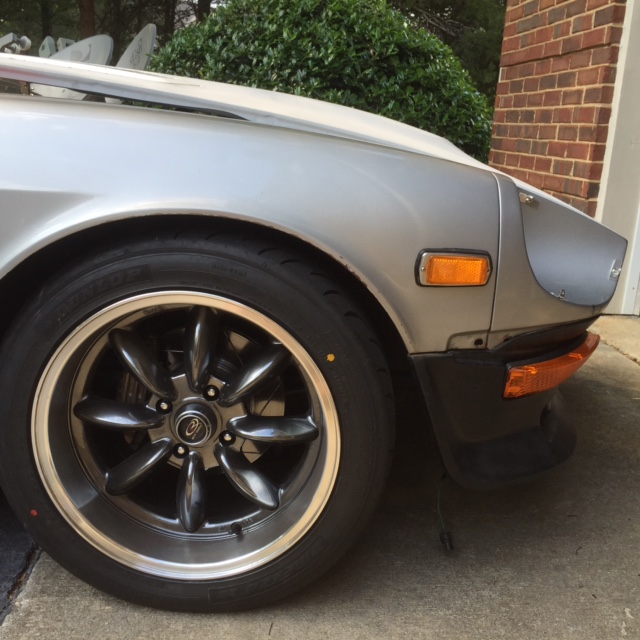
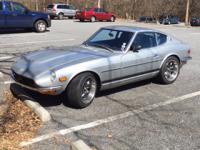
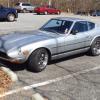
Hey! I want to give you guys an update. Just did the first trial fitting of the Xenon air dam tonight and it clears the tires (235/45/17) with about a 1/4" to spare on hard turns. I may tweek it a bit with a file or a sander as suggested. But so far I have had any rubbing issues, straight out of the box! I've attached a couple of photos. Thanks for your help. I hope this tread can be of assistance to someone else in the future. (Assuming their search skills are better than mine and they can find it

-
I was concerned that the back edge was just a thin lip of plastic, which once I cut it off the sides would not be supported (I haven't had the chance to examine one of these air dams in person) but from what you guys have described it sounds more like it's fairly thick lip which can be trimmed (filed down) within reason. It also sounds like the line design may give more room than the factory sheet metal. I think I'll go ahead and order one and fit it up. Worst case I have to sell it and someone else on the forum gets a bargain! I'll try and follow-up on this post as I progress. Thanks for your help!
-
Thanks! For the quick response. If I do have a clearance issue, do you know if the Urethane Air Dam can be trimmed or is it "game over'?
-
First of all I want to apologize to the group, I'm sure this question has been covered before, but after searching for a couple of hours I haven't had any luck finding the right postings! So I'd appreciate people pointing me in the right direction. I have a 10/73 build 260z with coilovers and I'm running 235/45/17 tires on 17x8.5" Rota rims. No flares, just rolled the fender lip. I'm getting ready to paint the car this summer and I'm considering fitting the Xenon Ducted Urethane Air Dam before painting, but I'm concerned about clearance when the tires are turned to the limits. Originally I had to trim about 3/4" off the lower valence sheet metal to gain enough clearance to eliminate the rubbing. My question is: am I going to have clearance problems with the Xenon Air Dam and if so how much can I trim the Xenon Air Dam without butchering it? Thank for your help and your patience with my search skills!
-
How does it look? Initial impression?
-
It has been 4 months since the last post. Did anyone ever buy one of these covers and install it? Any comments? Updates?
-
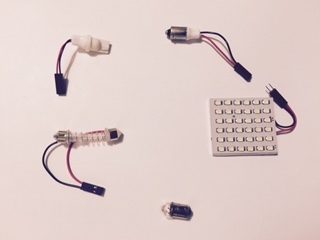
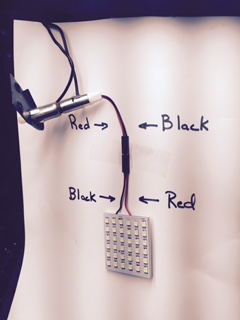
Hybrids is a great Forum and the members have shared a tremendous amount of knowledge and experience. So I'd like give back a little and hope it might be useful to someone else! I just completed converting all the lights in my 260z to LED's. The subject has been covered pretty throughly in many other post, so I won't rehash what has already been shared (thanks to those of you who posted on the subject I found it very helpful). One issue that seems to be a problem is the glove compartment light, because the positive voltage is on the outside and negative is on the center post. LED's are particular about their voltage and the standard bulb won't work. But there is a simple solution without having to rewire your car. You can buy on Amazon (I'm sure there are many sources) an LED that is about 2" X 2" and it has an adaptor for different types of sockets. When you connect the adaptor simple reverse the plug and the problem of the reverse bias voltage is is fixed! The LED has a nice piece of 3m double sticky tape and mounts out of sight to the top of the glove compartment and is completely out of sight and does a great job lighting the glove compartment. I've included a couple of pictures. I hope someone fines this helpful
-
260Z Build: Phase 1 - Suspension & brakes
Bob_260 replied to Bob_260's topic in S30 Series - 240z, 260z, 280z
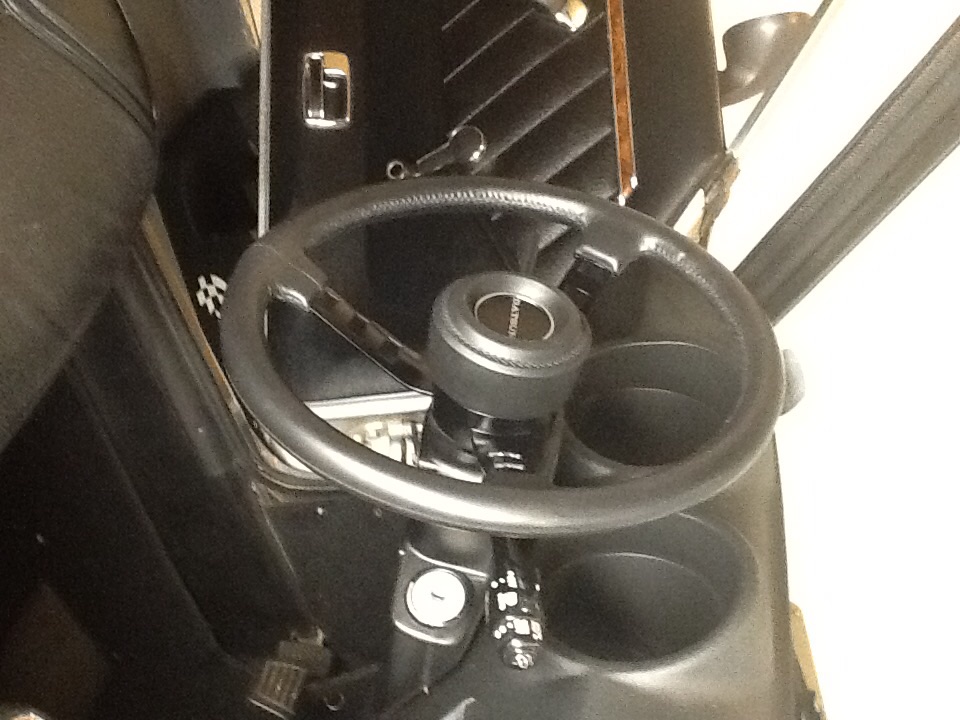
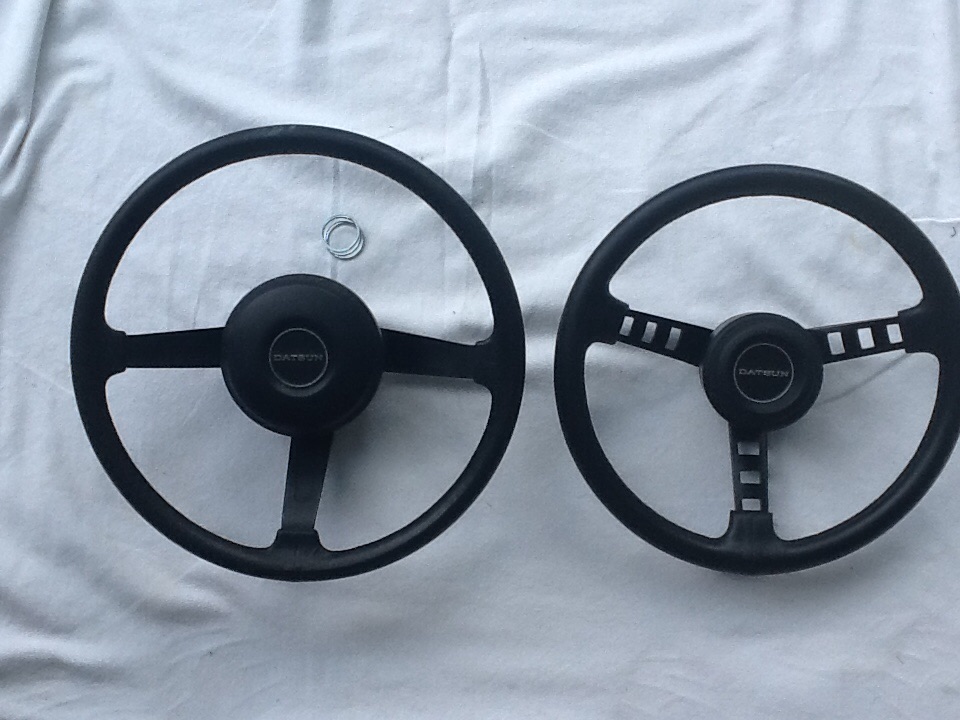
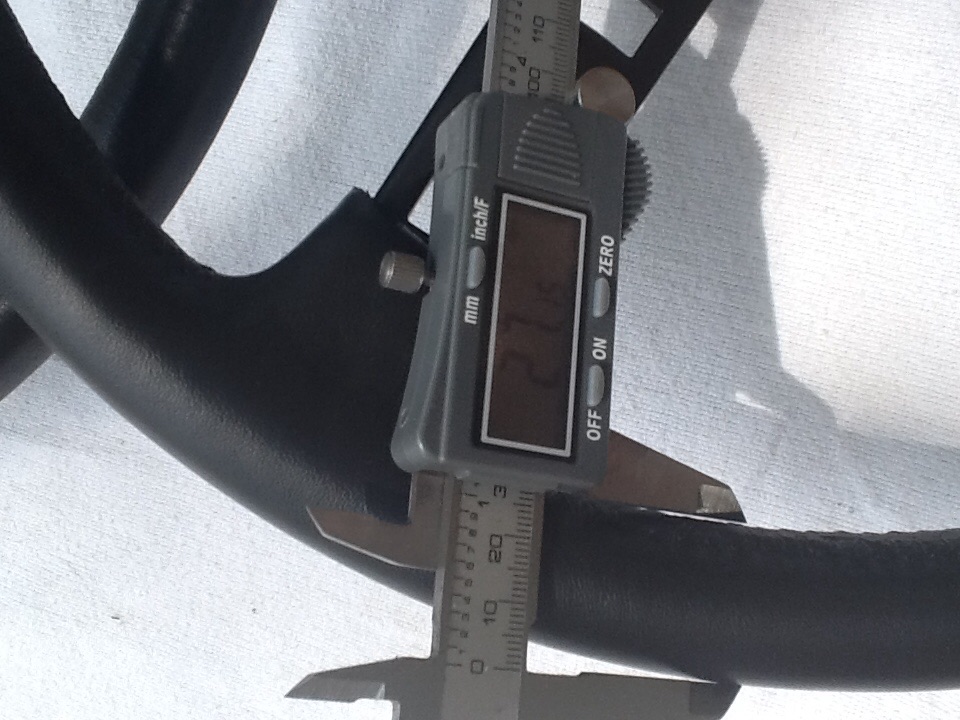
As part of the suspension & handling upgrades I decided to install the Competition Steering Wheel from MSA. It maintains the overall OEM look of the car but is about 1.5 inches small on diameter as well as being thicker to grip. The original wheel has a vintage feel, but did not have the class of being a wooden wheel. It felt thin and large. The original steering wheel on my car was 15" in diameter, the new wheel 13.5". I know it will increase the steering effort. If I did the math correctly, it will result in about a 10% increase in effort. If I had to apply 10lbs of force on the old wheel I'll need to apply 11.1 lbs on the new wheel. (Not a crazy increase IMO). In addition to the improved tactical feel, the other BIG improvement I've noticed is how much easier, getting in and out of the car is. I'm 6'4" and that additional 3/4" of clearance between the wheel and the front of the seat is noticeable. I've attached a few photos. Removing the old wheel and installing the new wheel was remarkably easy. I put a small amount of anti-Seize lug on the splines just in case I need to remove the wheel again in the future.
-
260Z Build: Phase 1 - Suspension & brakes
Bob_260 replied to Bob_260's topic in S30 Series - 240z, 260z, 280z
I forgot the picture of the car with the rear suspension is done. I drove it for a few days to make sure everything was OK and nothing fell off. Now the front suspension is off the car and all the parts are at the powder coater getting done.
-
260Z Build: Phase 1 - Suspension & brakes
Bob_260 replied to Bob_260's topic in S30 Series - 240z, 260z, 280z
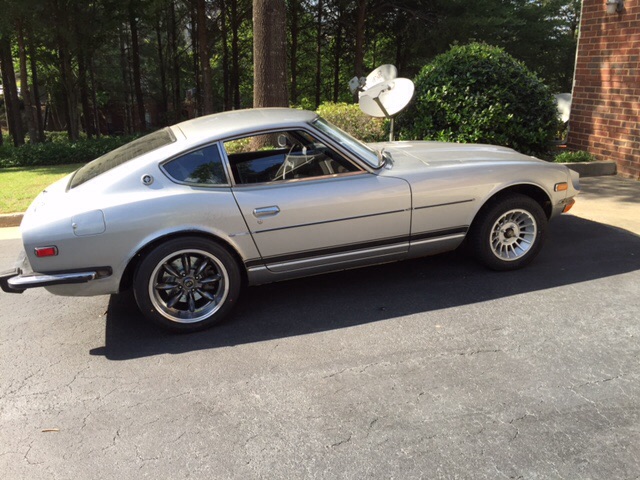
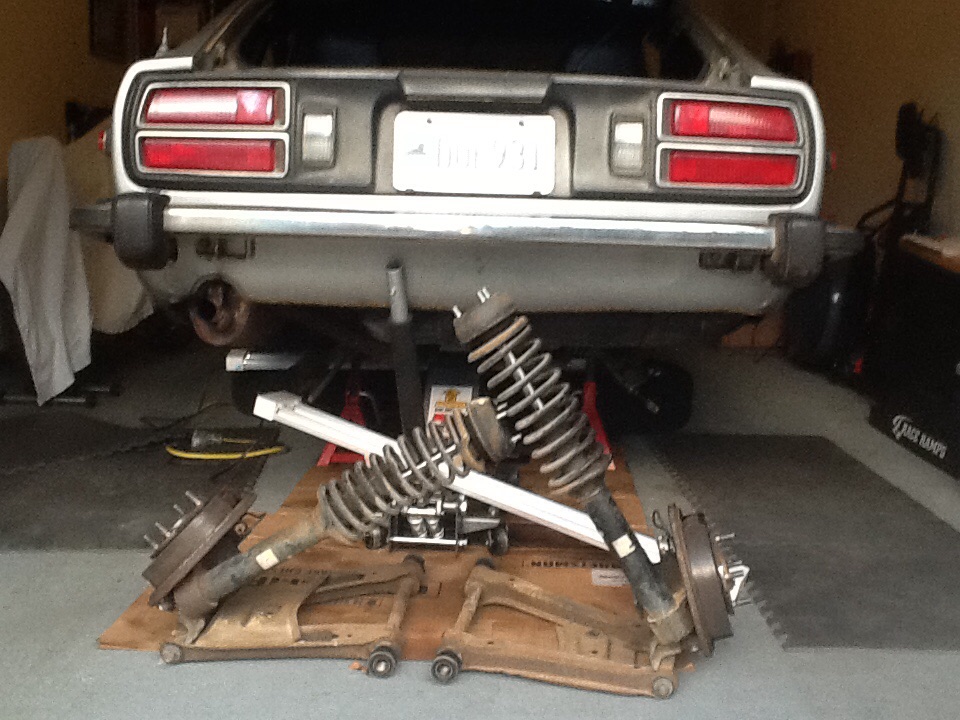
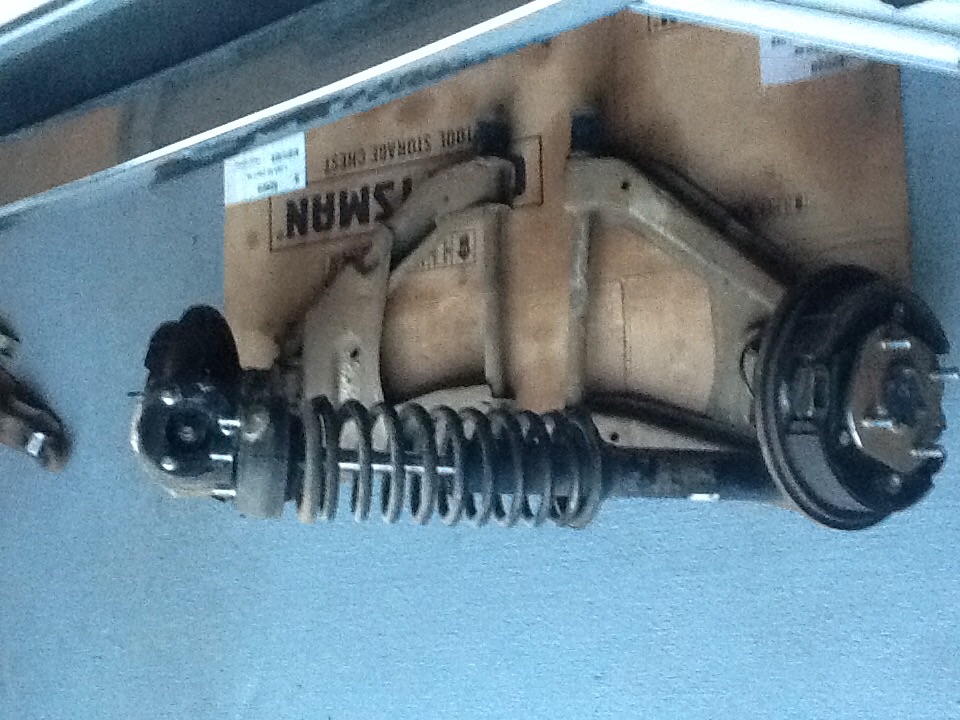
Here is another post that I hope might help someone that is new to the Z Community. I wanted to put as much rubber on the ground as possible without having to add flares. After a lot of digging it seemed that I would be able to go with the Rota RB 17x8.5 +4mm offset rim with Dunlop 234/45/17 Direzza ZII Star Spec. (I went with 17 to insure clearance for Stage IV disc brake kit I bought from Silvermine Motors) To gain the wheel well clearance I needed I bought a tool from Eastwoods for $99 to roll the fender lips. It worked great! Gave a very professional look. I also did a coil over conversion to gain a little extra clearance and to allow me to dial-in the ride height. Attached are a couple of pictures that might help clear up some of the clearance questions that others might. One shows a "before" with the original coil springs and the others show the "after" with the coil overs. The rear suspension now done and everything worked! No tire clearance issues, no problems bottoming out. I've also attached a before/after half done photo so you can seen how it's shaping up.
-
260Z Build: Phase 1 - Suspension & brakes
Bob_260 replied to Bob_260's topic in S30 Series - 240z, 260z, 280z
Dat260: do you recommend some aftermarket components that enable toe, camber, caster adjustments? I'm planning installing camber plates on the front. I've seen some eccentric bushings that say allow for adjustments (caster I think it was). Are these worthwhile? Necessary? Can anyone comment? -
260Z Build: Phase 1 - Suspension & brakes
Bob_260 replied to Bob_260's topic in S30 Series - 240z, 260z, 280z
I pulled my spindle pins for two reasons. The first reason is that as I work my way through the brake and suspension upgrade project, I am powder coating all the suspension components. It gives me the opportunity to inspect virtually every area of the underside of the car. The second reason is that I want to replacing the +40 year old rubber bushing. After all the effort to get the spindle pins out I will apply plenty on Never Sieze! -
260Z Build: Phase 1 - Suspension & brakes
Bob_260 replied to Bob_260's topic in S30 Series - 240z, 260z, 280z
I have a question for the group. Everything I read says there are no alignment adjustments for the rear. Is that really the case or should I take the car to specialty shop to have it checked? -
260Z Build: Phase 1 - Suspension & brakes
Bob_260 replied to Bob_260's topic in S30 Series - 240z, 260z, 280z
Sorry, I meant to attach a couple of photos to my last post
-
260Z Build: Phase 1 - Suspension & brakes
Bob_260 replied to Bob_260's topic in S30 Series - 240z, 260z, 280z
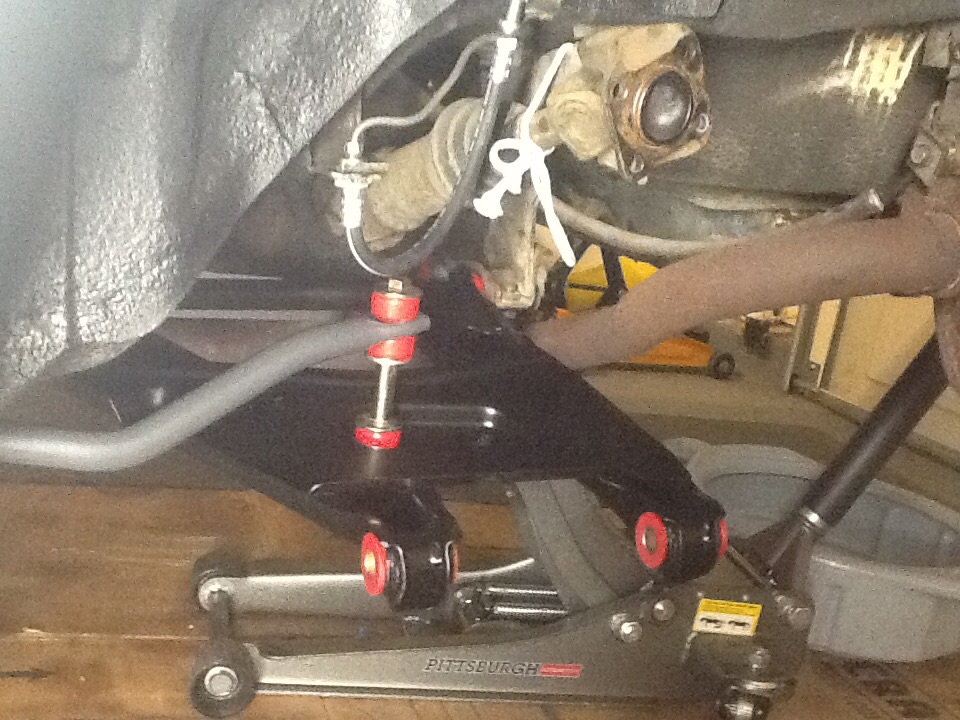
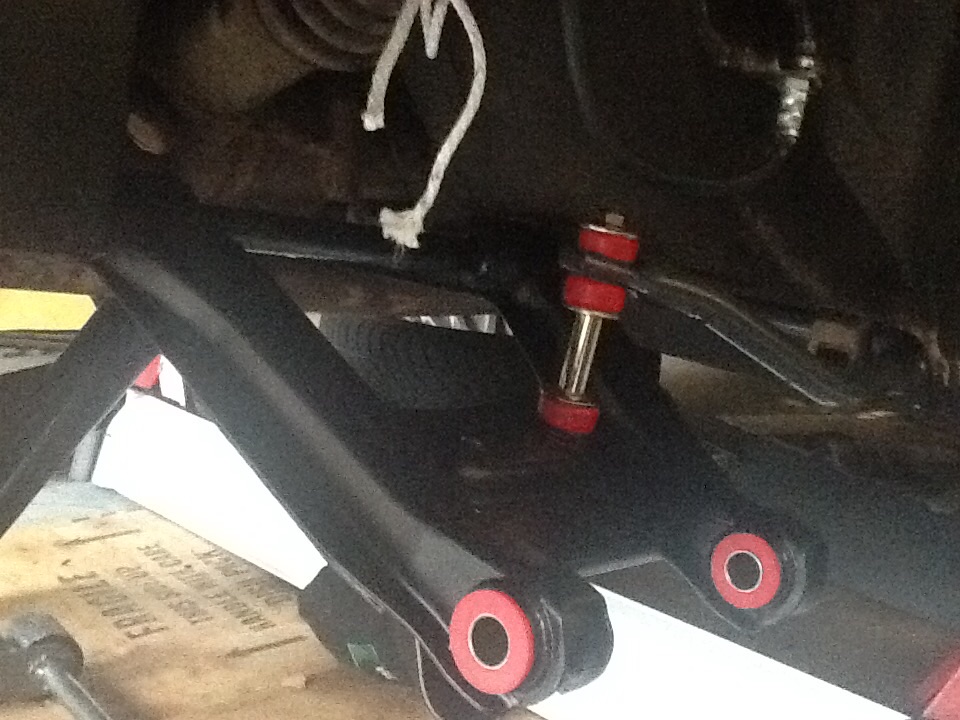
Things are starting to go back together. I have installed 22mm rear swaybars (the car came with 20mm's on the rear). I had to enlarge the swaybar bushing to accept the larger bar. The kit came with a 20mm bushing. I used a 25mm grinding wheel on my drill and just keep working the hole until the split line just closed. The lower control arms are also installed. Everything seems to be going back together smoothly so far! The strut towers are at the local machine shop having the bearings pressed in and the end-play set. I hope to get them back this week and to continue to reassemble the rear suspension -
260Z Build: Phase 1 - Suspension & brakes
Bob_260 replied to Bob_260's topic in S30 Series - 240z, 260z, 280z
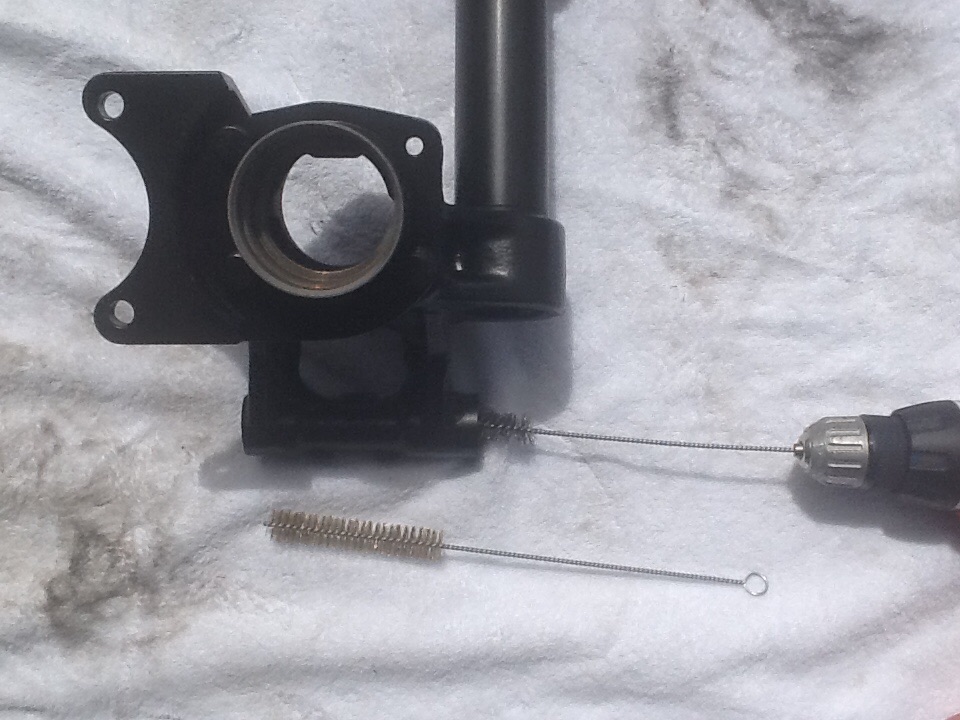
Given all the trouble removing the old spindle pins, I went to Harbor Freight and bought a long round wire brush and mounted it in my drill to clean out any rust. It seemed to work well, the new spindle pin fit snuggly but,slide in and out without any problems. I plan to apply Never-Sieze to them when I do final install. I don't if it will,make any difference, but at least I tried!
-
260Z Build: Phase 1 - Suspension & brakes
Bob_260 replied to Bob_260's topic in S30 Series - 240z, 260z, 280z
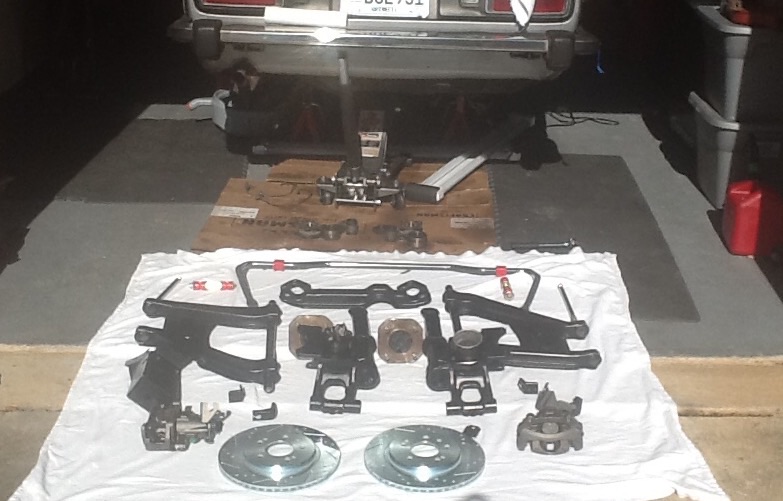
All the rear suspension parts are back from the powder coater and they look great! The new spring perches are welded on strut towers for the Ground Control Coilovers and the adapters are installed for the Silver Mine Stage IV big brake kit. I will also be installing the 7/8" rear swaybar as part of the suspension upgrade.
-
260Z Build: Phase 1 - Suspension & brakes
Bob_260 replied to Bob_260's topic in S30 Series - 240z, 260z, 280z
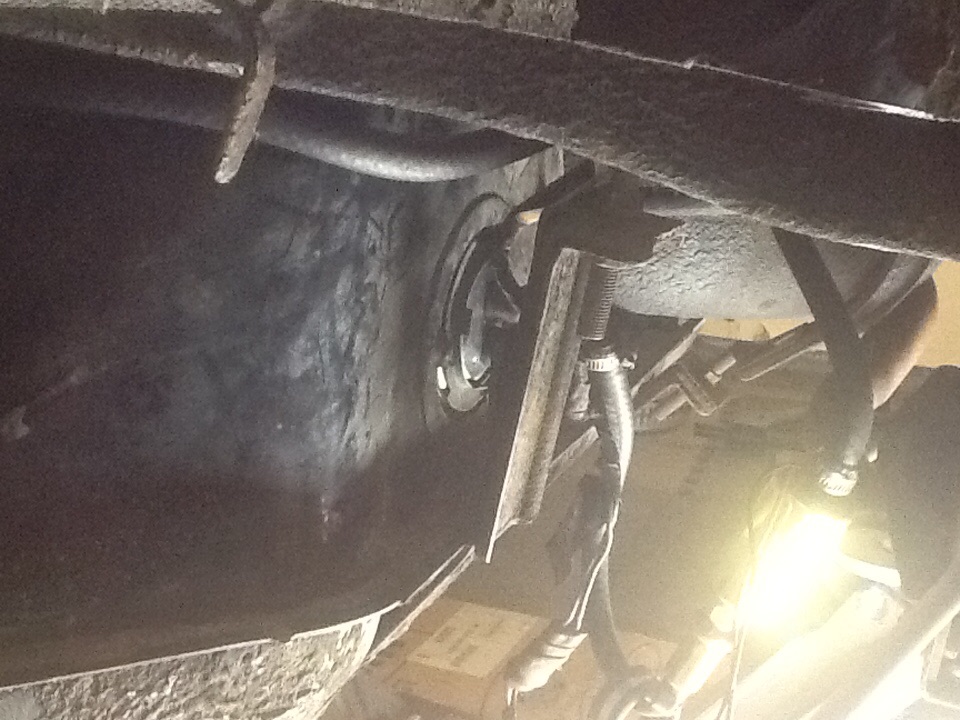
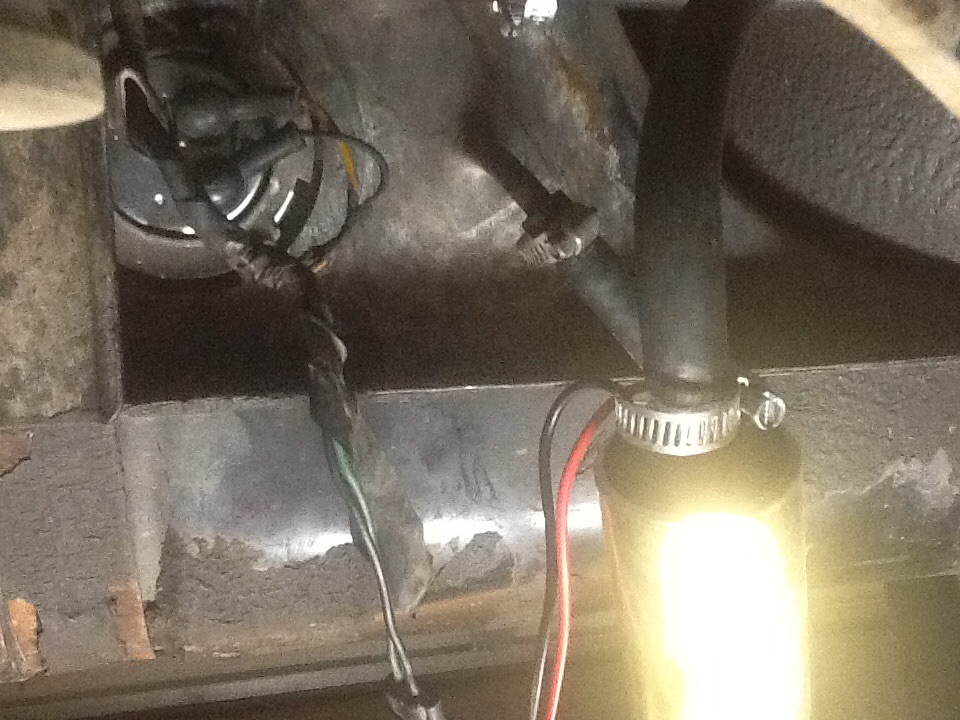
With the rear suspension out of the car replacing the Fuel tank level sending unit was very simple. The whole process took 30 minutes or less! Now that I did it I almost embarassed that I asked for advice. The biggest concern was "have I siphoned enough gas out of the tank?" I basically siphoned everything I could out of the tank, and that happened to be about 9 gallons. So I was sure I was below the half full level even if I hadn't been able to get everything out of the tank.
-
260Z Build: Phase 1 - Suspension & brakes
Bob_260 replied to Bob_260's topic in S30 Series - 240z, 260z, 280z
Everything is apart. I had to take the assembly to a local machine shop to have the spindle pins removed. (They don't just slide out like it shows in the factory Manuel! Hahahah). I have the original spring perches cut off and will have the new spring perches for the Coilovers welded on tomorrow. Then everything is going to be powder coated. Question for the community: While I have the suspension out and there is lots of room to work, I plan to replace my defective fuel tank level sending unit. Other than making sure that I have enough gas out of the tank to avoid having it run all over the place. Are there any "tricks" that make this easier or does anyone have a "mistake to avoid" that they can share? I have a new gauge and "o"-ring.
-
260Z Build: Phase 1 - Suspension & brakes
Bob_260 replied to Bob_260's topic in S30 Series - 240z, 260z, 280z
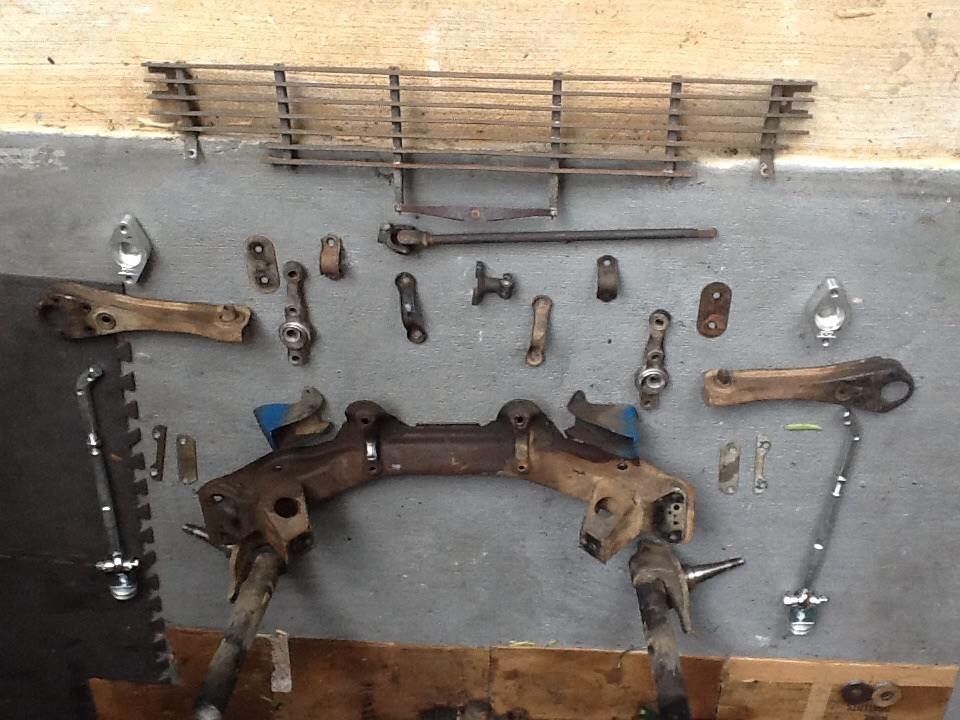
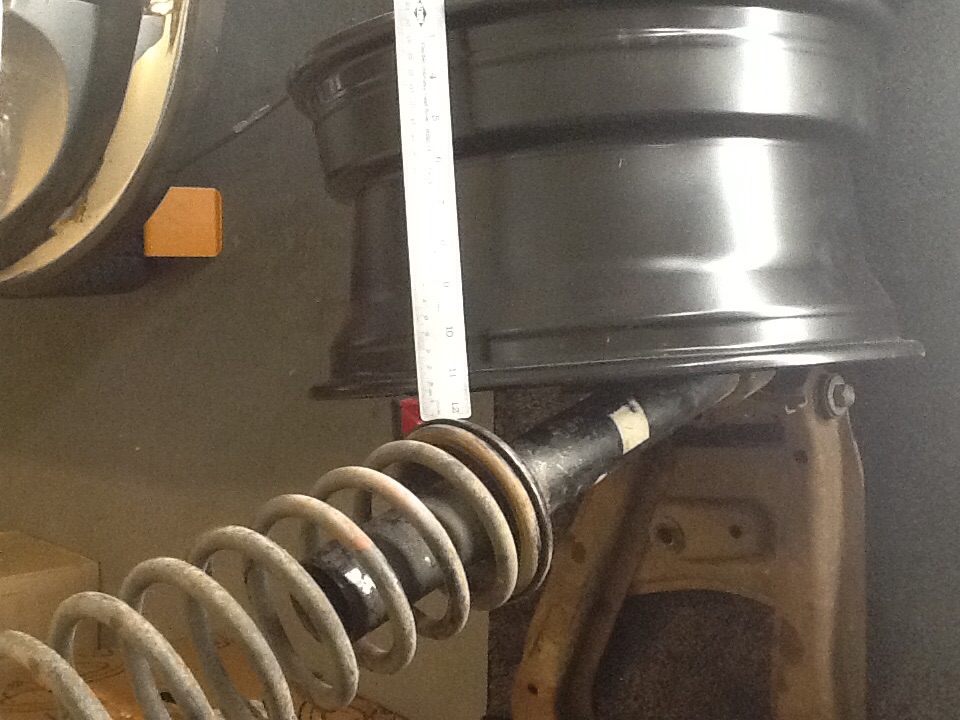
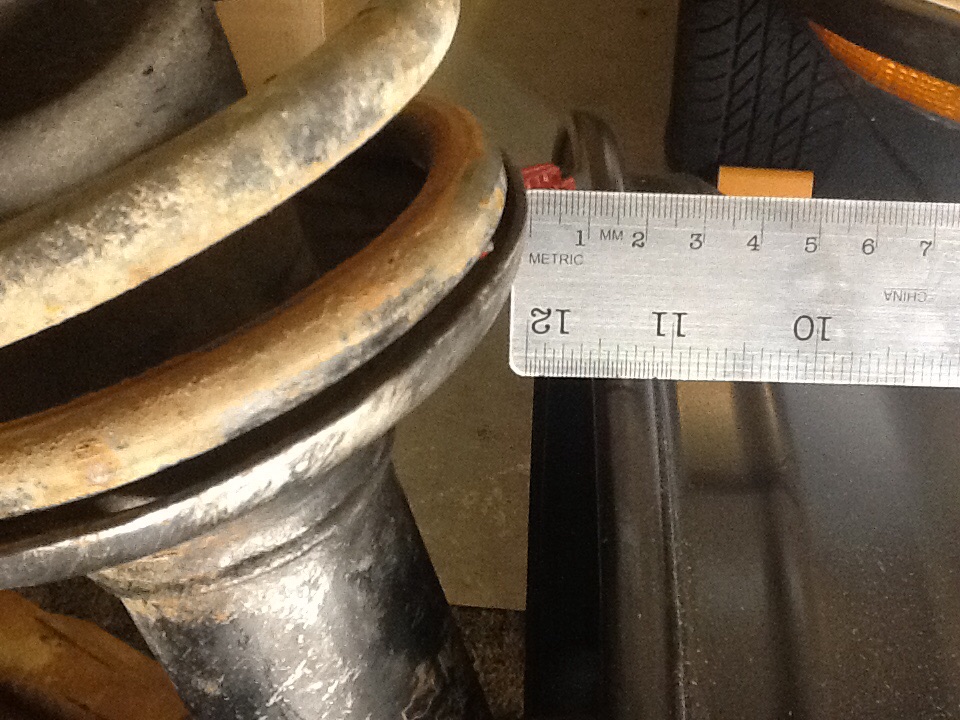
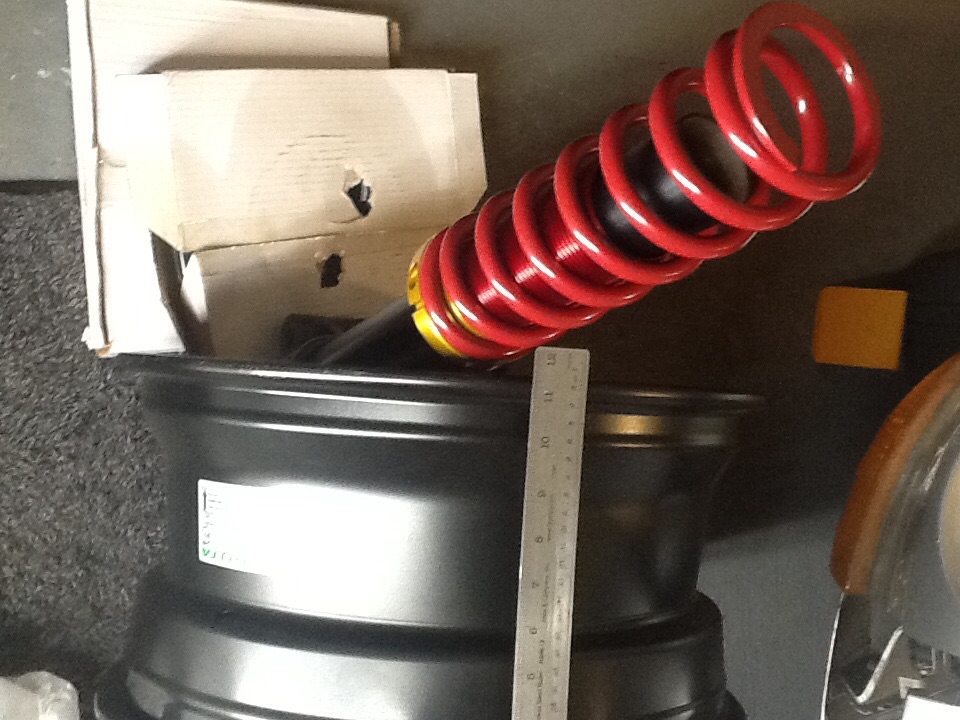
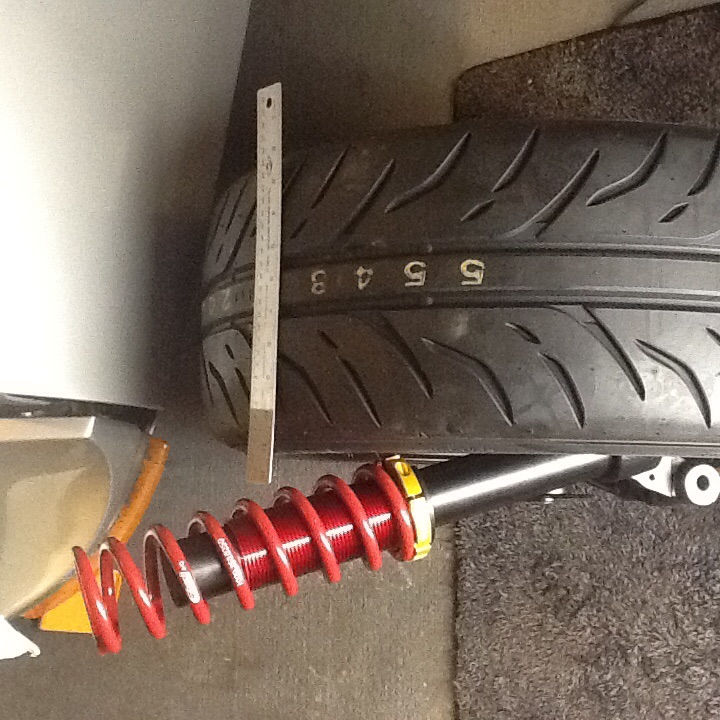
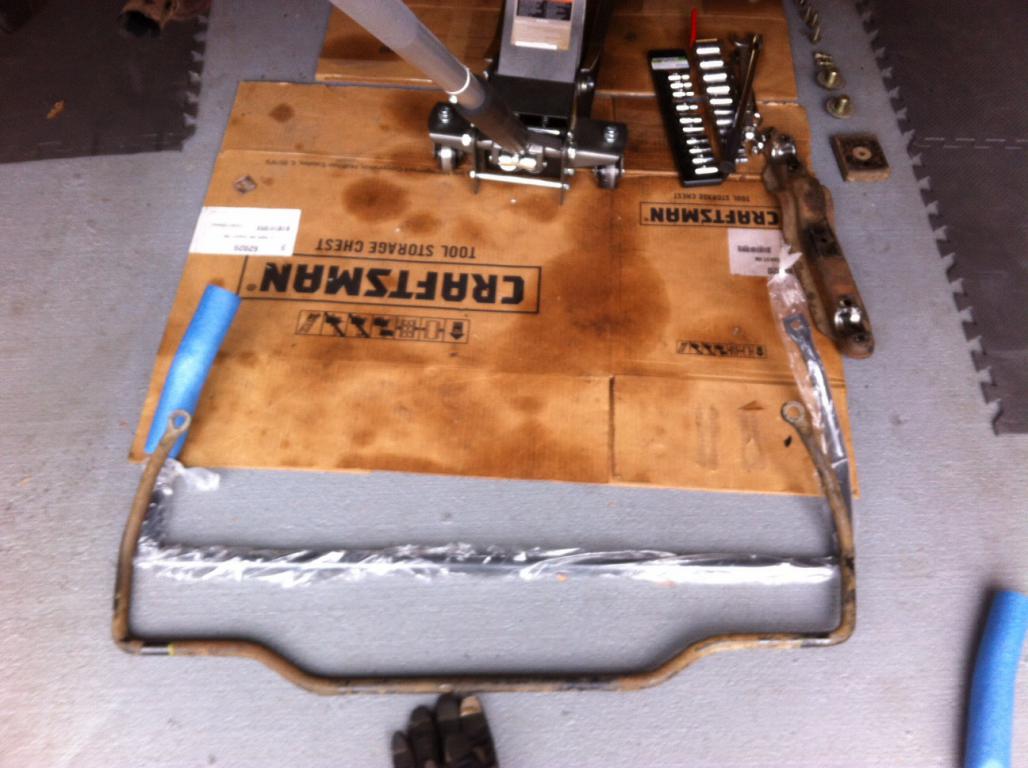
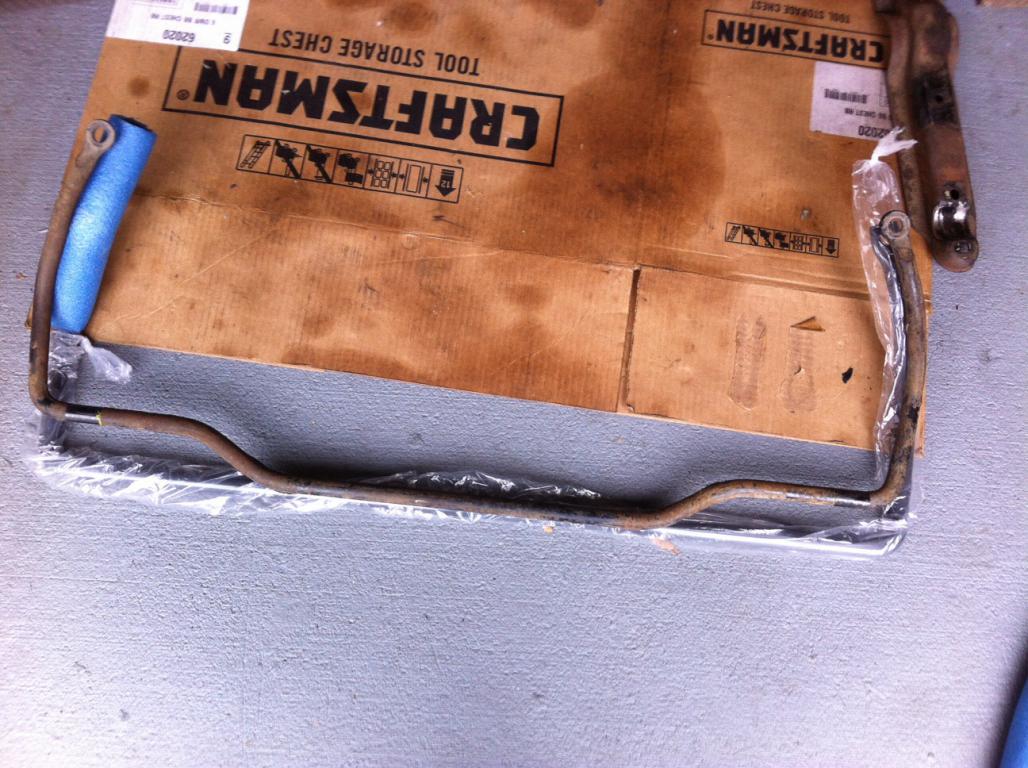
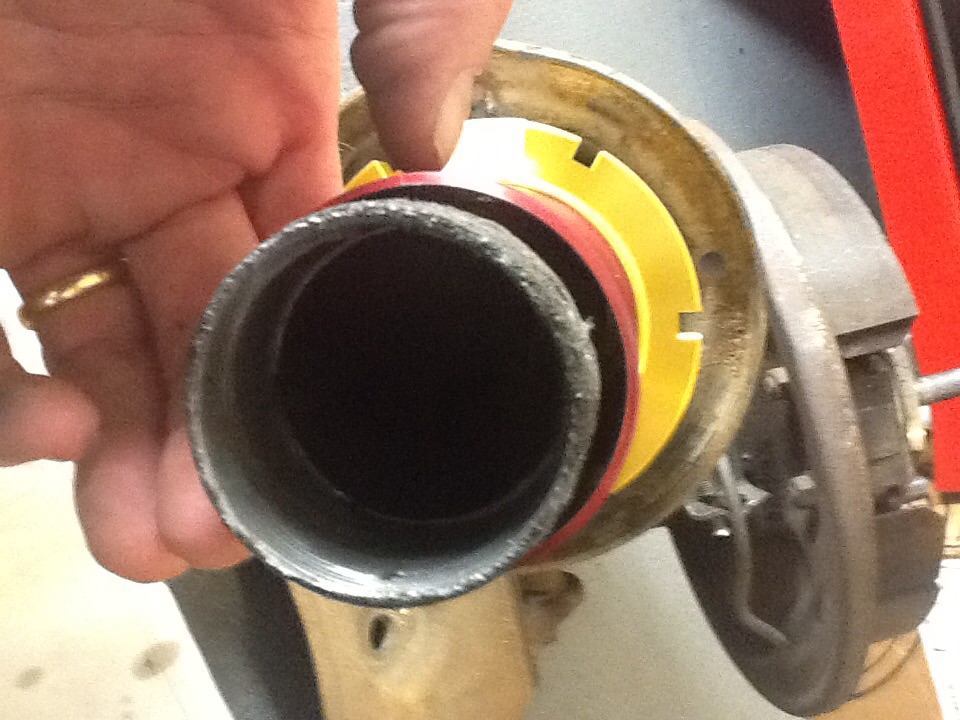
As I said in my original posts, I hope that by sharing my experiences with my 260z build (that's a nice way of saying mistakes) I can help some future Newbie avoid some of the same mistakes. (Why make the same mistakes over and over when there are SOOOO many new ones you can make!) So here is my first "experience". My car was built in 10/73 so it should have the earlier 240Z suspension, but when I checked what was supposed to be the best indicators, the front hubs, I found that the car has the round hubs of the 280z and a factory rear swaybar . So I ordered parts for a 280z. WRONG! So for the next Newbie here is what else would have been helpful for me. The swaybar for the 280z that I recieved is straight across the width of the car, while the swaybar that was on the car has a 50mm bend in the middle of the bar (see attached photos). The other issue is the strut assembly. I ordered Coilovers for a 280Z. But they diameter is too big. The outside daimeter of my strut tubes are 51mm. Measuring the Coilovers that I recieved it appears that the 280Z has a 56mm outside diameter. (See photos) I hope this helps someone avoid the same mistake on their build. If anyone out there knows of other 260 specific suspension differences, I would welcome you input!
-
260Z Build: Phase 1 - Suspension & brakes
Bob_260 replied to Bob_260's topic in S30 Series - 240z, 260z, 280z
The rear suspension is now out of the car. The project has started!
-
260Z Build: Phase 1 - Suspension & brakes
Bob_260 replied to Bob_260's topic in S30 Series - 240z, 260z, 280z
My plan for the car is mostly street, with a little bit of weekend autocross thrown-in for fun. I will drive it as the projects progress. But to be honest I enjoy planning the projects and working on my cars as much as the driving (maybe more!). My first priorty is making sure the car goes where I point it and stopping! That's why I've started with brakes and suspension. I'll be glad to share some photos as the project progresses.....if someone can give me a tip on how to upload them to the site. -
Hello! I'm new to the "Z-Community" but what I can say so far is that it's GREAT! The enthusiasm and support so far has been fantastic. I recently purchased 1974 260Z with 56,000 miles on it. The car sat, covered on a car-port for nearly 30 years. I have a four phase plan for the car. Phase 1: brakes and Suspension Phase 2: drive train Phase 3: Engine upgrade phase 4: Body and Paint. I look forward to sharing the build with the community and drawing on the experience that is available. I hope that as my project progresses I can "pay it forward" to those that follow. Bob_260