

Jboogsthethug
-
Posts
1720 -
Joined
-
Last visited
Content Type
Profiles
Forums
Blogs
Events
Gallery
Downloads
Store
Everything posted by Jboogsthethug
-

Jboogsthethug's 1971 240z build
Jboogsthethug replied to Jboogsthethug's topic in S30 Series - 240z, 260z, 280z
No problem! I've always looked up to all you guys in the military, it's a tough job! Even if you're a person that doesn't get deployed you still have to be so strict with your time, go to a million drills, move around a bucnh, etc. Salute to you sir! and yeah I am pretty pick as well. Plus, I'm not even super tall and it's hard to find a seat that fits me and the Z, so always a good idea to sit in them beforehand! Are you looking at recline able or fixed back? -
Jboogsthethug's 1971 240z build
Jboogsthethug replied to Jboogsthethug's topic in S30 Series - 240z, 260z, 280z
Thanks for your service in the military! What branch are you in? As far as Corbeau, you definitely should have look! Call ahead and they will let you try out their seats in their show room! -
Jboogsthethug's 1971 240z build
Jboogsthethug replied to Jboogsthethug's topic in S30 Series - 240z, 260z, 280z
Thanks mate! It's in Bluffdale, Utah, right off of I-15! pretty short drive for me! -
Jboogsthethug's 1971 240z build
Jboogsthethug replied to Jboogsthethug's topic in S30 Series - 240z, 260z, 280z
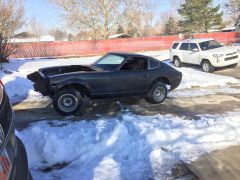
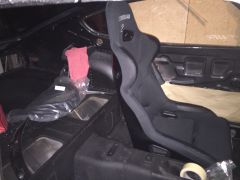
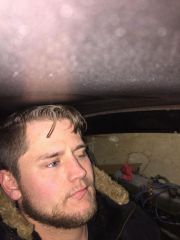
This past week I got a good amount of progress done. I'm pretty happy with it! Firstly, I bought an fx1 pro from corbeau (Initially they gave me the fx1, which has a 2 inch wider base and it did not fit at all, so I took it back to their warehouse and they swapped me there, along with hooked me up with a bunch of stickers. Obviously not a huge money loss on their part but it was nice). Here is my friend Jordan test driving out the wrong seat haha Then, installed the seat into the driver's side of the Z! I used the stock rails, Knocked out the stock carriage bolts on one side of both rails, and drilled new holes on one side of each rail until they matched the holes for the seat. They were pretty close to begin with initially so it wasn't hard. after all that, I put tape on the front stock seat mount, put the rails back as far as they would go so they were exactly aligned, put those aligned bolts on the tape and marked the spots. Then, found center of those marks on the mount and drilled! After that, I cut a 1 1/2" piece of metal bar into the correct length, then marked up the holes and drilled those out (easier to do this from behind the seat, climbing over from the passenger side. I slid the bar to where I could see the middle of the stock holes on the rear mounts, as well as where the bolts lined up). then I marked those all, centered them out, and drilled. Attached the rear bar to the seat, then attached the bar/seat to the rear mounts, then front. worked out pretty well! (I will admit, it was more of an eyeballing it all as I don't plan on these being my final seat mounts. As you can see, I'm 6'0" and my head is about a centimeter from hitting with the cushions in, I'll need to do some adjustments and probably do some side mounts to make it a bit safer! So, I can't fully recommend my method, though I am please with how well the seat fits in and how straight/centered it is. I also drilled out some holes in the side of the rear mounts so I could tighten the rear bolts to the custom bar, but found it to be much easier to use the aforementioned process above.) The next day or so, I used my Christmas present from my wife ( a new pressure washer, she knows me well!) and cleaned off the engine/tranny, taking care to cover any ports well. It looks much better now! Though I will clean it more eventually. Later on, I dropped it in the bay! the next day, I installed my dash! pretty simple process, I'm happy with how my self restored dash turned out, though I'm willing to bet it won't be permanent. then tonight, I borrowed a floor jack, lifted the tranny inside the trans tunnel, and finished installing the engine! I also removed the smog pump and a few bits, taking care to reintsll the bolt holding the adjustment bar back in with washers as I'm pretty sure it helps hold some cover on. overall, pretty goos weight reduction haha. I also installed the steering wheel bar thing. more updates soon! -

From the album: Jboogsthethug's 1971 240z build
-

From the album: Jboogsthethug's 1971 240z build
-

From the album: Jboogsthethug's 1971 240z build
-

From the album: Jboogsthethug's 1971 240z build
-

From the album: Jboogsthethug's 1971 240z build
-

From the album: Jboogsthethug's 1971 240z build
-

From the album: Jboogsthethug's 1971 240z build
-

From the album: Jboogsthethug's 1971 240z build
-

From the album: Jboogsthethug's 1971 240z build
-

From the album: Jboogsthethug's 1971 240z build
-

From the album: Jboogsthethug's 1971 240z build
-
From the album: Jboogsthethug's 1971 240z build
-

From the album: Jboogsthethug's 1971 240z build
-

From the album: Jboogsthethug's 1971 240z build
-
From the album: Jboogsthethug's 1971 240z build
-

From the album: Jboogsthethug's 1971 240z build
-
From the album: Jboogsthethug's 1971 240z build
-

From the album: Jboogsthethug's 1971 240z build
-

From the album: Jboogsthethug's 1971 240z build
-

From the album: Jboogsthethug's 1971 240z build
-

From the album: Jboogsthethug's 1971 240z build