

Jboogsthethug
-
Posts
1717 -
Joined
-
Last visited
Content Type
Profiles
Forums
Blogs
Events
Gallery
Downloads
Store
Everything posted by Jboogsthethug
-
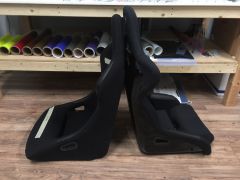
From the album: Jboogsthethug's 1971 240z build
-
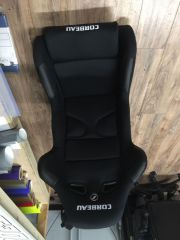
From the album: Jboogsthethug's 1971 240z build
-
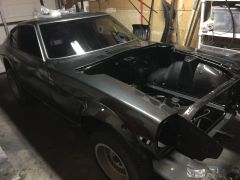
From the album: Jboogsthethug's 1971 240z build
-
From the album: Jboogsthethug's 1971 240z build
-
From the album: Jboogsthethug's 1971 240z build
-
From the album: Jboogsthethug's 1971 240z build
-
From the album: Jboogsthethug's 1971 240z build
-
From the album: Jboogsthethug's 1971 240z build
-
From the album: Jboogsthethug's 1971 240z build
-
From the album: Jboogsthethug's 1971 240z build
-

From the album: Jboogsthethug's 1971 240z build
-
From the album: Jboogsthethug's 1971 240z build
-

Jboogsthethug's 1971 240z build
Jboogsthethug replied to Jboogsthethug's topic in S30 Series - 240z, 260z, 280z
Dang! That looks very clean! your z was very rust free! I'm impressed with that, I've never see it done that way before, but I do wish that I had seen that before I did mine! Props to you mate! -
Jboogsthethug's 1971 240z build
Jboogsthethug replied to Jboogsthethug's topic in S30 Series - 240z, 260z, 280z
Interesting! Definitely a clean way to do it! Did you use sealant on your edges where you cut the fender? -
Jboogsthethug's 1971 240z build
Jboogsthethug replied to Jboogsthethug's topic in S30 Series - 240z, 260z, 280z
Thanks for adding in! Just to make sure I understand correctly, you just basically bent the inner fender inwards in the spots that needed extra room to install the hardware? Like a little cave? mcmaster is awesome, tha place is definitely cheap! Also check out pegasusautoracing, they have great prices as well! -
Jboogsthethug's 1971 240z build
Jboogsthethug replied to Jboogsthethug's topic in S30 Series - 240z, 260z, 280z
I actually just barely got some parts from there. I'll pick some up later and try them out, thanks for the info! -
Jboogsthethug's 1971 240z build
Jboogsthethug replied to Jboogsthethug's topic in S30 Series - 240z, 260z, 280z
I was wondering the same thing, I will try that out, thanks for the tip! and treat it as in primer the spot, or what would you suggest? -
Jboogsthethug's 1971 240z build
Jboogsthethug replied to Jboogsthethug's topic in S30 Series - 240z, 260z, 280z
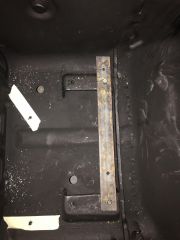
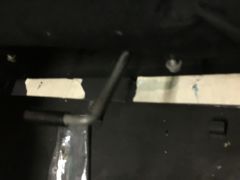
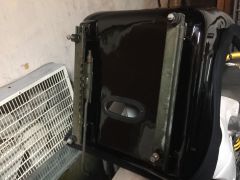
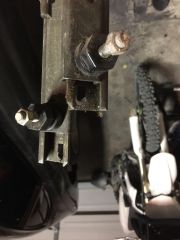
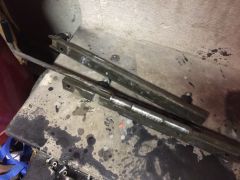
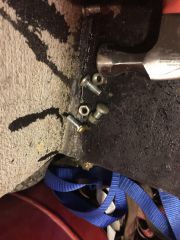
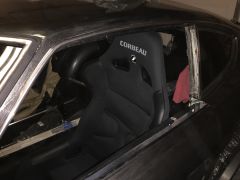
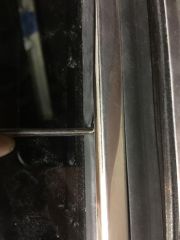
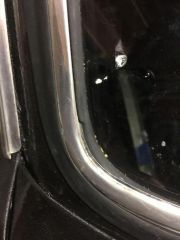
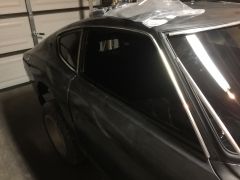
I did get the window weatherstripping glued in and the windows installed. From my experience, two people is a must, or you'll be out there all night. here are some pictures for reference. glued on (you can see the longer part of the U in the gasket went towards the outside of the window). It ends up being a little under an inch longer than needed. try not to stretch it but rather just lay it down or else you might have gaps when installed, especially in the corner (see below) let it sit for a day (I have no idea the exact time it recommends) then installed. If you look on the passenger side detail picture, you can see there is a very slight gap where the gasket isn't sealed up completely against the body. I must've gone too tight around that corner when gluing, keep that in mind! I got to work last night and installed the trim on the entire windshield and one side of the hatch (it takes forever unless somebody has a better trick to it) I have a small pick set, and after pushing the trim in on one side I pushed it in on the outside first then worked my way down the inside side), I worked slowly using the pick so I wouldn't hurt the rubber. I slid my pick in so it couldn't catch or tear, then I (also making sure it couldn't tear by angling the pick downwards) nudged the small piece of trim up and out. I did this over and over again across the entire windshield. I also got the rain gutter trim and my front flares installed. The front flares do not fit quite the same after all the body straightening I did after my initial install. Something to keep in mind, not a big deal as I plan on doing other flares most likely in the future. I forgot but I never did the rivets for the rear flares. I got to work doing that yesterday. I already had the rivet holes drilled, but on a lot of those spots I couldn't fit the rivets in because they'd hit the inner fender. I fixed this by first drilling a small guide hole as centered as I could (going through the main hole into the inner fender). Then I got a larger bit and slowly went through the inner fender from inside the fender well. Be careful with this, that last little bit of drilling it likes to catch and pull through and It also pulled through my main hole. I was using a larger diameter drill bit so it ended up drilling a hole too large and now I'm looking for new rivets that have a larger lip. I plan on going through and filling those holes with silicone after it's all done. -
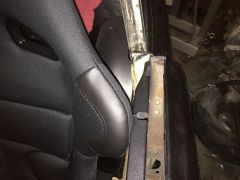
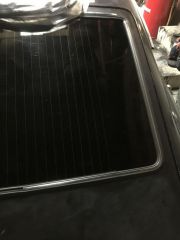
Windshield/ Hatch Rubber: I had this professionally installed as I had already broken my first windshield and was not looking to break another. Upon picking them up, you could see slight gaps in the corners, mostly the bottom corners and they told me that once I installed the trim then that would push the rubber over. Pics for reference: I got to work last night and installed the trim on the entire windshield and one side of the hatch (it takes forever unless somebody has a better trick to it) I have a small pick set, and after pushing the trim in on one side I pushed it in on the outside first then worked my way down the inside side), I worked slowly using the pick so I wouldn't hurt the rubber. I slid my pick in so it couldn't catch or tear, then I (also making sure it couldn't tear by angling the pick downwards) nudged the small piece of trim up and out. I did this over and over again across the entire windshield. Hope this helps somebody in the future!
-
cgsheen's advice proved to be helpful! I did get the window weatherstripping glued in and the windows installed. From my experience, two people is a must, or you'll be out there all night. here are some pictures for reference. glued on (you can see the longer part of the U in the gasket went towards the outside of the window). It ends up being a little under an inch longer than needed. try not to stretch it but rather just lay it down or else you might have gaps when installed, especially in the corner (see below) let it sit for a day (I have no idea the exact time it recommends) then installed. If you look on the passenger side detail picture, you can see there is a very slight gap where the gasket isn't sealed up completely against the body. I must've gone too tight around that corner when gluing, keep that in mind!
-
From the album: Jboogsthethug's 1971 240z build
-
From the album: Jboogsthethug's 1971 240z build
-

From the album: Jboogsthethug's 1971 240z build
-
From the album: Jboogsthethug's 1971 240z build
-
From the album: Jboogsthethug's 1971 240z build