Tebirkesueth
-
Posts
25 -
Joined
-
Last visited
-
Days Won
4
Content Type
Profiles
Forums
Blogs
Events
Gallery
Downloads
Store
Everything posted by Tebirkesueth
-
Swedish Datsun 240z Restoration
Tebirkesueth replied to Tebirkesueth's topic in S30 Series - 240z, 260z, 280z
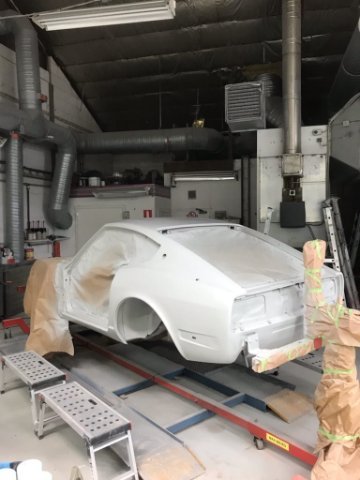
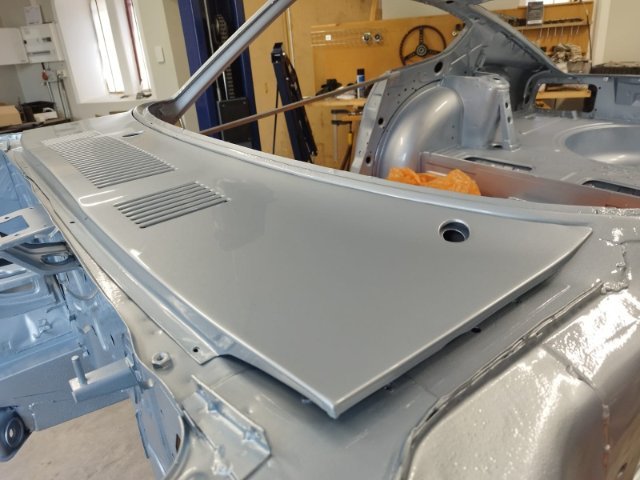
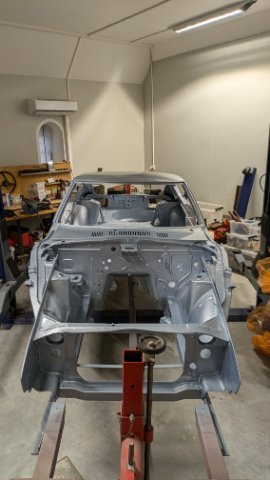
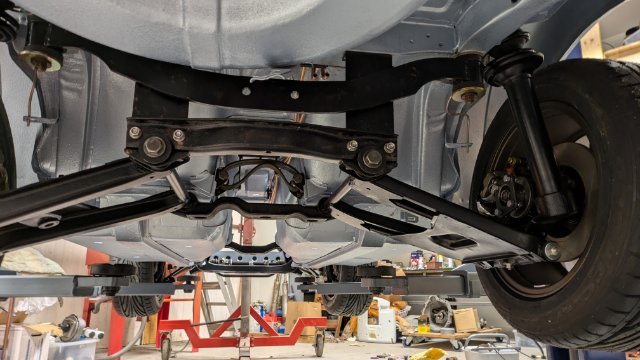
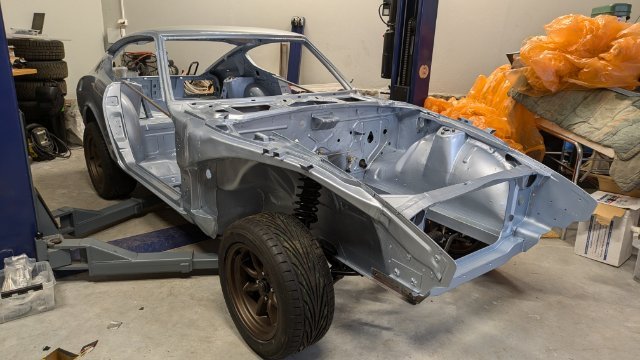
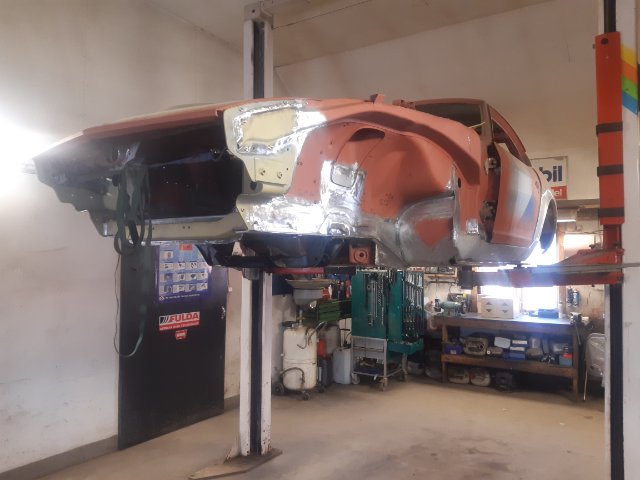
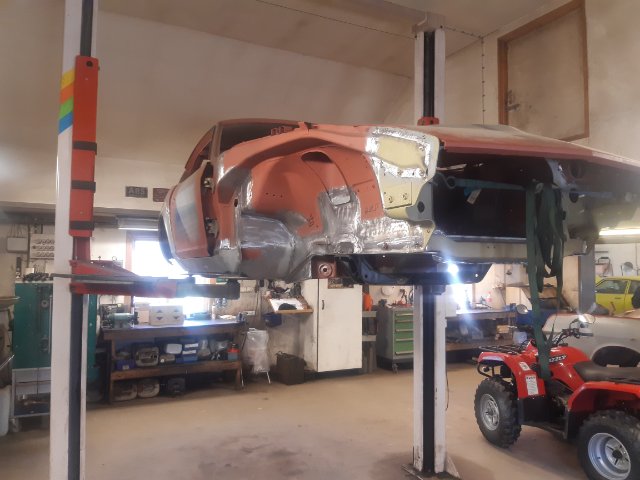
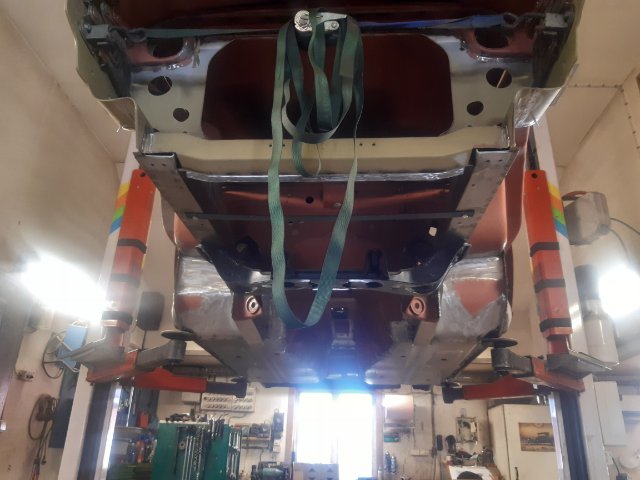
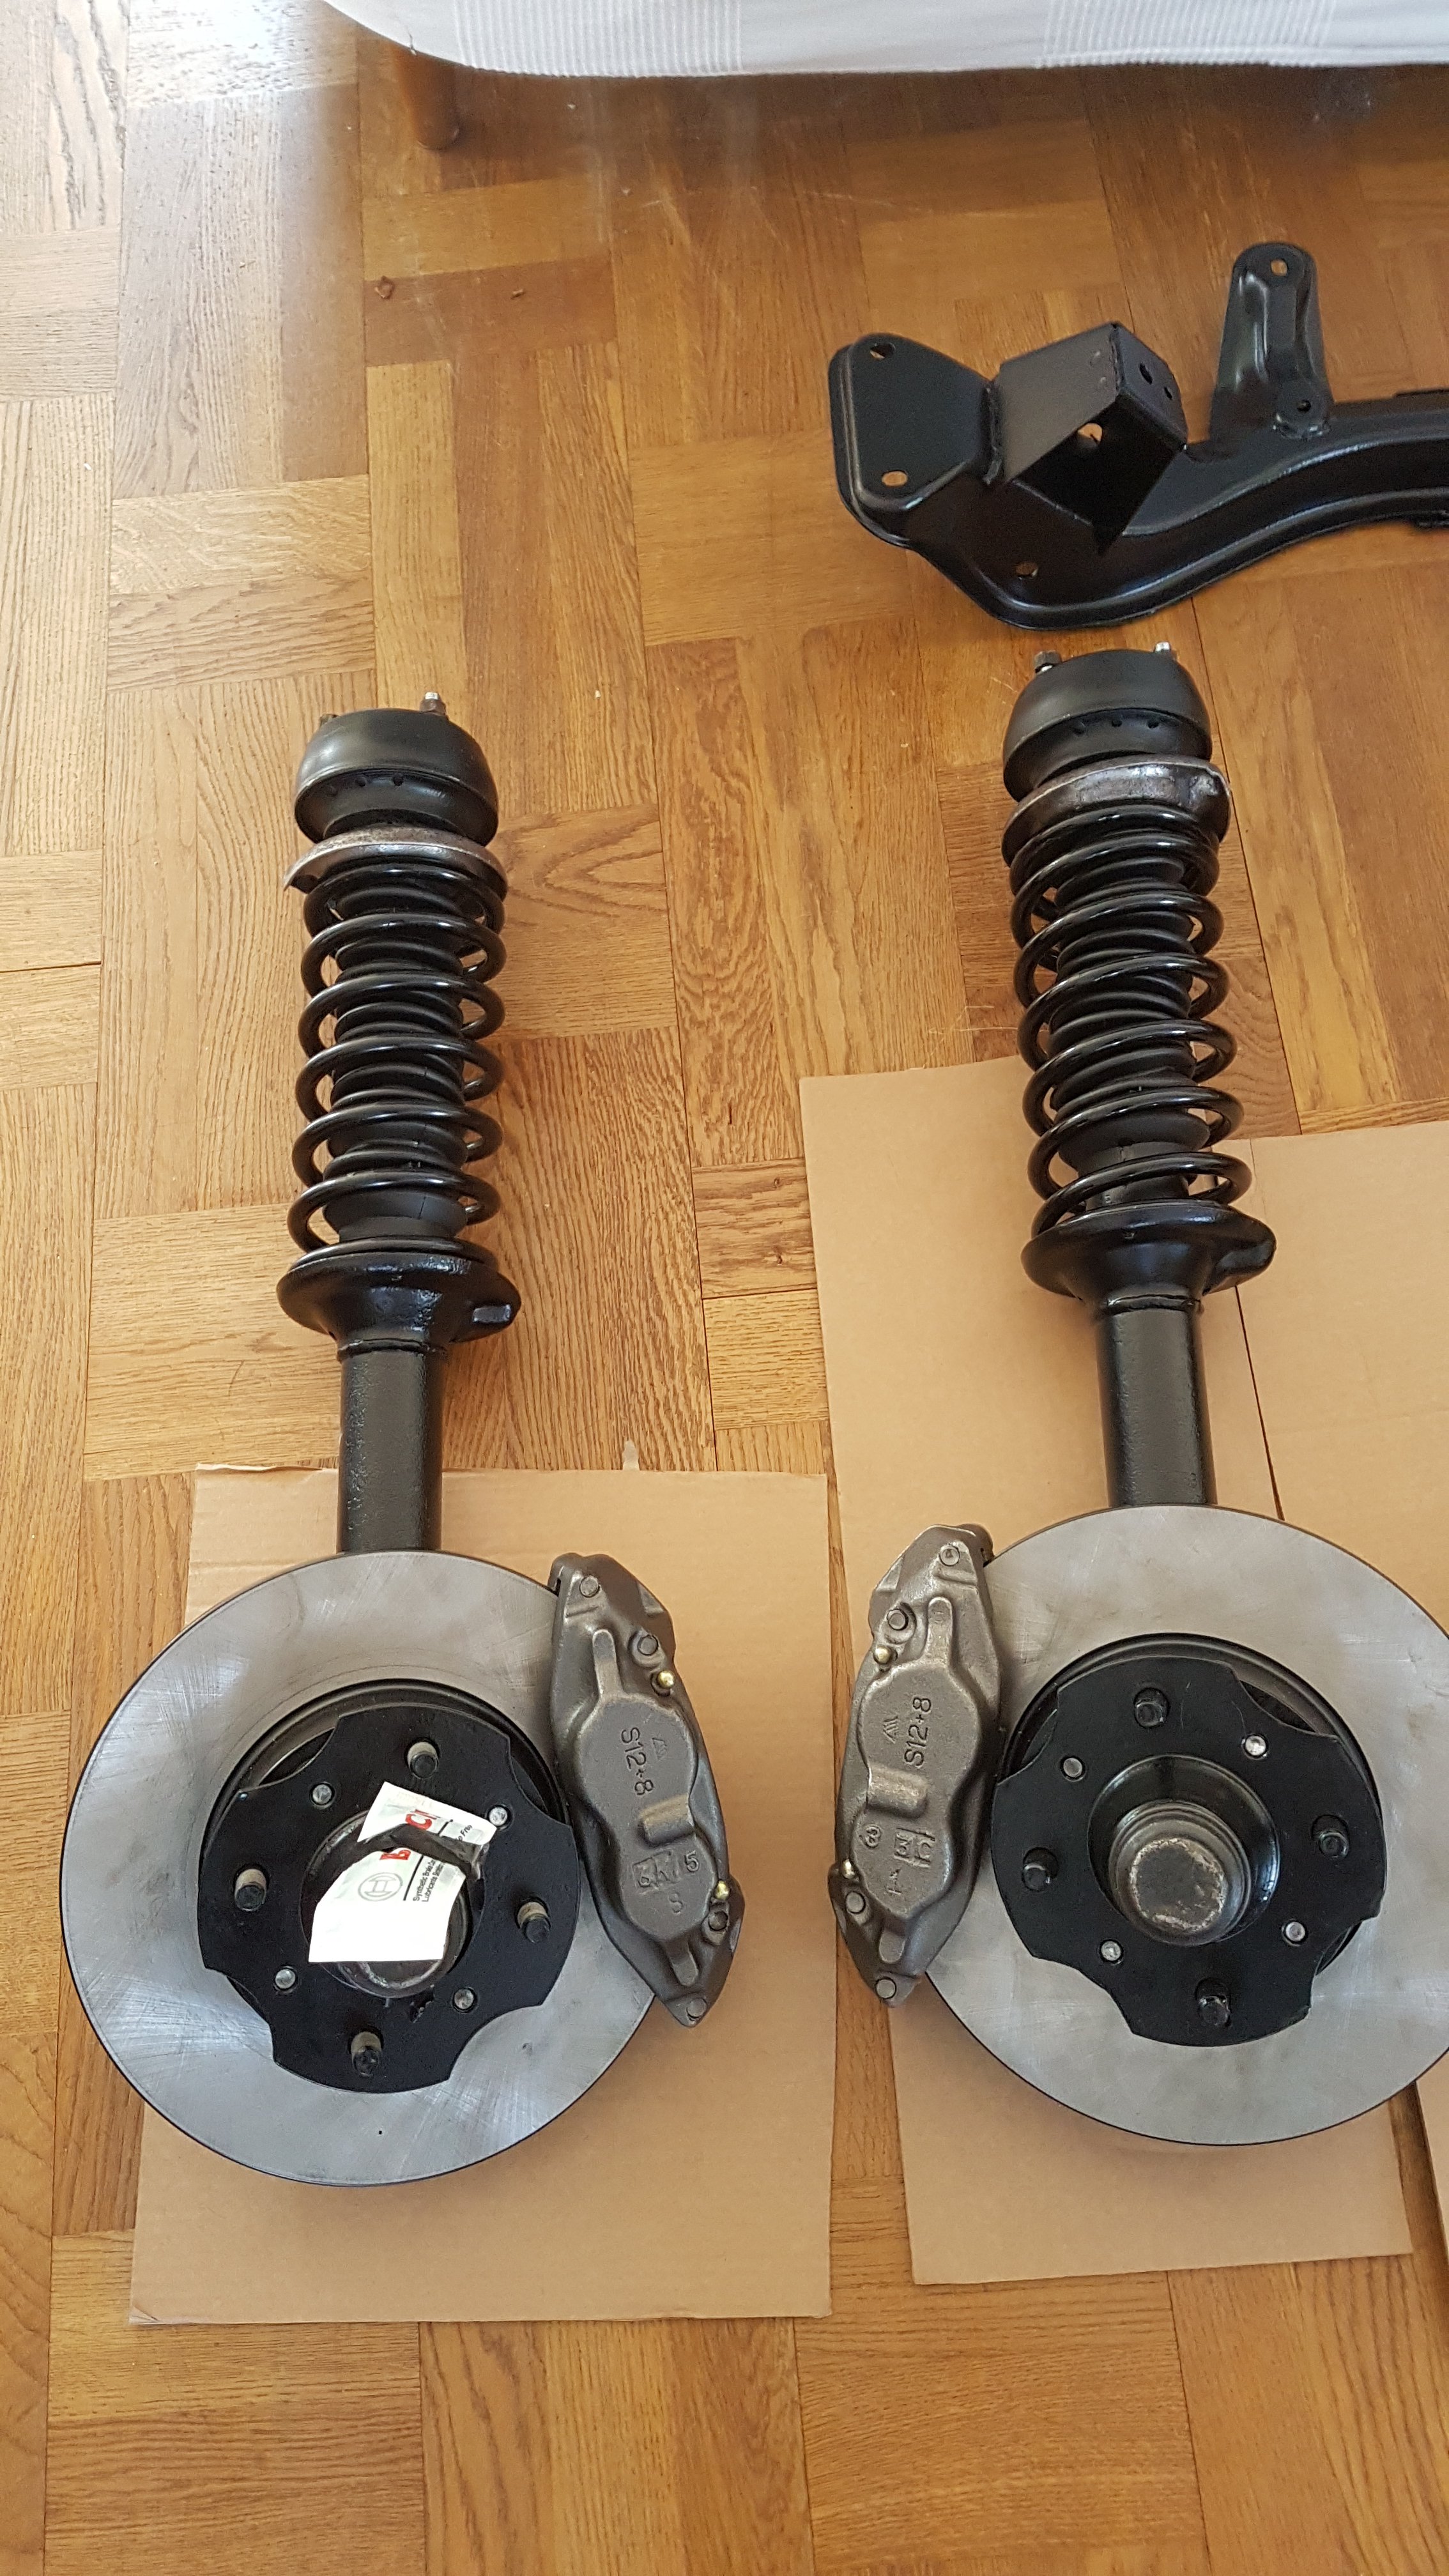
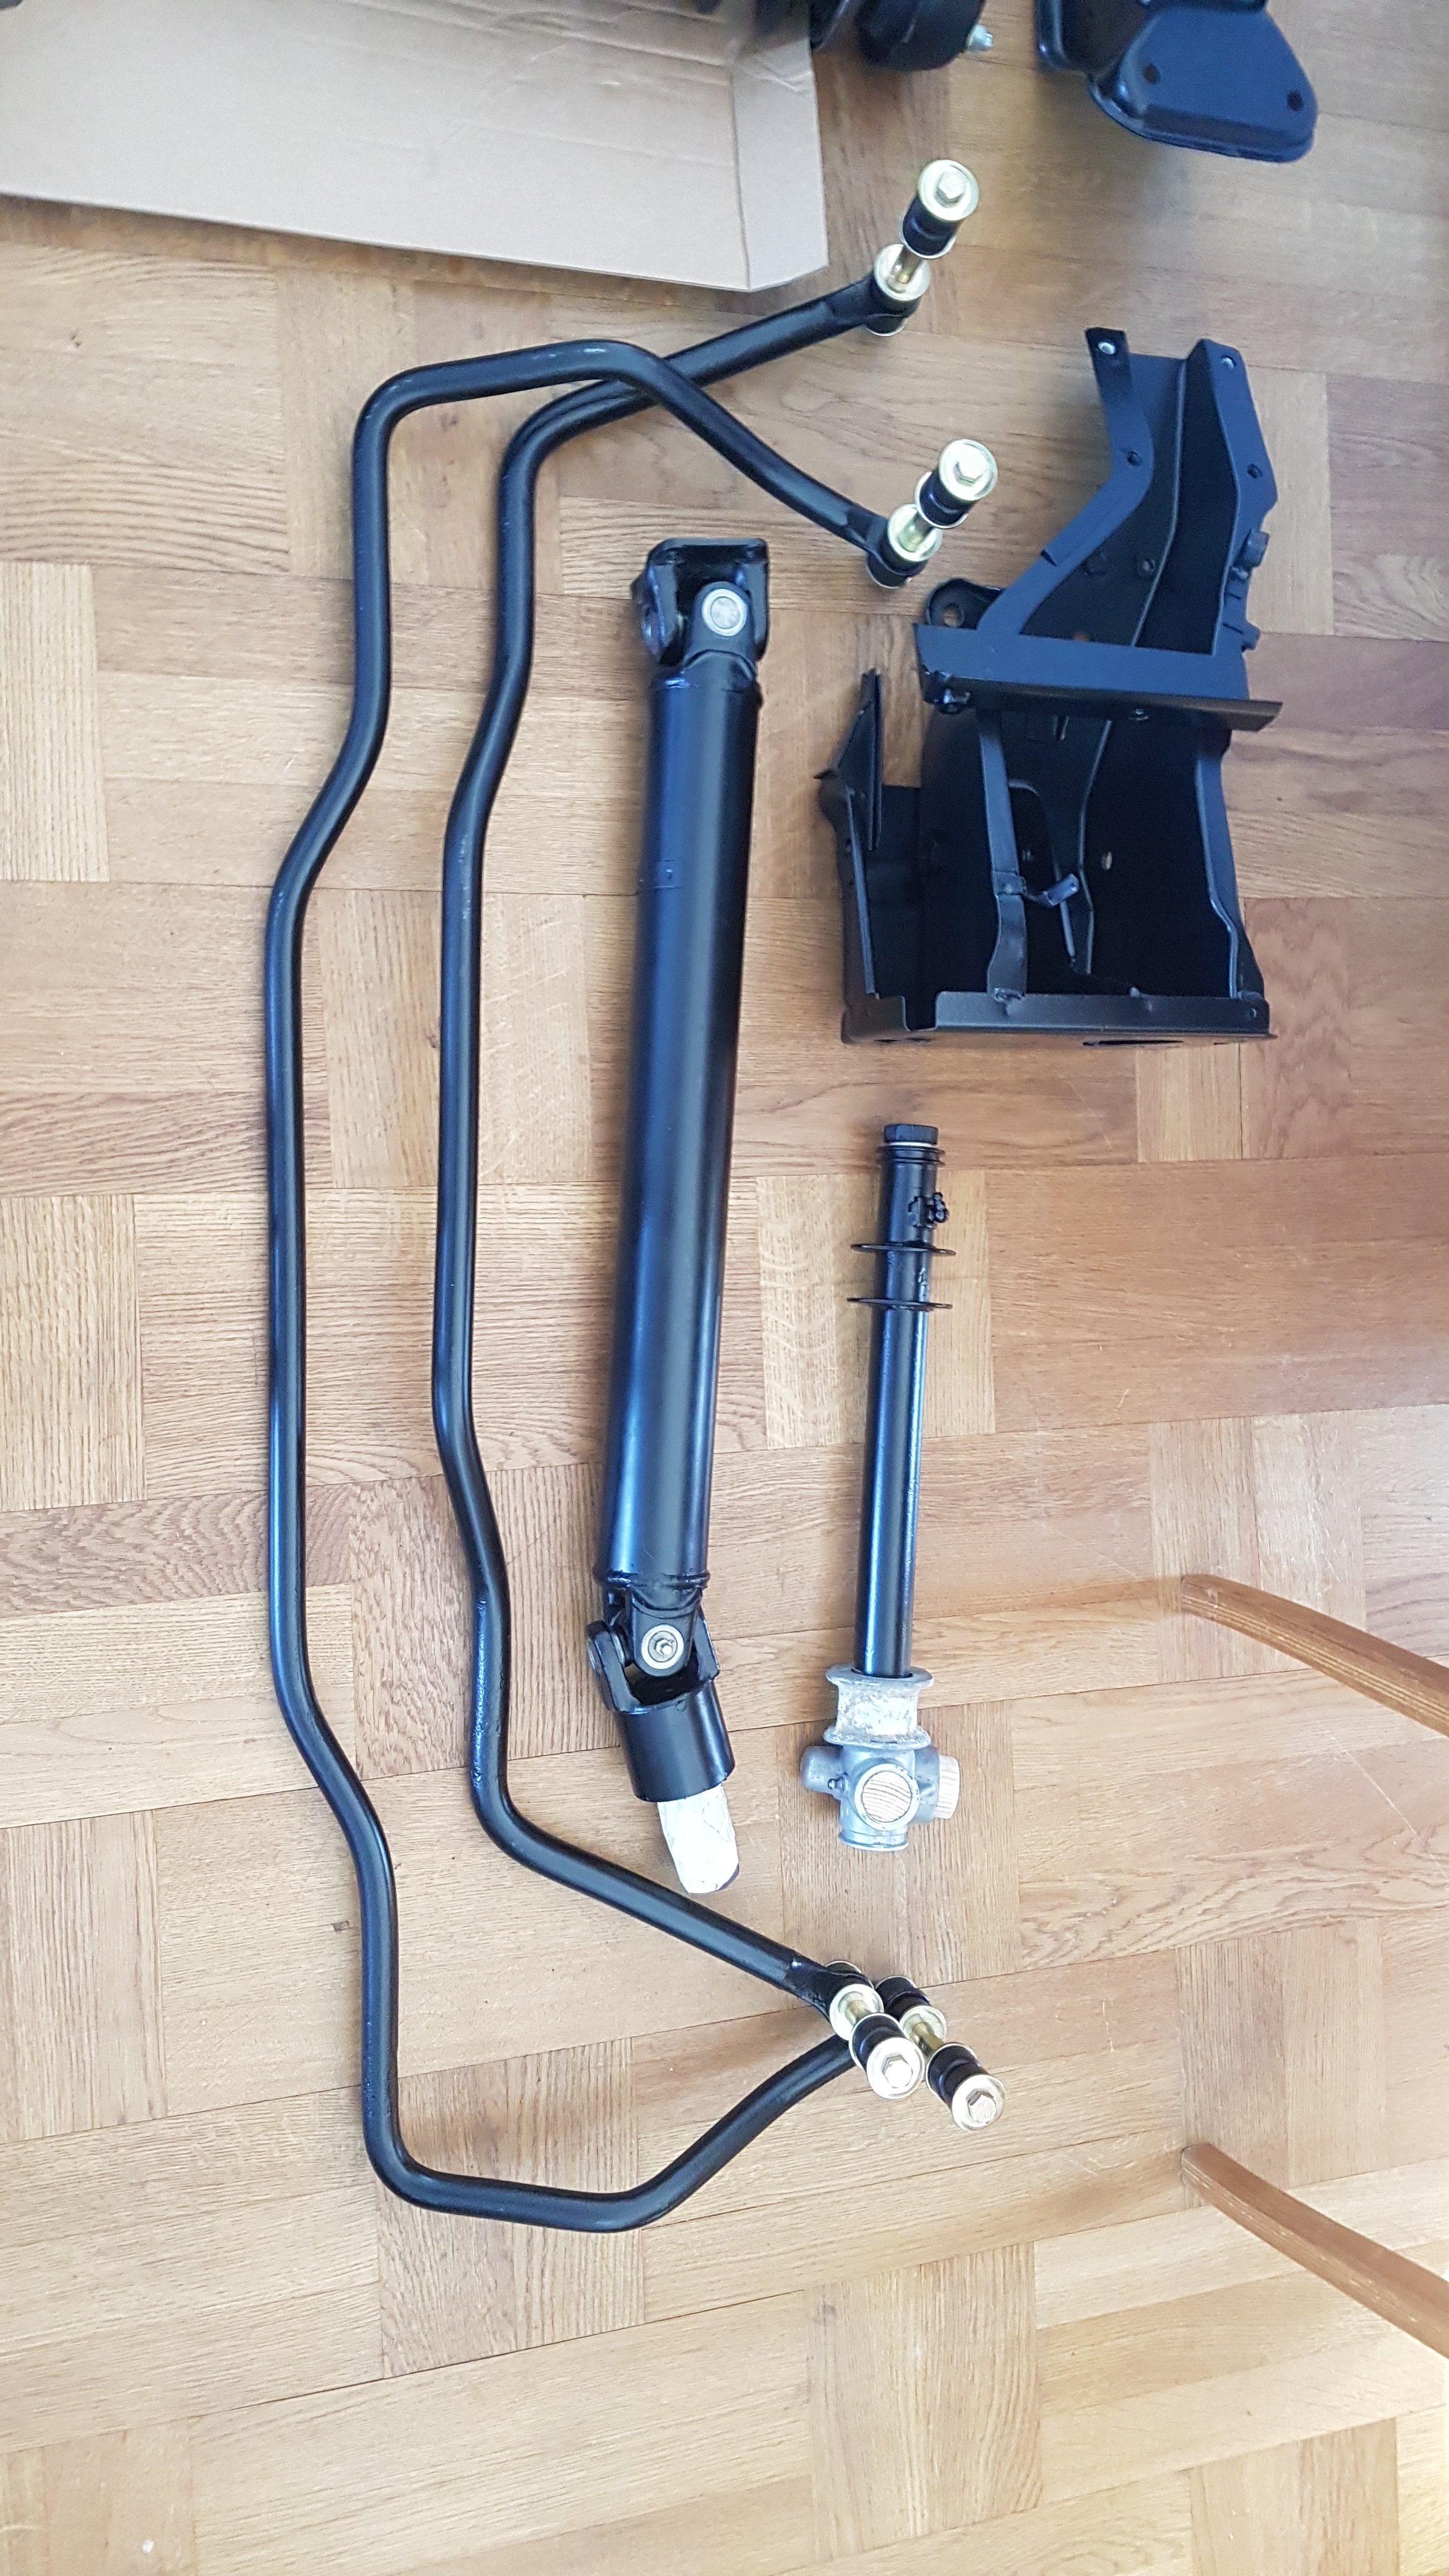
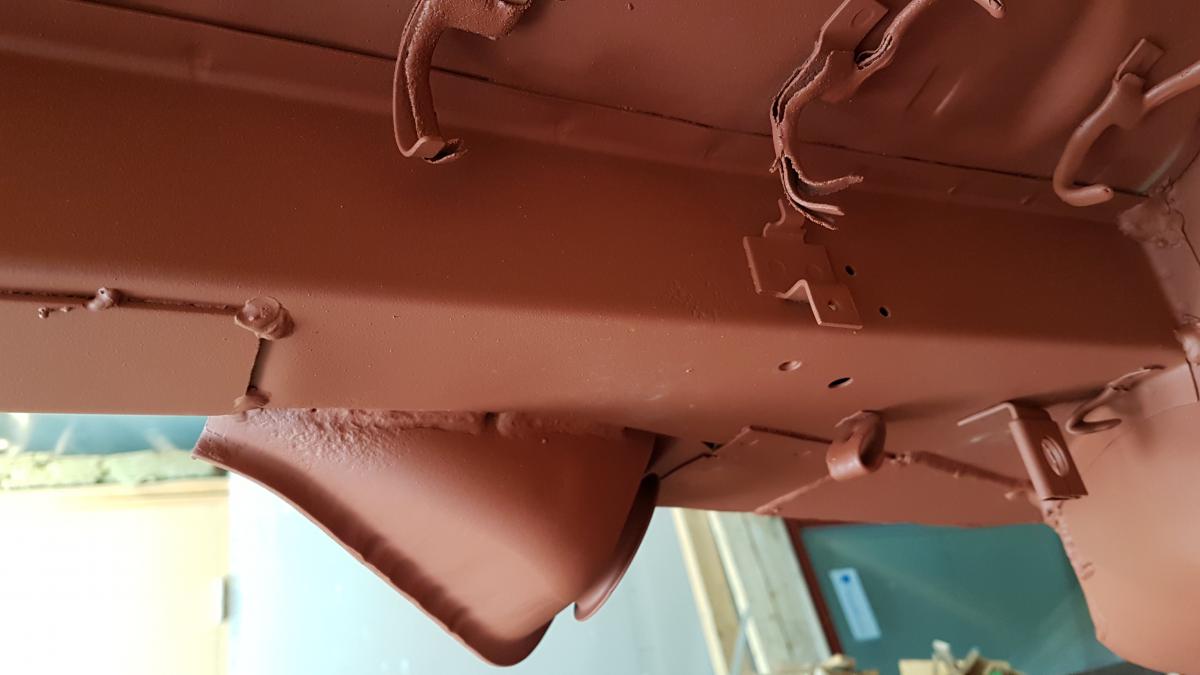
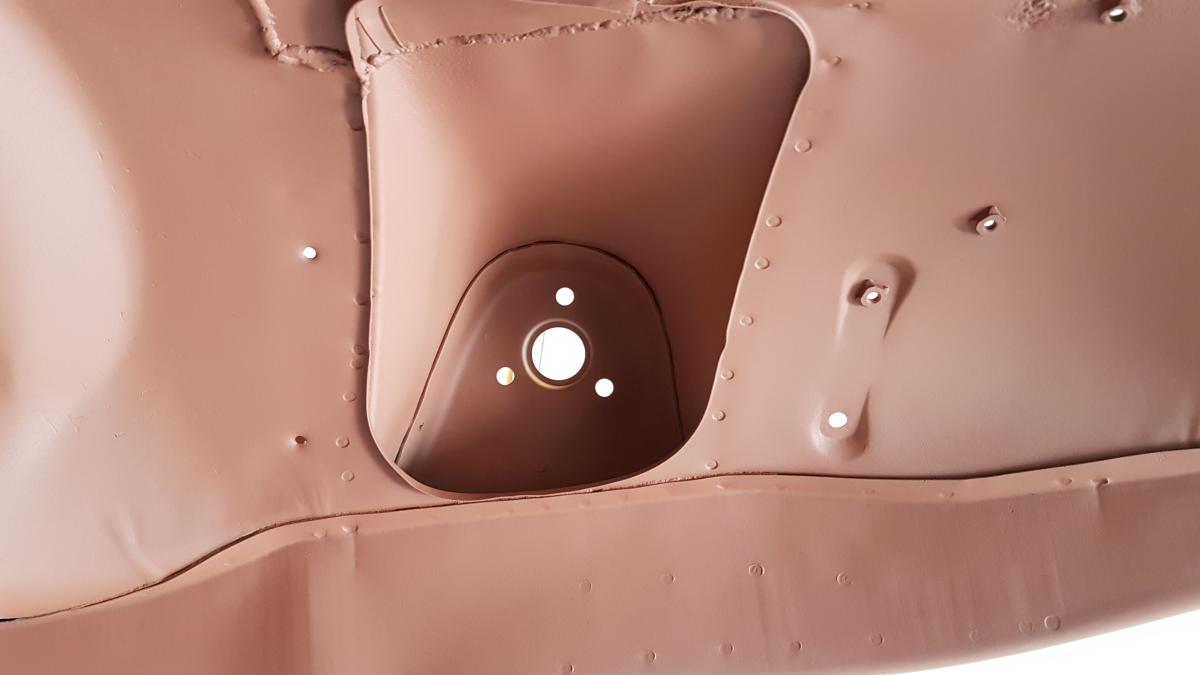
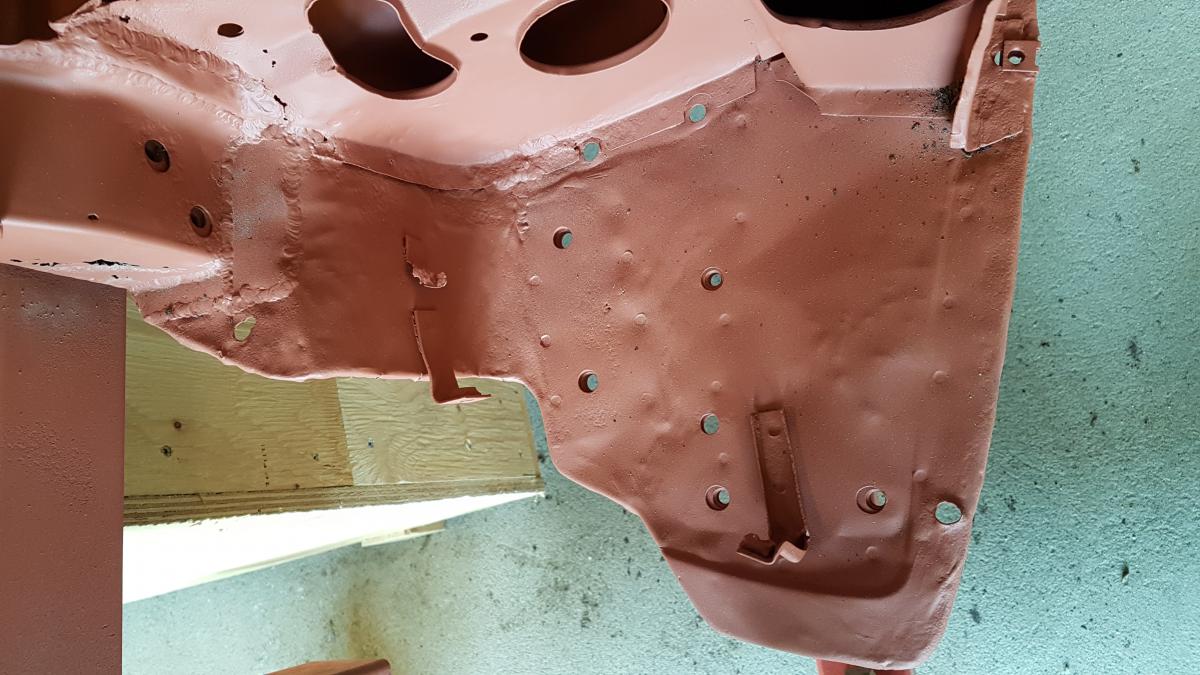
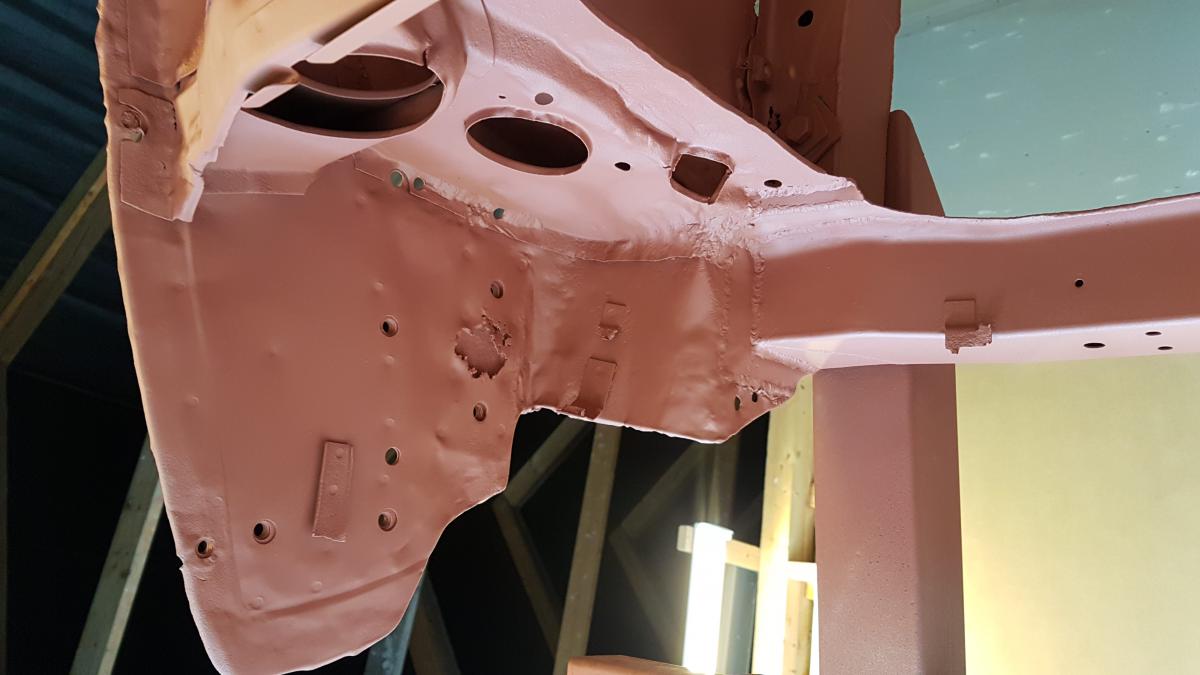
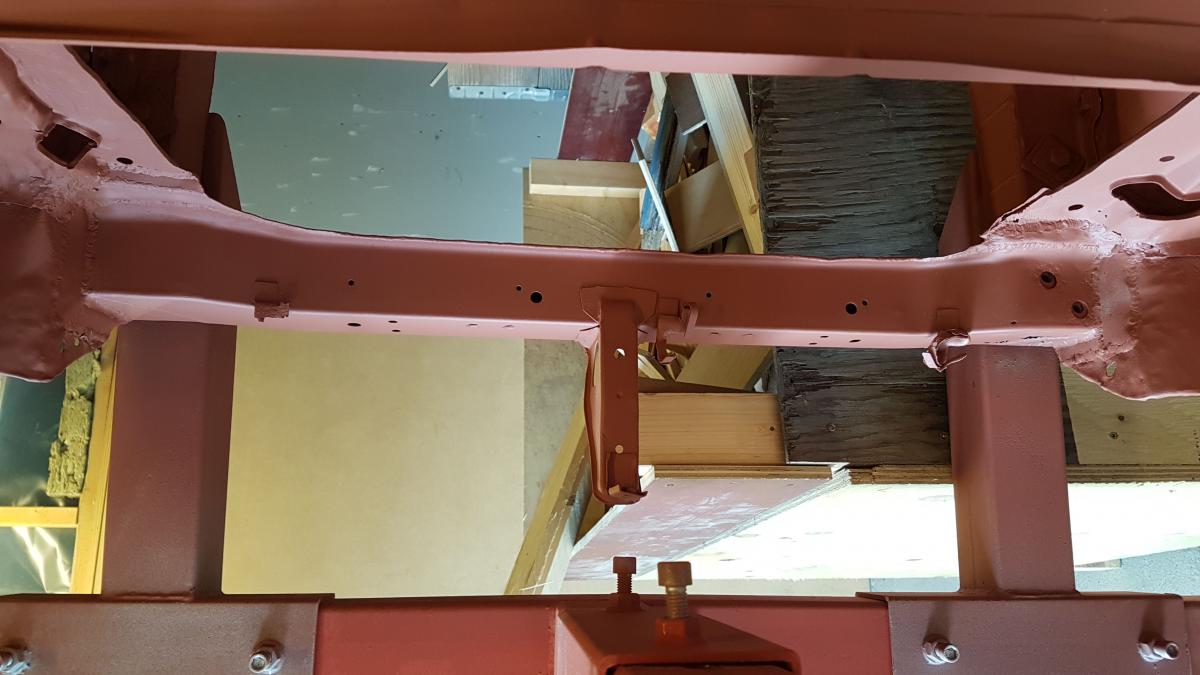
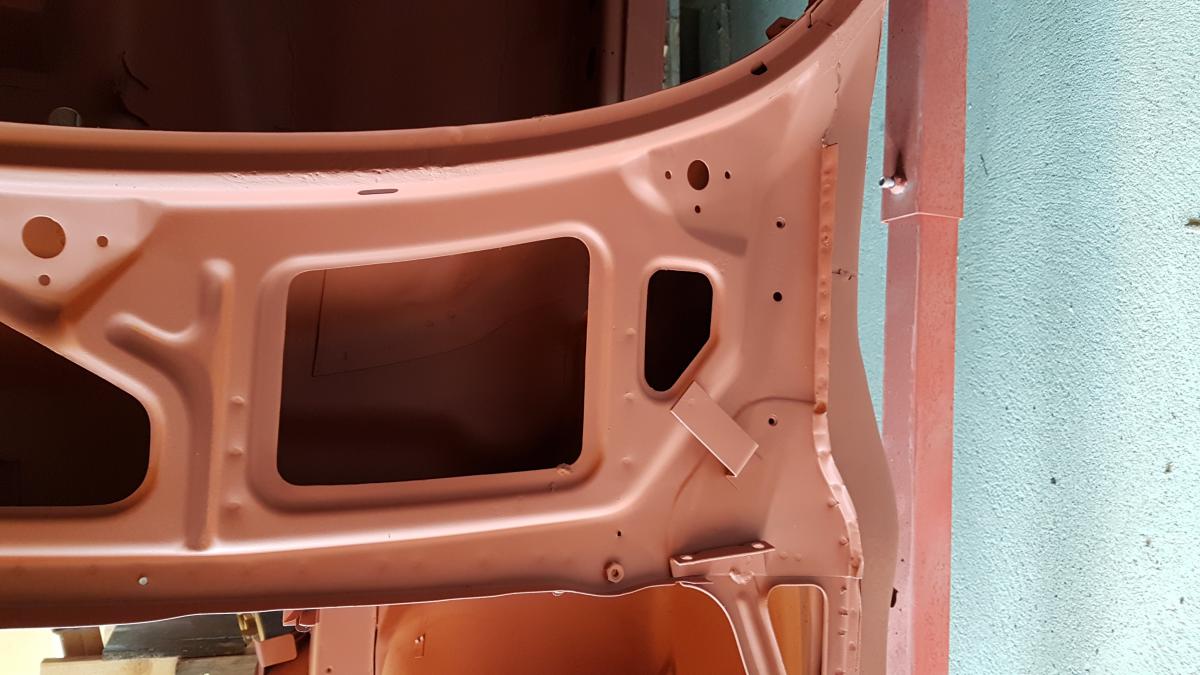
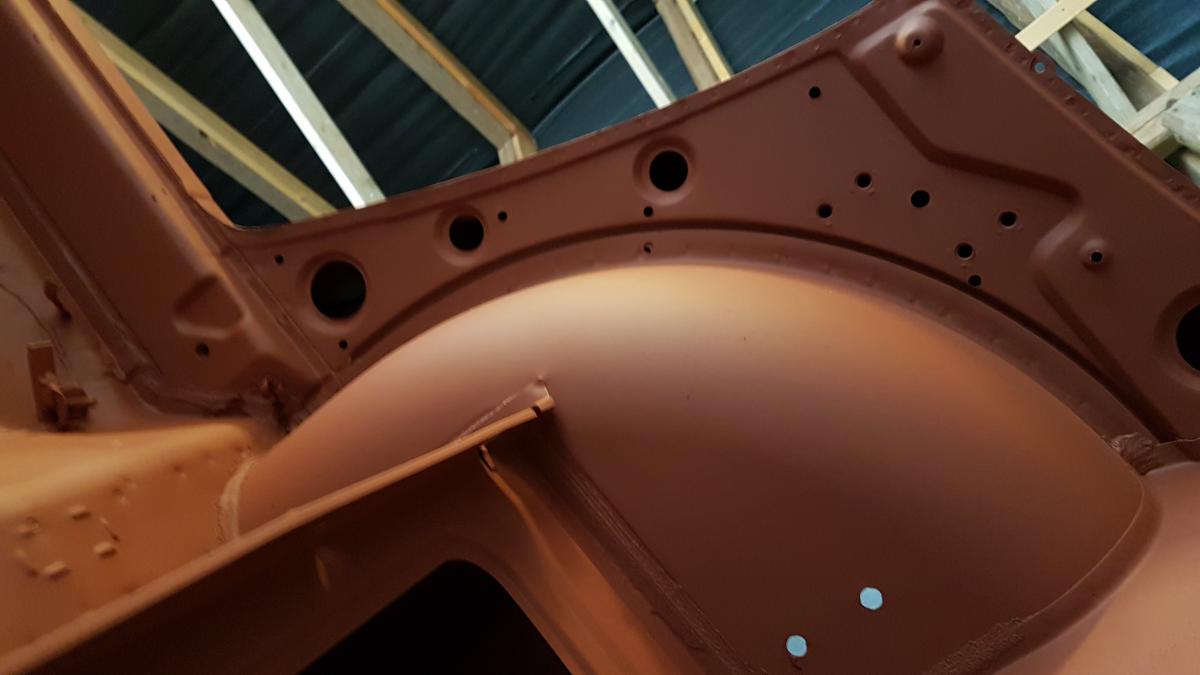
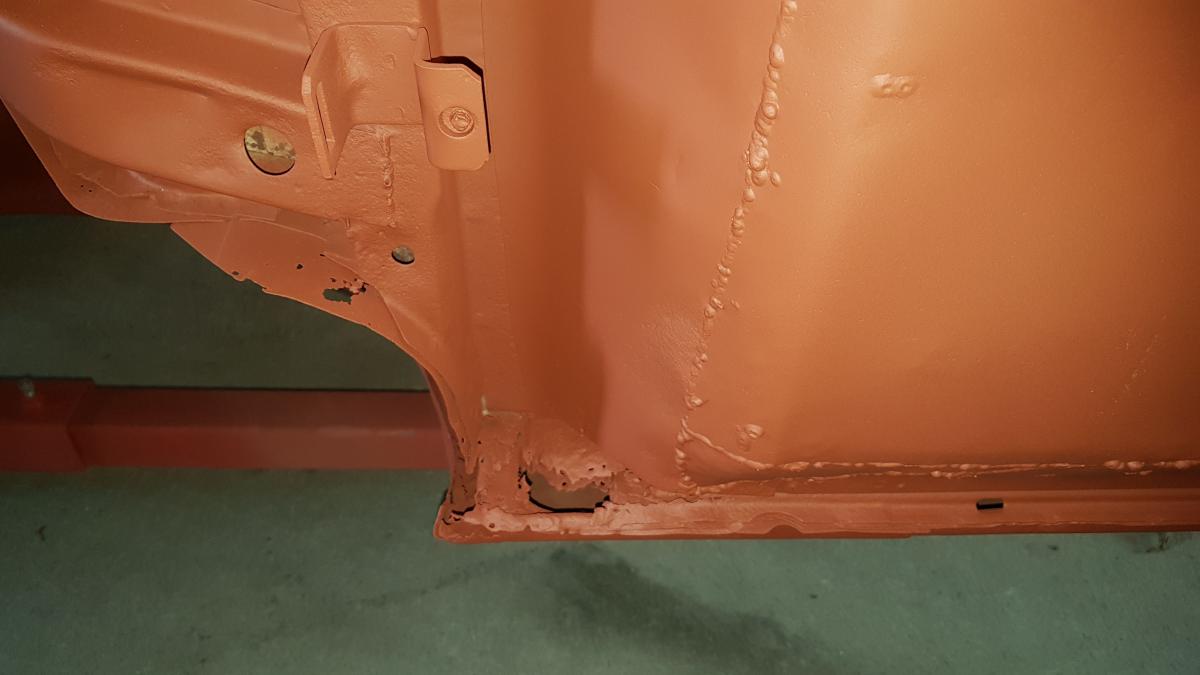
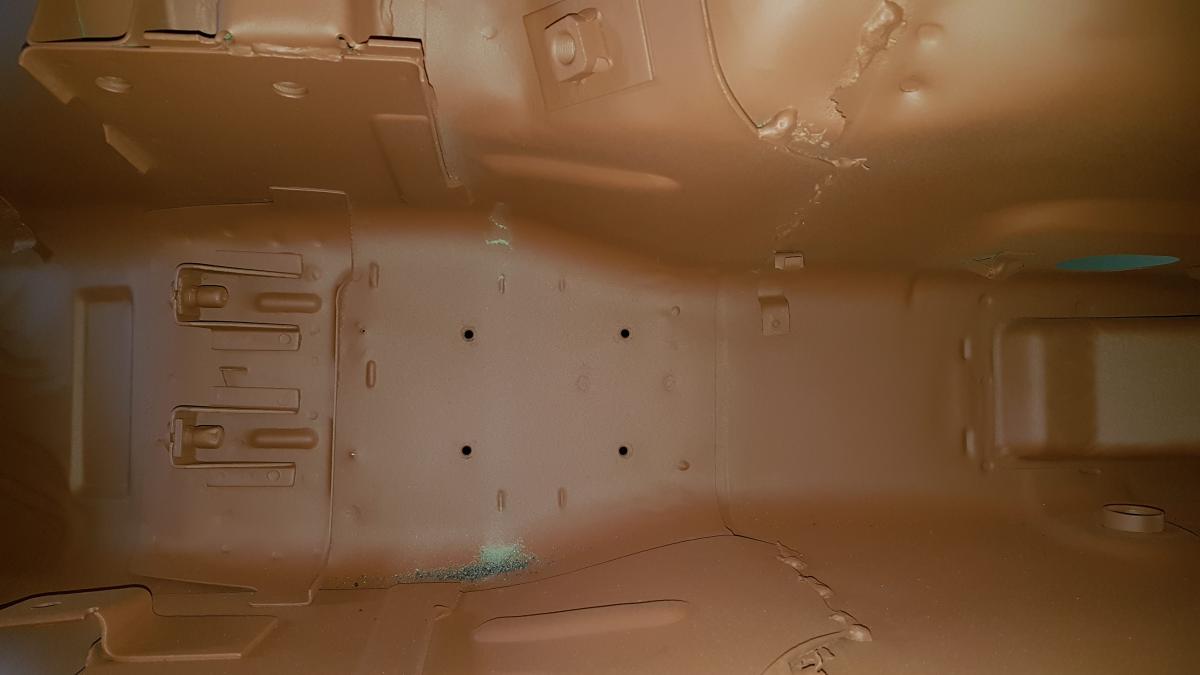
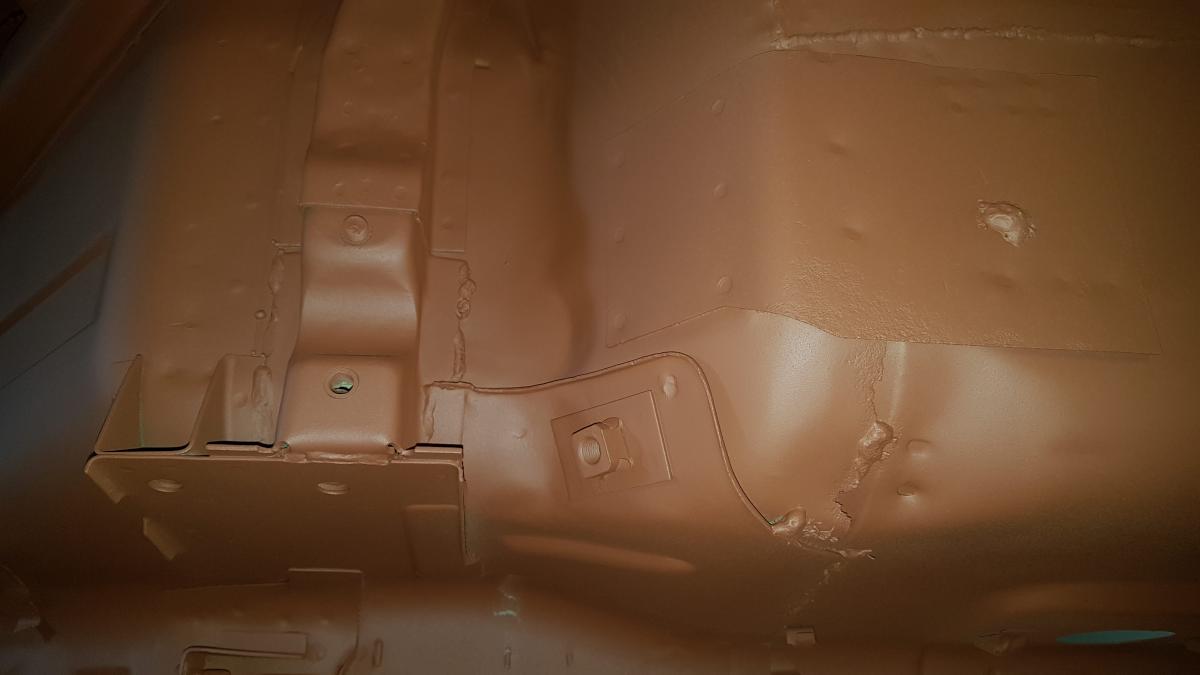
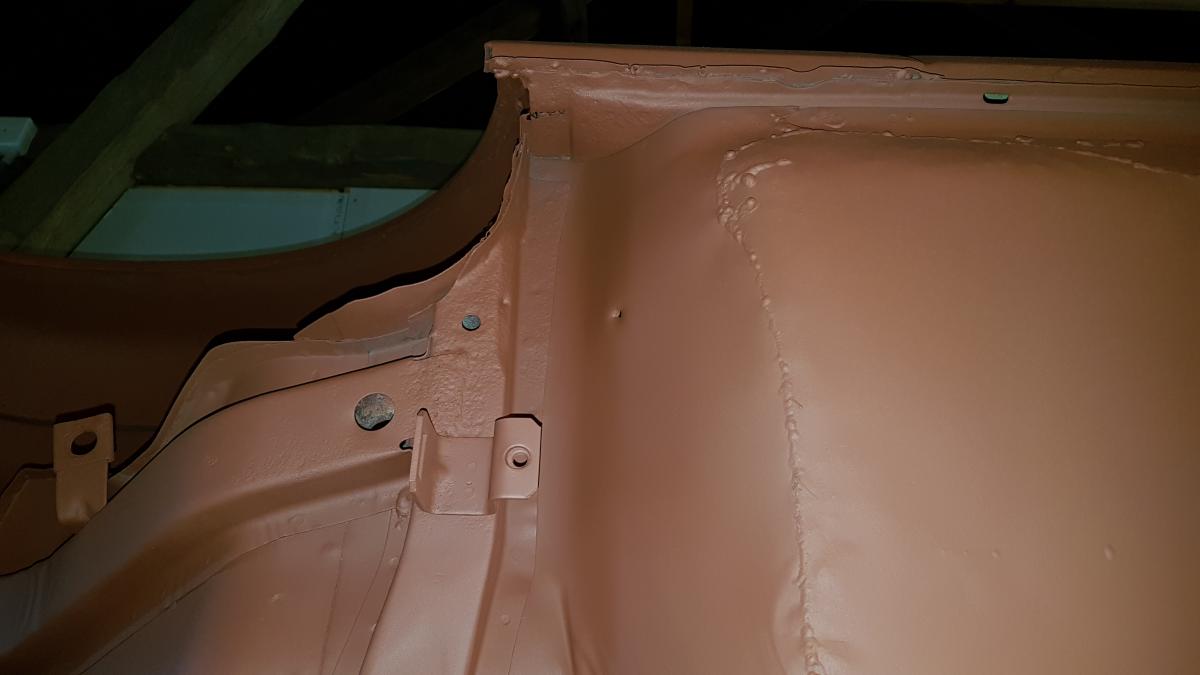
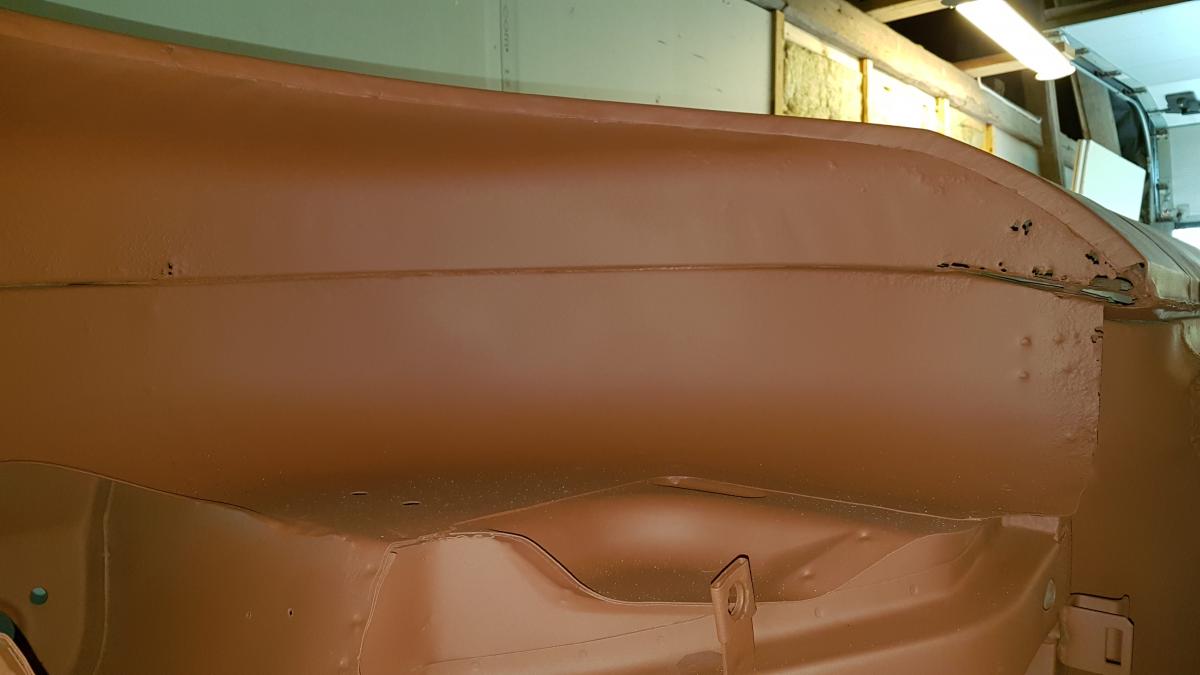
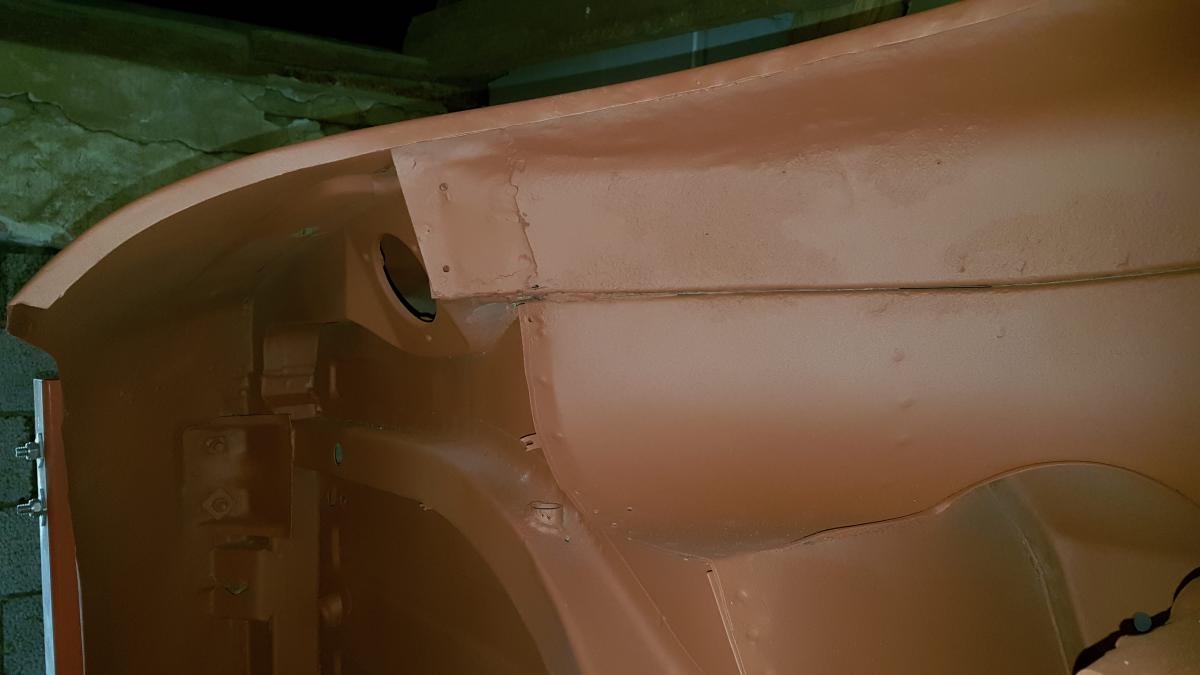
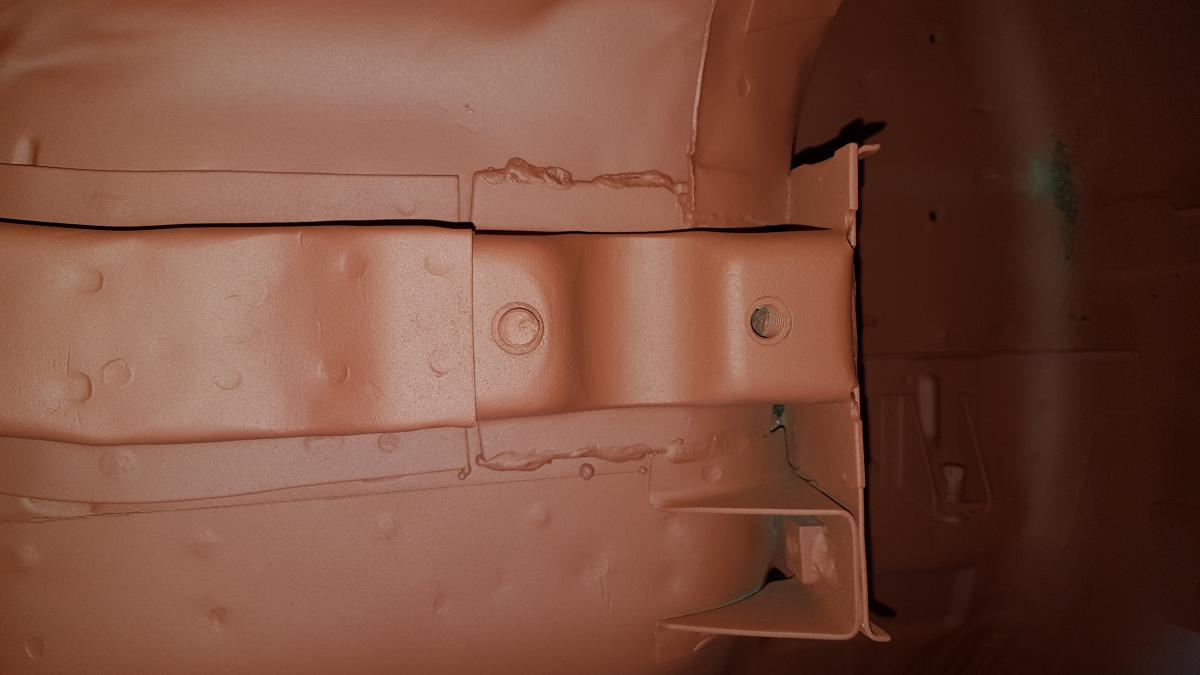
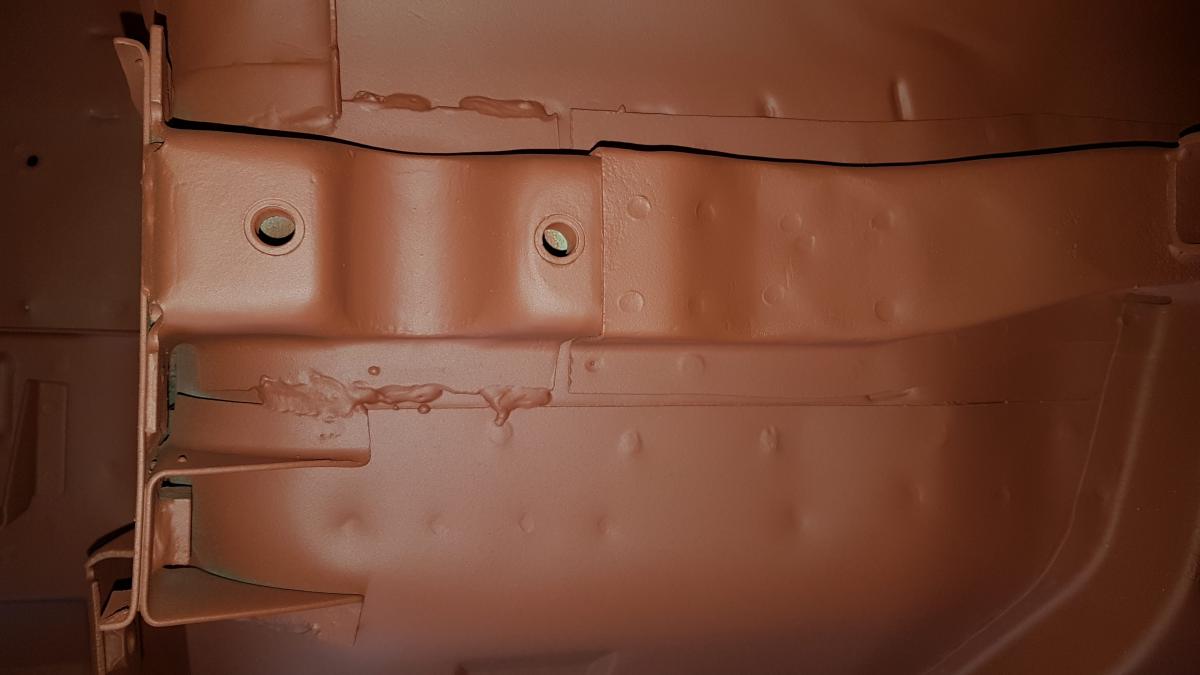
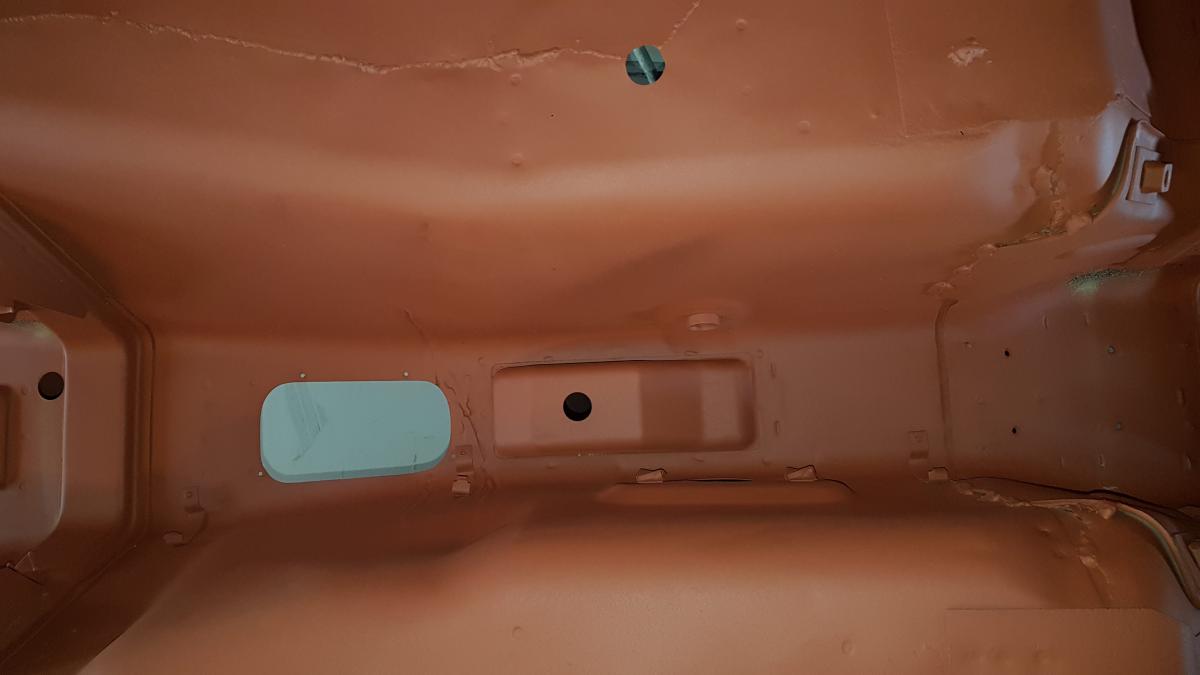
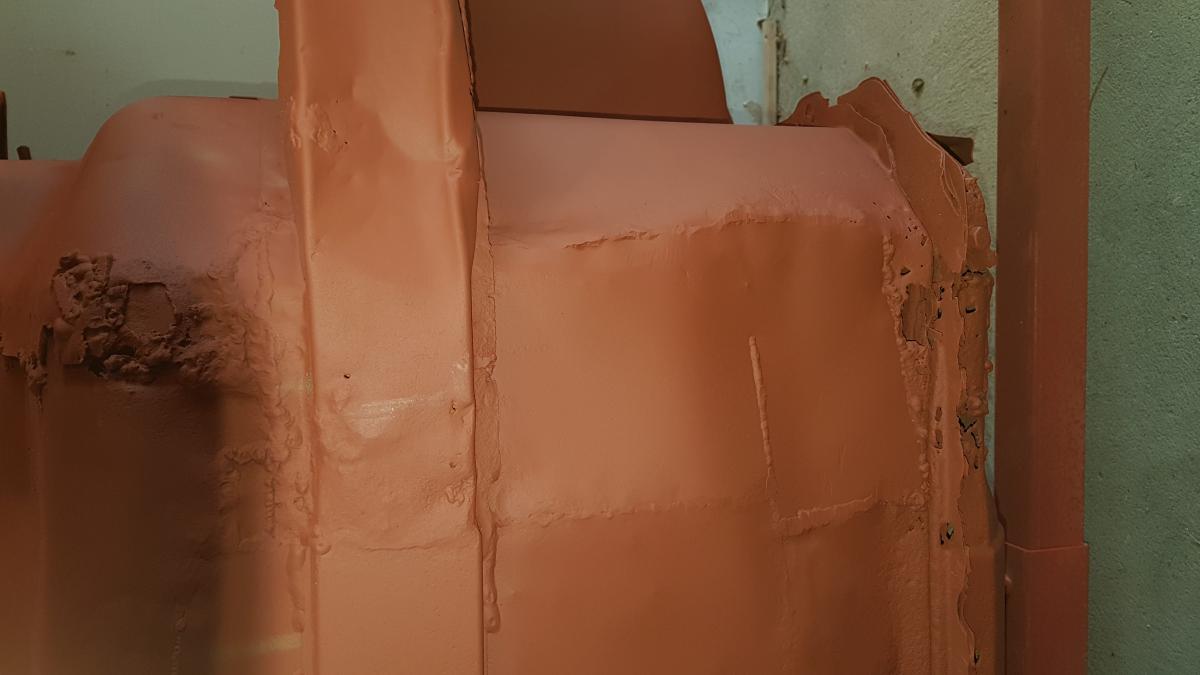
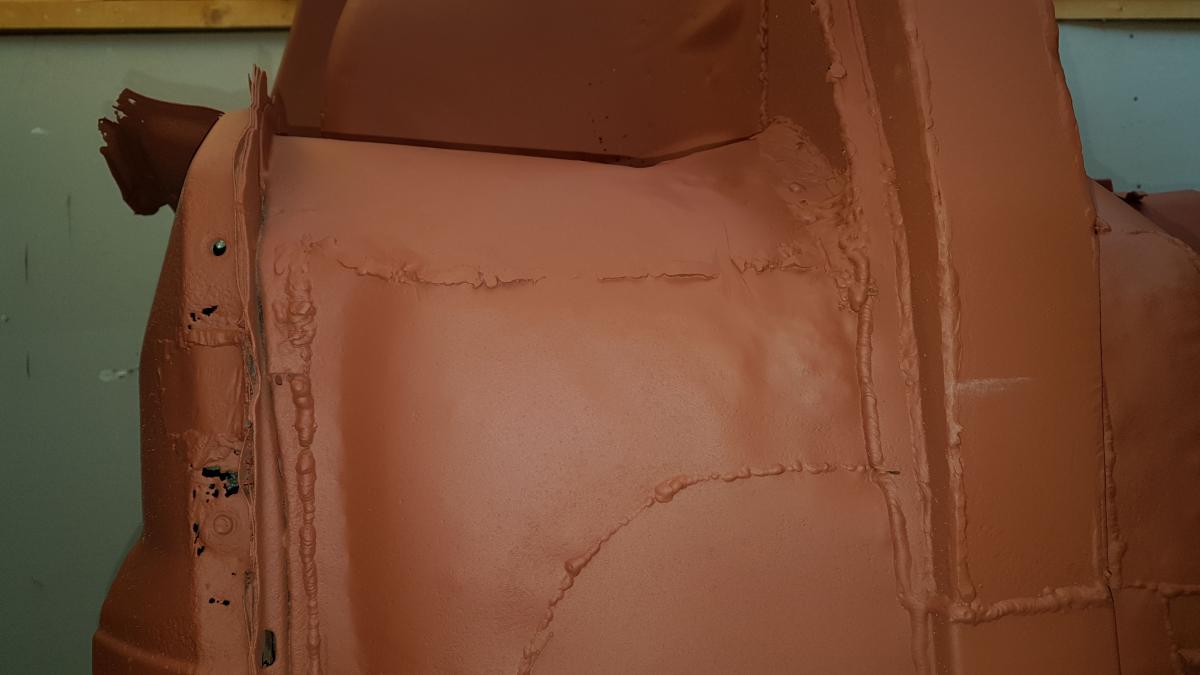
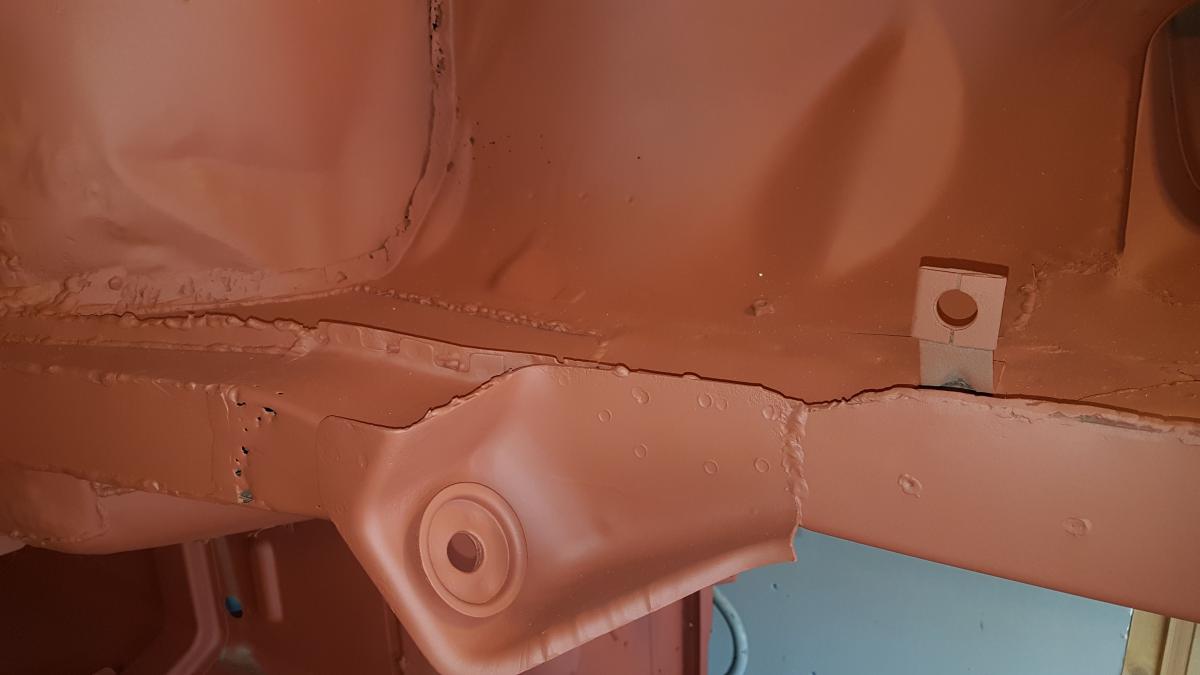
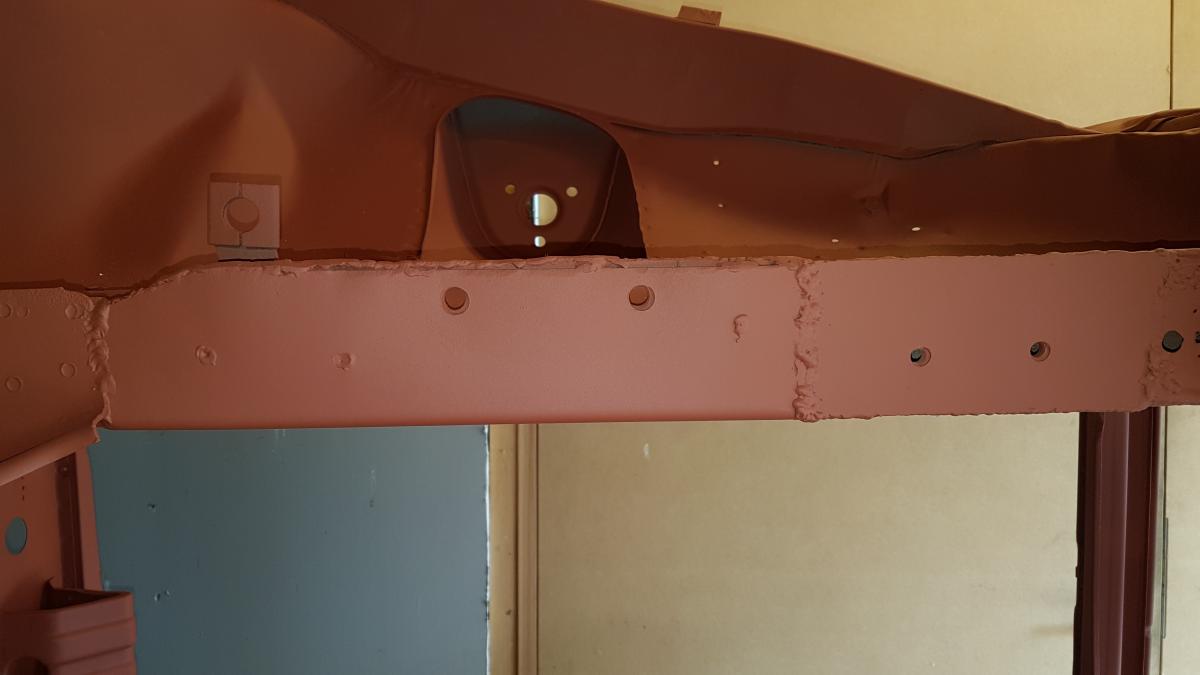
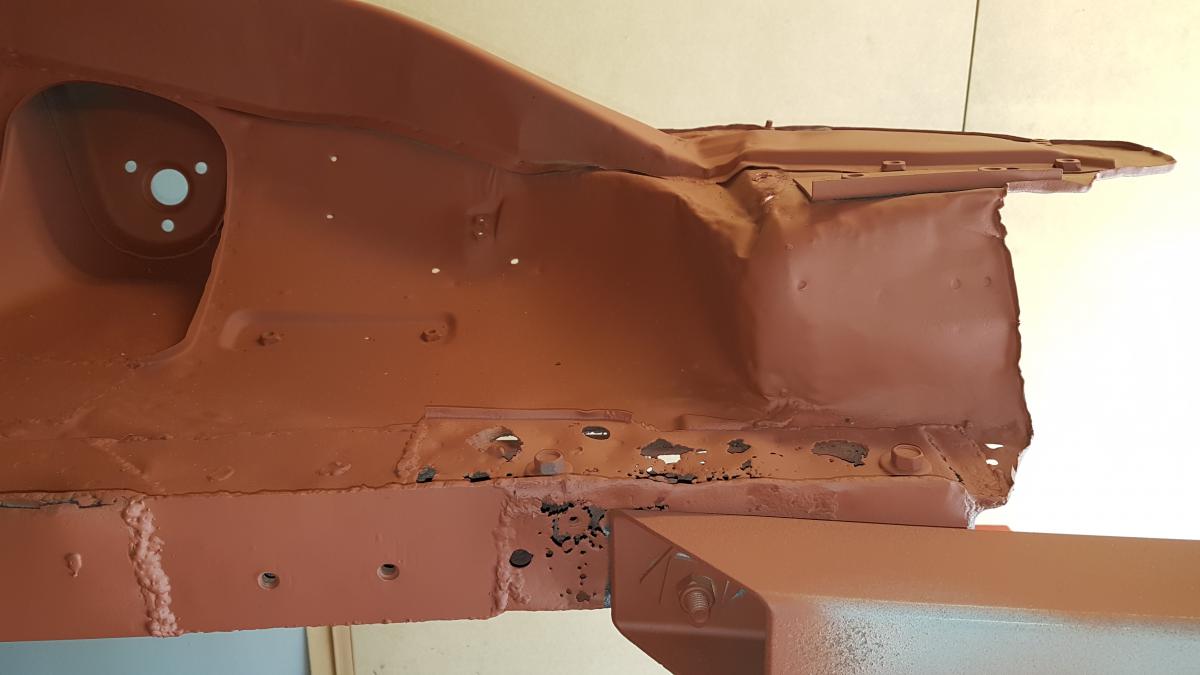
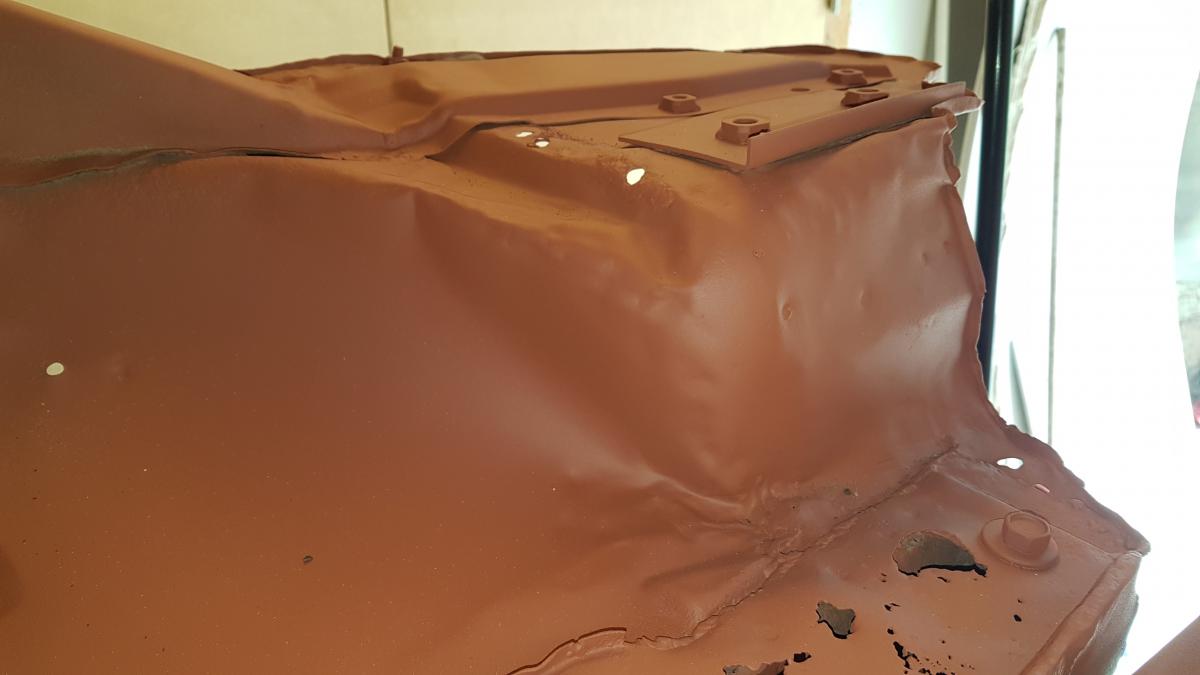
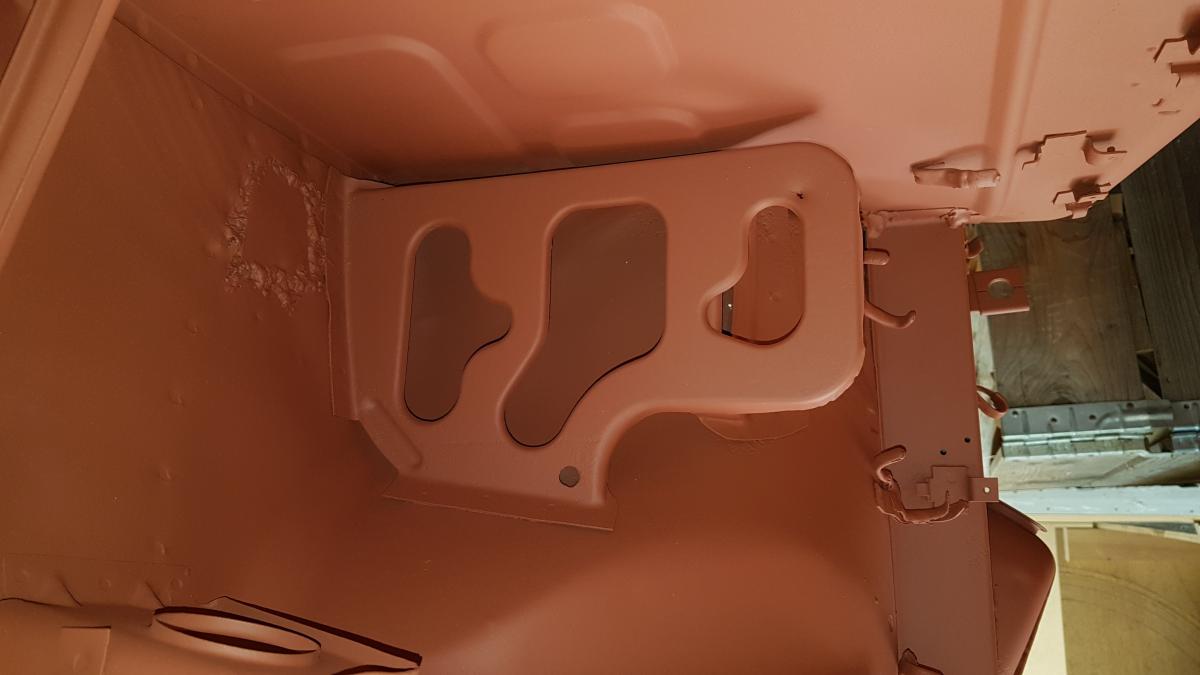
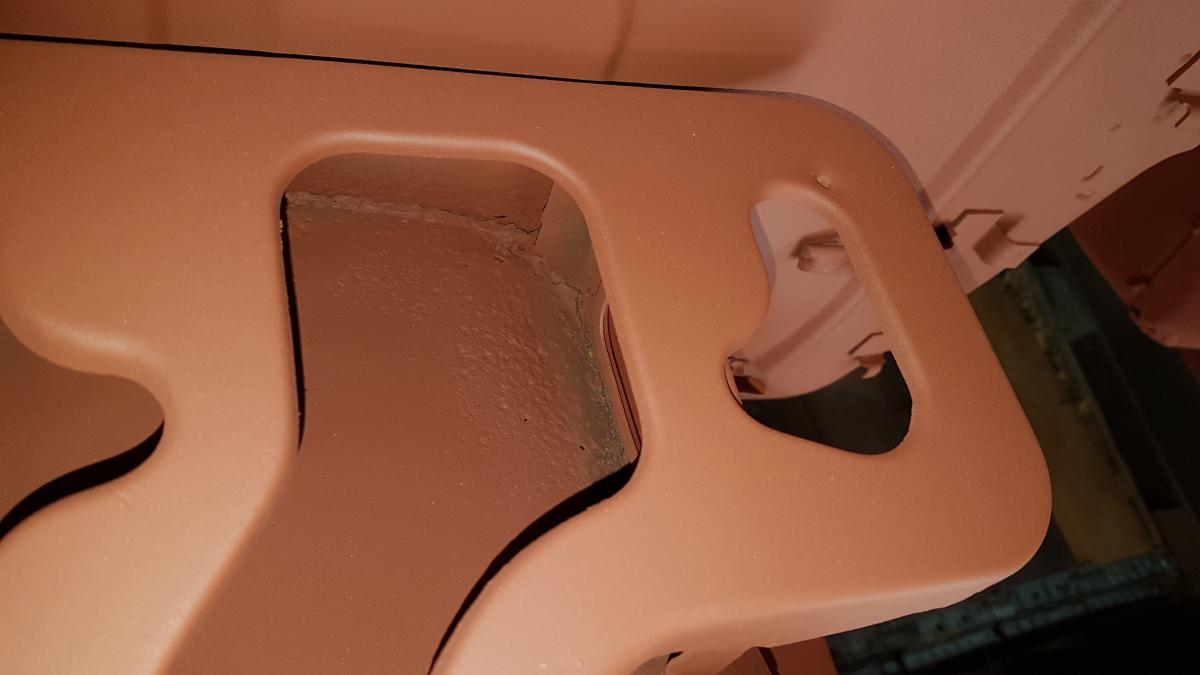
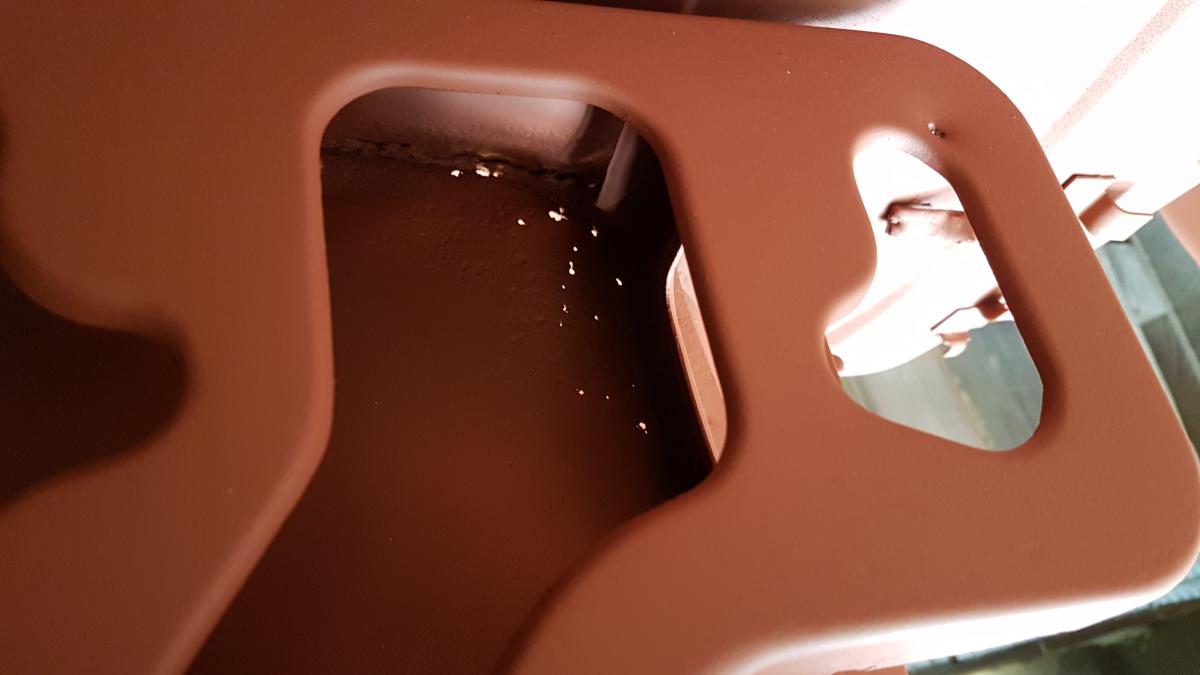
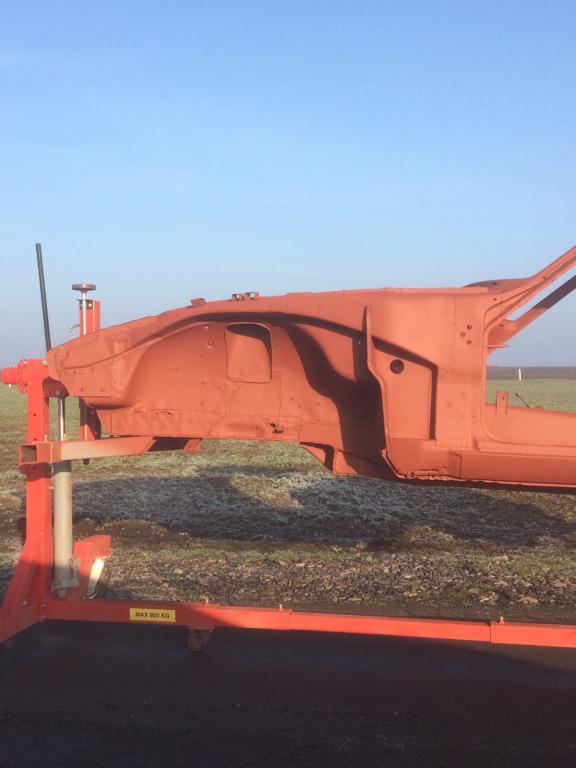
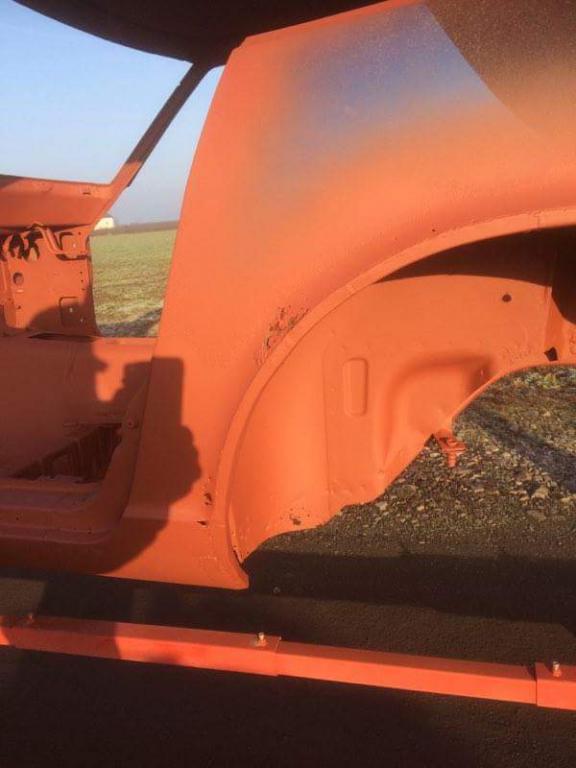
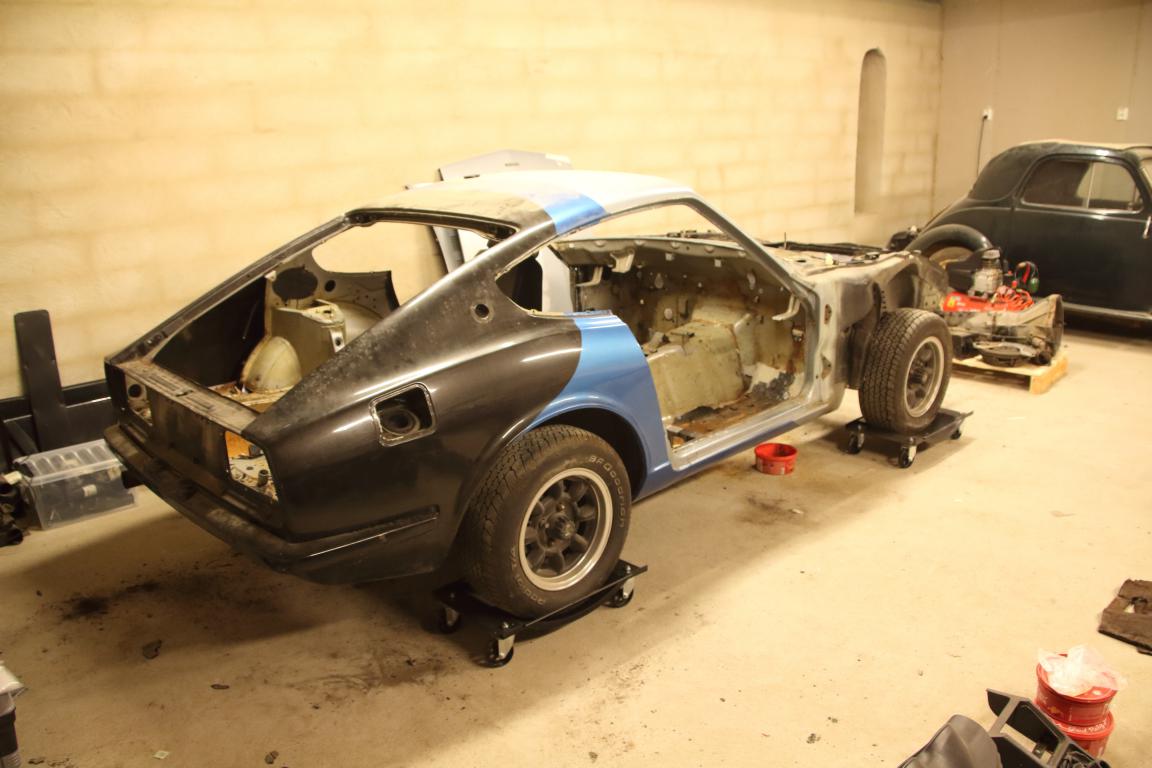
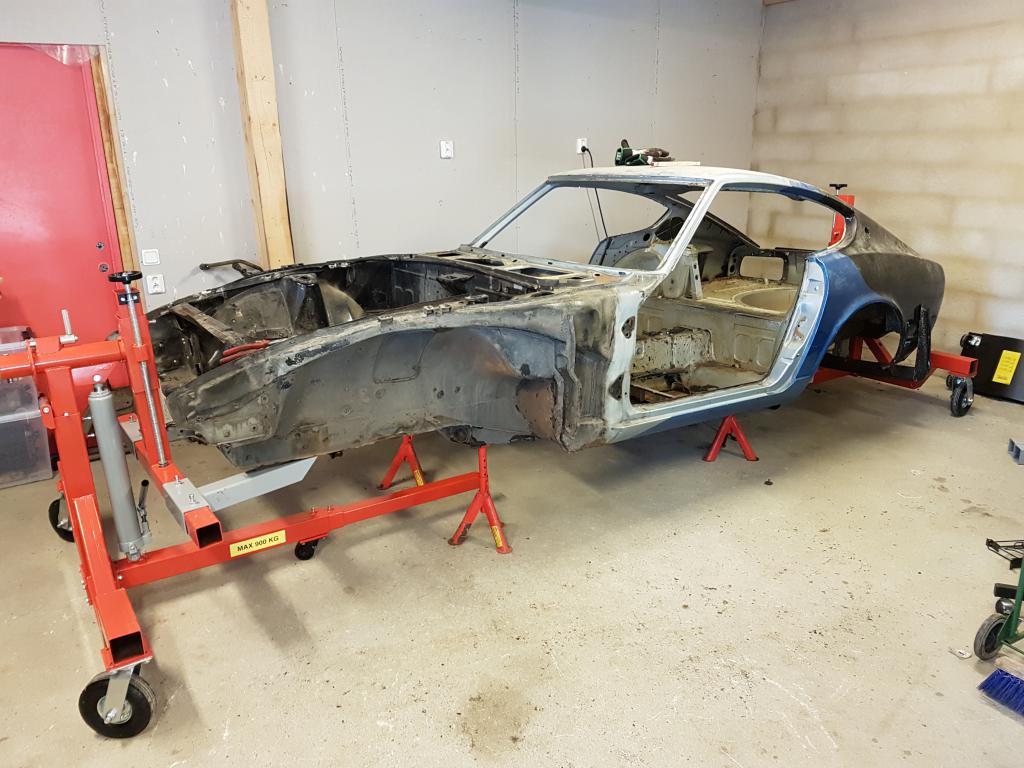
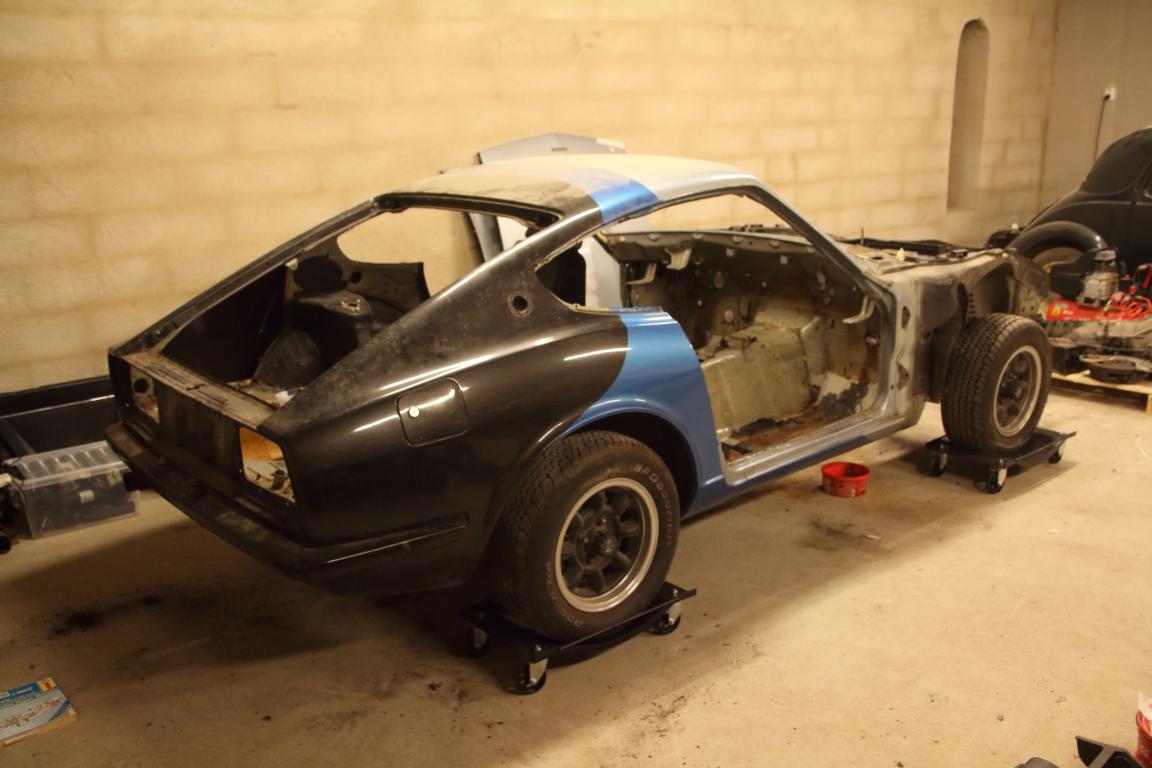
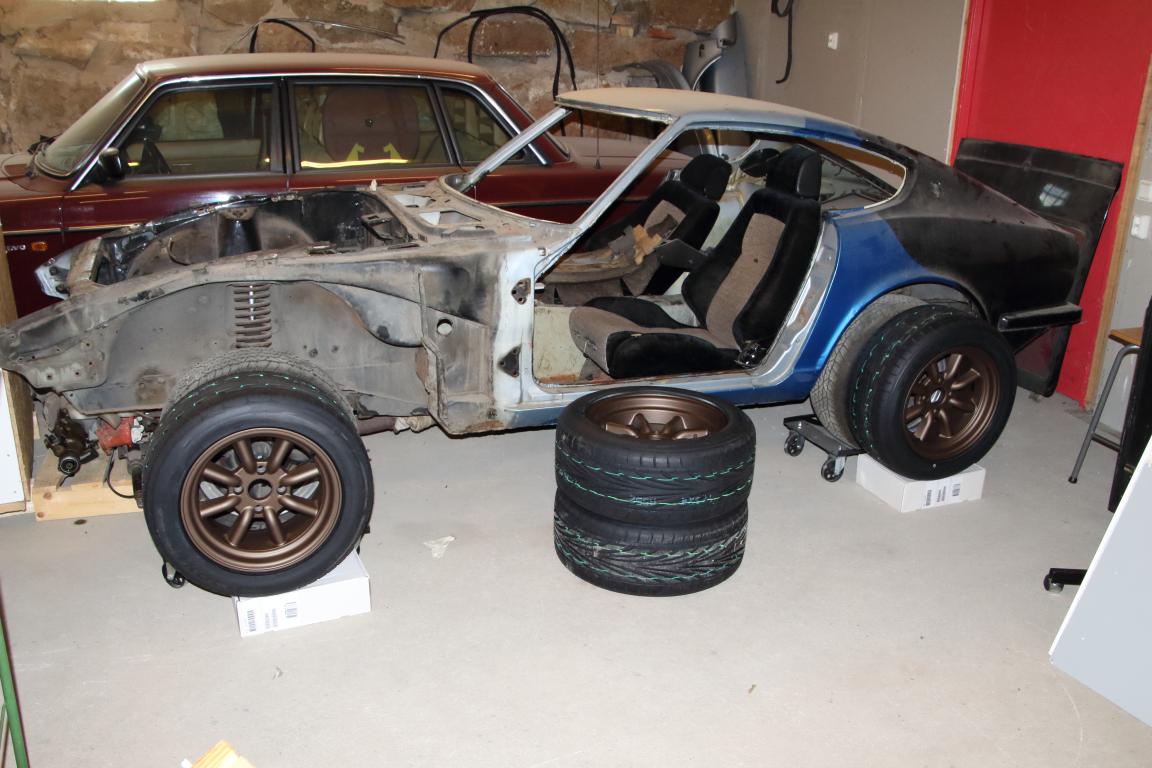
3 years later... took ages to find a good painter willing to take on the project. These days insurance jobs with small panel fixes seem to be more profitable. Luckily I found someone willing to do it in the summer months of this year while the insurance workload is reduced. Prepping... Overall quite happy with the result. Couldn't contain myself and started puzzling together the undercarriage the first chance I got. Pulled lines in the trans tunnel and assembled the suspension component. On the wheel first the first time since 2017!
-
Swedish Datsun 240z Restoration
Tebirkesueth replied to Tebirkesueth's topic in S30 Series - 240z, 260z, 280z
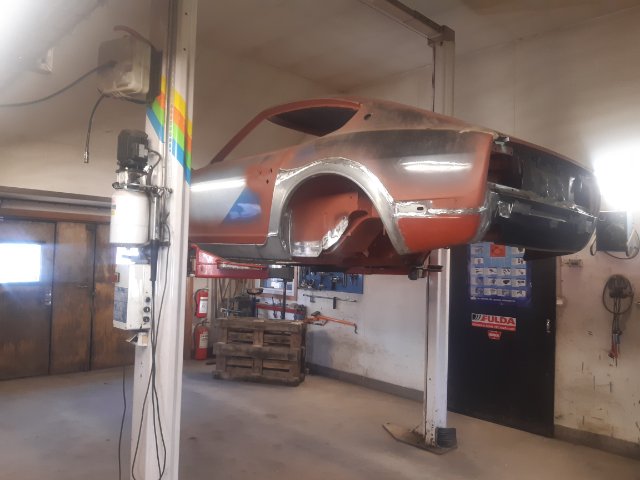
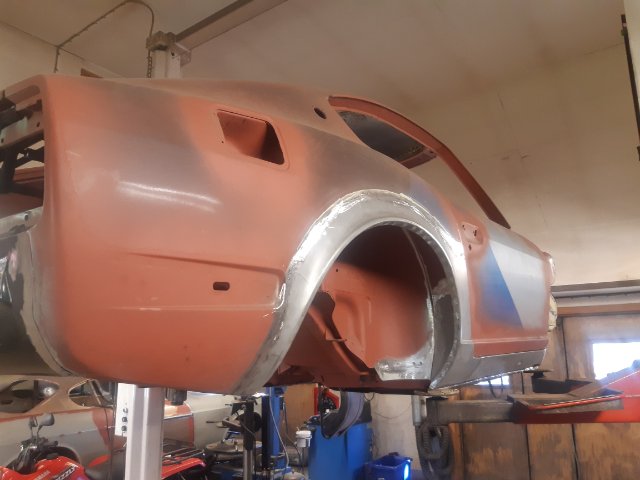
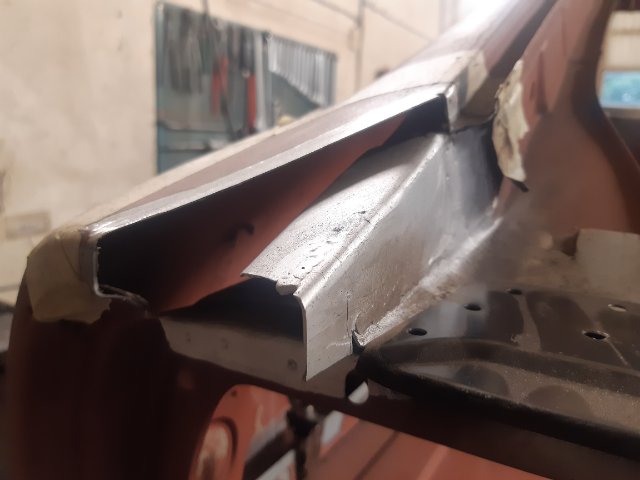
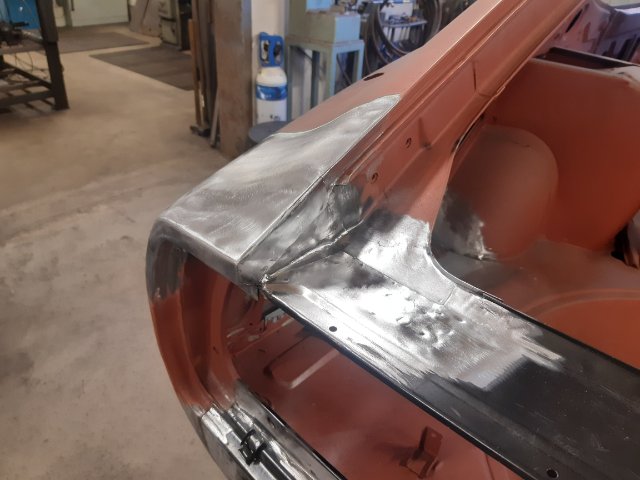
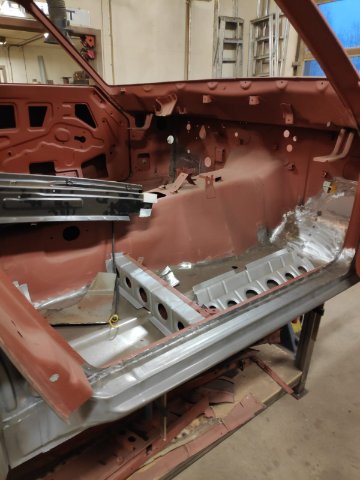
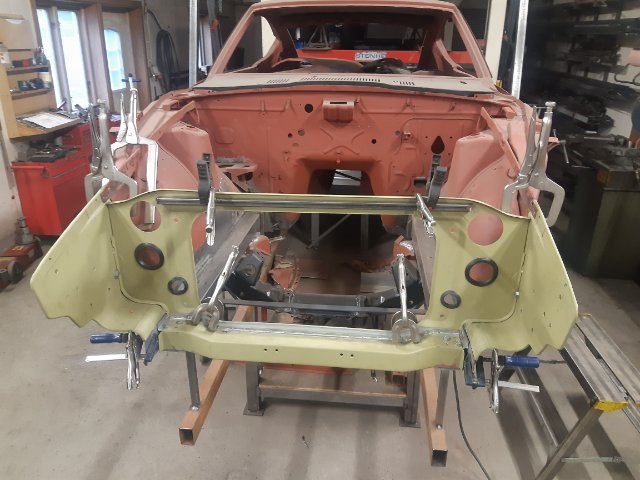
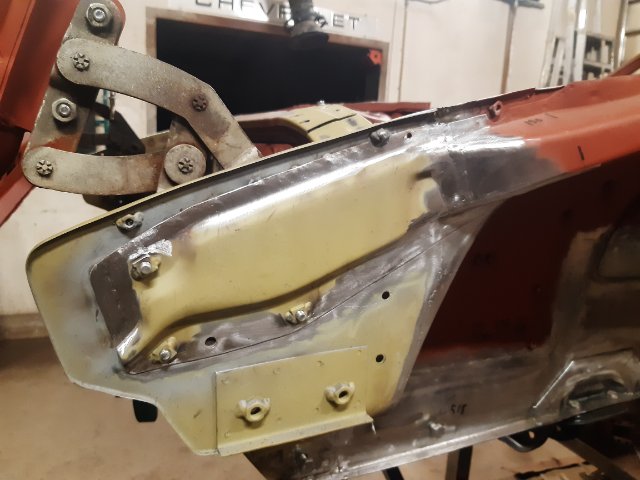
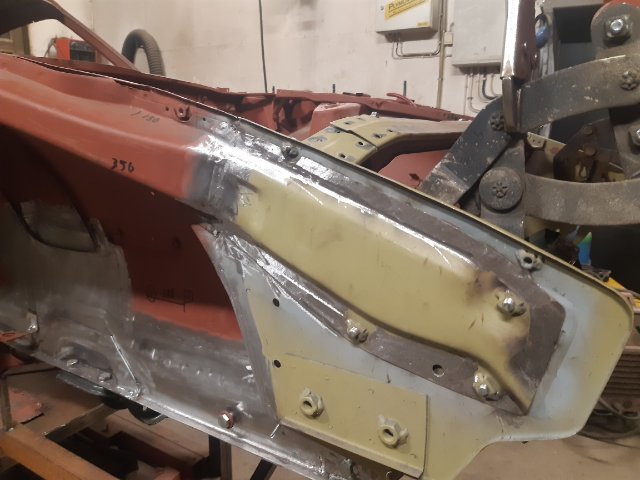
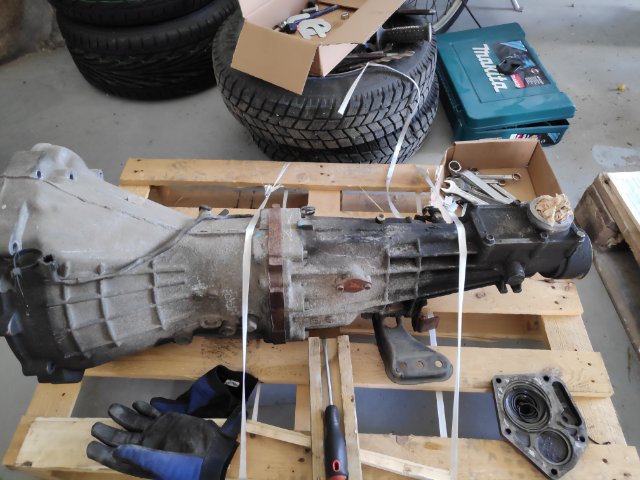
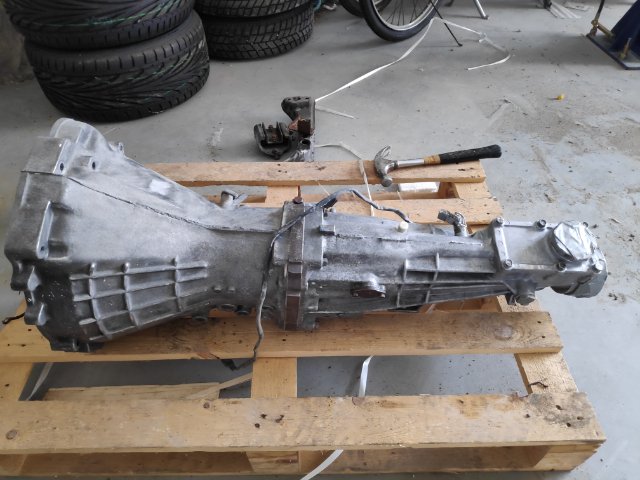
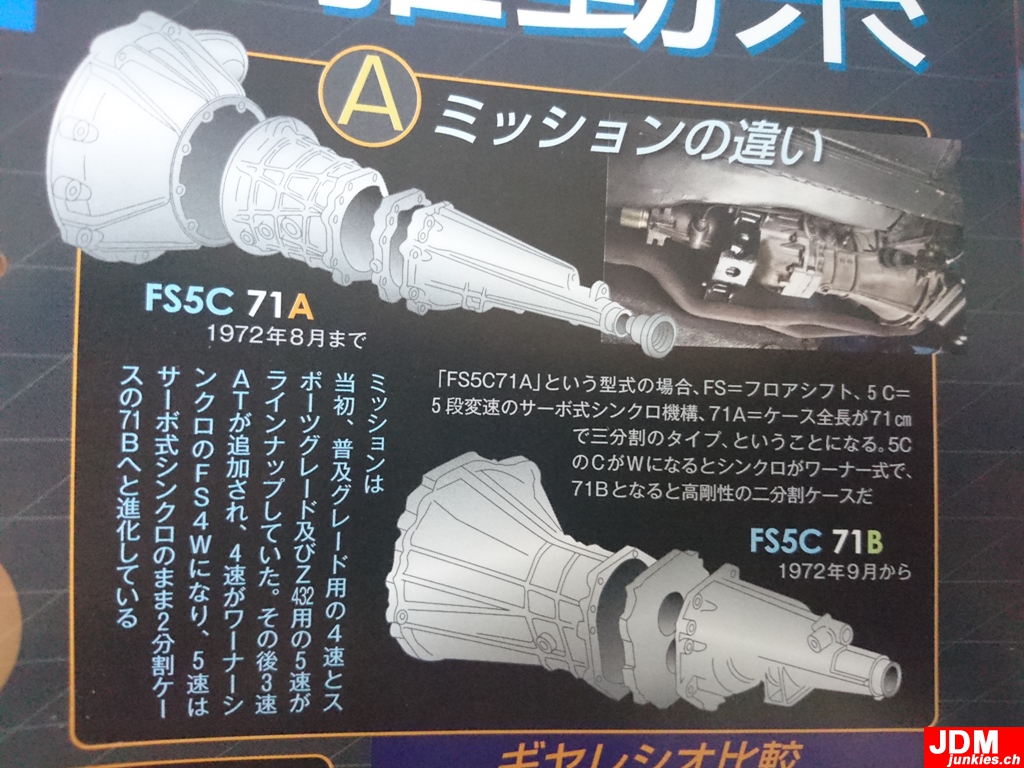
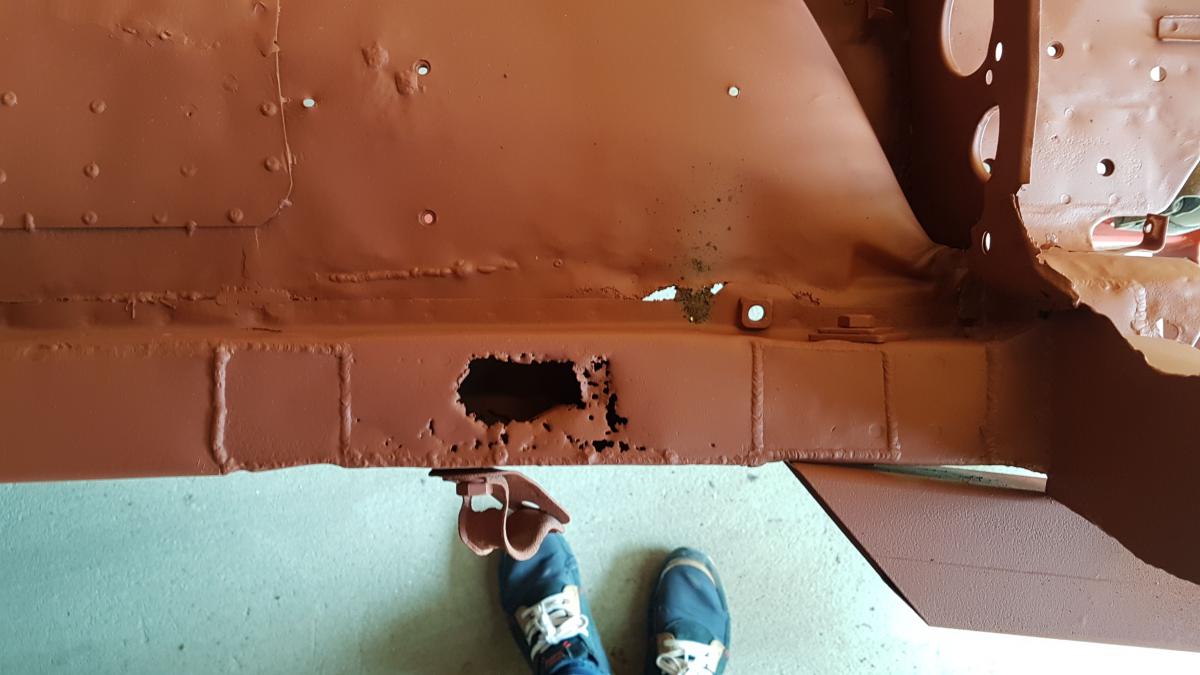
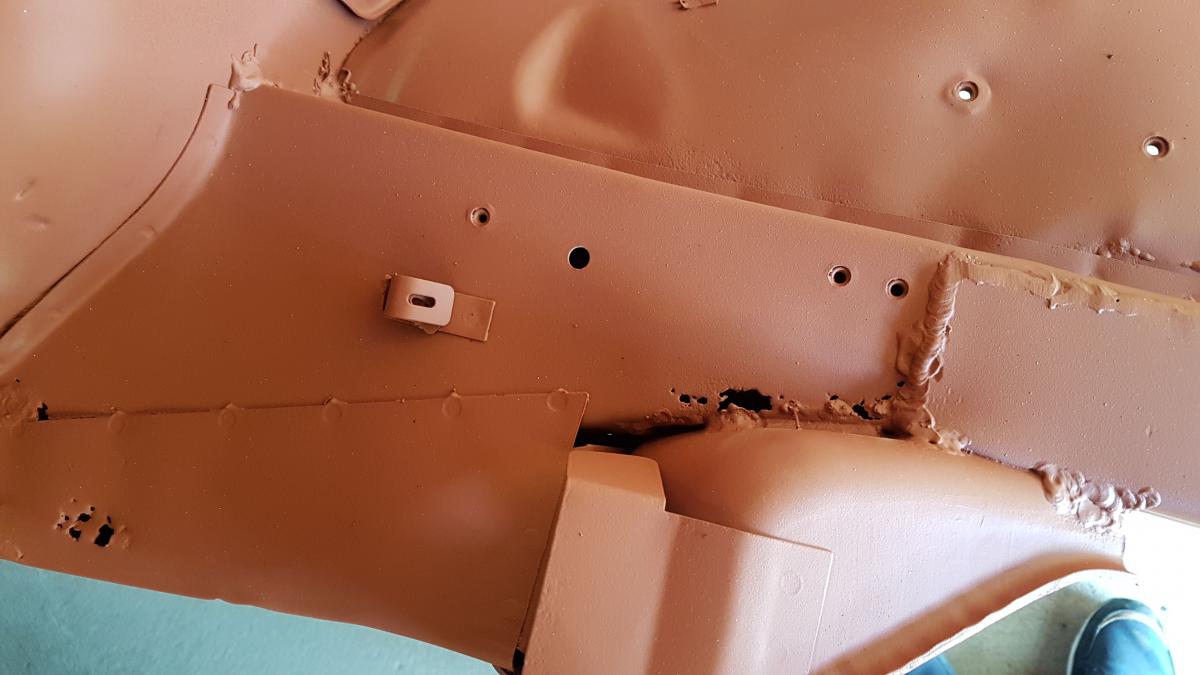
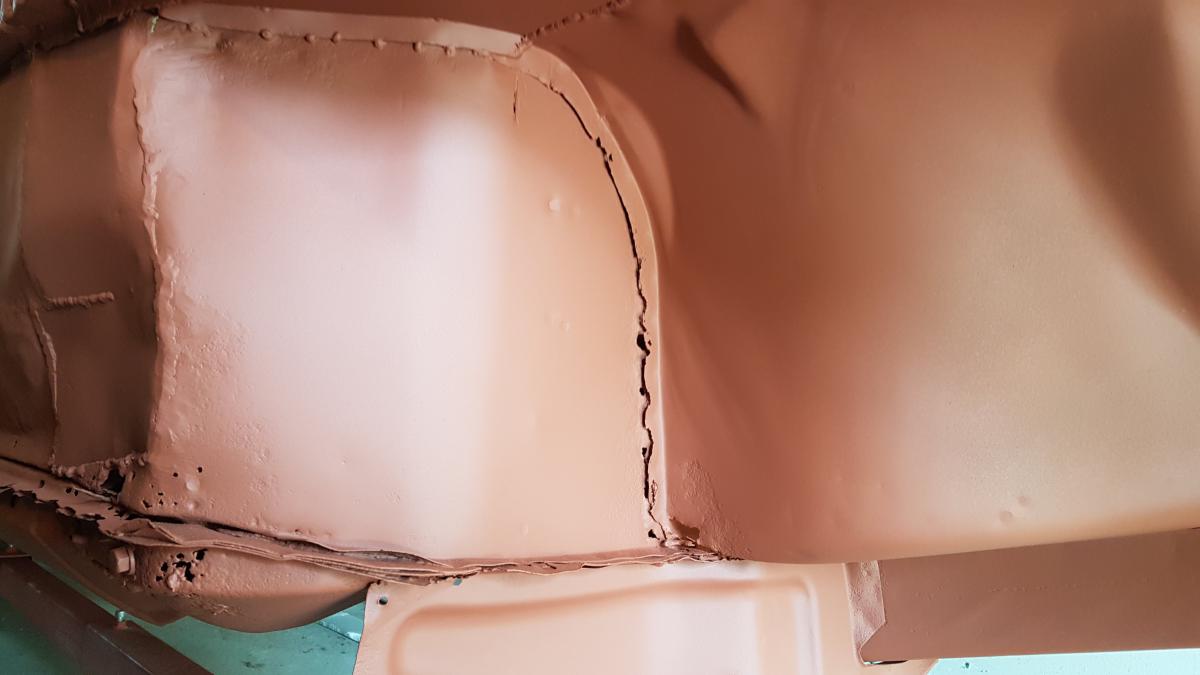
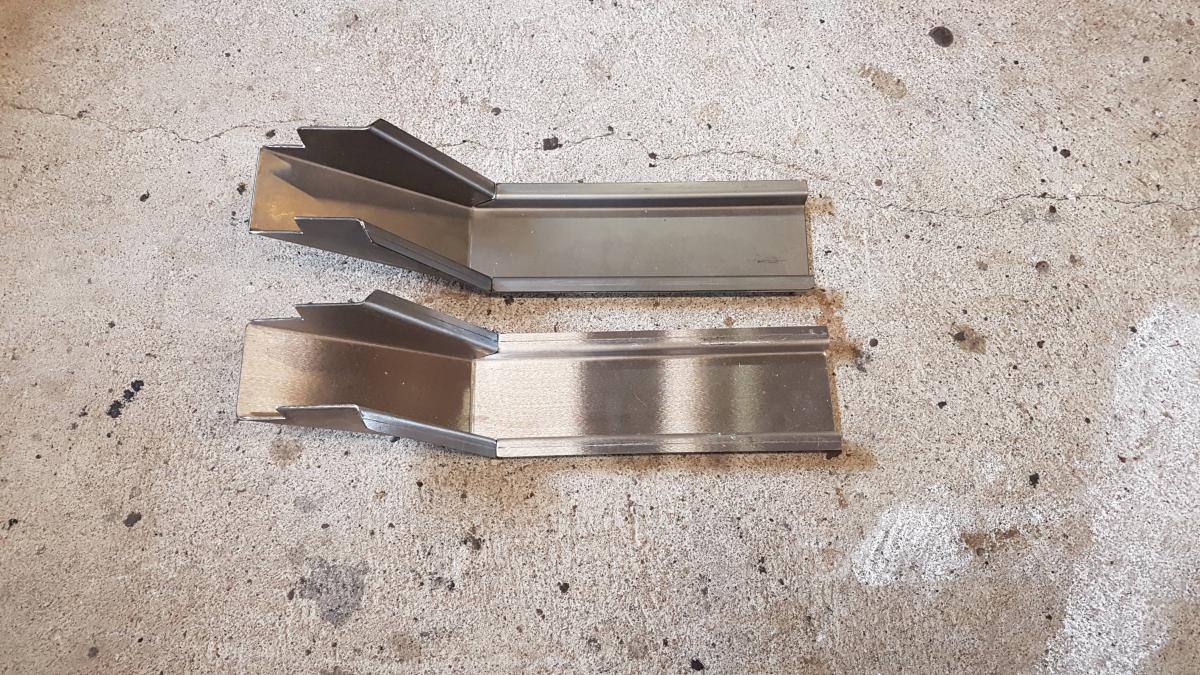
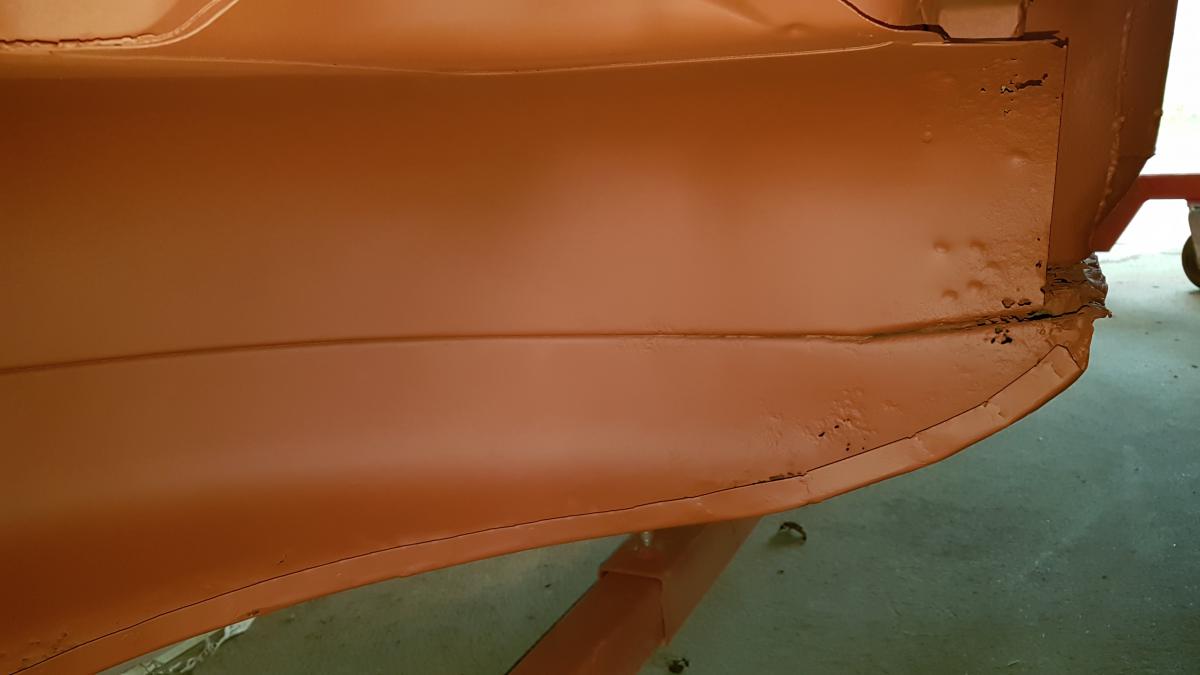
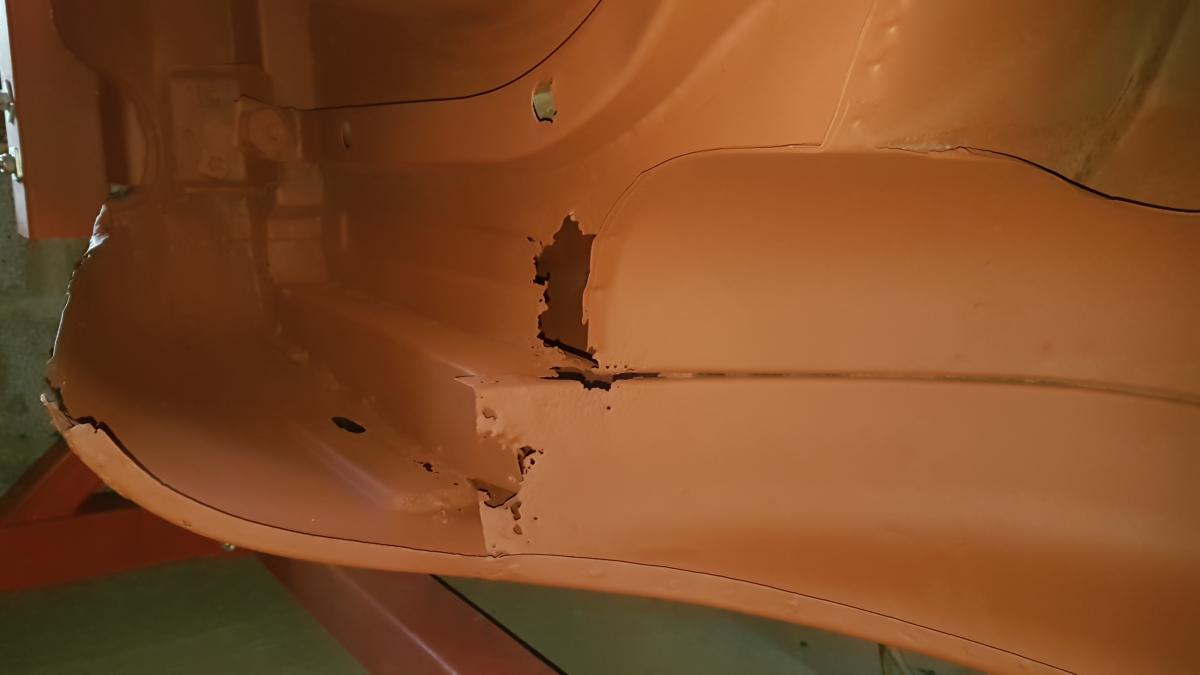
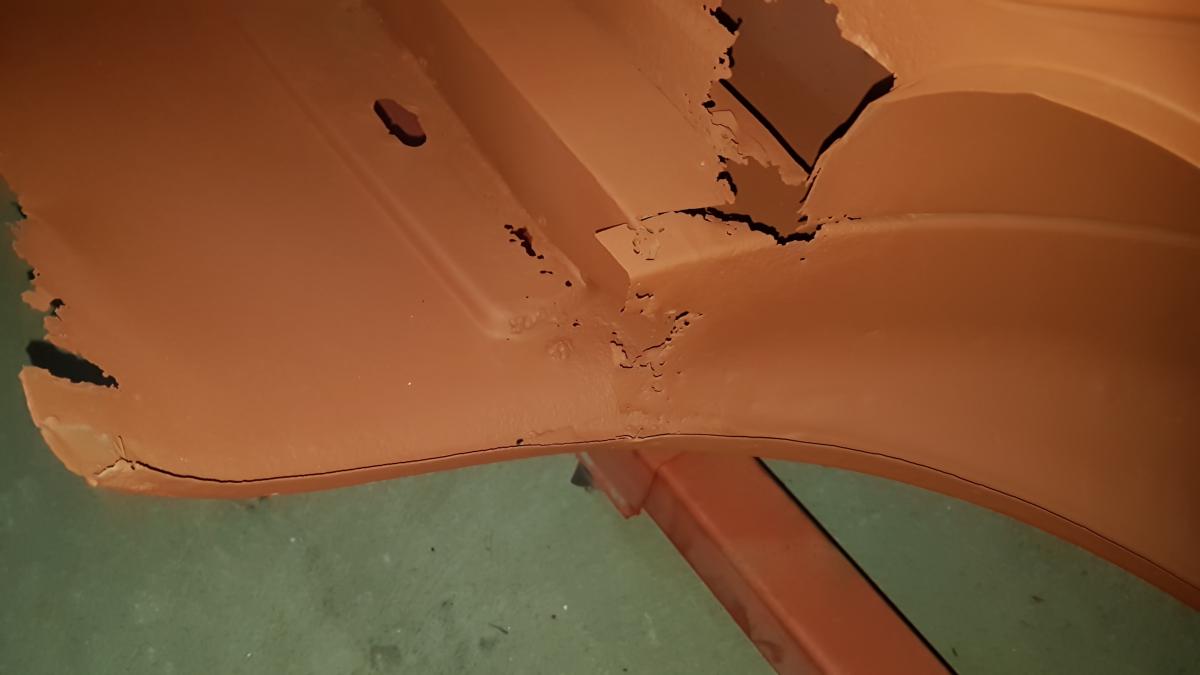
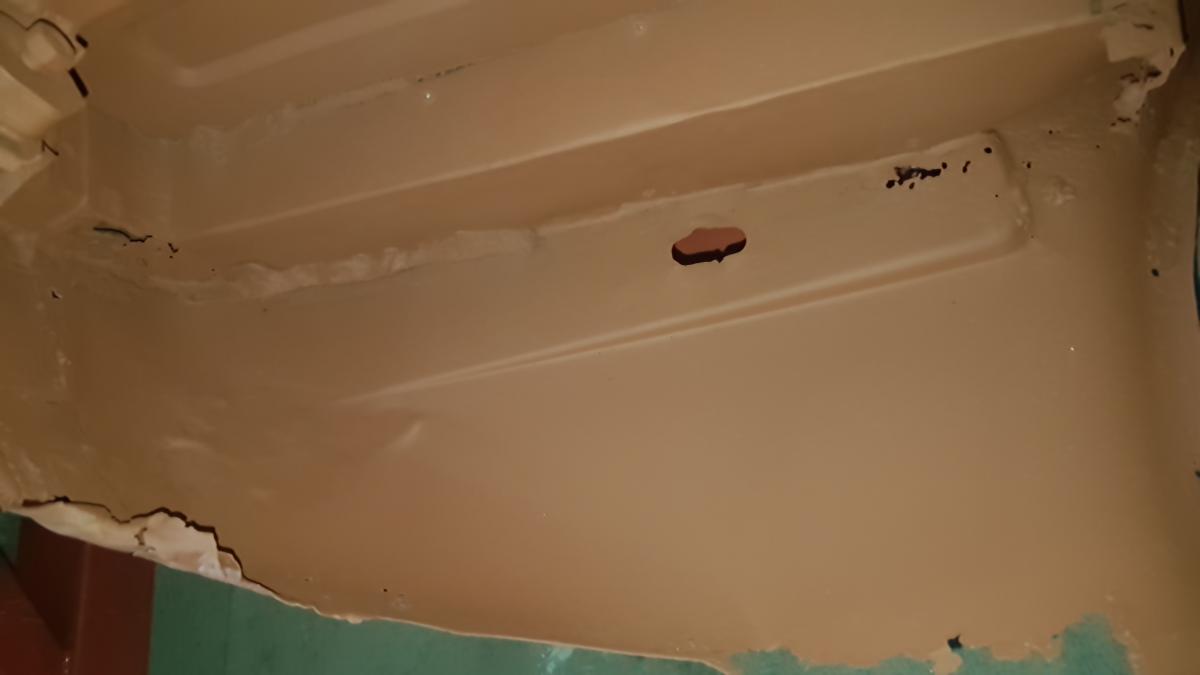
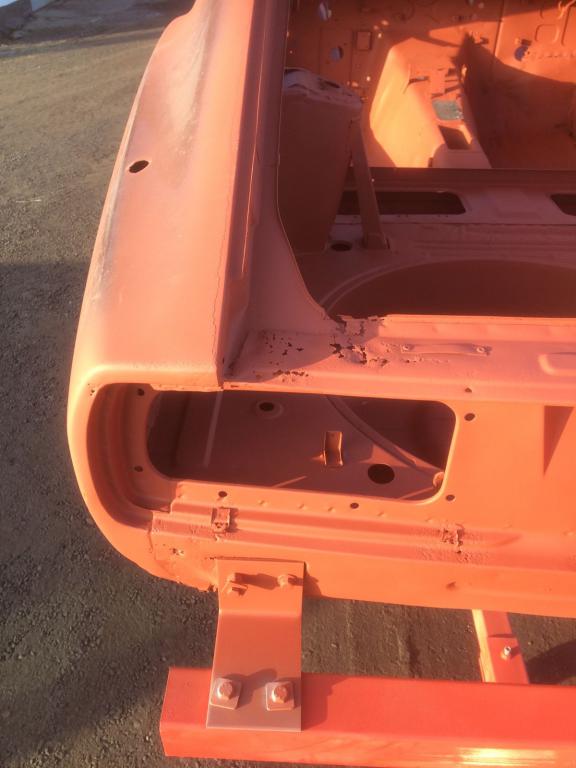
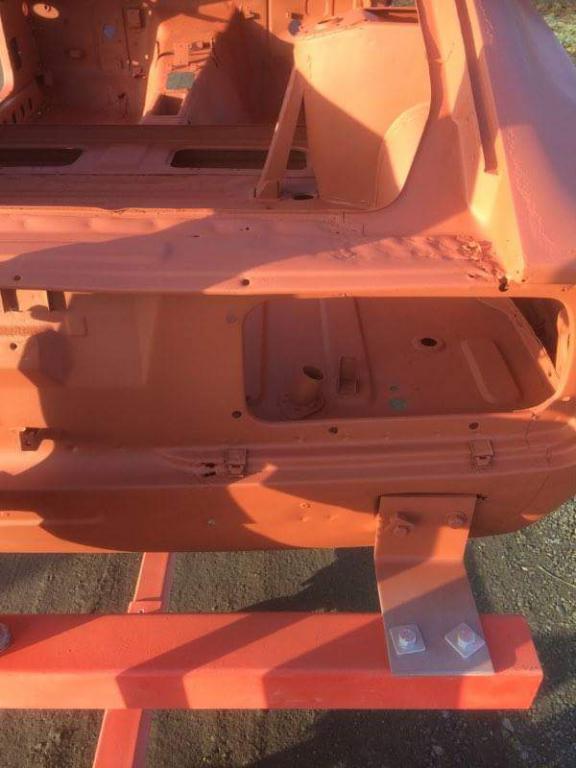
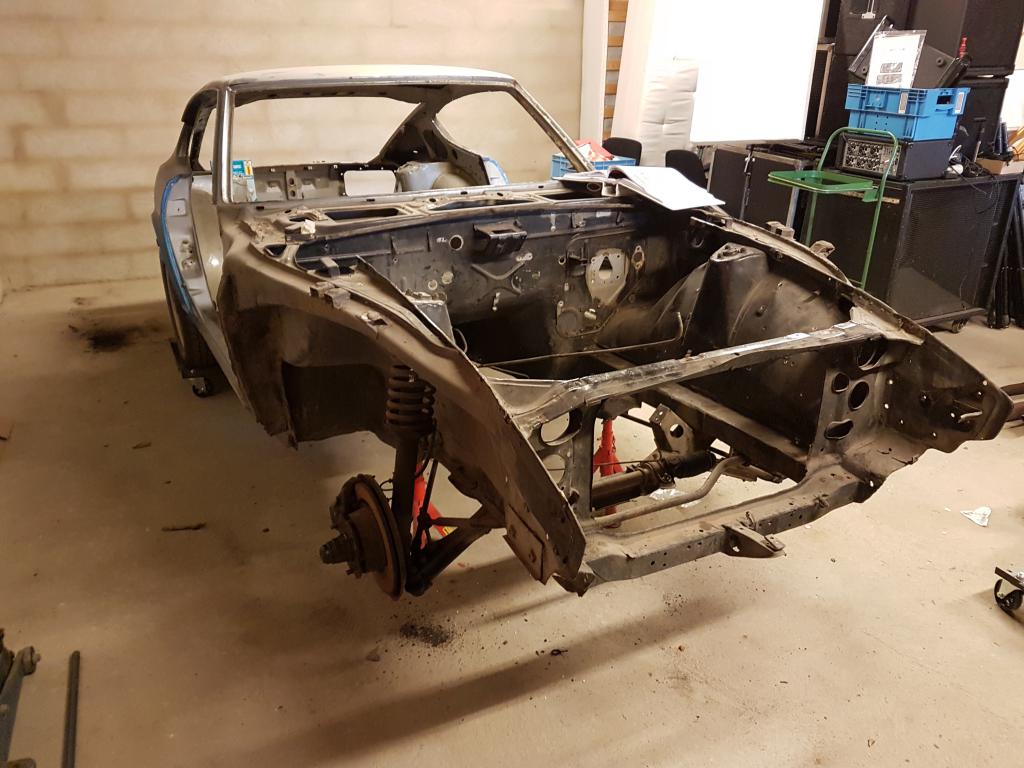
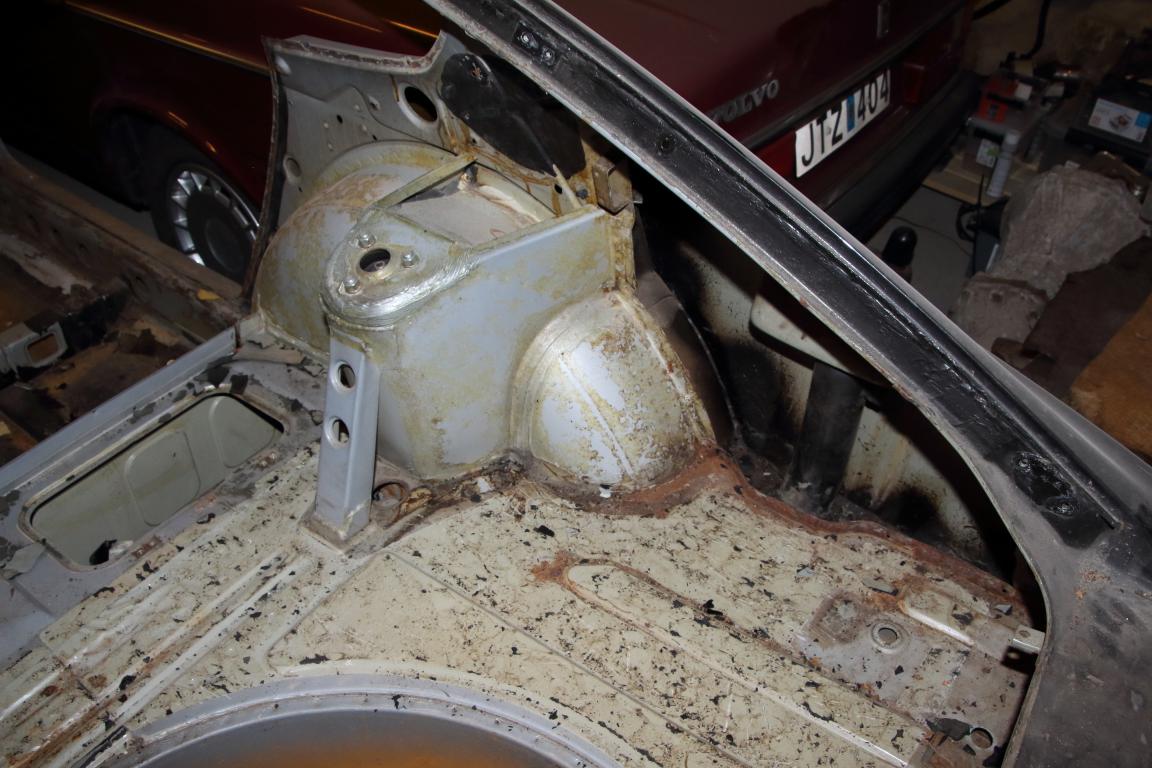
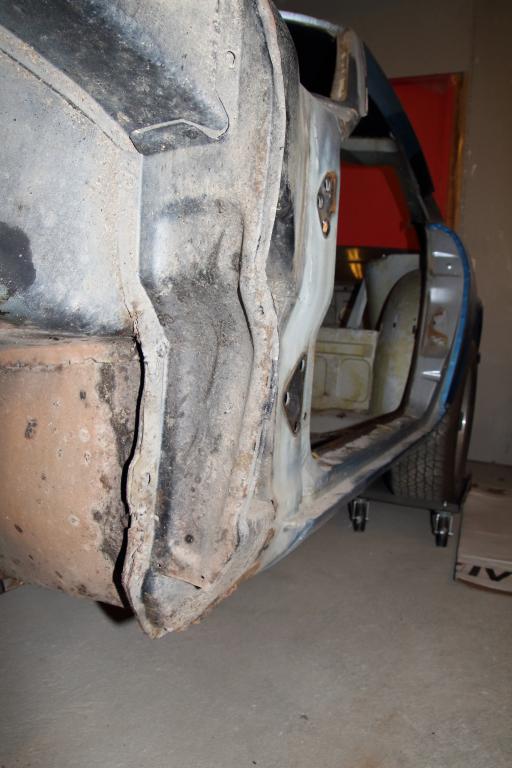
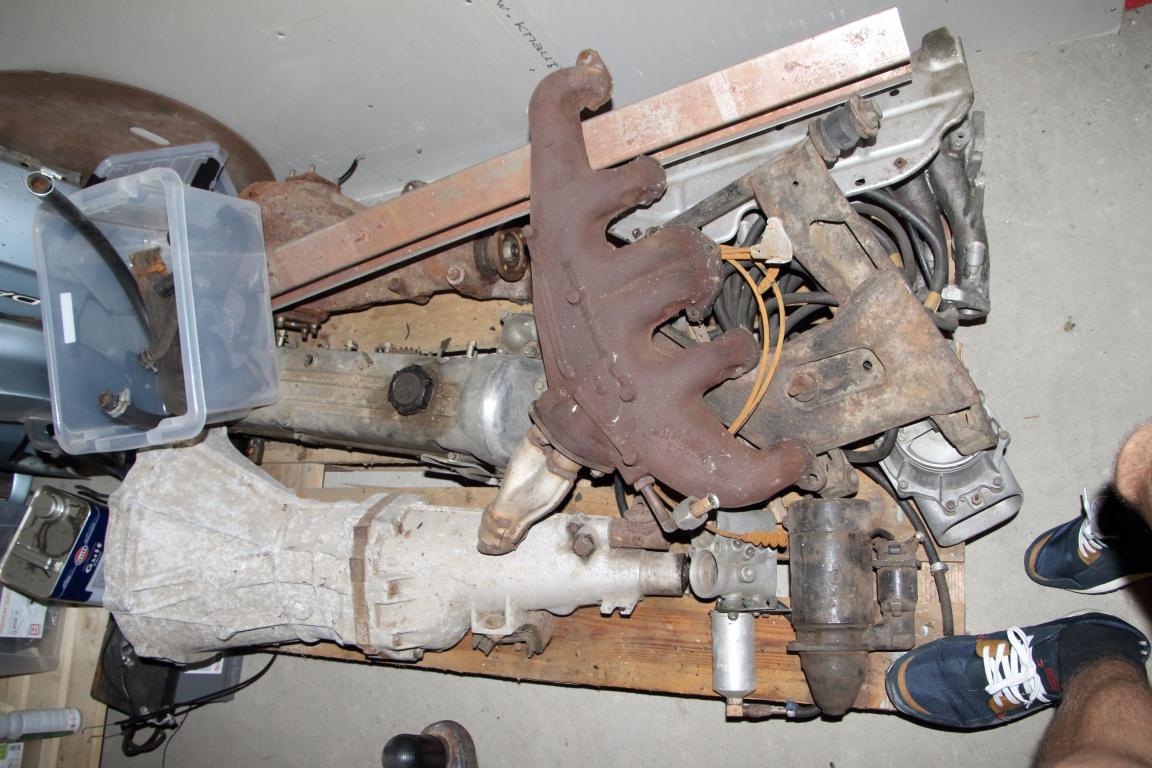
It has been a while... no real excuses more than waiting for the body to be completed. The car was recently taken off the table and put into the lift to fix the remaining structural items. This is mainly the rear of the floor and the floor supports with extensions back to the rear axle. Rockers + inner / outer wheel wells replaced + rear beaver panel (think that is what it is called). Same exercise on the right hand side. Rust had found its way into the quarters at the hatch close area (both sides). This was cut out and replaced. Floors have also been replaced extending up a bit on the foot well firewall - there were small rust damages, almost like Morse code, along the transition edge. I decided to replace the frame rails (completely shot) and the radiator support. Floor supports remain to be installed together with the frame rail reinforcements. The car had a or some front ding(s) at some point in its life - evident by the massaged areas on both right and left side shown earlier in the thread (sand blasting section). The right side was worse though, but decided to get the package to replace it all at once. In terms of body repairs and improvements the list is slowly coming to an end and the expectation is that the car is back in my garage early this summer. In the meantime I worked a bit on the engine and gearbox situation. I have two five speed gearboxes that came with the car. One has been in storage for a very long time and has damage at the end seal area towards the drive shaft. The one that was installed in the car cannot keep 5th gear and pops out under load (allegedly). Through some research I'm inclined to believe the bolt that holds the 5th gear in place has come loose (if someone has another idea let me know). Anyway, my plan is to install a 240SX gearbox in the car to get a bit more up to date equipment in this respect. I managed to source a used rather low mileage FS5W71C gearbox from a salvage yard - from my car I have 2 old FS5C/W71B gearboxes from which I can use the bell housing. I intend to follow the instruction posted by Steve Heimsoth on zhome.com. I also need to source a new early 240z driveshaft - anyone have a spare one laying around or know someone that does? Should be the early FS5C/W71A style driveshaft which is about 5cm shorter than the later FS5C/W71B gearboxes. FS5W71C as it arrived. After a bit of soda blasting. The 71B bell housing which will be machined to fit the 71C gearbox. That's it for now - it has been a dormant period now for quite some years. I'm hoping that I can pick up the pace as the car returns home.
-
Swedish Datsun 240z Restoration
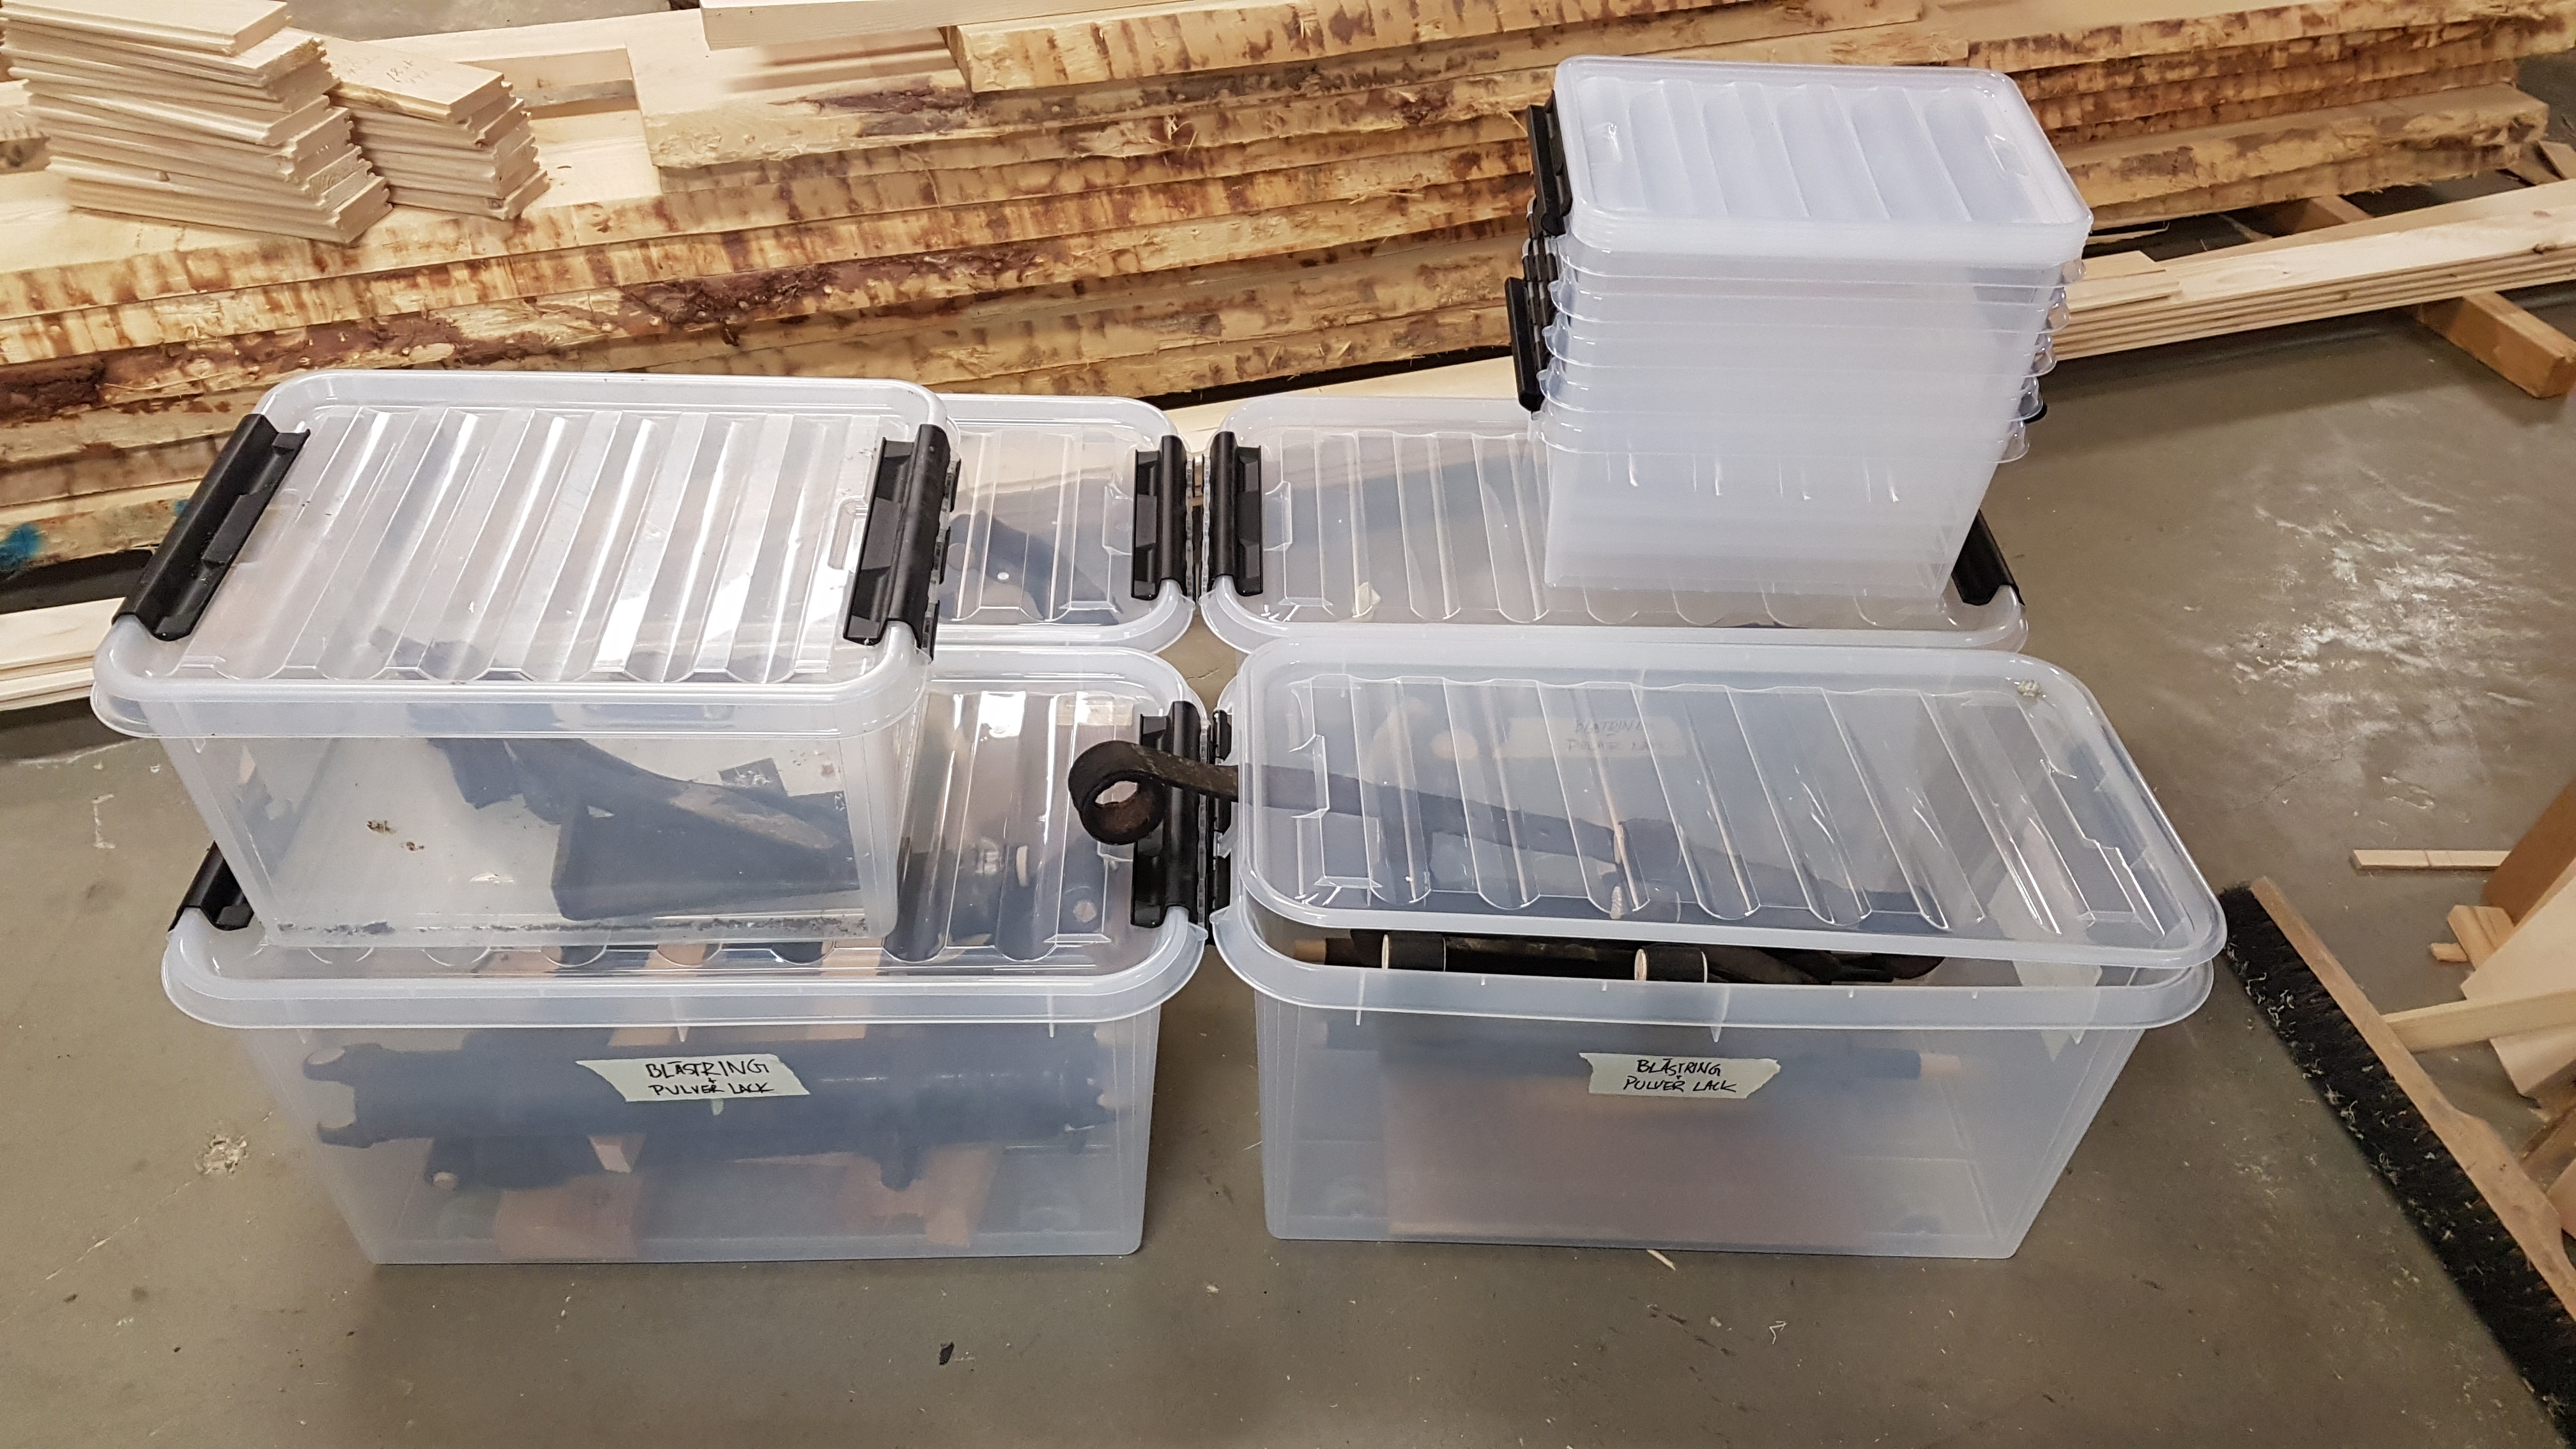
Tebirkesueth replied to Tebirkesueth's topic in S30 Series - 240z, 260z, 280z
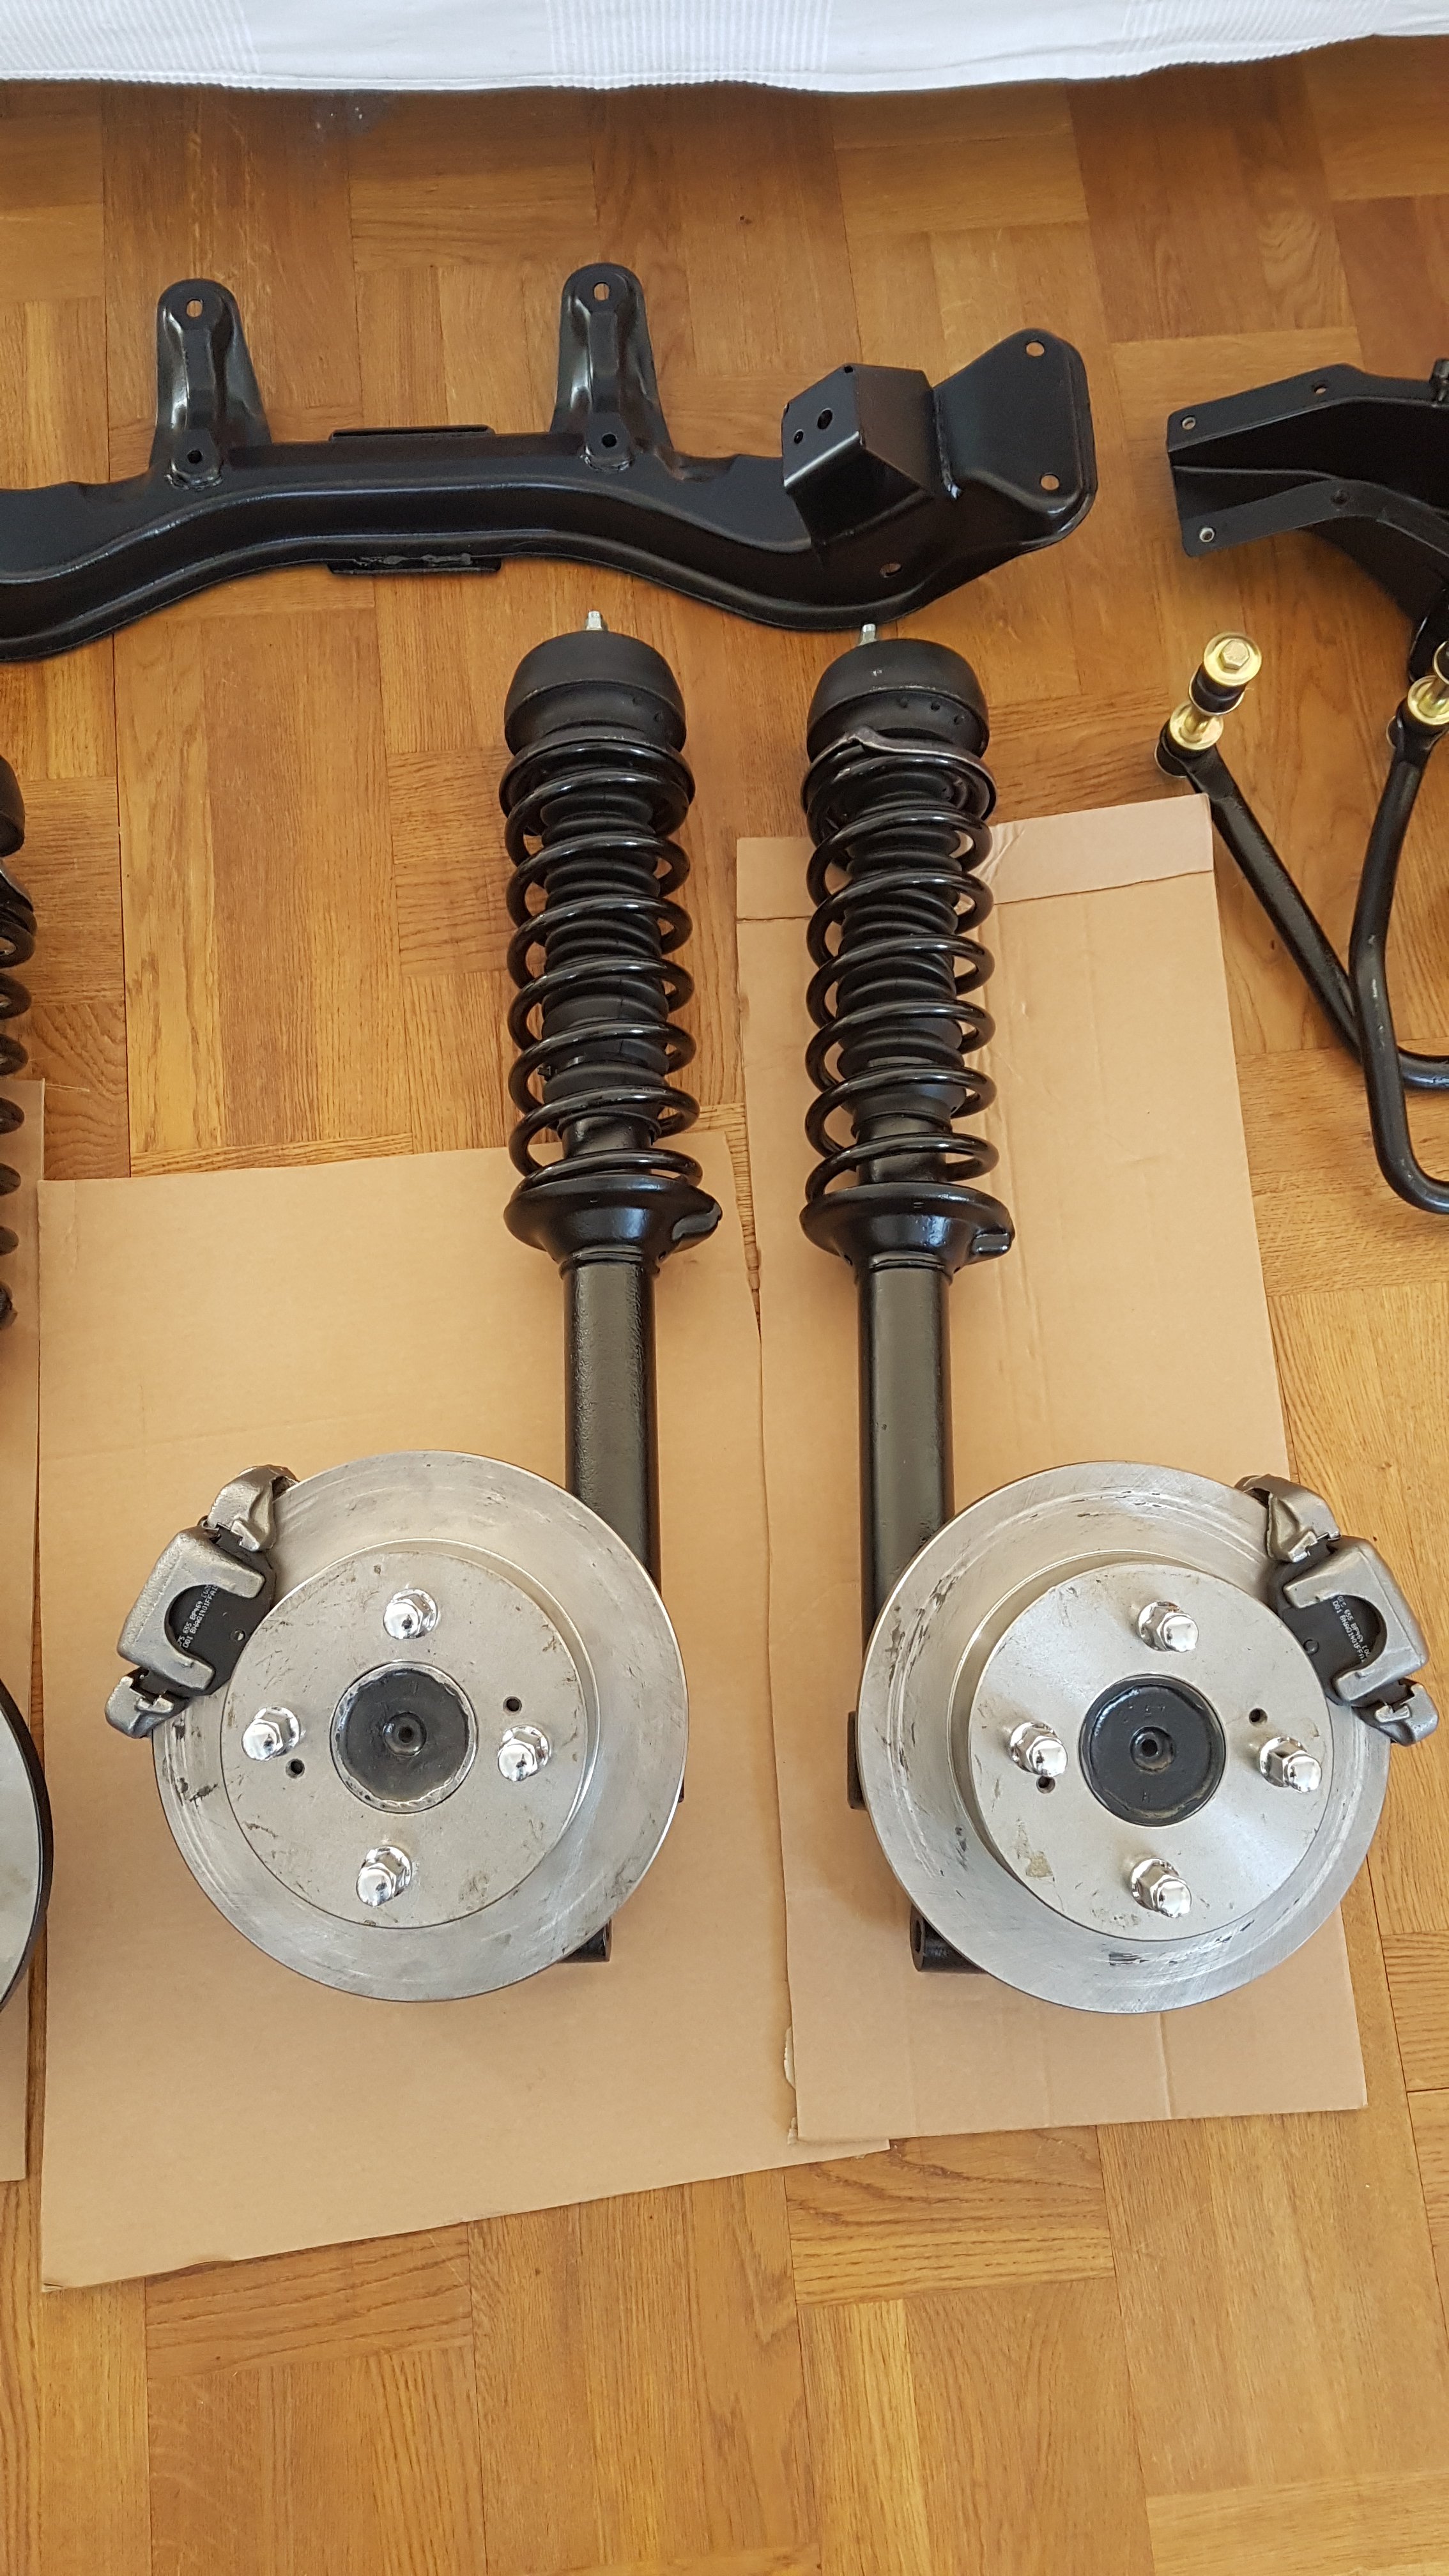
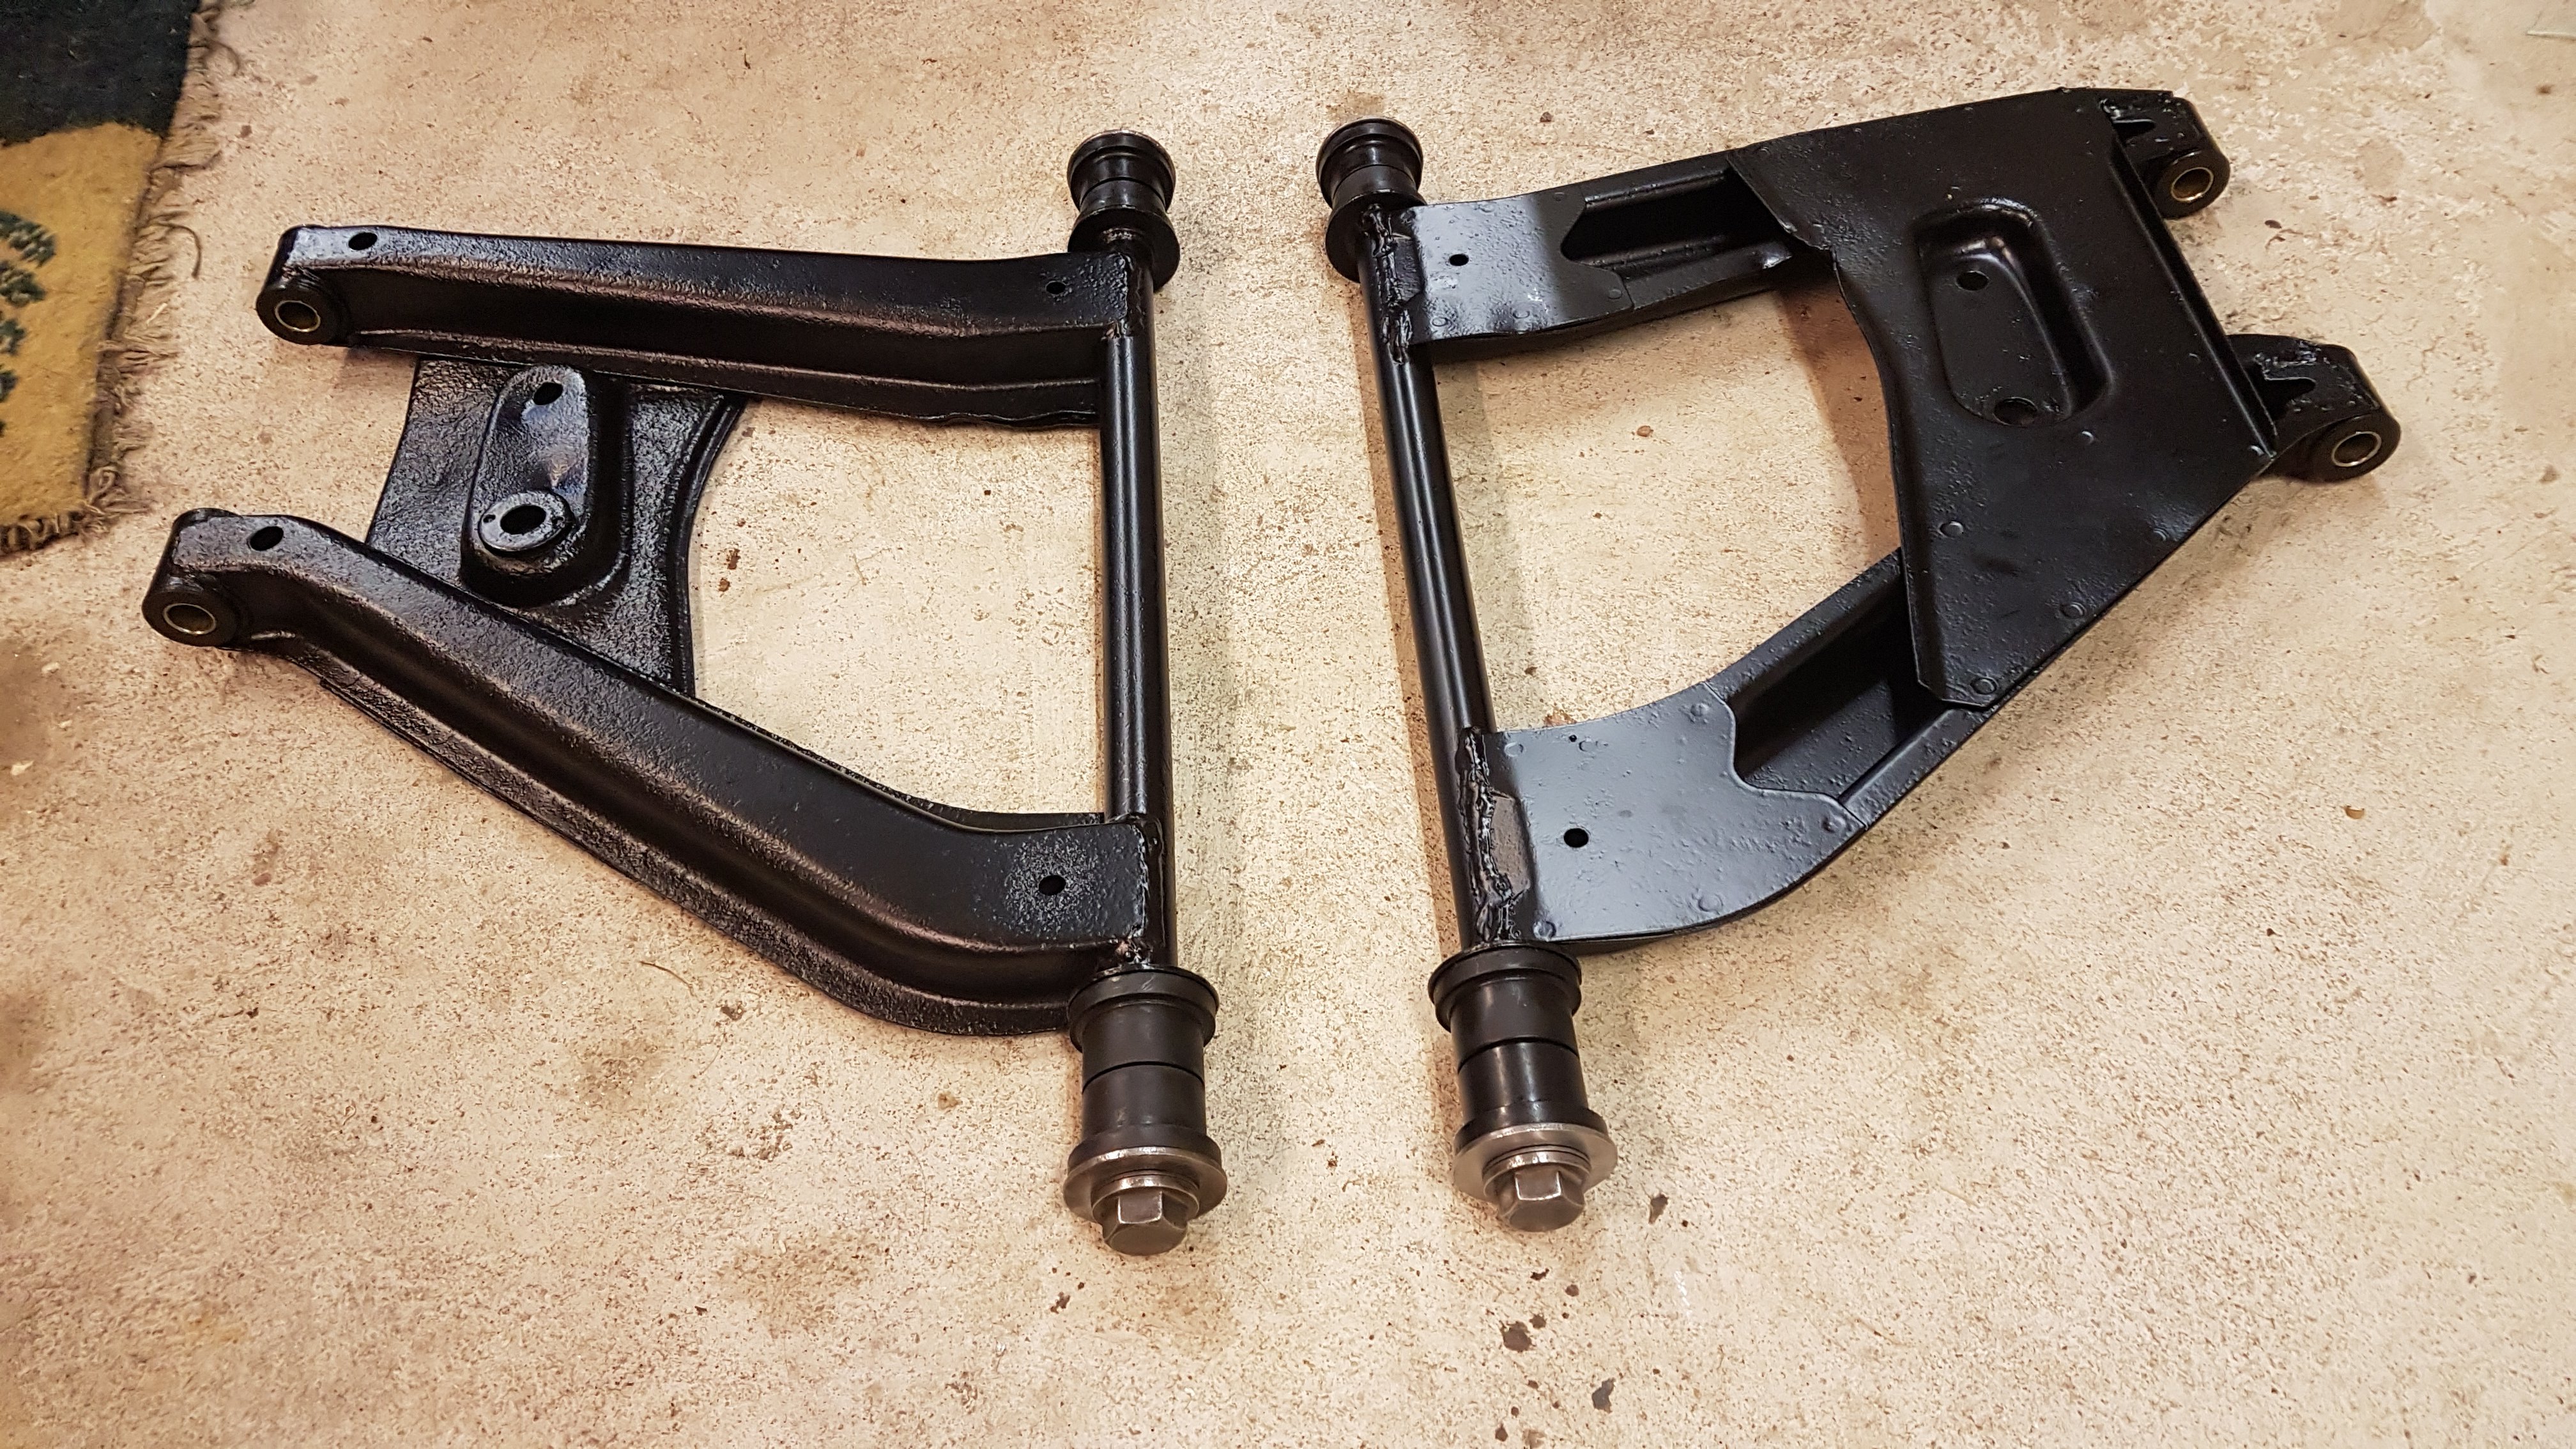
Hey guys, long time since my last activity (about a year in fact). The car body is still waiting for the needed weld repairs.. but things are slowly moving so hopefully it will be finished and ready for paint by summer. In the meantime I have worked on the undercarriage. In November 2017 I prepped the parts for sand-blasting and (at that time) powder coating. In the end the paint was changed to another type that was easier to arrange. Unfortunately I don't have a consolidated picture of the parts coming back, but you can get the idea from the assembled components. For those with eagle eyes the bump stops are indeed missing. Also the upper spring seats are unpainted as I forgot to send them with the rest of the things Oh well, guess a second batch was to be expected. Hopefully next update won't be in a year... ^^
-
240z FS5W71C swap using FS5C71B Bell Housing
Tebirkesueth replied to Tebirkesueth's topic in Drivetrain
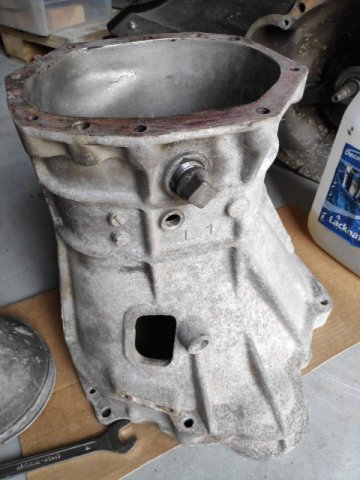
Thanks for the input NewZed, the FS5C71B has a combined bell housing and front gear case as well (courtesy JDM junkies). I have to confess that I'm not 100% certain I have an FS5C71B gearbox, but it makes the most sense as my car is the right year and market to have one...The value of a restored original gearbox is a good point. I actually have two gearboxes with the same housing (at very similar).. so I plan to keep one original and restore it for future use. After looking around in my picture archive this is the best comparison I can find in terms of the housings; FS5W71B housing from http://zhome.com/ZCMnL/tech/240SX5spd/transmission3.htm My gearbox as taken out of the car... looks promising at least. I might pick-up the FS5W71C gearbox anyway as I can get my hands on it quite cheap. Thanks for the input!
-
Hello all, I'm pondering doing a gearbox upgrade as I have everything out of the car for my restomod and my 5-speed gearbox is "missing" 5th gear. The car is a 73 240z Europe edition and I believe I have the FS5C71B gearbox mounted in the car. Searching around I found recommendations of the FS5W71C swap from the 180SX, 200SX, and 240SX. I can find plenty of rather low mileage FS5W71C gearboxes for sale so that is not a problem. I read the following guide http://zhome.com/ZCMnL/tech/240SX5spd/transmission.htm and it is highlighted that you need the FS5W71B bell housing. Question is -> Has anyone had any experience using the FS5C71B bell housing for this swap rather than the FS5W71B? Cheers, Erik
-
I have been looking at the Kemppi MinarcMig 200. Have heard good things about Kemppi in general, perhaps that suits your needs? https://www.premierwelding.com/kemppi-minarcmig-evo-200-package?gclid=EAIaIQobChMI0-LntoPs1gIV1RobCh1GzgIBEAQYAiABEgJ-G_D_BwE
-
Swedish Datsun 240z Restoration
Tebirkesueth replied to Tebirkesueth's topic in S30 Series - 240z, 260z, 280z
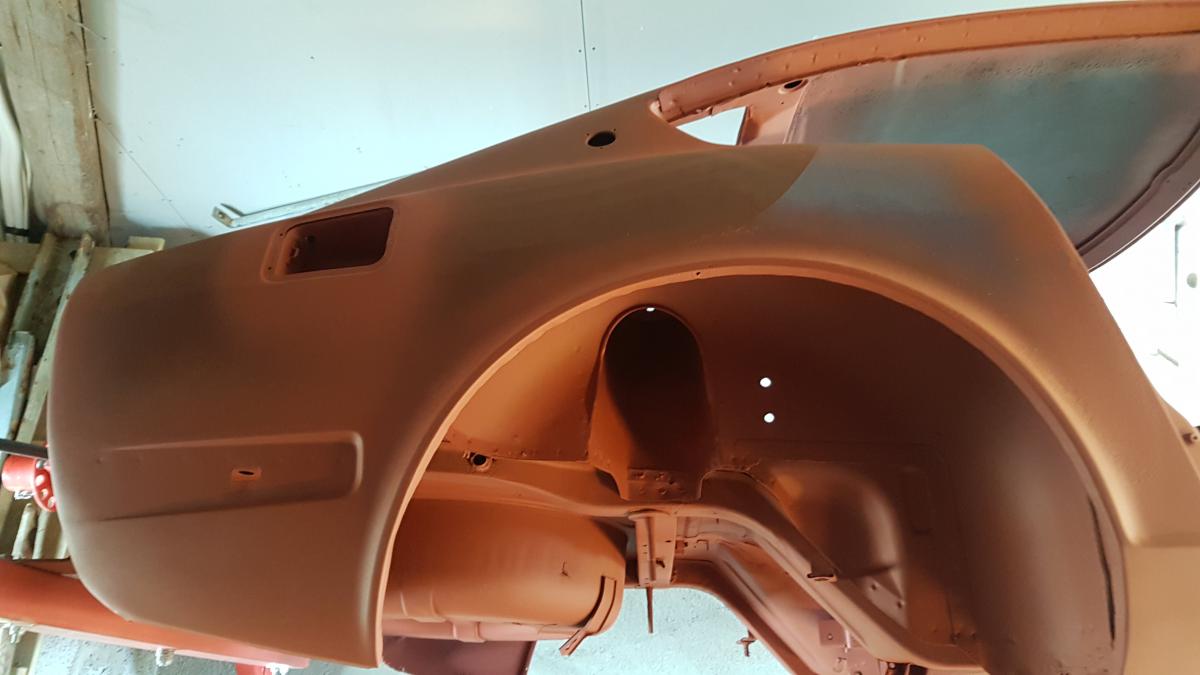
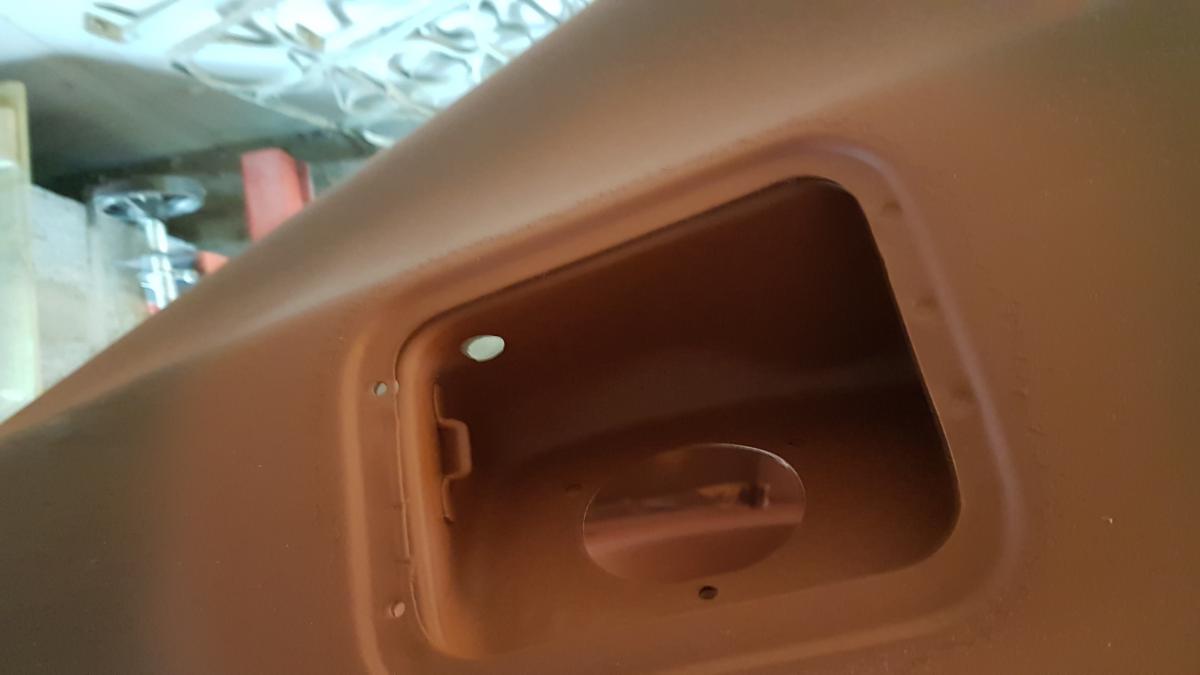
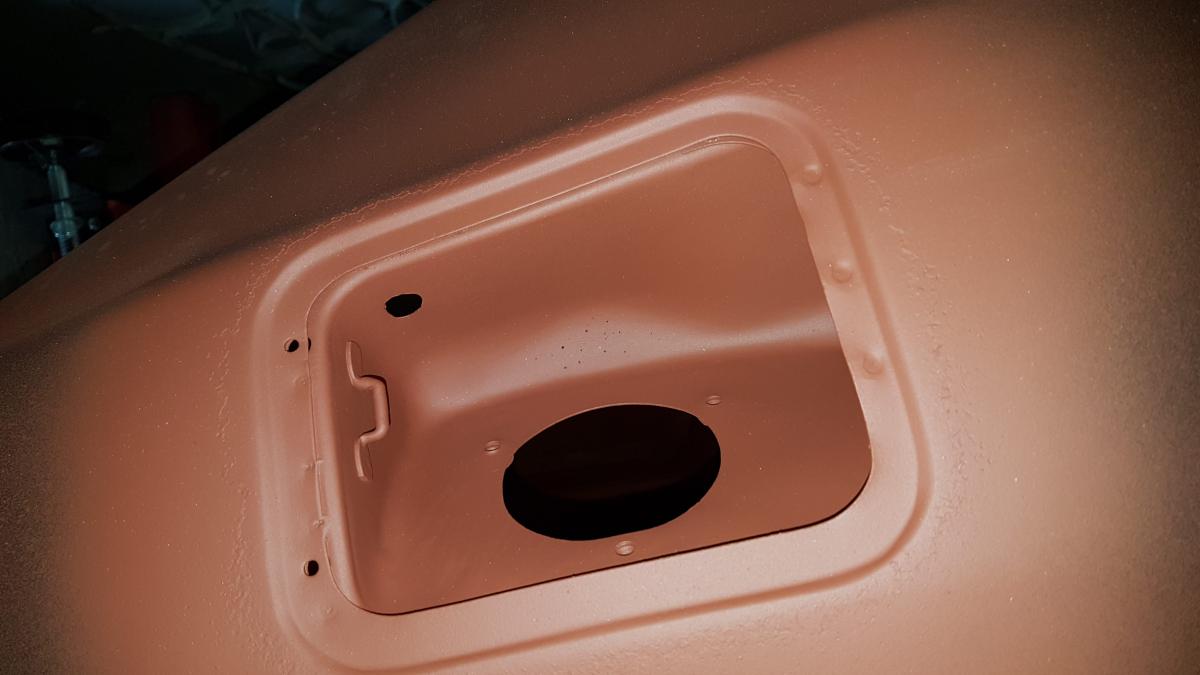
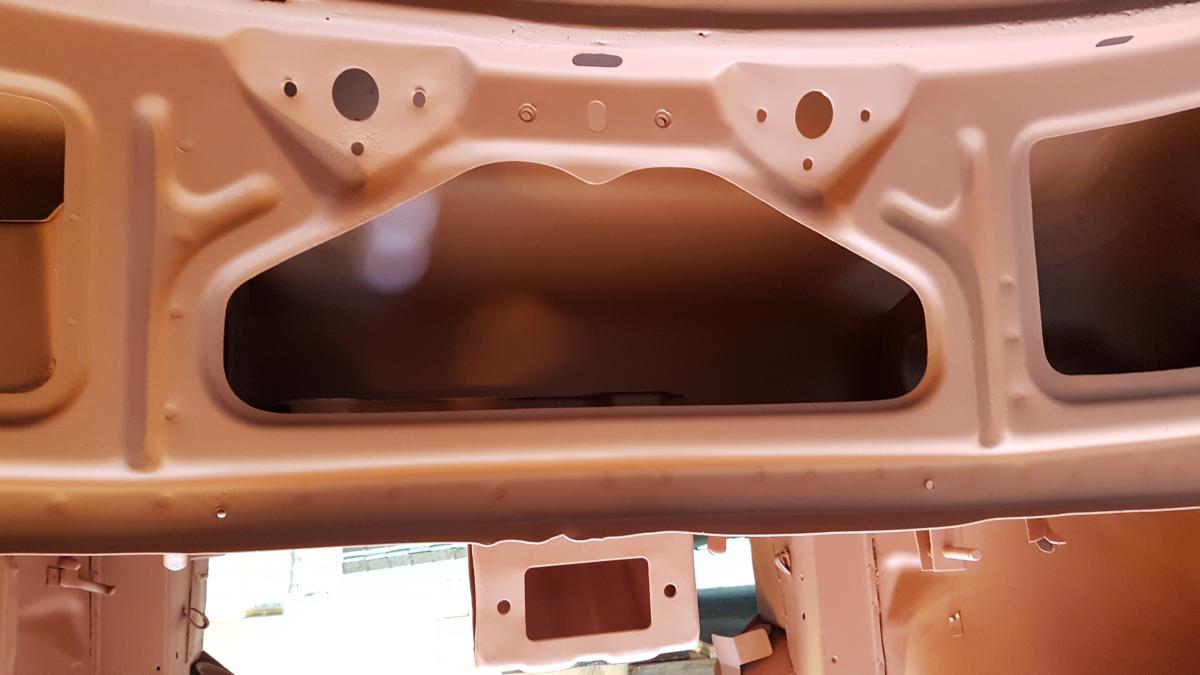
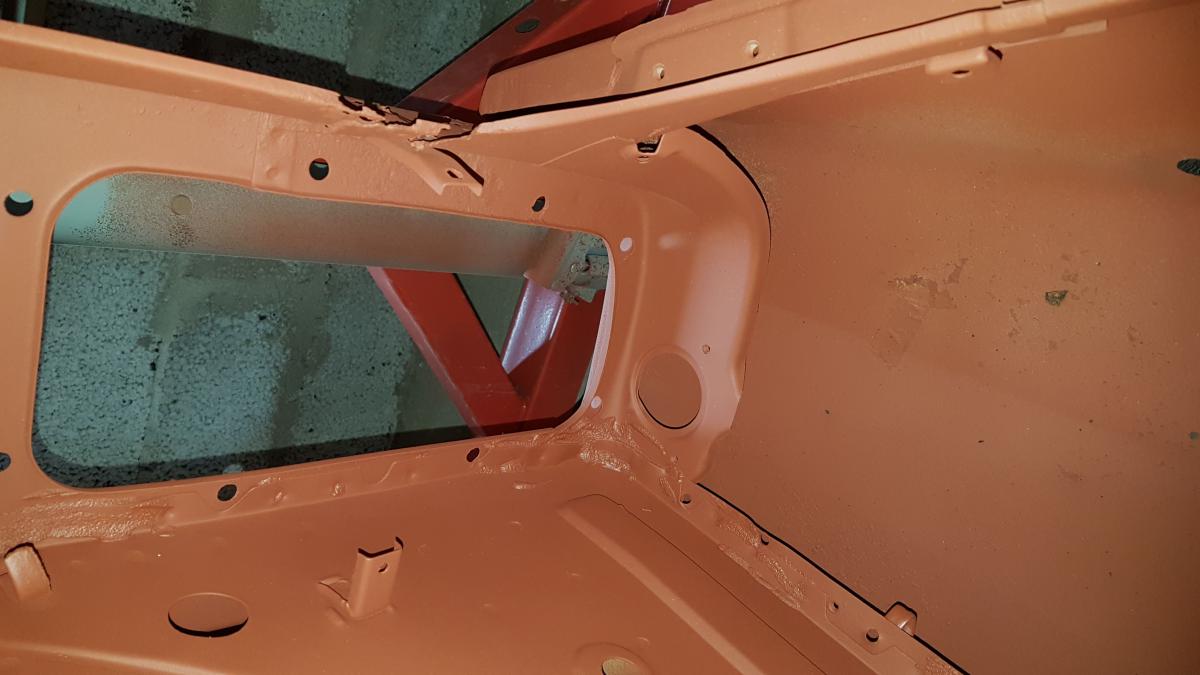
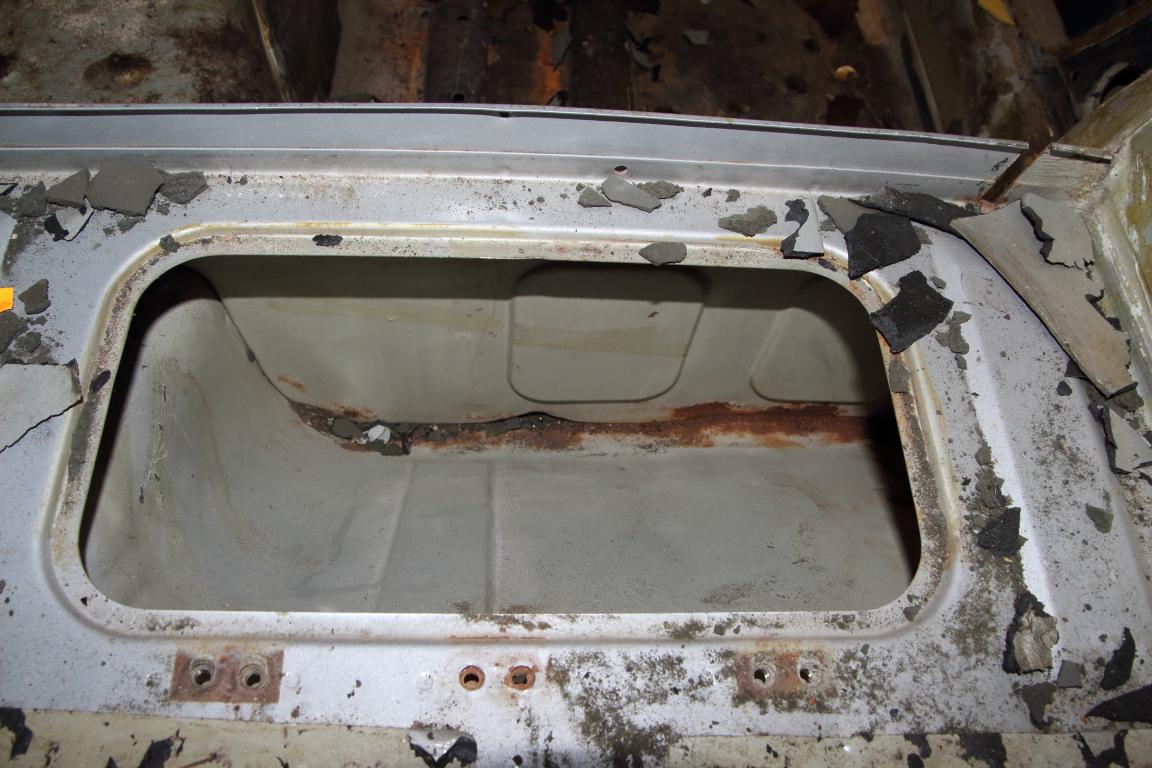
Thanks guys, I think I'll have a go at welding it once it comes back. In the meantime I have been looking at replacement panels and I found a number of sources. Question number 1; Quality - I managed to find some threads about TABCO and their pieces and the quality seems to be comme si comme ca requiring a bit of massaging (granted it seems expected). Up to now I didn't find any threads about ZCD's panels, anyone have experience with them? I found some panels there which are reasonably priced. Question number 2; As many have seen the blasting revealed quite some rust and bad patches from my Z's previous life. There is some rust in the inner rear wheel wells and I would like to try and source these new. When looking at the car it seems it consists of one inner and one outer part (see picture). From TABCO I can source the outer wheel well housing (at least named to be); https://tabcoparts.com/cars/datsun/240z-260z-280z-1970-1978/16753.html From ZCD I can source the inner wheel well housing (at least named to be); https://zcardepot.com/exterior/sheet-metal/rear-wheel-well-inner-fender-sheetmetal-right-240z-280z.html Anyone got experience if these two are indeed the two separate pieces or just different naming of the same part? Cheers, Erik
-
Swedish Datsun 240z Restoration
Tebirkesueth replied to Tebirkesueth's topic in S30 Series - 240z, 260z, 280z
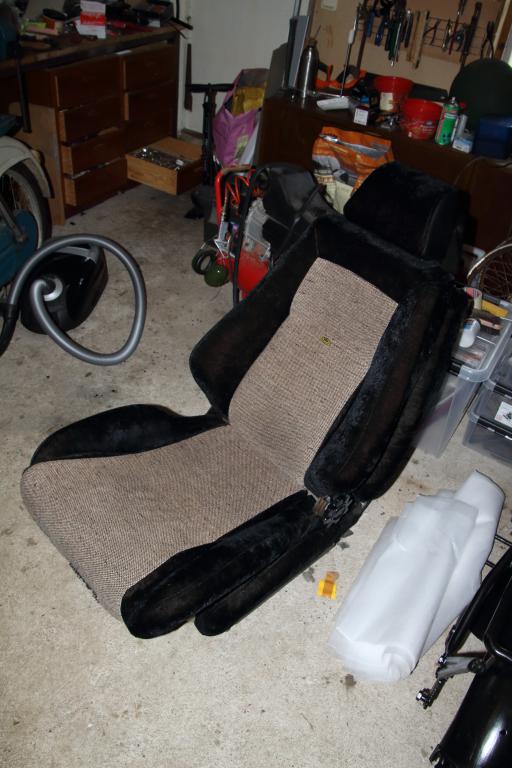
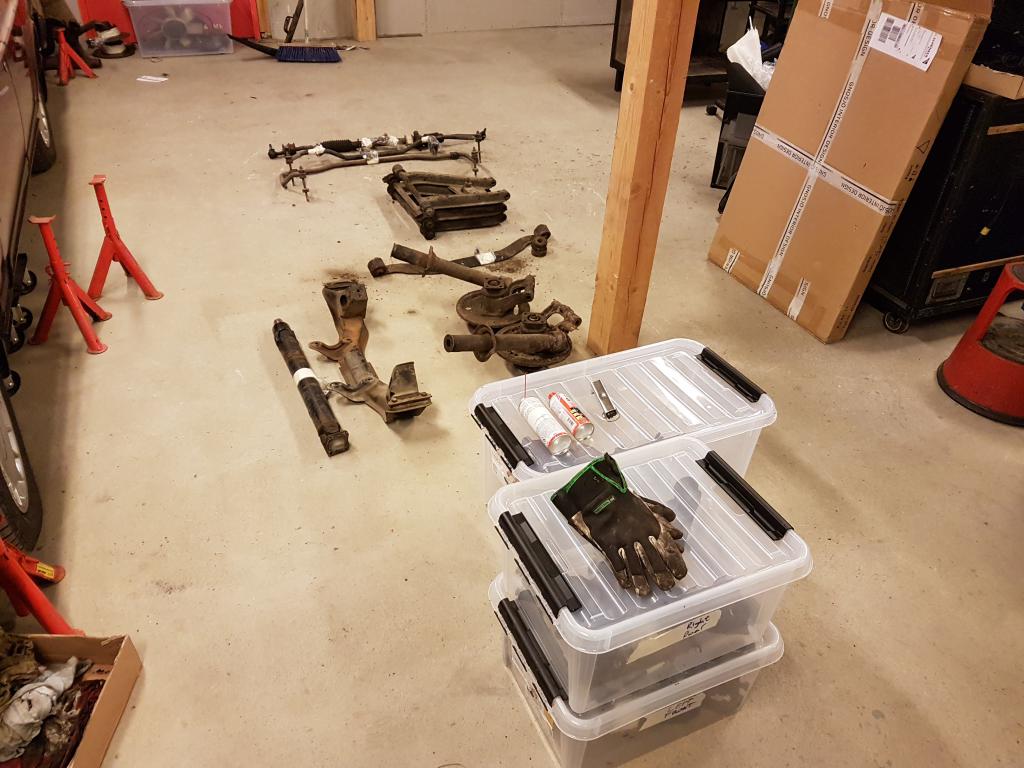
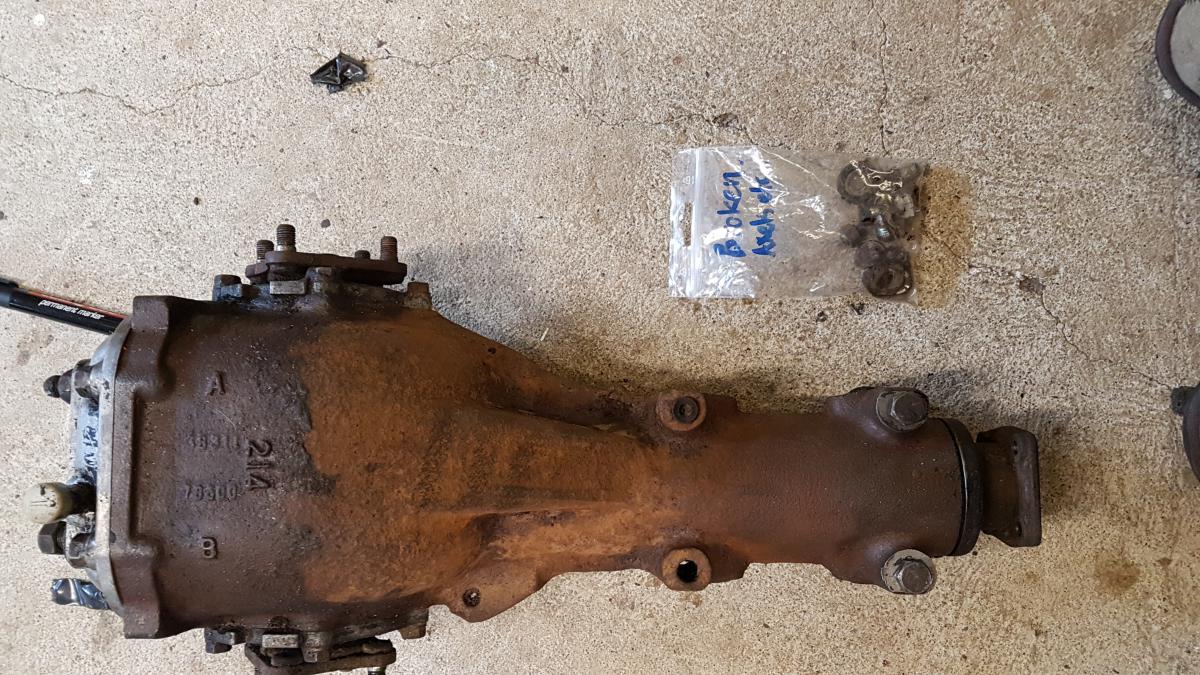
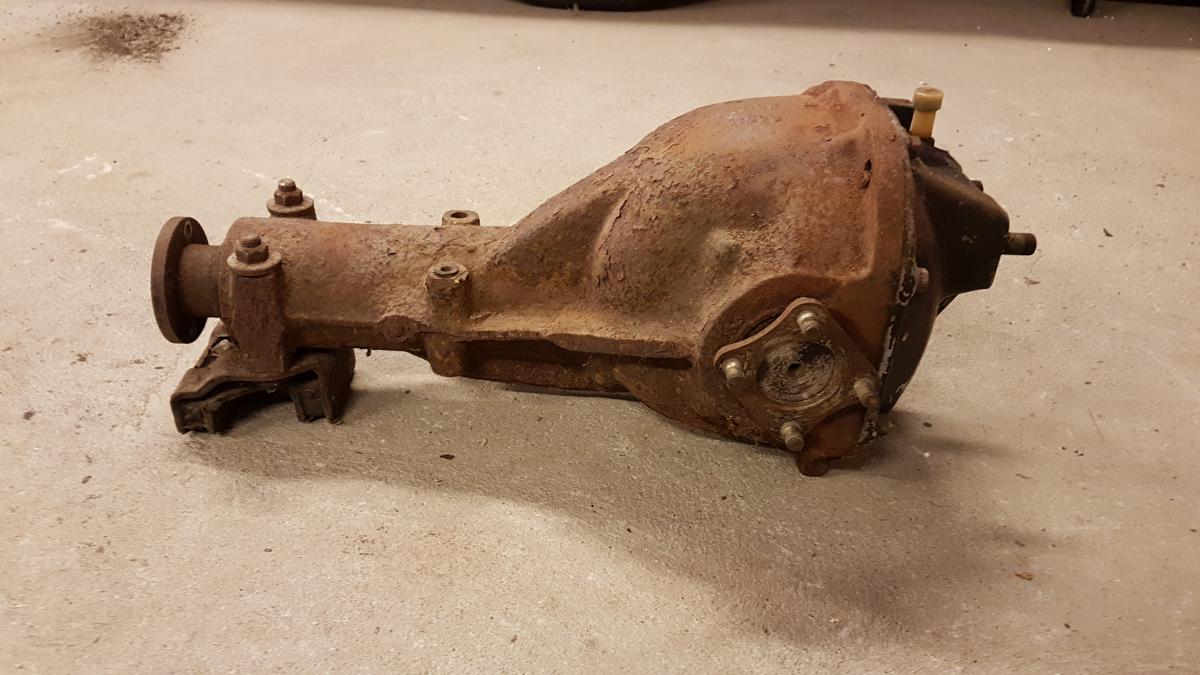
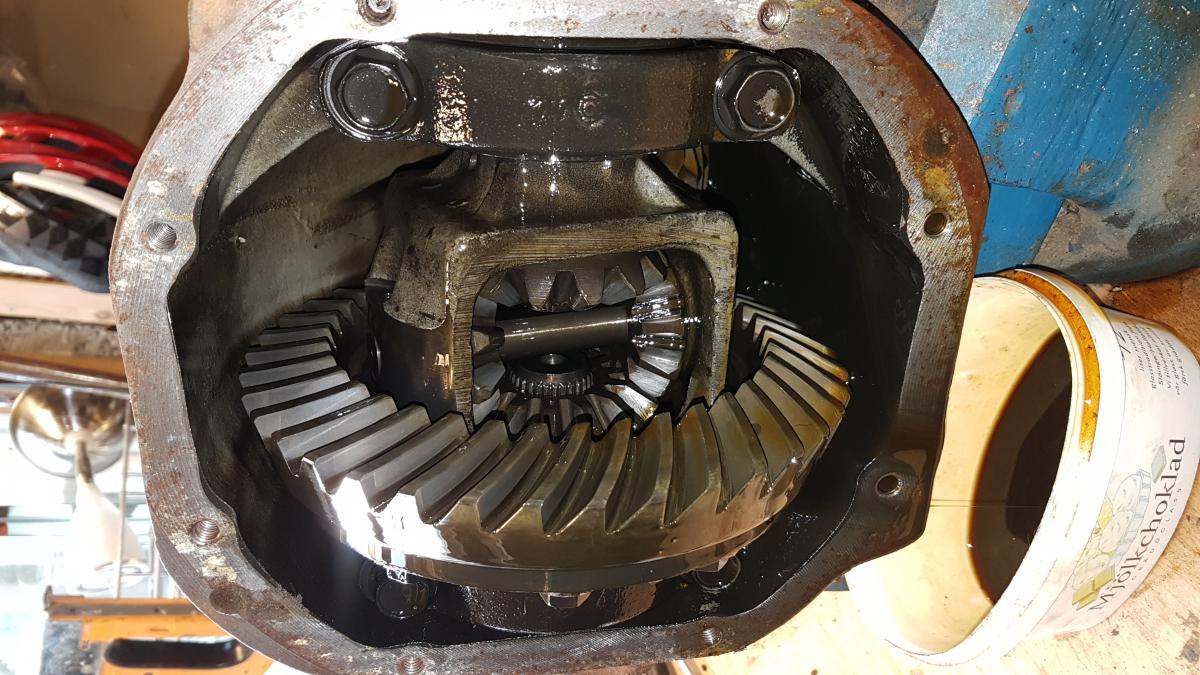
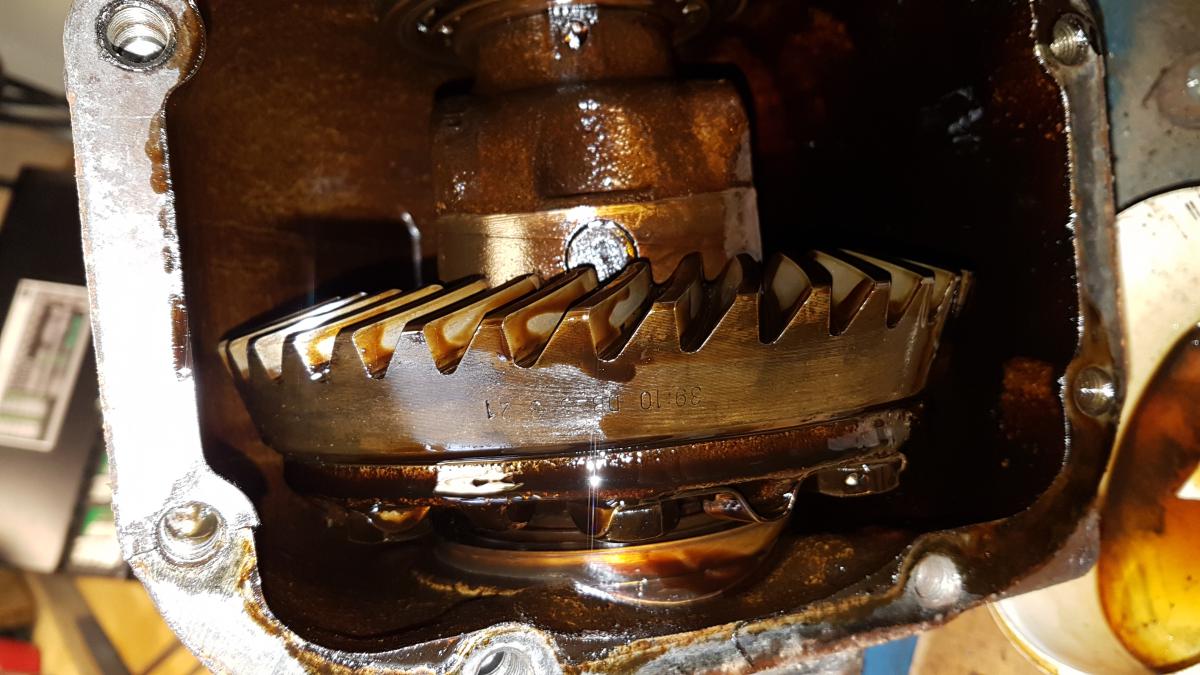
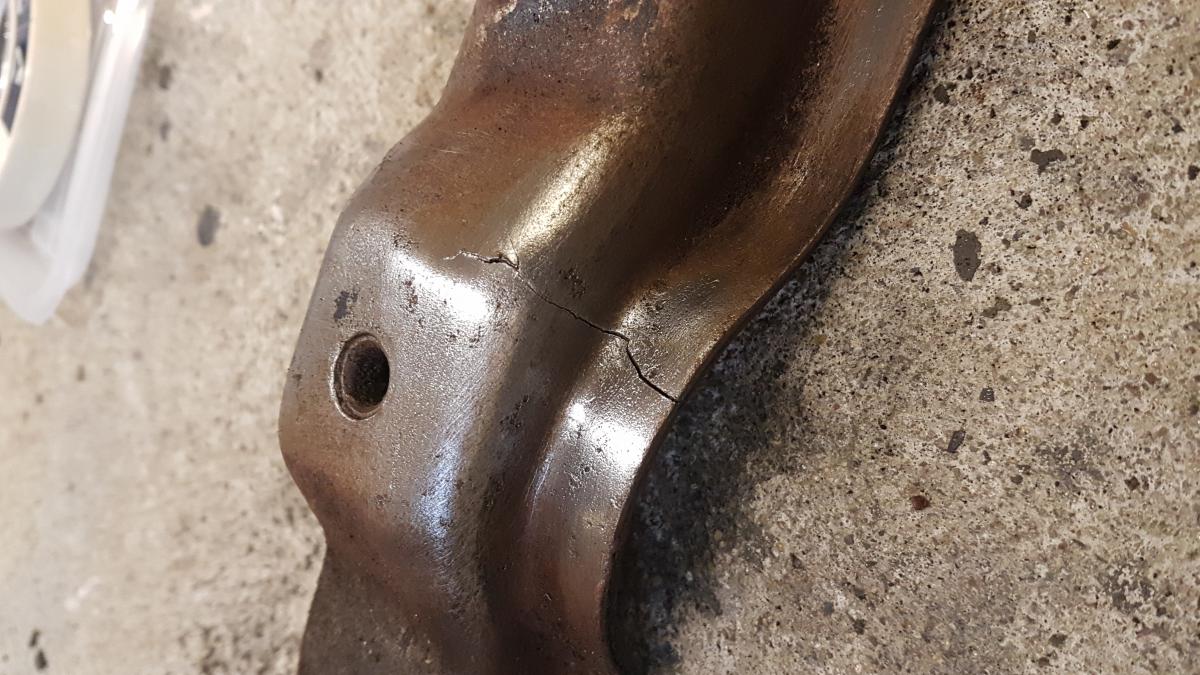
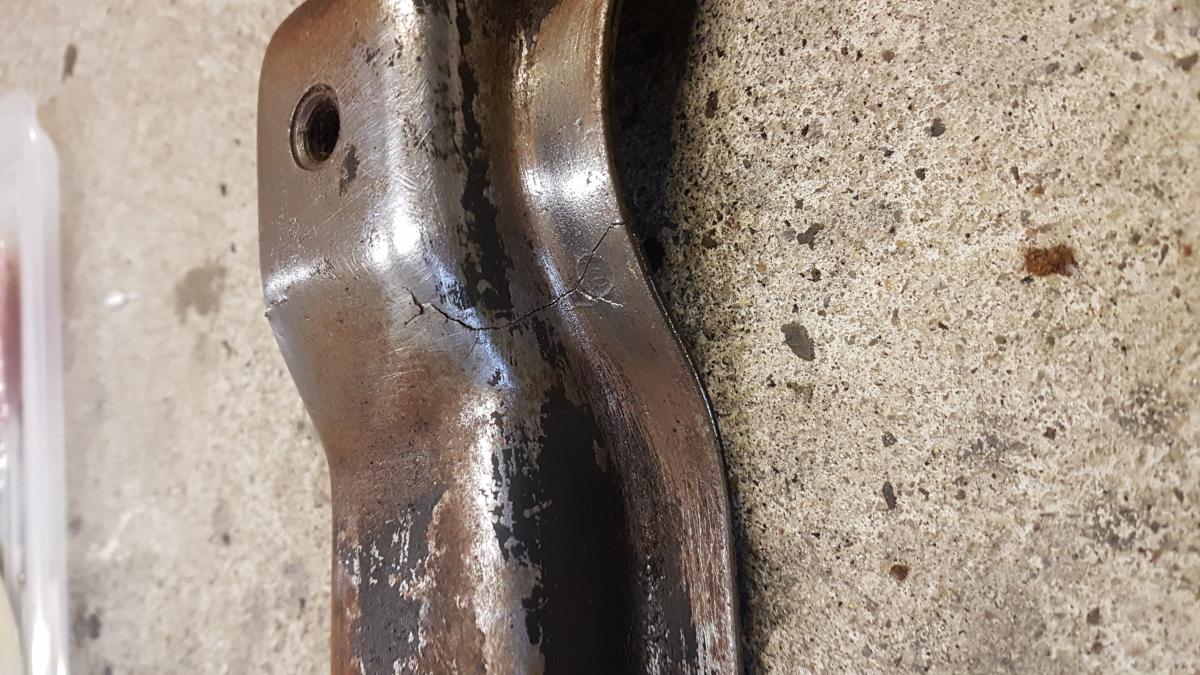
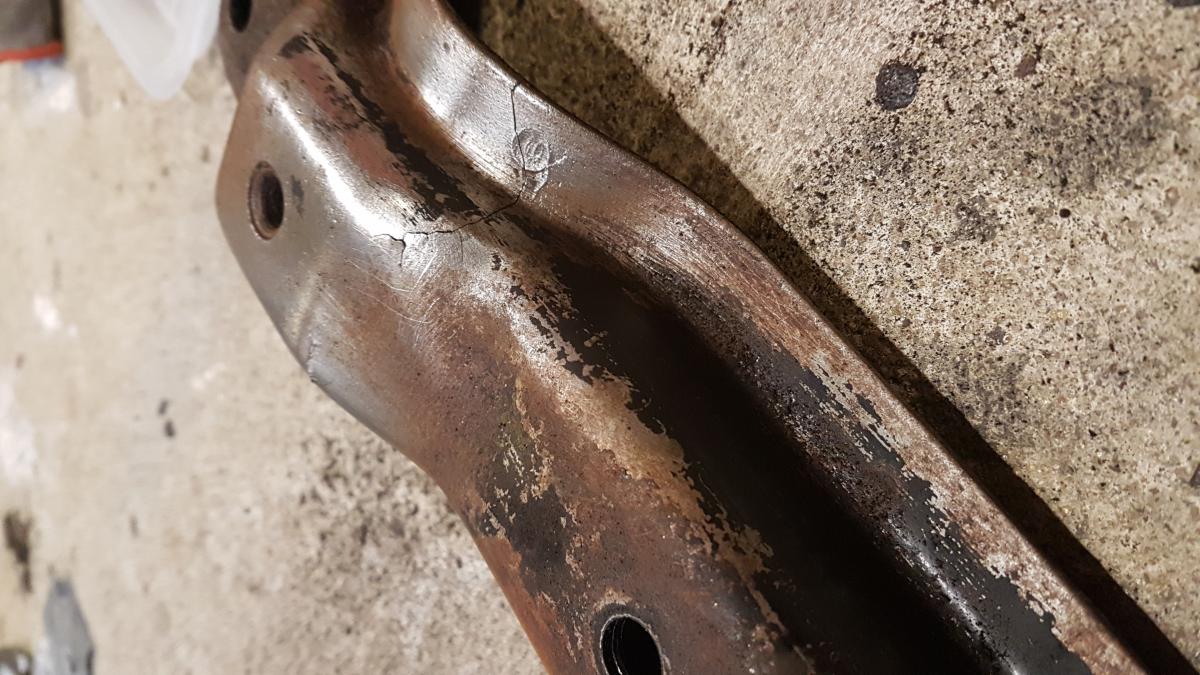
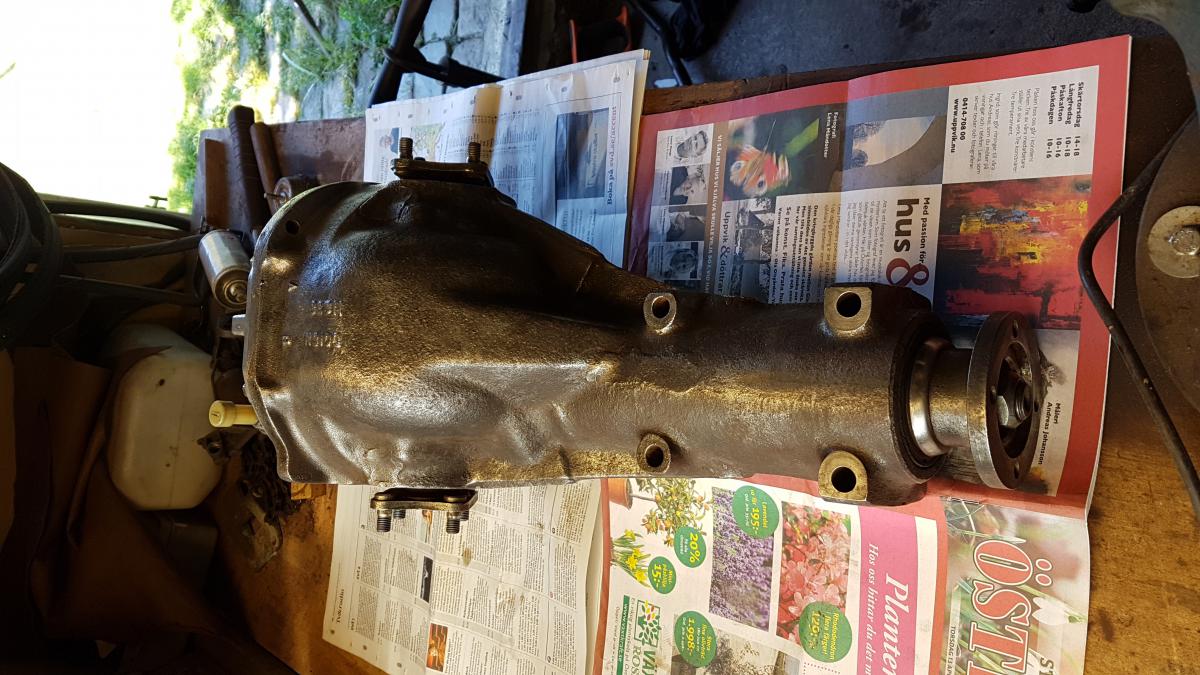
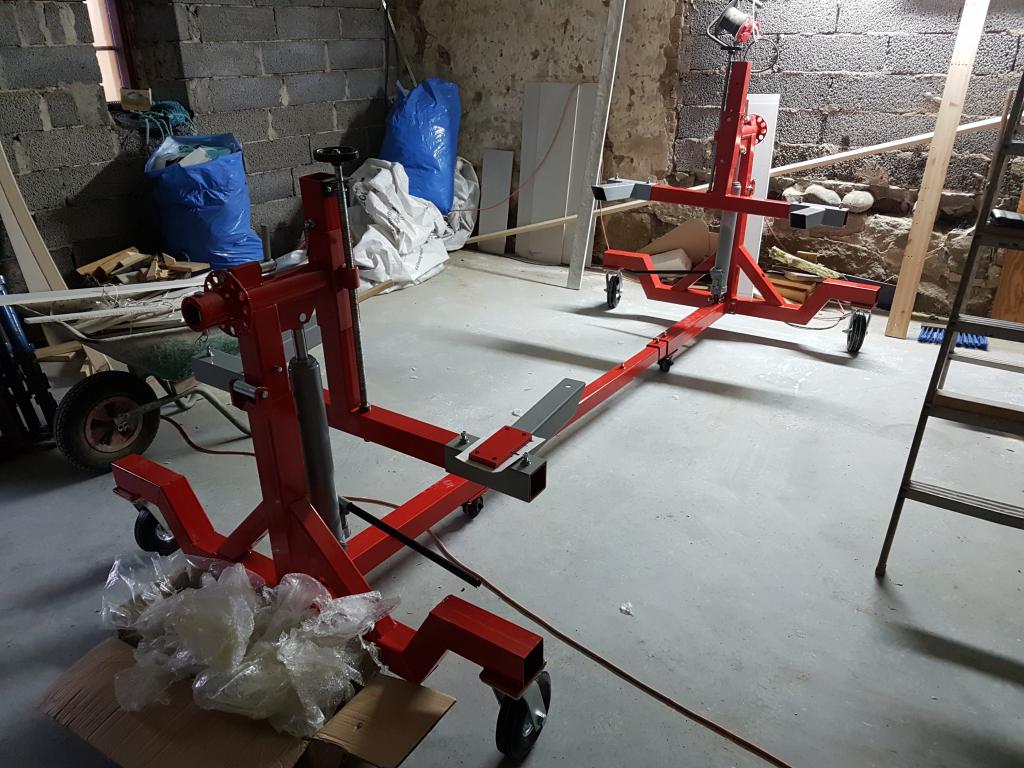
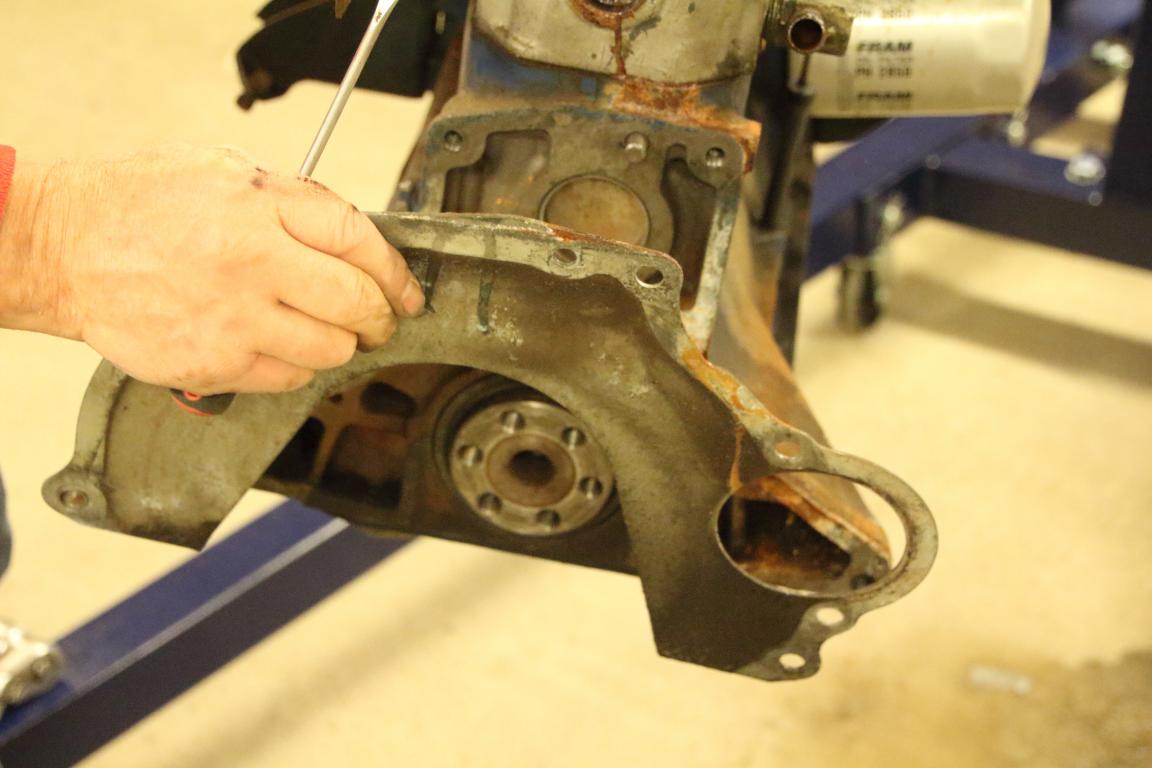
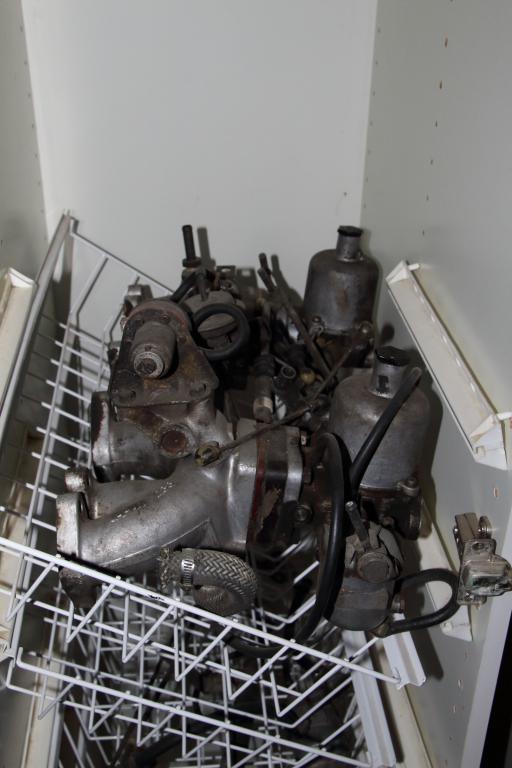
So... Another session of holiday and car tinkering is almost over.. Oh well, I tried to be productive. I've been trying to sort out someone willing to do the body metal repair work, but the availability in South of Sweden seems to be very scarce! Best offer I got so far is to start working on the car earliest this Autumn. Worst case I'll have to extend the search a bit farther, but I'd like to keep it close buy and with people known in the area. Luckily I can spend the time sorting out other stuff not directly related to the body. To be productive I decided to work a bit on the seating solution. In the end I have chosen to keep the Cobra seats (Paddy Hopkirk) that came with the car rather than buying new seats. Probably I would come off a bit cheaper buying new ones, but I really like the idea of having them specially made buy the local guy in Town. He has pretty free reins but will take inspiration from the original seats. Quite excited to see what he comes up with! In addition I worked on collecting and prepping all items that I want going to blasting and powder coat. I've broken down all of it to its basic Components and sealed off any sensitive areas like e.g. the bearing housings in the struts. Hopefully it can go out to the shop within a few weeks. This is the latest Picture I have, but since this was taken everything has been further stripped down. Found the front differential mount is cracked in the one of the plates.. Not sure if it was hit somehow because it looks like it has got a dent close to the source of the crack. Is this weld repair worthy, or a must scrap and replace? I was pondering whether to send the complete differential for blasting and powder coat as well. In the end I decided against it due to risk of sand entering the seals. I'm also not keen on breaking the diff into pieces and I'd rather have it assembled as I don't think there is any issues with it. Instead I went at it with a wire Wheel and a can of paint. With the car I got two differentials, one R180 installed and a loose R200. I had no idea what the ratios were so Before choosing which diff to use in the car I opened them up. - R180 - R200 - R180 - 3.9 - R200 - 3.54 Plan is to go with the R200 as I like the aspect of reducing crusing rpm slightly. Previous owner stated the RPM at 90 km/h is 3000 which he thought was a bit too high (I have a euro spec 5 speed) and I tend to agree with him. After a few hours of wire wheel work it went from this to this After first coat of paint (hammerite). Until next time.
-
Swedish Datsun 240z Restoration
Tebirkesueth replied to Tebirkesueth's topic in S30 Series - 240z, 260z, 280z
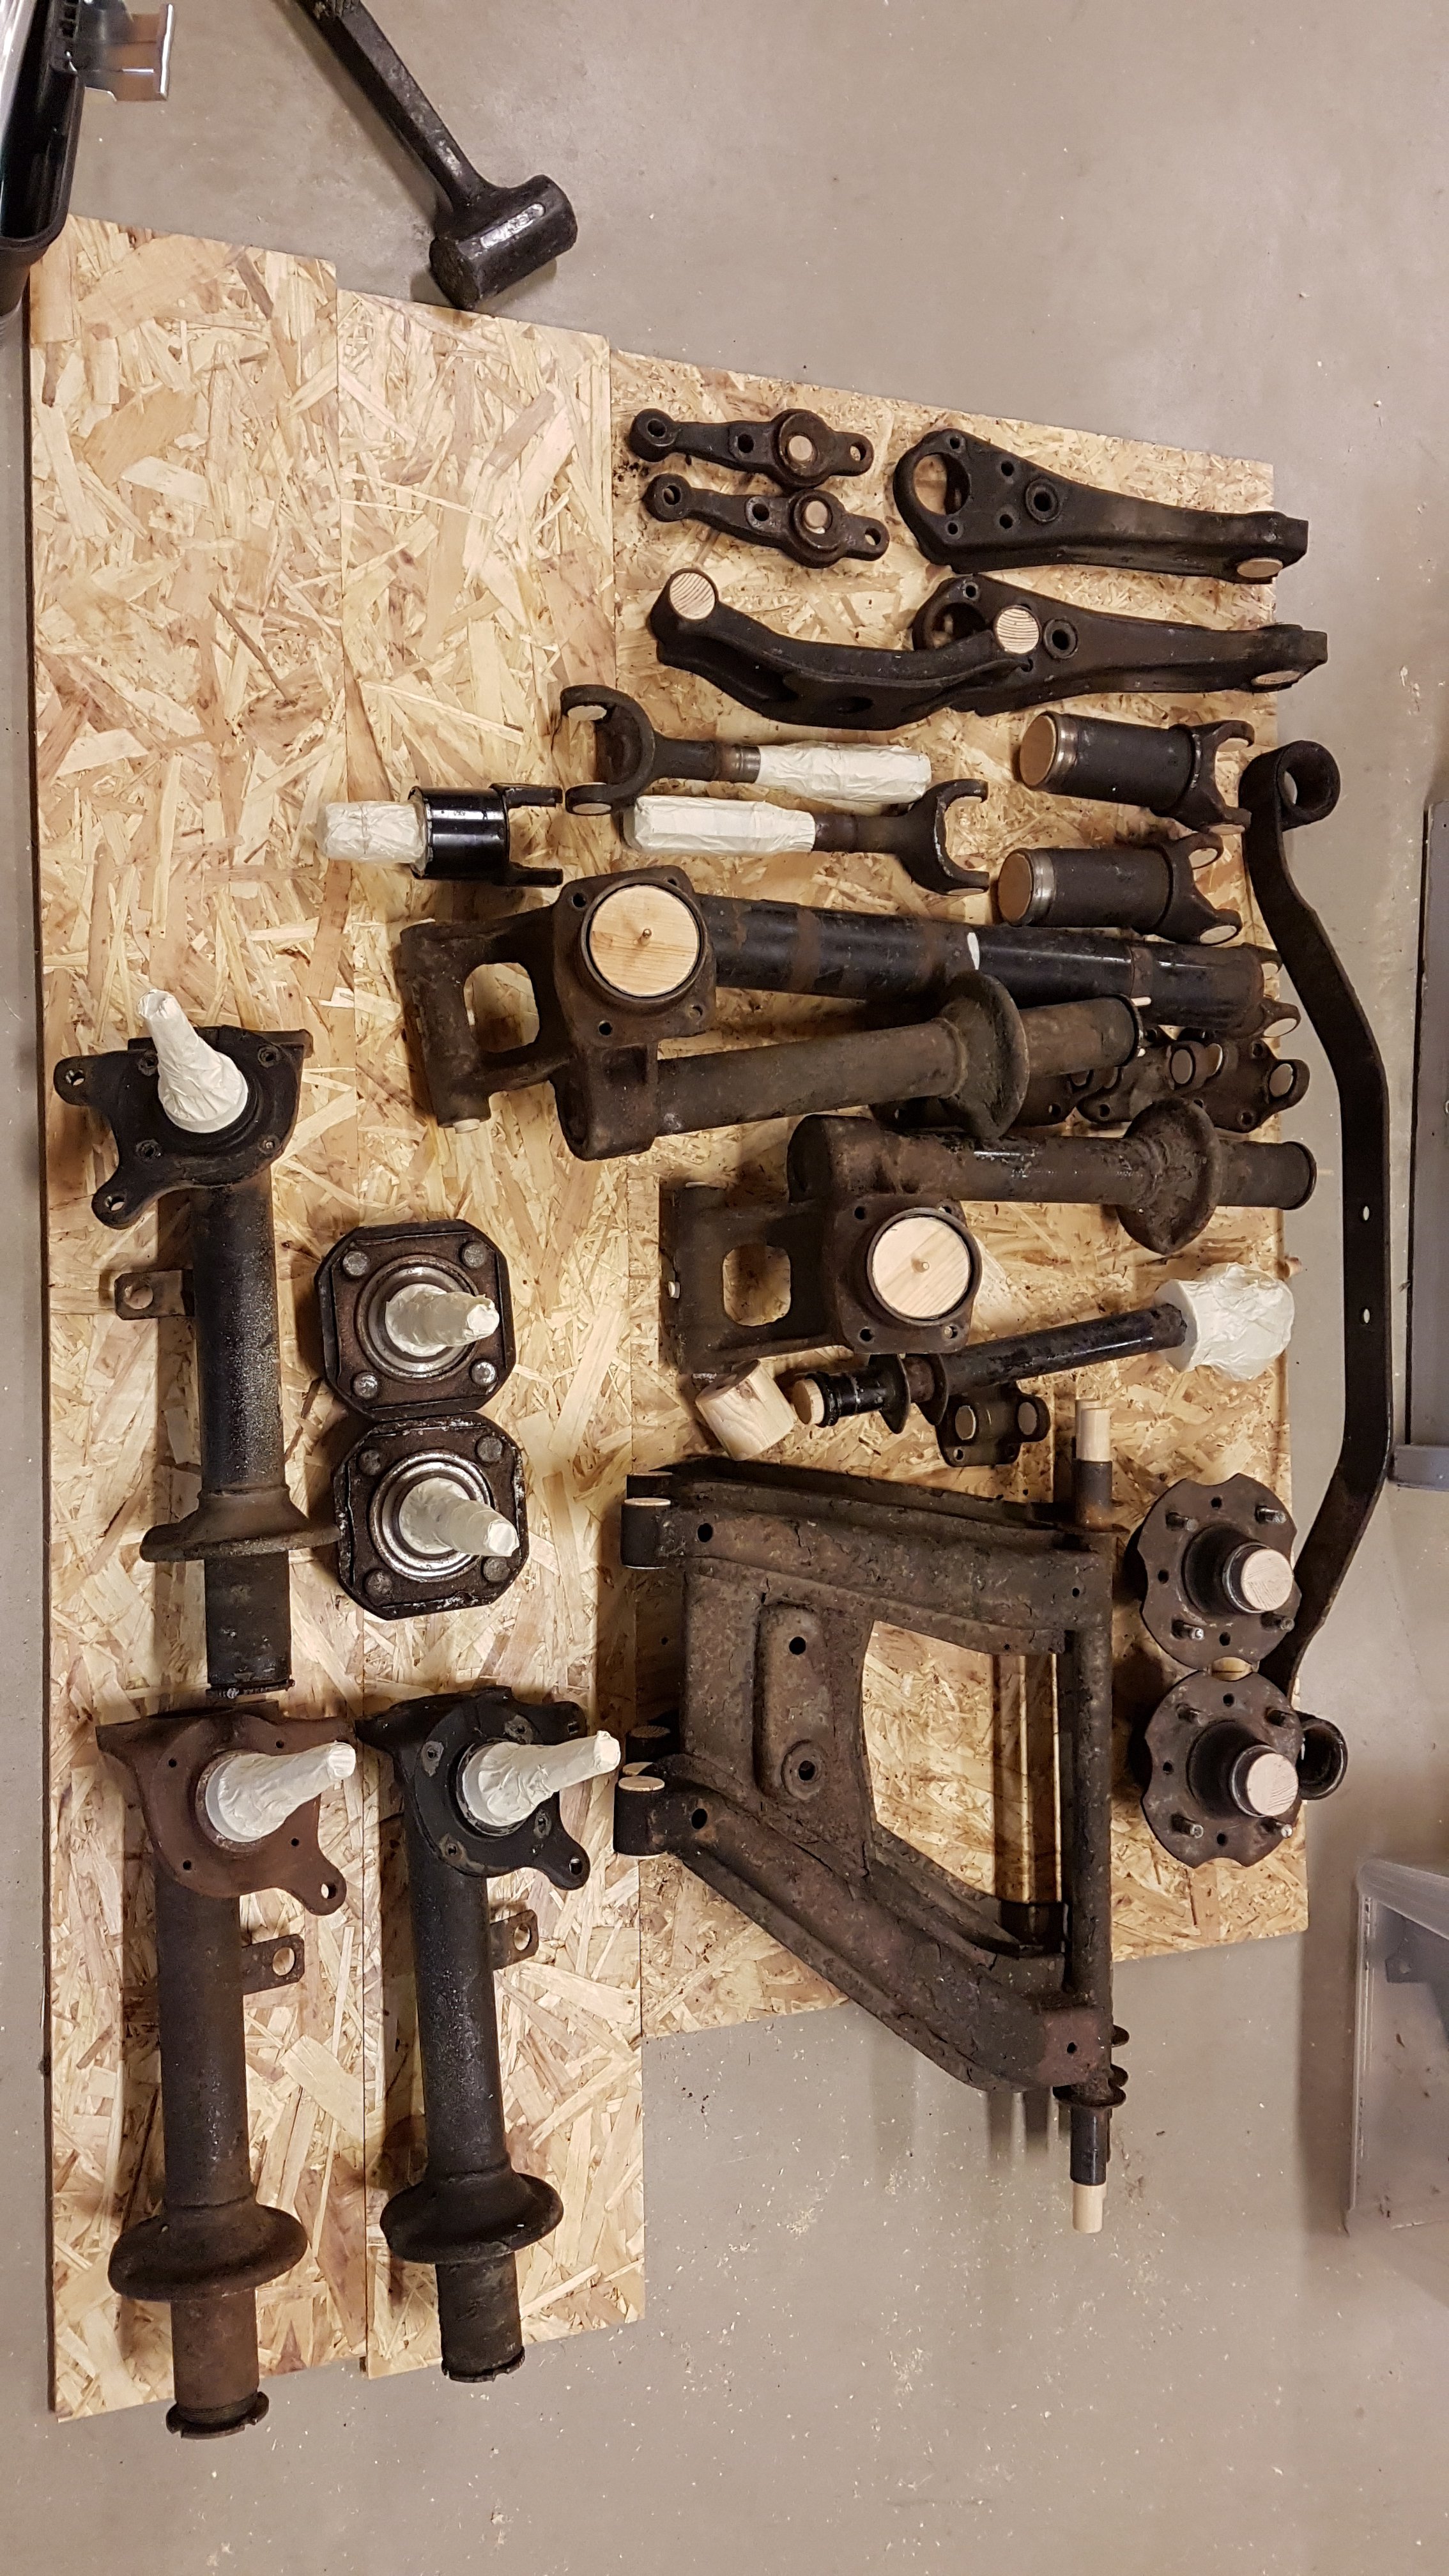
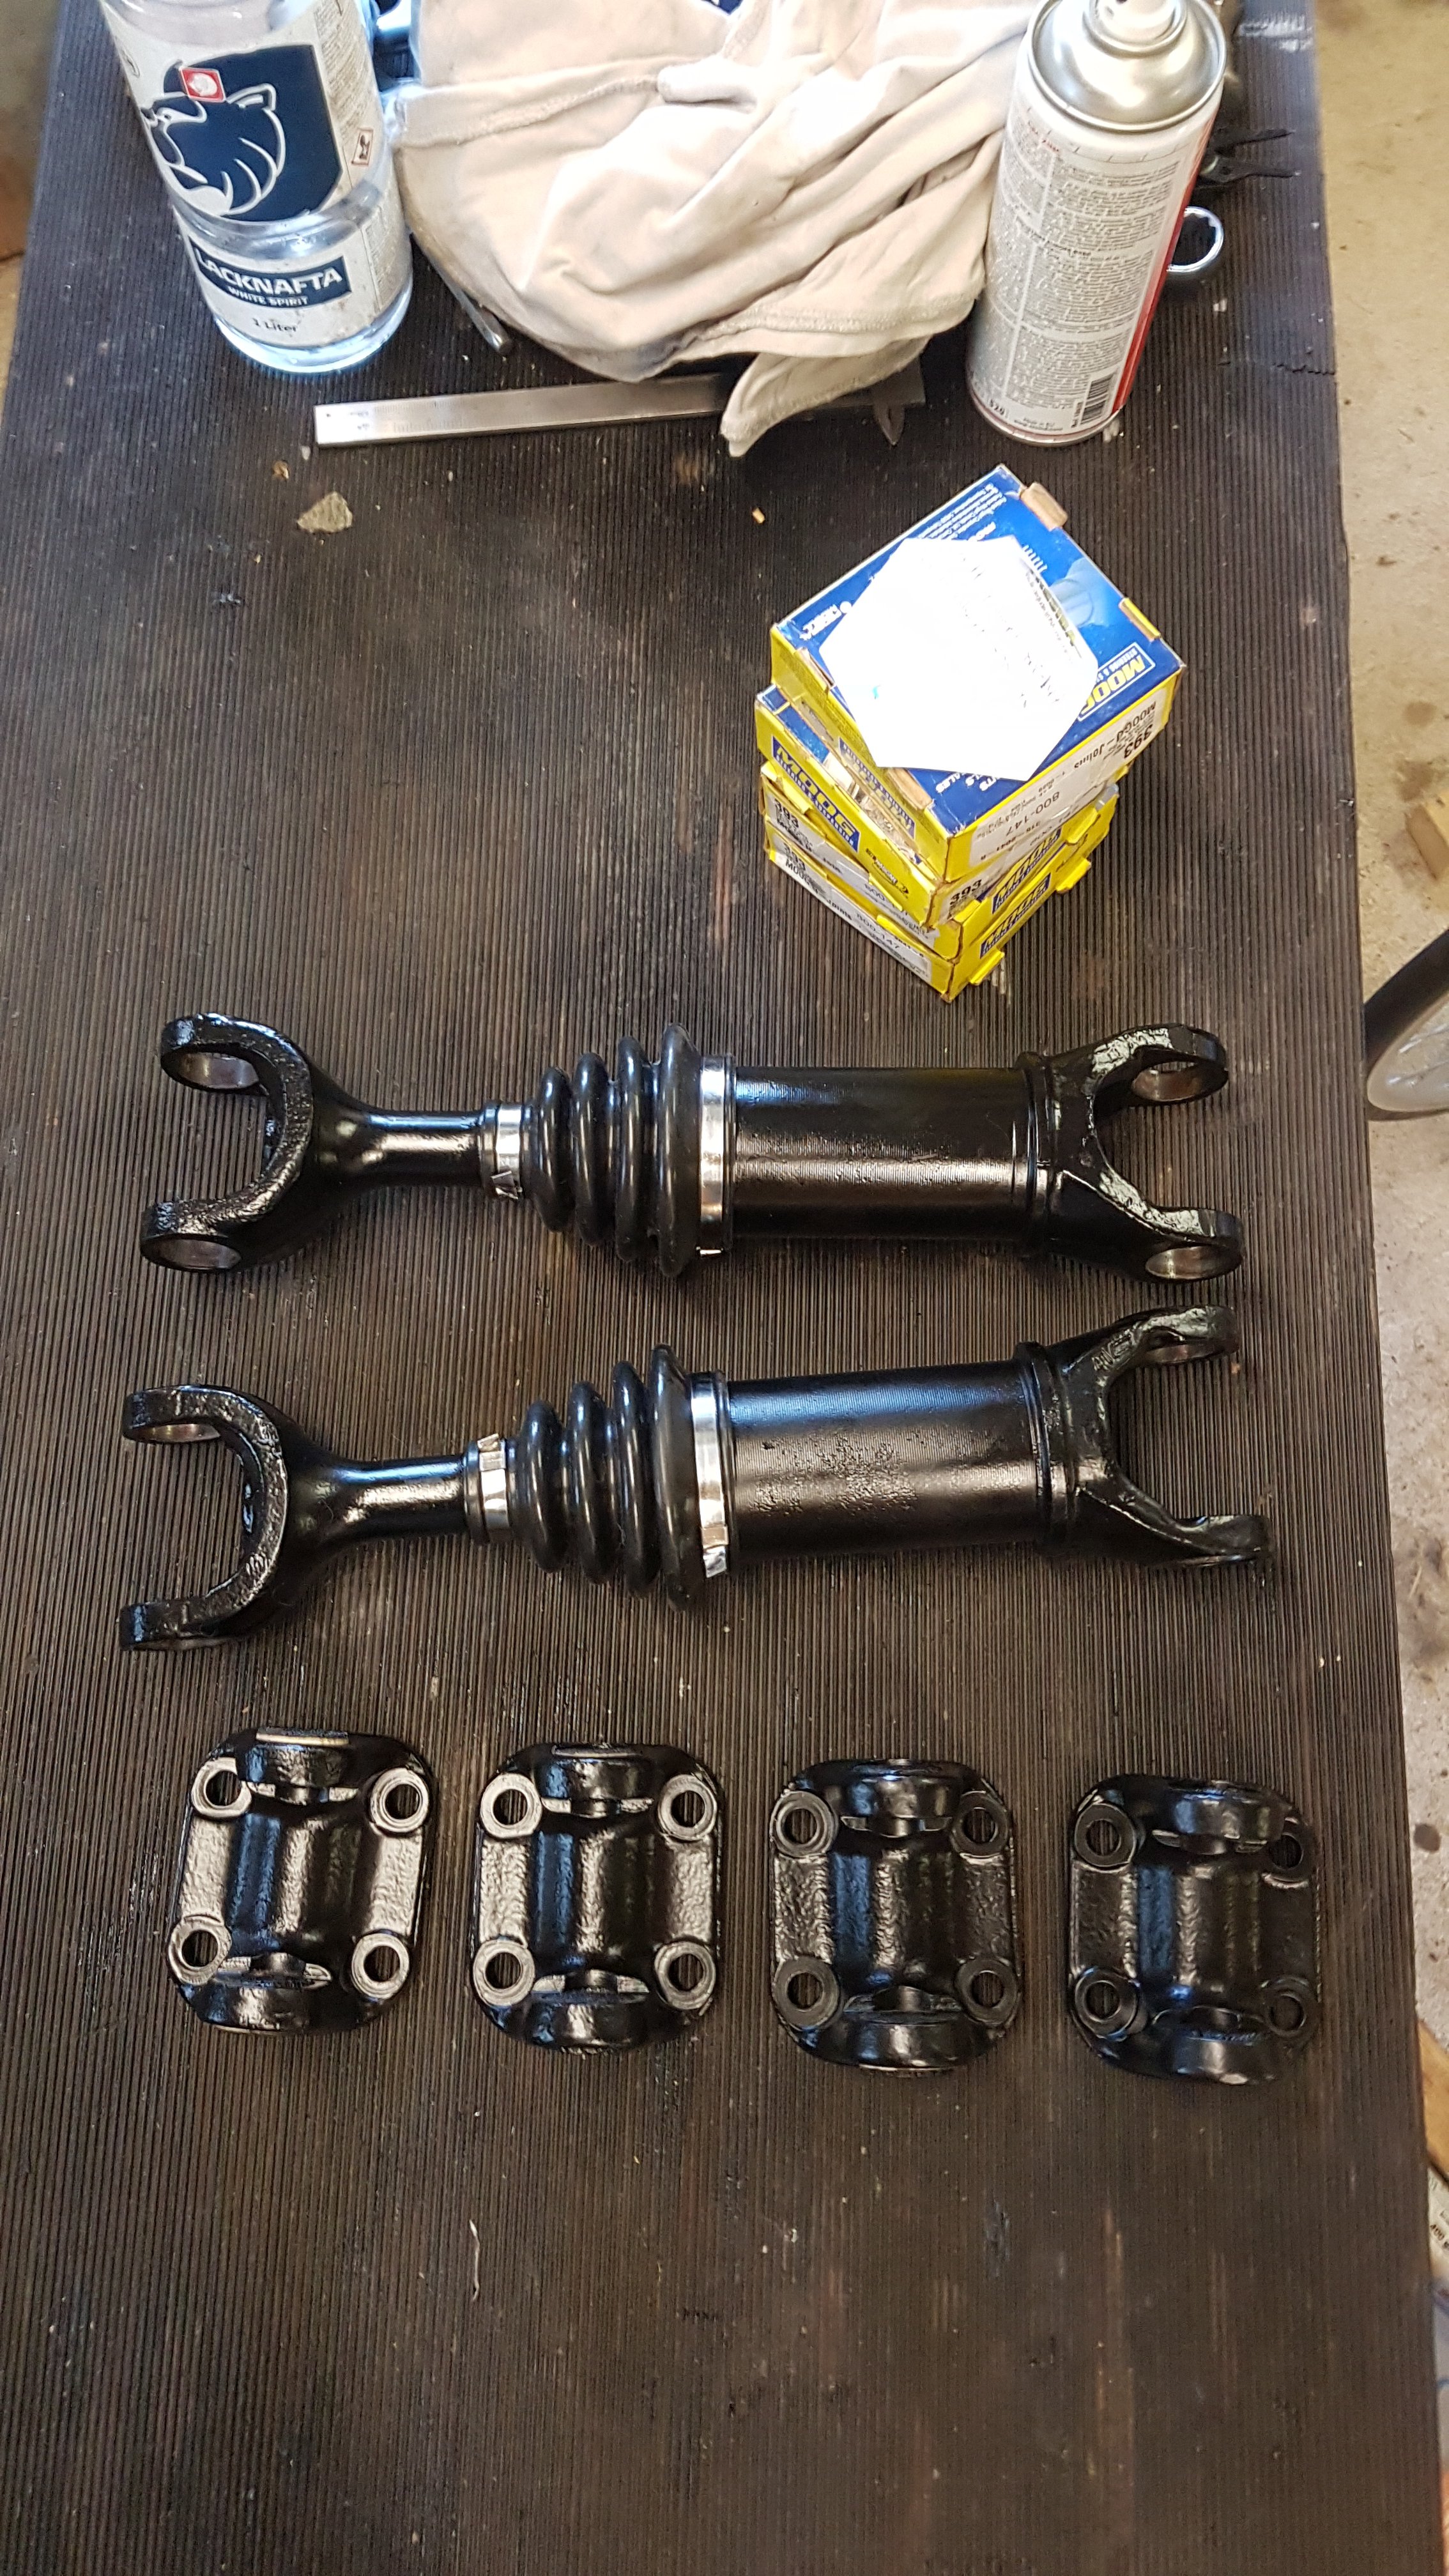
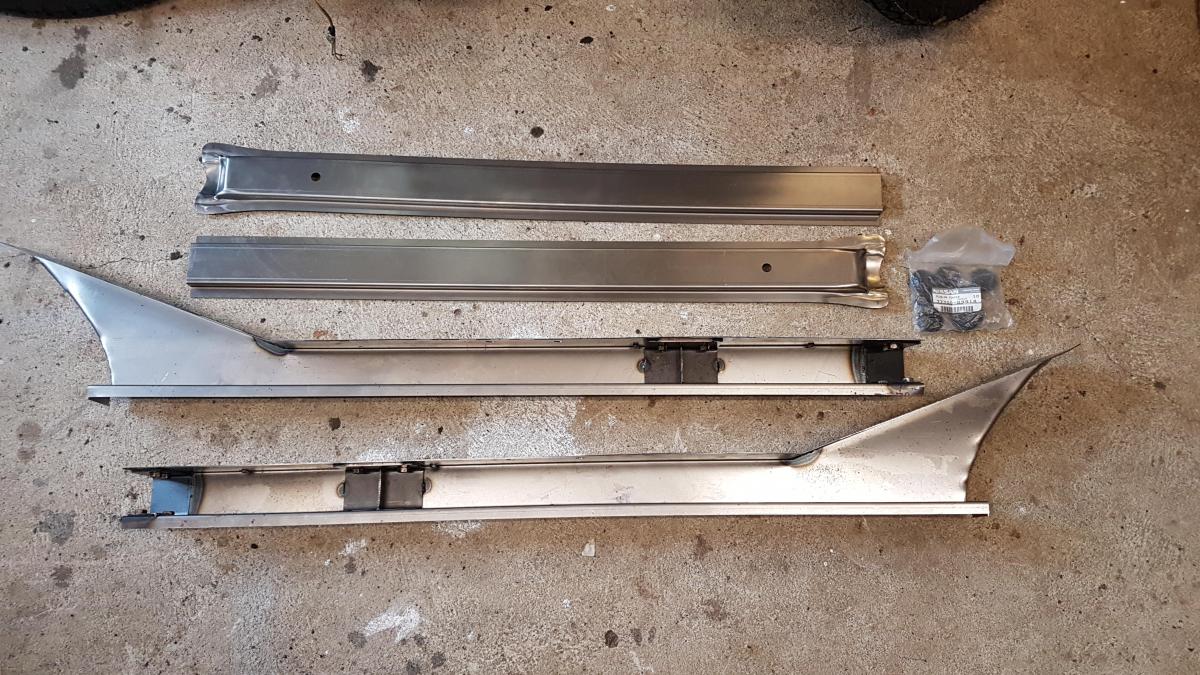
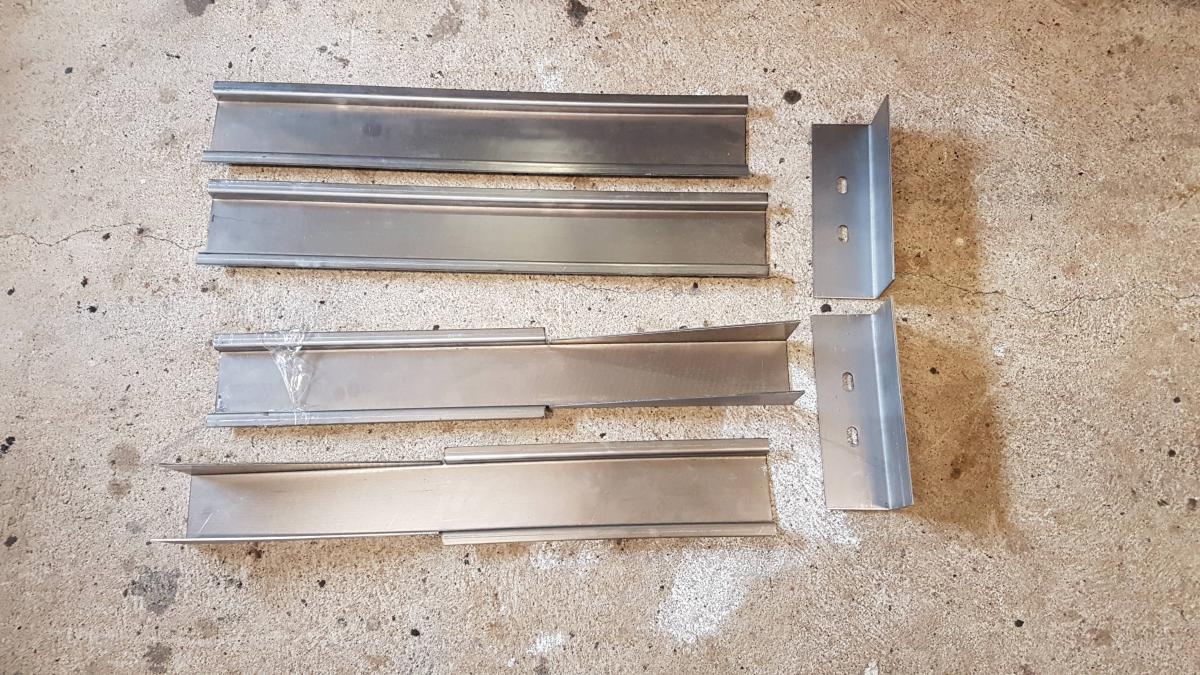
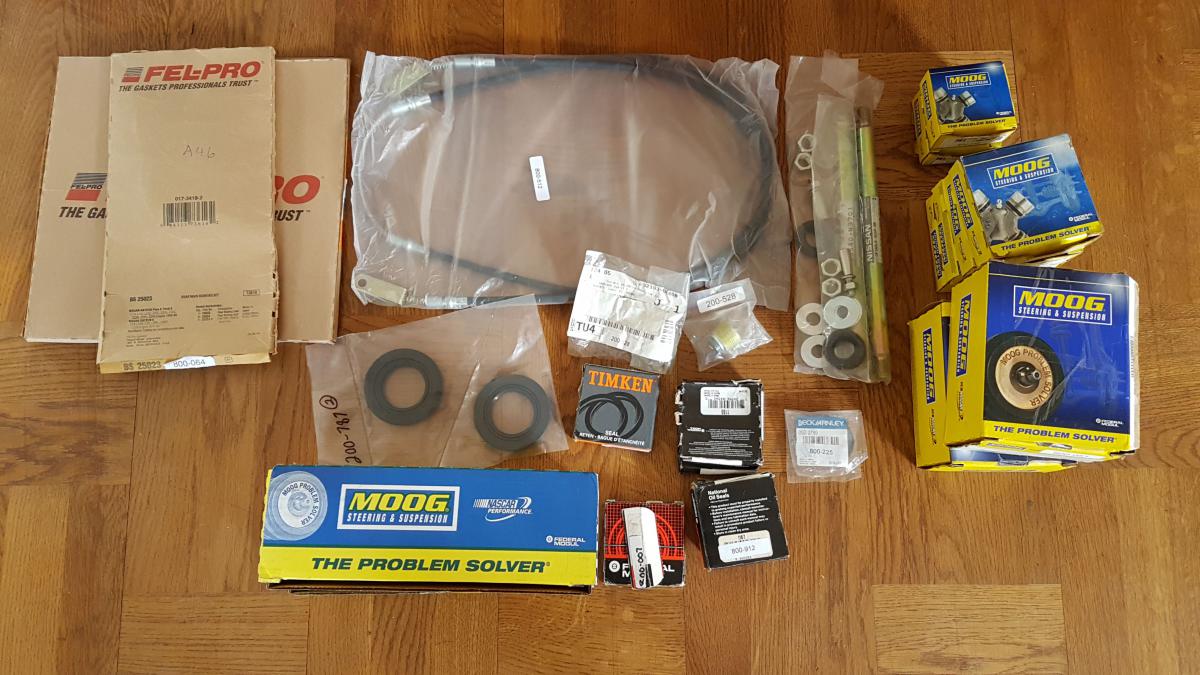
Part 2 To ease the pain of looking at those Swiss cheese frame rails I finally got to unwrap the following: Last time I was home I also worked a lot on stripping all of the suspension and drive train pieces. I didn't like the idea of installing worn items and instead did some more shopping for seals, U-joints etc.. The major Components such as struts, driveshafts, axels will go the same sand blaster for cleaning and powder coat. Question - since I'm having a lot of metal replaced I was thinking that it might be a good idea to seam weld the chassi. Searching around I have seen a lot of mixed opinions on this topics so I'm unsure if it is worth it. Anyone have any good advice? Edit; Digging around in my files I found a video of the first "first" start after some general maintenance and tinkering. I uploaded it to youtube for those interested. https://youtu.be/p7s3ohS-cfM Cheers! Erik
-
Swedish Datsun 240z Restoration
Tebirkesueth replied to Tebirkesueth's topic in S30 Series - 240z, 260z, 280z
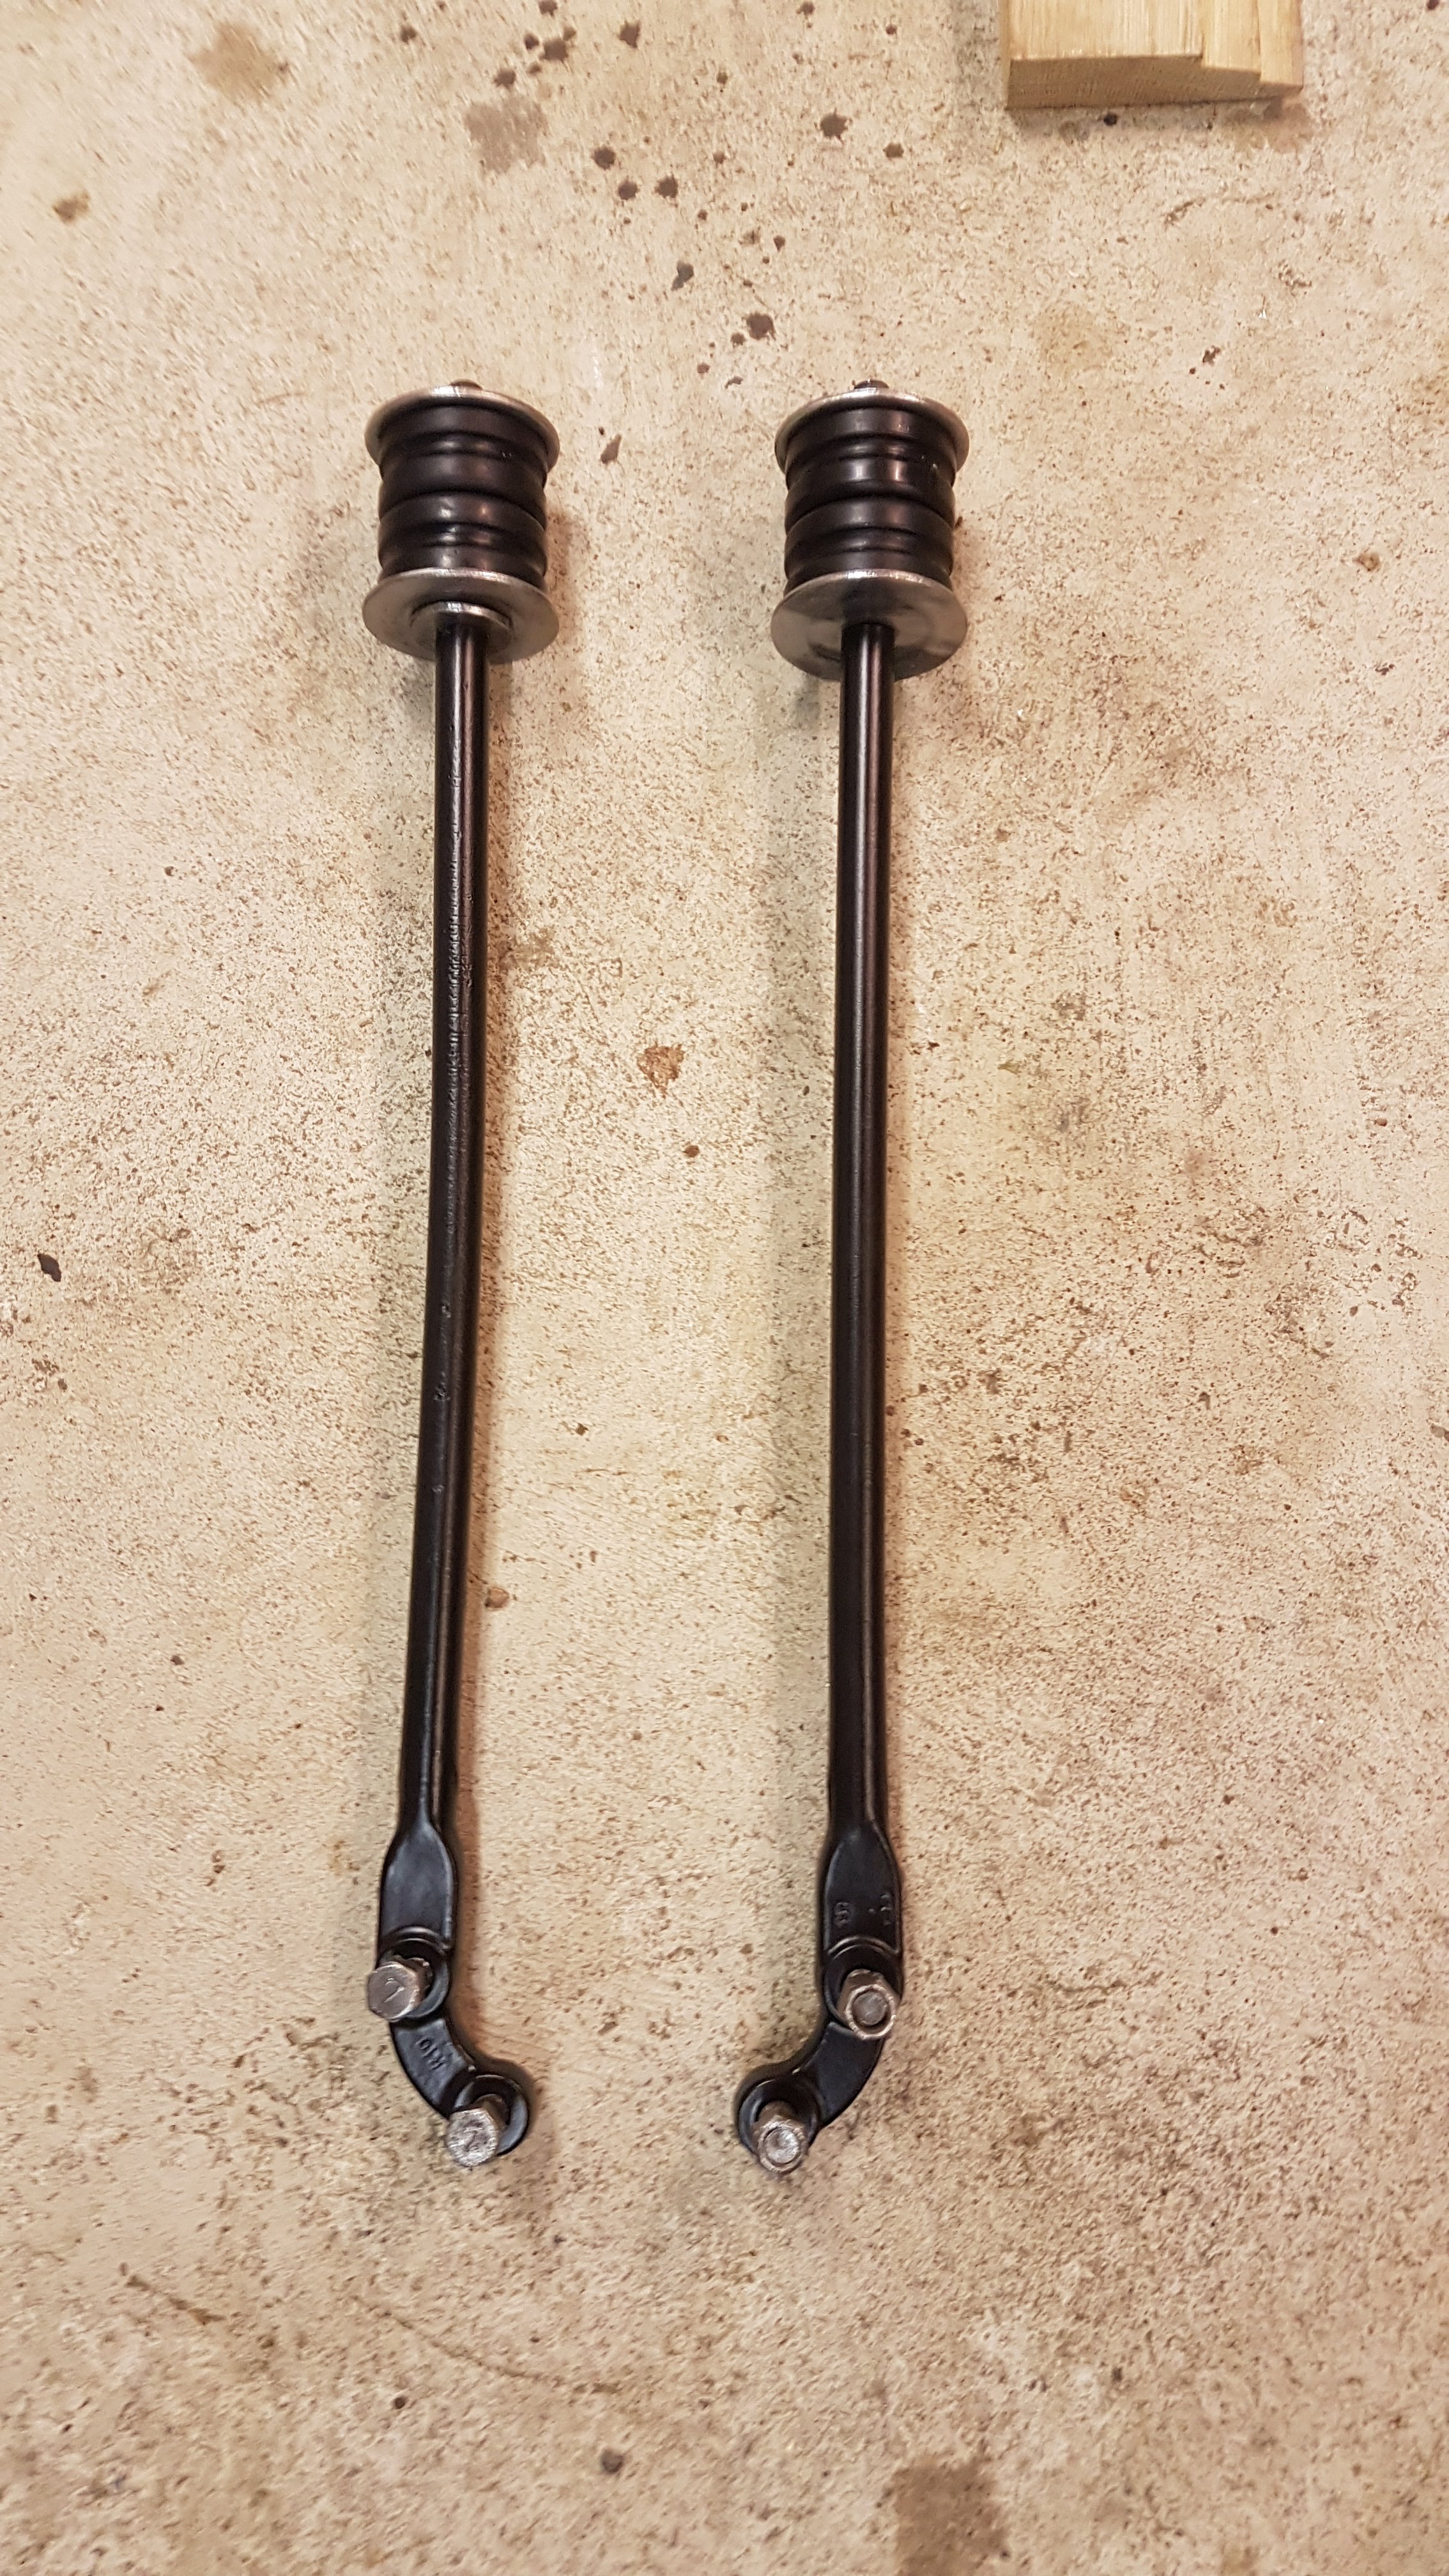
Hello guys, it is about time I make an update. Now that I'm finally home for the Easter holidays I can document and work a bit on the car. First off - good news! I inspected the mustache bar bolts and it turns out the iphone camera was phony and produced heavily distorted pictures, i.e. they are both straight. After going over the car my conclusion is that the sand blaster did a thorough job. Some major rust areas which were already shown above, but loads of small ones have popped up. To do this properly I will target to have it all fixed. Warning for heavy post.
-
Koenigsegg is developing through their sister company Freevalve a camless engine. Find out the benefits found in a small turbo 4 in the video linked. To test reliability they have a Saab running the system since a few years to mature the concept. https://youtu.be/S3cFfM3r510 How about this on an L6?
-
Swedish Datsun 240z Restoration
Tebirkesueth replied to Tebirkesueth's topic in S30 Series - 240z, 260z, 280z
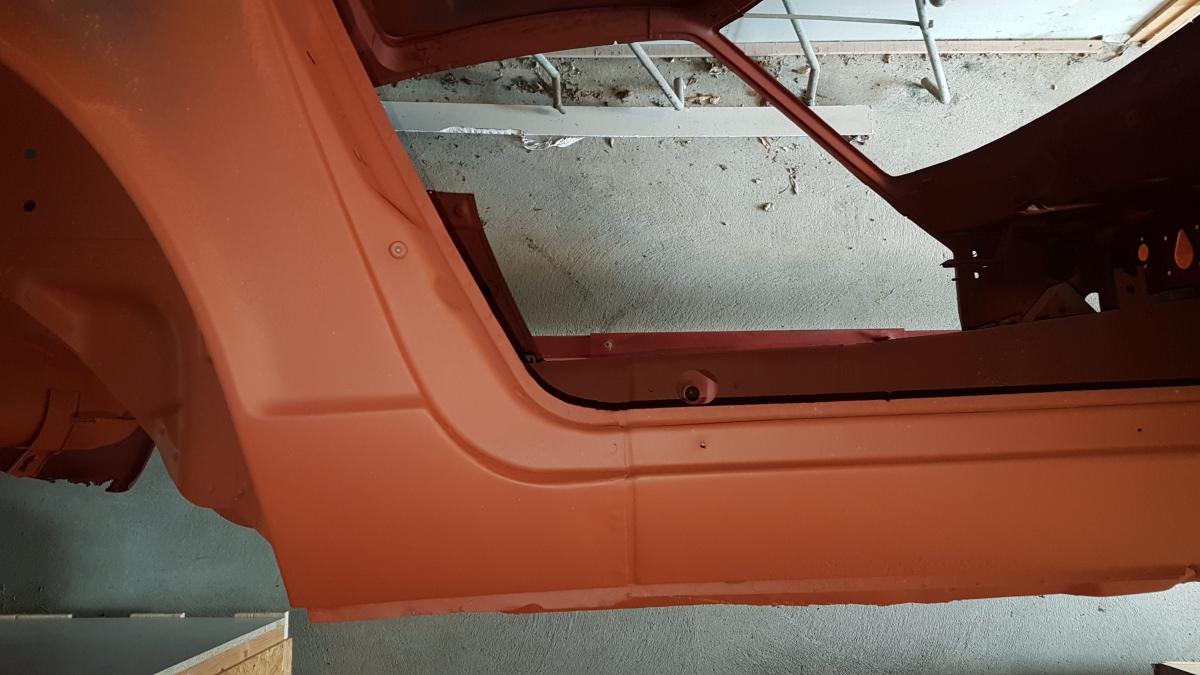
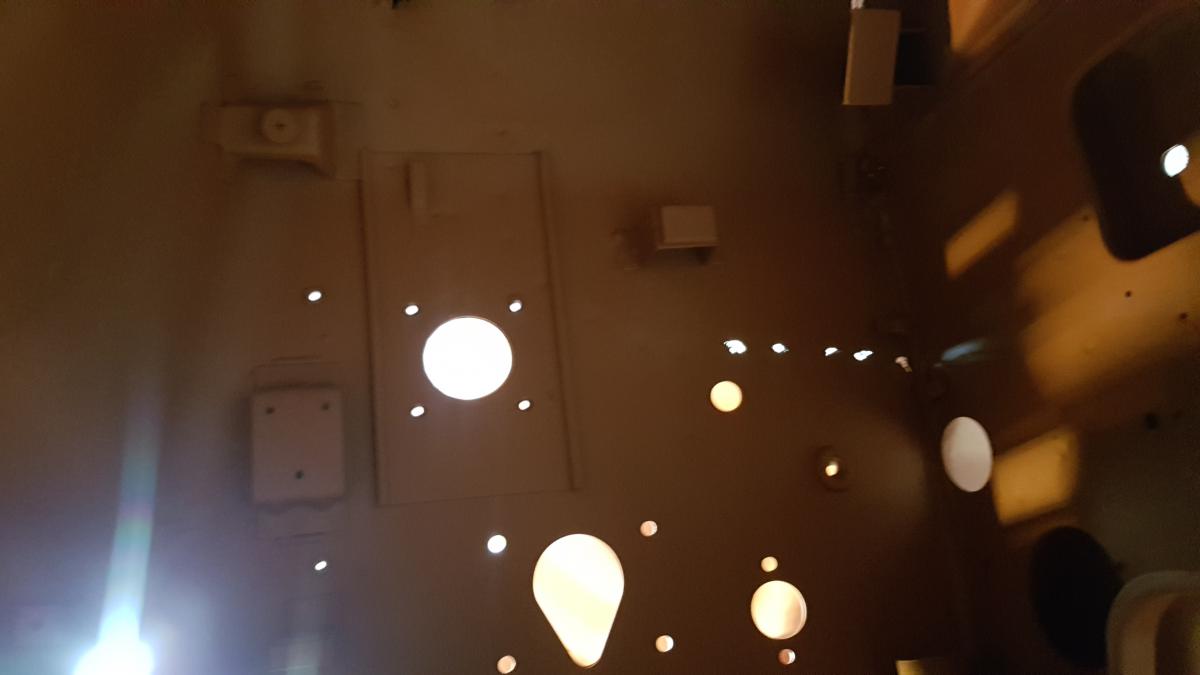
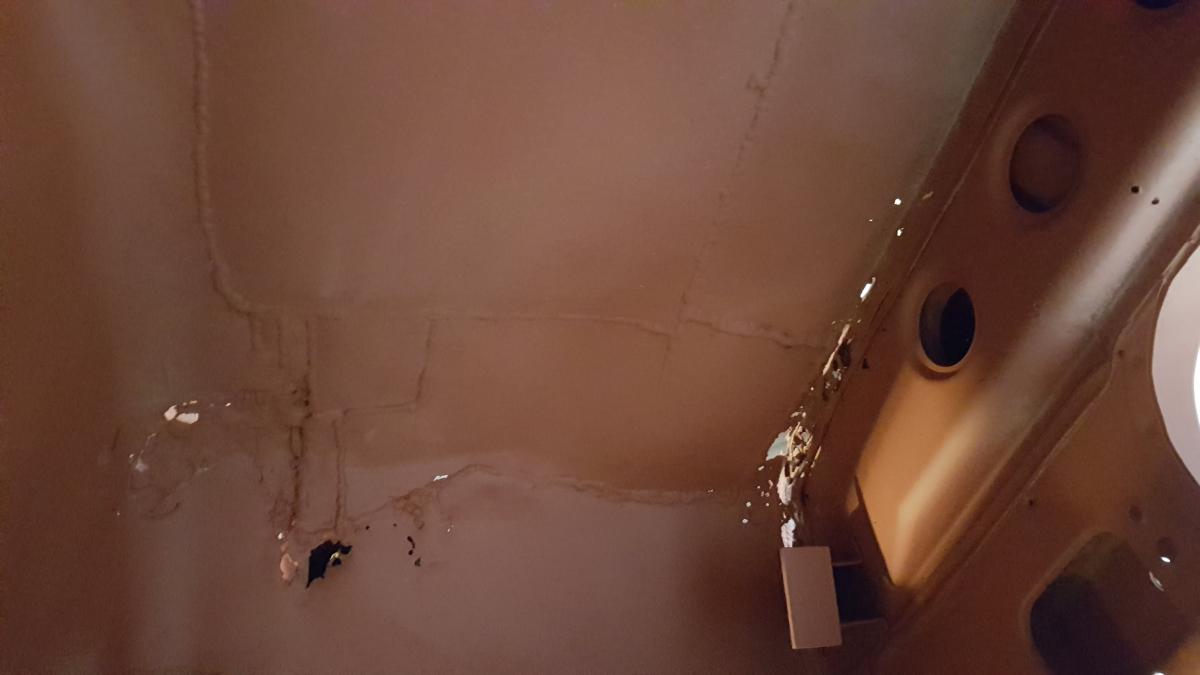
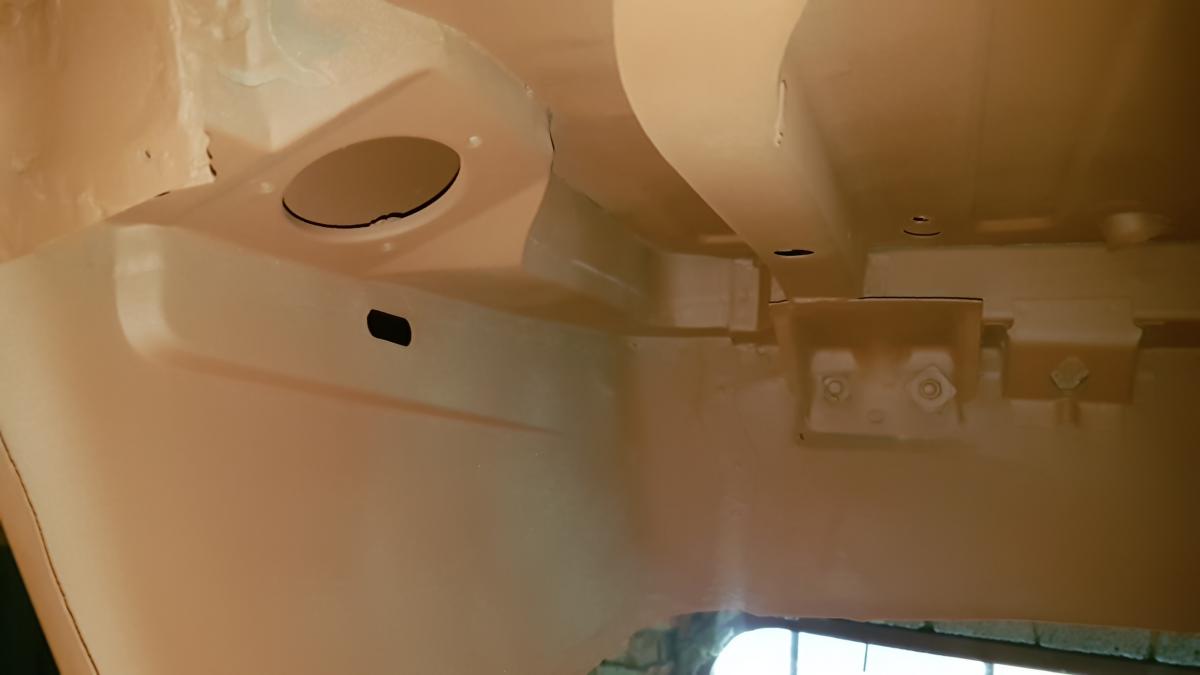
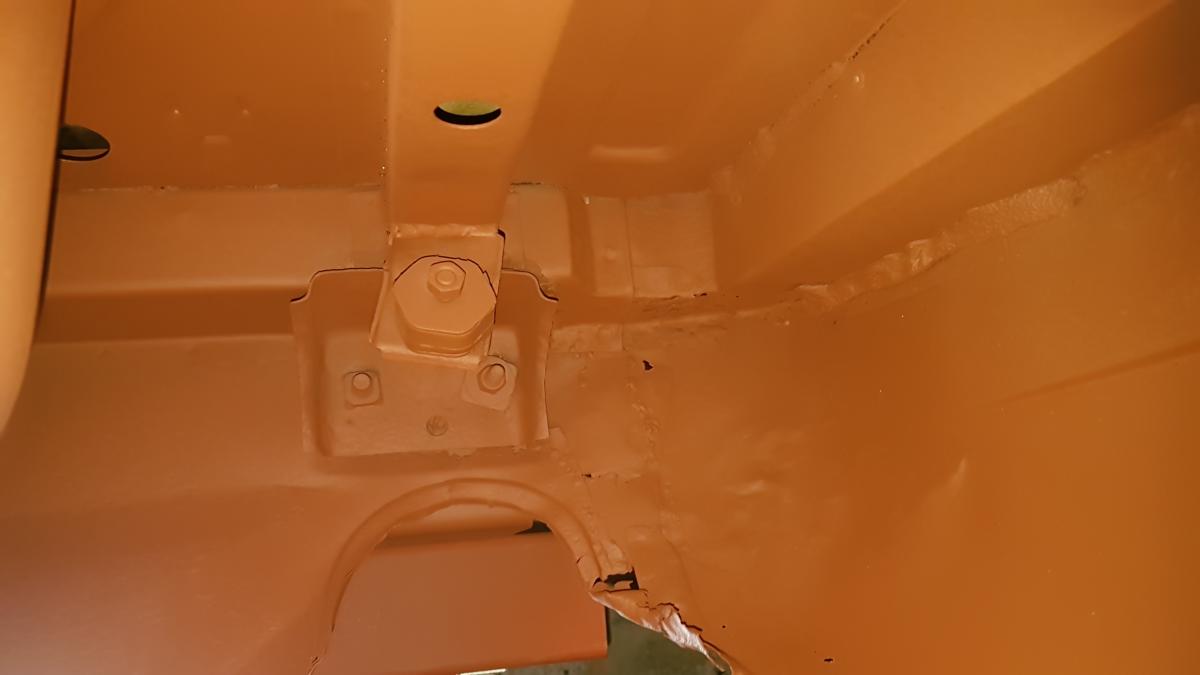
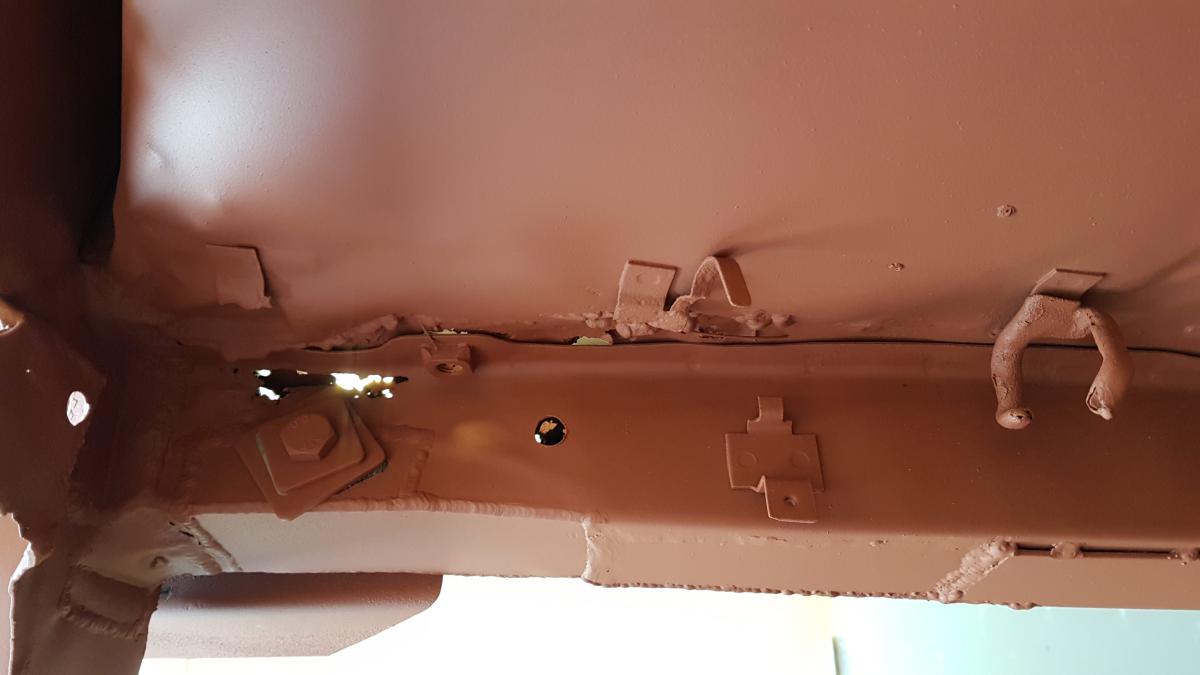
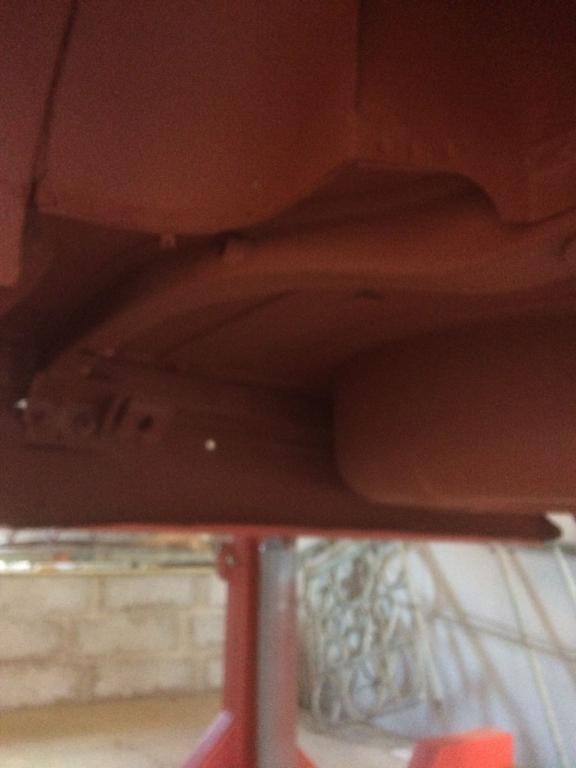
They didnt spray the metal of any large open surfaces. Because the lining of the roof is glued i opted to leave it installed and i think it got damaged while sanding the a-pillars. It was supposed to be wrapped but either i forgot to tell them or they missed it. The bolt is being checked more in detail though. Those are sturdy and very difficult to bend. The bolt could be replaced (albeit annoying), but my biggest fear is that they bent/collapsed the mounting point inside the car. -
Swedish Datsun 240z Restoration
Tebirkesueth replied to Tebirkesueth's topic in S30 Series - 240z, 260z, 280z
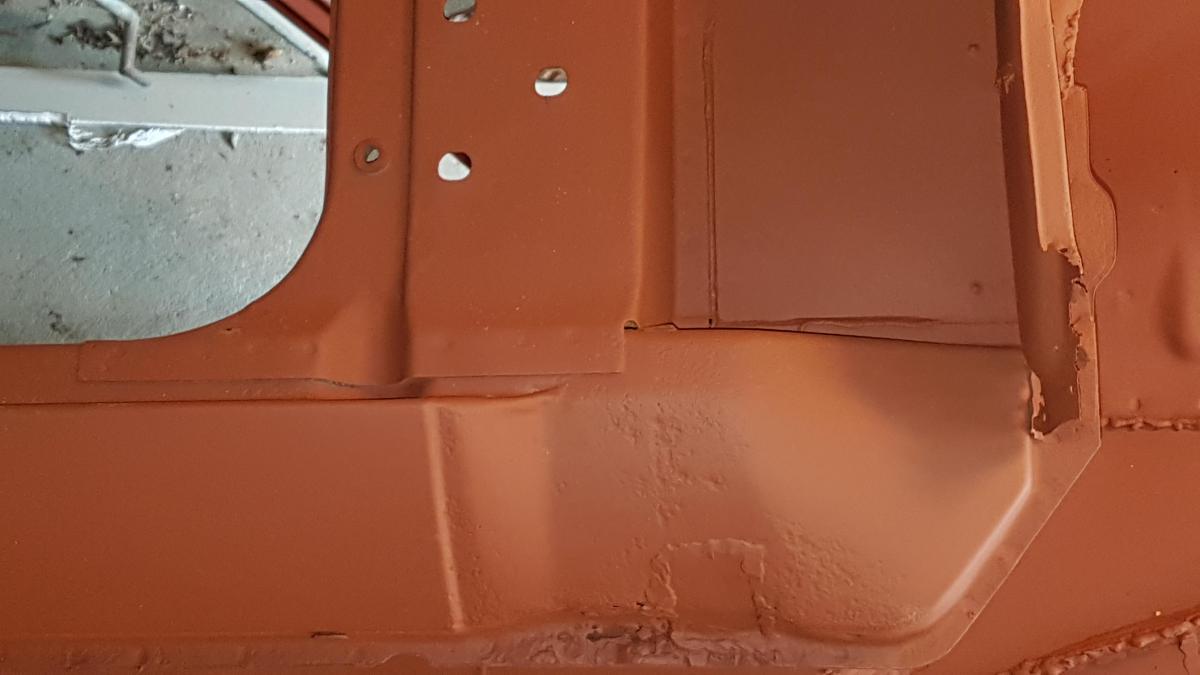
Thanks for all the input guys! I have decided that I will replace the frame rails completely. I also received some more pictures of what the sand blasting revealed. I unfortunately forgot to tape over the inner roof or express the need to protect it. It therefore has blast damage and it is covered in primer. In addition one of the mounting bolts for the mustache bar has been bent. It looks like the floors have been replaced once upon a time. Some other interesting spots that need repair have also appeared. Next step is to arrange for a body shop to initiate the repairs.
-
Swedish Datsun 240z Restoration
Tebirkesueth replied to Tebirkesueth's topic in S30 Series - 240z, 260z, 280z
Yeah, agreed. Looks like the left wheel well together with part of the frame rail has a patch welded in as well. Unfortunately my dad has not had time yet to properly document the car. Hopefully he has some spare time this week to take some more photos of the underside and the rest of the frame rails. Already before blasting I had the feeling the floors were swapped, mainly because there was no under-seal applied on those parts and you could see some welding seams looking suspiciously non-standard. Thanks for the heads up! I´ll take a closer look when I have access to the car. In the meantime I have been looking at some possible sources for frame rails.. Does any of you have experience with the following sources. Bad Dog Parts? Zedd Findings? My thought is to source new front rails (firewall to radiator mount from Zedd Findings) and new rails from firewall to rear frame (i.e. Bad Dog Parts Front and Rear frame rails). -
Swedish Datsun 240z Restoration
Tebirkesueth replied to Tebirkesueth's topic in S30 Series - 240z, 260z, 280z
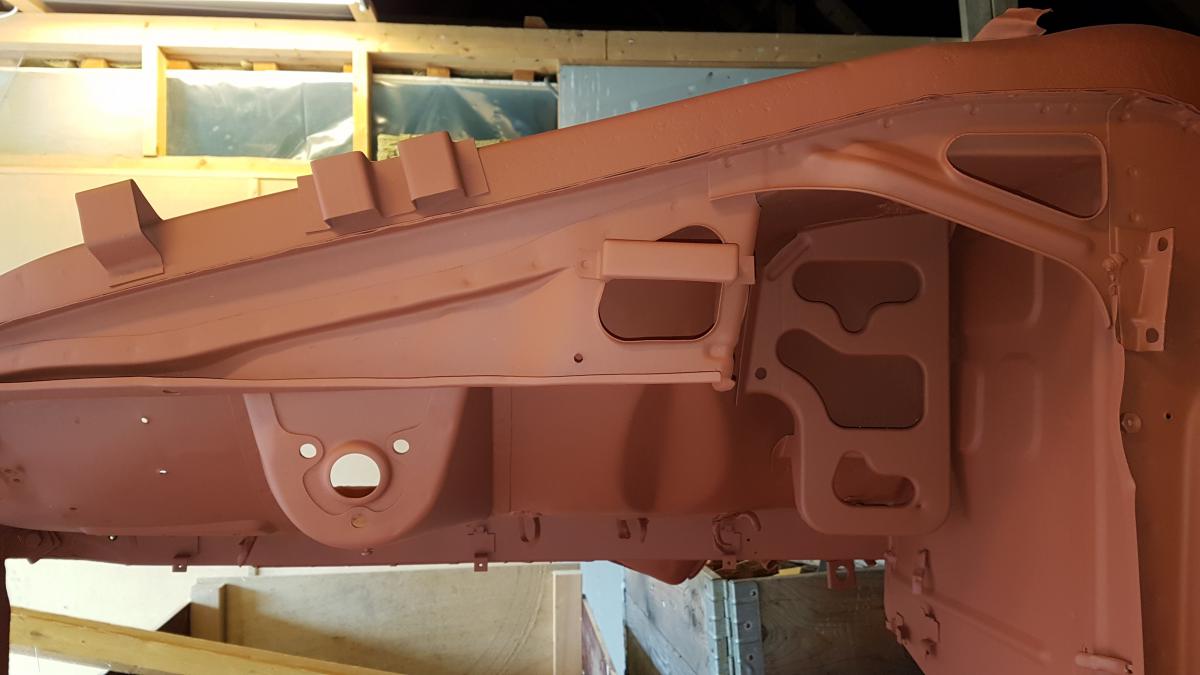
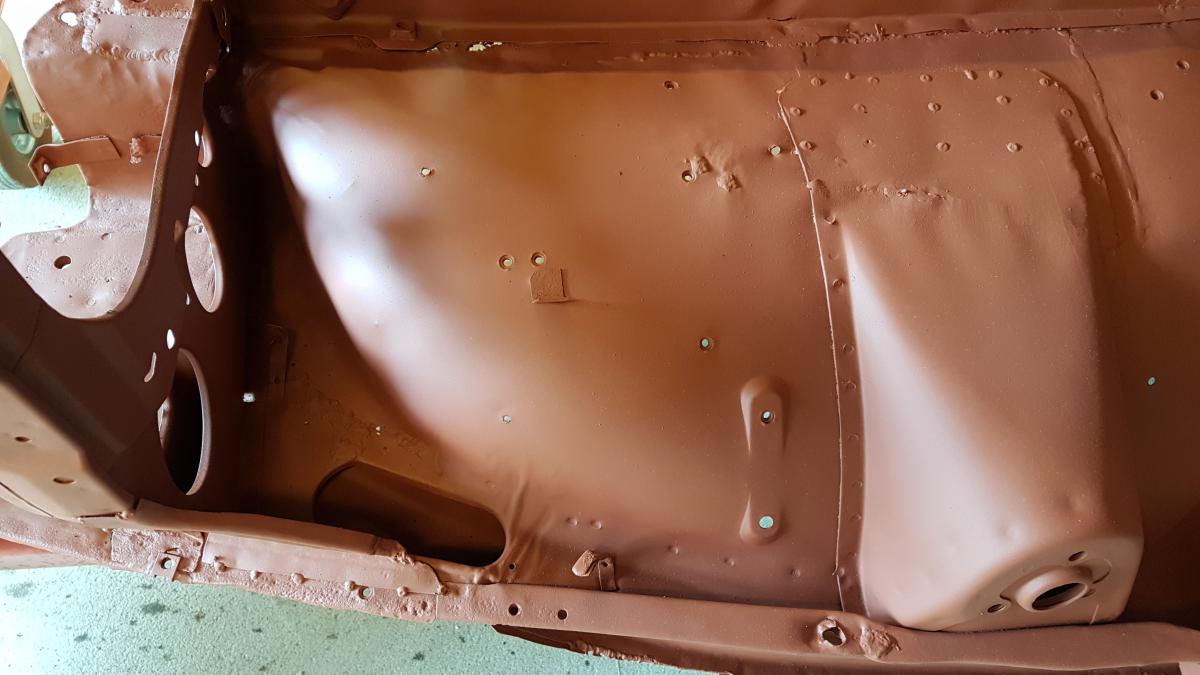
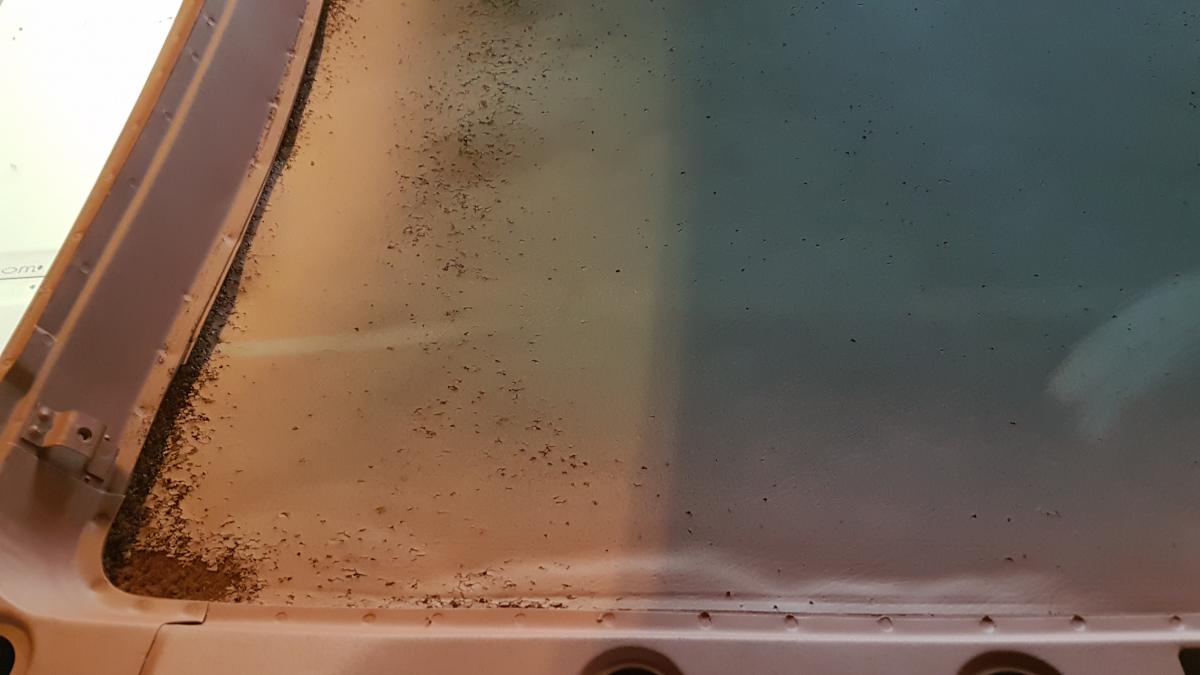
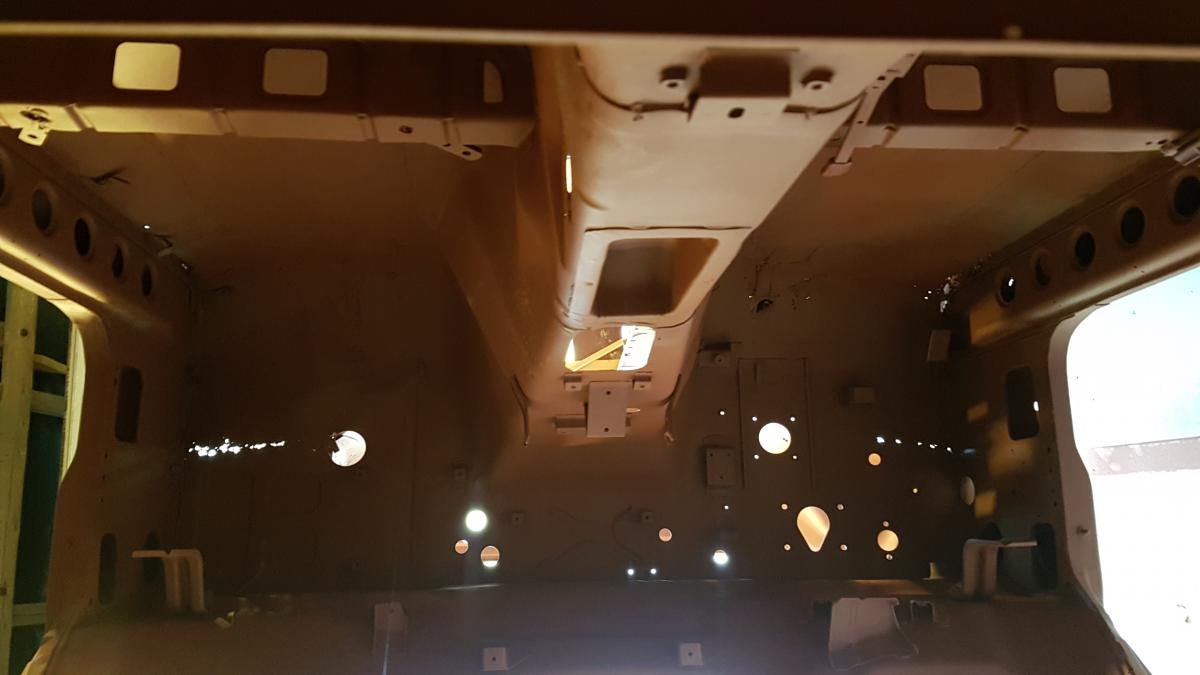
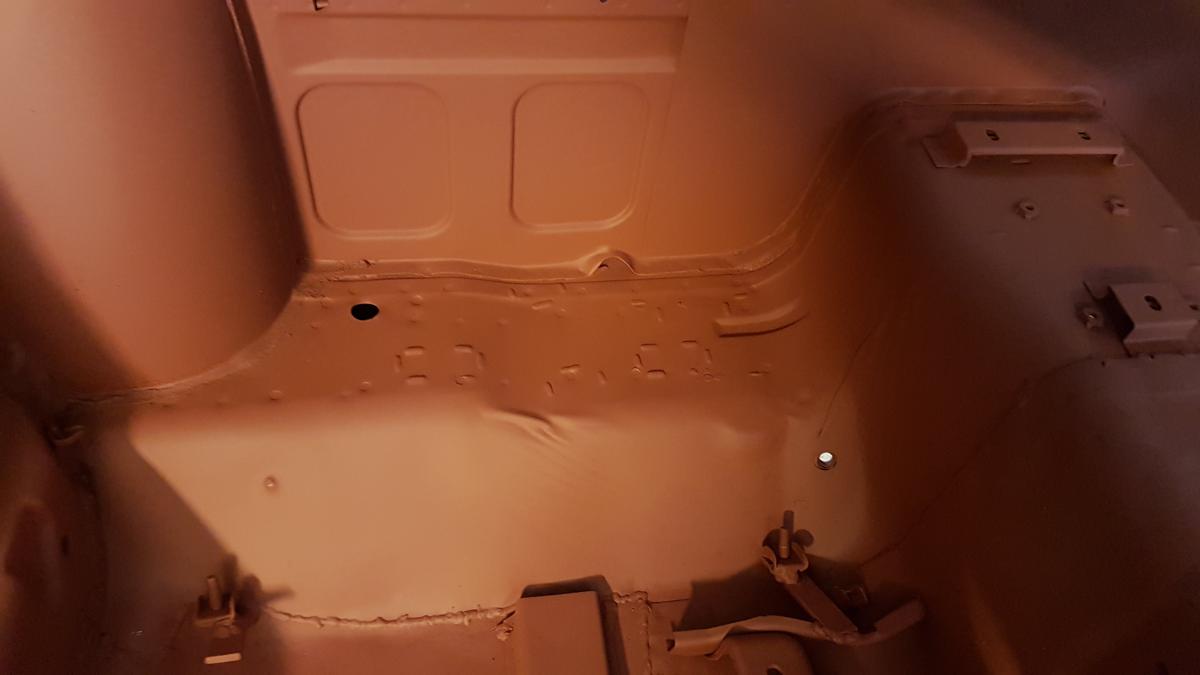
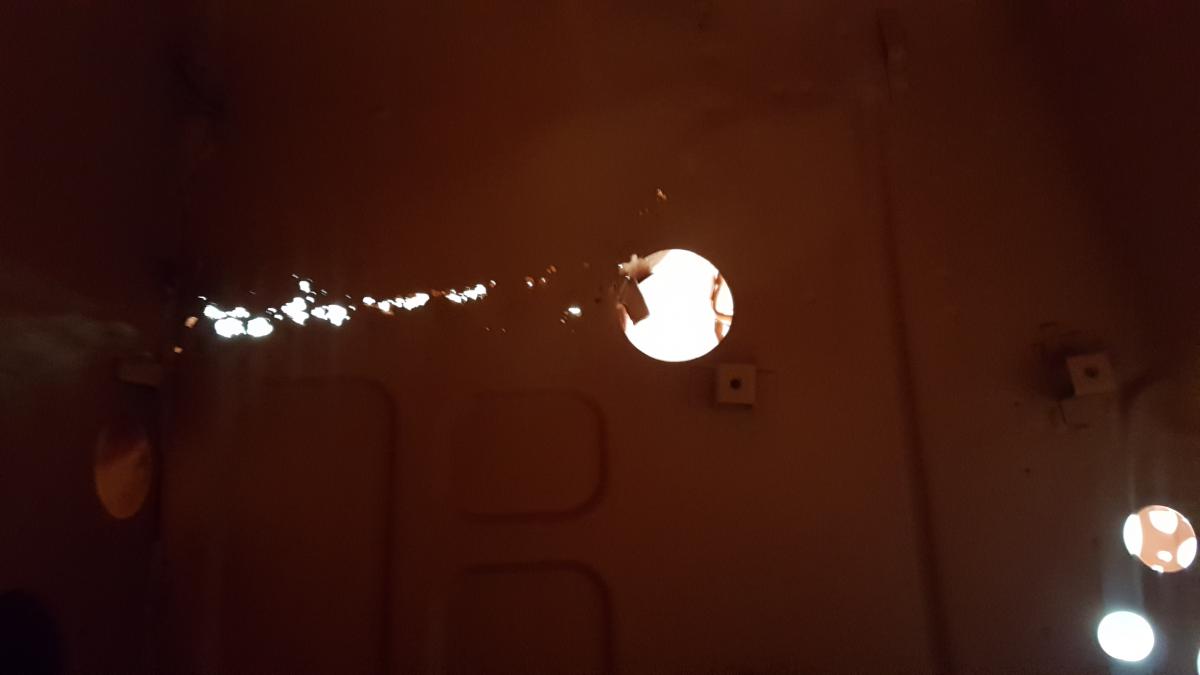
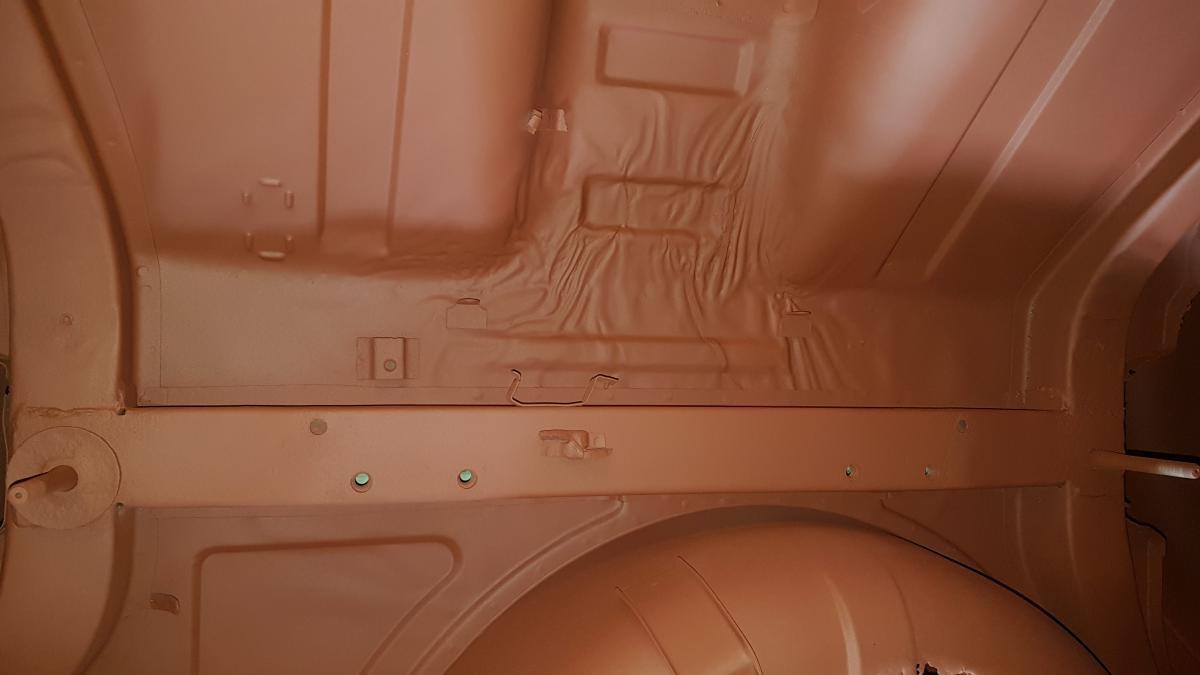
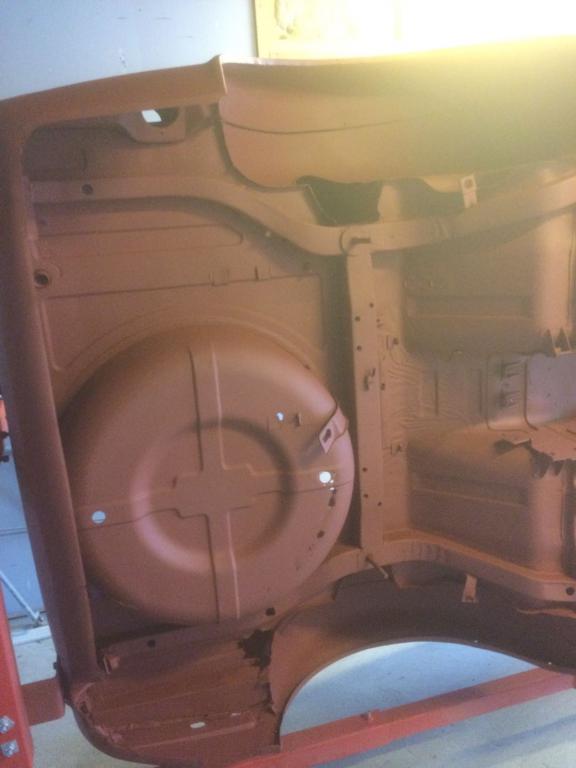
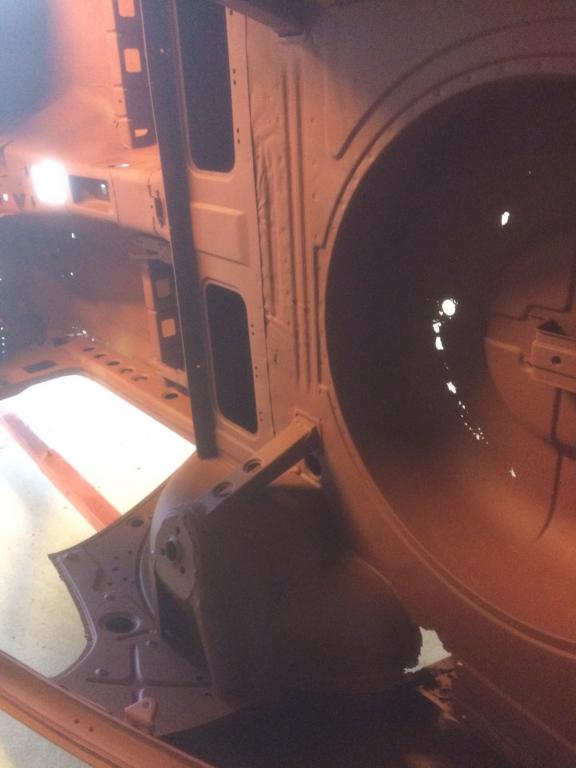
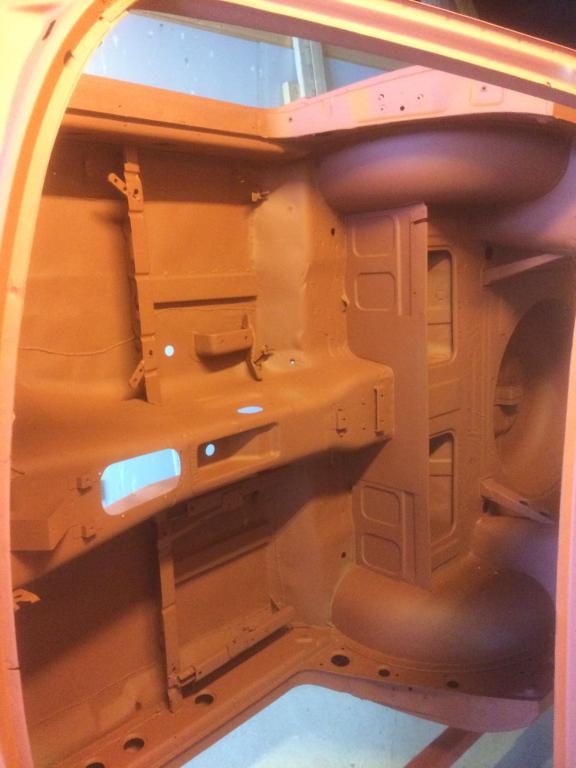
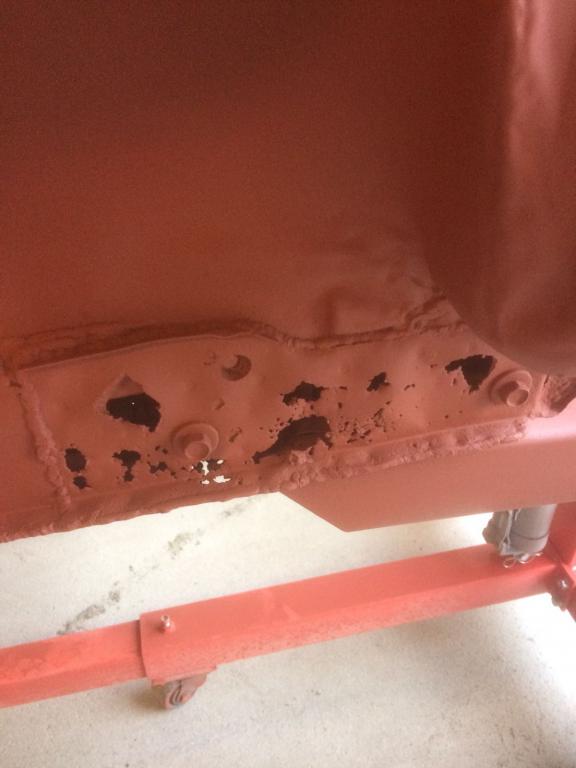
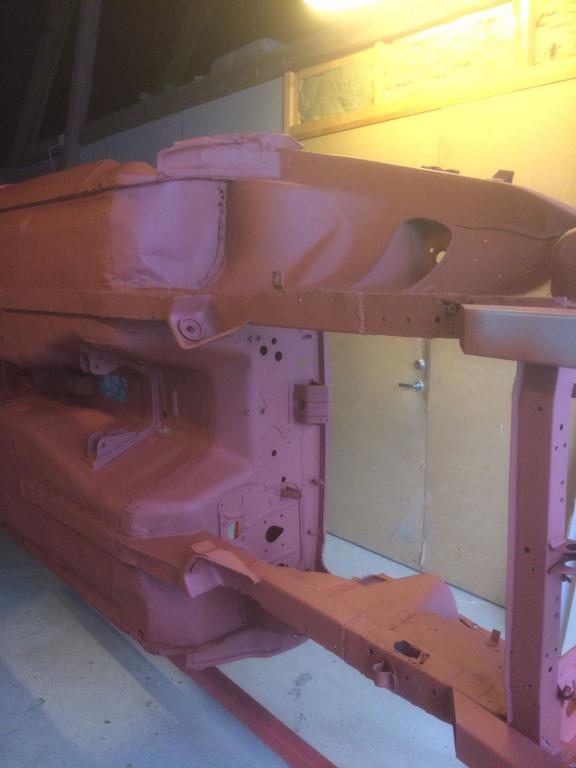
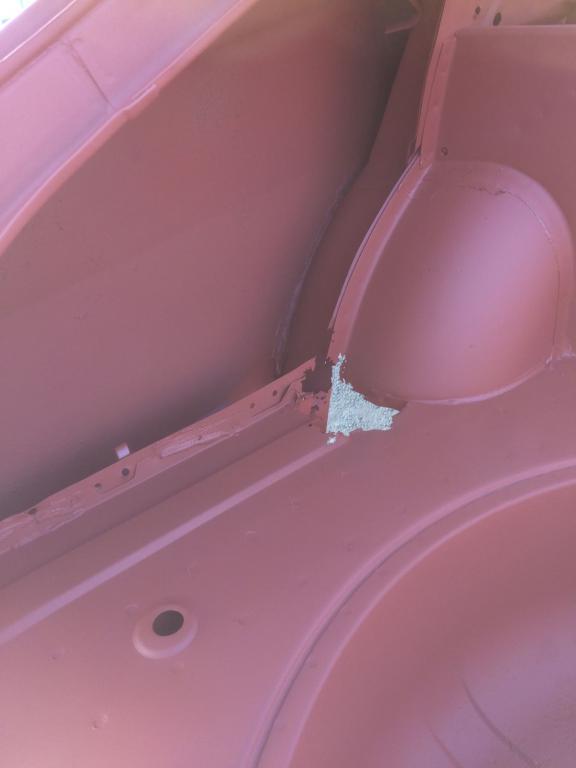
Minor update; The car body and frame is finish at the sand blaster. Since I'm not personally picking up the car I only have 3 pictures to show for at the moment. I have to trust my dear dad about the actual condition until he manages to fully document everything. Some small surprises were revealed so you never know what you'll find once all the dirt, paint and rust comes off. Better get it all off so that a proper repair job can be done before starting to put it together again. I'll post some more photos as they drop in. On the basis of what can be seen in the photos, are these the normal problem areas? /Erik
-
Swedish Datsun 240z Restoration
Tebirkesueth replied to Tebirkesueth's topic in S30 Series - 240z, 260z, 280z
Hello Anders! Malmö is definitely close by. The car and the garage is located in the Österlen region, however I live in Switzerland so I only work on it from time to time (not often enough in my opinion) when I visit my parents. Do you have any nice pictures of your 260Z to share? I spy some "raps" fields in your profile pic so I guess this is your car - How bad is the rust on your 260Z? Mine doesn't seem that bad chassi wise, but I haven't actually sanded down any of the panels yet to see if there are any hidden surprises. - You are not happy with the 15" rims? I bought 15" rims (14" installed) to ensure I can fit the brake upgrades while still retaining some tire wall as I prefer this over low profile tires. In hindsight I might later on go for 16" rims. - In terms of fender flares I will not do these. I like the original look of the Z and I don't want to cut into the fenders. Most of my purchases are from the US and my preference is for ZcarDepot. If I cannot find everything I need there I use theZstore as they have almost everything you can ever imagine for your Z. Edit; The bolt kit is from the ZcarDepot /Erik -
Swedish Datsun 240z Restoration
Tebirkesueth replied to Tebirkesueth's topic in S30 Series - 240z, 260z, 280z
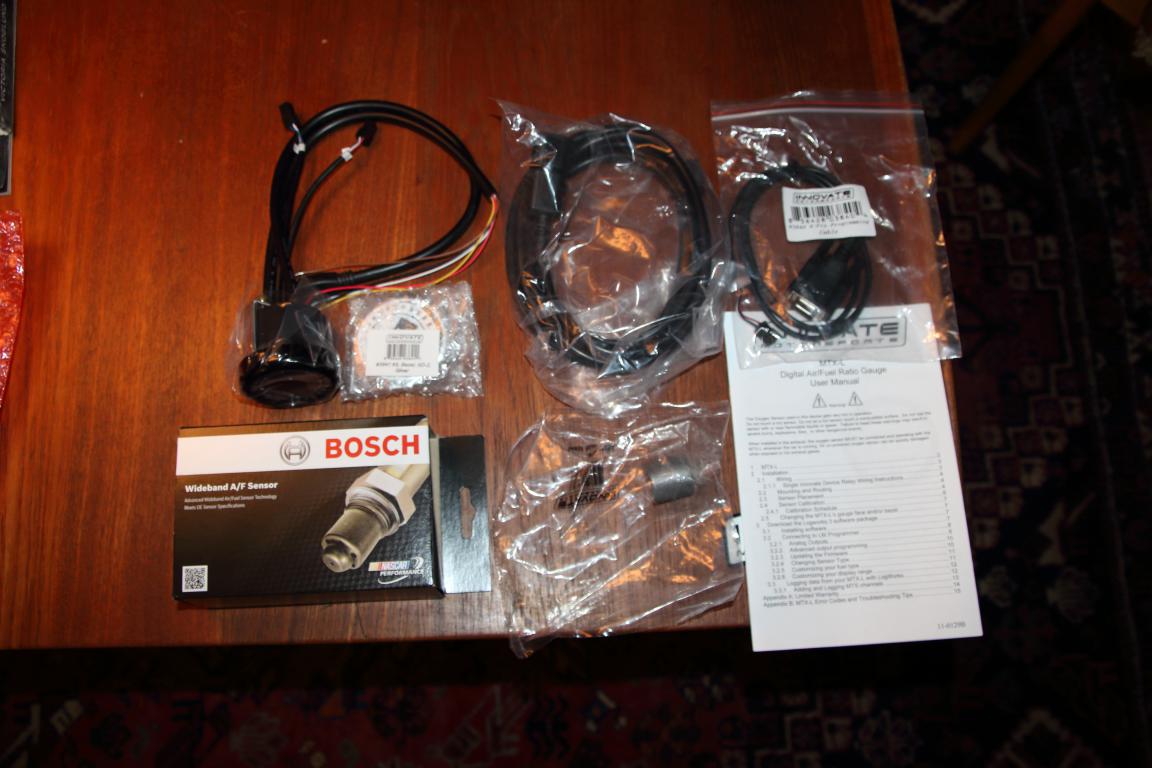
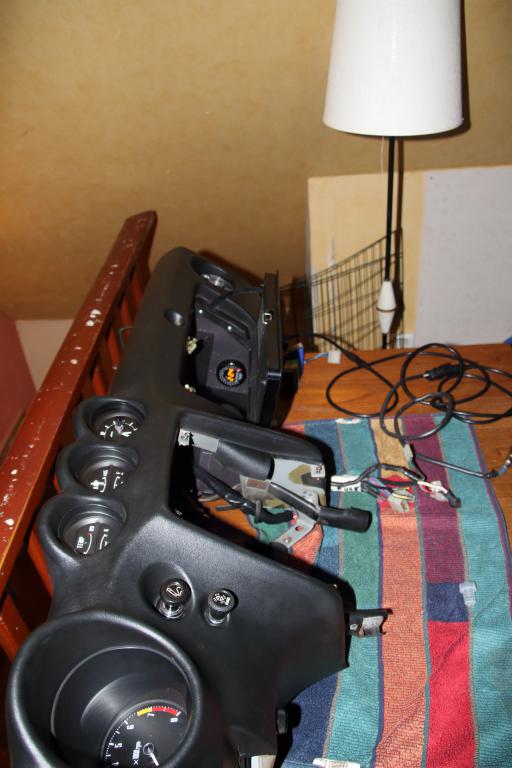
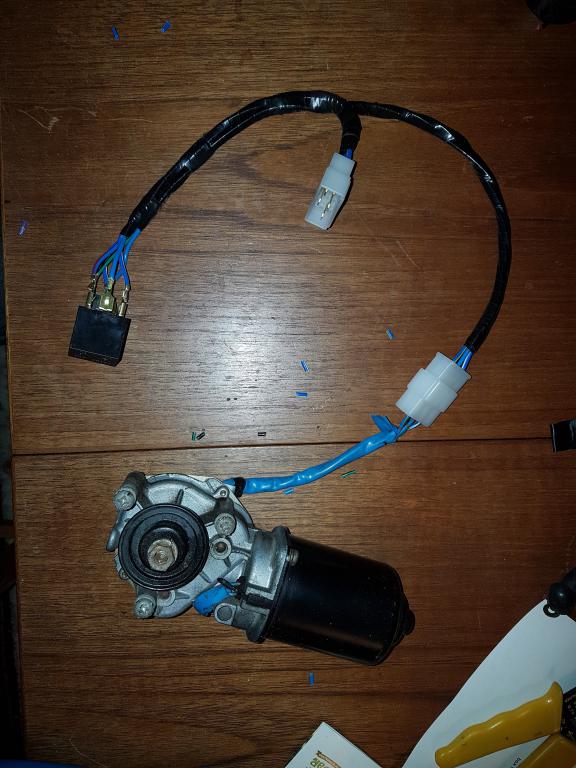
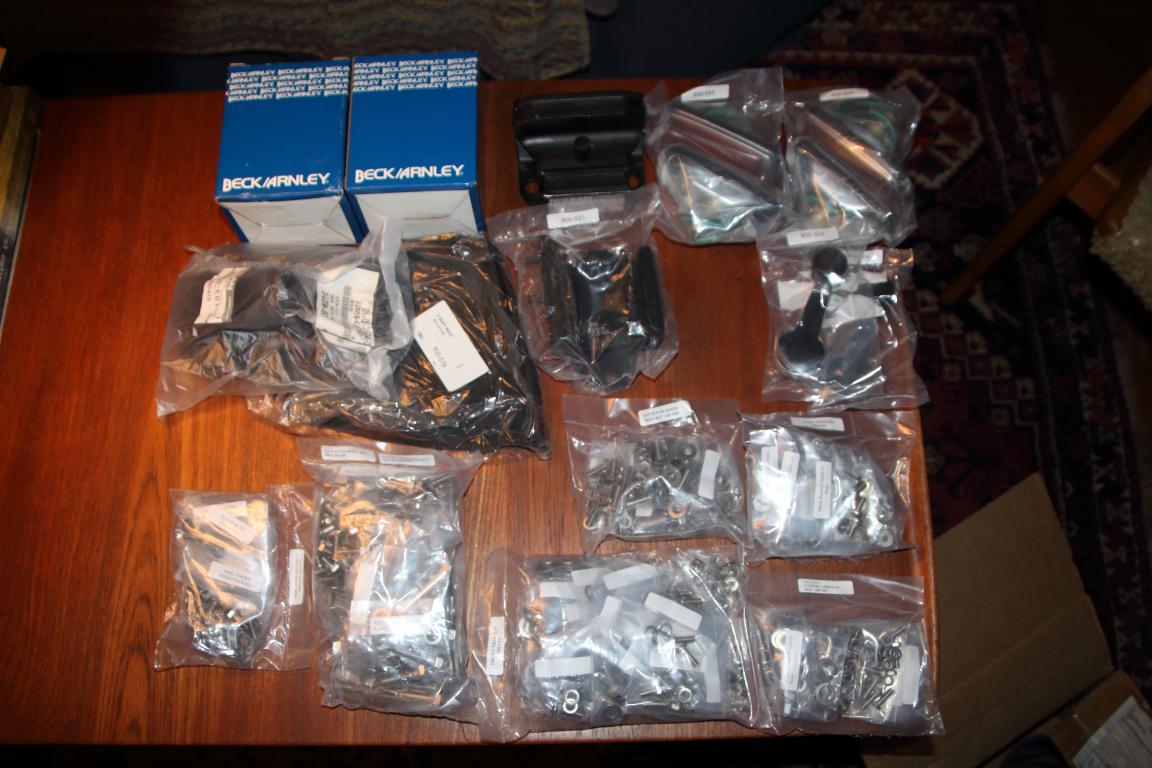
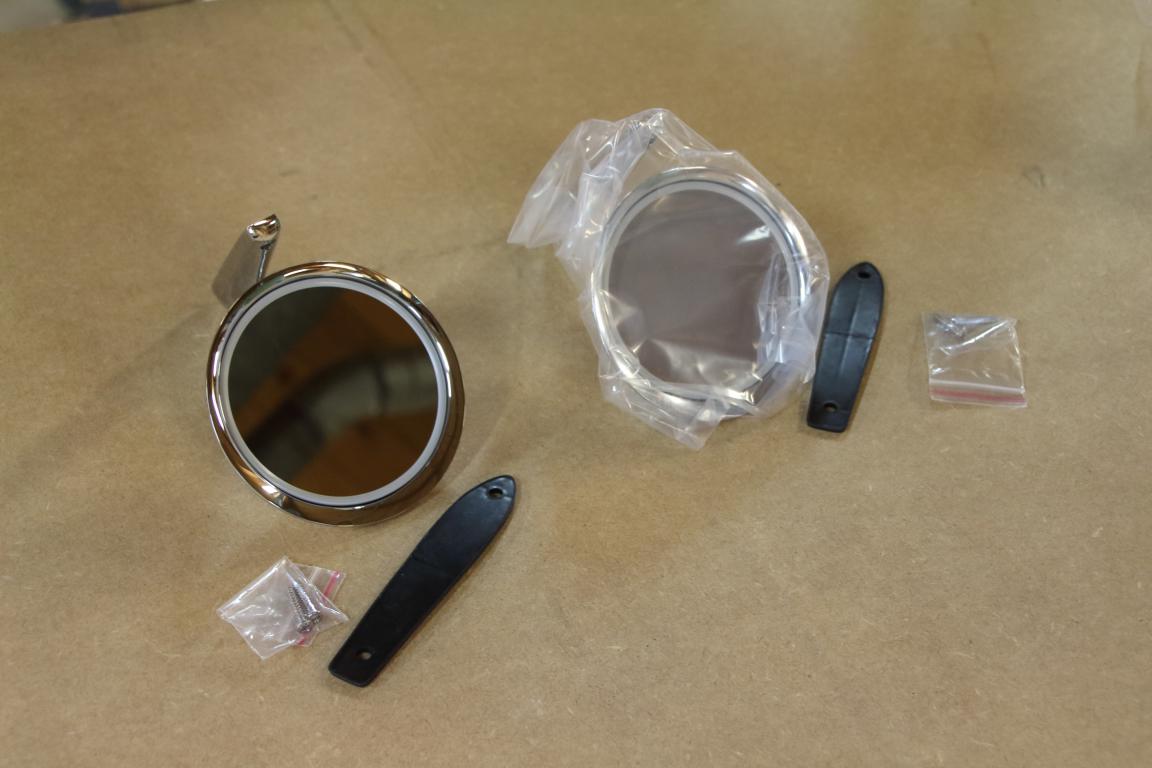
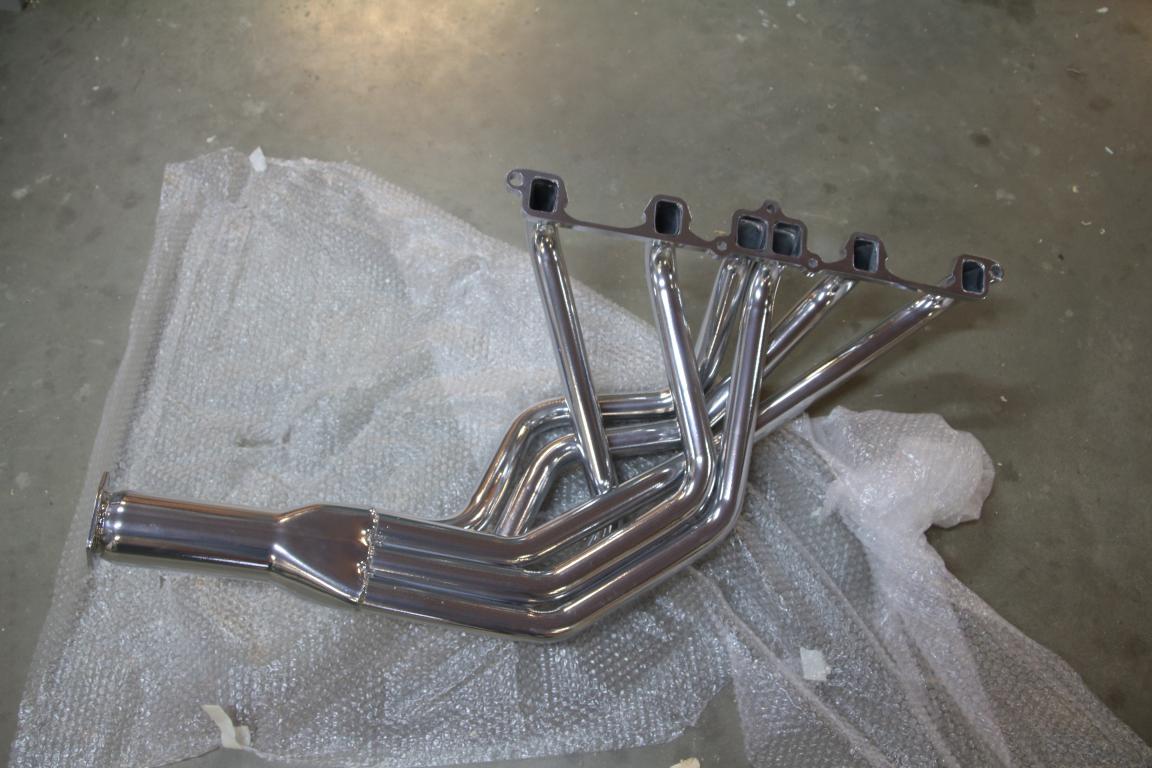
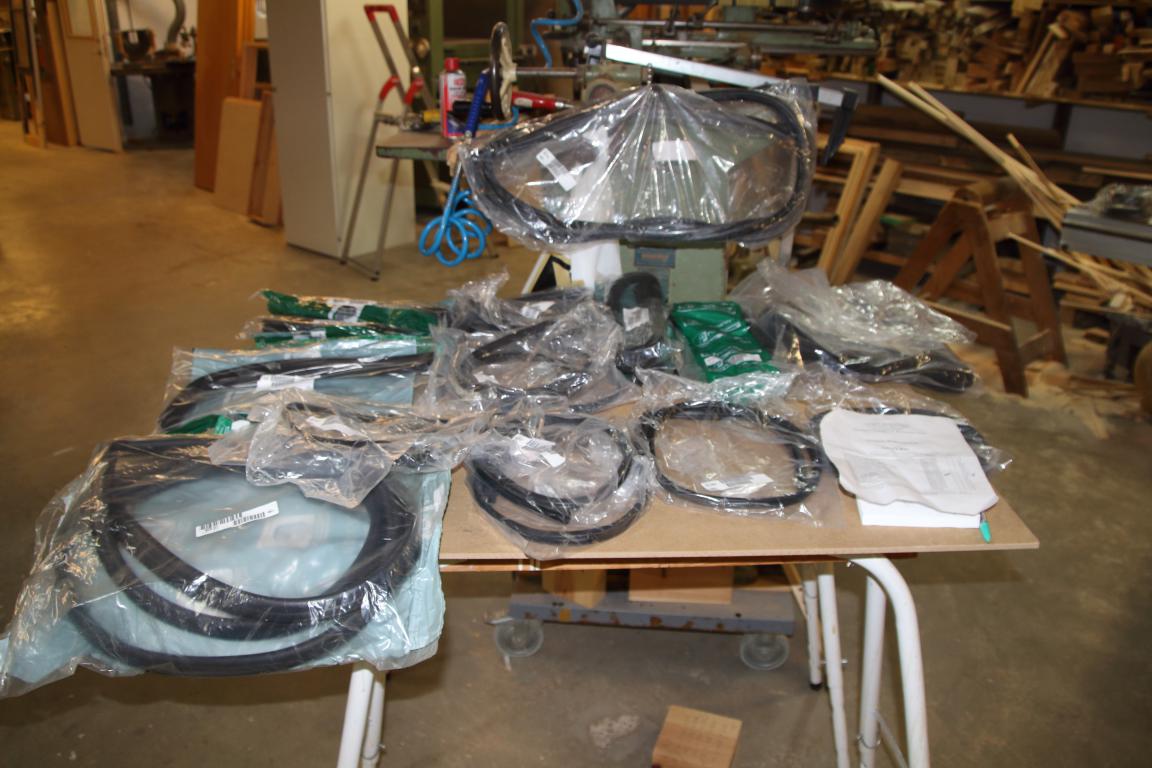
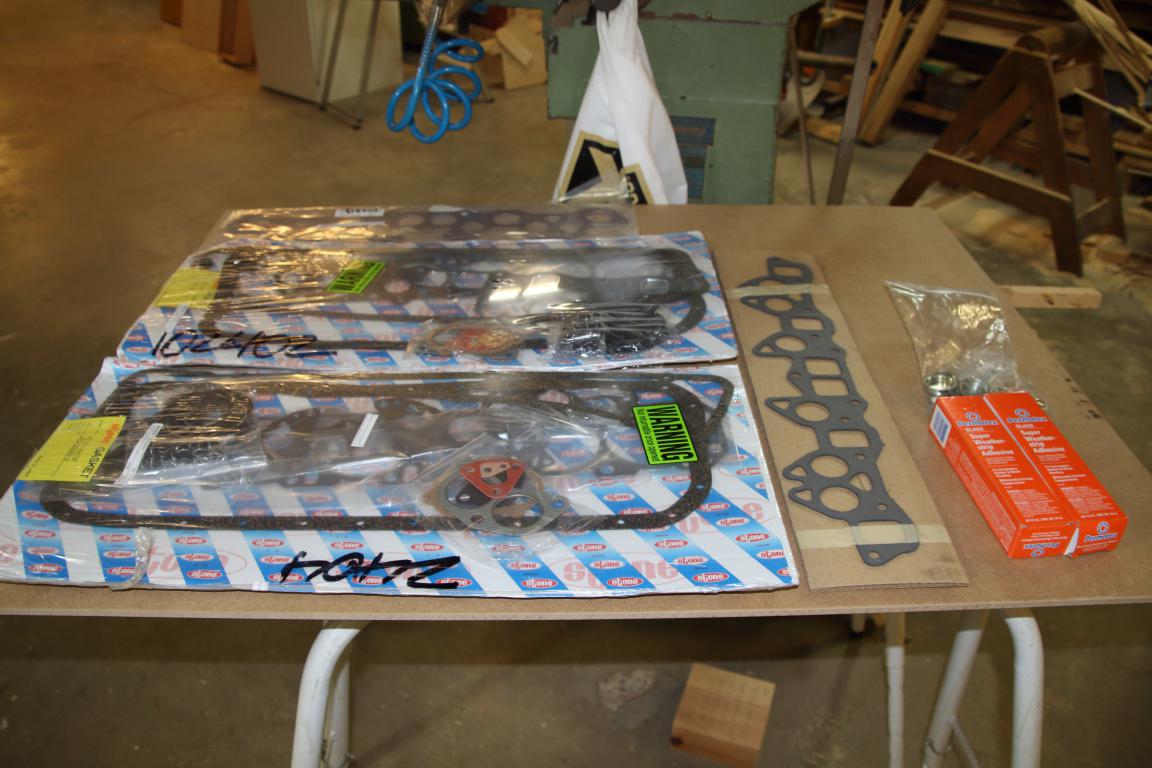
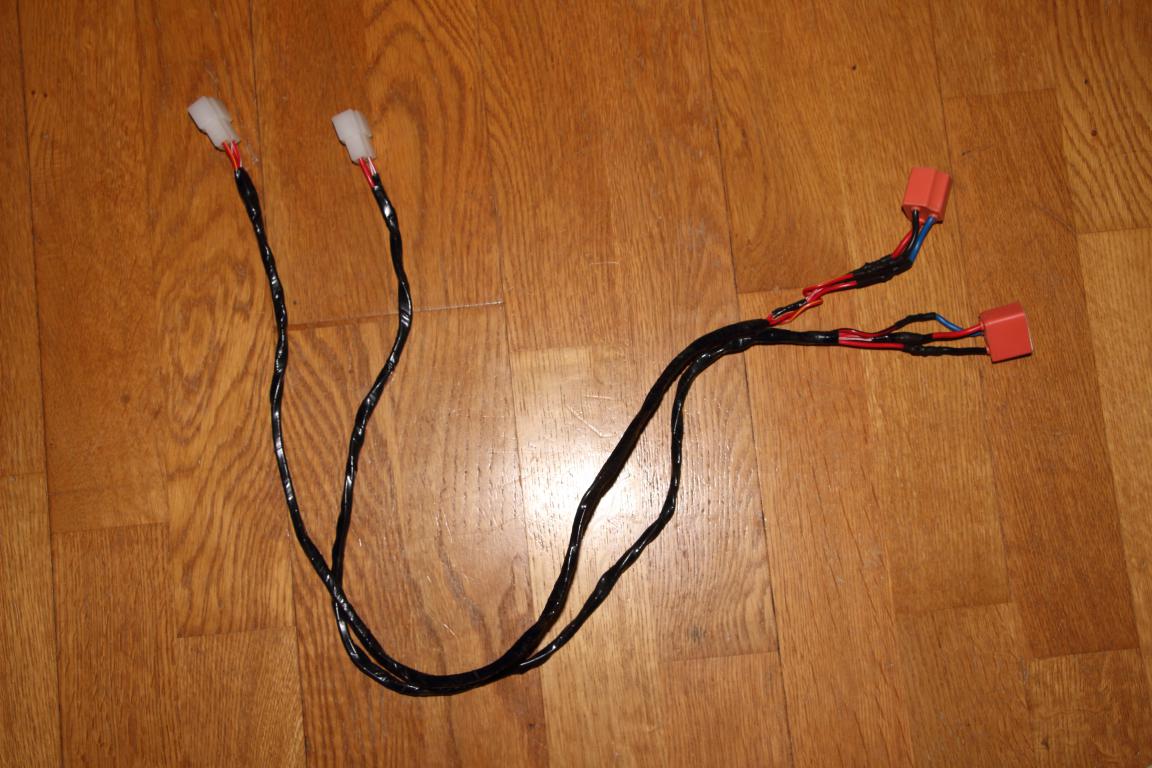
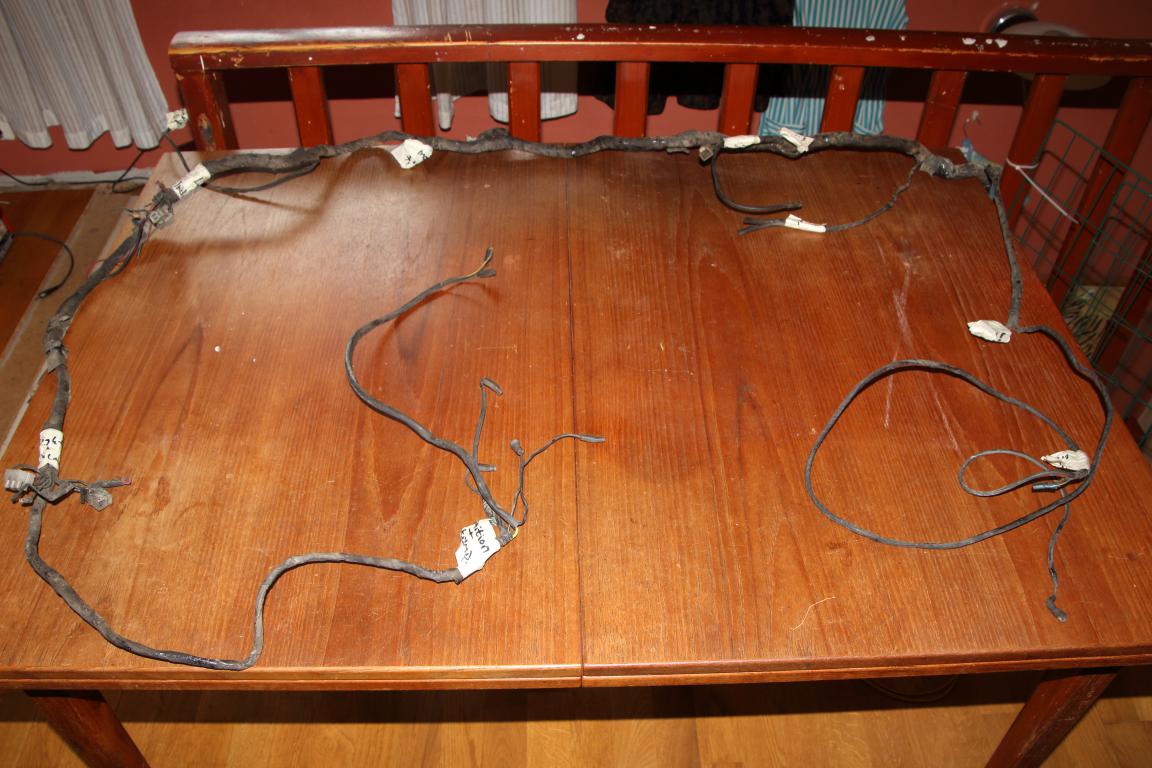
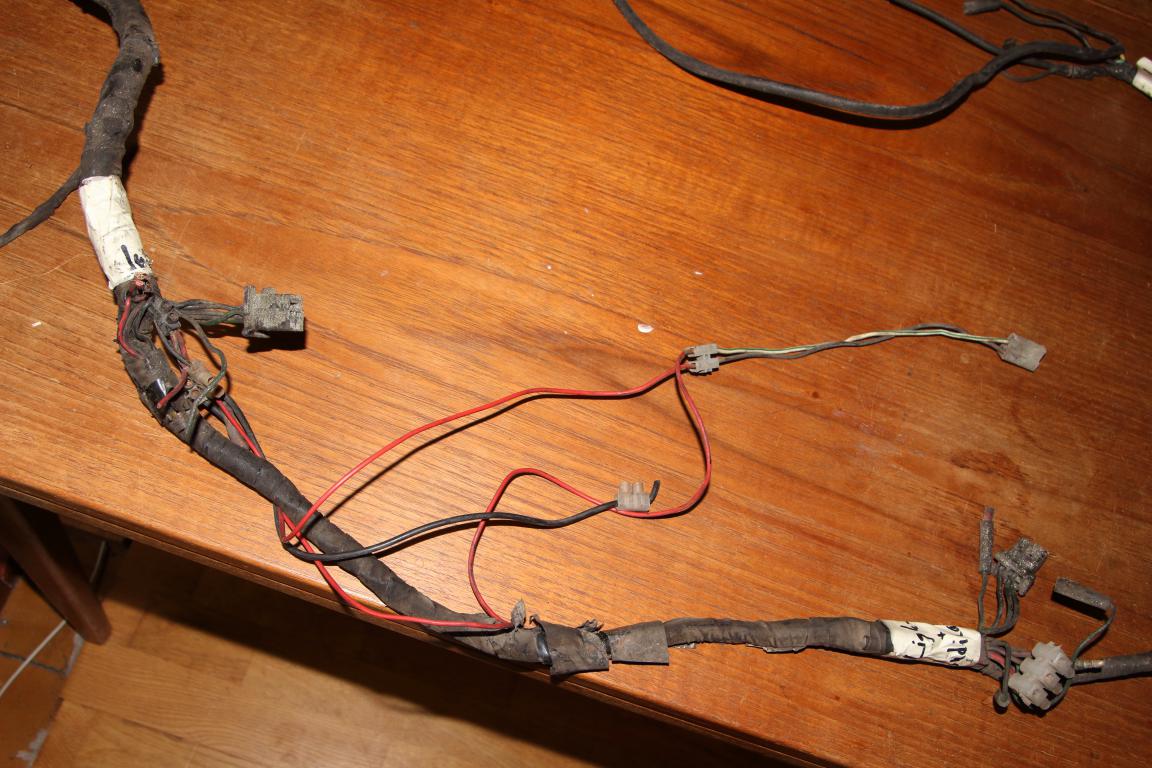
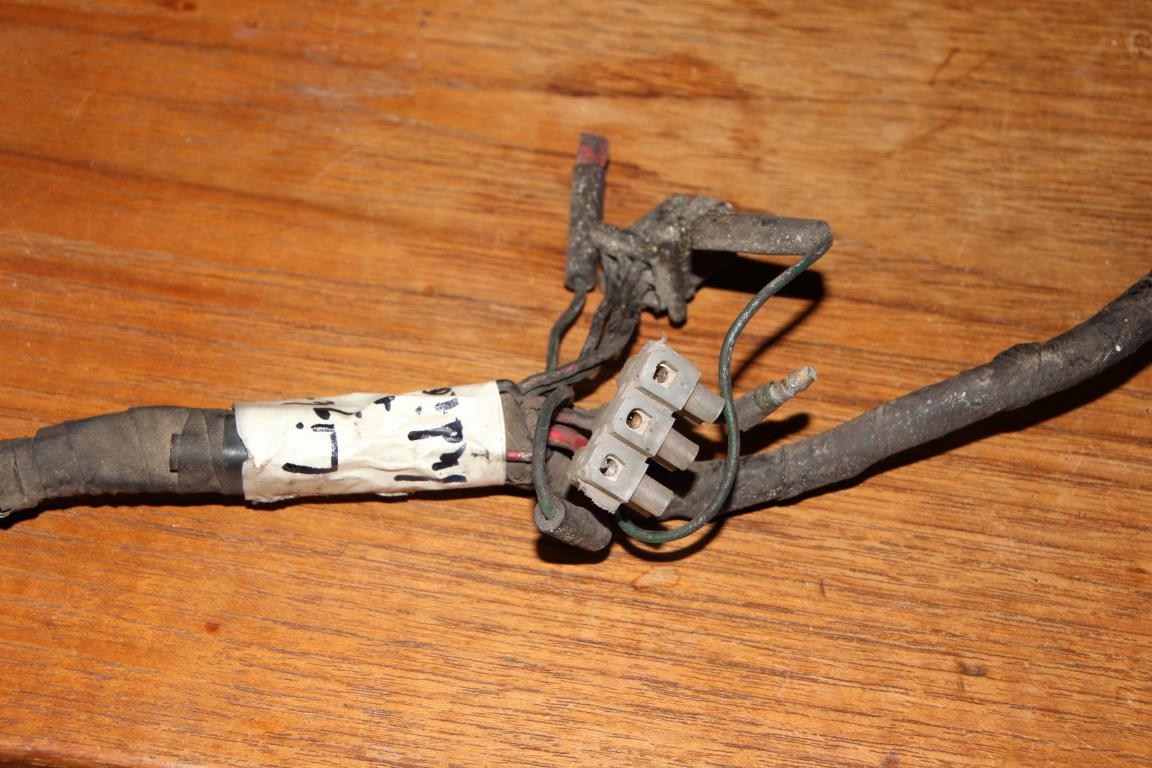
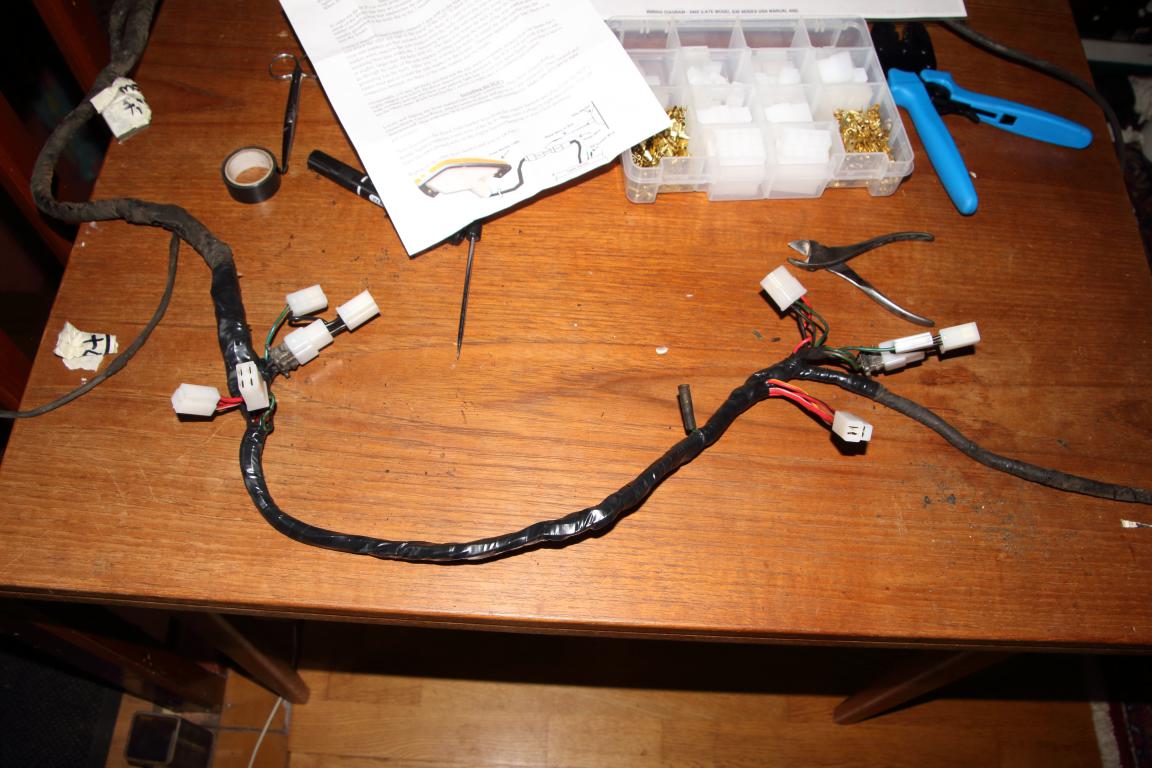
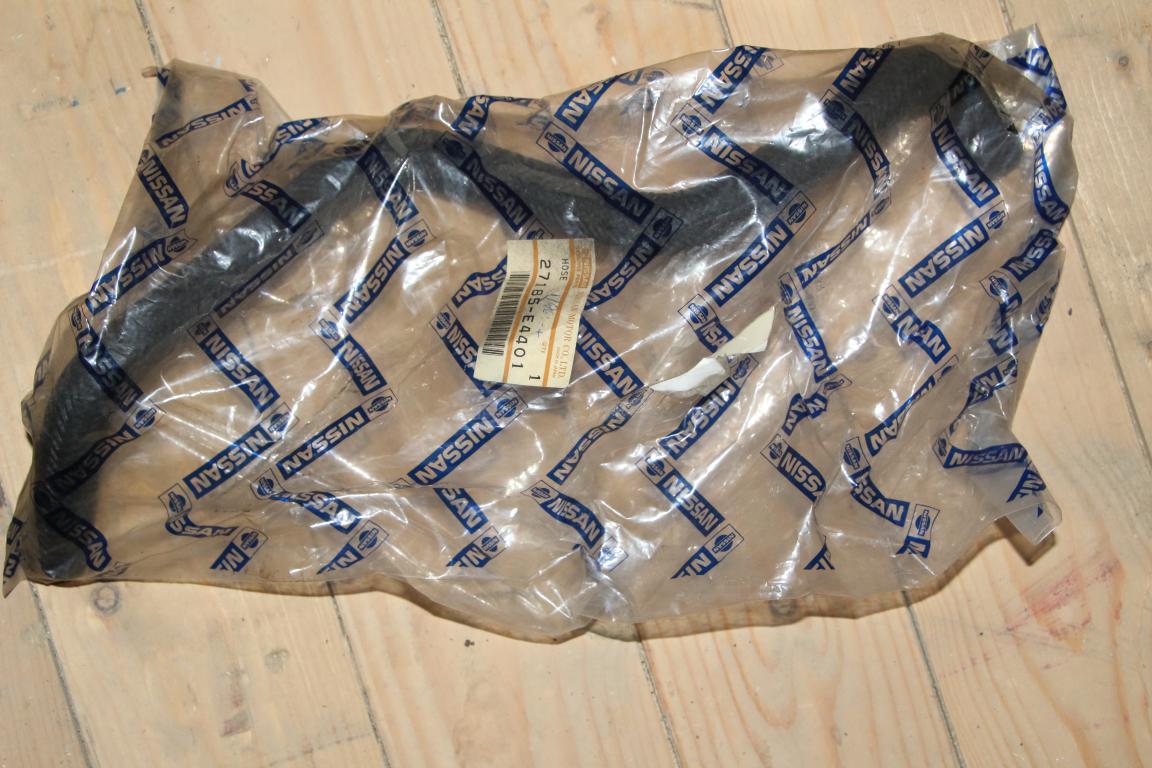
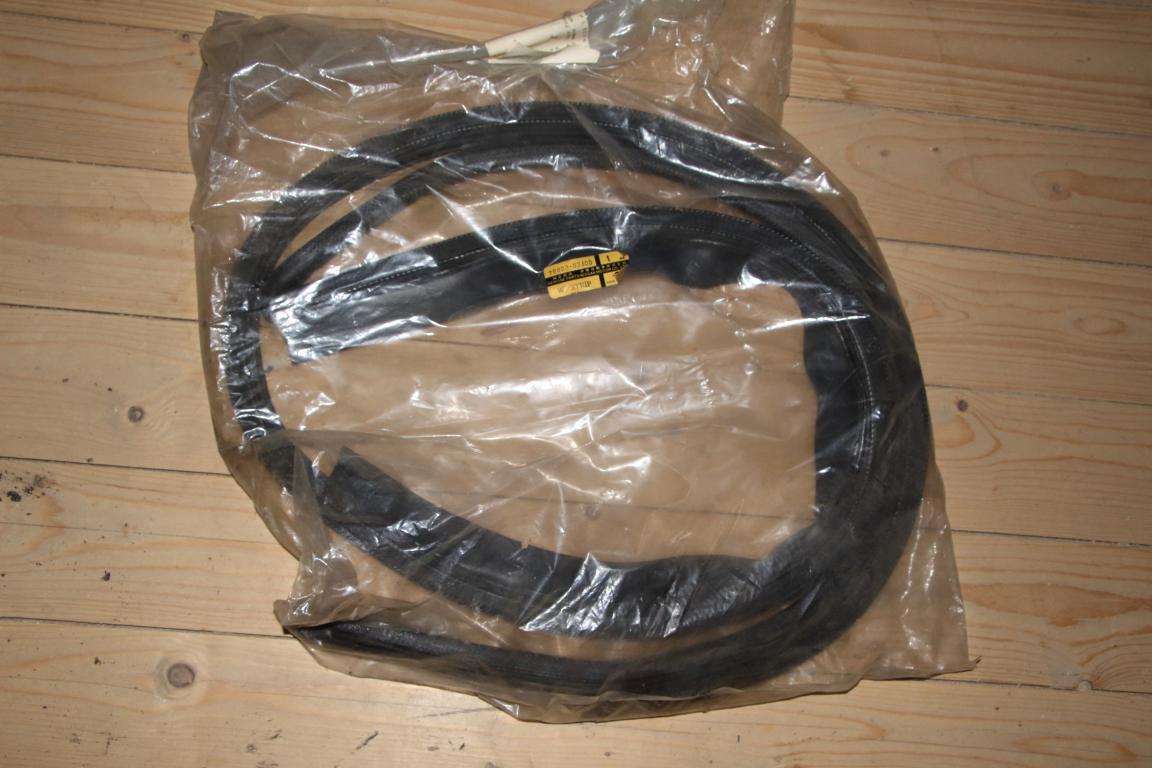
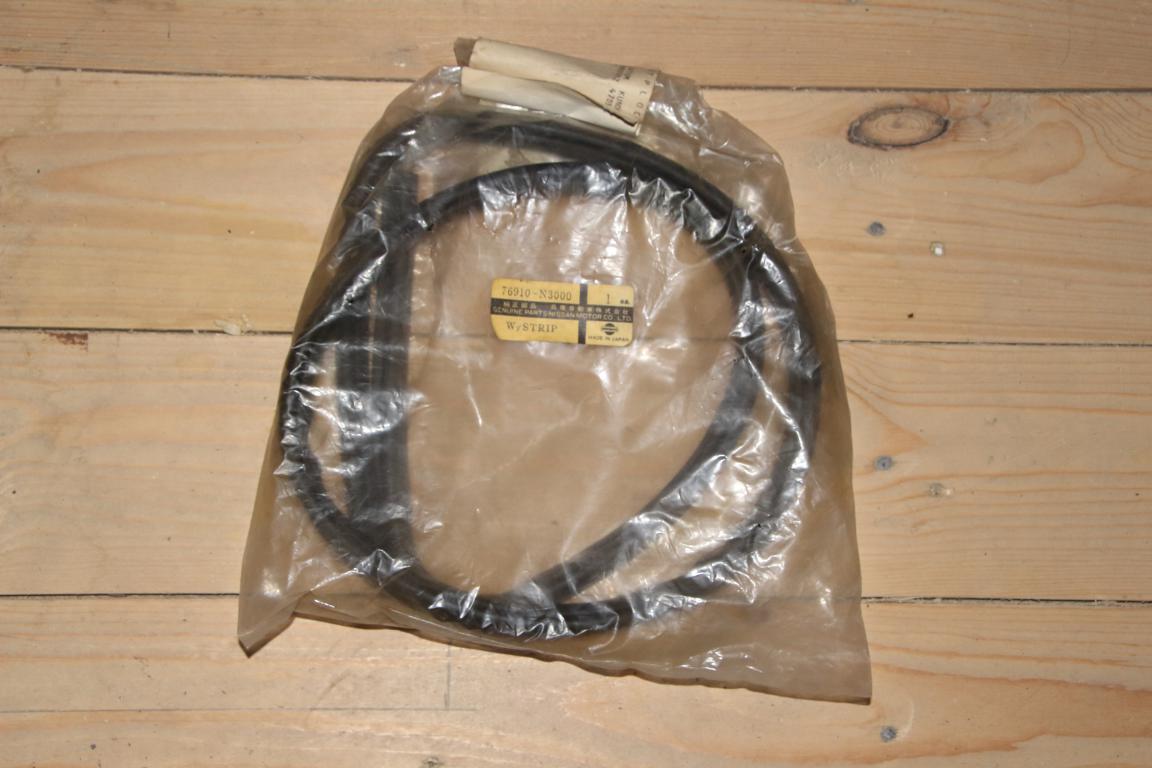
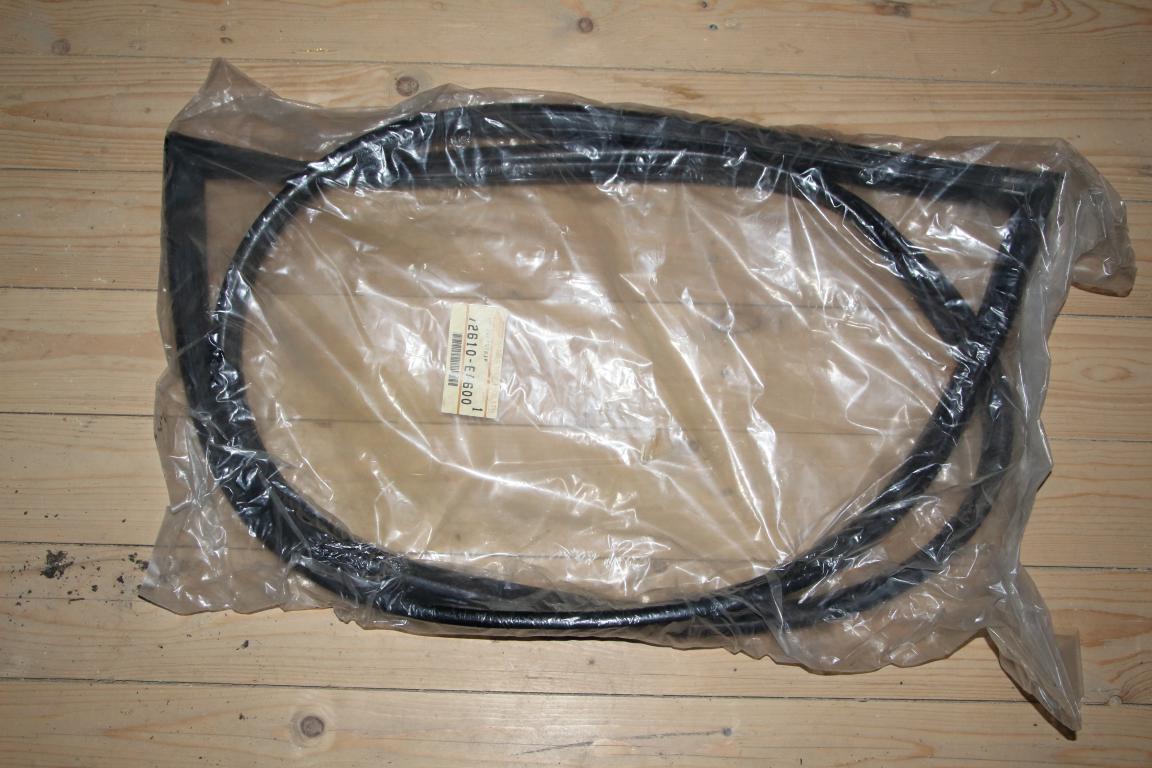
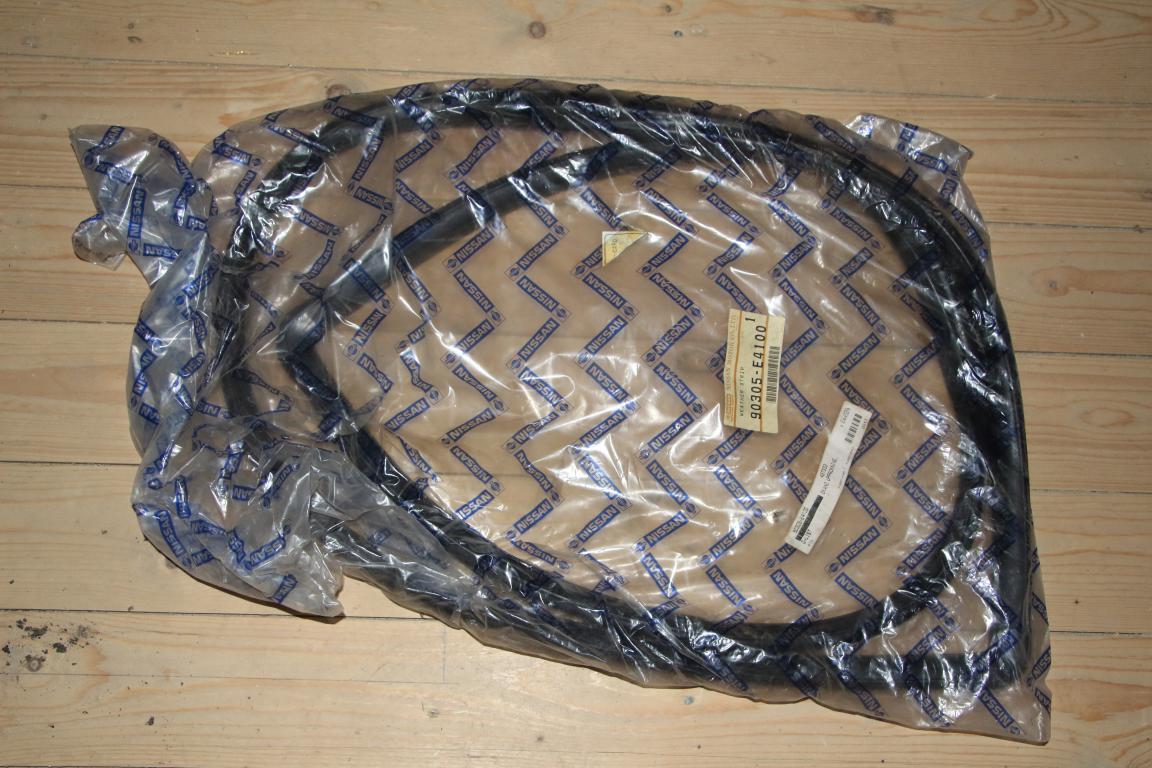
Beginning of December the car was delivered to the sand blaster. Now I'm just ilding until the car can go to the body repair shop, however doing that you can accomplish other tasks, e.g. such as taking deliveries and repairing broken stuff. To properly tune and monitor the operating conditions of the carbs I bought AFR and data logger kits from the UK. I didn't want to mount the AFR gauge in a very visible place to avoid any temptation for thiefs. I decided in the end to mount the gauge in the sidewall of the glove box where it should be visible from the driver position. To avoid having to look at it constantly the logger will log any data during normal driving. To complete the trend I will later also log RPM so that I can see in which range the AFR goes out of range to allow fine tuning. While also installing the logging equipment I swapped out any worn contacts and broken lamps. From the US one can source a nice kit of new 70's style contacts and crimping kit which will fit perfectly together with the original Datsun 240z electric system. This way one can keep the original look and refresh the electrics if required. Wiring with the correct coloring code and gauge was found in the UK to allow correct replacement of damaged wires. While at it I installed a new fuse box as well as a relay kit for the hazard lights. Full beam relay kit as well as marker flasher kit were also installed on the engine harness. The seat brackets that came with the car were quite badly worn and partly broken. Since I really hate bad sliding mechanisms I decided to try the Corbeau custom brackets. They have had mixed reviews, but I decided to try them anyway. Time will tell if it was a good idea. The wiper motor was quite tired. Reading online I have seen multiple thread regarding replacing it with a honda motor which is significantly stronger. A bit of rewiring is required, but since I already aquired original coloring wires from the UK I could easily fabricate a small harness extension which allows mounting of the additonal relay that is required to make the wipers park properly. The original header was quite rusty, but to my knowledge still usable. Plan is to blast it and save it for use with the original L24 engine at a later stage. The new L28 will get a Zstore 6to1 header with 3 inch exhaust. The original windscreen was cracked and needed to be replaced. I sourced one from the UK and it arrived well packed! Most of the weather stripping was quite badly worn or dried out. I decided it was a good idea to replace them all to avoid any leakage into the new car. I also got a bit of weather stripping from the previous owner, so at a later stage I will decide which components to use. The car only had one driver side mirror mounted which looked like it was from a 90's Audi. That had to go and I bought both driver and passenger side mirrors. I was playing with the thought of having fender mirrors but decided to stick with door mirrors. Bolt sets, new engine, transmission and differential mountings, side markers and window winders (mounted was a very cheap type of aftermarket electric winders). New suspension and drivetrain components, protective rubber parts as well as miscellanous engine and body components. My intention was to break the engine and replace all the seals, bearings etc... however after a call with the previous owner I found out the engine is very fresh. Originally it was bought with low milage on it and directly broken down for full refurbishing and tuning. New bearings, seals, pistons, auxiliaries etc were installed and the engine broken in (approximately 20000 km of driving). Since then it was stored in a warm garage. I will break the engine and swap some of the gaskets, but I will not touch bearings or rings. The second sealing kit I intend to use to refurbish the original L24 engine. /Erik
-
Swedish Datsun 240z Restoration
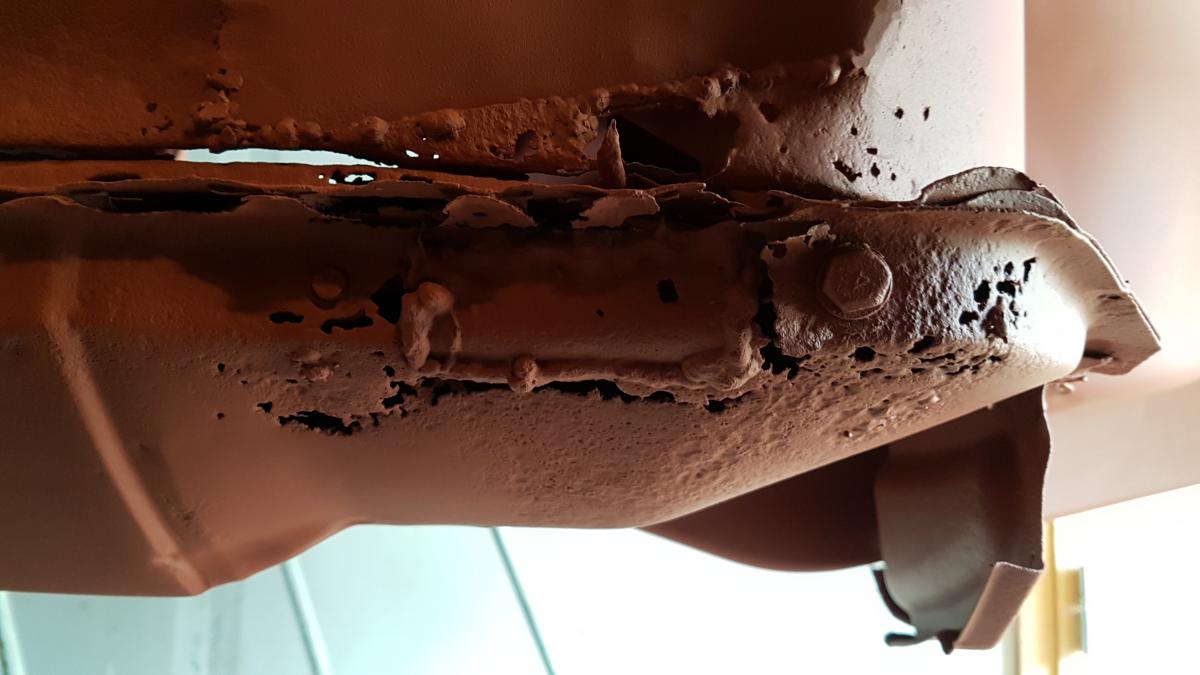
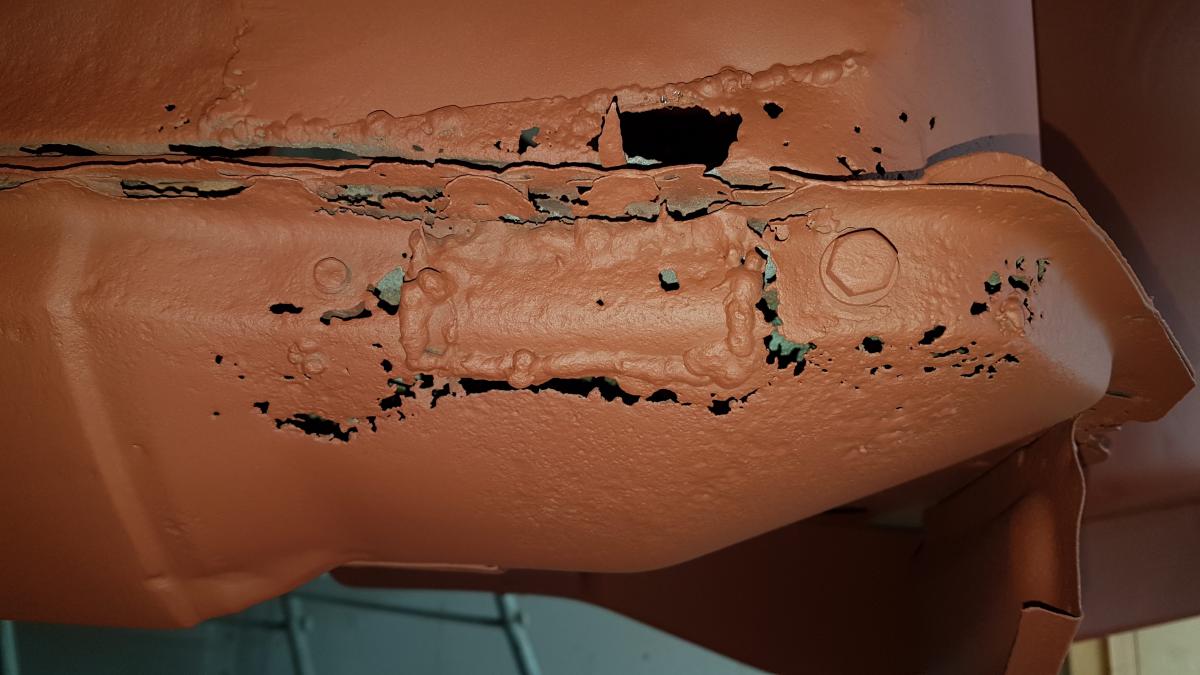
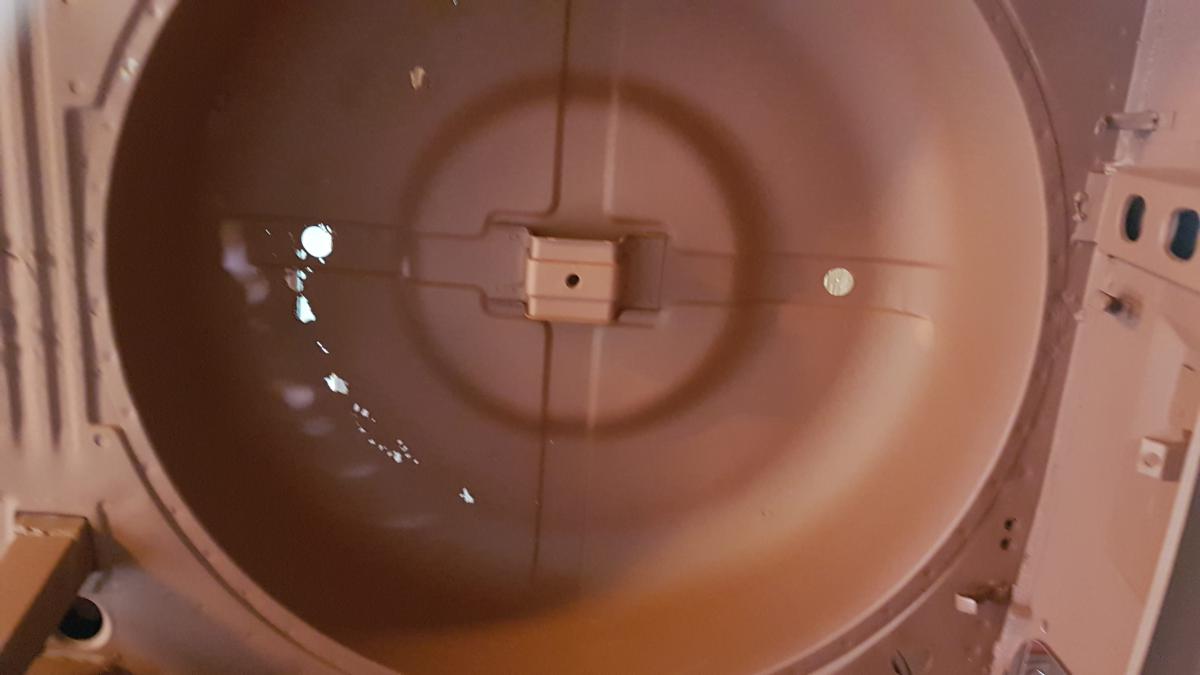
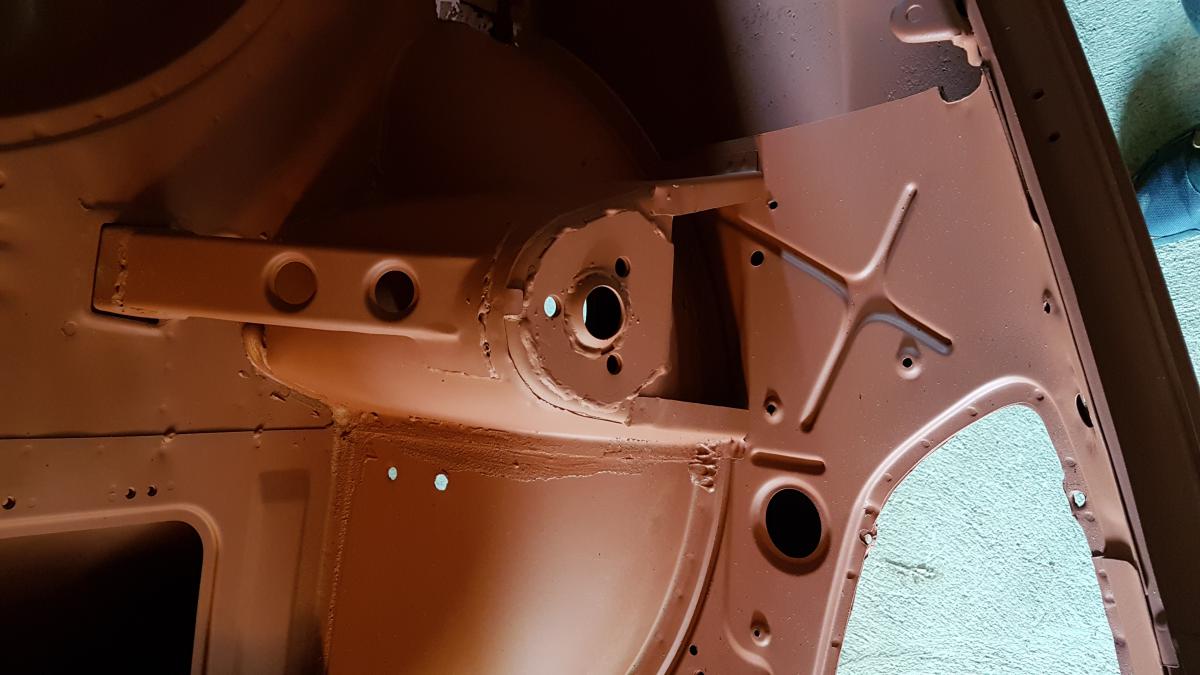
Tebirkesueth replied to Tebirkesueth's topic in S30 Series - 240z, 260z, 280z
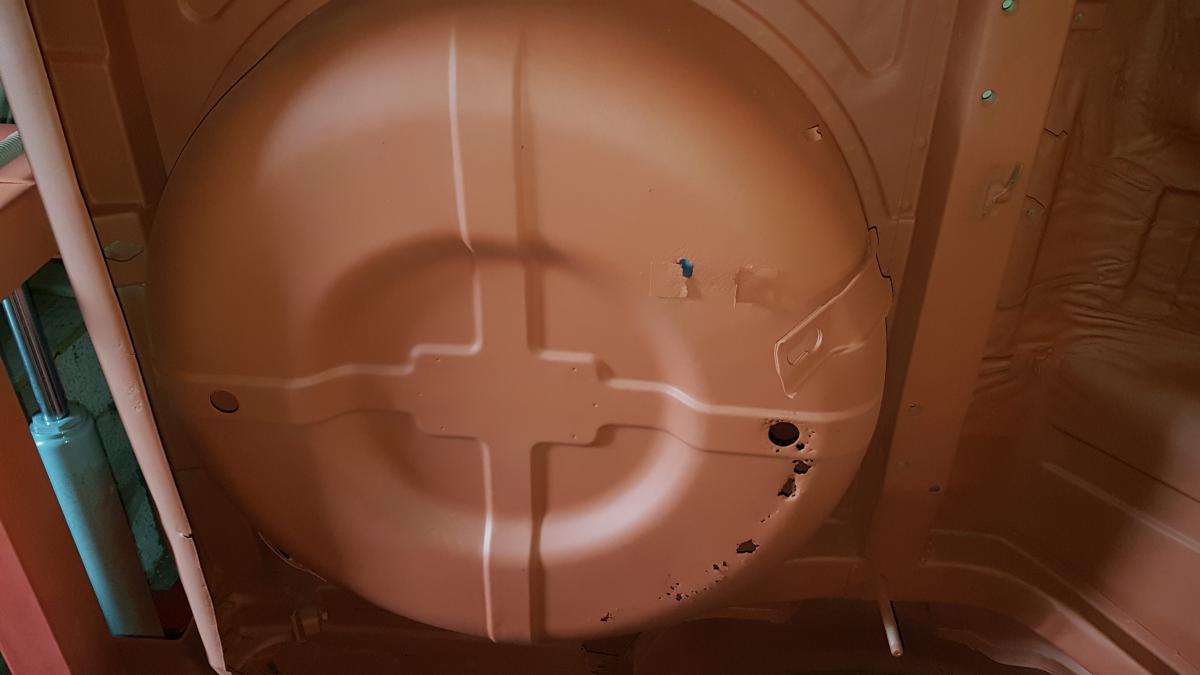
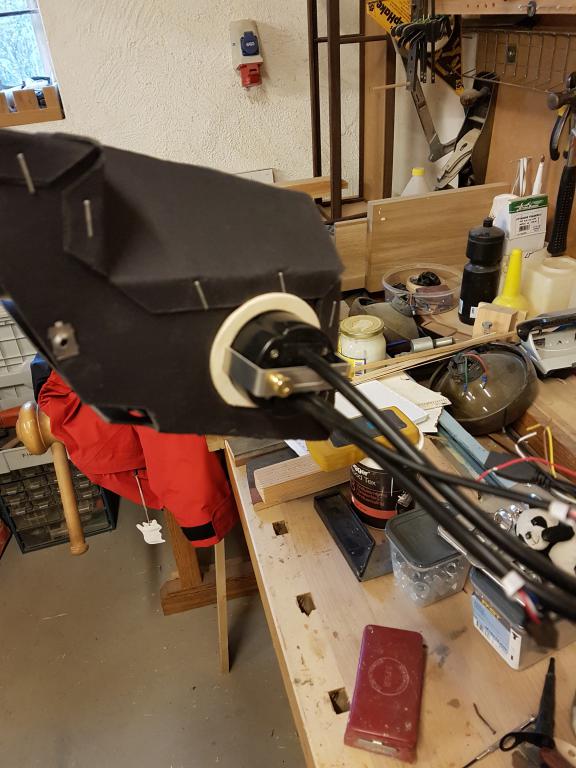
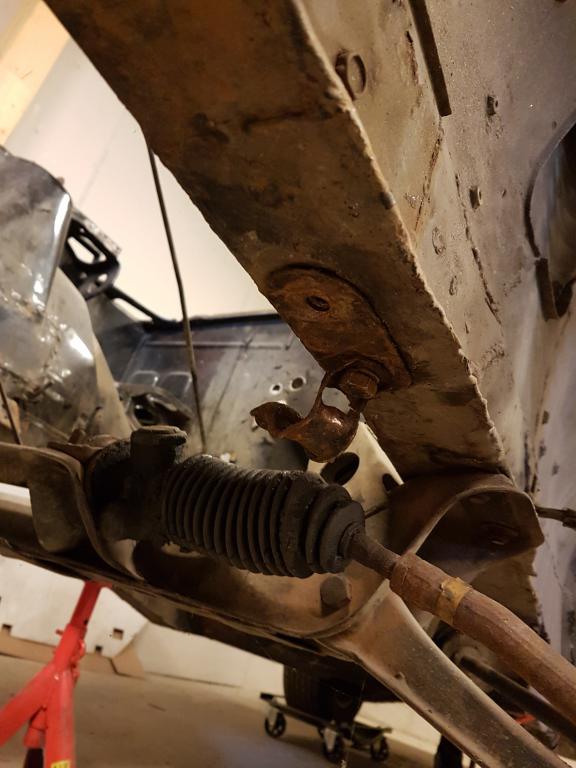
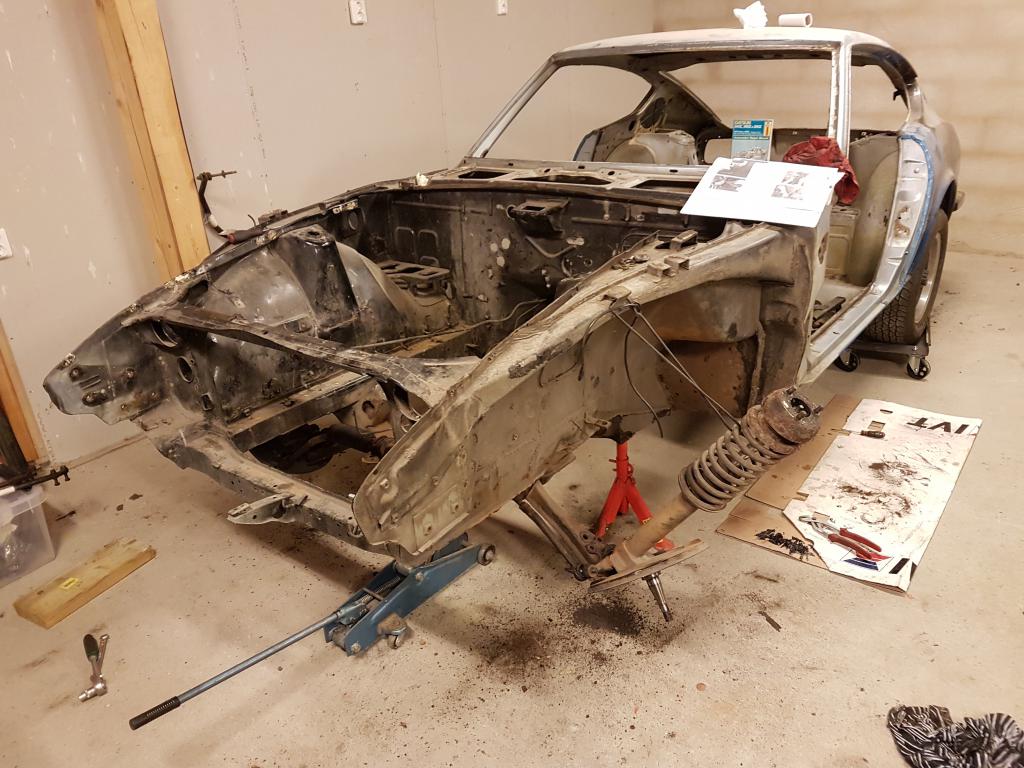
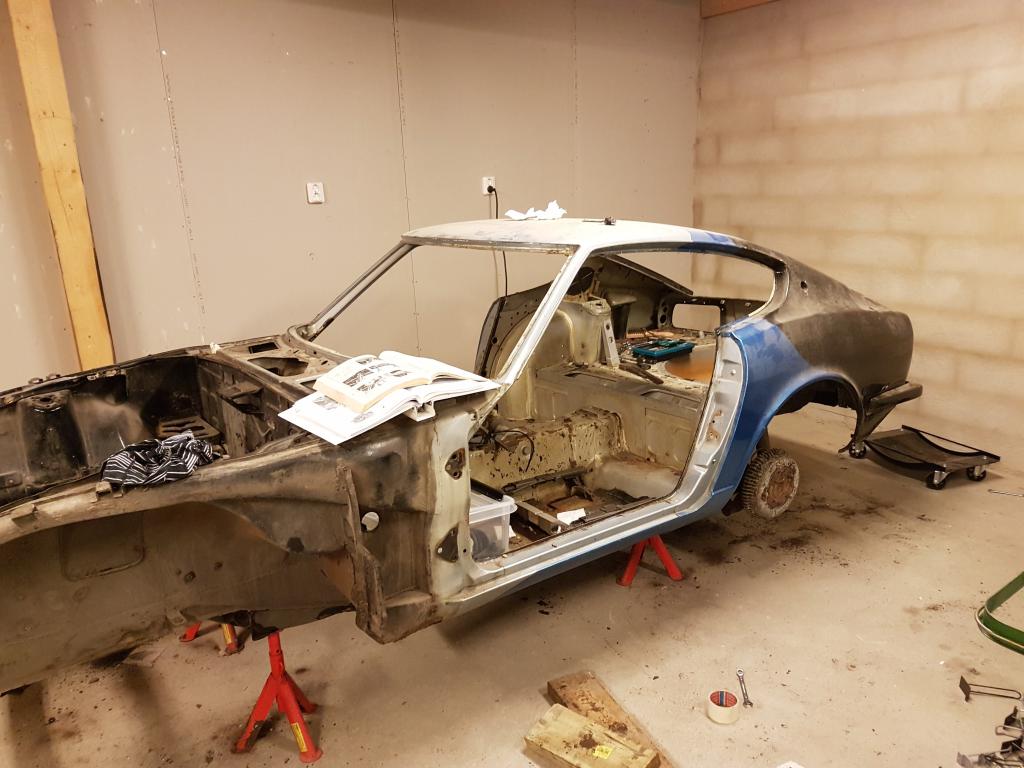
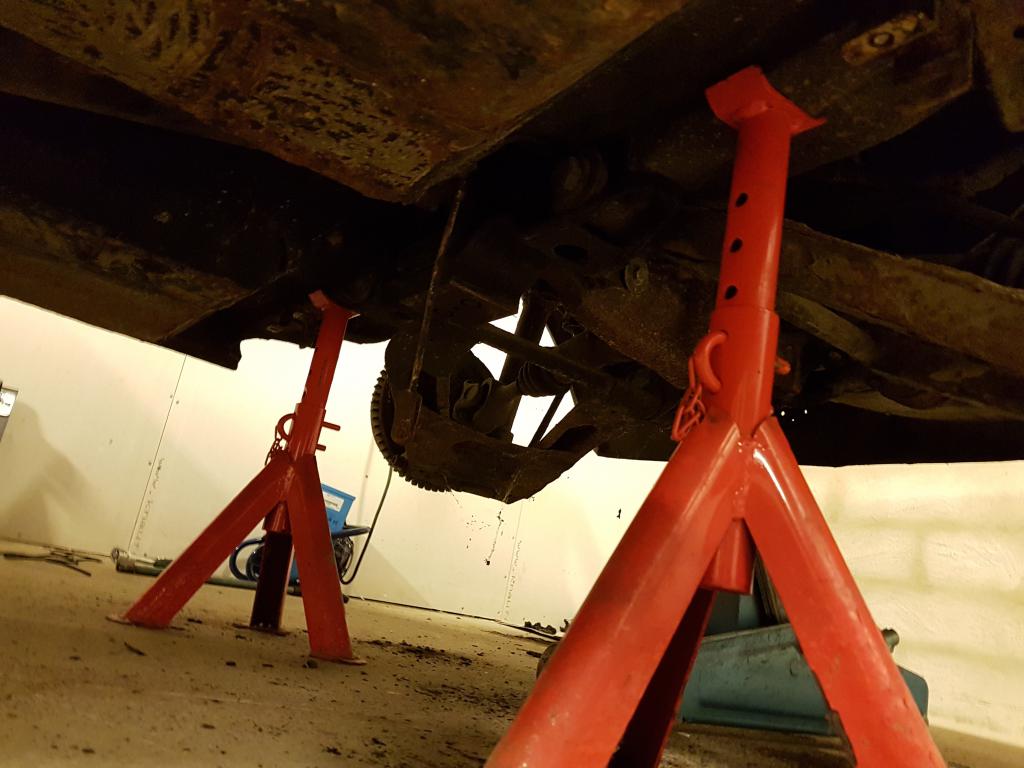
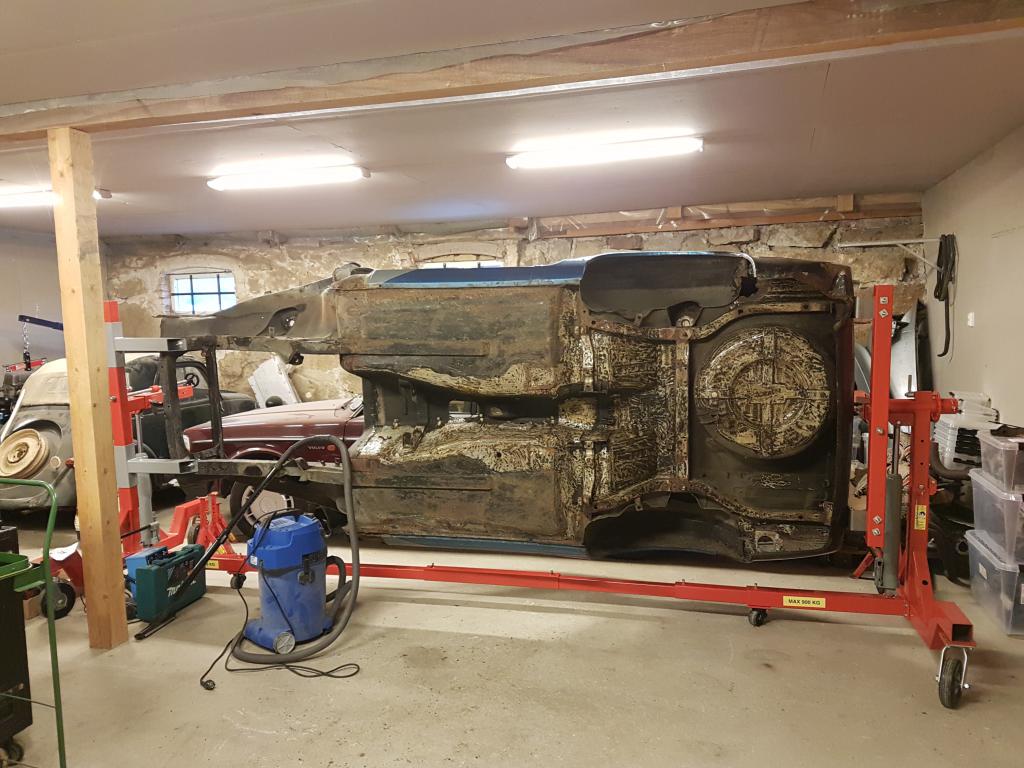
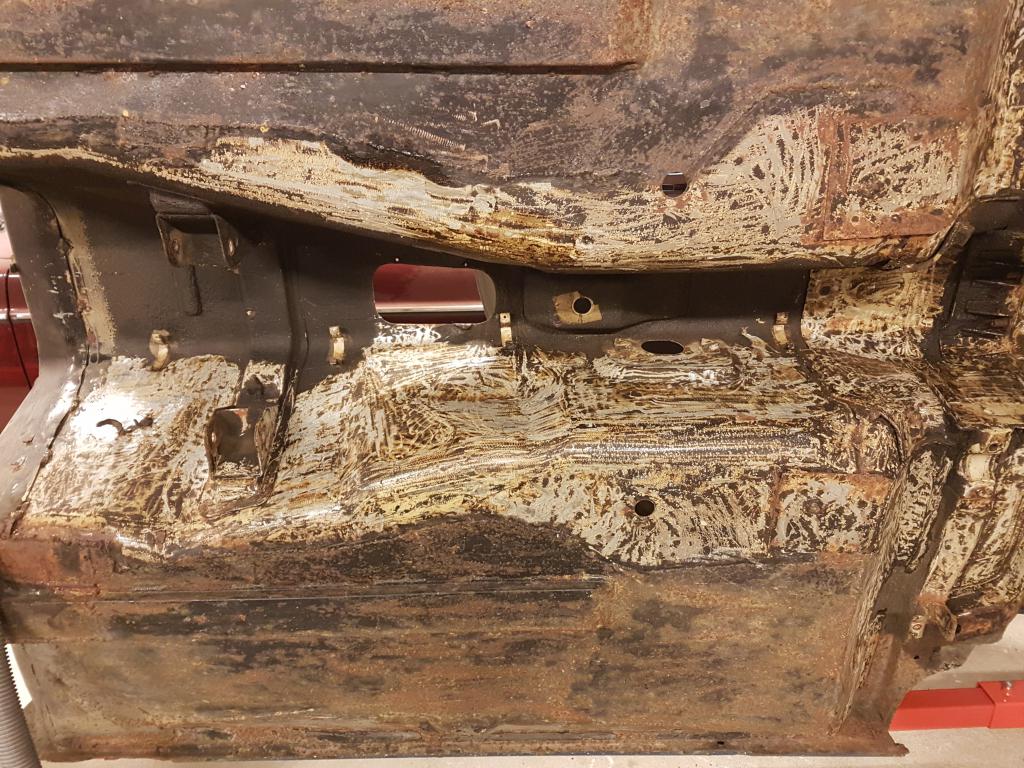
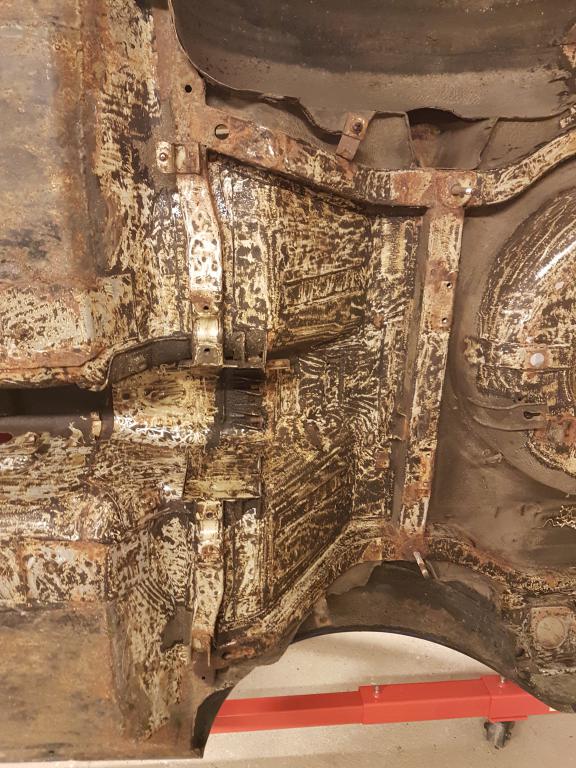
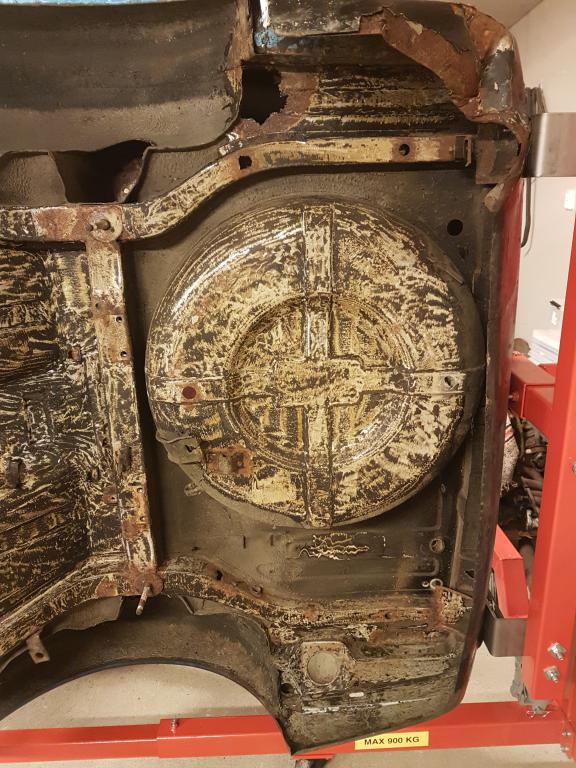
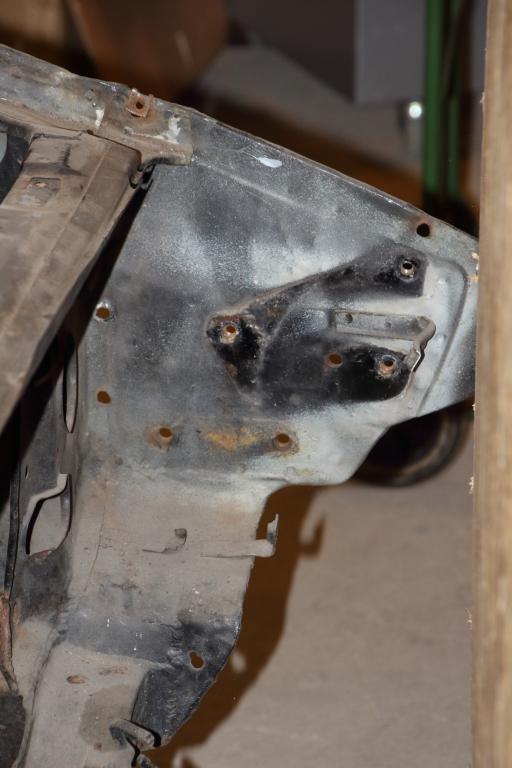
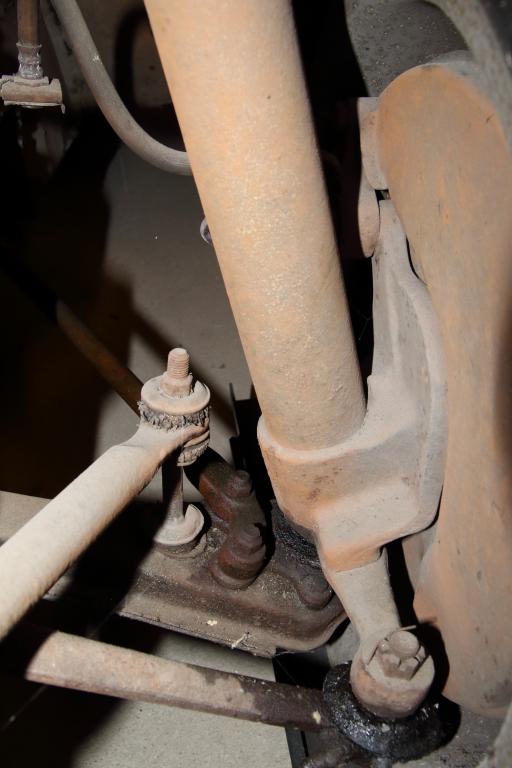
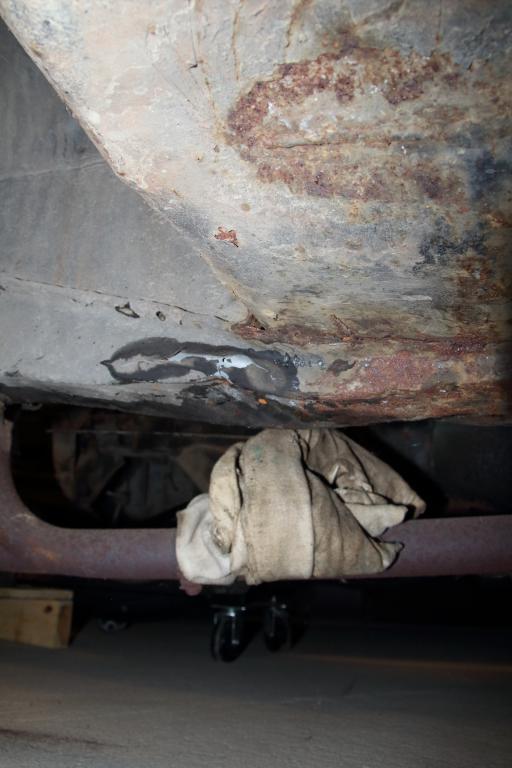
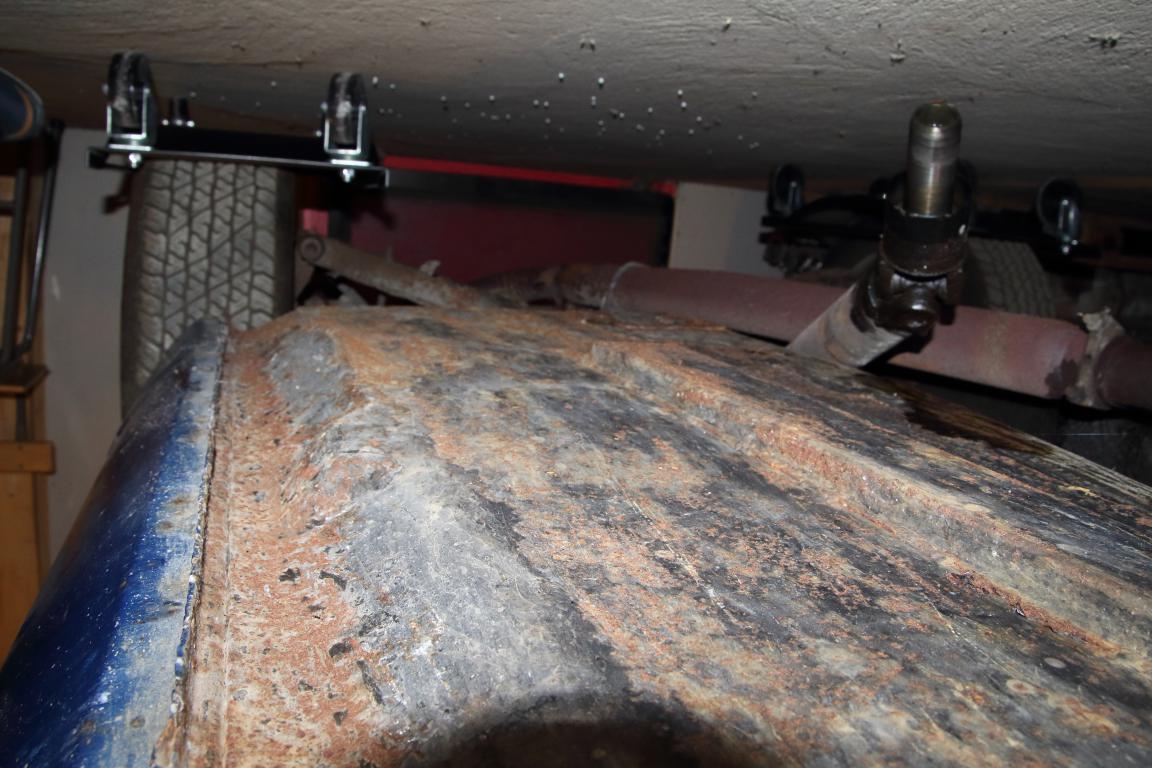
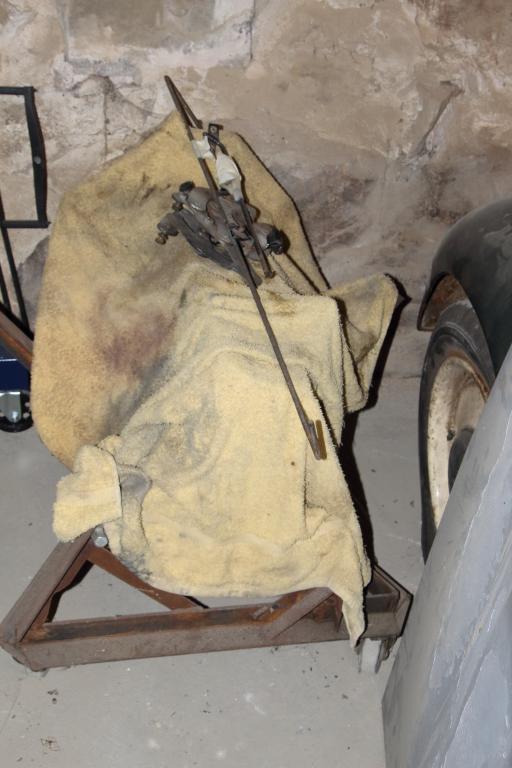
Long time since my last update... glad to say that progress has not been completely stagnant. The latest status was approximately I decided the next step was to remove the all components underneath the car to make it more accessible for sand blasting. I started by supporting the front of the car on jack stands and removing the front wheels. Once on jack stands I could access the front suspension and steering rack components. While removing the stabilizer bar one of the bolts started turning inside the frame rail box. I cannot inspect it in detail but I believe the plate containing the threads inside the box has come loose and spins while trying to undo the bolt. After further inspection the box is flaky in front of the steering mounting location on both sides (bottom piece, inside and top of the box is still solid, but rust has attacked the sides towards the wheel well). I intend to have the box opened and the rusted out areas replaced as well as refix a new plate for the stabilizer bar. Removal of the steering rack and suspension components was accomplished in one go. Since I was alone and didn't fancy hanging the suspension solely supported in the steering rack I tied some lines to the top of the shock towers. This way I could remove the large moment force while at the same time lower the complete package without additional manpower. Front suspension and steering rack off the car. Next step was to remove the rear axel, differential and suspenion components. Before I started I noted that the car was now extremely light in the front end and relatively heavy in the rear resulting the front jack stands loosing contact with the frame rails. Luckily I noticed this before I actually mounted the jack stands in the rear and solved it by placing some heavy components in the passenger and driver foot wells. Location of the rear jack stands. Being a 73 I had to first remove the rear stabilizer bar to position them properly. Final look after removal of all components. I had now removed everything which was practical based on the access. So now I had to assemble some more new tools! I bought myself a rotisserie which after assembly looked like this Ready to attach the car. Car lifted. With the car on the side I started to remove the under seal to reveal any rust and prep the car for sand blasting. The guy doing the sand blasting for me prefers to have the underseal removed because the sand tends to bounce and generate heat. I did unforunately not have the time to remove all of the underseal, but the contracted company will take the rest. Noted after removing the underseal was that the rust in the spare tire well was worse than expected and had rusted through in a few spots. Similarly the
-
Thanks for your help everybody! Didn't know about carpartsmanual before, really good link which is now bookmarked. Unfortunately the part seems to be discontinued, but I managed found one nissan parts website with limited availability.. fingers crossed.
-
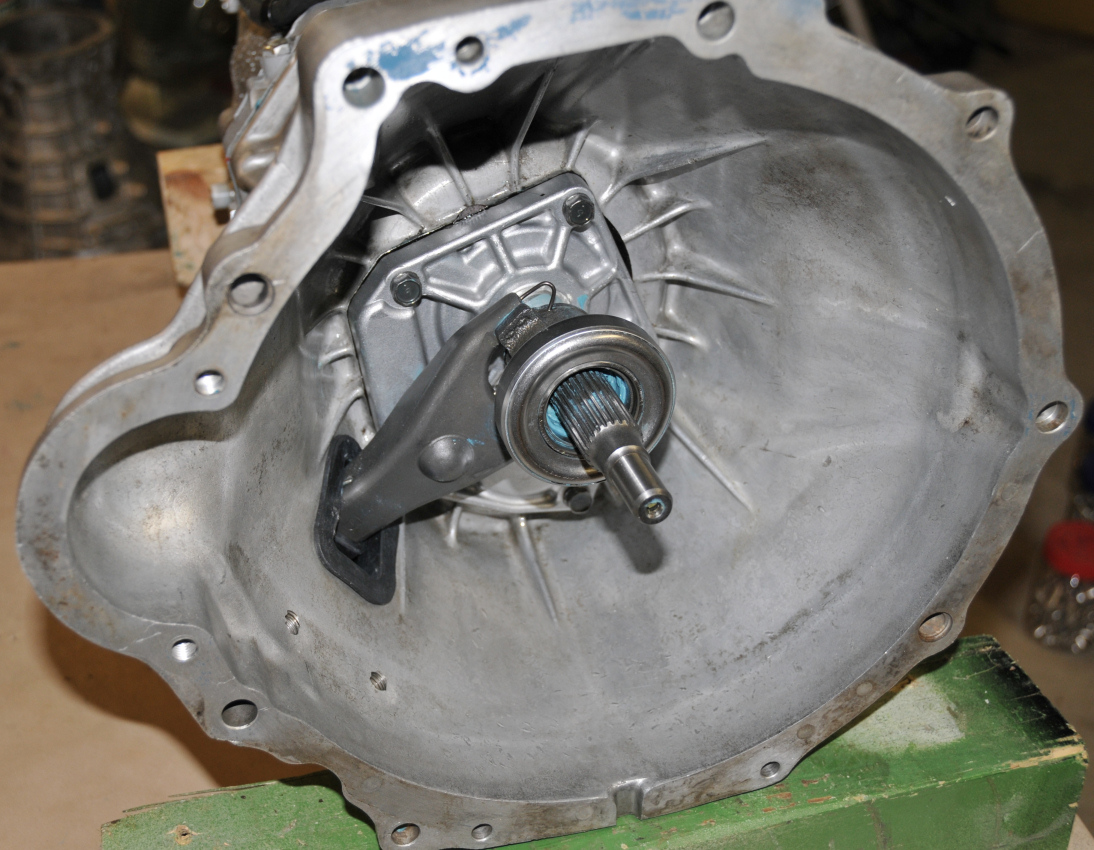
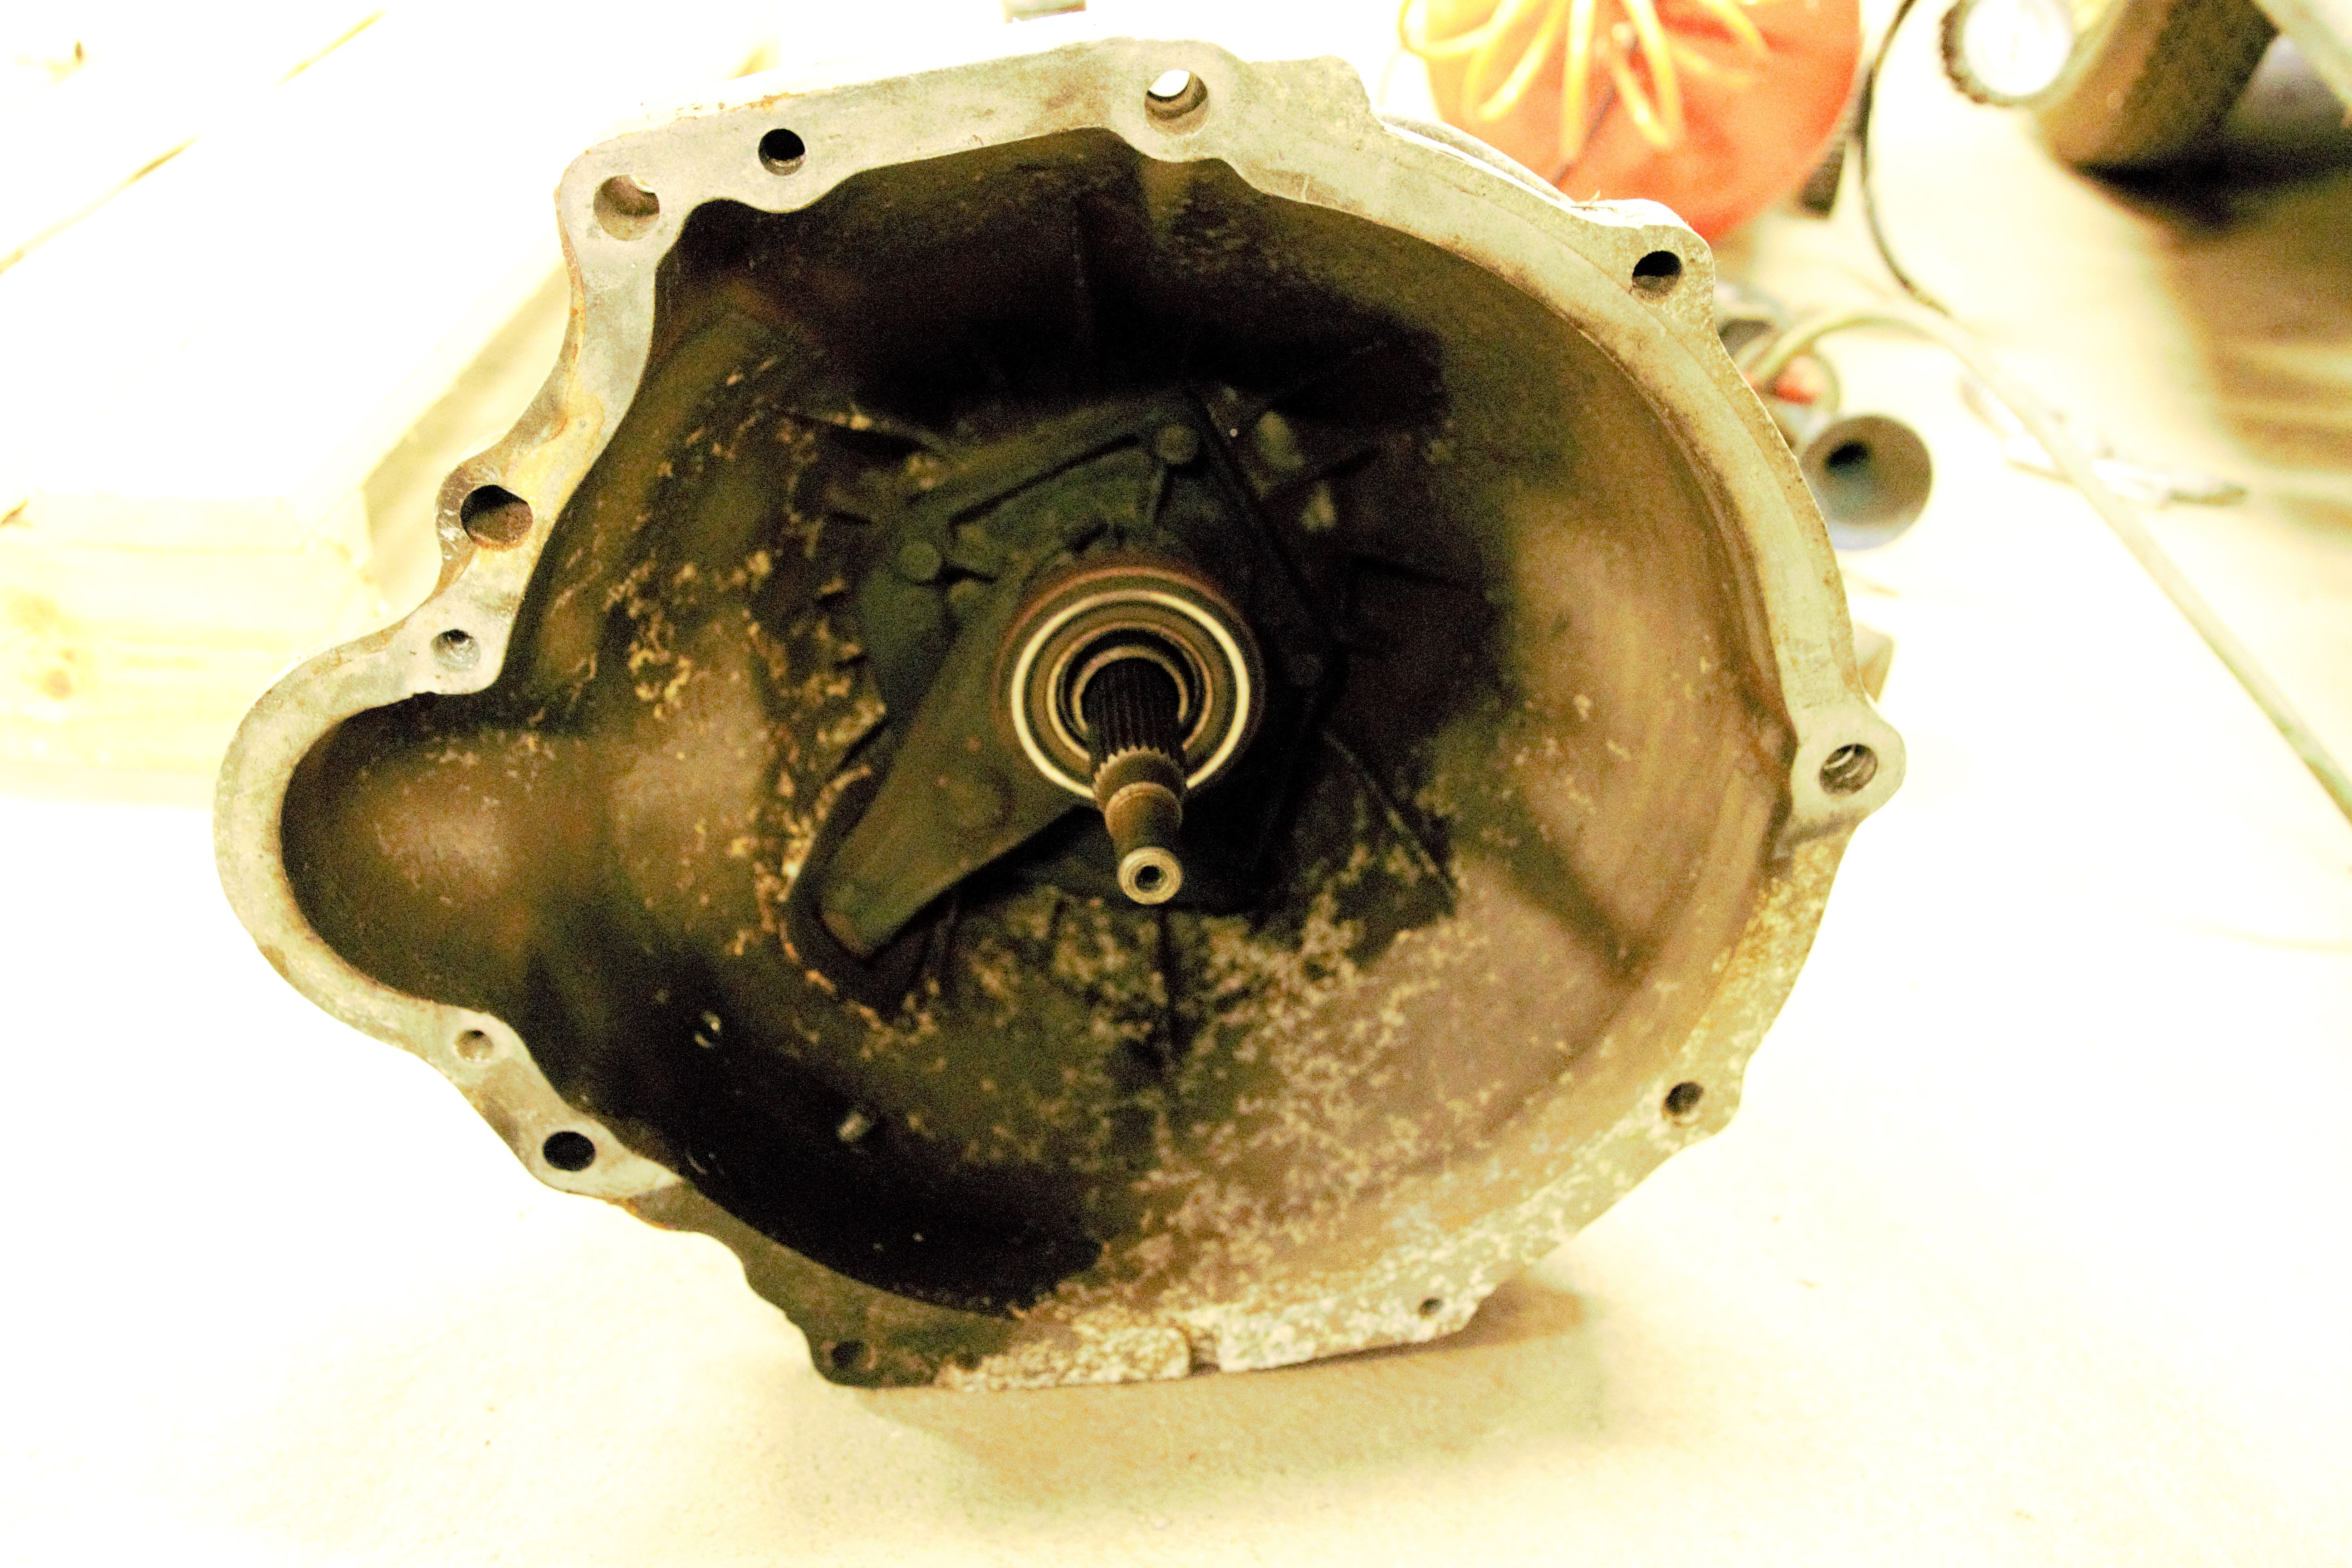
Hello all, I tried searching in the forum for this but I couldn't find too much (perhaps I don't know the correct name for the item). After separating my L28 from the transmission I found out that the separator plate is cut in half exposing the flywheel and throw out bearing to dirt and grime from the road. Is this the standard look? I cannot imagine that it is supposed to be like this.. I started looking to source a new one but I'm struggling to find this item. I have find some pictures of old ones (but not many) and only one new listing of a NOS plate at 125 USD... http://jdm-car-parts.com/collections/engine-parts-nissan-datsun-fairlady-z-240z-260z-280z-280zx/products/engine-plate-for-l-engine-with-manual-transmission Are these rare since people just fabricate their own or am I just too bad at searching? ^^ Thanks! Erik
-
Swedish Datsun 240z Restoration
Tebirkesueth replied to Tebirkesueth's topic in S30 Series - 240z, 260z, 280z
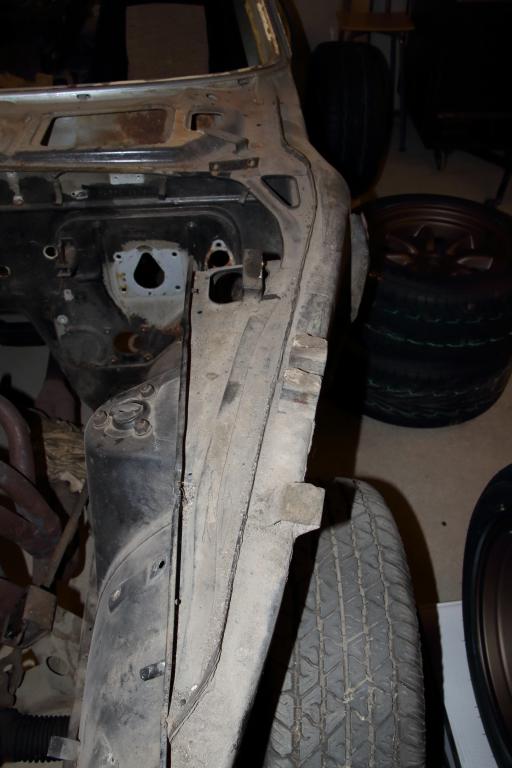
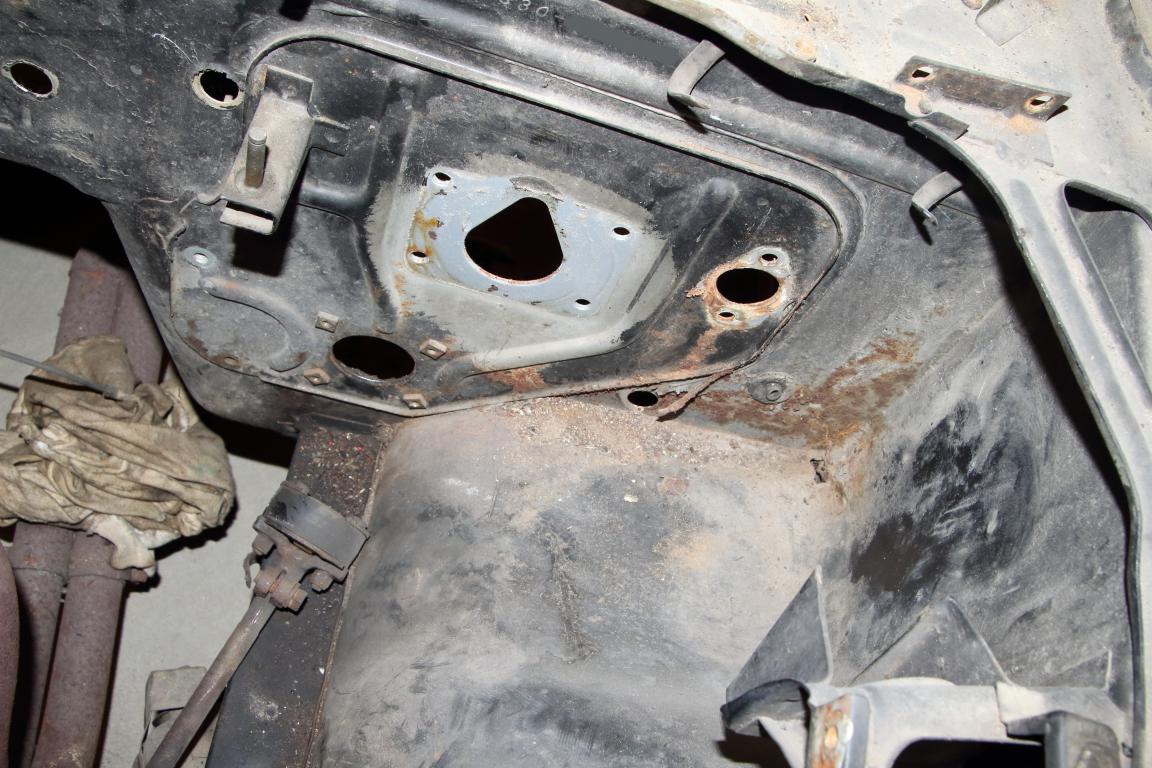
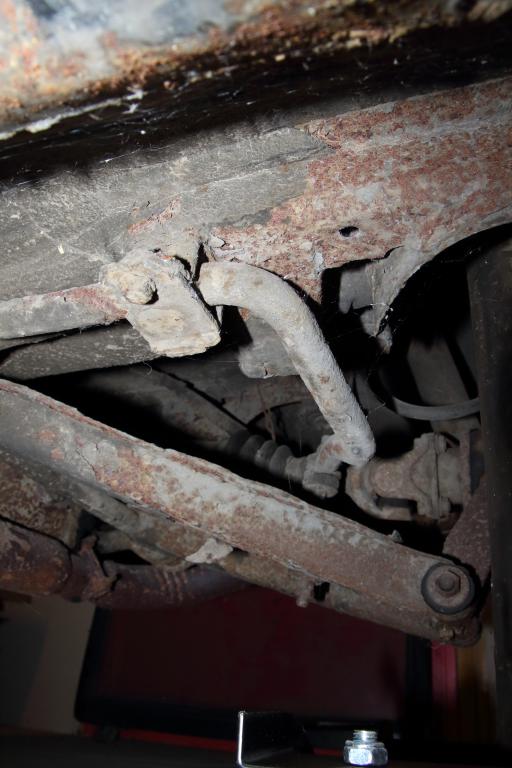
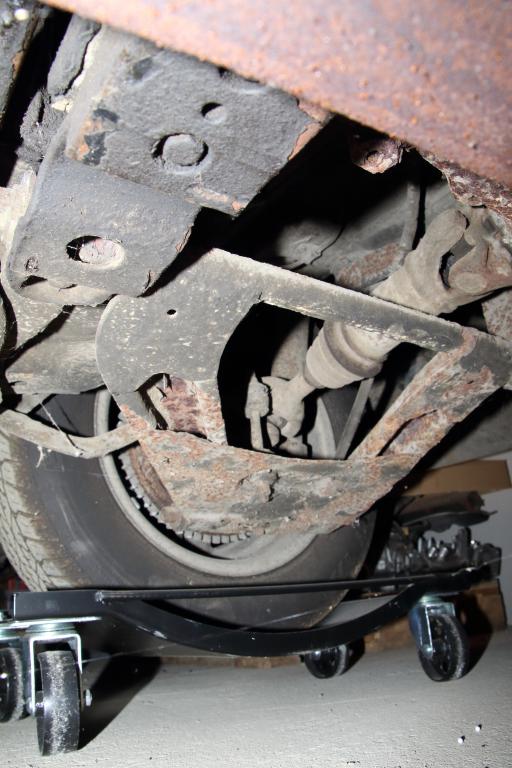
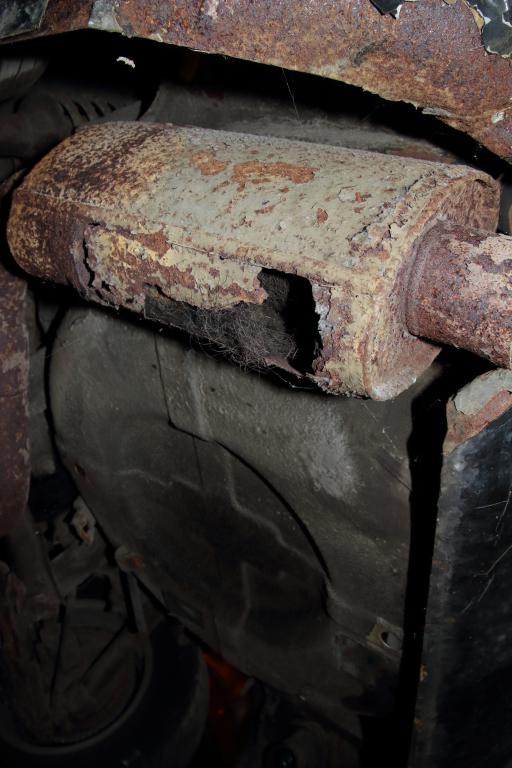
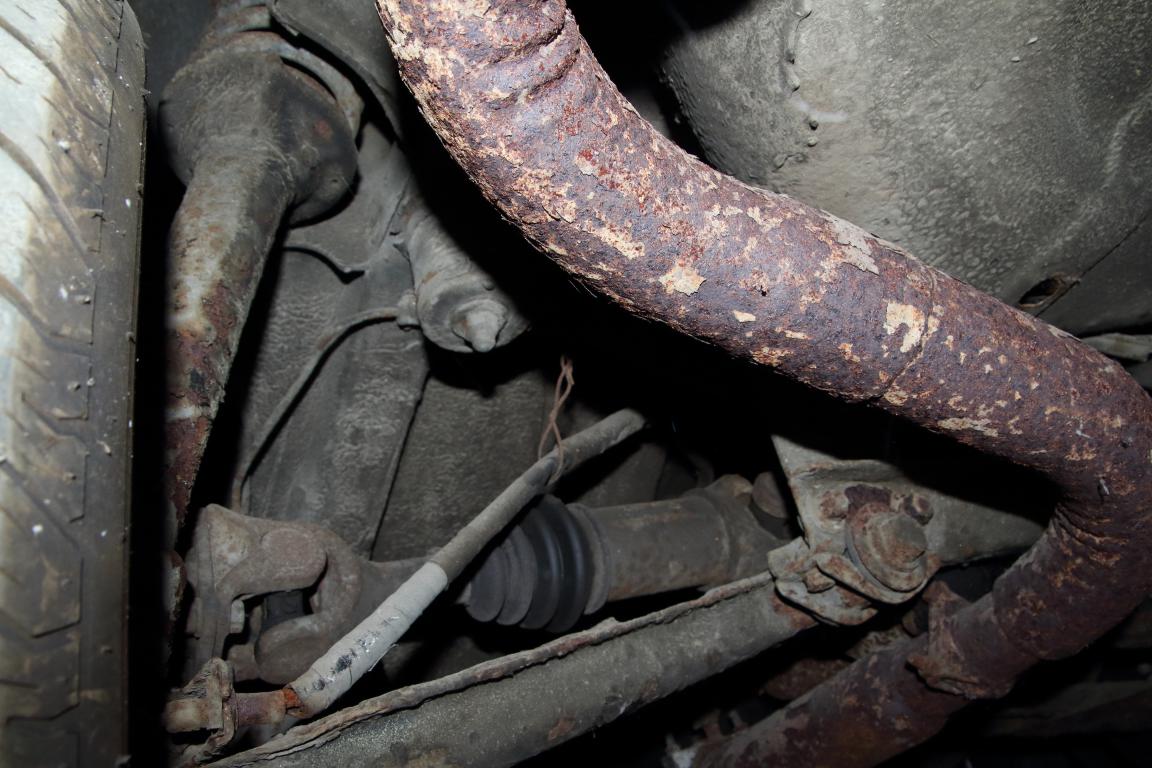
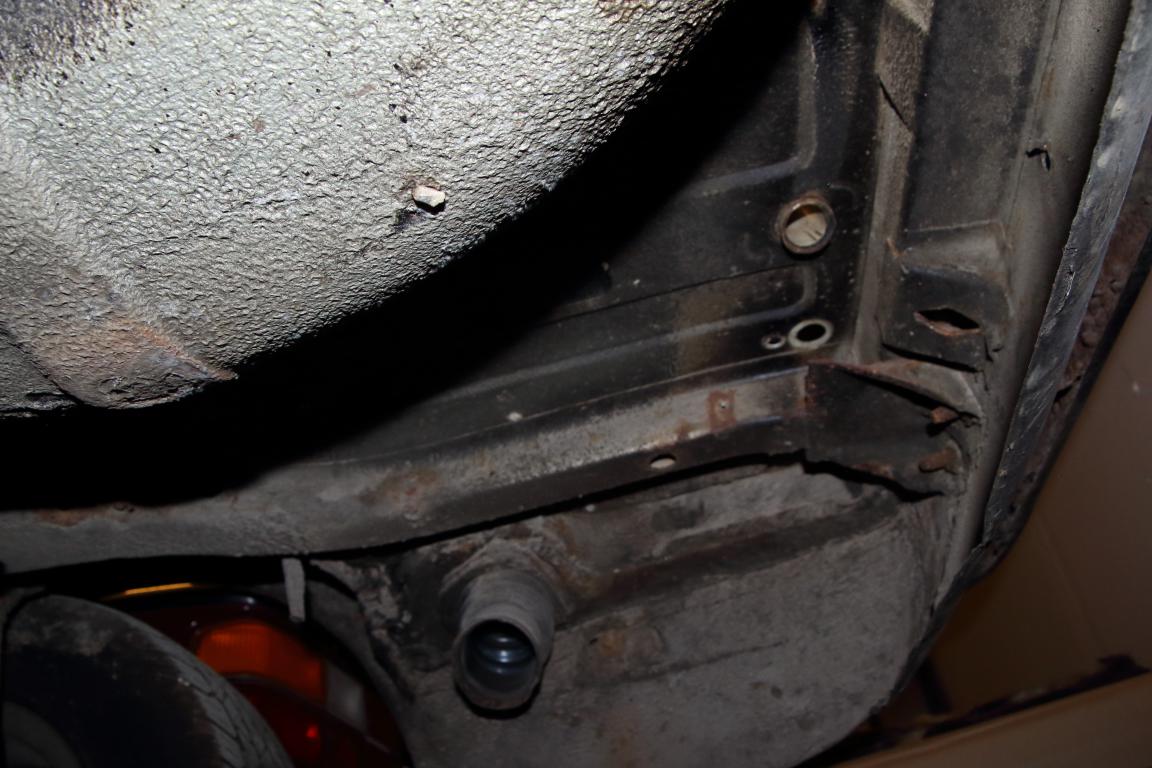
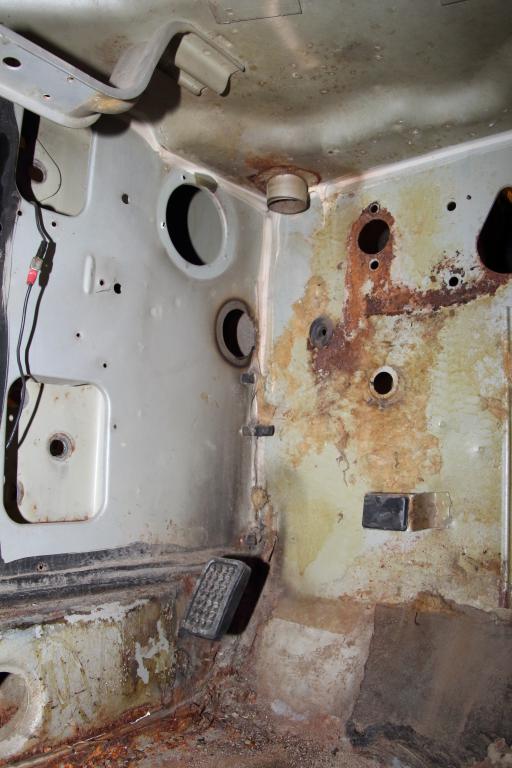
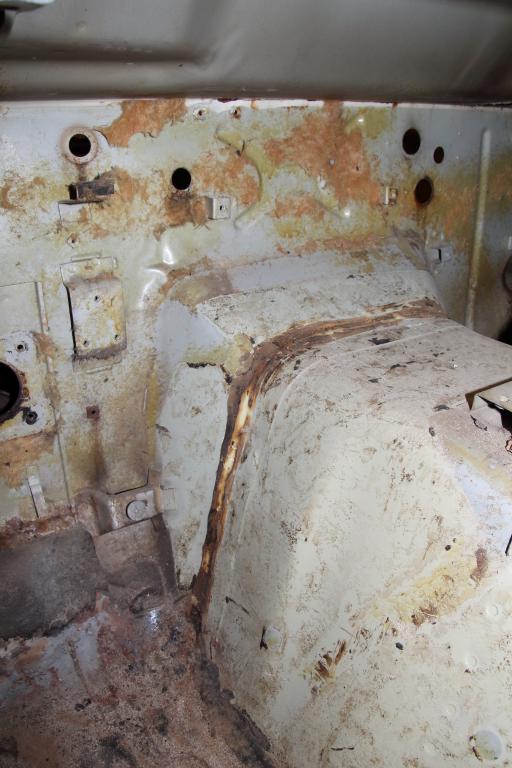
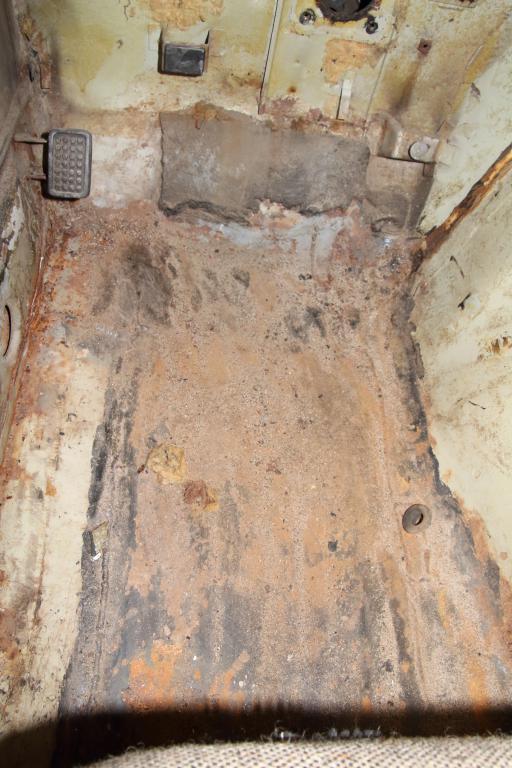
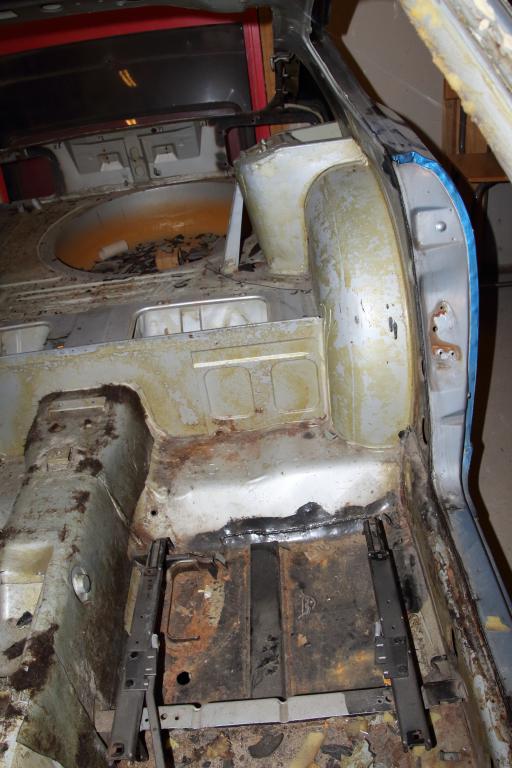
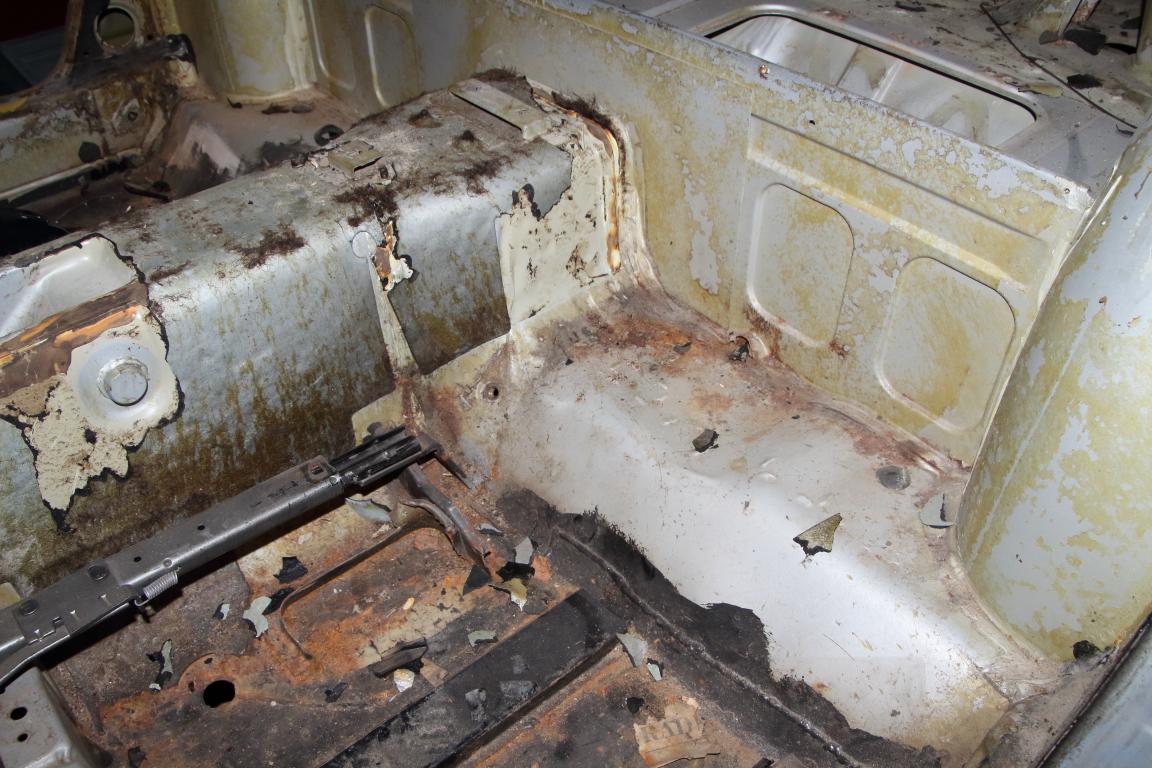
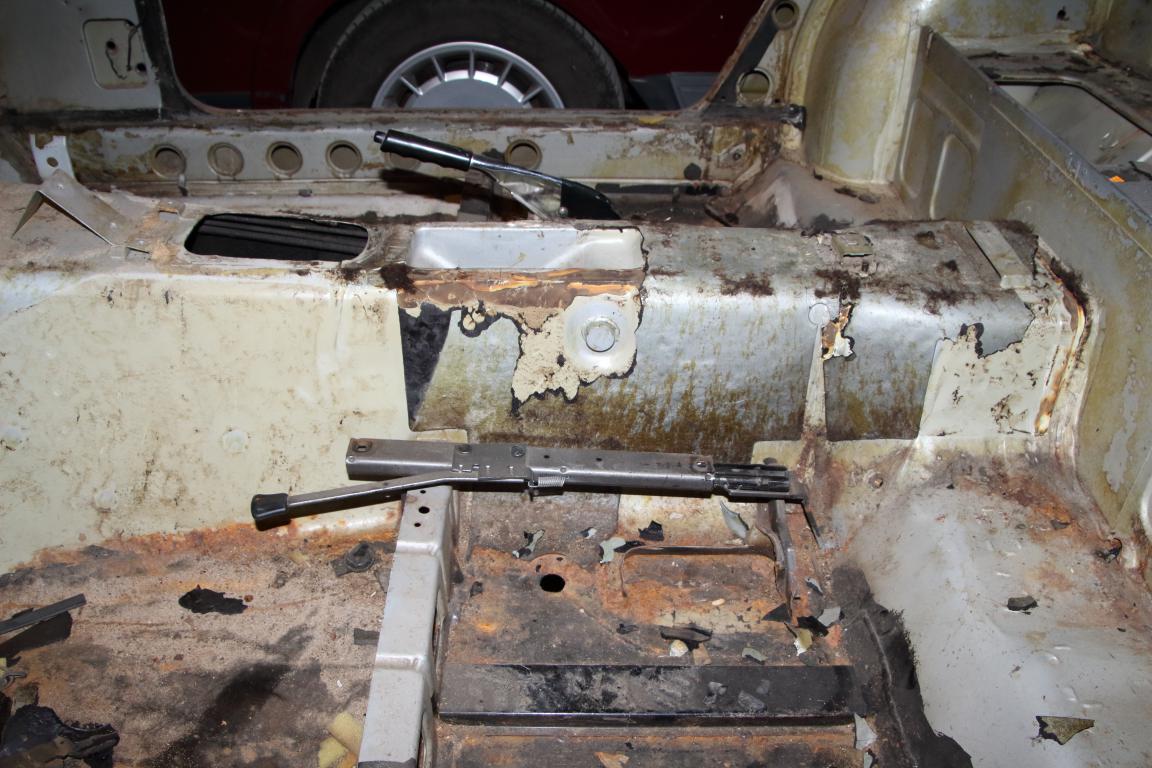
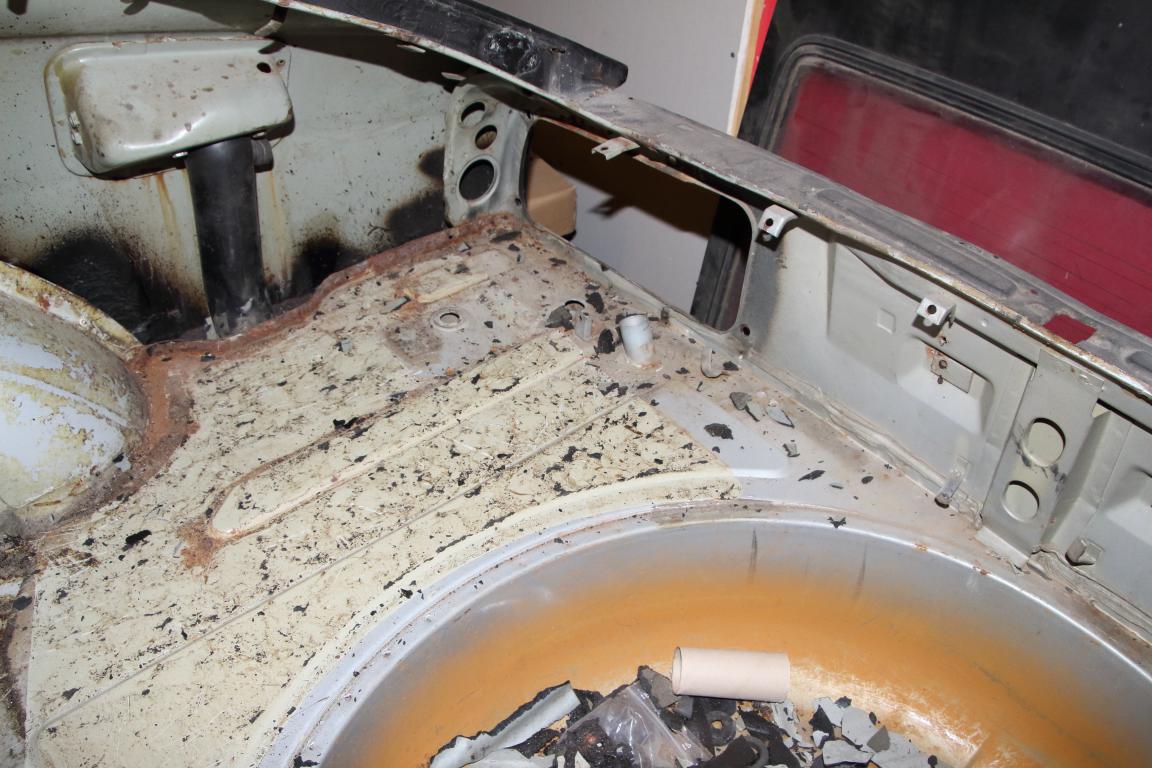
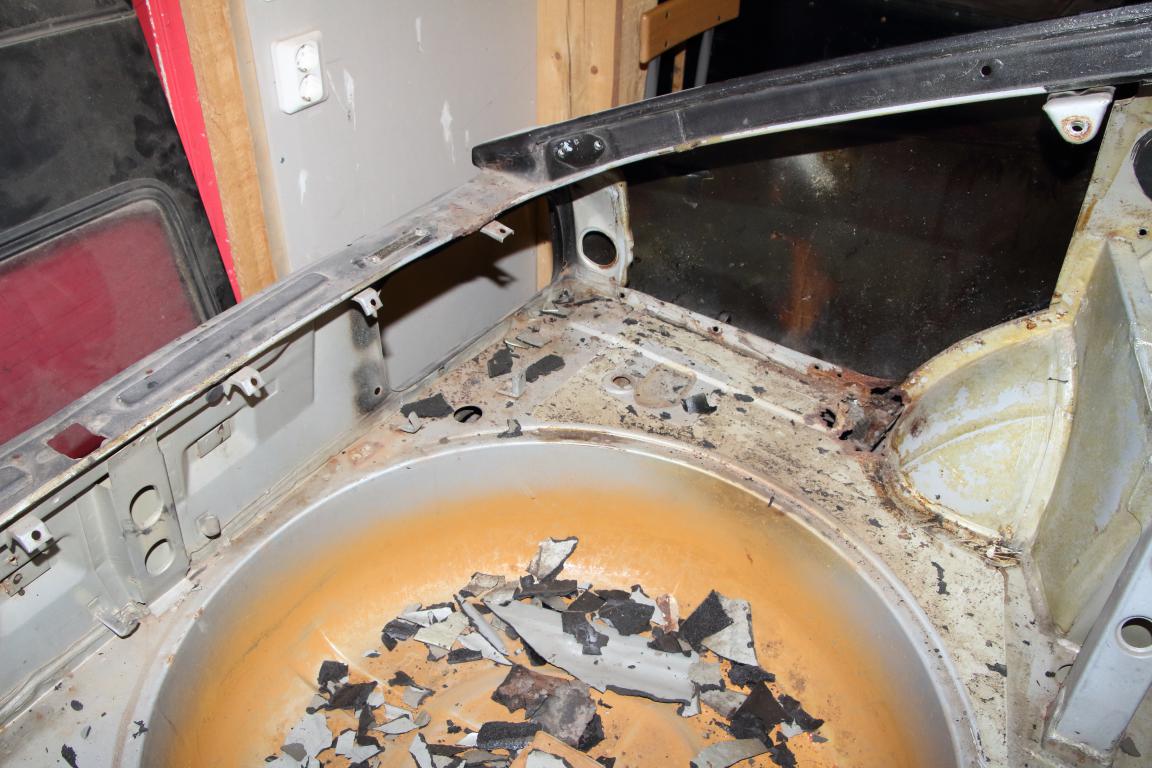
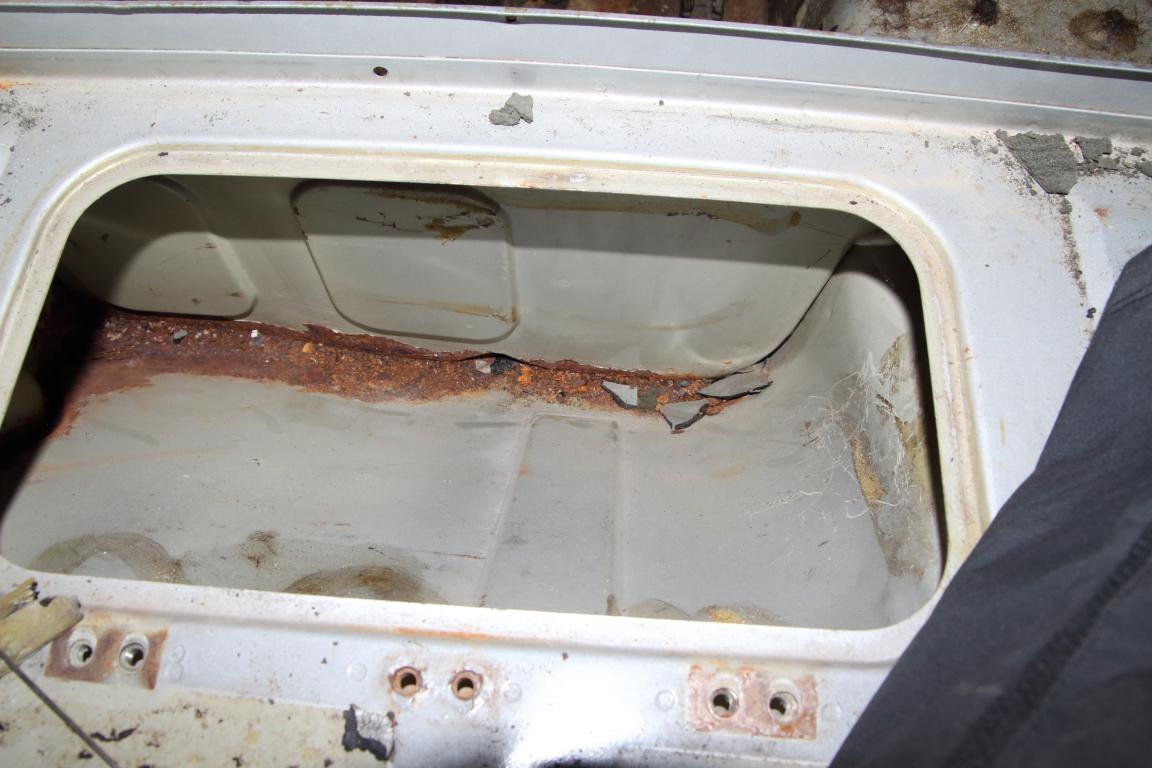
Update 2; After some well needed vacation in the north of Italy I can continue to catch up with the progress on the car. In the meantime I have ordered and received a number of items such as e.g. a A.F.R probe and gauge from Innovate motorsports (MTX-L) for carb tuning, a new windscreen, exhaust header from MSA as well as engine rebuilding kits (gaskets etc) and some additional other items. I'll document these items a bit better once I have access to them. During winter 2015/2016 I started to dismantle the car, but not before testing to see if there was any life in the engine. The previous owner stated that he had started it before selling it, but that due to evaporation of light hydrocarbons in the carbs they were heavily clogged and he only ran for a few moments to confirm that it fired up. Summer 2015 I had the carbs refurbished to see if I could start the engine before tearing everything down. Before starting it I had the oil changed, coolant and gas changed. The engine fired up and was run for some 30 seconds to confirm oil pressure and generally check how it was running. I have a video from my Canon but it is way too big and would require editing to upload. If anyone is interested I could try to download some editing software. By my own take of things it seems to fair pretty well. It will still be dismantled and sent to an engine shop for a proper check and refurbish. Best pictures of before and after carb refurbishment (filter boxes will go back on at a later stage); I have tried to document the body and chassis status as much as possible during the teardown. Unfortunately I don't have access to the car lift yet as we are still setting it up so pictures of the underside might not be as good as I would have hoped (hopefully still visible). As this is my first restoration I'm not familiar with the status of bad rust. I can judge if there is heavy pitting, holes or bad damage obviously, but when it comes to light damage that requires little to no attention I'm more uncertain. However, if you see any damage that definitely requires heavy attention, please let me know. The car will be sand blasted by a professional shop later on and I guess some areas might not be visible until that is finalized. Apologize for lots of pics! Better too many than too few - Status beginning of 2016 - Battery tray area. - Rail below front fender (passenger side is in same condition). - Area around brake booster / cylinder and clutch master cylinder. - Mounting areas for hood brackets - Frame rails and steering rack - Driver front suspension area - Transmission tunnel area - Frame rails plus jack lifting damage. Think a new piece has to be welded in here.. - Floor pan area from below - Rear suspension area - Silencer (muffler) and spare wheel well. Think the exhaust system is a non-stainless steel aftermarket (or homemade) system which started to rust early on. - Rust damage next to silencer (muffler). This is next to the strut tower on the driver side and will require new panels to be made. Not sure if this is caused by the high mounting of the silencer? Can the heat have damaged the under-seal and allowed the rust to get a hold? - Suspension, differential and parts of the spare wheel well - Area above fuel tank - Splash shield in driver side front fender area - Status of panels from the interior side. Driver side seat bracket is welded in rather than bolted.. /Erik
-
Swedish Datsun 240z Restoration
Tebirkesueth replied to Tebirkesueth's topic in S30 Series - 240z, 260z, 280z
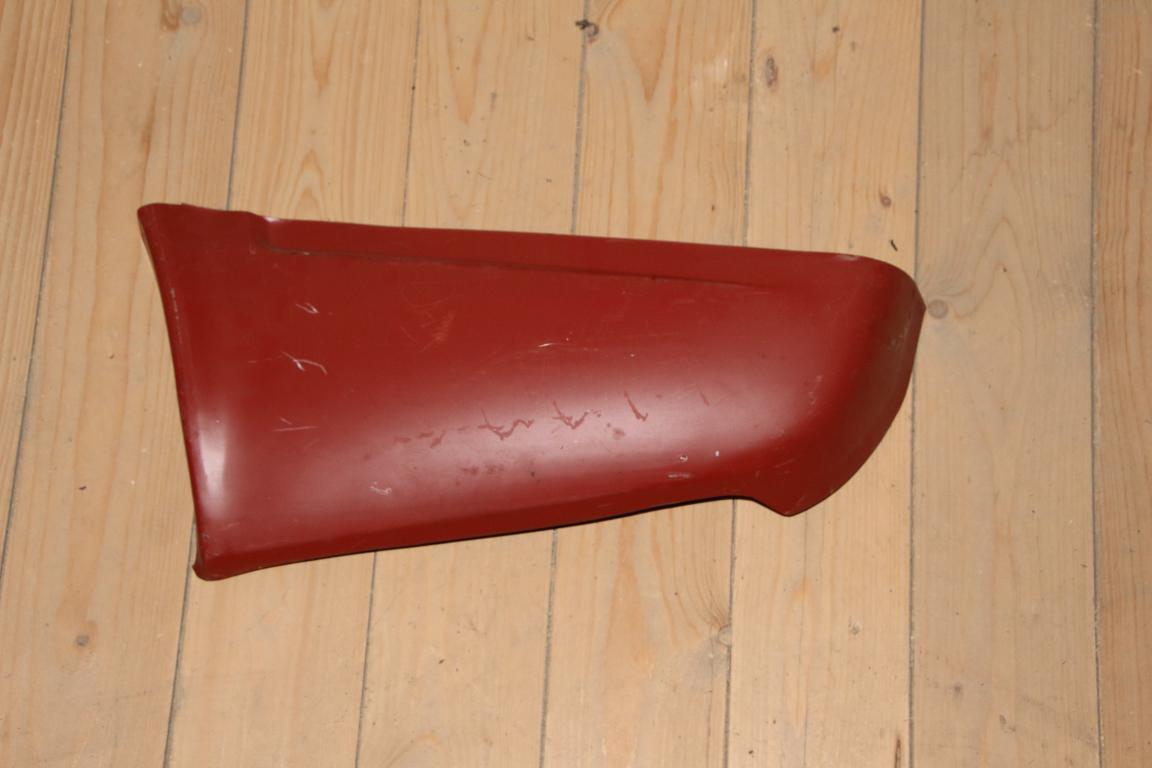
The rear panel was included with the car. I think it was bought by the previous owner sometime during the 90's in preparation for restoration. -
Swedish Datsun 240z Restoration
Tebirkesueth replied to Tebirkesueth's topic in S30 Series - 240z, 260z, 280z
Hello Andreas! Nice to hear from another Swedish 240z owner, they are few and far between Where are you located? Before I make any promises I'd to check the status of the ones currently installed on the car. I'll keep you posted! Erik -
Swedish Datsun 240z Restoration
Tebirkesueth replied to Tebirkesueth's topic in S30 Series - 240z, 260z, 280z
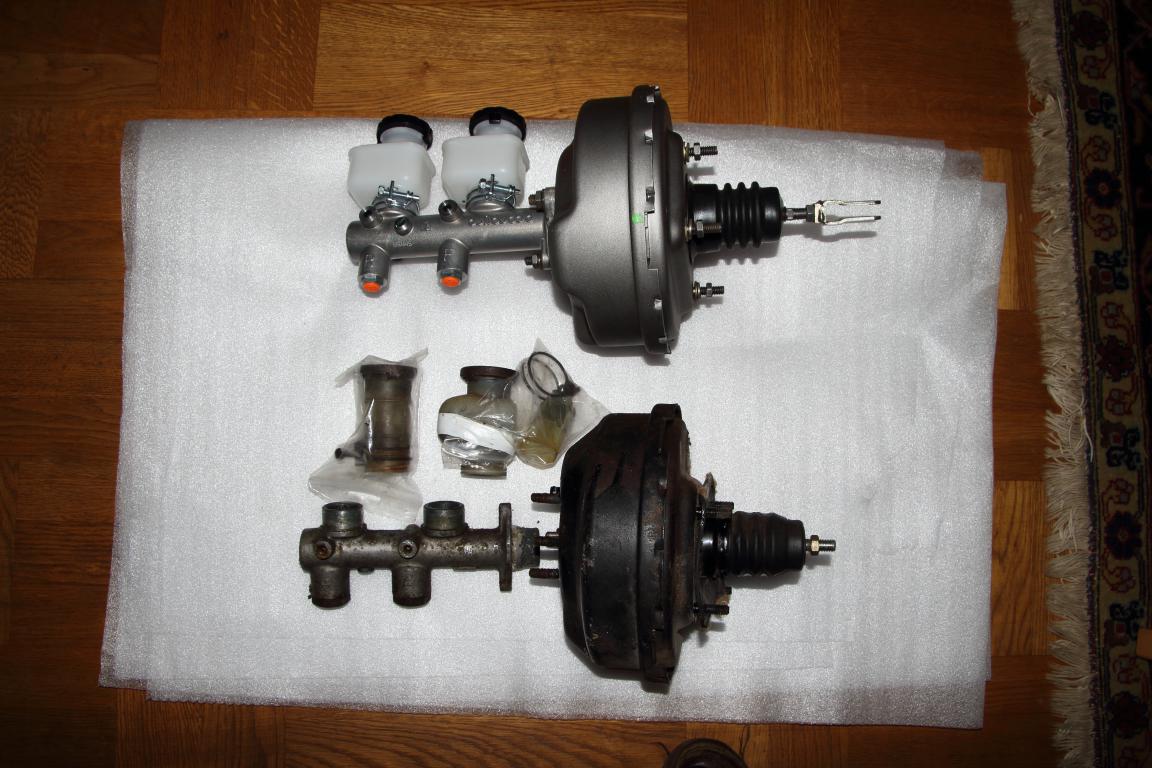
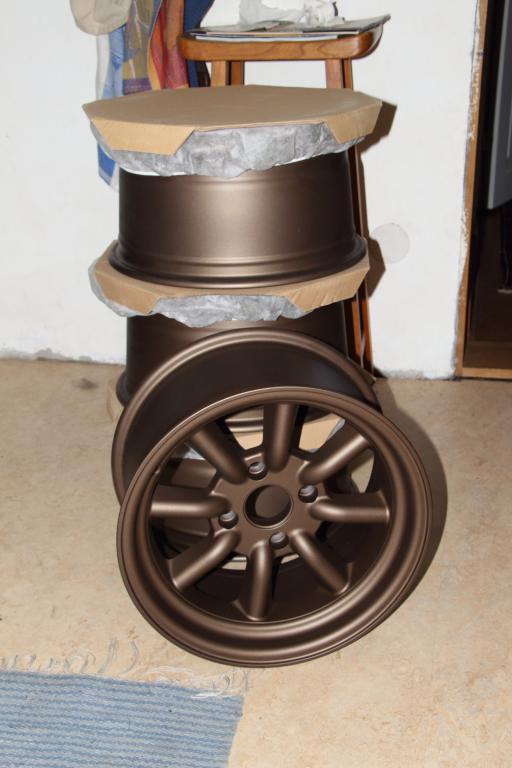
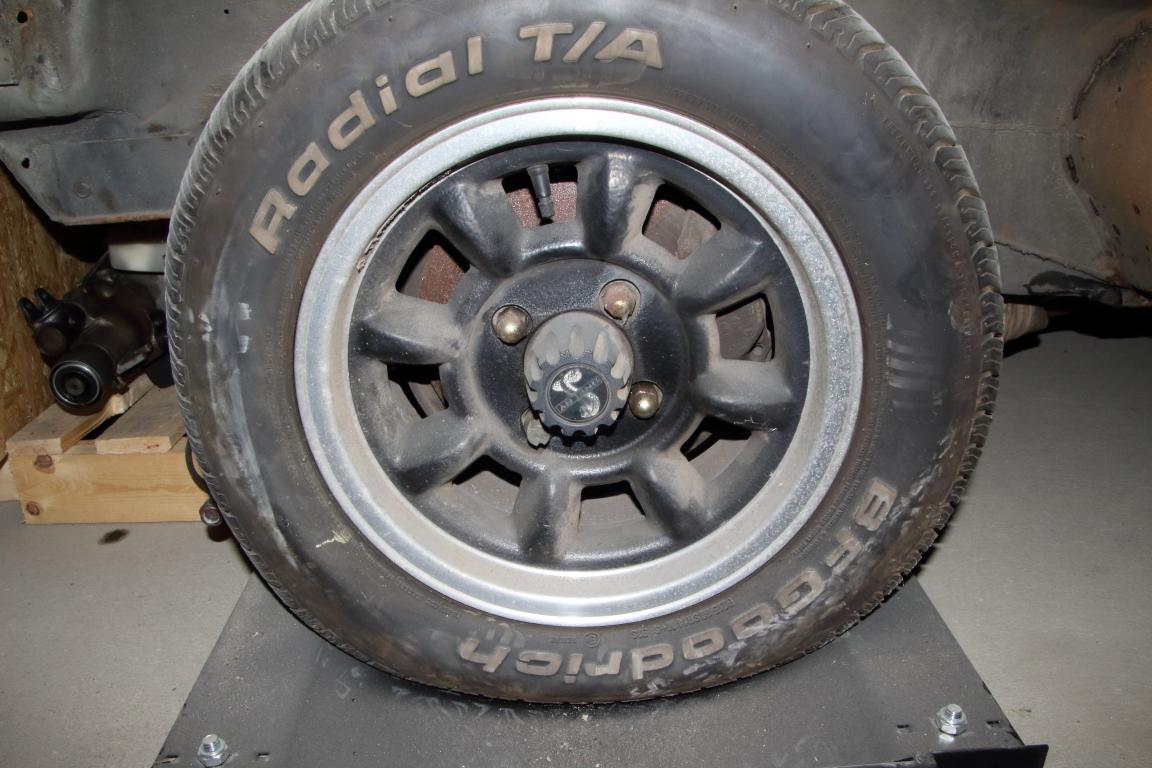
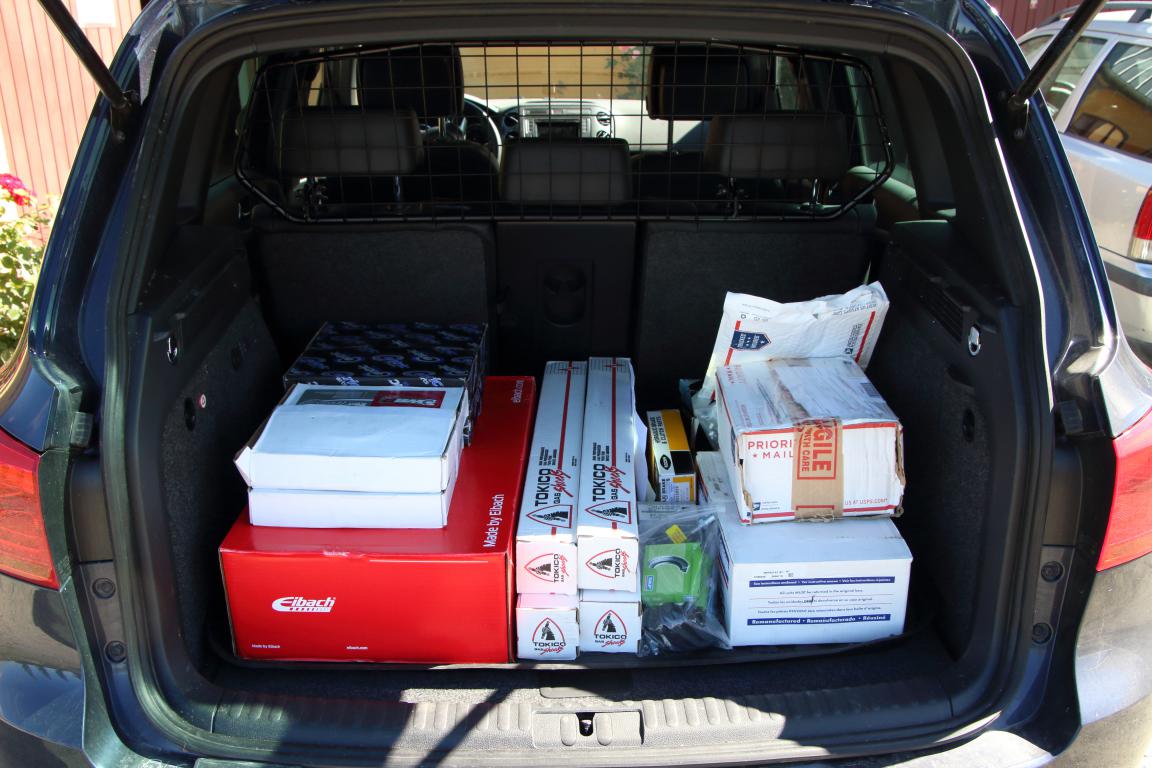
Update 1; To further catch up with my progress - some parts which were acquired so far for installation after ground up restoration are. New vac booster and wilwood 1" brake master cylinder. The vac booster is 8.5", so a slight upgrade from the original 7", but I hope it is sufficient to soften the pedal. Otherwise I'll work up a nice right leg Do you typically keep the brake balancing block? I.e. the block which houses the pressure imbalance switch between rear and front circuits. I have issues finding replacements for this items, plus the absolute recommendation from Nissan / Datsun is to not refurbish it.. I guess I could live without it. In addition I swapped the front / rear brake proportioning valve to a Wilwood product so I can adjust the bias later on. New Hella H4 head lights and horns (air horn was installed..). I decided to also rewire the main headlight as the original wiring was quite butchered. I suppose it wasn't easy to get hold of proper connectors and color coded wires resulting in wiring all over the place. In the end I managed to find a kit in the US with original Japanese connectors and new properly color coded wires from England. The housings were also sent for sand blasting. As you can imagine the engine harness in this region was also in bad shape. I decided to install new connectors and order them in such a way that it suits my needs. I decided to wire the side marker conversion kit directly into the harness. In addition I got the headlight harness upgrade kit as well as the parking light upgrade kit. I haven't yet sealed or put dielectric grease on the connectors, anyone aware of good products available in Europe (or perhaps the US)? The original wheels are unfortunately too small for my brake plans. The original wheels say "Shelby" on them, however I have no clue from where they originate. Anyone familiar with this type of wheel? The new set of wheels are Rota RKR in bronze and the tires are Toyo Proxes. A nice present arrived from the US as well * Rear disc conversion kit with calipers * Front / Rear brake rotors * Front calipers * Eibach progressive springs * Tokico shocks * New set of wheel bearings * Urethane bushings all around * Clutch master / slave cylinder, throw out bearing, fork etc * Some additional small goodies That's it for today.
-
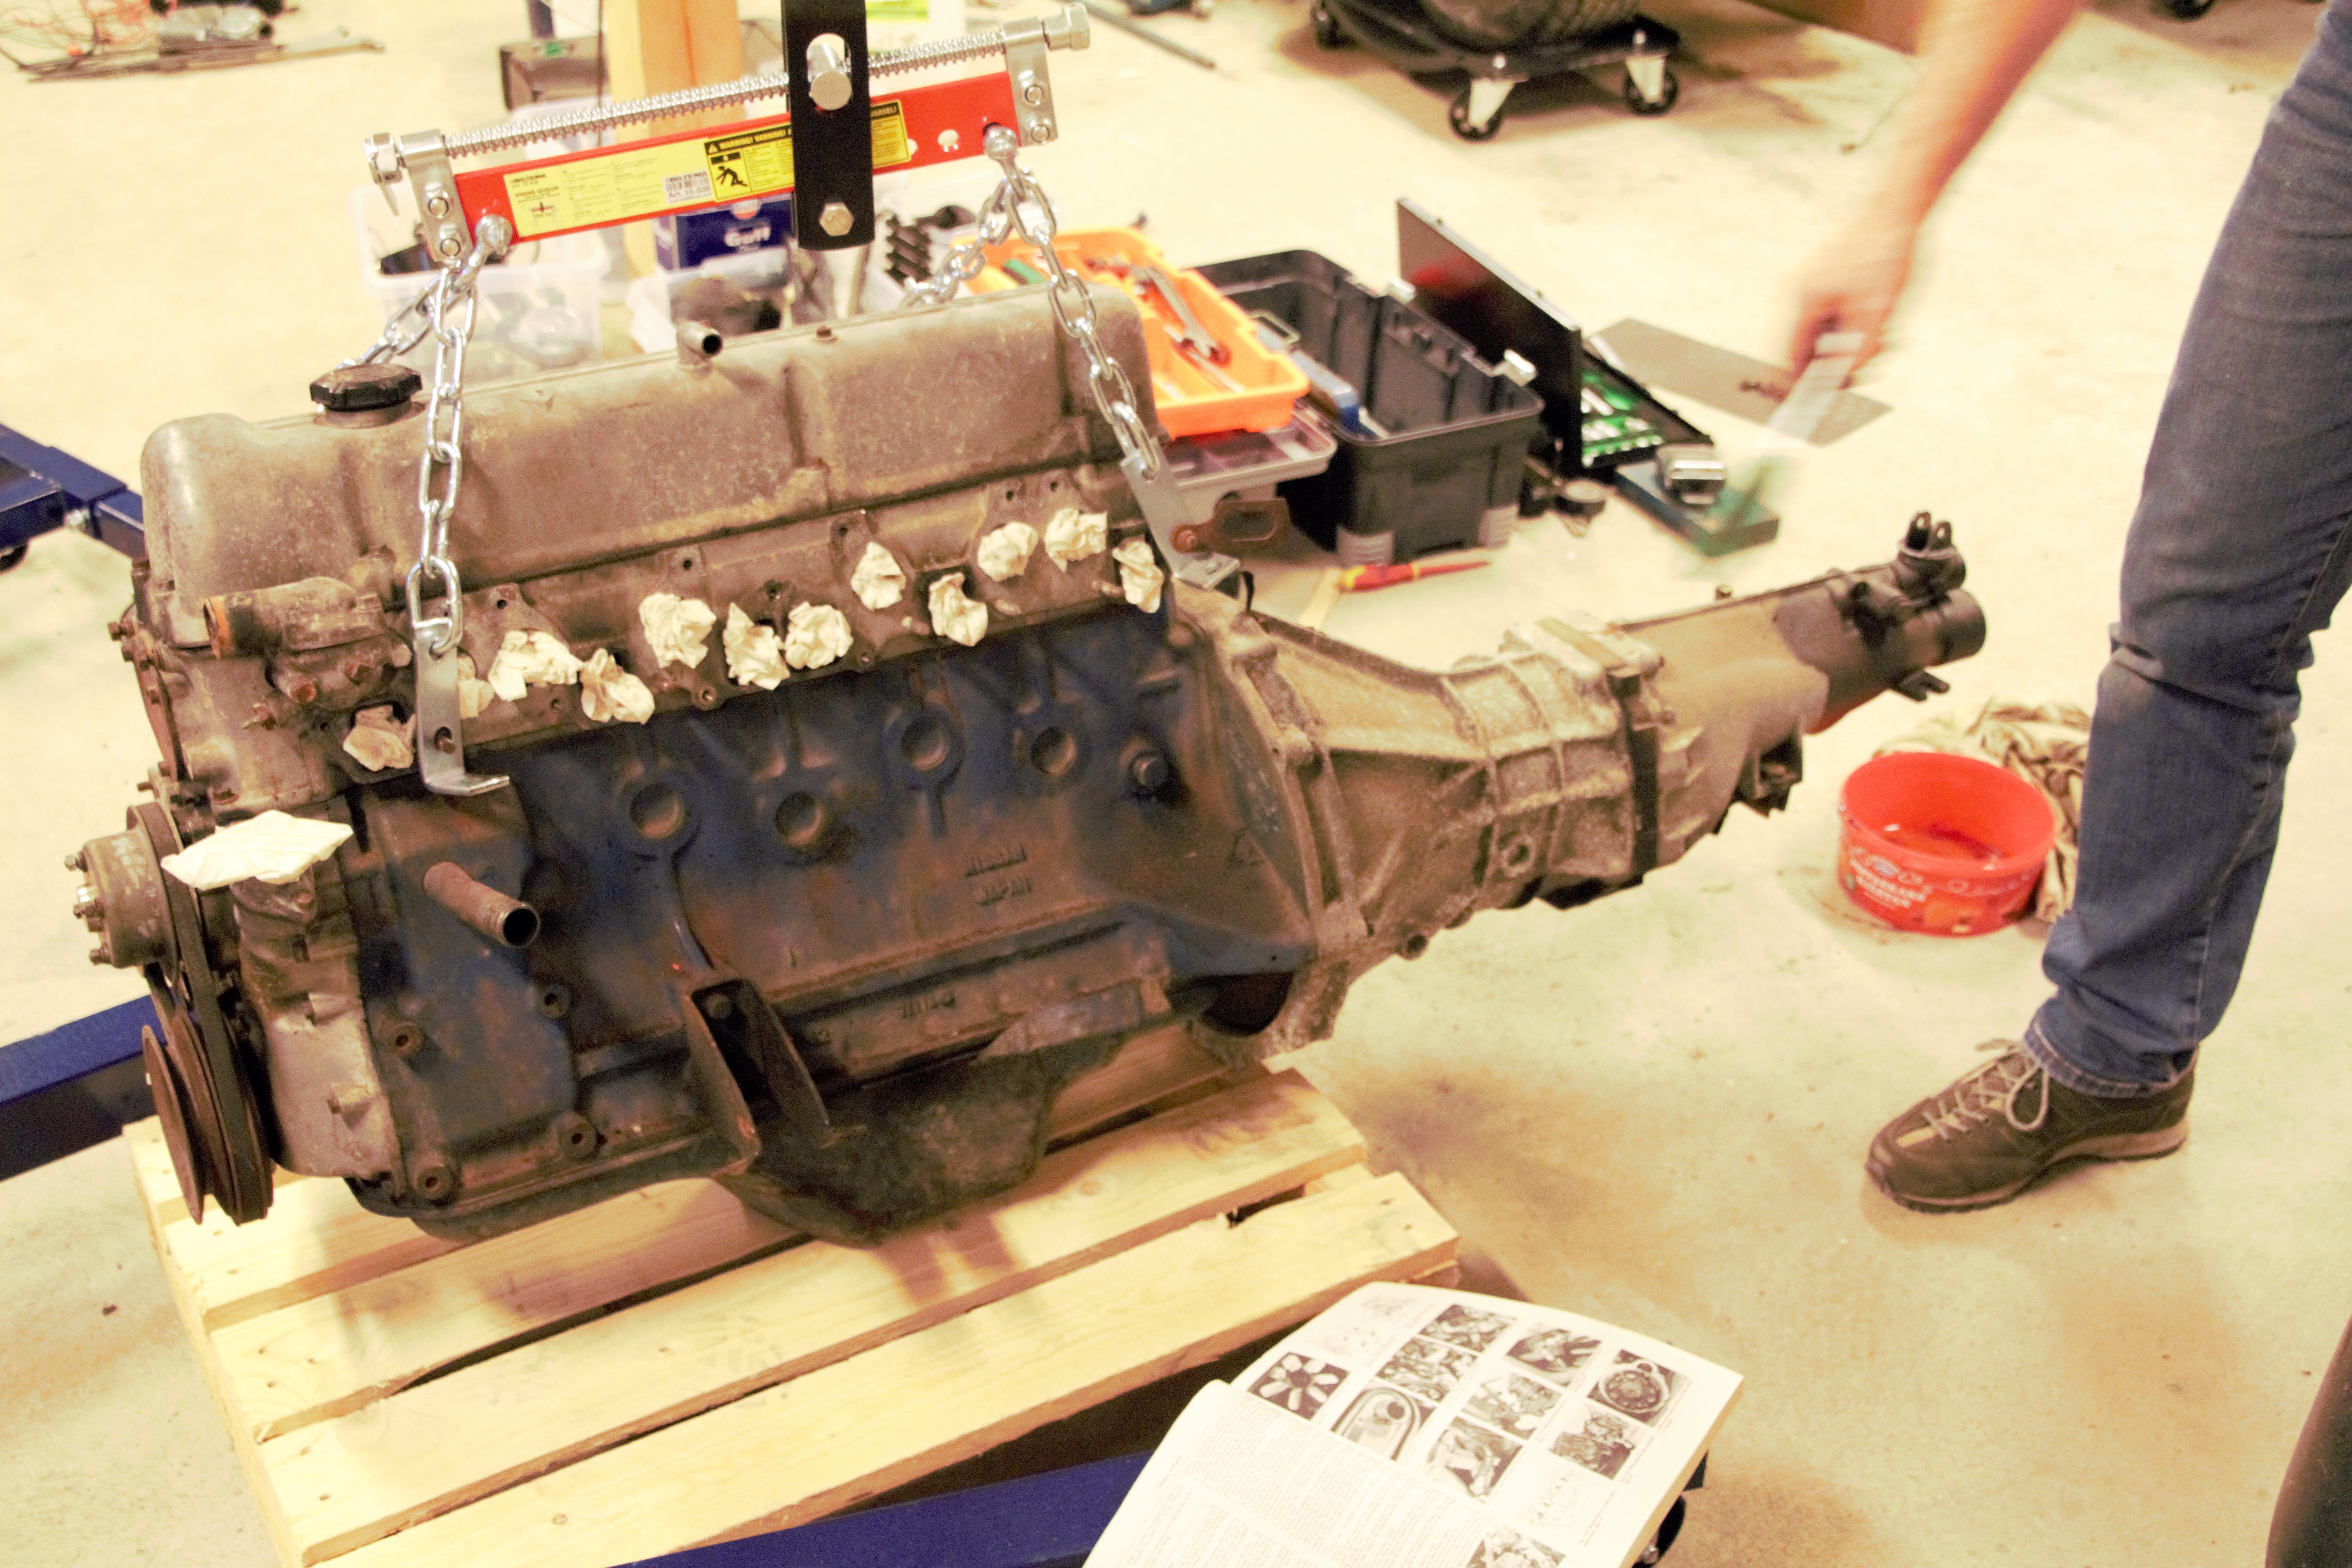
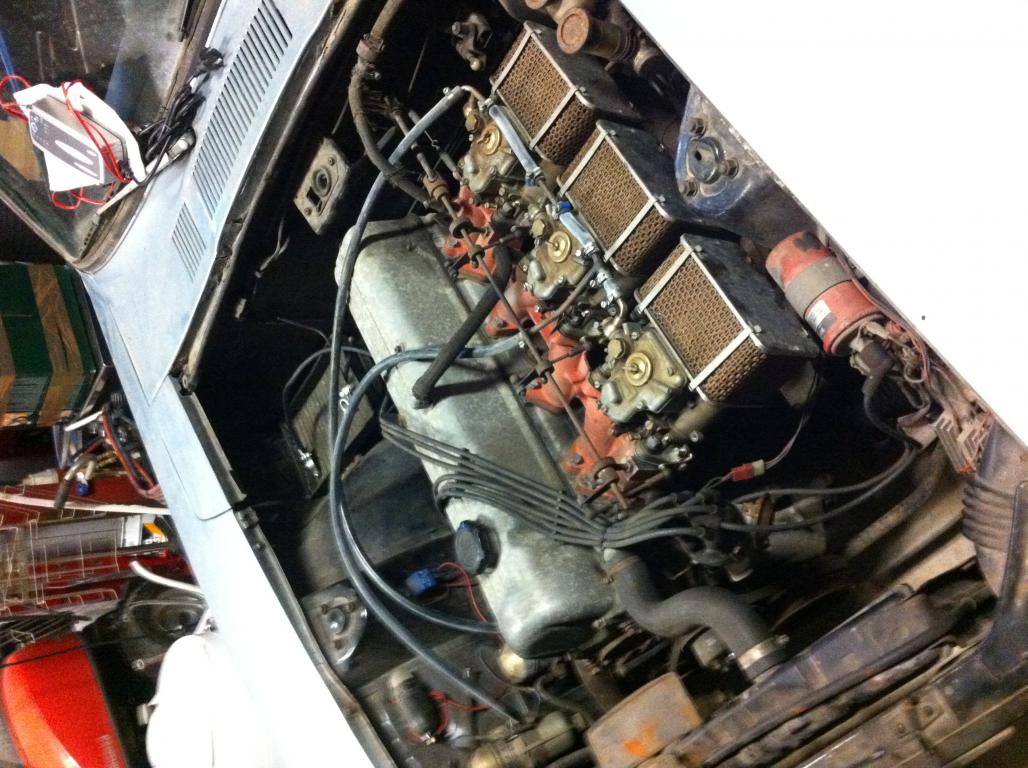
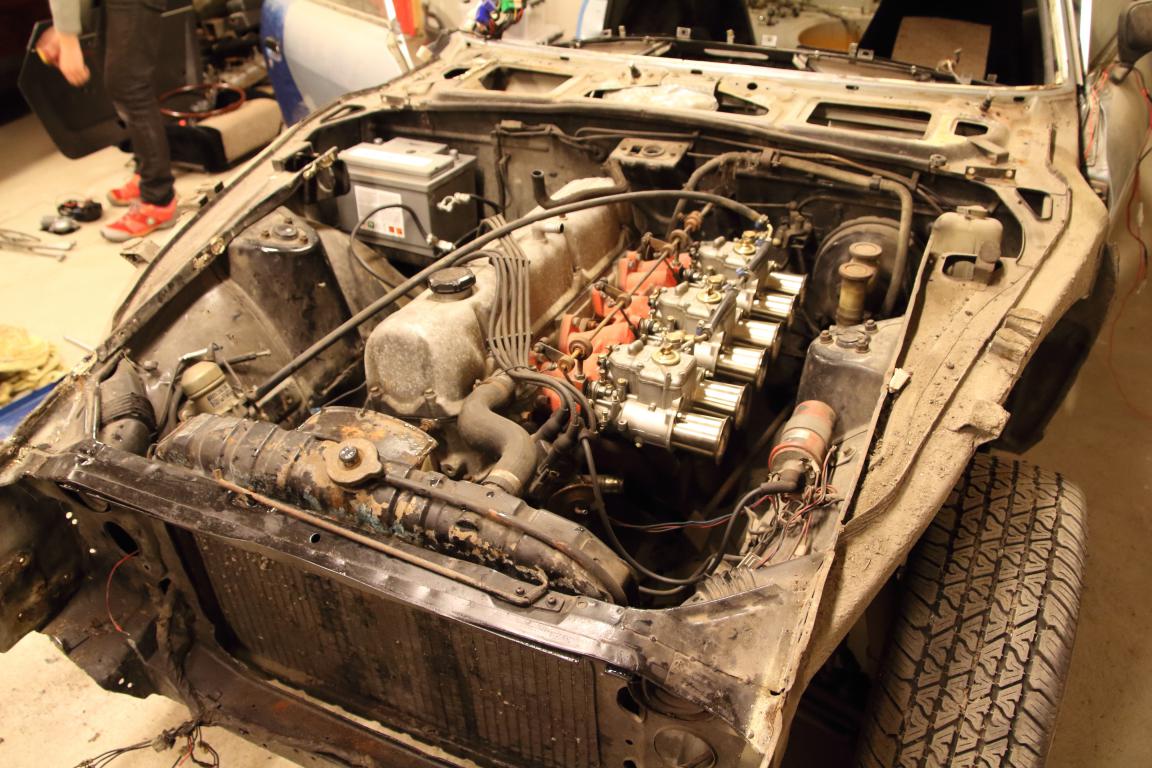
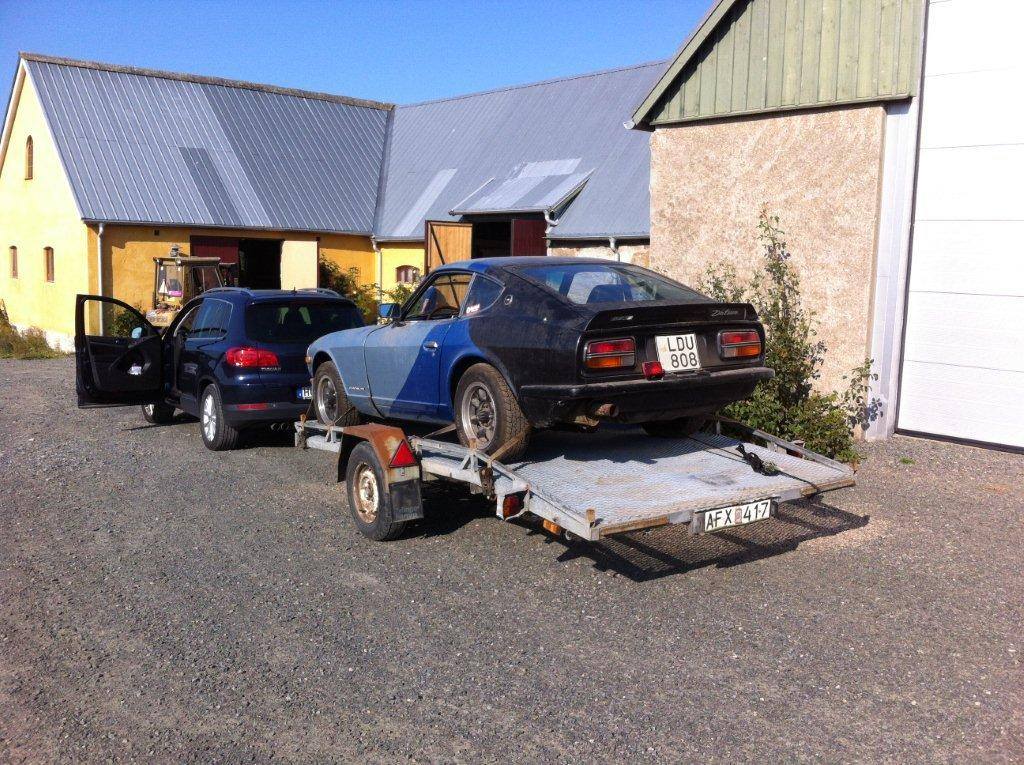
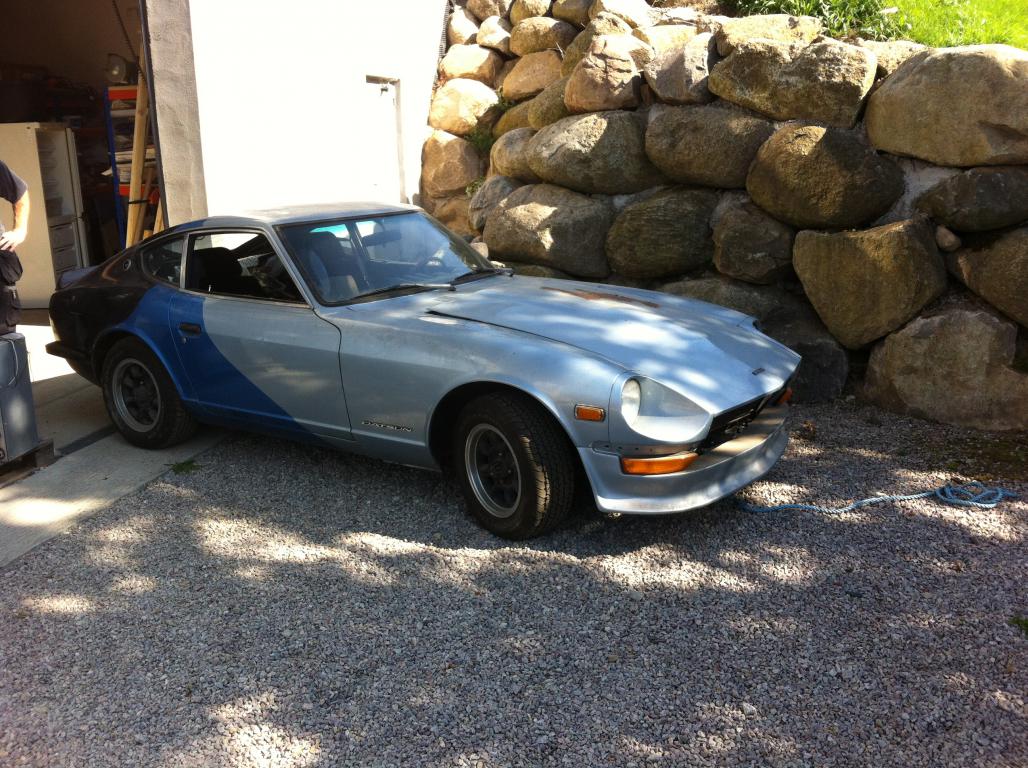
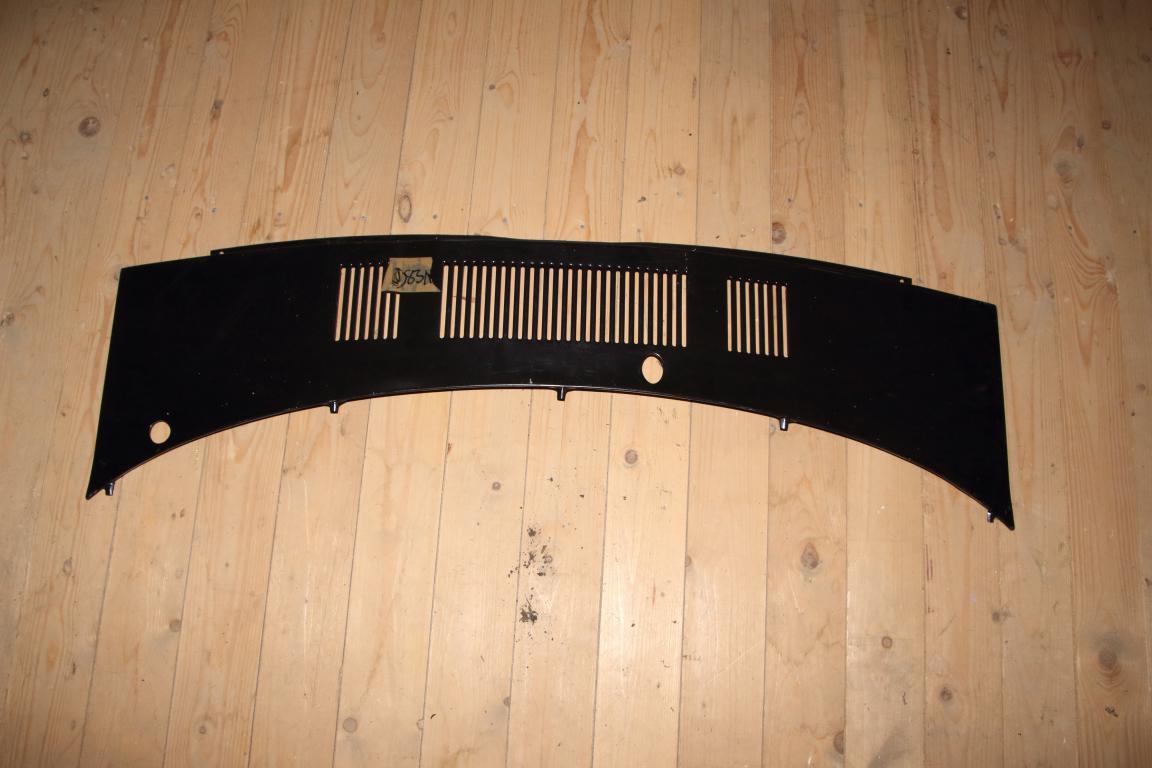
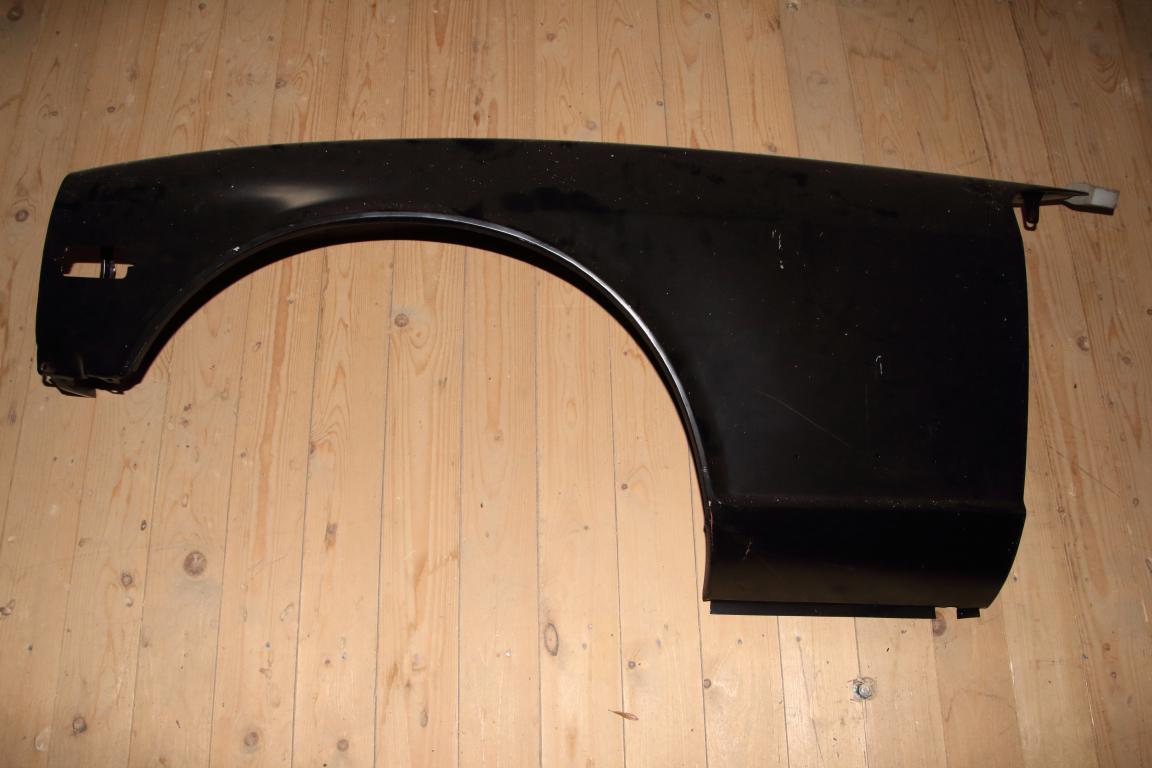
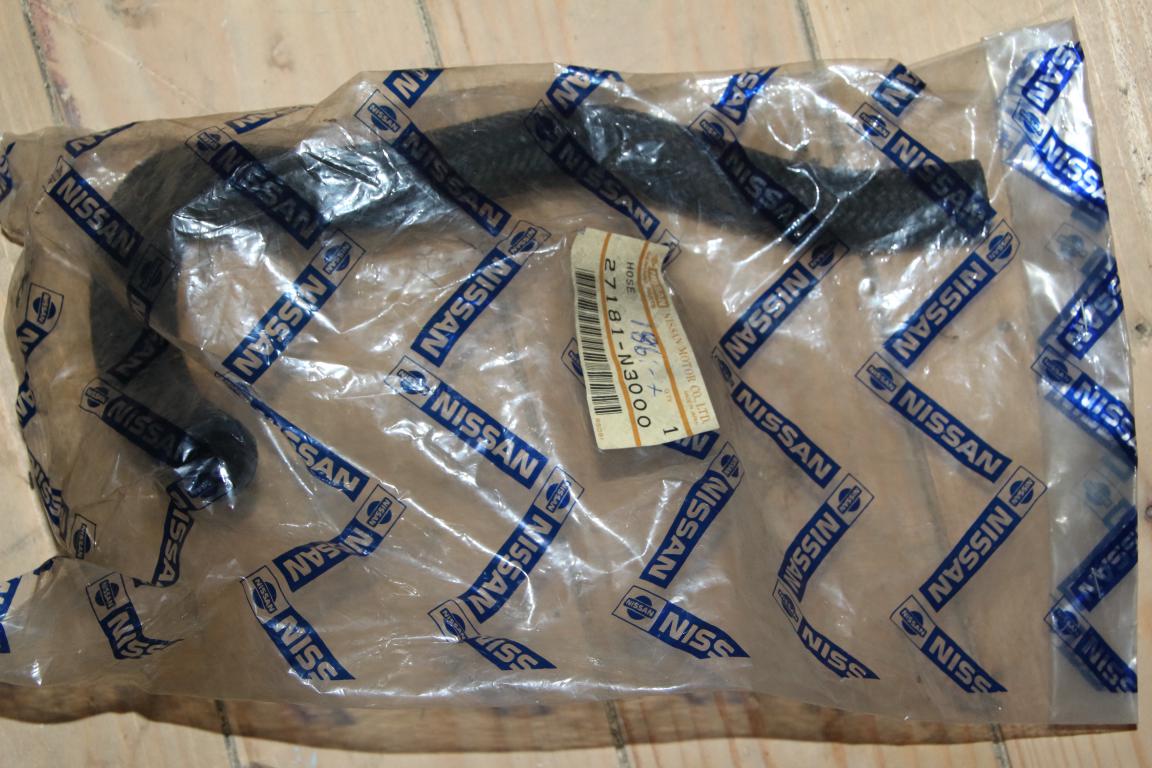
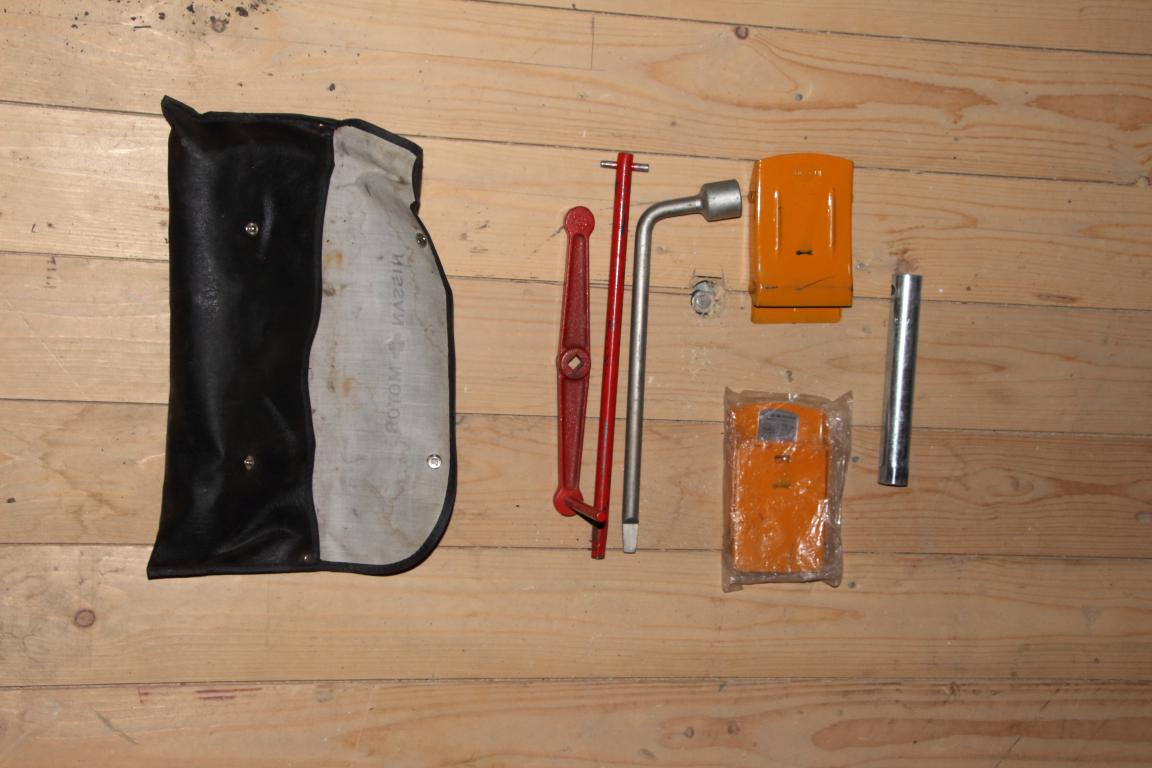
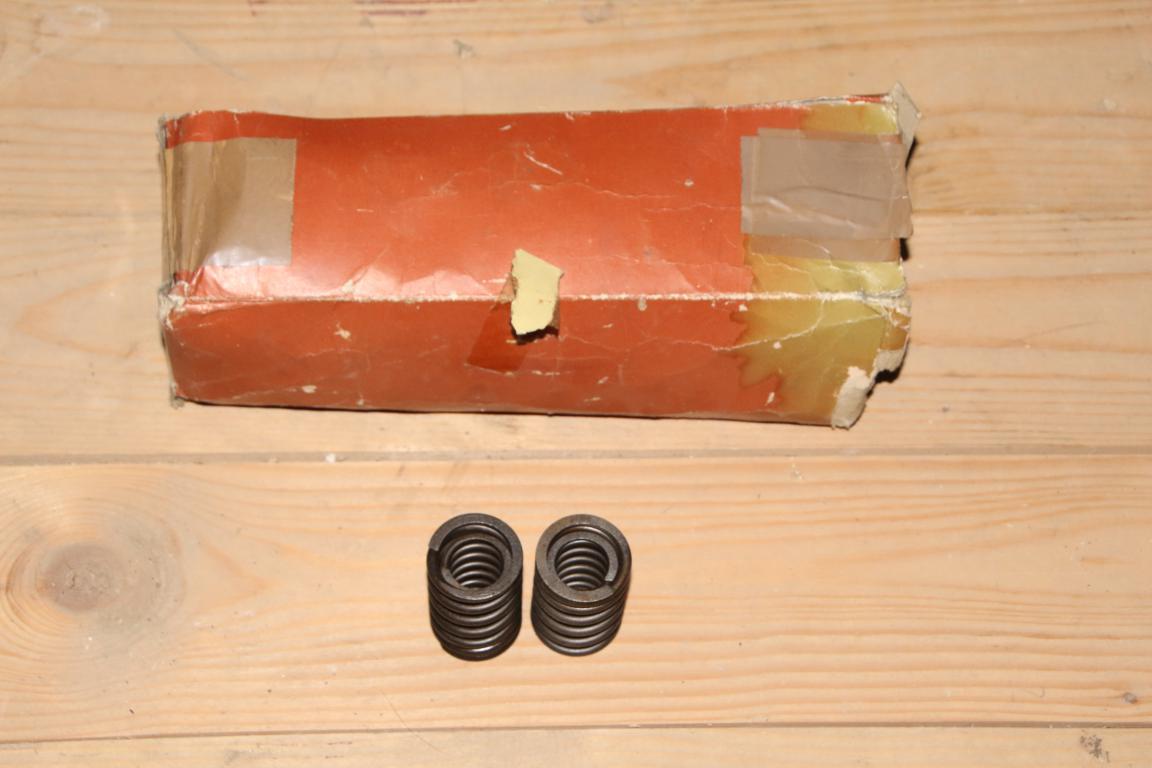
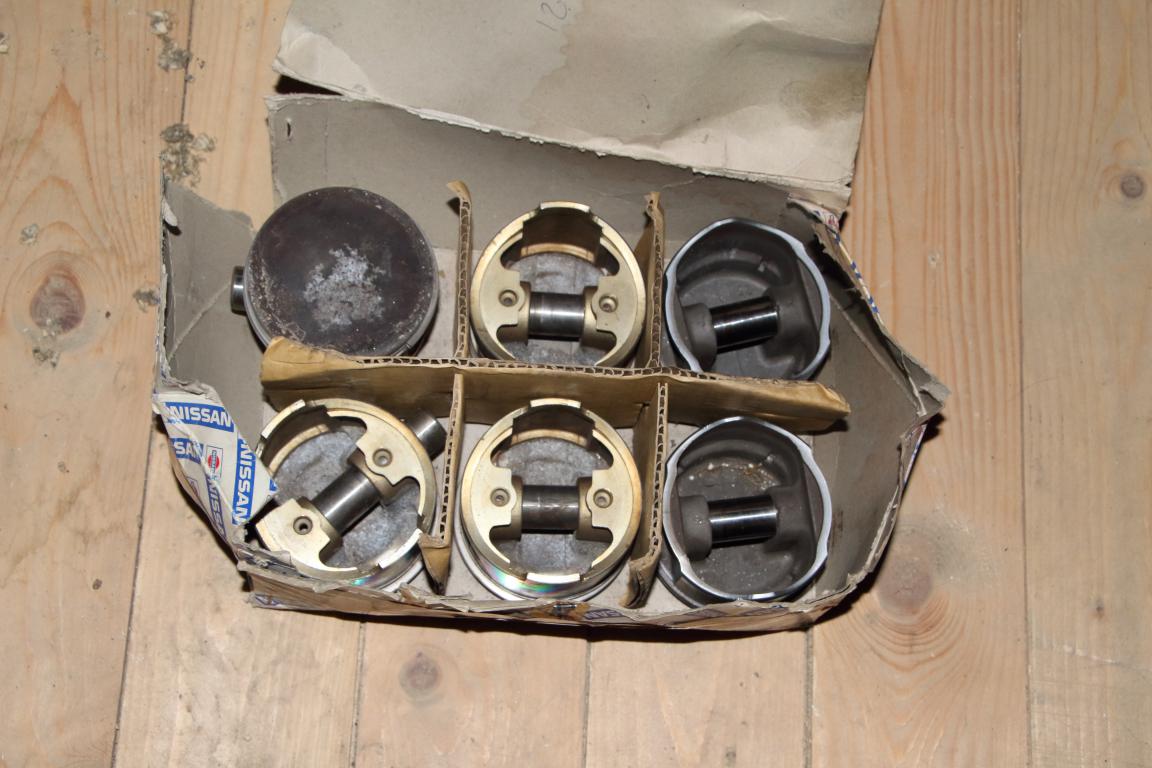
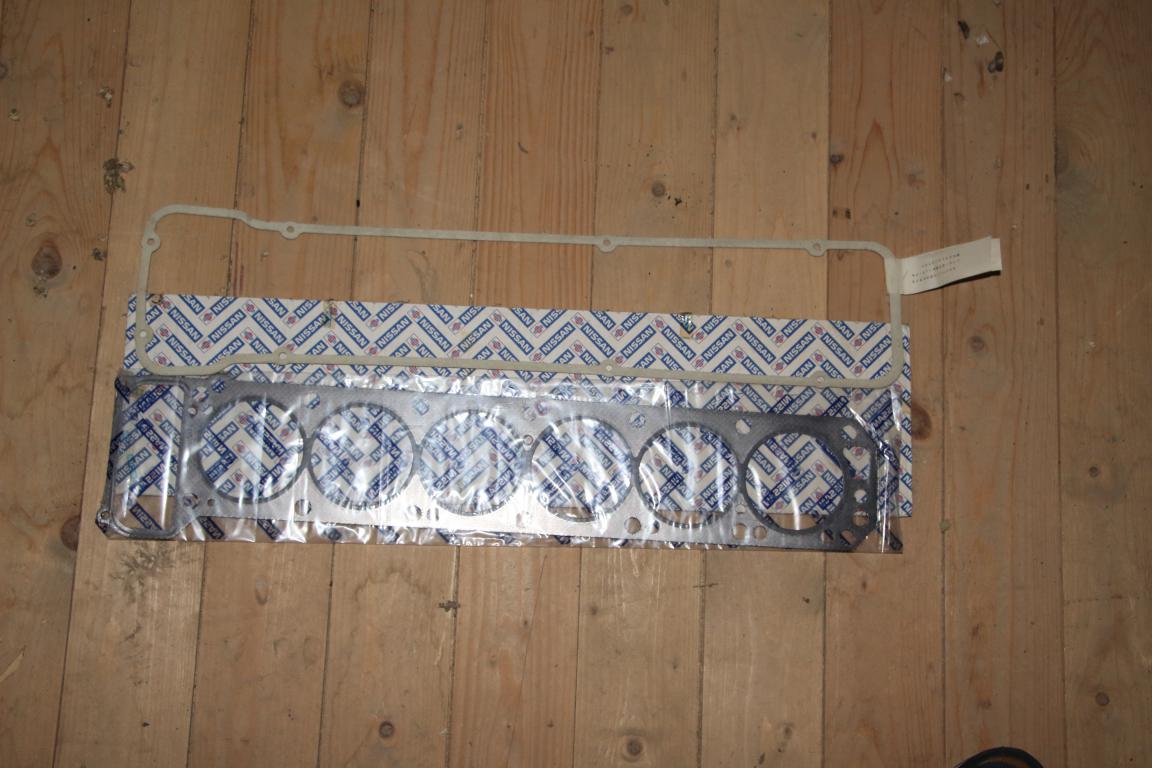
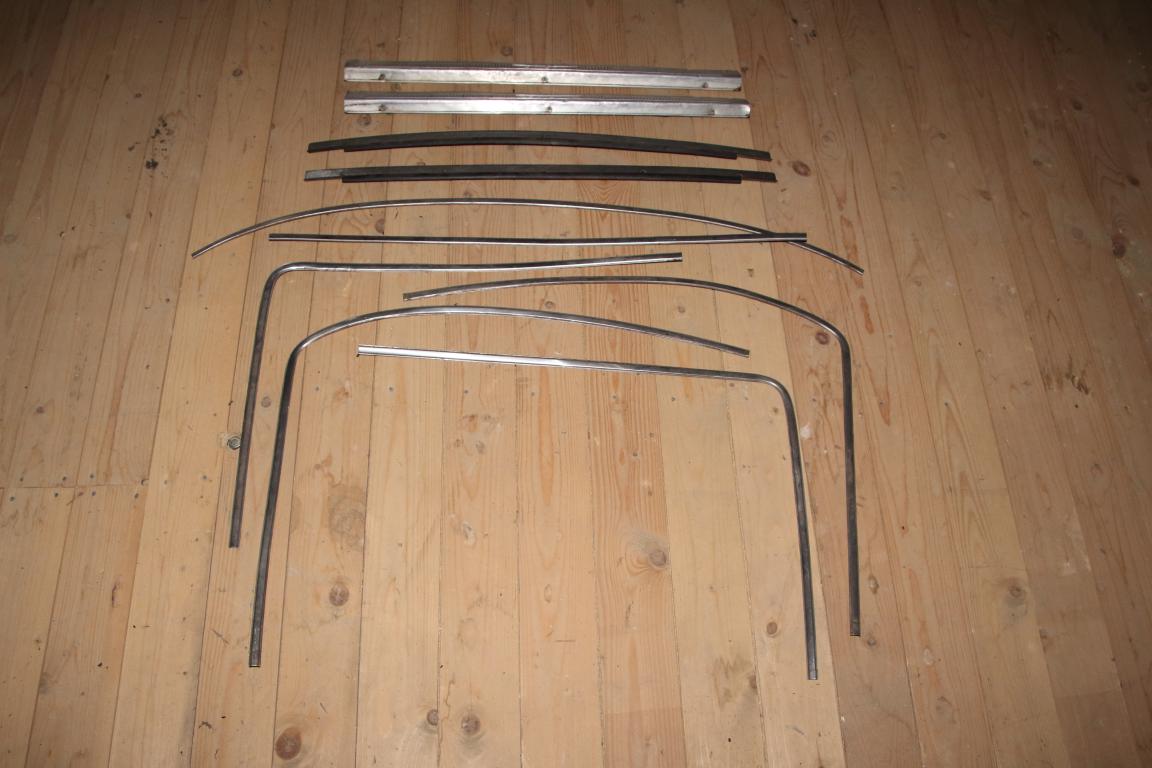
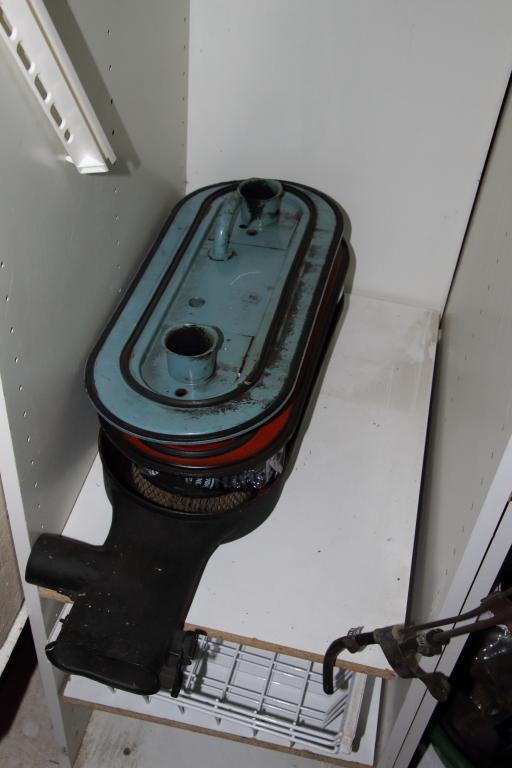
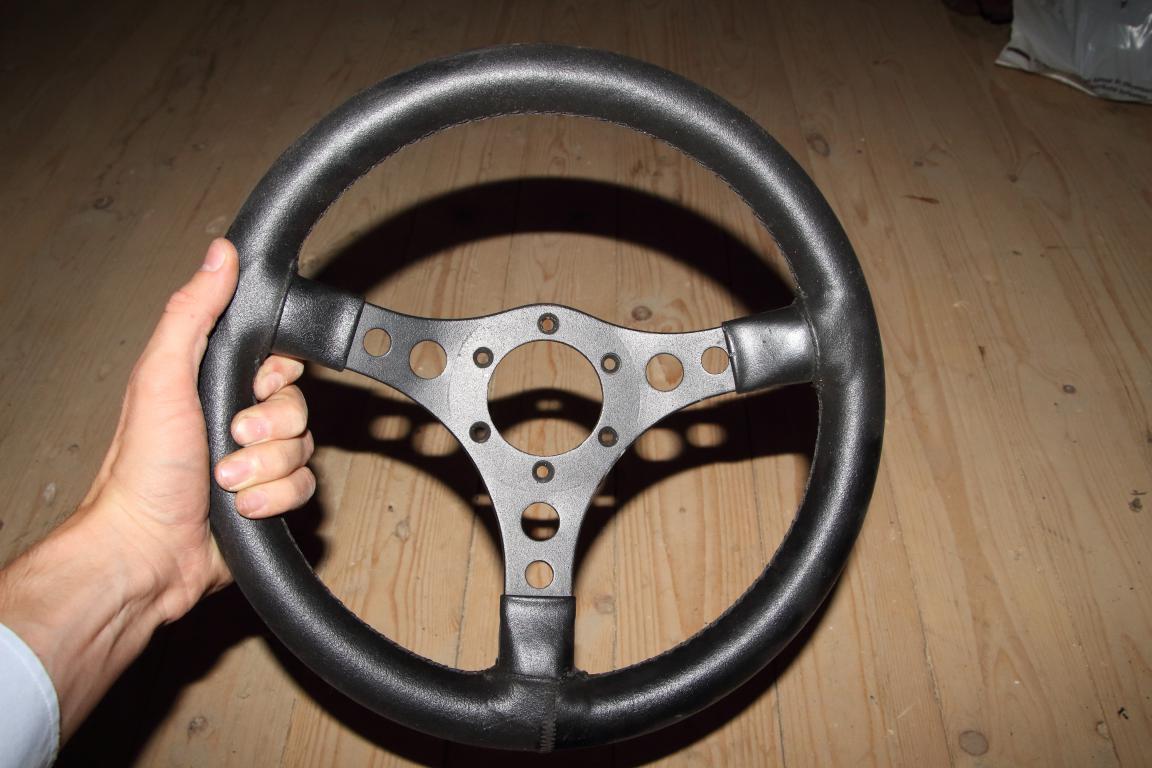
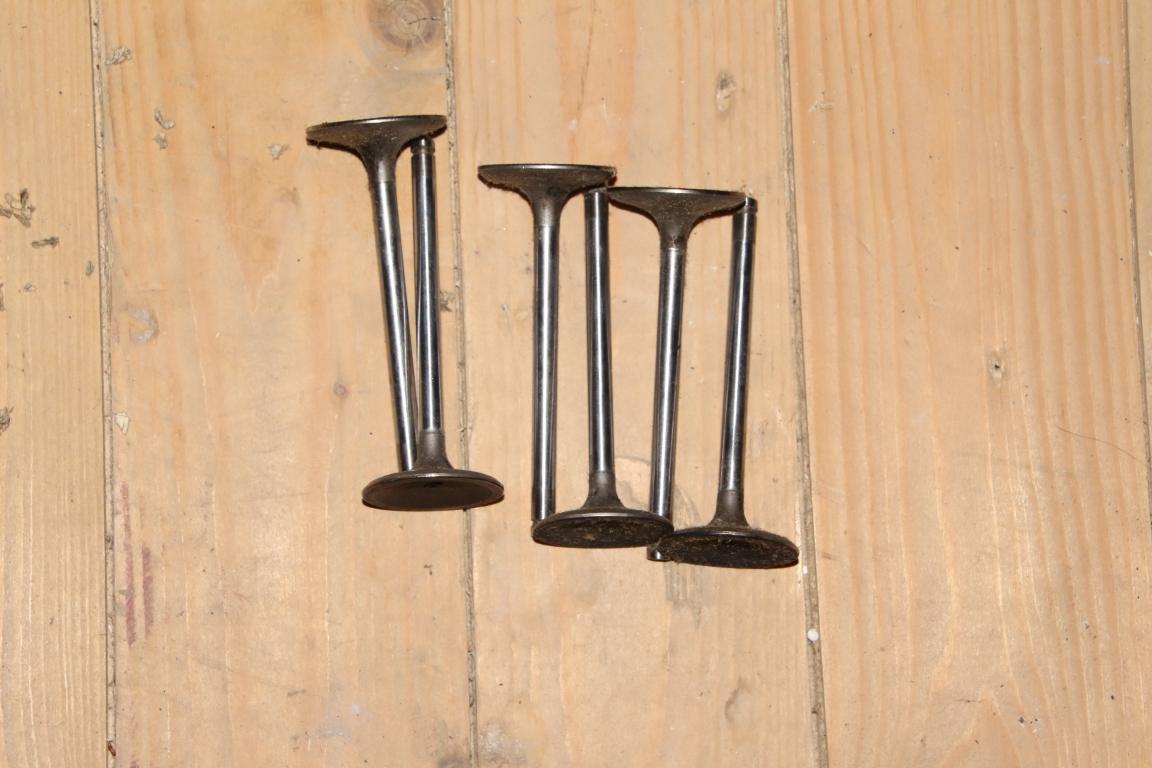
Hello everyone, Thought I´d finally start actually posting a bit about my restoration project, telling the story as it goes and hopefully also get some well needed advise on the way. It will be intermittent updates as I don´t have constant access to the car. Through a friend I got wind of a Datsun 240z for sale just 20 km away from my parents home in southern Sweden. I decided to drive over and have a look. To be honest I did not check all the items which probably should be checked before making such an investment / expense, but the owner gave the right impression so I decided to go for it almost instantly. The car is a Datsun 240z from 1973 imported to Sweden from the Netherlands in 1983. The owner drove it until 1990 from when it was put into warm storage. There it rested until I bought it in the summer of 2014. The L24 drive train was swapped for a complete L28 drive train from a 77-78 280z including an upgrade from SU to Weber carbs. The cam is mildly aggressive, but I don't know any numbers. -> L28 + triple Webers With the car I also got some additional parts. - Original L24 block. It has taken a hit during storage while sitting without the head on. Would require substantial work to get going again. - Mixed parts from 280Z and 240Z drive trains. - New Rear panel. There is some rust where the rear hatch meeting the rear panel, and a panel was bought to fix this. - New cowl cover panel. There is some rust in this area, not too bad what I can see. - New front left fender. There is a parking damage and the previous owner bought a new panel to fix it. - New heater hoses - Weather stripping - Extra rear lights - Tool kit - L28 Dished pistons, extra valve springs and 2 sets of valves. - New head / rocker cover gasket - Chrome lists were taken off and stored away. Not sure if it is a complete set, but they are in good condition. - Original airbox and SU carbs with intake. - Anyone know this steering wheel? It is made in France if I remember the writing on the back correctly. --------------------------------------------- Since purchase I have started collecting the items required / wanted for the European roads. In Sweden the law is quite strict so the re-registration of the car after all the mods have been completed must go through a special process (sort of like a one off homologation). Luckily the car is old enough that no smog laws apply which makes things a bit easier, so I can keep the carbed L28 without much fuss (the engine can also be tuned to give maximum 15kW / 100 kg as the rules are now). The rules state that for the vehicle to be legal with the L28 engine the whole 280z drive train must be installed (L28 + gearbox + differential) in addition to 1) the complete brake system exchanged from the donor car / or generally upgraded or 2) the steering rack upgraded. I don´t have the book with me so if any Swedes know better please don´t hesitate to chime in. Currently I'm looking at doing step 1 meaning I'll have to completely upgrade / replace the original break system. Some parts have already been acquired, but I'm learning that it is dangerous to own a car you are passionate about. There is always something new that you "need" . More updates to come! Regards, Tebirkes