carbuilder723
-
Posts
51 -
Joined
-
Last visited
Content Type
Profiles
Forums
Blogs
Events
Gallery
Downloads
Store
Everything posted by carbuilder723
-
BMW S54 into S30 Chassis - Build Thread
carbuilder723 replied to carbuilder723's topic in Other Engines
Leaning toward going with the BMW rack, primarily for cost reasons since I already have one on the shelf. Also I'm not a huge fan of most electric power steering racks. I much prefer hydraulic and BMW is one of the best in my opinion. -
BMW S54 into S30 Chassis - Build Thread
carbuilder723 replied to carbuilder723's topic in Other Engines
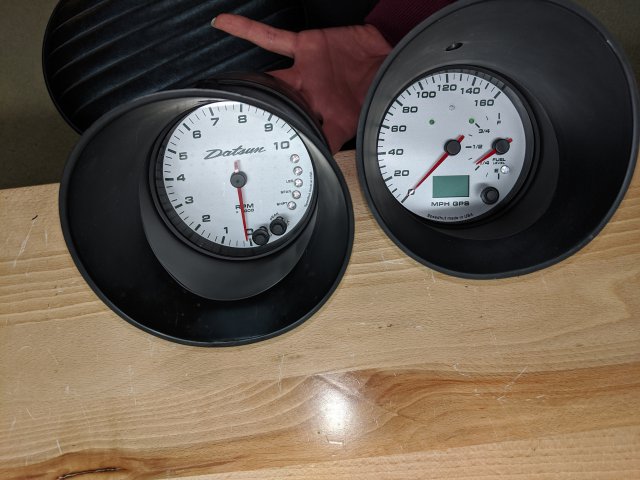
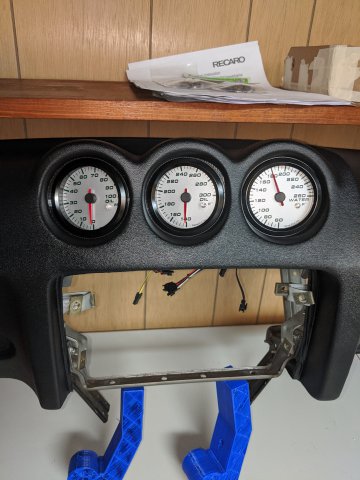
Been a while since I posted anything, but here's few small updates. I refurbished the turn signal stalk, and cleaned up the combo switches and put together the NRG quick release hub with my wheel. I still need to find a horn button that I like to finish it off. I also cut down the strut housing in prep for the coilover installation and had everything sand blasted. Currently those are out being welded. I figured I'd leave to the hands of a professional. I still need to paint them, but the weather here in Michigan has been prohibitive to spray painting. I also started working on getting the large gauges installed using the Skillard adapters. Lastly, i received all of my wheels and just did a quick mockup of the Arizona Z car front brakes and ... they fit! so good new there. Next things up are: - getting all of the new wheel bearing assemblies painted and pressed together - finishing restoring the dashboard and getting everything I can installed into the new Vintages Dash. Once spring hits, it's going to be full speed ahead with working on the Body Shell. It needs modifications made for a new steering rack, fuel cell, pedal box, Recaro seat etc...
-
BMW S54 into S30 Chassis - Build Thread
carbuilder723 replied to carbuilder723's topic in Other Engines
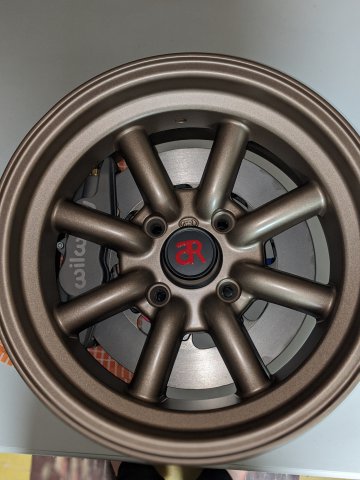
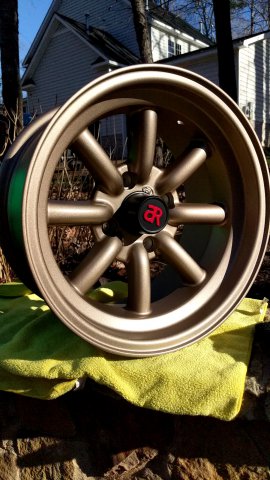
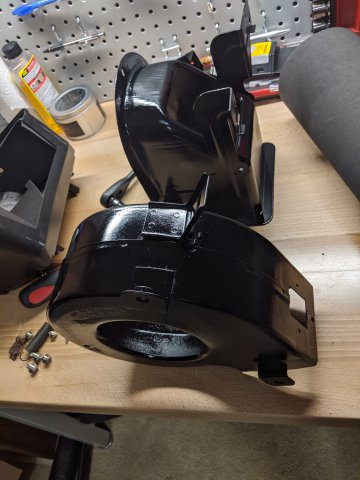
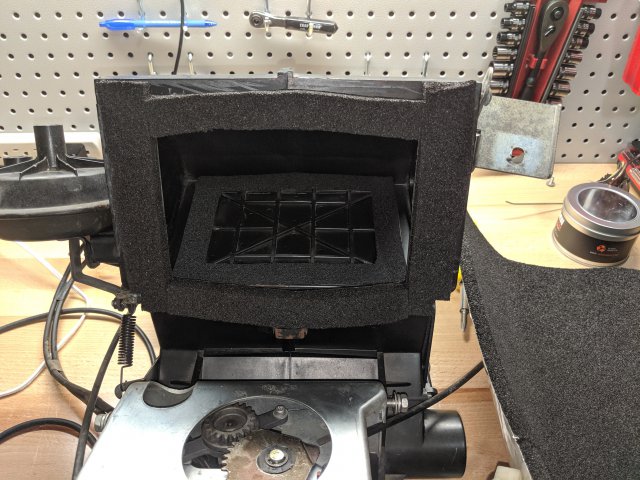
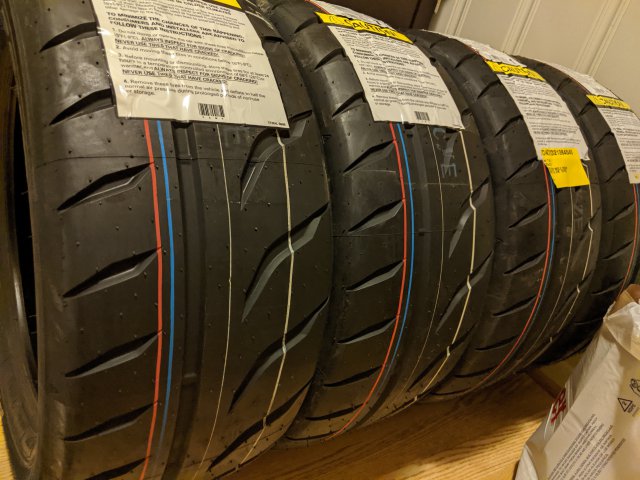
I hadn't realized it's been so long since my last post... a couple things have happened... I got the rear end completely sorted out and mounted just how I wanted it with the RT suspending the diff from the top and the snubber sandwiching it from the bottom. I (just for fun) mocked up the driveshaft and am working on an adapter to go from the BMW CV joint to the R200 input flange. Anyone interested in machining this guy for me? I got the transmission cross member welded up and in position I started to work on refurbishing the HVAC unit. Right now, I'm still up in the air if I want to install AC or not... but i'll at least have the equipment behind the dash if I want to.This basically involved taking EVERYTHING apart, cleaning, greasing, repainting and replacing every piece of foam. I also retro fit the Kia Sportage blower fan. I got some of my accessory gauges mounted in the new dashboard too. I'm going to continue working on the dash over the winter when i'm not out in the garage as much. Next up will be the two main gauges... I just need to get a hold of some of the Skillard adapters for Speedhut gauges. I also took delivery of some more T3 goodies... this time the front control arms along with BC coilovers. i'll be cutting my strut housings soon and then it's time to look for a professional welder to bring it home... since you really only get one good go at welding these up... I'll hand it over to a professional. Lastly, I settled on my wheel and tire package and ordered those. 15x8 0 offset Atara racing wheels with 225/50/15 R888r tires - these should fit under the body with no flares. Picture below is the same setup (minus the different style wheel)
-
BMW S54 into S30 Chassis - Build Thread
carbuilder723 replied to carbuilder723's topic in Other Engines
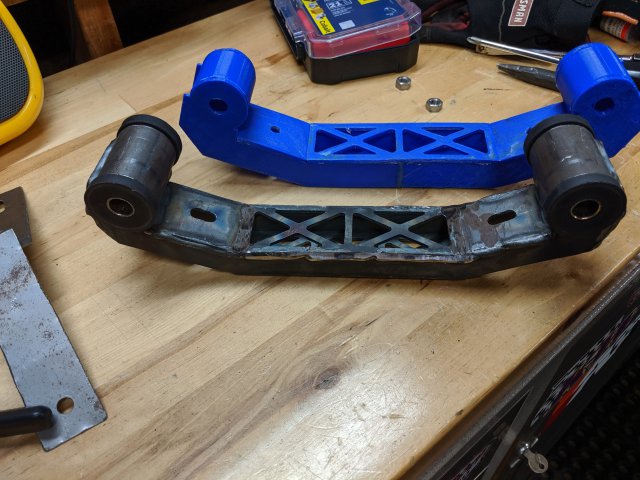
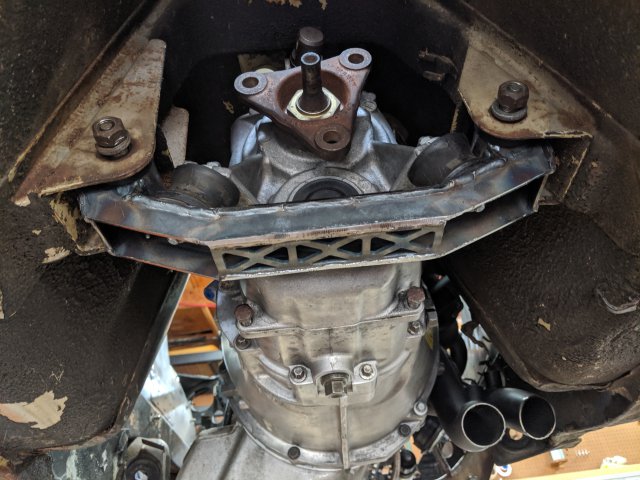
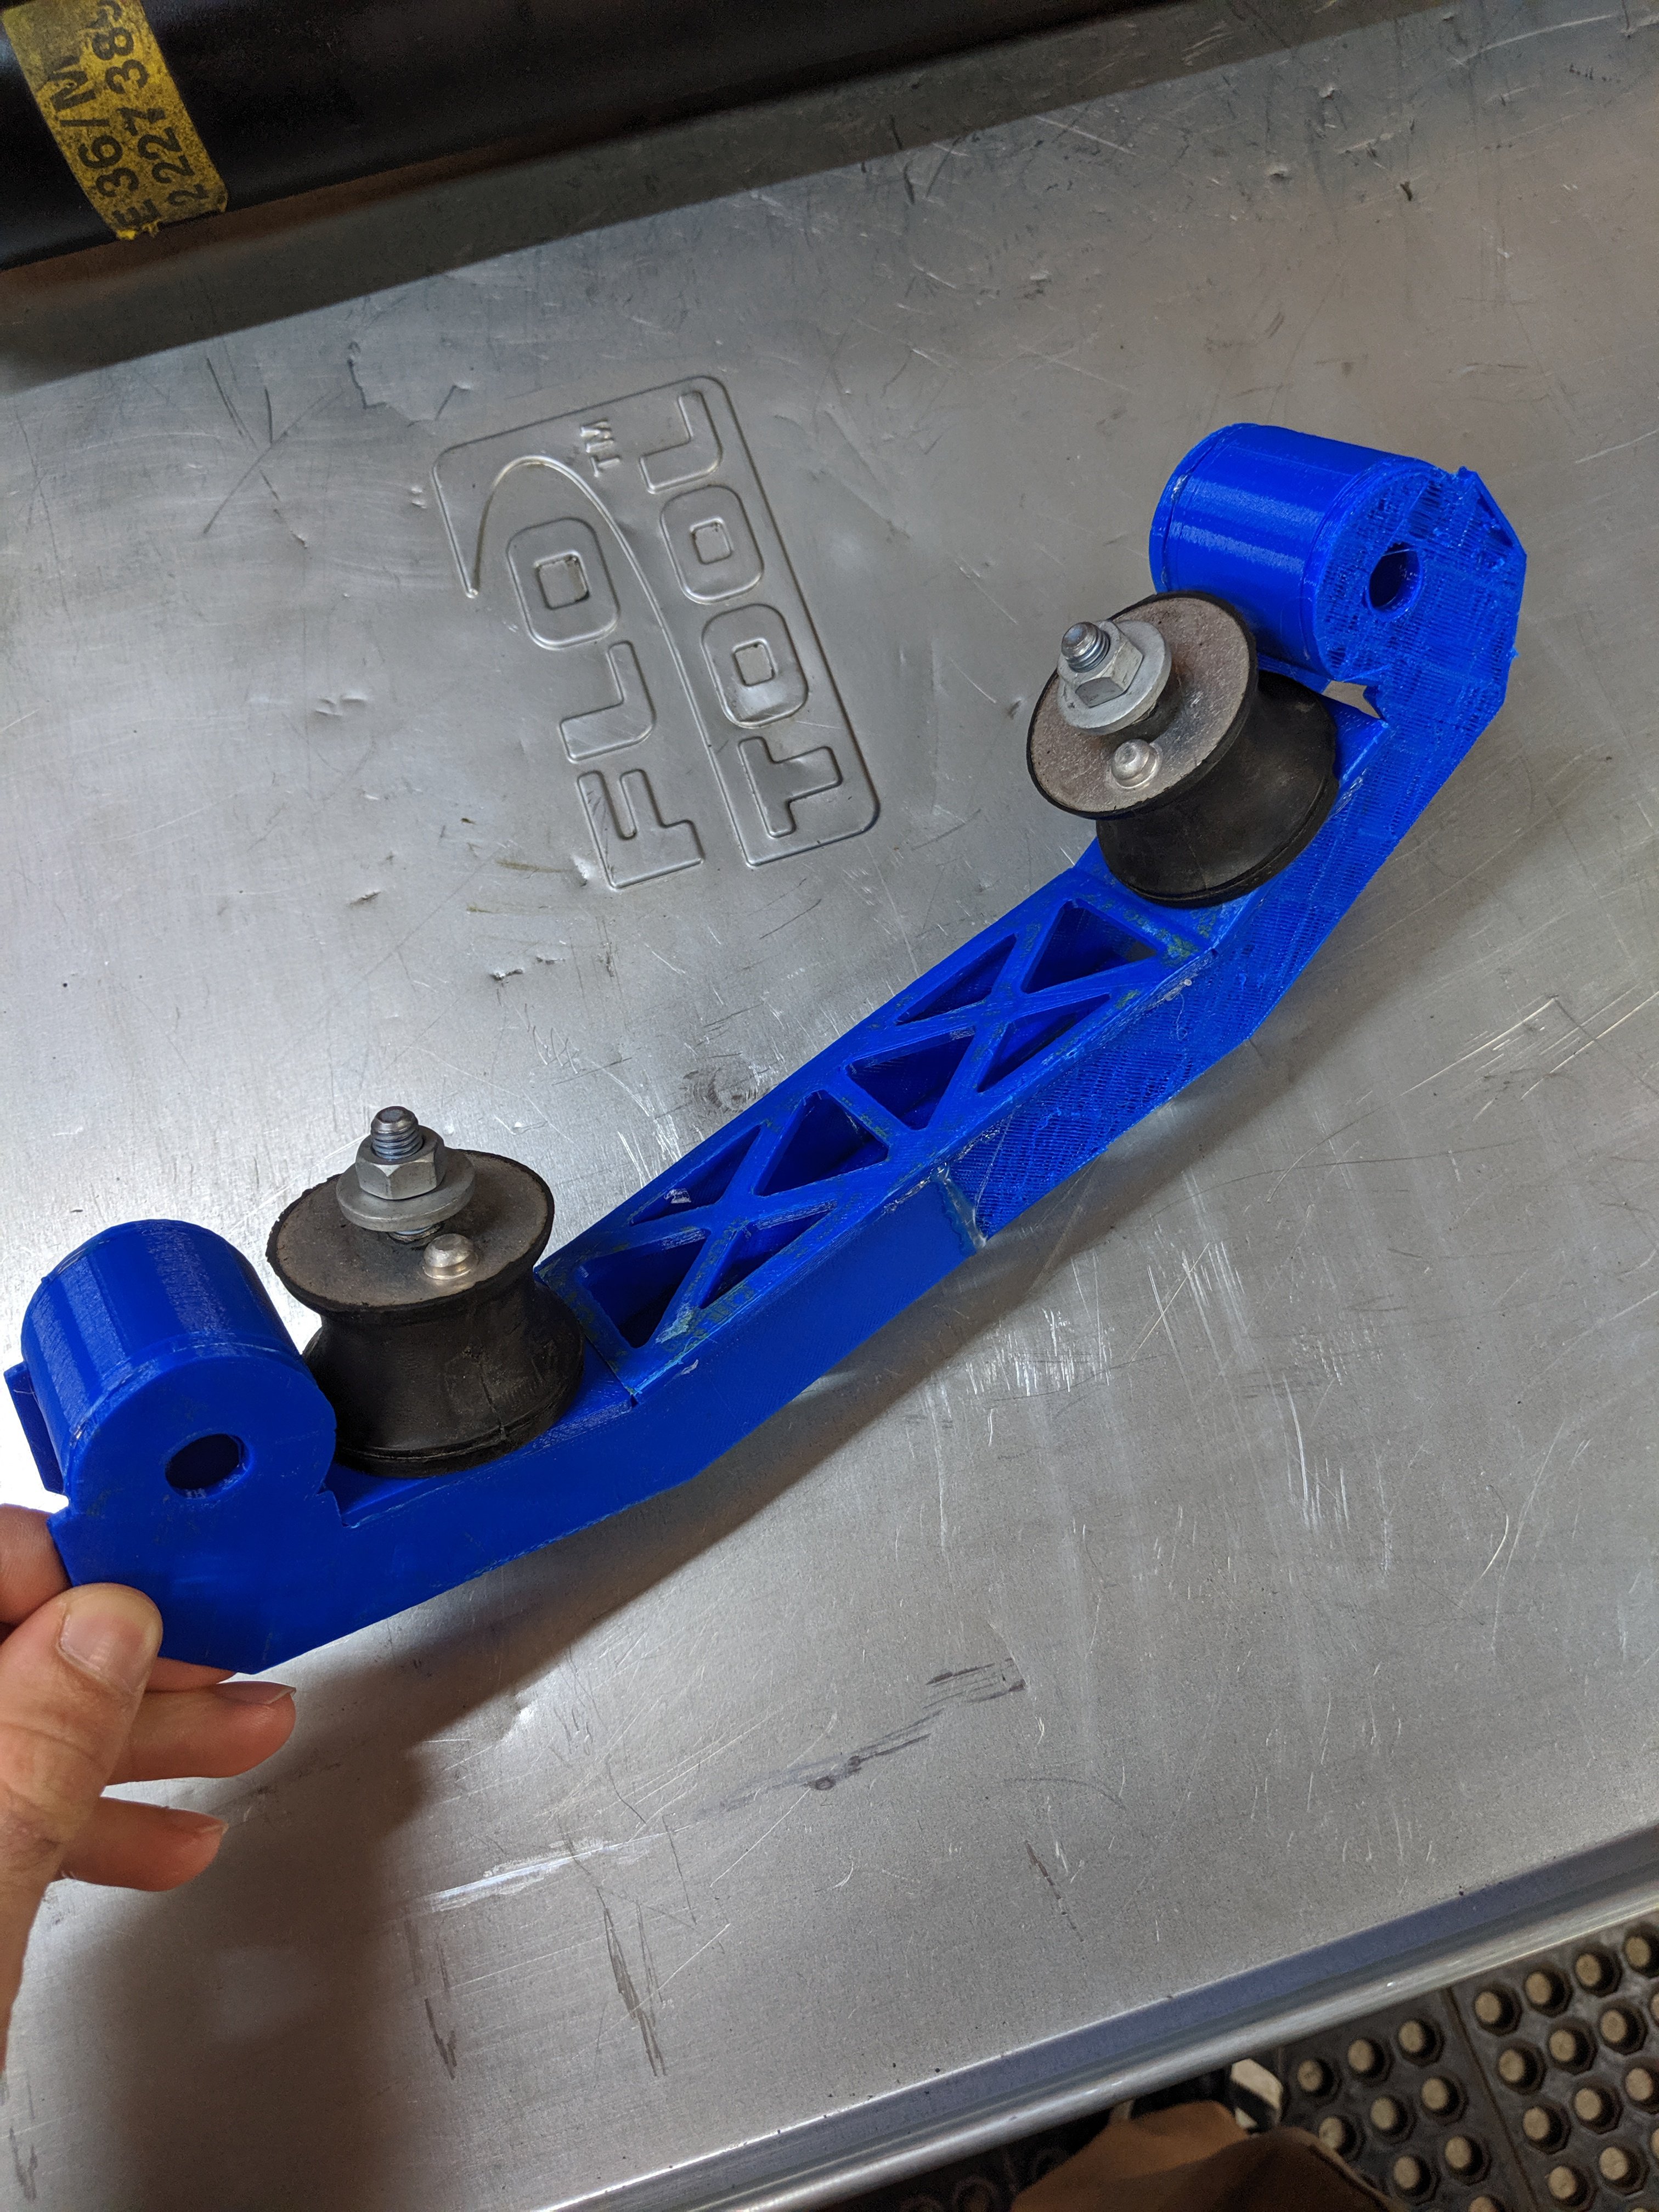
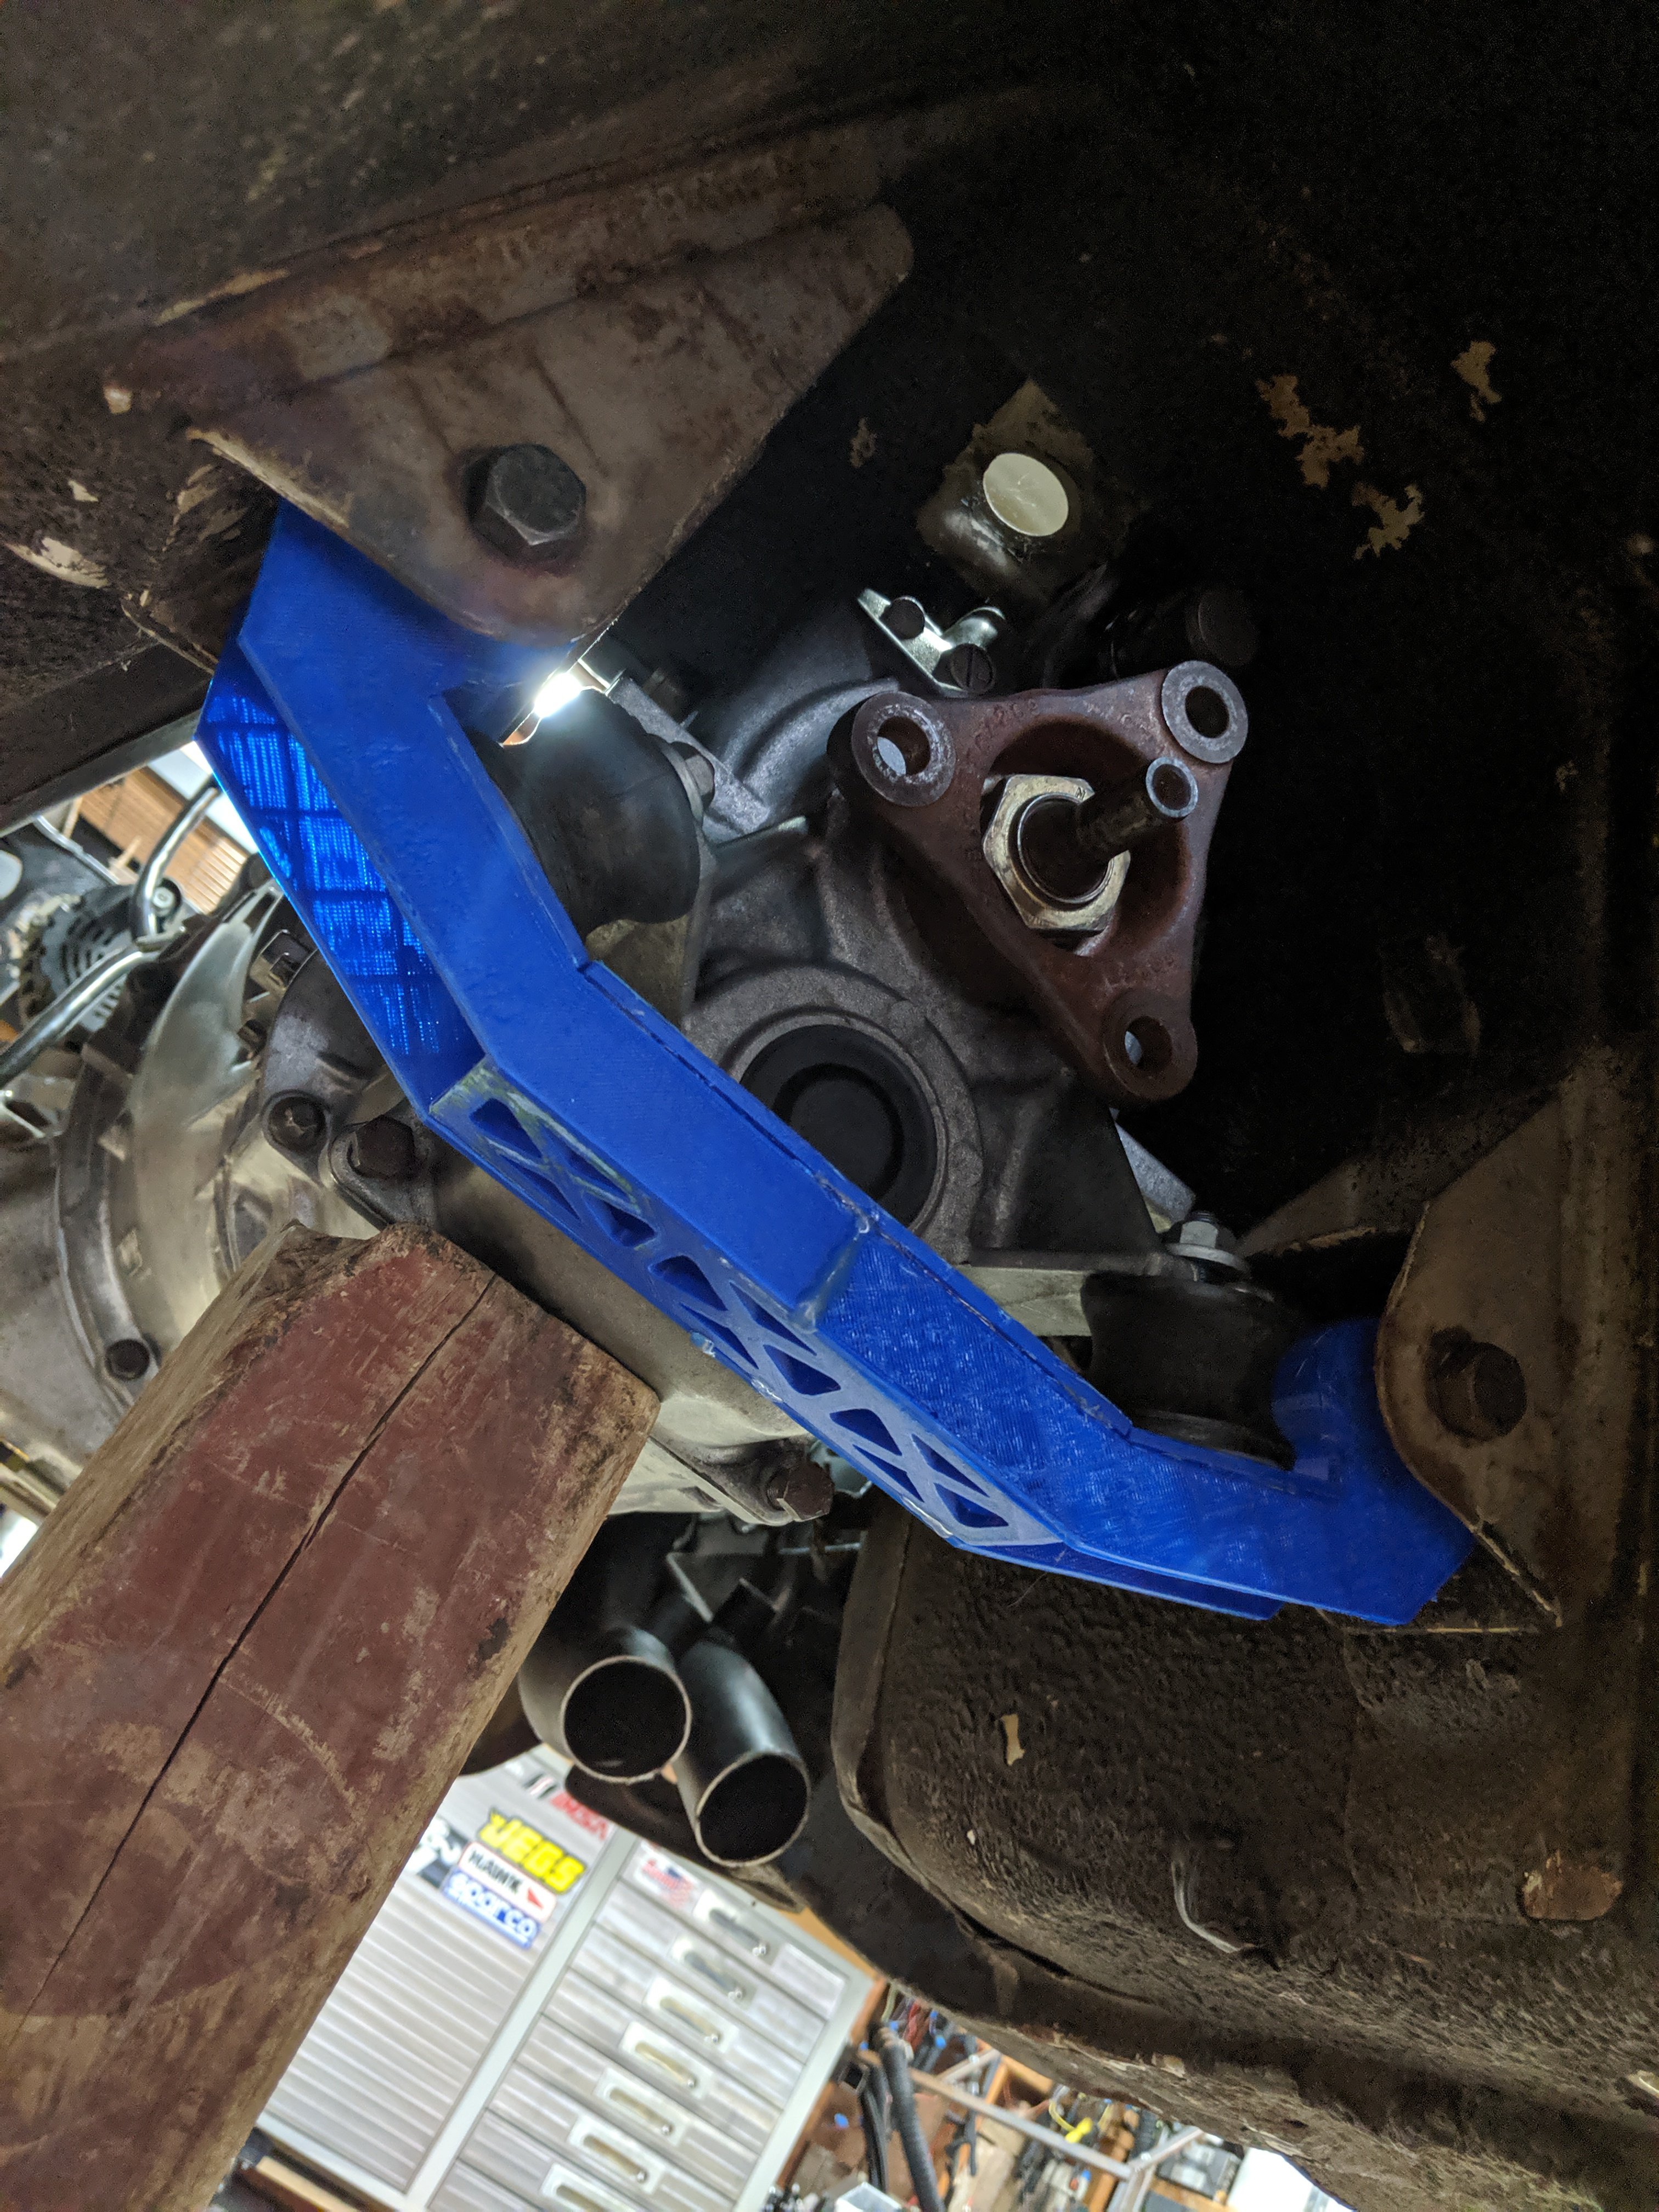
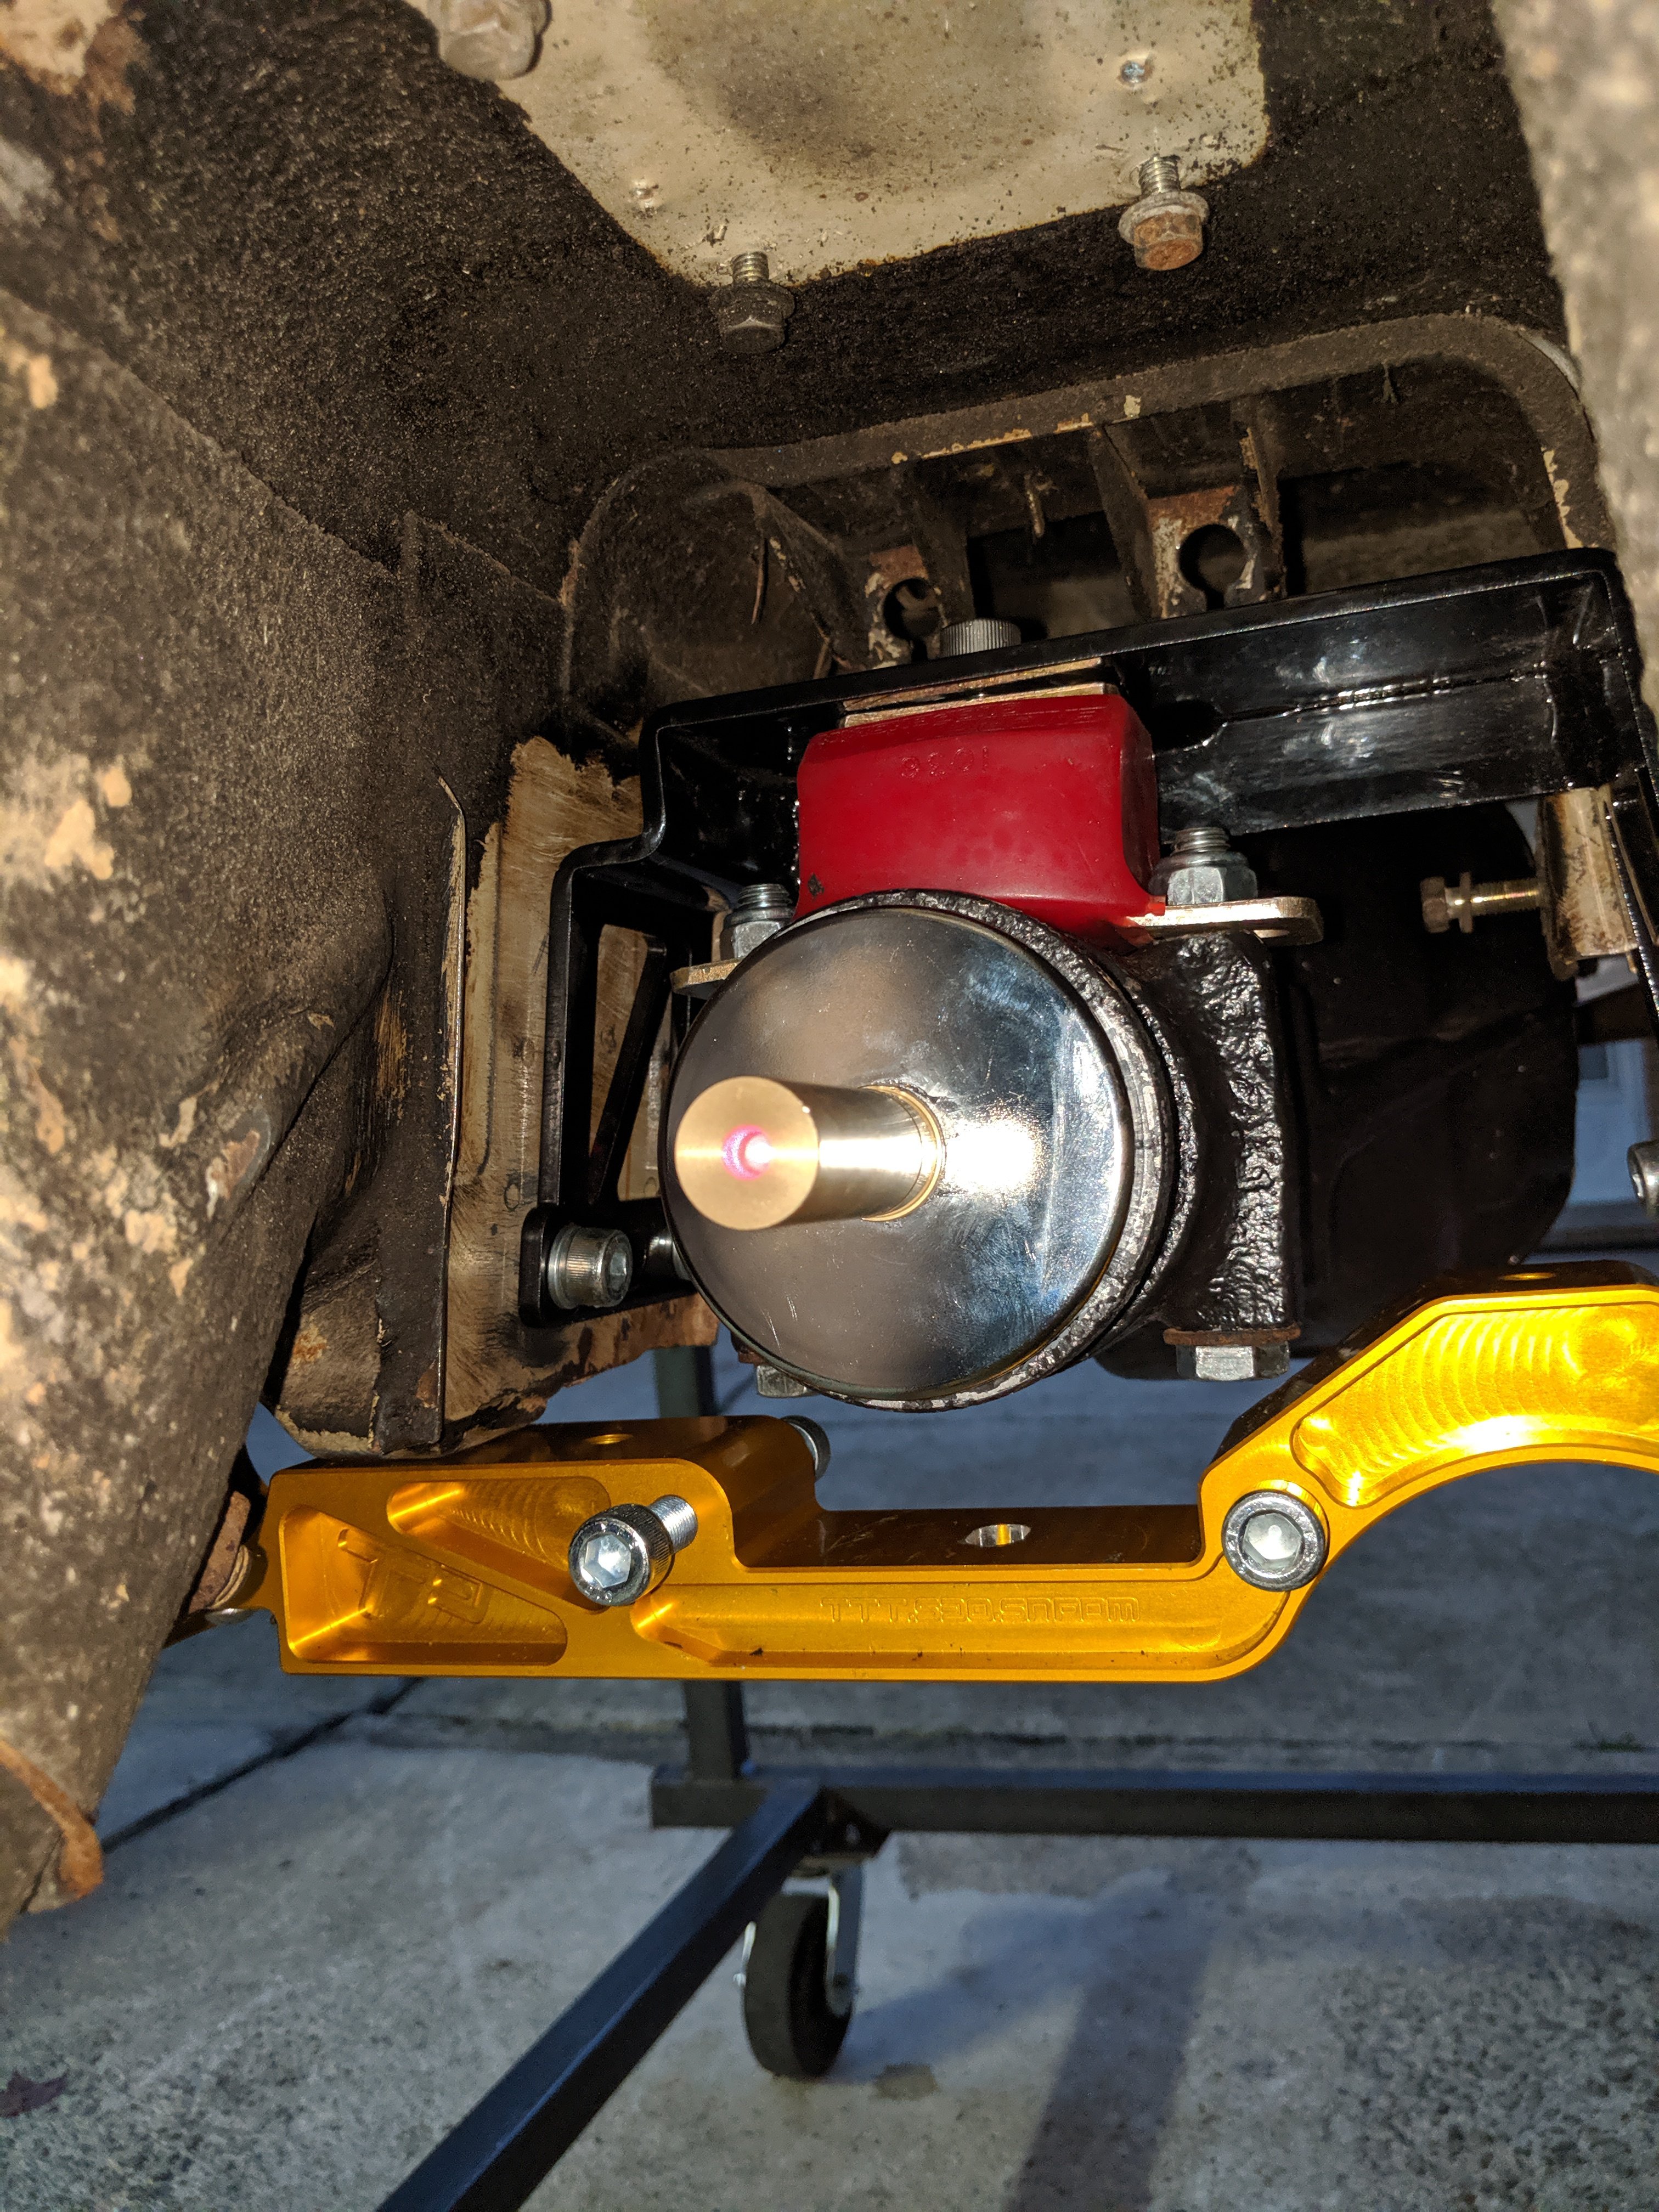
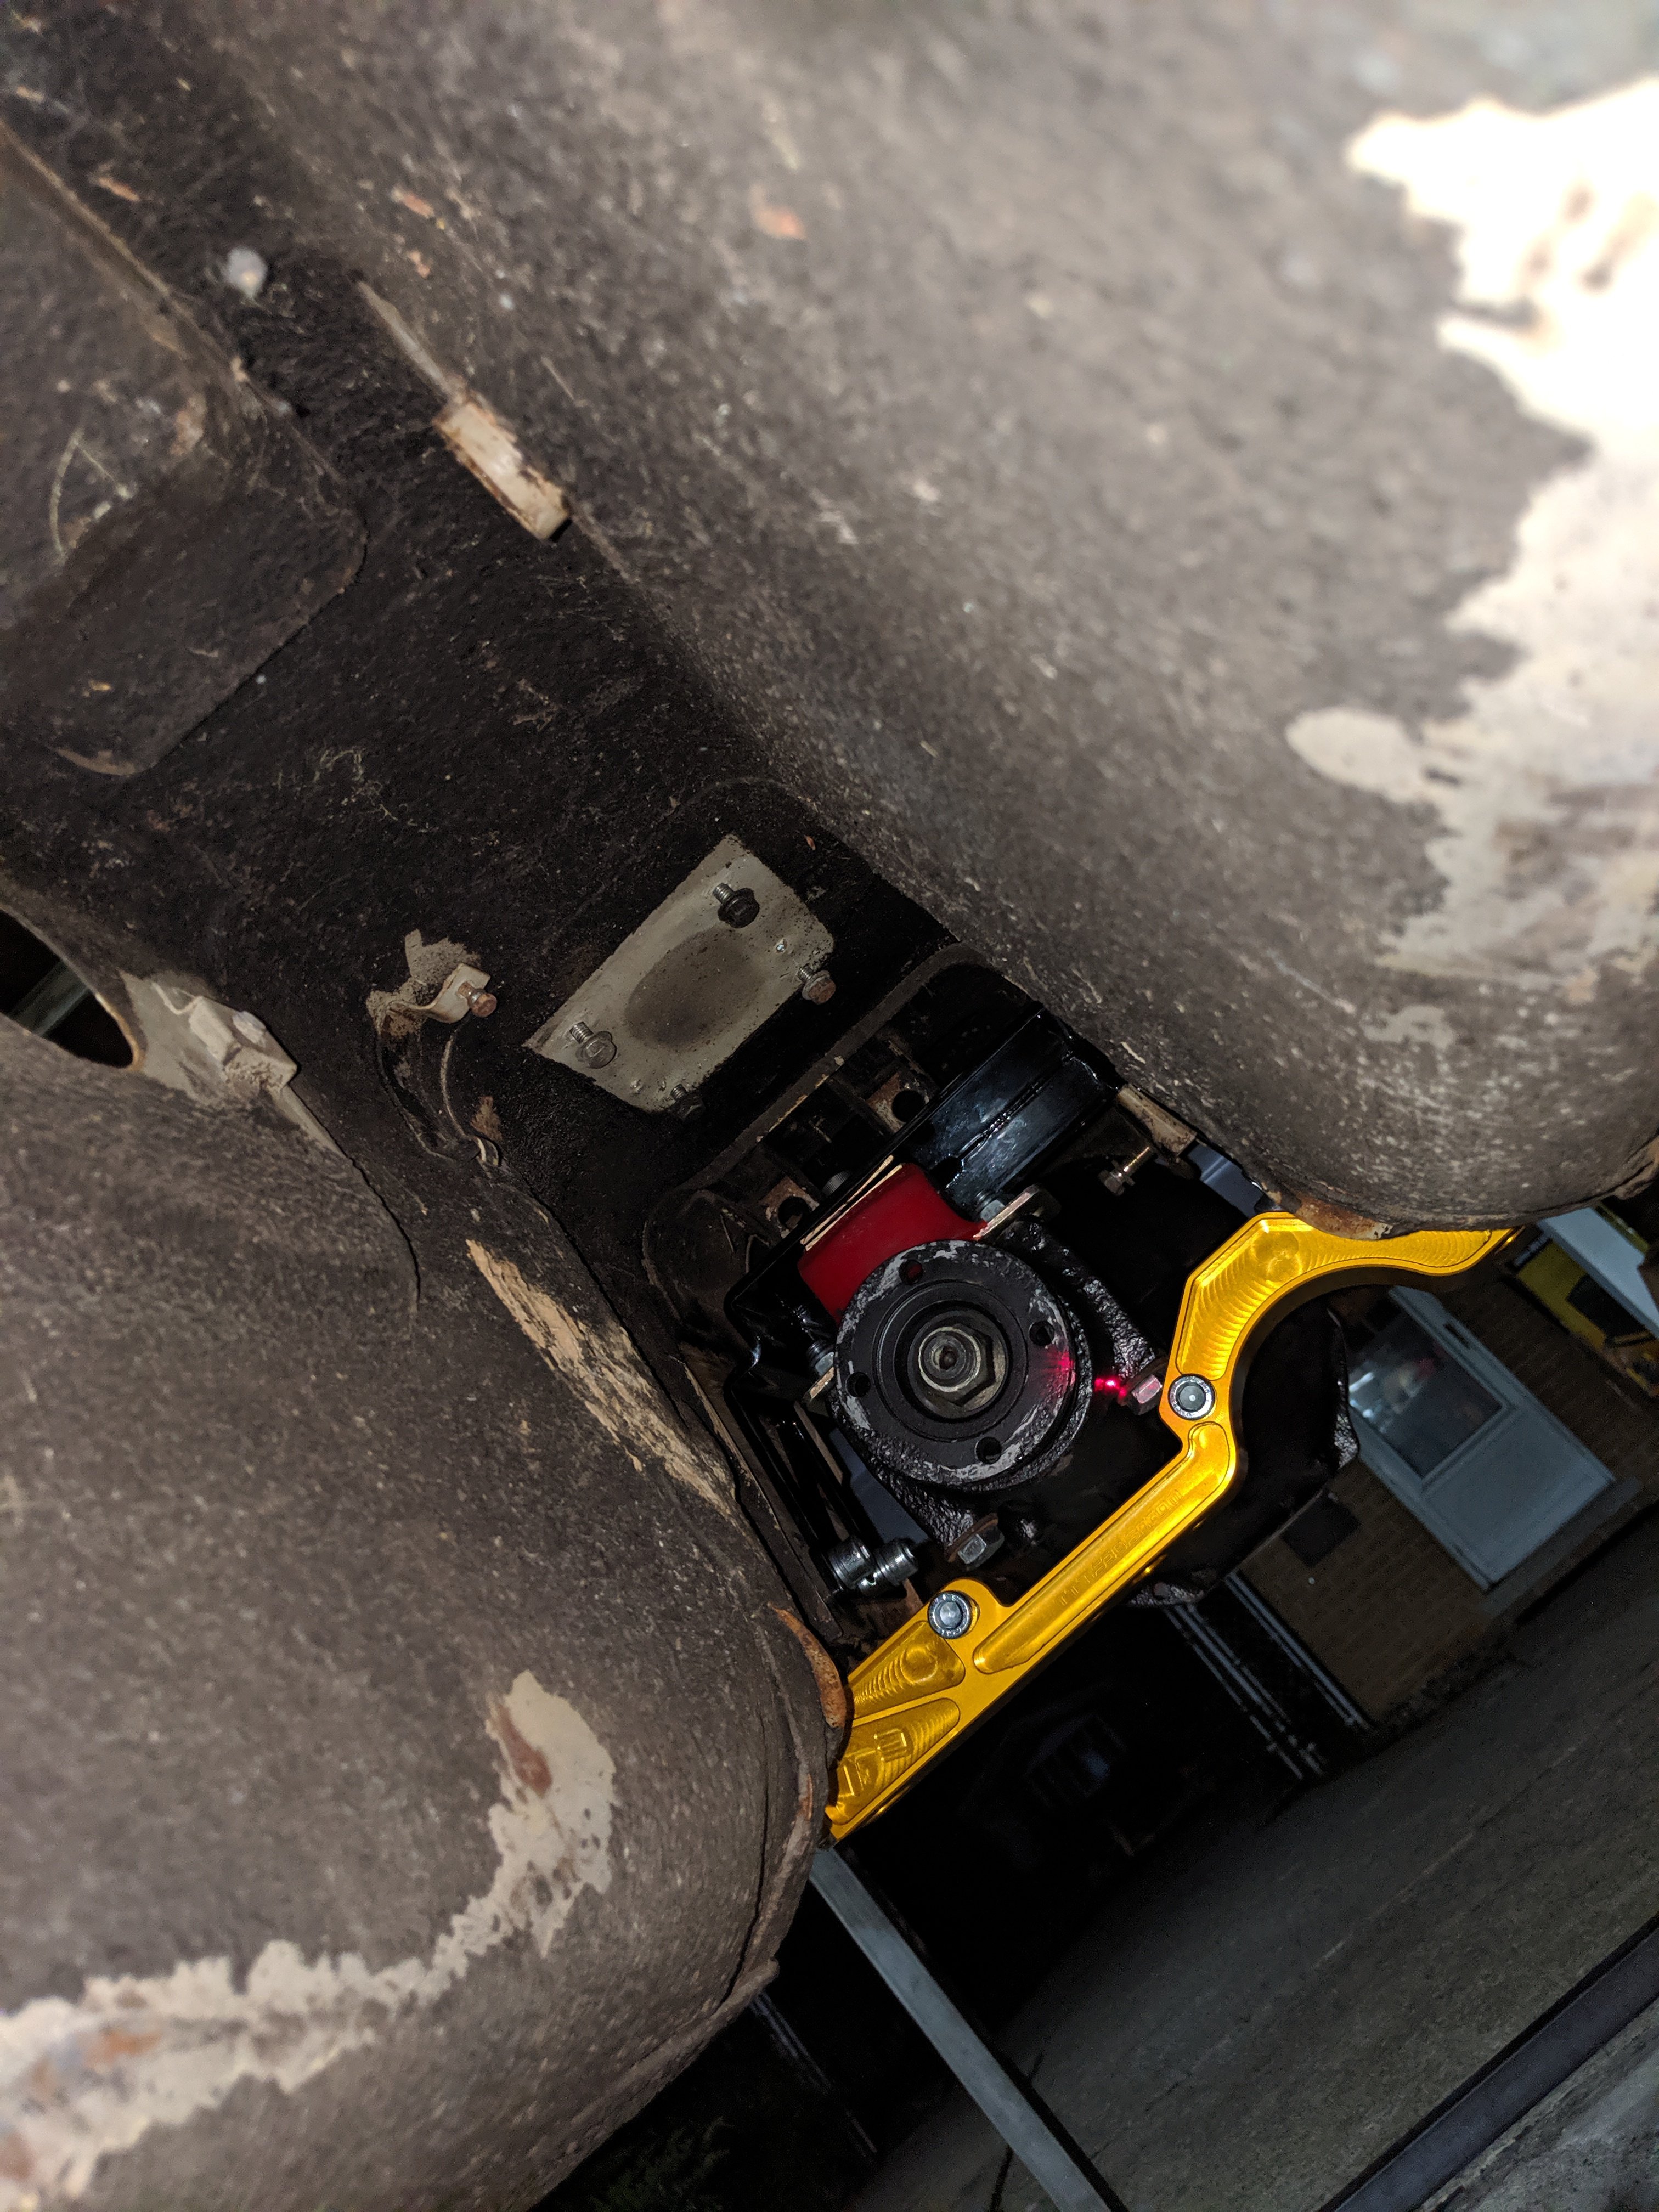
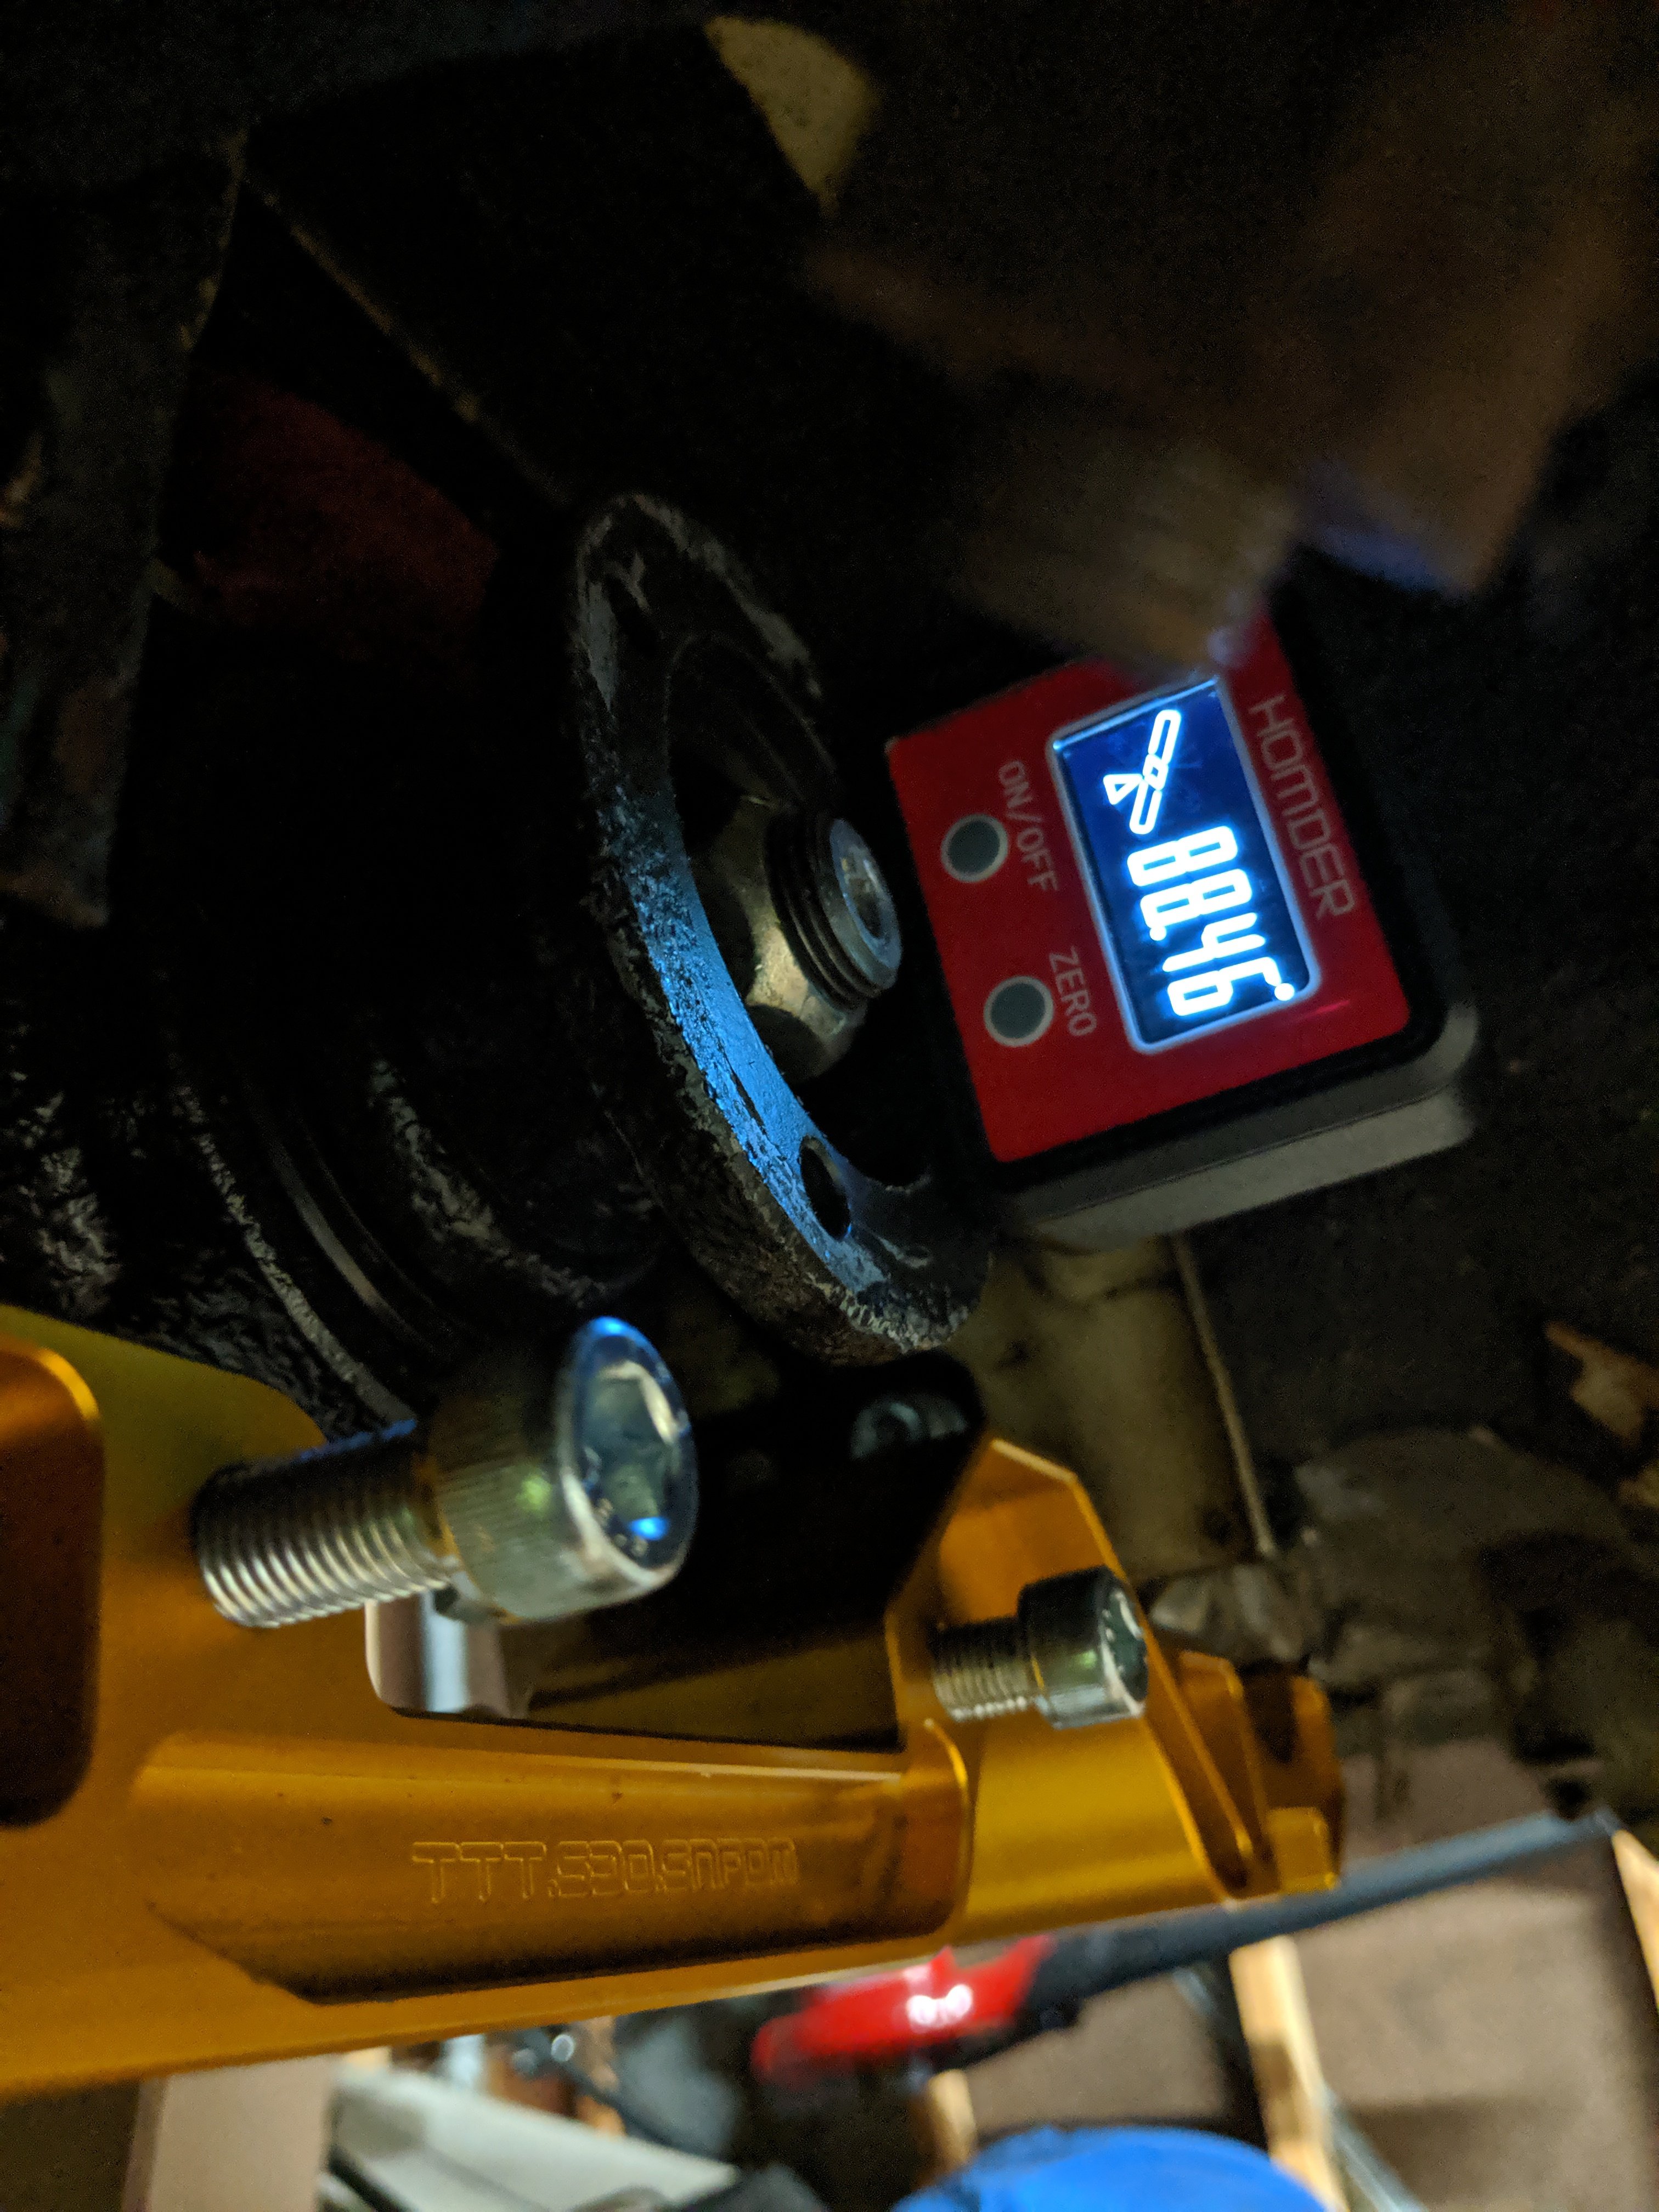
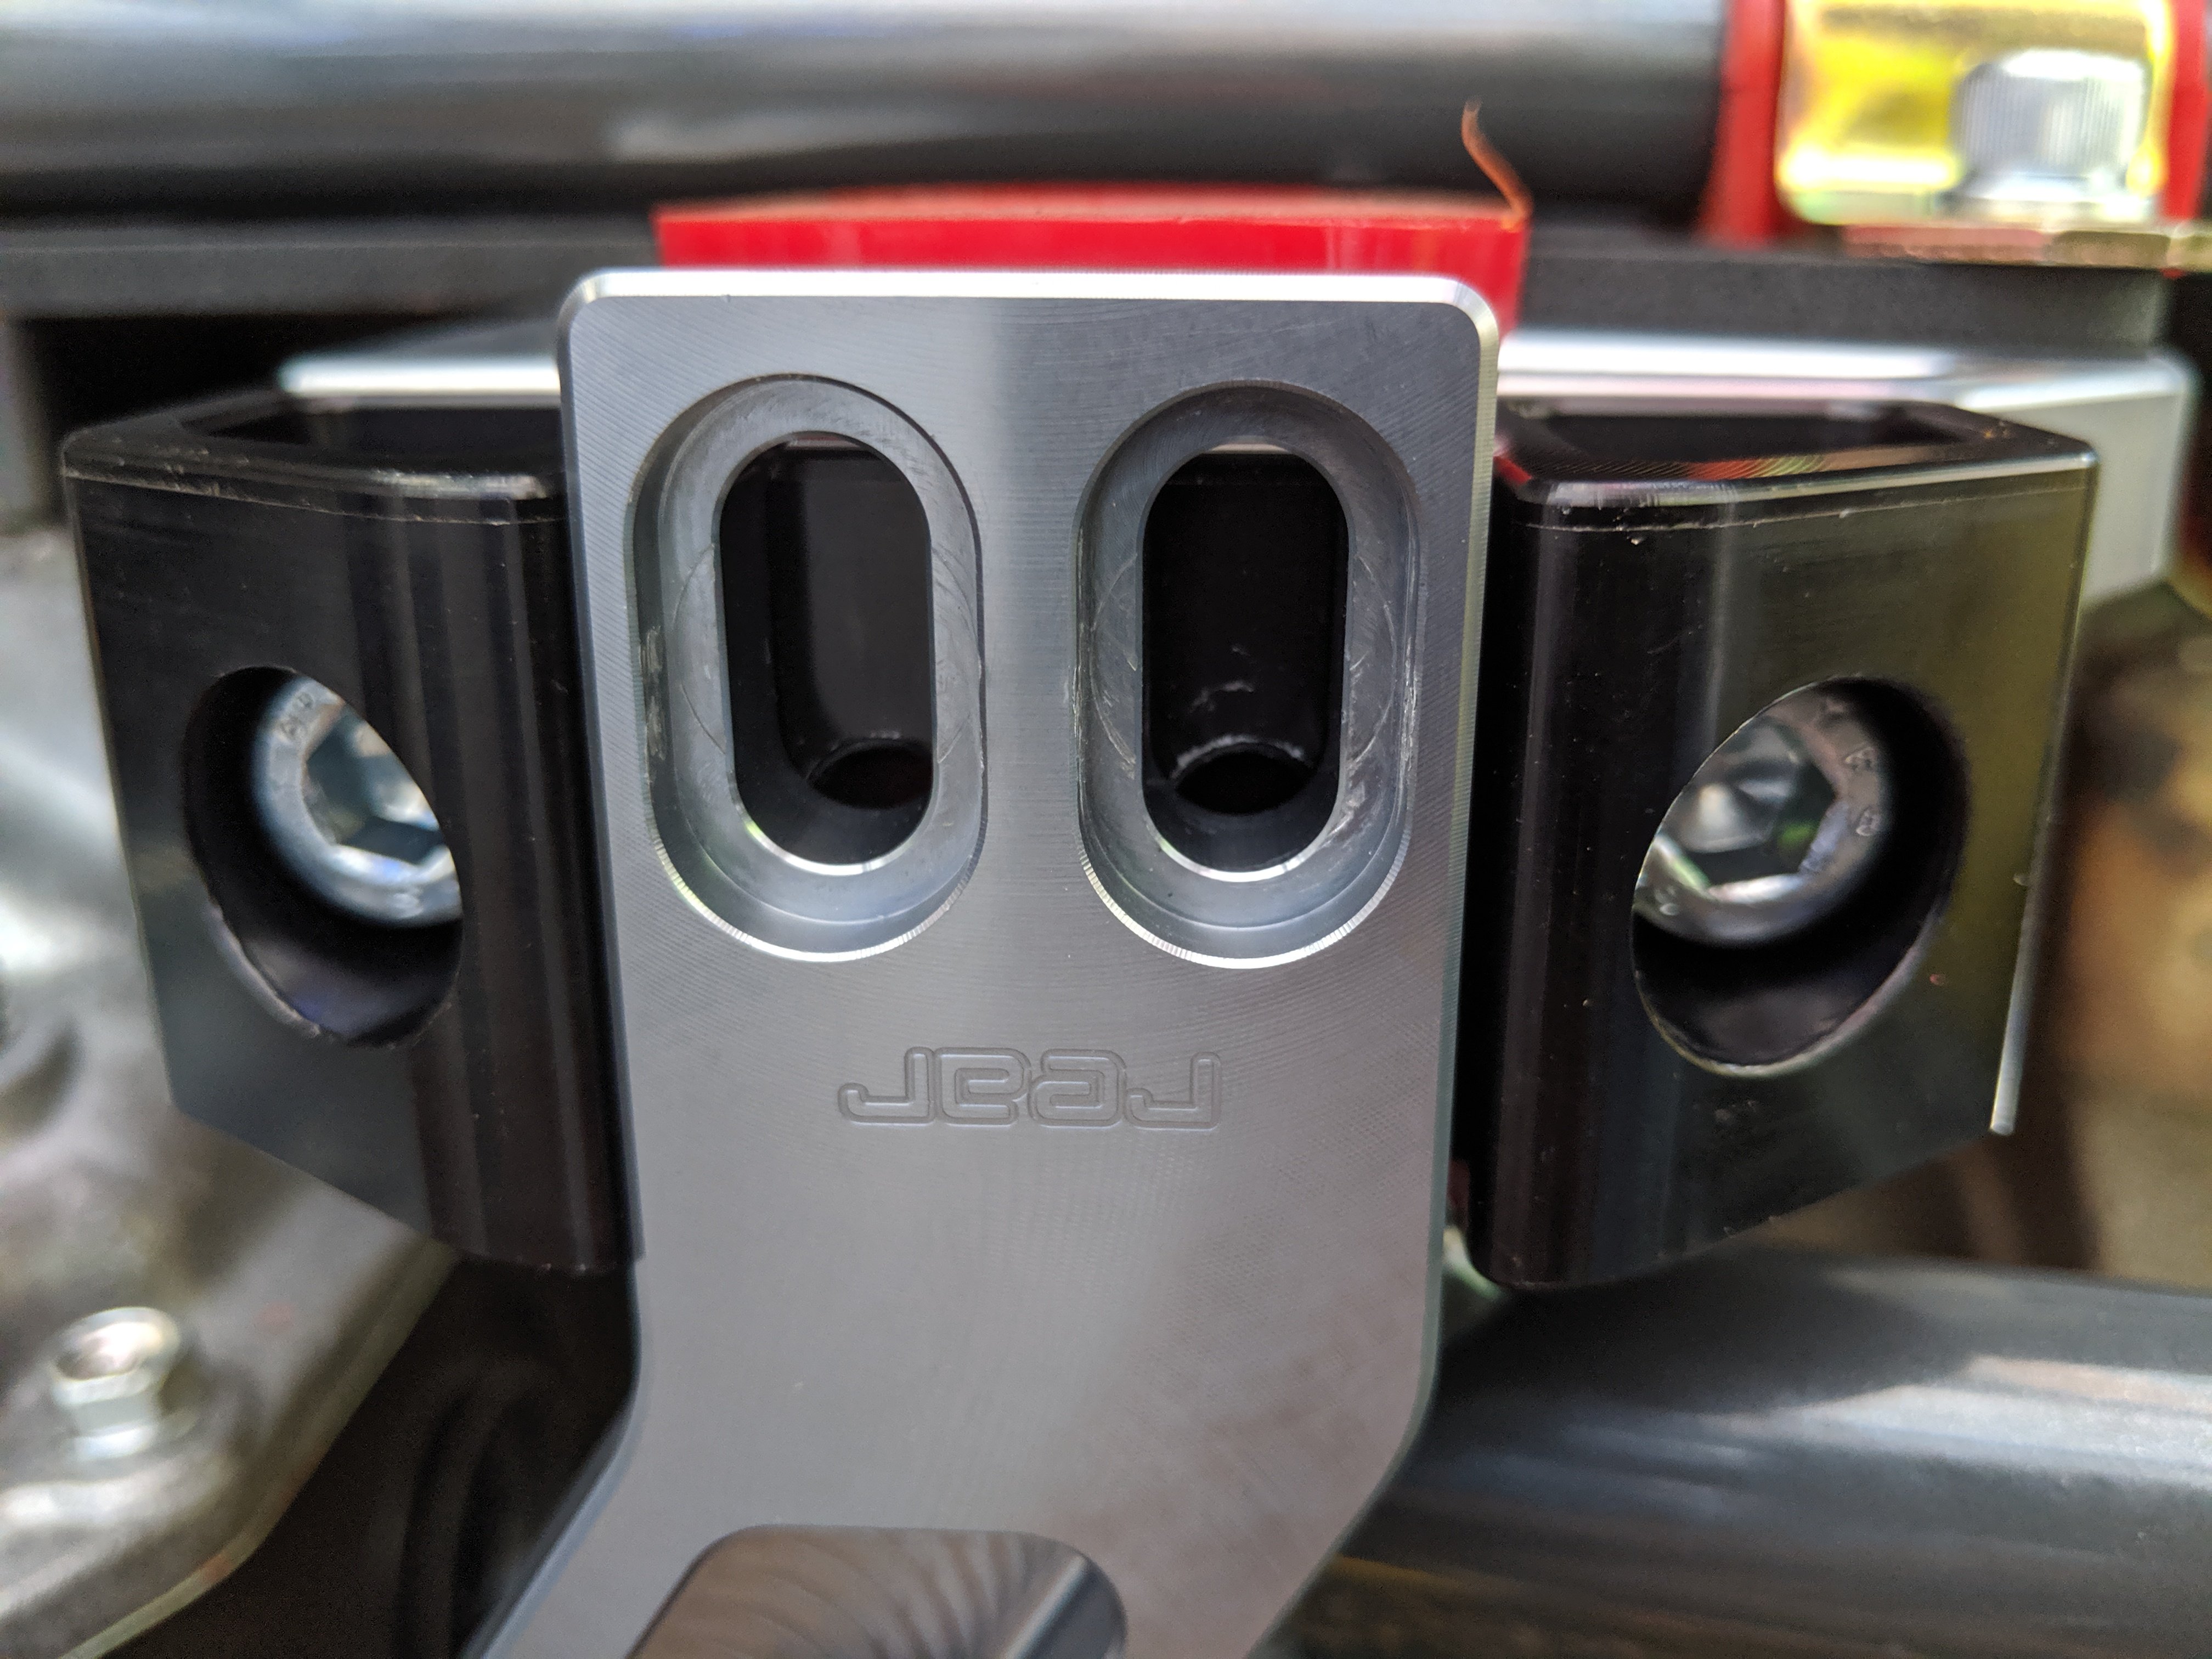
After a taking a break for a while, I've been working on getting the transmission mount sorted out. I took some measurements, drew up some CAD and fired up the 3D printer. I got it fitted in and it really looks like it's going to work out quite nicely. The laser pointer is near dead on, but I still need to put the angle finder on it one more time to verify that all of the misalignment is < 1deg. The plan is to send out the drawings before the end of the week to be laser cut. Hopefully I can get it welded up by mid next week.
-
BMW S54 into S30 Chassis - Build Thread
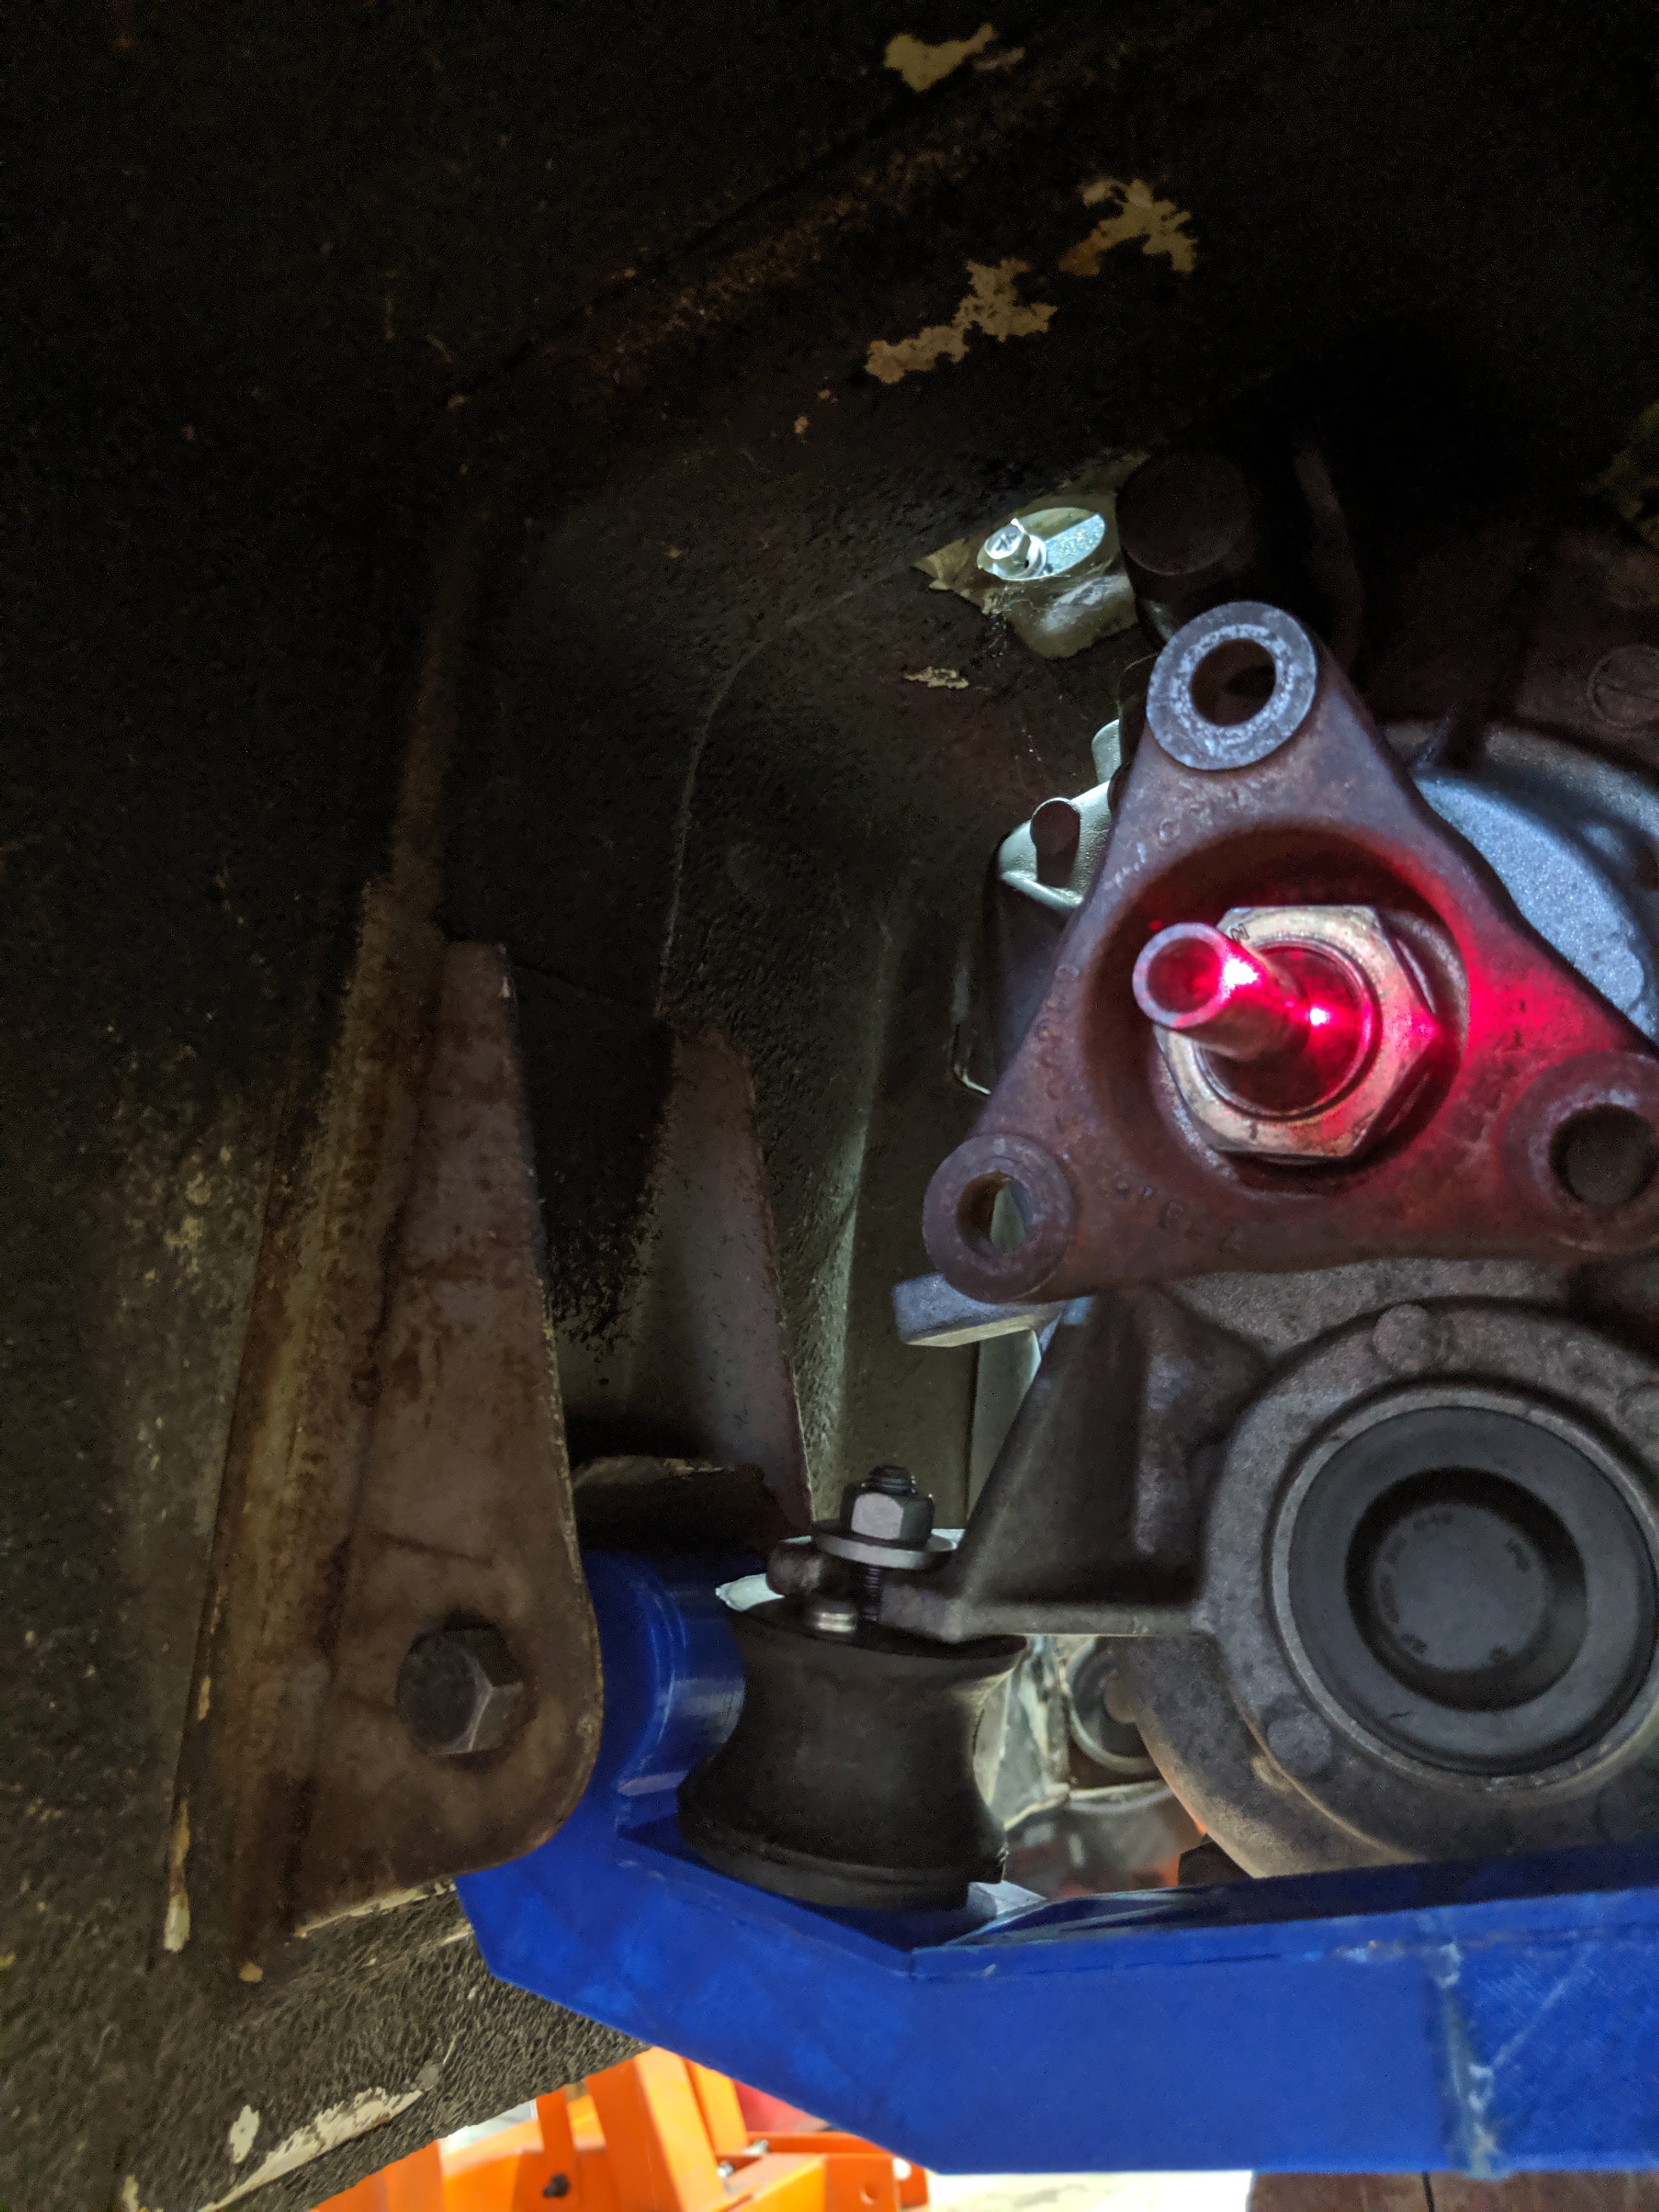
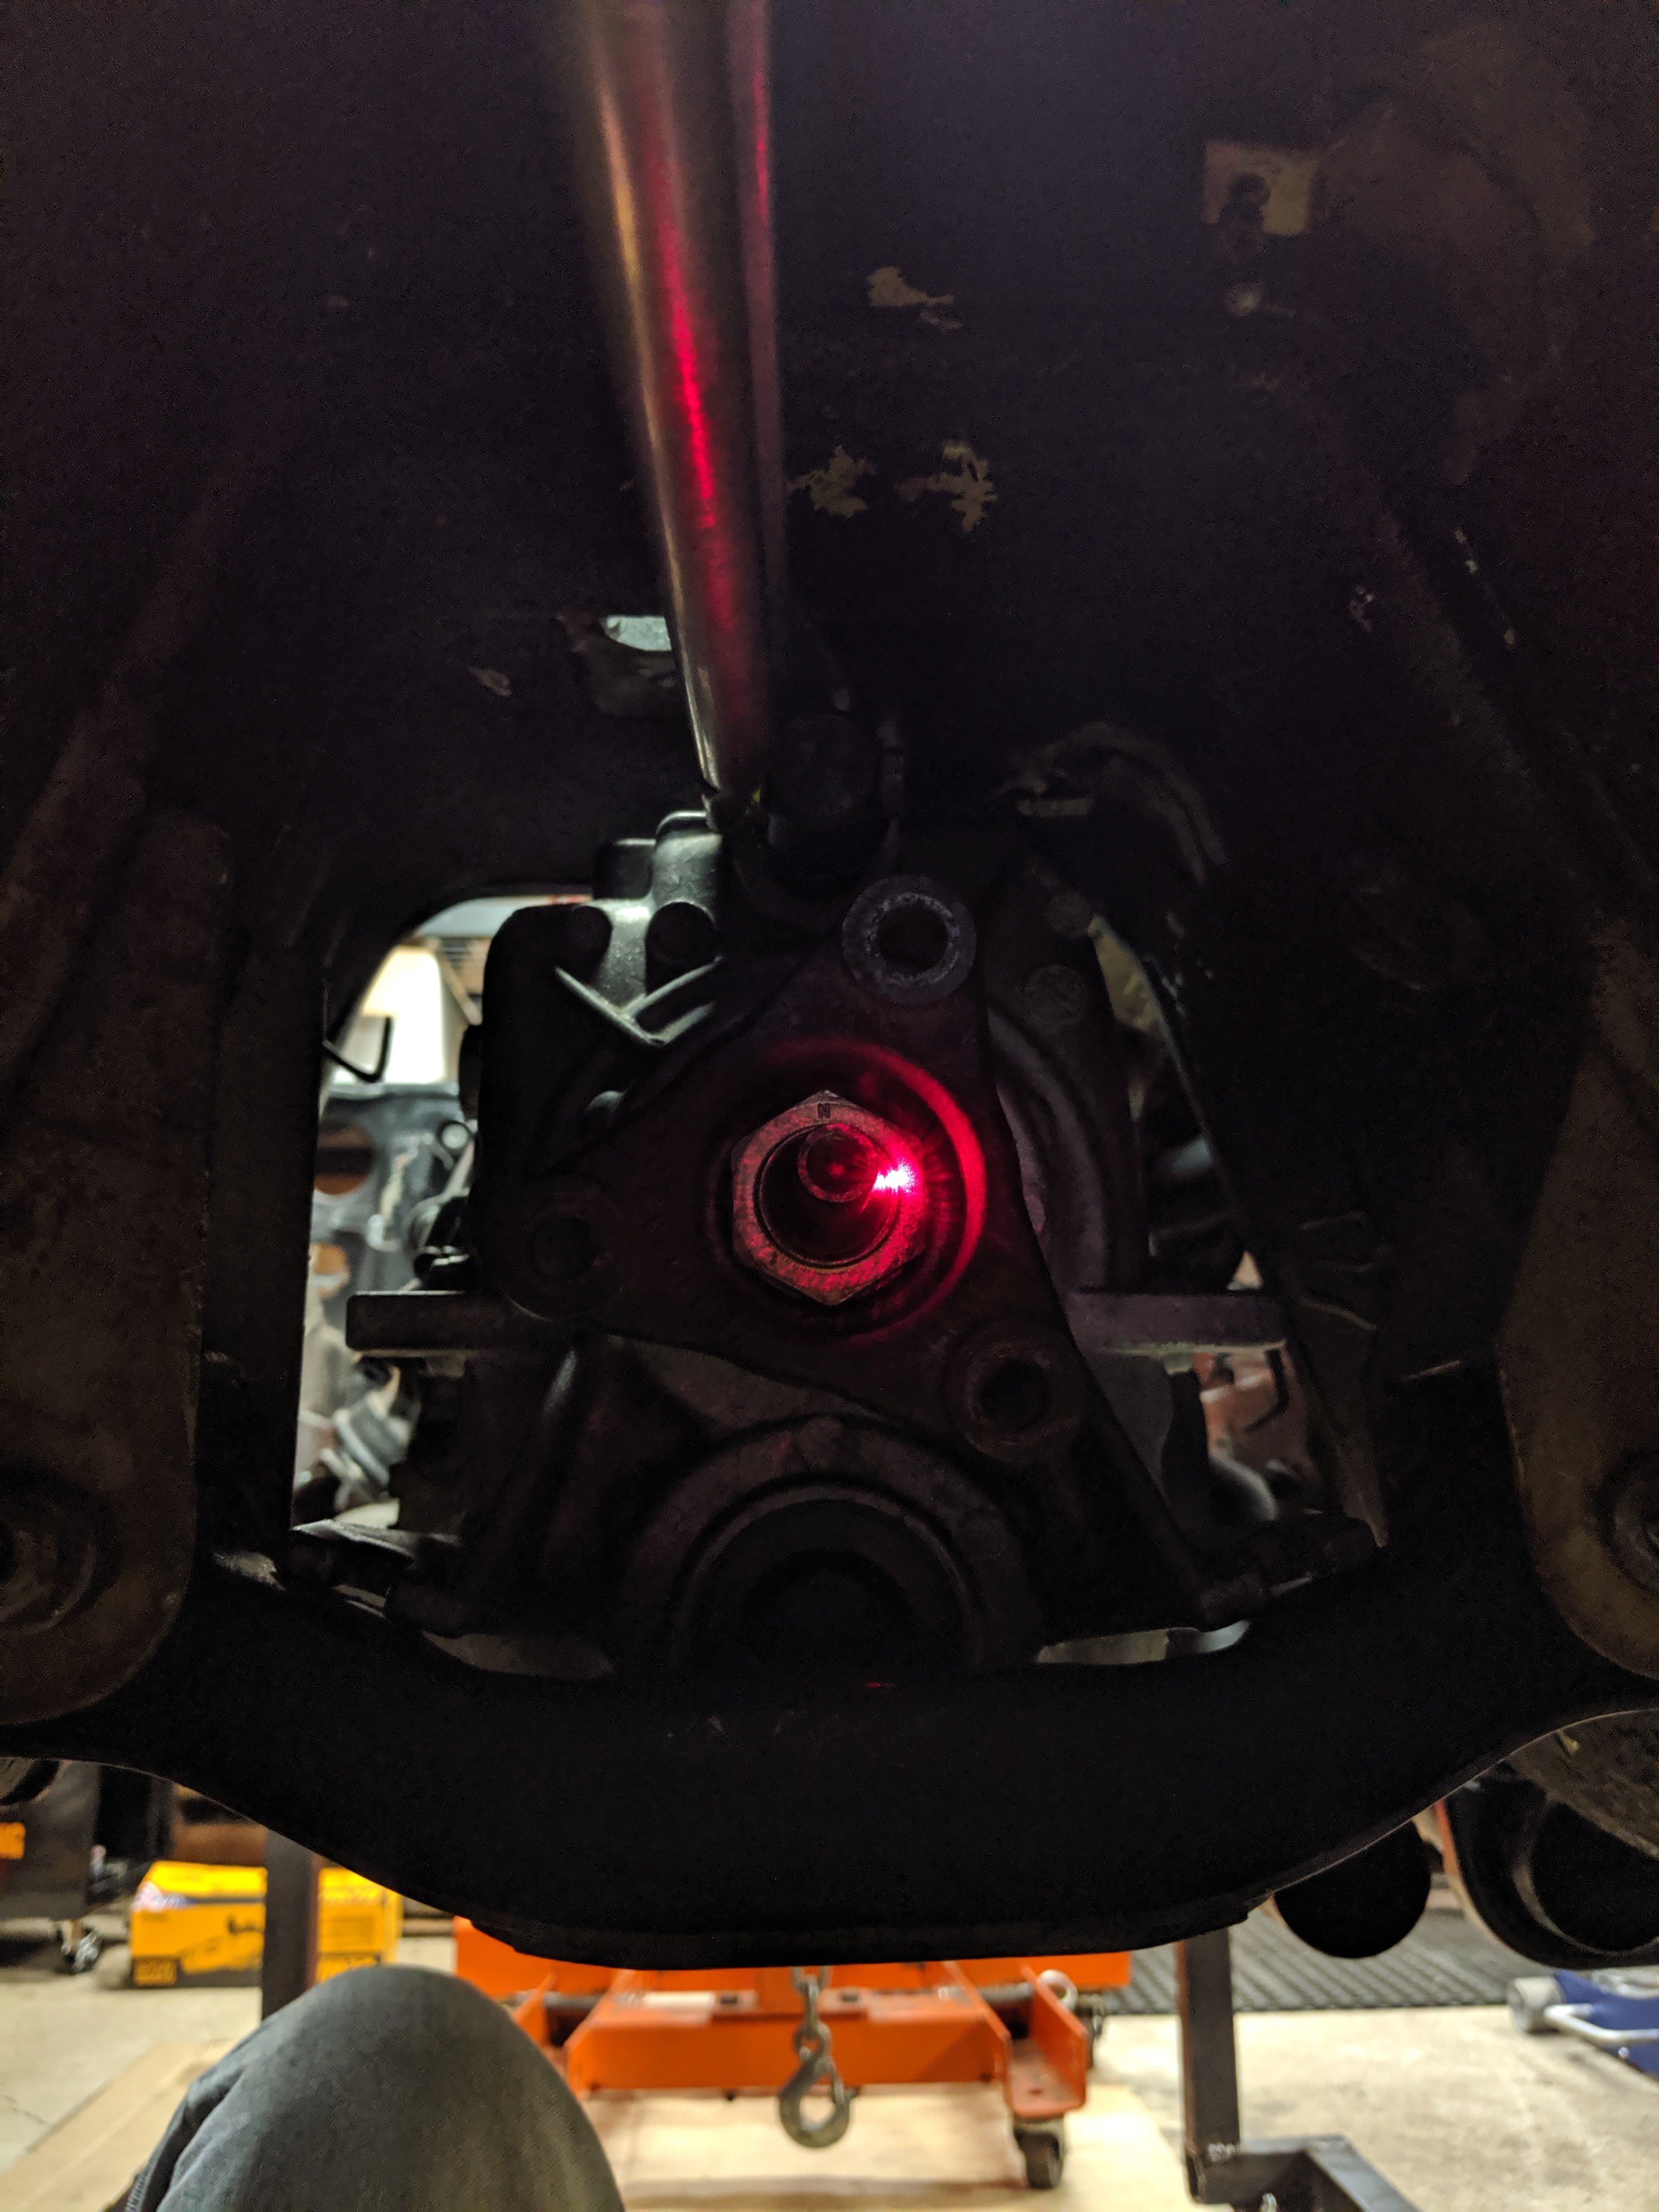
carbuilder723 replied to carbuilder723's topic in Other Engines
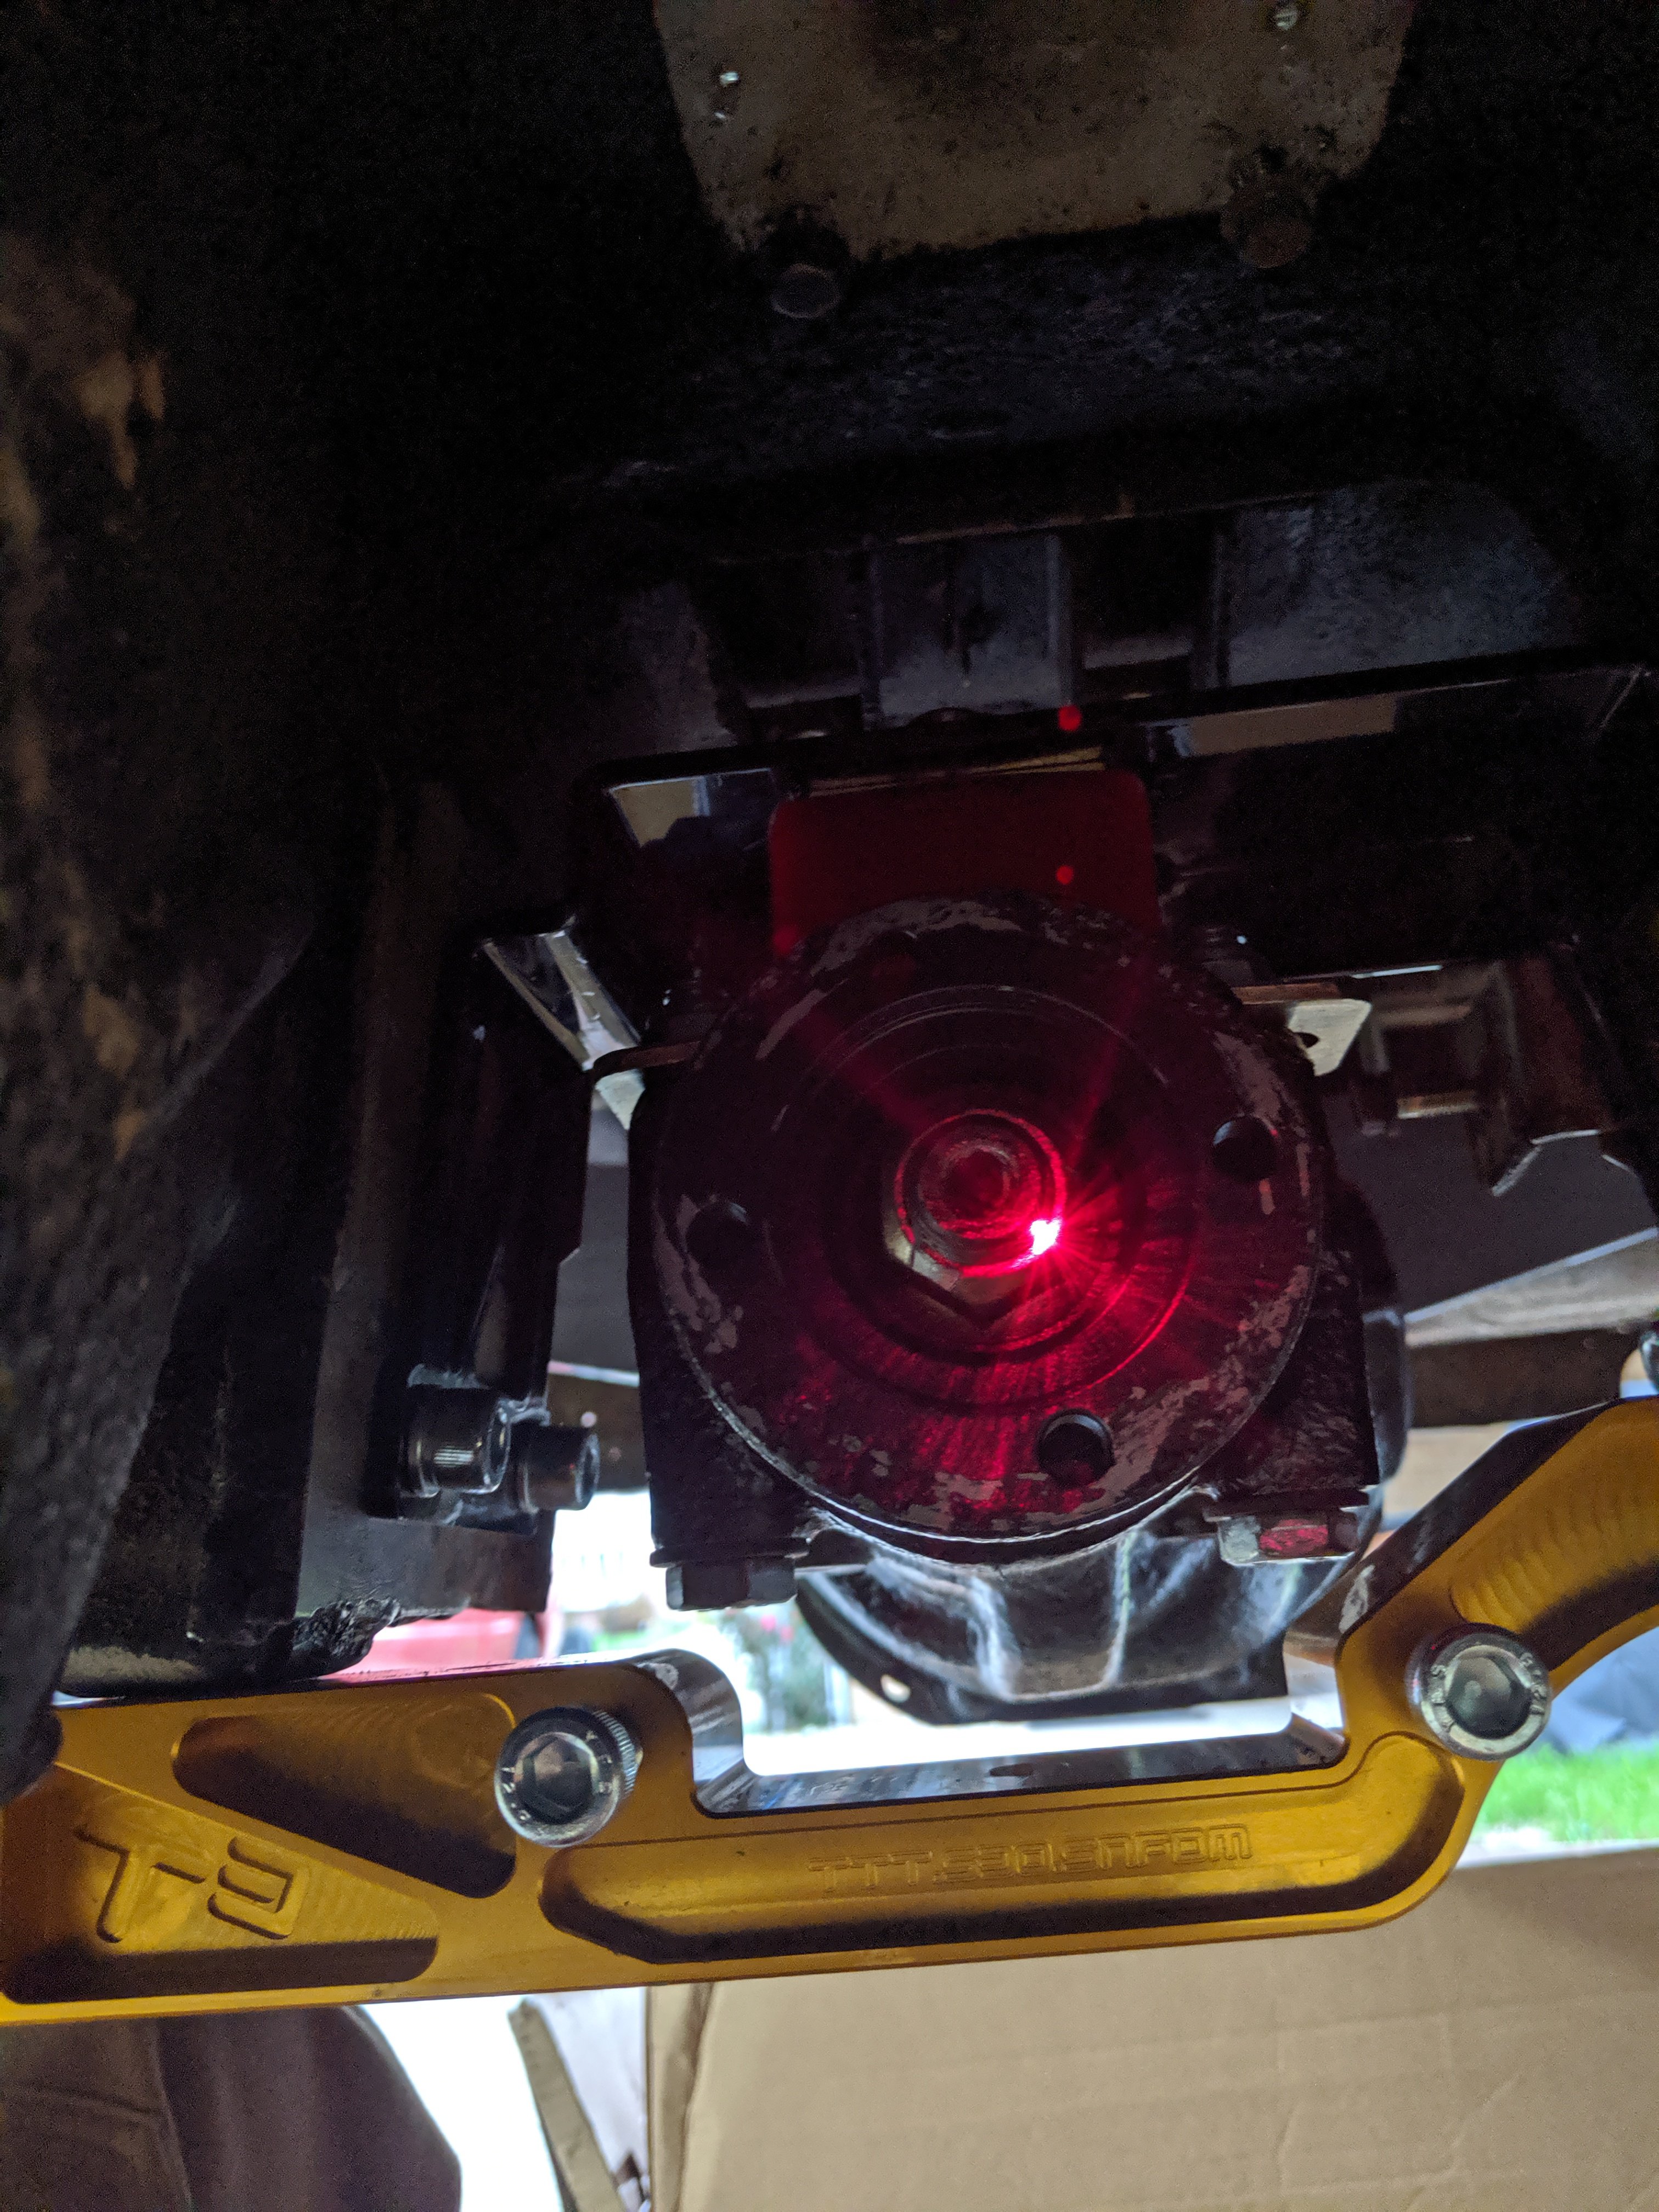
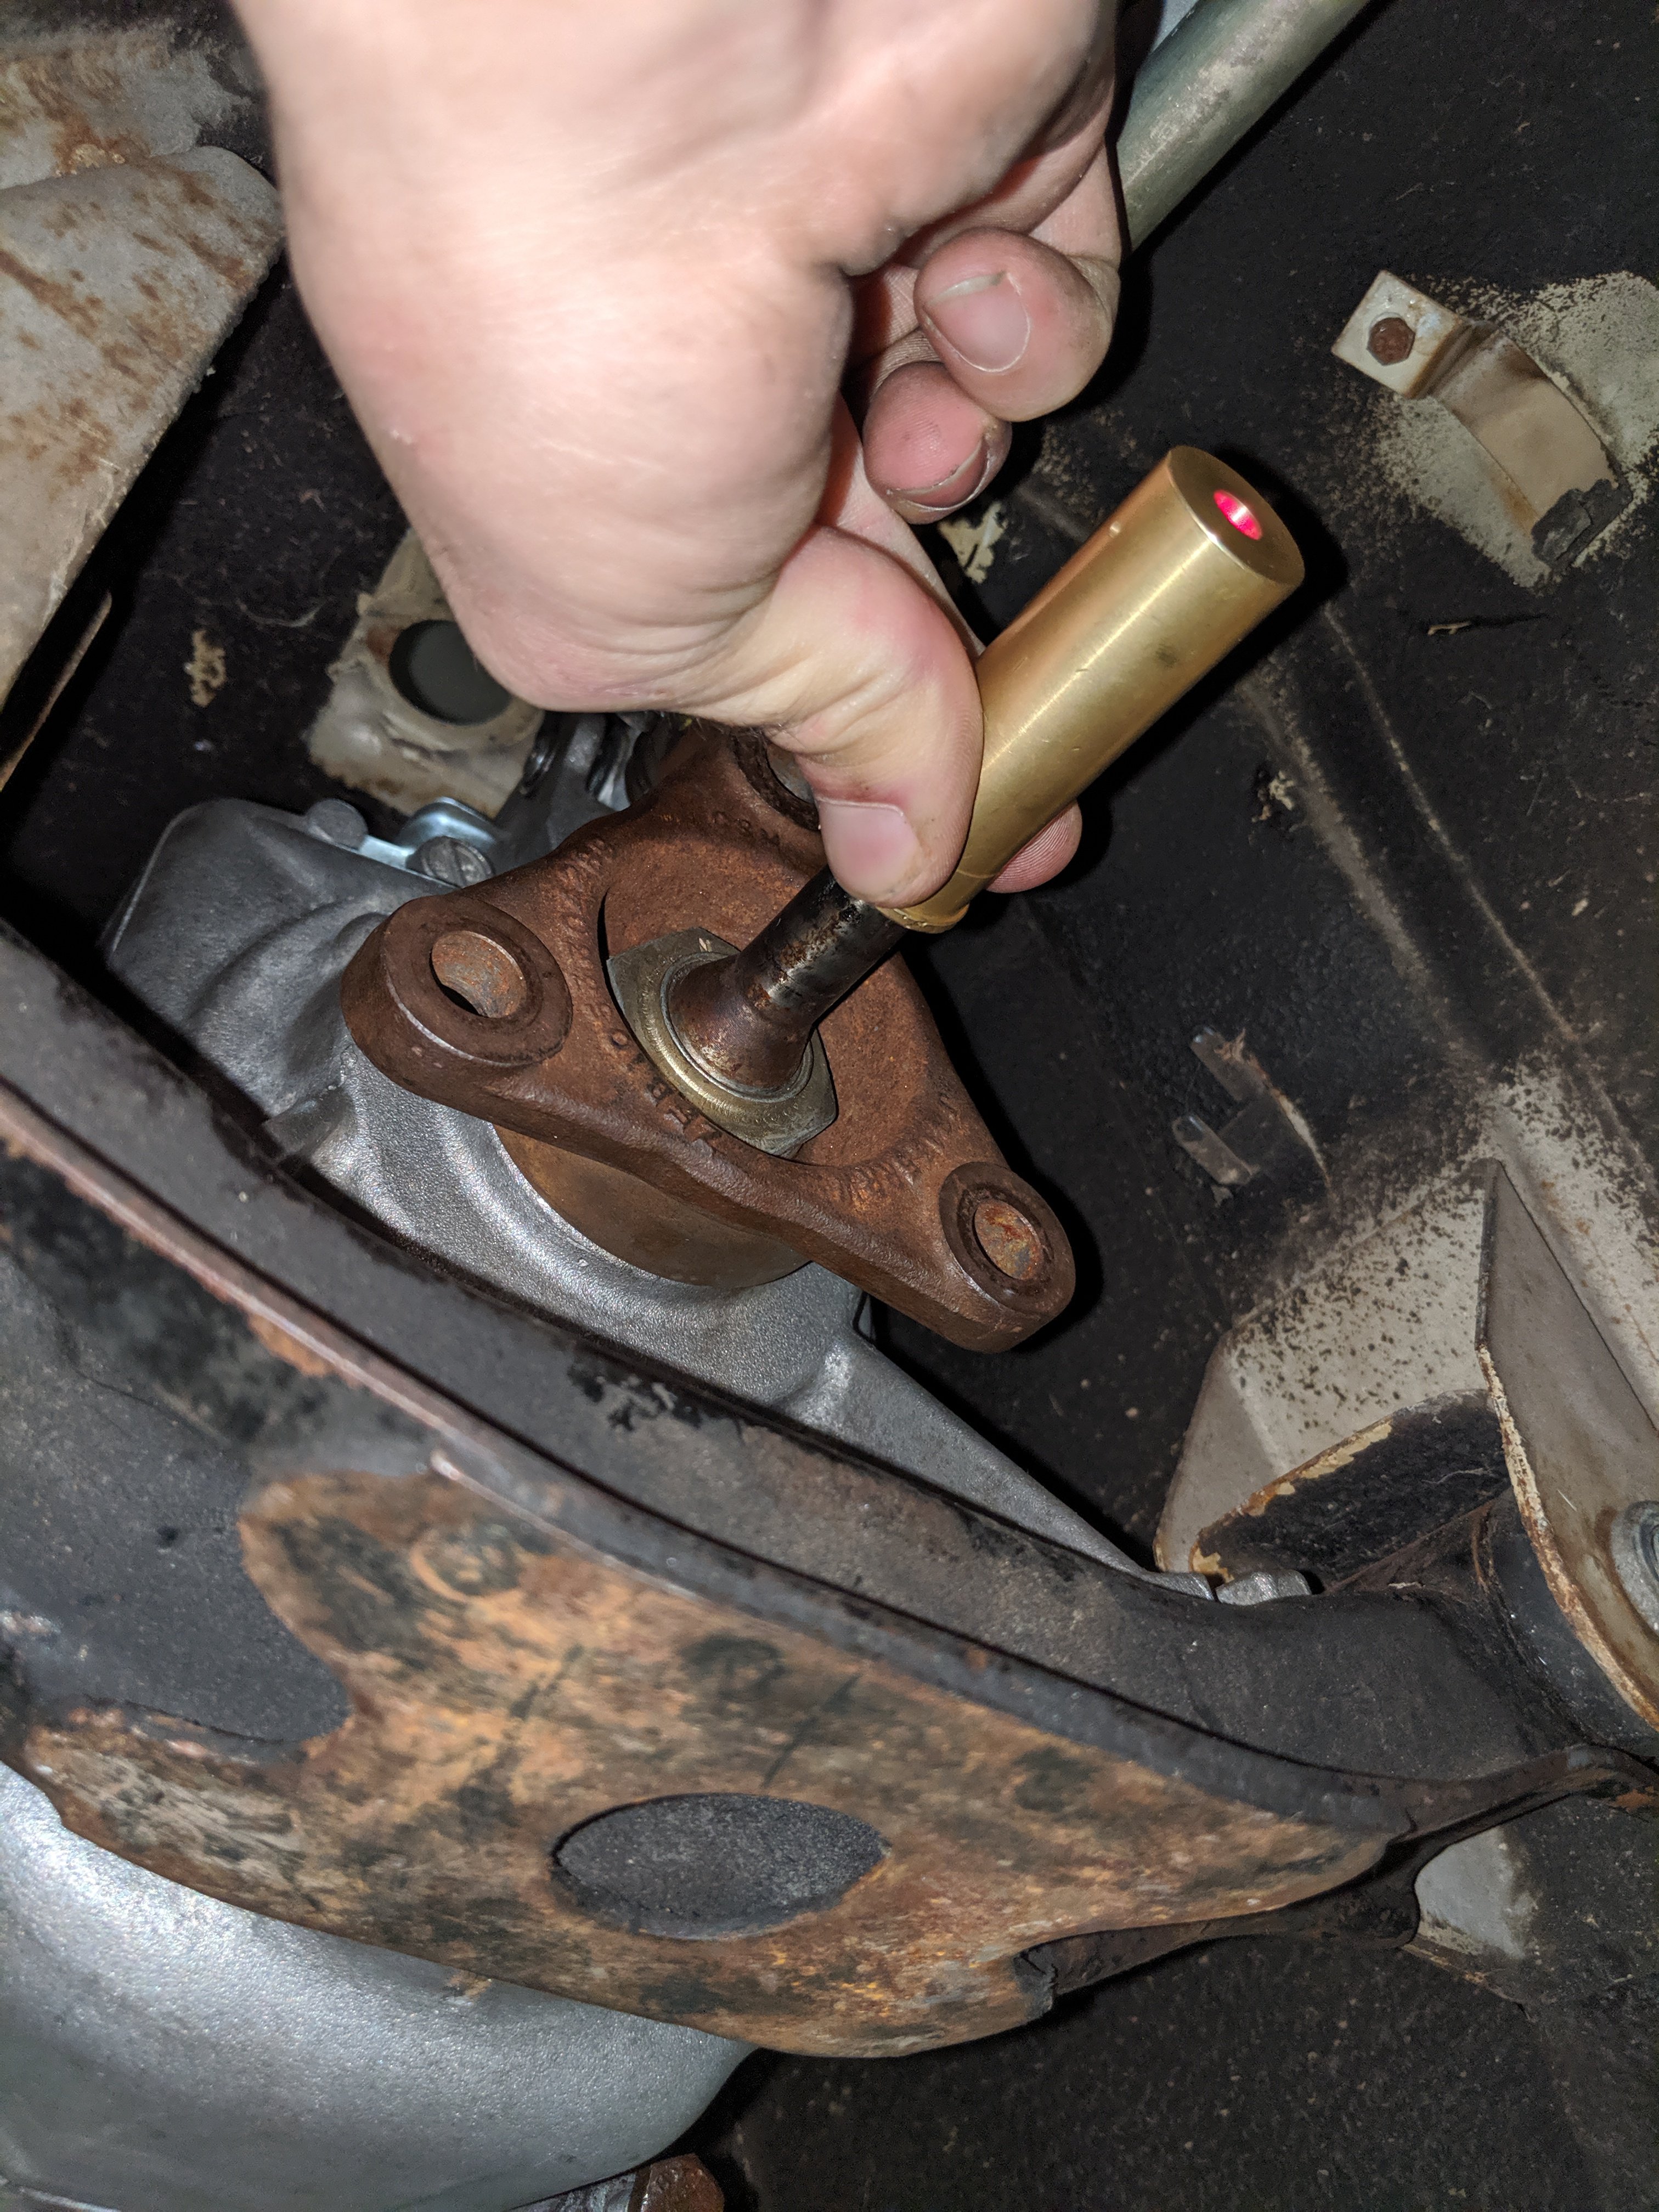
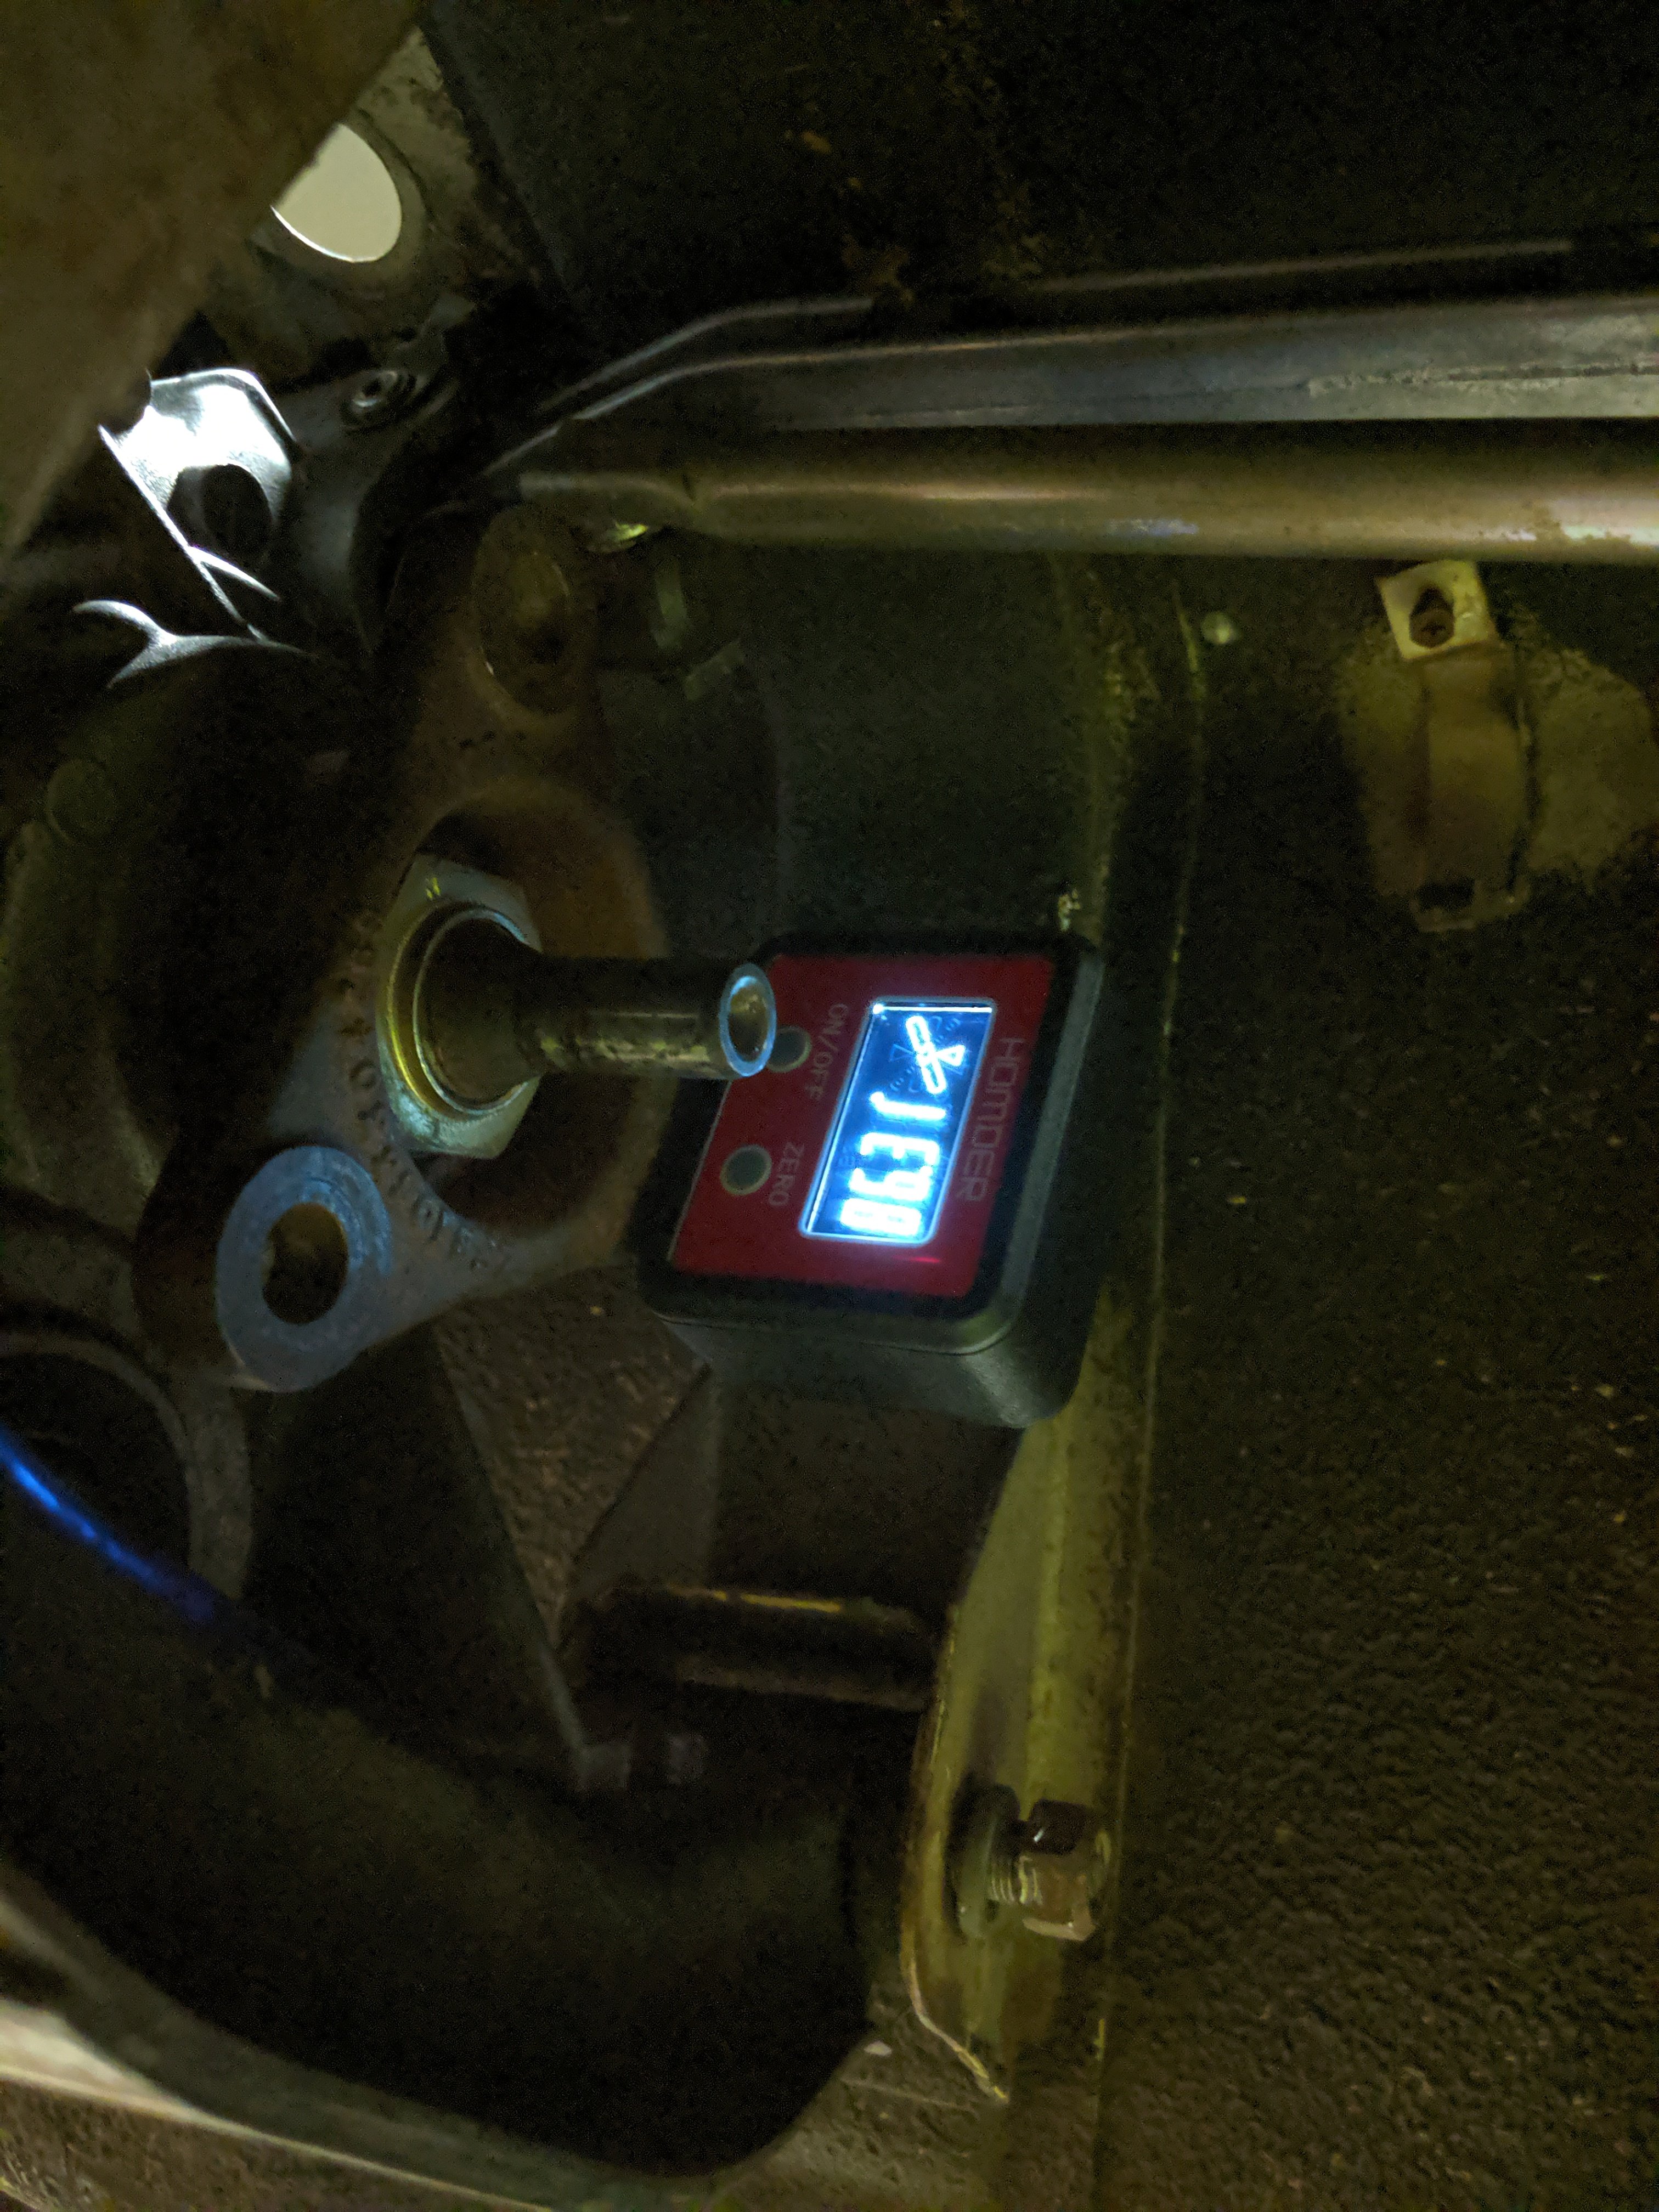
So tonight I focused on just gathering some information on the relationship b/w the differential and the transmission. I got a 20ga boresight laser and a mag base from amazon and used that to see where each was pointed. The differential was pointed almost exactly where it needs to be, and the transmission was a little off, but it still needs actually mounted, right now it's just sitting on the stock trans cross member. I also probably need to work on something to better hold the laser on the transmission. The current solution of just holding it there isn't very consistent. I also got a digital angle finder and took the angles of each flange. The difference in the angles right now is about 2deg and I'd like to get it closer to 1deg given that I am planning on using a single piece driveshaft with a BMW guibo on one end and a CV joint on the other.
-
BMW S54 into S30 Chassis - Build Thread
carbuilder723 replied to carbuilder723's topic in Other Engines
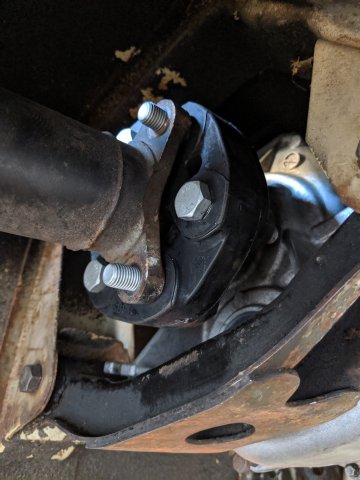
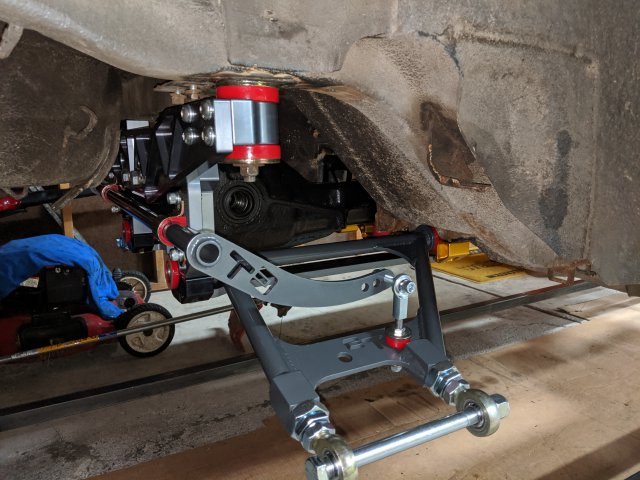
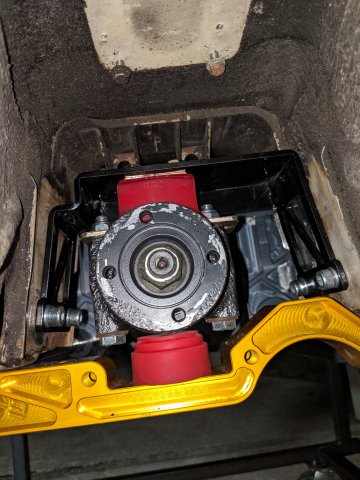
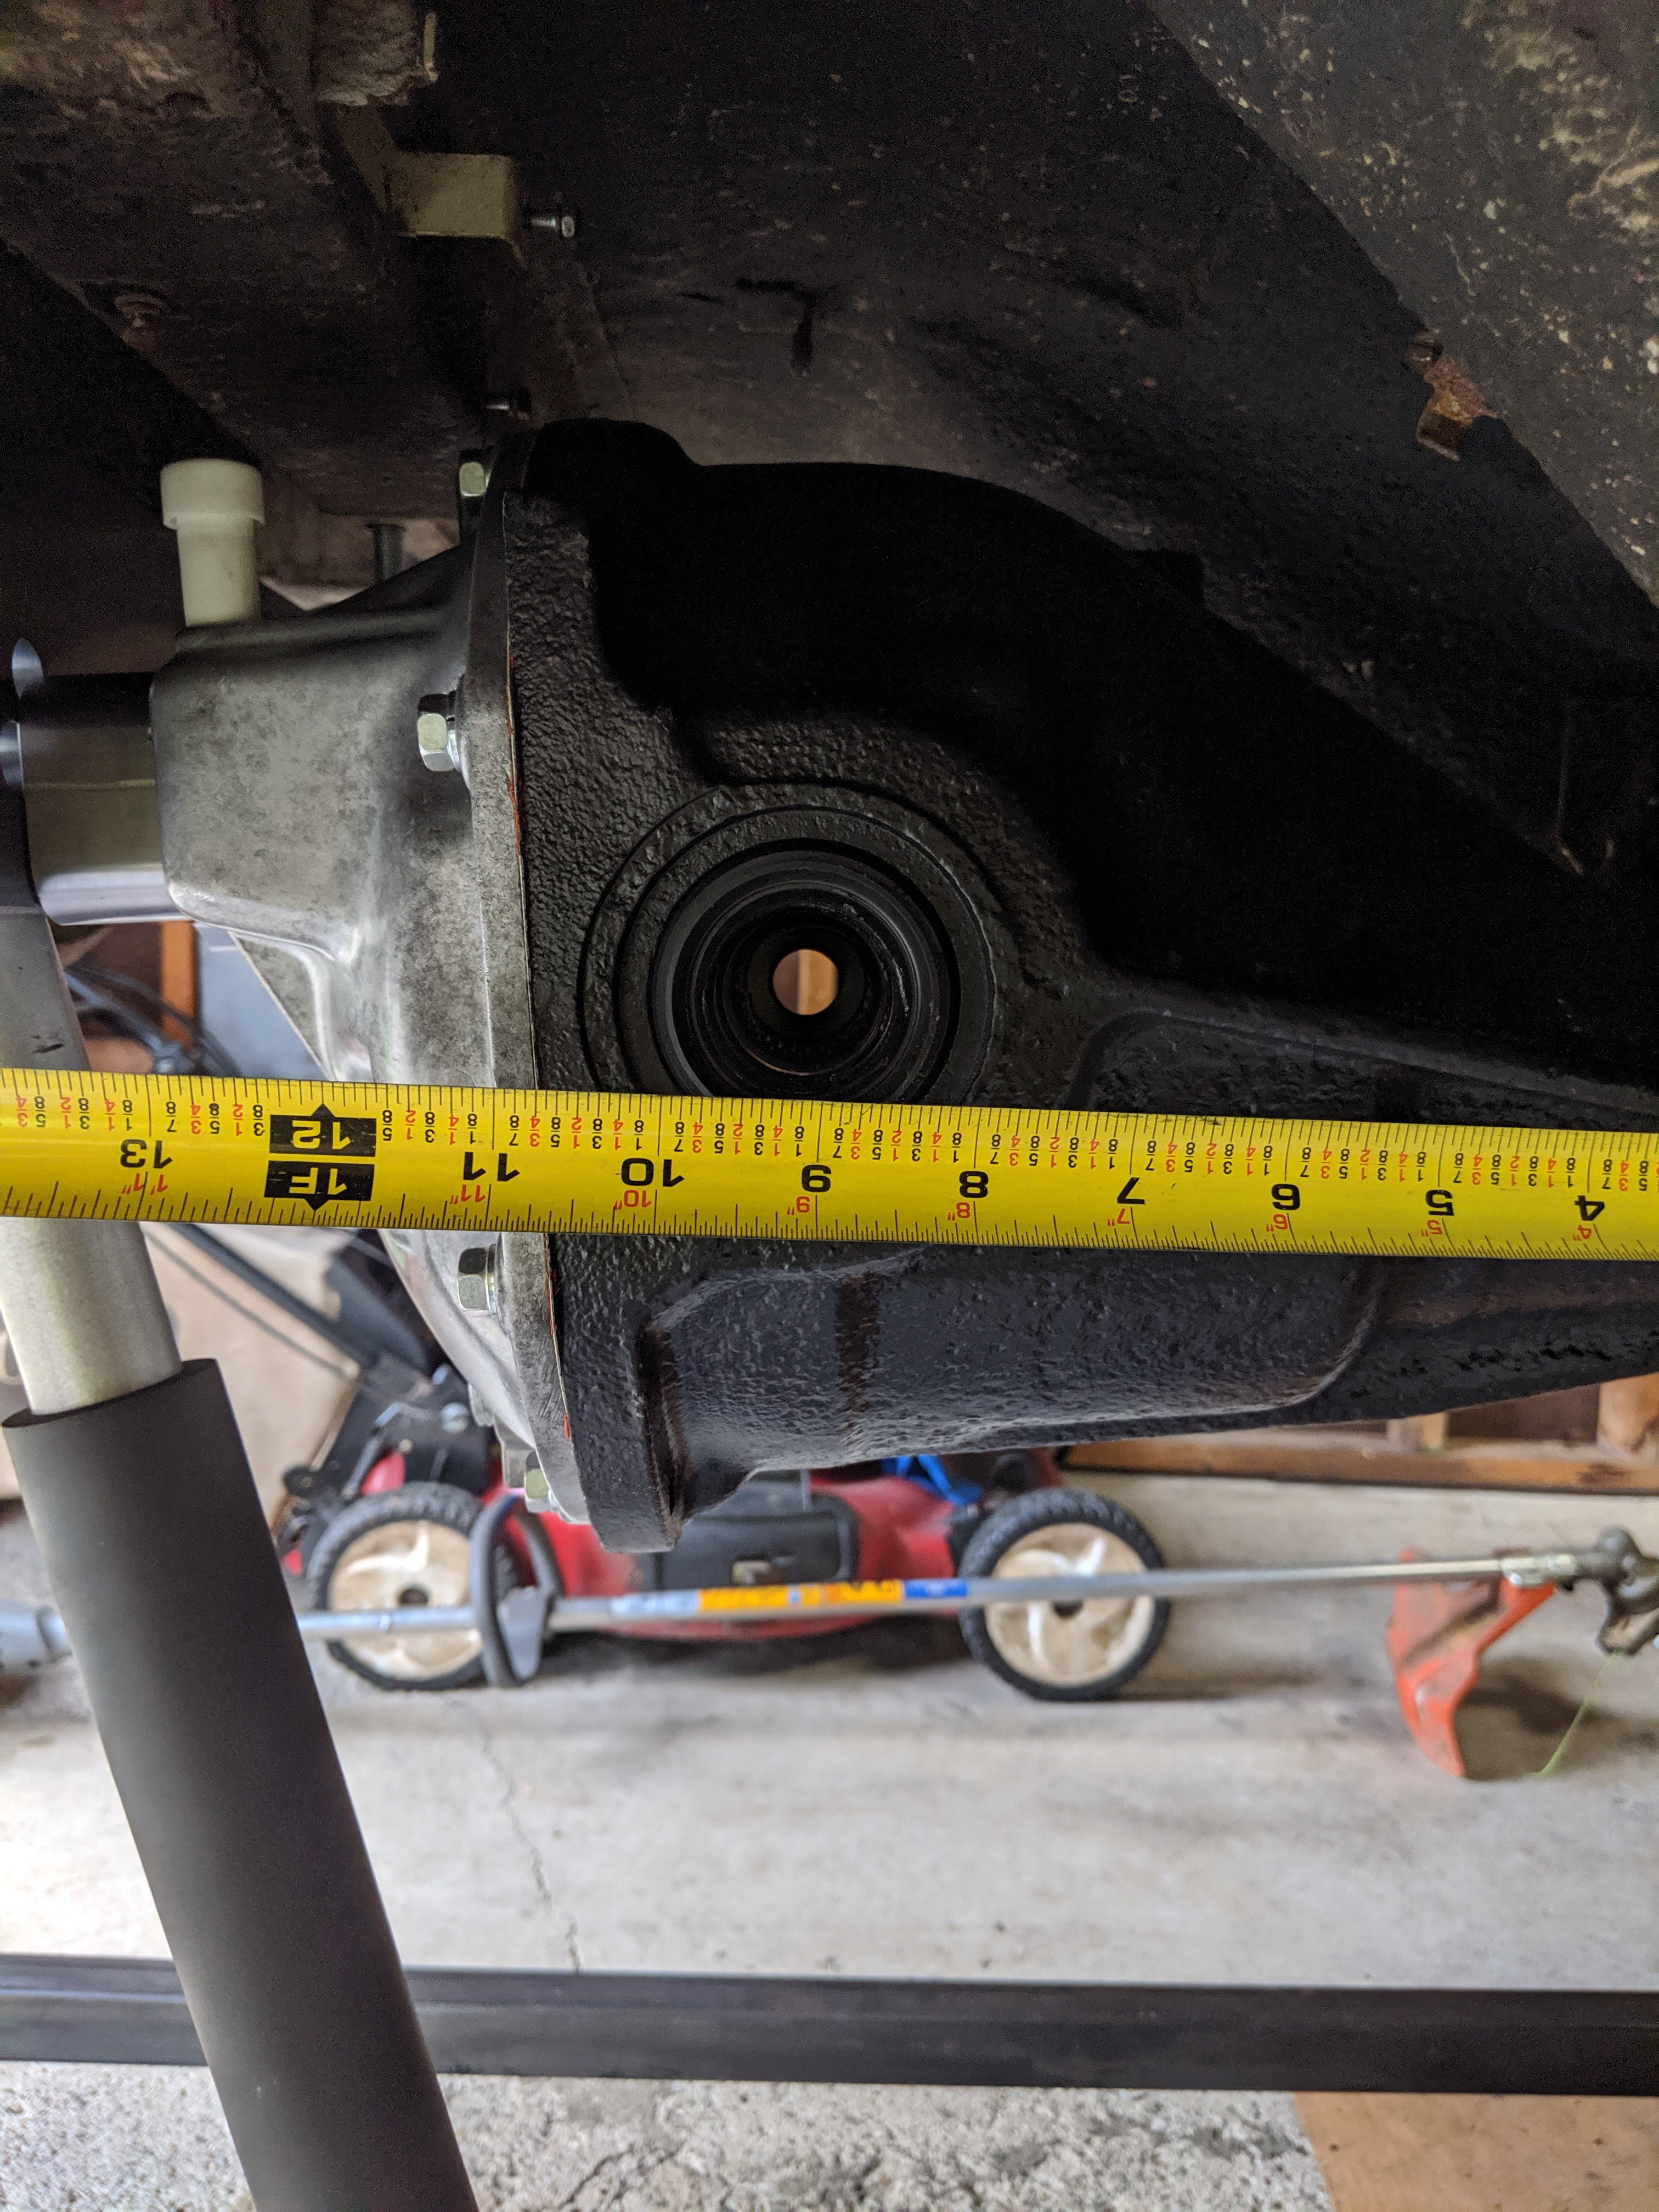
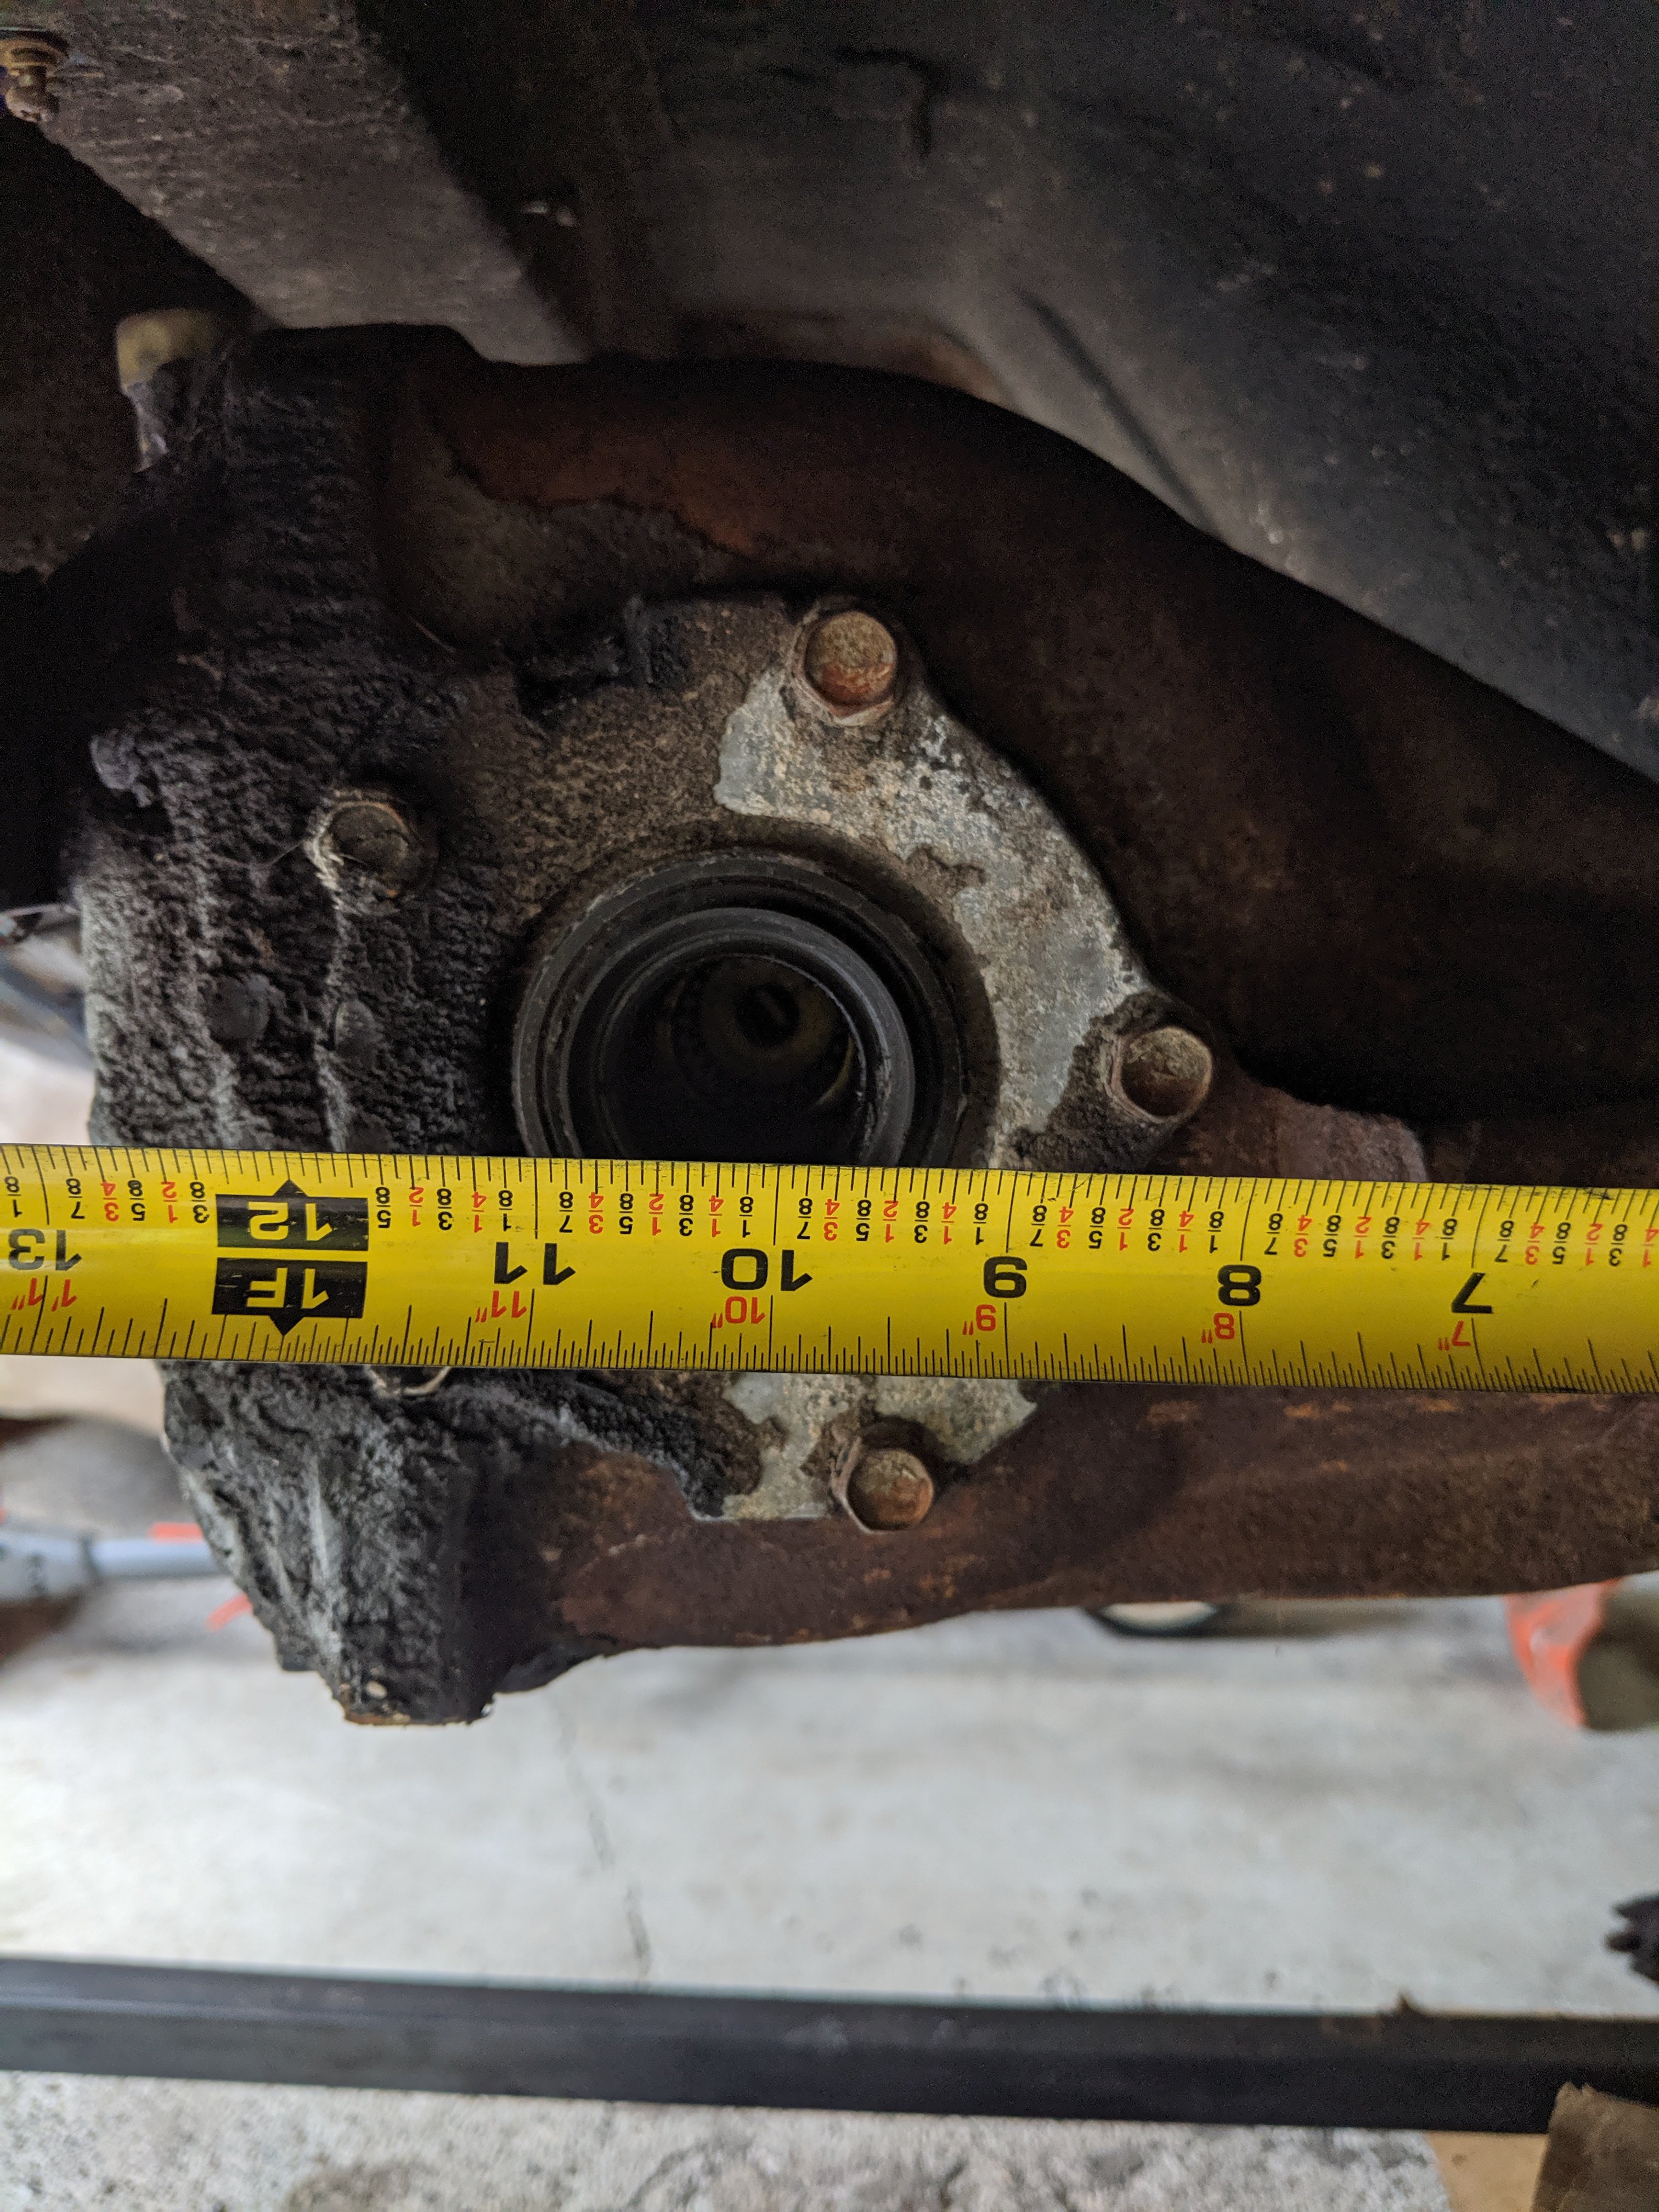
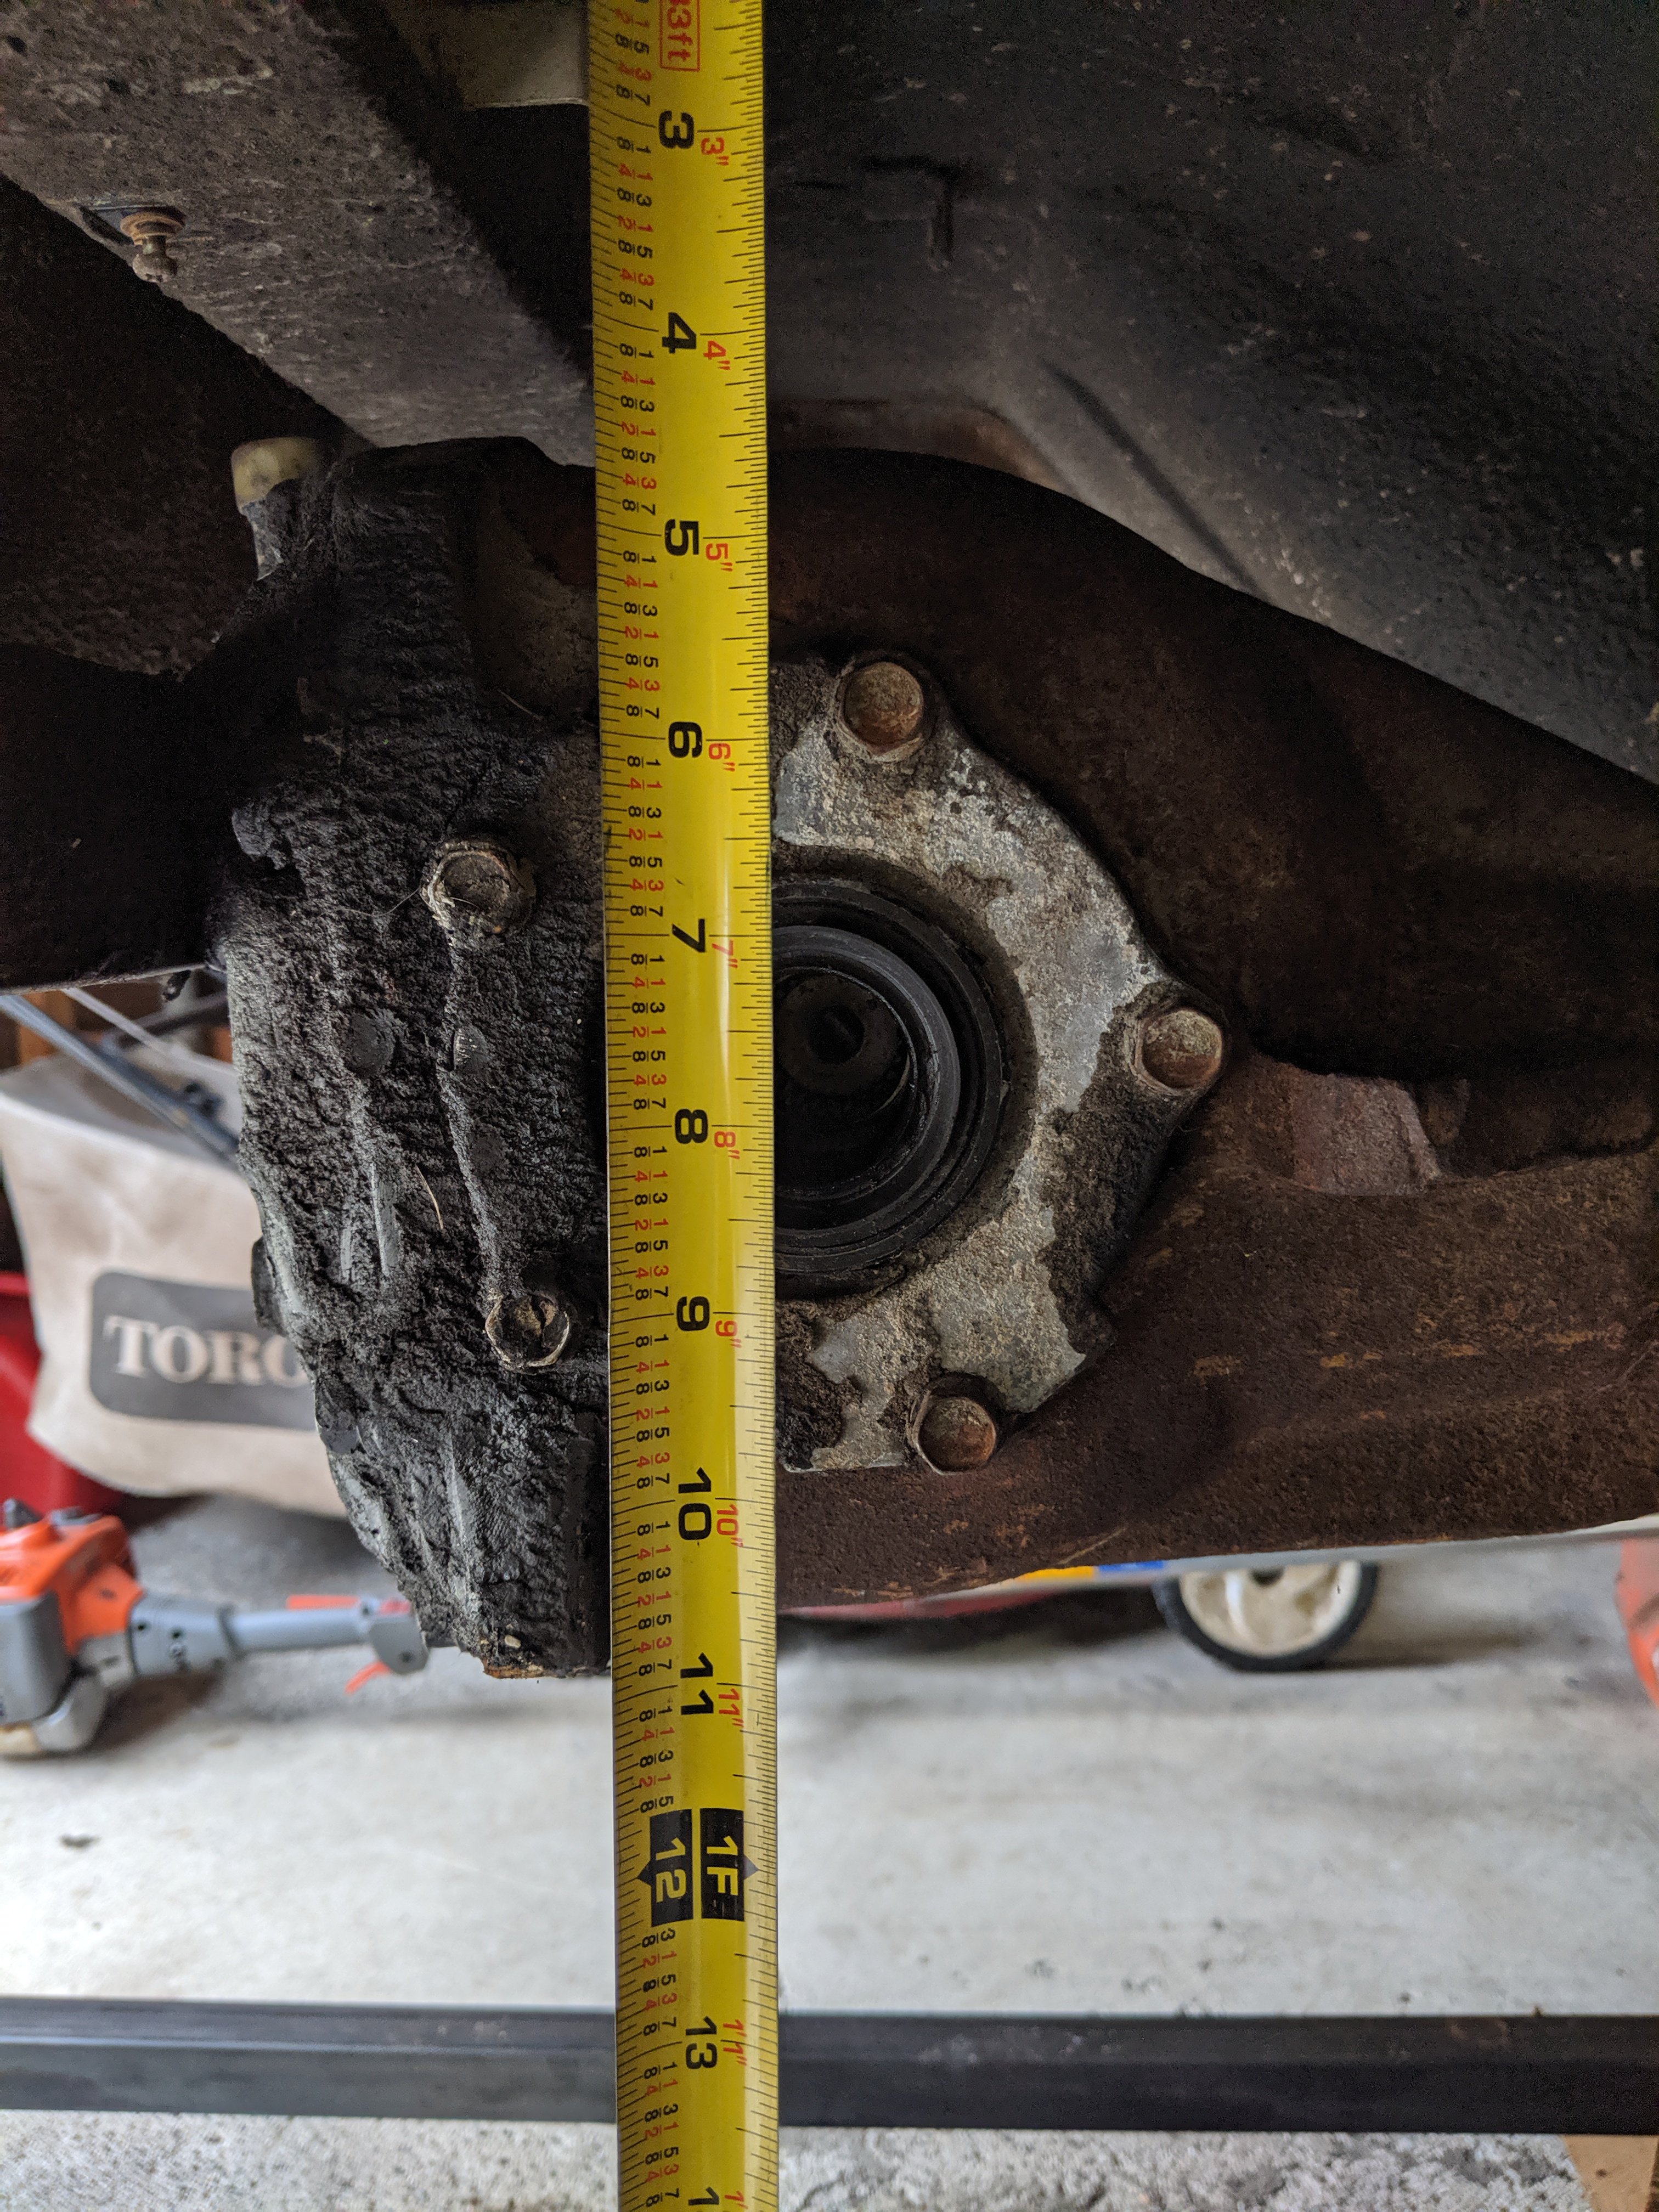
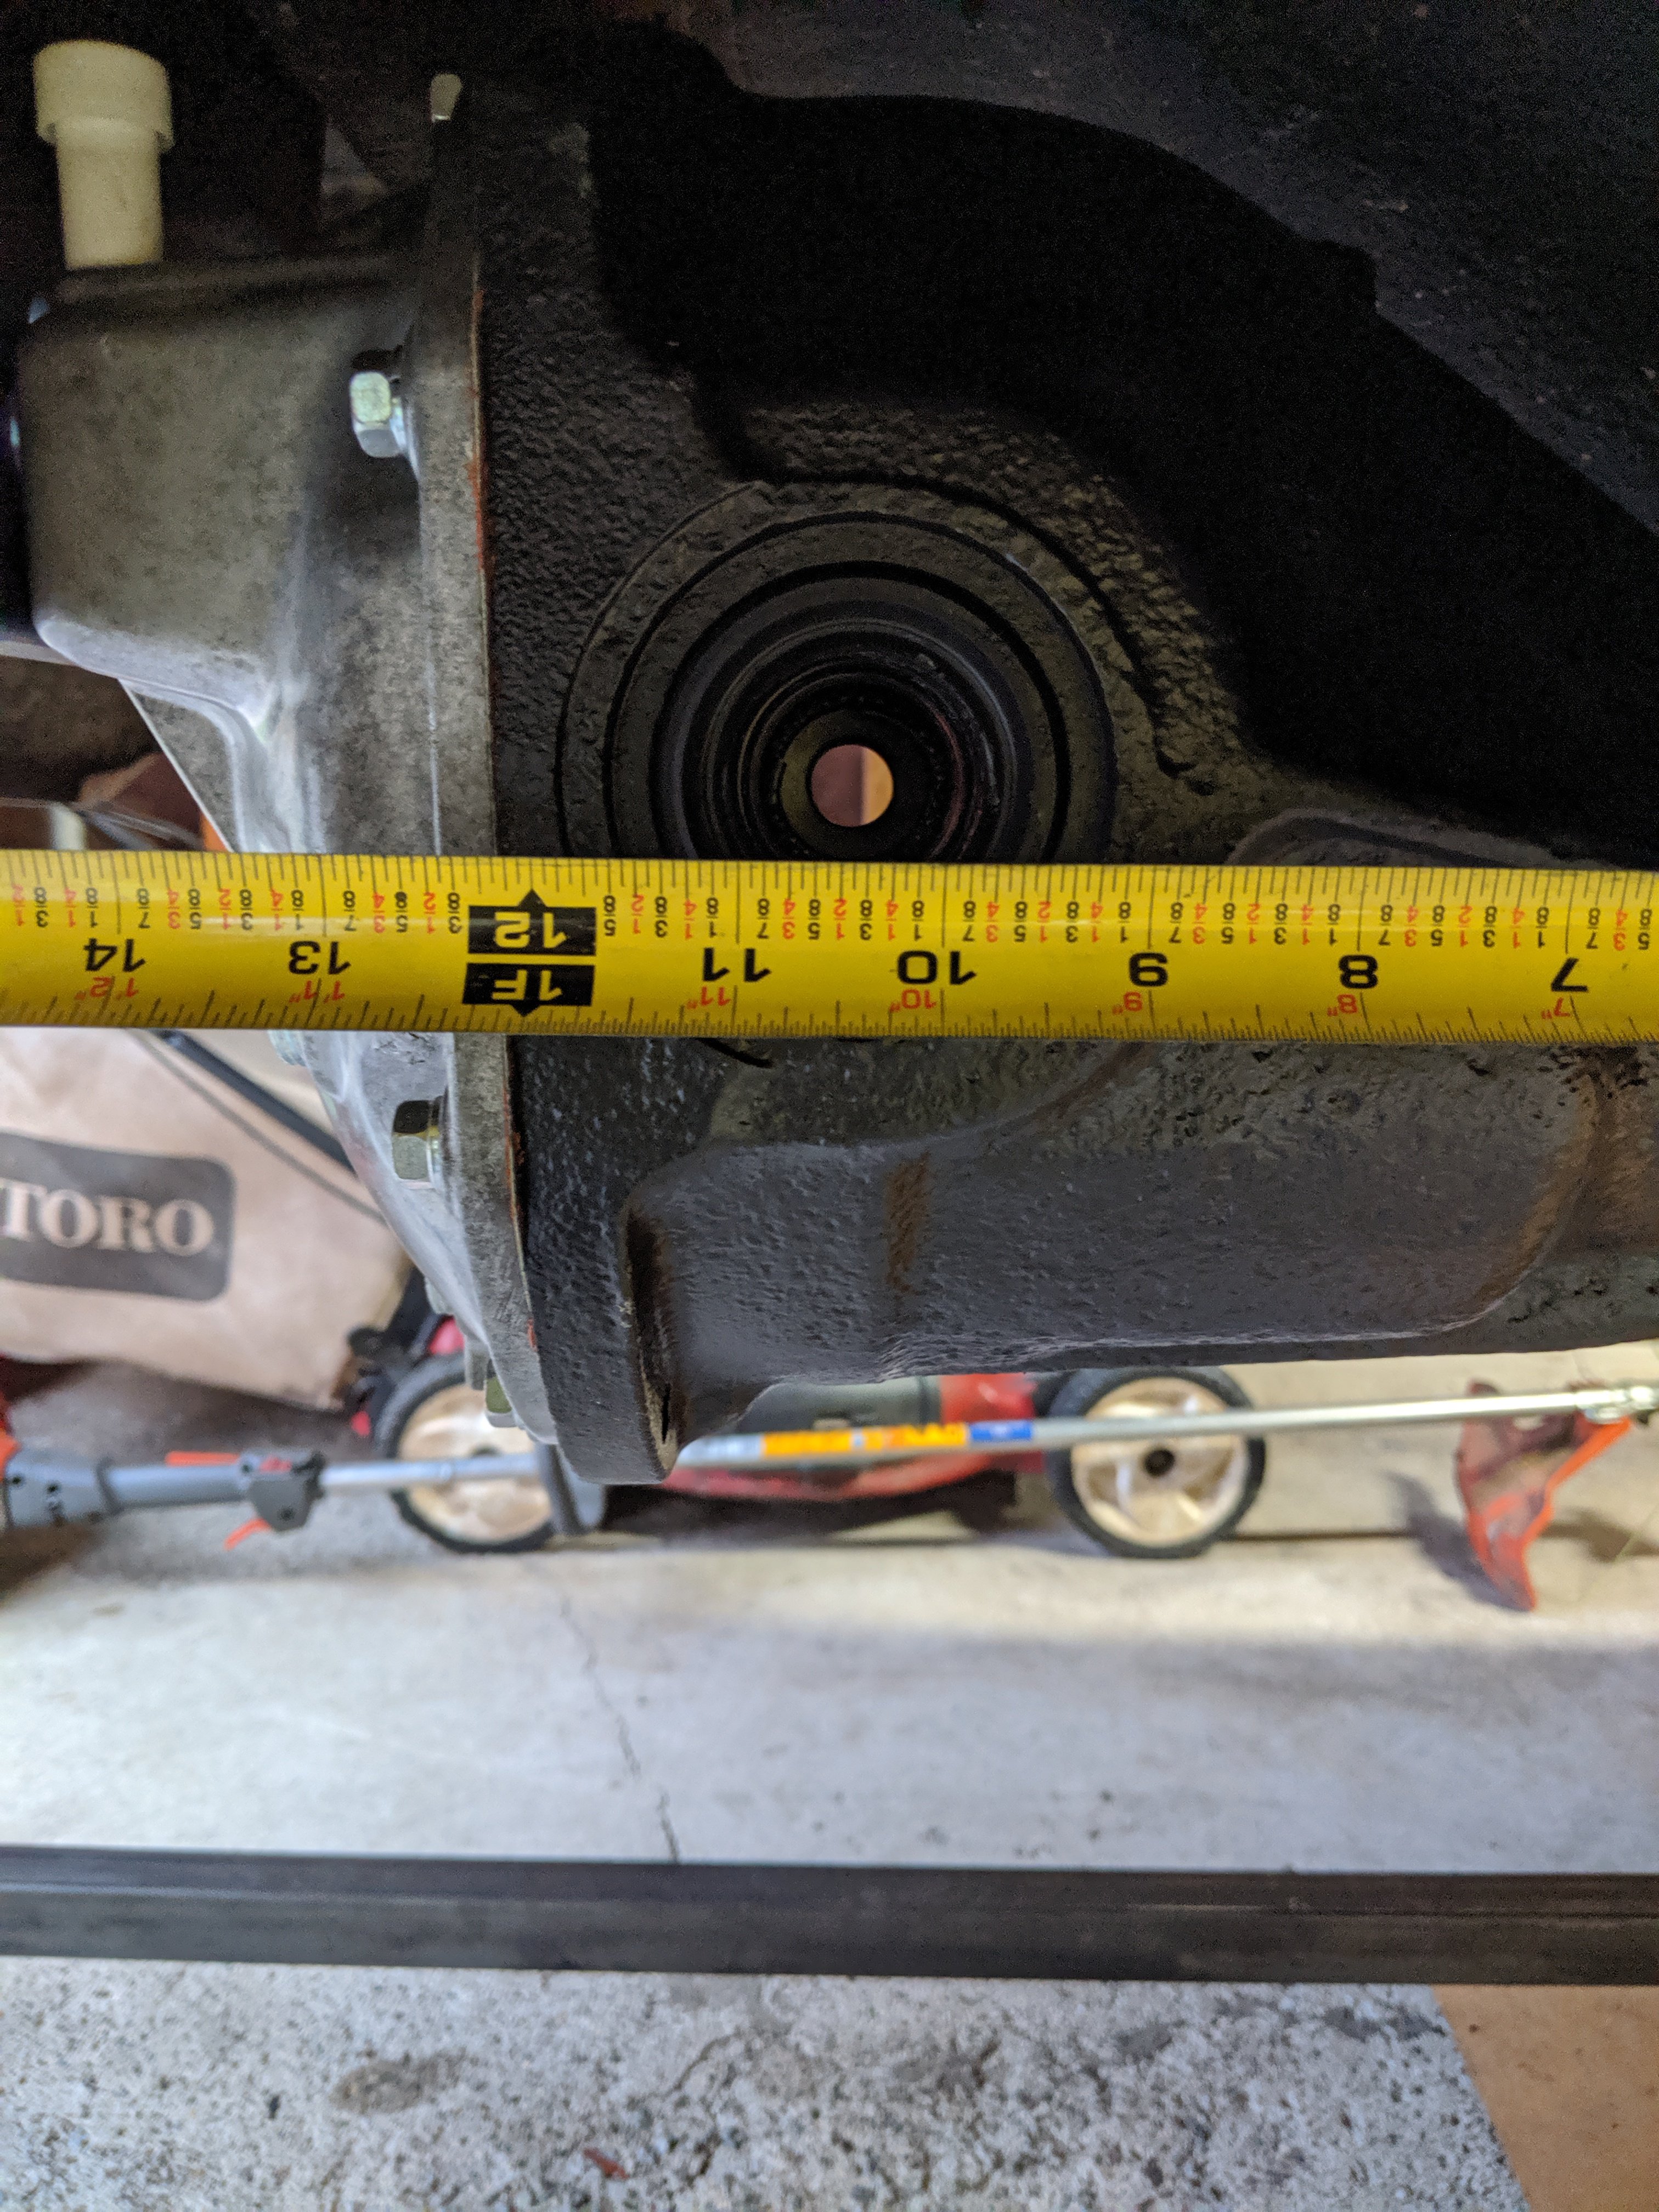
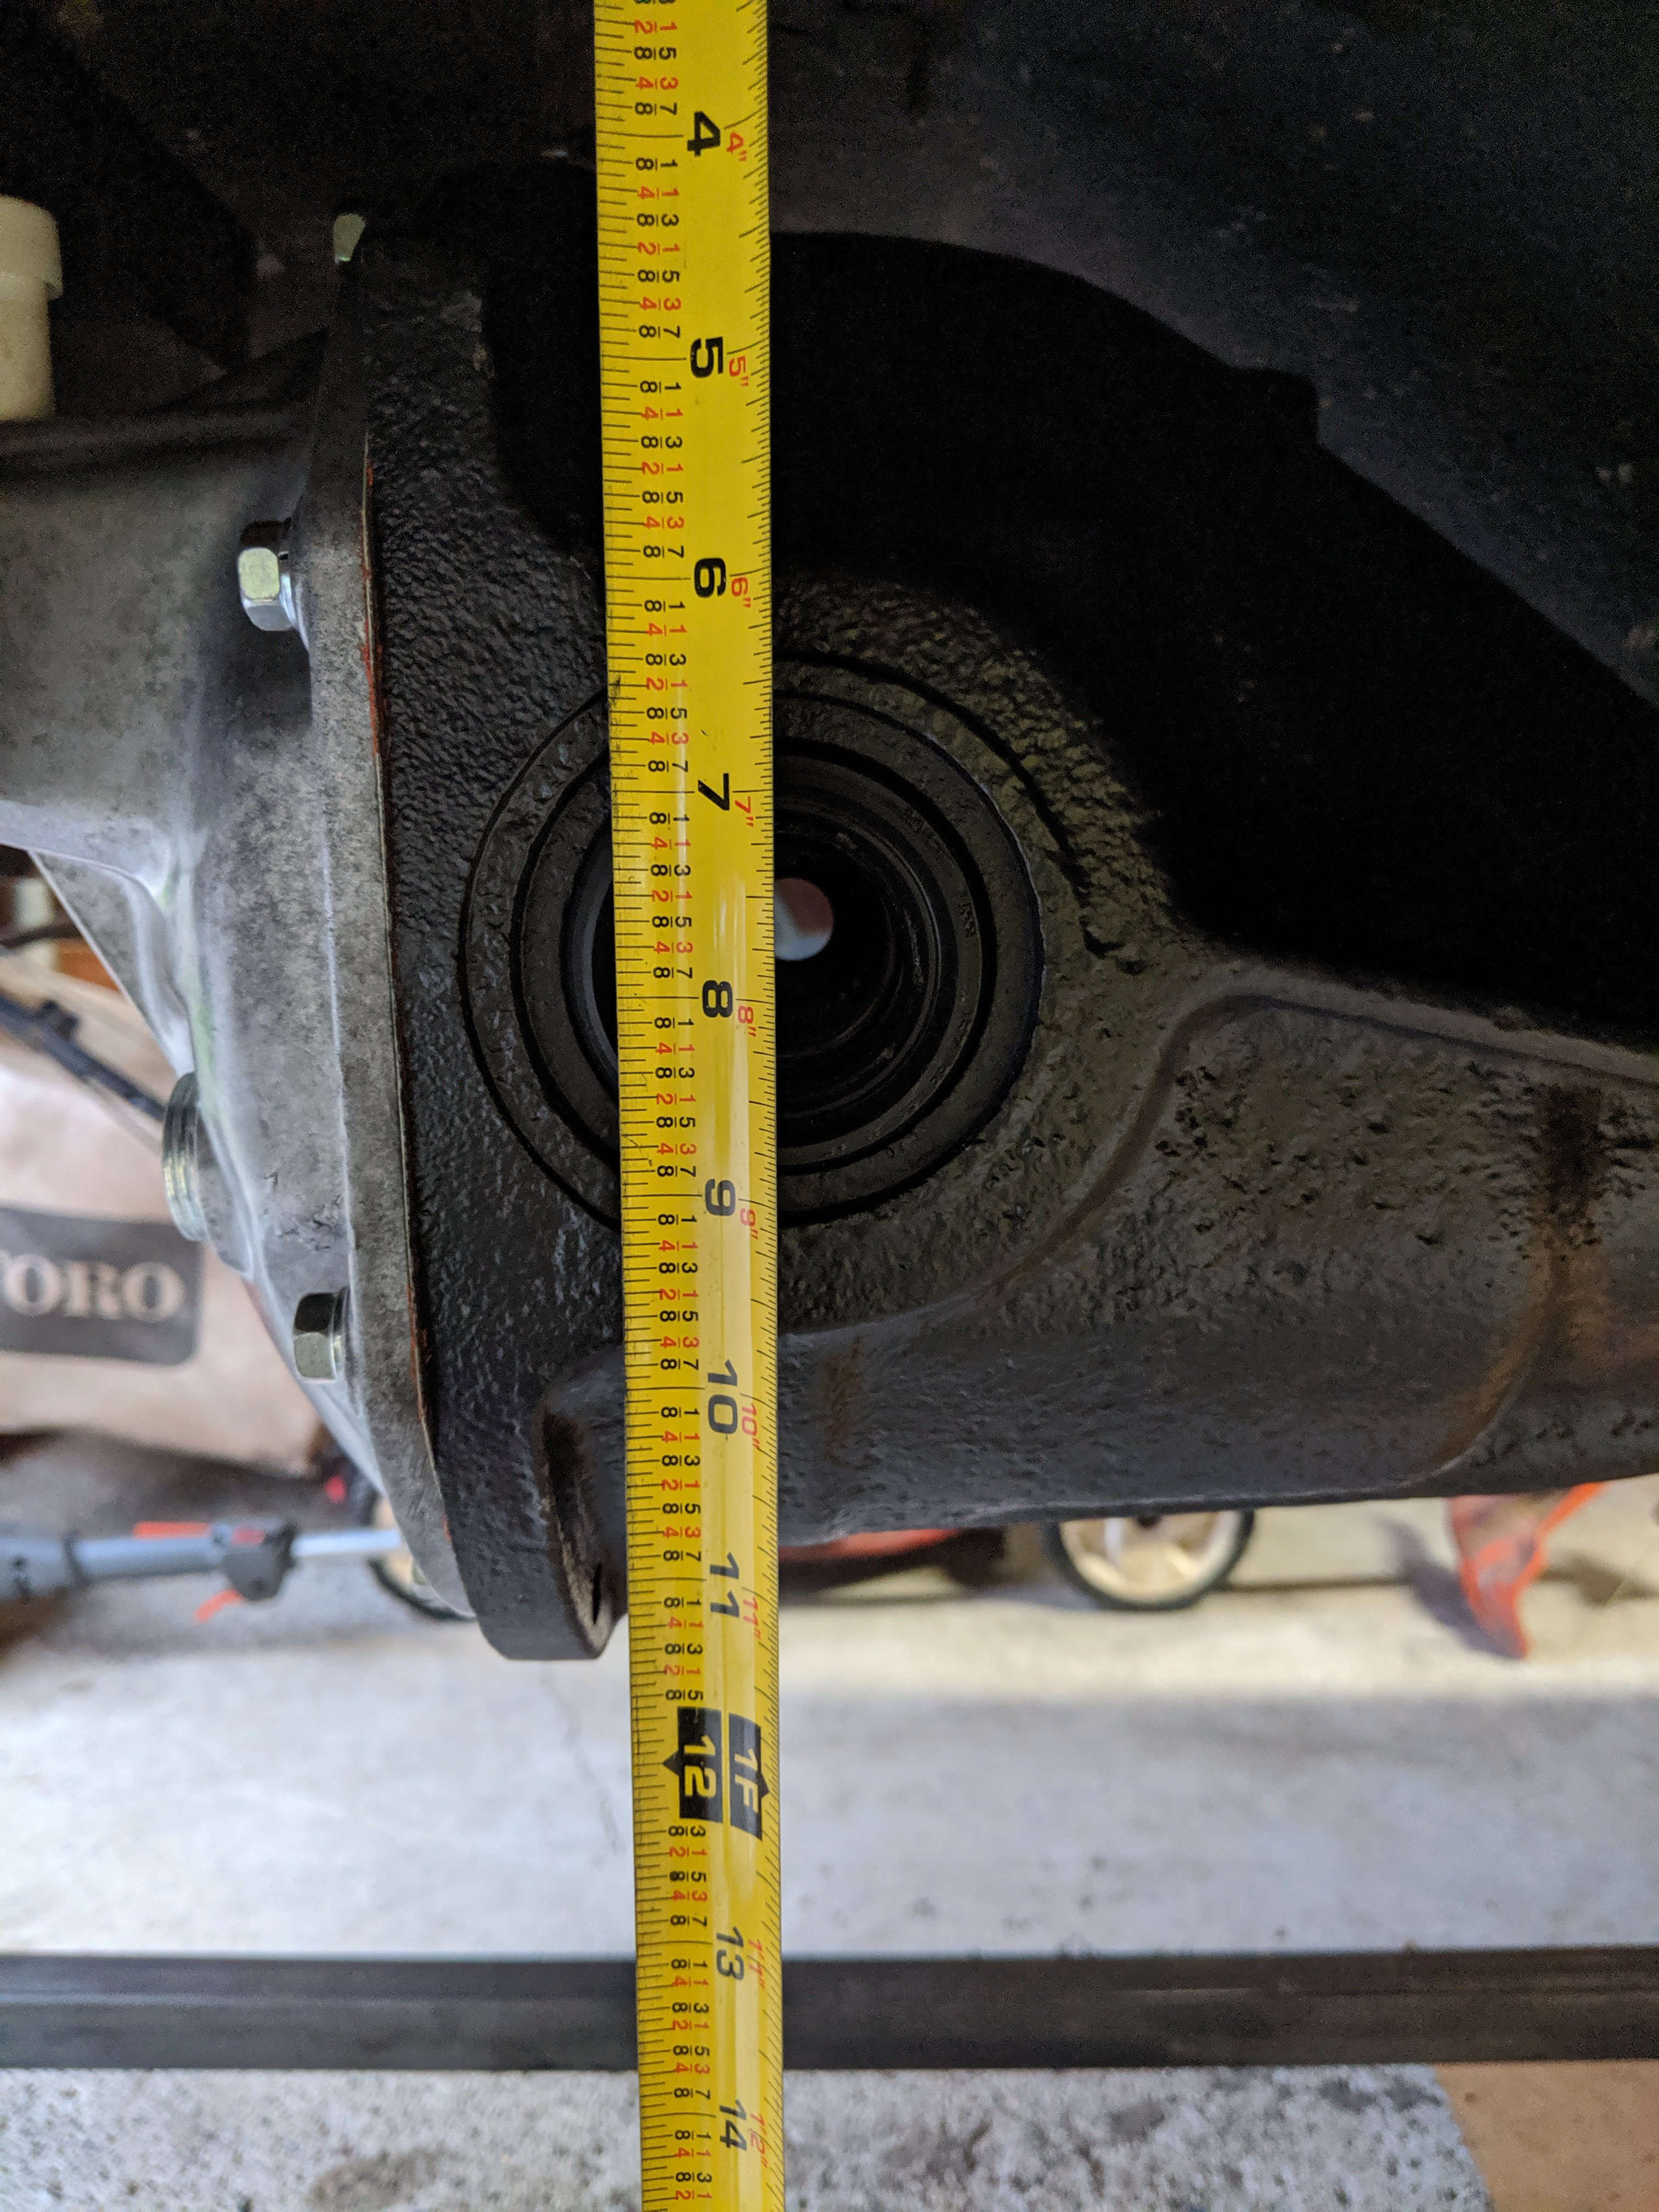
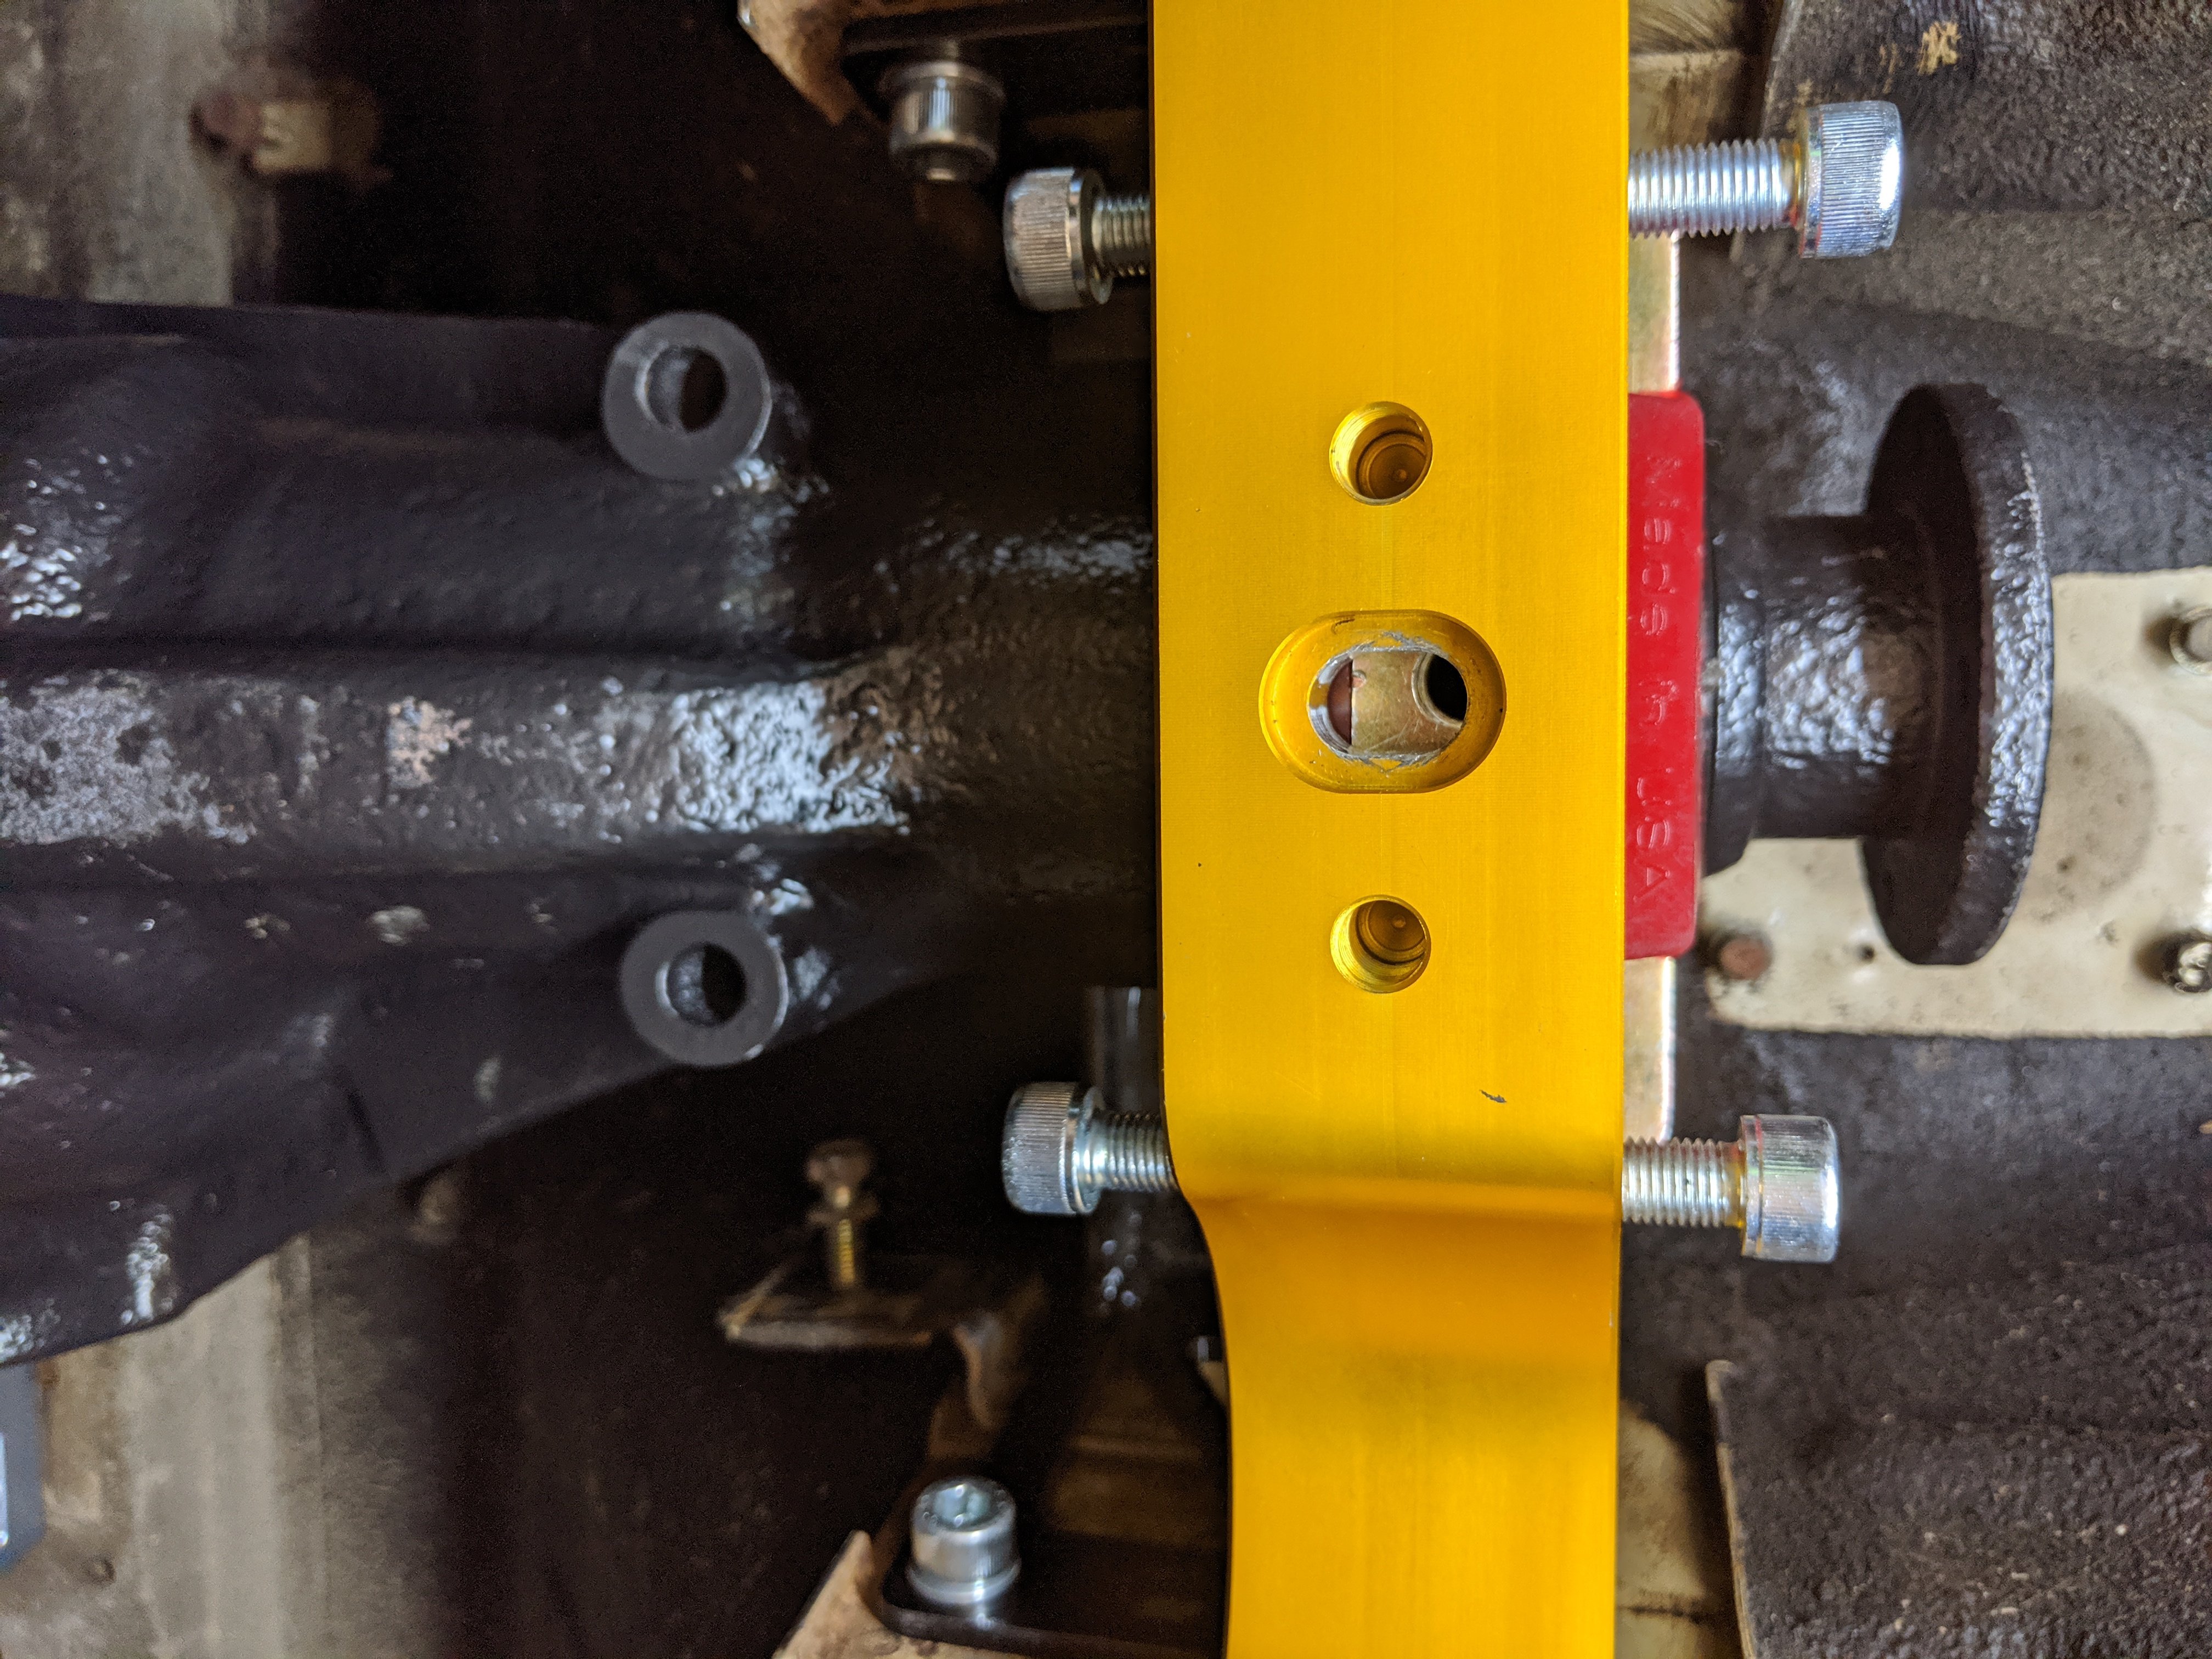
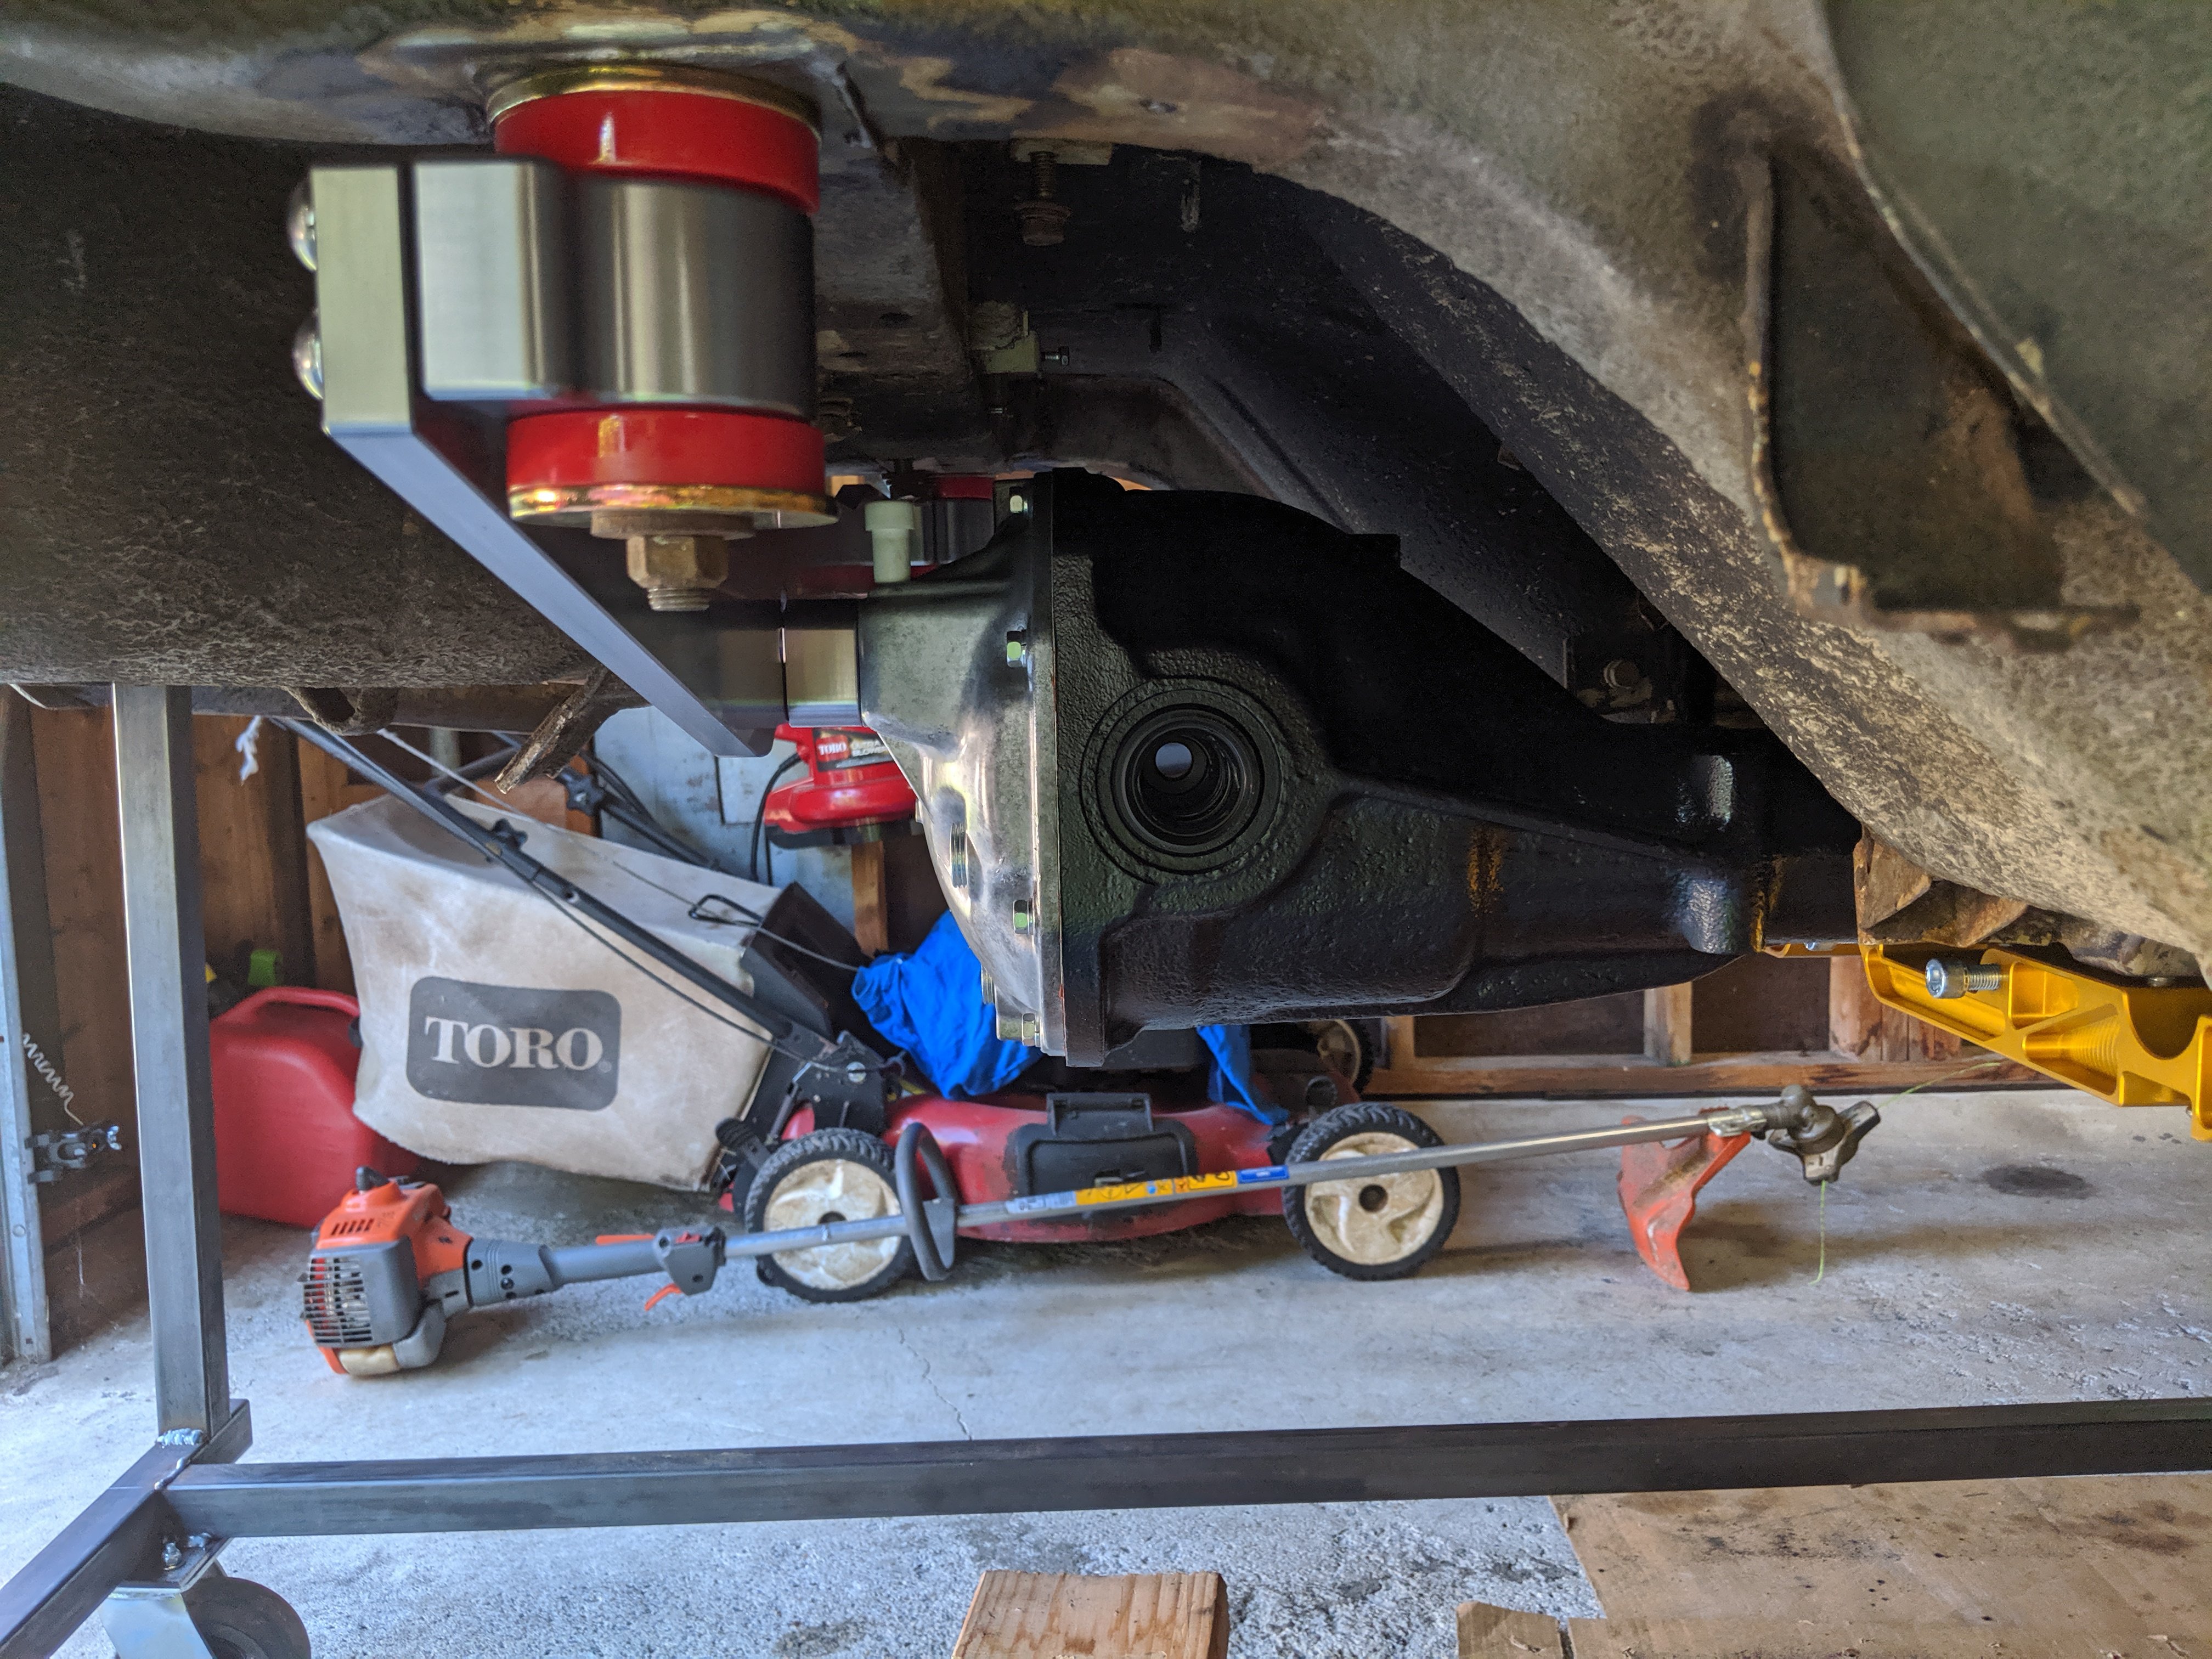
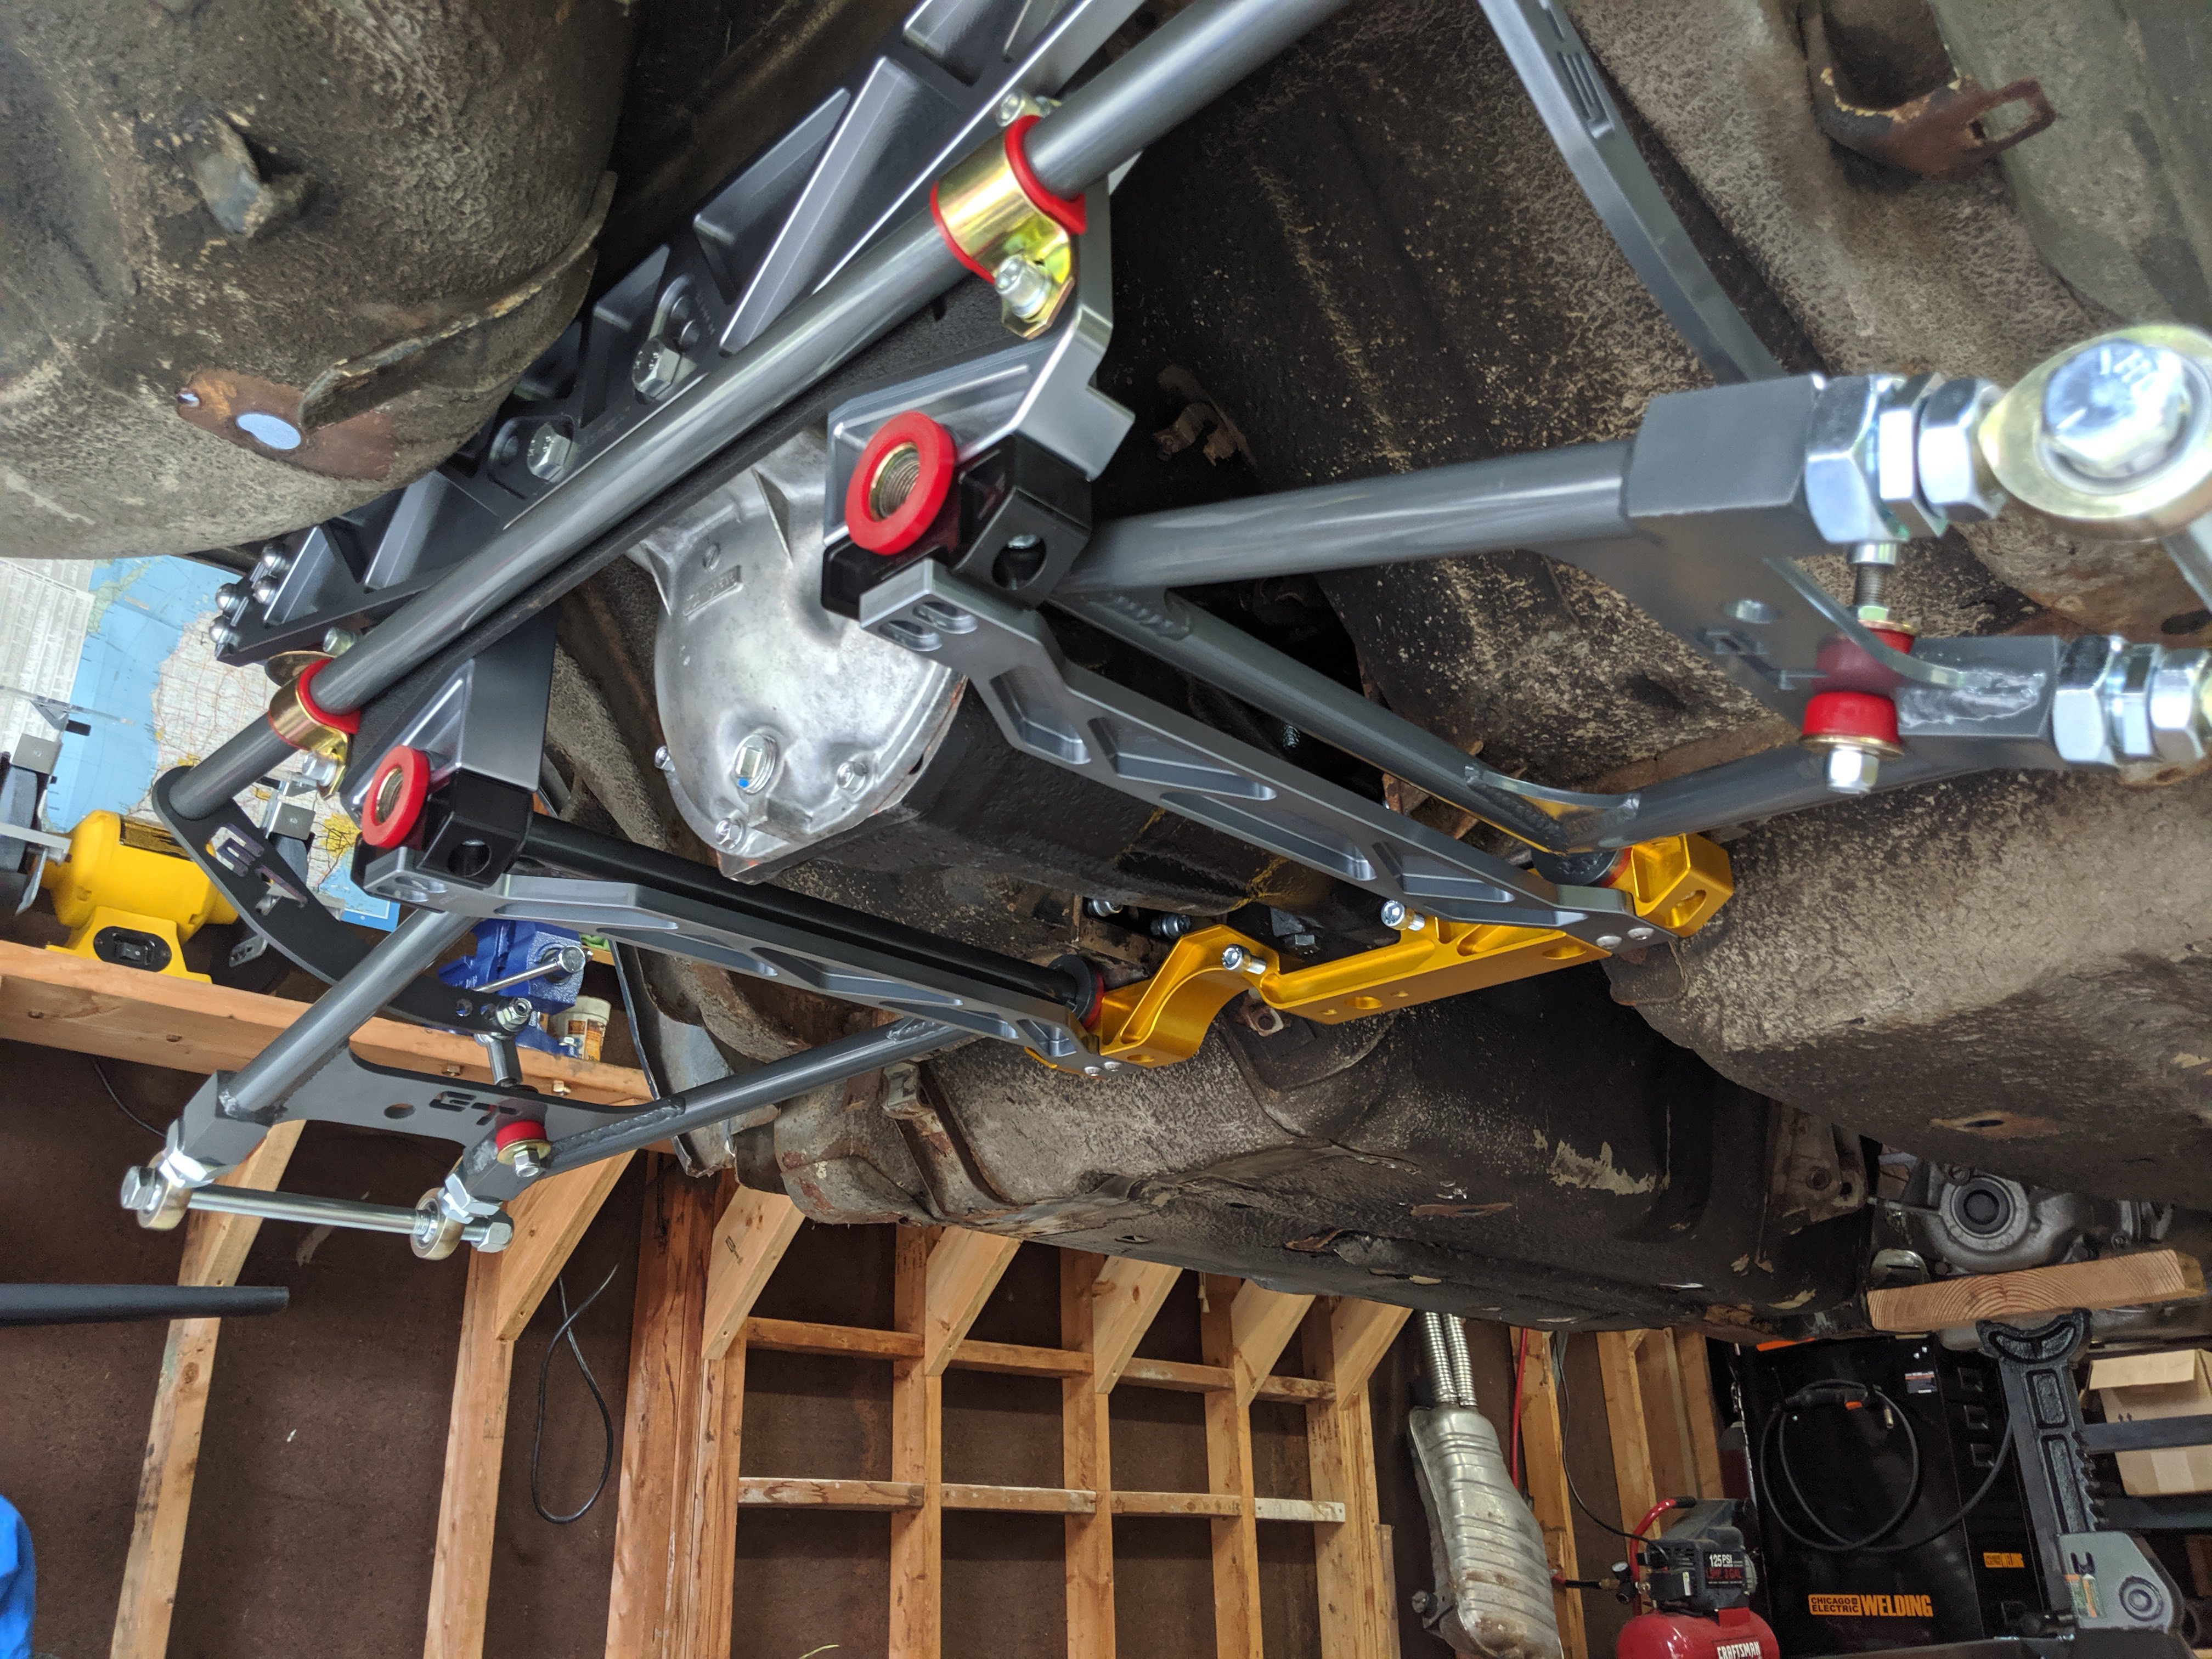
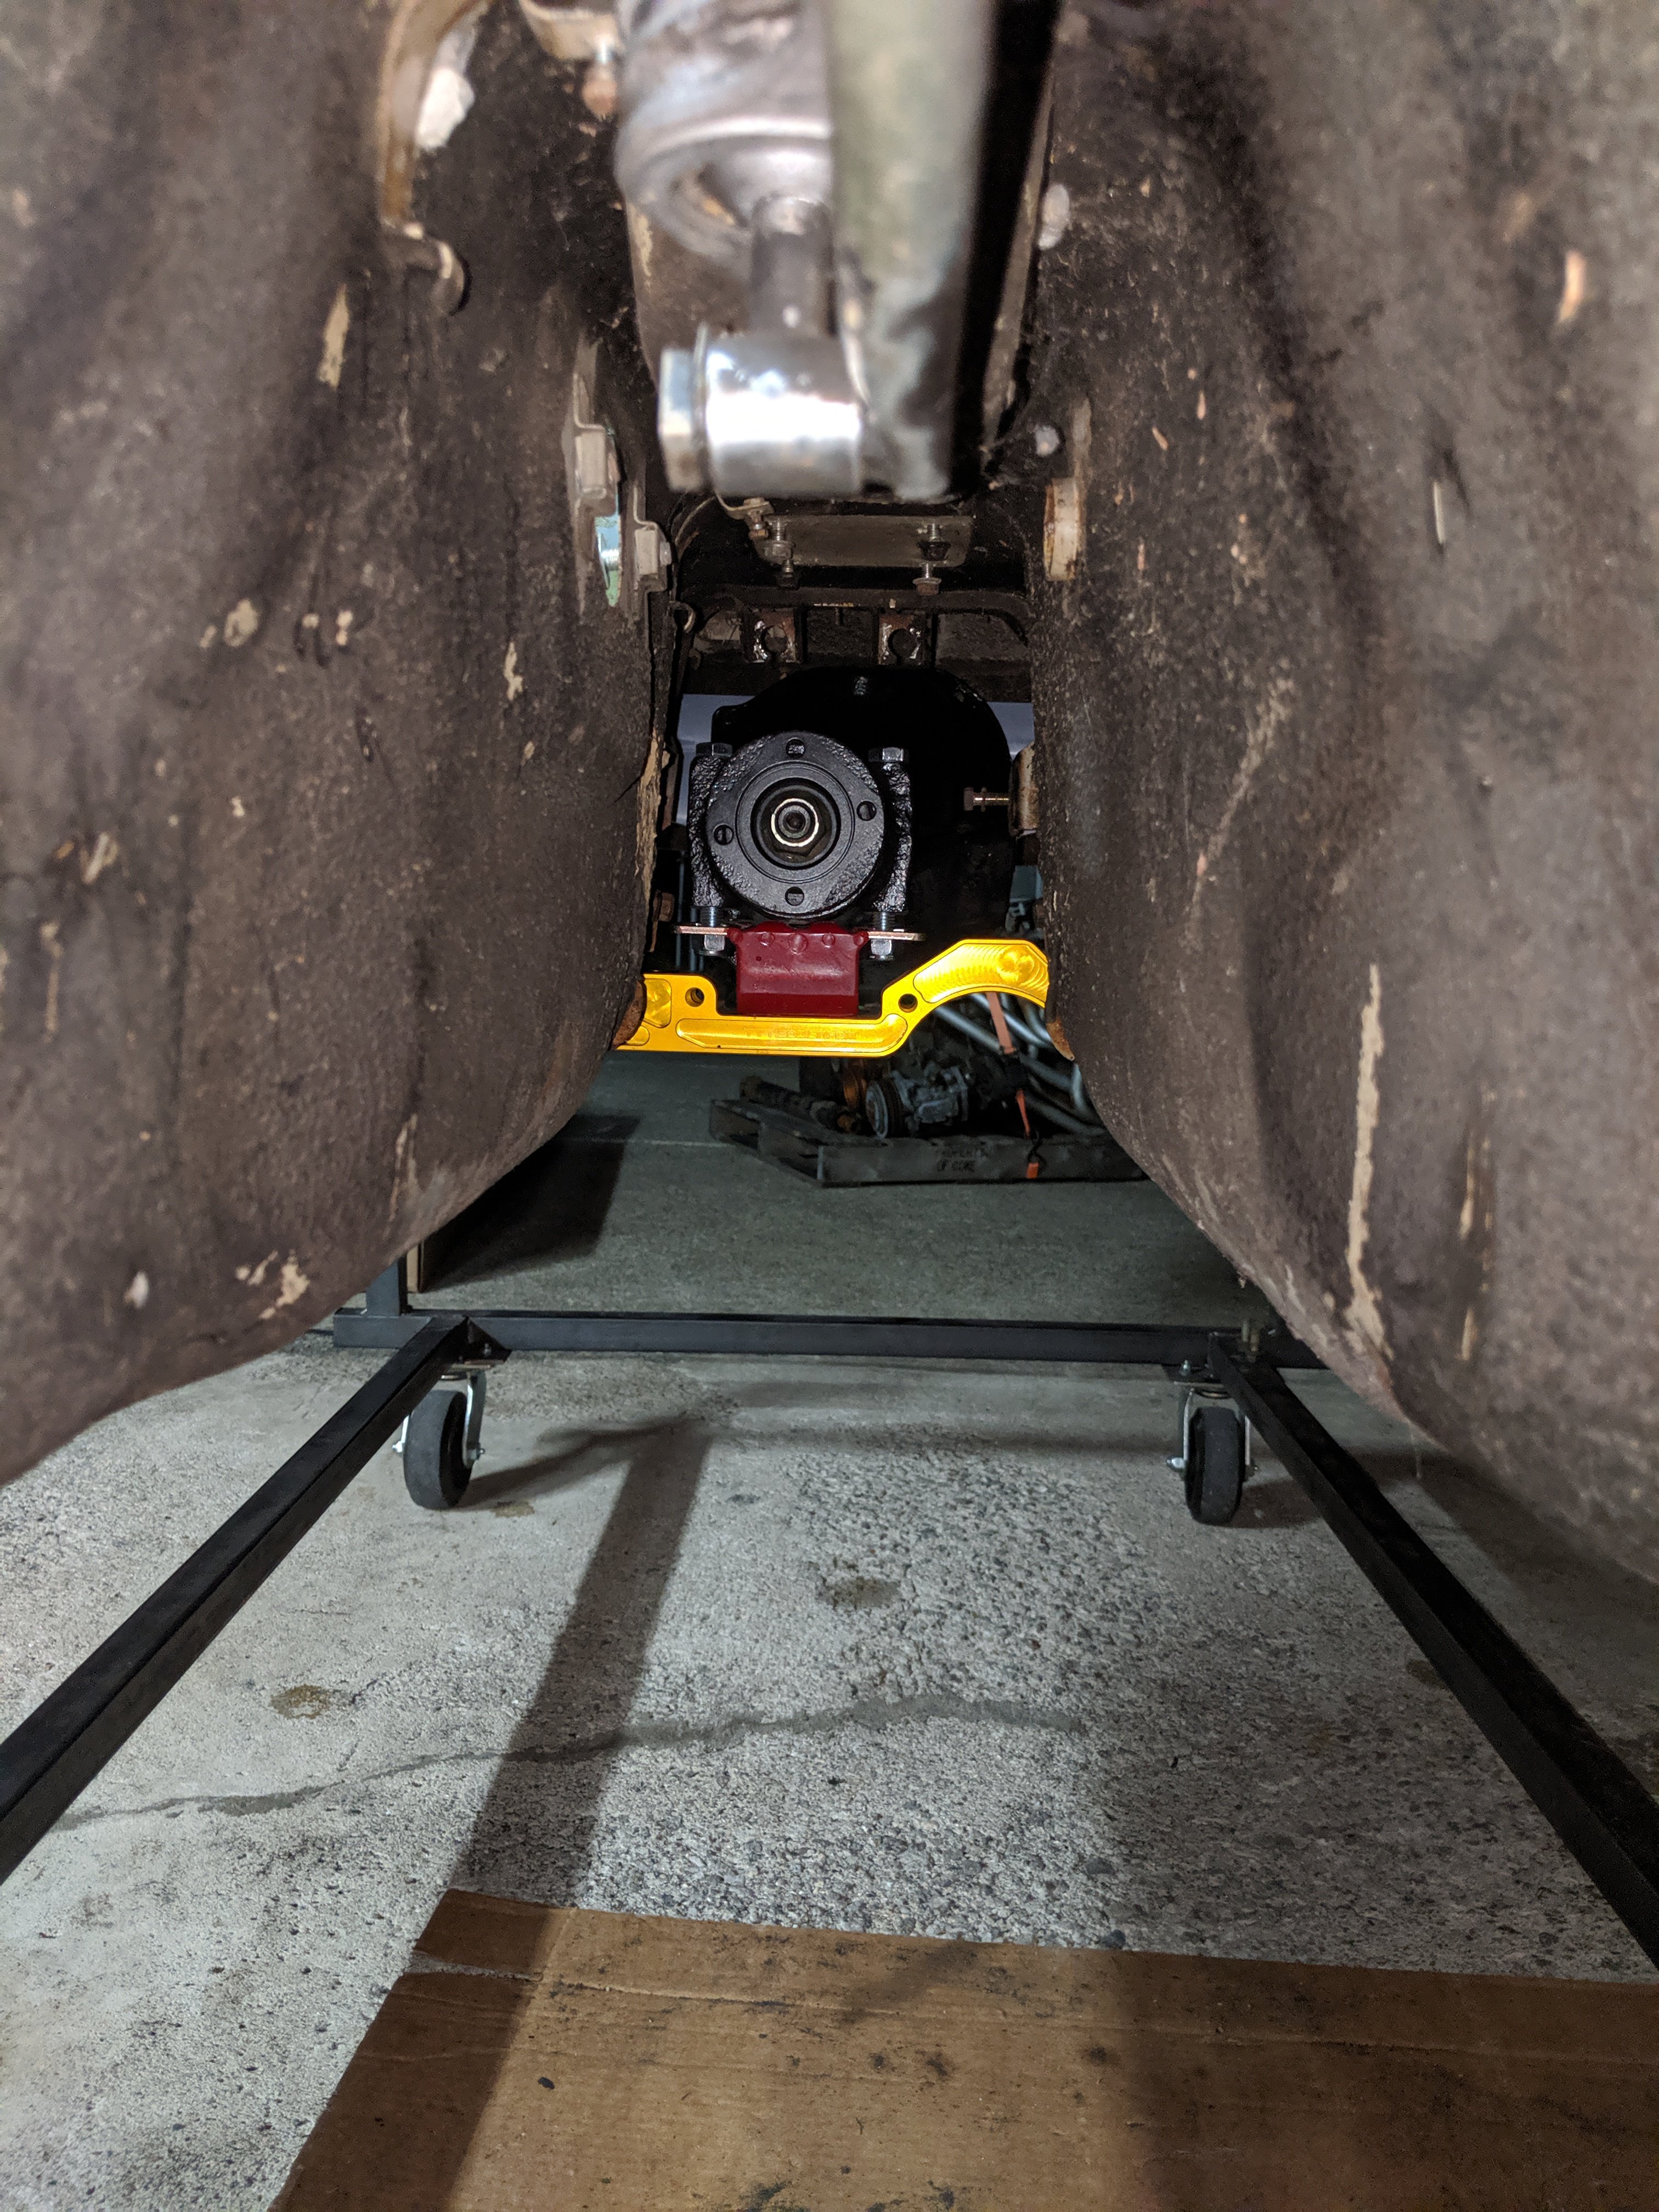
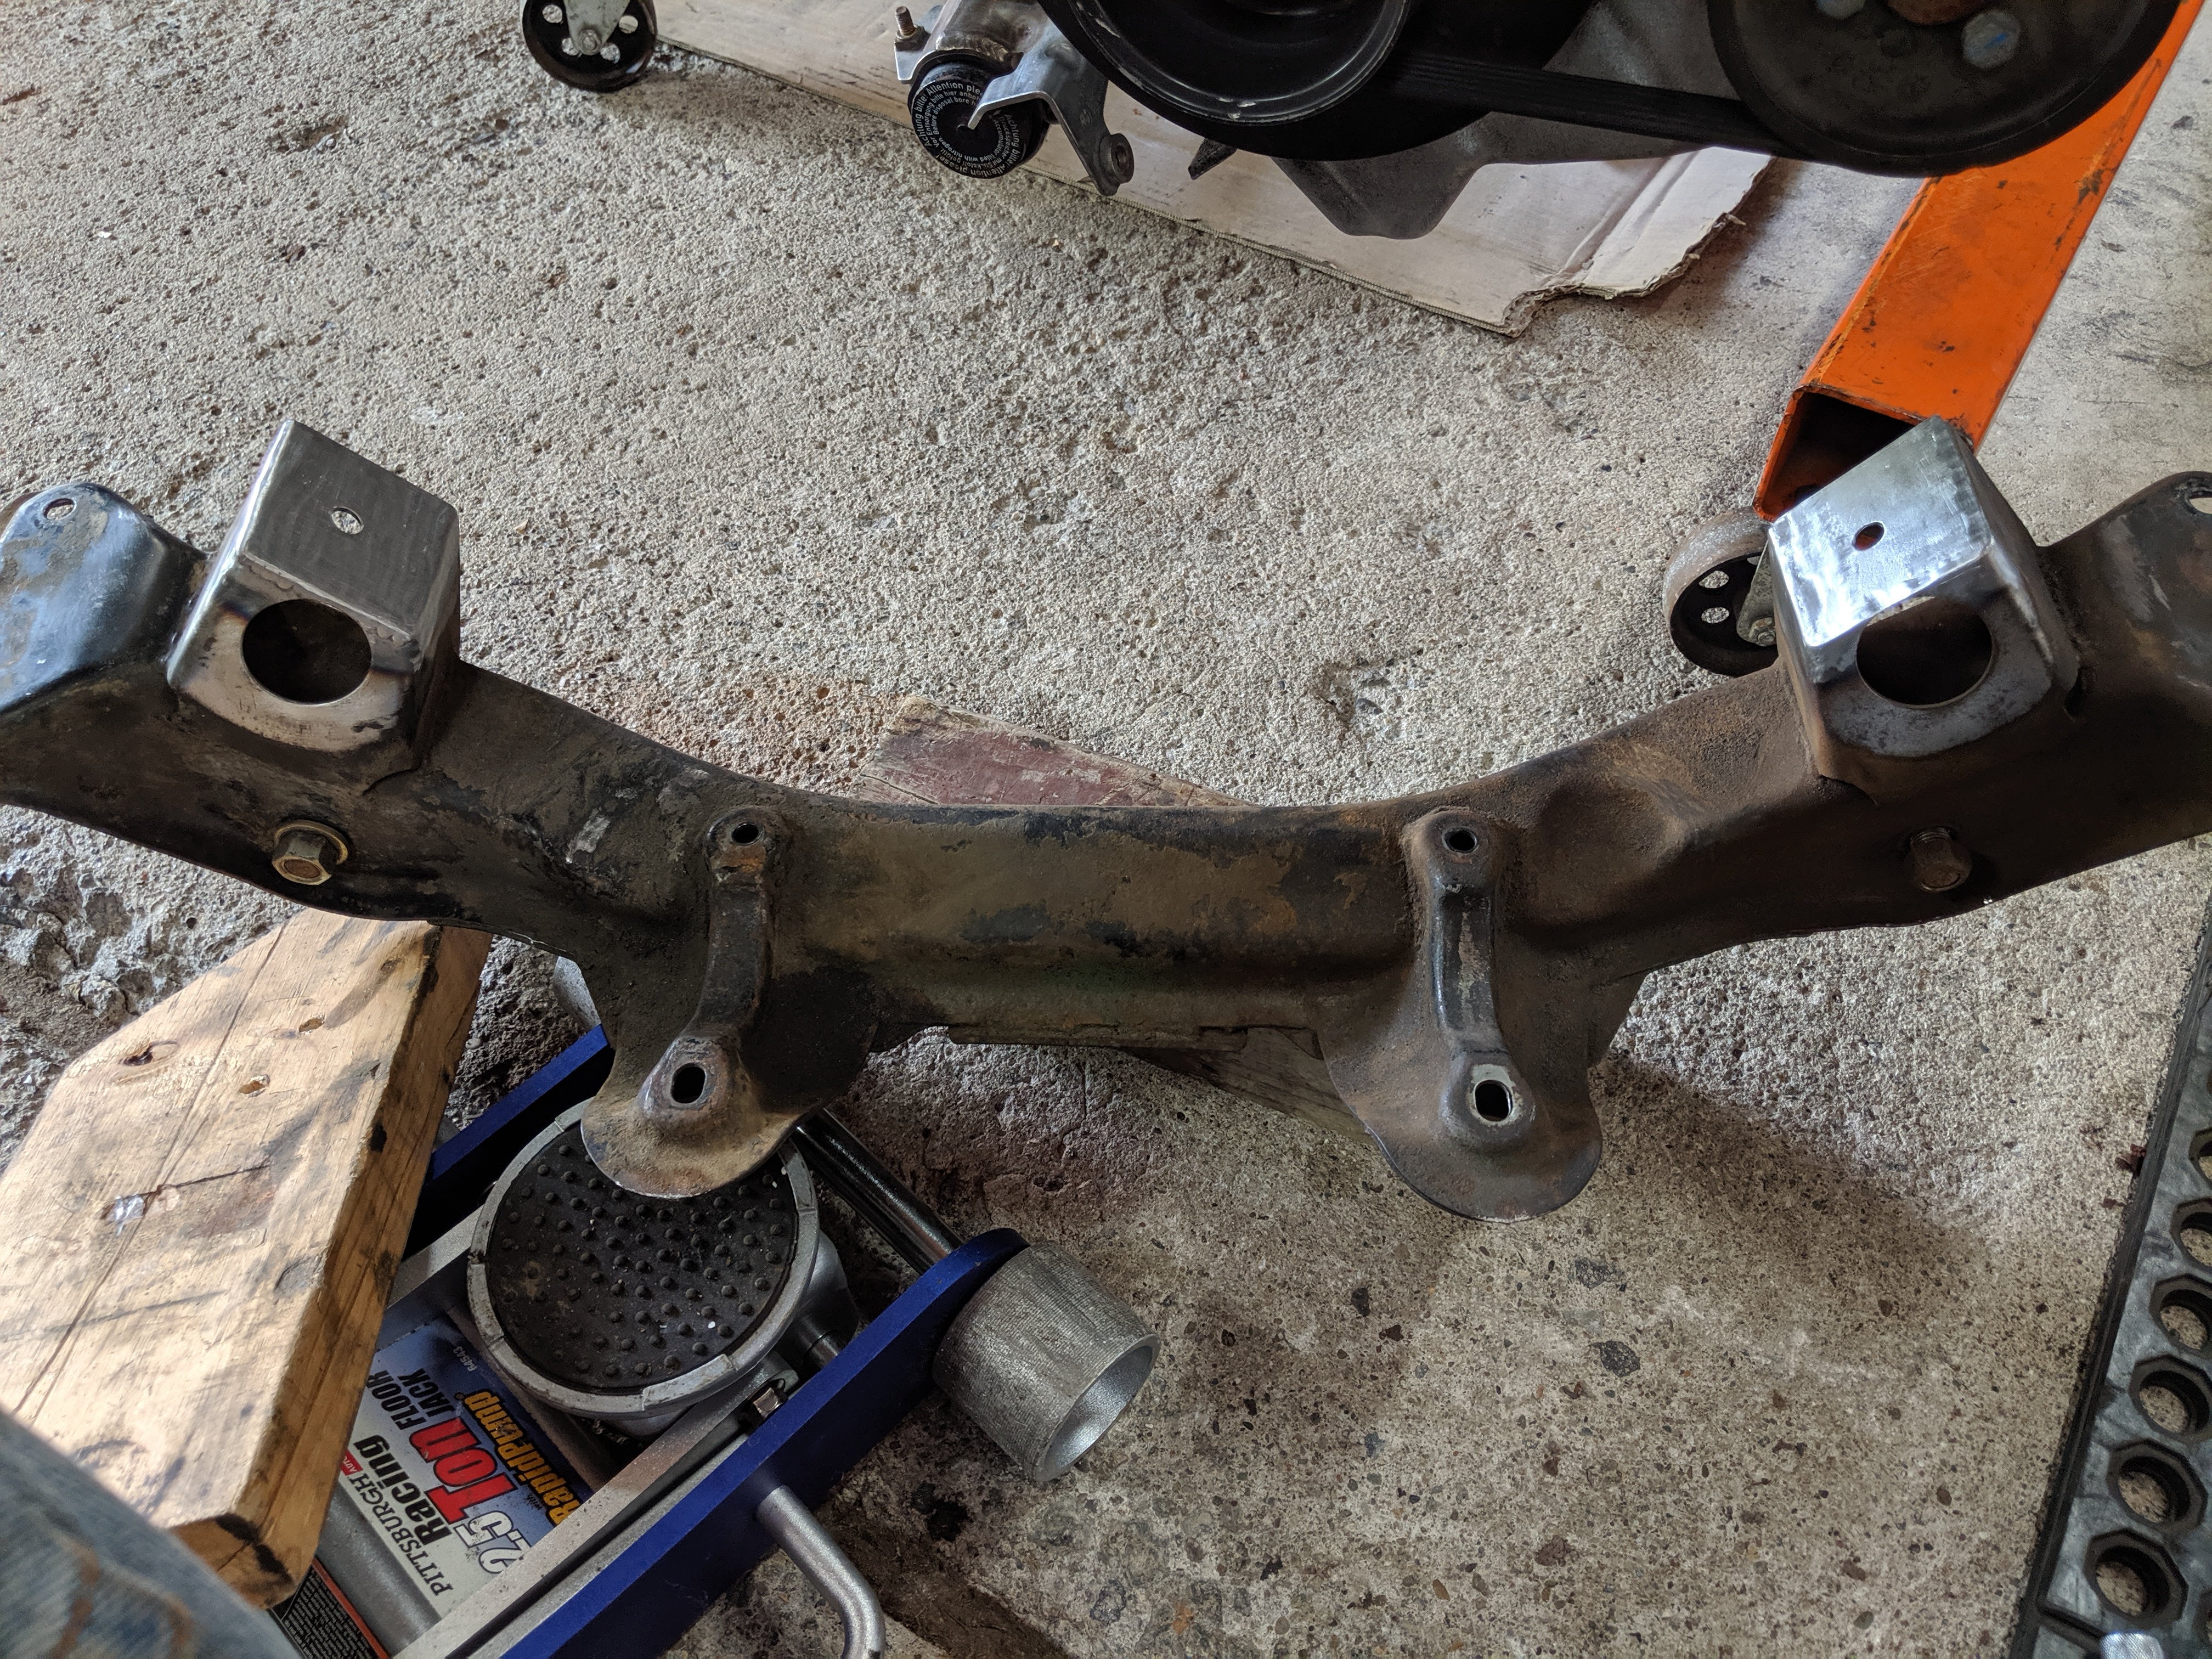
Here comes an update... I think I figured it out and finally have the whole rear differential where I want it now. So here goes my attempt at an explanation... I had all of the stock parts so I reinstalled all of that and decided to take some measurement of the output shaft locations. The numbers are a bit arbitrary here but are for reference only. I measured a fore/aft location of about 10.25" and an up/down location of about 7.75". Keep those in mind. Then I put all of the new parts back in as you expect and as designed by T3 with the spacer between the mustache bar and the diff. I redid the same measurements and came out with: fore/aft location of about 9.125" and an up/down location of about 7.75". You'll notice that the fore/aft measurements are different by 1.125", where the new parts sat further forward in car than the old parts. Now, that being said, the T3 front differential mount and cross member with the parts in this configuration were very close to lining up although were out by approx 0.25". I could probably have made this work. However my desired set up is to use the 3-1108 GM transmission mount to hang the diff from the Technoversions R/T mount I'm also using, in concert with the the snubber on the bottom. But the issue with this was the the differential was sitting much too far forward to have the R/T mount line up with the forward set of holes on the diff. (no picture of this... sorry) So, I decided to try one more thing... (and maybe you see where I'm going with this...) I removed the spacer b/w the mustache bar and the differential. It is exactly 1.125". I reinstalled everything less spacer and what do you know... the R/T mount and the front set of holes on the differential line up. So I got the 3-1108 poly mount installed and the differential hanging that way. I took the front differential cross member and snugged that up. All is good, except now I'll be using a snubber on the bottom to "sandwich" the nose of the diff. I also redid my measurements one more time in this configuration and the numbers came out much closer to those with the original equipment. so in summary my current set up is: R200 from an '83 280ZX T3 Mustache bar (with 1.125" spacer removed) TechnoVersions R/T mount and 3-1108 GM transmission mount to hang differential - This also put the nose of the differential a bit lower to reduce the pinion angle which I was having issues with before T3 differential front crossmember with snubber (needs cut down to fit properly per normal process) I'll get some more pictures up soon that show the overall setup better, but I am waiting for a new set of T3 power braces to come in. My original issue with those was that they were too long, and T3 is being great and sending me a new set of them to try out. With the differential in its place... Now I can move on the the transmission and figure out where that needs to be in order for the driveline to be angled properly. I got my laser and mag base in today, so that should be happening this week.
-
BMW S54 into S30 Chassis - Build Thread
carbuilder723 replied to carbuilder723's topic in Other Engines
The shim idea would move the diff backwards, but unfortunately since the power braces attach to the front cross member and the drop mounts, their position is independent of the mustache bar. I also need to check where the axle outputs are positioned with all of this. I don't want to slide the whole thing back and then mess up the half shaft angles. -
BMW S54 into S30 Chassis - Build Thread
carbuilder723 replied to carbuilder723's topic in Other Engines
Not sure what I'm supposed to be hitting to be honest. haha -
BMW S54 into S30 Chassis - Build Thread
carbuilder723 replied to carbuilder723's topic in Other Engines
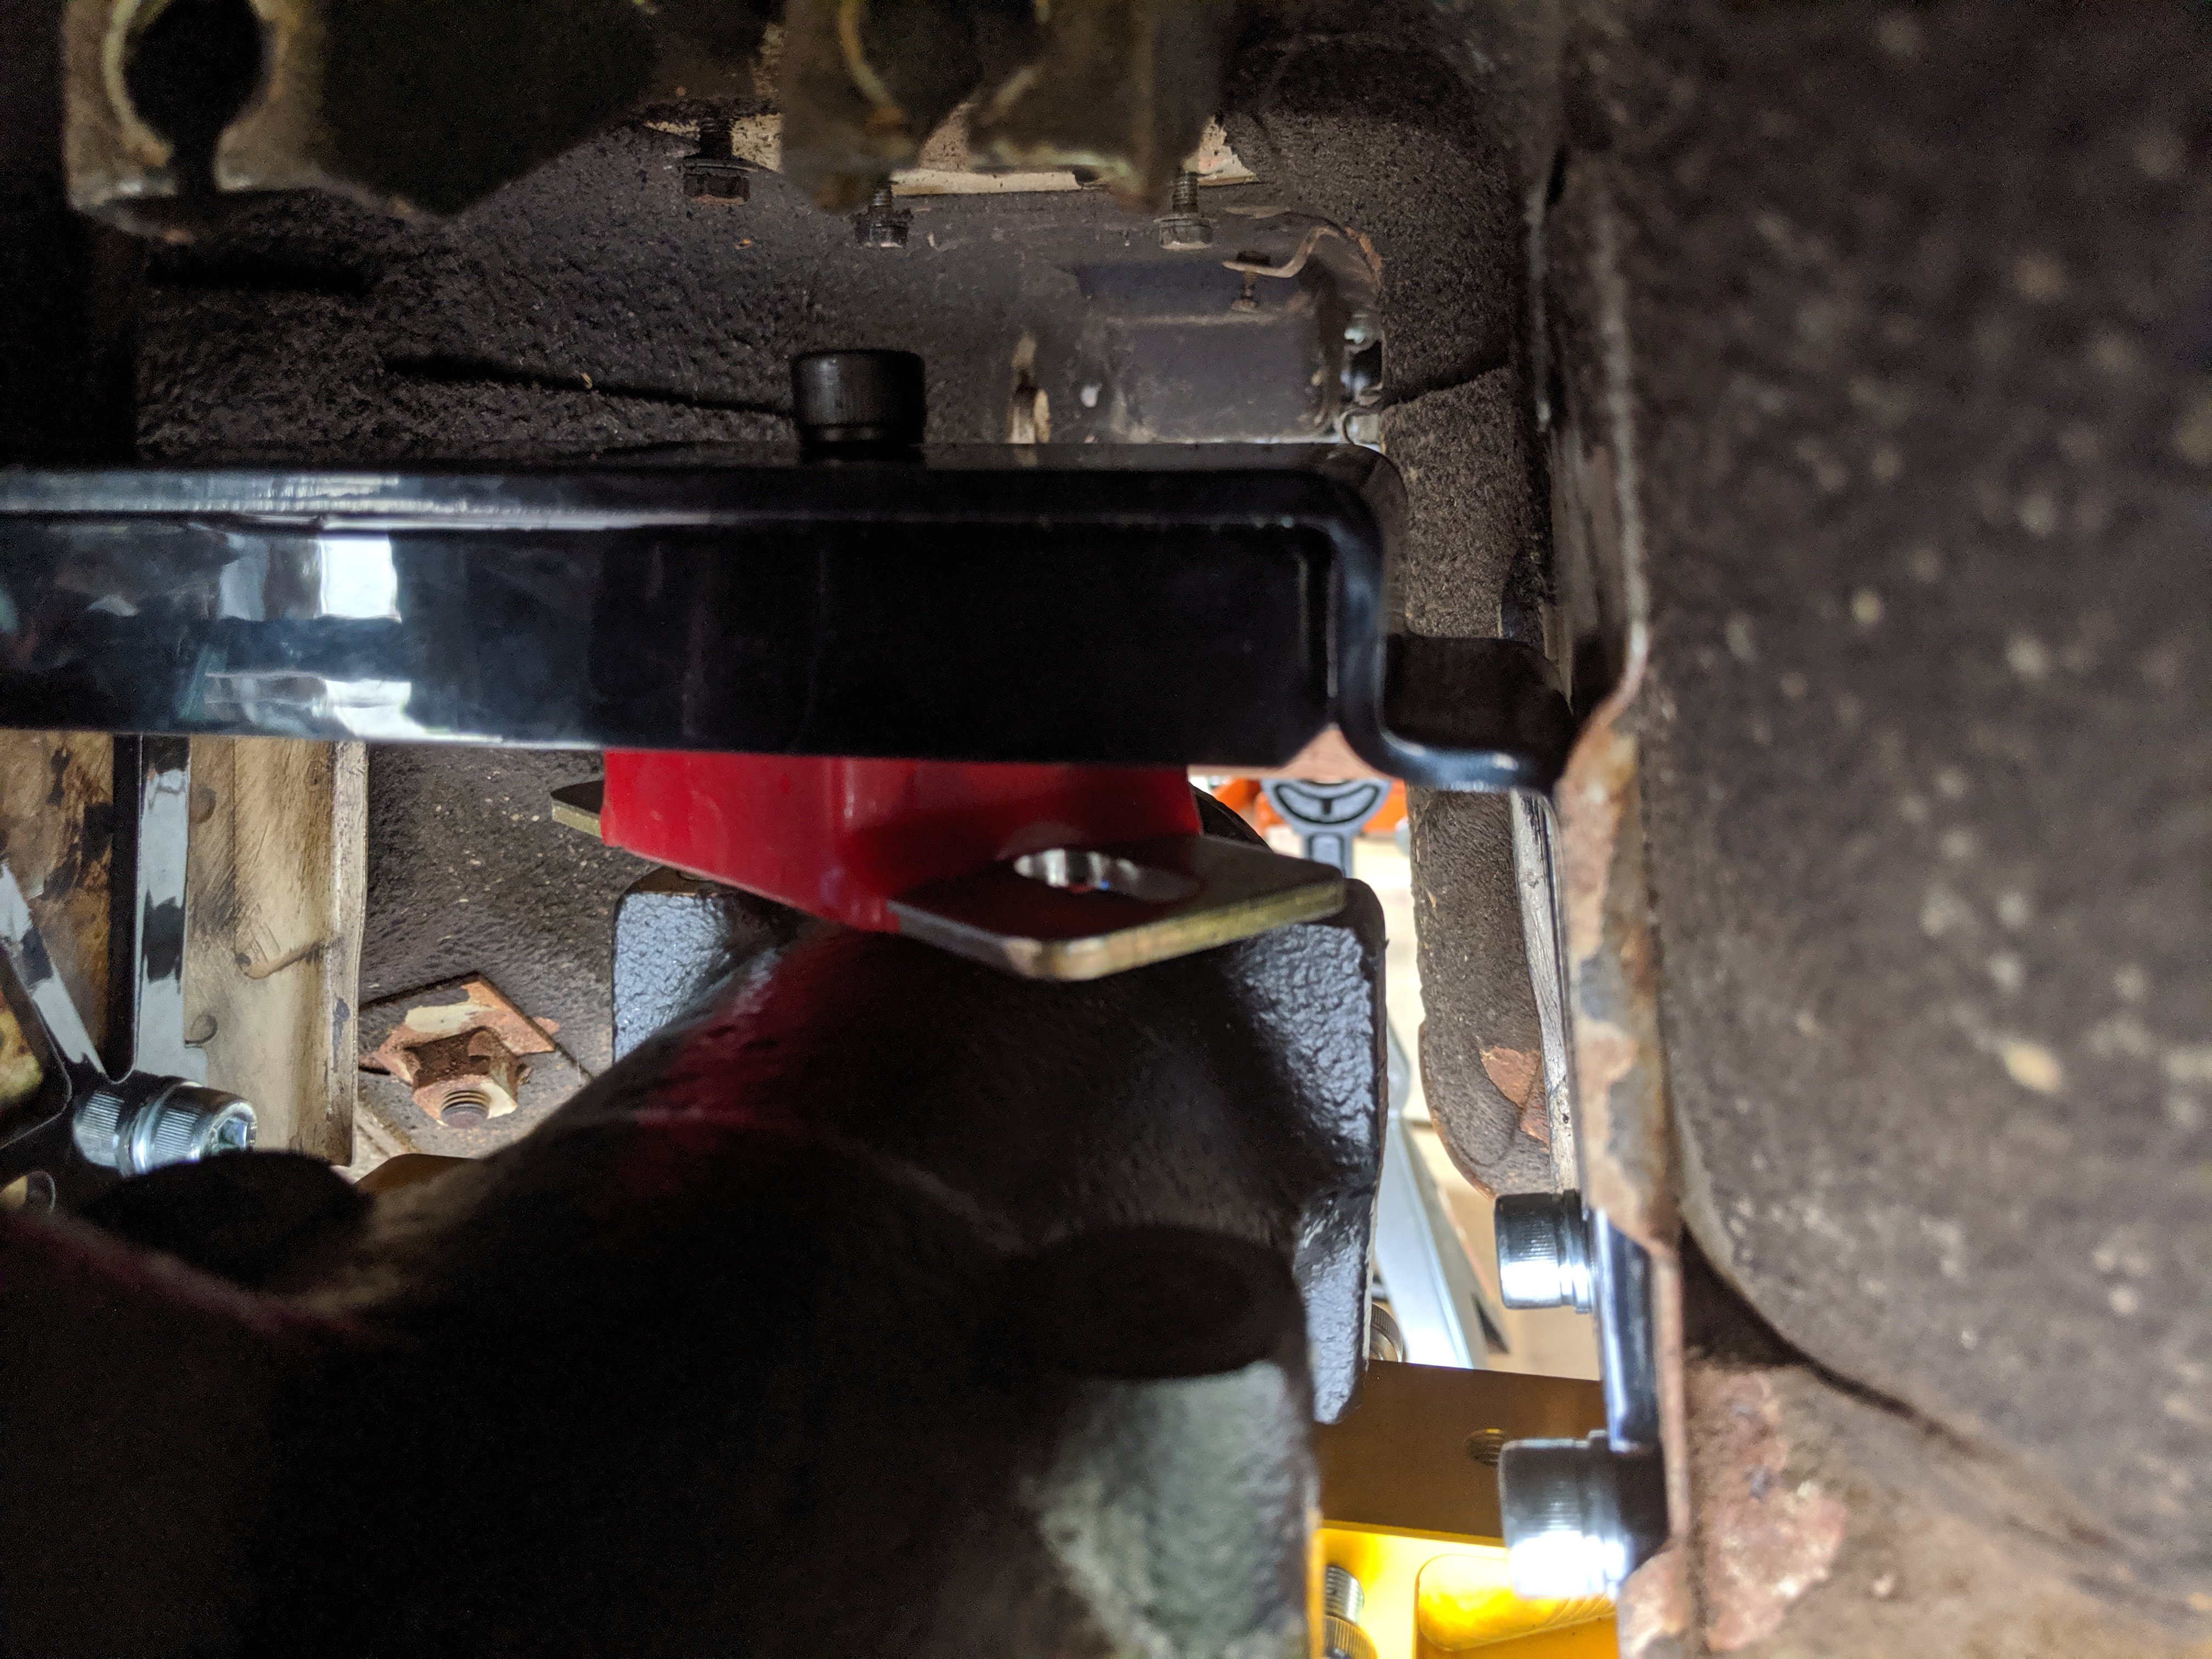
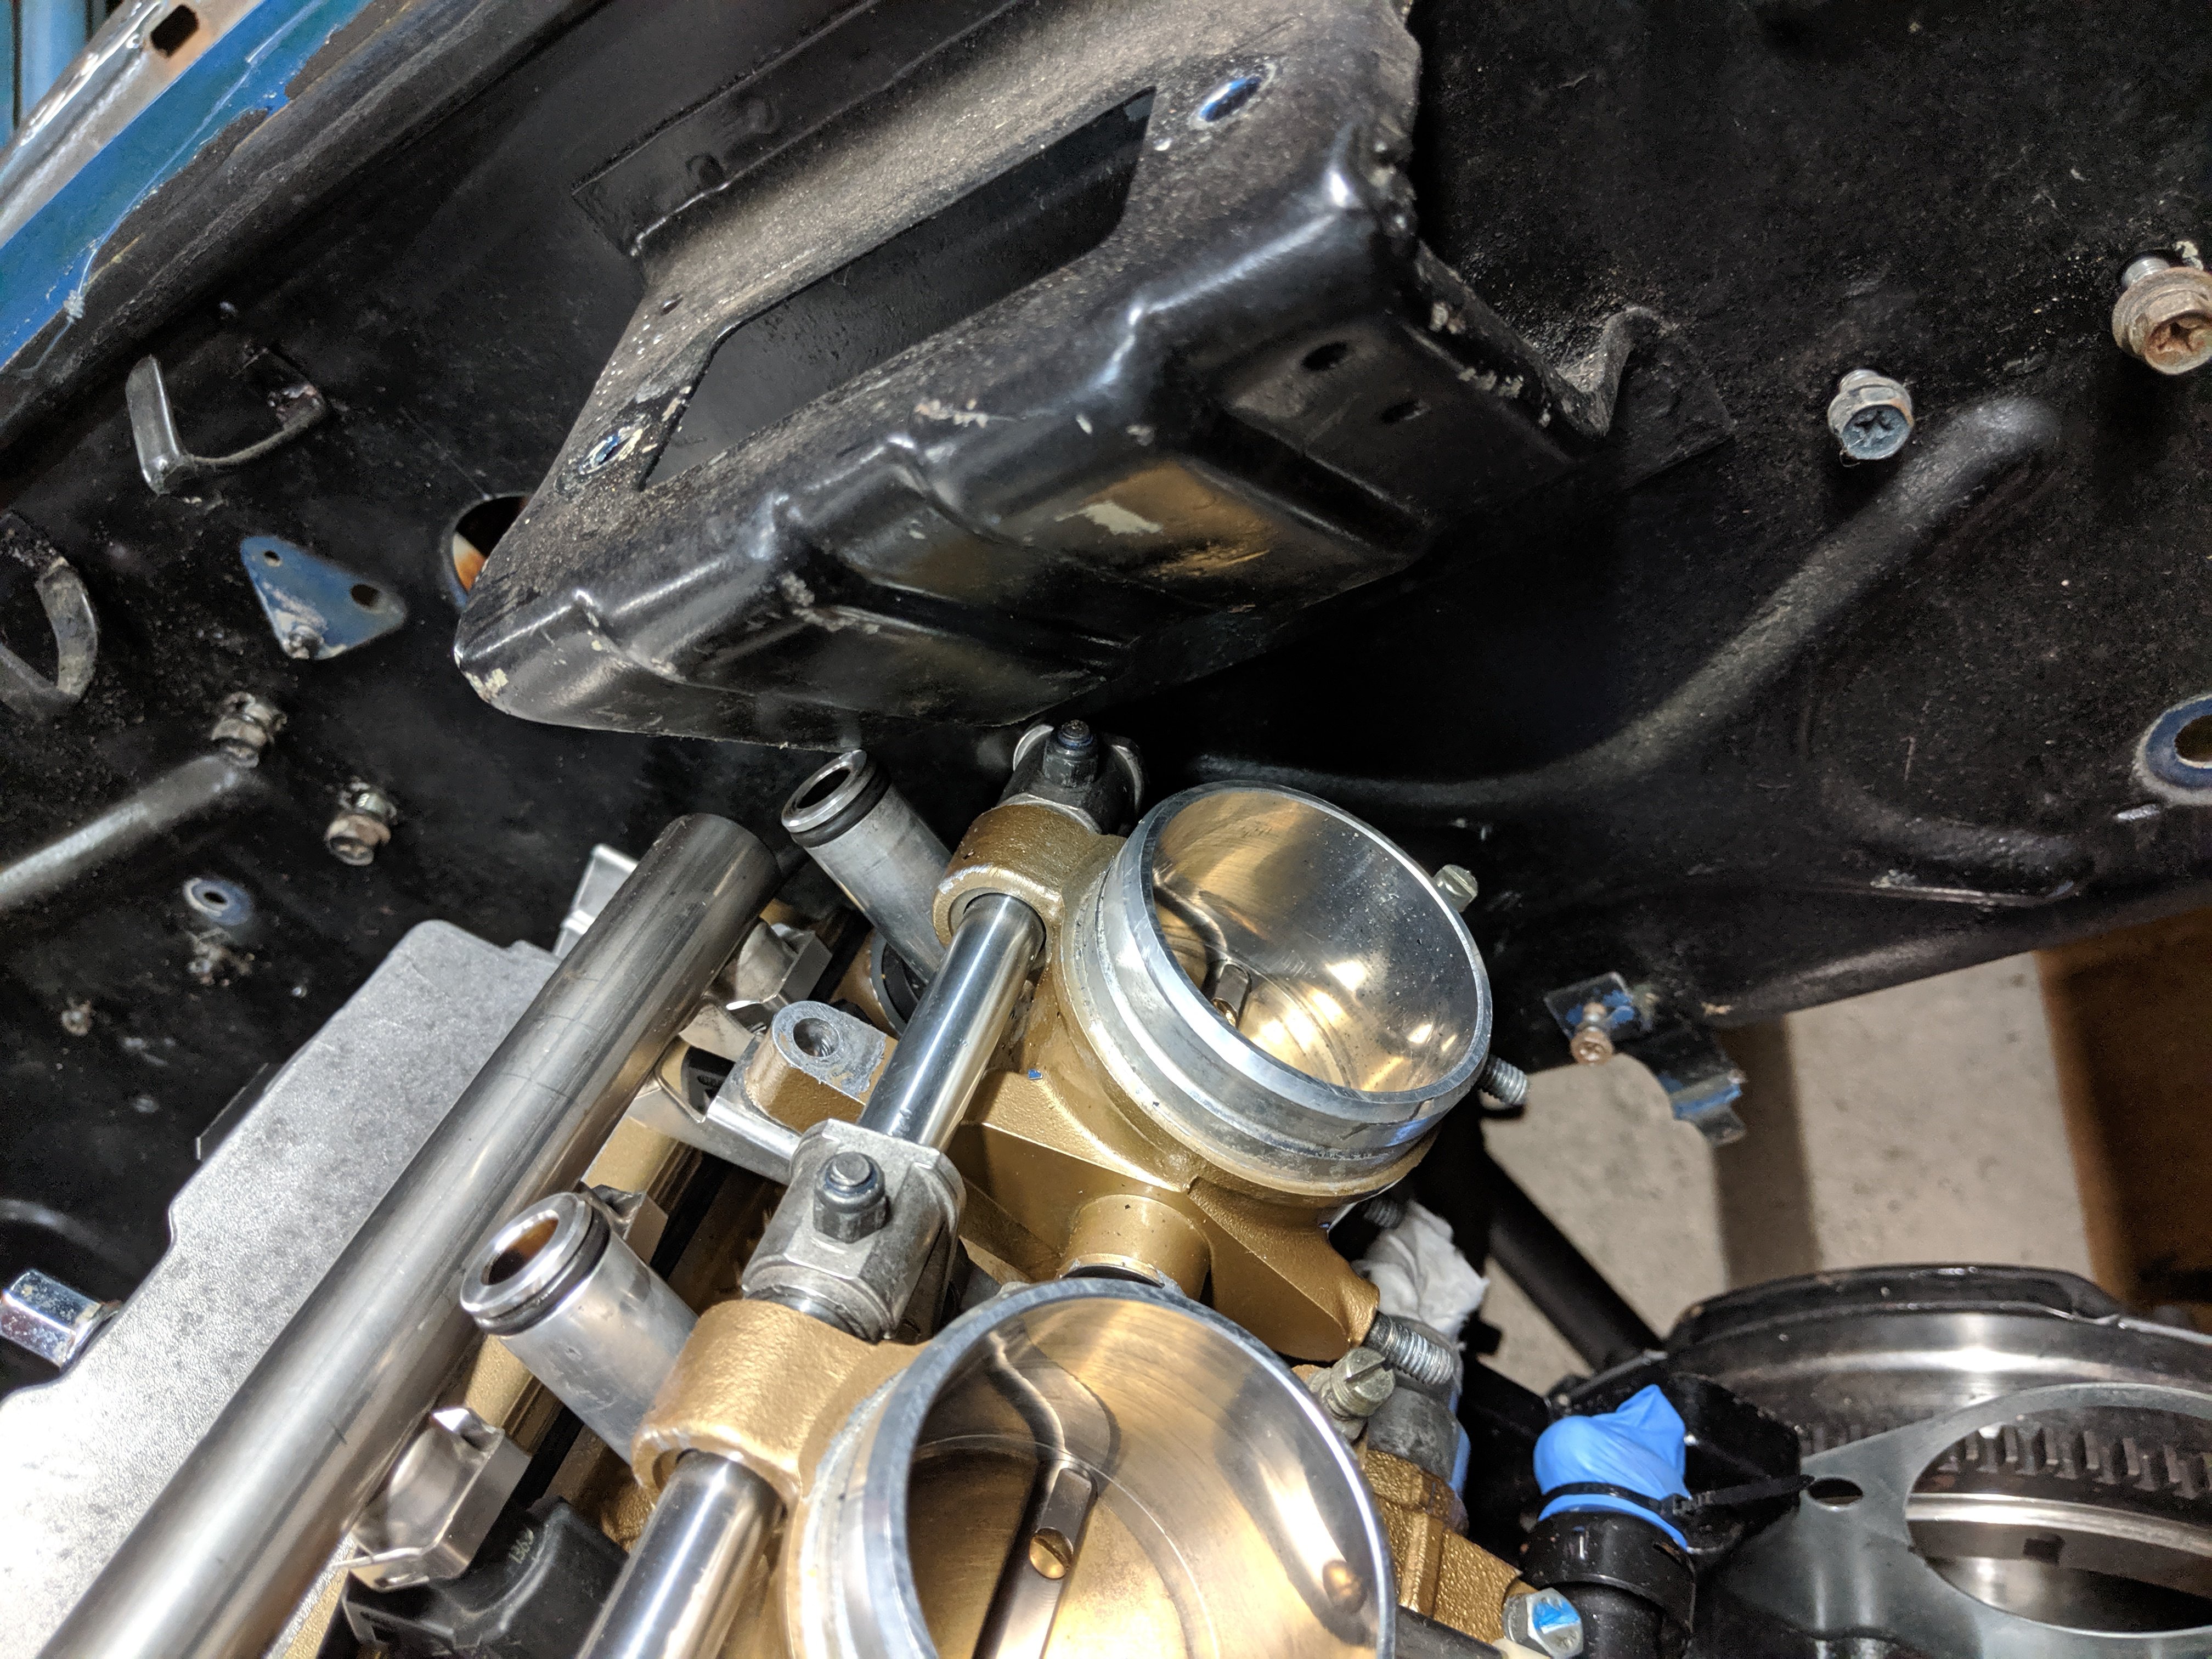
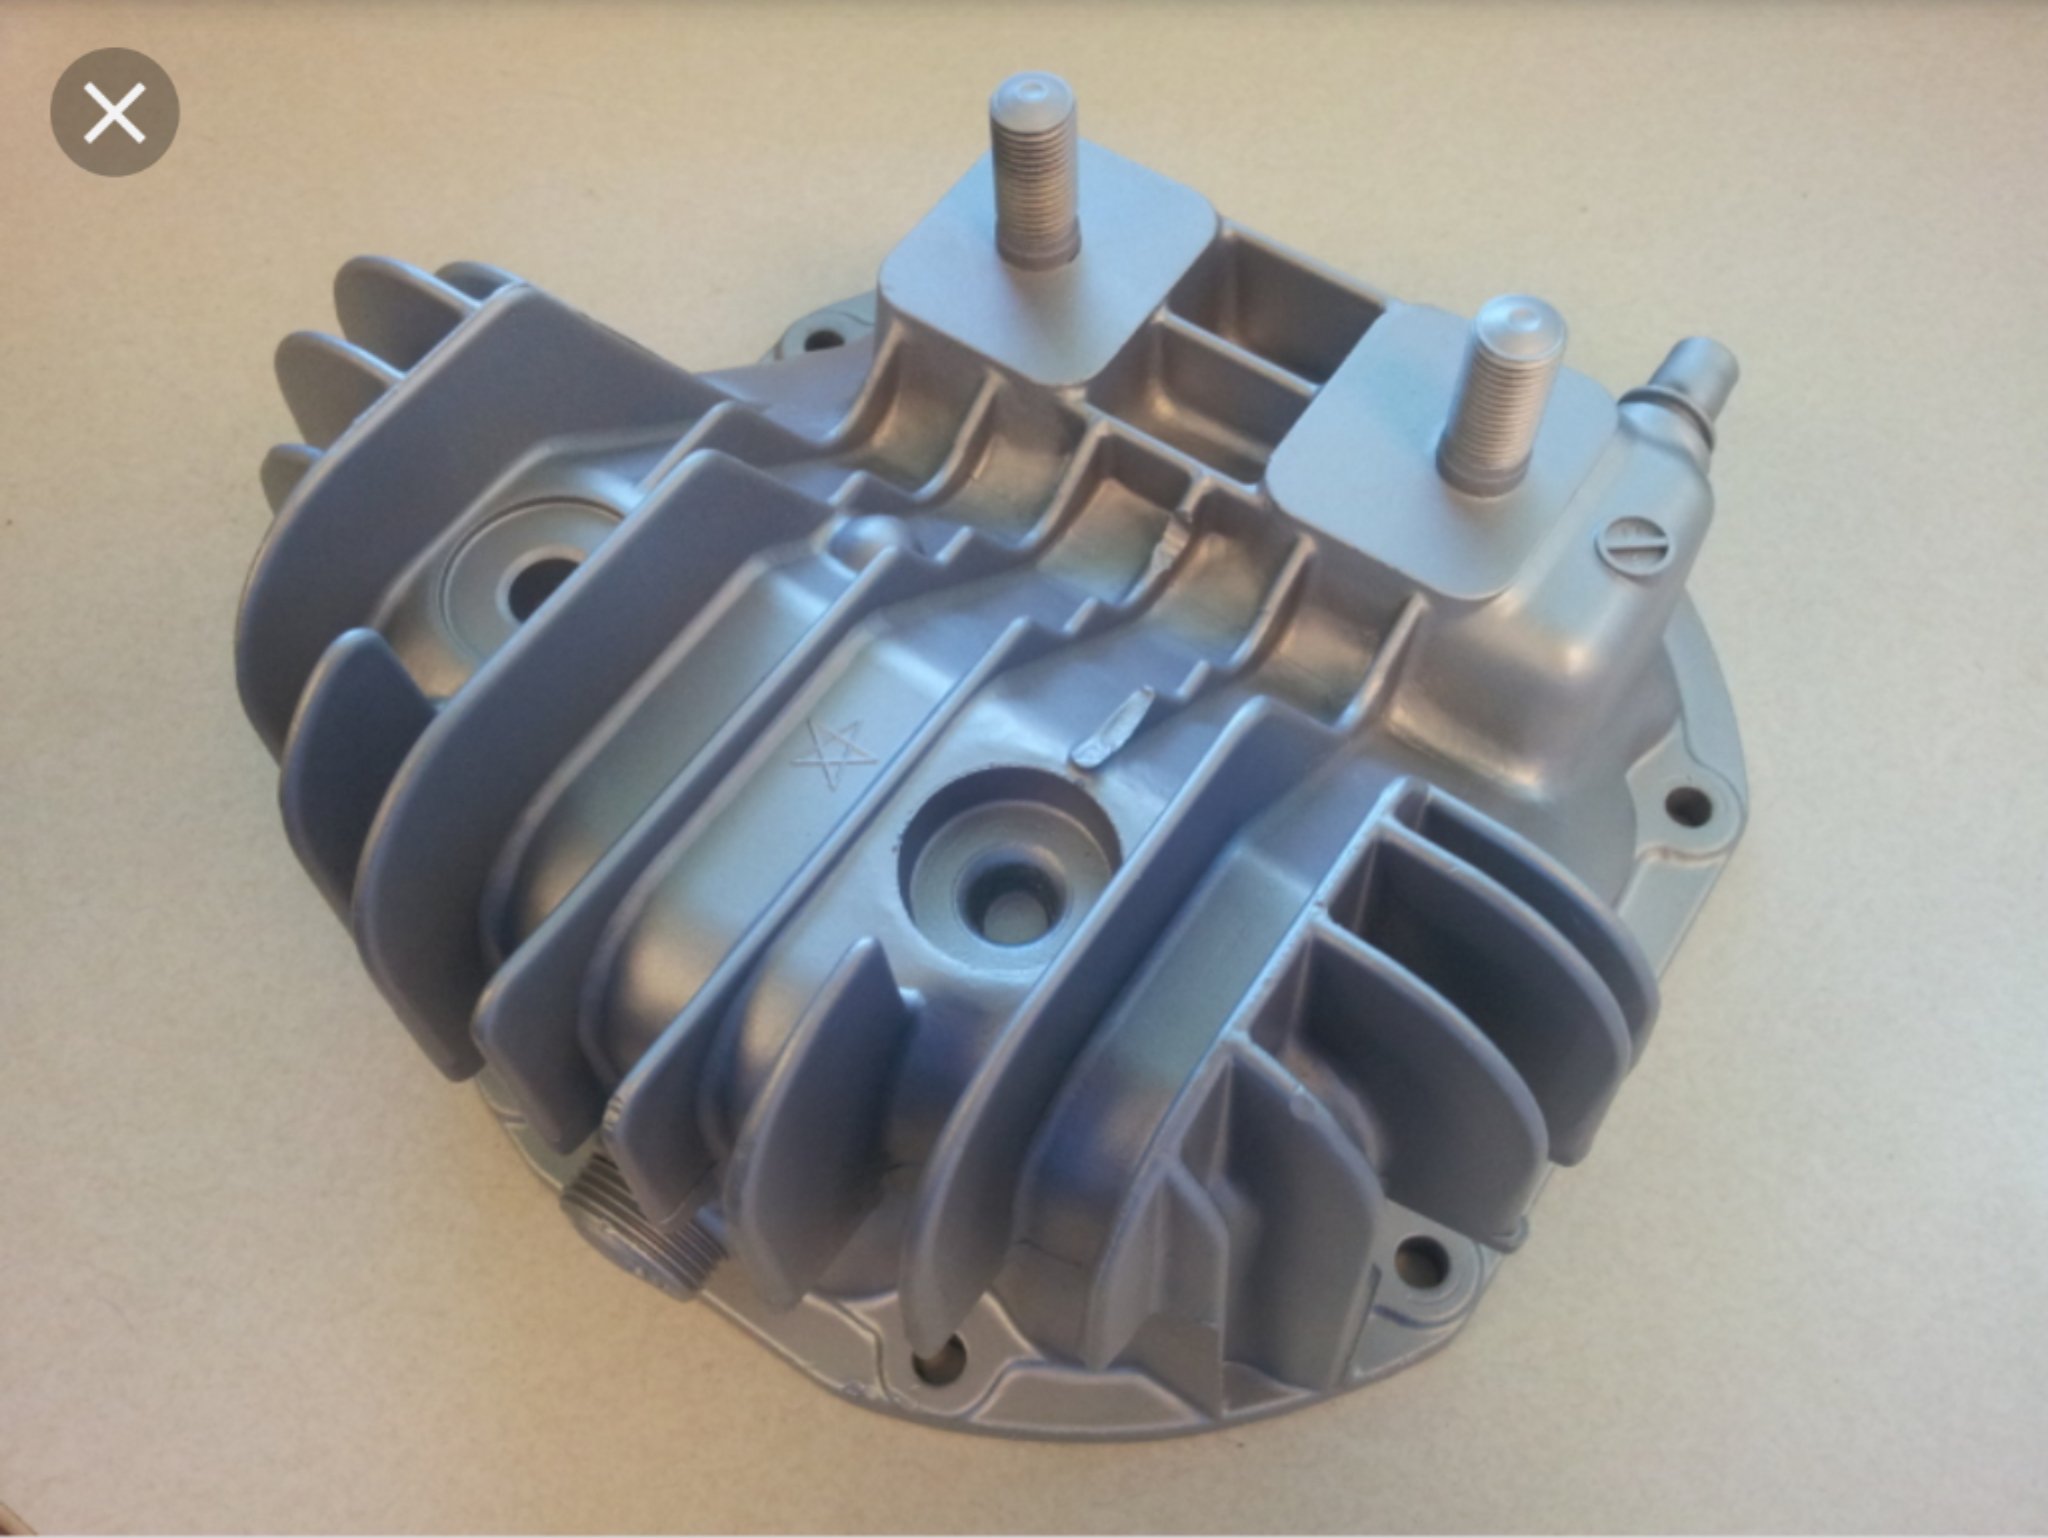
I'll have to look into that. I didn't know about that until just now apparently In other news. I went to mock up all of the rear suspension parts so that I could start to evaluate the driveline angles b/w trans and differential and ran into all sorts of issues. I also want to note, that my car has been wrecked or had any rear end repairs done that could cause misalignments and because all of my parts are from T3, I'm trying to sort through things with them, but I'm open to input from the forums too. 3 main issues despite the fact that it does look quite good 😛 My first issue is that the T3 mustache bar and front differential cross member seem to not be compatible with each other. The back of the differential sits what I think is too low. Either that or the front differential crossmember and isolator push the front of the differential too high. High enough that it starts to put a good amount of twist or torque into the billet aluminum mustache bar. My differential is a 1983 280zx r200 with the proper cover, so it should be a completely standard swap from the R180 that came in the car. Is my assumption wrong that this mustache bar should not be under significant twist when completely unloaded? It's hard to tell put you can kind of see the slope of the differential in this pic. This picture includes the front isolator. This Picture is the same set up, but with the front isolator removed. You can see the diff sits much more level. At least by my eye... The second issue I'm having is that the "power braces" I bought are too long. The holes are slotted but even in their shortest position, I cannot get the bolts to line up with the drop mounts. The third issue is that even if I was comfortable torquing the mustache bar by just tightening down the front cross member, the hole in the front cross member does not line up with the isolator when the isolator is secured to the differential. You can see in the picture that the middle through hole and the isolator threaded hole are shadowing each other. I'm also using an RT mount on the top side, so I played around with the idea using the isolator that came with the front cross member to suspend the differential from the top. This did not work at all for the moment, as the mounting holes on the differential fell well forward of where they would need to be. In this pic, I got one bolt through (the one close to the front of the car) but this causes the other hole to rotate away from where it would need to be. I feel like I'm battling a combination of tightening sequence of all of the bolts / slight part incompatibilities / old cars never having things exactly in the original fresh out of the factory locations. I'm open to any suggestions of things to try. Thanks!
-
BMW S54 into S30 Chassis - Build Thread
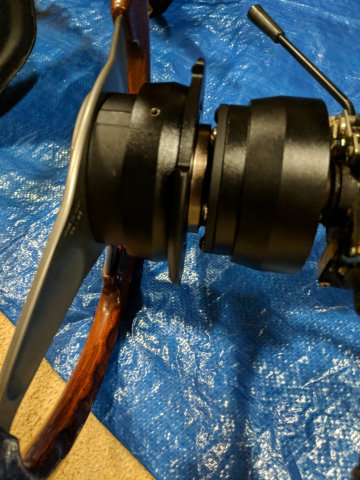
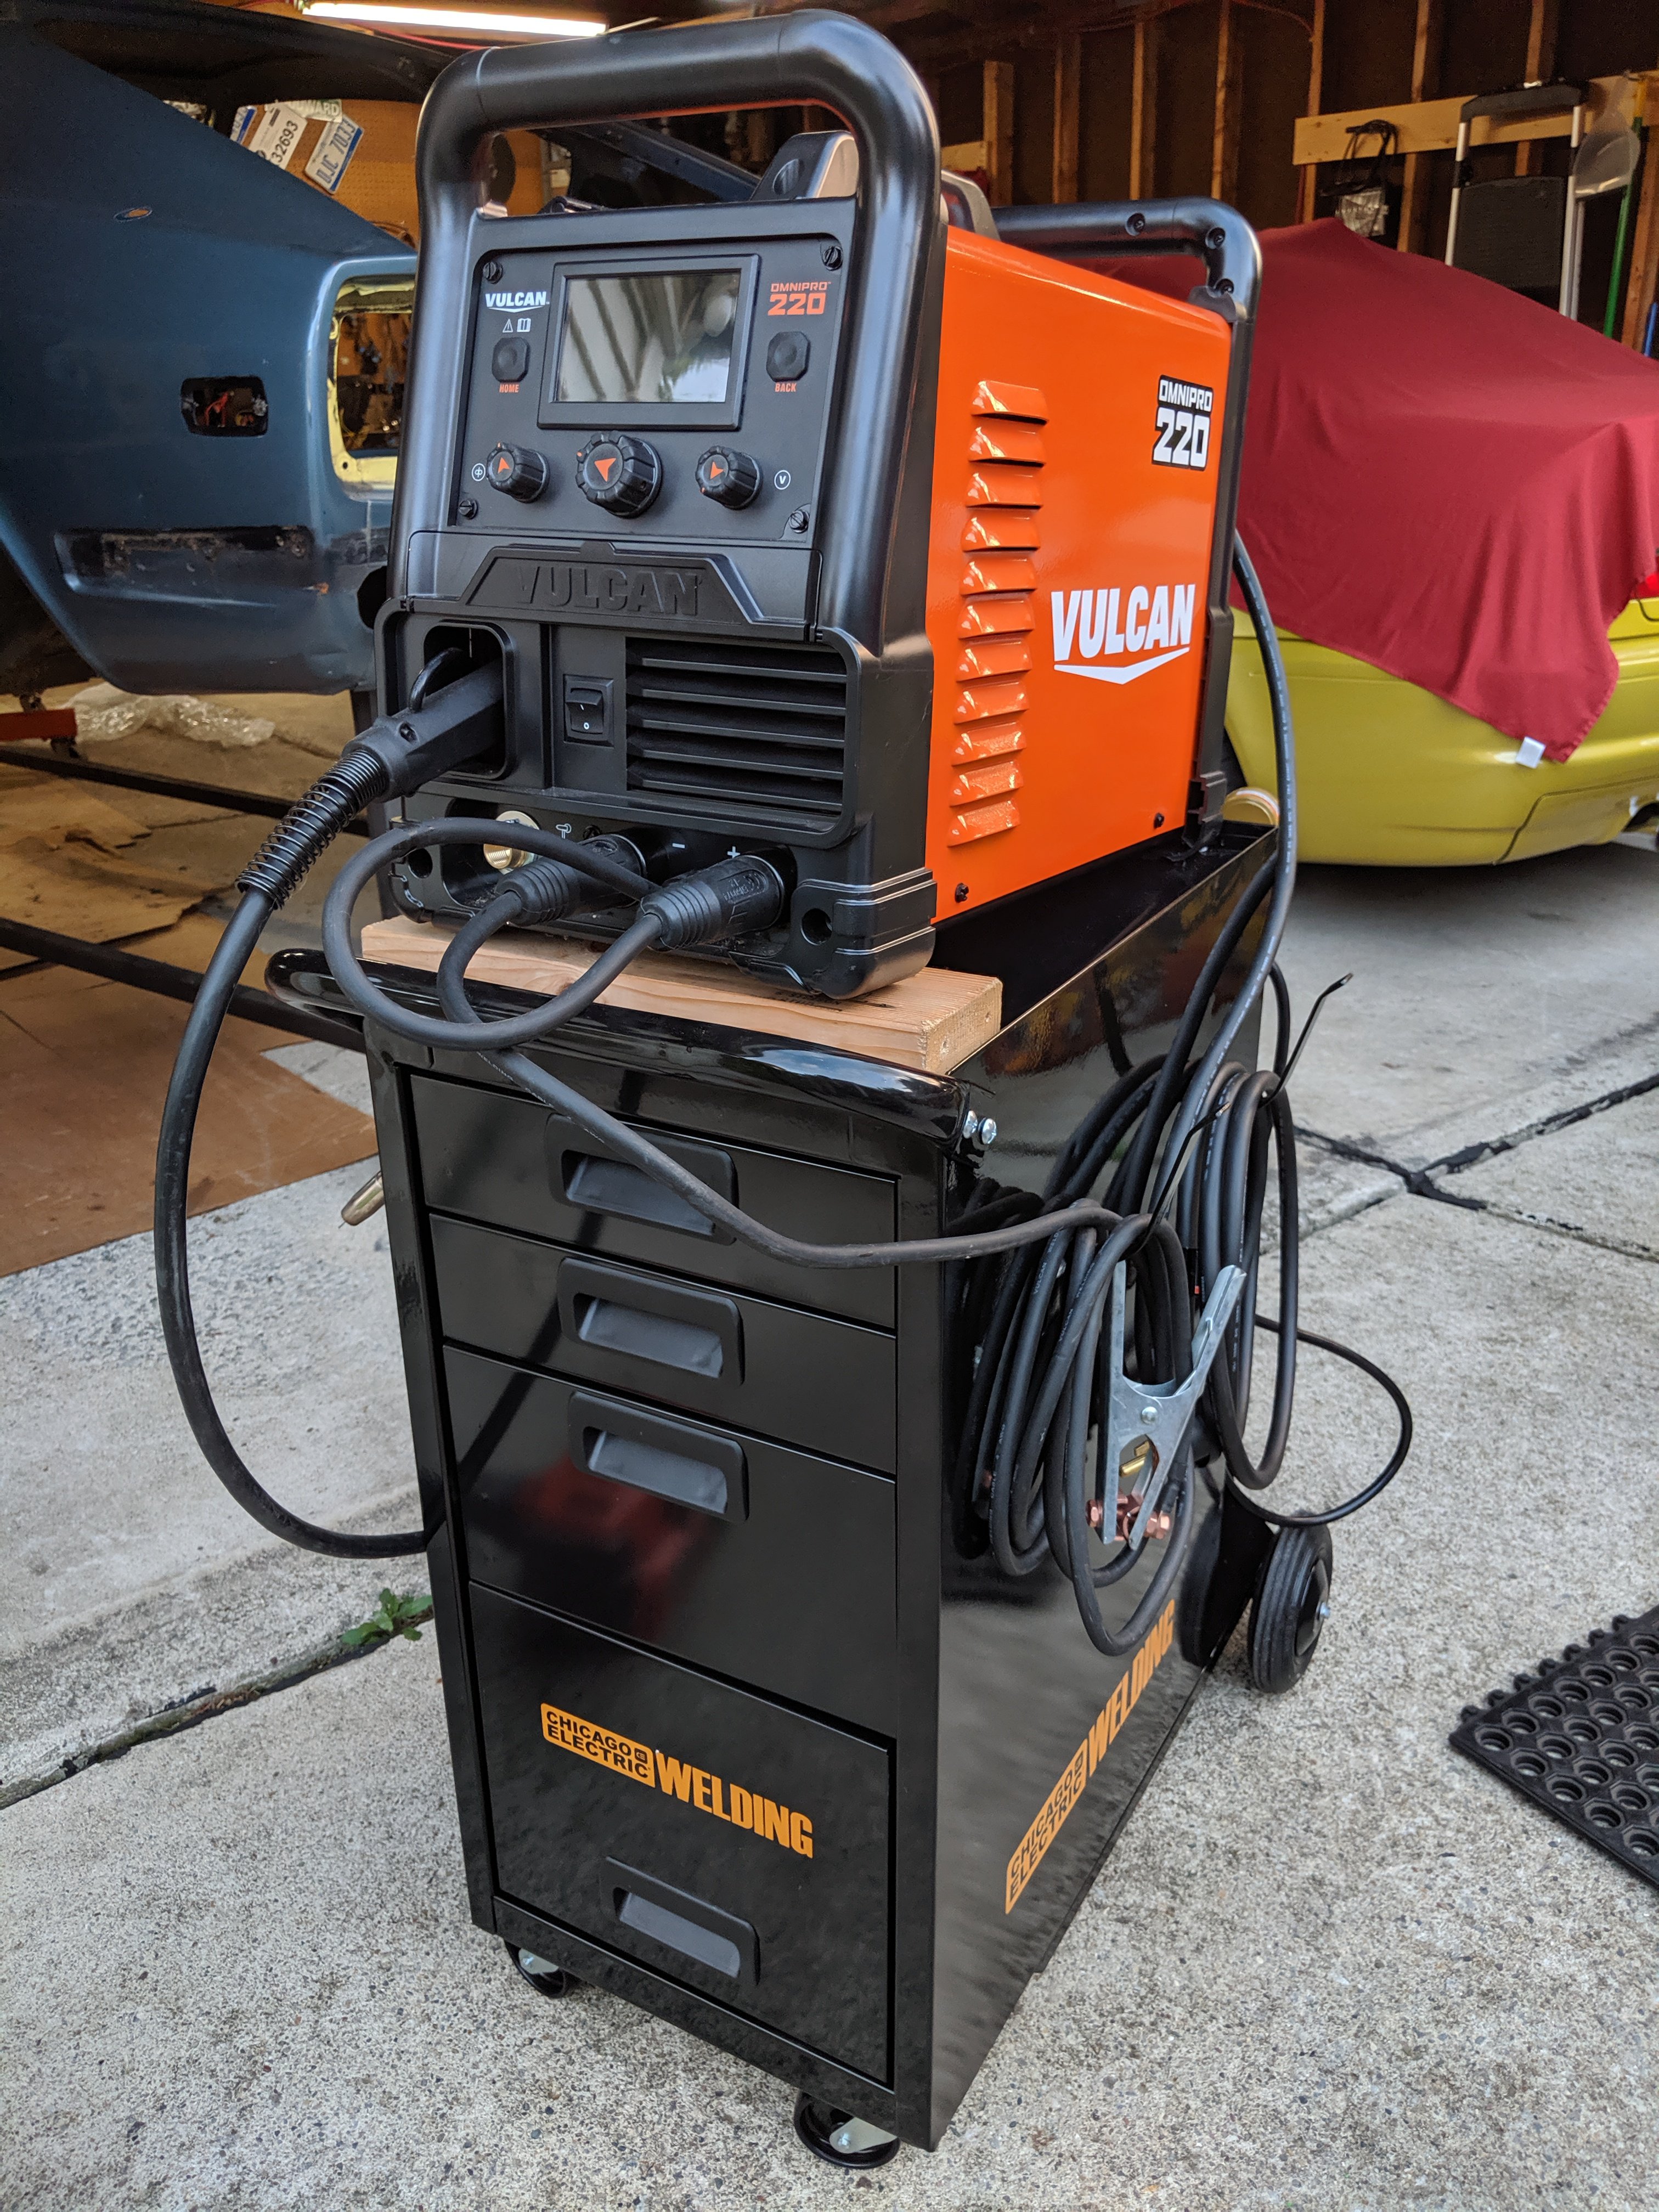
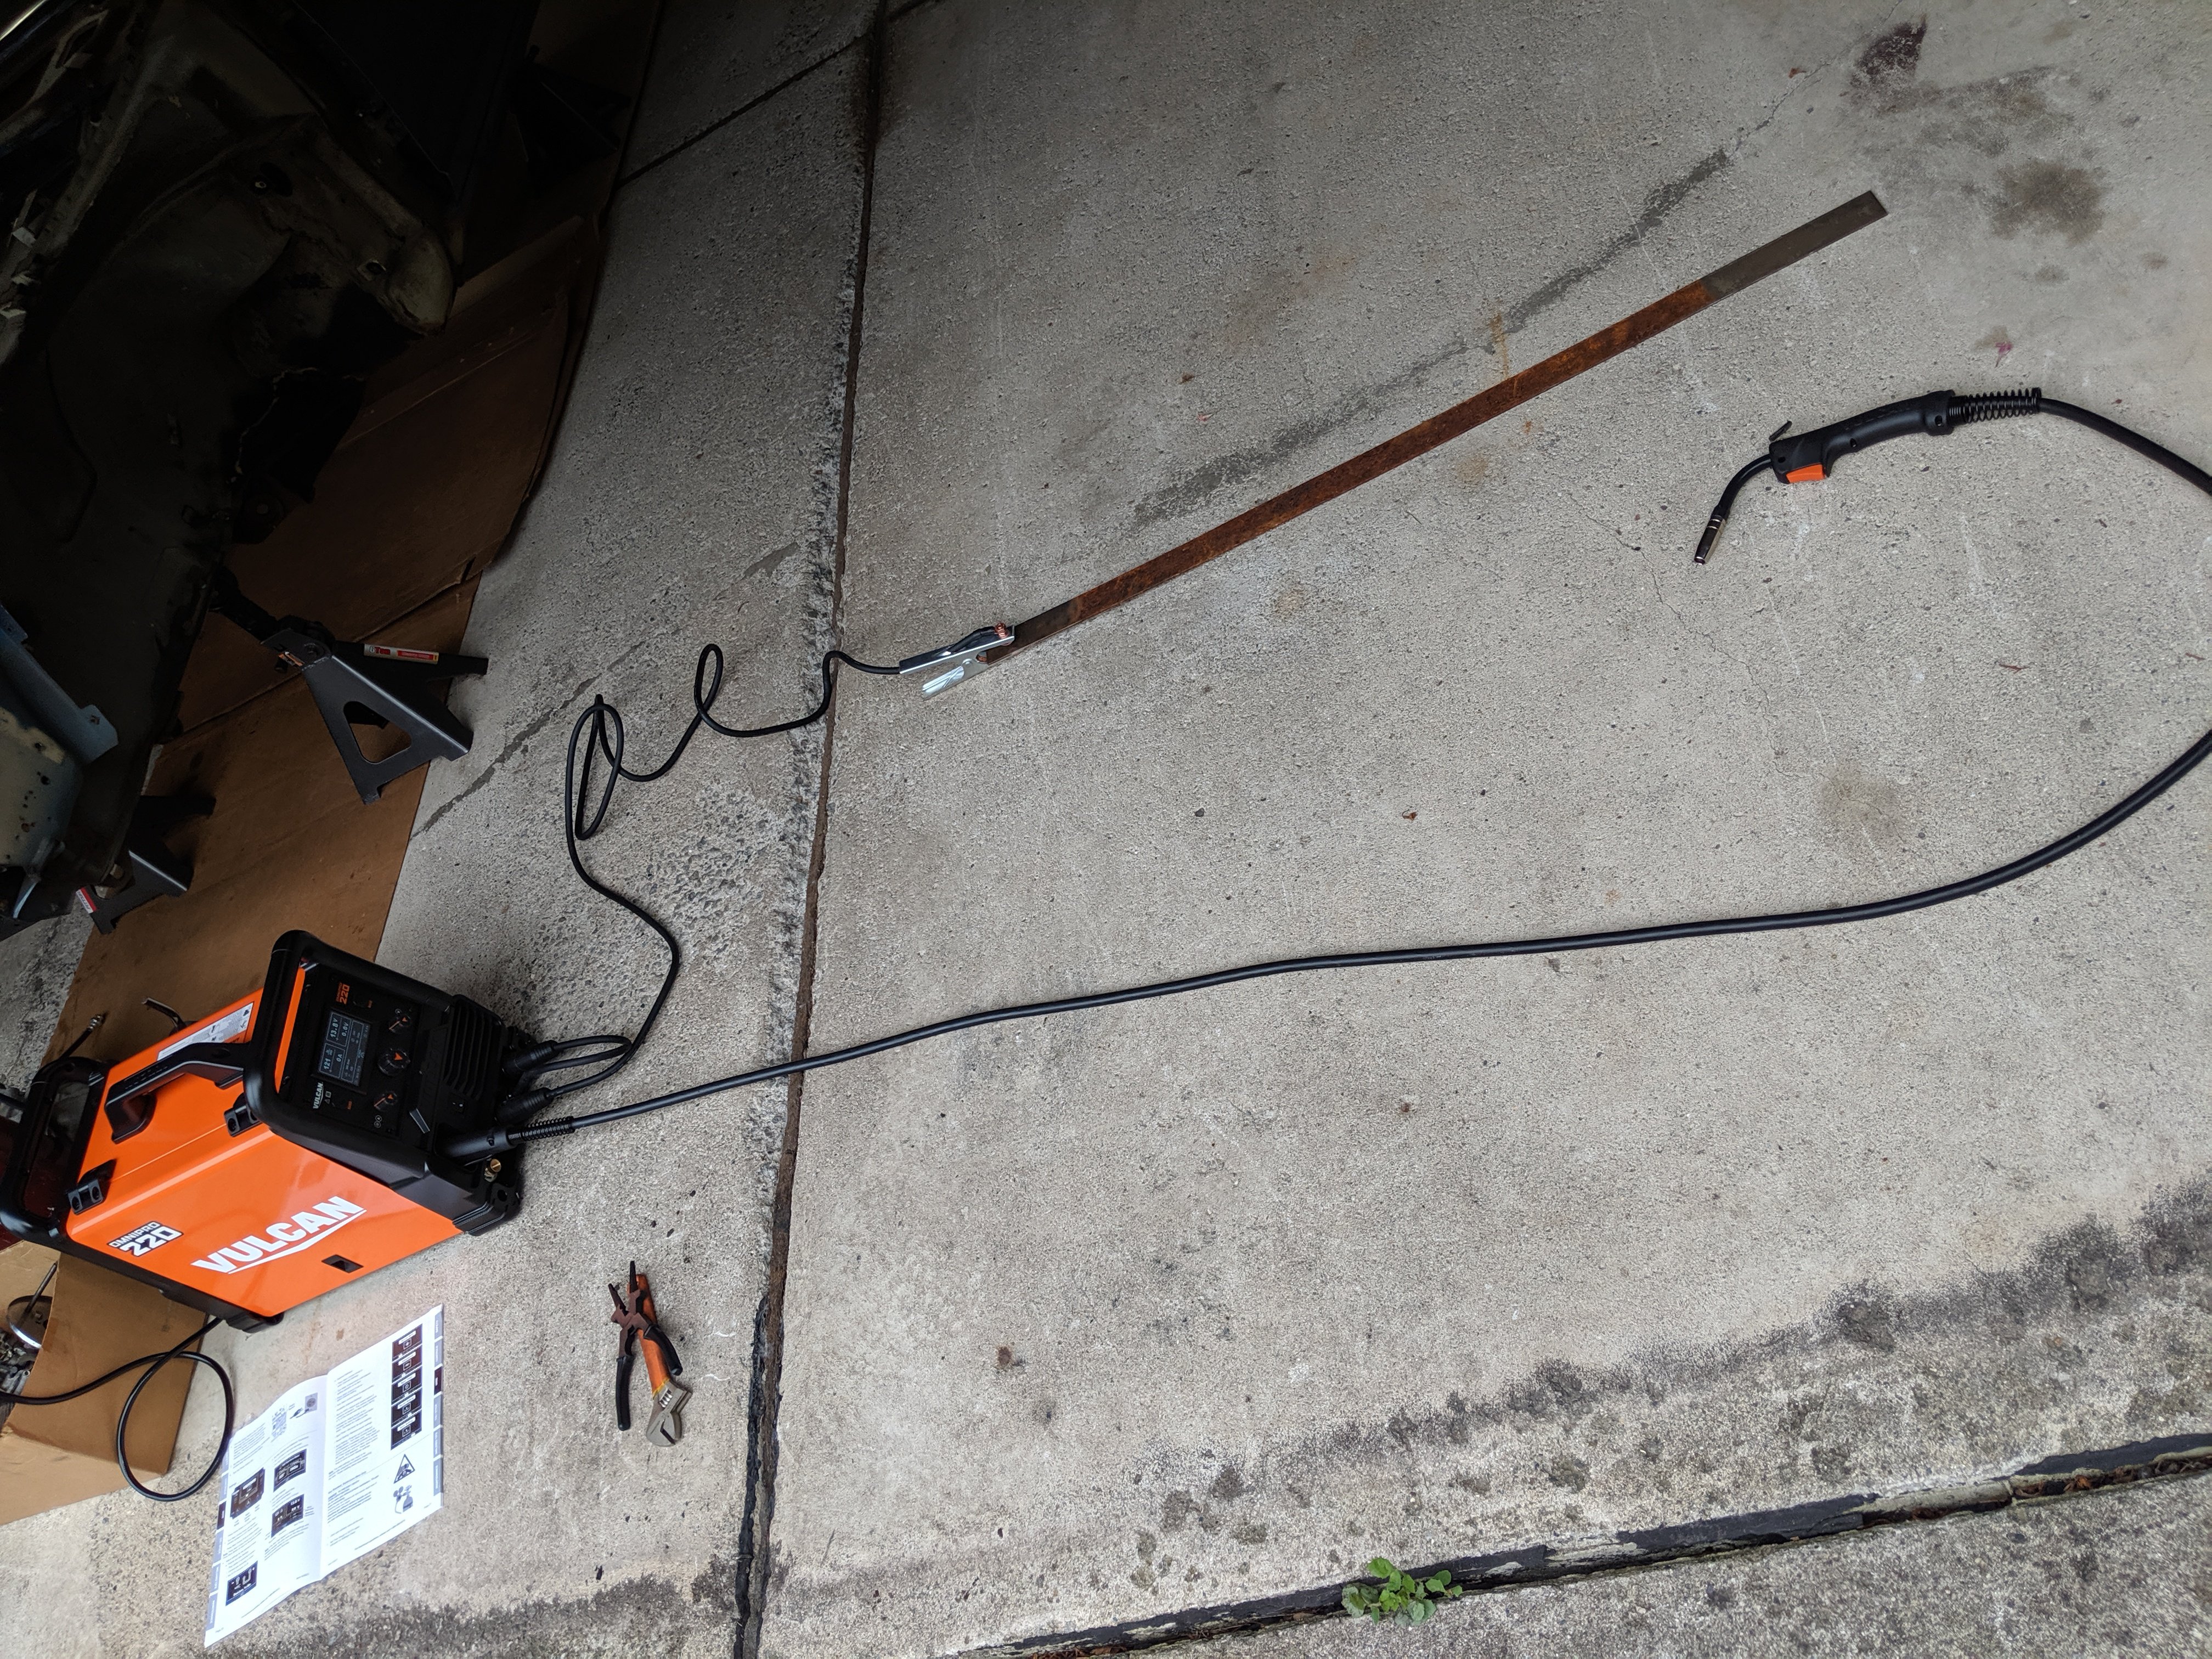
carbuilder723 replied to carbuilder723's topic in Other Engines
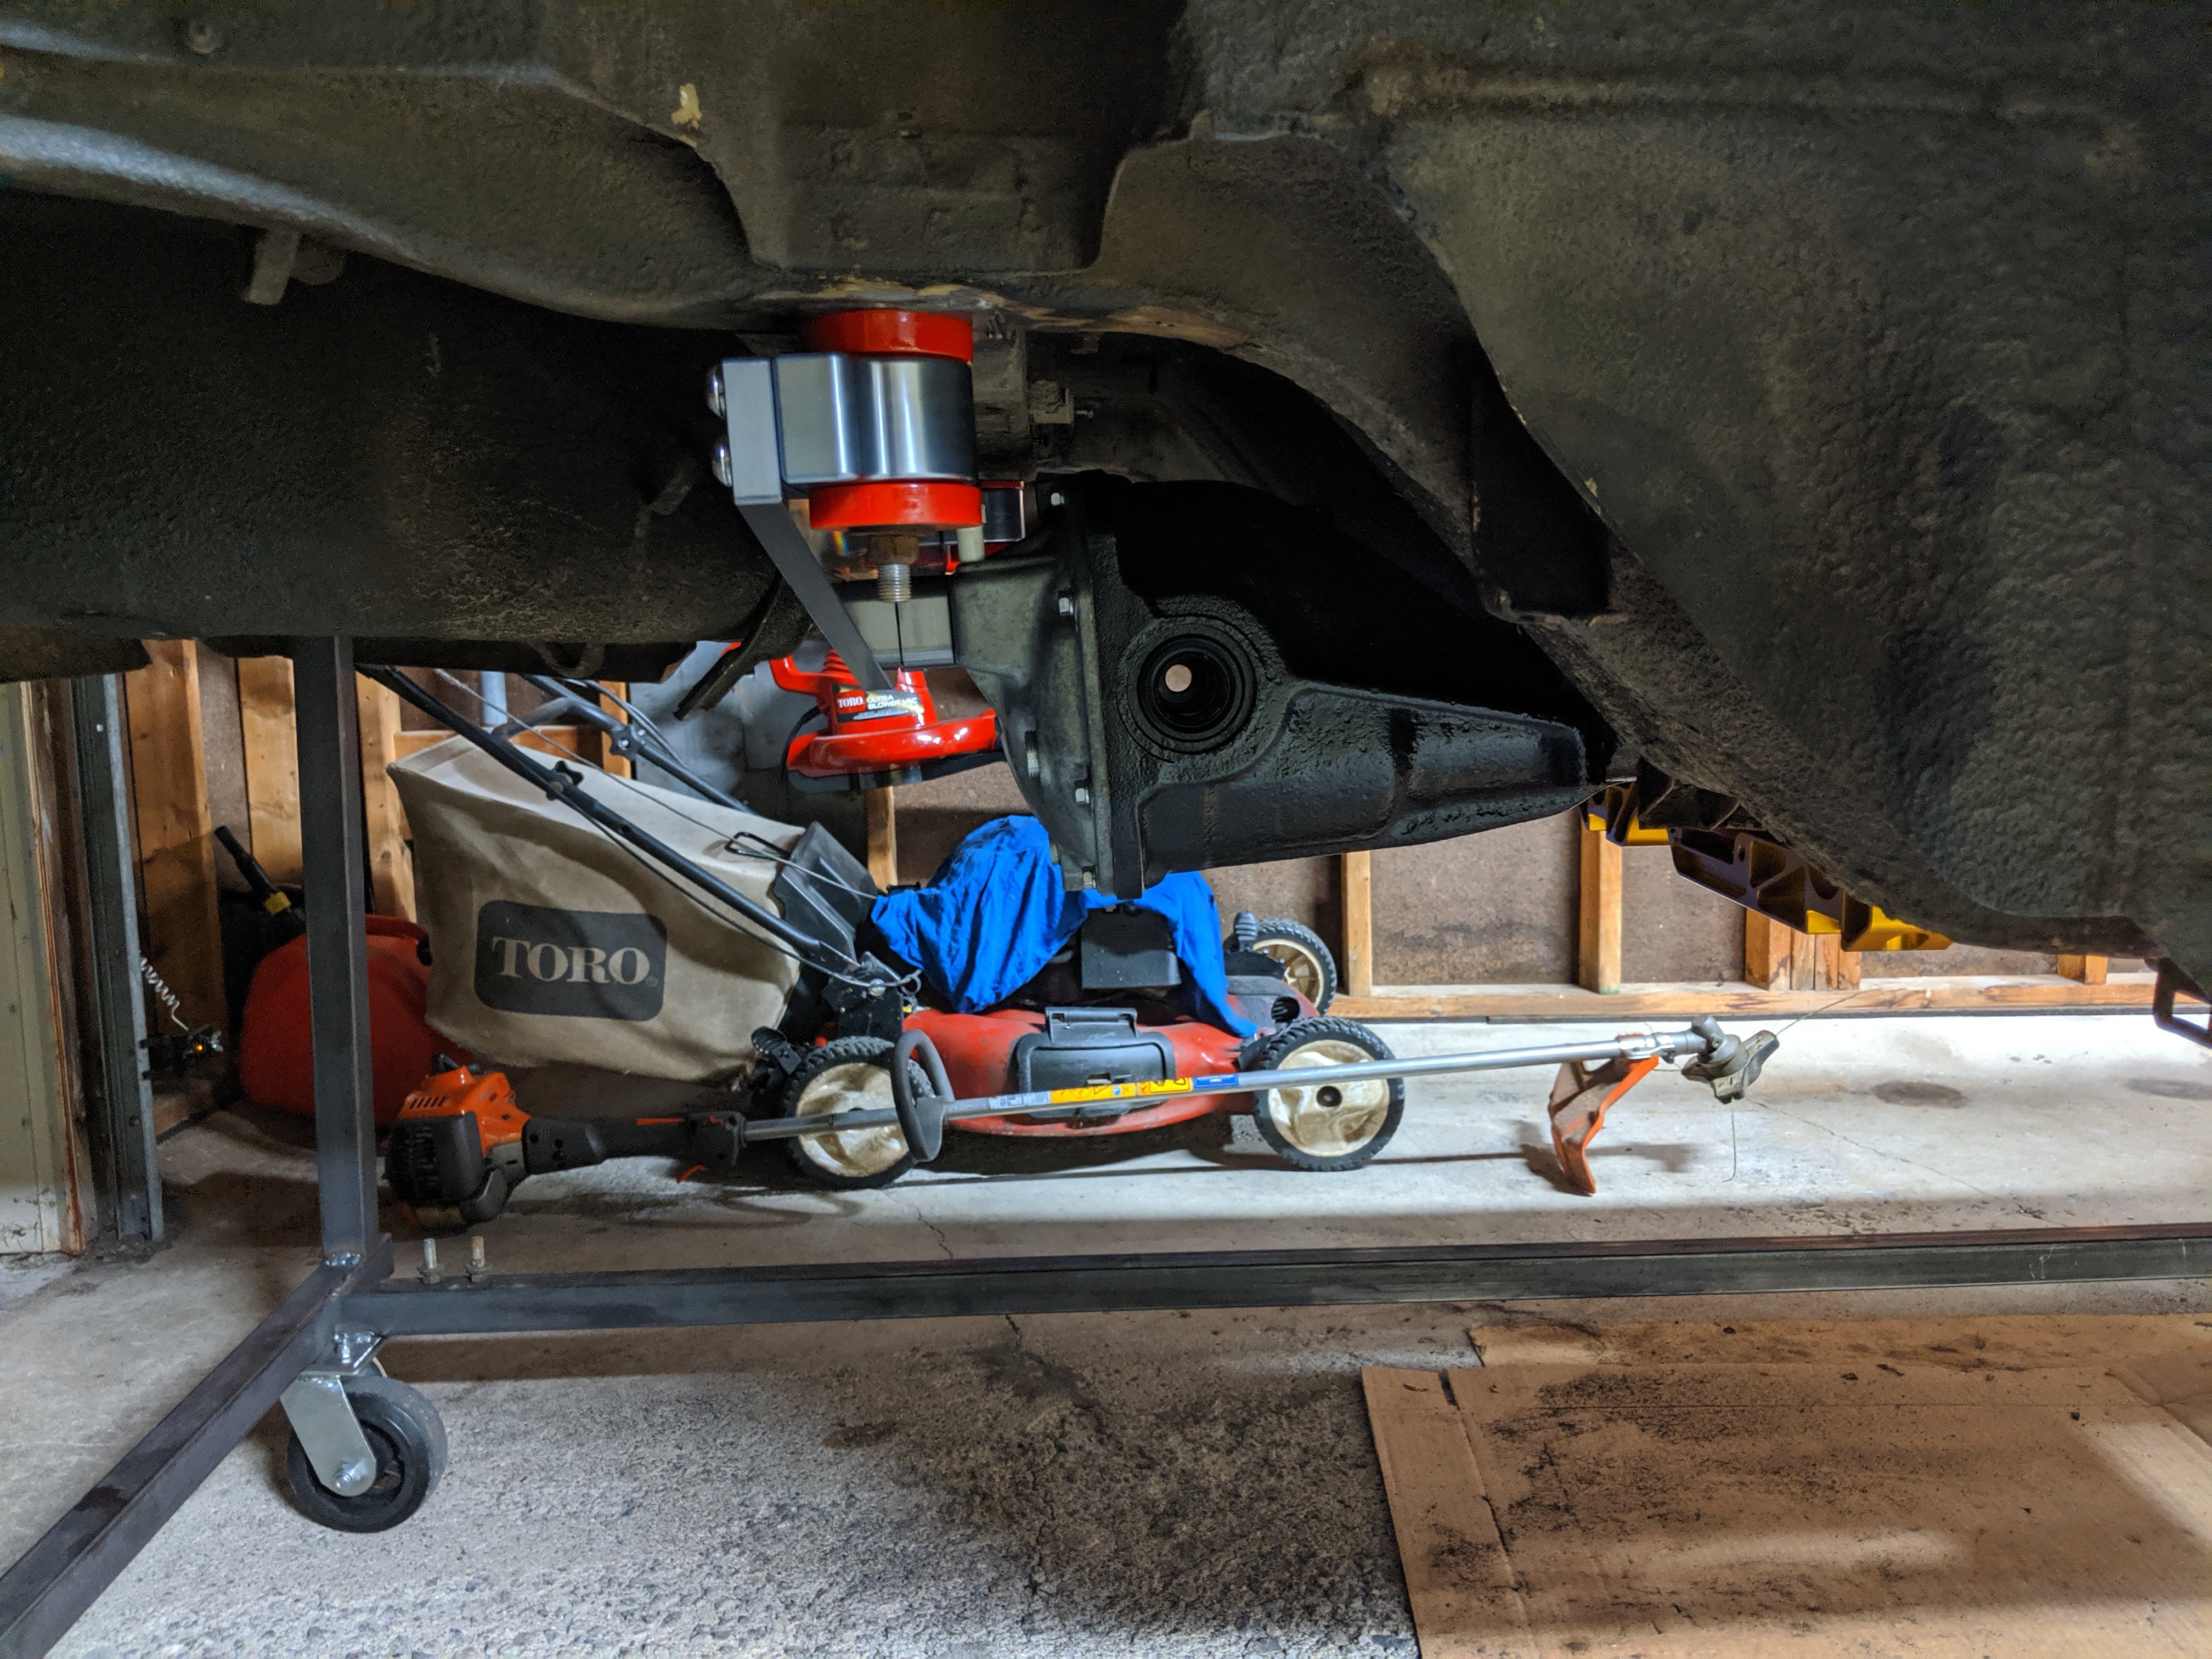
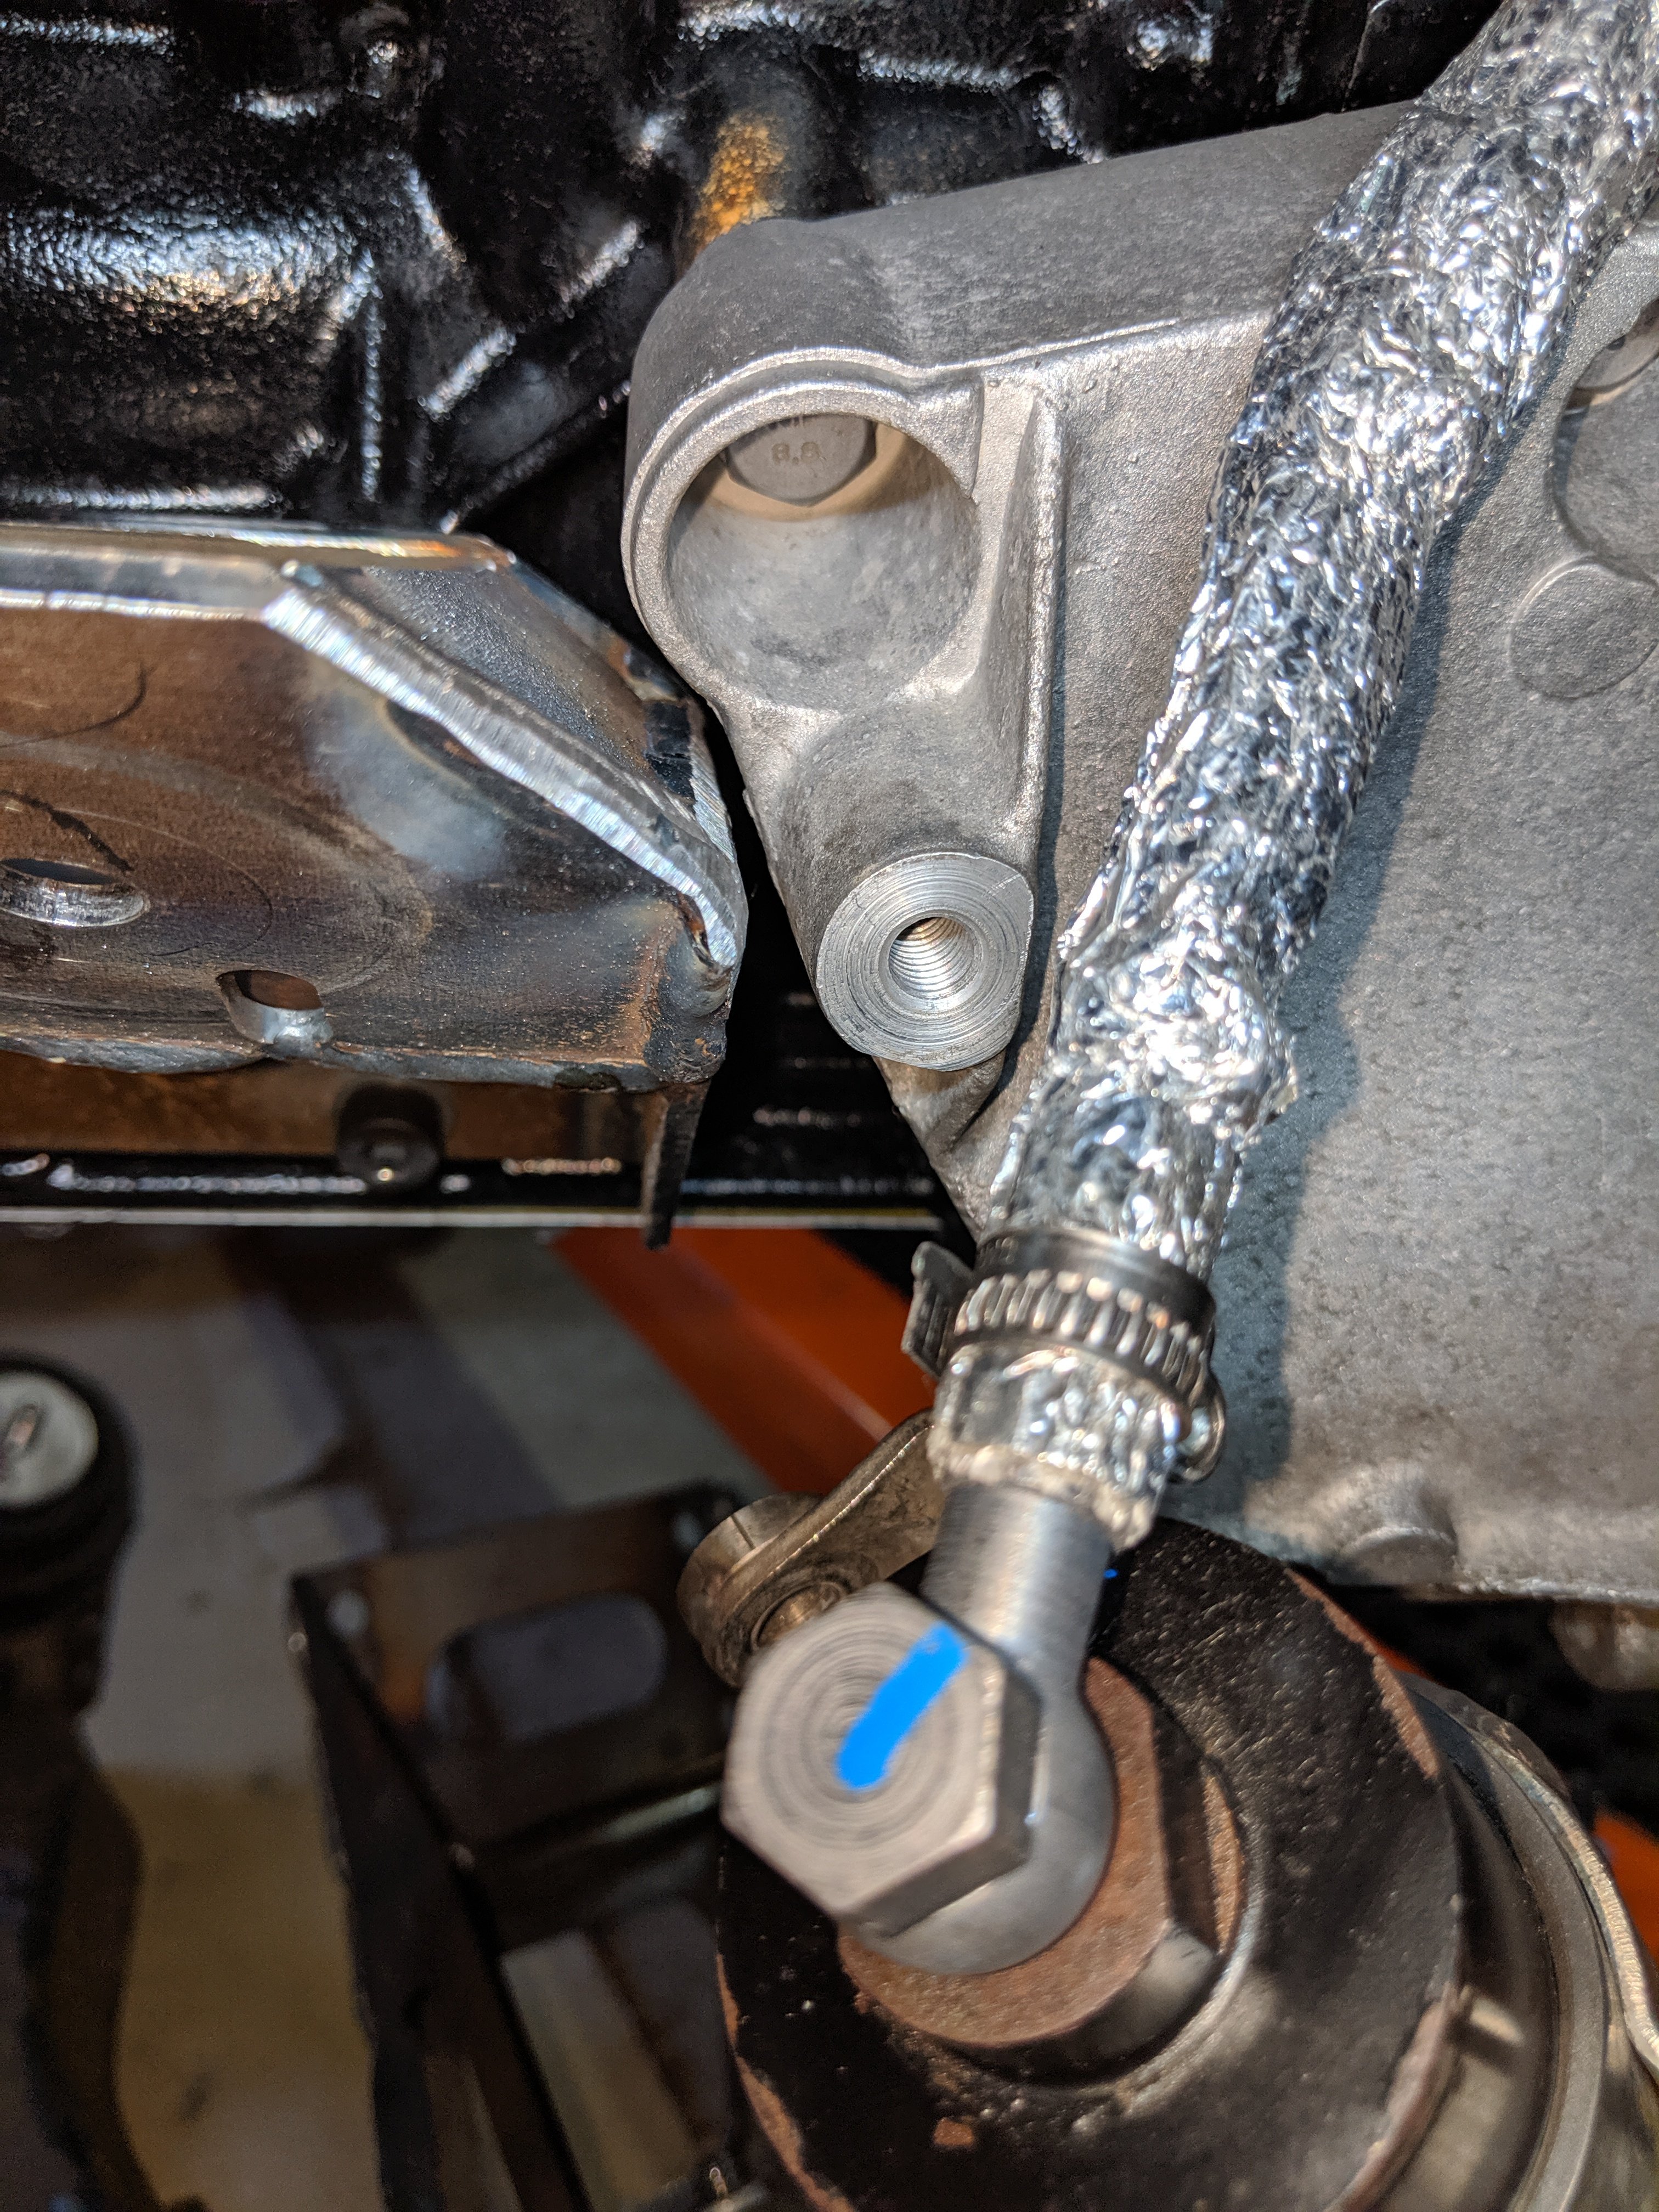
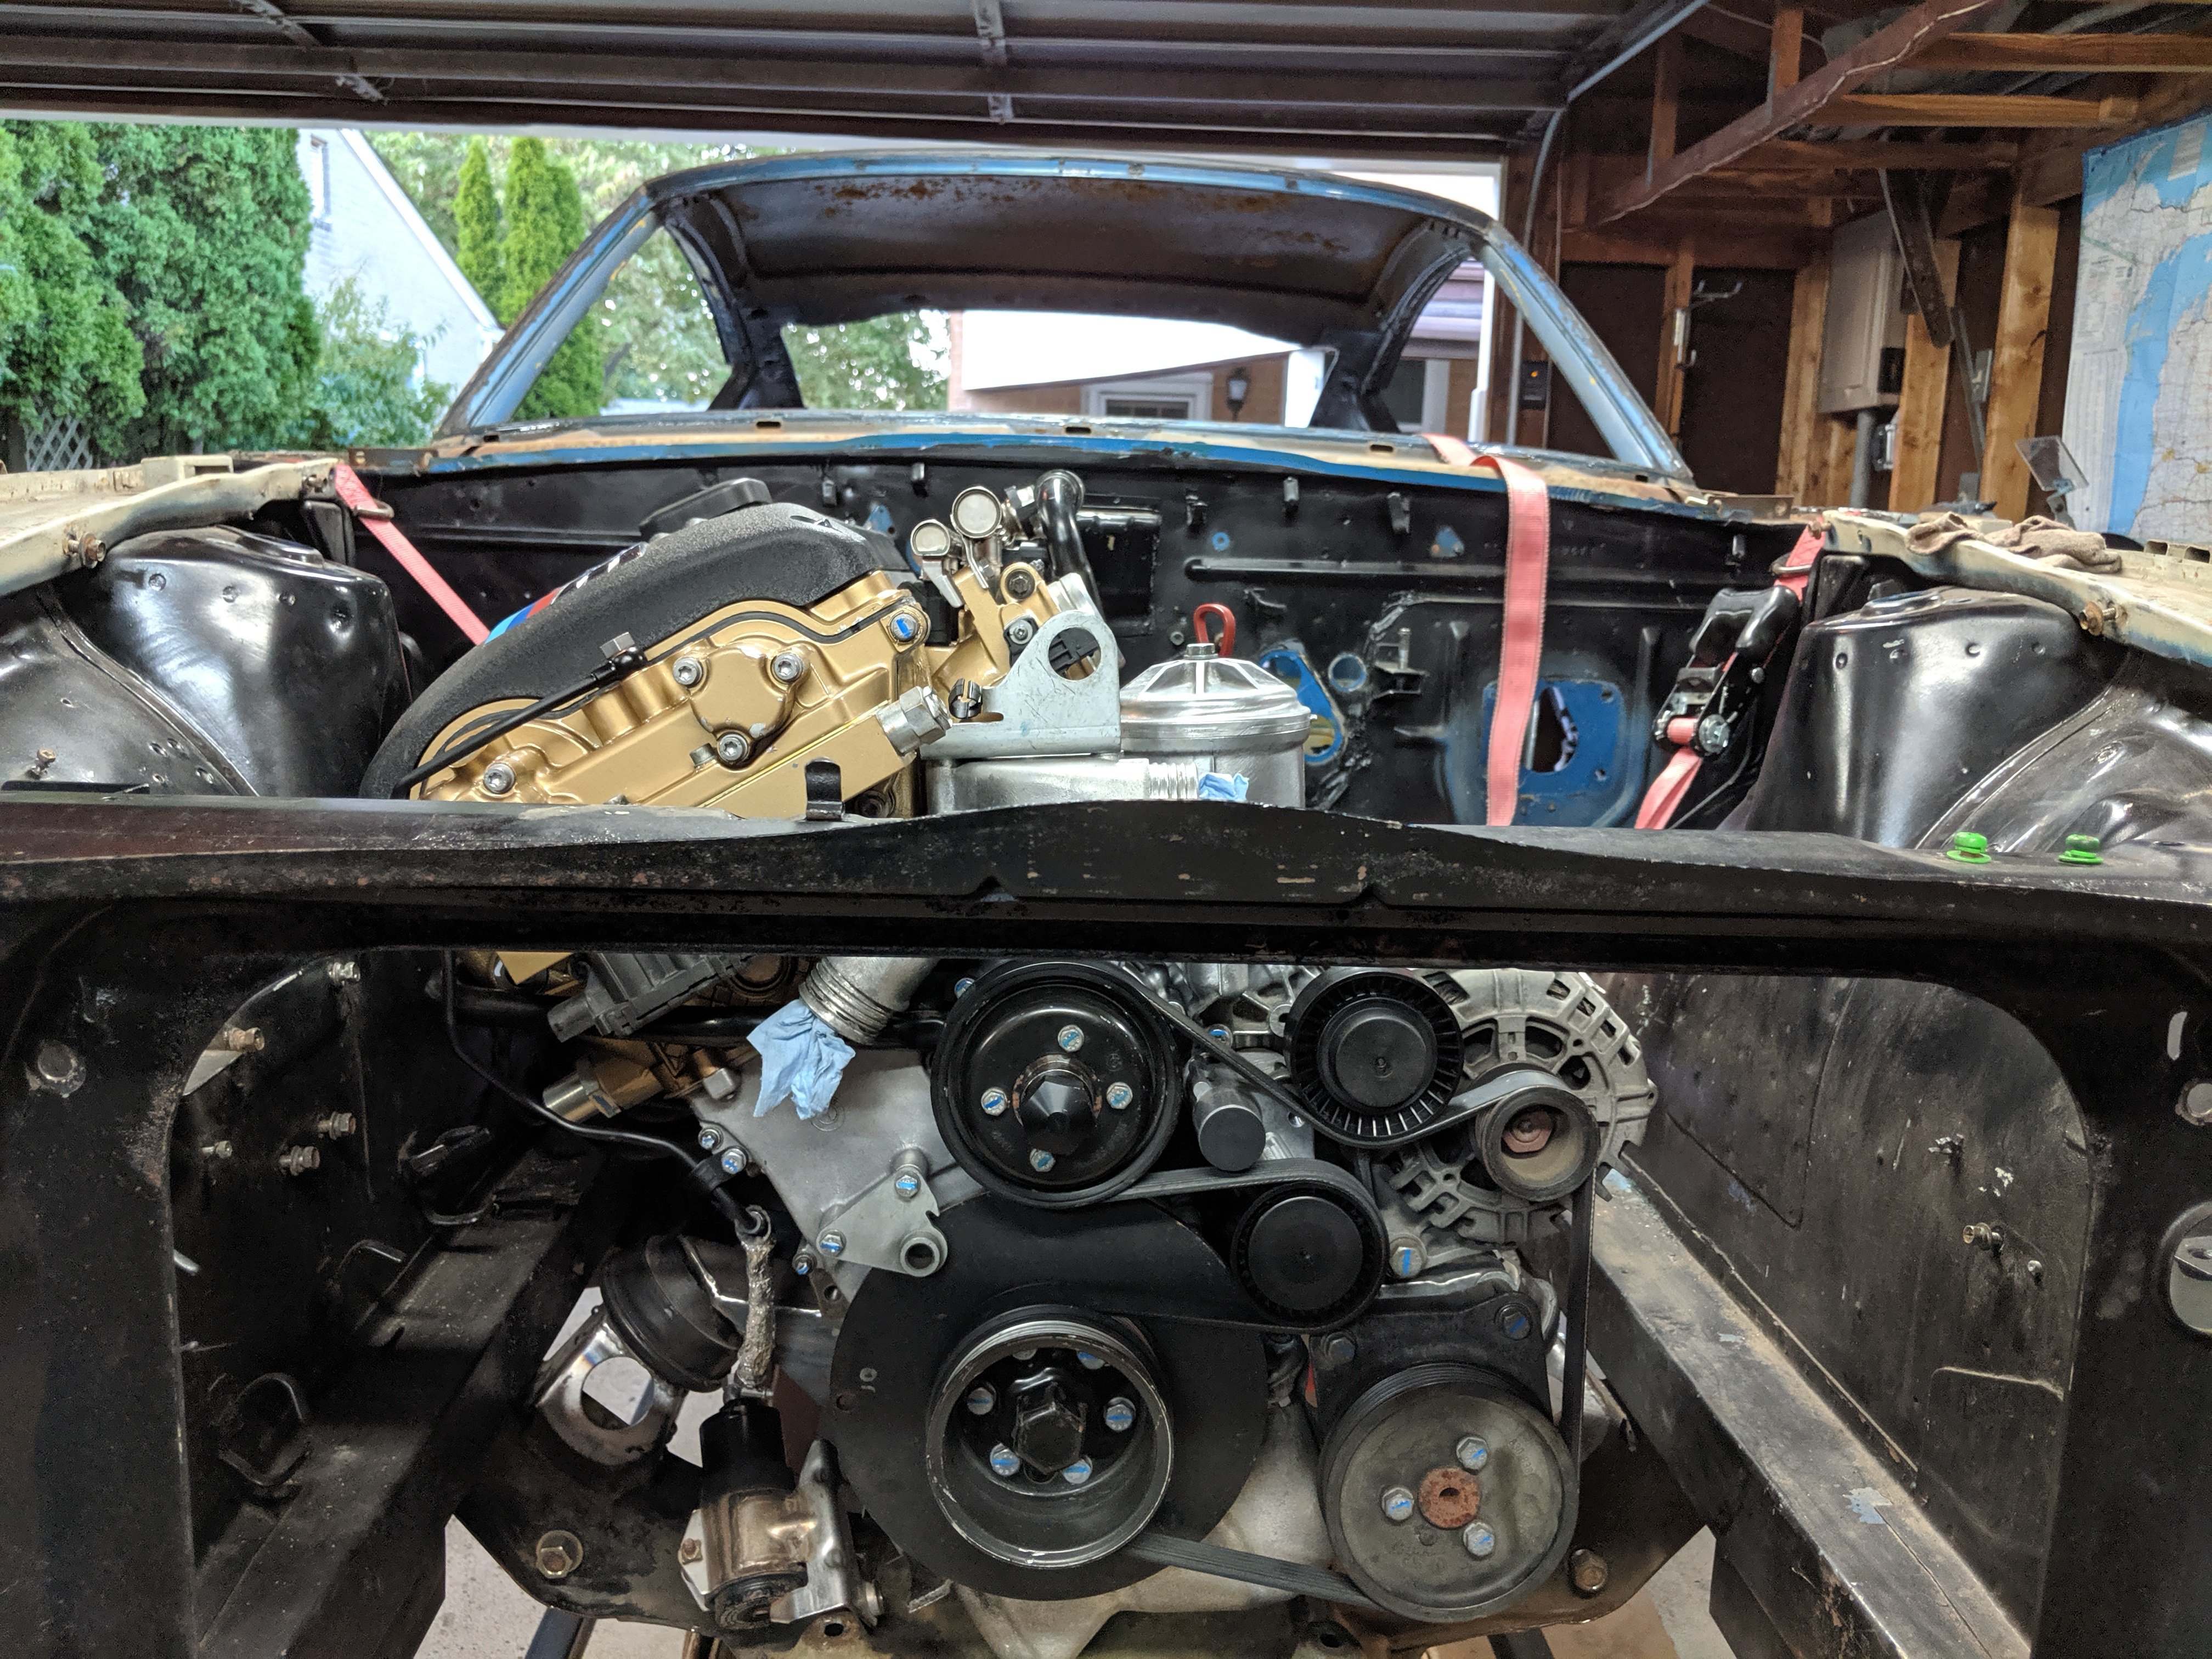
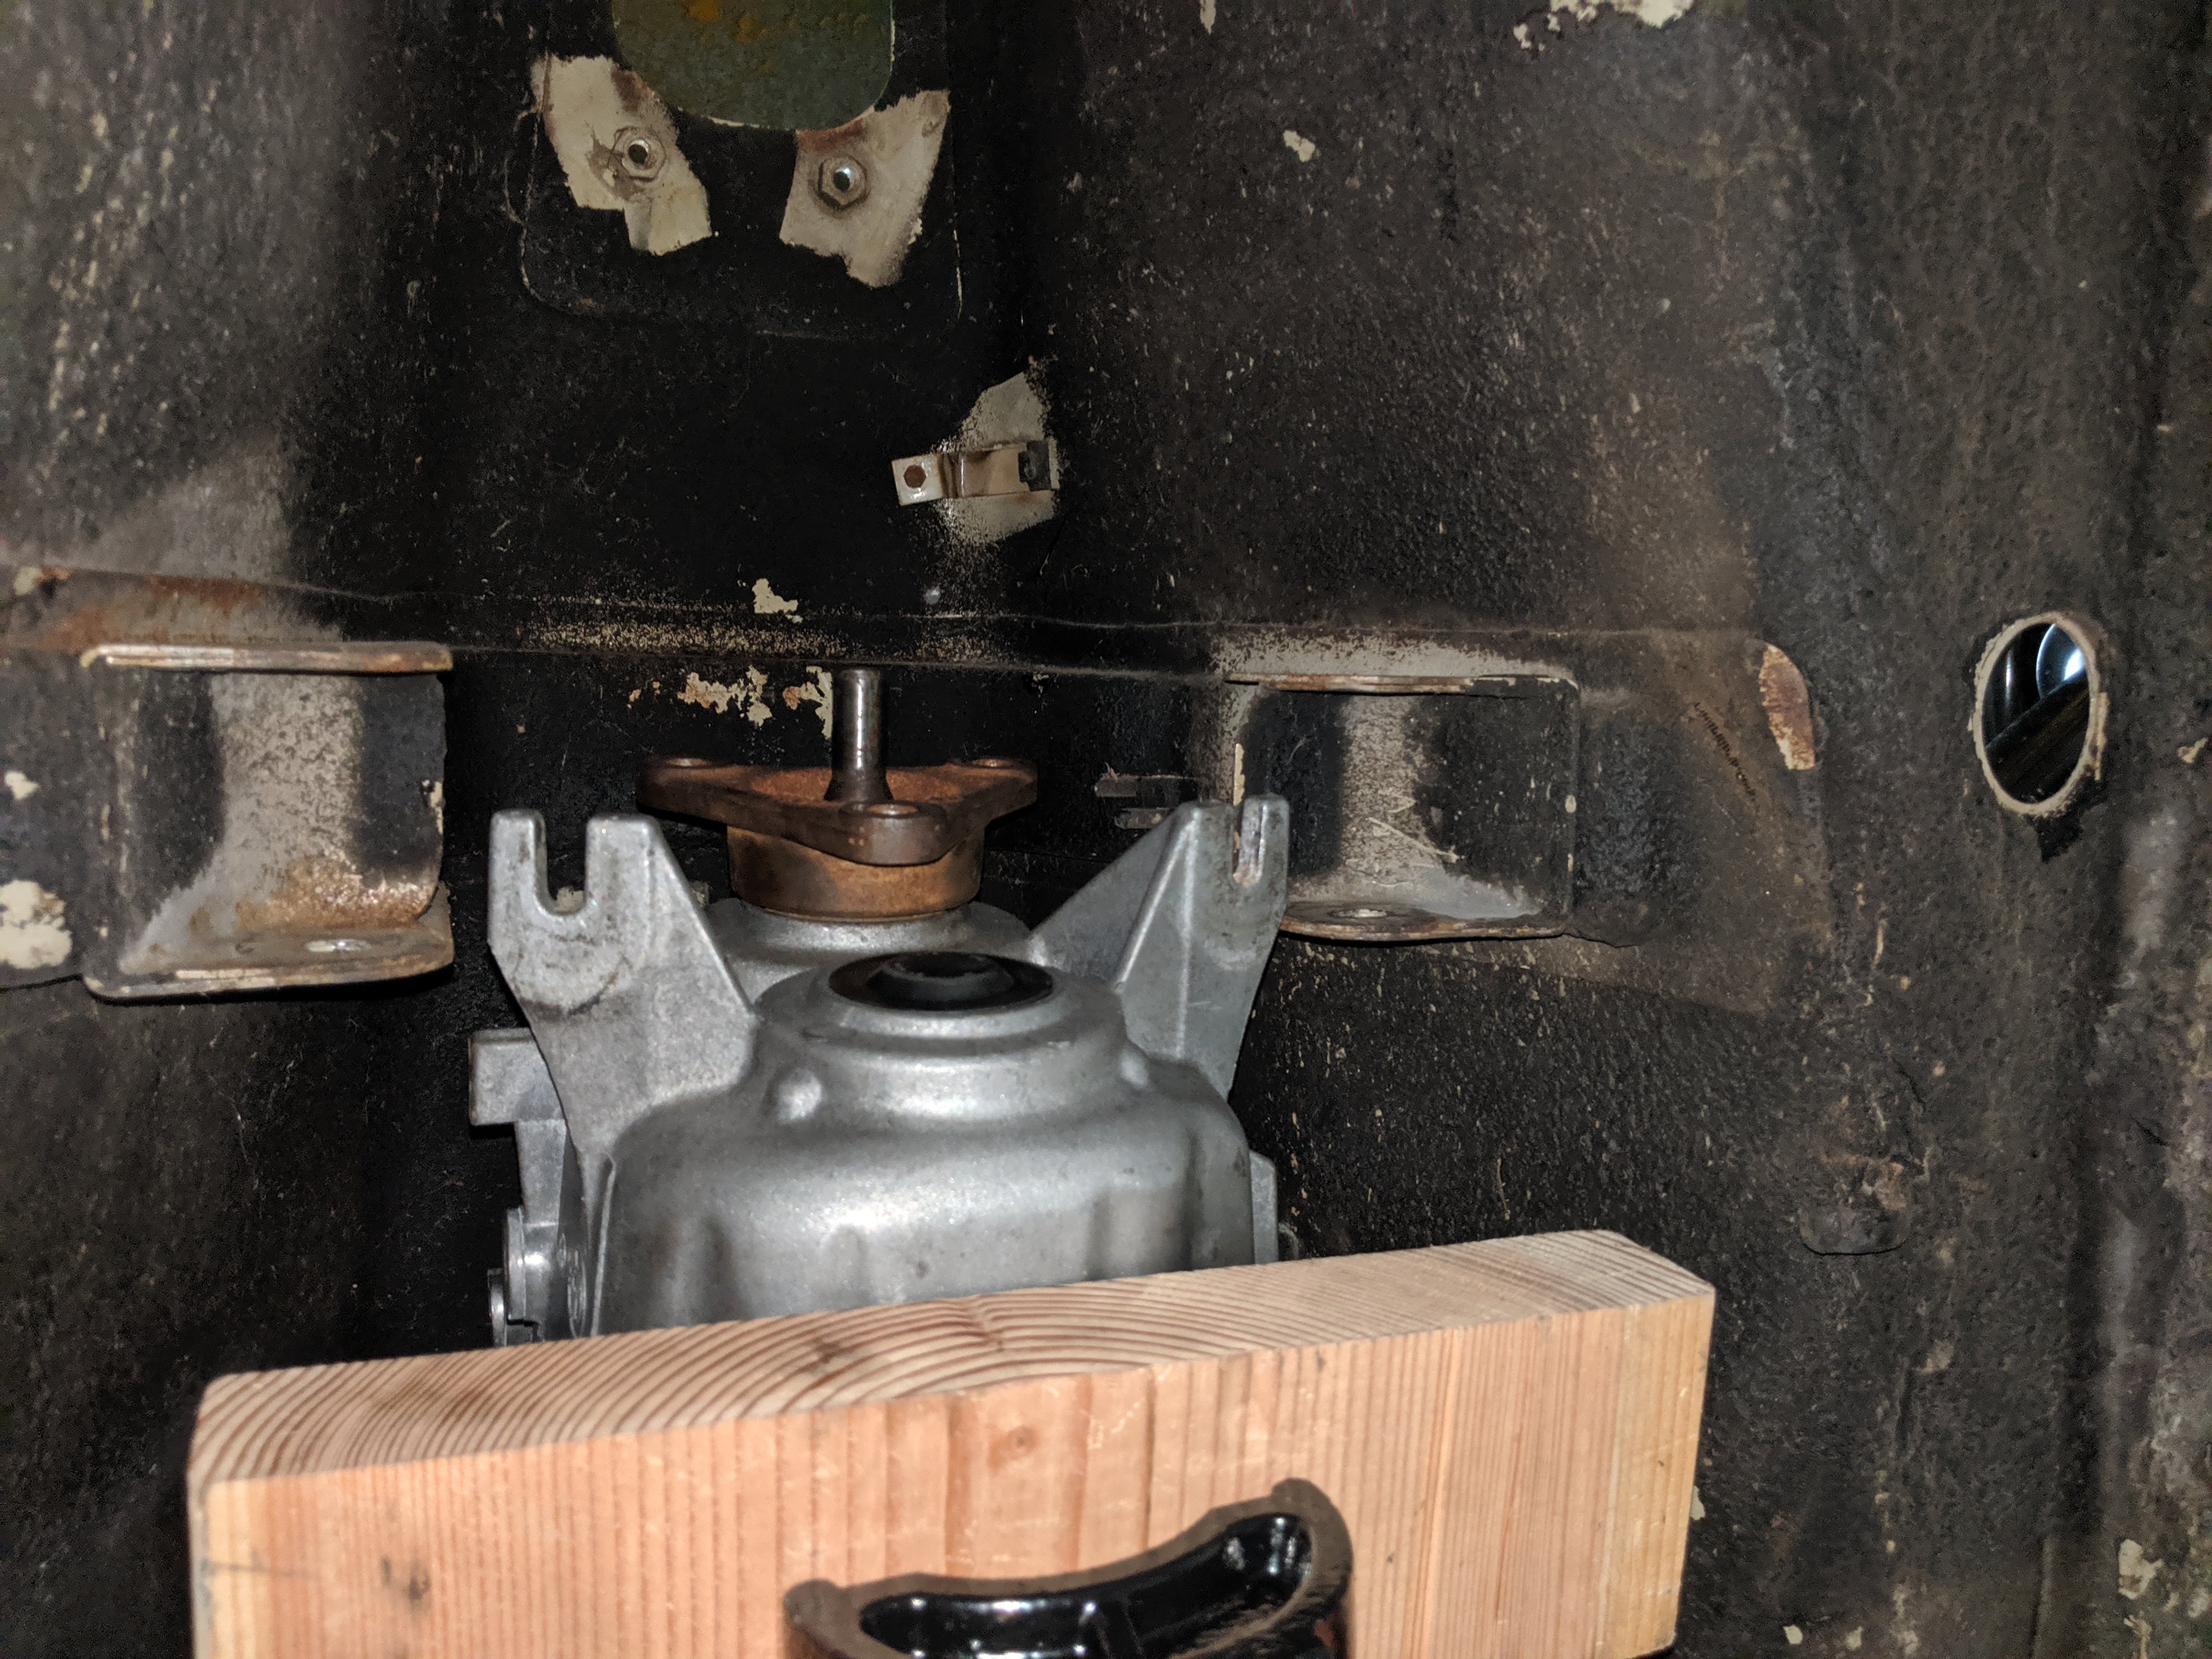
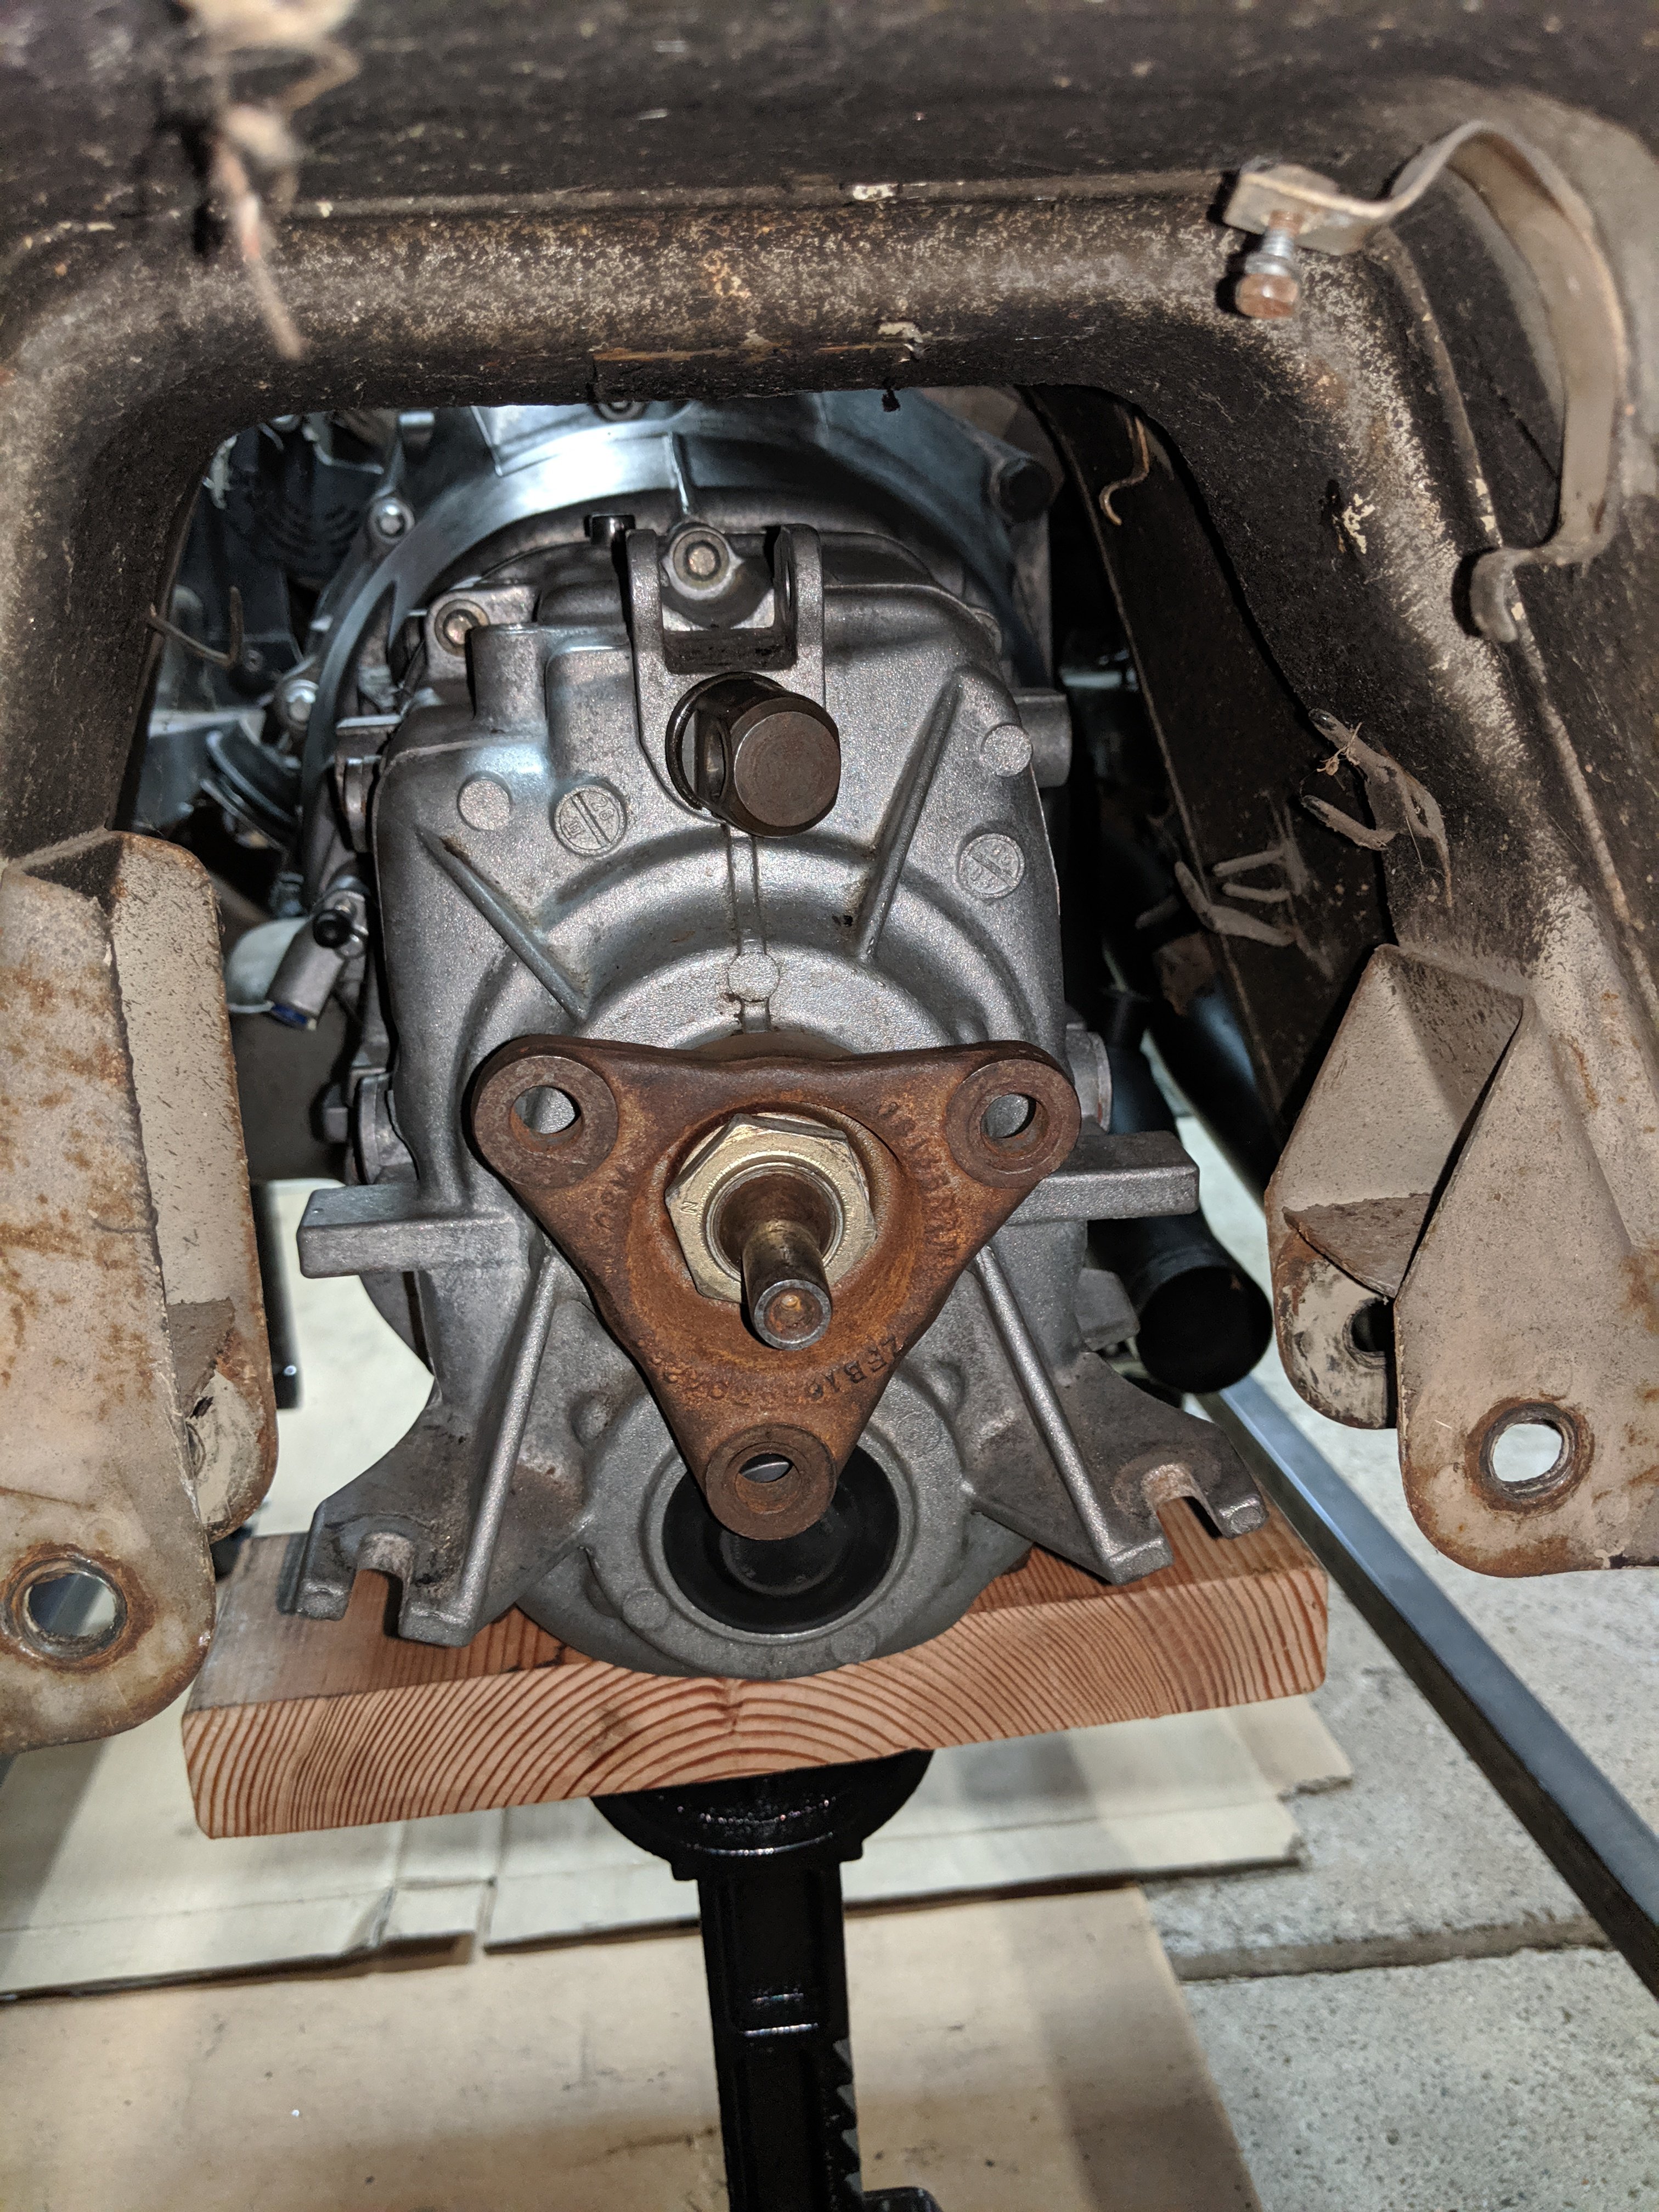
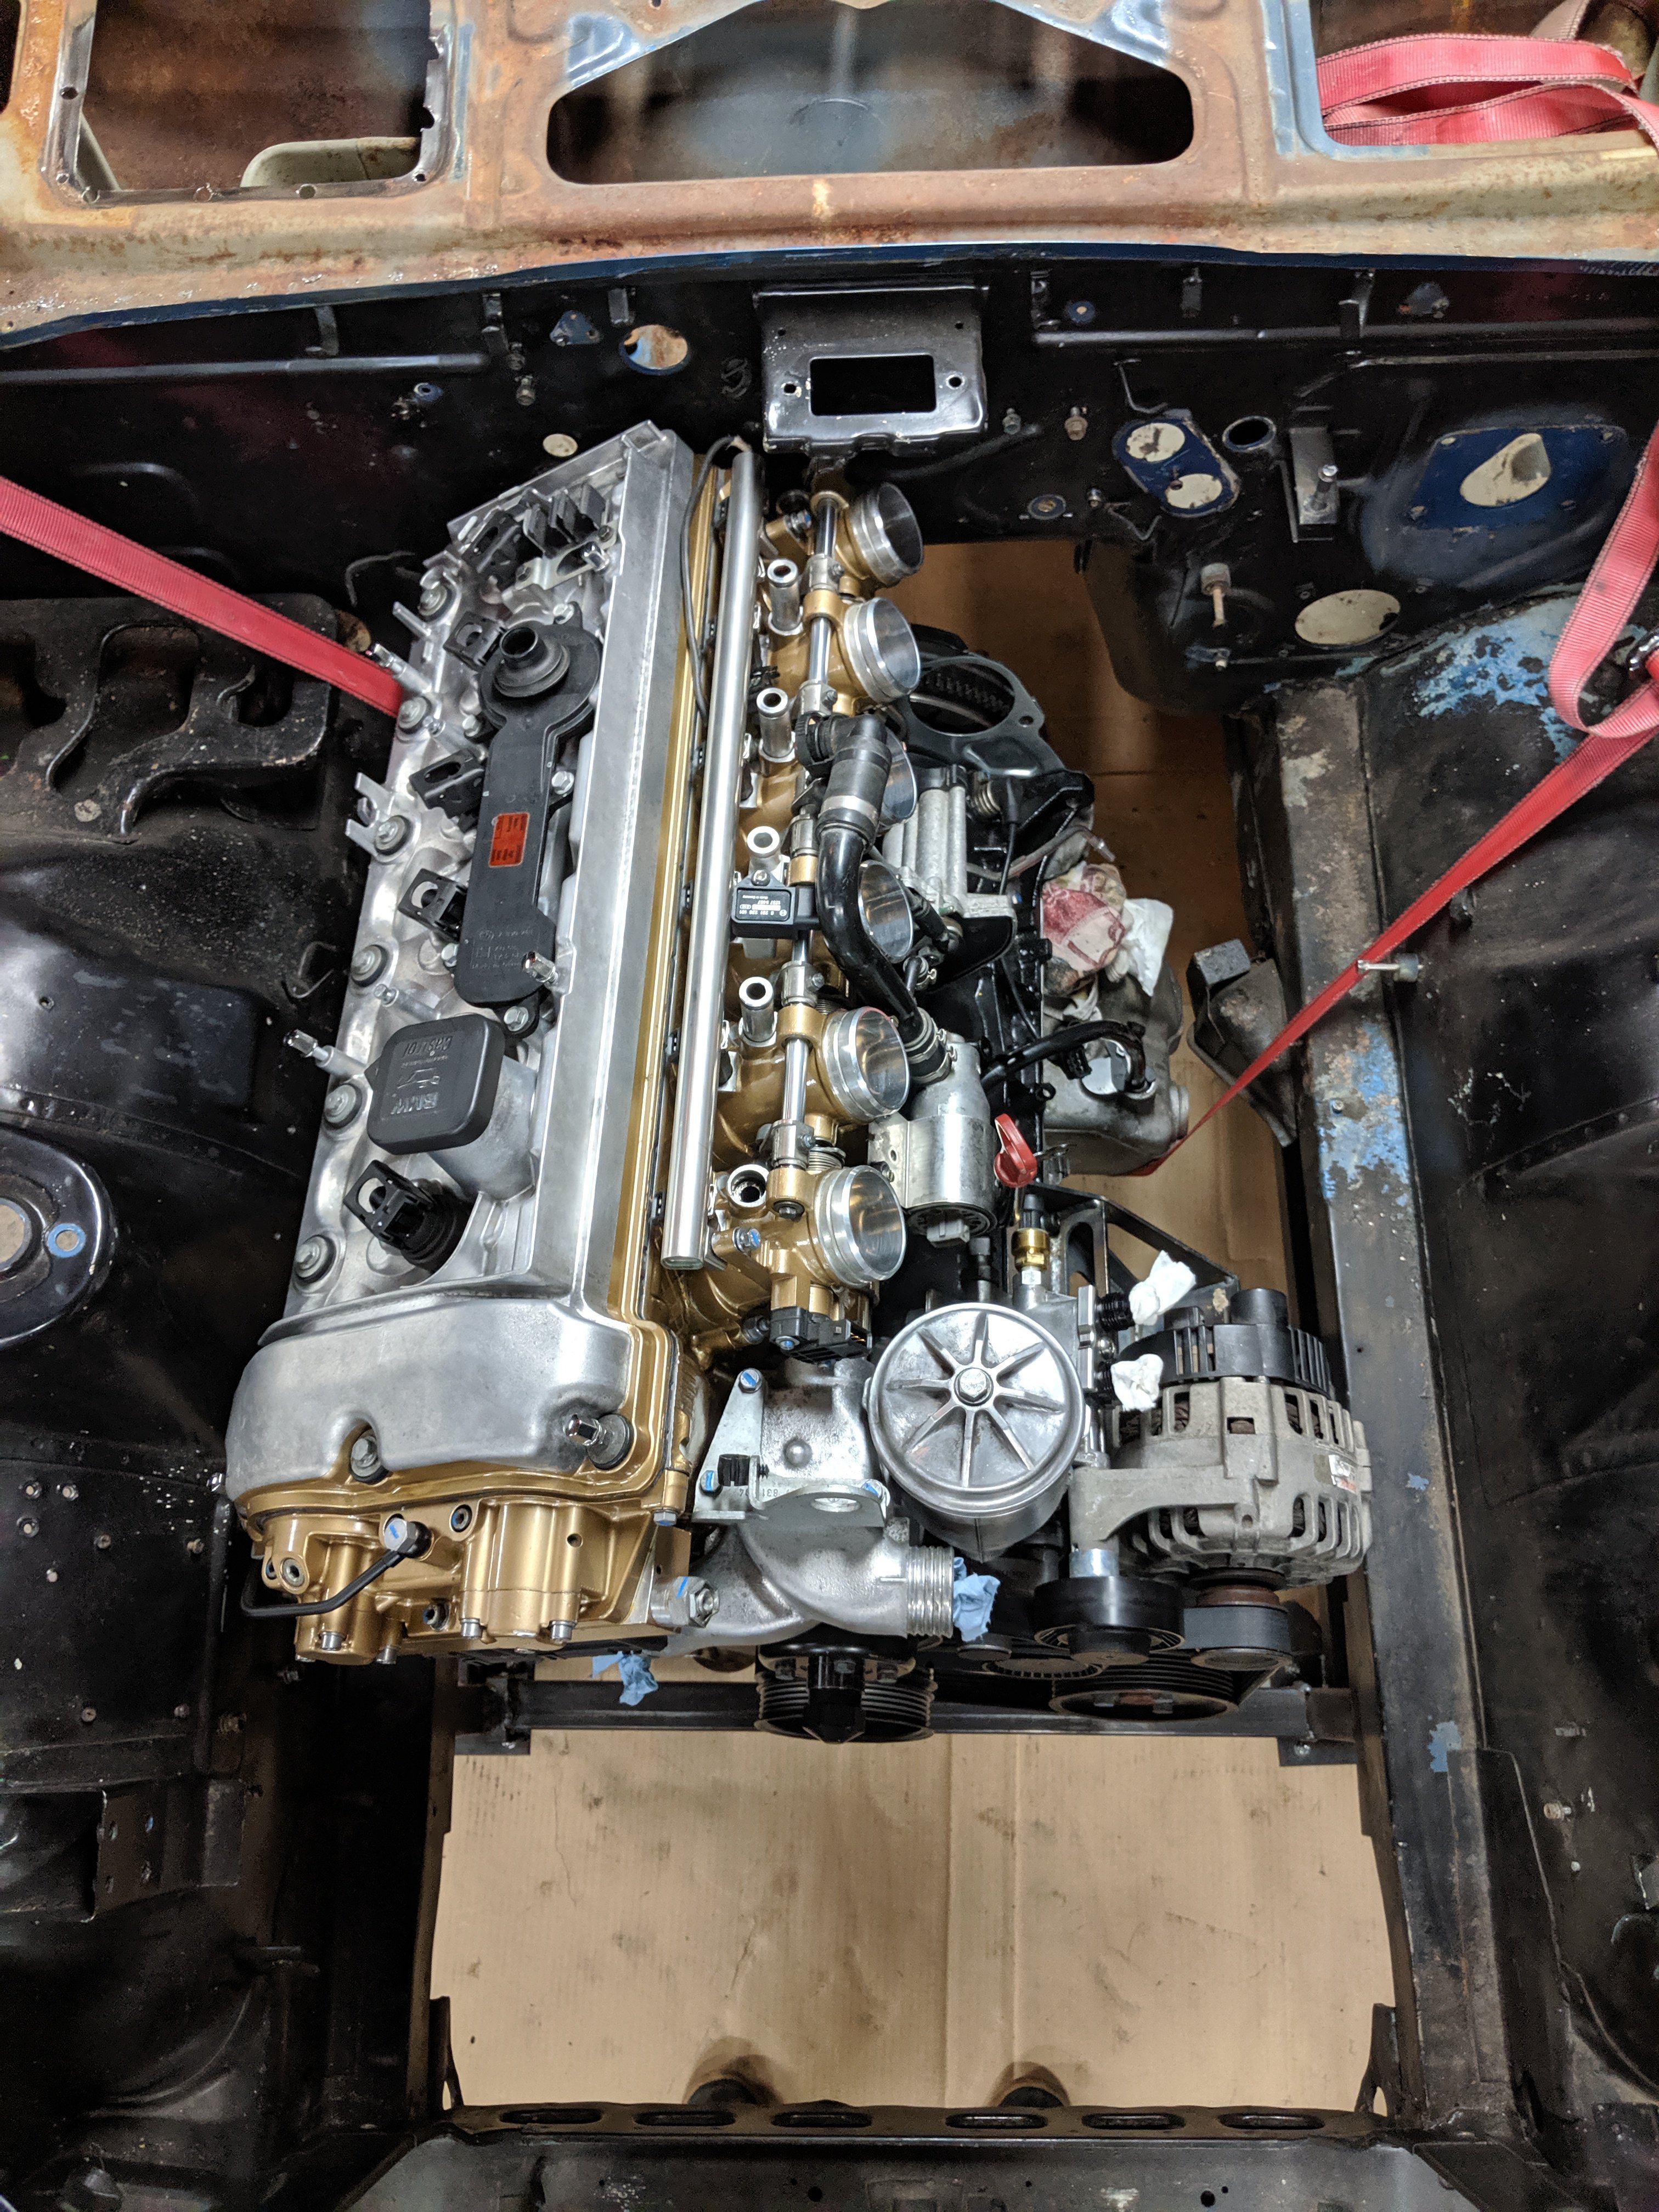
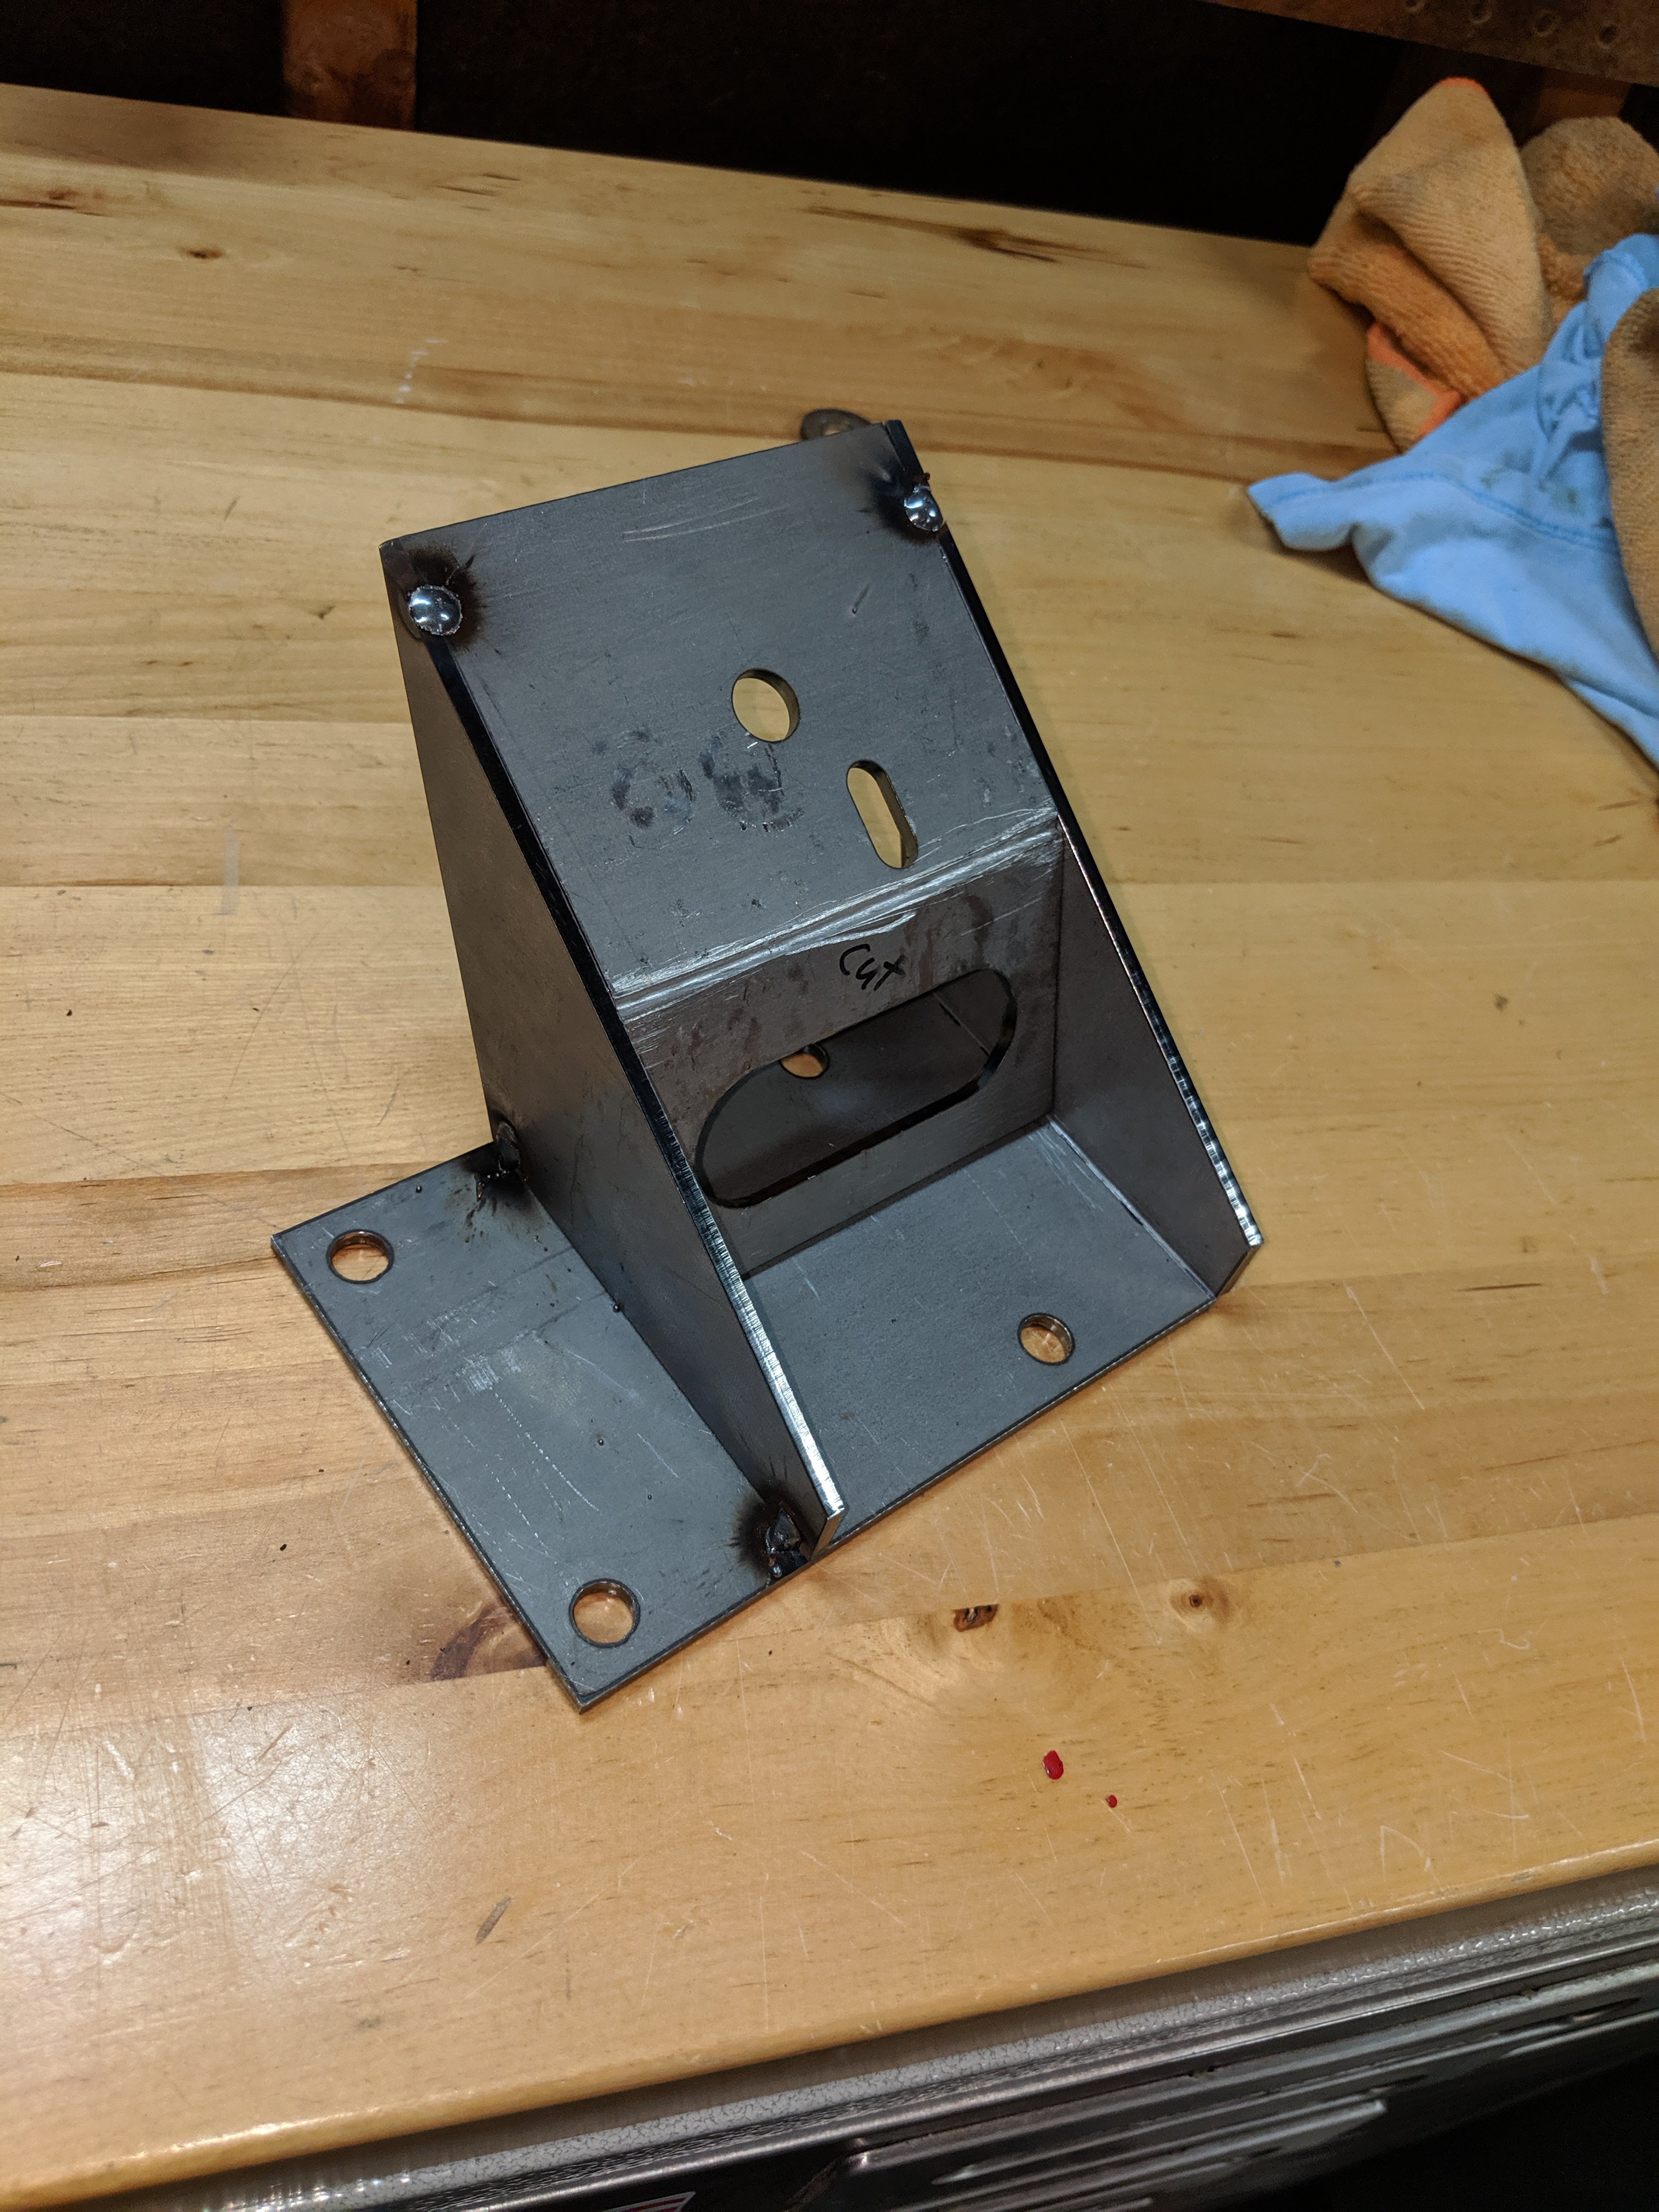
It's been a few weeks, so it's probably about time for an update. Also finally got a cart for the welder. Lifting that thing around while trying to keep the bottle from tipping over was a major PITA. I got the sub-frame engine stand off supports finished and welded in, finished up the driver side engine adapter bracket, and then modified the passenger side adapter bracket to be able to *potentially* install an AC compressor in the future if I decide to go that route. I'll also include the wiring in the engine harness to be able to plug in the compressor so that it's already there a future proofed. The I started to look at the steering situation. This was an issue I saw coming so it was no surprise to confirm that the steering rack will need to be moved. I have an old e46 M3 power steering rack too that I'm considering using, but haven't made the decision yet to stick with Datsun mechanical steering or to go with the BMW rack. Nonetheless, I've torn apart the BMW rack and am going to rebuild it with all new seals etc... if I end up not using it, I'll just sell it. Now with all of the engine mounting modifications completed, it was time for test fit #2. I dropped the engine in and found that the clearance issue with the hood latch bracket was solved by lowering the engine and that the clearance to the hood should also be much more acceptable now. The other oil pan to driver side TC mount clearance remained sufficient. With the engine in and sitting pretty well, I started to bolt up the transmission for the first time. With a lot of maneuvering, I managed to get it bolted up and the tail end supported. The BMW transmission mounts line up nearly perfectly with the stock body mounts on the car. The trans cross member will take a little work, but that's expected. Also, installed the shifter just for kicks and found that I will need to shorten it up a bit, or extend the hold in the tunnel, we'll see where the seats land and how the ergo works out. Next I'll need to get the rear end in and that I can start looking at drive line angles.
-
BMW S54 into S30 Chassis - Build Thread
carbuilder723 replied to carbuilder723's topic in Other Engines
That is definitely on the list of things to look at next go around. I am running pretty much the entire rear suspension set up from T3, so theoretically that shouldn't change much, but worth noting nonetheless. -
BMW S54 into S30 Chassis - Build Thread
carbuilder723 replied to carbuilder723's topic in Other Engines
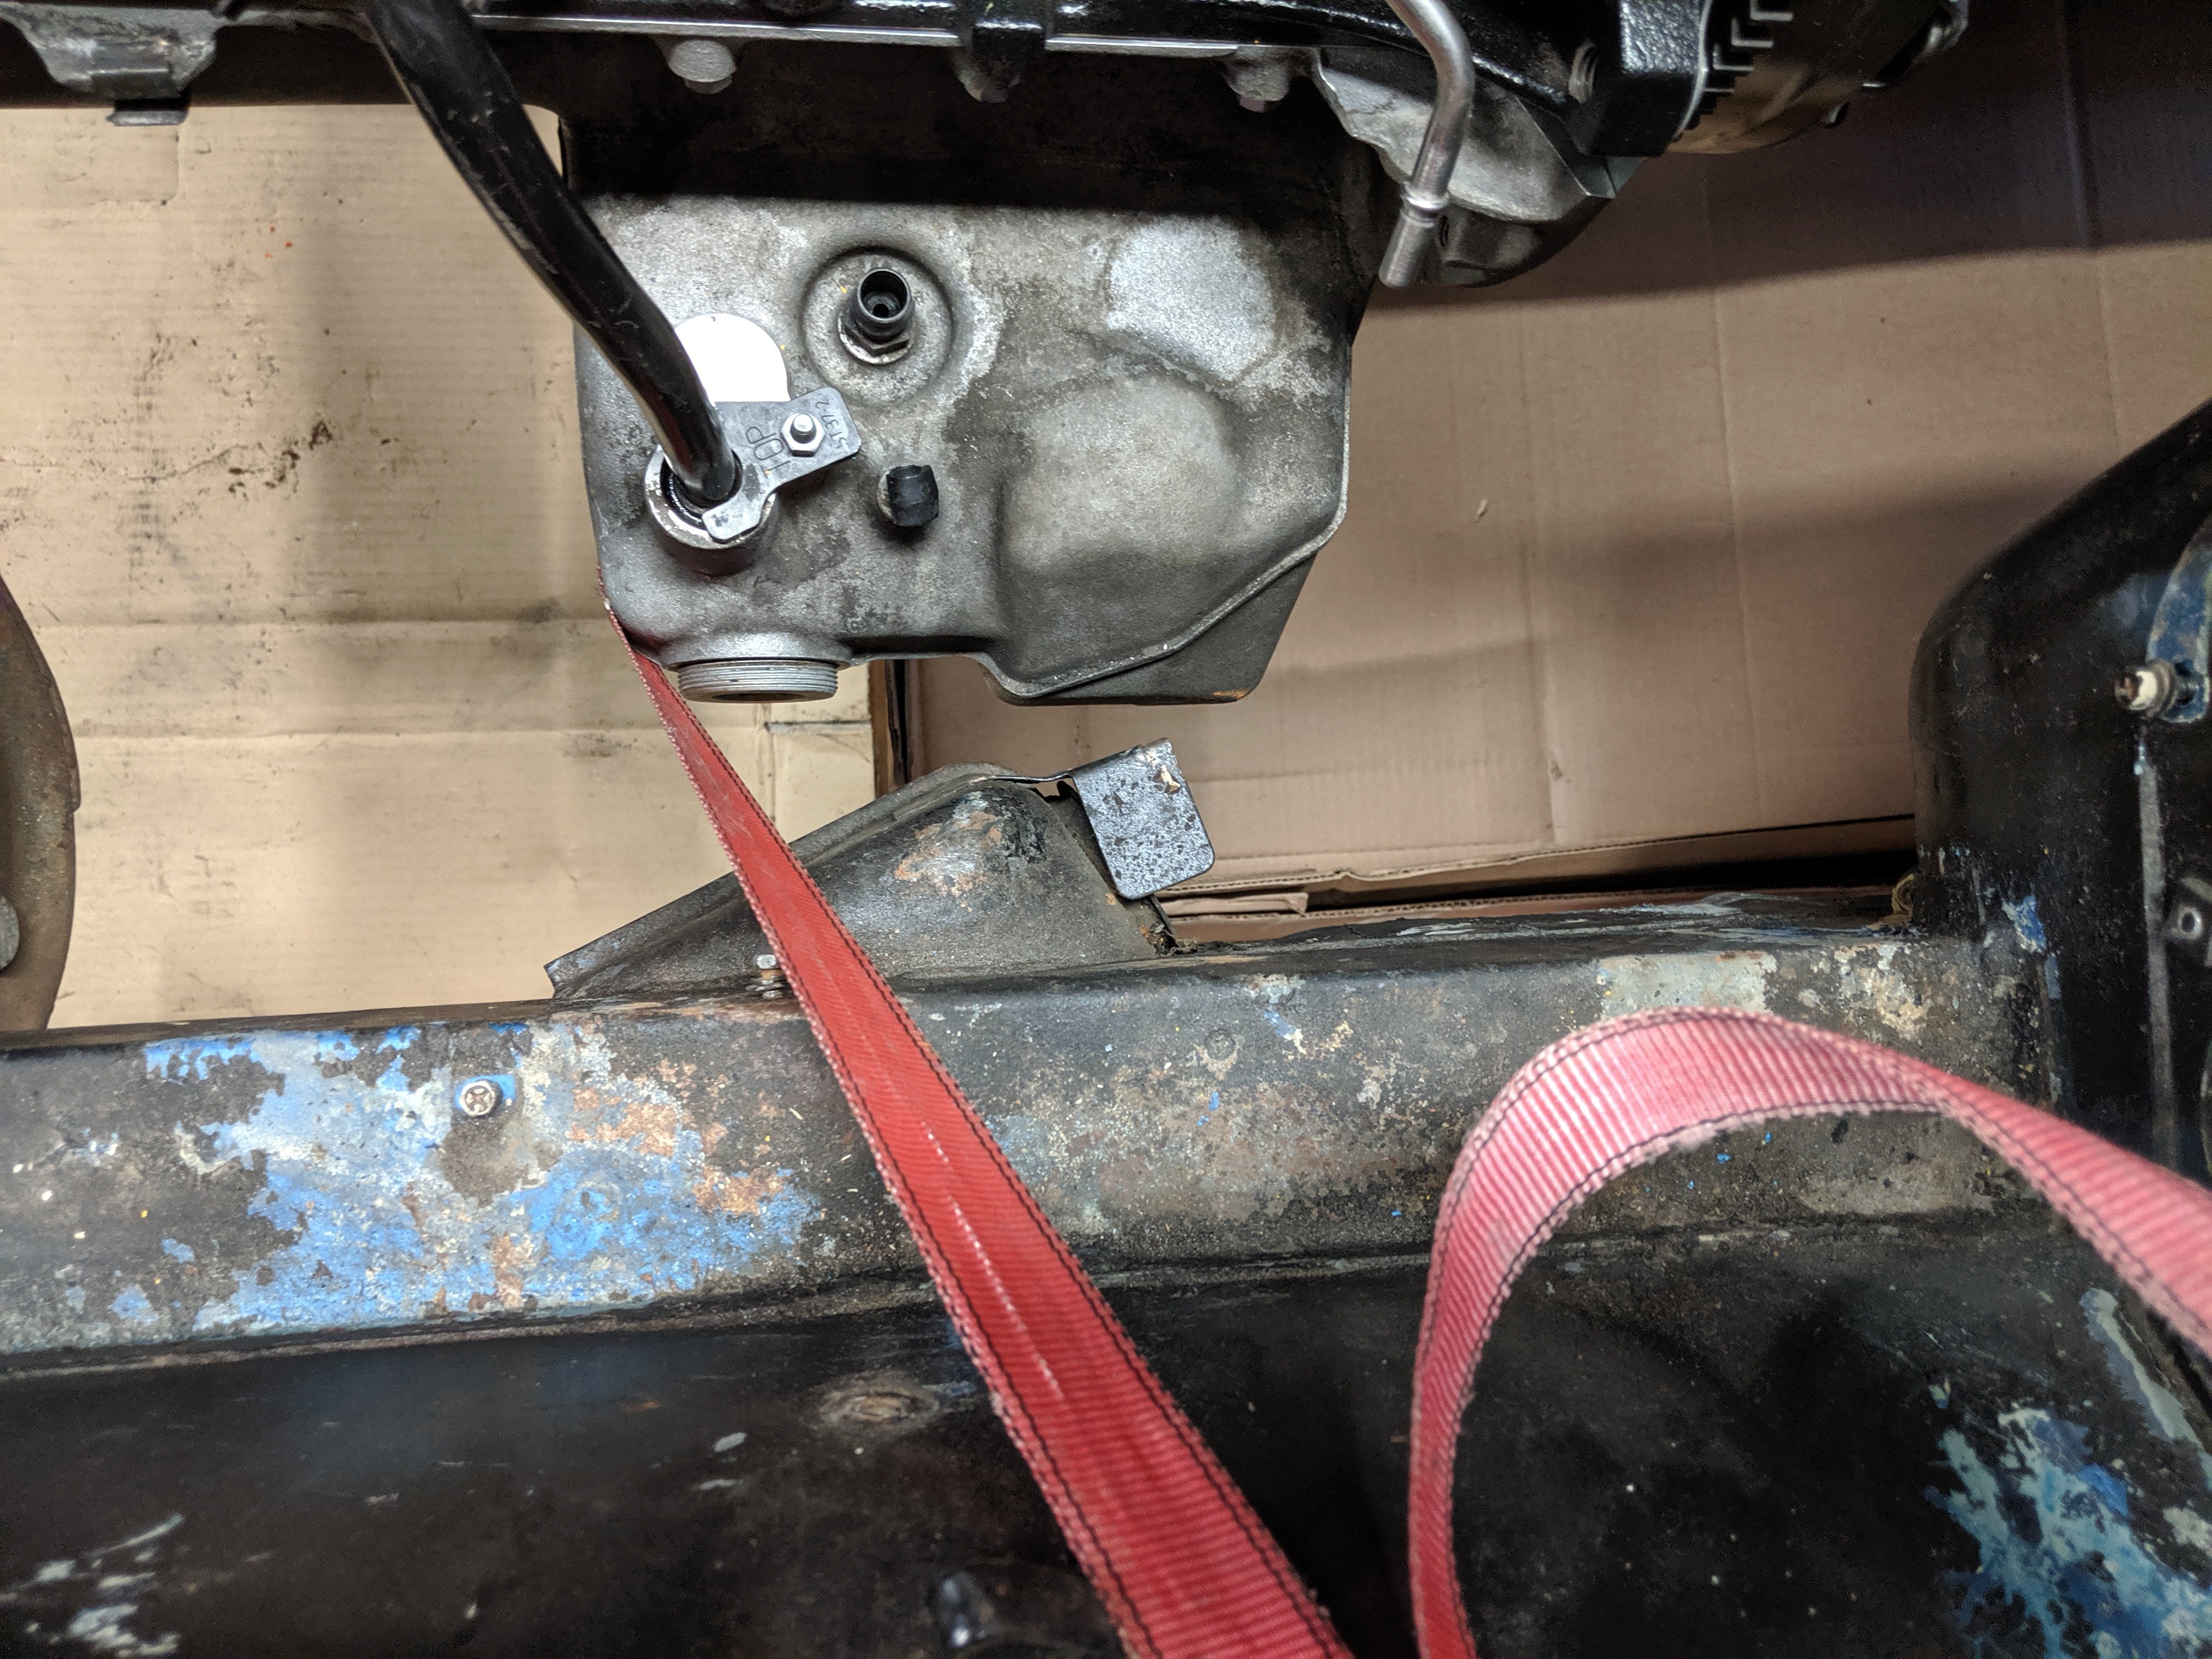
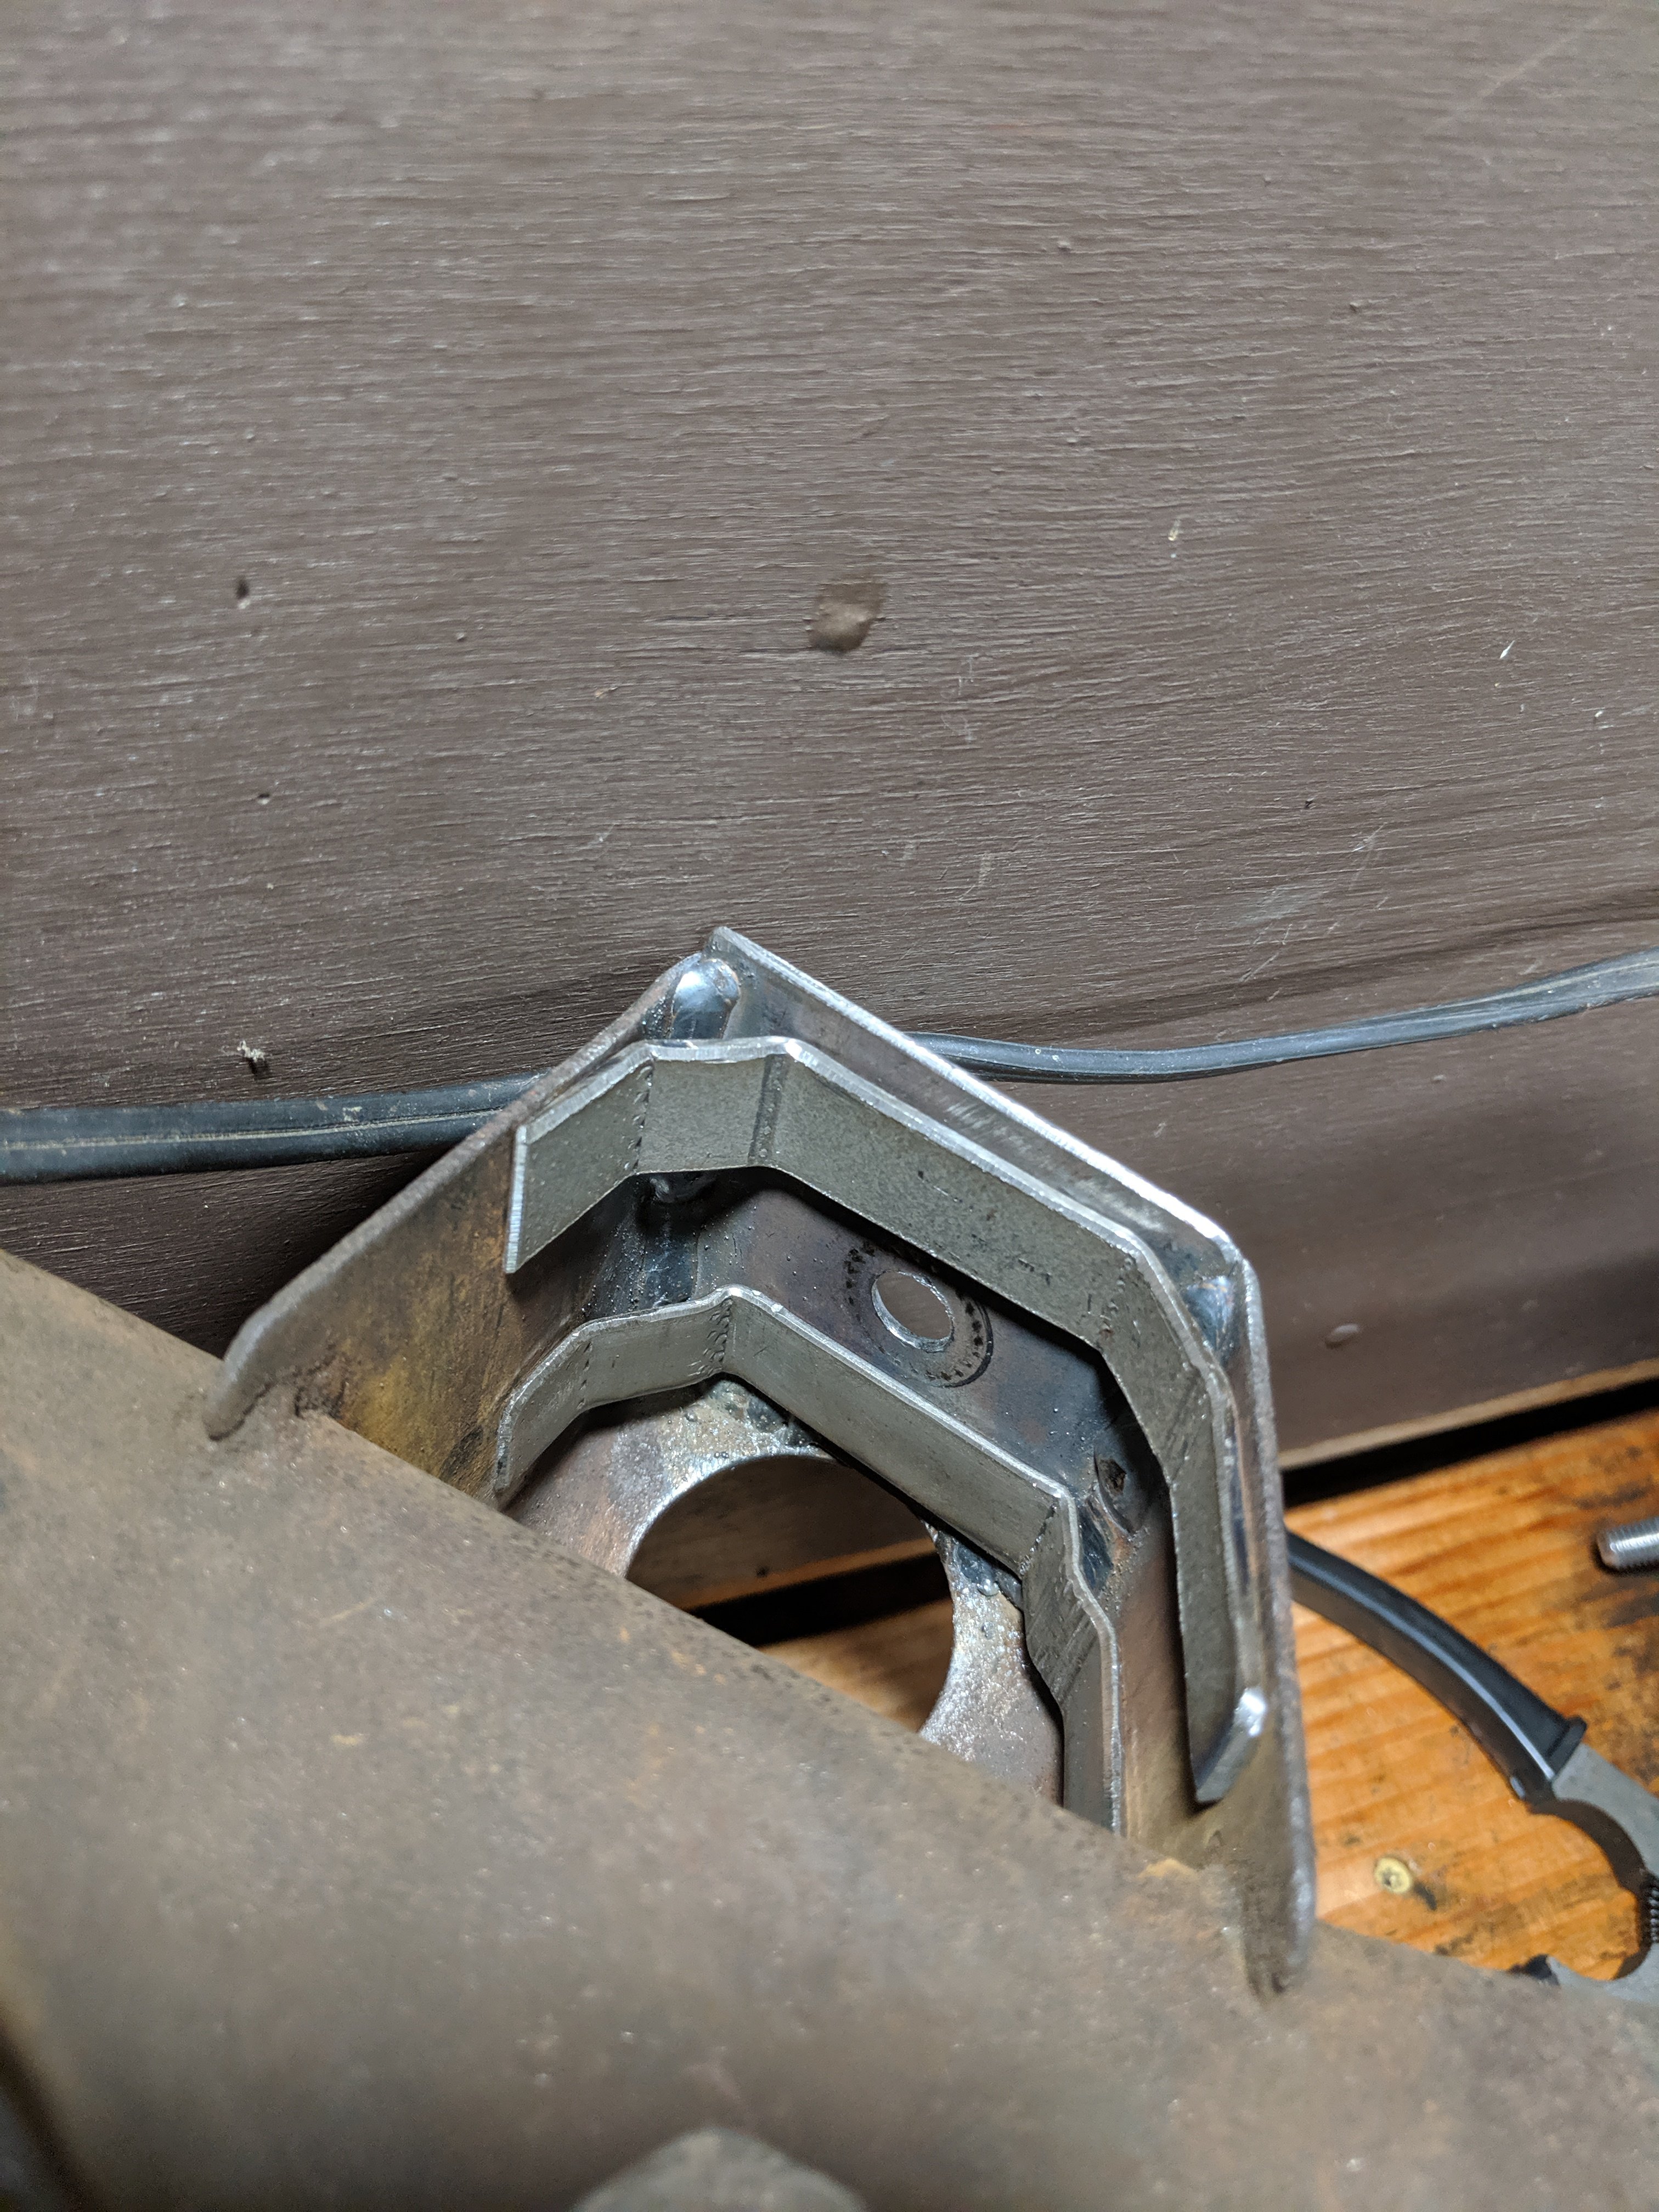
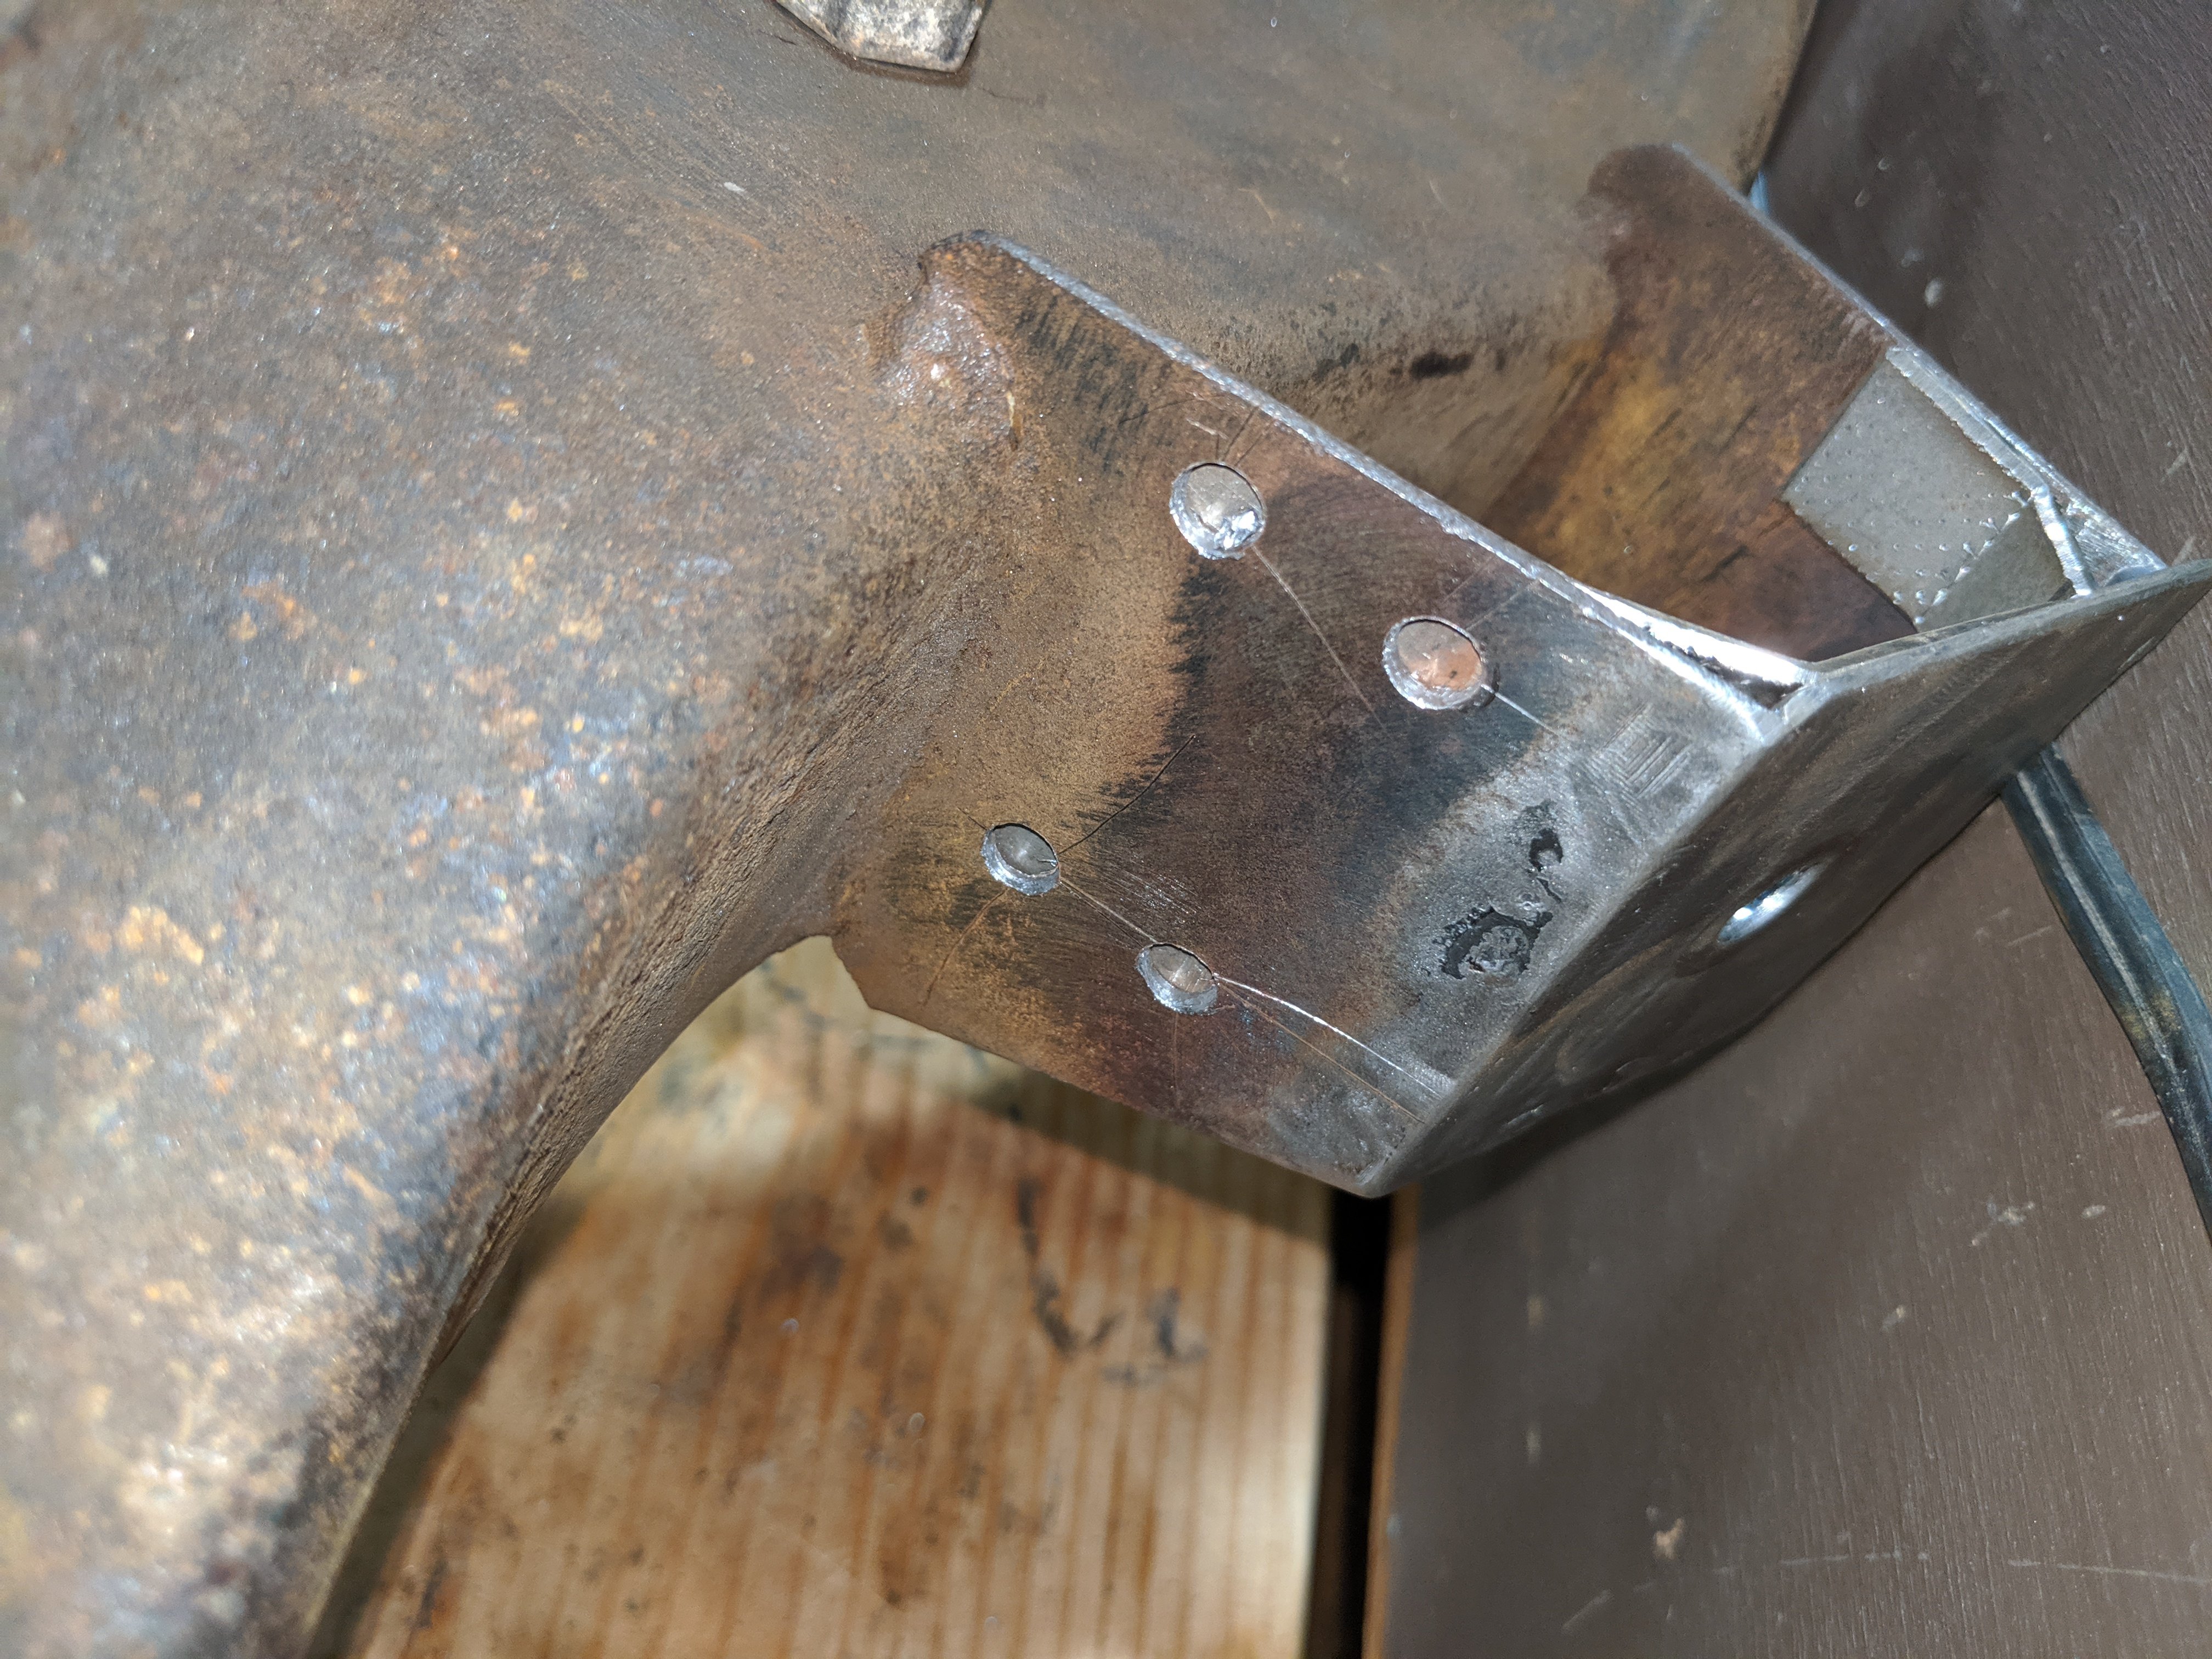
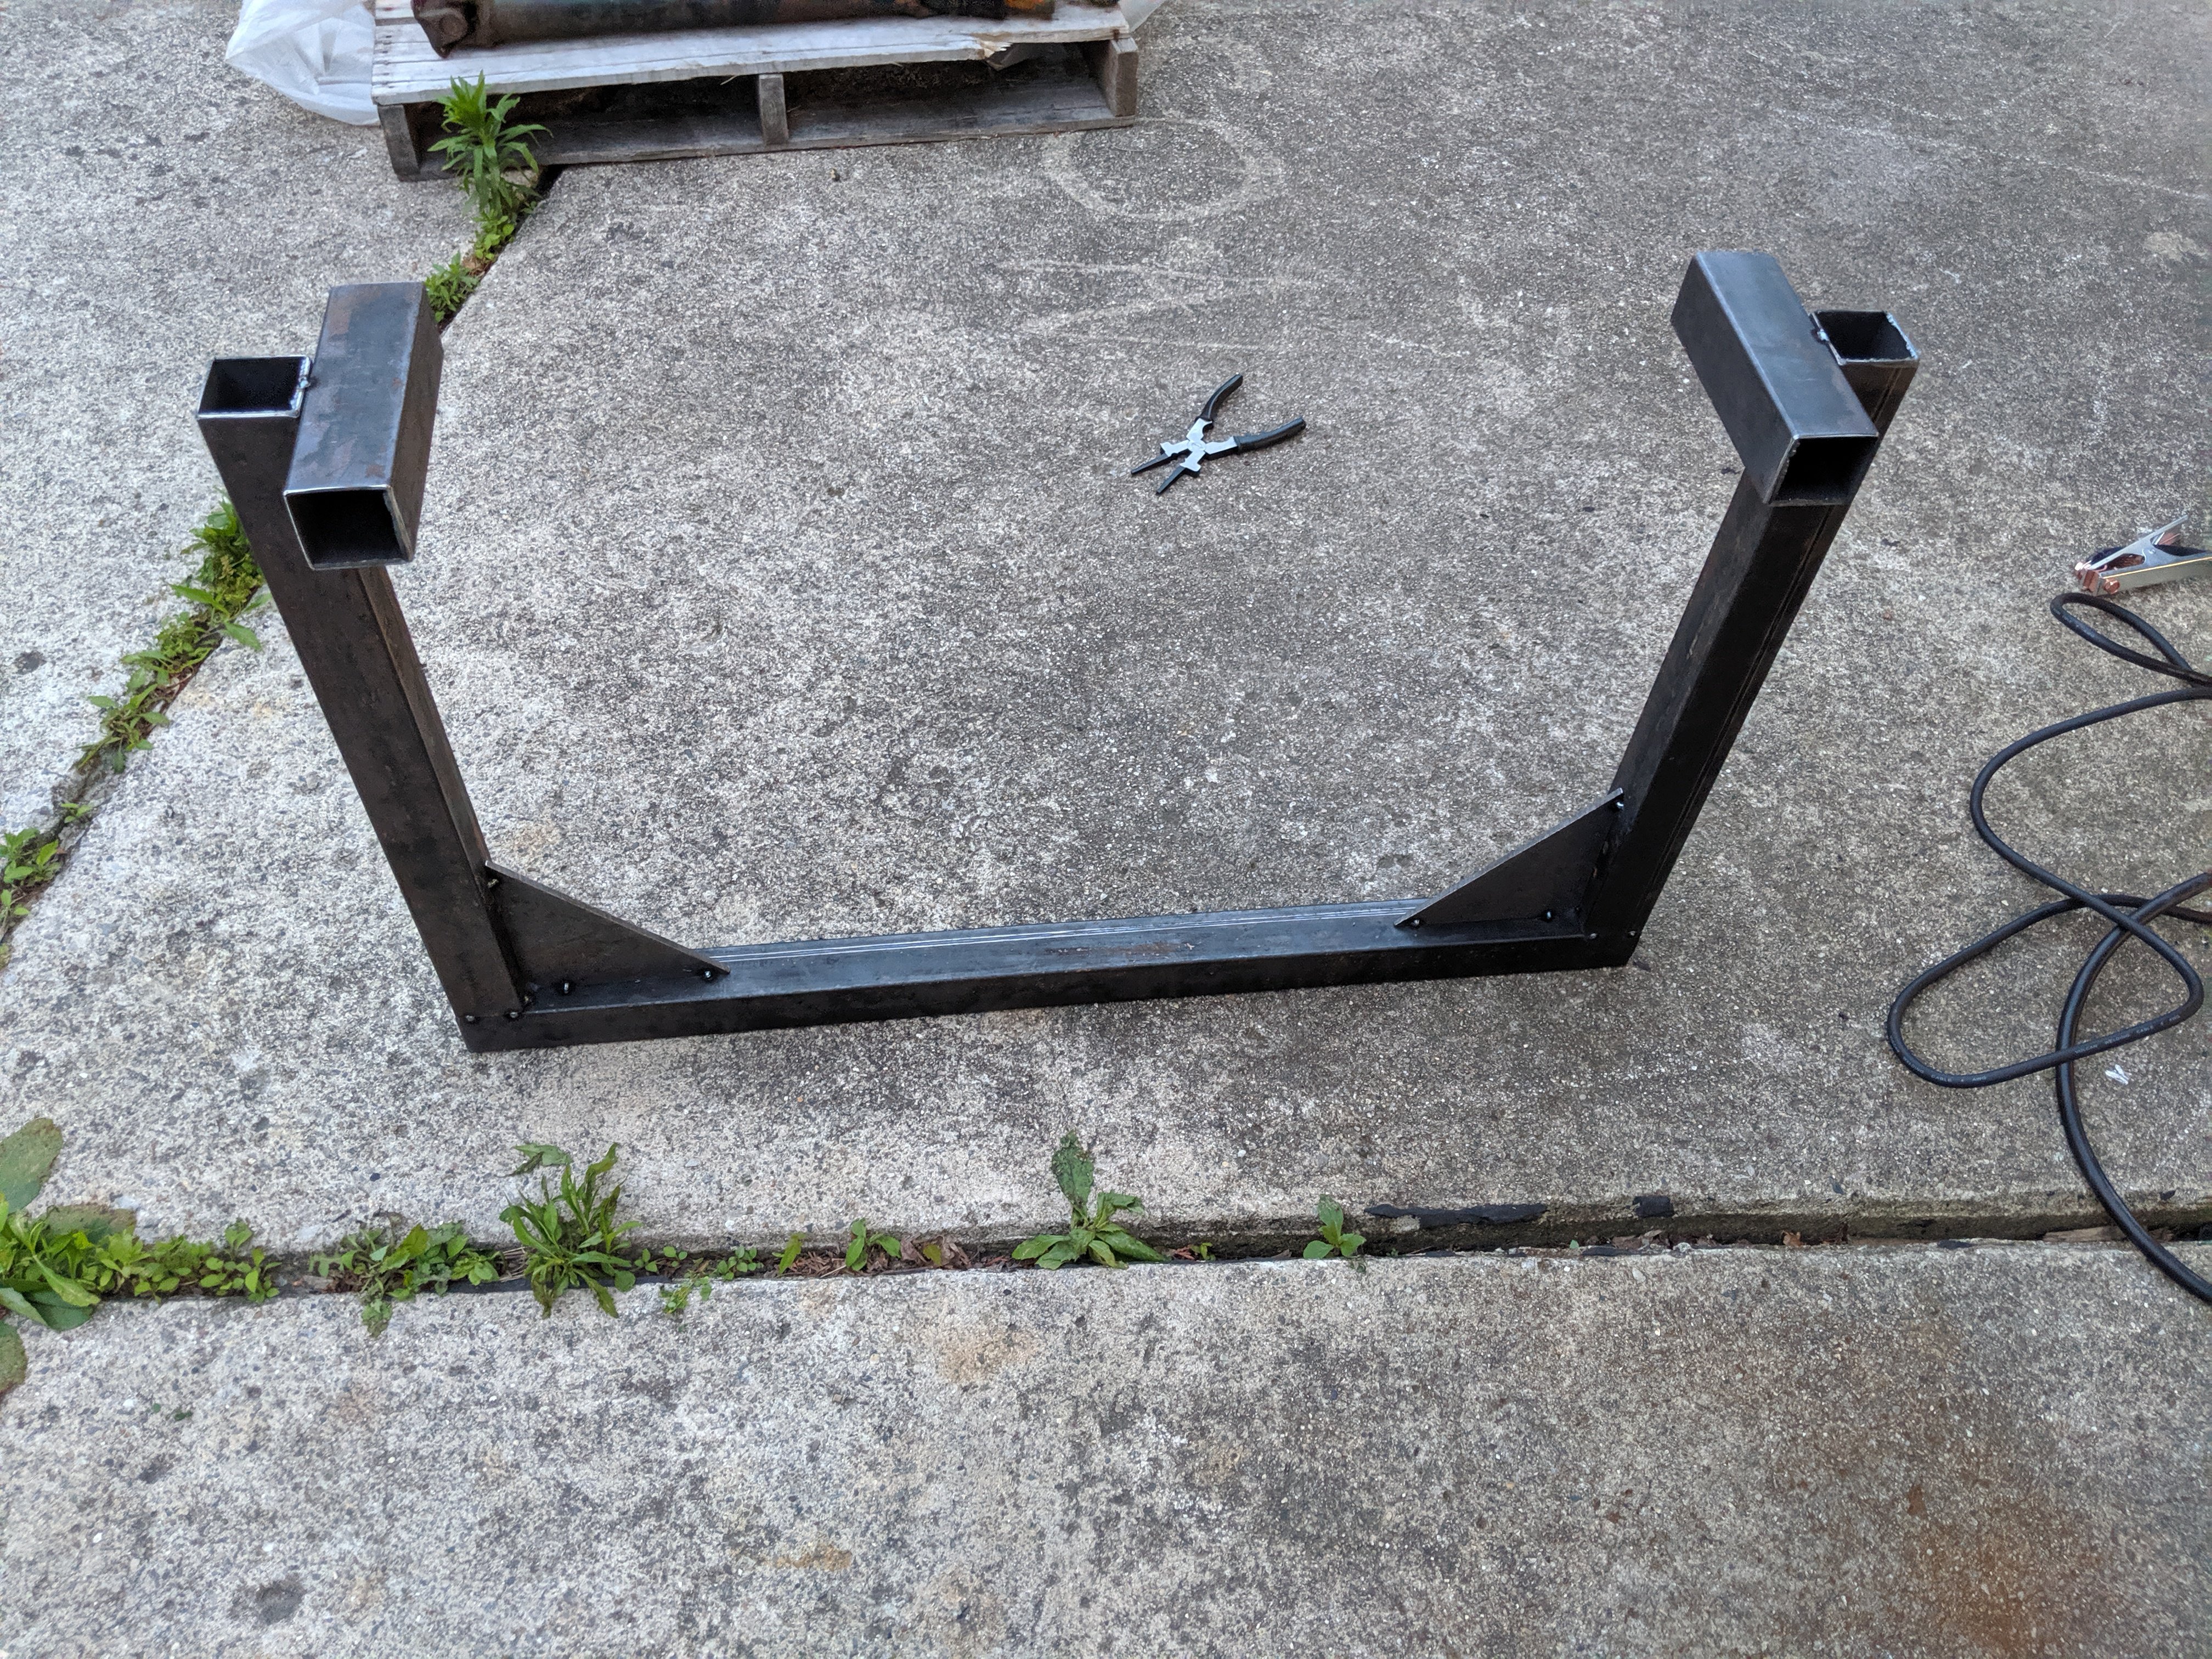
If I need to drop it any further, I will definitely look at the JTR spacers as an option. I think I am going to be okay after the cutting I've already done, but the next test fit will tell us quite a bit in terms of next steps. I also am almost done adding some small, higher gauge reinforcement pieces to the engine stand offs. Just need to clean them up and plug weld them in permanently.
-
BMW S54 into S30 Chassis - Build Thread
carbuilder723 replied to carbuilder723's topic in Other Engines
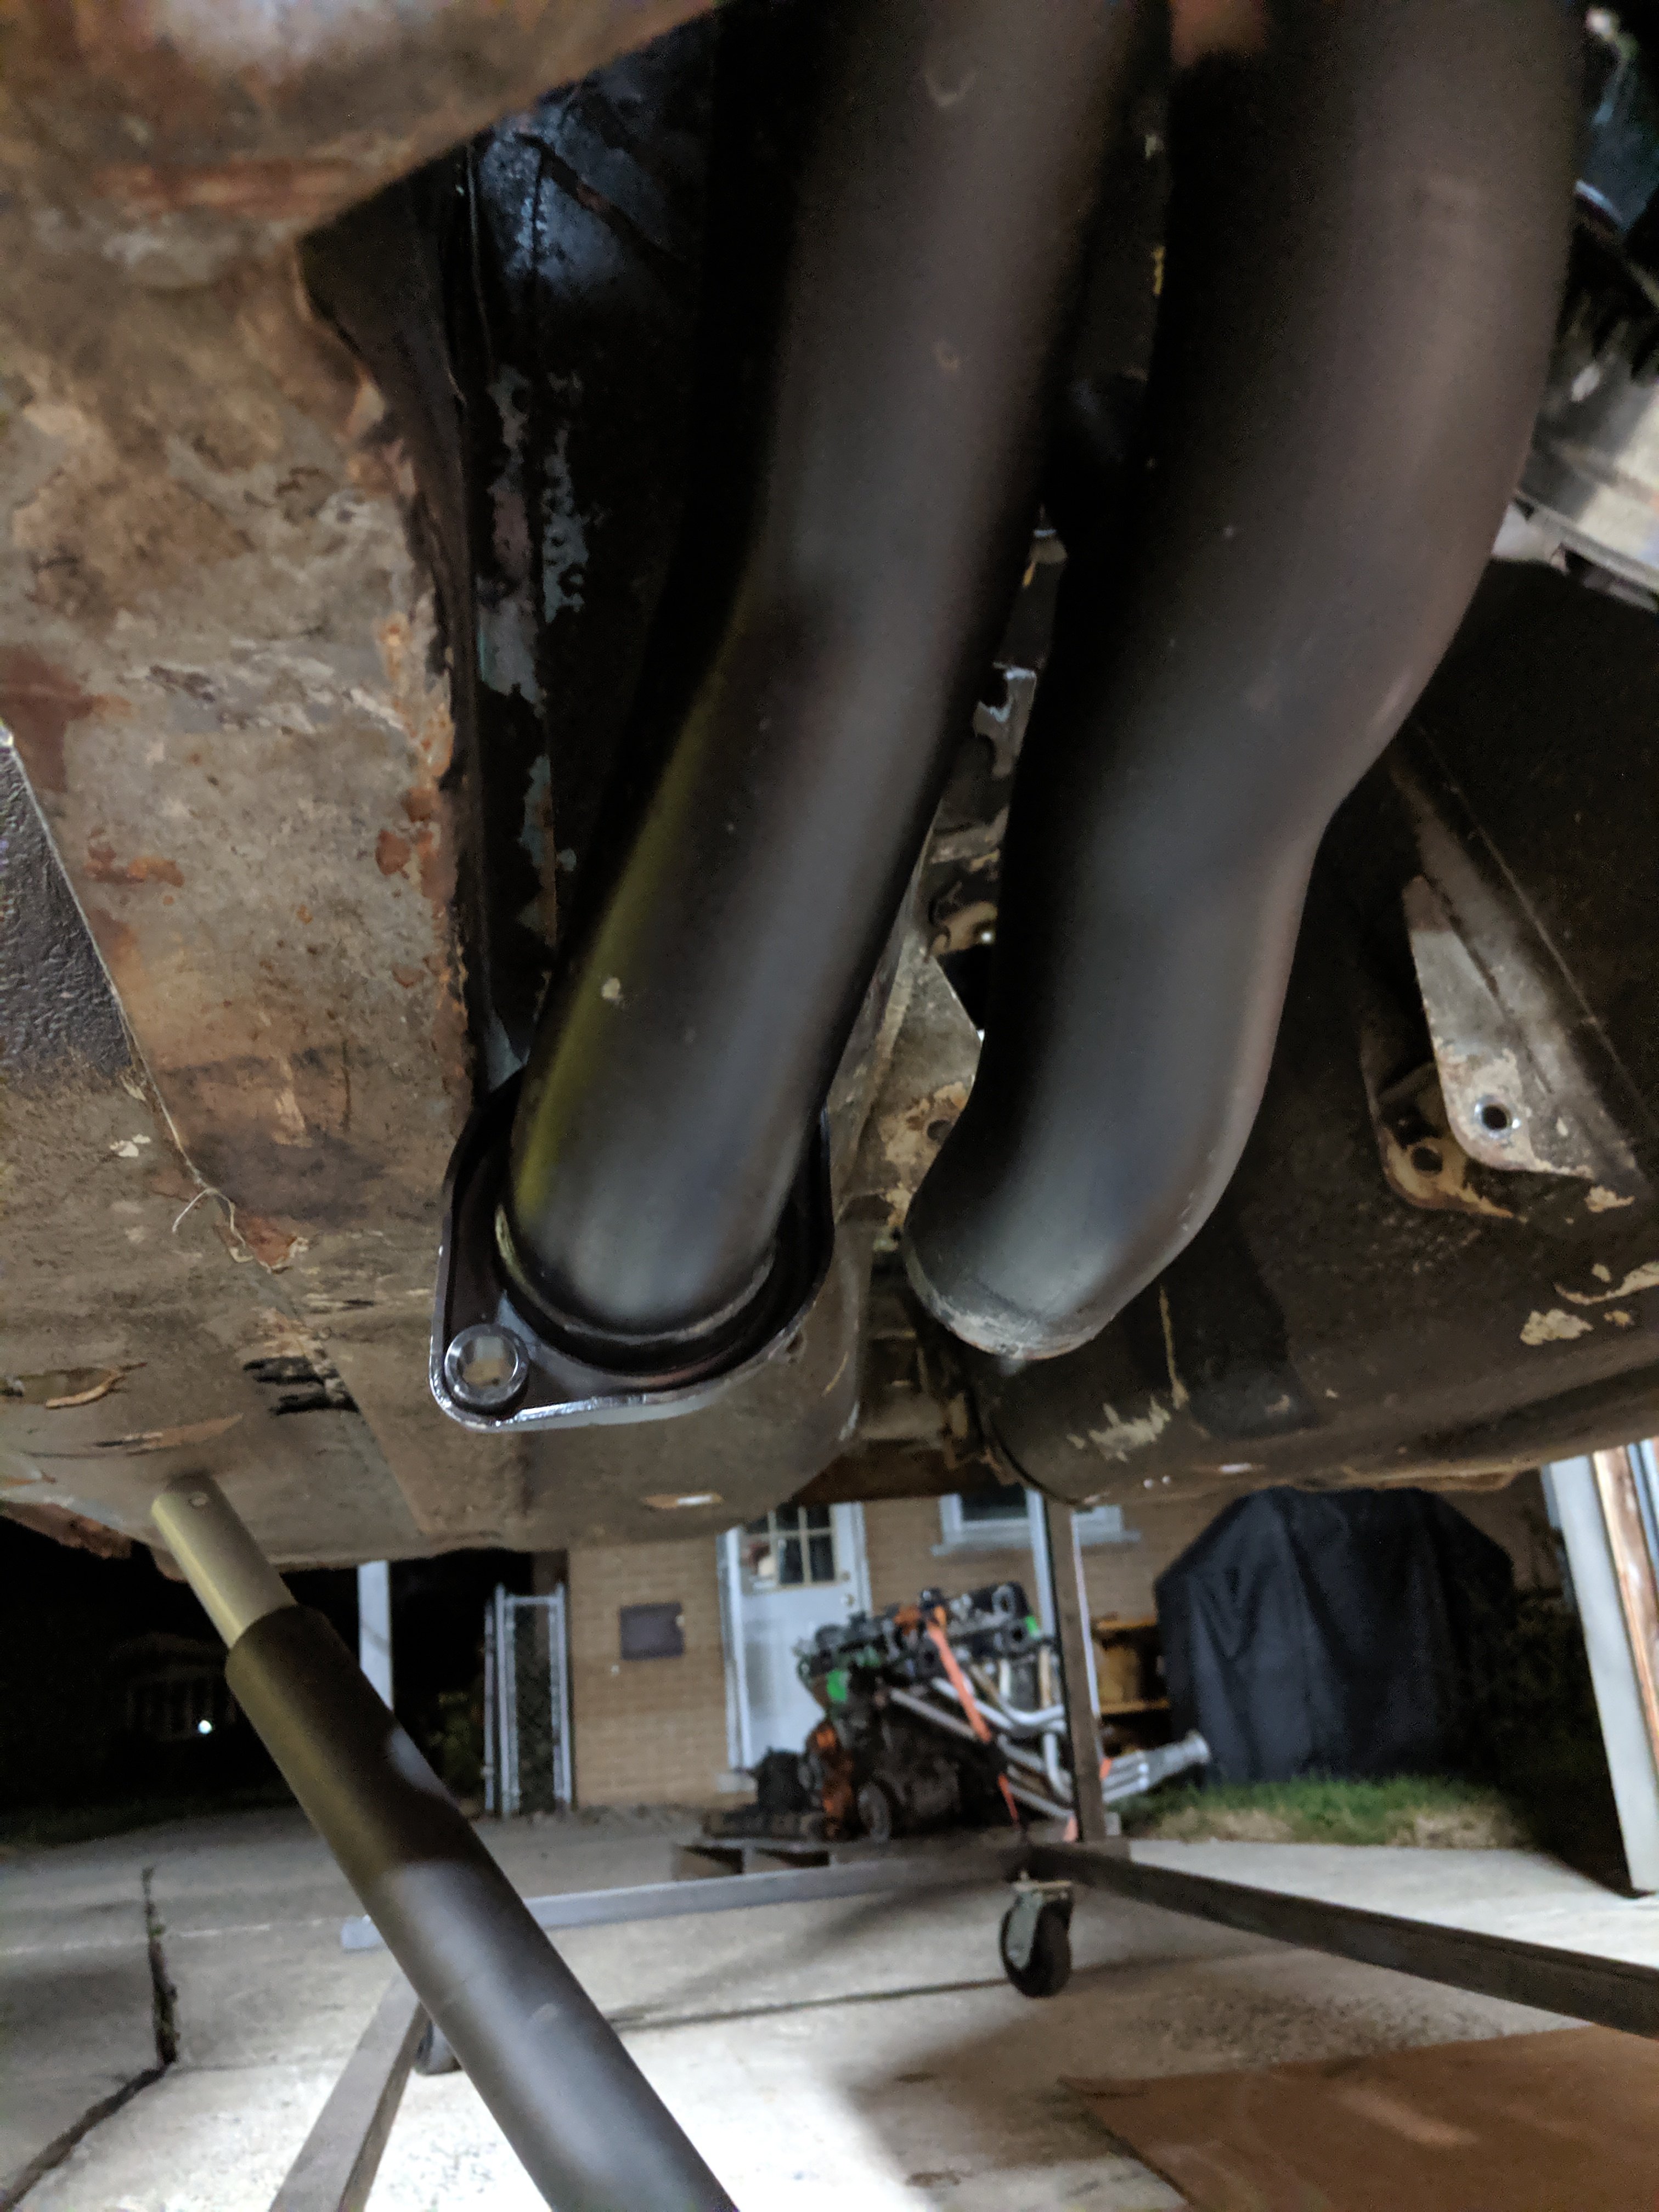
Progress is being made, although a bit slow. Big news though... I test fit the engine for the first time and, surprisingly it fit (sort of).The first test fit was with the front sub-frame completely unmodified. Just the engine adapters sitting on the BMW isolators sitting on the Datsun sub-frame. In this configuration, there was an interference at the back of the engine with the hood latch bracket, and with the exhaust at the right hand frame rail. Surprisingly though, the oil pan to Left side TC rod mount seemed to be reasonable enough with out any modification. The previous swaps I've seen with this engine had required the oil pan to be trimmed in this area, but (for the moment) it looks like I won't need to do that. Also in this configuration, the front of the engine sits very high... high enough that I think it would be a problem with the hood fitting. So... the next thought was to take the front of the engine down a bit, so I cut about 1.5 inch off of each standoff on the front sub-frame. I haven't test fit this in the car yet, but it put the front of the oil pan approx 2 inches closer to the cross member in the front. I figure this has a few benefits including lowering the CoG, clearing the hood and possibly solving the interference at the hood latch. We'll have to see once I refit the engine with the modified sub-frame in the car.
-
BMW S54 into S30 Chassis - Build Thread
carbuilder723 replied to carbuilder723's topic in Other Engines
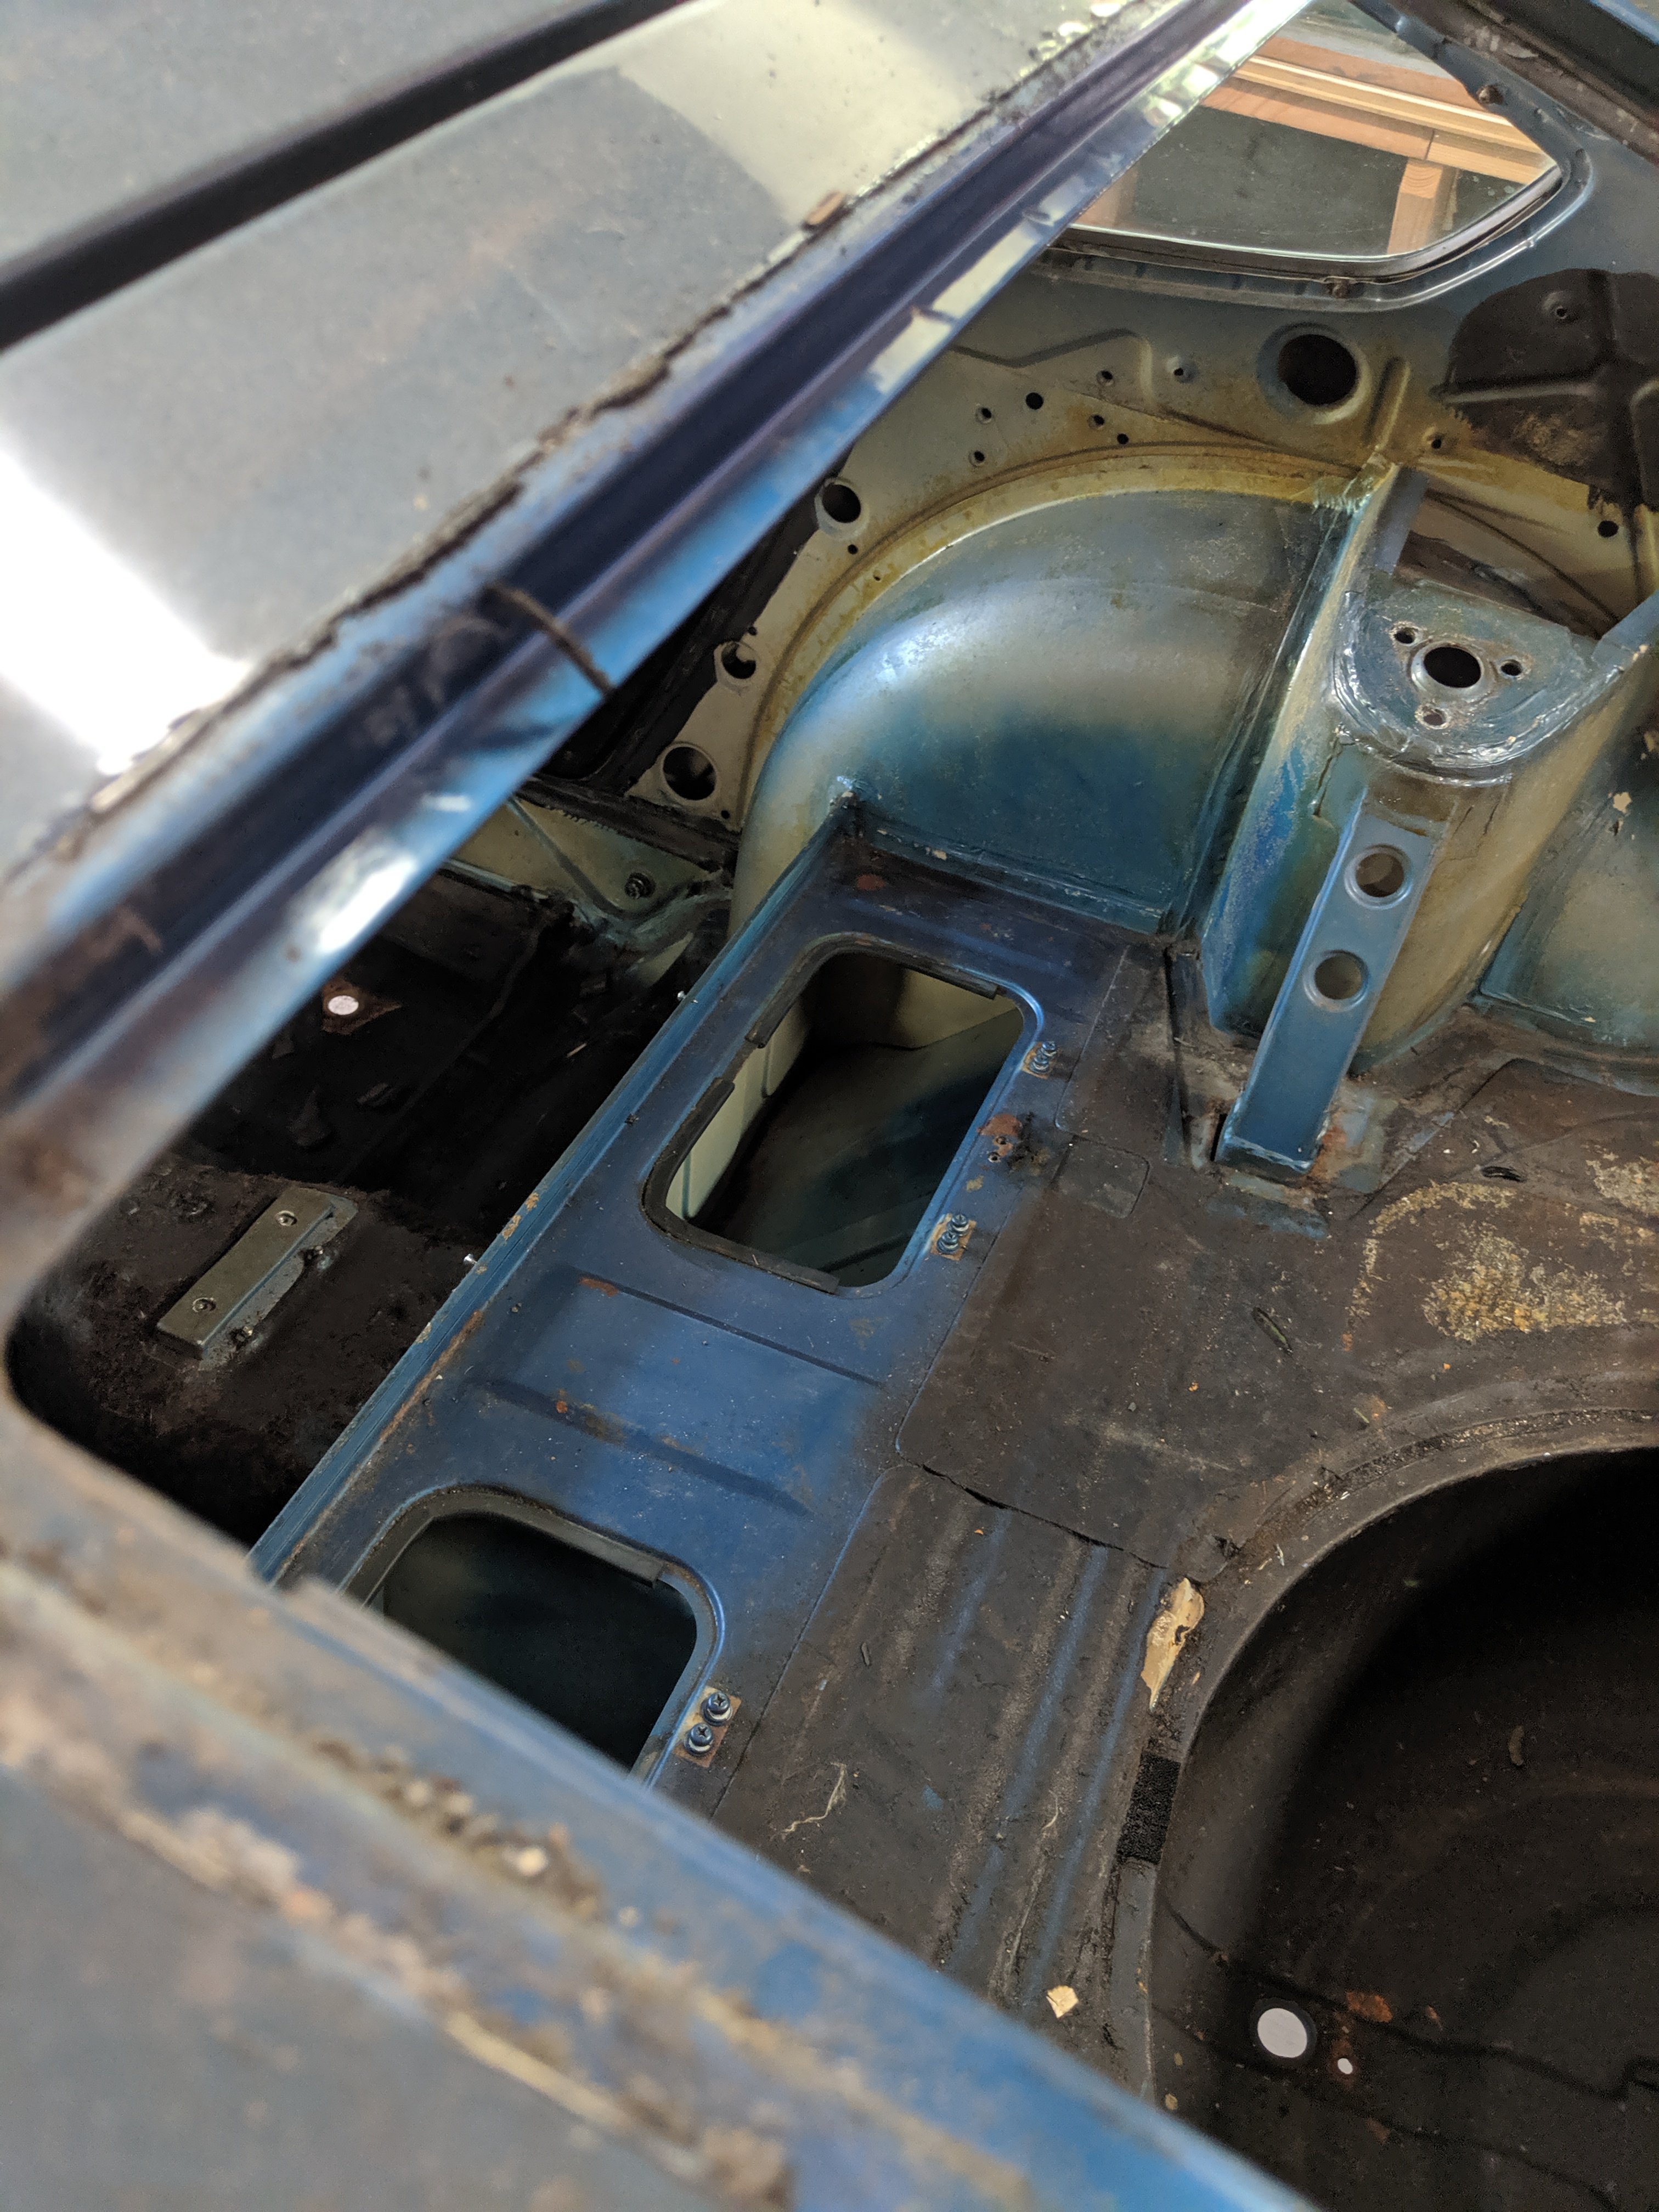
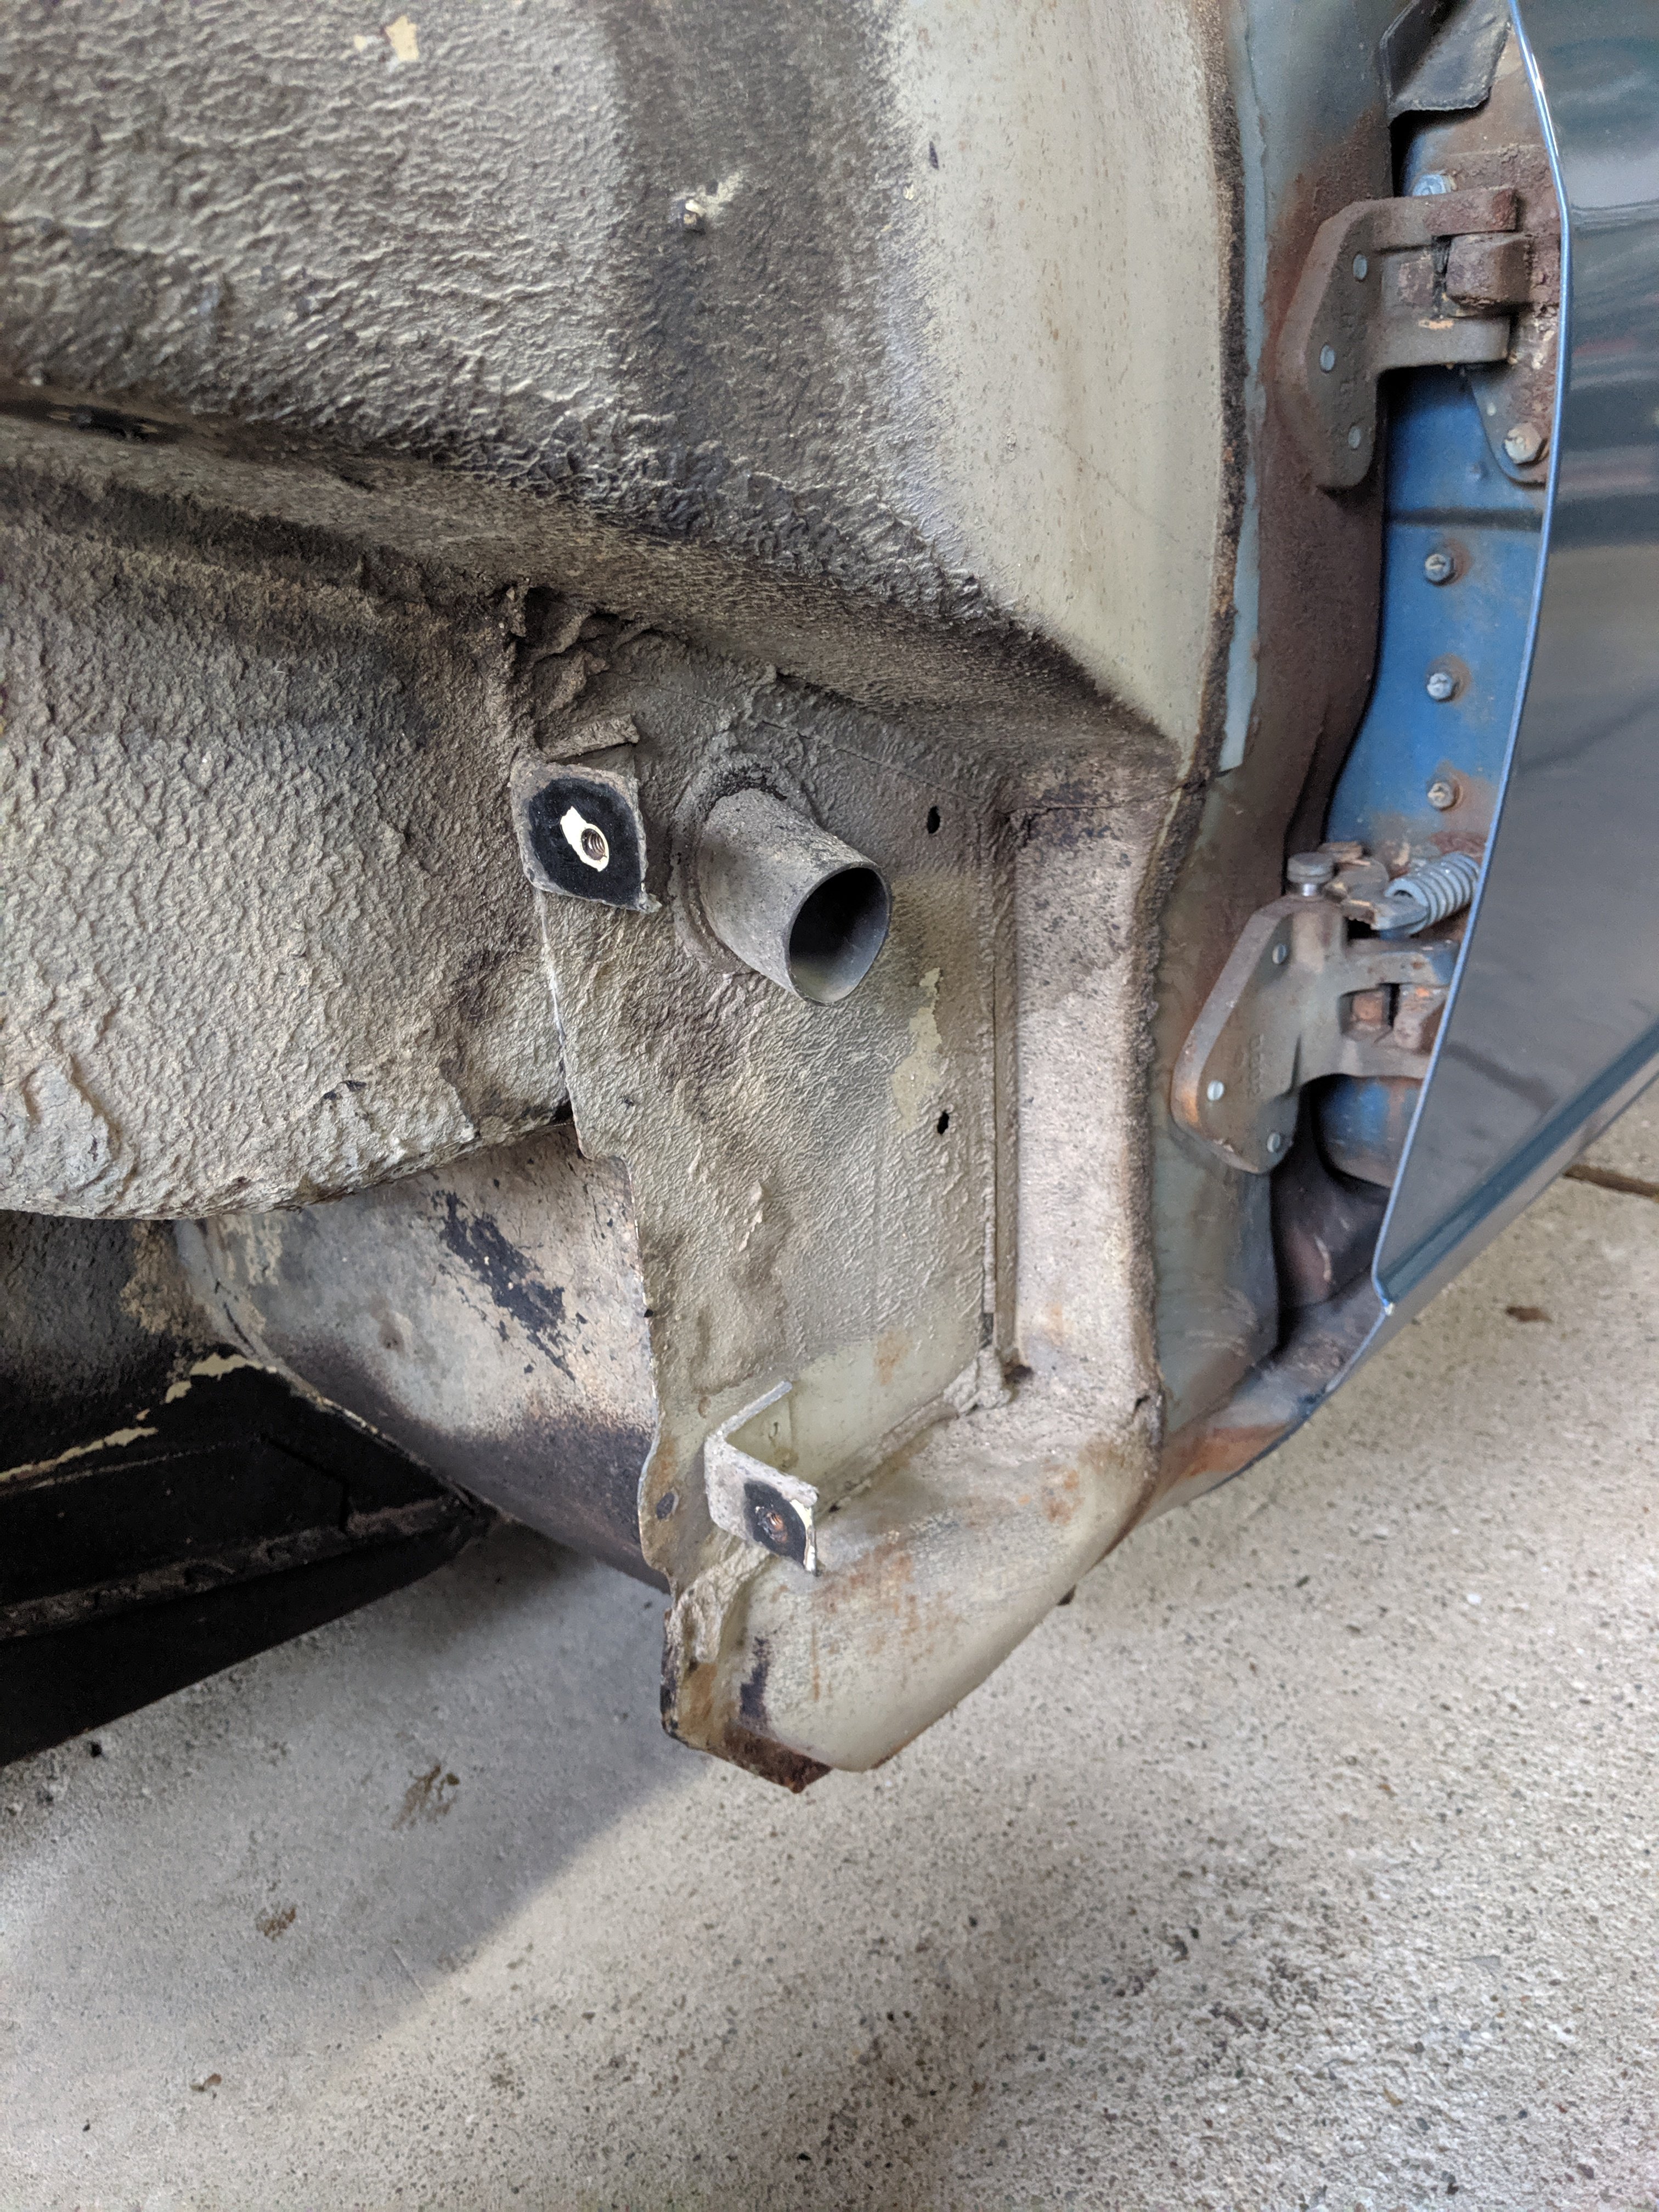
So I went to poking a few more holes last night and good thing... found a few more areas that will need patched up. I also got the rain hat removed from the inner cowl and found that I will definitely need to do some work on the passenger side cowl, including the air intake tunnel/tube.
-
BMW S54 into S30 Chassis - Build Thread
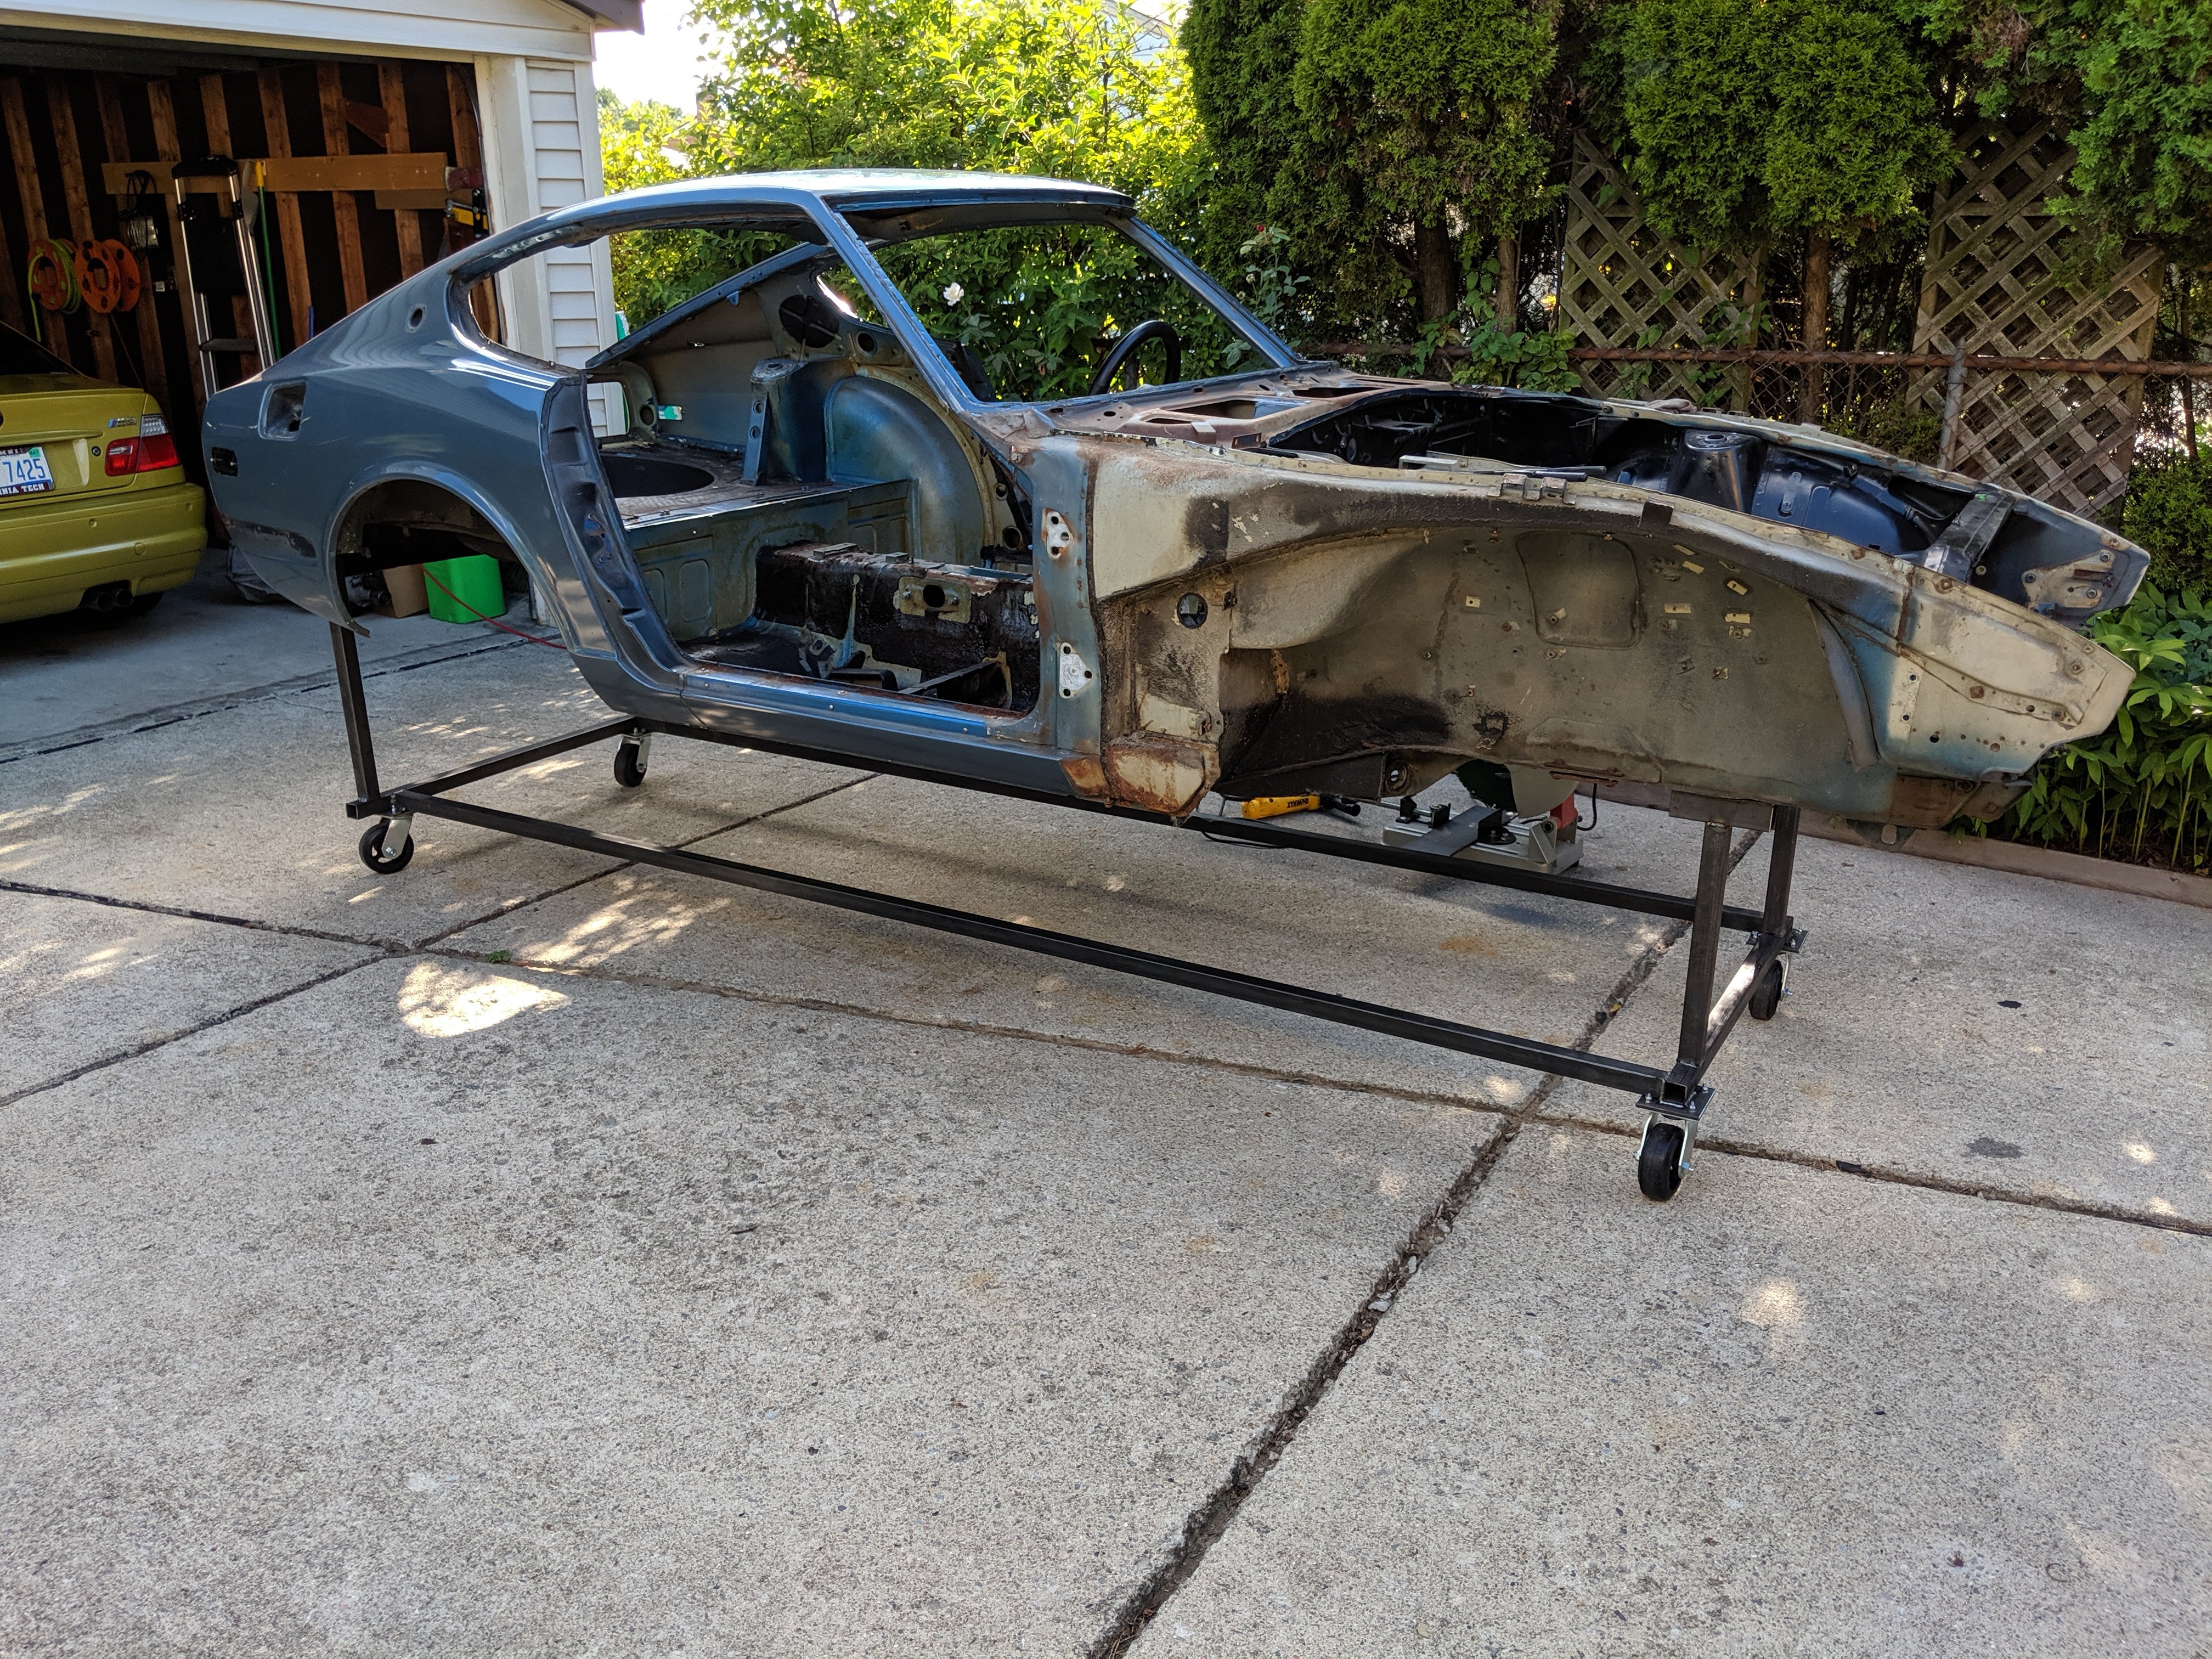
carbuilder723 replied to carbuilder723's topic in Other Engines
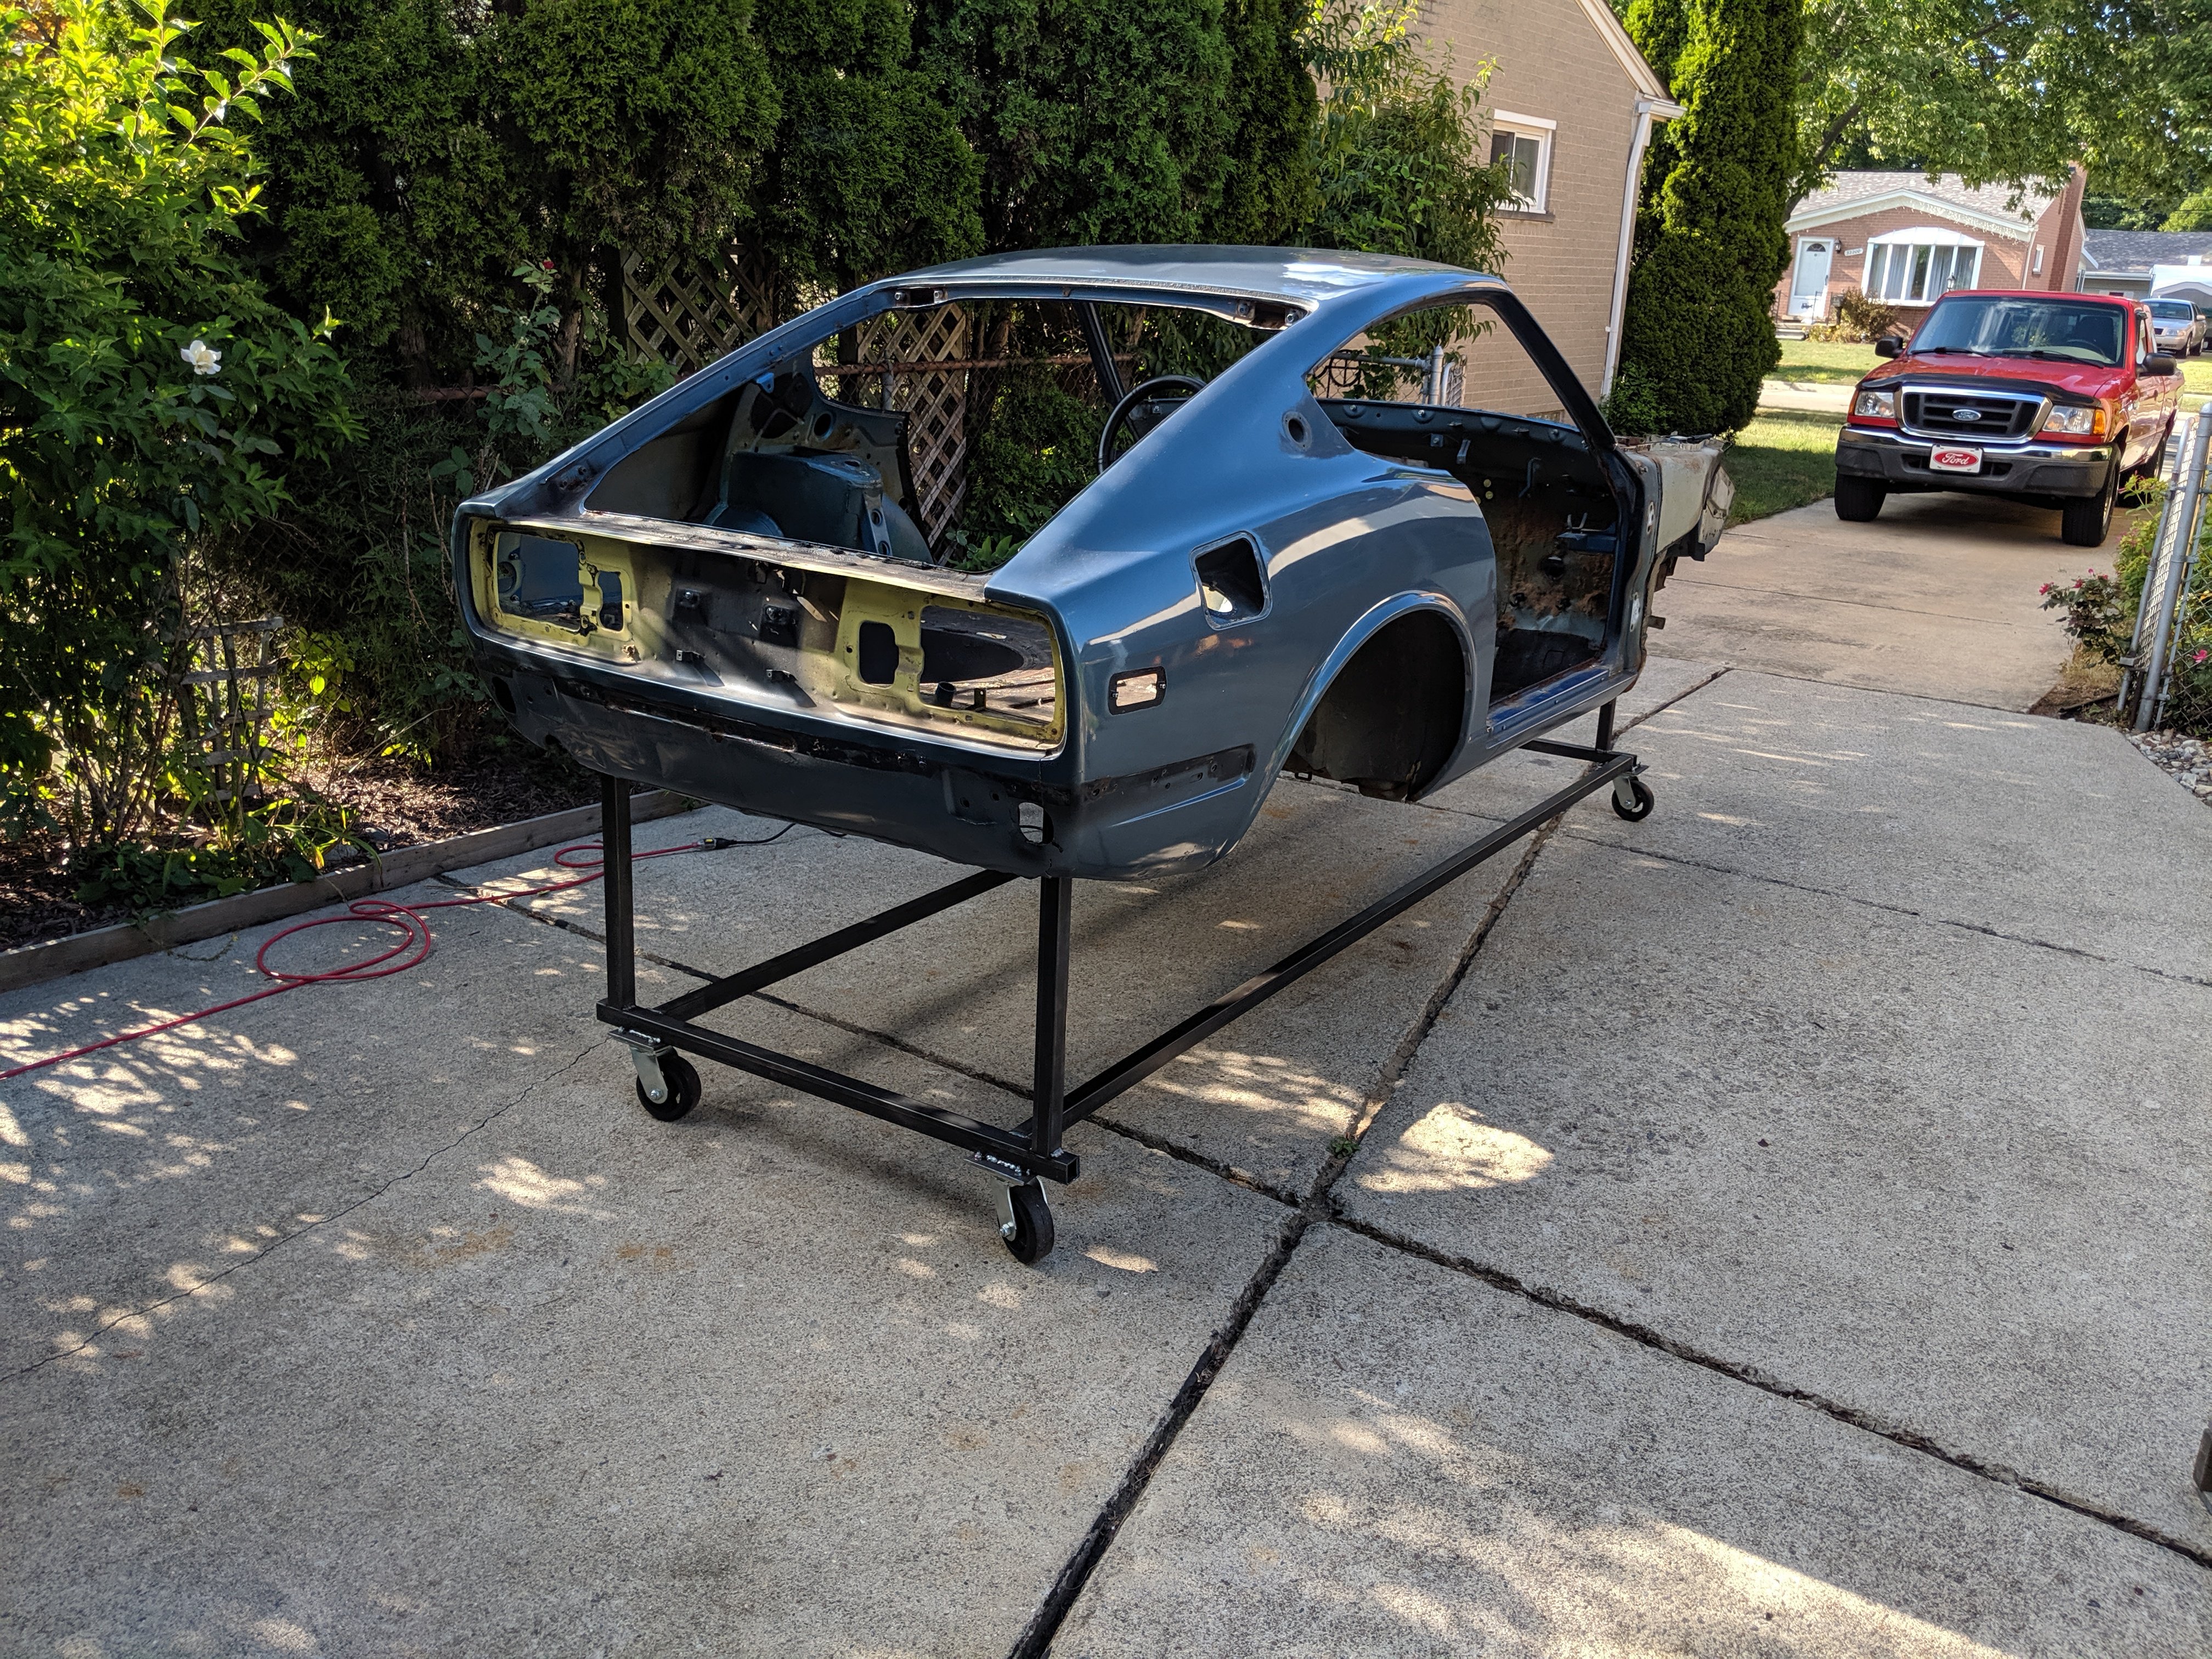
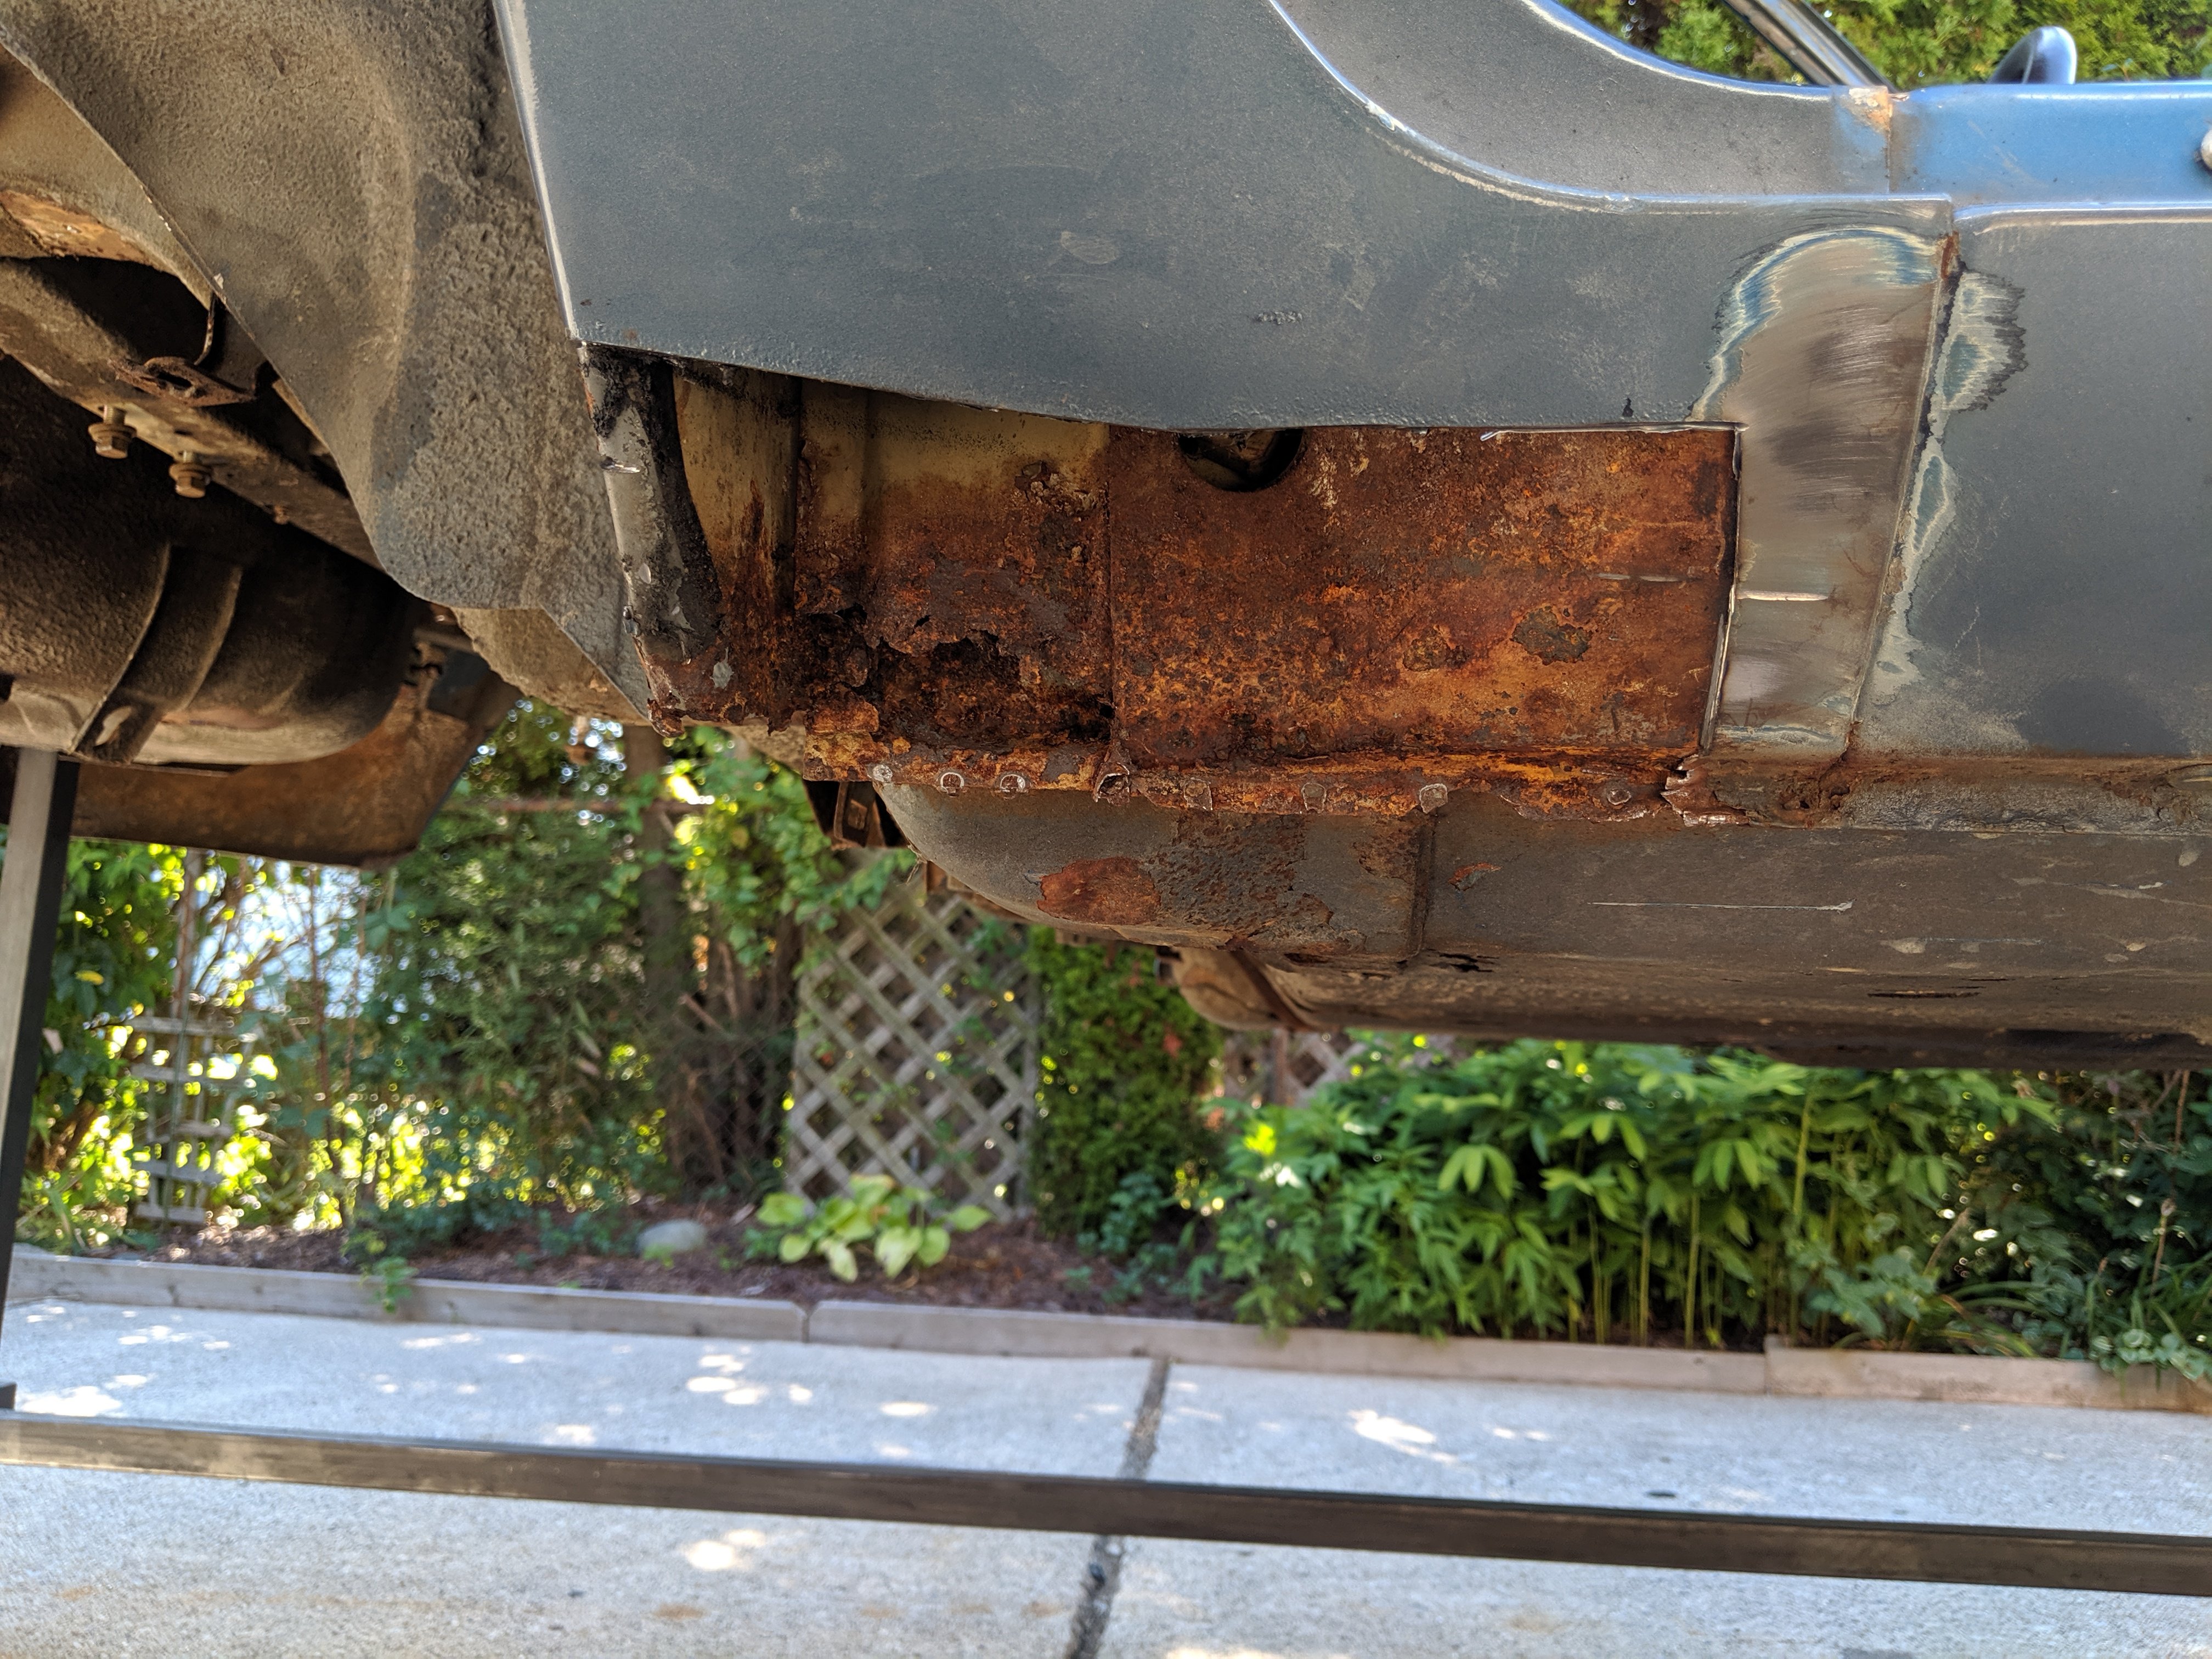
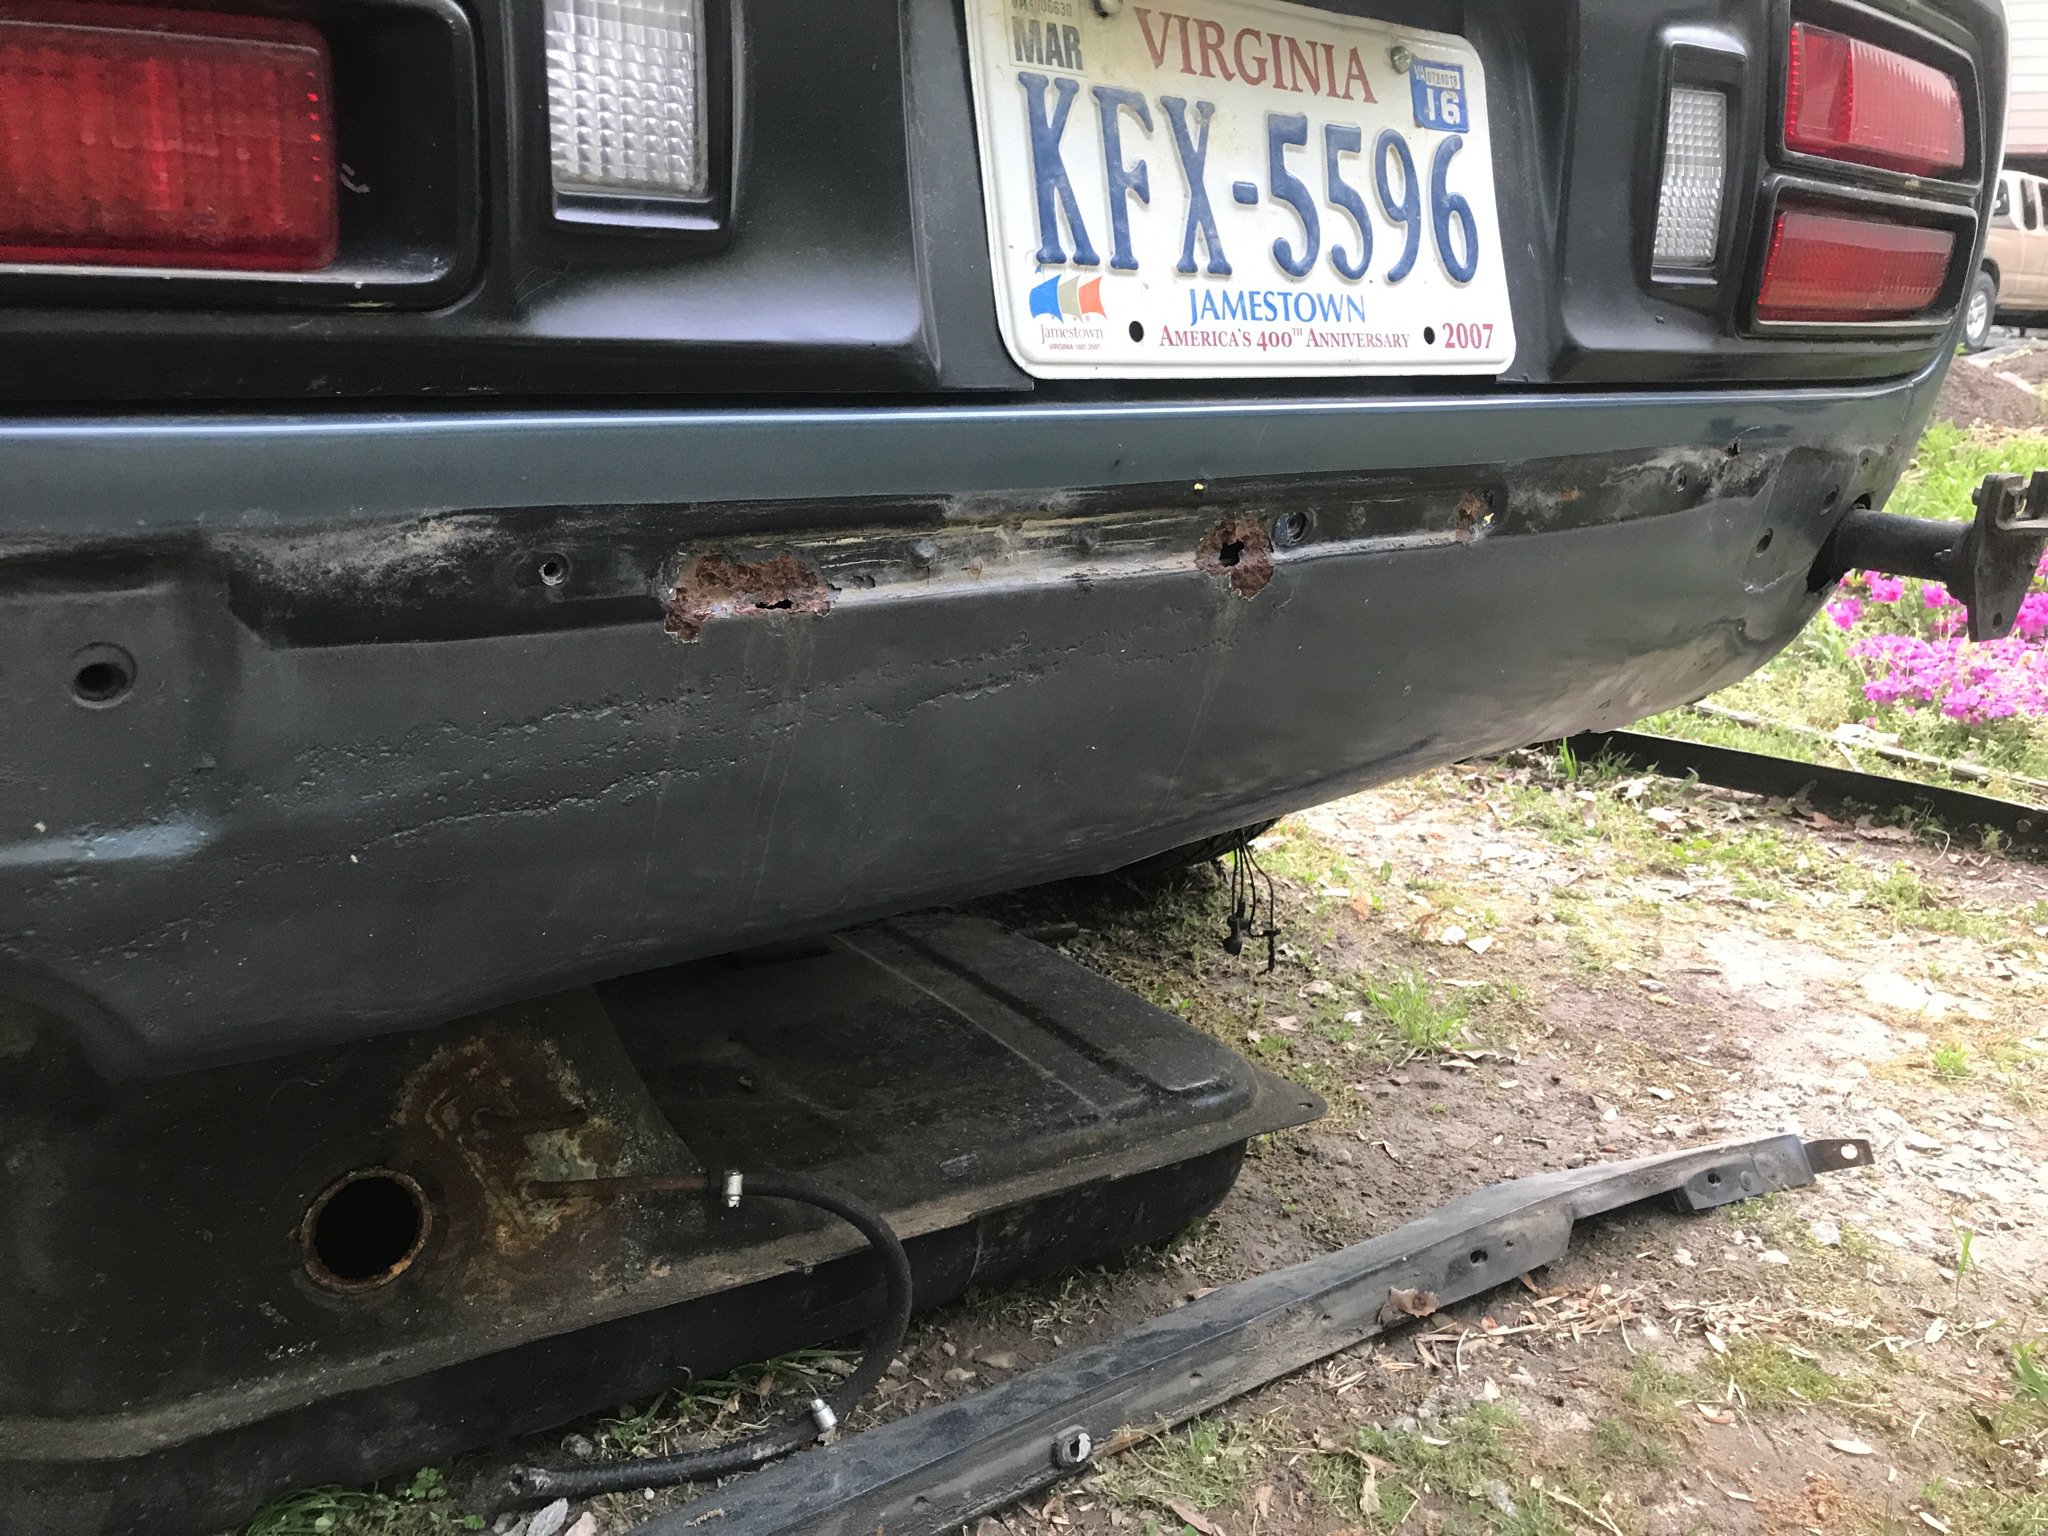
So this last week was about getting the shell up onto a frame so that I could roll it around the garage and driveway. Also, a friend and I went to town on removing all of the sound deadening from the floor pans. Dry ice was our friend here, but even the trans tunnel material was still a total pain. Then I started to cut into the some of the areas where I was suspicious about with respect to rust... let's just say, I was right to be suspicious. Looking up into the dog leg cavities, the metal looks in really good shape, but the bottom skin and secondary layer will definitely need some pieces replaced. The rear valence (as suspected) was also full of bondo so I'm likely going to try to just replace this entire panel.
-
BMW S54 into S30 Chassis - Build Thread
carbuilder723 replied to carbuilder723's topic in Other Engines
I have not yet. If I do weight it though , I'll post it up for you. I am expecting it to be around 350-400 lbs, but we'll see. -
BMW S54 into S30 Chassis - Build Thread
carbuilder723 replied to carbuilder723's topic in Other Engines
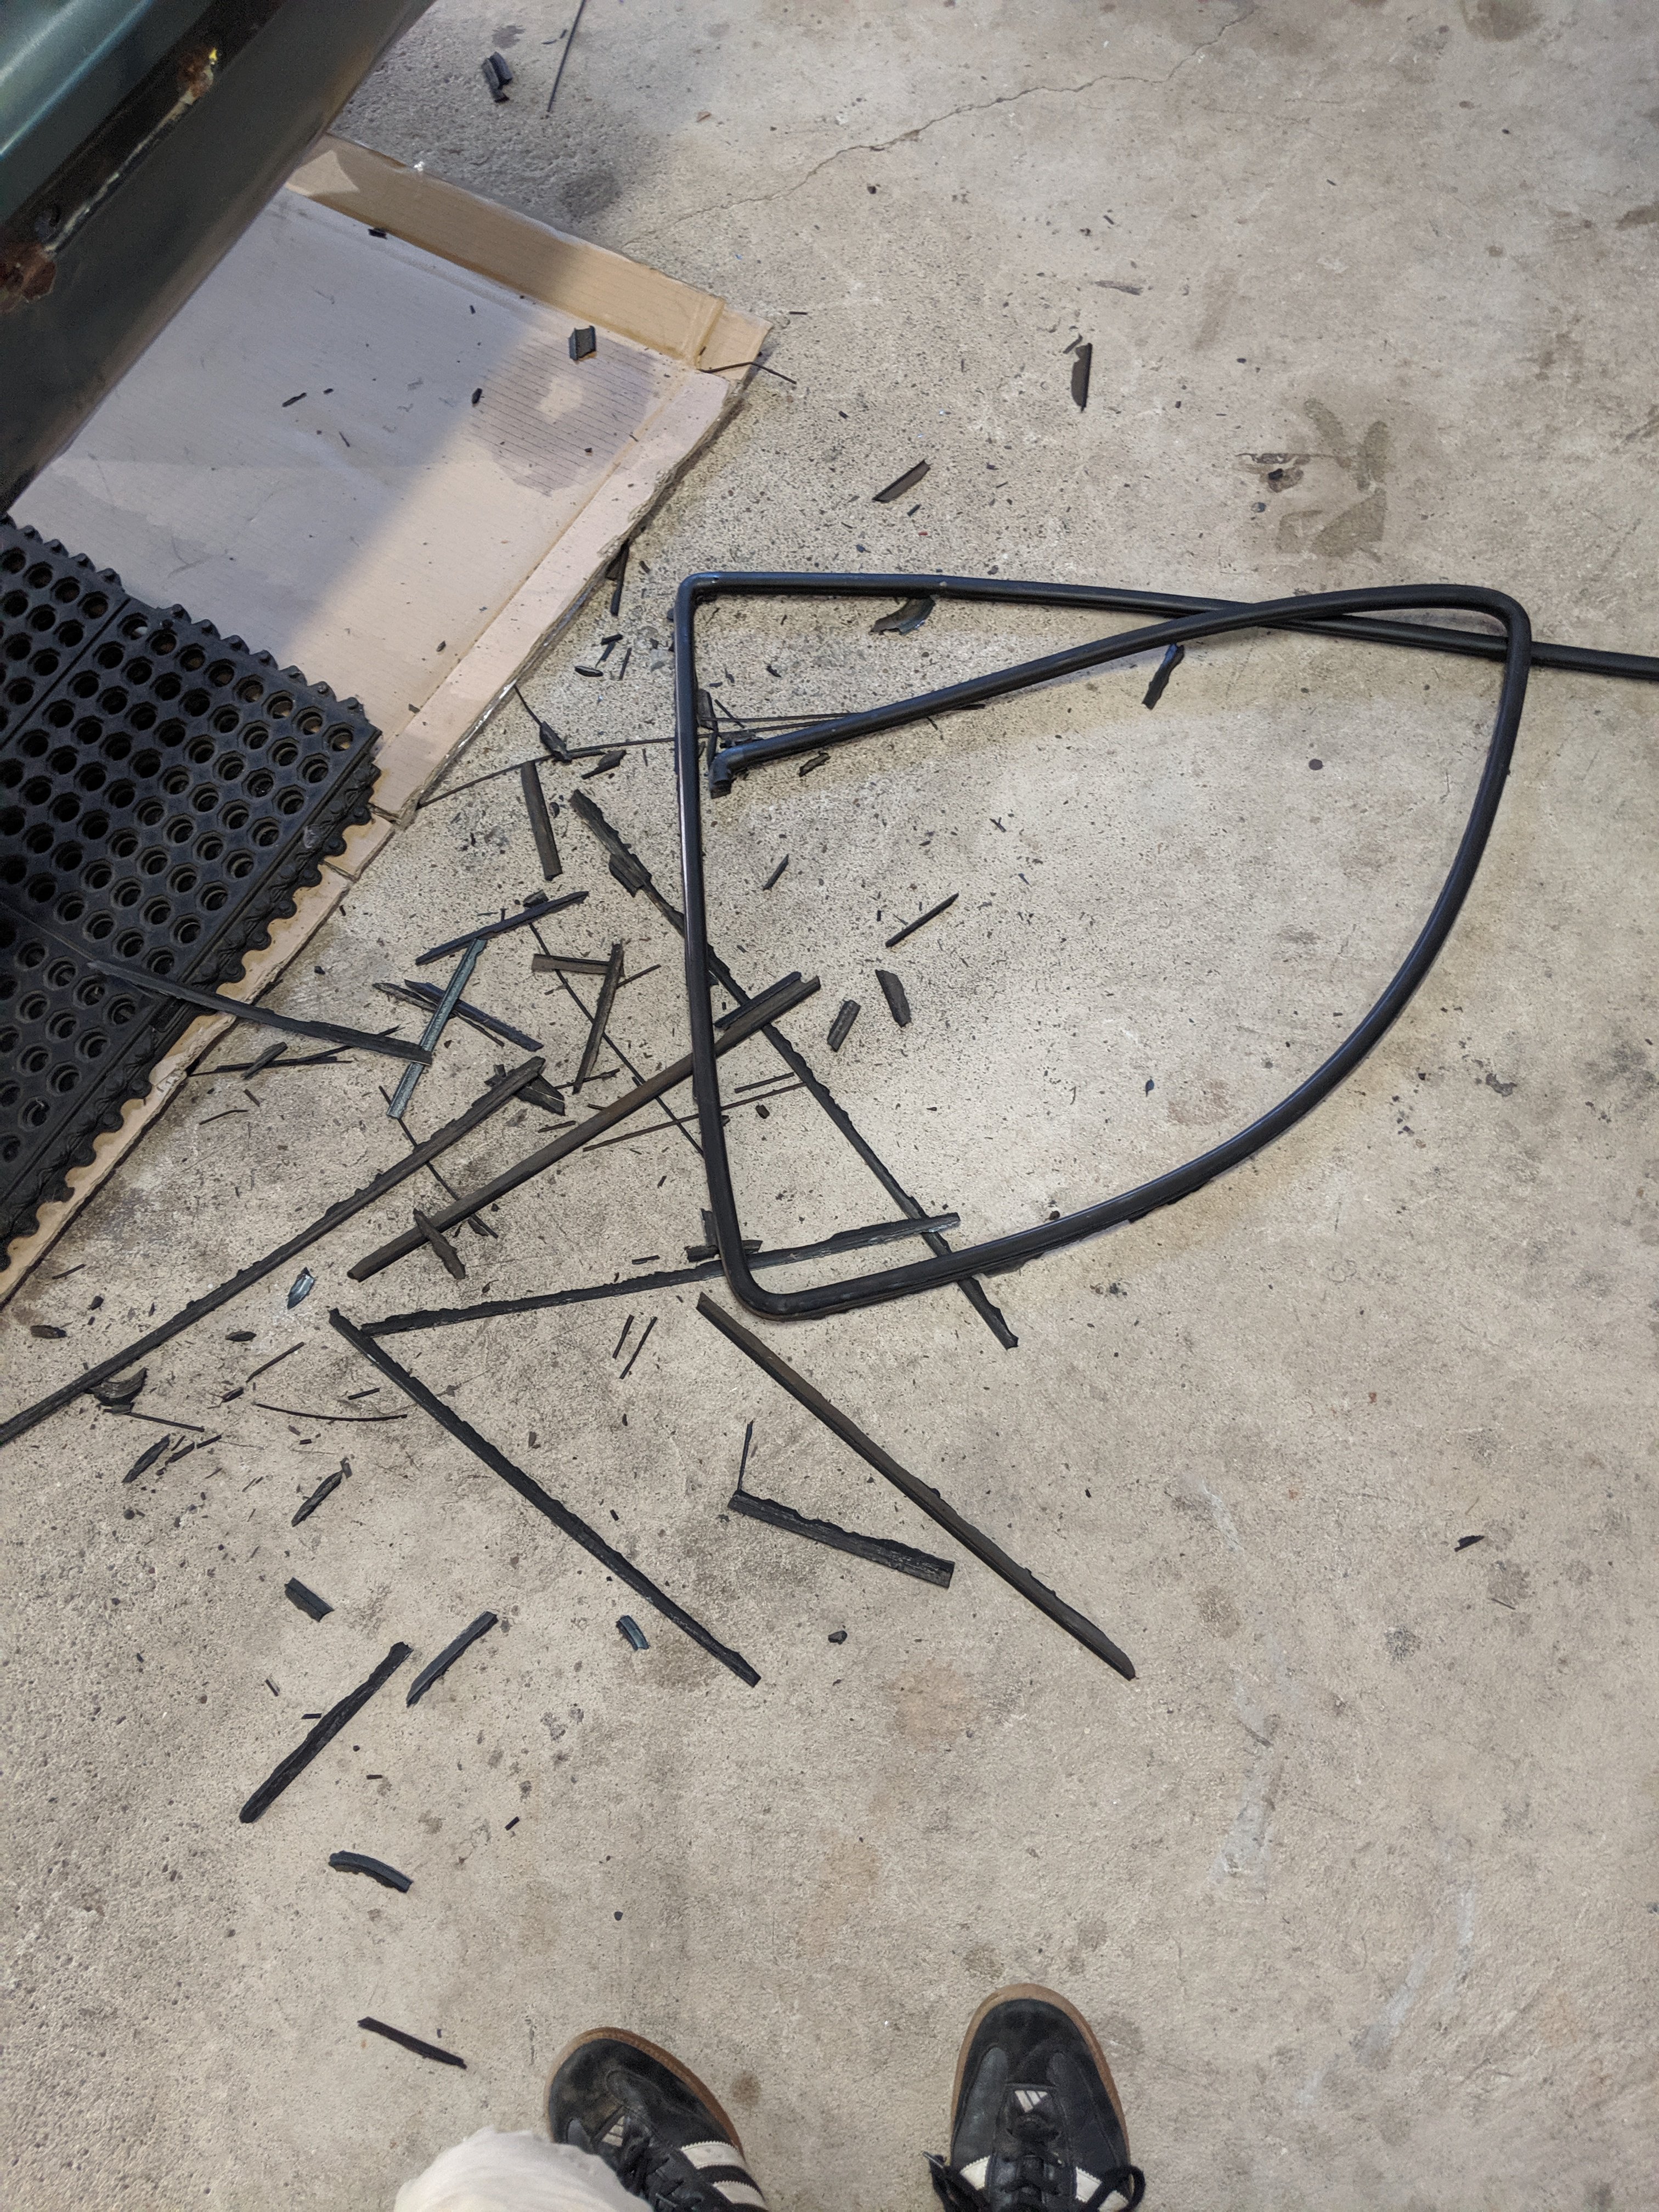
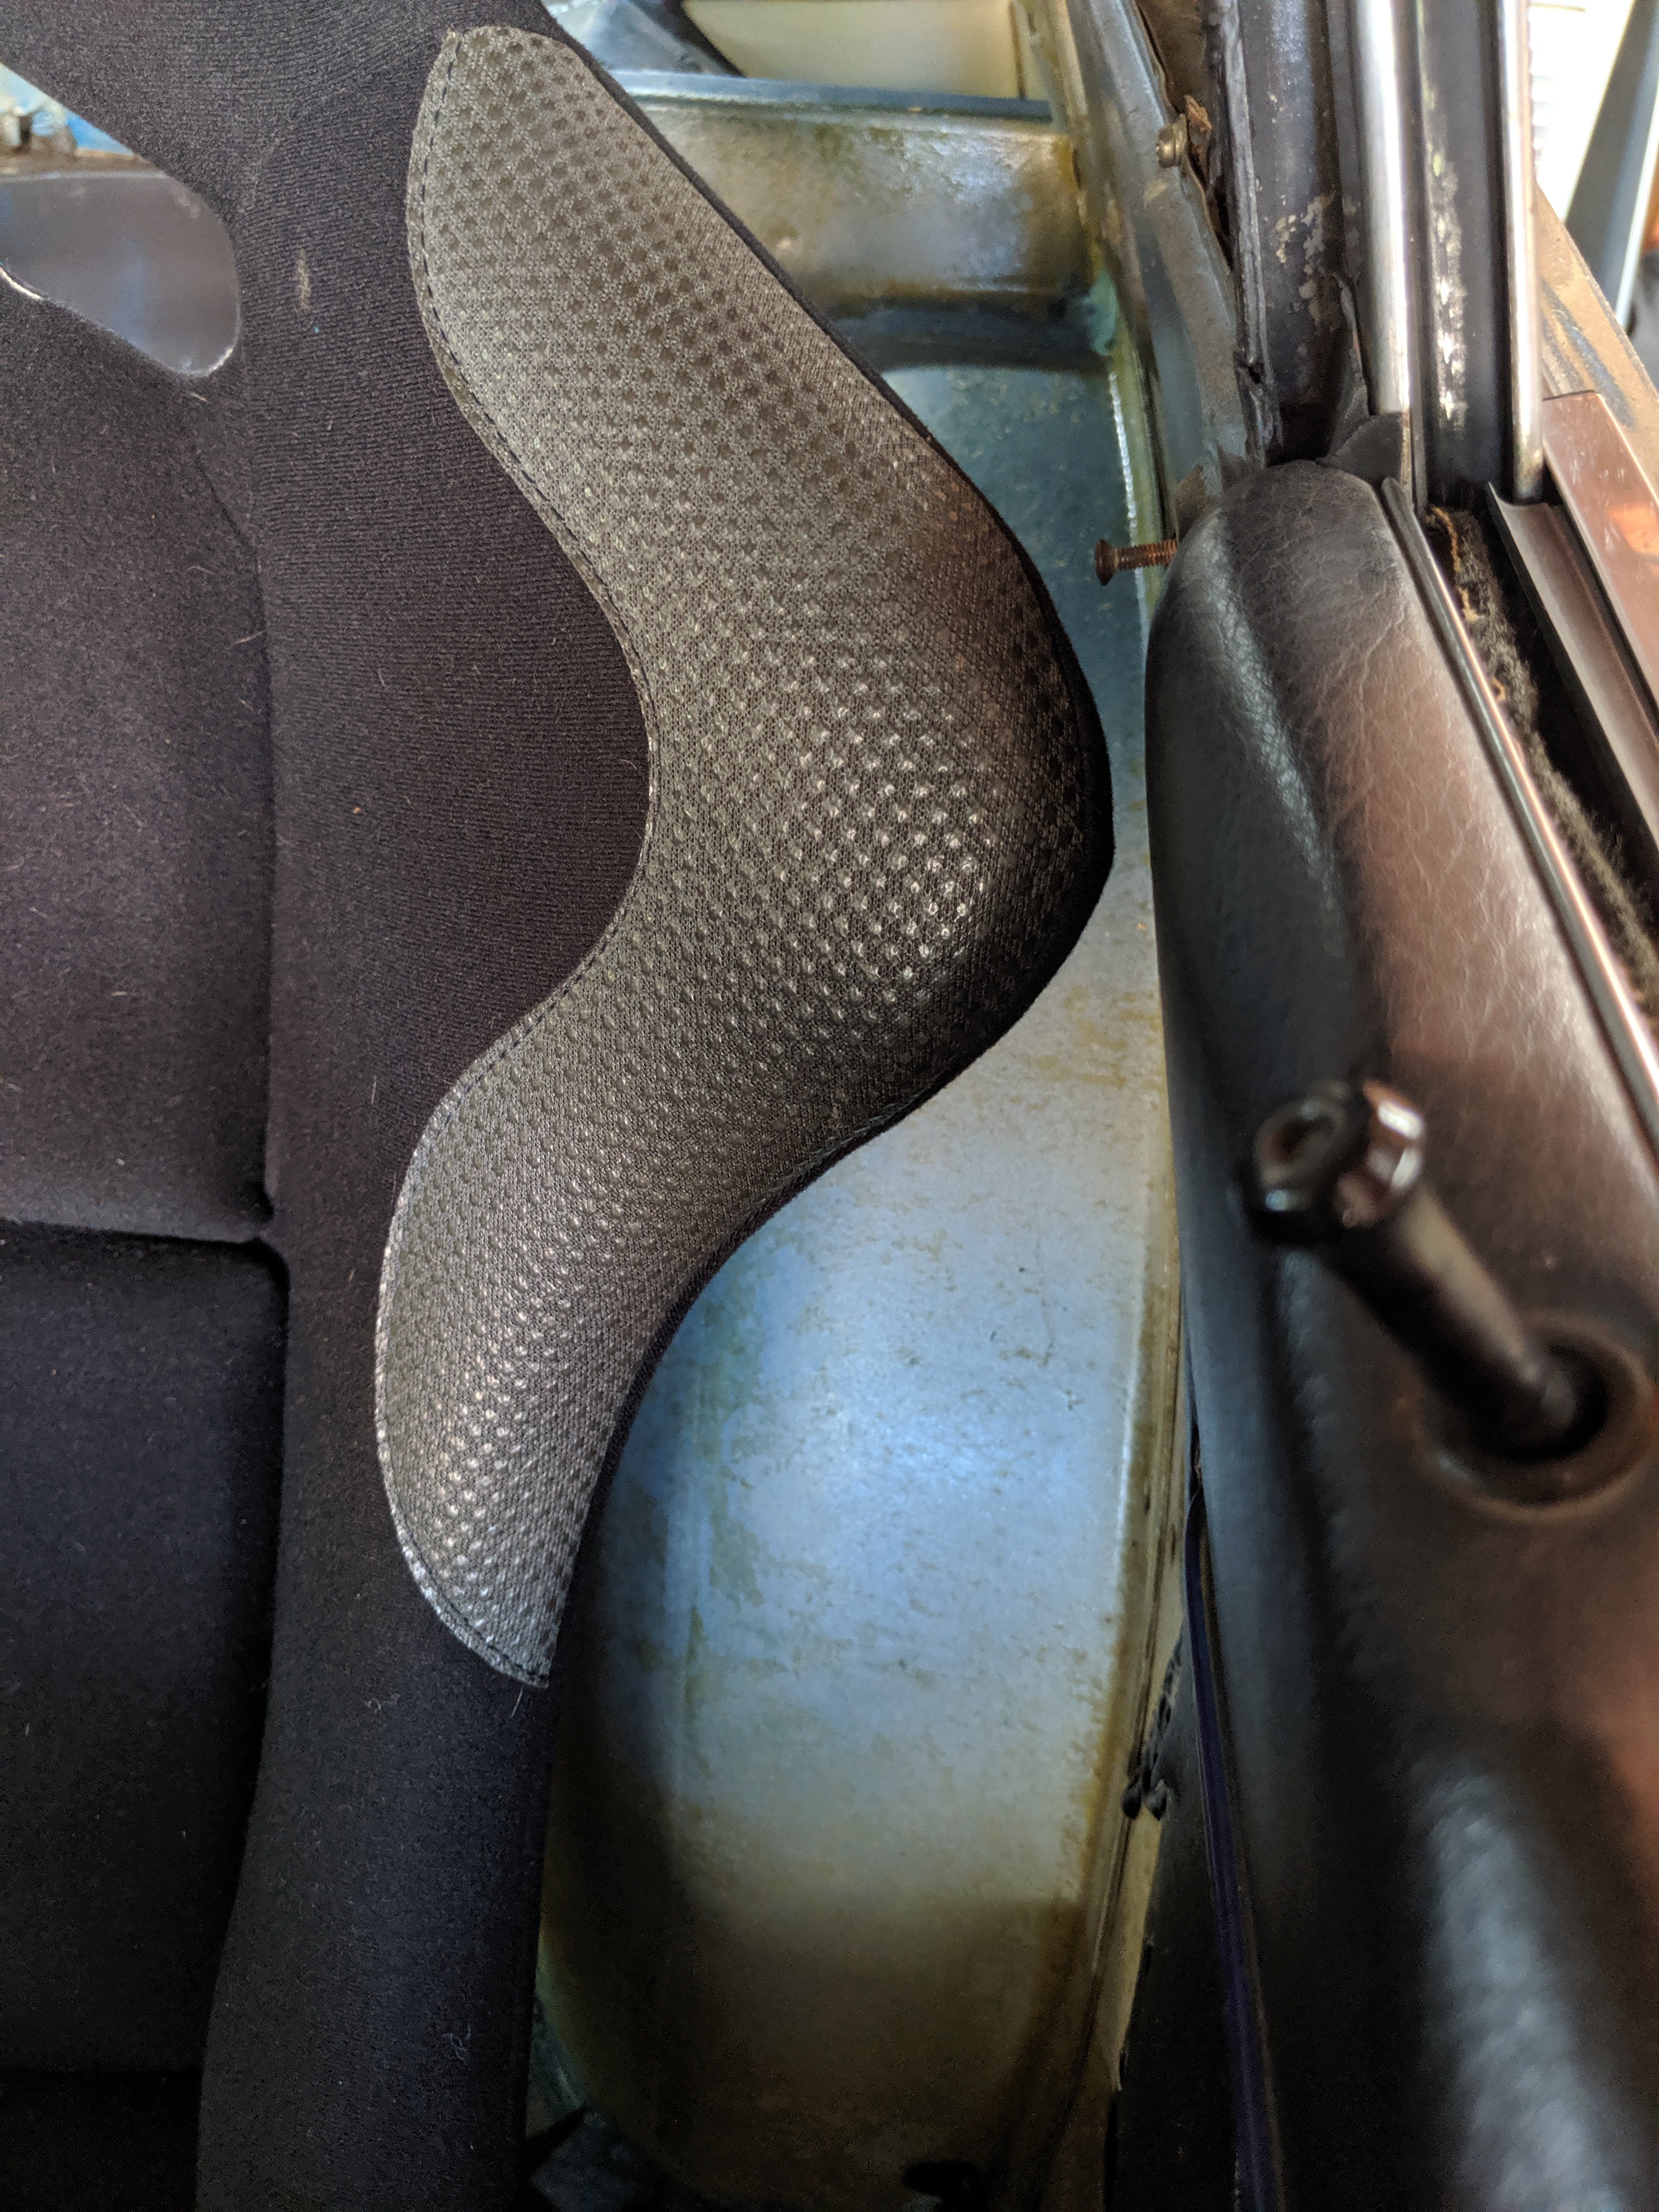
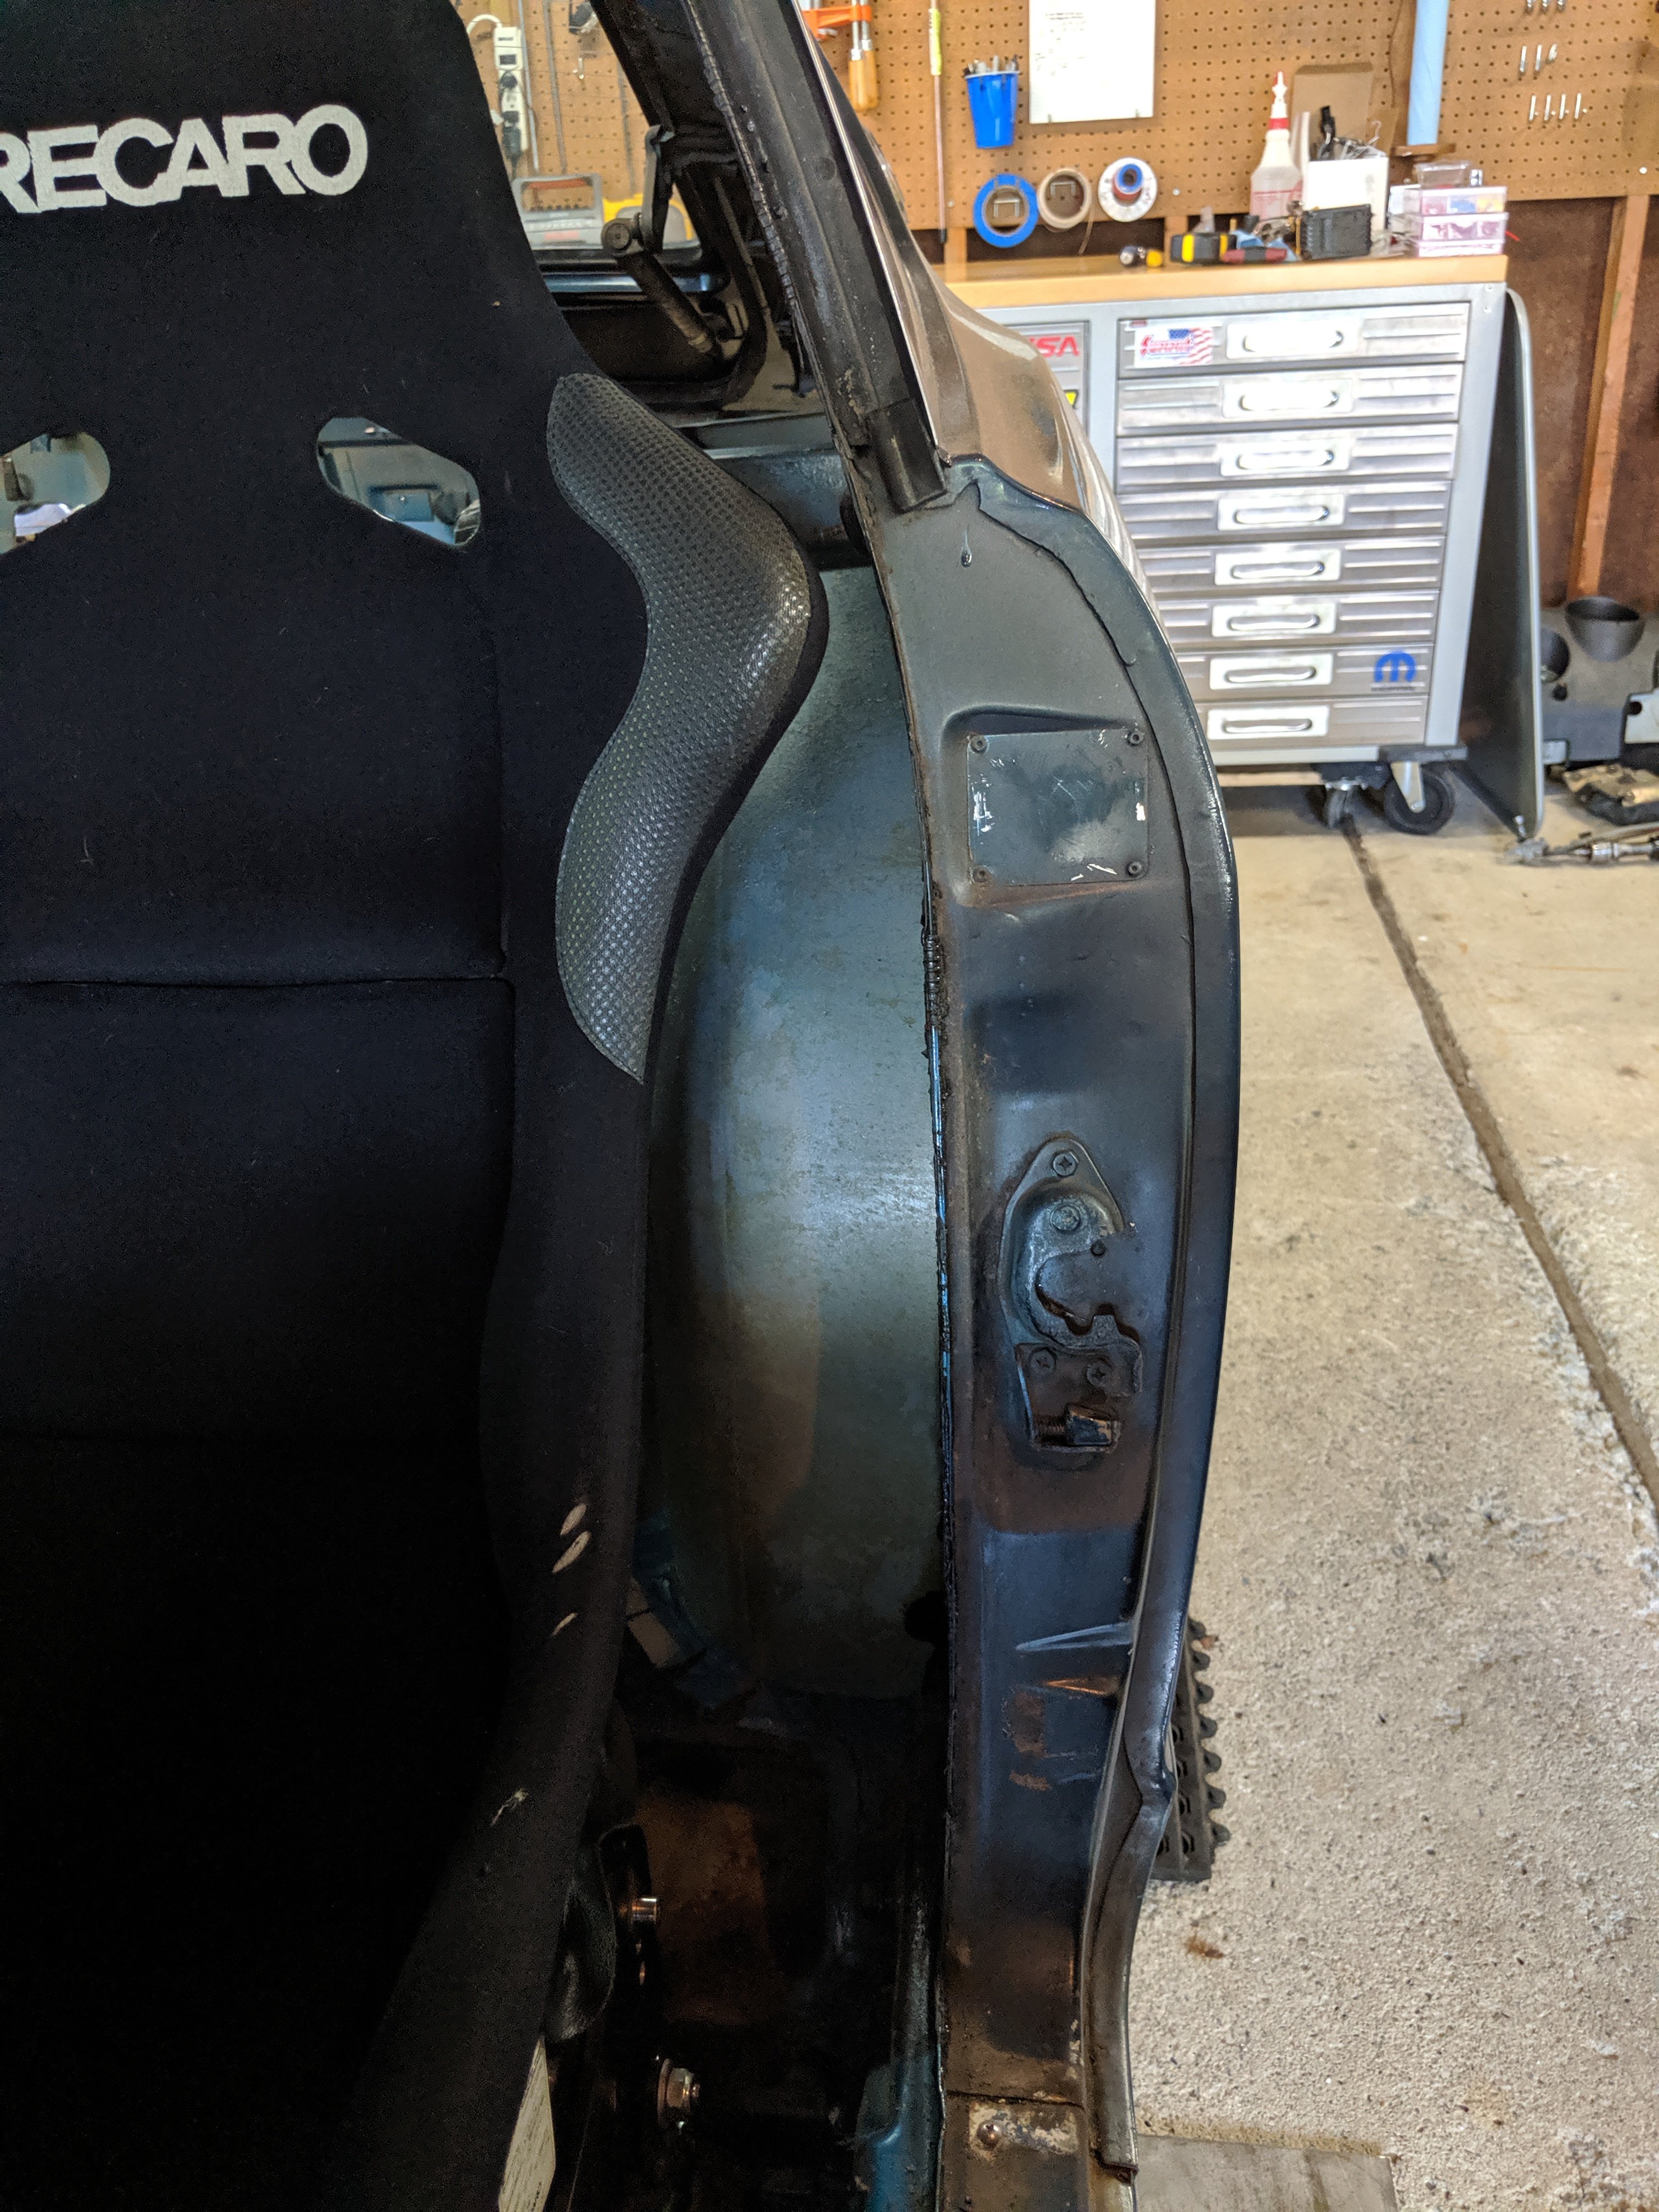
The trumpets will have their own individual filter setup before it runs on the road. Just haven't gotten them yet. As far as the bearing wear issue, I have heard of Lang's service and I have also heard mixed things about that process. I decided to just use the best OE crank I could find and if I need to service the bearings every 60k miles, that's not too bad considering that is going to take quite some time to rack up that many miles. And yup, aiming for 340hp and 2500lb. Should be more than enough while still being balanced. Today was about seats and getting the glass out. The Recaros are going to fit great. I just need to get them lower down in the car. I have the side mounts and sliders coming this week. I got all of the glass out of the body with no drama, except that I cracked the windshield. Any specific places known to have quality replacements? Seems like $150 is the going rate for one from the normal Z stores.
-
BMW S54 into S30 Chassis - Build Thread
carbuilder723 replied to carbuilder723's topic in Other Engines
SOOO, now that we're all up to speed, From here on out the posts should be a bit less dense and I'm looking forward to keeping this as a build journal for the duration. -
BMW S54 into S30 Chassis - Build Thread
carbuilder723 replied to carbuilder723's topic in Other Engines
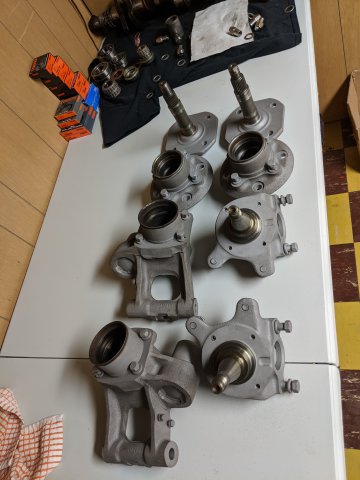
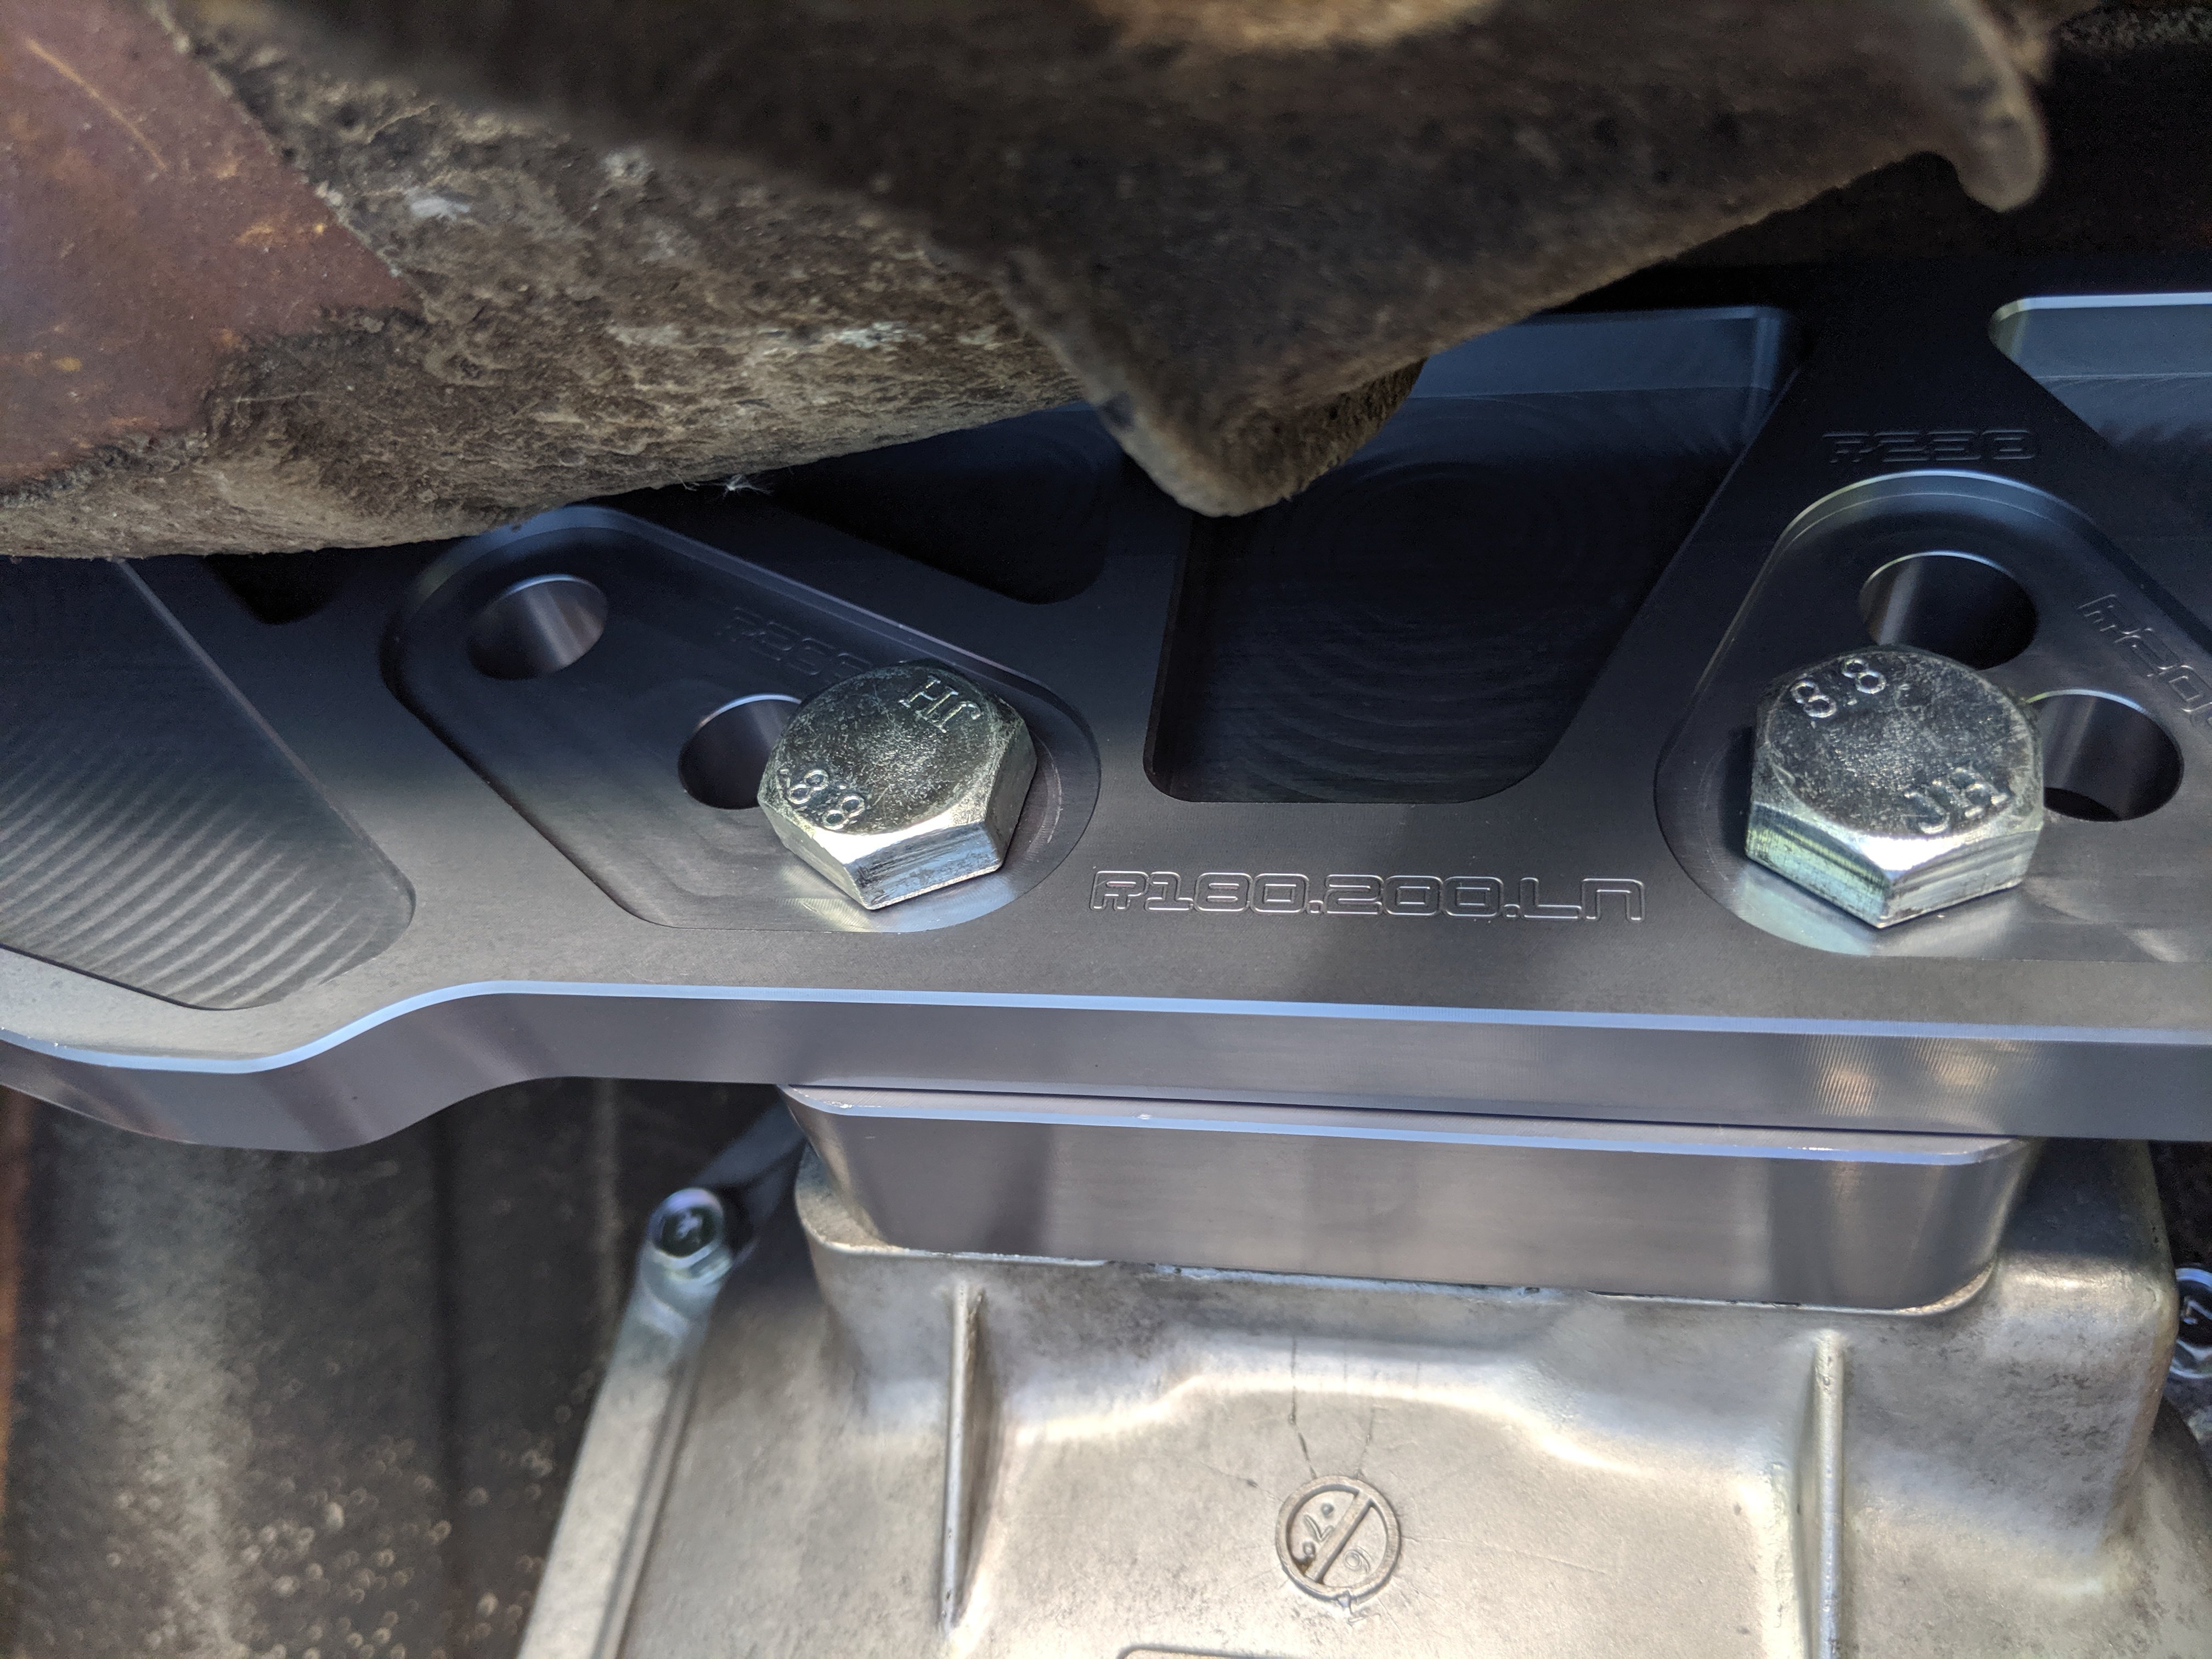
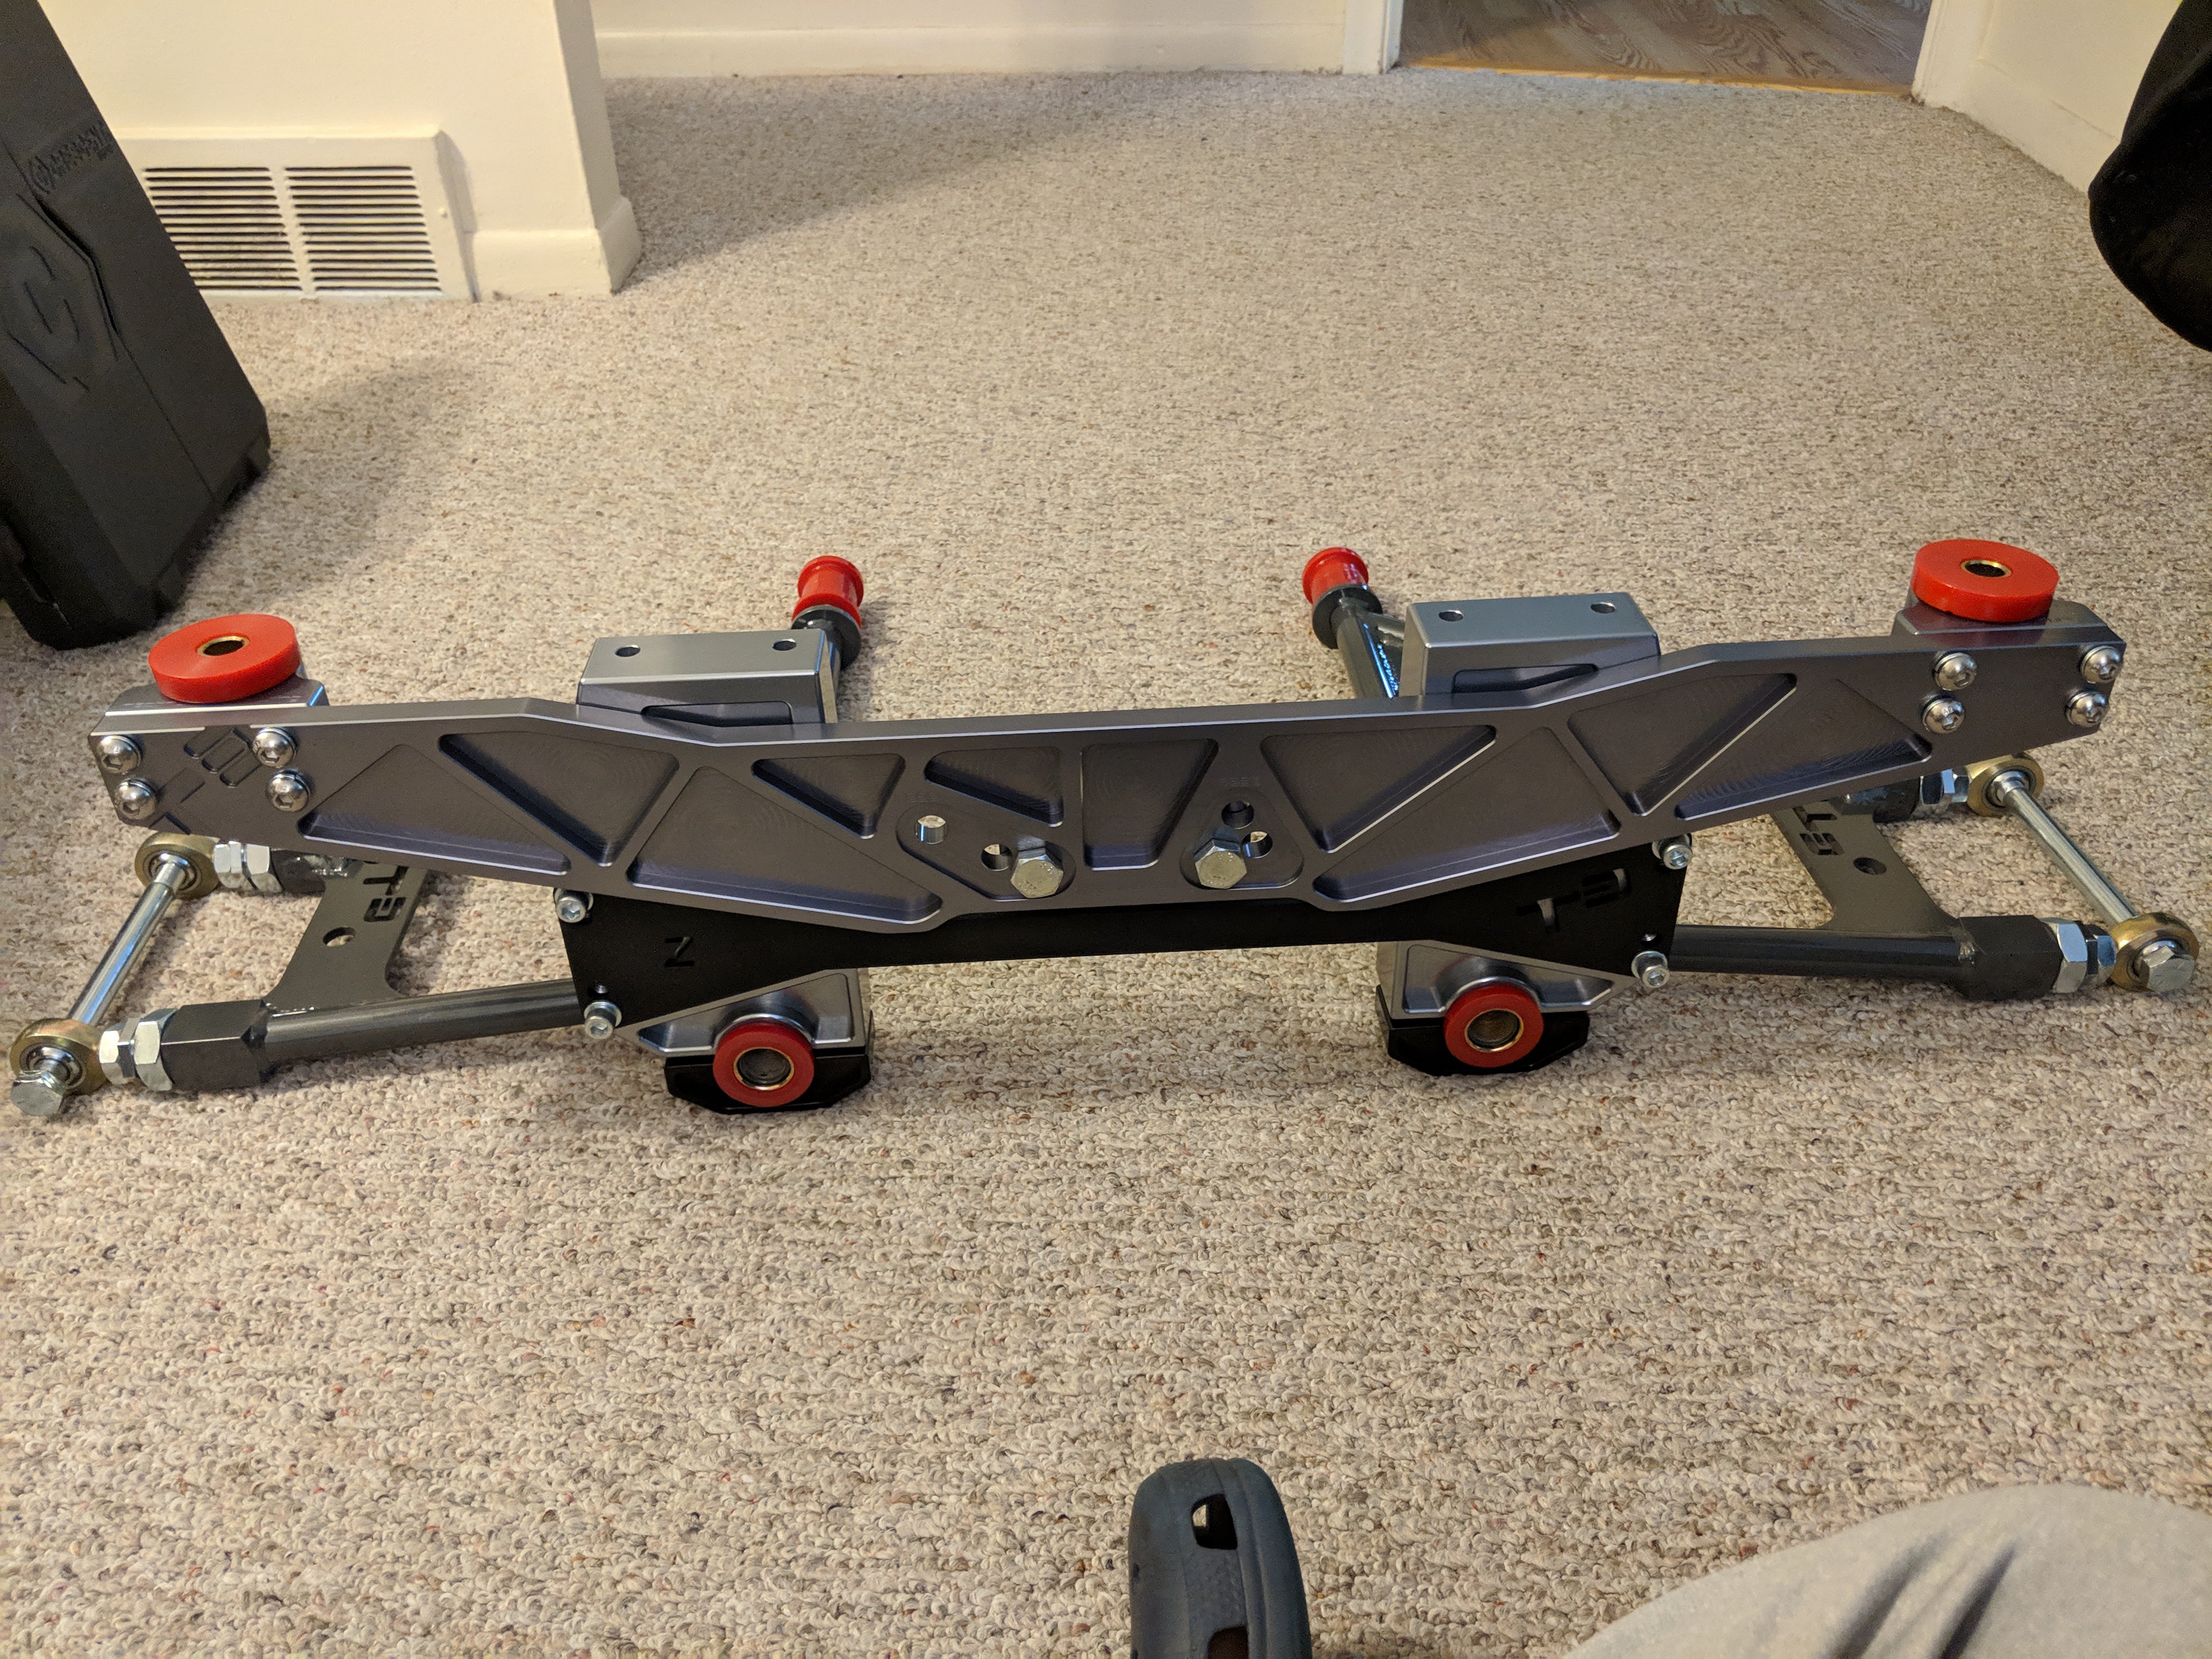
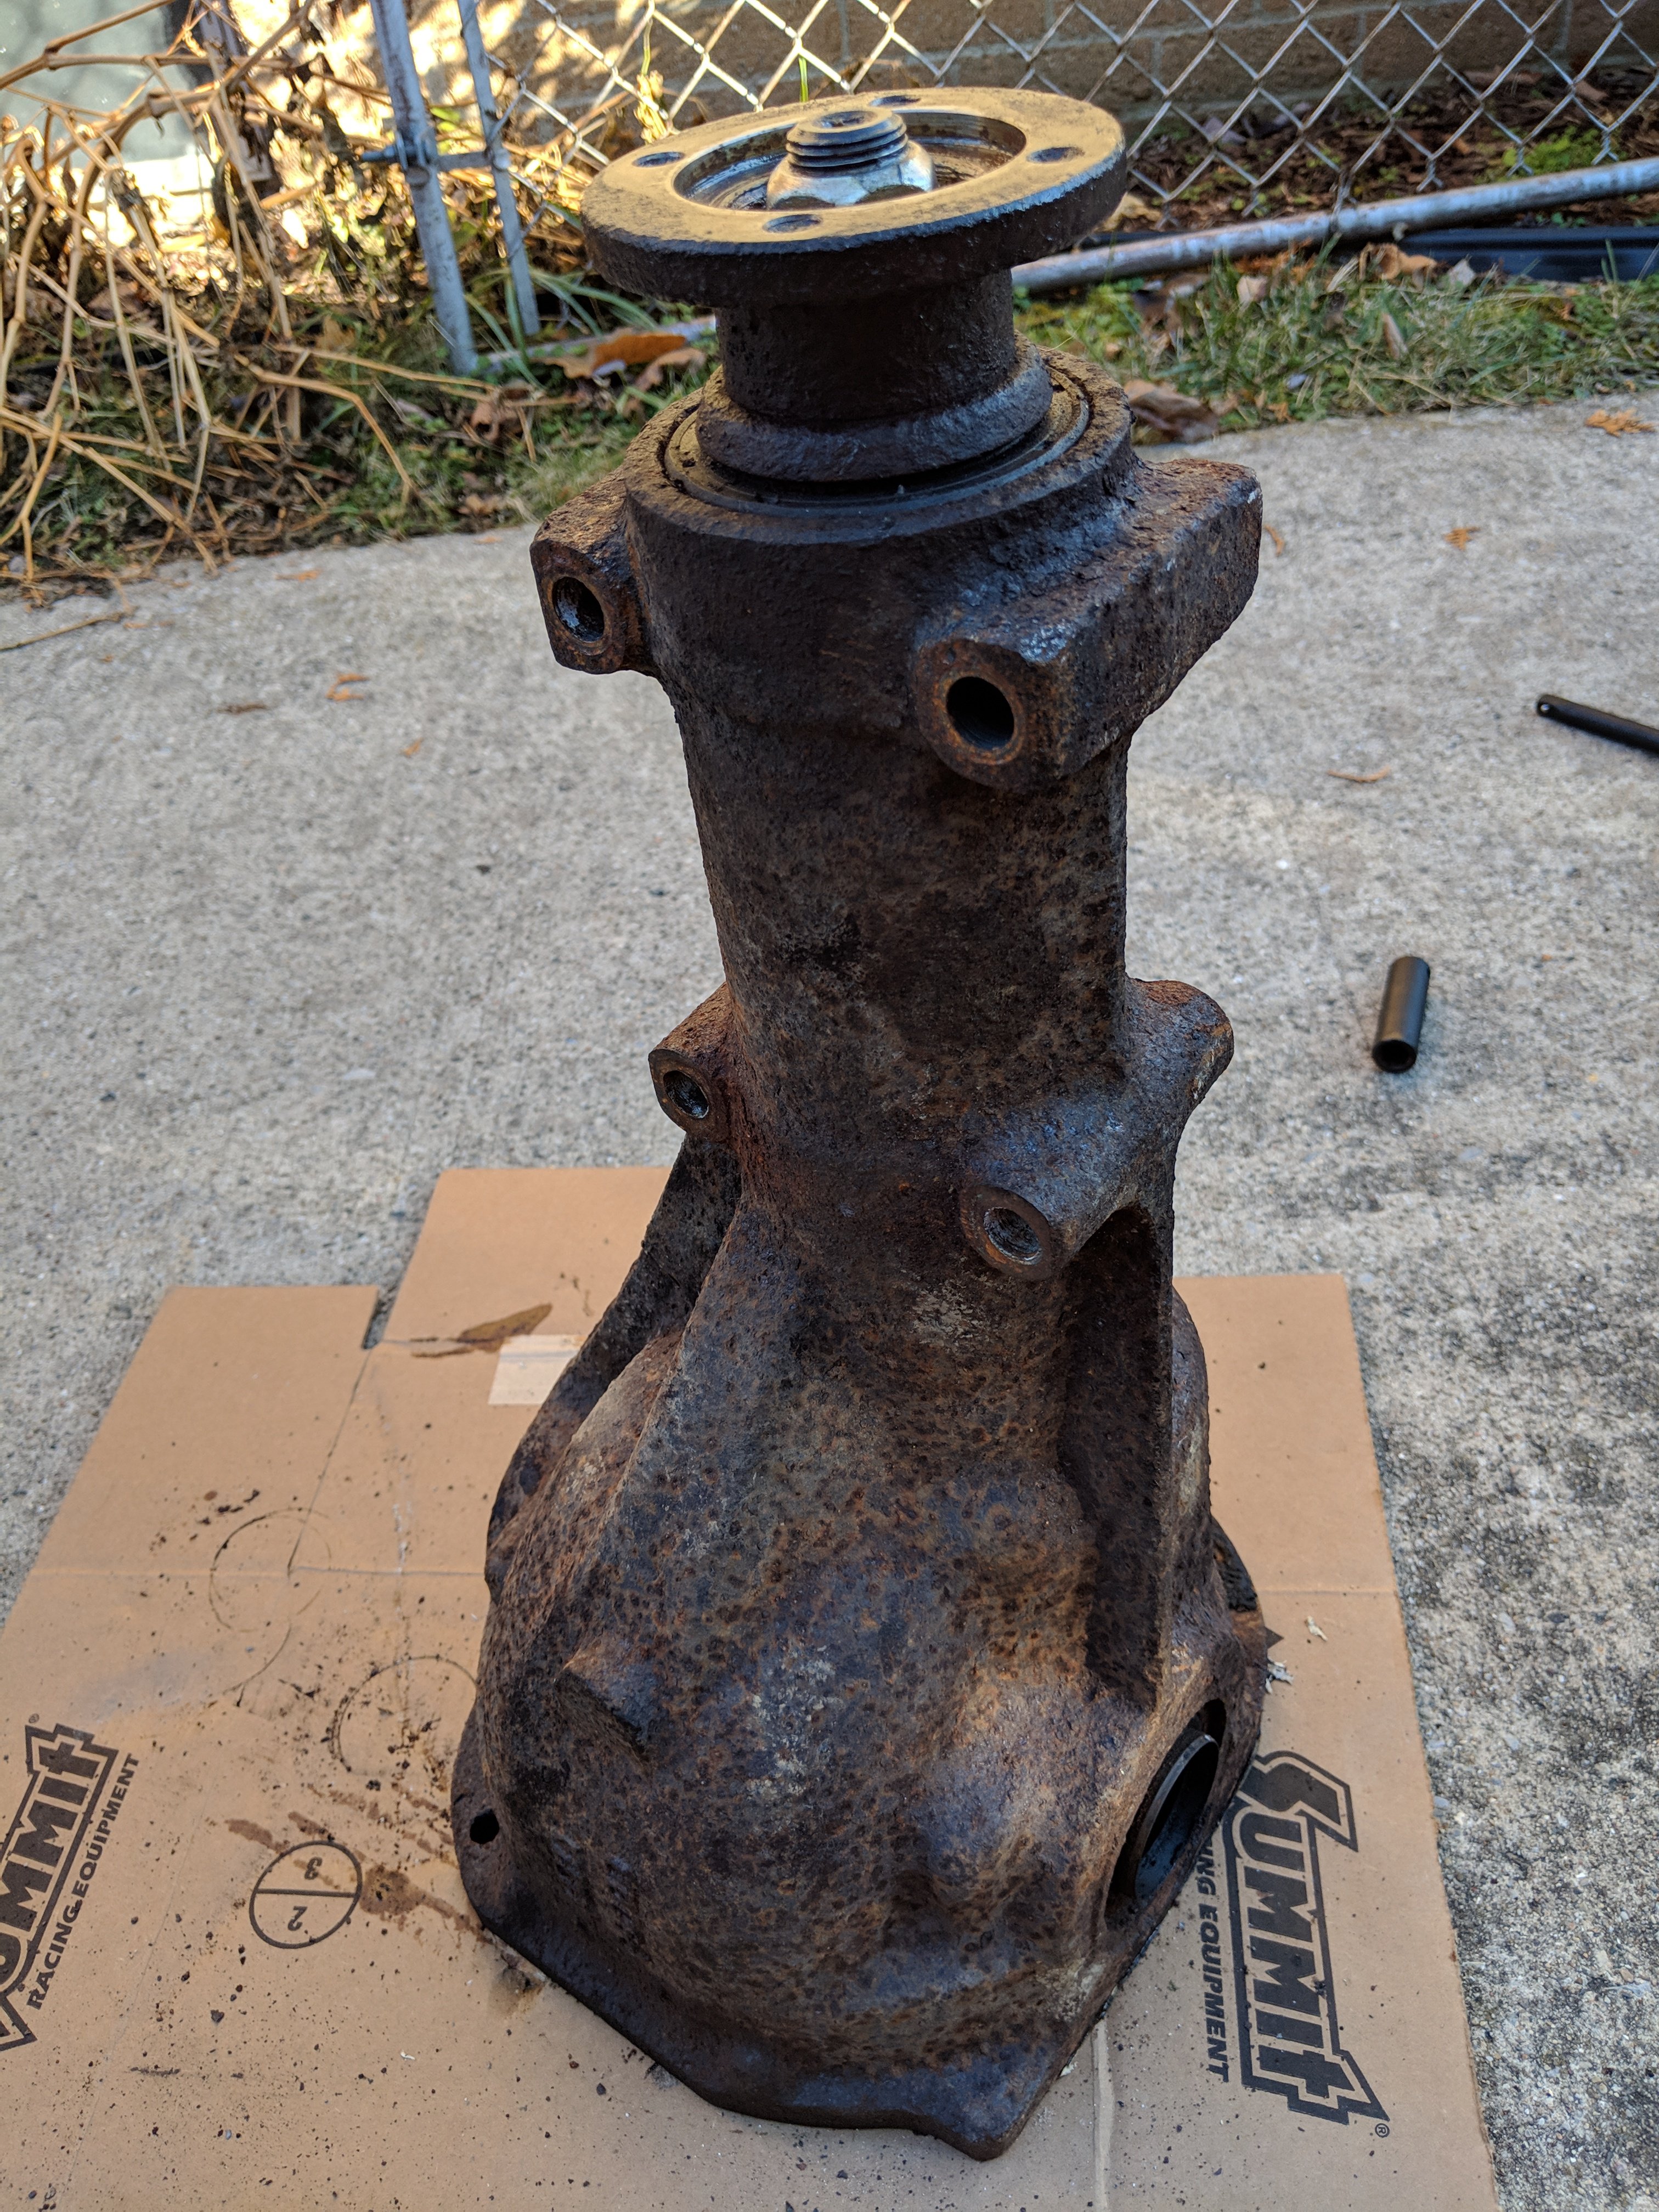
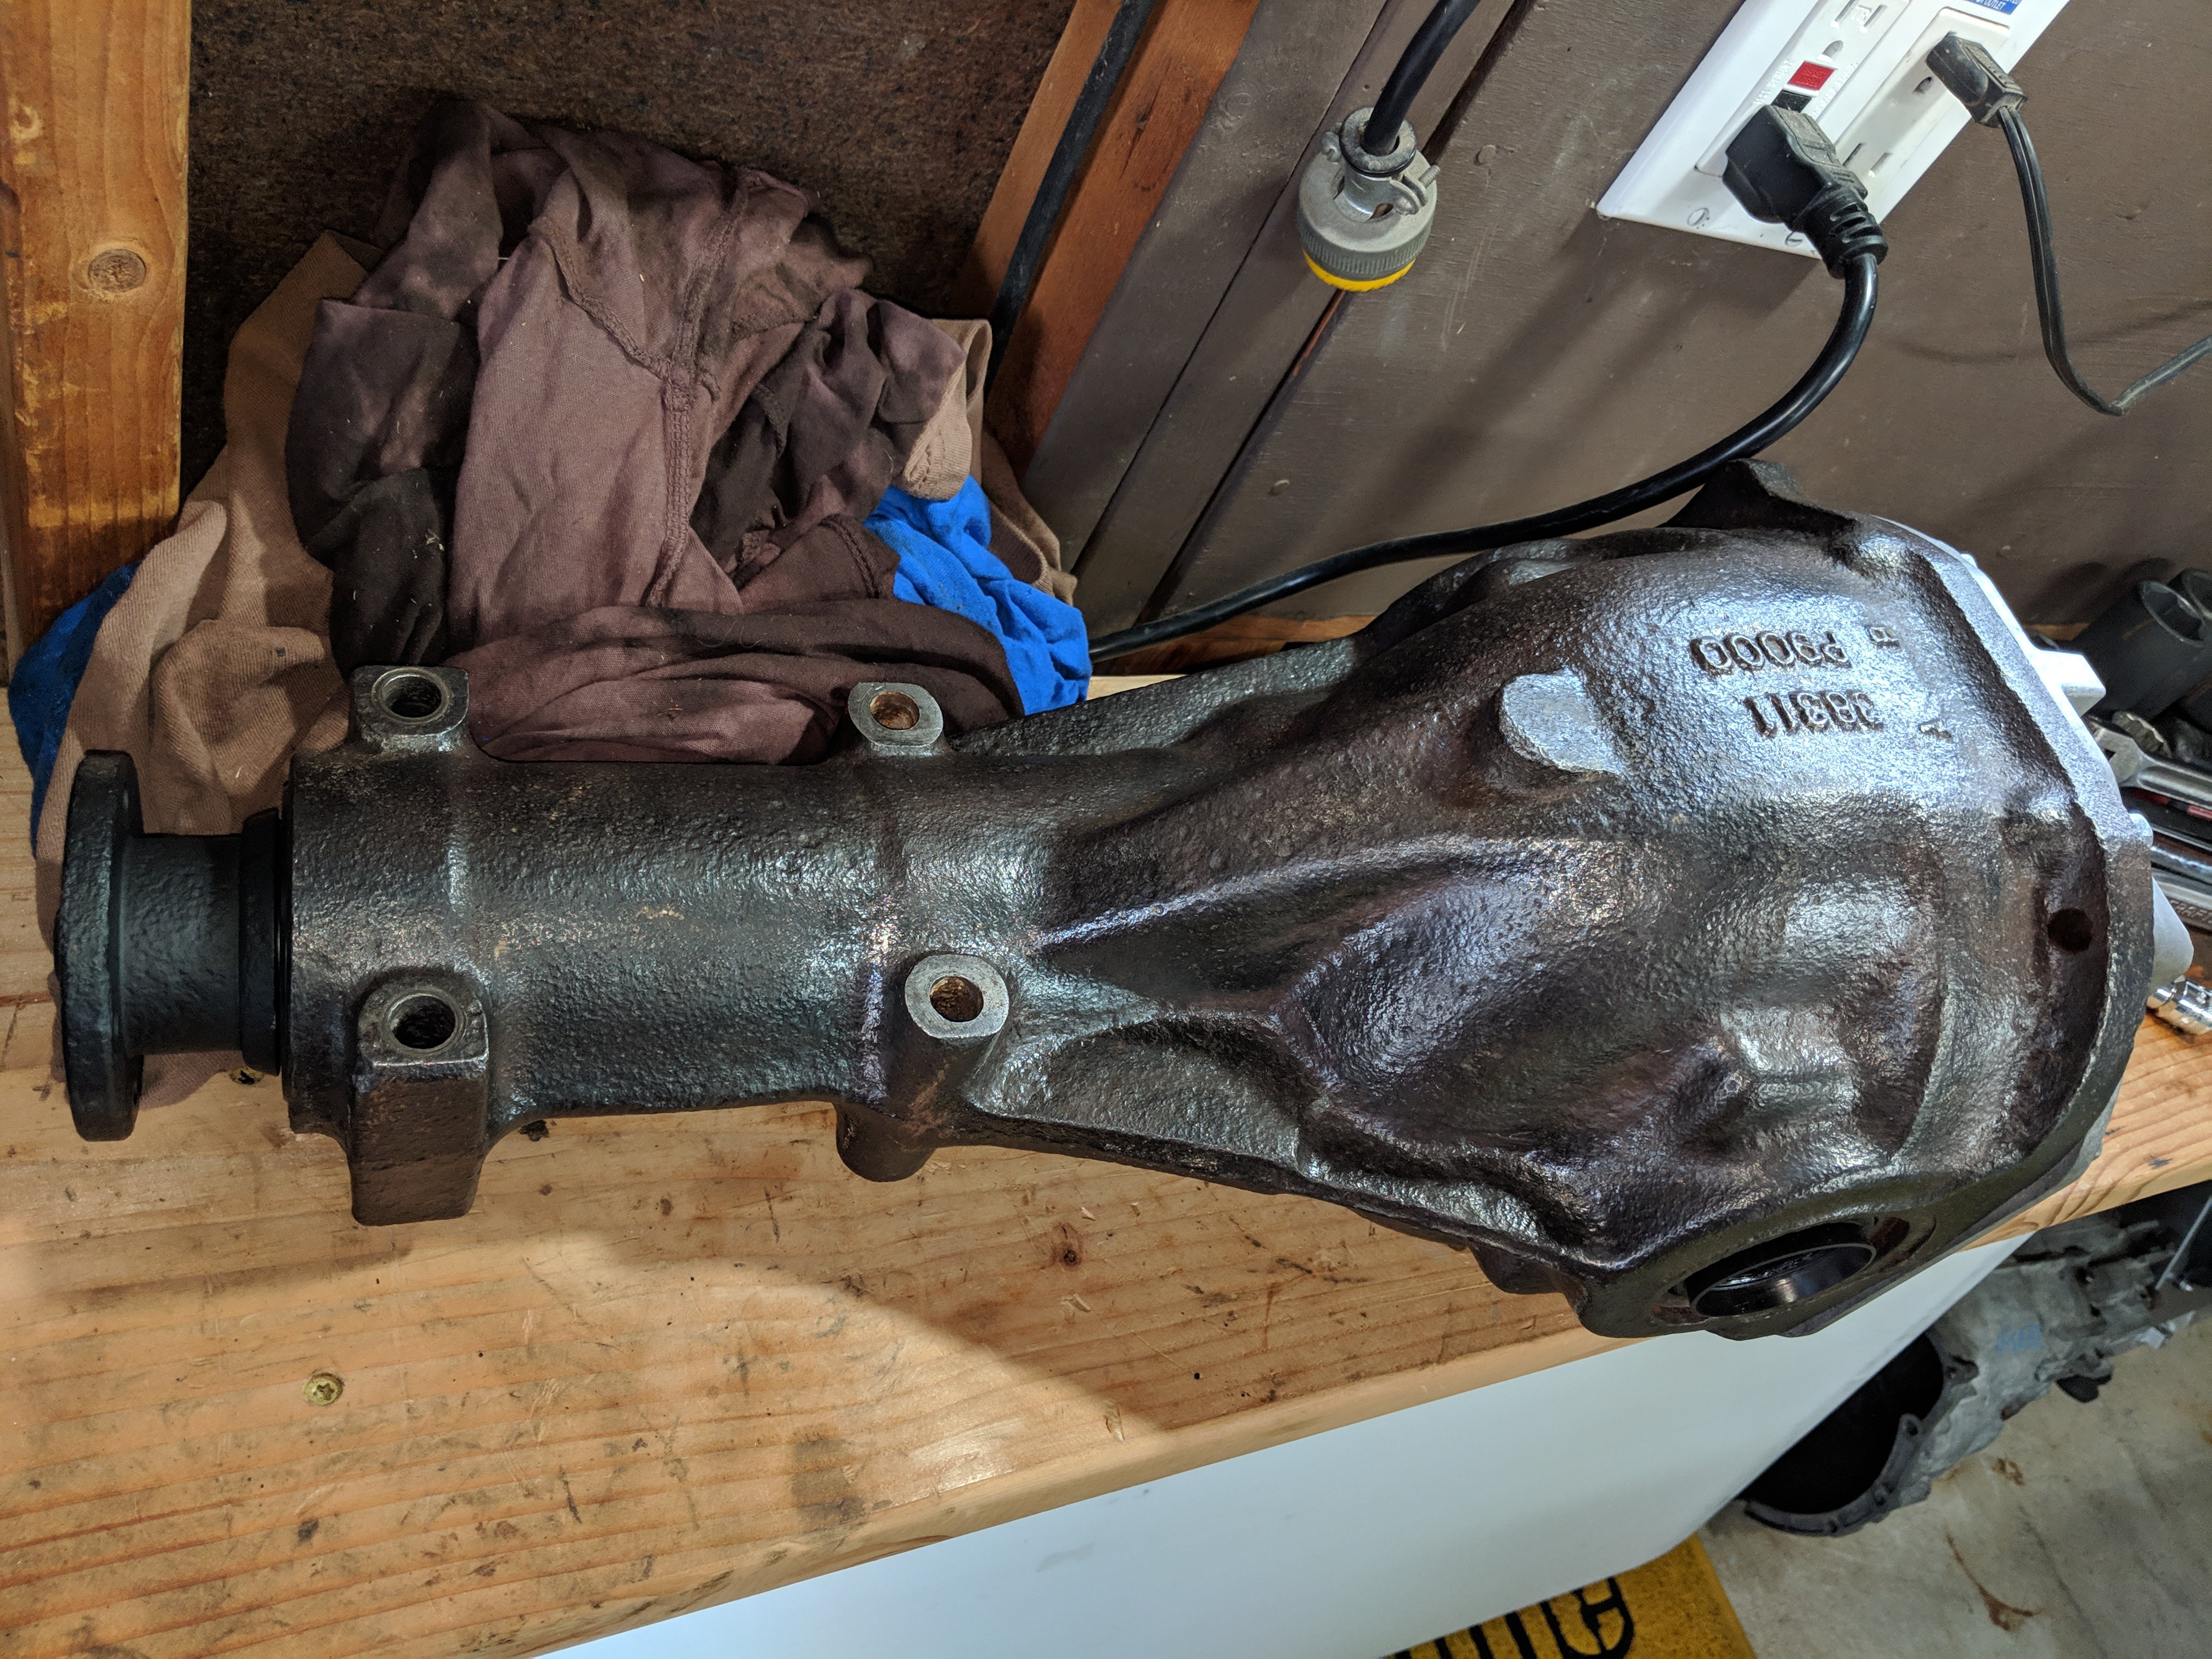
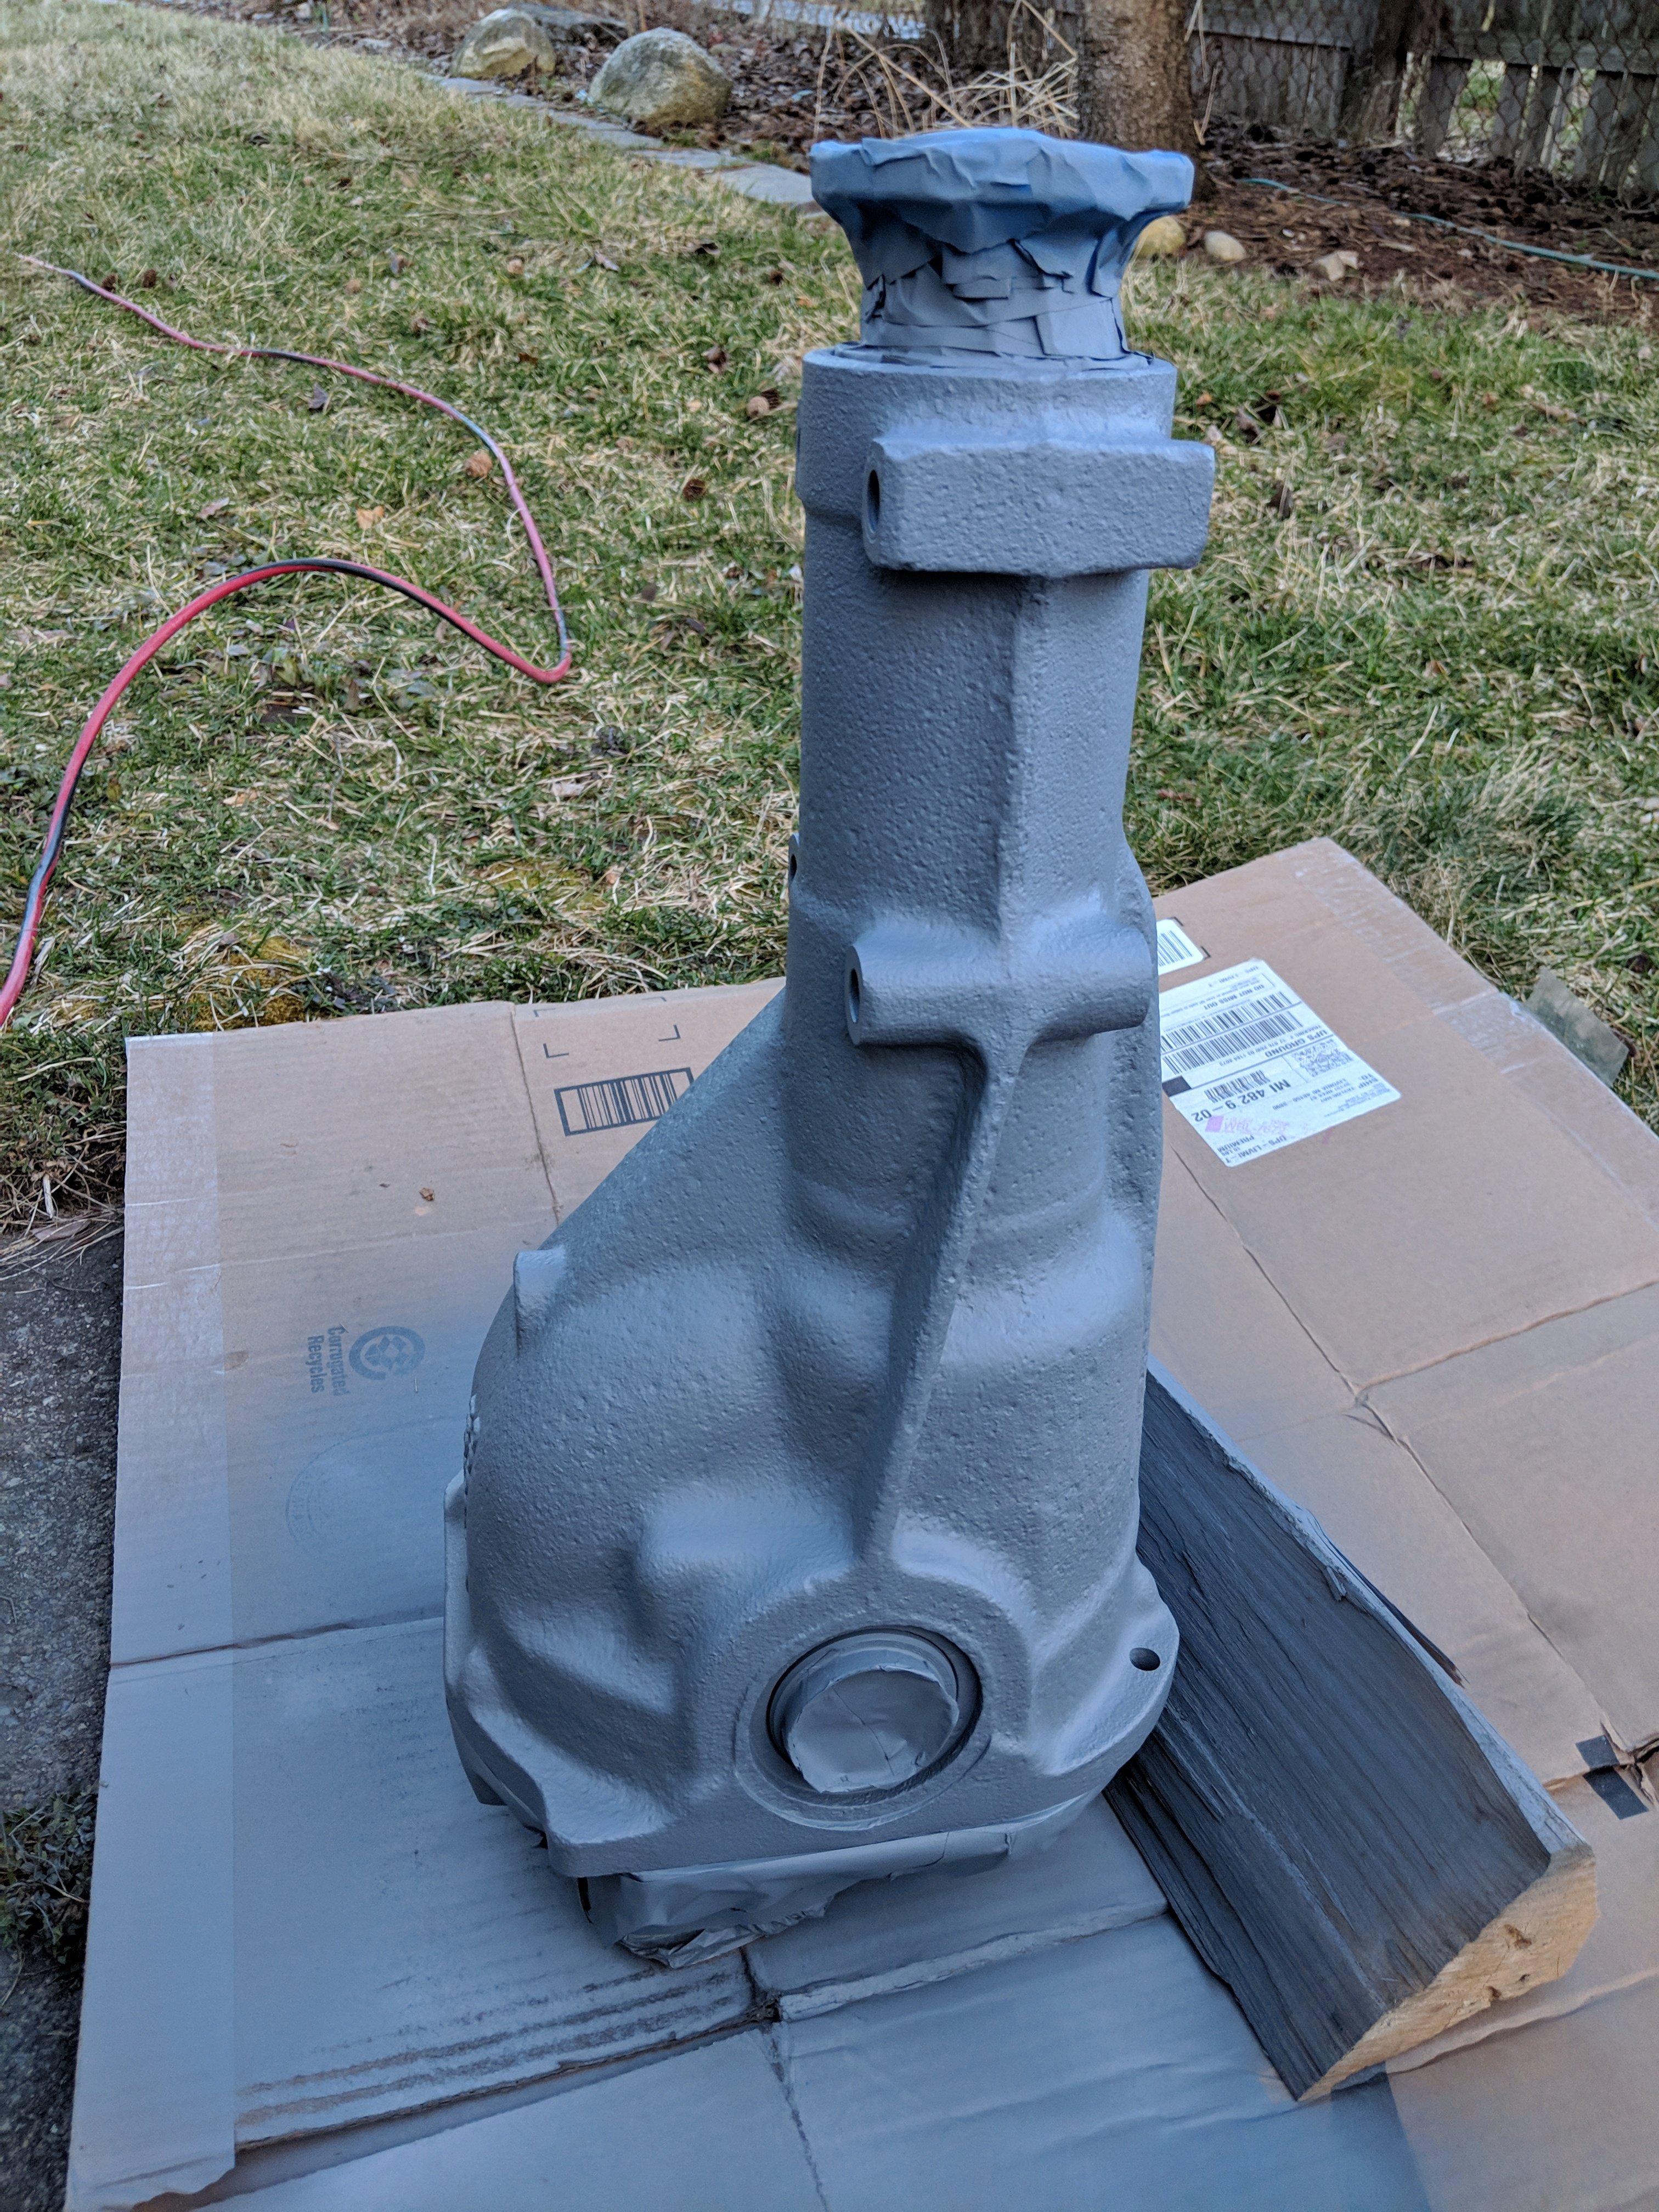
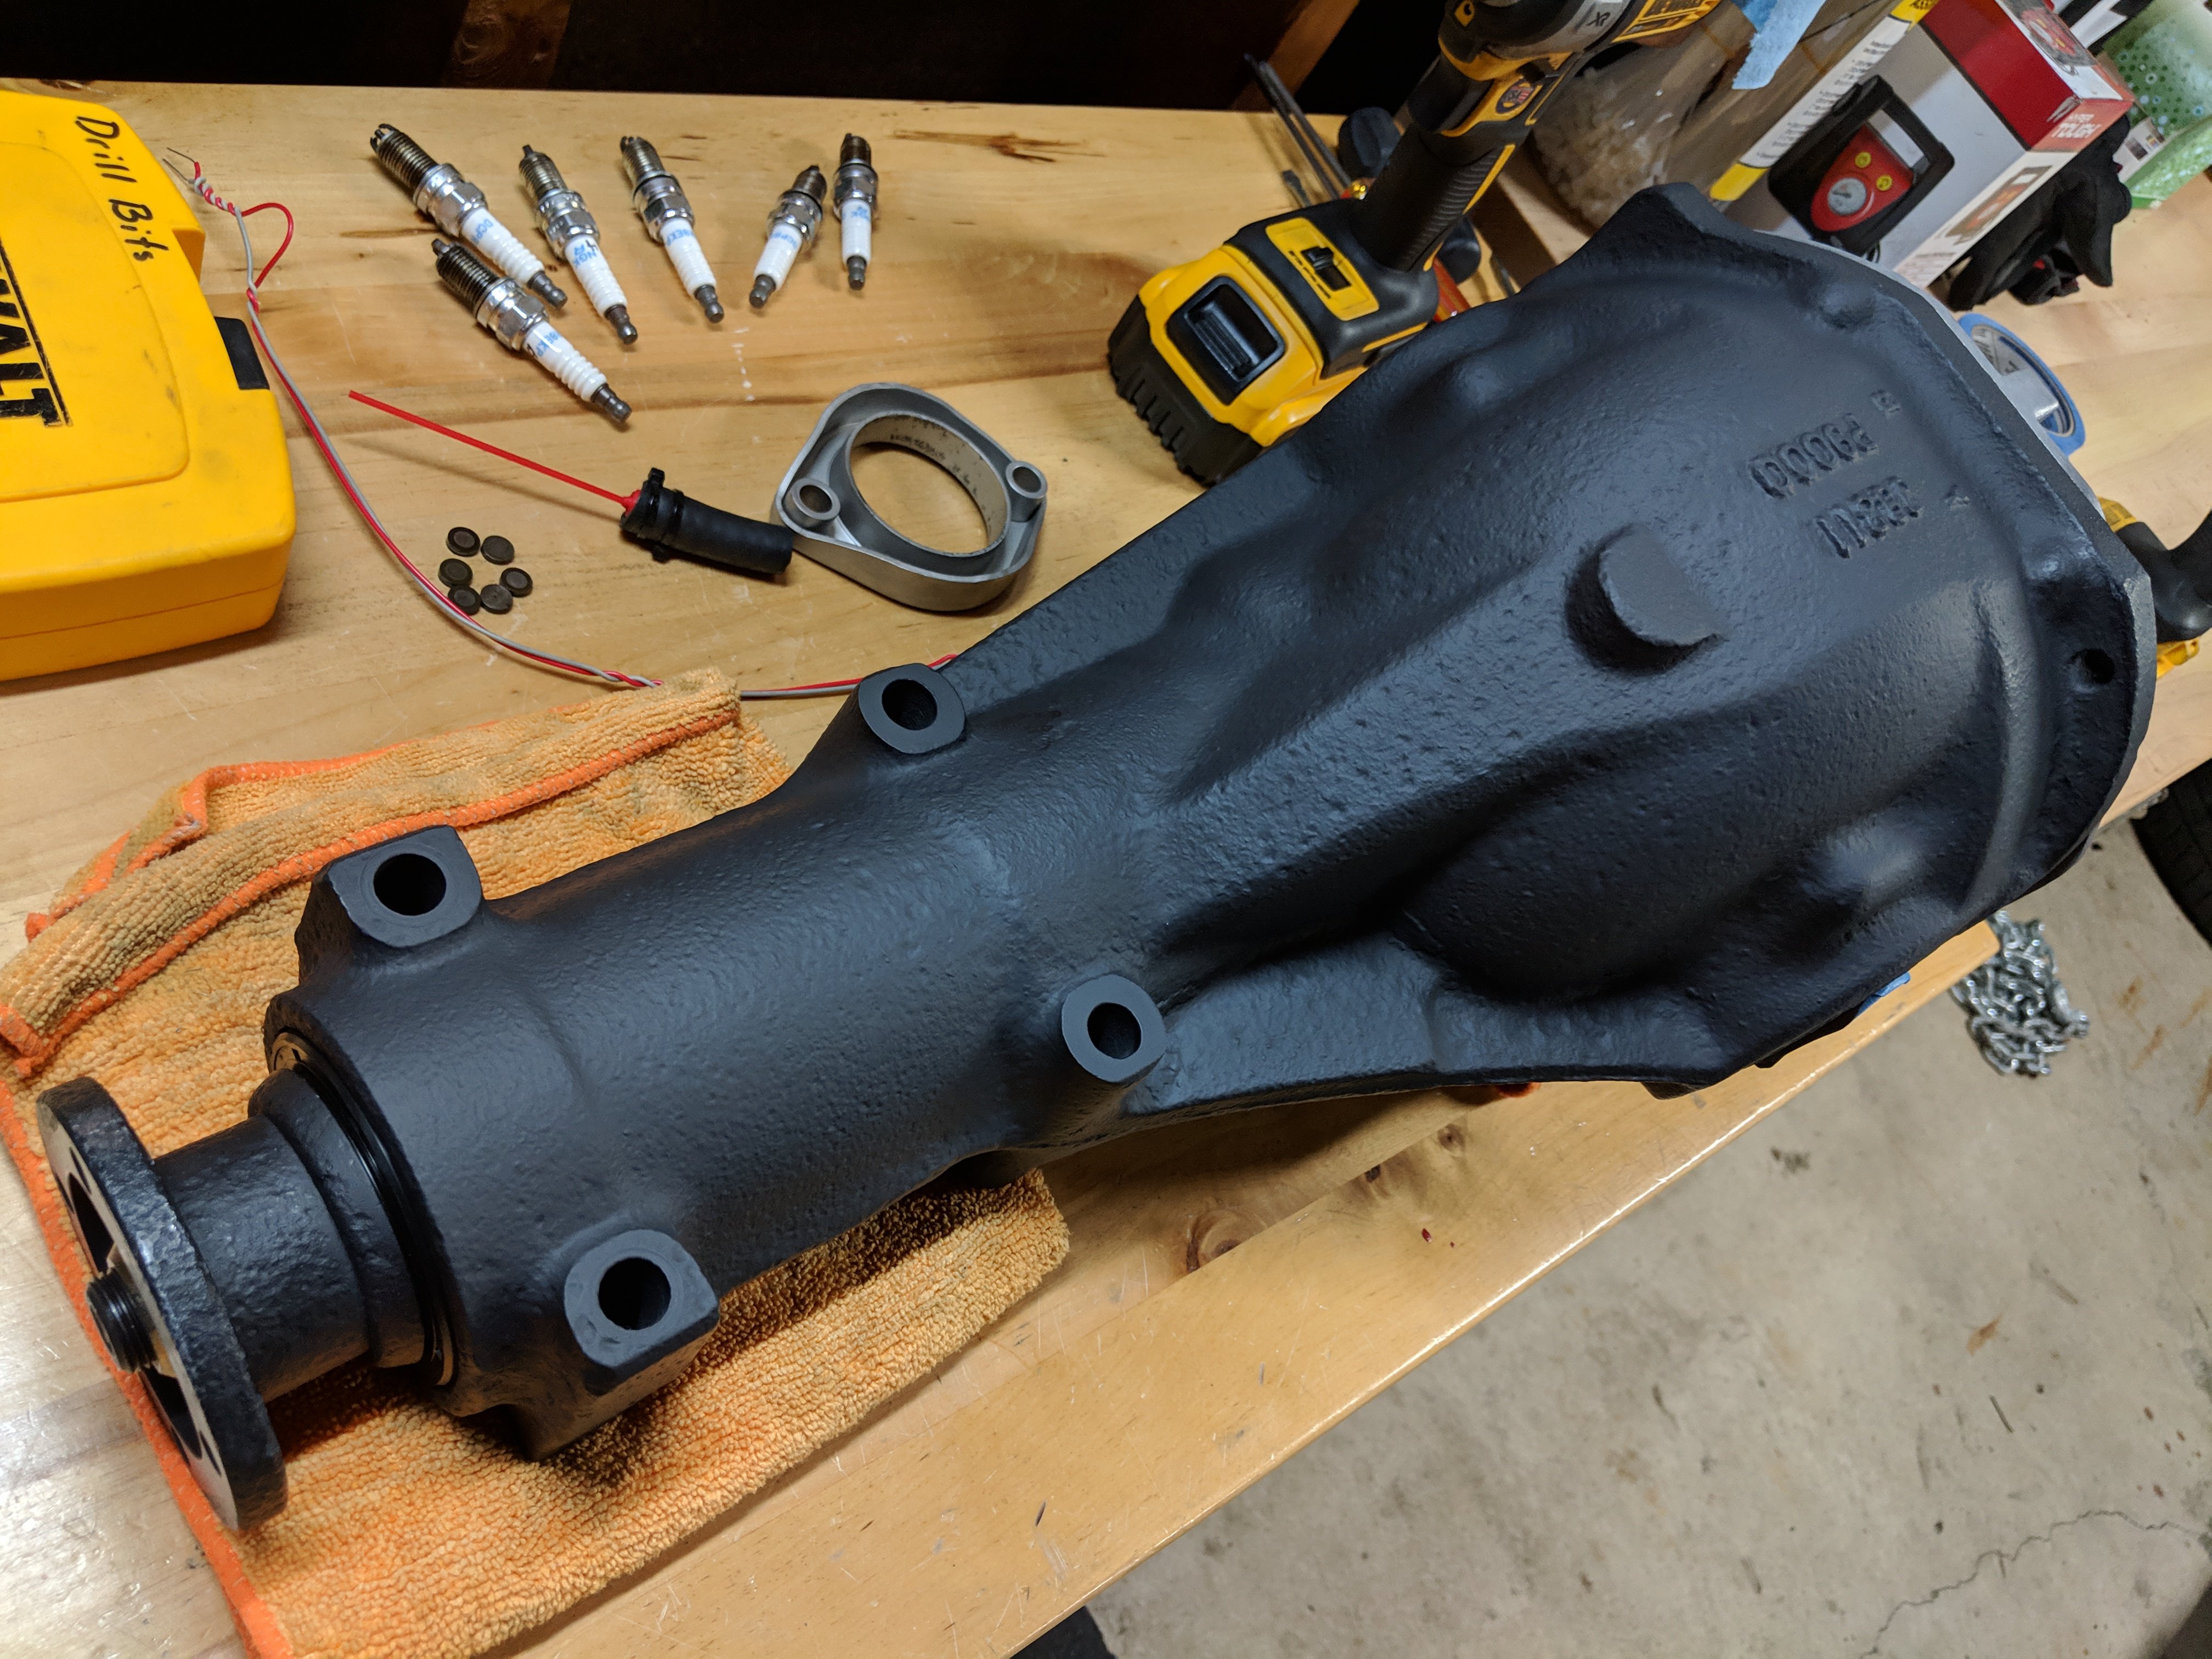
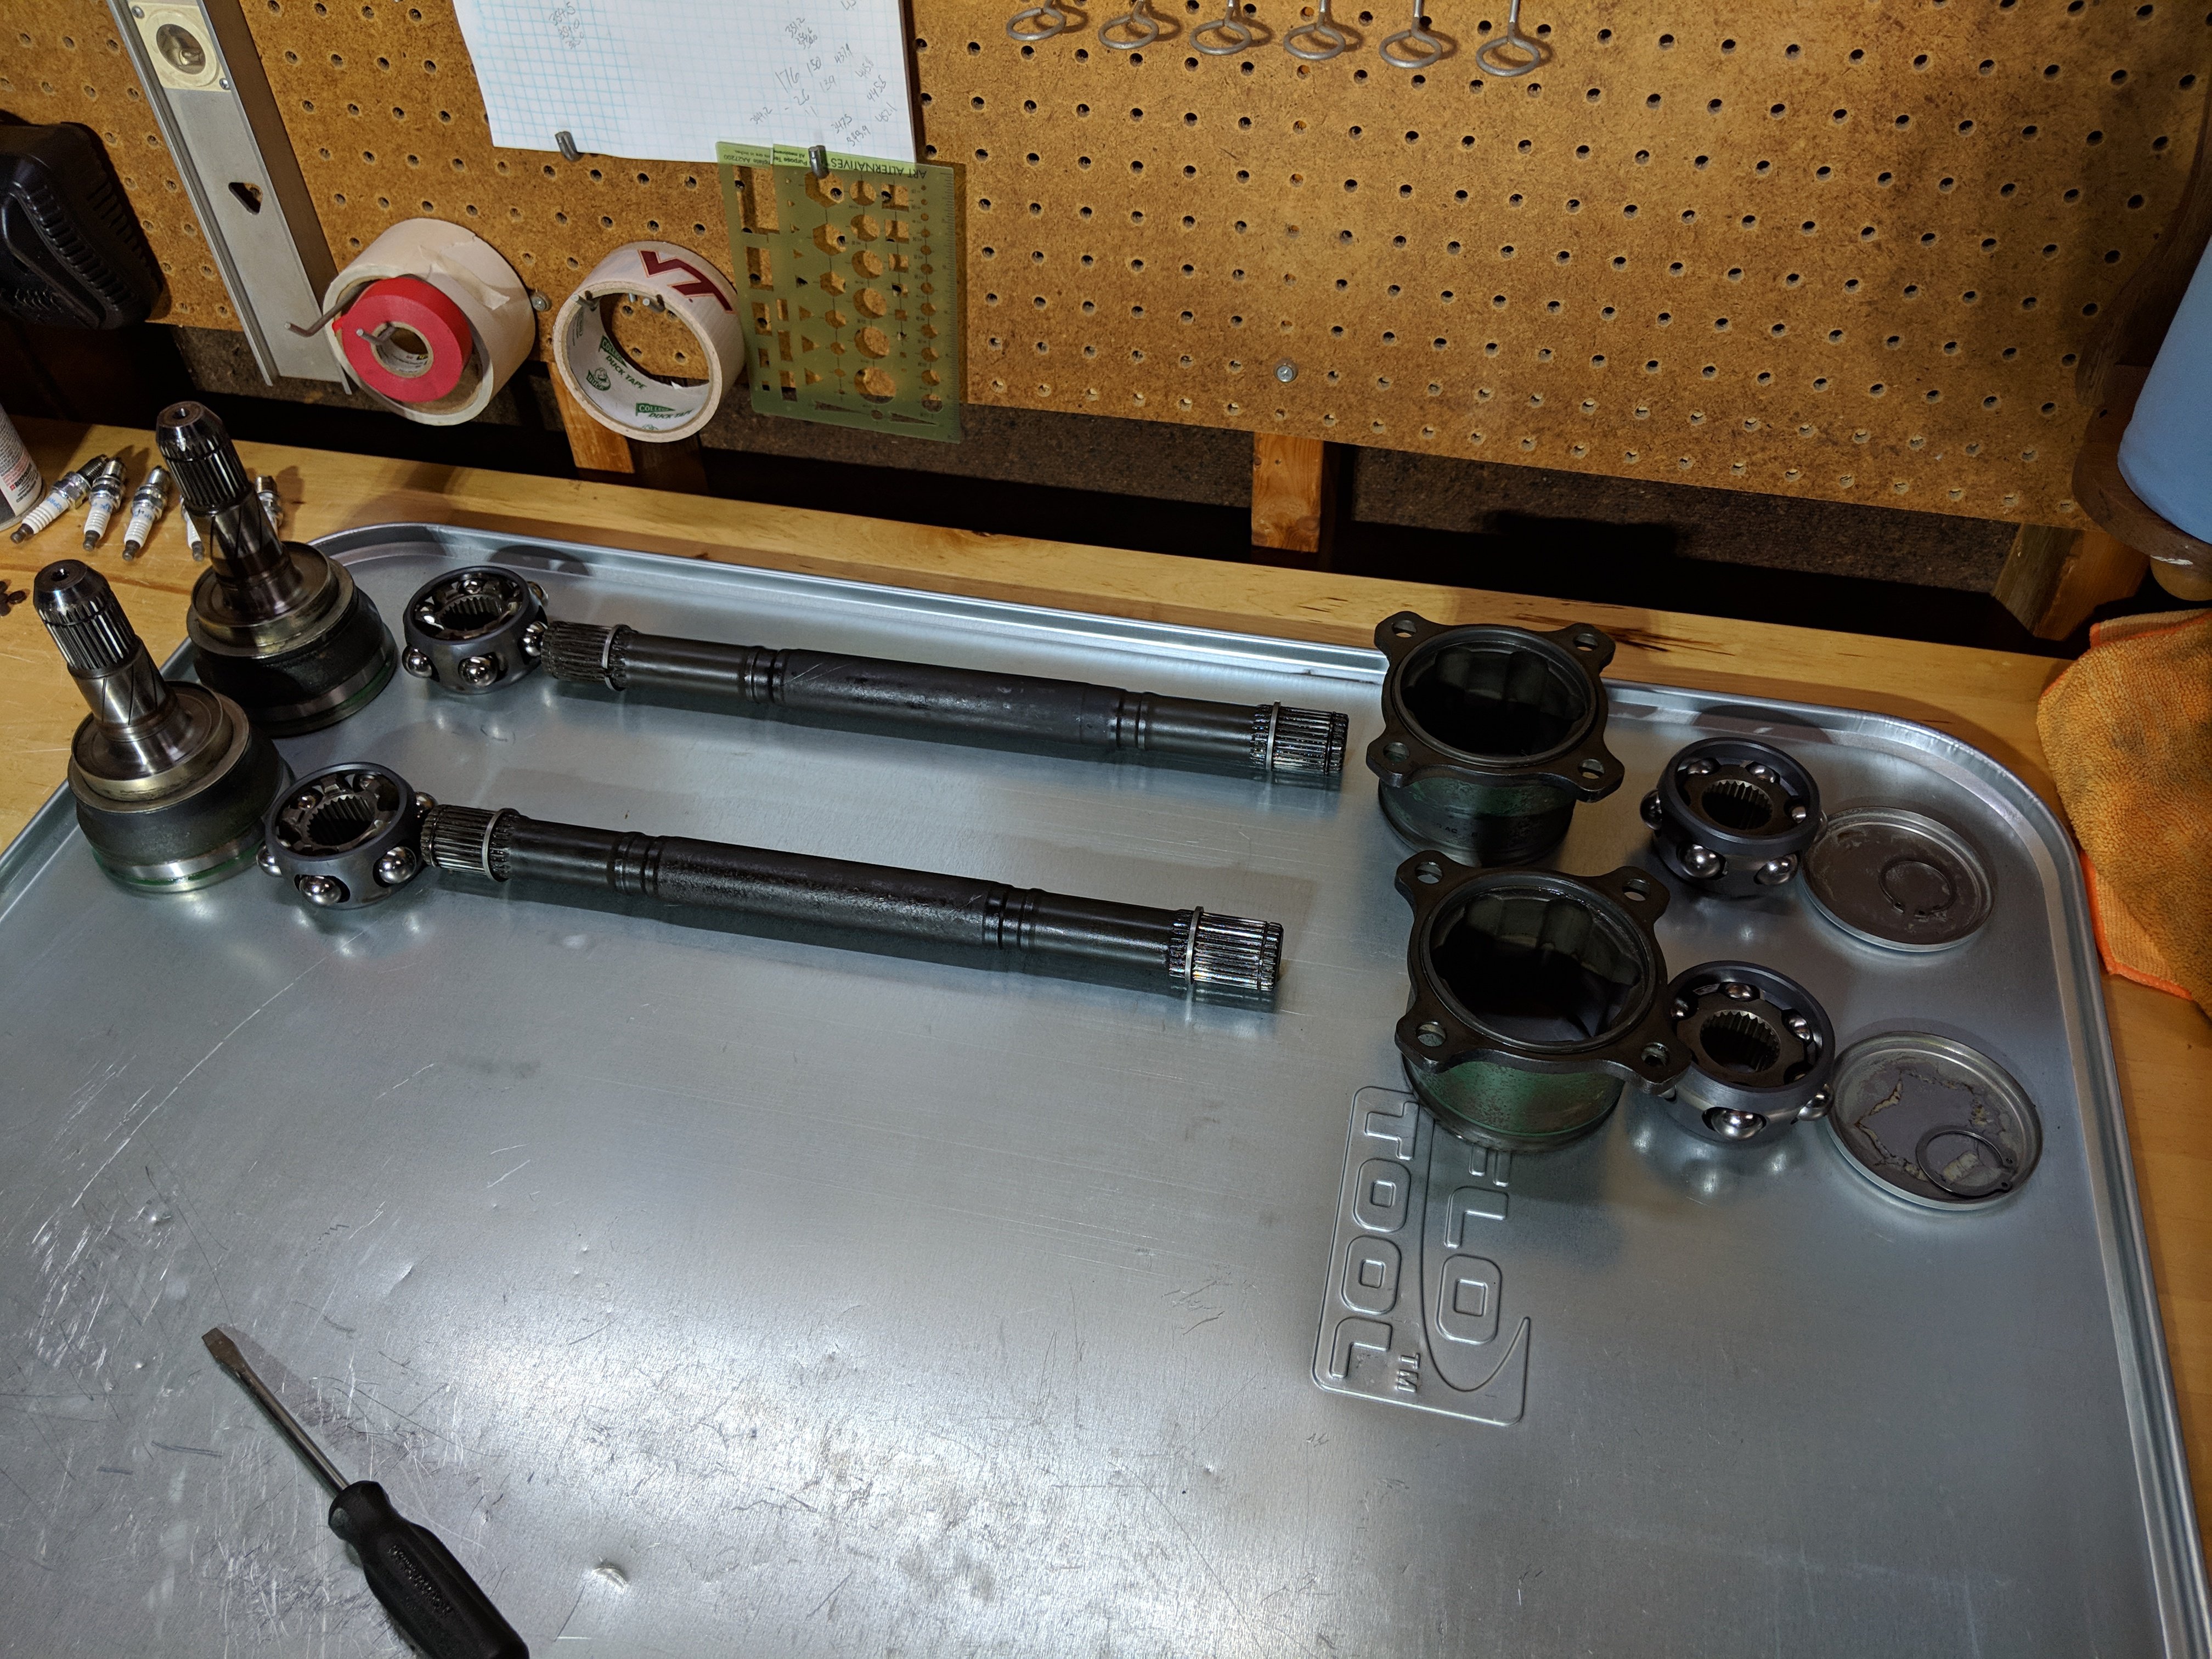
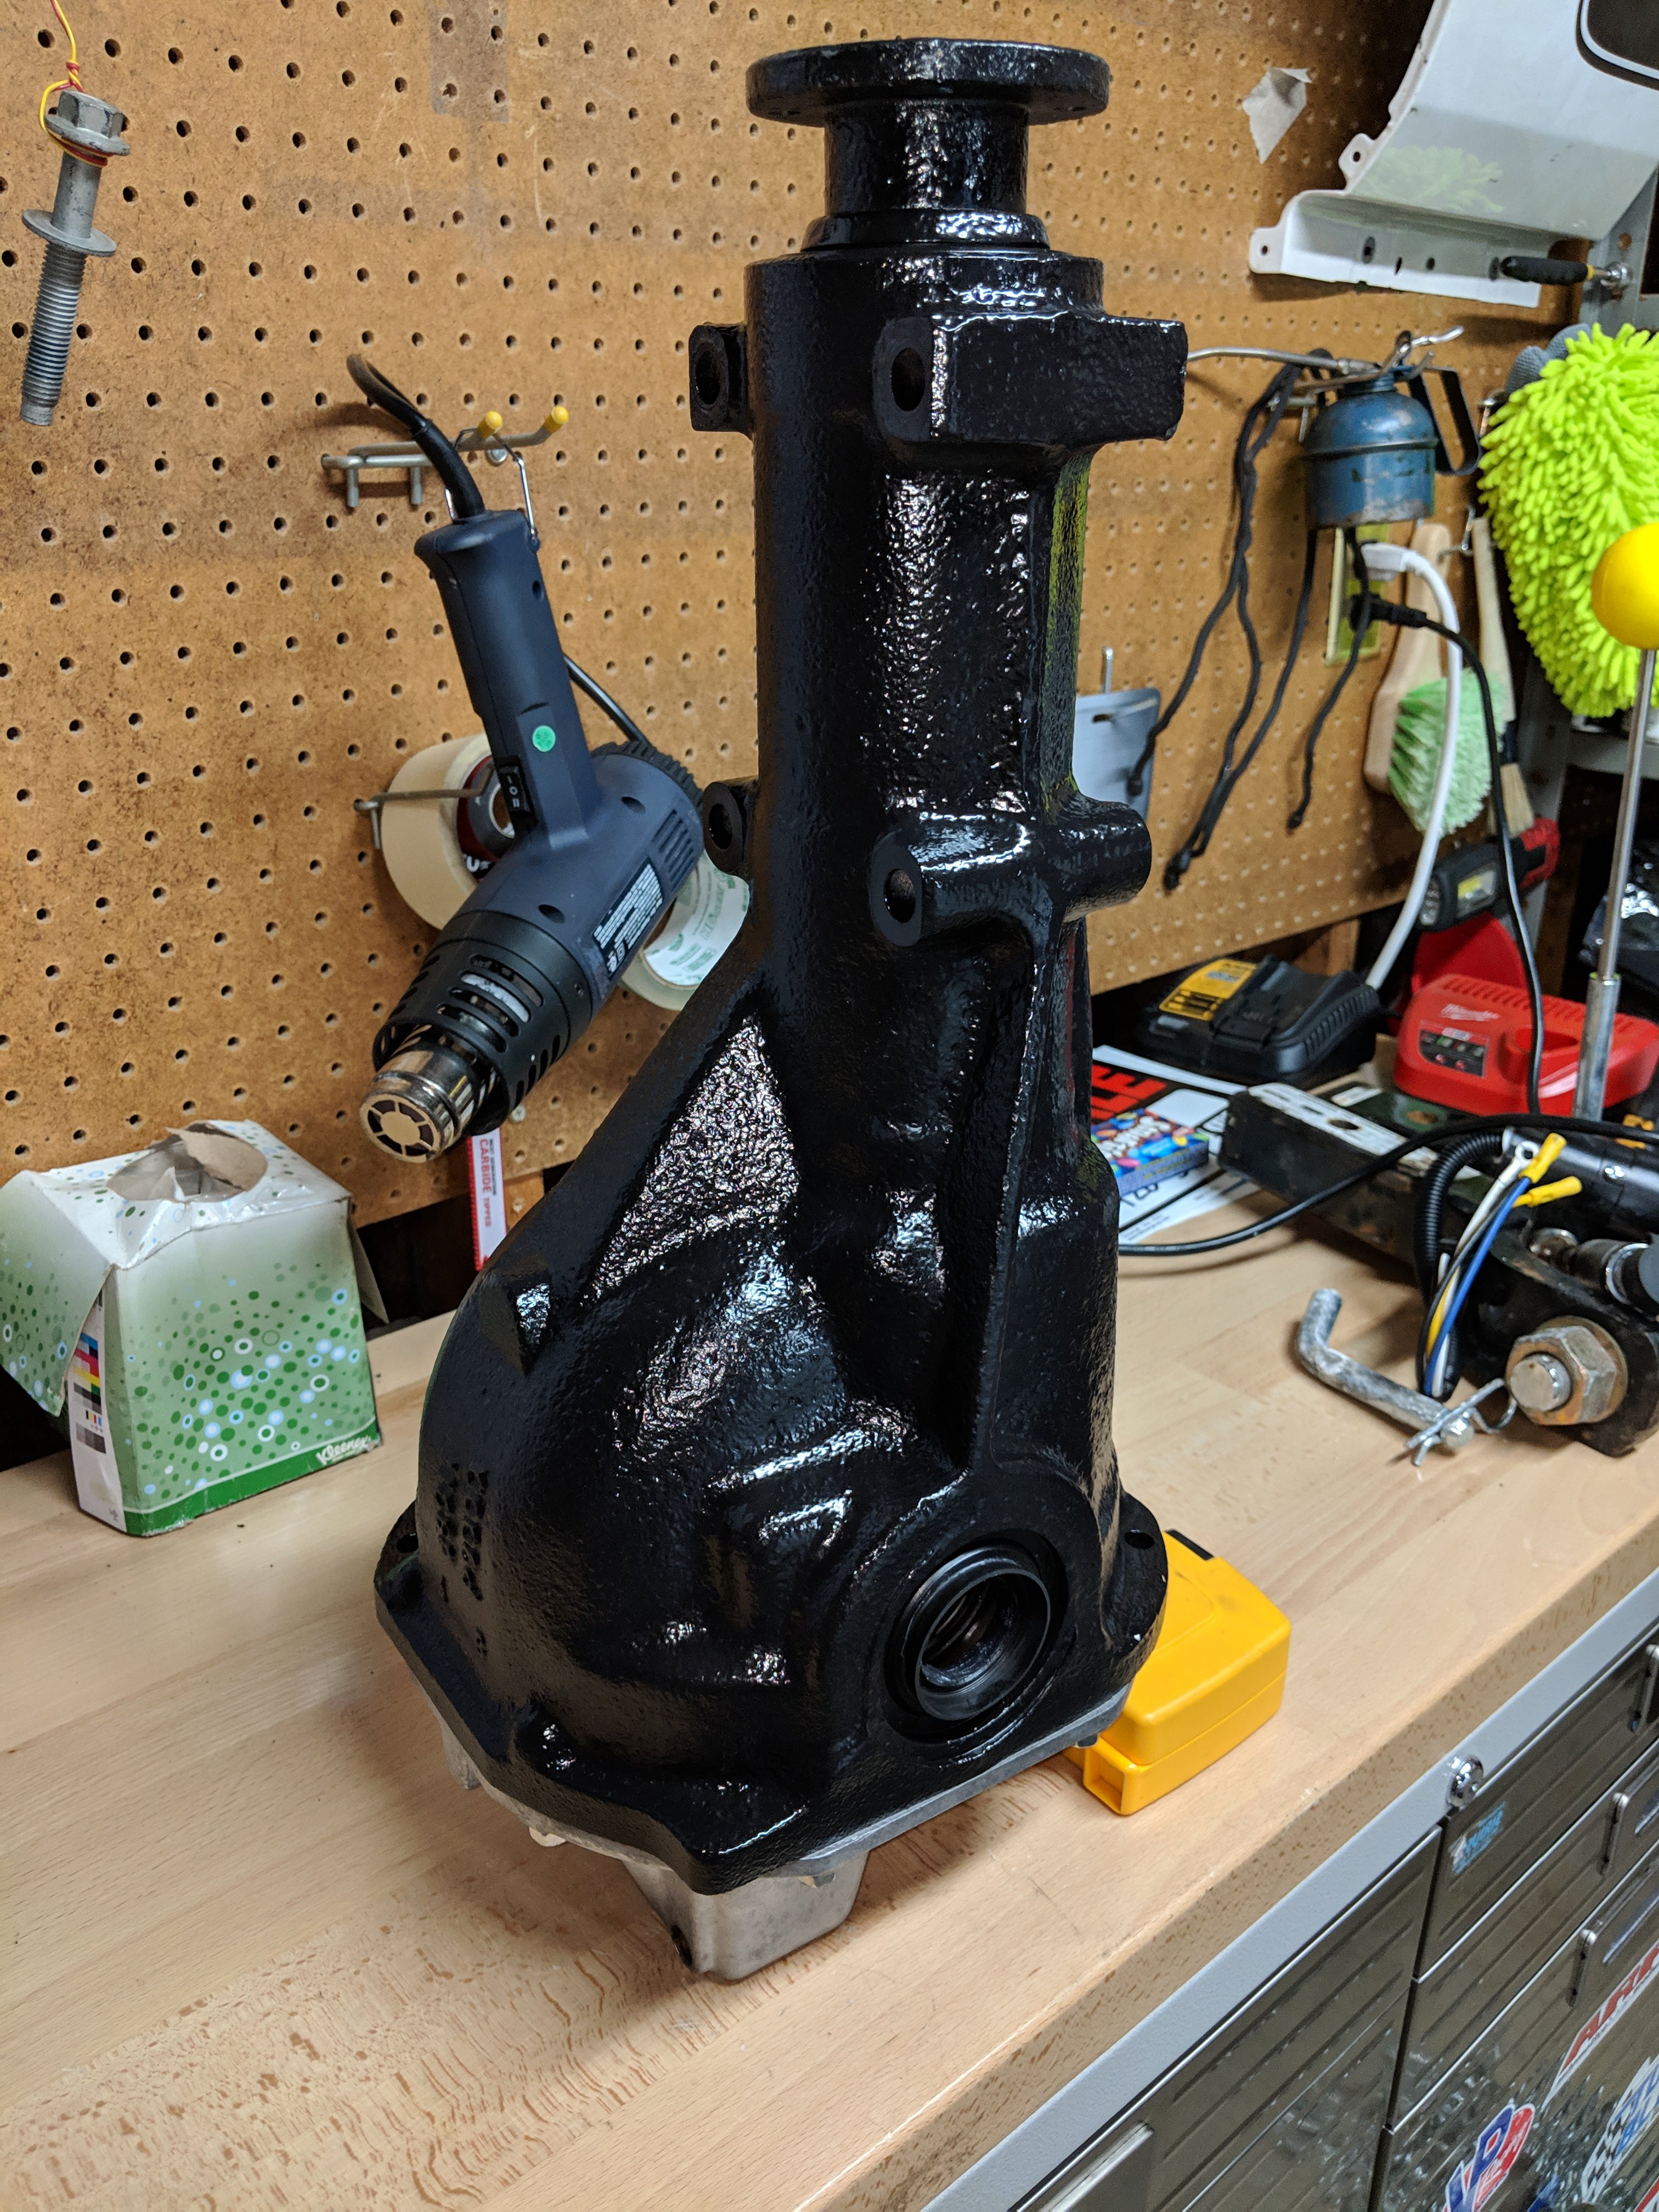
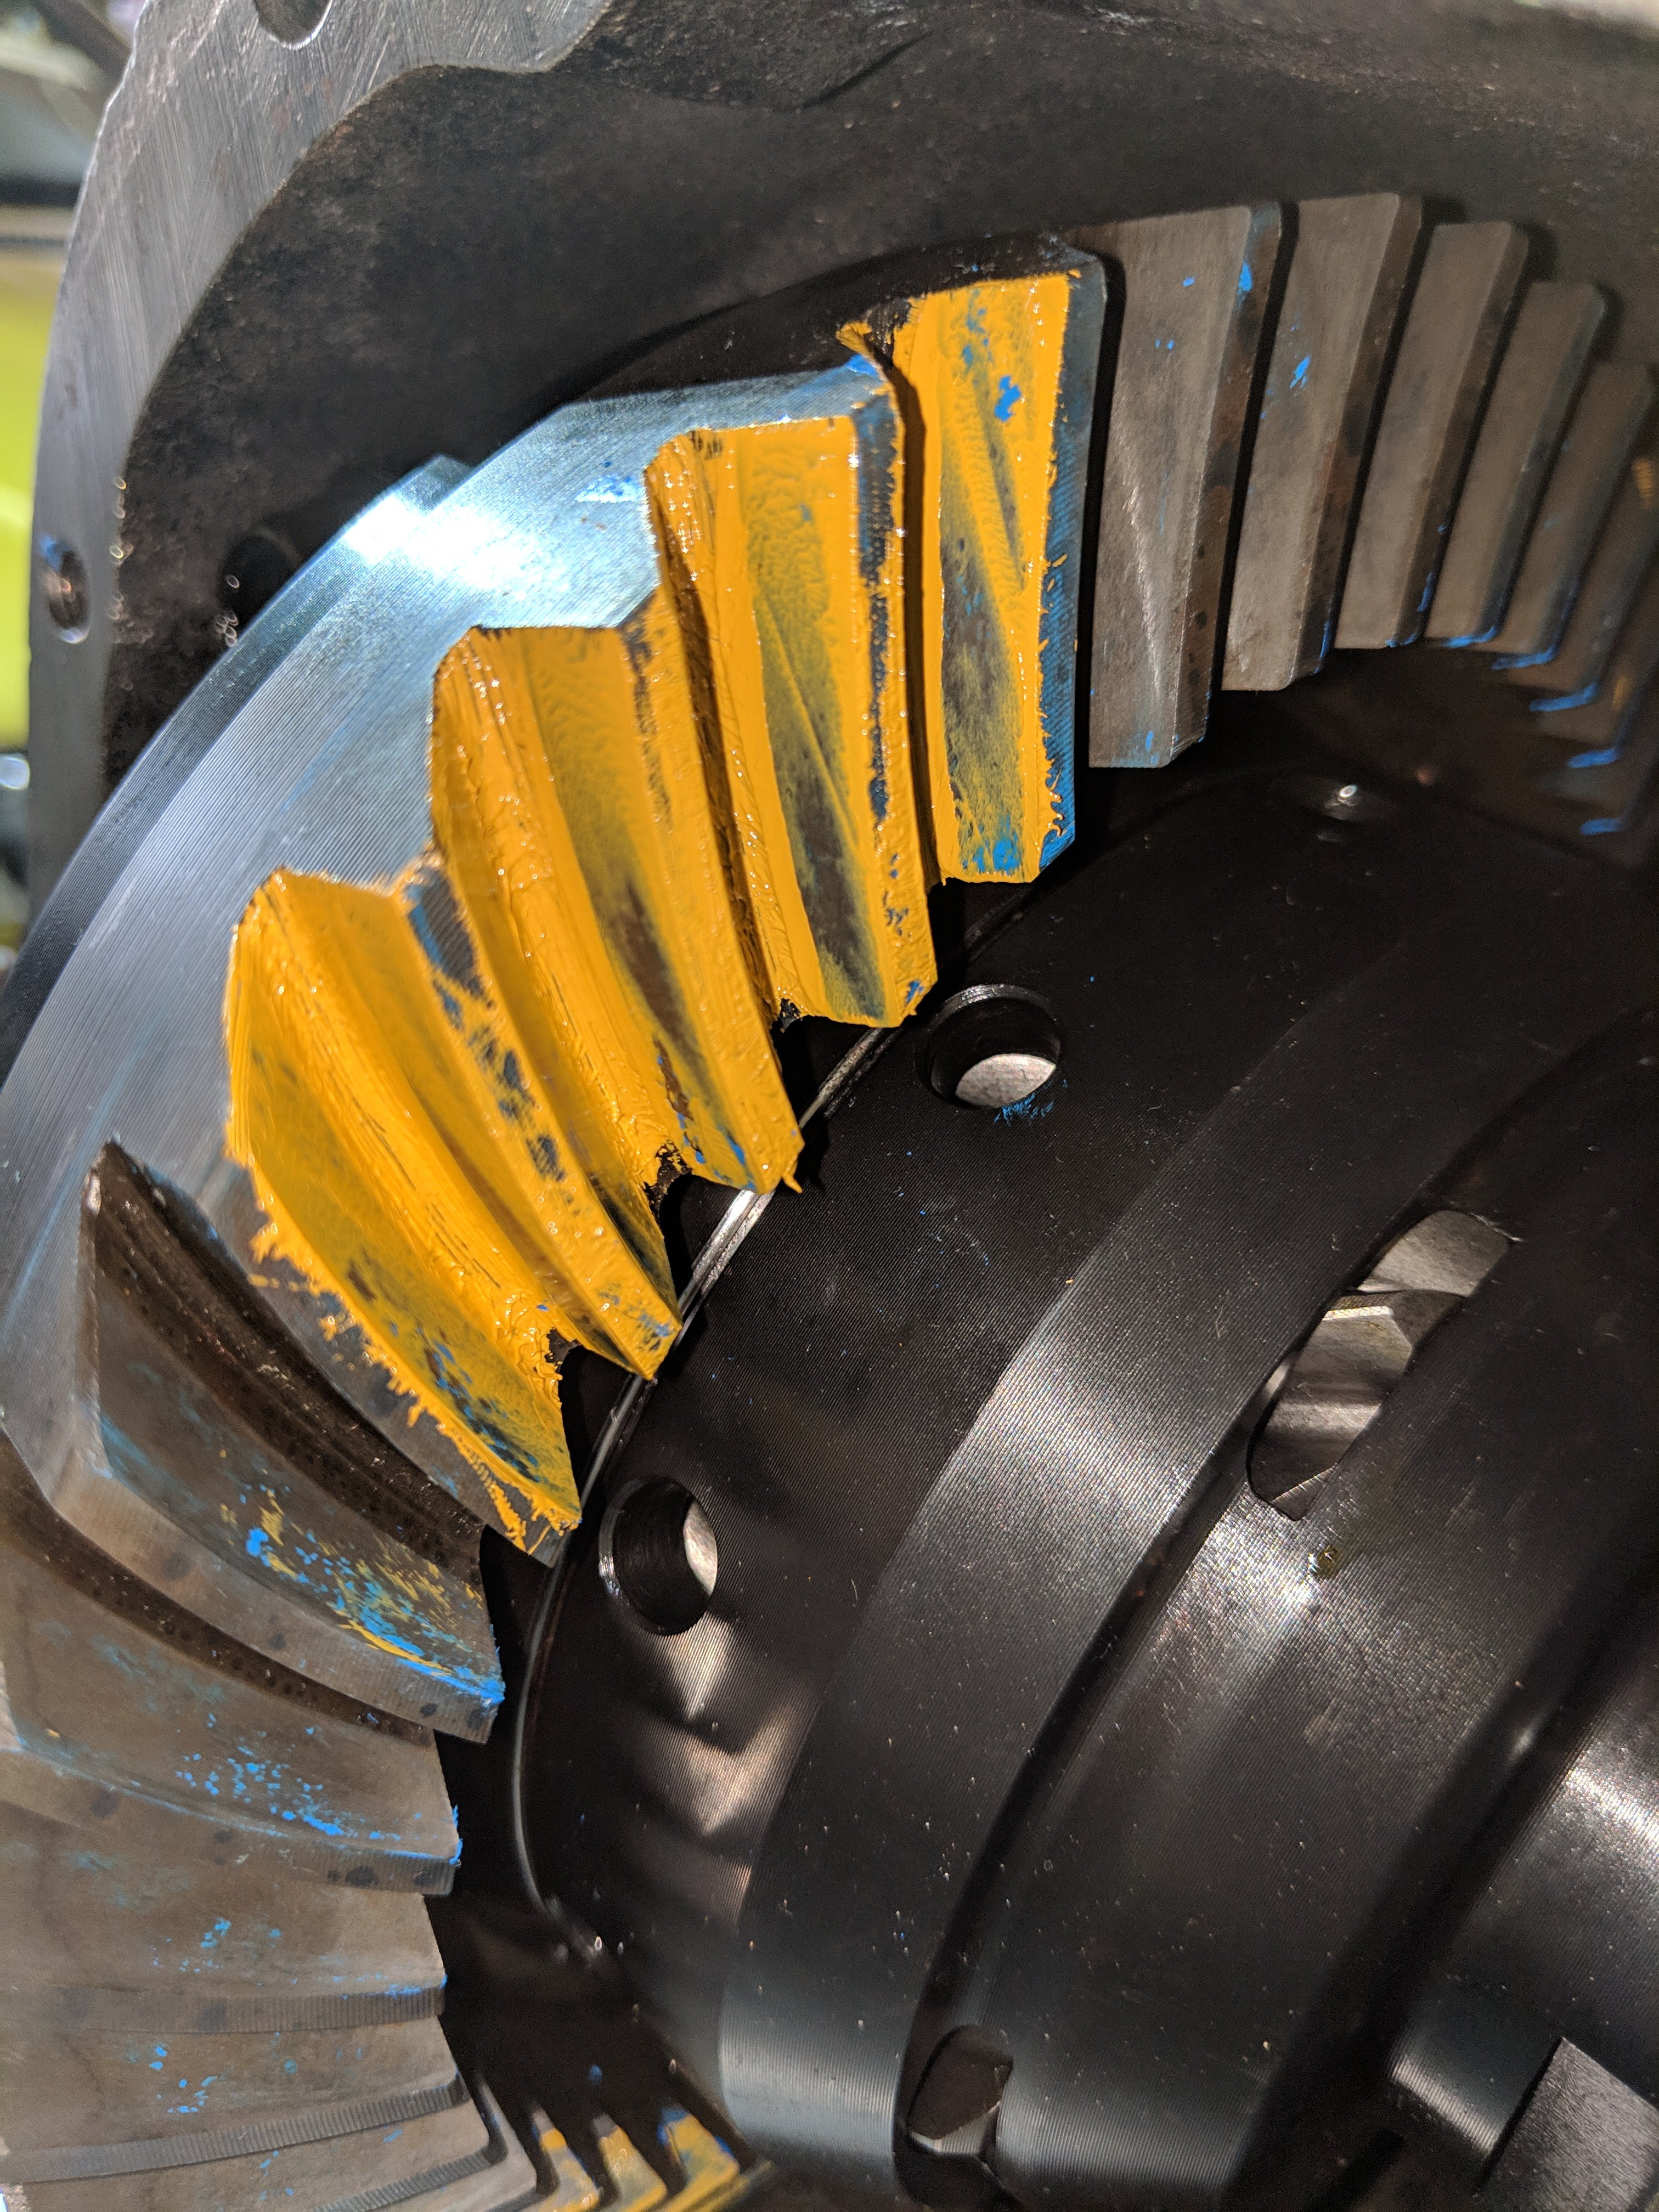
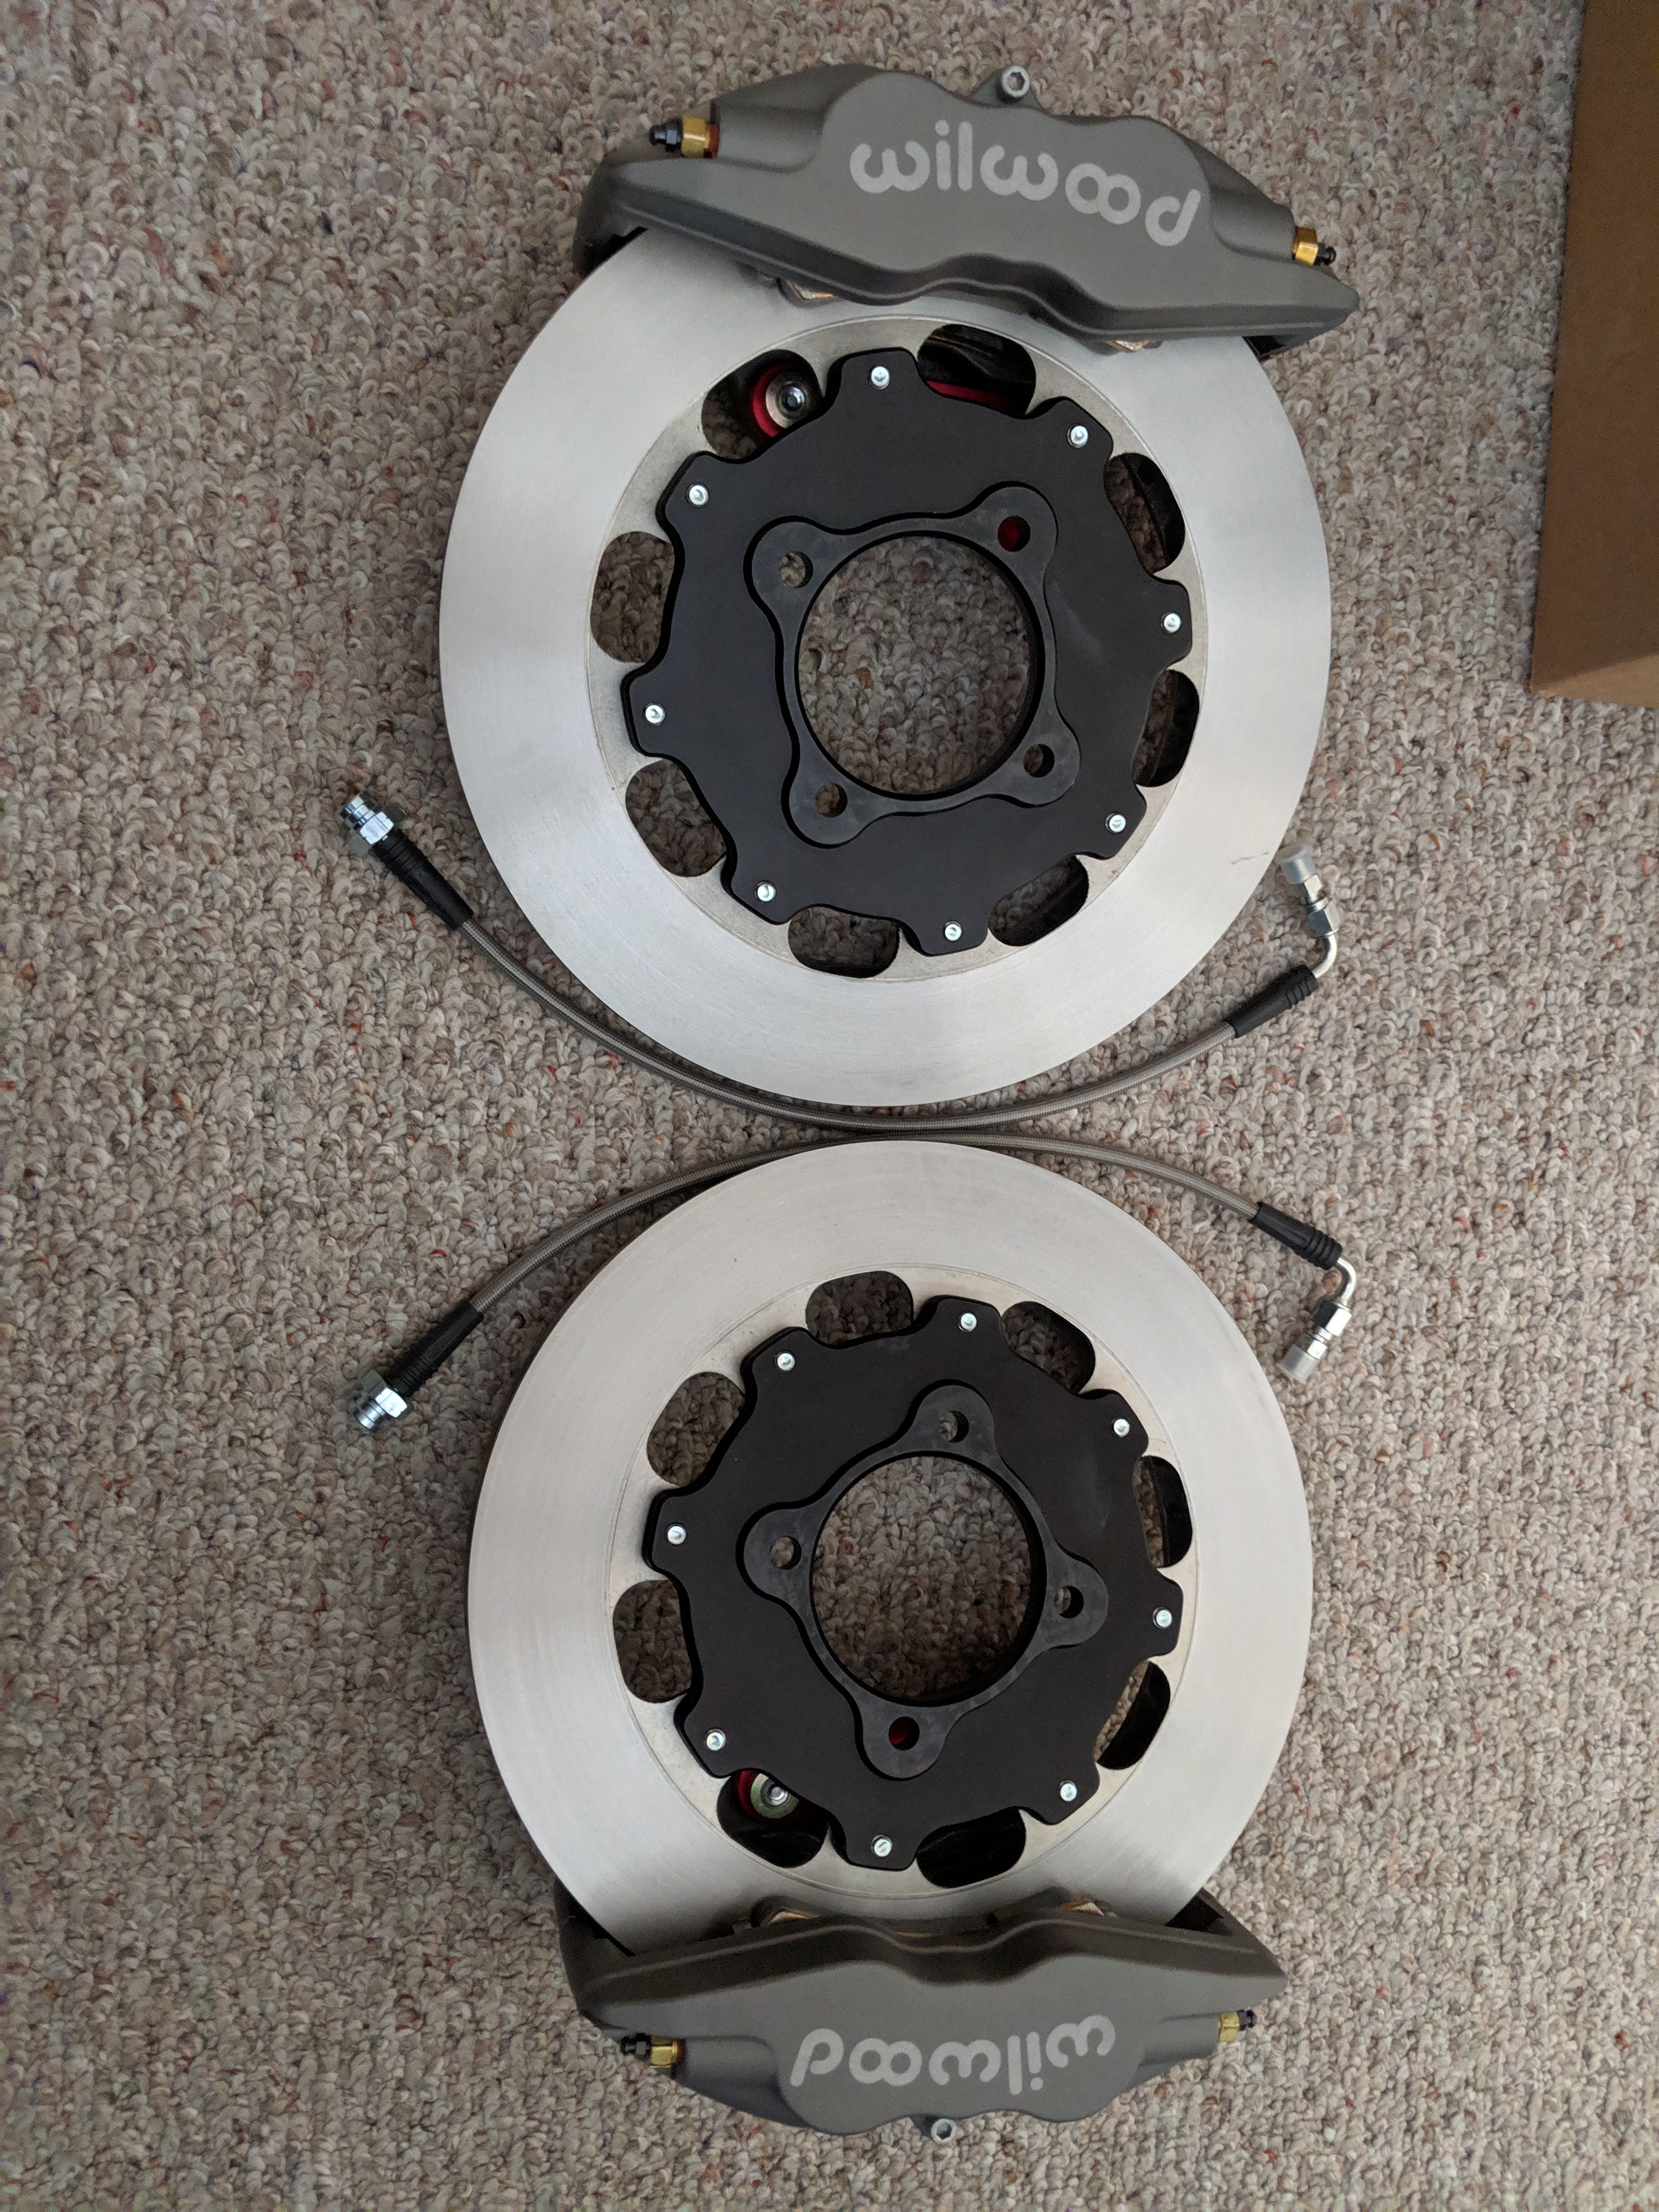
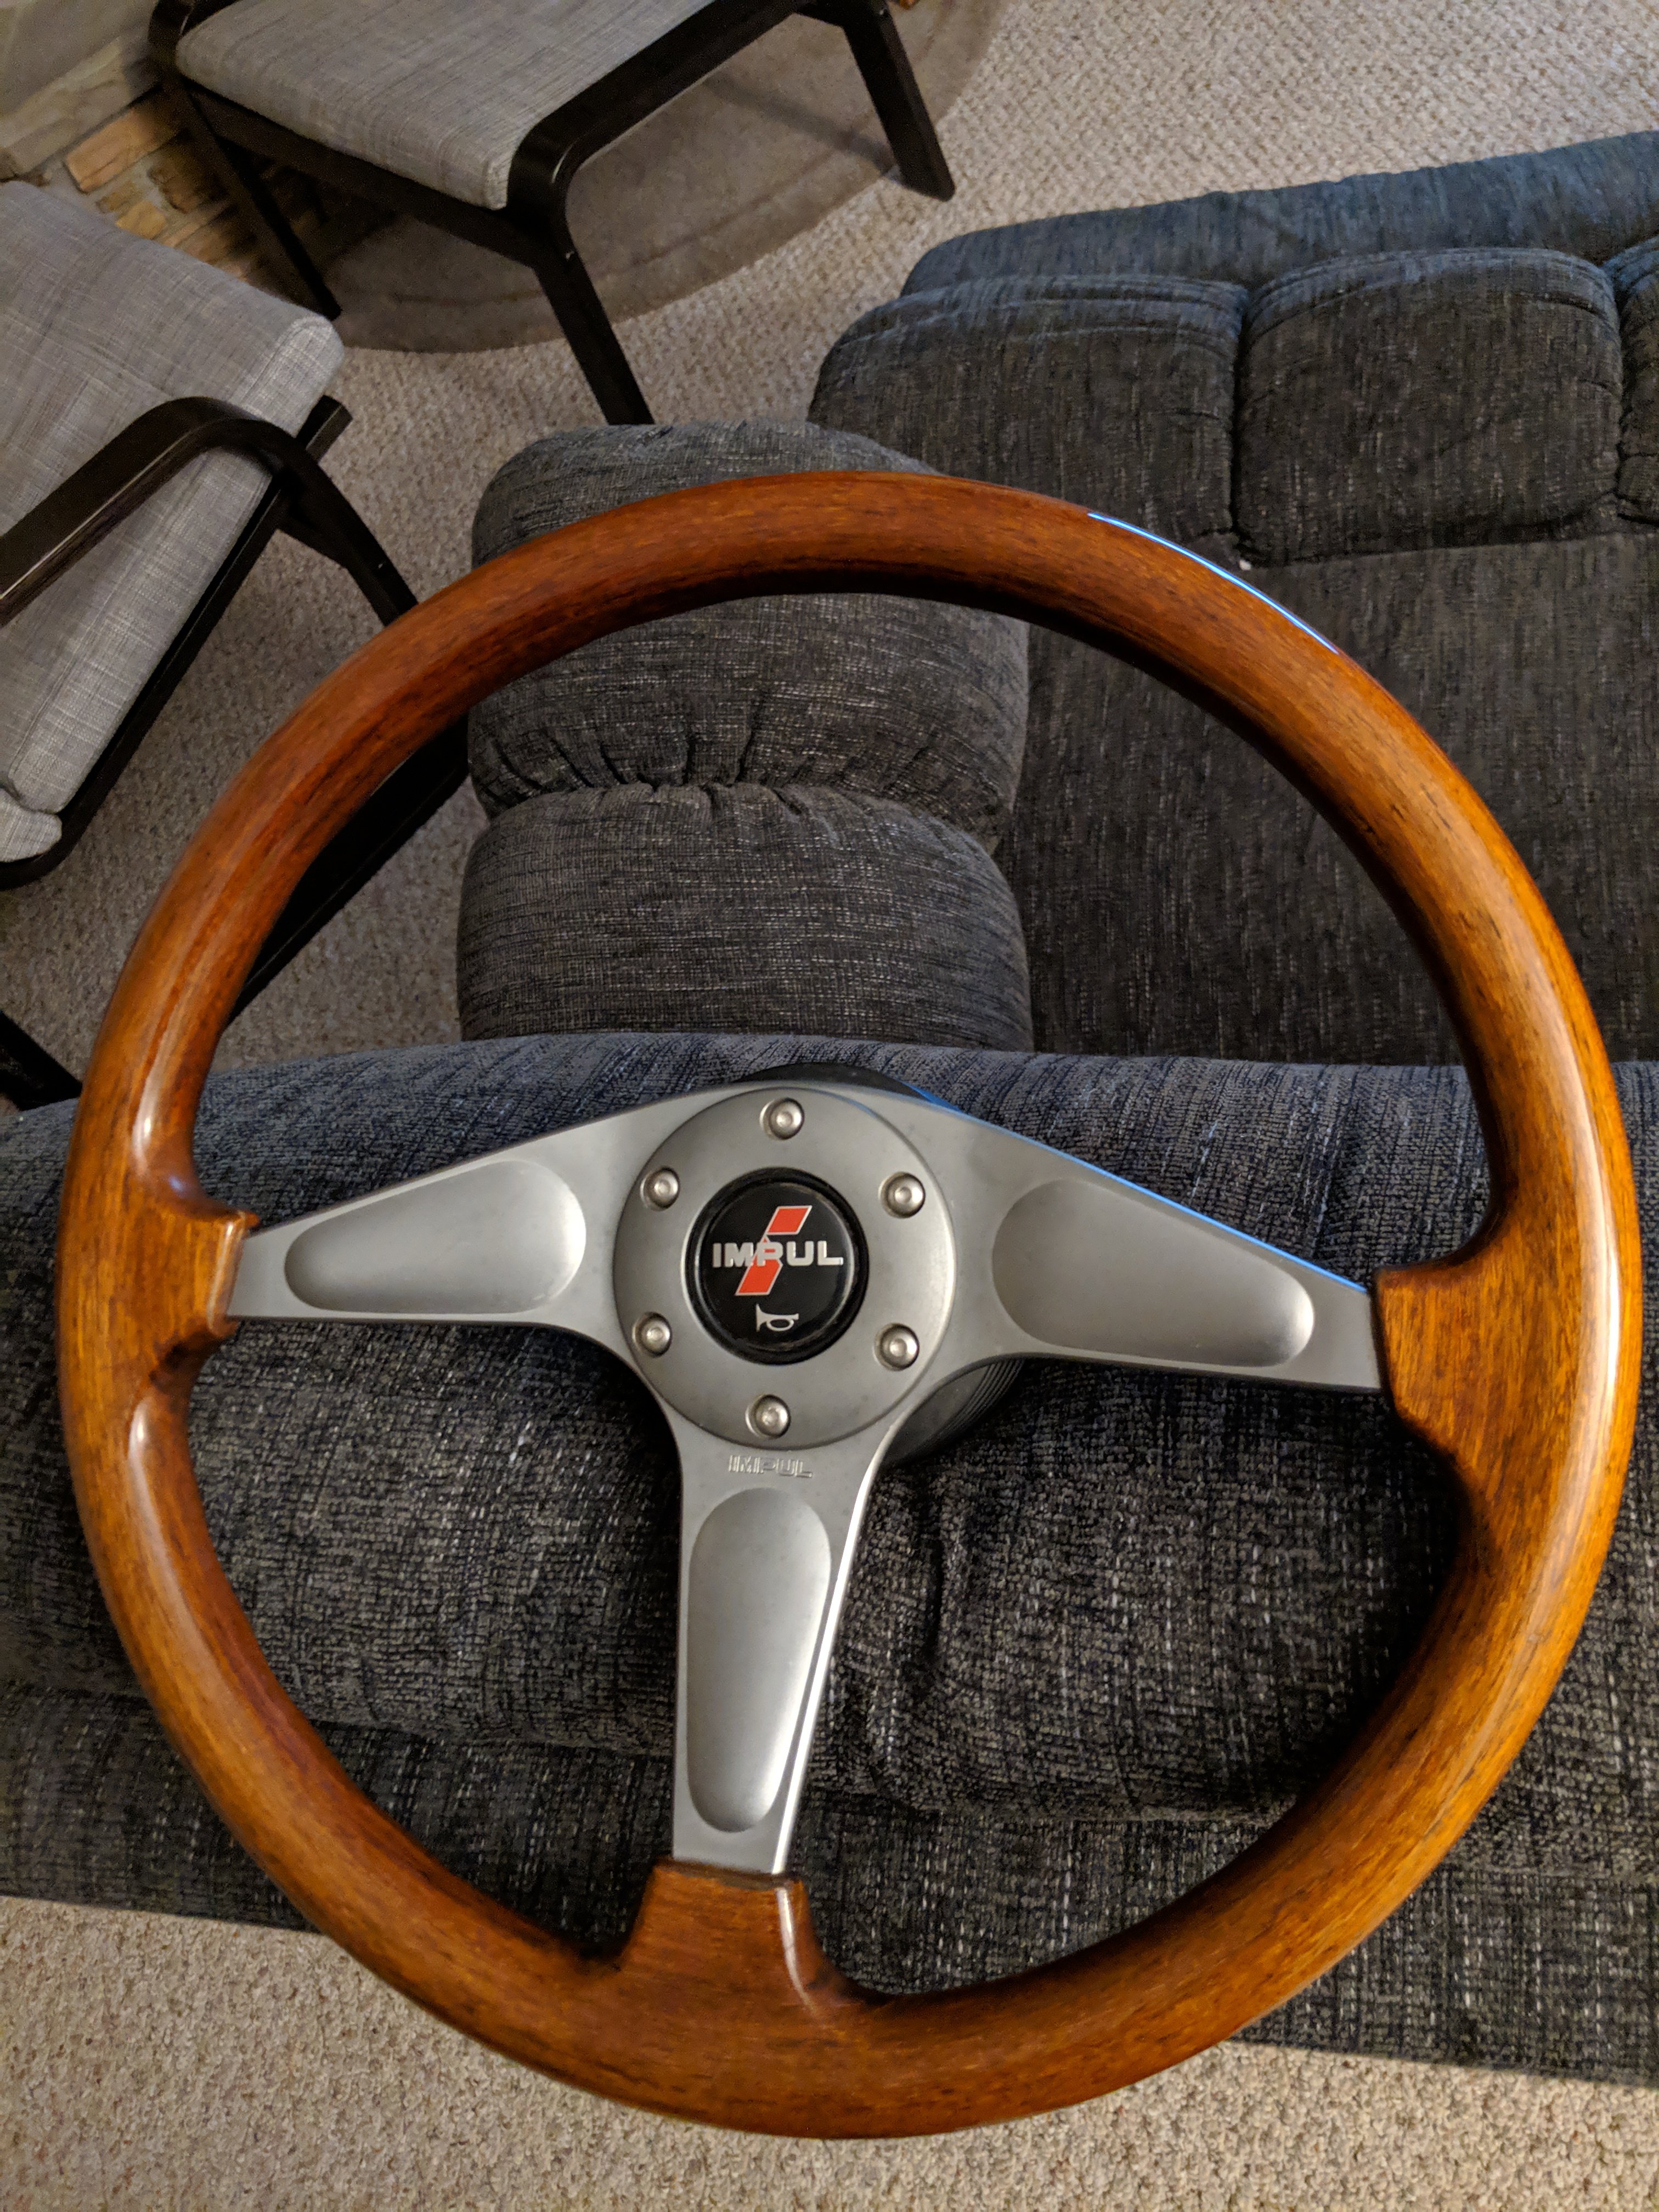
Other projects I've completed in the mean time: Rear differential build: - 83' 280zx R200 - 3.90 ring and pinion - Mfactory HLSD - new bearings all around and a fresh coat (several actually) of paint CV axle build - '84 300zxt CV shafts - 4340 shorter axle shafts from White Head Performance - 27 spline companion flanges from White Head Performance - stock 27 spline outer stub axles that came with the car Can't say these next ones are projects, but they are parts waiting in the wings until I go to put this whole thing back together. Full T3 rear suspension Arizona Zcar front brake kit IMPUL steering wheel Recaro Profi SPG seats Vintage Dashes replacement dash board
-
BMW S54 into S30 Chassis - Build Thread
carbuilder723 replied to carbuilder723's topic in Other Engines
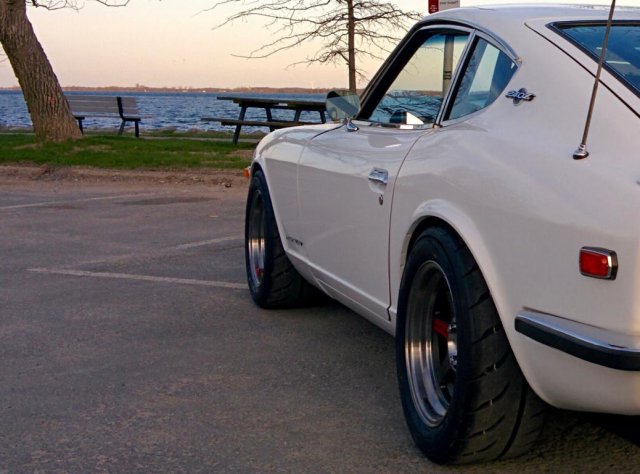
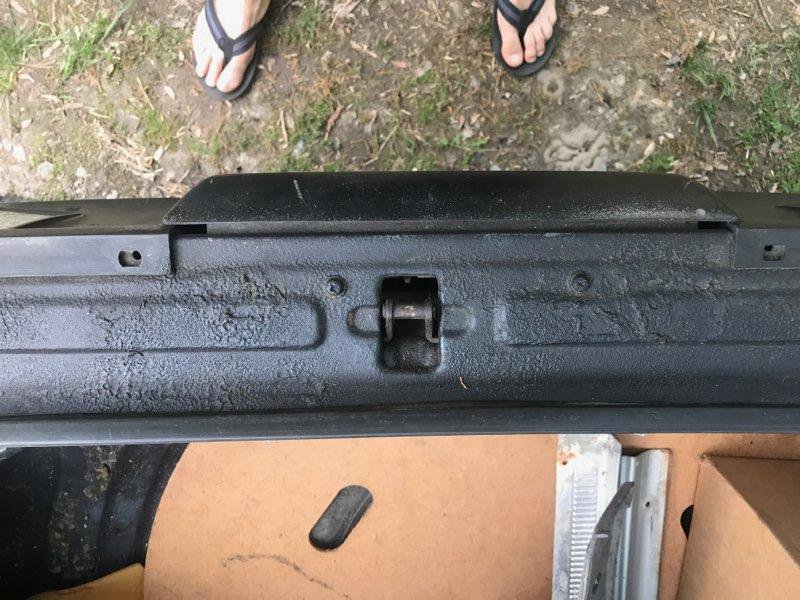
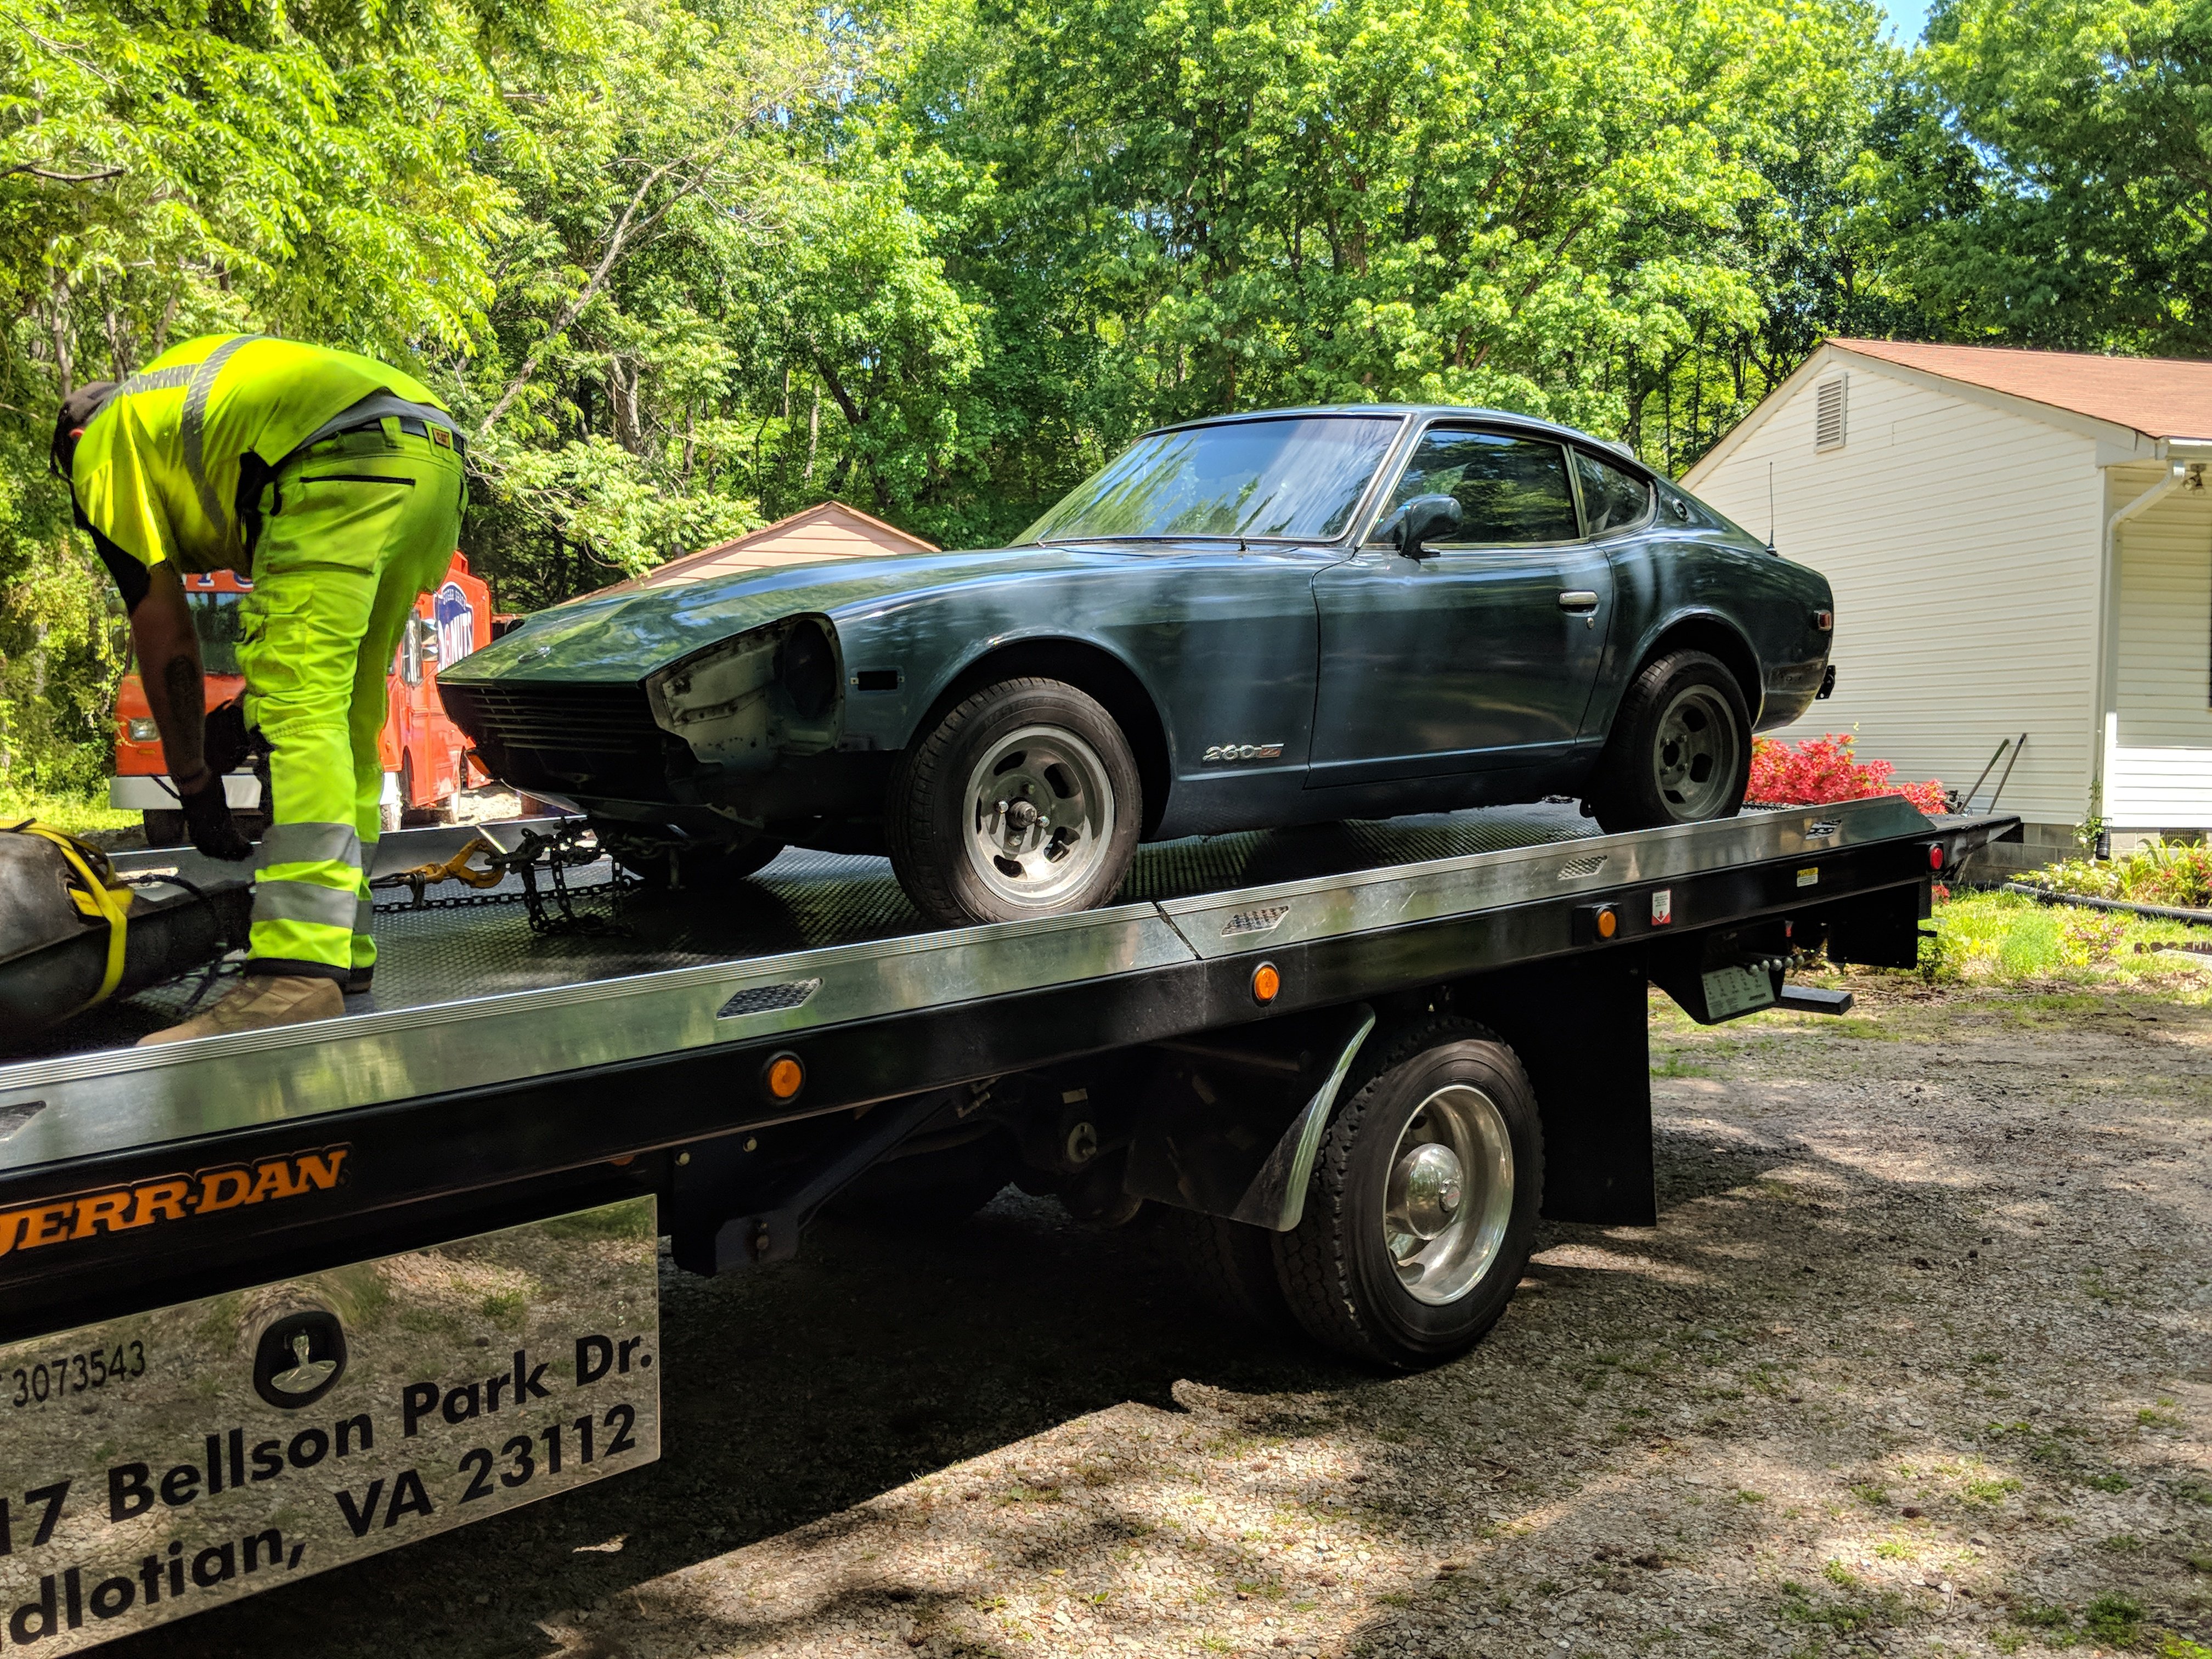
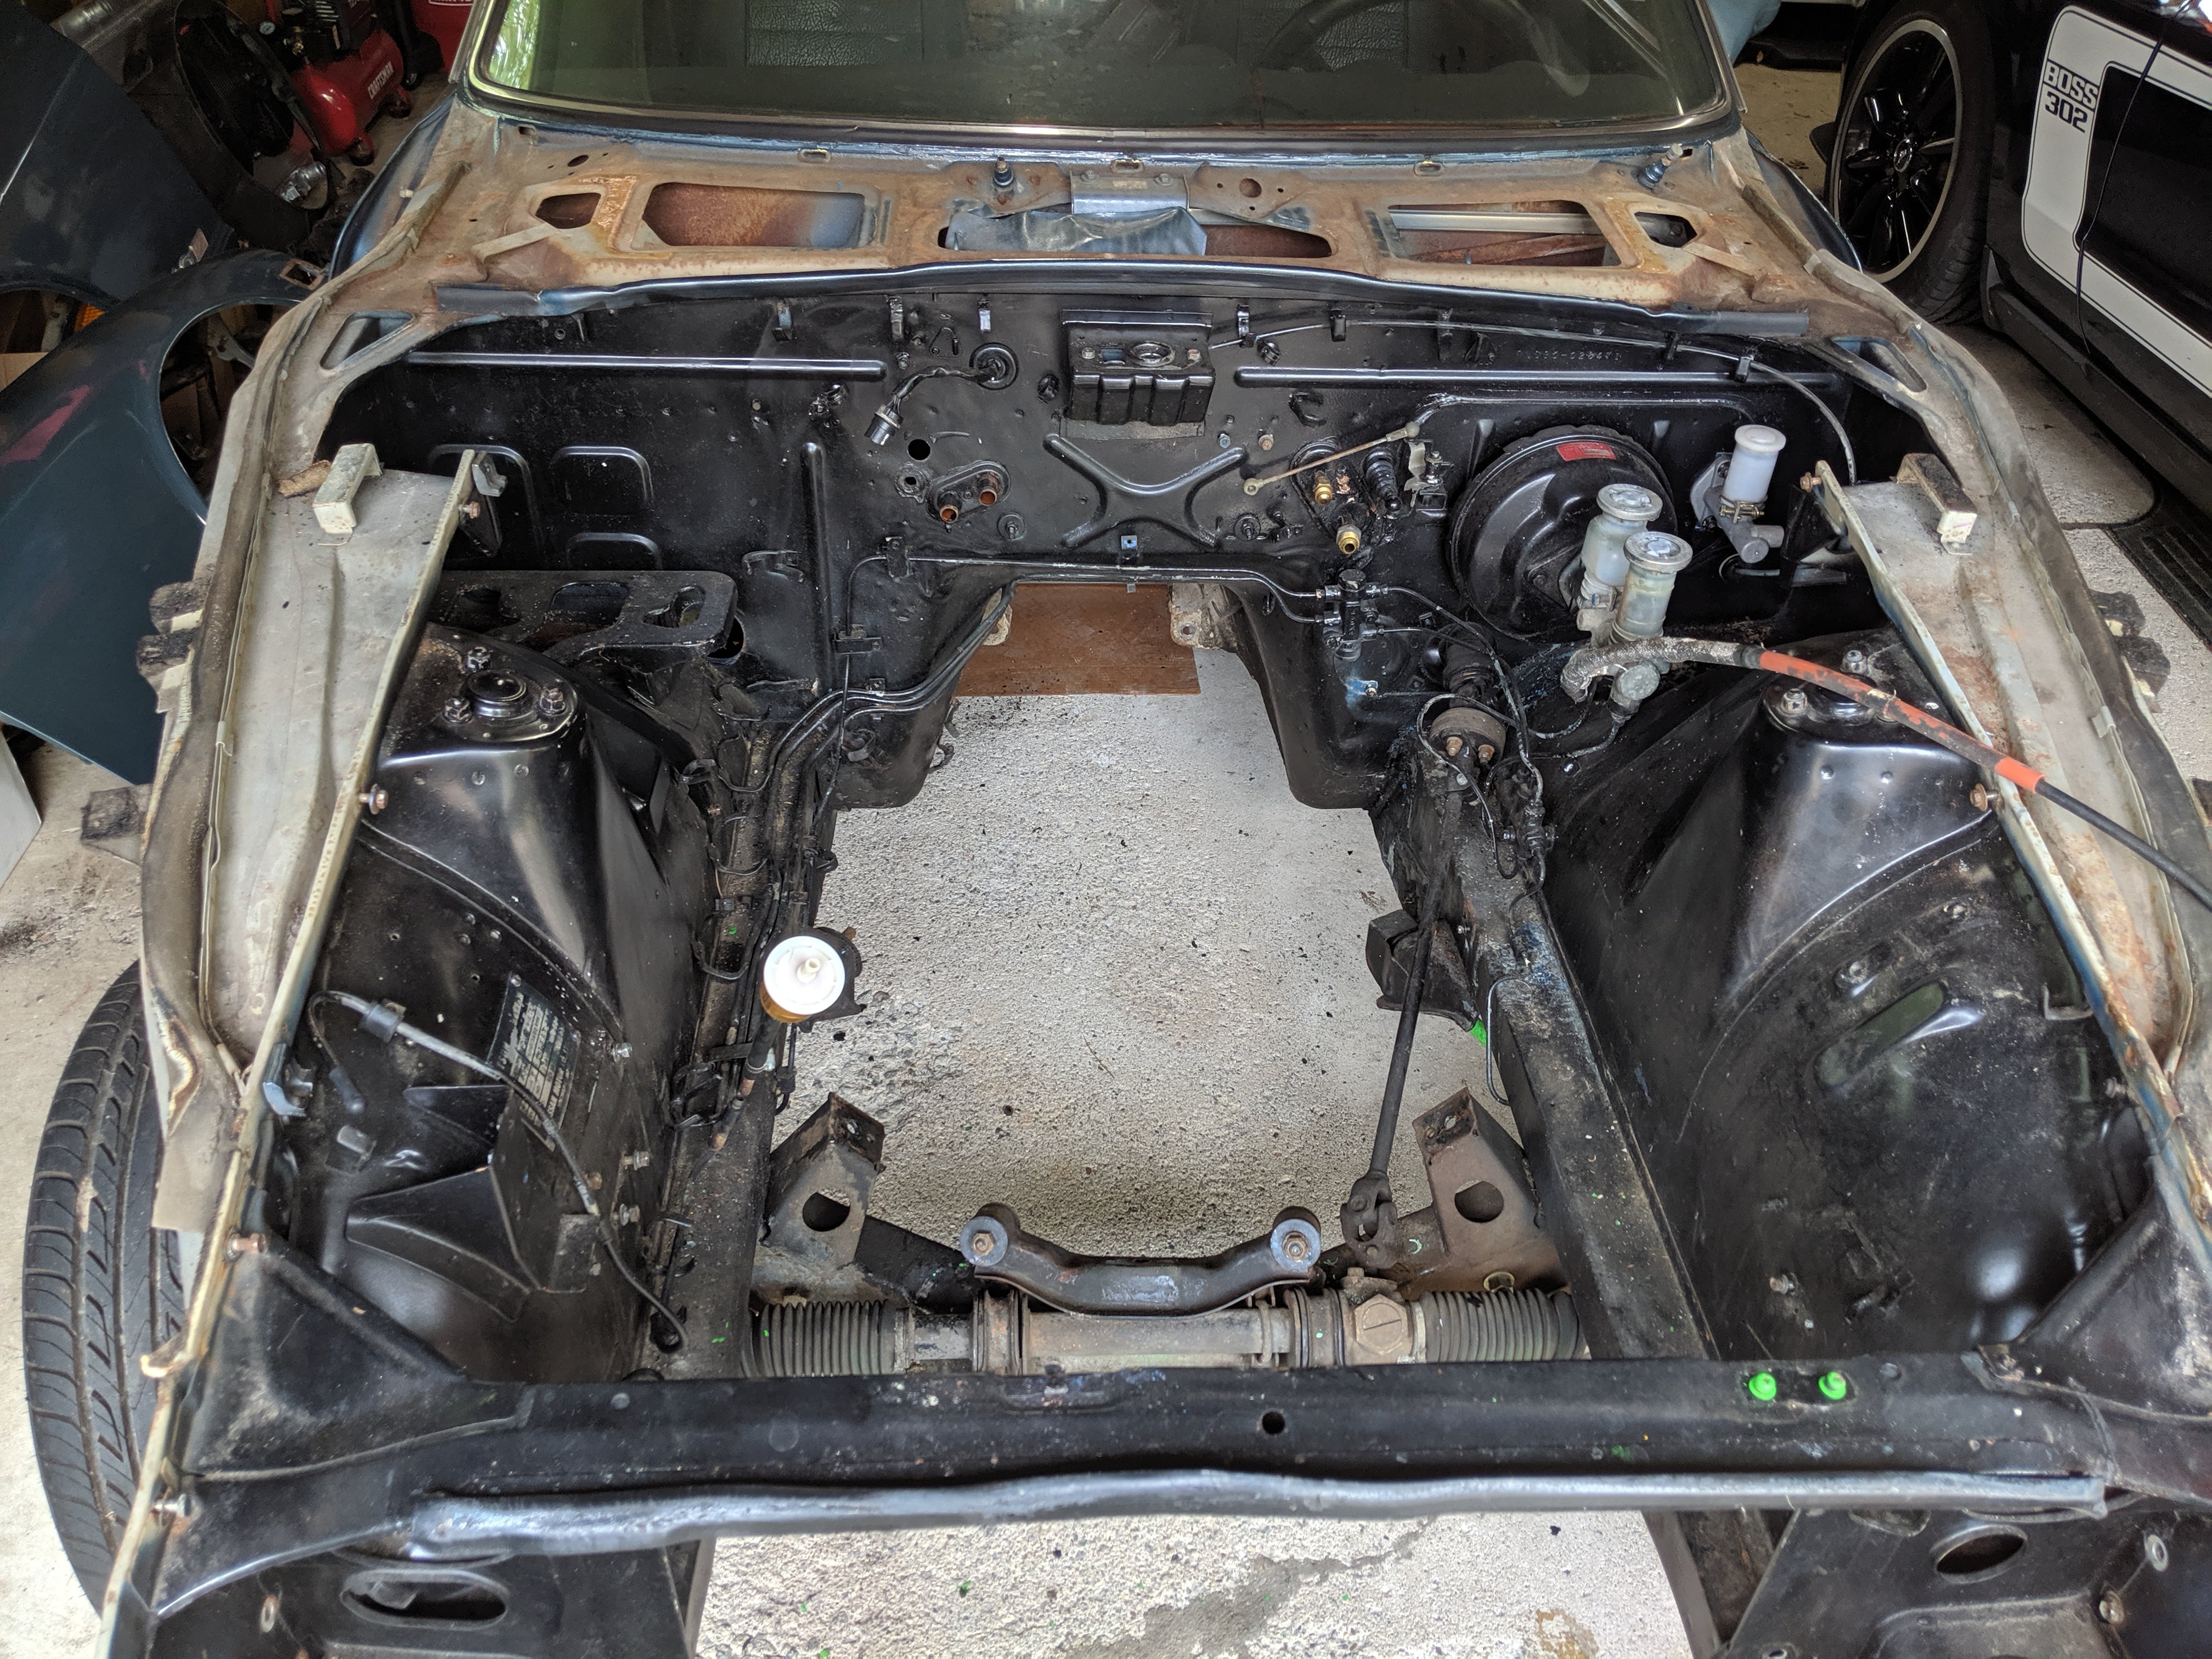
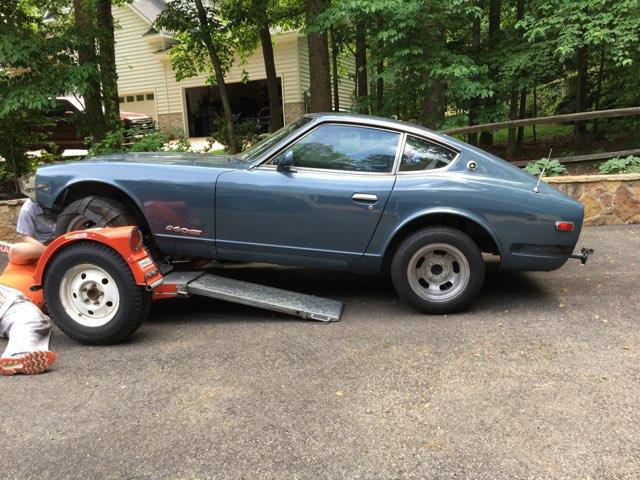
With the engine built, and the test stand operational, let's take a look at the car itself. It's a 74 260z, VIN in the high 28,000 range. When I bought it, it didn't run which didn't matter so much since an engine swap was the prime directive. The body was in really good shape from every indication I could see. Frame was straight, floors not rotted out (depsite being a little dented from someone who didn't know where to put the jack), battery tray completely mint. The only area of concern I could find was along the rear valence in the sheet metal behind the rear bumper. But it was isolated to that area and seems to stop well below the license plate. Other than some minor hail damage, the sheet metal is as good as i could expect for what I paid. Like I mentioned in my first post, after I bought the car, I stored it for nearly a year in Virginia while I built the engine. (I live in Michigan). Once I finally had the car in Michigan, I made short order of completely stripping it of every part I could find that had a fastener. Now the car is sitting on jack stands in my garage. That is pretty much where the car sits for now.
-
BMW S54 into S30 Chassis - Build Thread
carbuilder723 replied to carbuilder723's topic in Other Engines
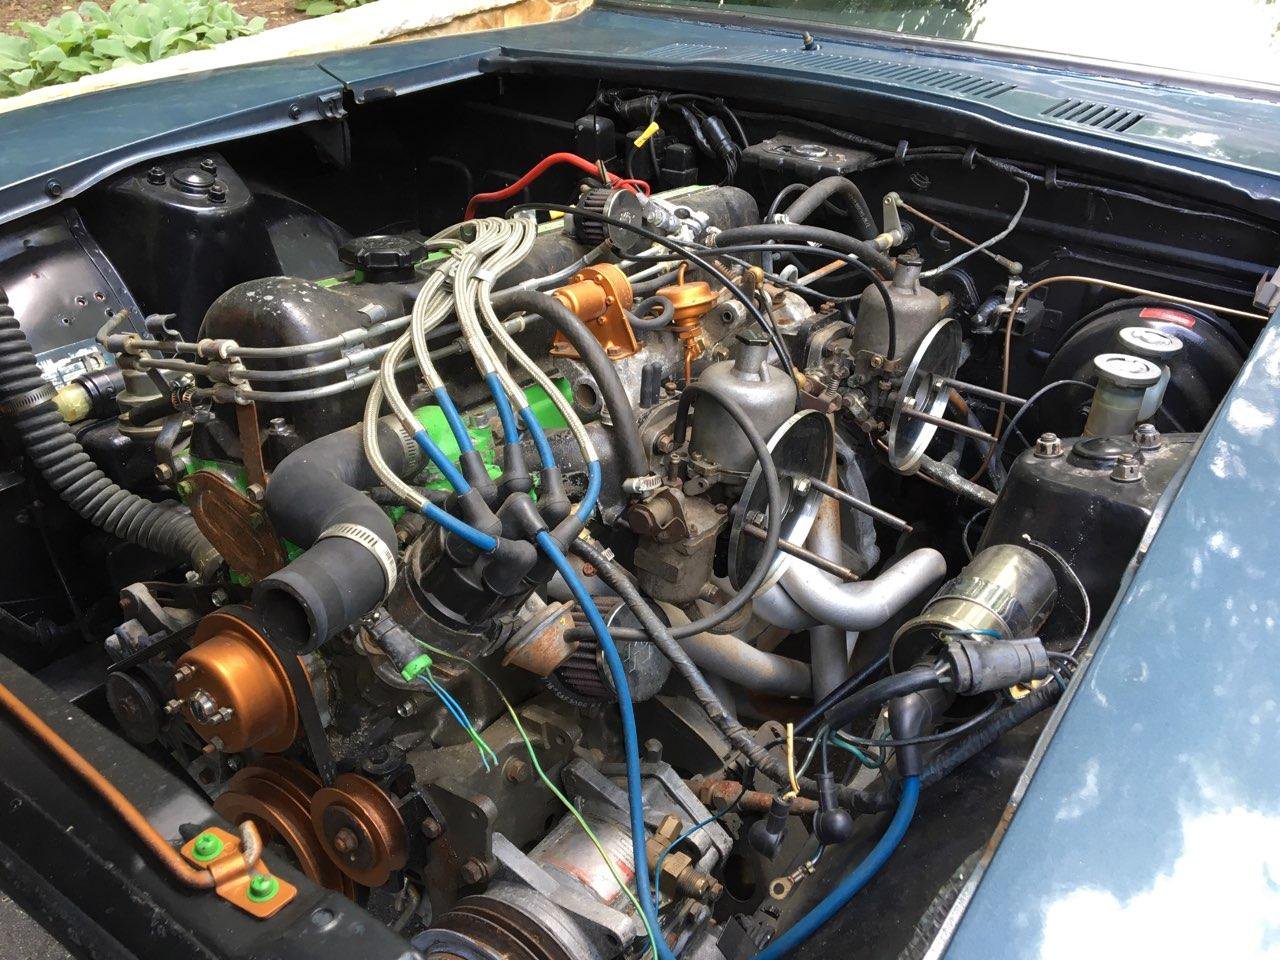
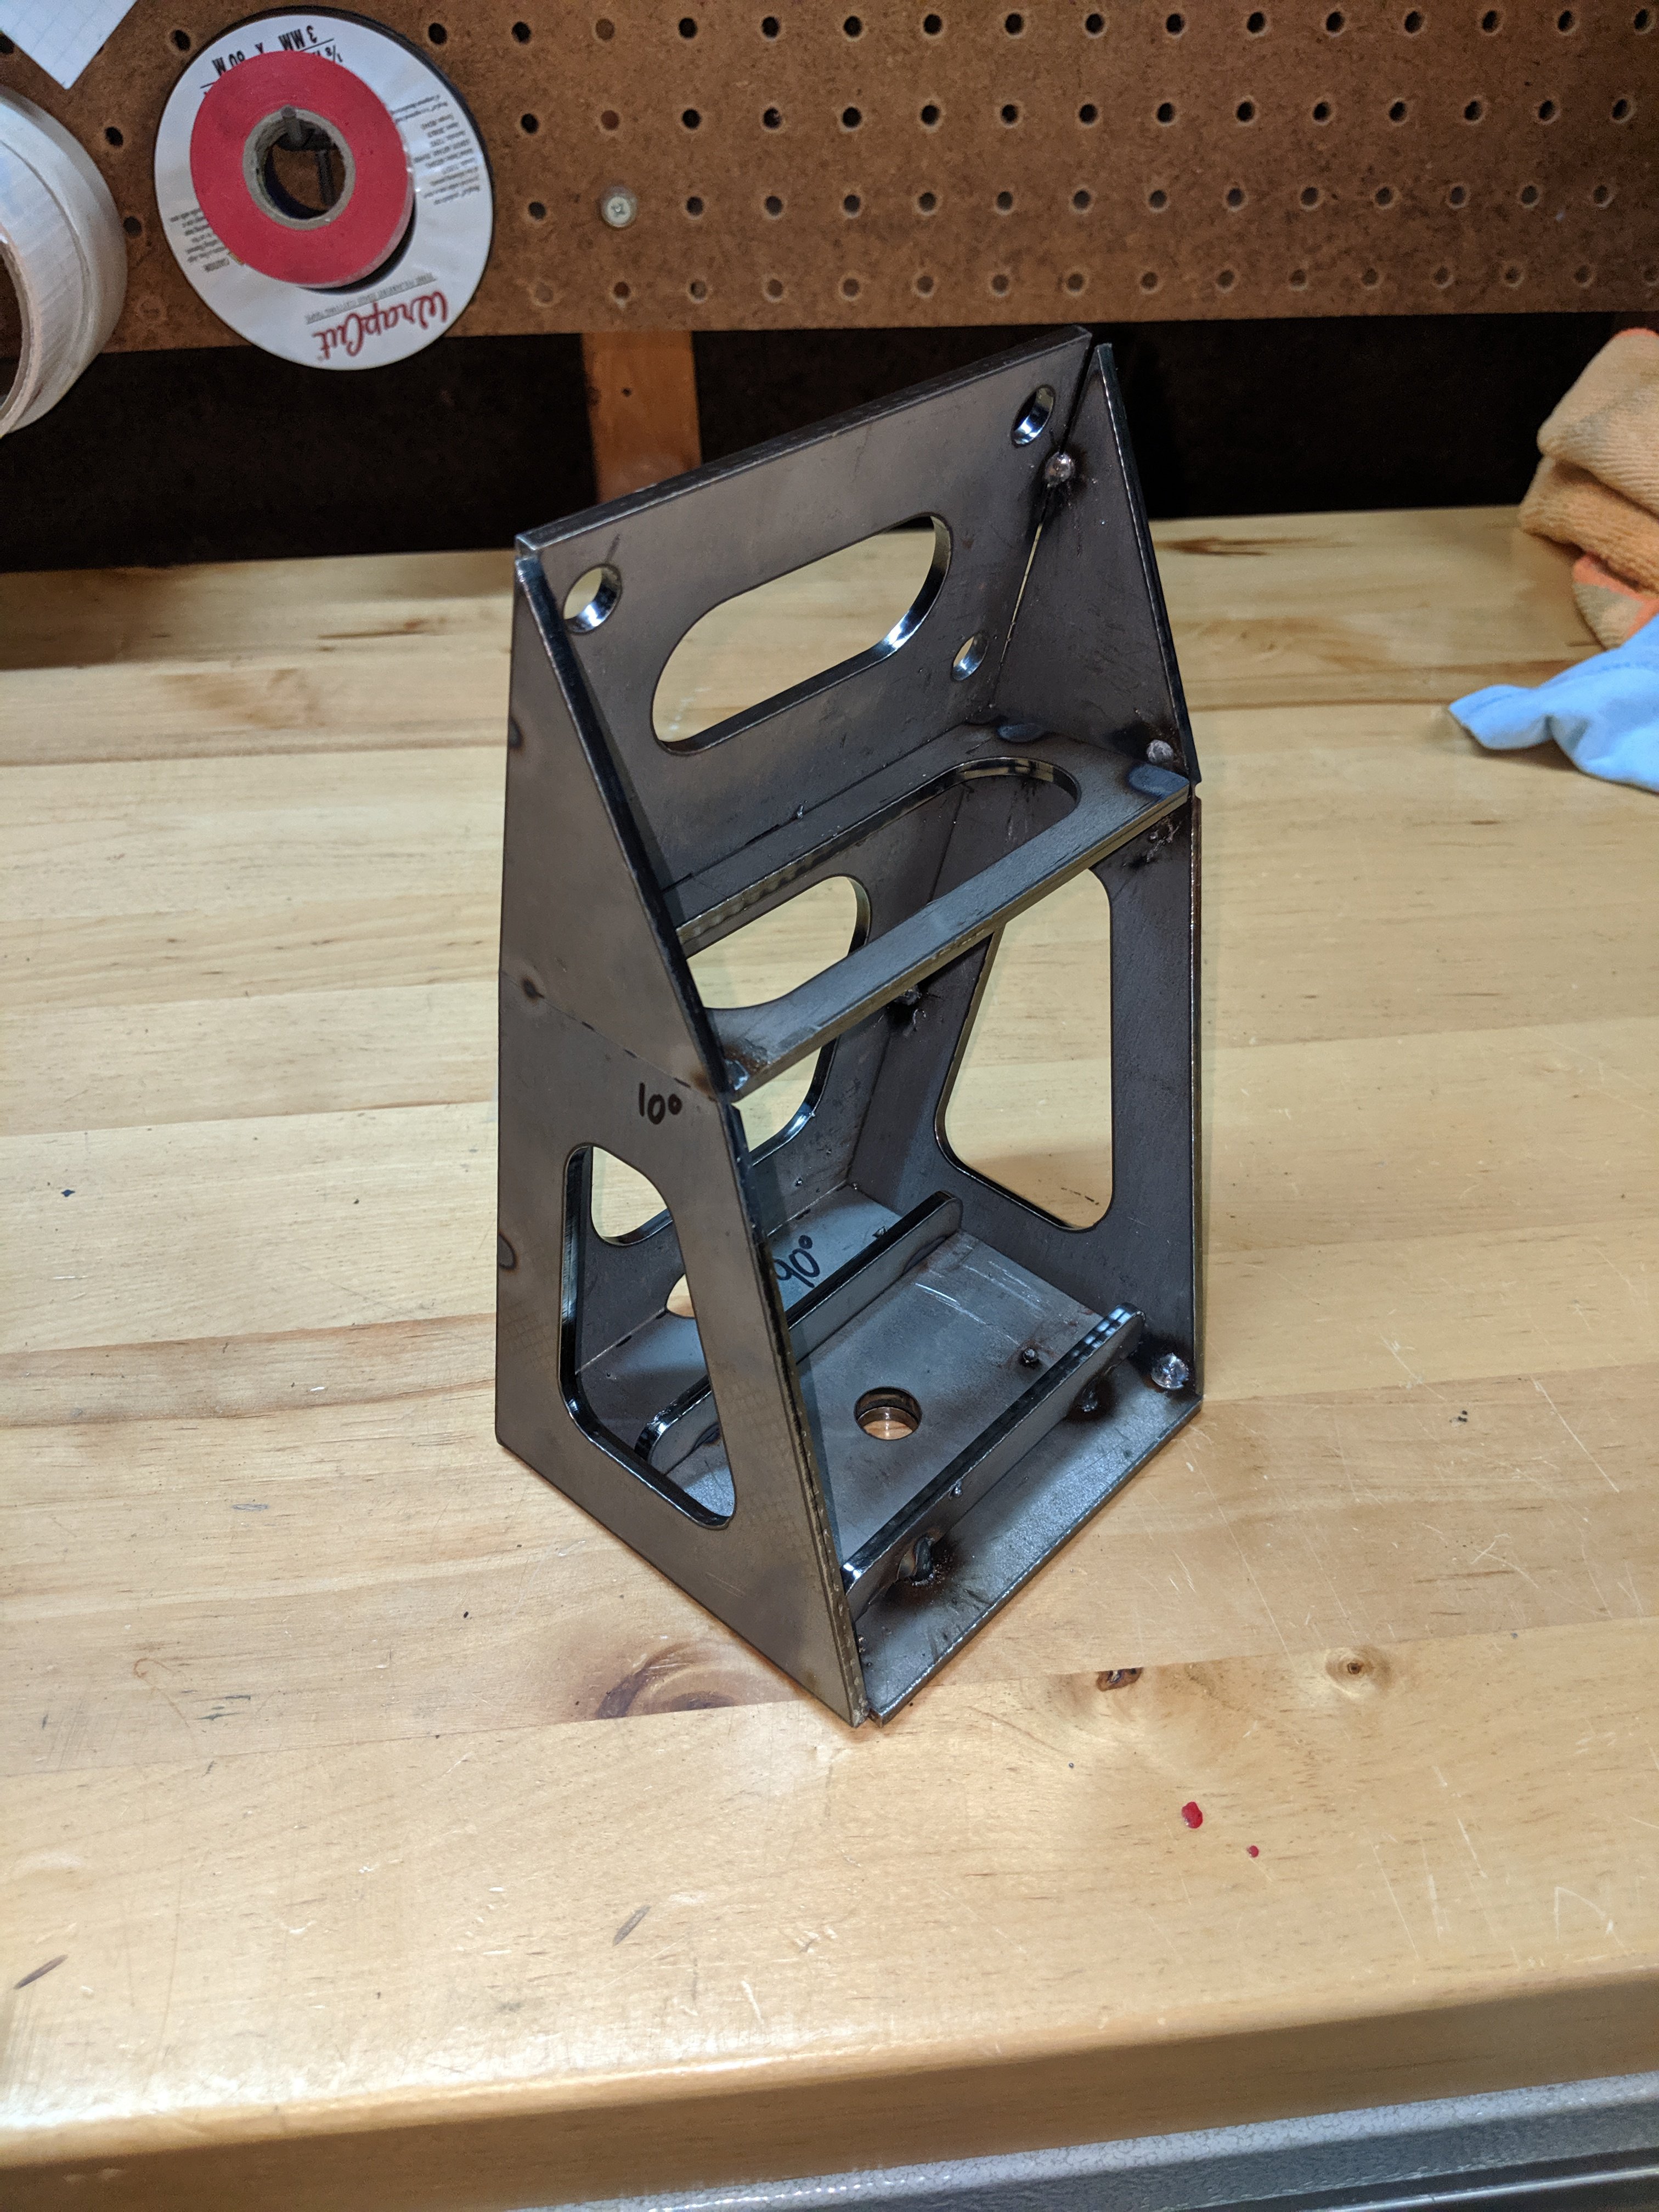
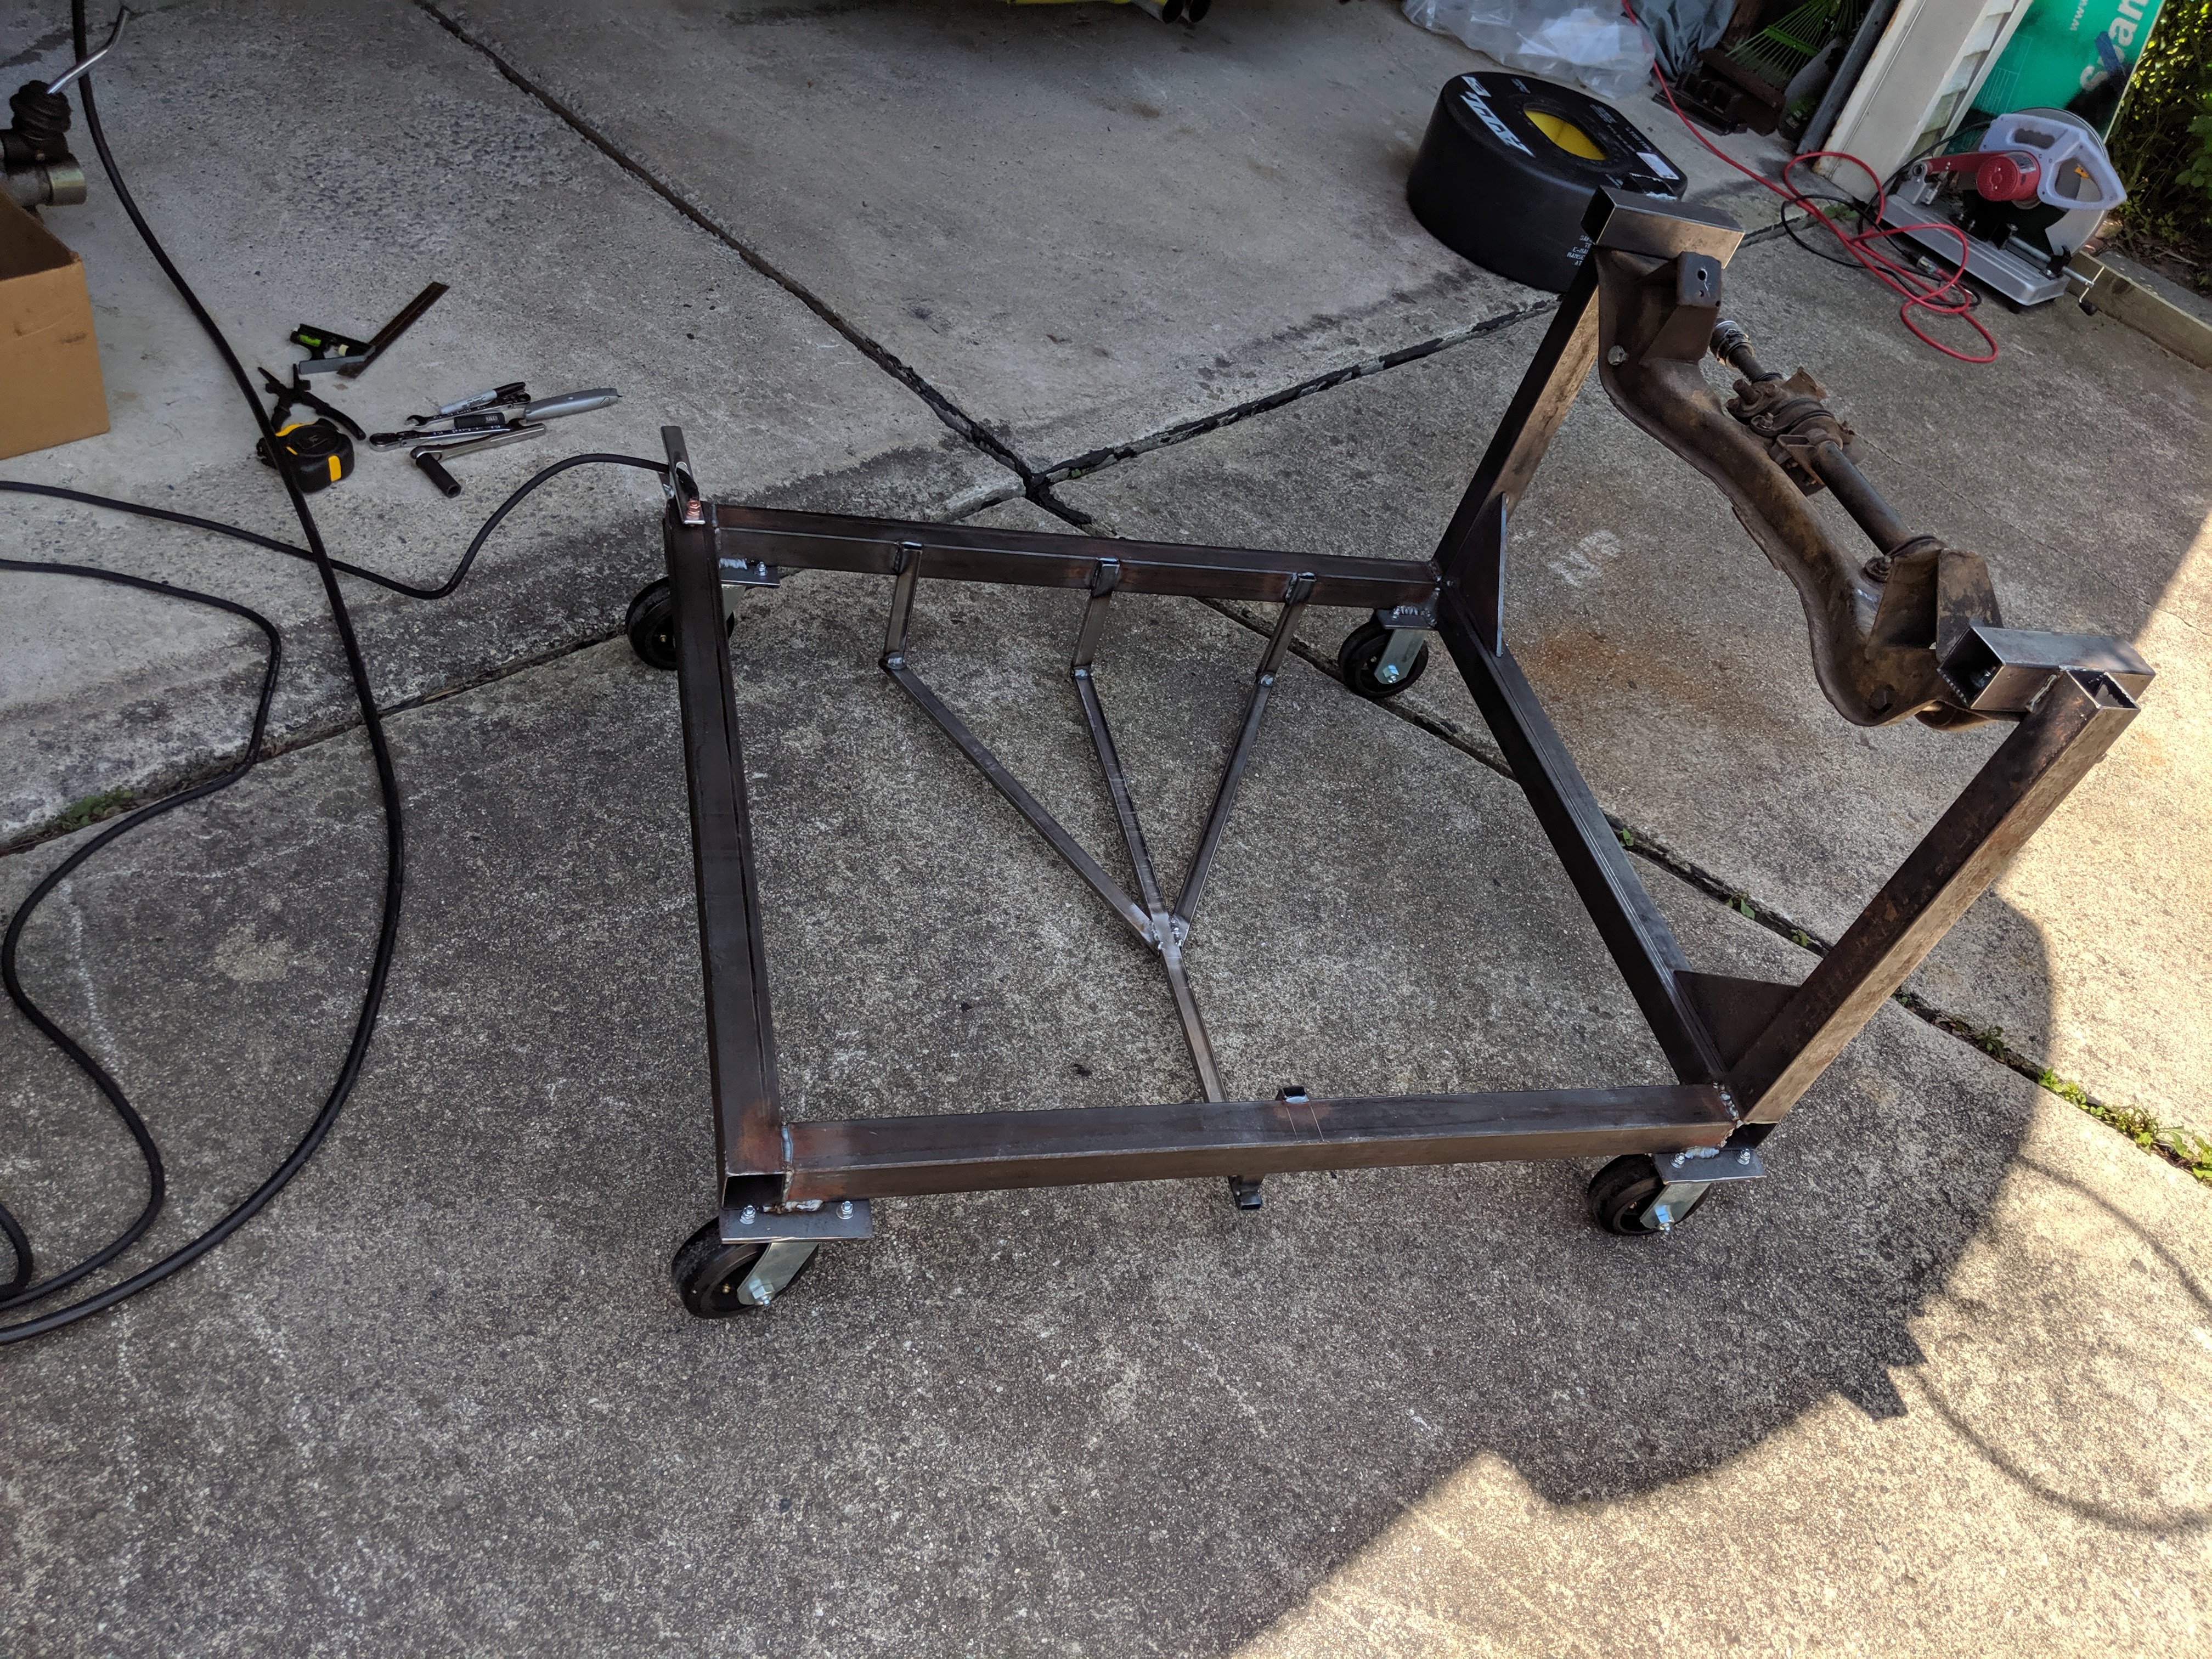
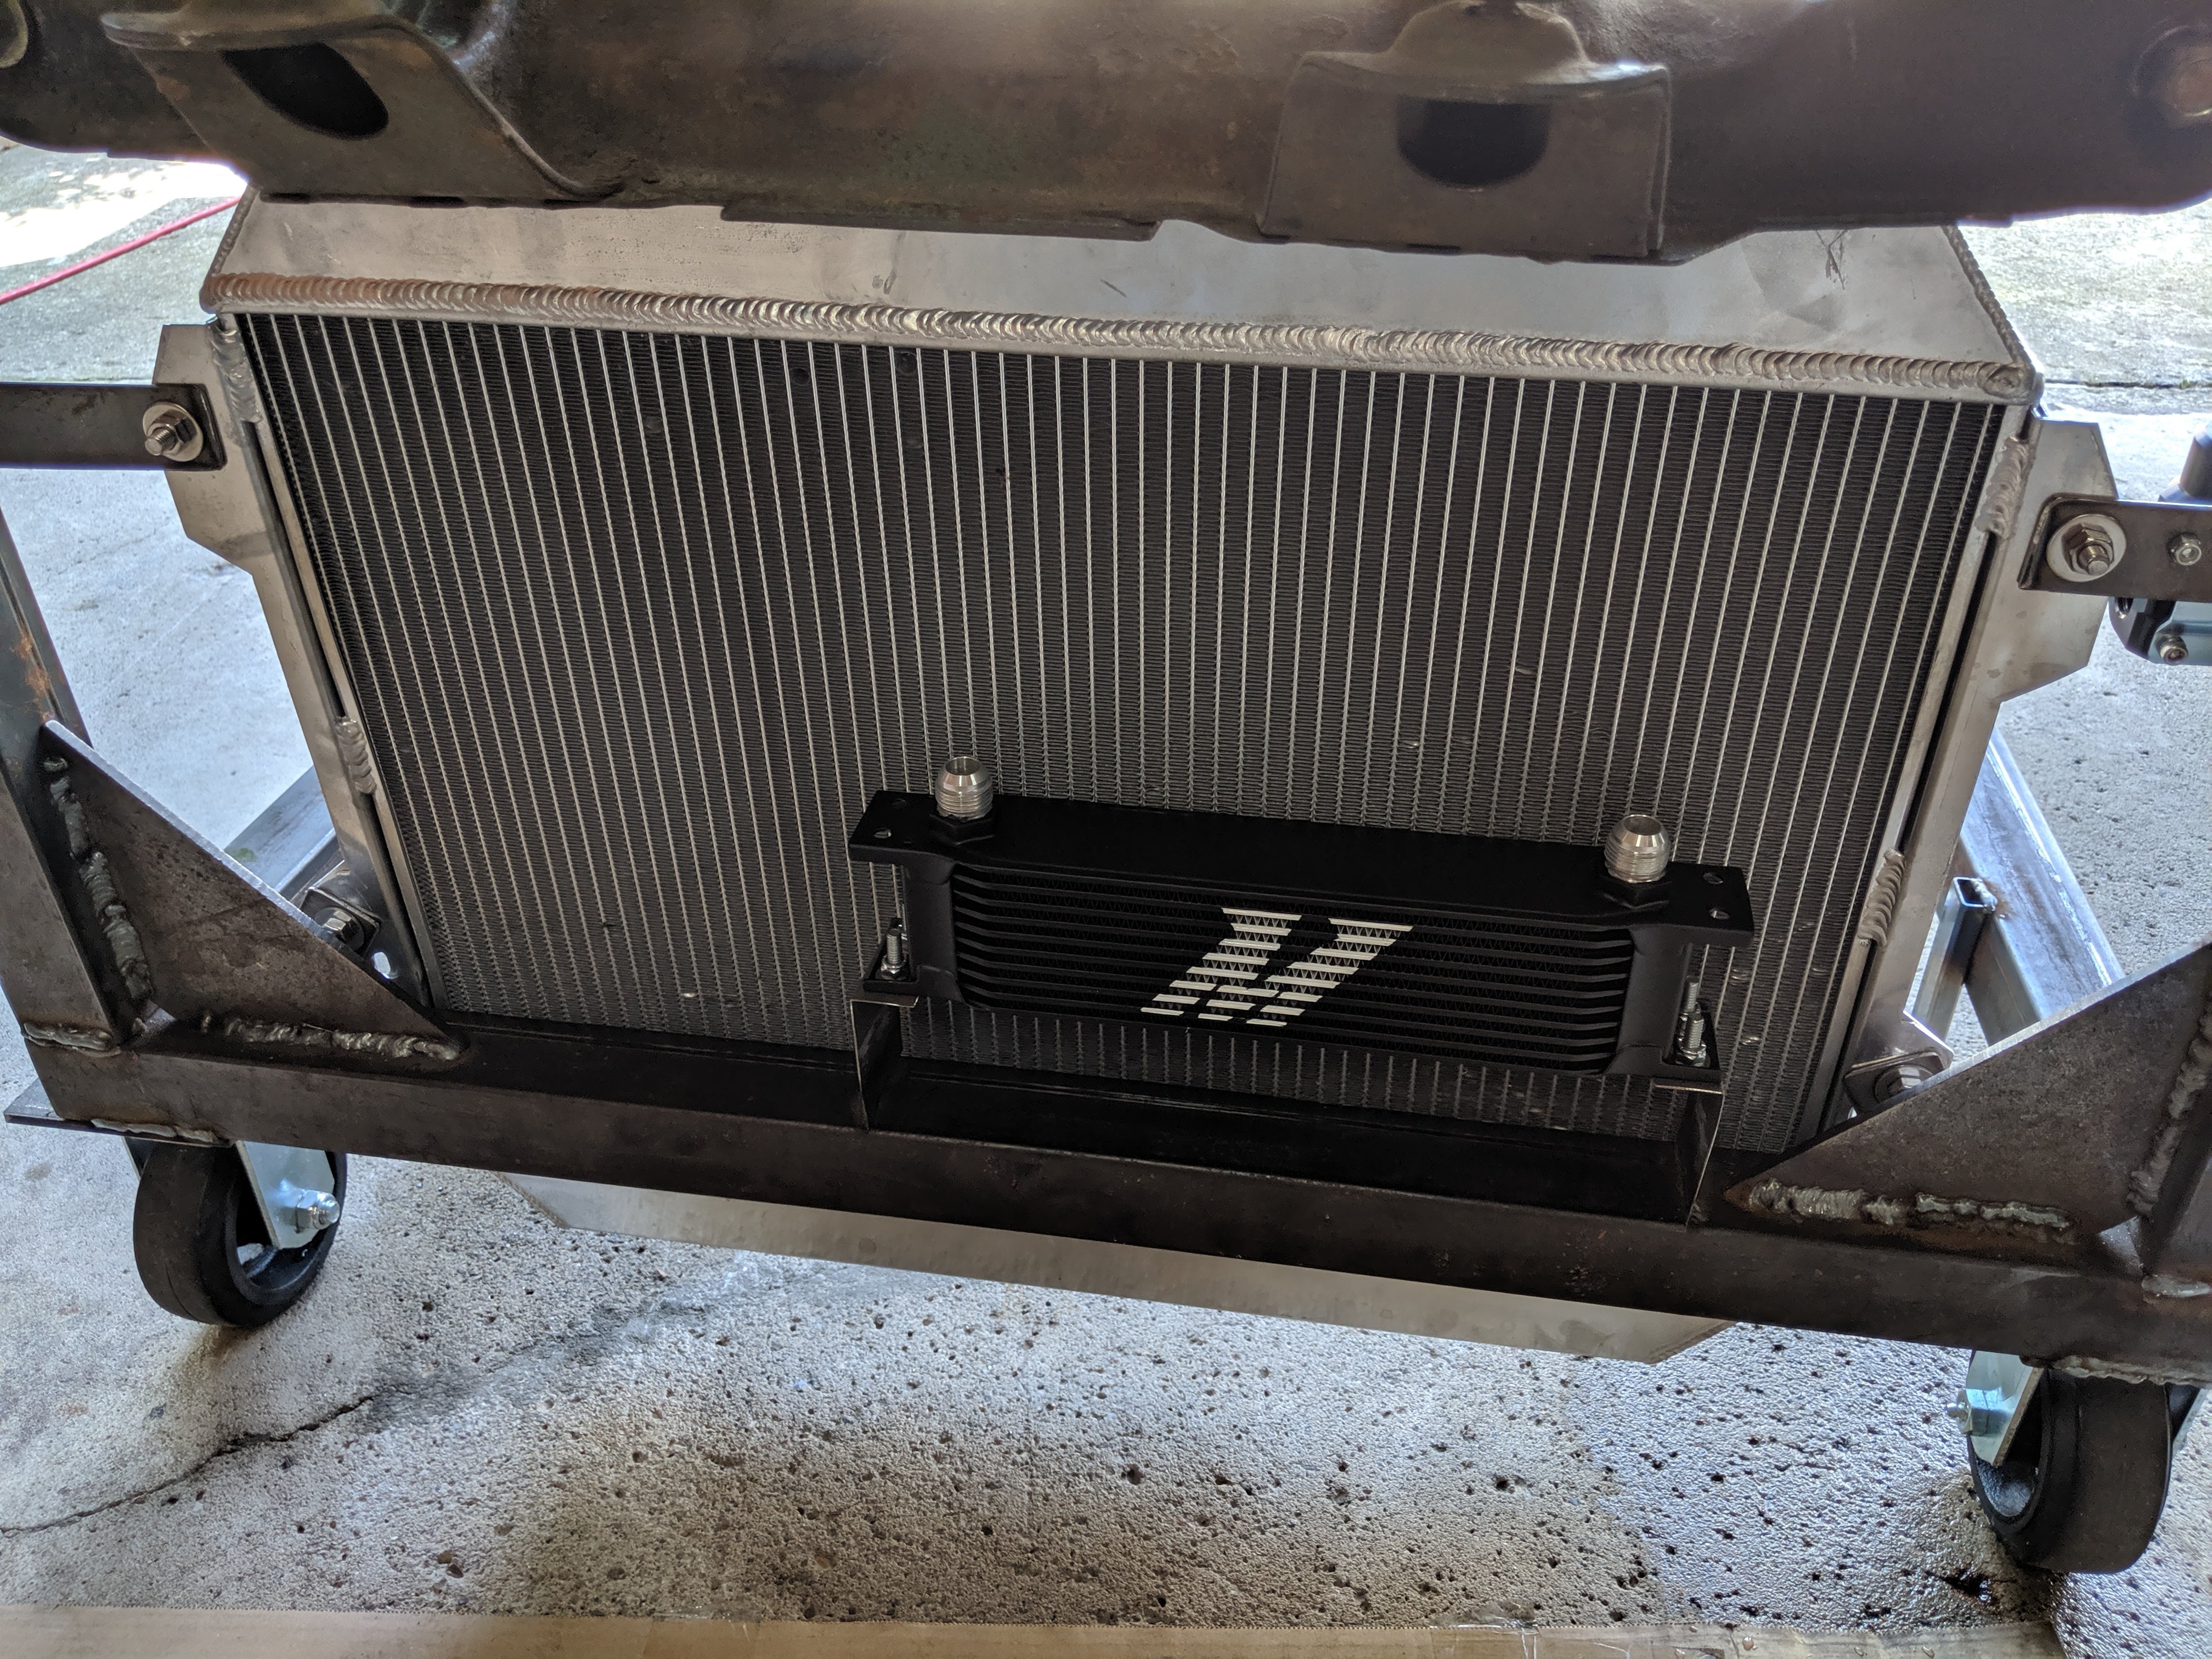
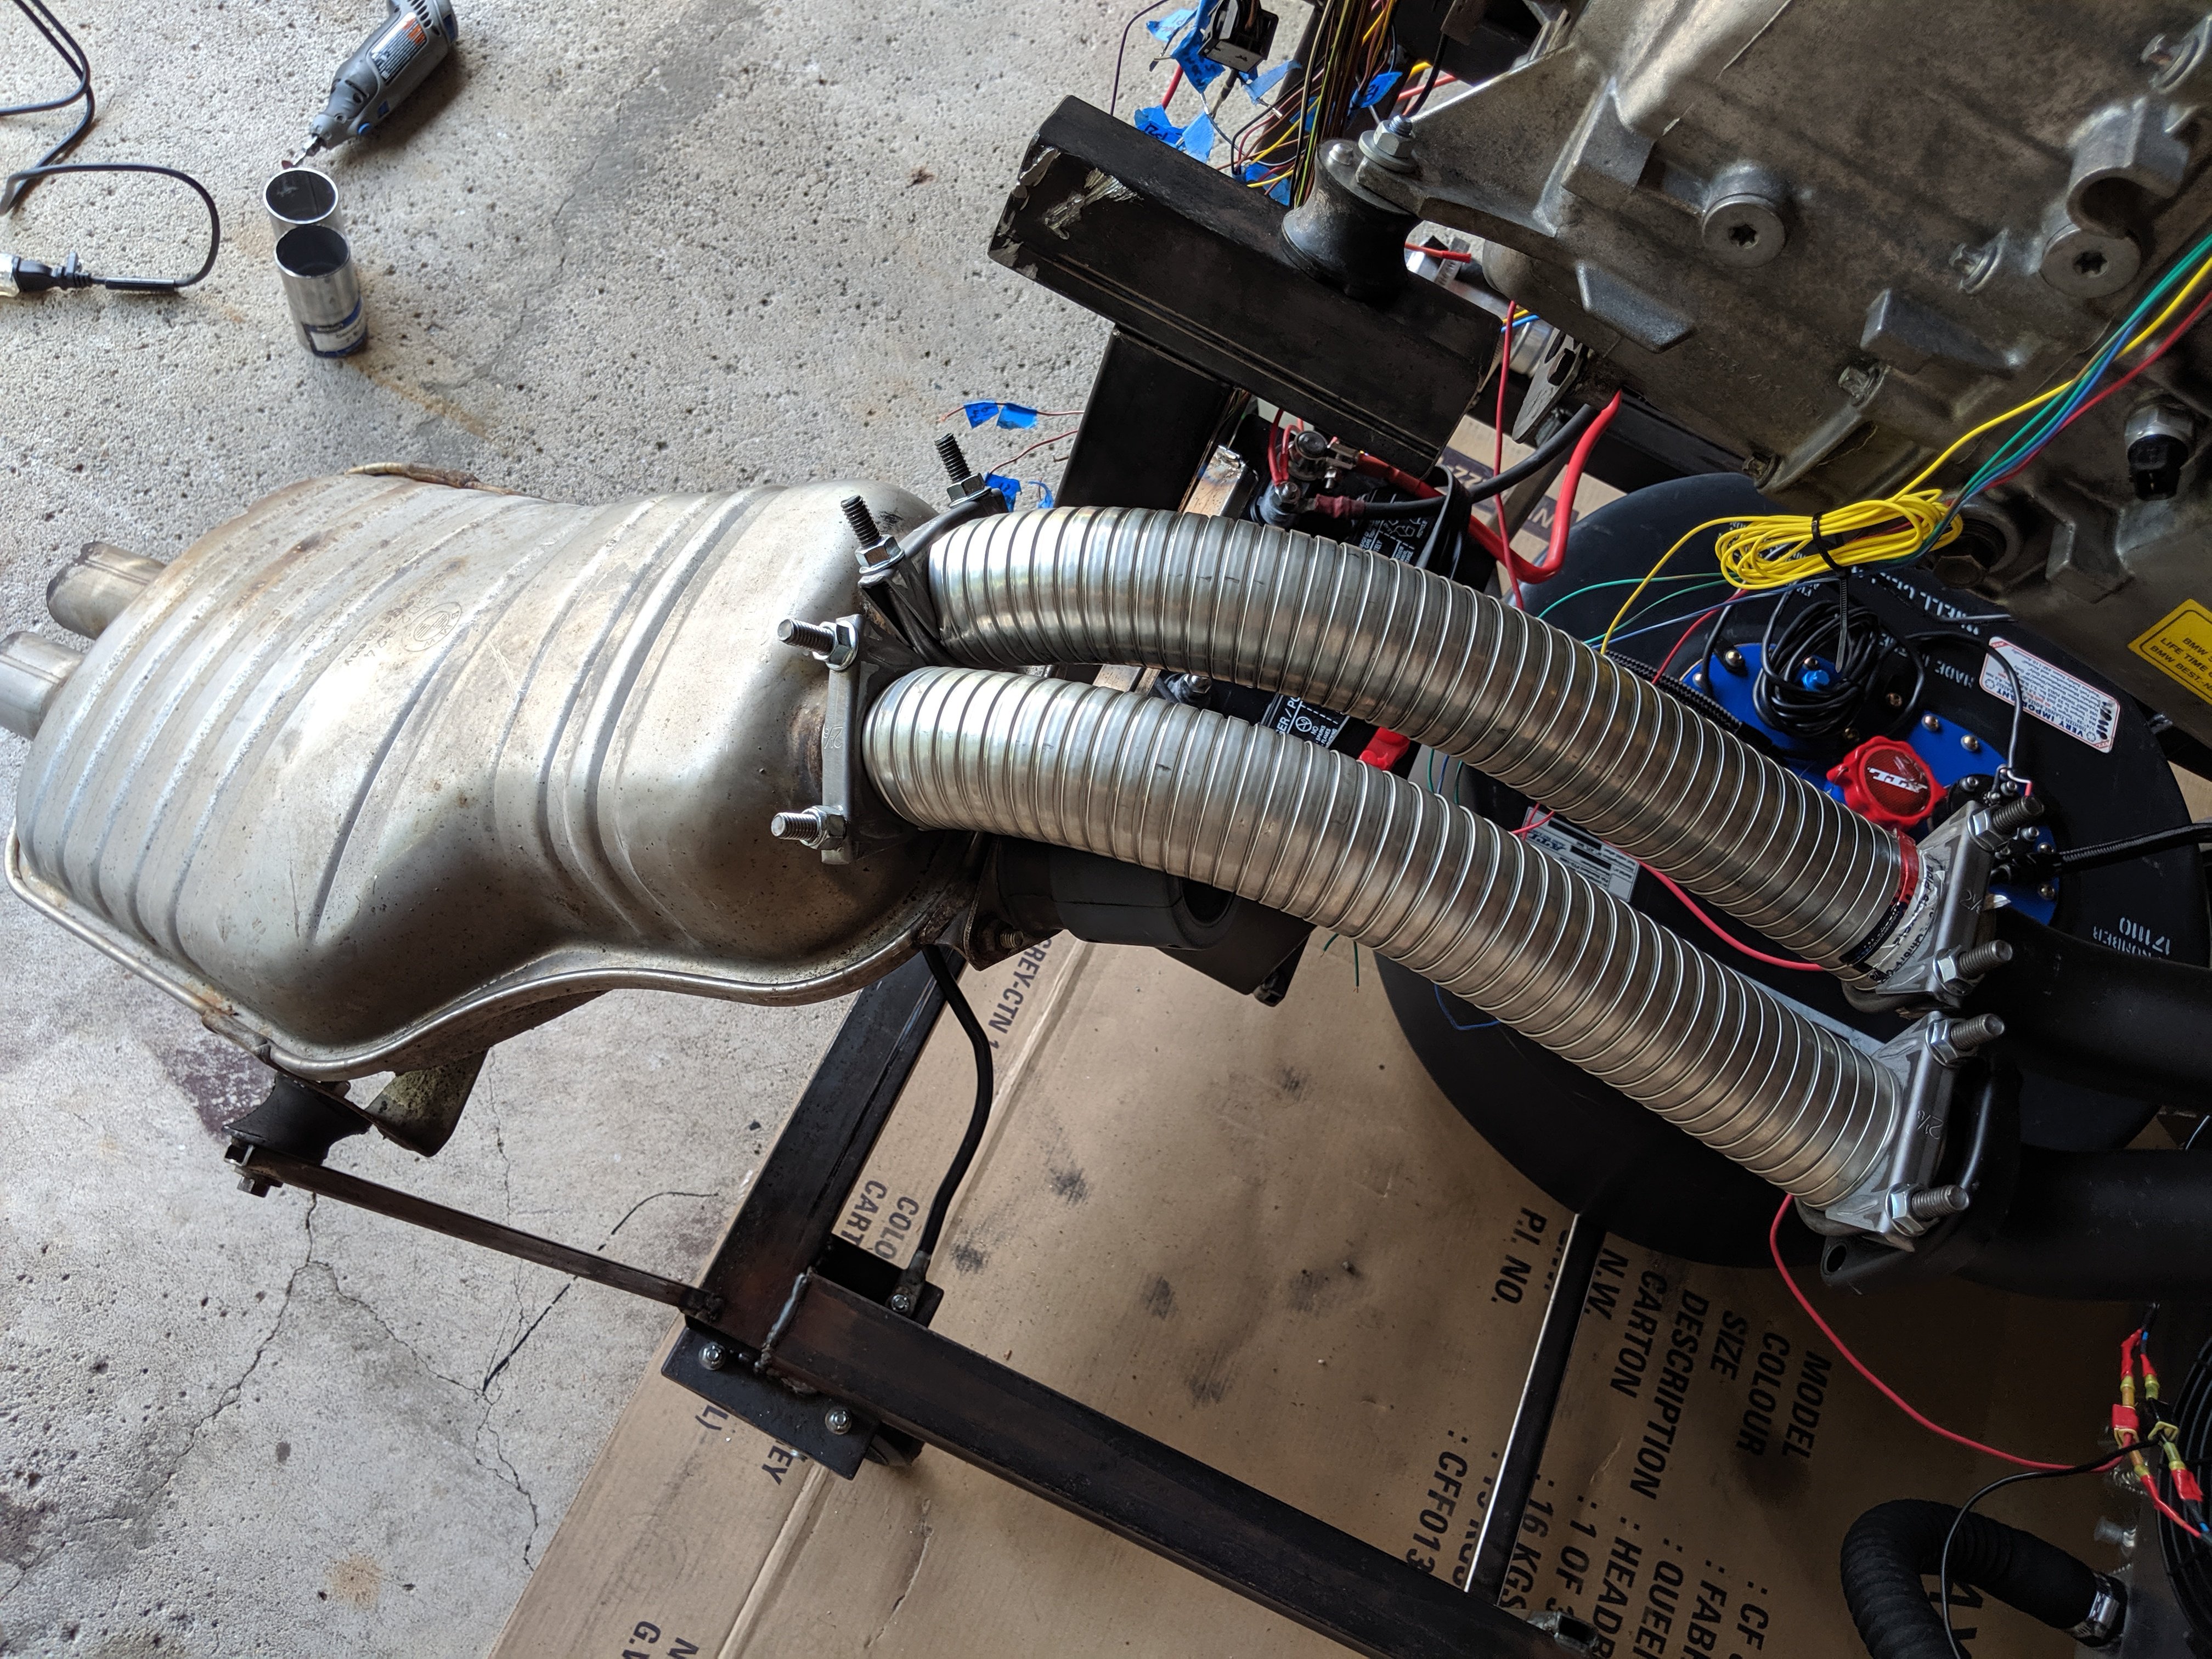
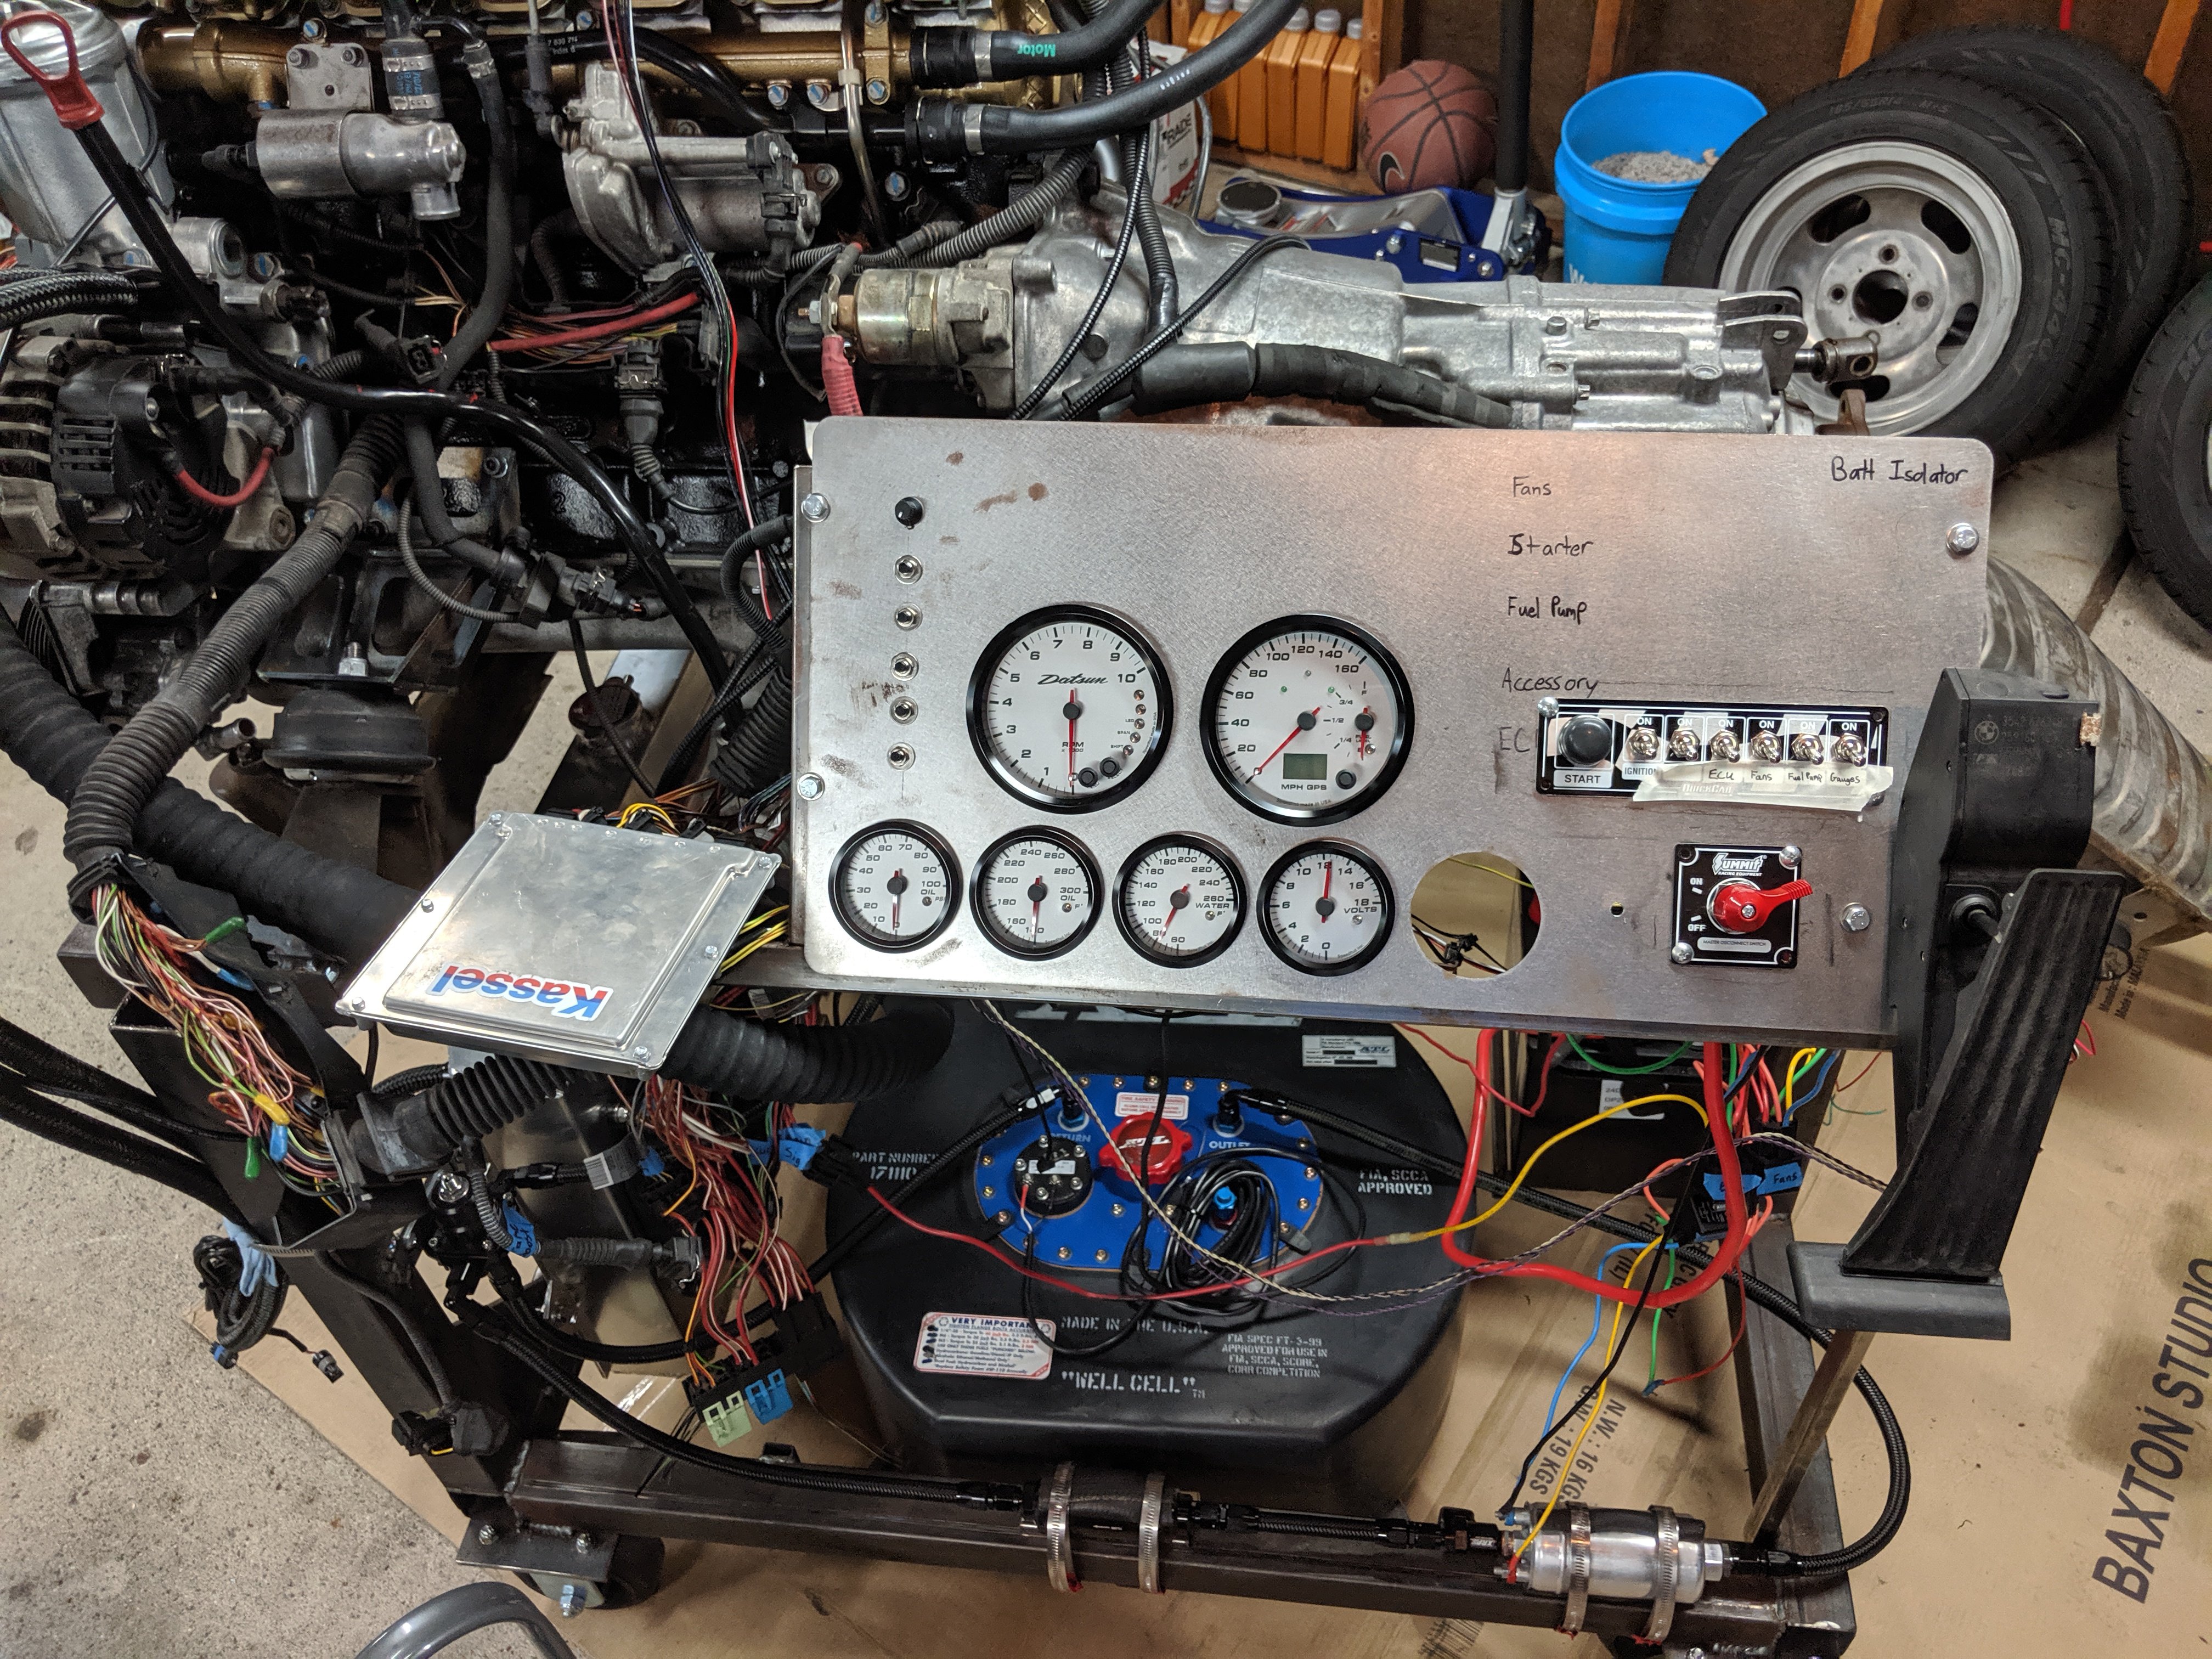
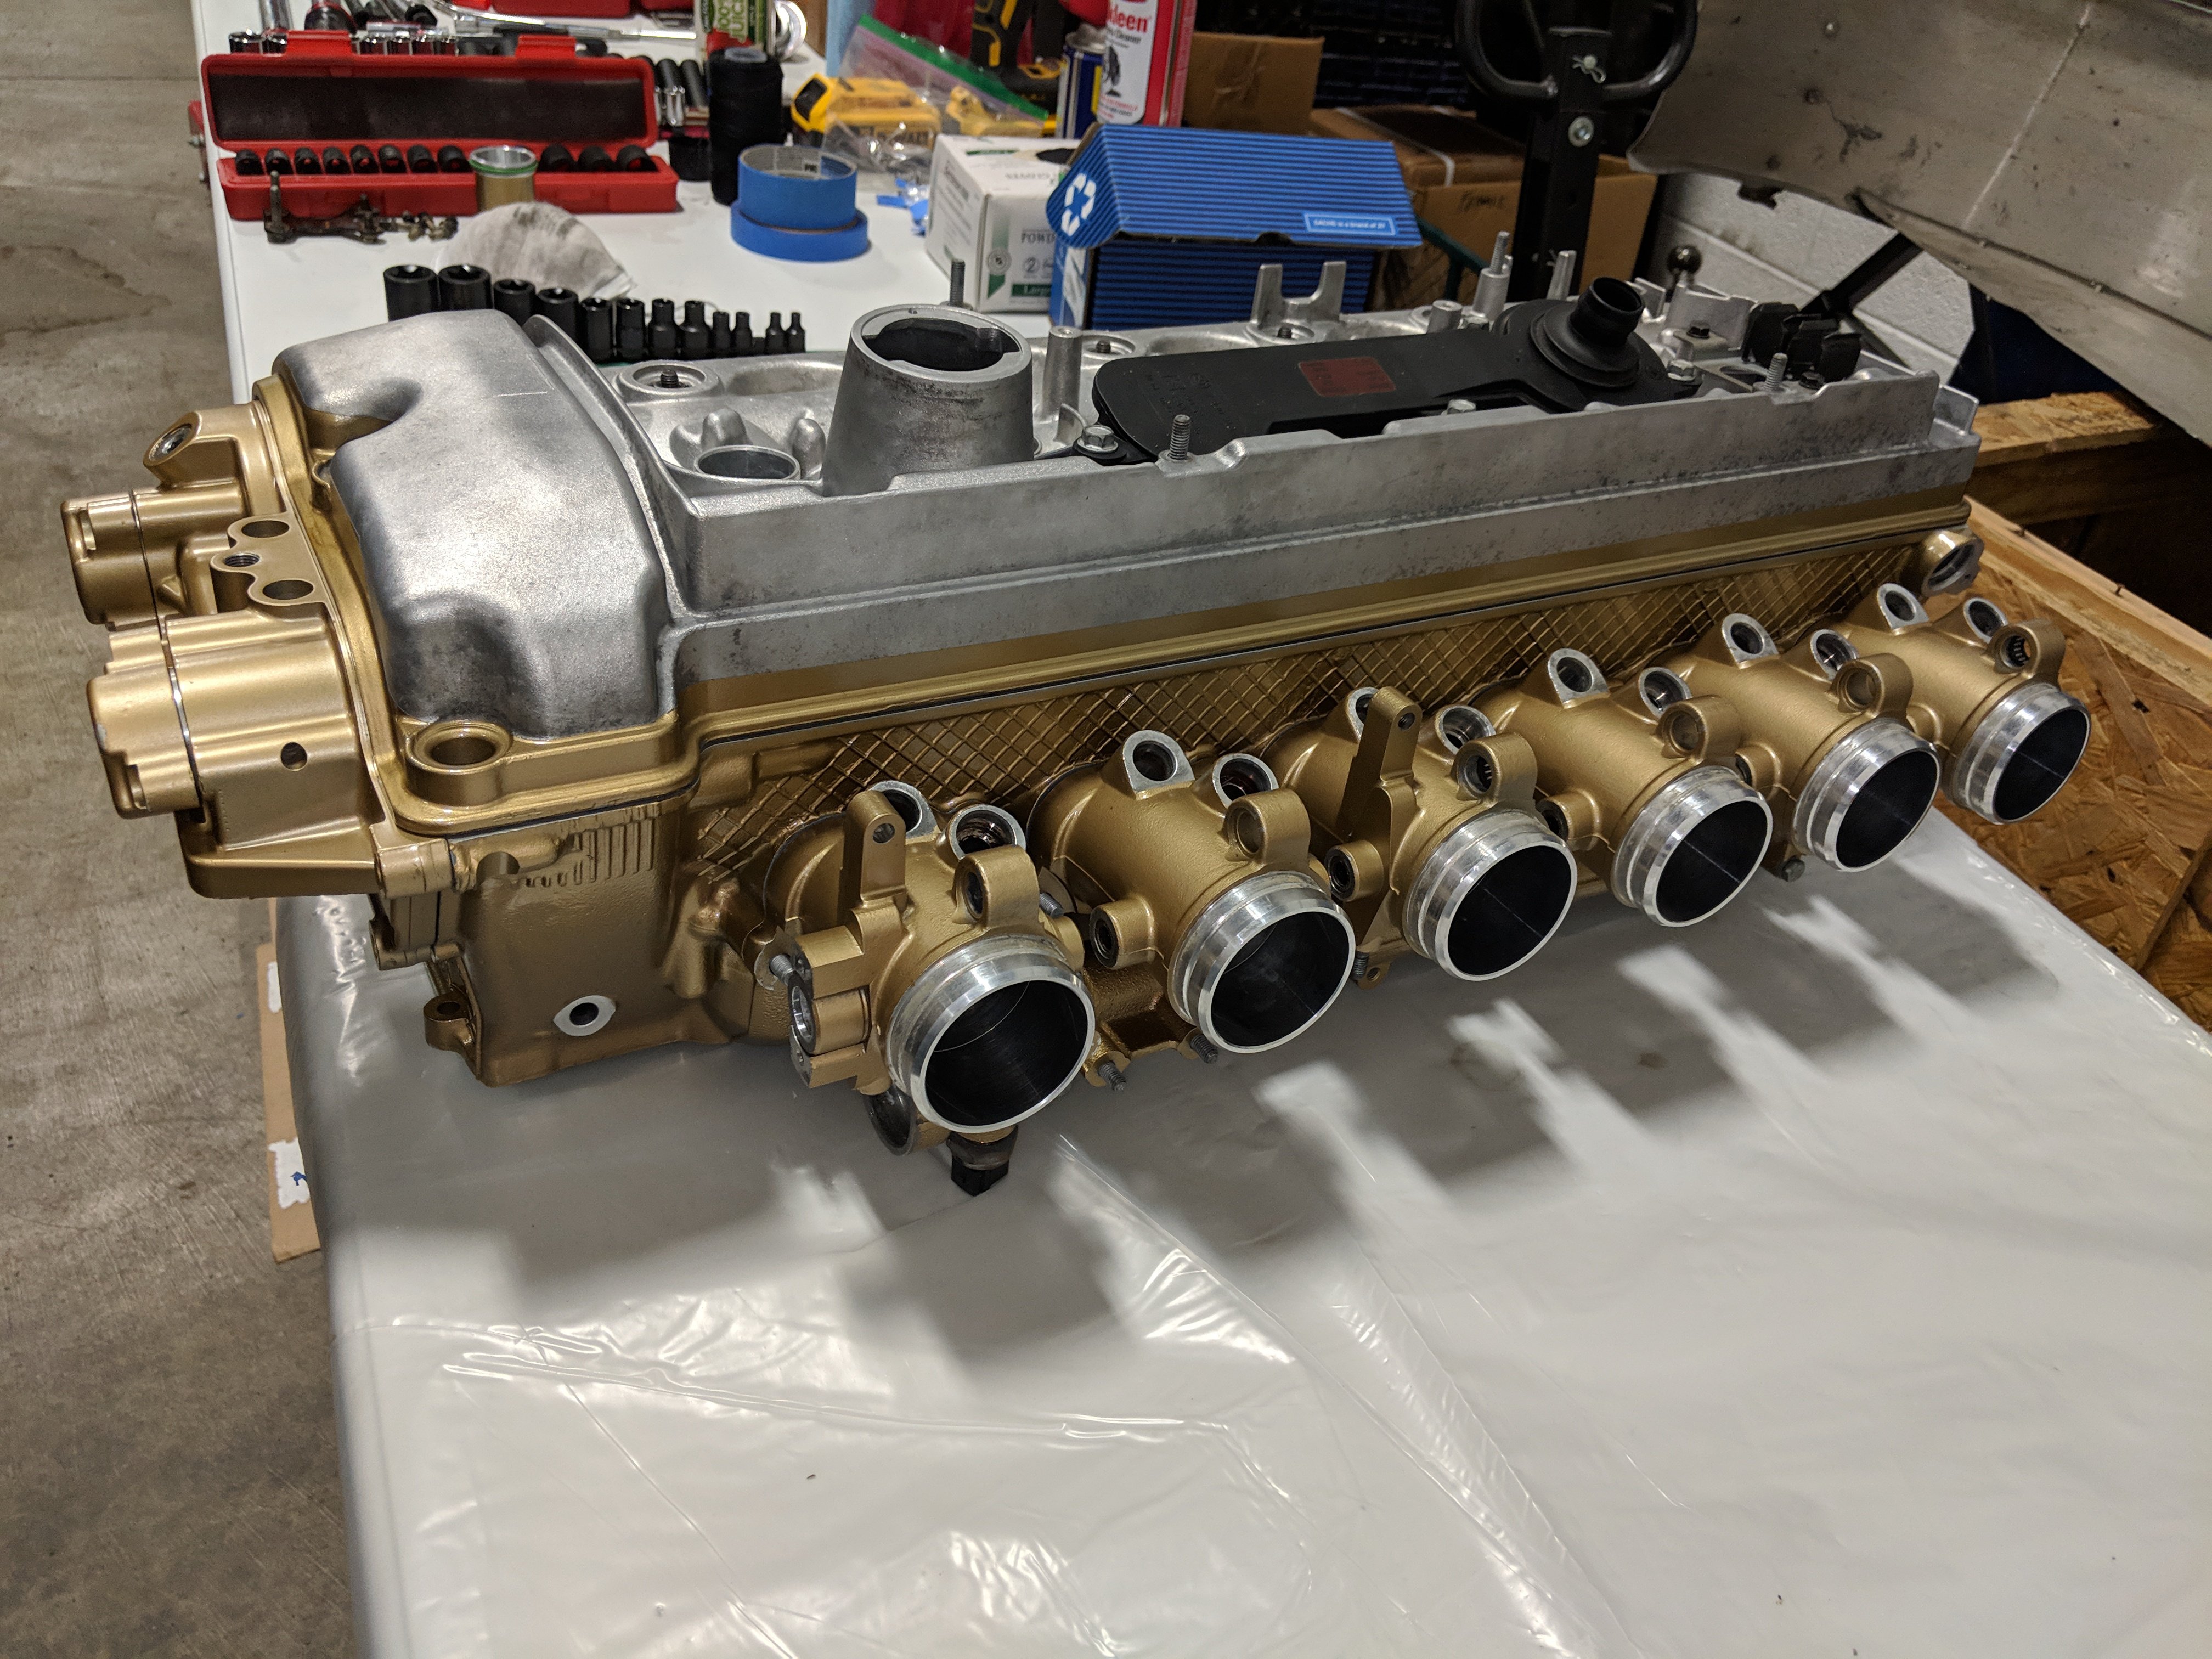
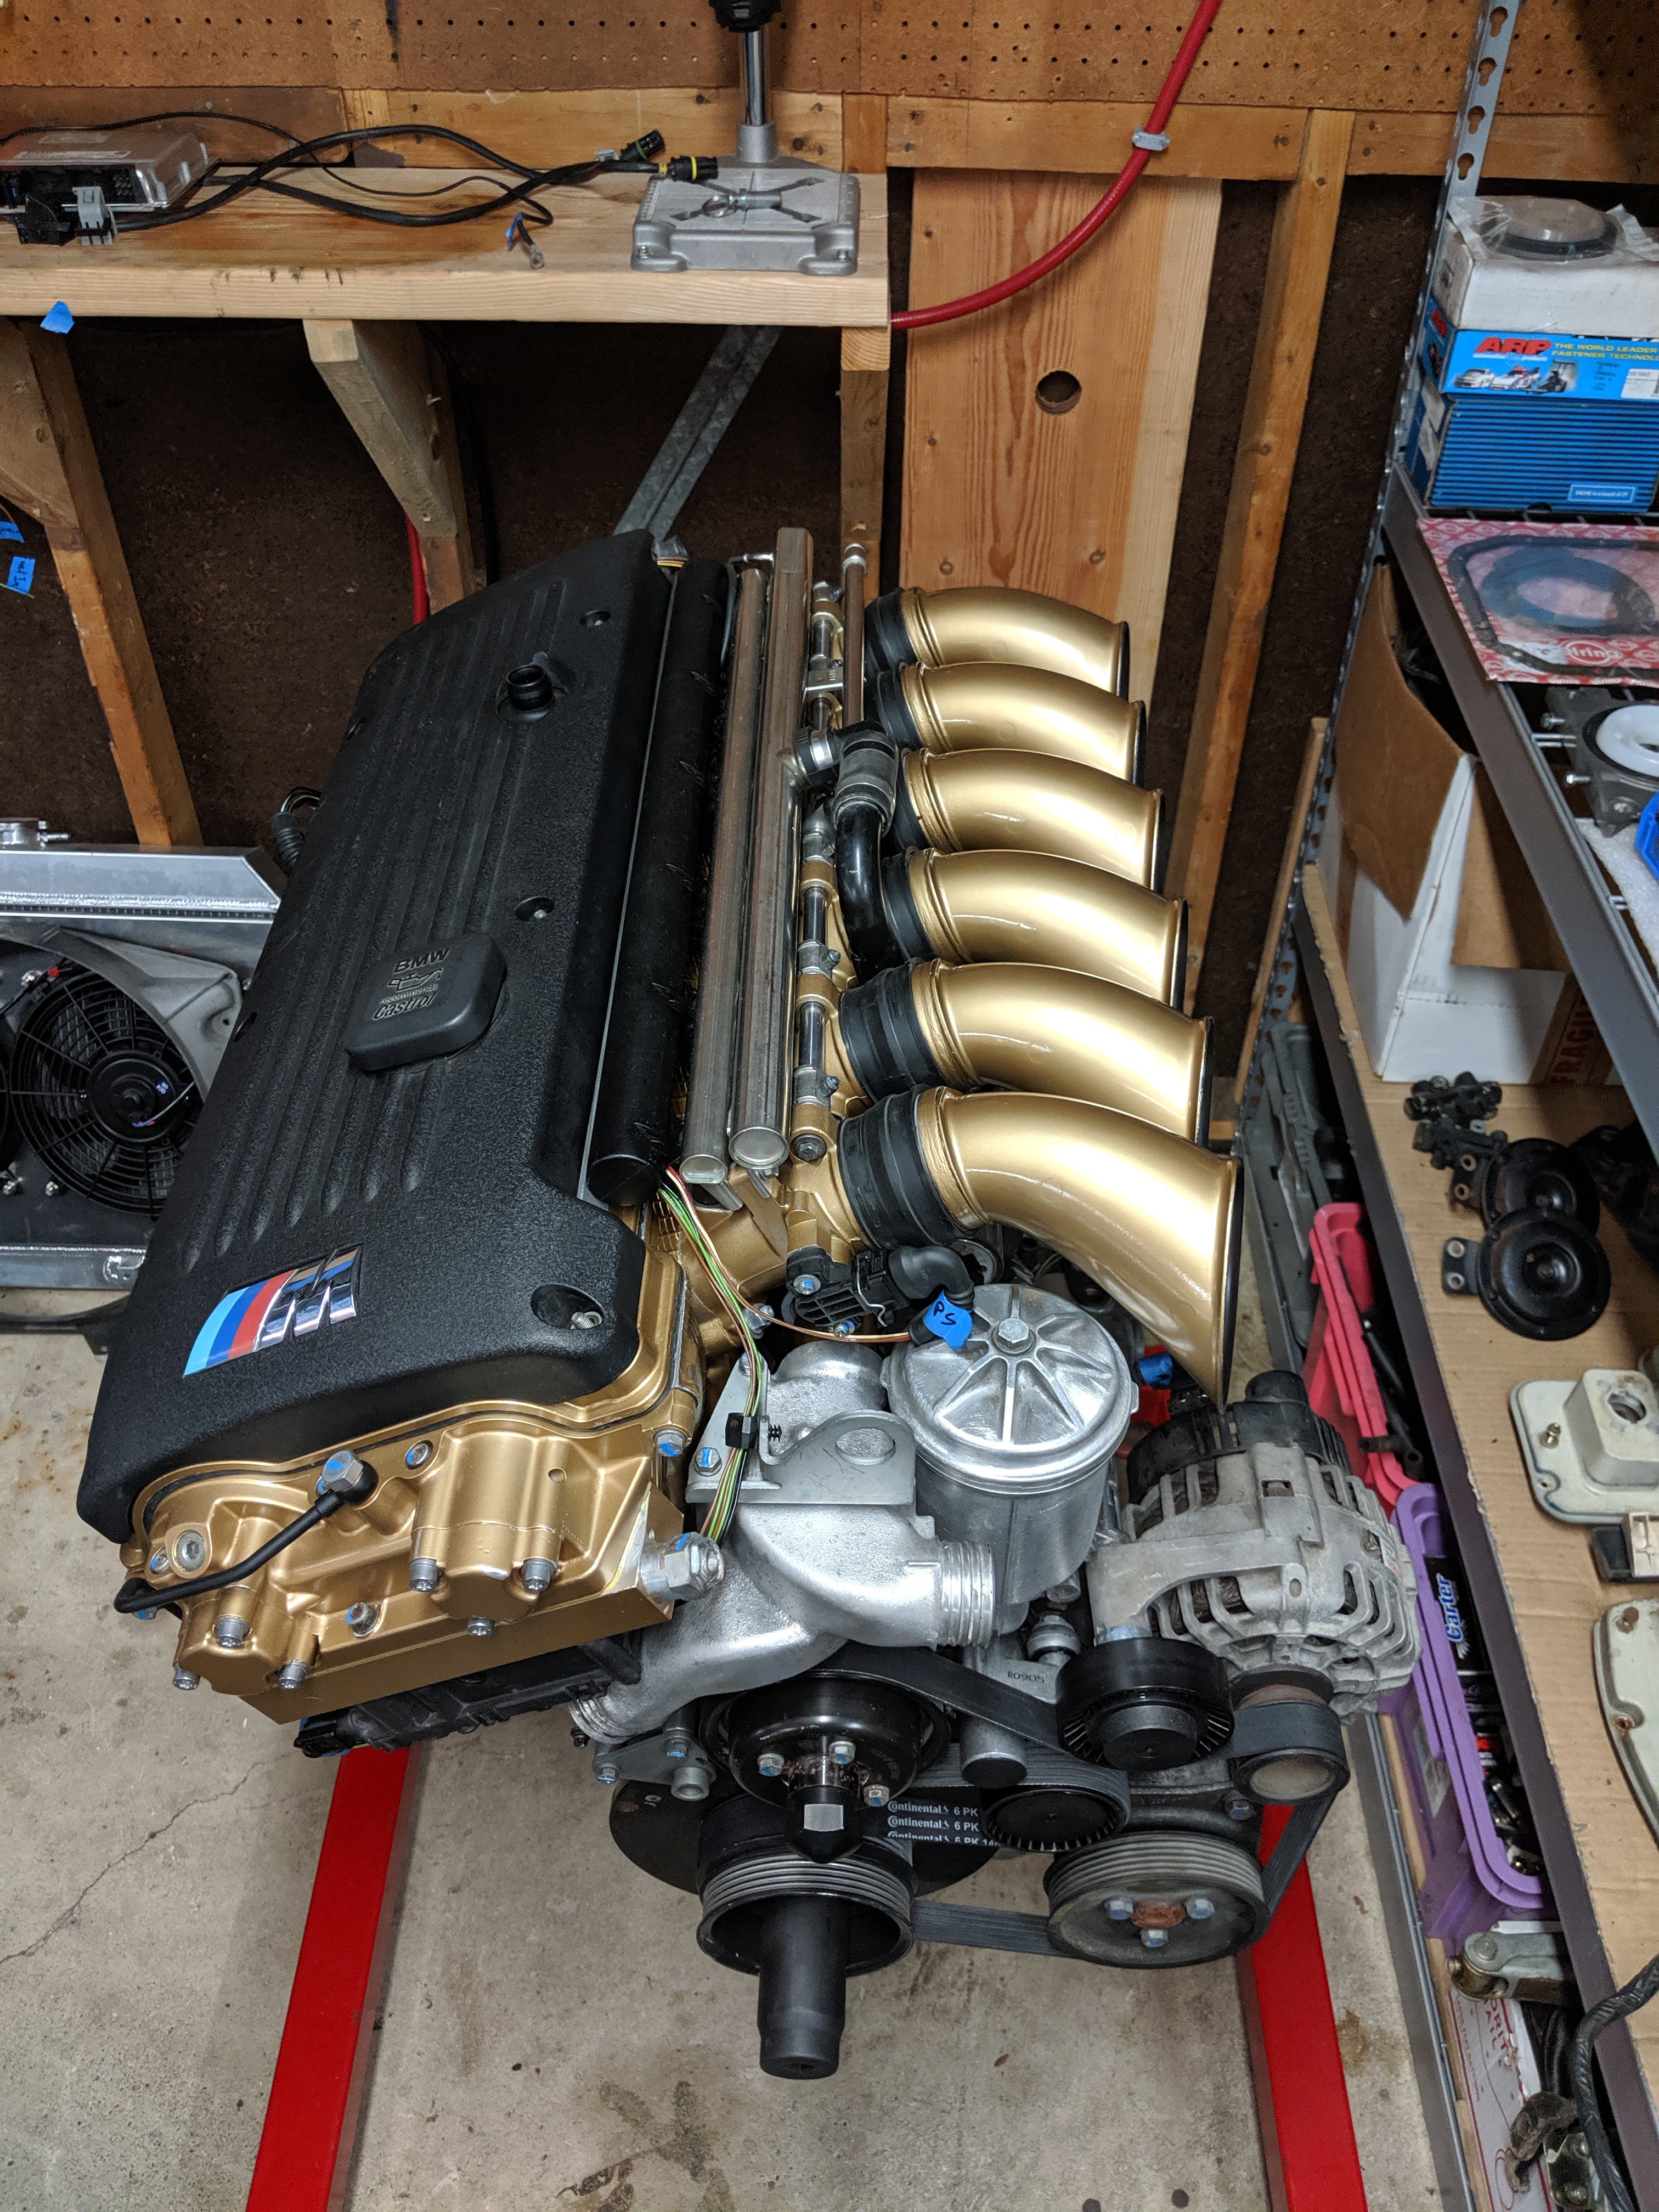
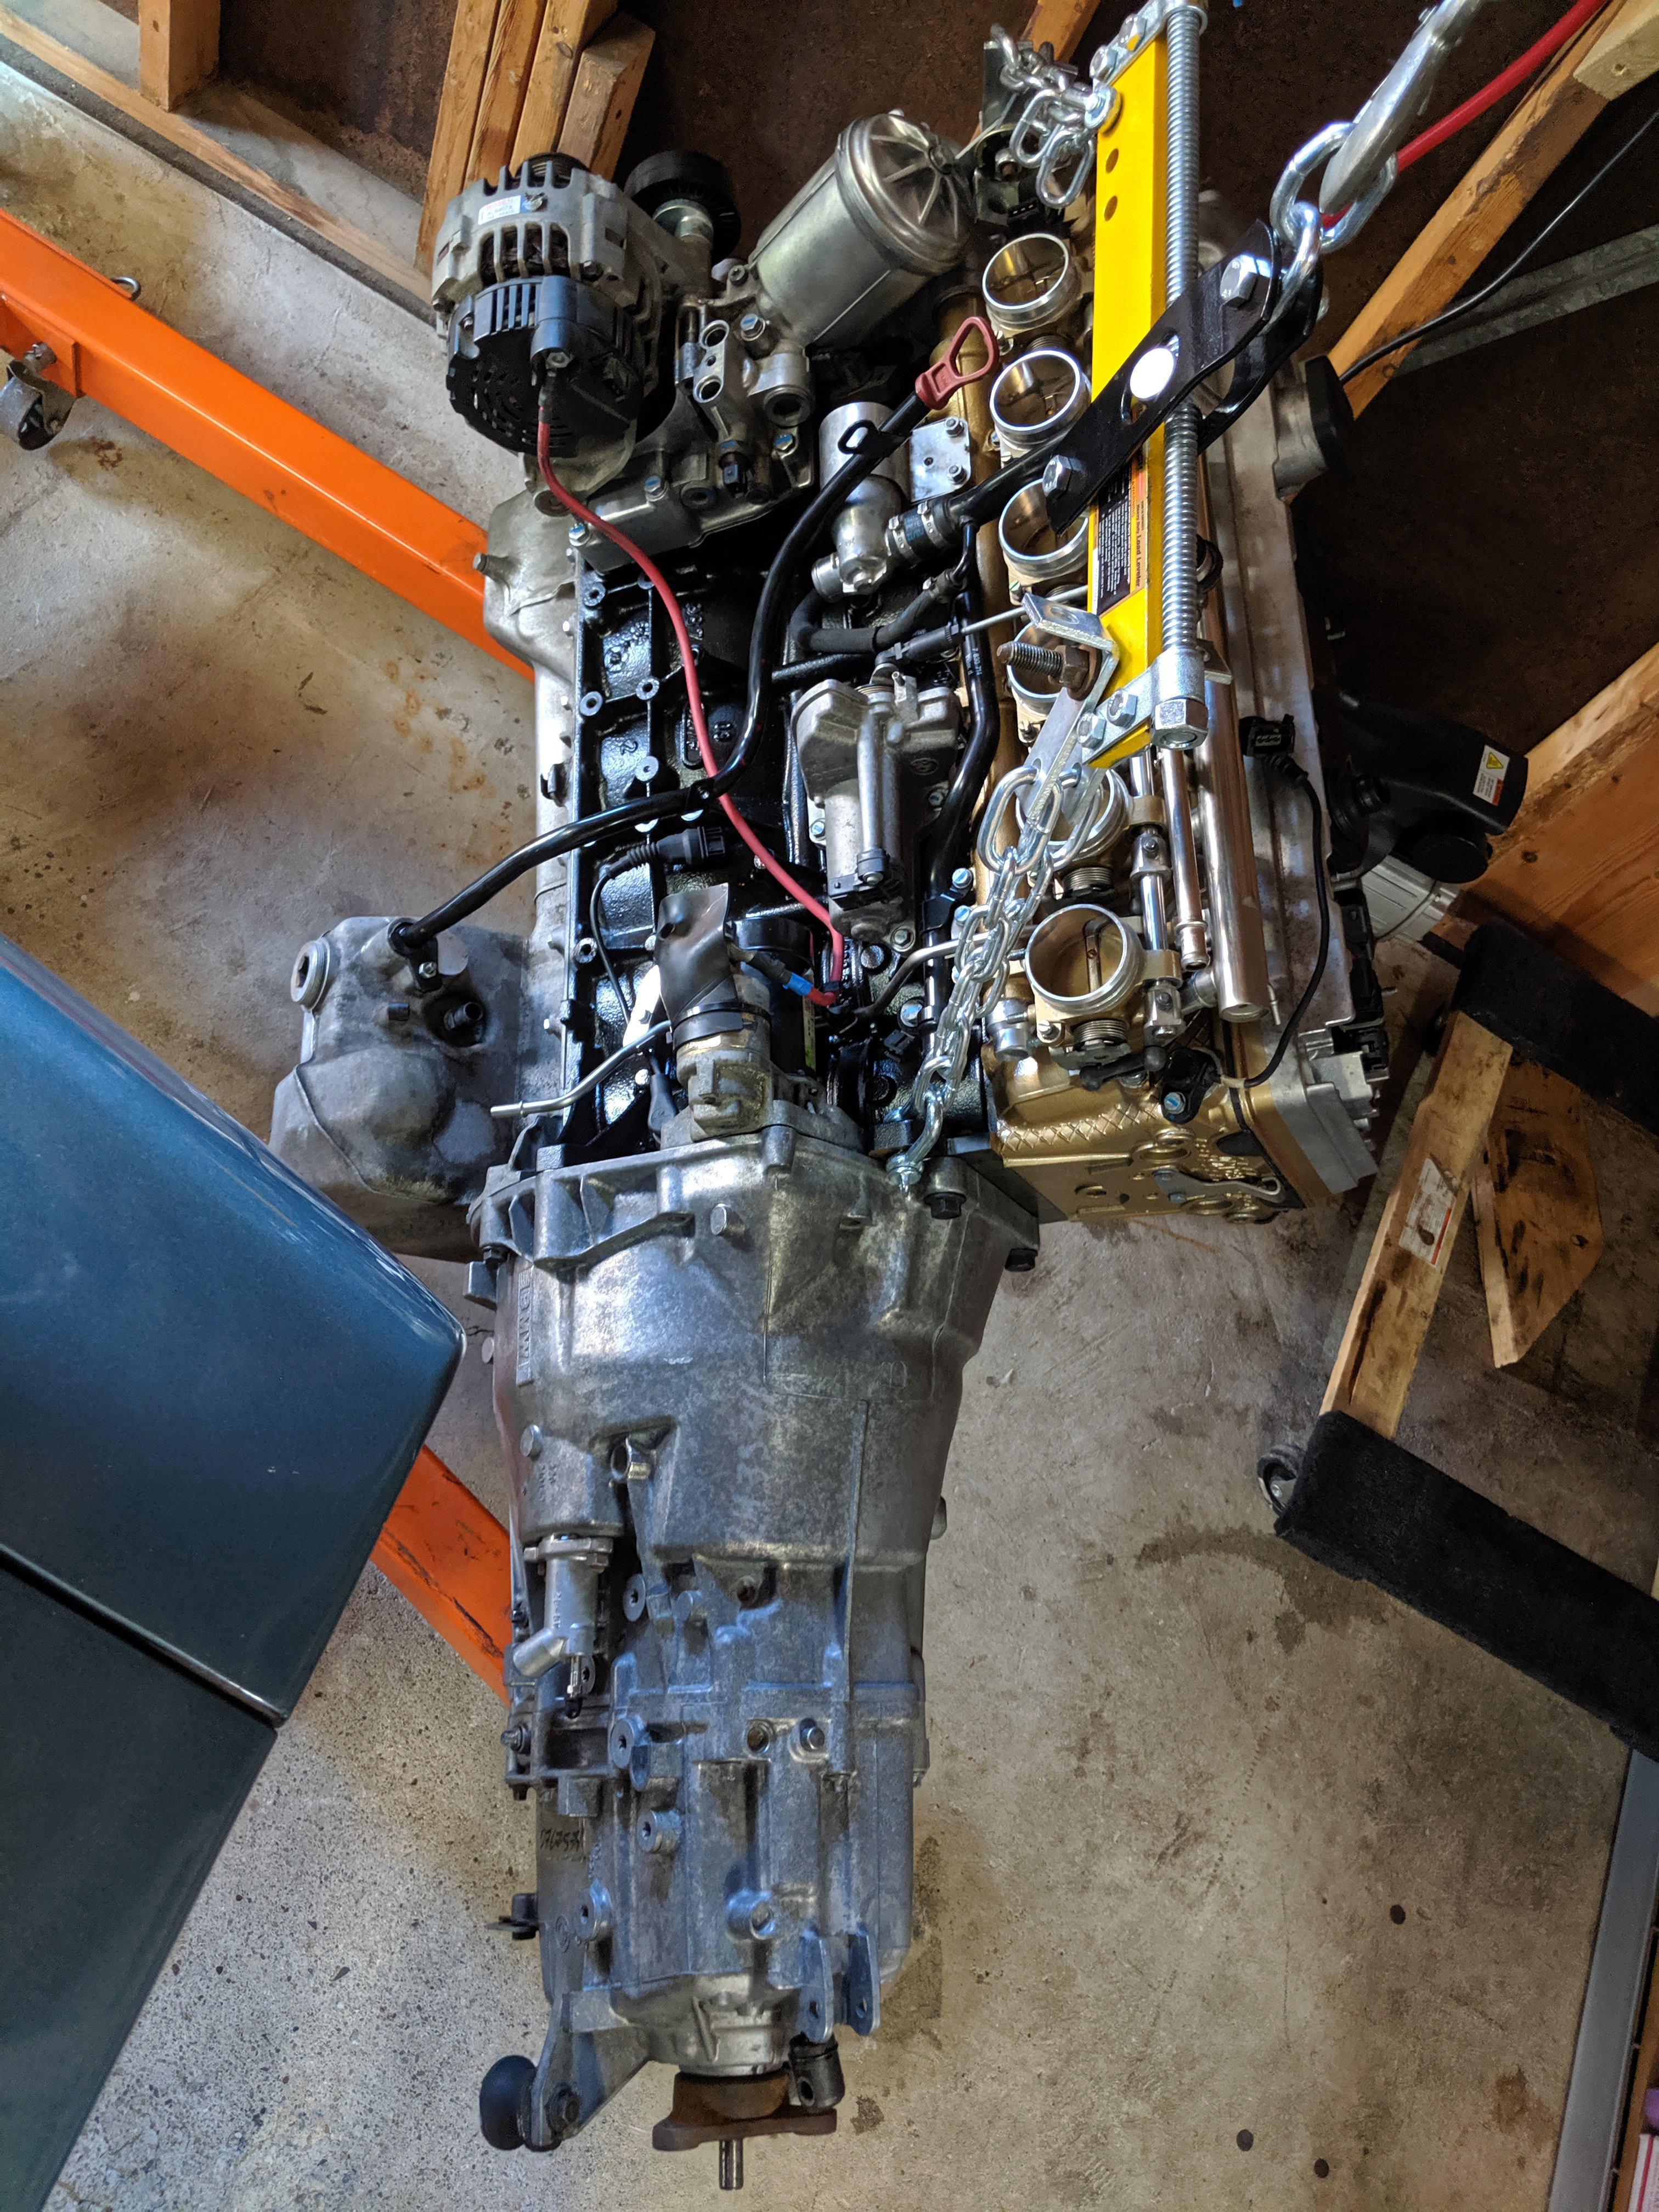
Engine Test Stand... This step probably wasn't entirely necessary, but I did it so that 1) I could get the engine running after an 8 month build process and 2) so that I could work out any of the bugs with the wiring and the computer before trying to integrate it into the car. I wanted to know that this thing actually worked before it made its way into the car. I bought a new welder and some raw material and went to town. Most, if not all of the accessories I have, will be used once the engine is in the car again, for consistency sake. some of those include: full suite of custom speedhut gauges that will make their way into the car Z Car depot 2-pass aluminum radiator Mishimoto 10-row oil cooler (may make this bigger eventually but this works for now) Bosch 044 fuel pump Summit 10 micron inline fuel filter Aeromotive fuel pressure regulator ATL Well Cell fuel cell Kassel Performance tuned MSS54HP ECU set up to run as a standalone engine management In addition to all of this, I wanted to use the actual front cross-member from the 260z to hold the engine on the test stand. This where some great forum members helped out immensely. Luckily, there are a few more rogue people like me that have put BMW engines into S30s and did some really great work to document how they did it and BMW was nice enough to make the engine pickup points the same on their 6-cylinders for nearly 20 years. RTz actually went through the effort to make engineering drawings of his engine mounts and M3240z documented his build with lots of pictures that have helped in a big way. I can't thank those guys enough just for helping me get to this point. Once this thing was done being built and everything mounted up, wired in and ready to go, it finally started for the first time on July 31st, 2019. She ran great with almost no issues. I plan to do a very basic "break in" while it's on the stand and go through a do a full leak check. Once it's installed in the car, I will do the actual break in procedure that my machine shop recommended. Next post will be about the car...
-
BMW S54 into S30 Chassis - Build Thread
carbuilder723 replied to carbuilder723's topic in Other Engines
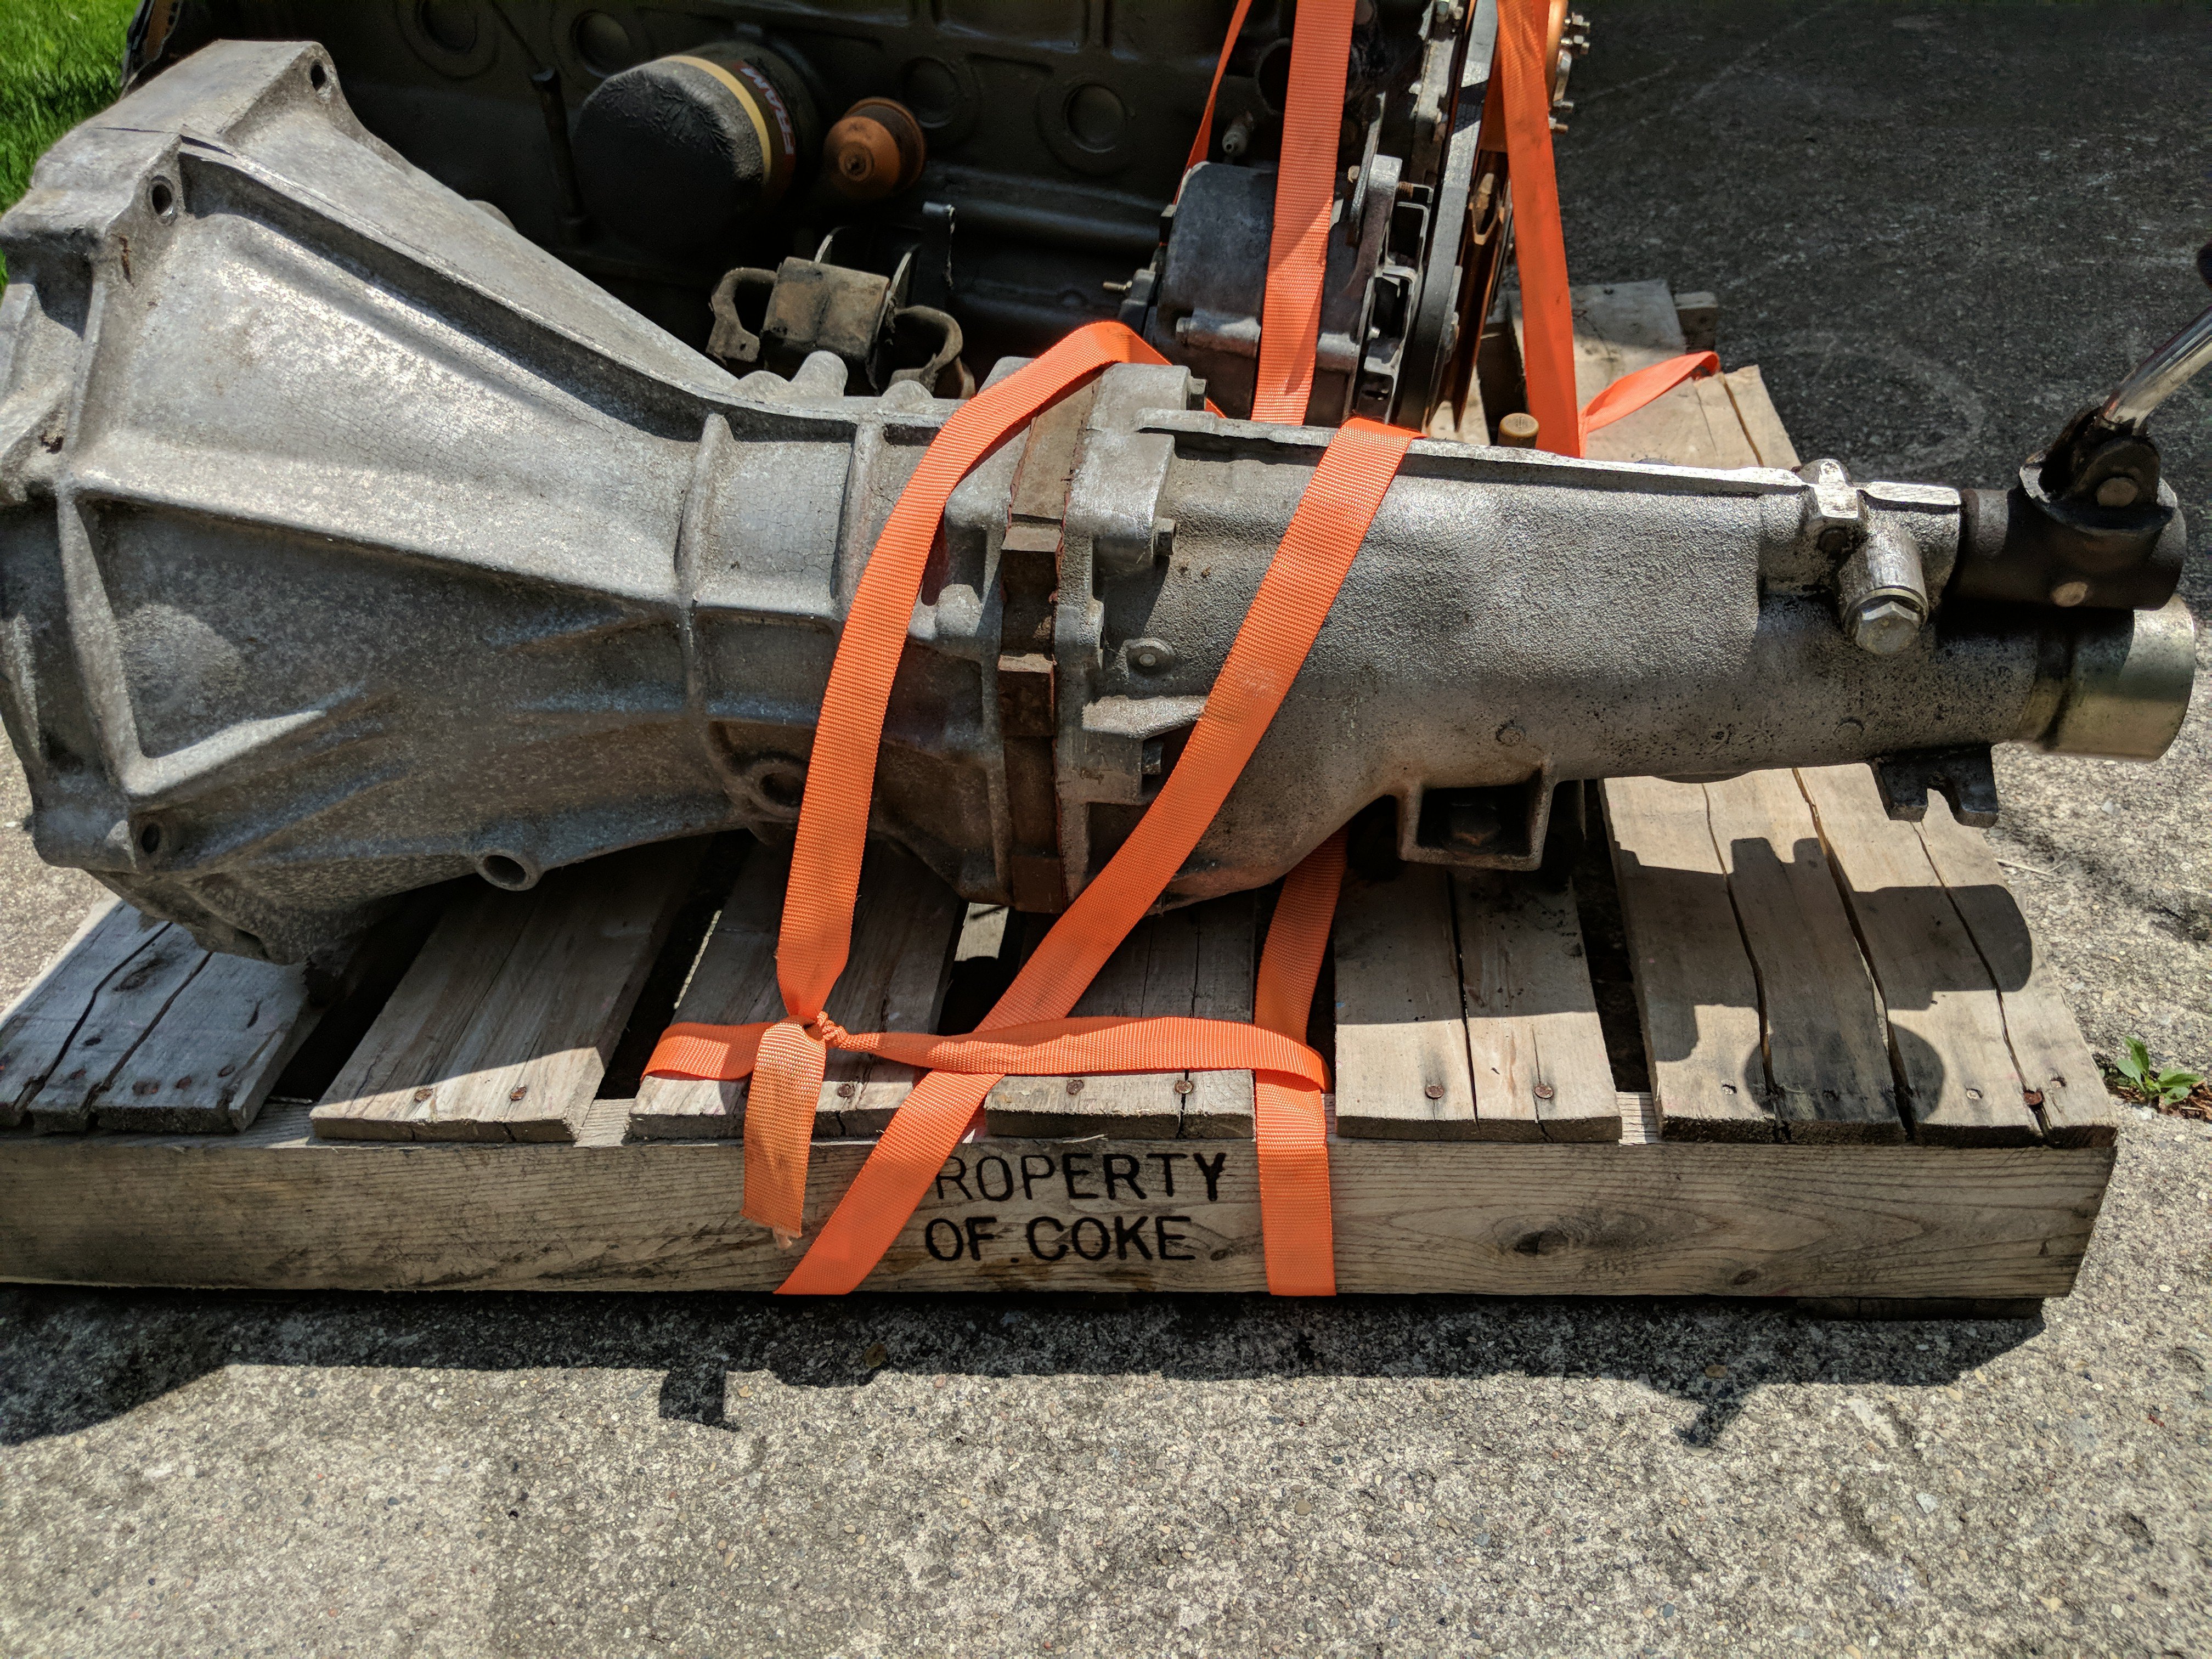
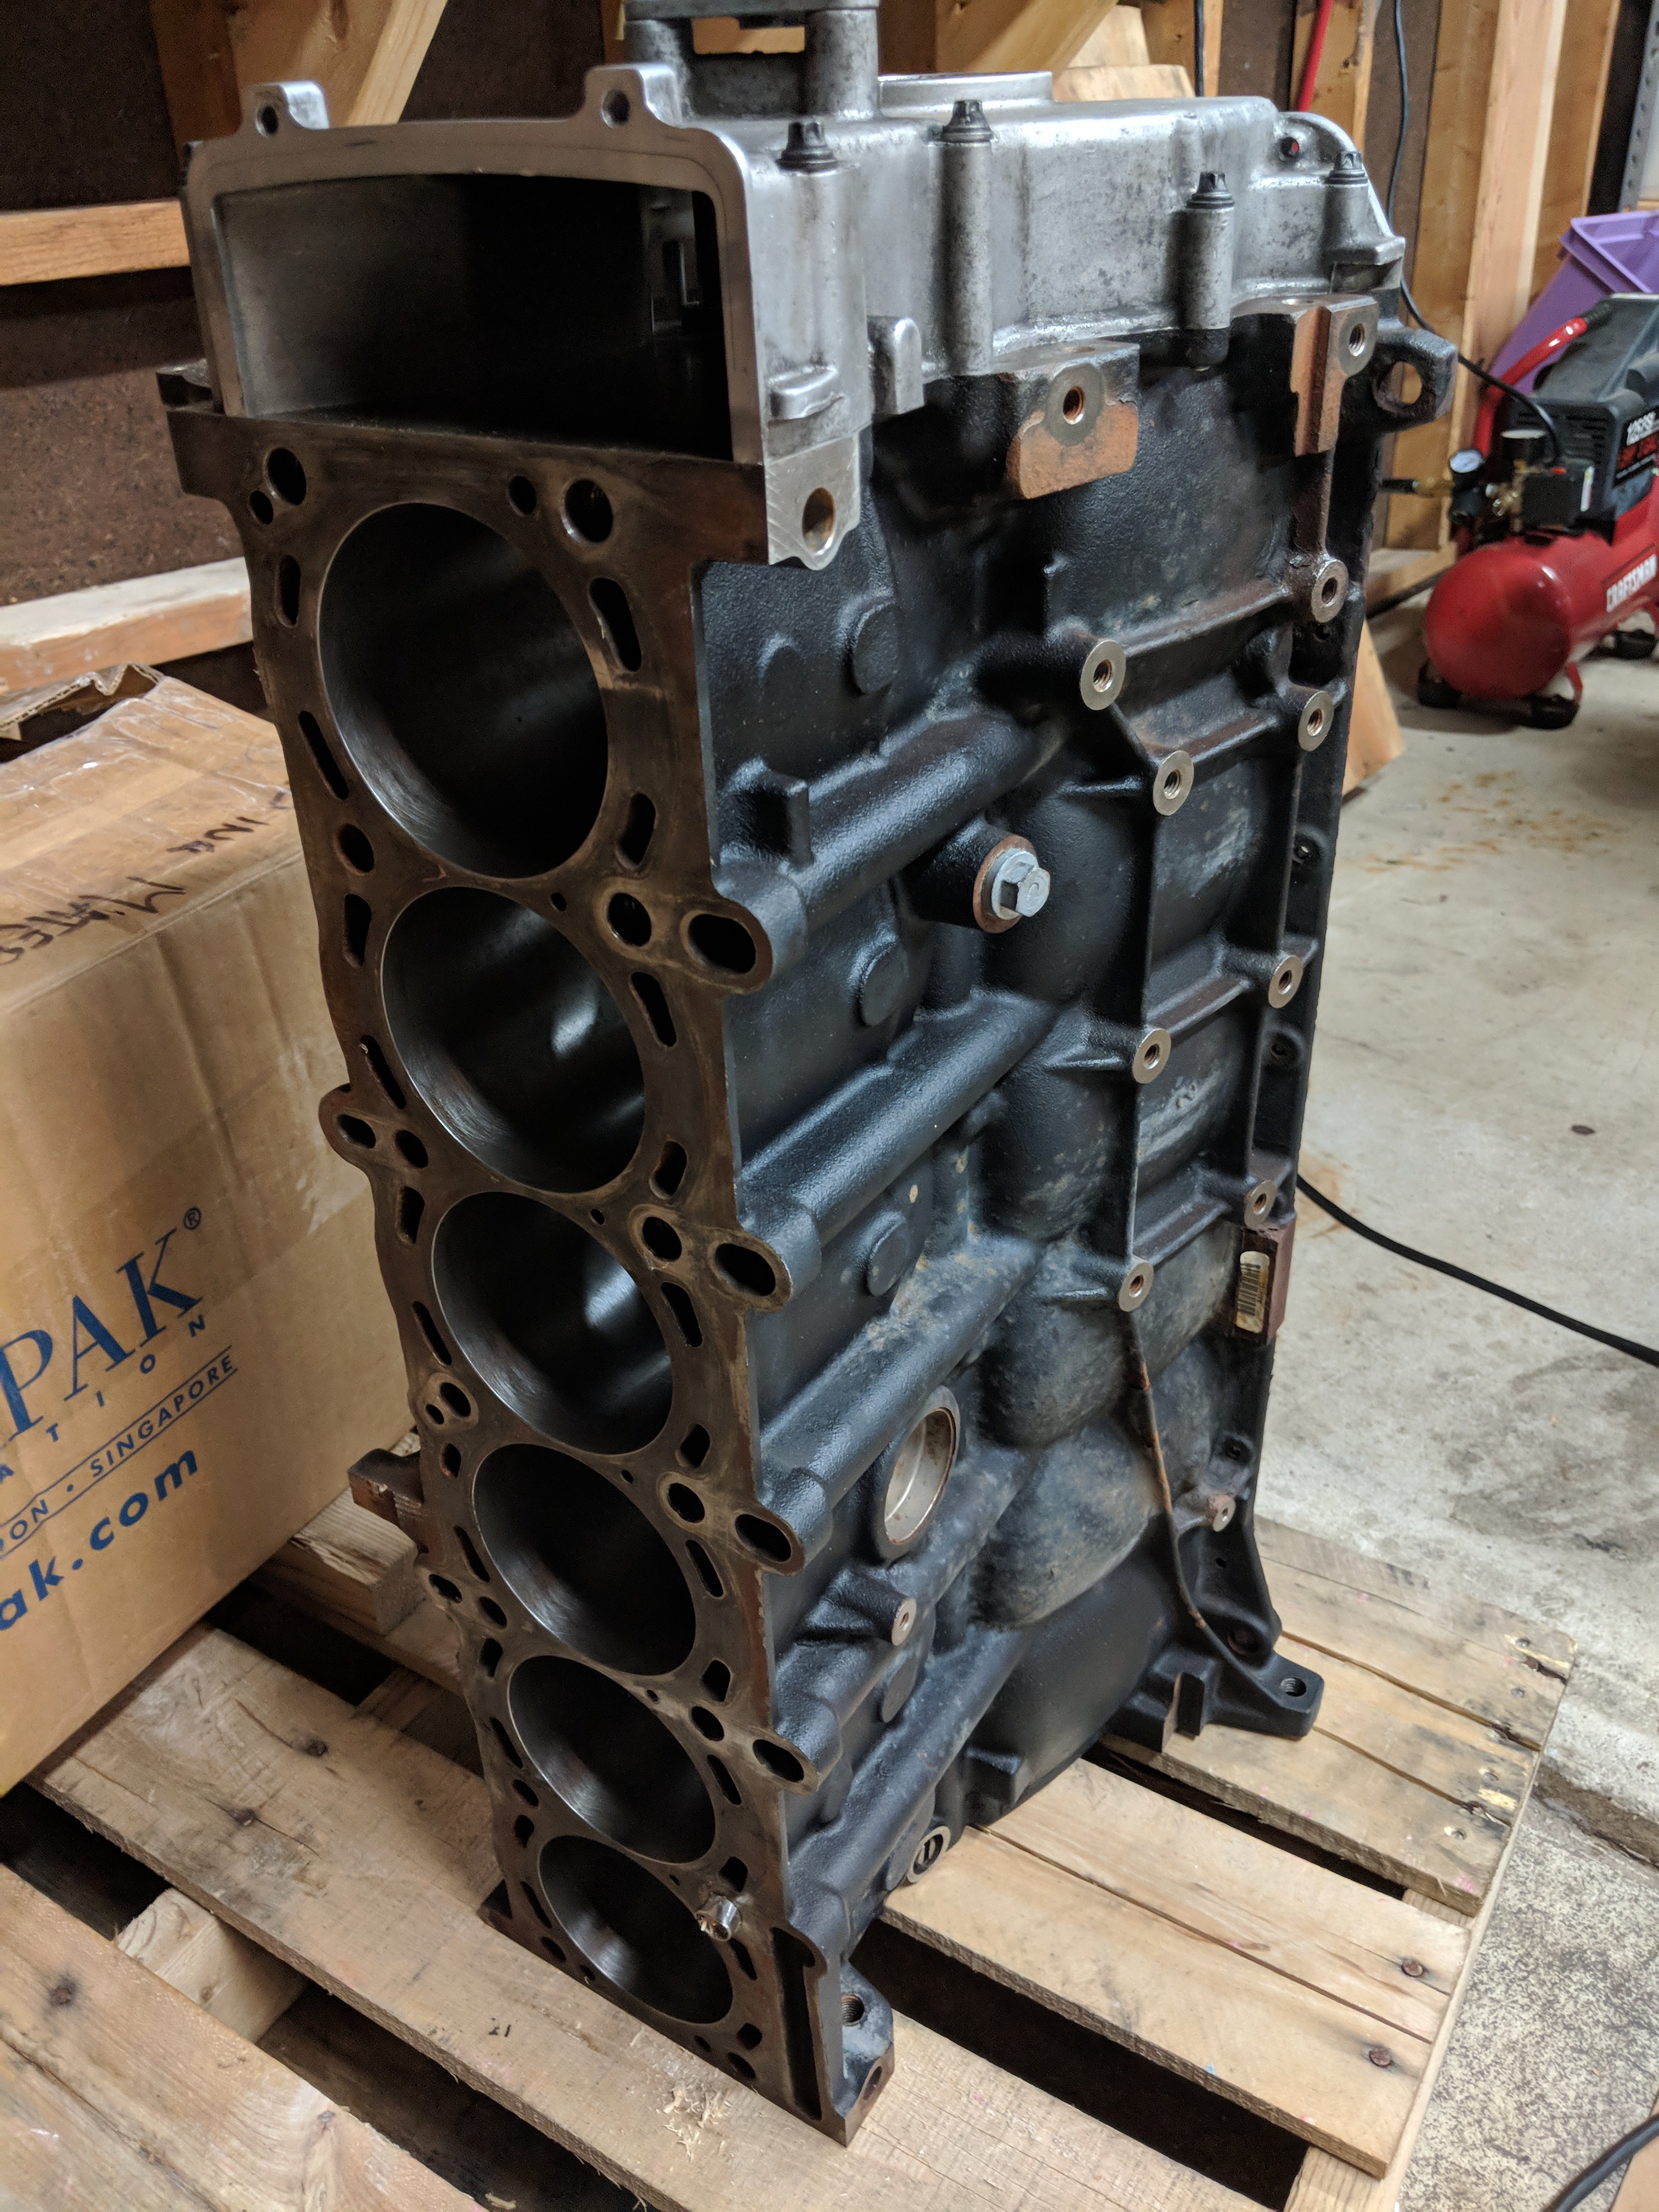
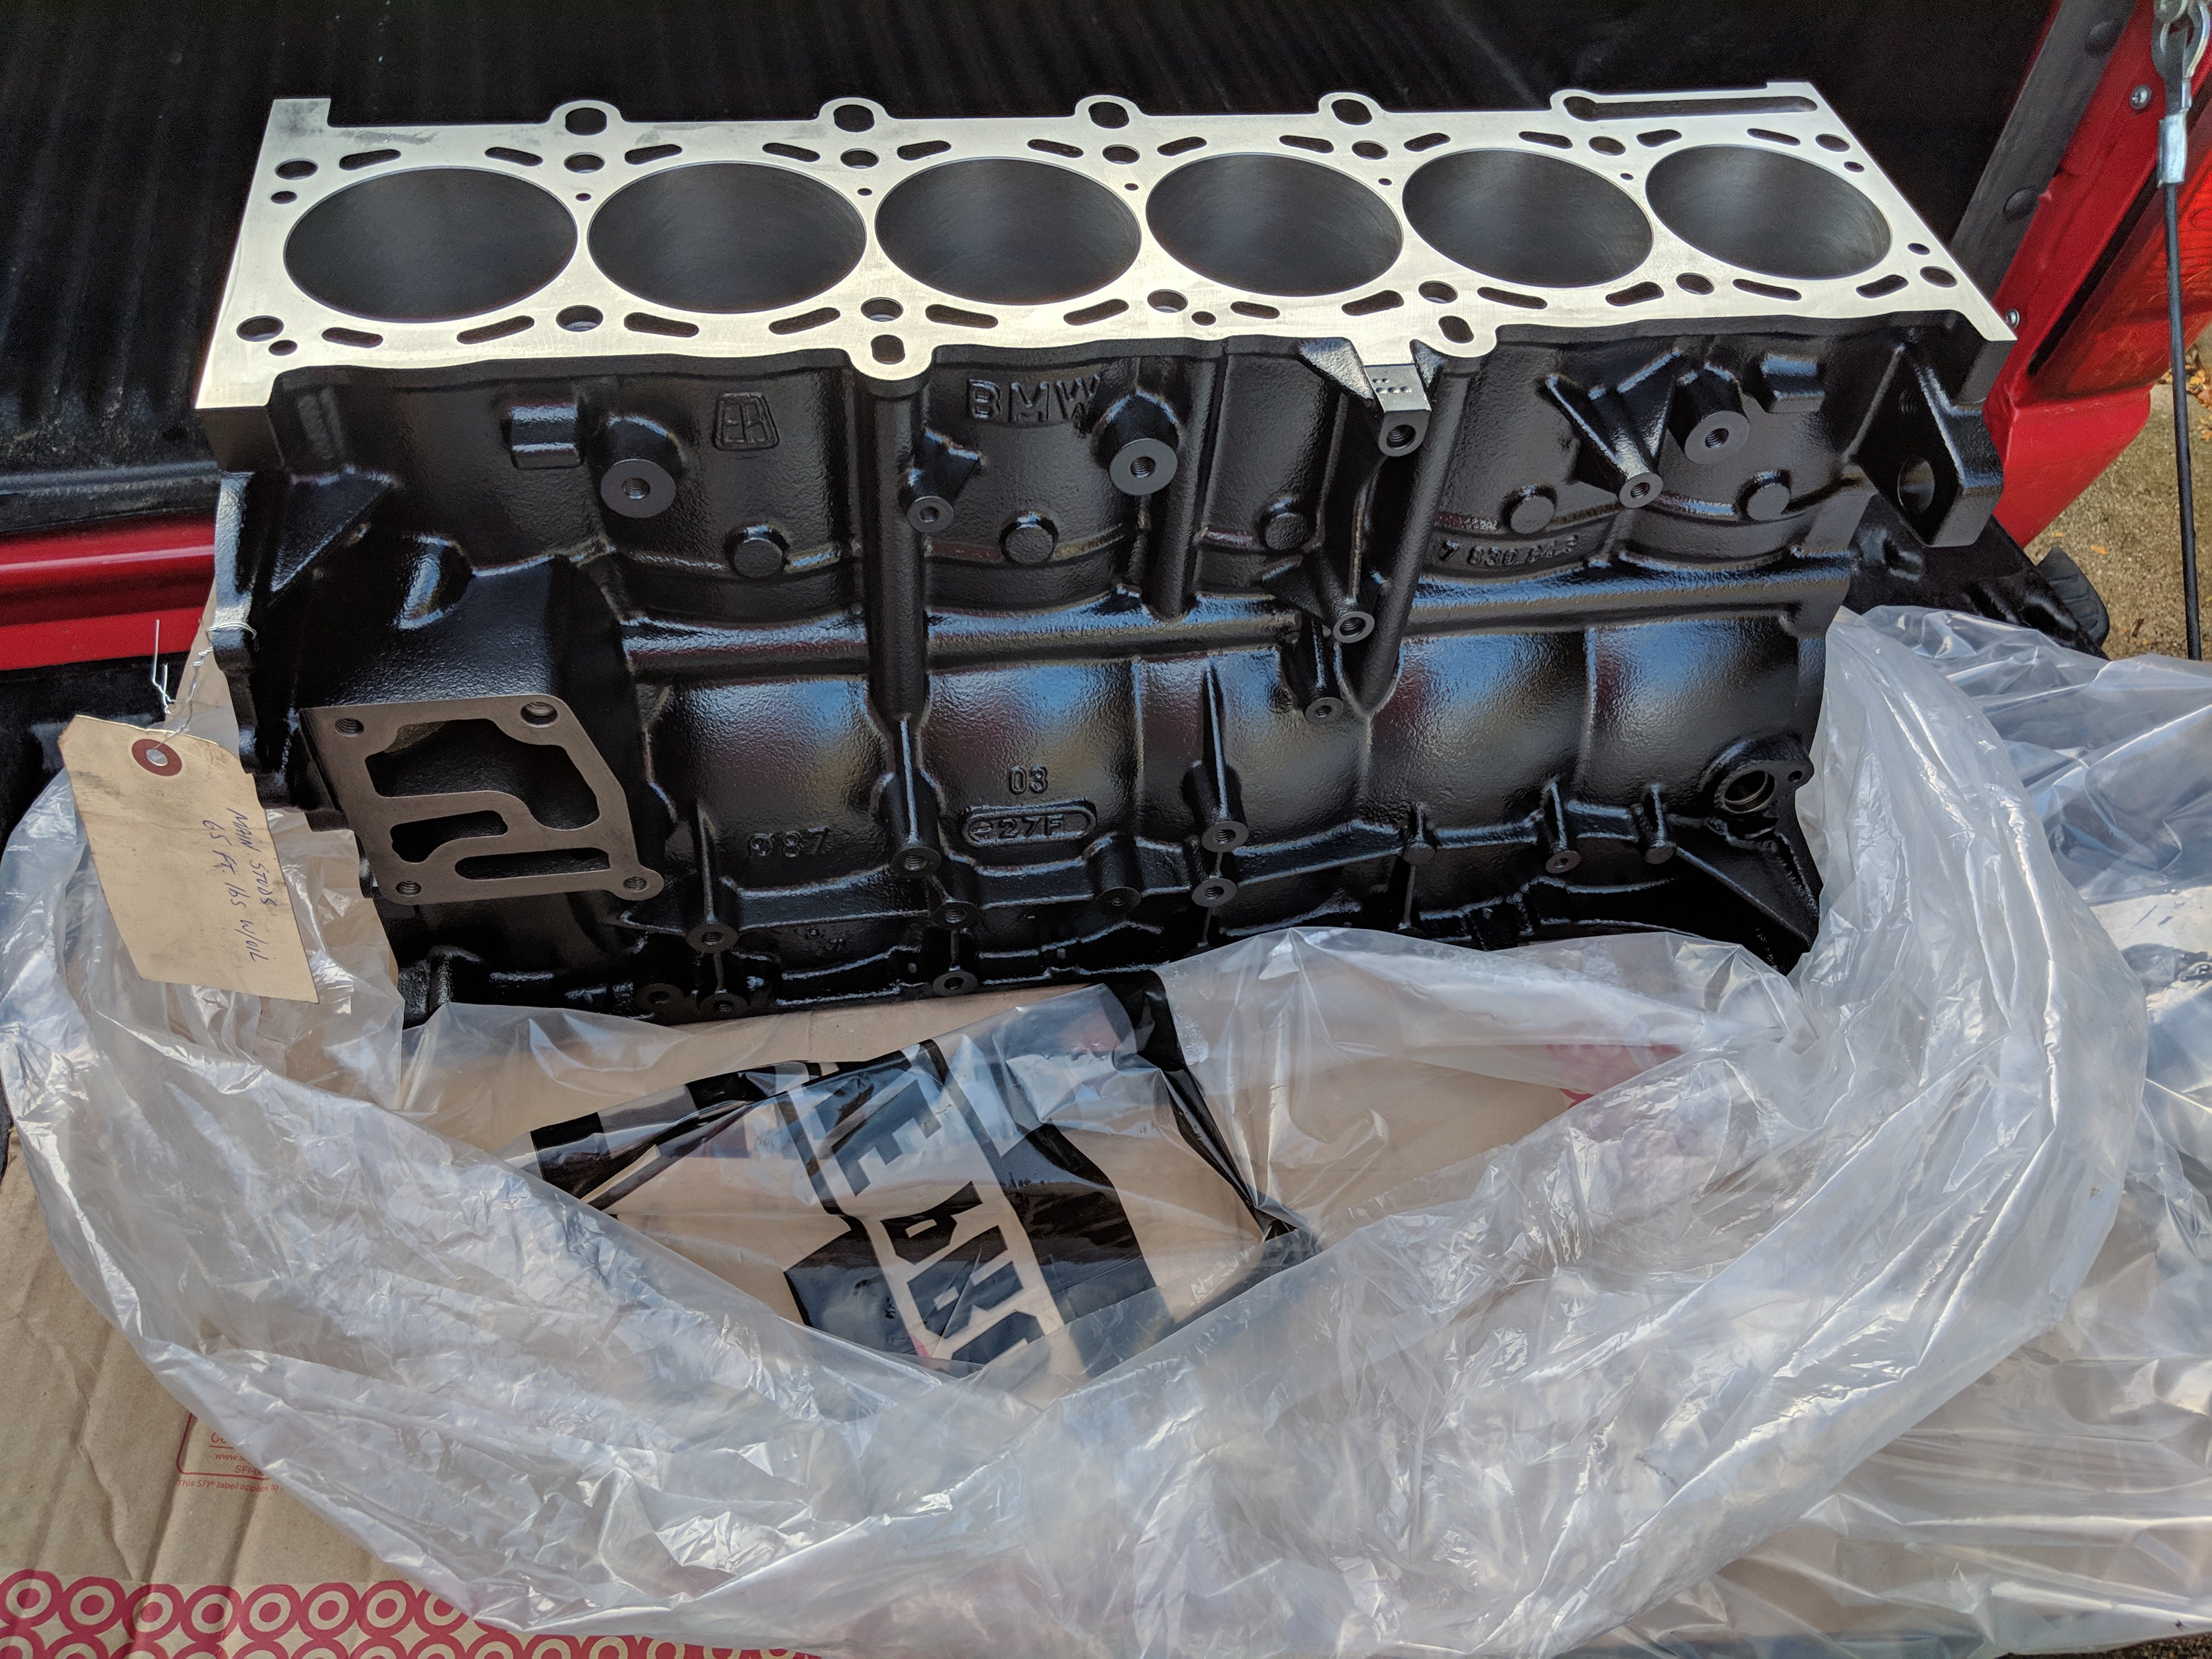
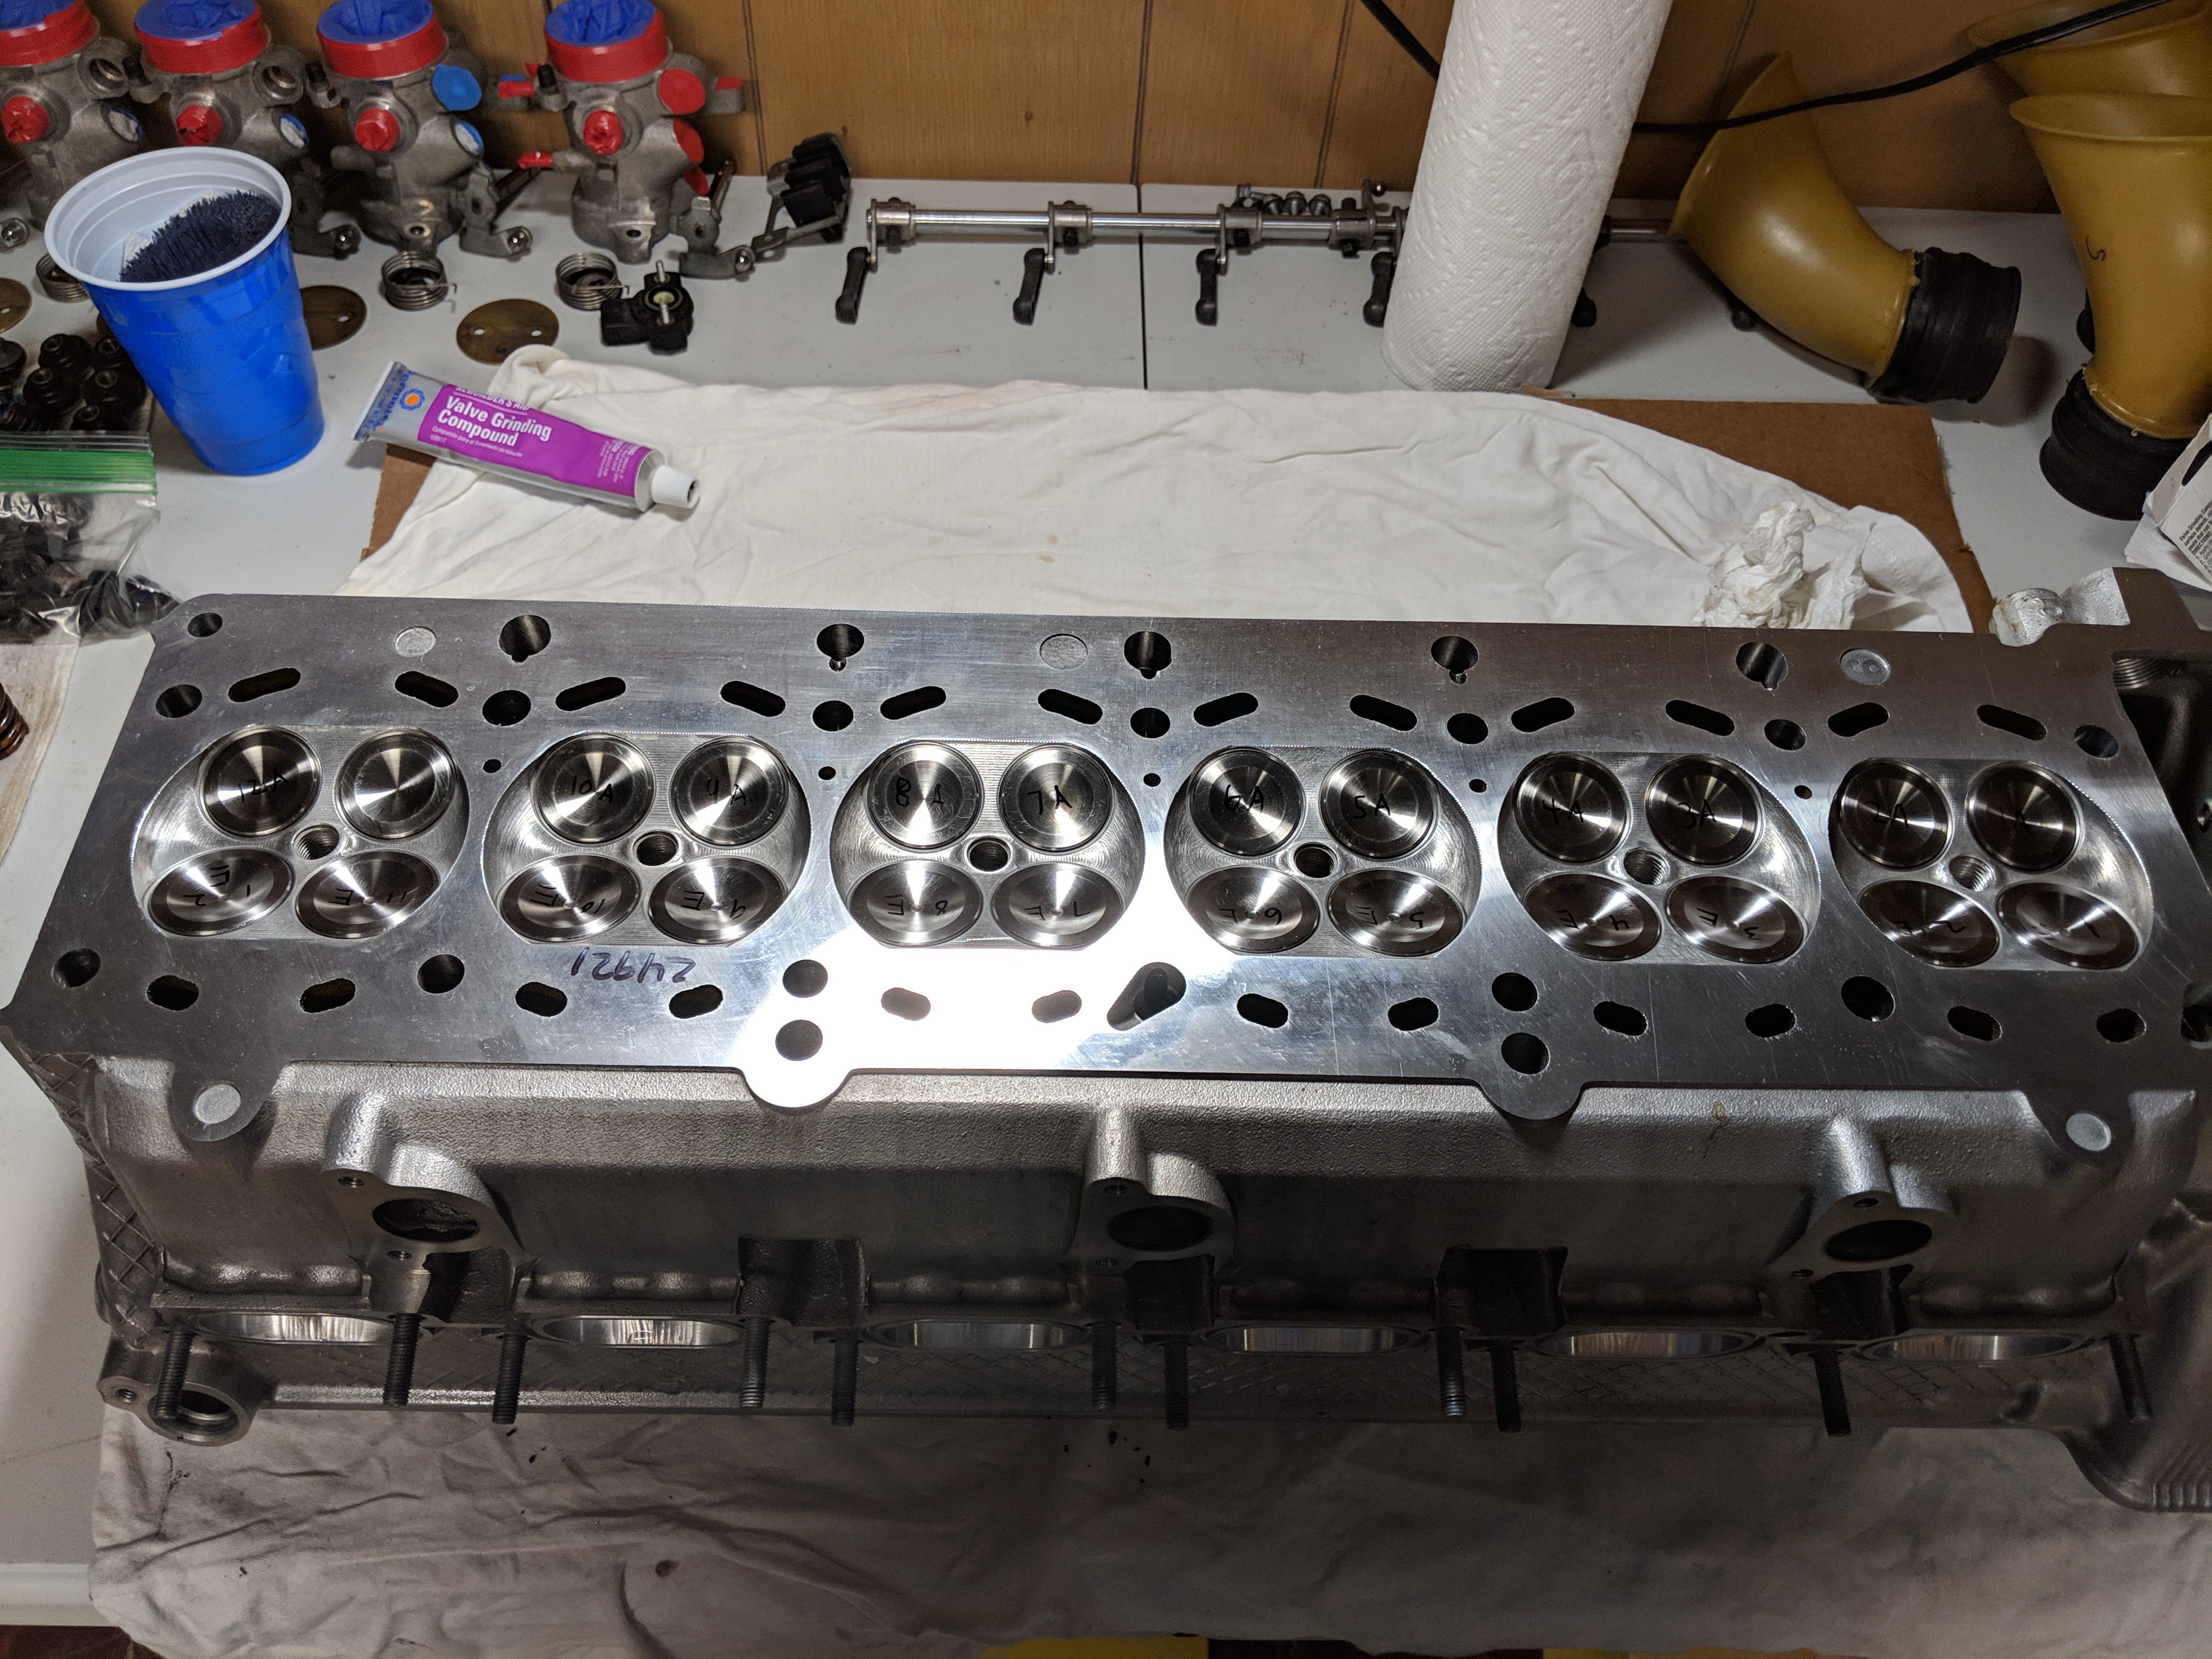
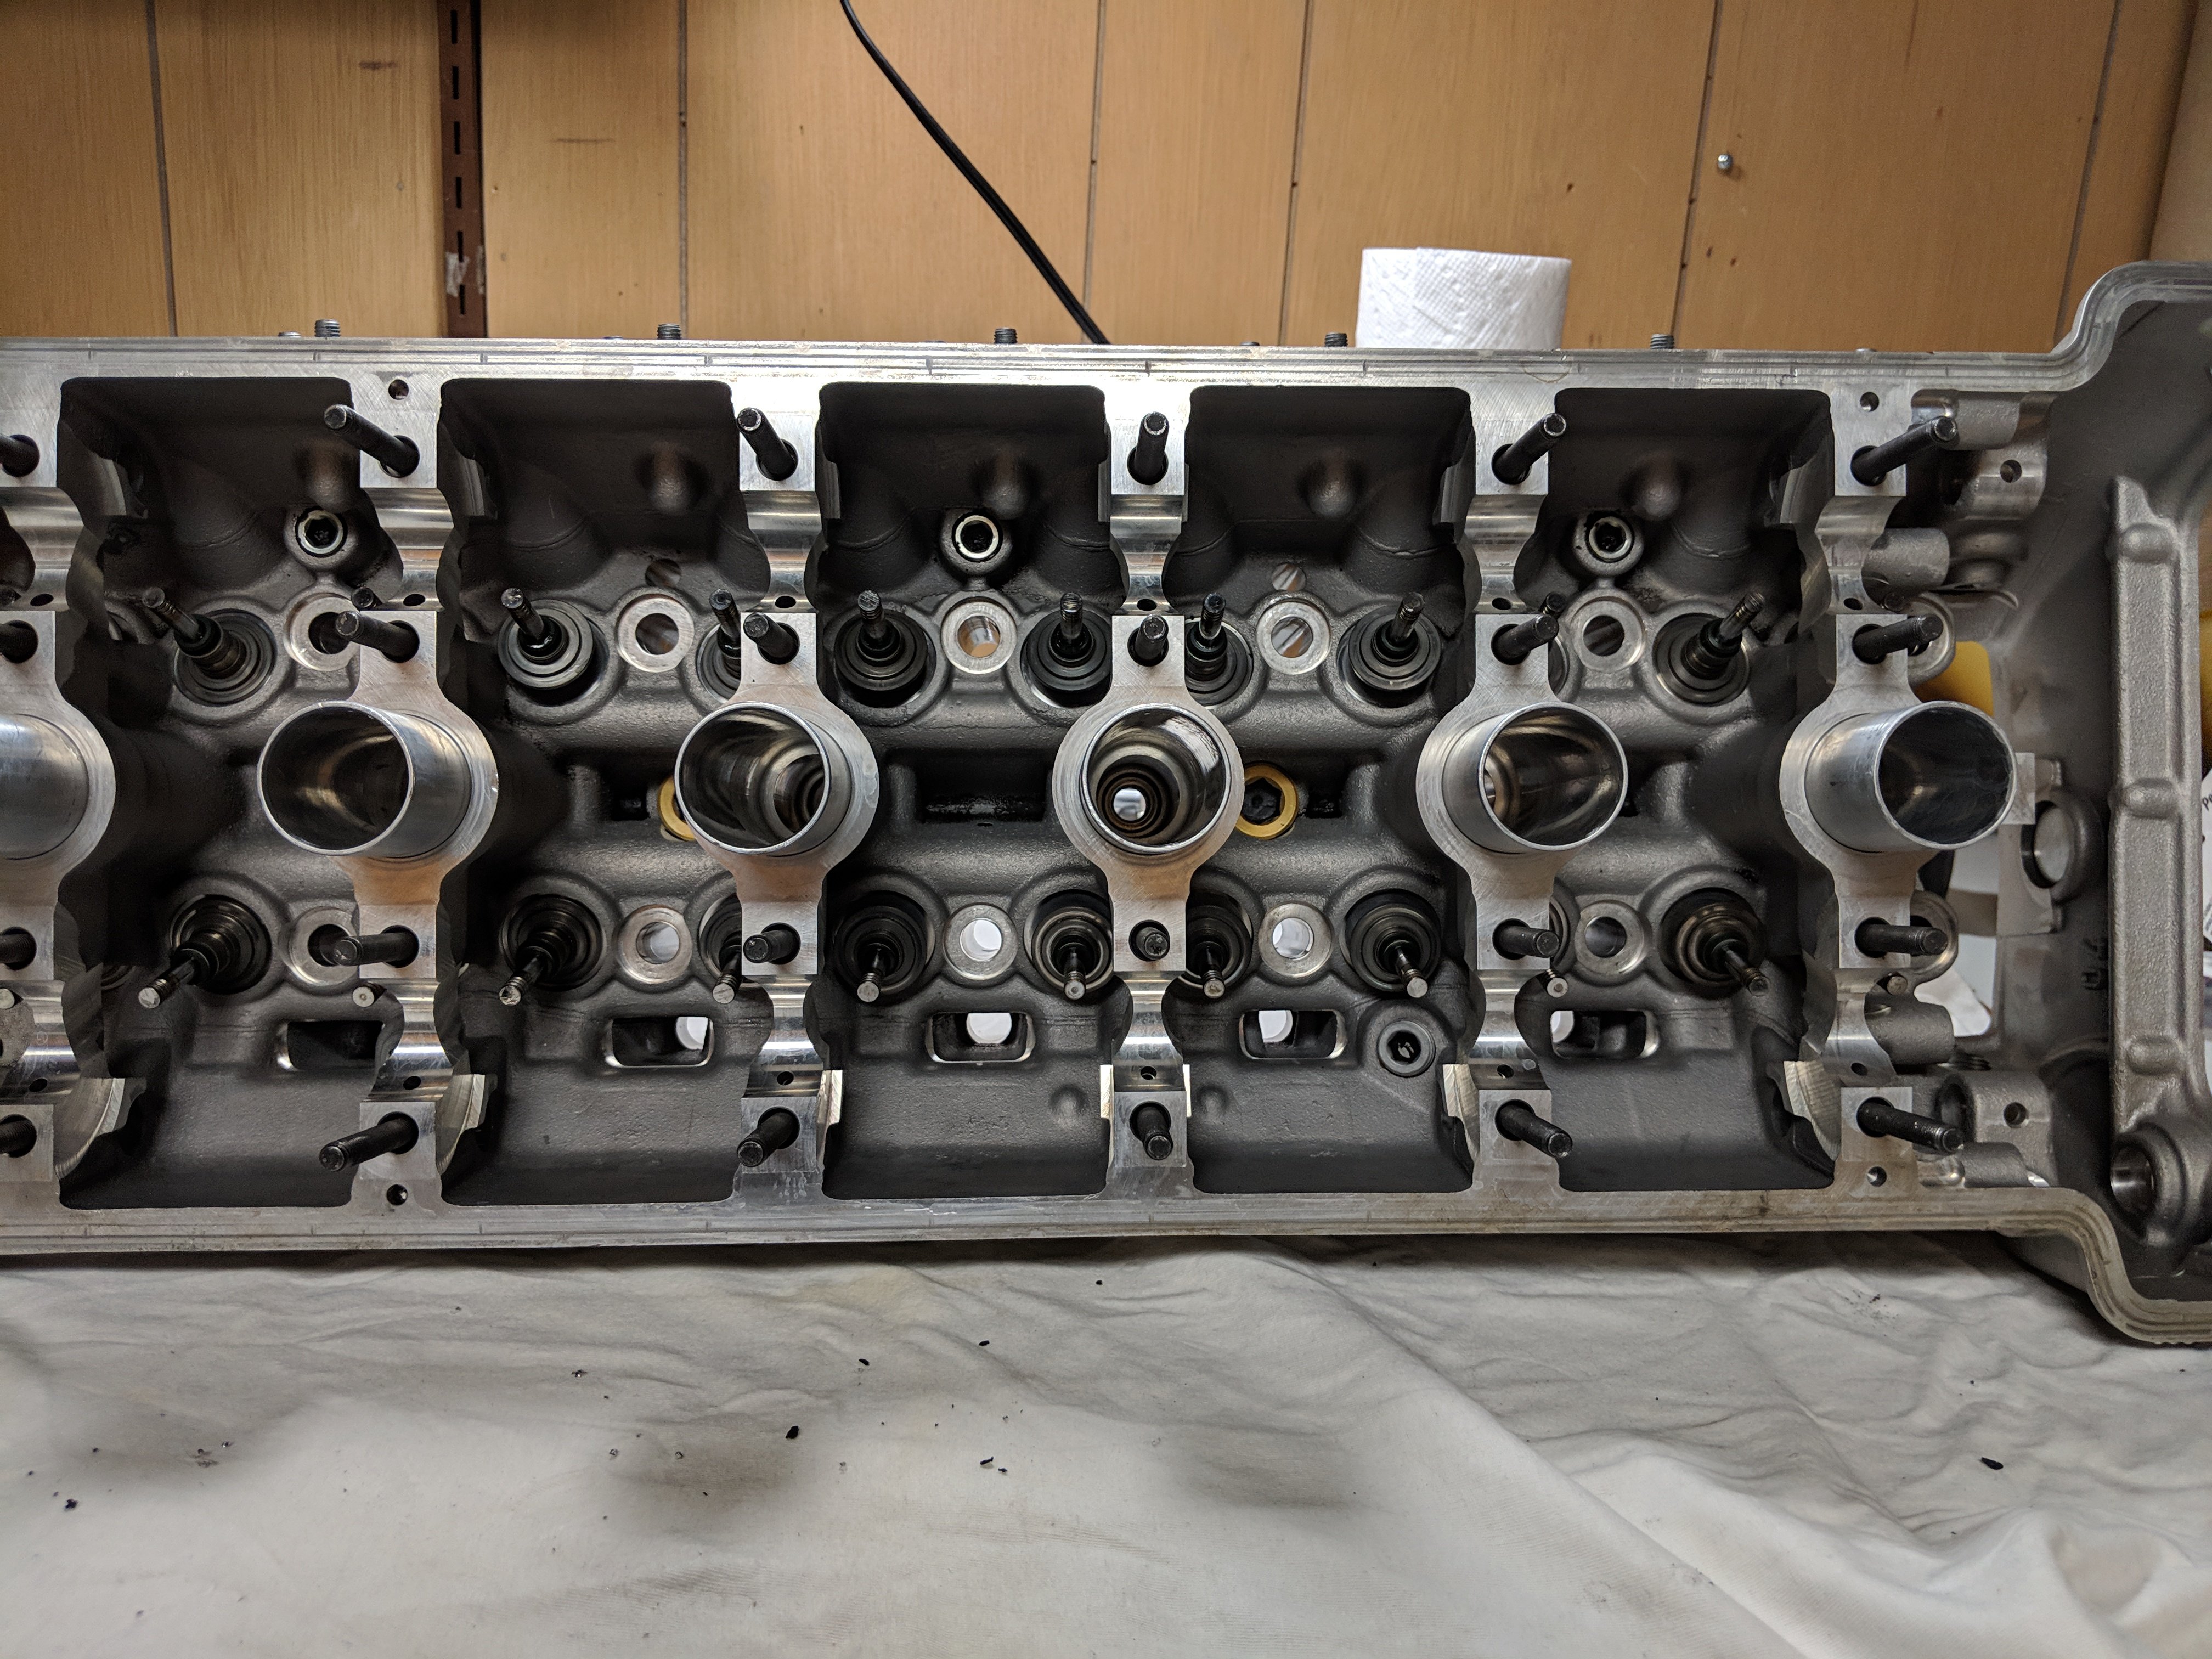
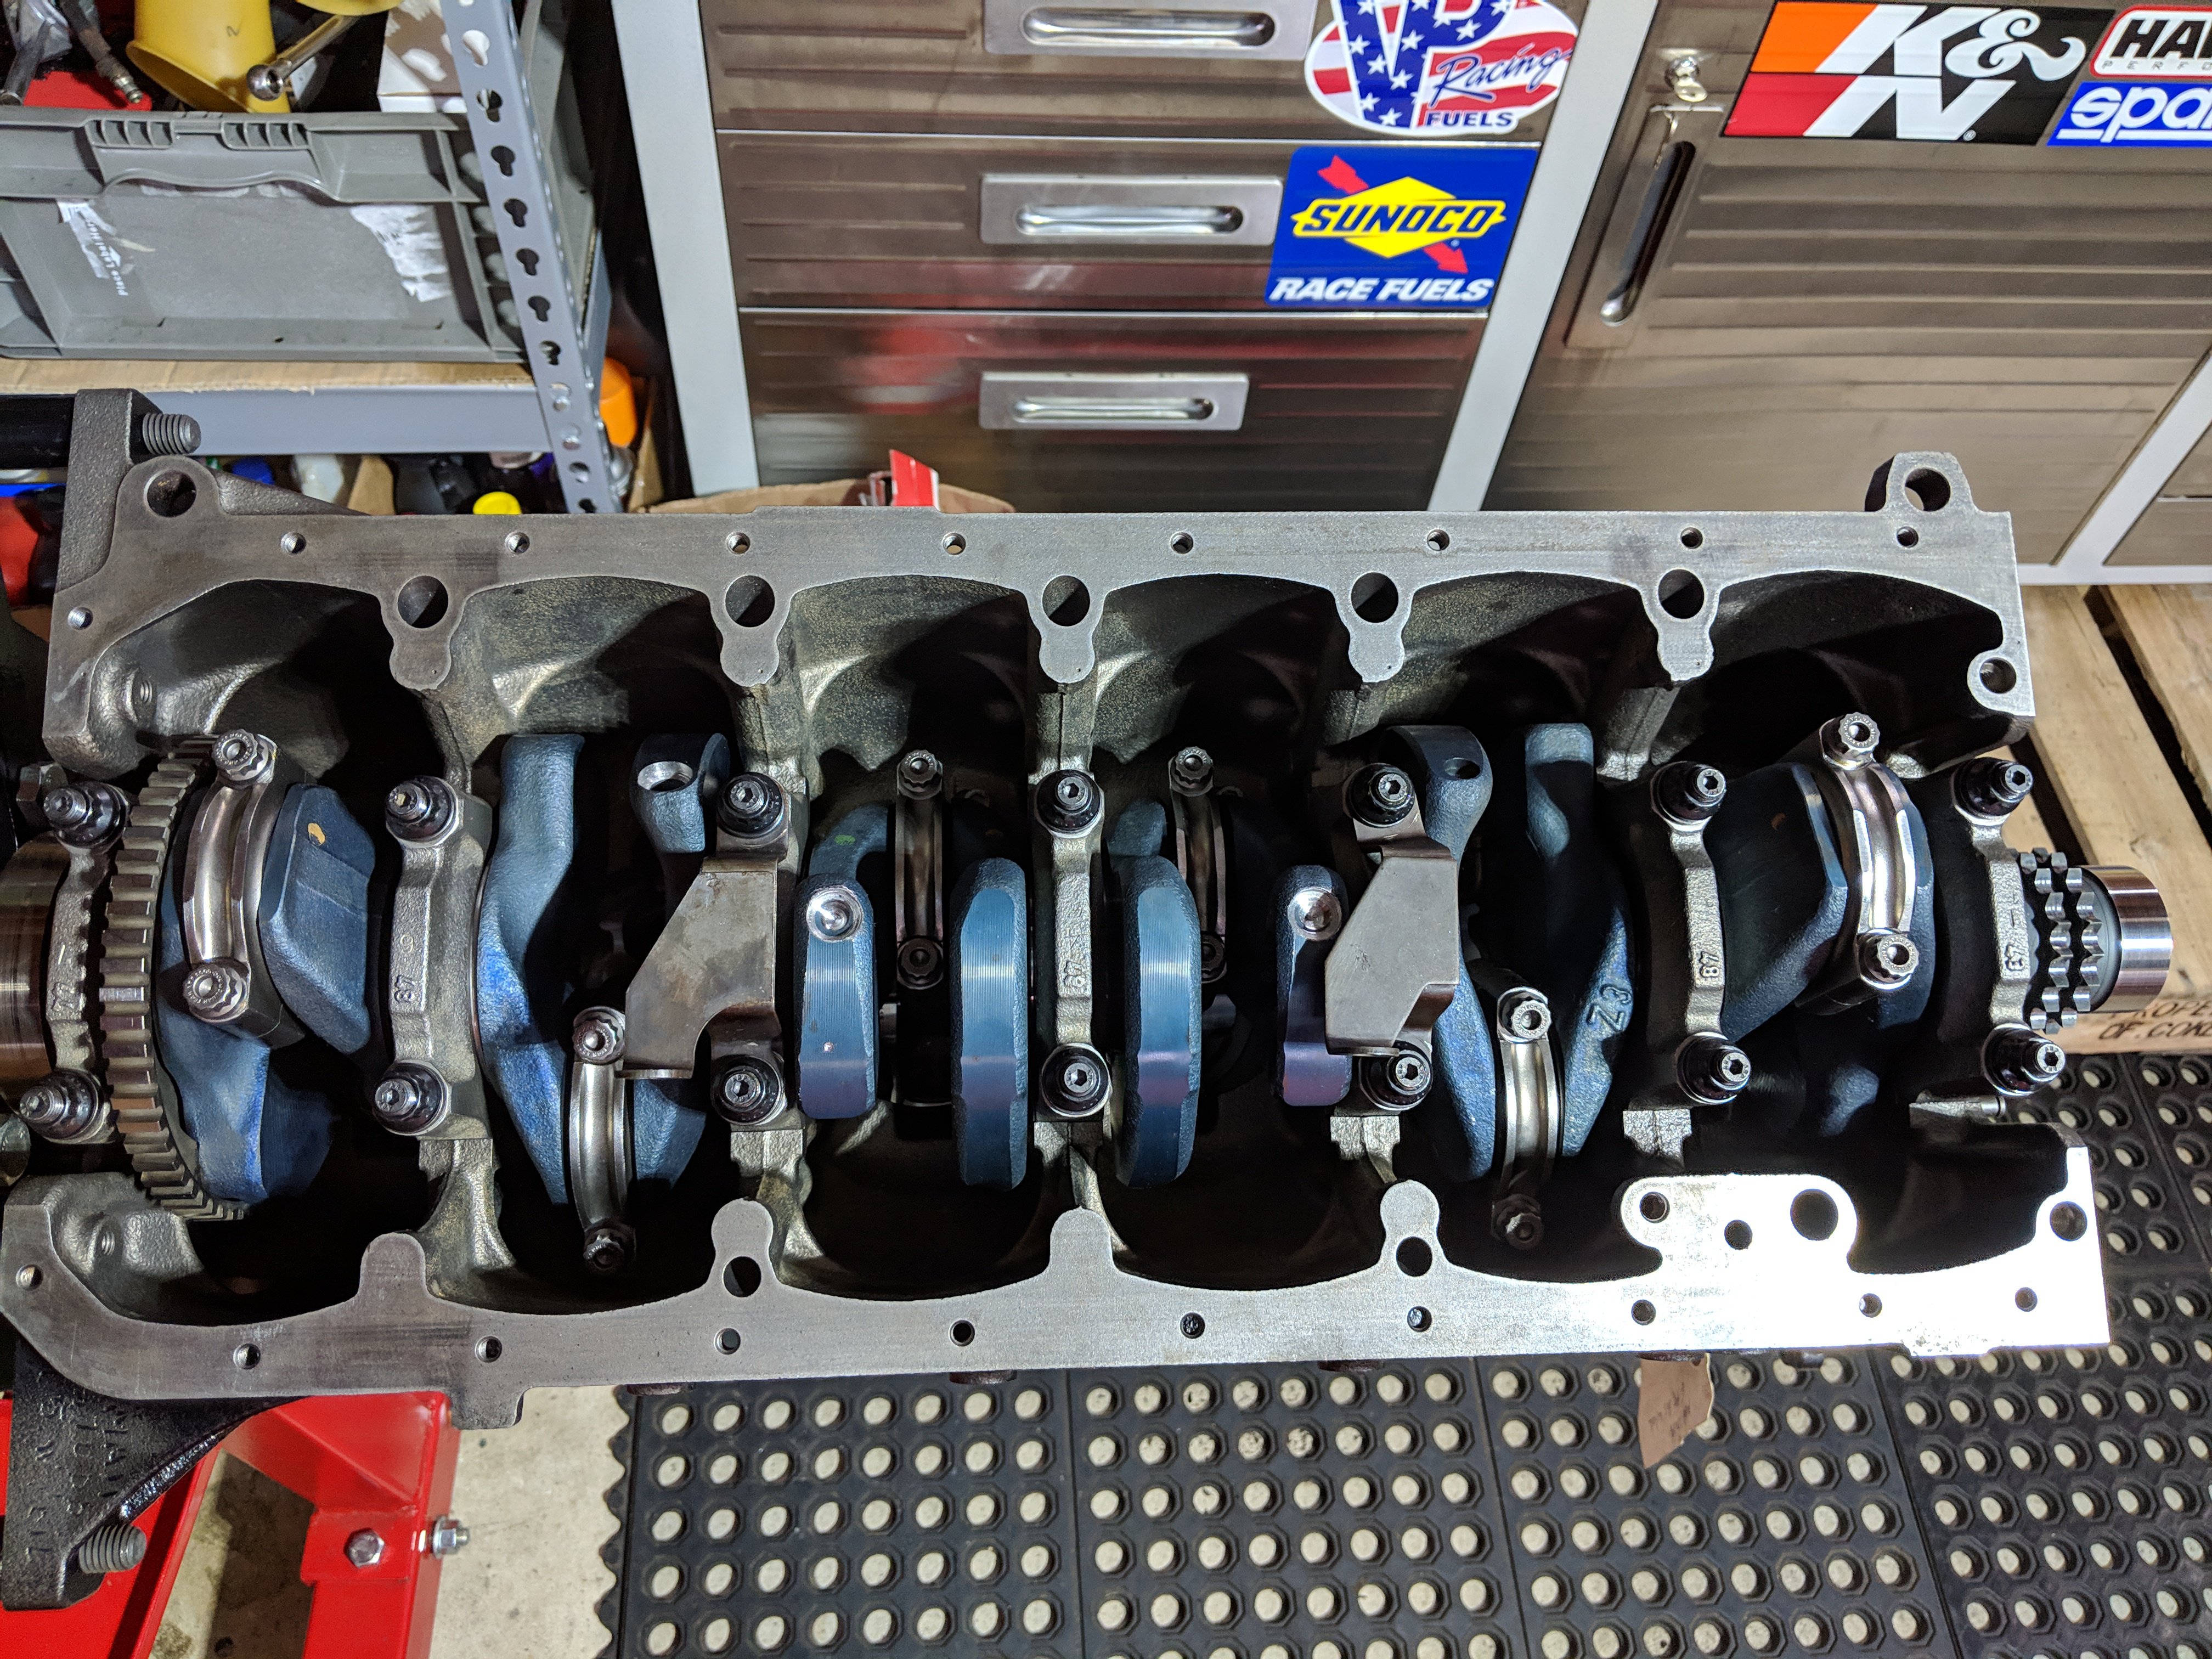
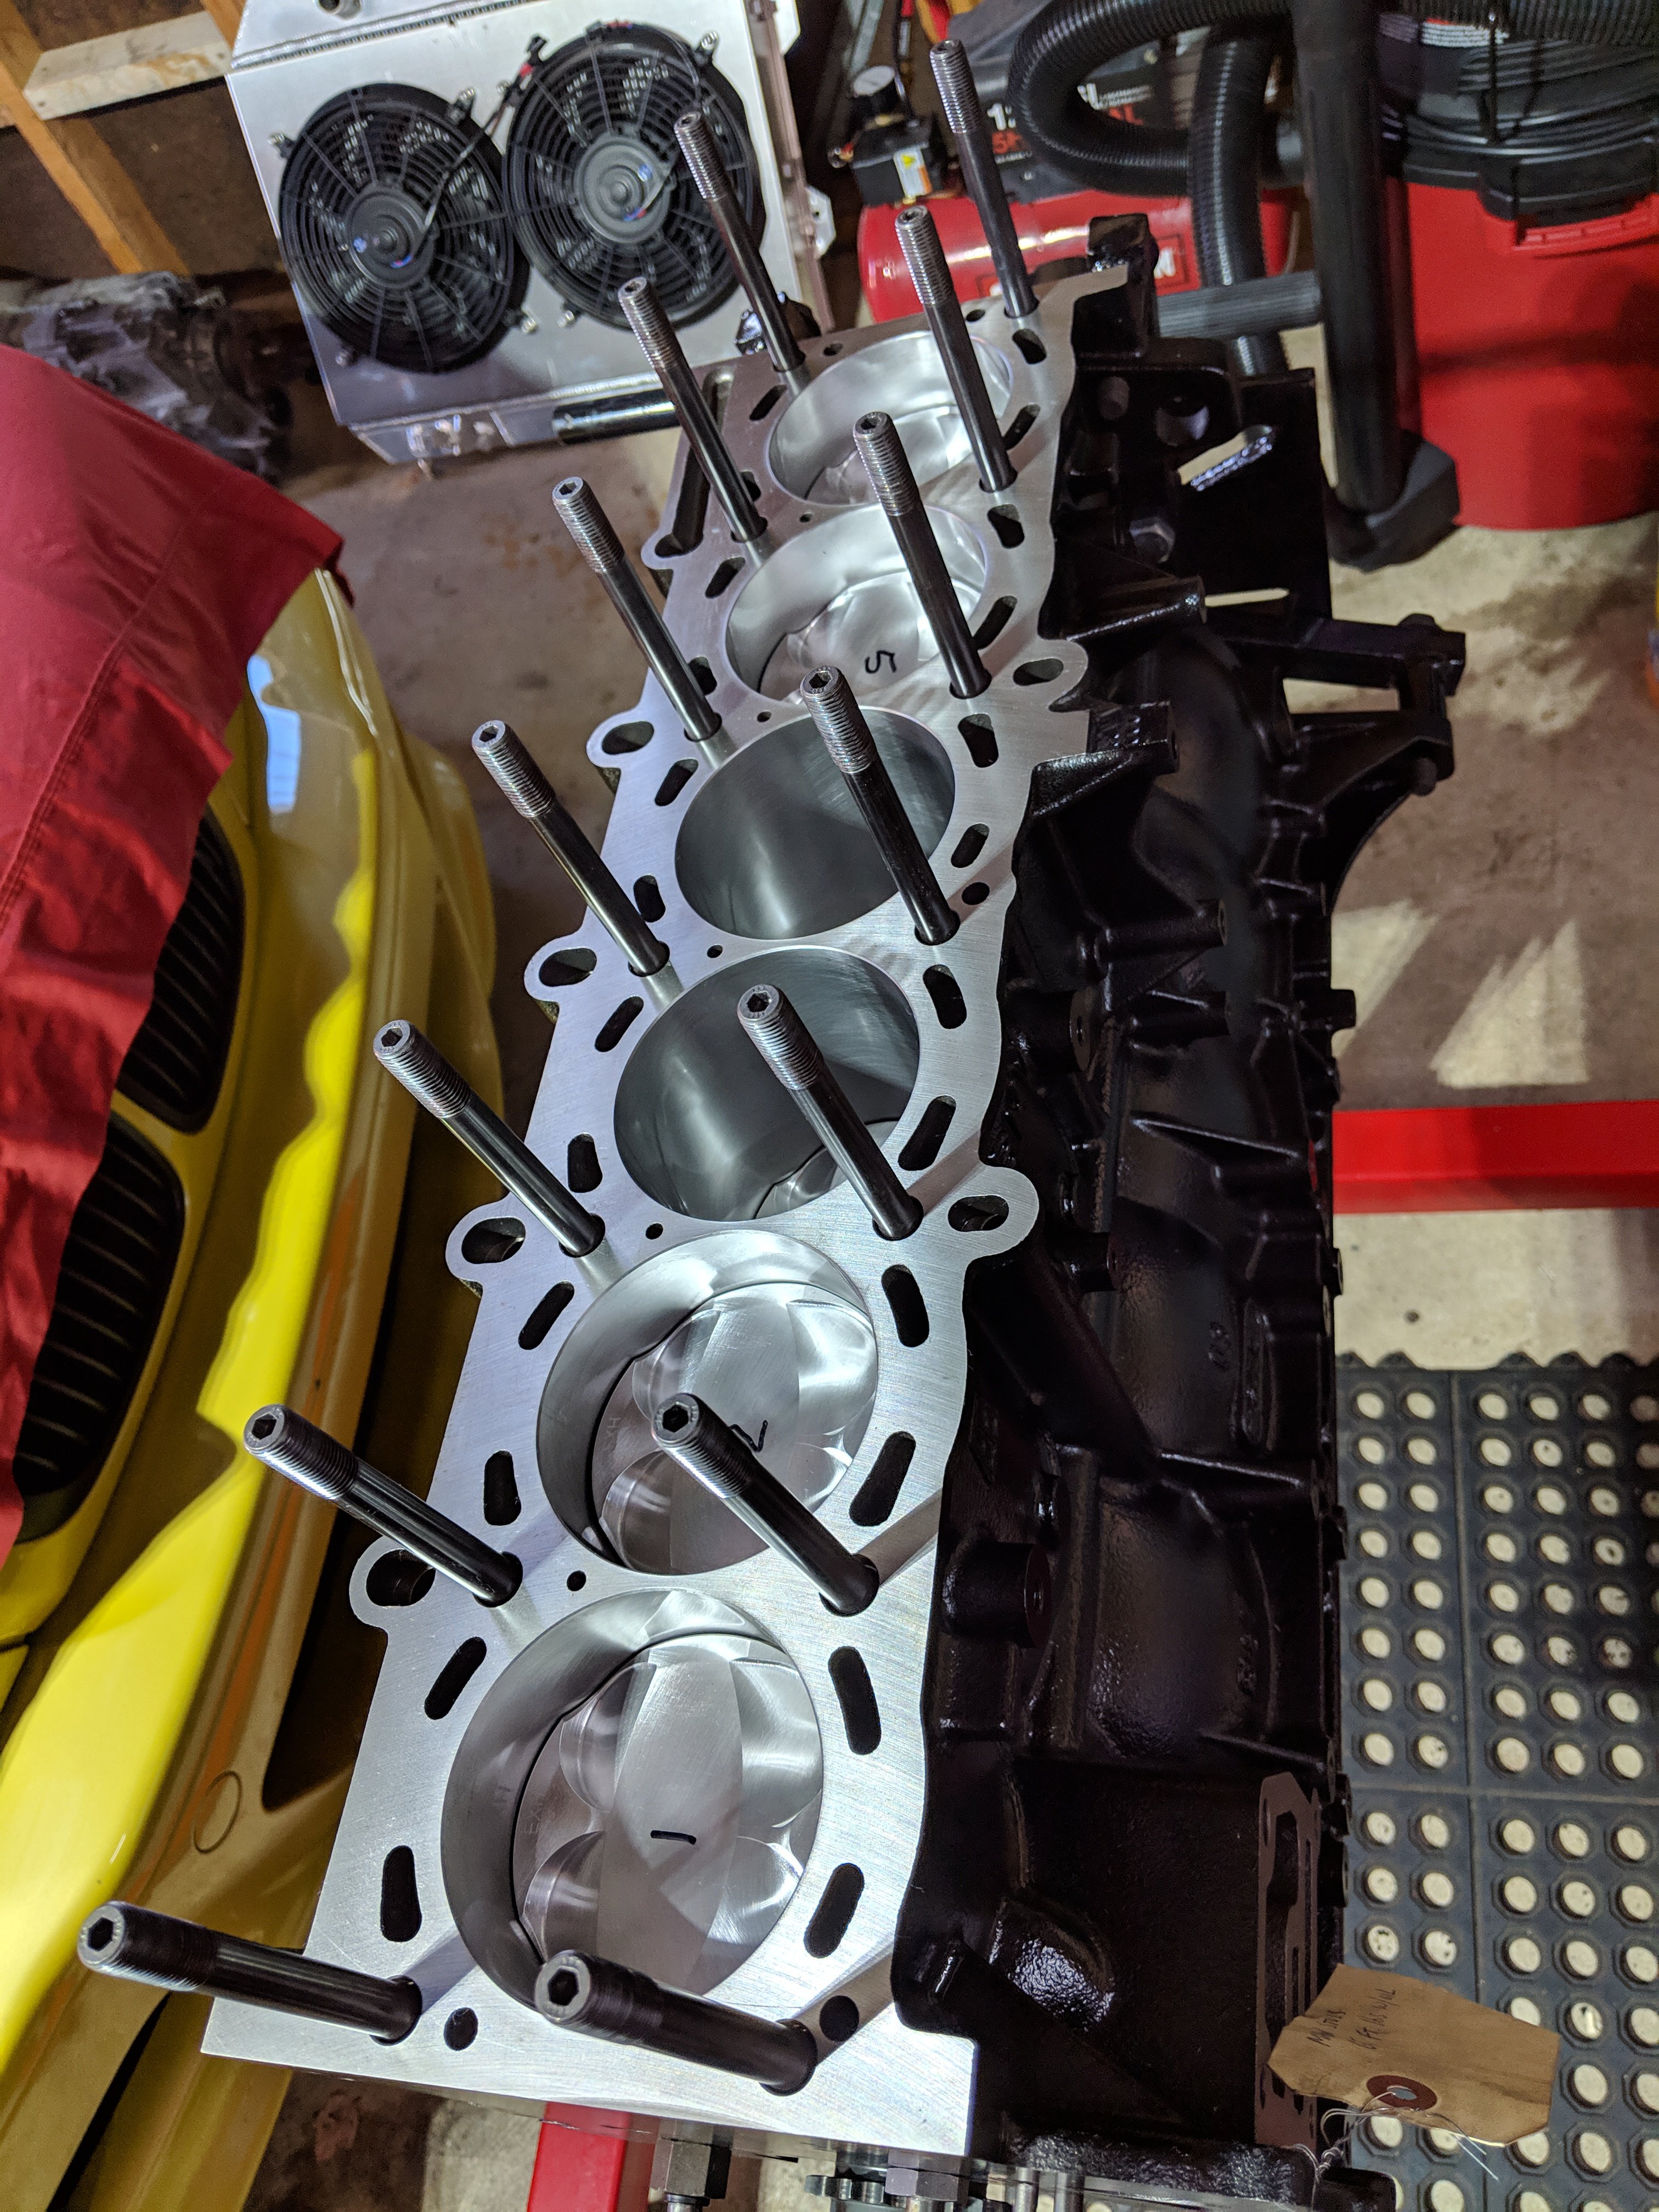
Not that it will directly interest too many people here, but my S54 build was pretty in depth and took place over about 8 months. I sourced parts from all over the place, but had the block bored out, decked, and aligned honed on the mains. I managed to find a 30k mile crankshaft that measured out with the micrometer to be completely nominal on every journal (rod and mains) that I had dynamically balanced with the new pistons and rods to within 1gram. Should spin nice and smooth all the way to 8200rpm. Standard cams and a bunch of parts that are known to "bullet proof" these otherwise finicky engines and a nice paint job and I ended up with a very pretty engine if nothing else. Along the way I had picked up a BMW 5speed transmission out of a 328i for really cheap and decided that would be what I use moving forward. Now that I had the engine and transmission, it was time to connect them up and see if I could get them to function on their own, outside the car. Enter the Engine Test stand side project.
-
Hey everyone, So I've been into doing this swap for over a year now, collecting parts along the way, planning, building my engine, test stand, and most recently getting my s54 running. SO i figure it's about time I start a thread that I can post up pictures, and progress as I go. So it all started back in 2017, when I bought my first Z. It was a white 280z, tan interior and was pretty stock overall. I loved to it and it really got me hooked. I drove it for a while and once I started to get this idea seeded in my head of swapping in a BMW motor, I began to realize, that I had the wrong car to start out with. It was in good shape, had been repainted real nice, but it had been in a front end accident at some point and the front frame rails were a little buckled in front of all of the suspension pickups. Not wanting to deal with that or some of the other things that may have been hiding under the fresh paint, I decided to sell it. In the mean time while selling the white one, another one showed up on craigslist (of course) about 40 minutes from my parents house. My Dad did me a solid and went to look at the car for me and was able to report that it was in reasonable shape, but not running. Long story short, I bought that blue car in May 2018 and then stored it in Virginia for almost a year while I finished selling the white 280z and started building my S54 completely fresh and planning out what I wanted to do with the rest of the build. So that is basically the back story. The next few posts will be for my engine build and the test stand that I build for it.
-
Interested in buying one of these if the prices haven't gotten too ridiculous. Pm me if you have anything. ~Jason
-
Hey everyone. I am trying to search around for an OBX Helical differential for an r200 and can't for the life of me find a vendor anywhere with them in stock. Any pointers or sites I should look at? Second thing... I have done plenty of research but just want to confirm with the experienced people here that my combo of parts for a rear end build are all compatible. The plan is: - R200LN housing from a '83 280zx - 3.90 ring and pinion from the '83 280zx - CV shafts from a '84 300zx turbo - OBX HLSD that would fit a '84 300zx turbo - shortened Axle shafts from either Modern Motorsports or Whitehead Performance - 27-spline companion flanges to mate up to the outer stub axles from either MM or WHP Any thoughts or help is appreciated. Thank you!