chris51881
-
Posts
48 -
Joined
-
Last visited
Content Type
Profiles
Forums
Blogs
Events
Gallery
Downloads
Store
Everything posted by chris51881
-
Z32 LS1 project thread... questions inside
chris51881 replied to fogged306's topic in Z32 Series - 300ZX
unfortunately no, its definitely not a good idea. I don't recommend it. -
Z32 LS1 project thread... questions inside
chris51881 replied to fogged306's topic in Z32 Series - 300ZX
Here's the poor man's lift... We started working on the trans tunnel. Didn't get far enough for any good pics. I have all of my pieces ready for the transmission mount. I'm going to try to get a MIG welder next time instead of the Home Depot flux core style rental unit. $1000 to have my truck fixed today is NOT helping my situation either...
-
Z32 LS1 project thread... questions inside
chris51881 replied to fogged306's topic in Z32 Series - 300ZX
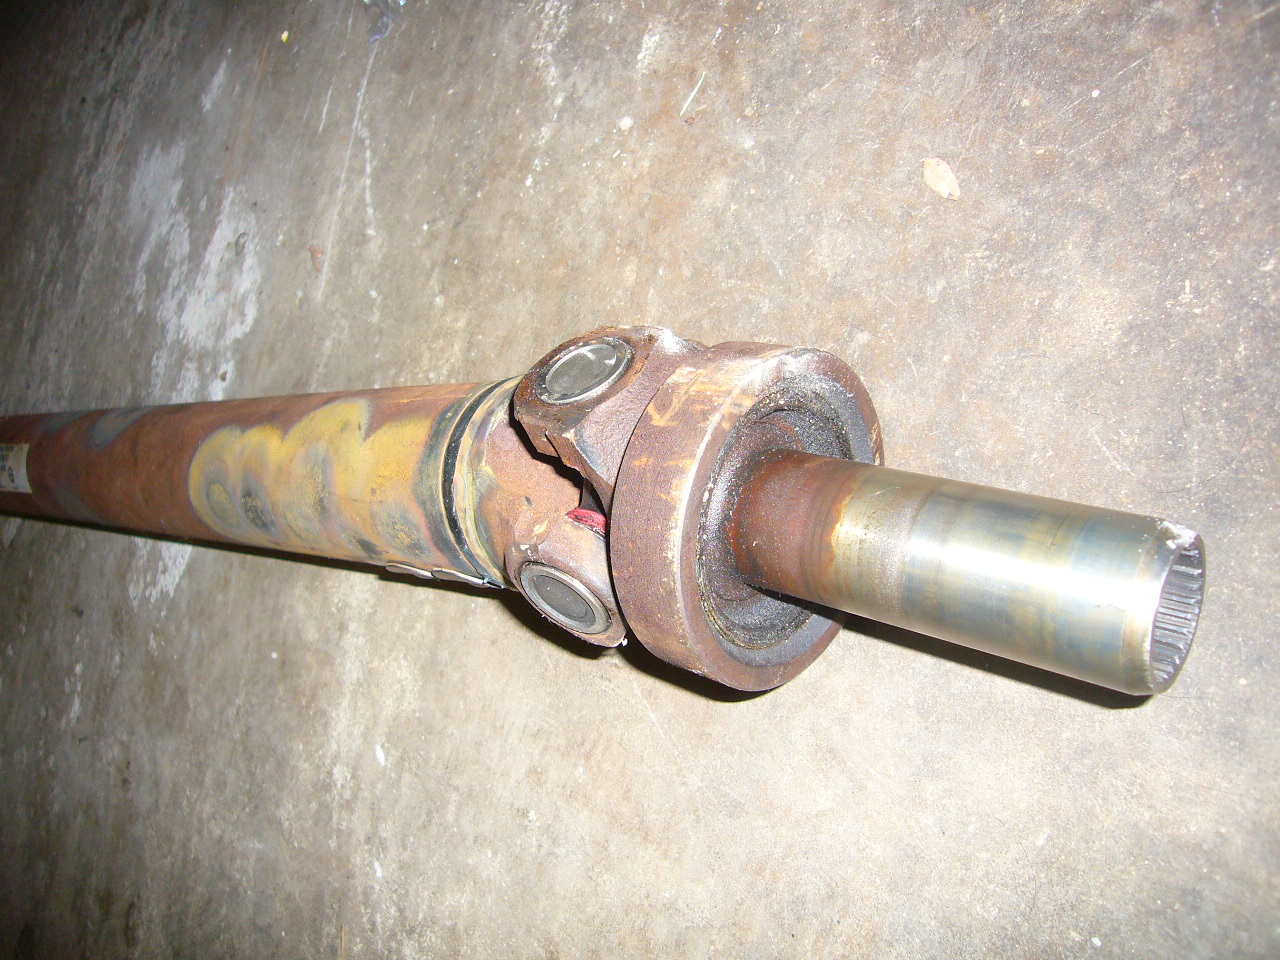
I had my driveshaft made yesterday. I got a full t56 driveshaft on ebay because I didn't feel like dealing with picking the right yokes. I was going to have the end cut off of the Nissan shaft and attached to GM shaft but the Nissan shaft diameter is 5mm wider than the GM shaft. We ended up putting a new Spicer flange on the end and it worked out great. Anybody in the Rochester/Syracuse NY area, I suggest contacting Vic at Ontario Engine & Machine: http://www.ontarioengine.com/ They do all kinds of engine/drivetrain work, good guy too. I guess there isn't much to say until I give it a few trial runs... This weekend I'll be doing more so look for updates in a few days.
-
<<face palm>> thanks for the heads up.
-
crap, i guess that's what i get when i buy the ebay "90-96 manual" sorry...
-
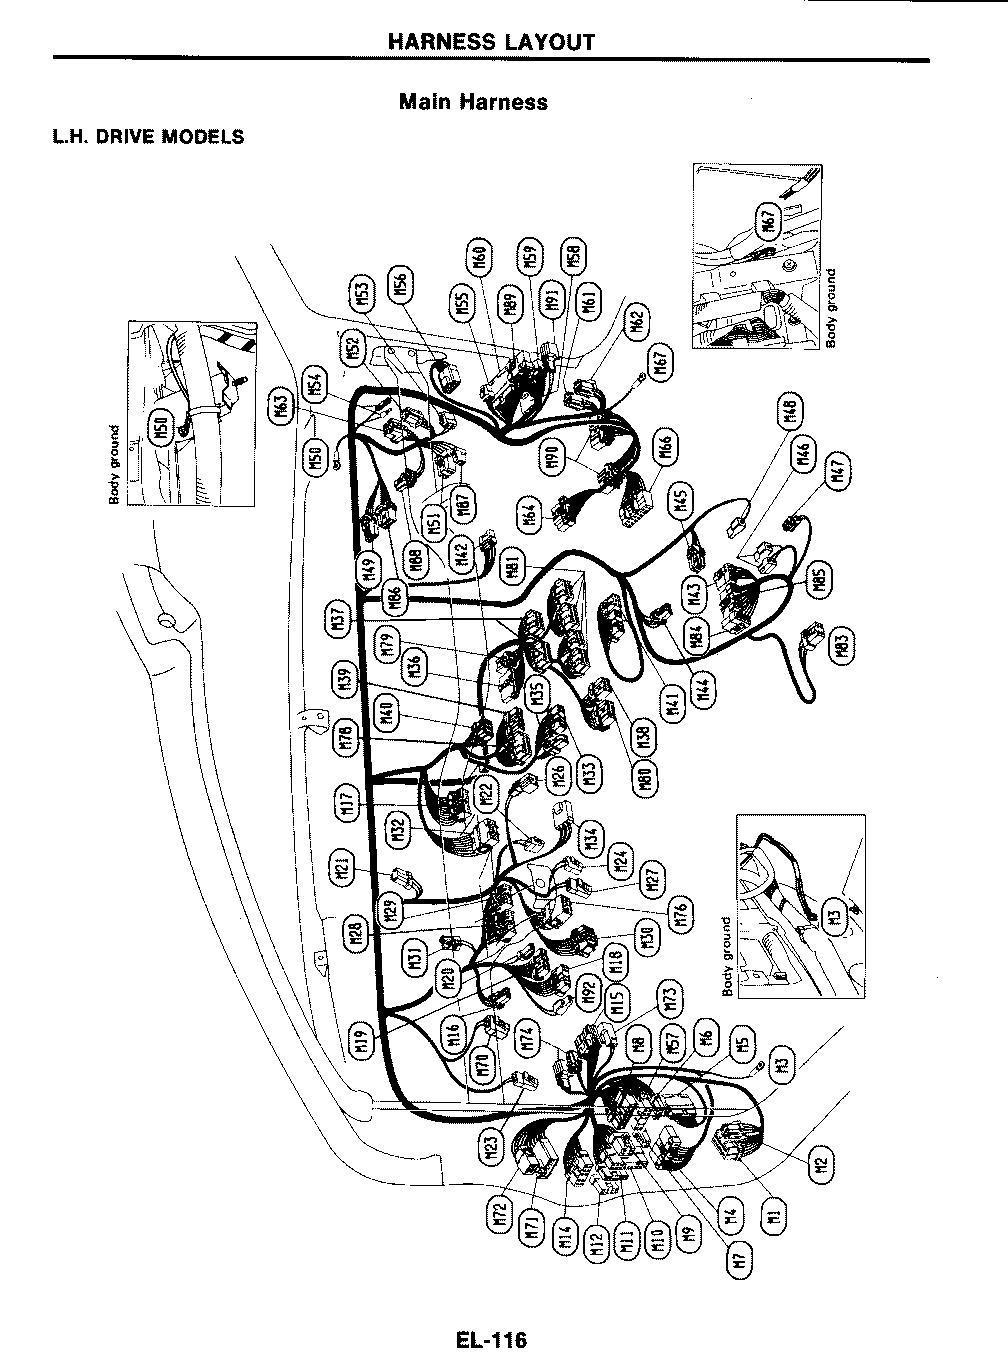
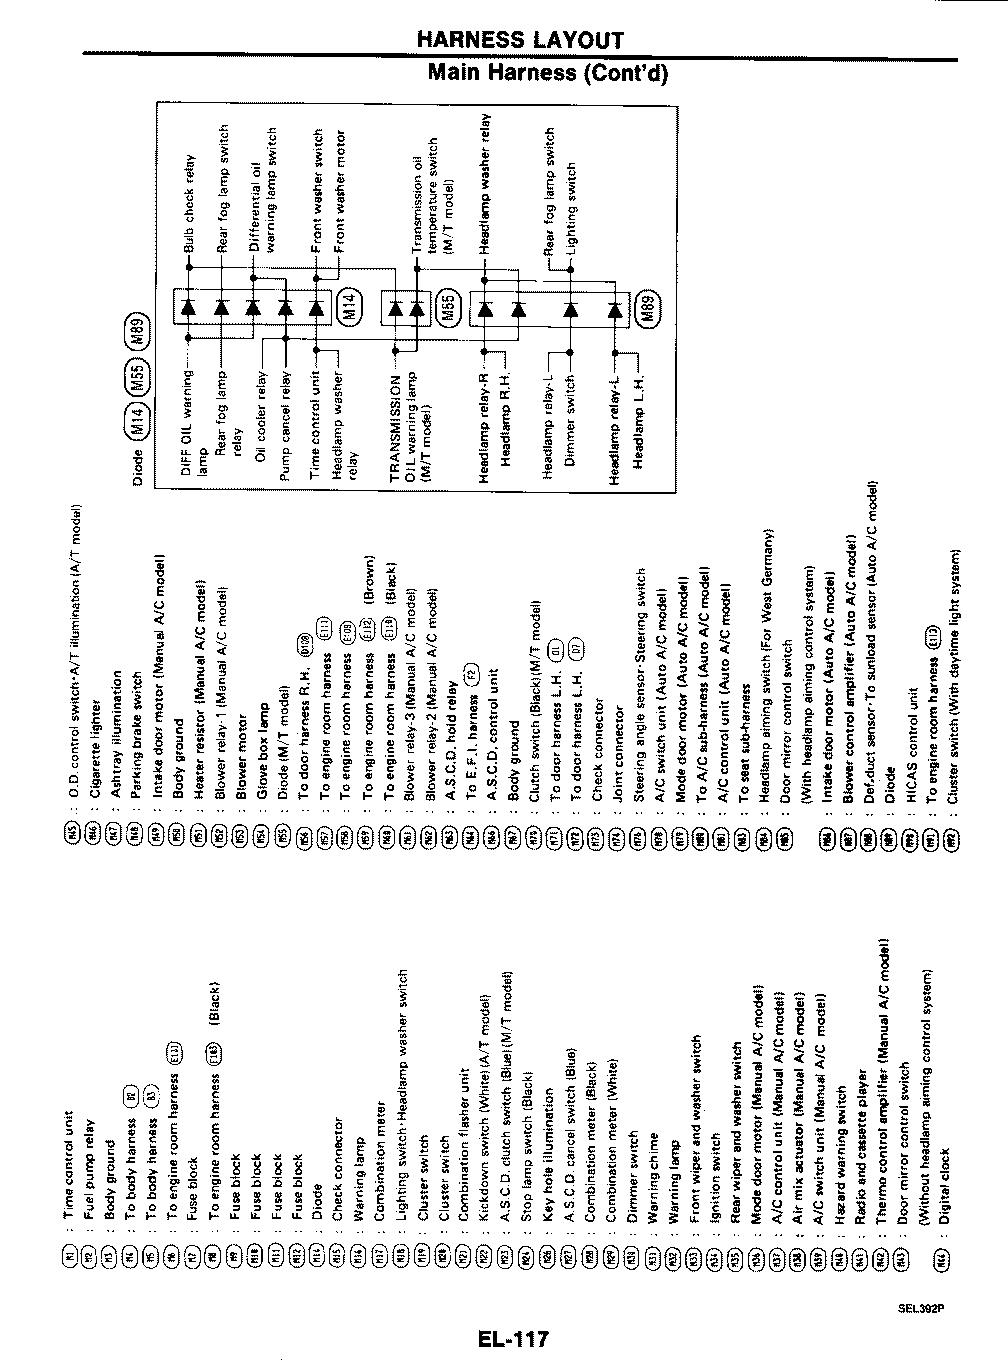
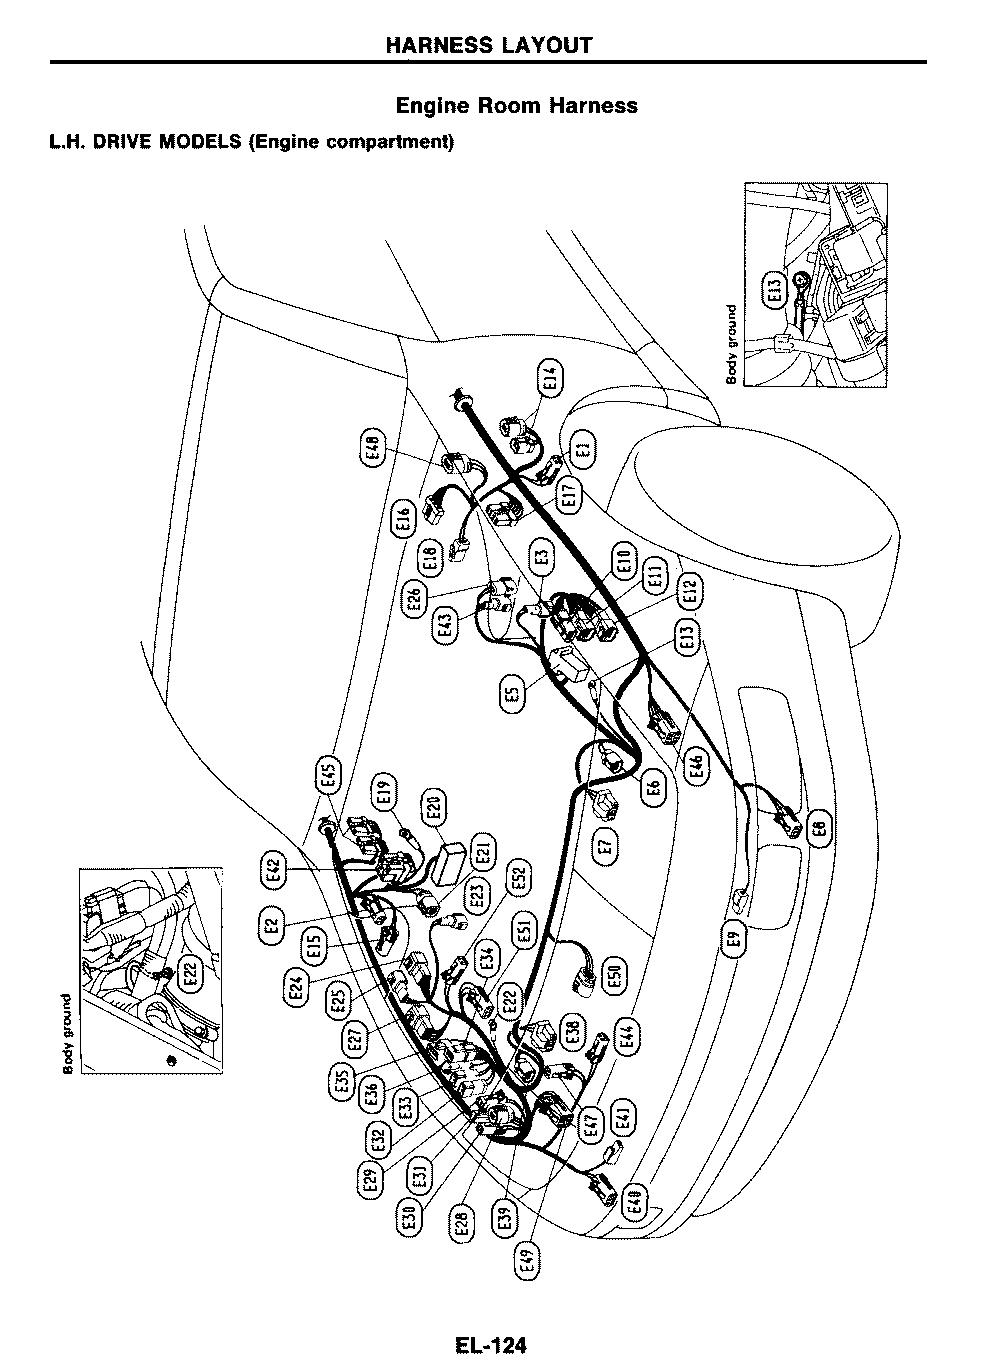
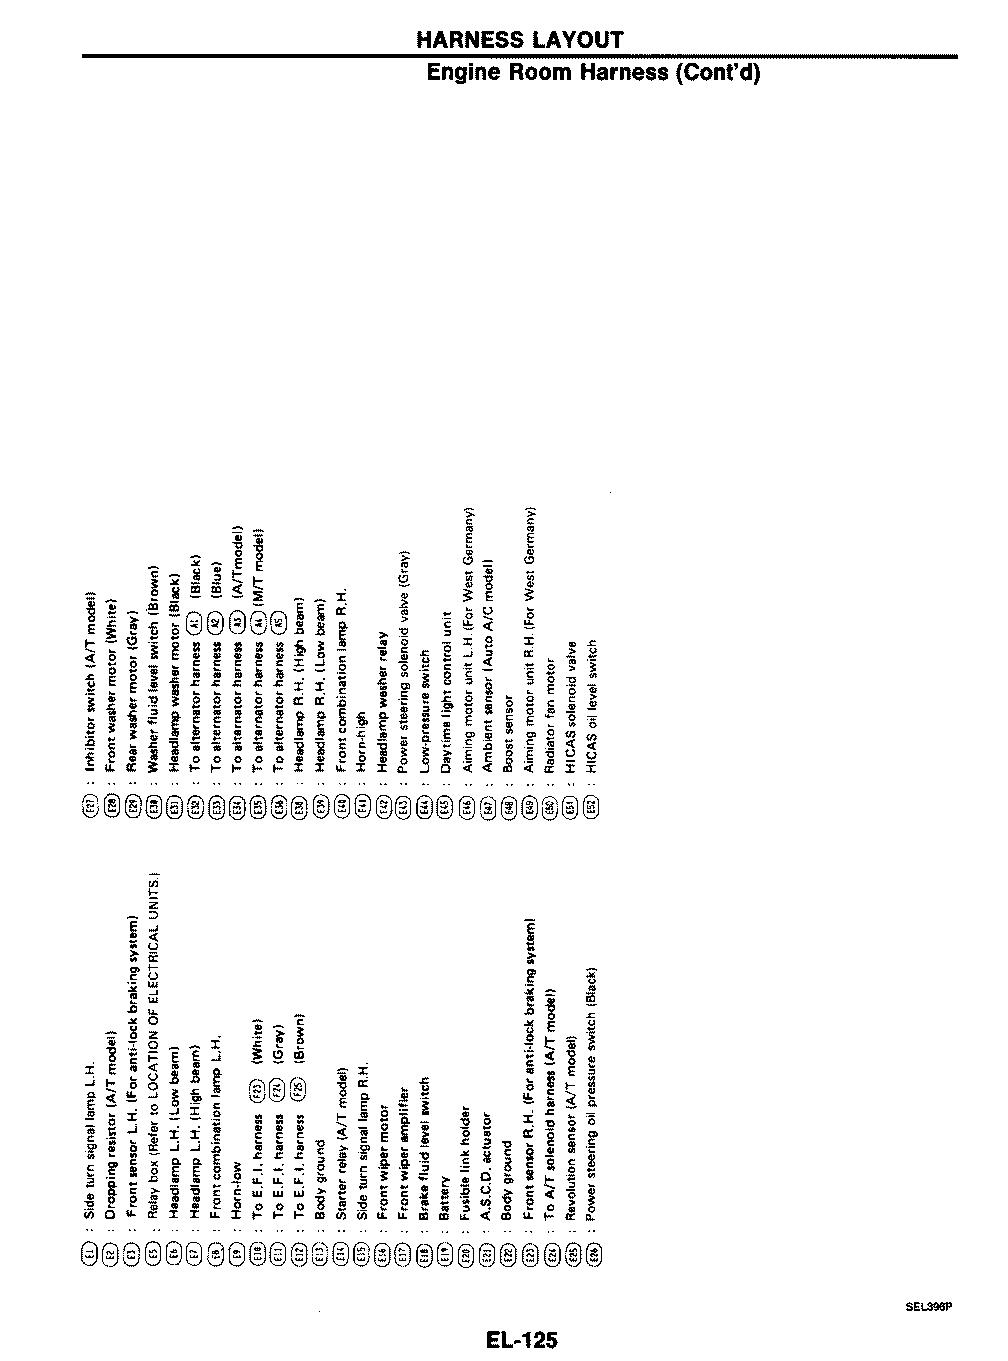
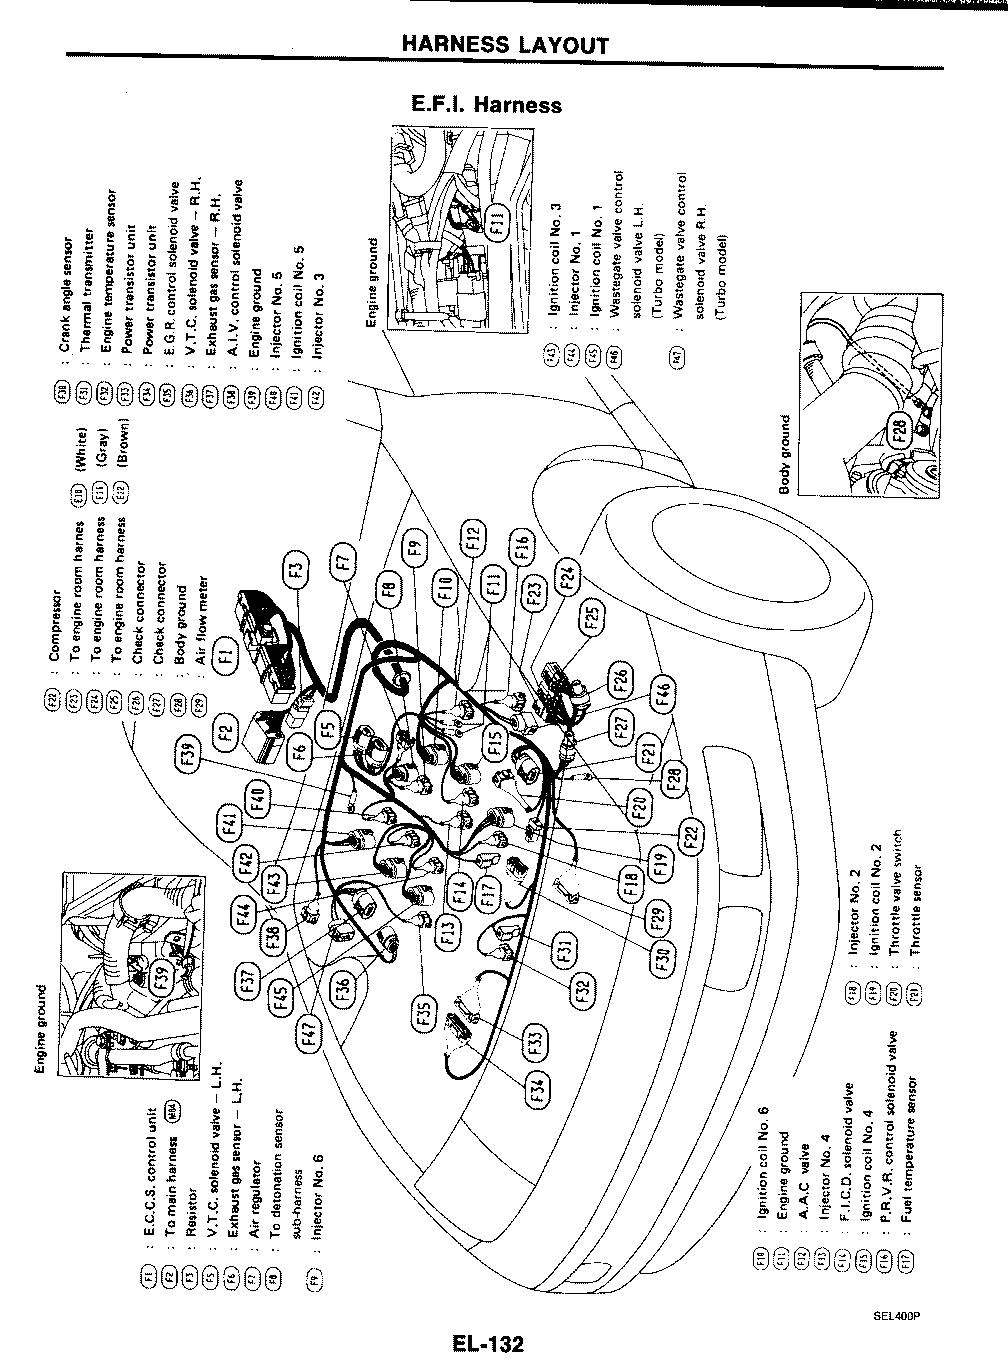
maybe the harness diagrams will help.
-
It's hard to tell from the pictures. hopefully they are big enough so you can zoom in.
-
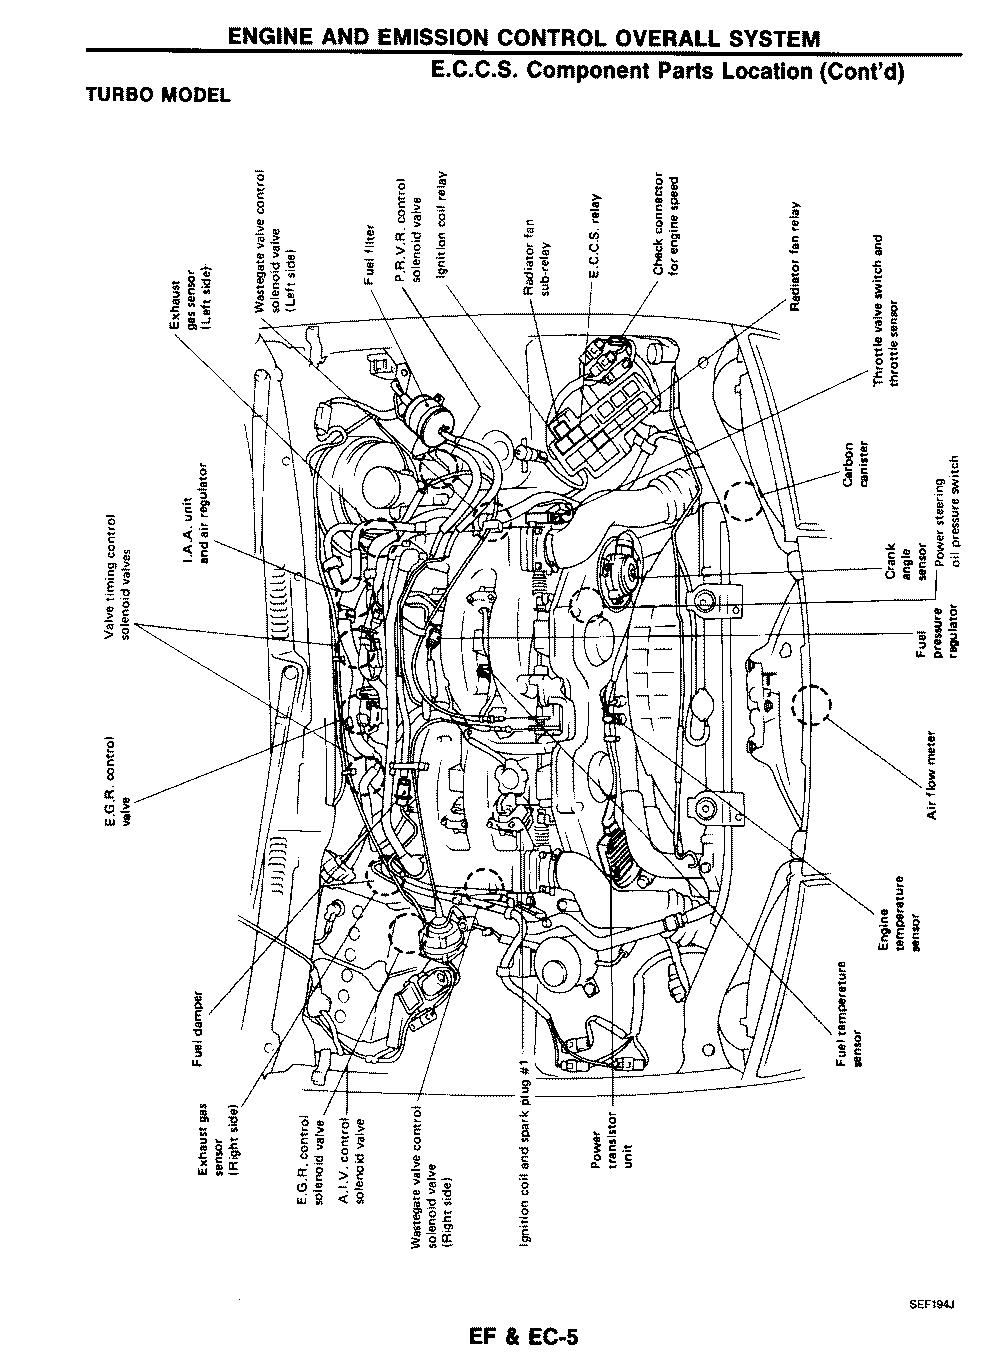
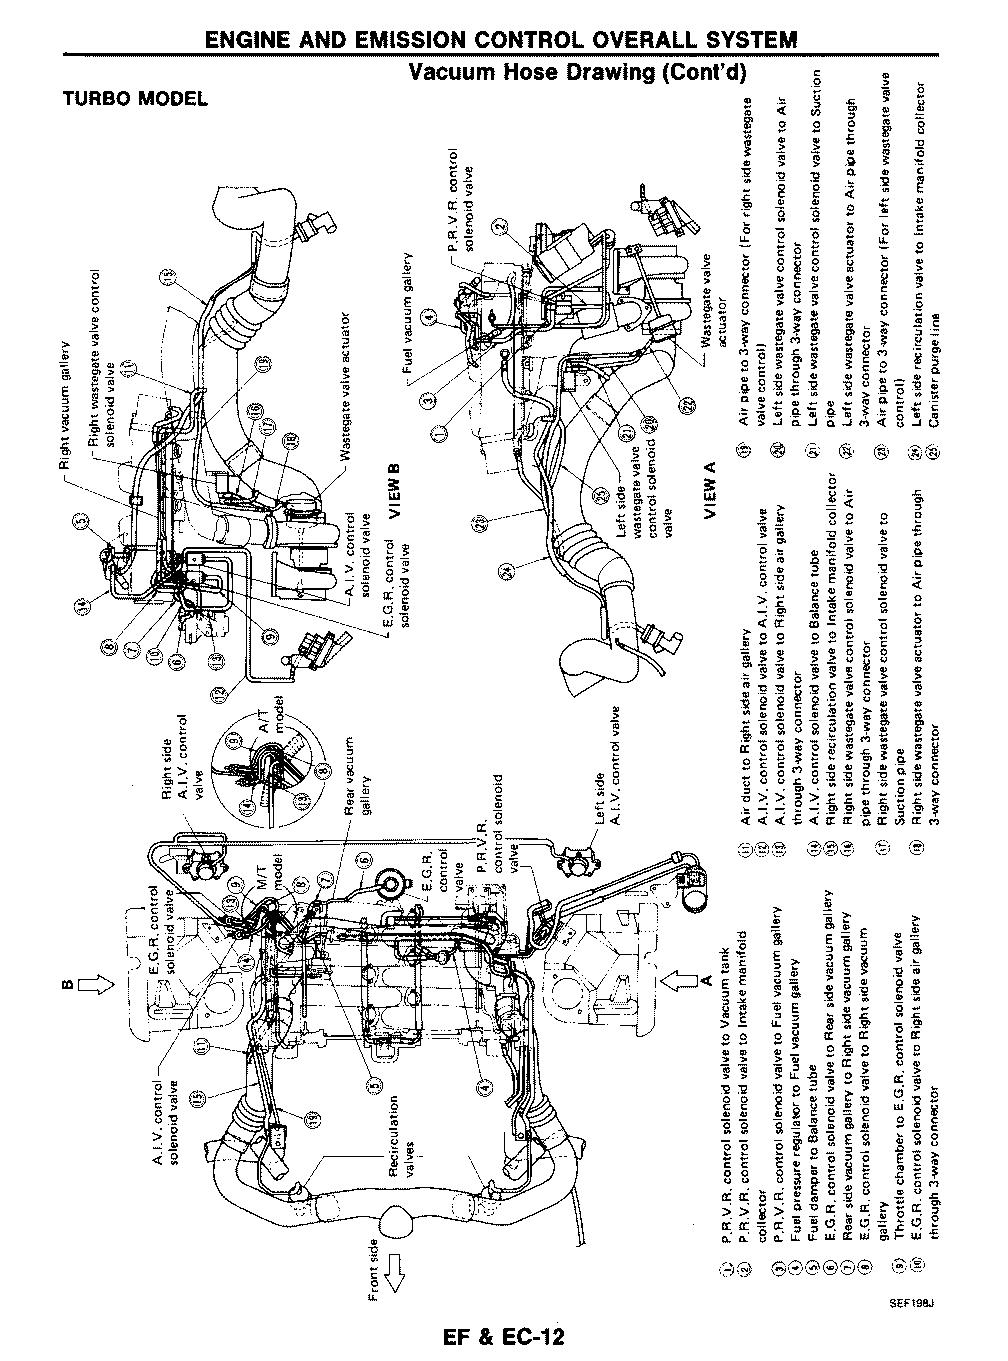
I have a service manual with diagrams so I may be able to find it. I need to know what side of the engine this came from and what it was attached to.
-
Z32 LS1 project thread... questions inside
chris51881 replied to fogged306's topic in Z32 Series - 300ZX
thanks man, i appreciate it! -
Z32 LS1 project thread... questions inside
chris51881 replied to fogged306's topic in Z32 Series - 300ZX
it has been a while..... just checking in so everybody knows we're still in the works here. i haven't done much since the last time i was on. there's 500 excuses so i'll spare everybody. anyway, we mounted a battery in the trunk, we have as much of the wiring done as we can for now, the throttle cable is set, and we have the plans for the tranny mount and driveshaft set. we had to remove 2 and 3/8 inch of sheathing from the stock z32 throttle cable to fit it on the ls1. not an easy process because the cable is wrapped with steel like and old pay-phone cord. no pictures because there just isn't anything interesting to look at. it is still going to be slow moving for a while, school is taking all my time right now but i'll b making a better attempt at progress. i'm sick of it not being done. -
Z32 LS1 project thread... questions inside
chris51881 replied to fogged306's topic in Z32 Series - 300ZX
unfortunately, nothing new. school takes most of my time and winter makes the garage too cold (was just looking at kerosene heaters last night though). i have been saving saving money so once i get going it shouldn't take long. i have been doing some looking around and found a great Z store: http://www.z1motorsports.com/ my buddy came up with a great idea for the gauge situation too. we are going to set up an in-dash computer (basically a home computer hard drive and screen) and run HPtuners on it (we know a guy that has the program). then i'll put a small LCD screen where the gauges go and have real-time gauges. if i dont get to anything on spring break then the beginning of may will be go time. i think aside from the gauges, all i have to do is run a radiator setup, close the trans tunnel, get a driveshaft, fuel filter, and exhaust. the worst thing in there going to be finding someone to make custom headers (you know how the steering column is in the way). depending how you look at it, this doesn't seem like too much. of course there's inevitably going to be problems. i will definitely have updates as soon as im back at it! -
LS2 into 350Z. NEED HELP
chris51881 replied to CodeRed30's topic in Gen III & IV Chevy V8Z Tech Board
im not entirely sure of everything you'll need for that swap. you will surely find things along the way. but, im putting an LS1 into a 300zx so heres a few things in addition to your list that may parallel your swap. driveshaft (probly need a shop to custom make) fuel line adapter for the GM quick connect system MAF sensor some sort of clutch adapter or new clutch reservoir setup to go with the t56. --> theres another quick connect style line on there as well. im using the LS1 ECU but only because i have a buddy who can wire it into the 300 with a pin-out sheet. i thought there was going to be more on my list here, im sure im forgetting something. i hope this helps tho. -
i am very interested to see this played out. good luck! lots of pics please!
-
LS1 300zx sump issue
chris51881 replied to imported_z32 tt's topic in Gen III & IV Chevy V8Z Tech Board
nice. those are some pro welds you have there. -
nice! makes everything look much cleaner.
-
LS1 300zx sump issue
chris51881 replied to imported_z32 tt's topic in Gen III & IV Chevy V8Z Tech Board
i have all the dimensions of that pan in post #38 here: http://forums.hybridz.org/showthread.php?t=149027&page=2 it looks like the pan is 1and3/4 up front and 5and1/4 at the sump. im not using my windage tray, i havent ran the car yet so i dont know if it will affect anything tho. -
Z32 LS1 project thread... questions inside
chris51881 replied to fogged306's topic in Z32 Series - 300ZX
thanks dude. hey if you get that project started, set up a thread on here. im sure theres tons of people who would love to see it. good luck! -
Z32 LS1 project thread... questions inside
chris51881 replied to fogged306's topic in Z32 Series - 300ZX
this is probly the best thread on here for any fitment questions: BRAAP's mock-ups the top of page 2 addresses the GTO among other LSx oil pans. im not familiar with the differences in size between the 240 bay and the 300 bay or where the rack sits in each but it looks like that guy you linked to had the same areas cut out of the GTO pan as BRAAP has detailed in his thread. it may be possible to do it, if you can do the fab work. i suppose that either way you go theres fab to be done. theres 3 things id be concerned about with moving the engine up so you dont have to cut the firewall: 1) the throttle body is so close to the hood even with it moved back. the last picture in post #32 of this thread shows where my throttle body was sitting after i had the motor positioned (with cut firewall). 2) the shifter comes up almost perfect with it set back in the firewall. if you move the engine forward it mite not fit right without an extension. (see picture right before the throttle body picture) 3) the farther back the engine is, the better geometry you have. im not sure if a few inches will really harm anything though. heat and a/c are both gone. i might be able to get it back in there but i would have to mod almost the whole system on both sides of the firewall. it isnt worth it to me. we dont need ac in ny and it wont be on the road in the winter. i know how florida is though... ac is a must. -
Z32 LS1 project thread... questions inside
chris51881 replied to fogged306's topic in Z32 Series - 300ZX
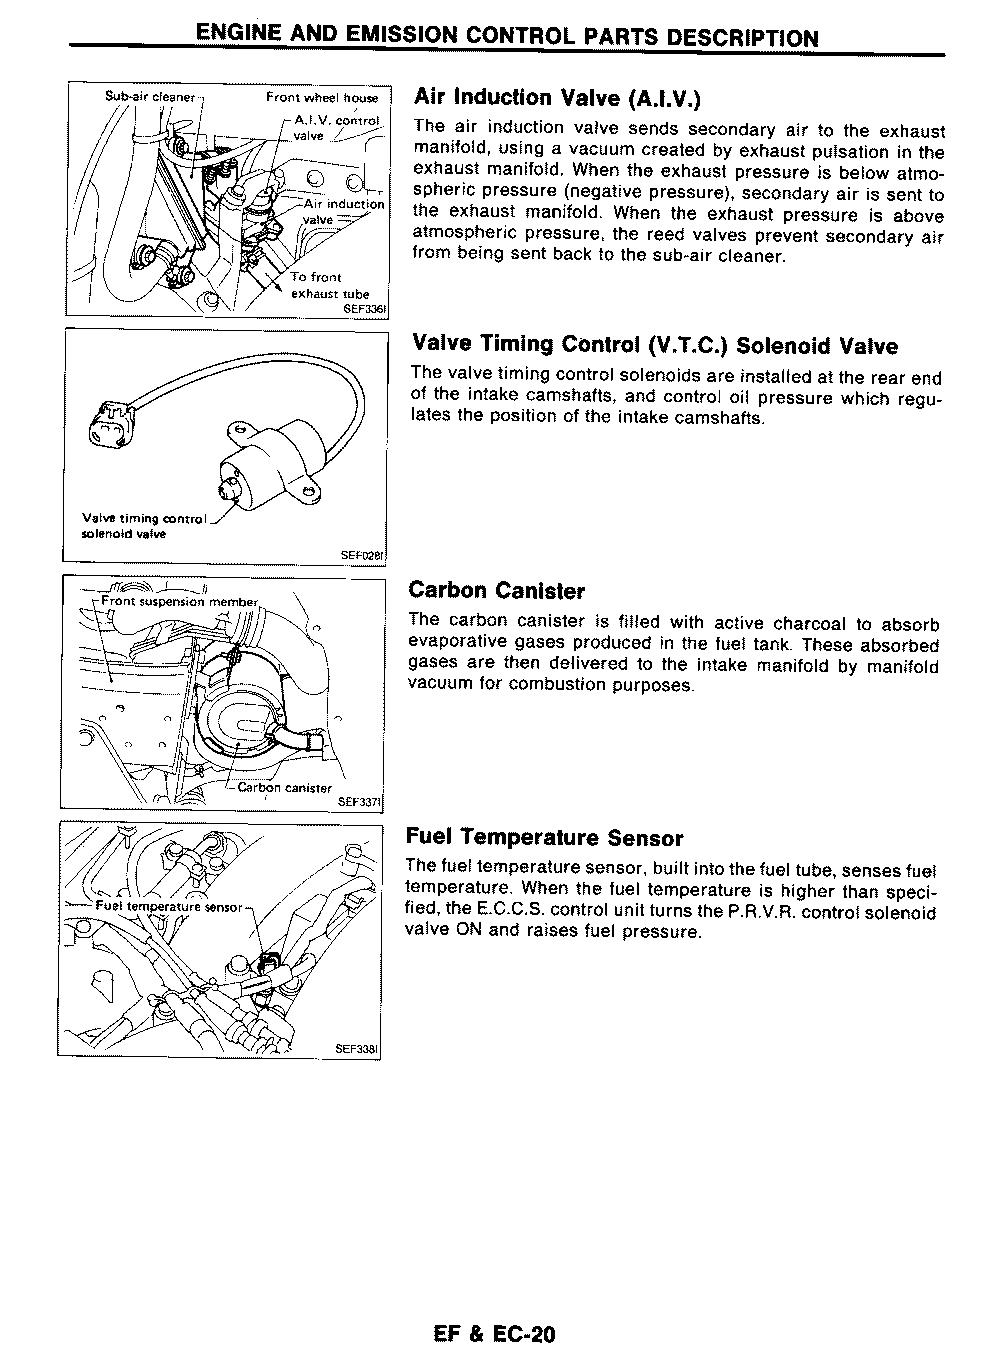
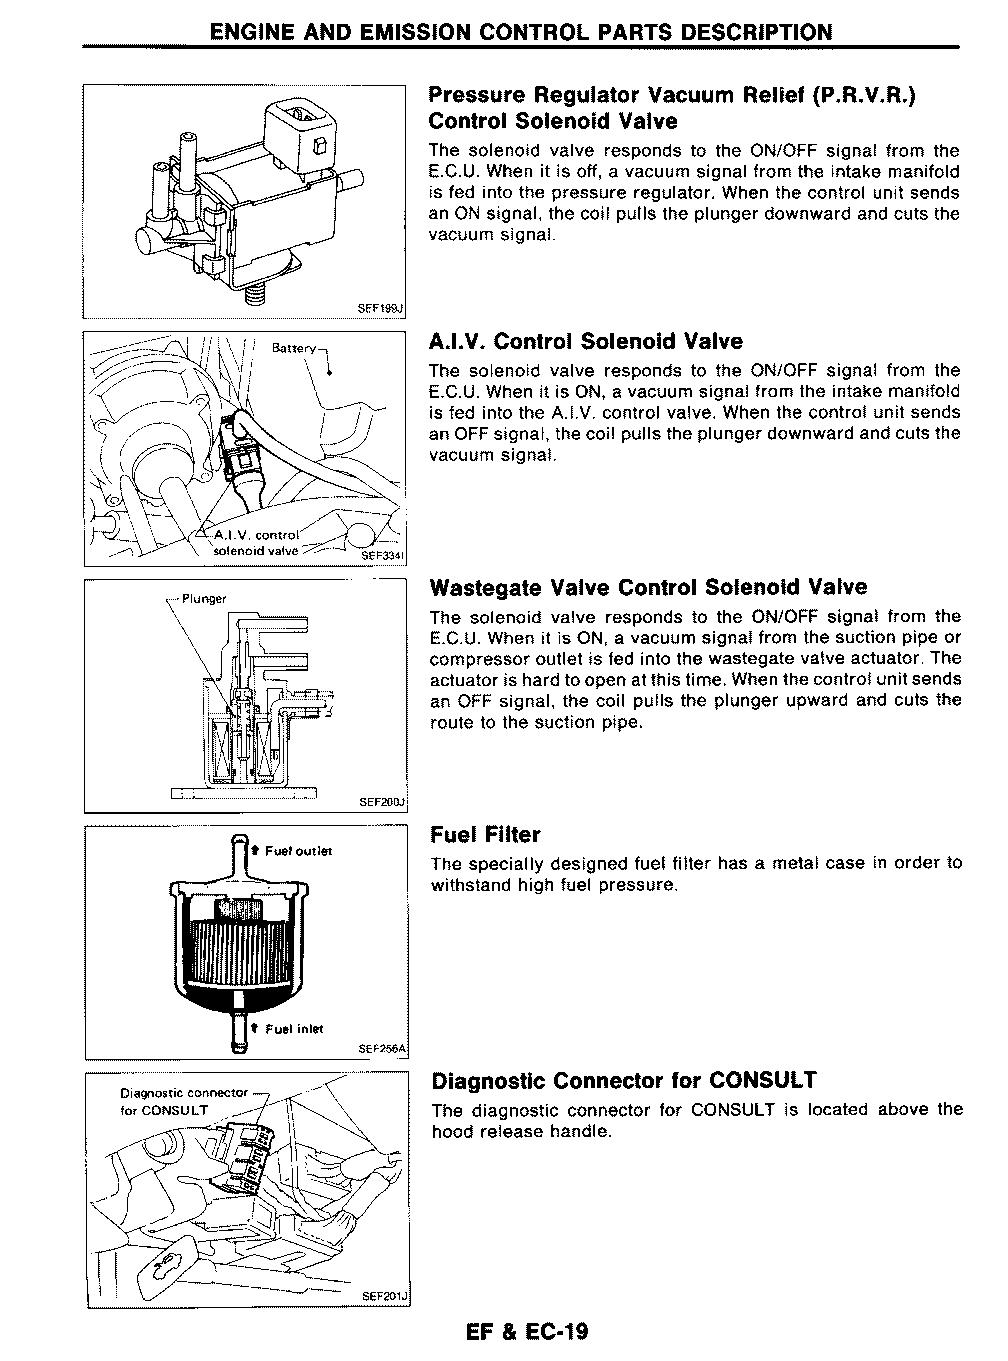
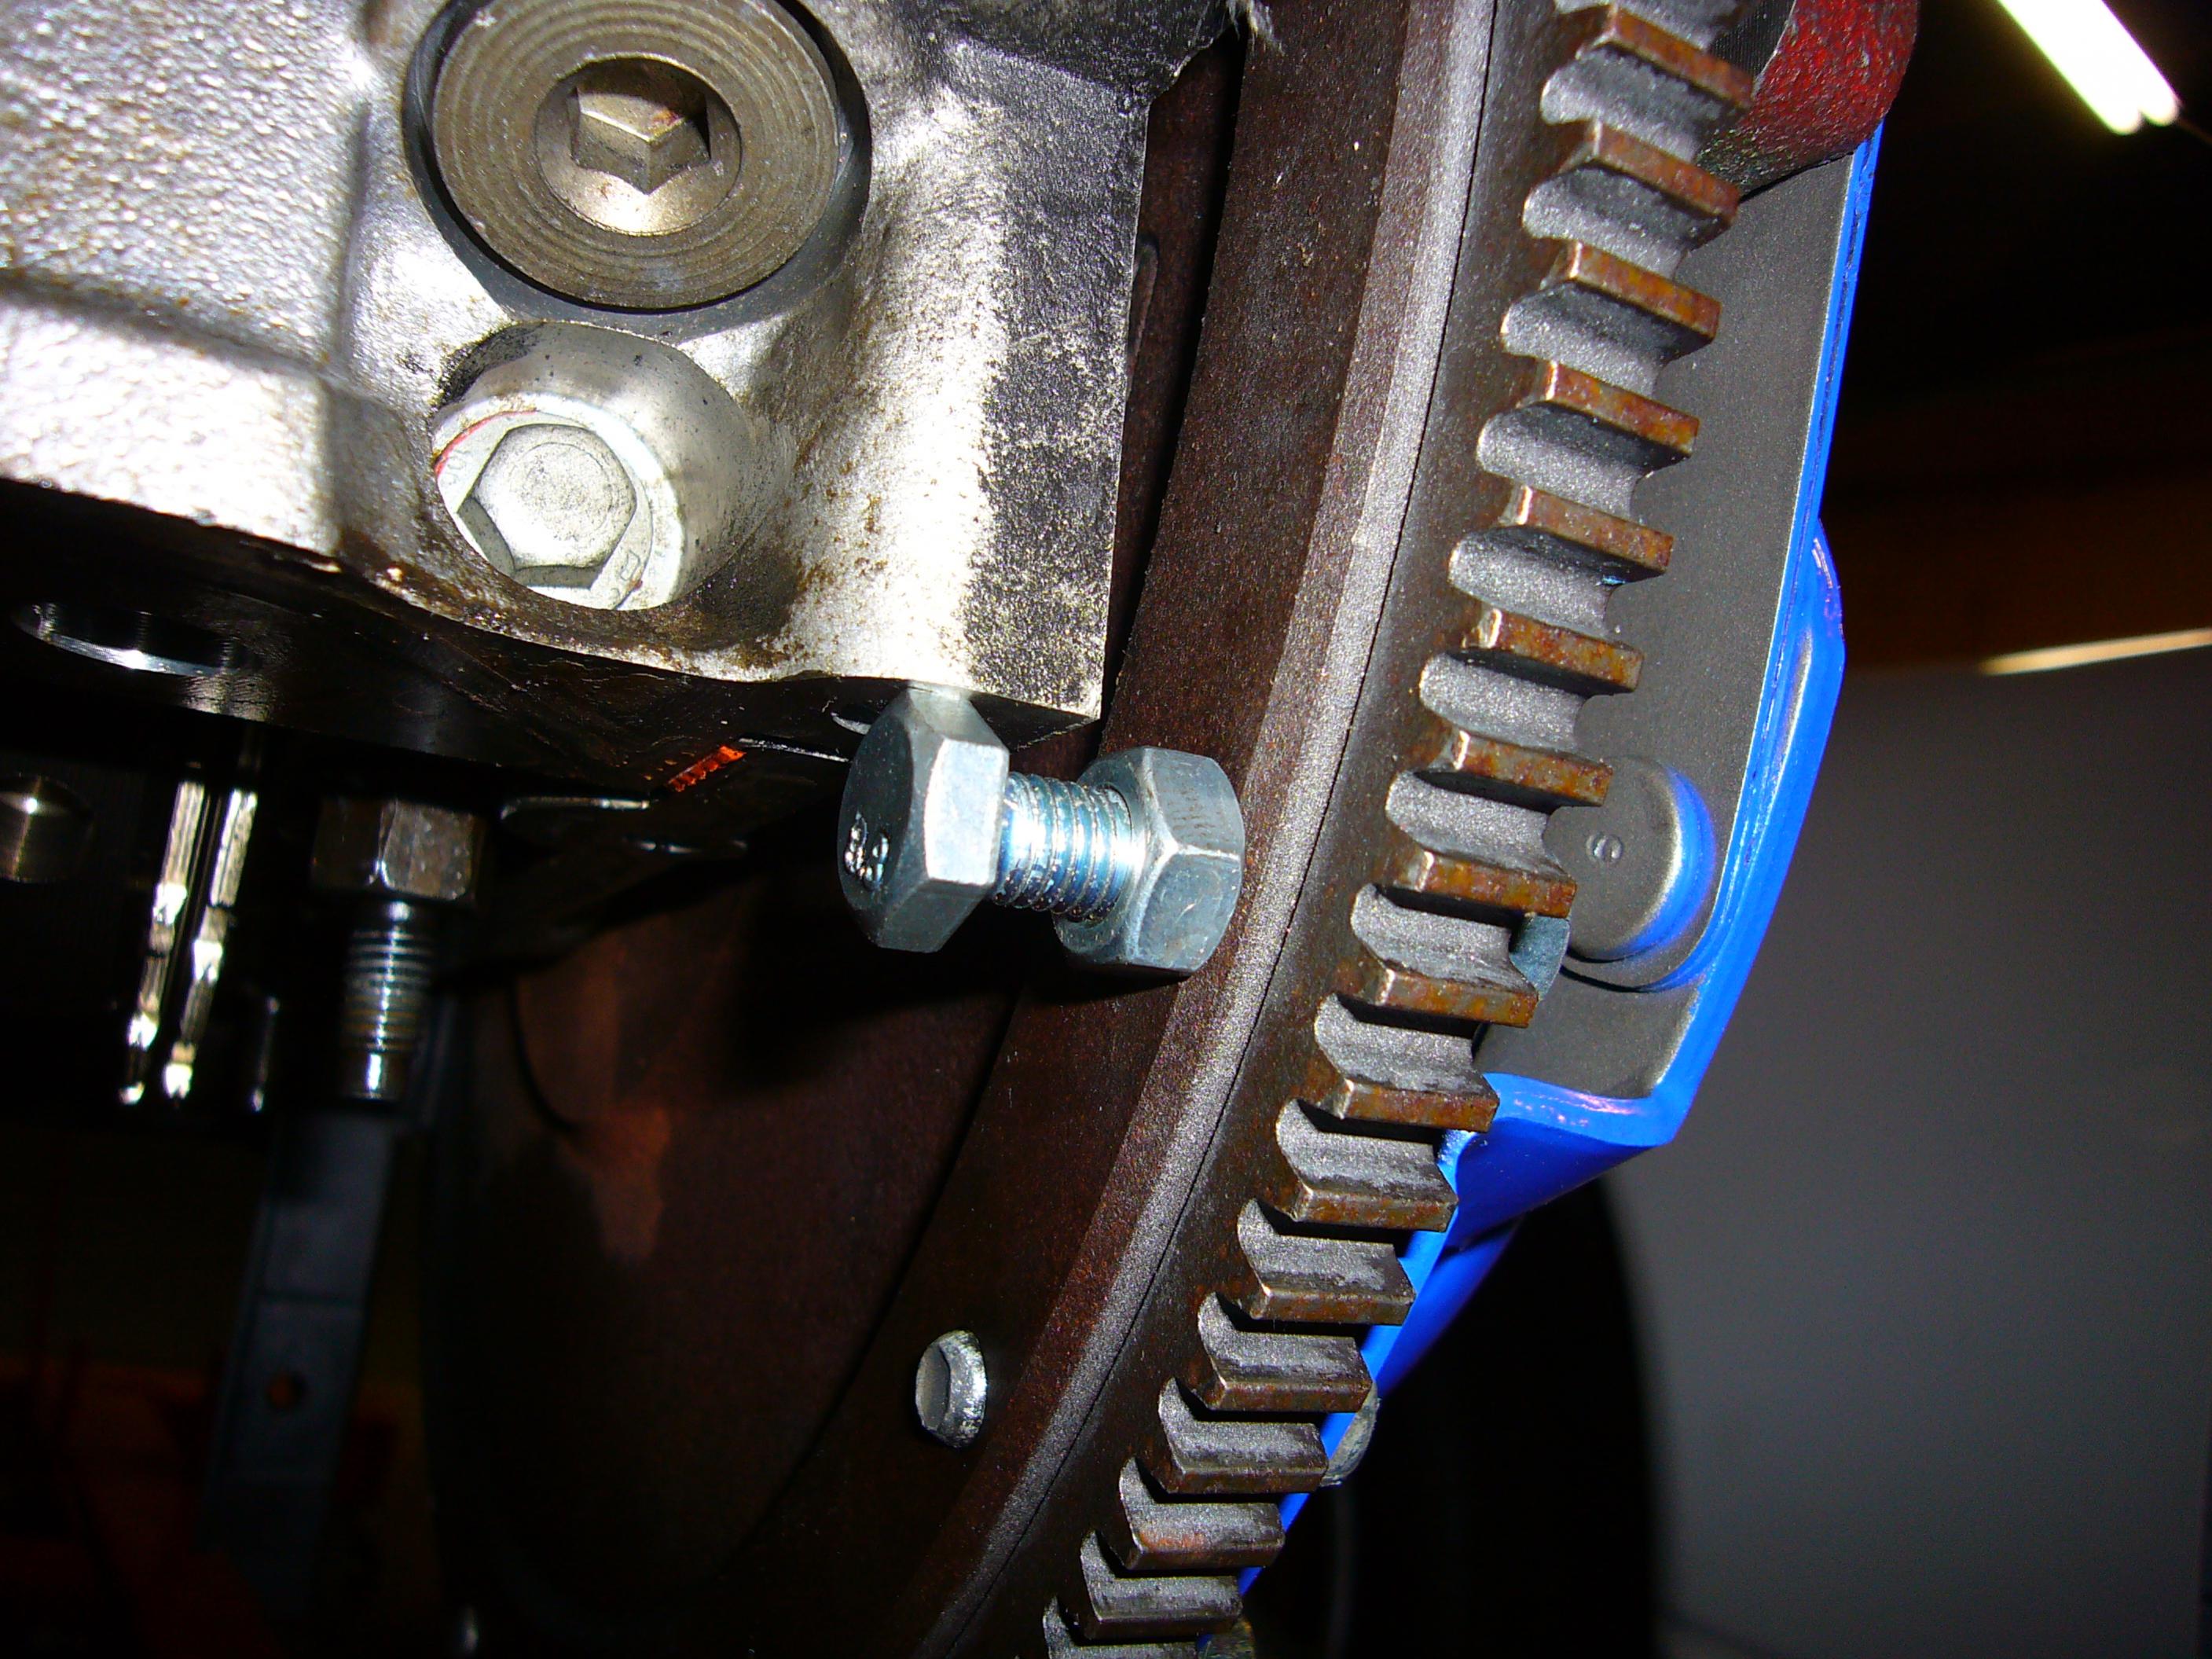
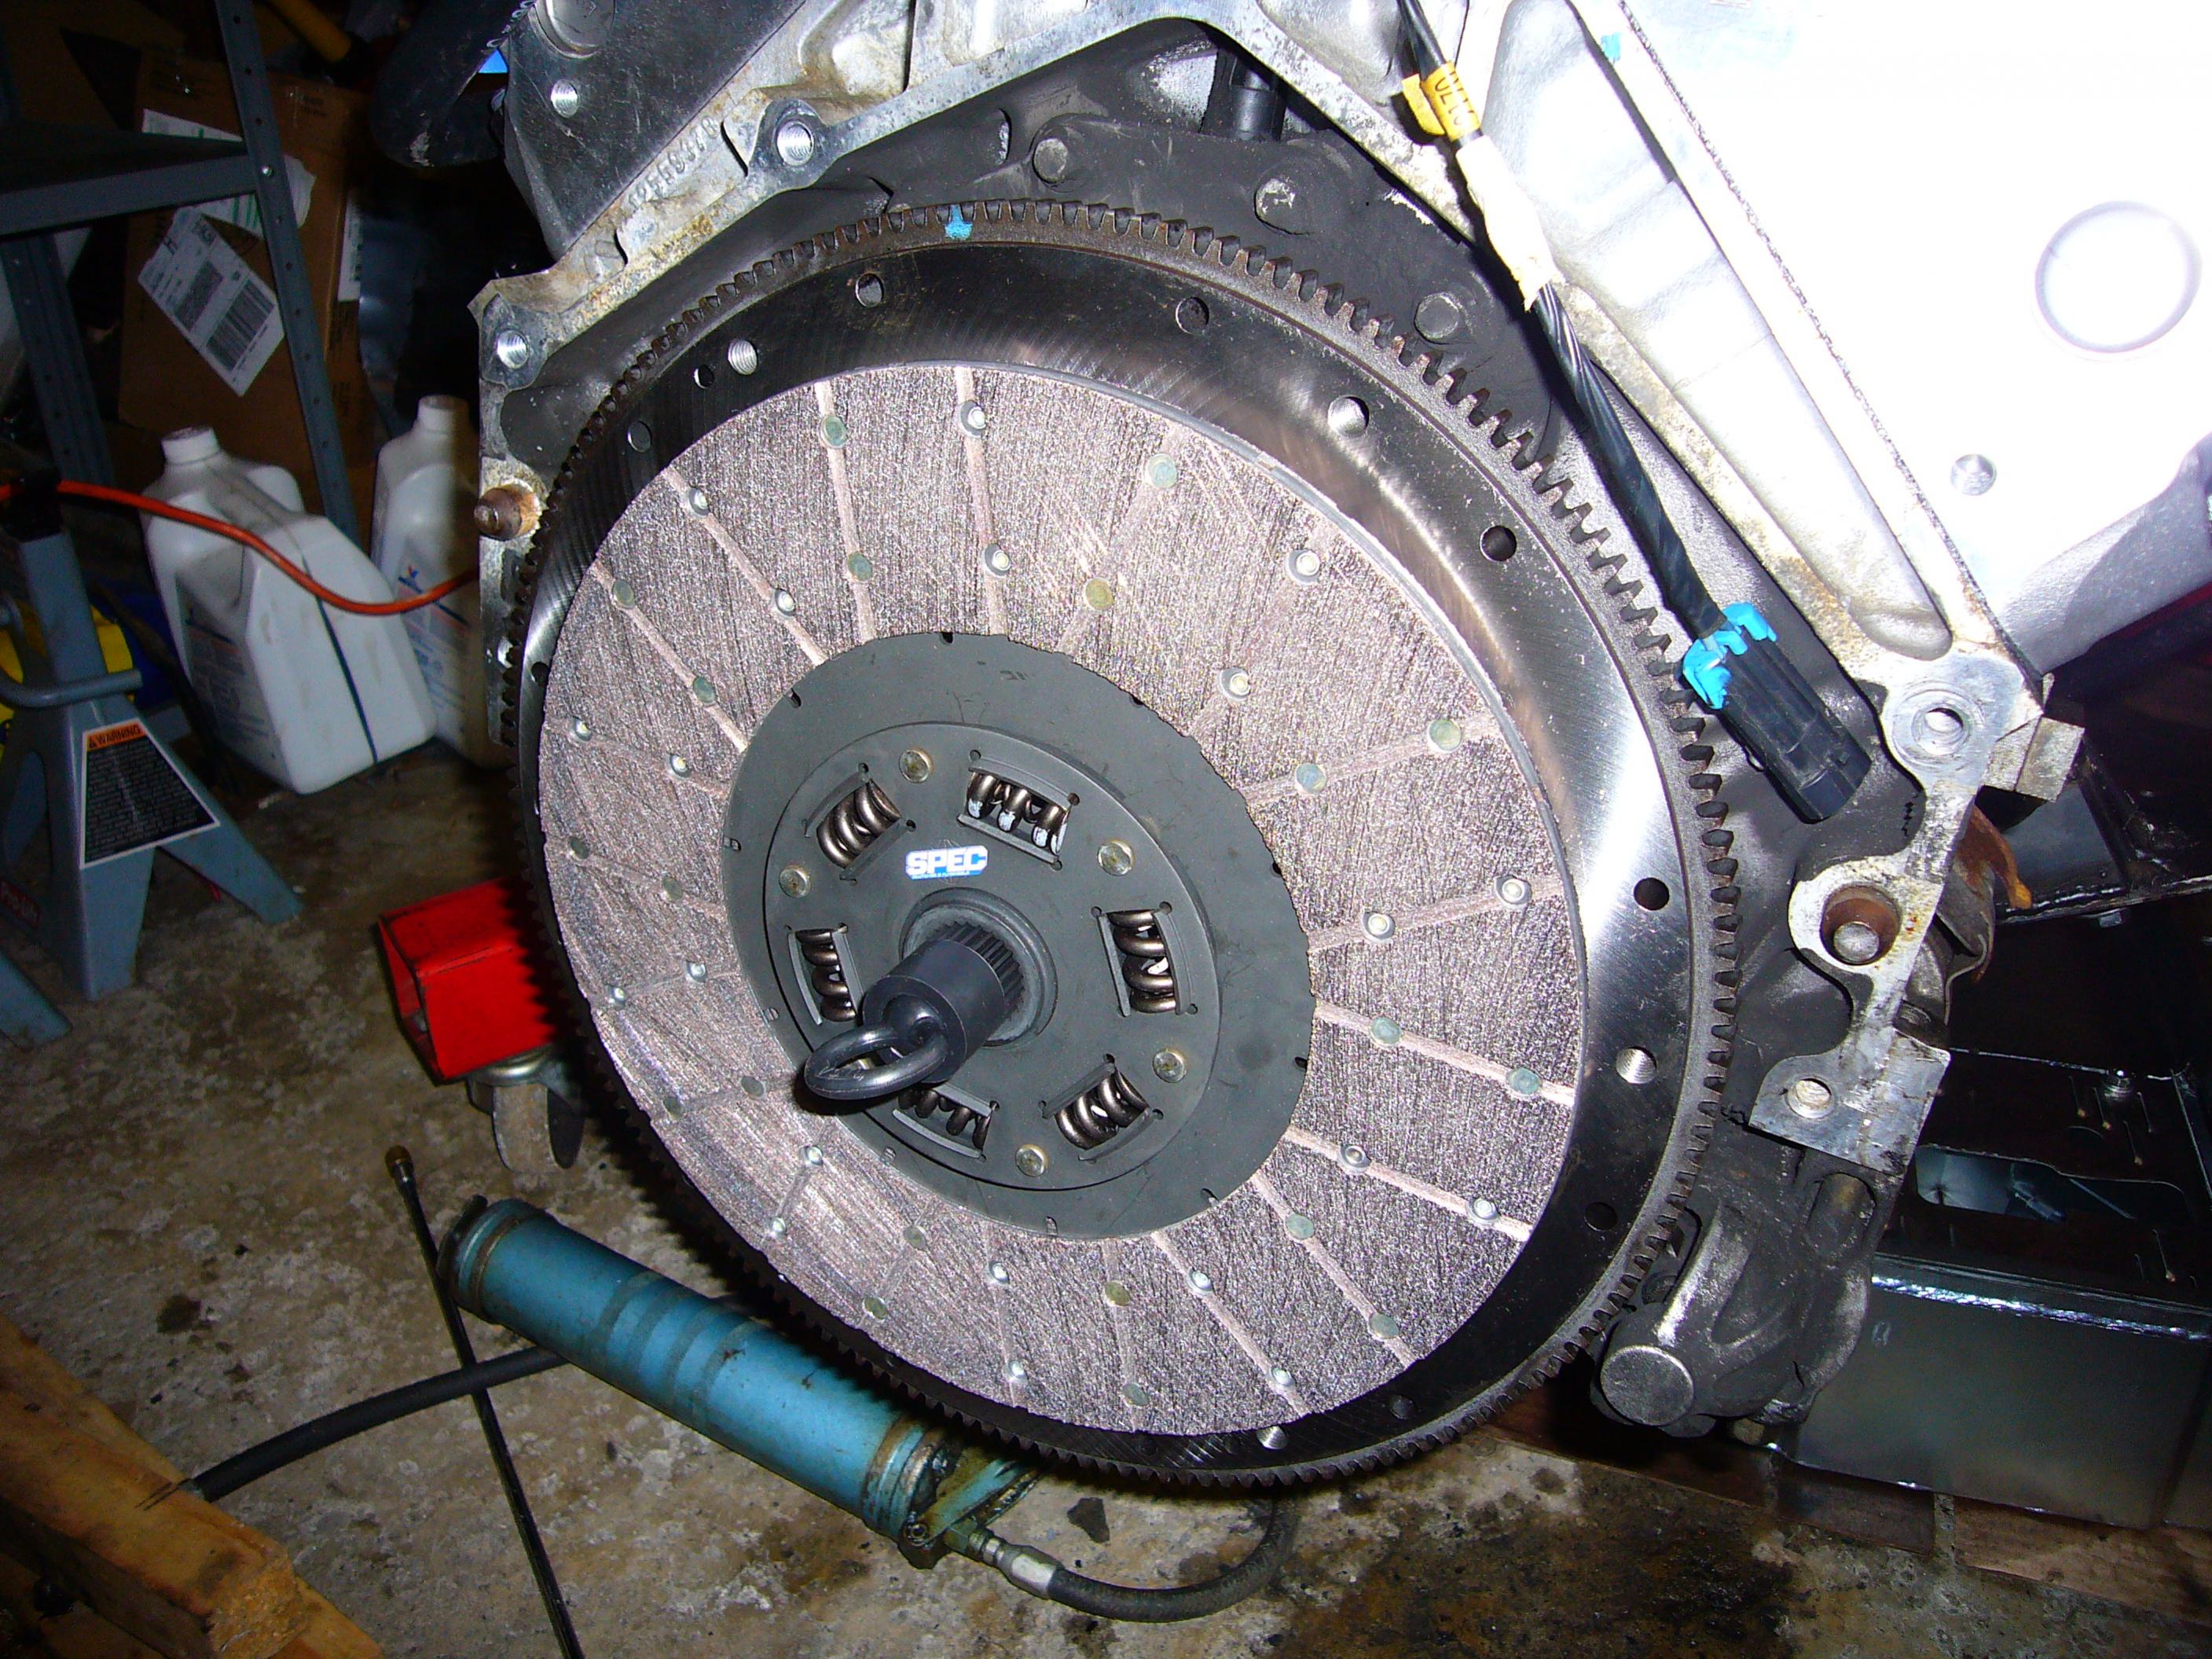
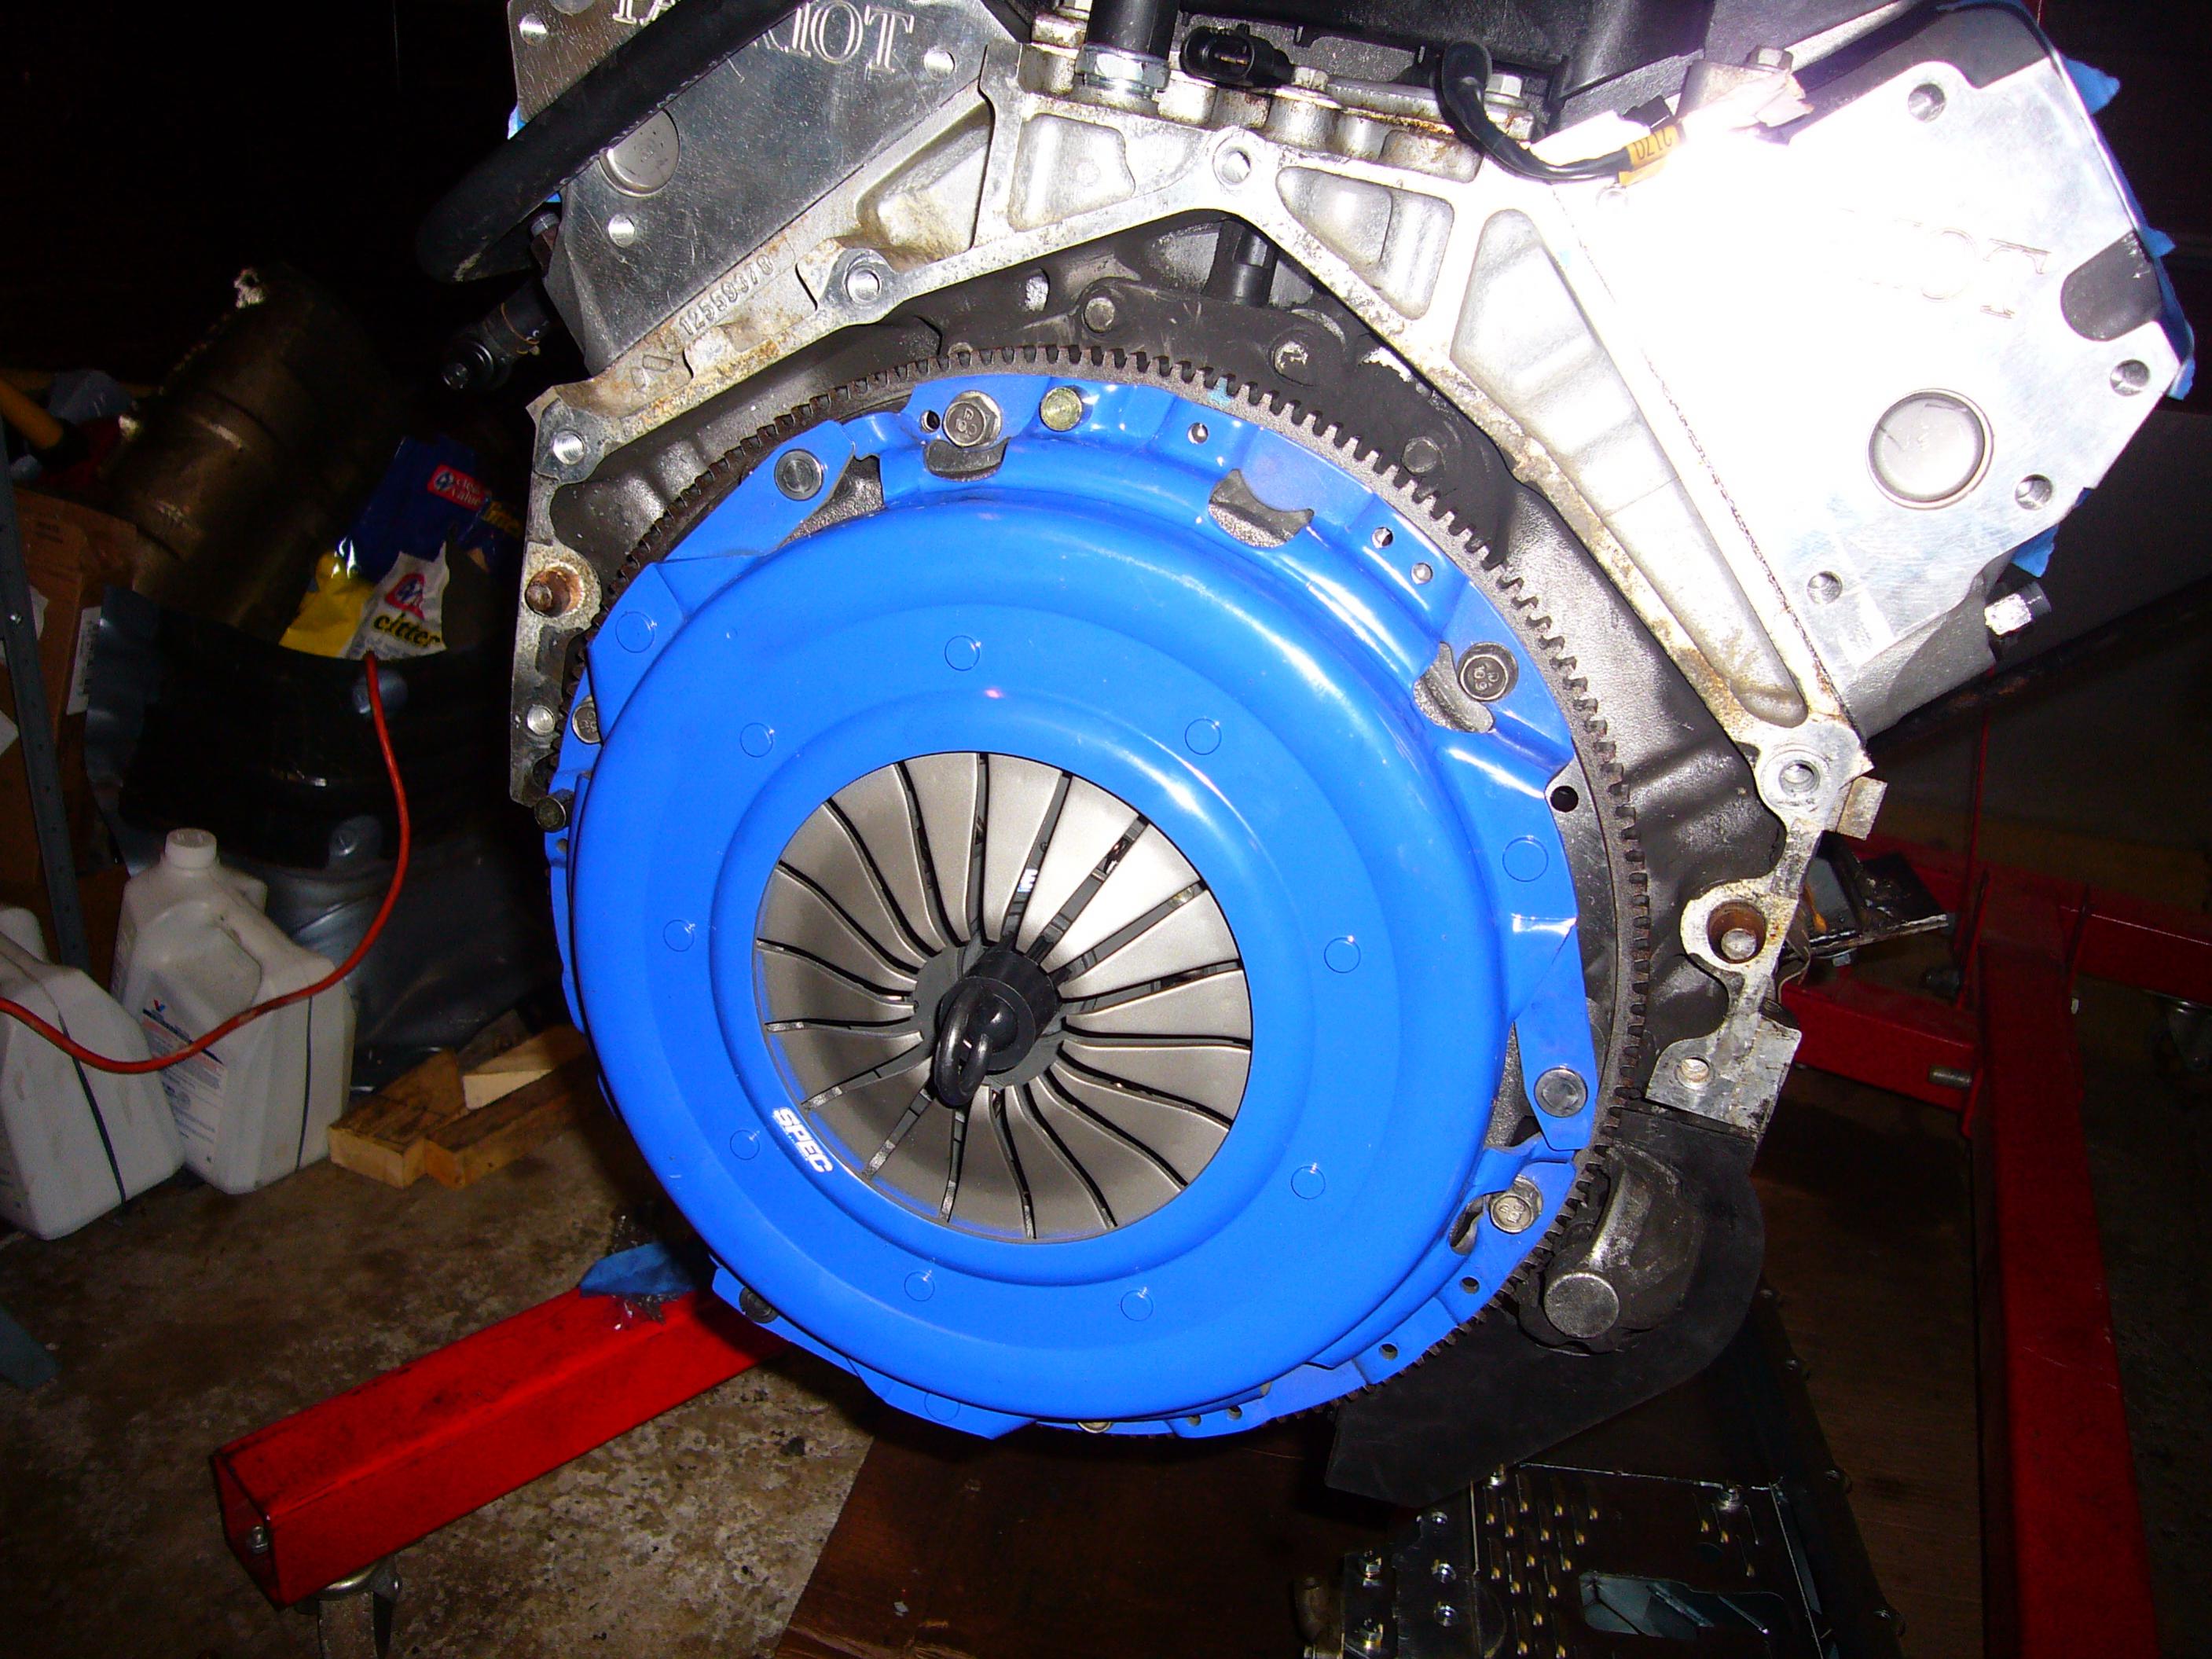
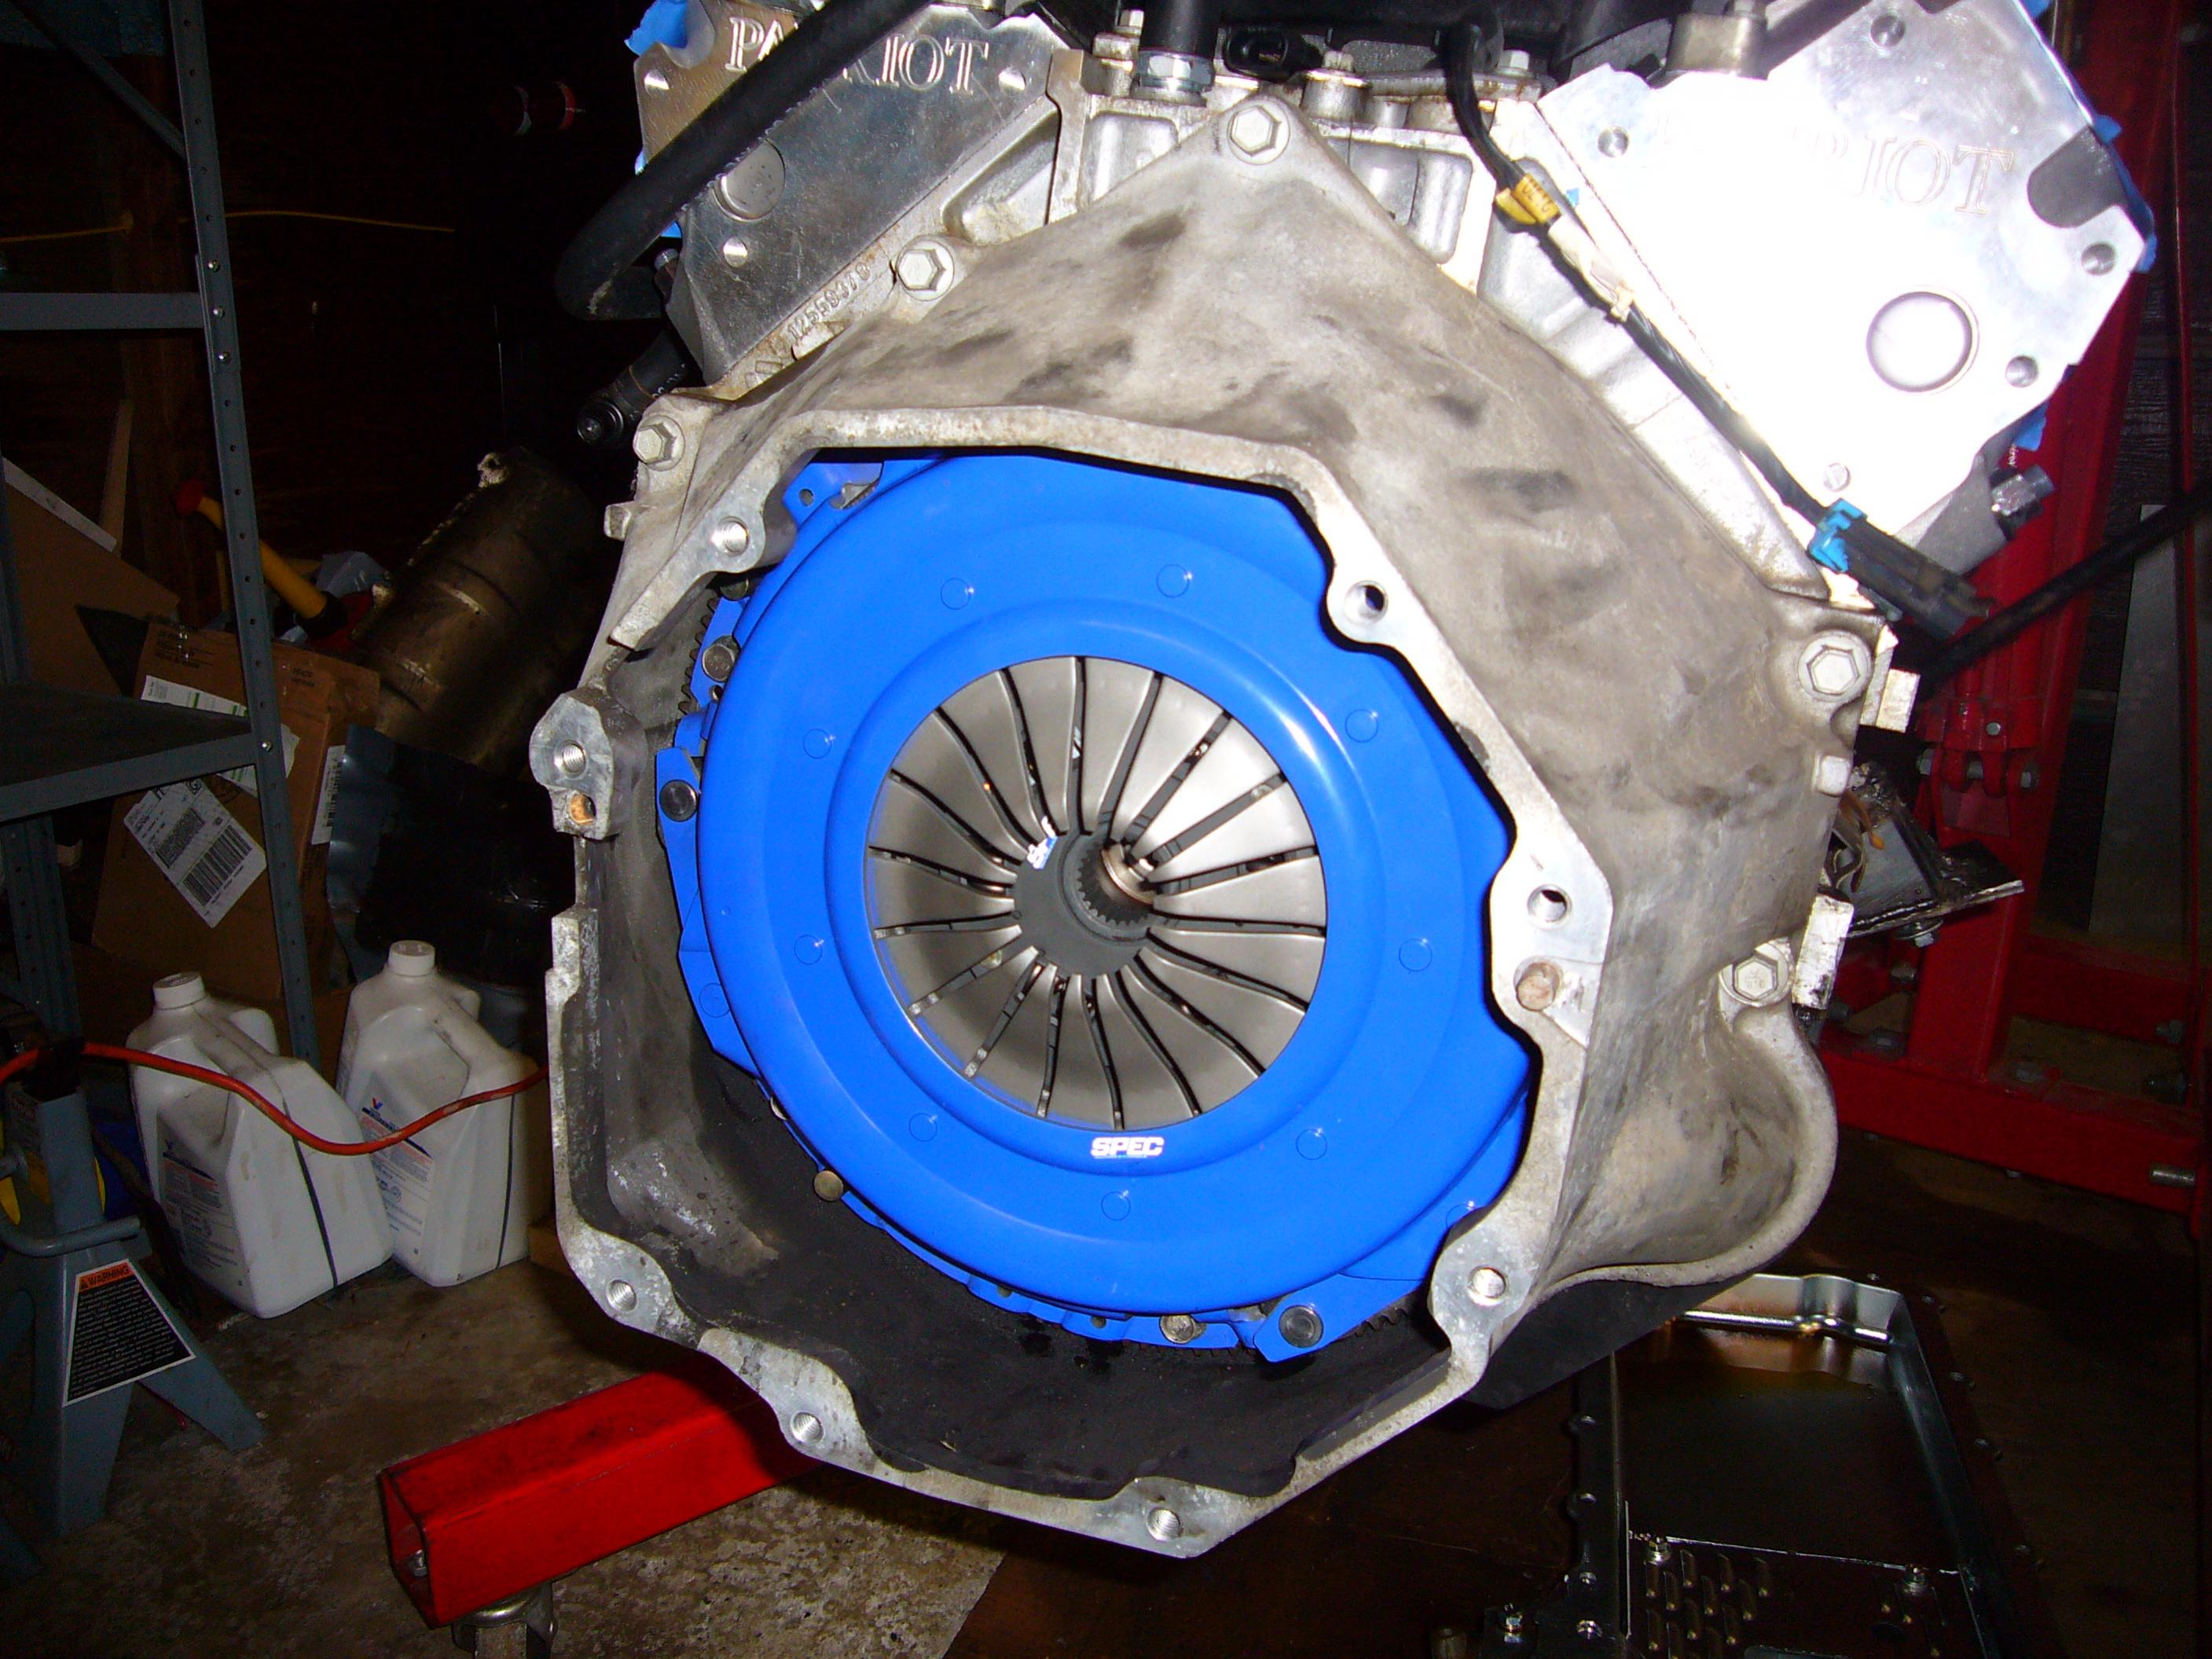
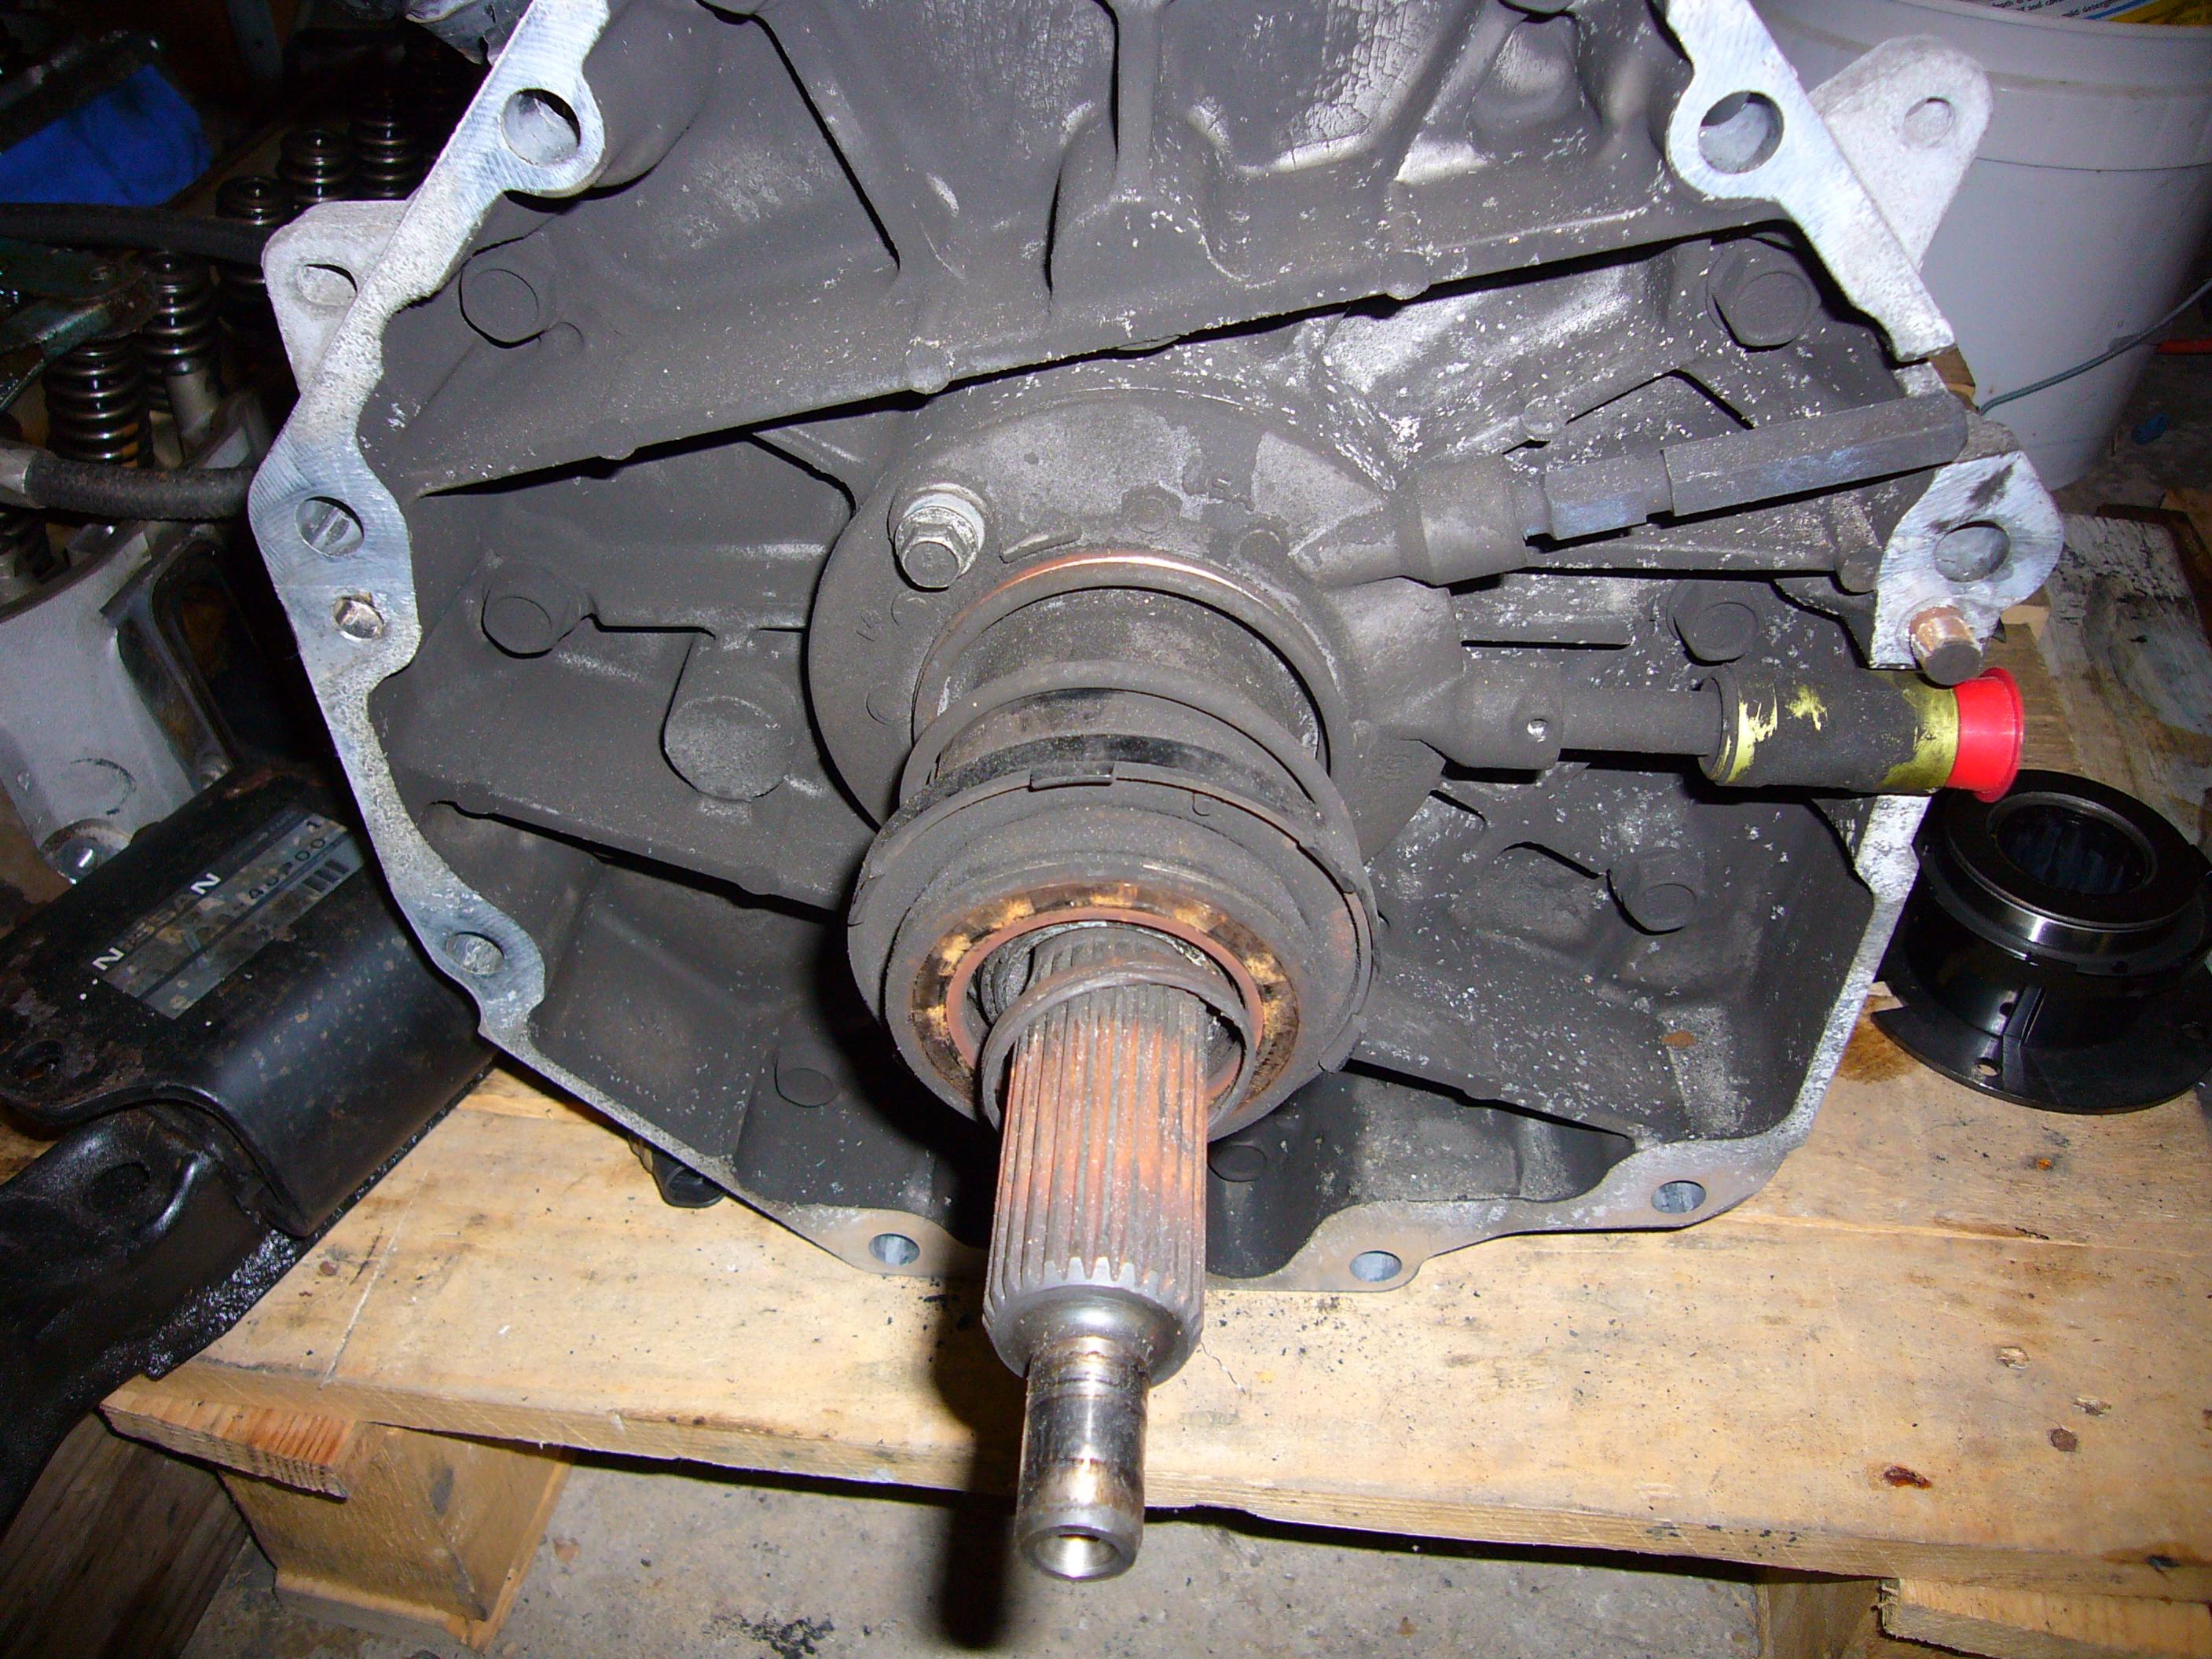
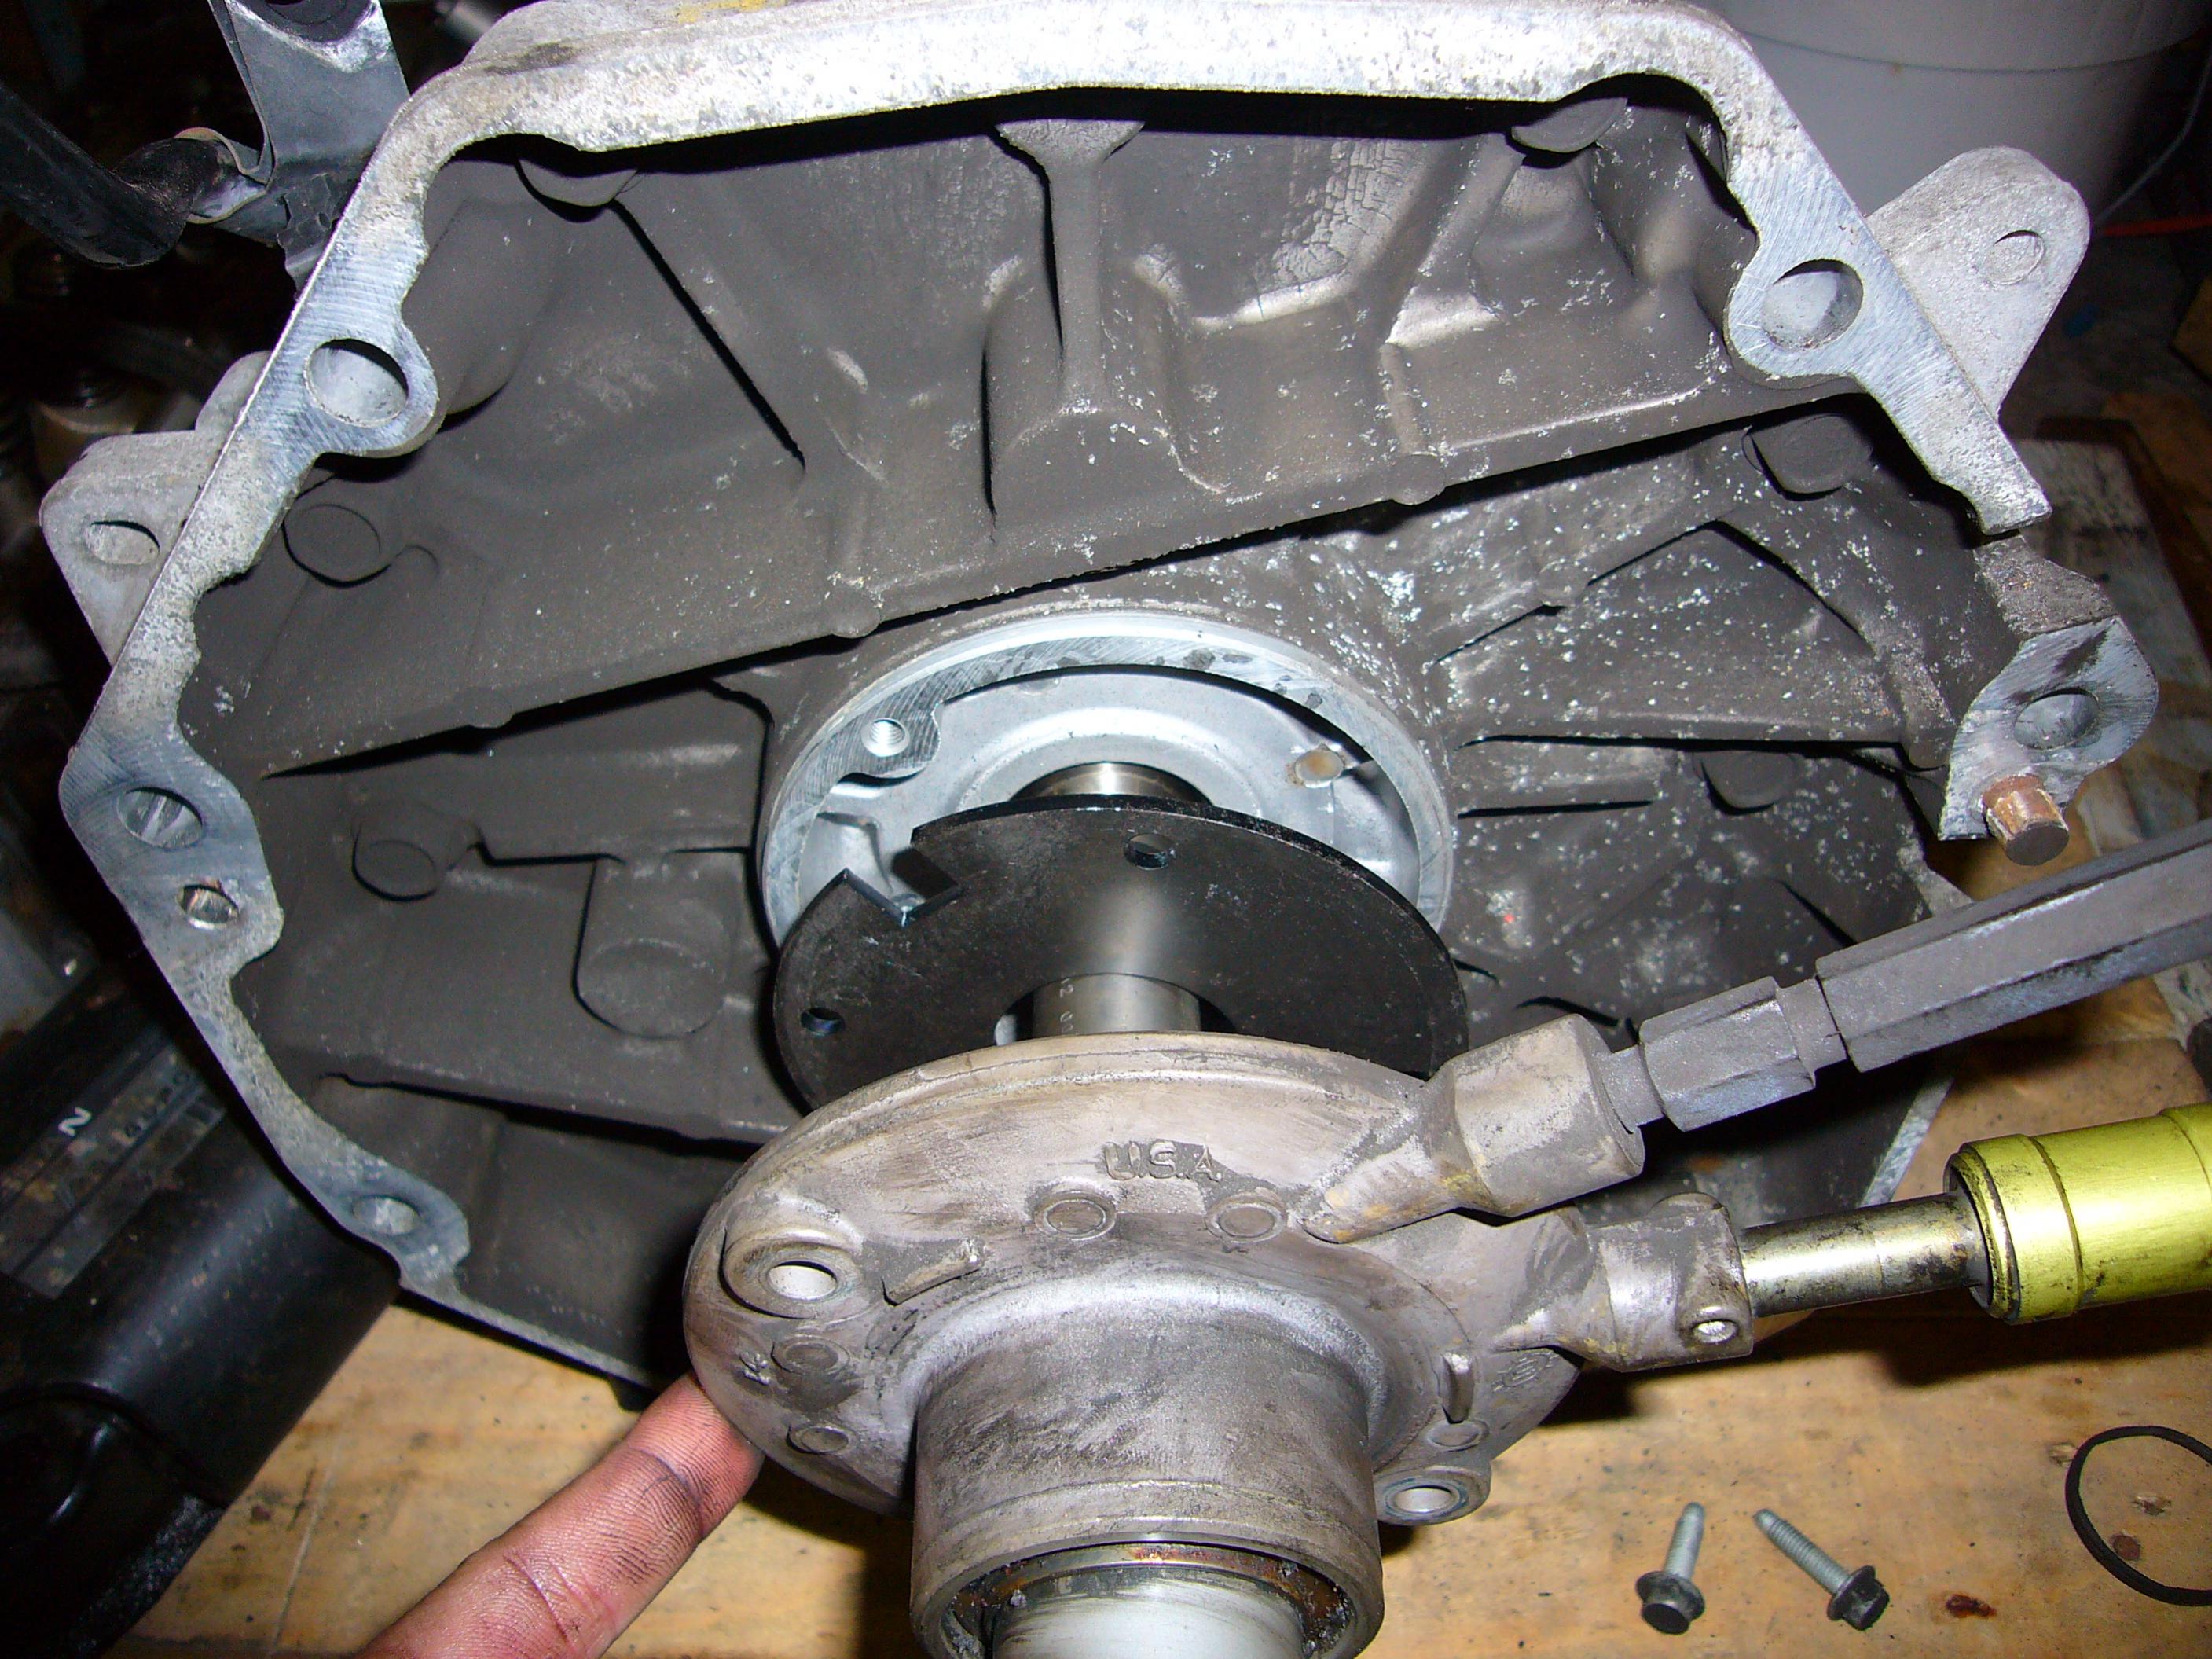
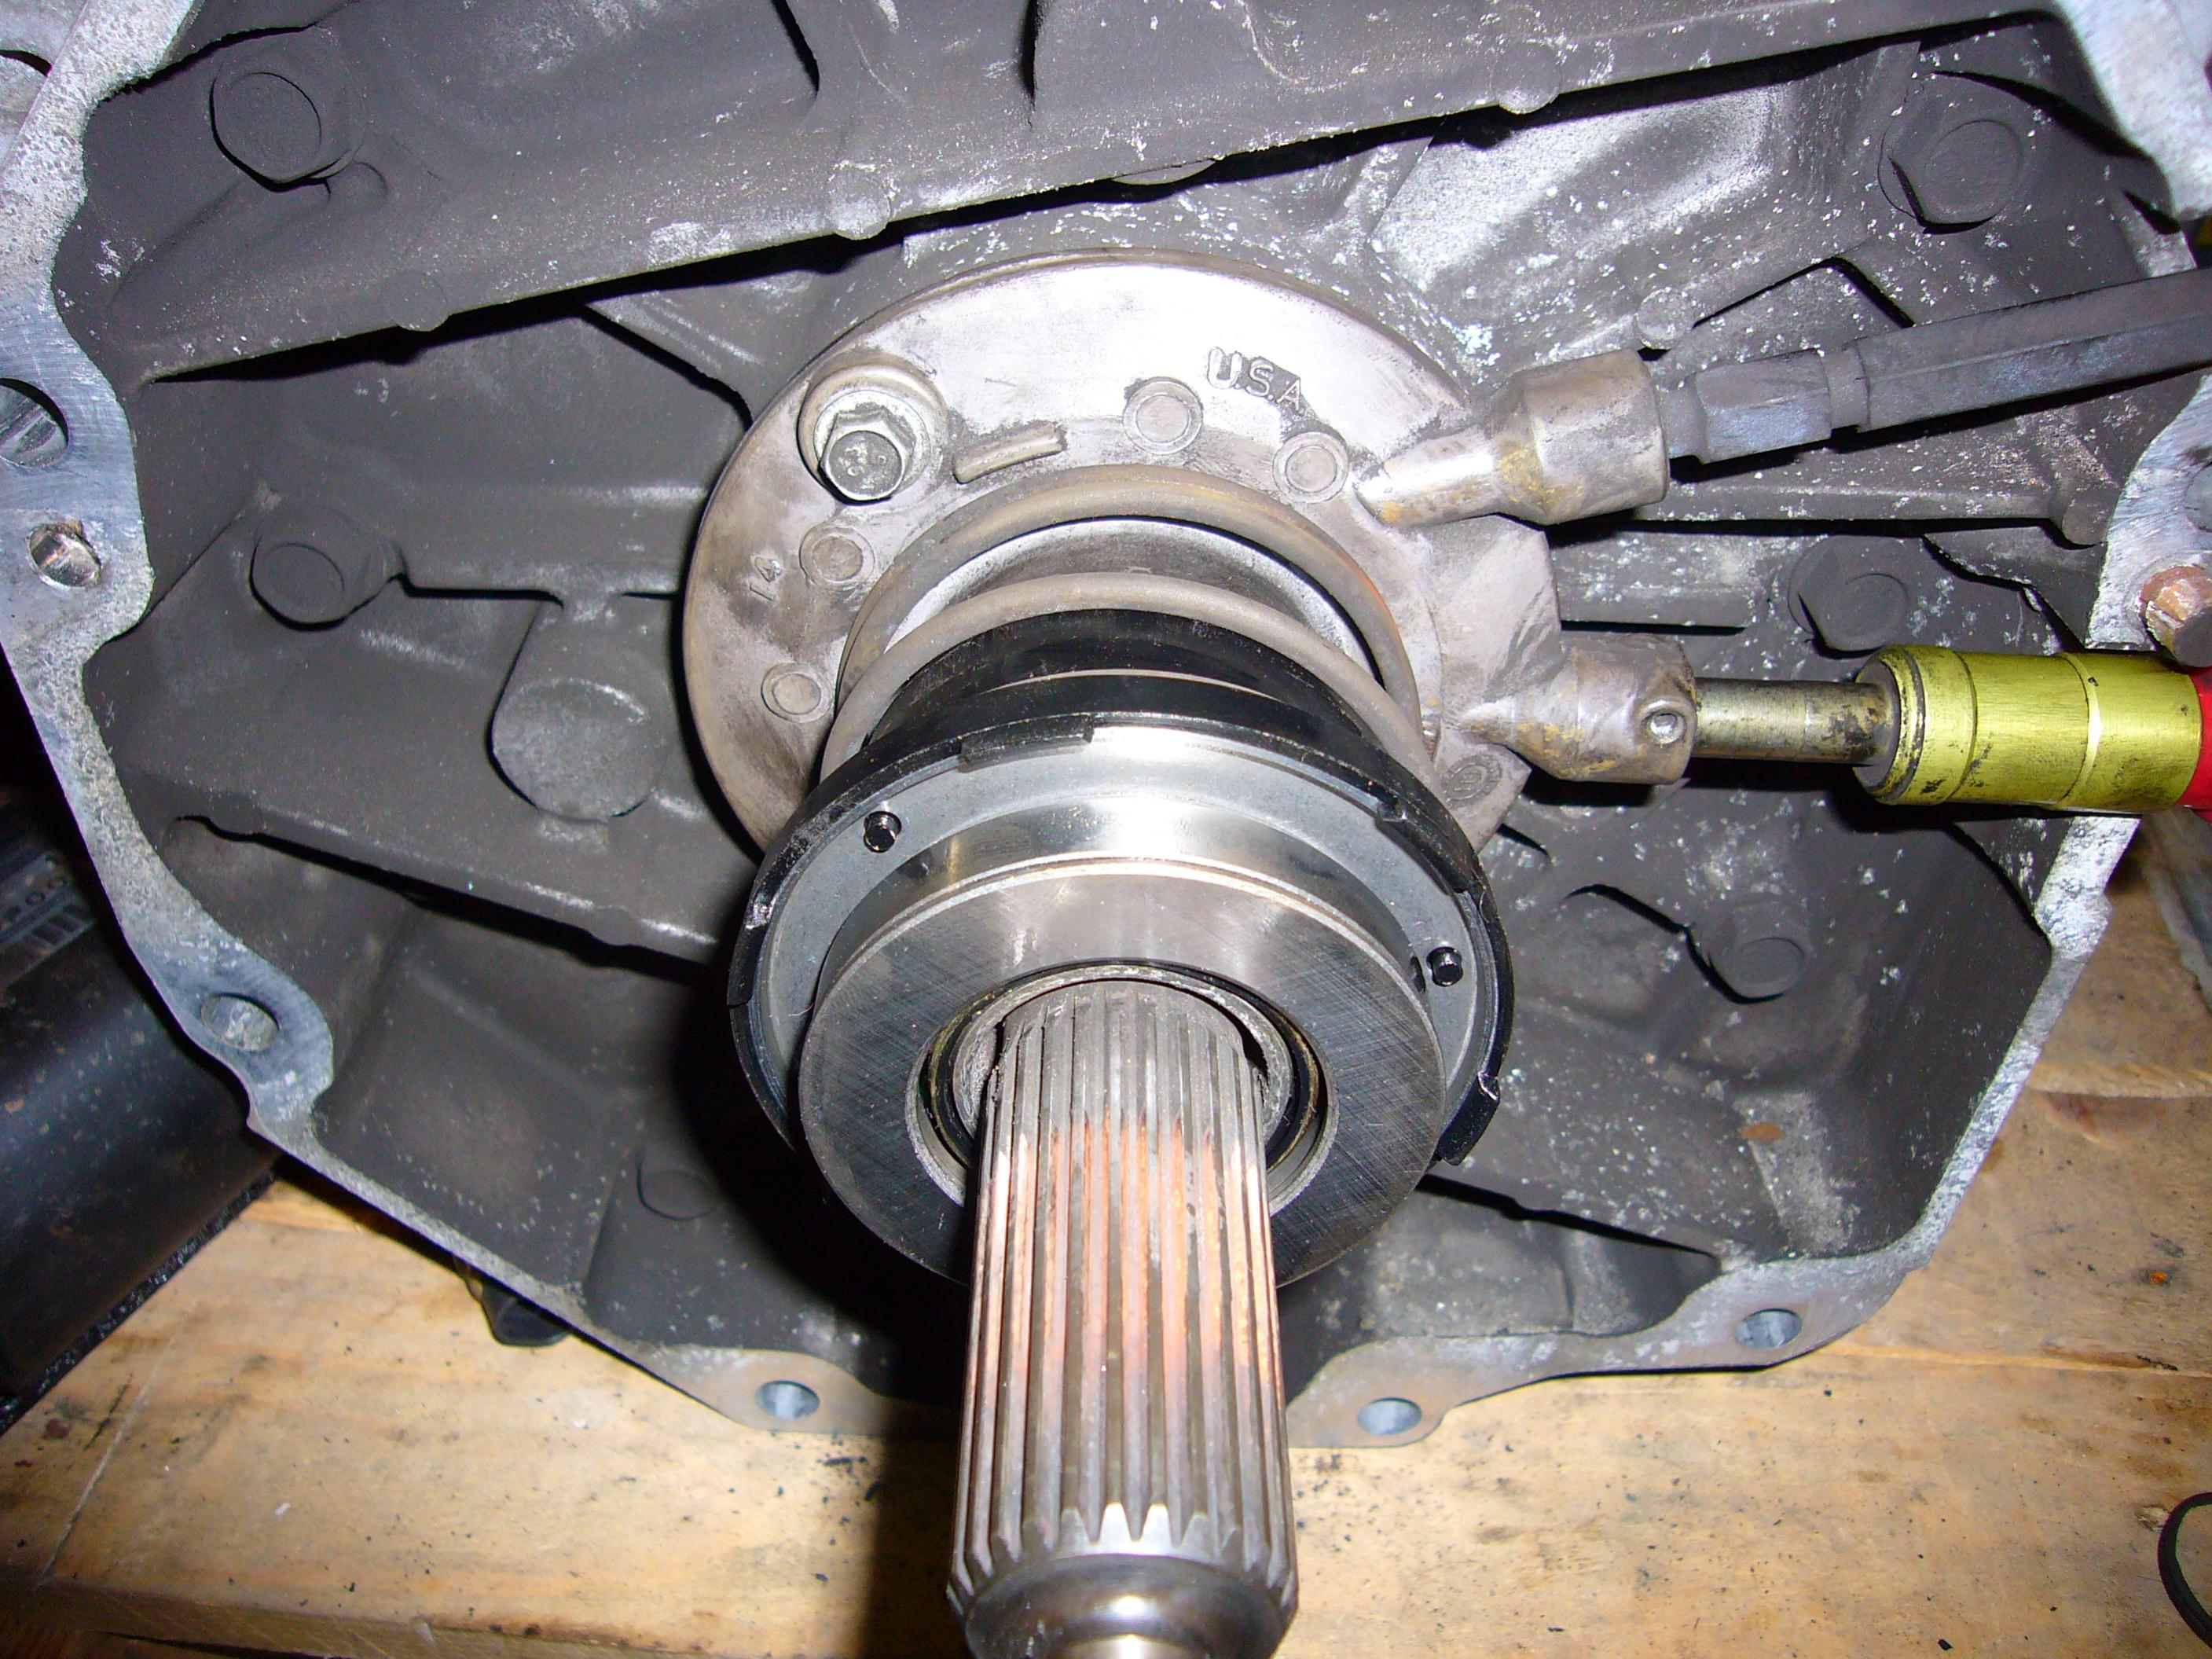
i got a SPEC stage 3+ clutch and had my flywheel resurfaced at a local shop. the setup comes with a slave spacer, a new throwout and a new pilot bearing. they claim the 3+ will handle almost 1000ftlbs of torque. SPEC stage 3+ clutch the directions specify that you must replace the pilot bearing (shown in pic). the best thing to do is go get a pilot bearing puller. i made the mistake of trying the hydraulic removal method by packing the area behind it with grease and hammering a dowel into it. DO NOT DO THIS!!! there is nothing but a thin cap behind the pilot bearing called an oil galley plug. mine got pushed right into the crankcase and it was a mess. after the pilot is out tap the new one in with a deep socket. then the 6 flywheel bolts go in. i put a temporary bolt through one of the holes around the rim of the flywheel that was long enough to touch the block. this was so it didnt turn when i torqued the bolts down. next is the pressure plate, make sure the side that says 'flywheel' is facing the flywheel. followed by the clutch, line that up and torque it down. make sure to take out that temporary bolt if you used it. since i separated the bellhousing when i took it off i just put that back on first. the kit i got came with a slave cylinder spacer that goes behind the slave. theres only 2 bolts in there but you have to take the throwout off before the slave will come off. if you turn the throwout while pulling it that helps. put the spacer behind the slave and bolt it in, put the throwout back on and dont forget the spring.
-
Z32 LS1 project thread... questions inside
chris51881 replied to fogged306's topic in Z32 Series - 300ZX
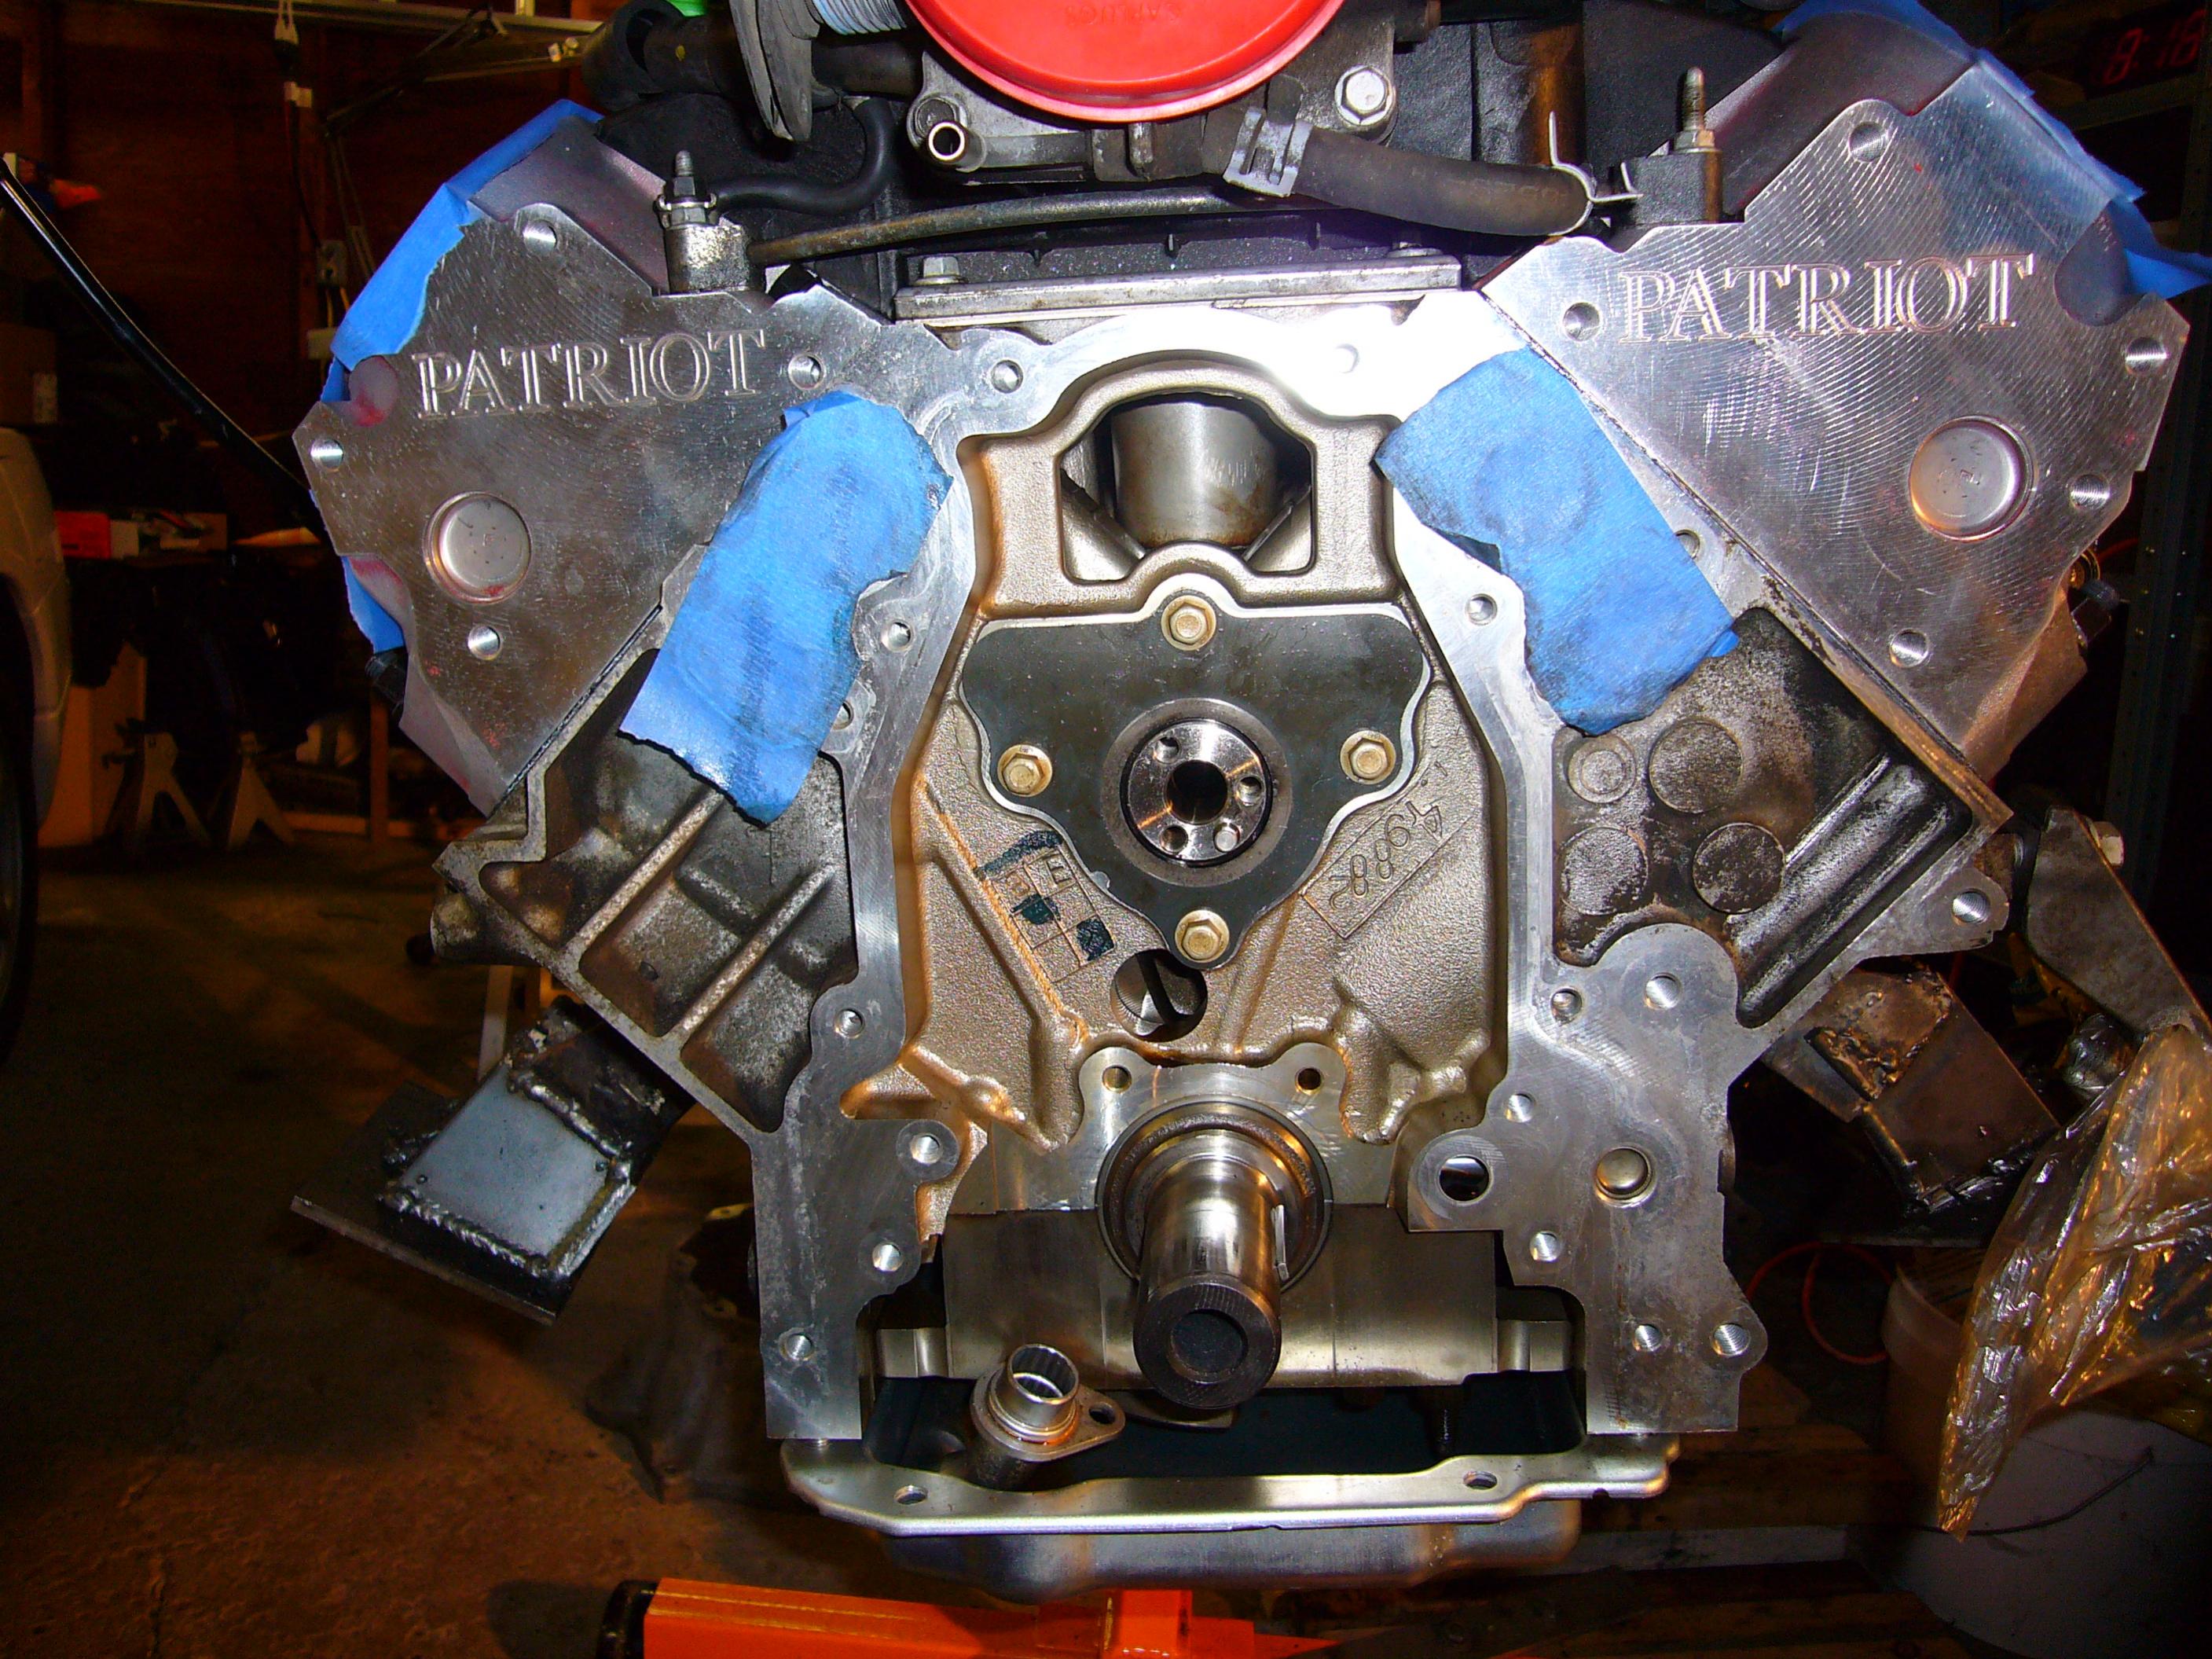
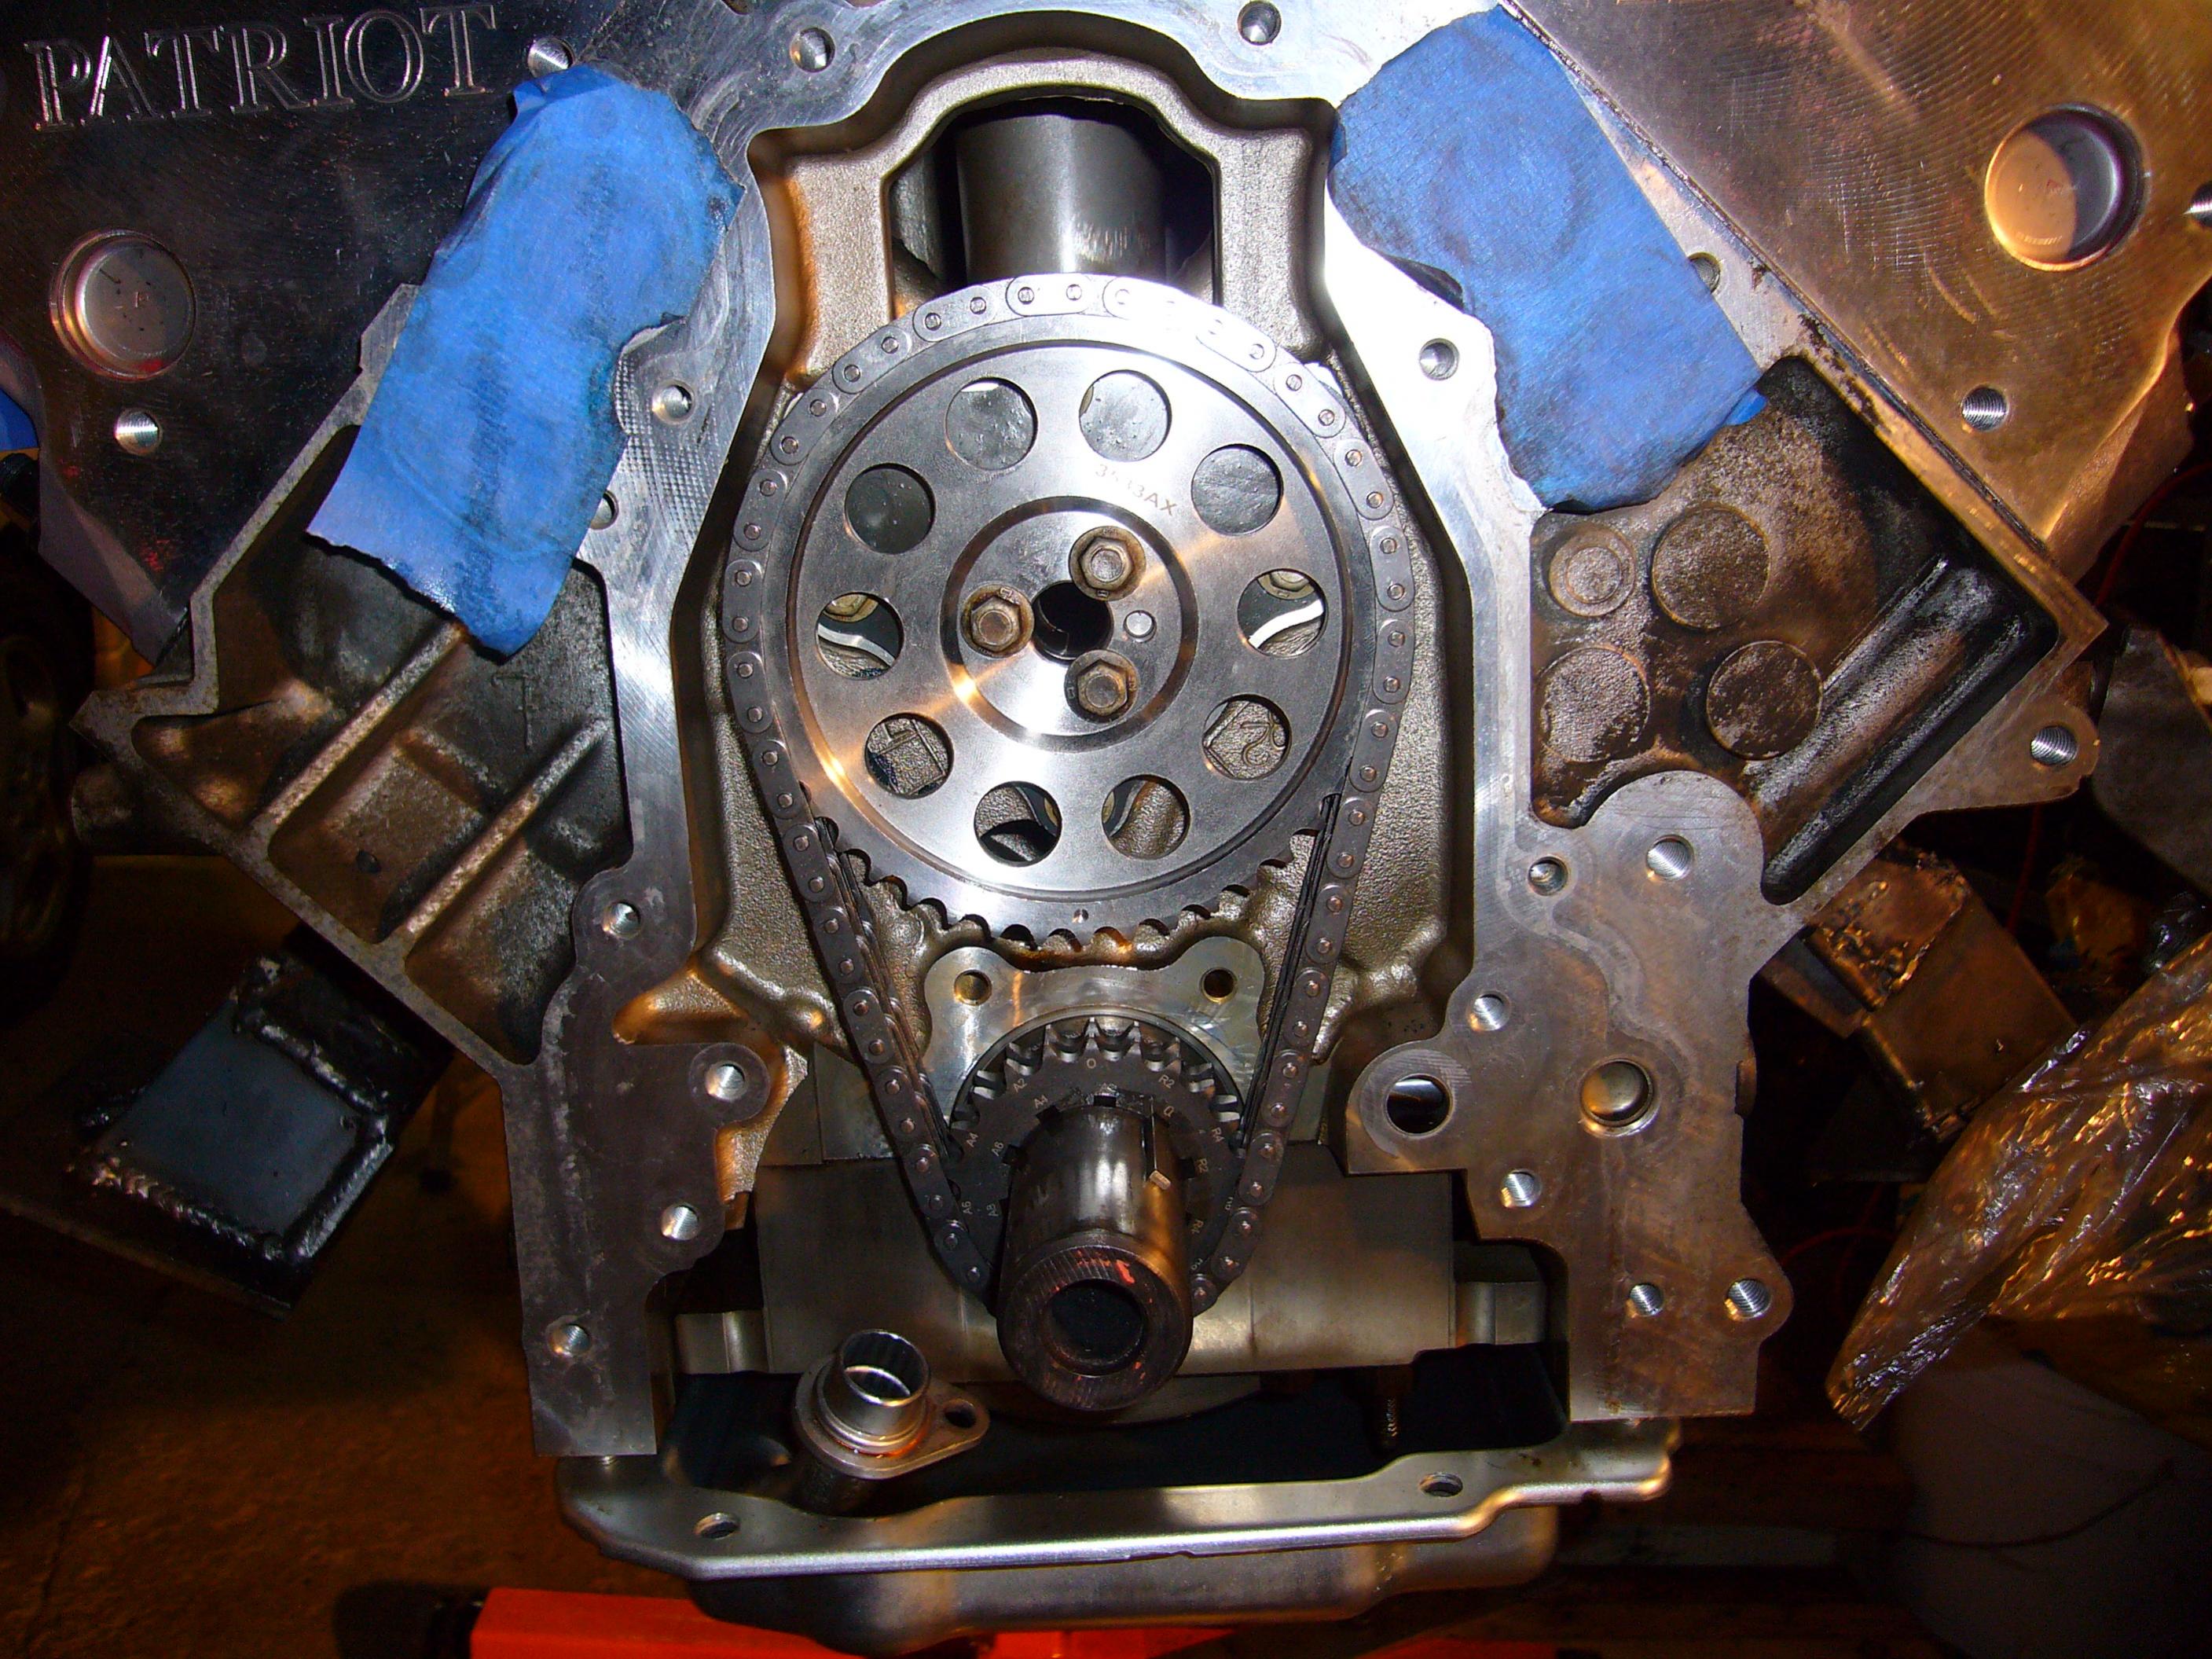
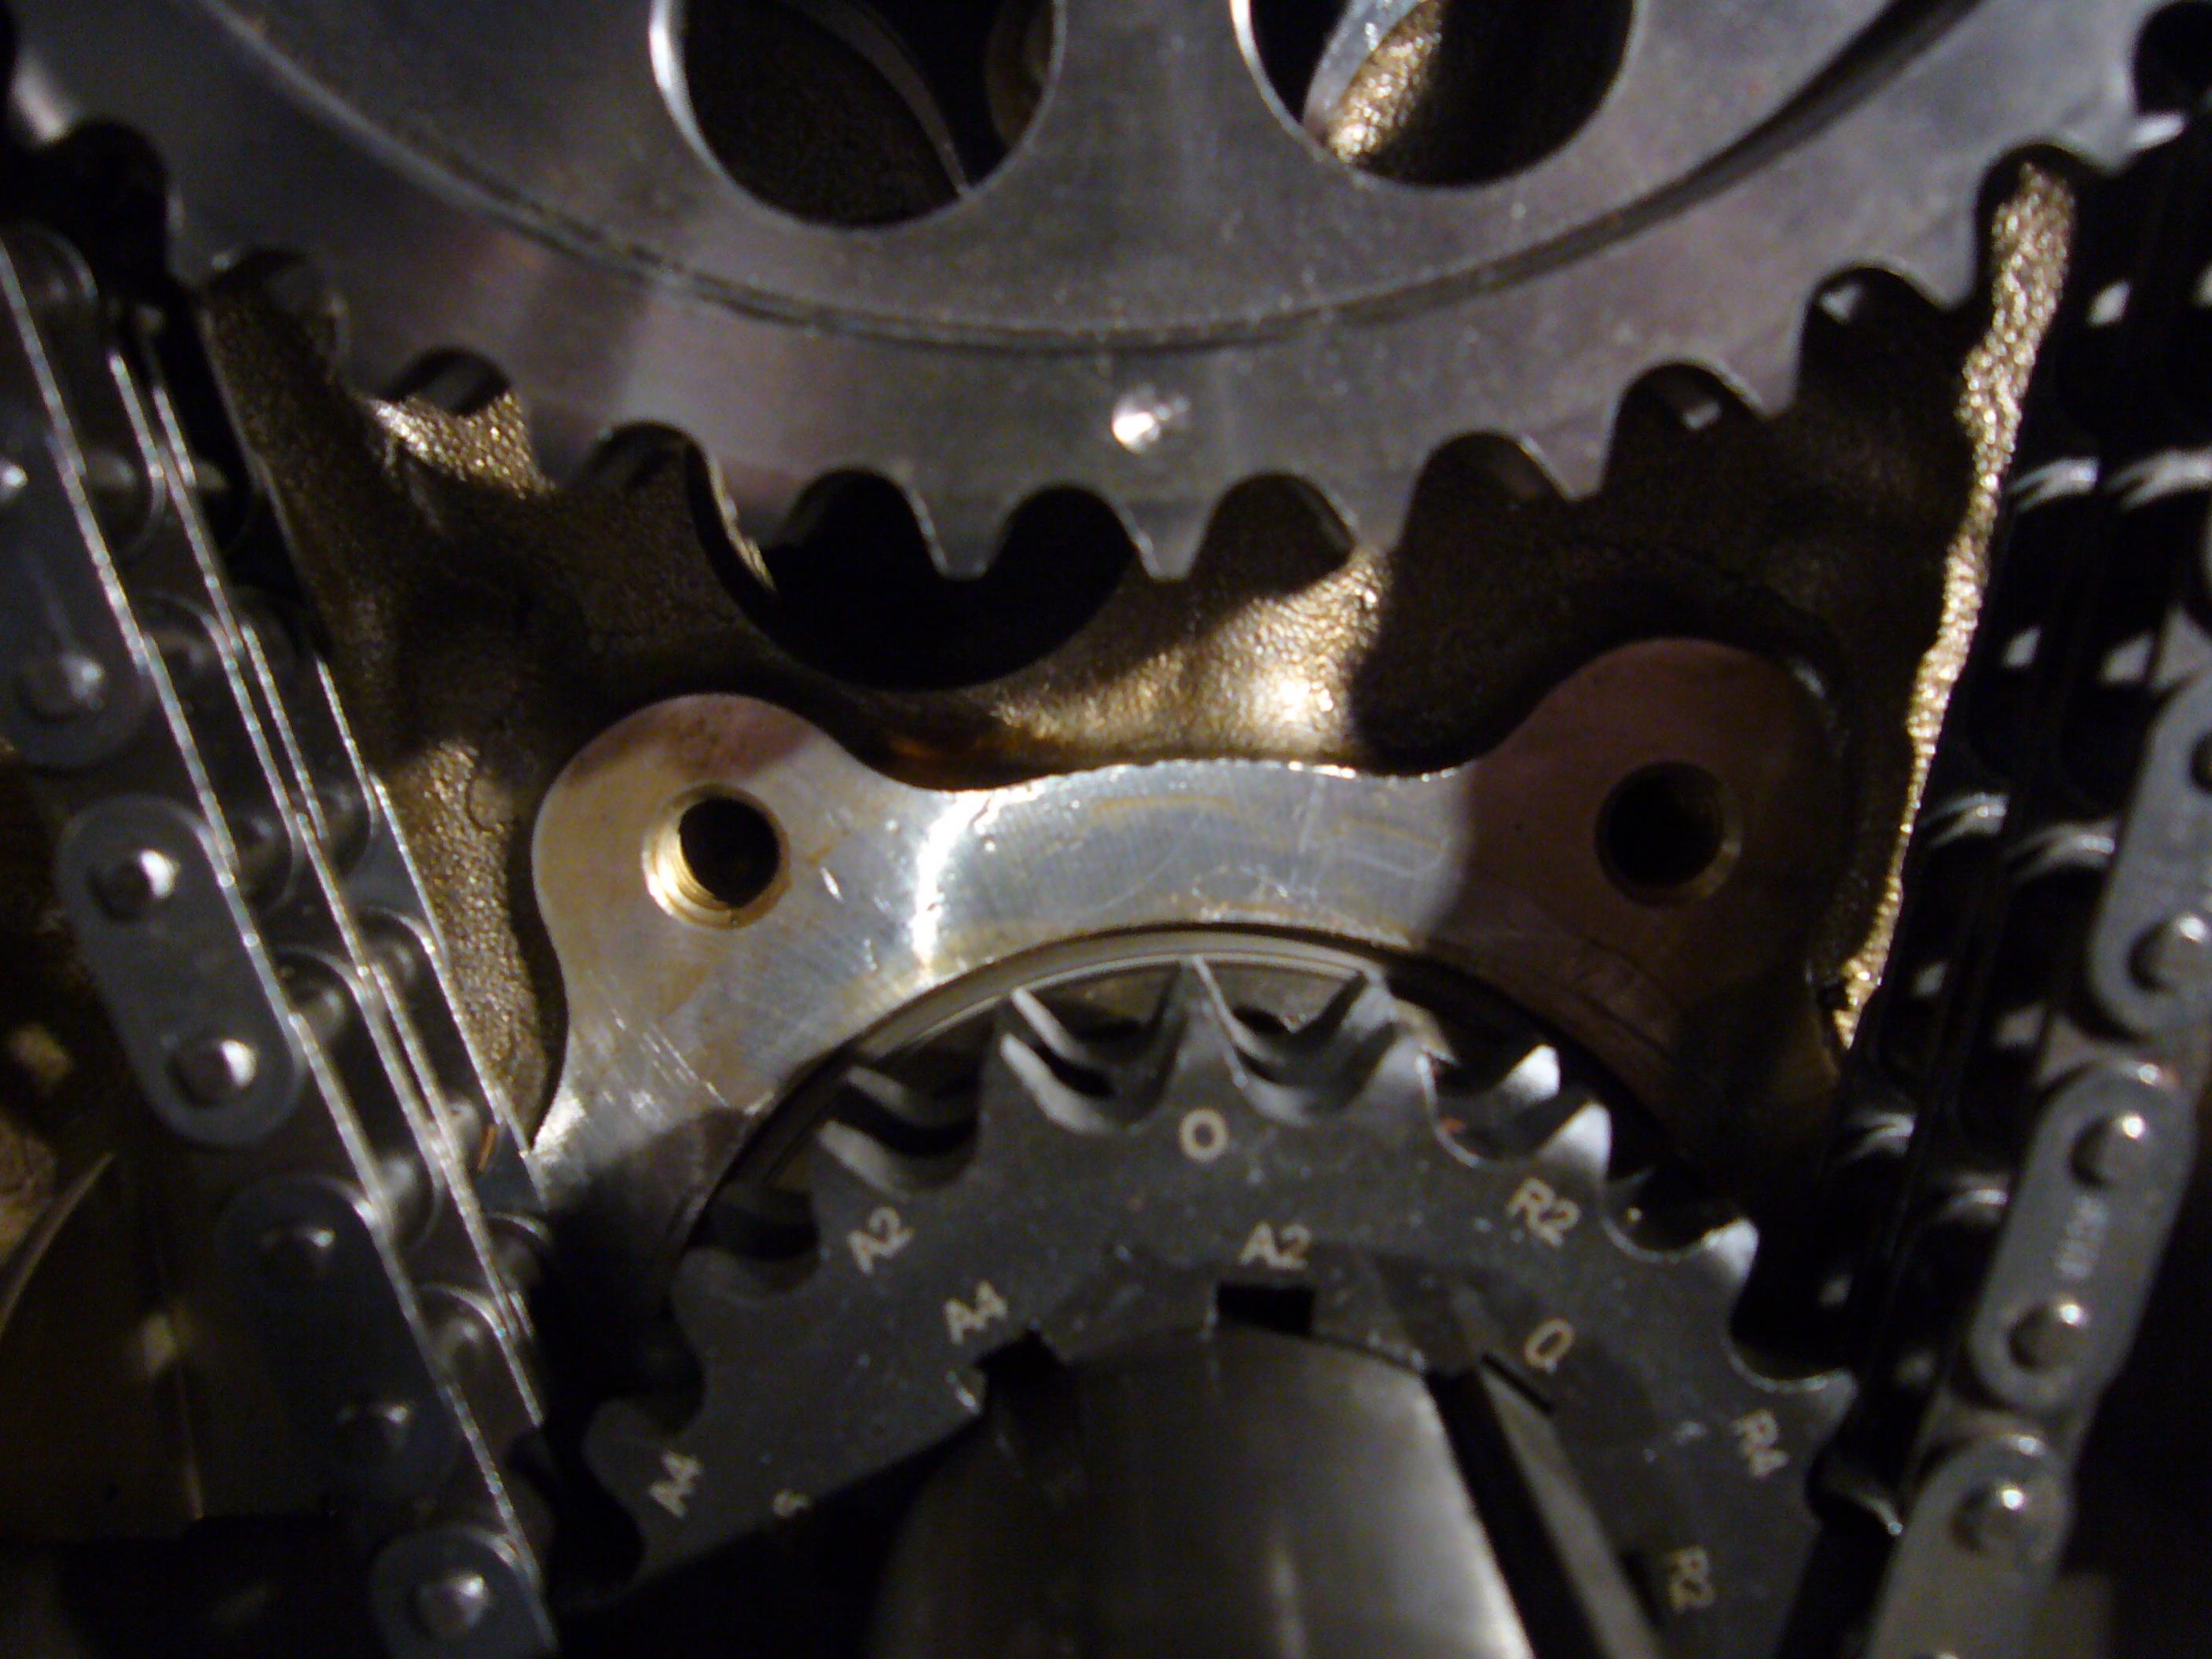
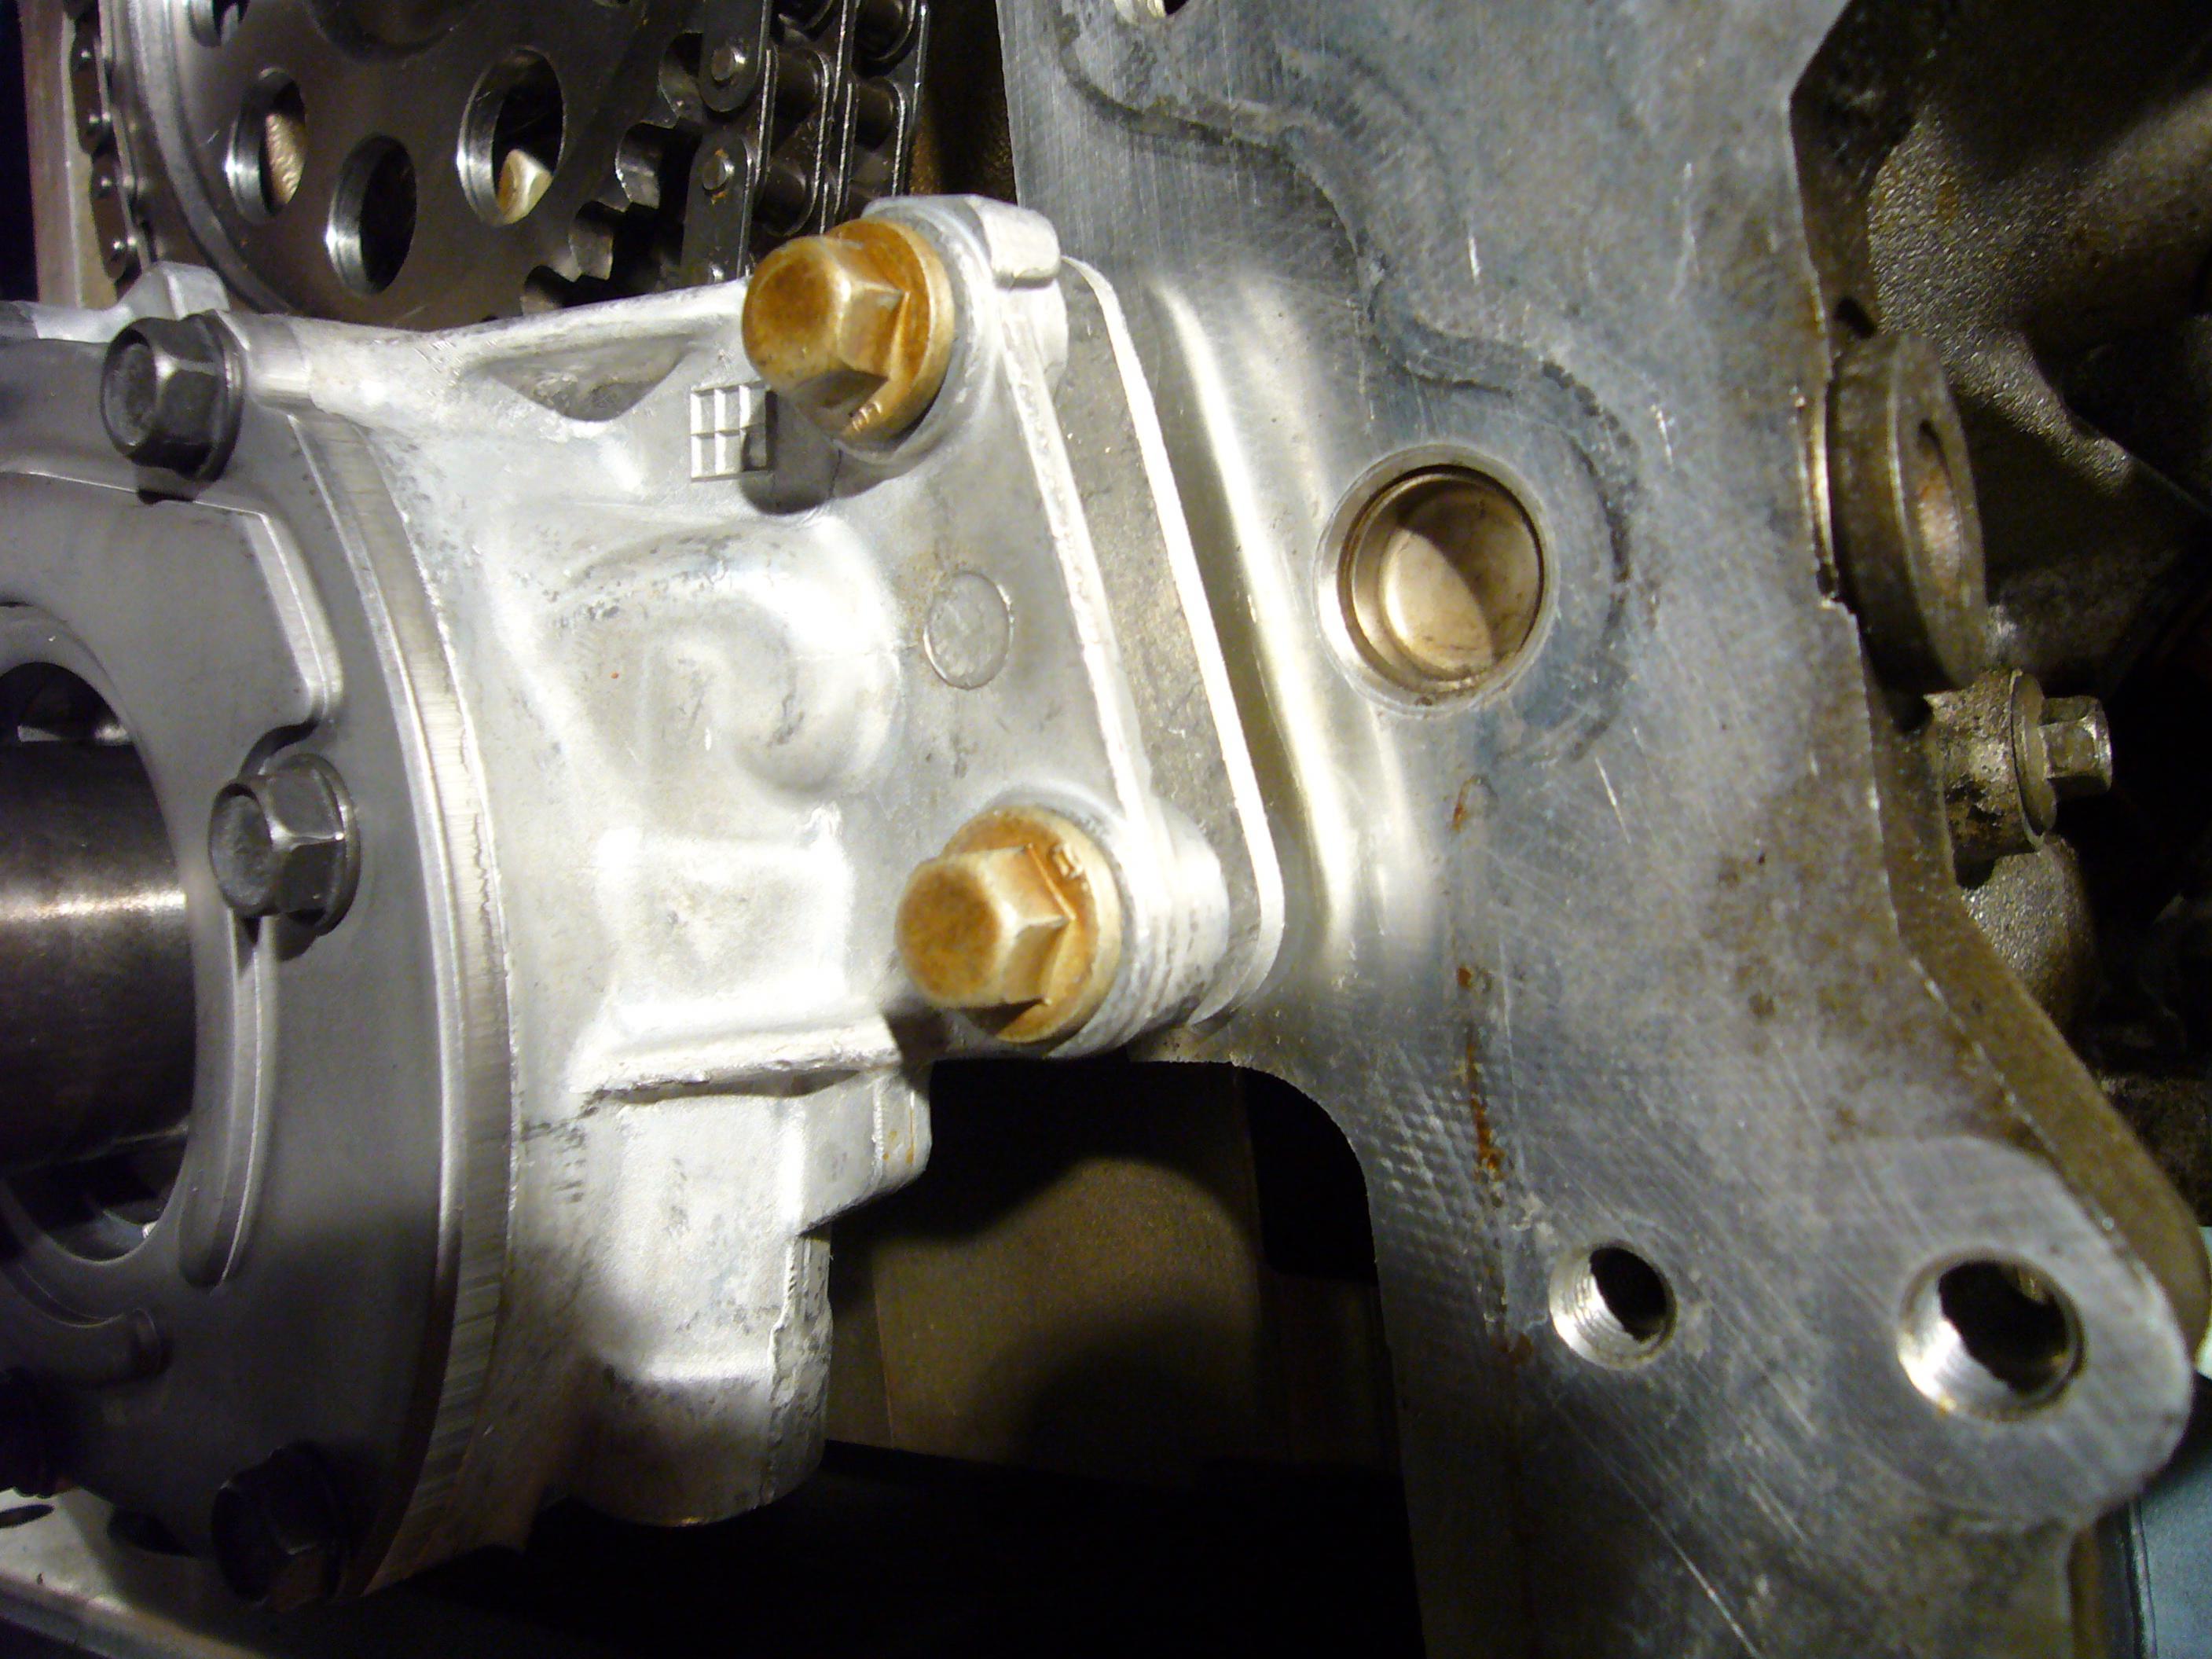
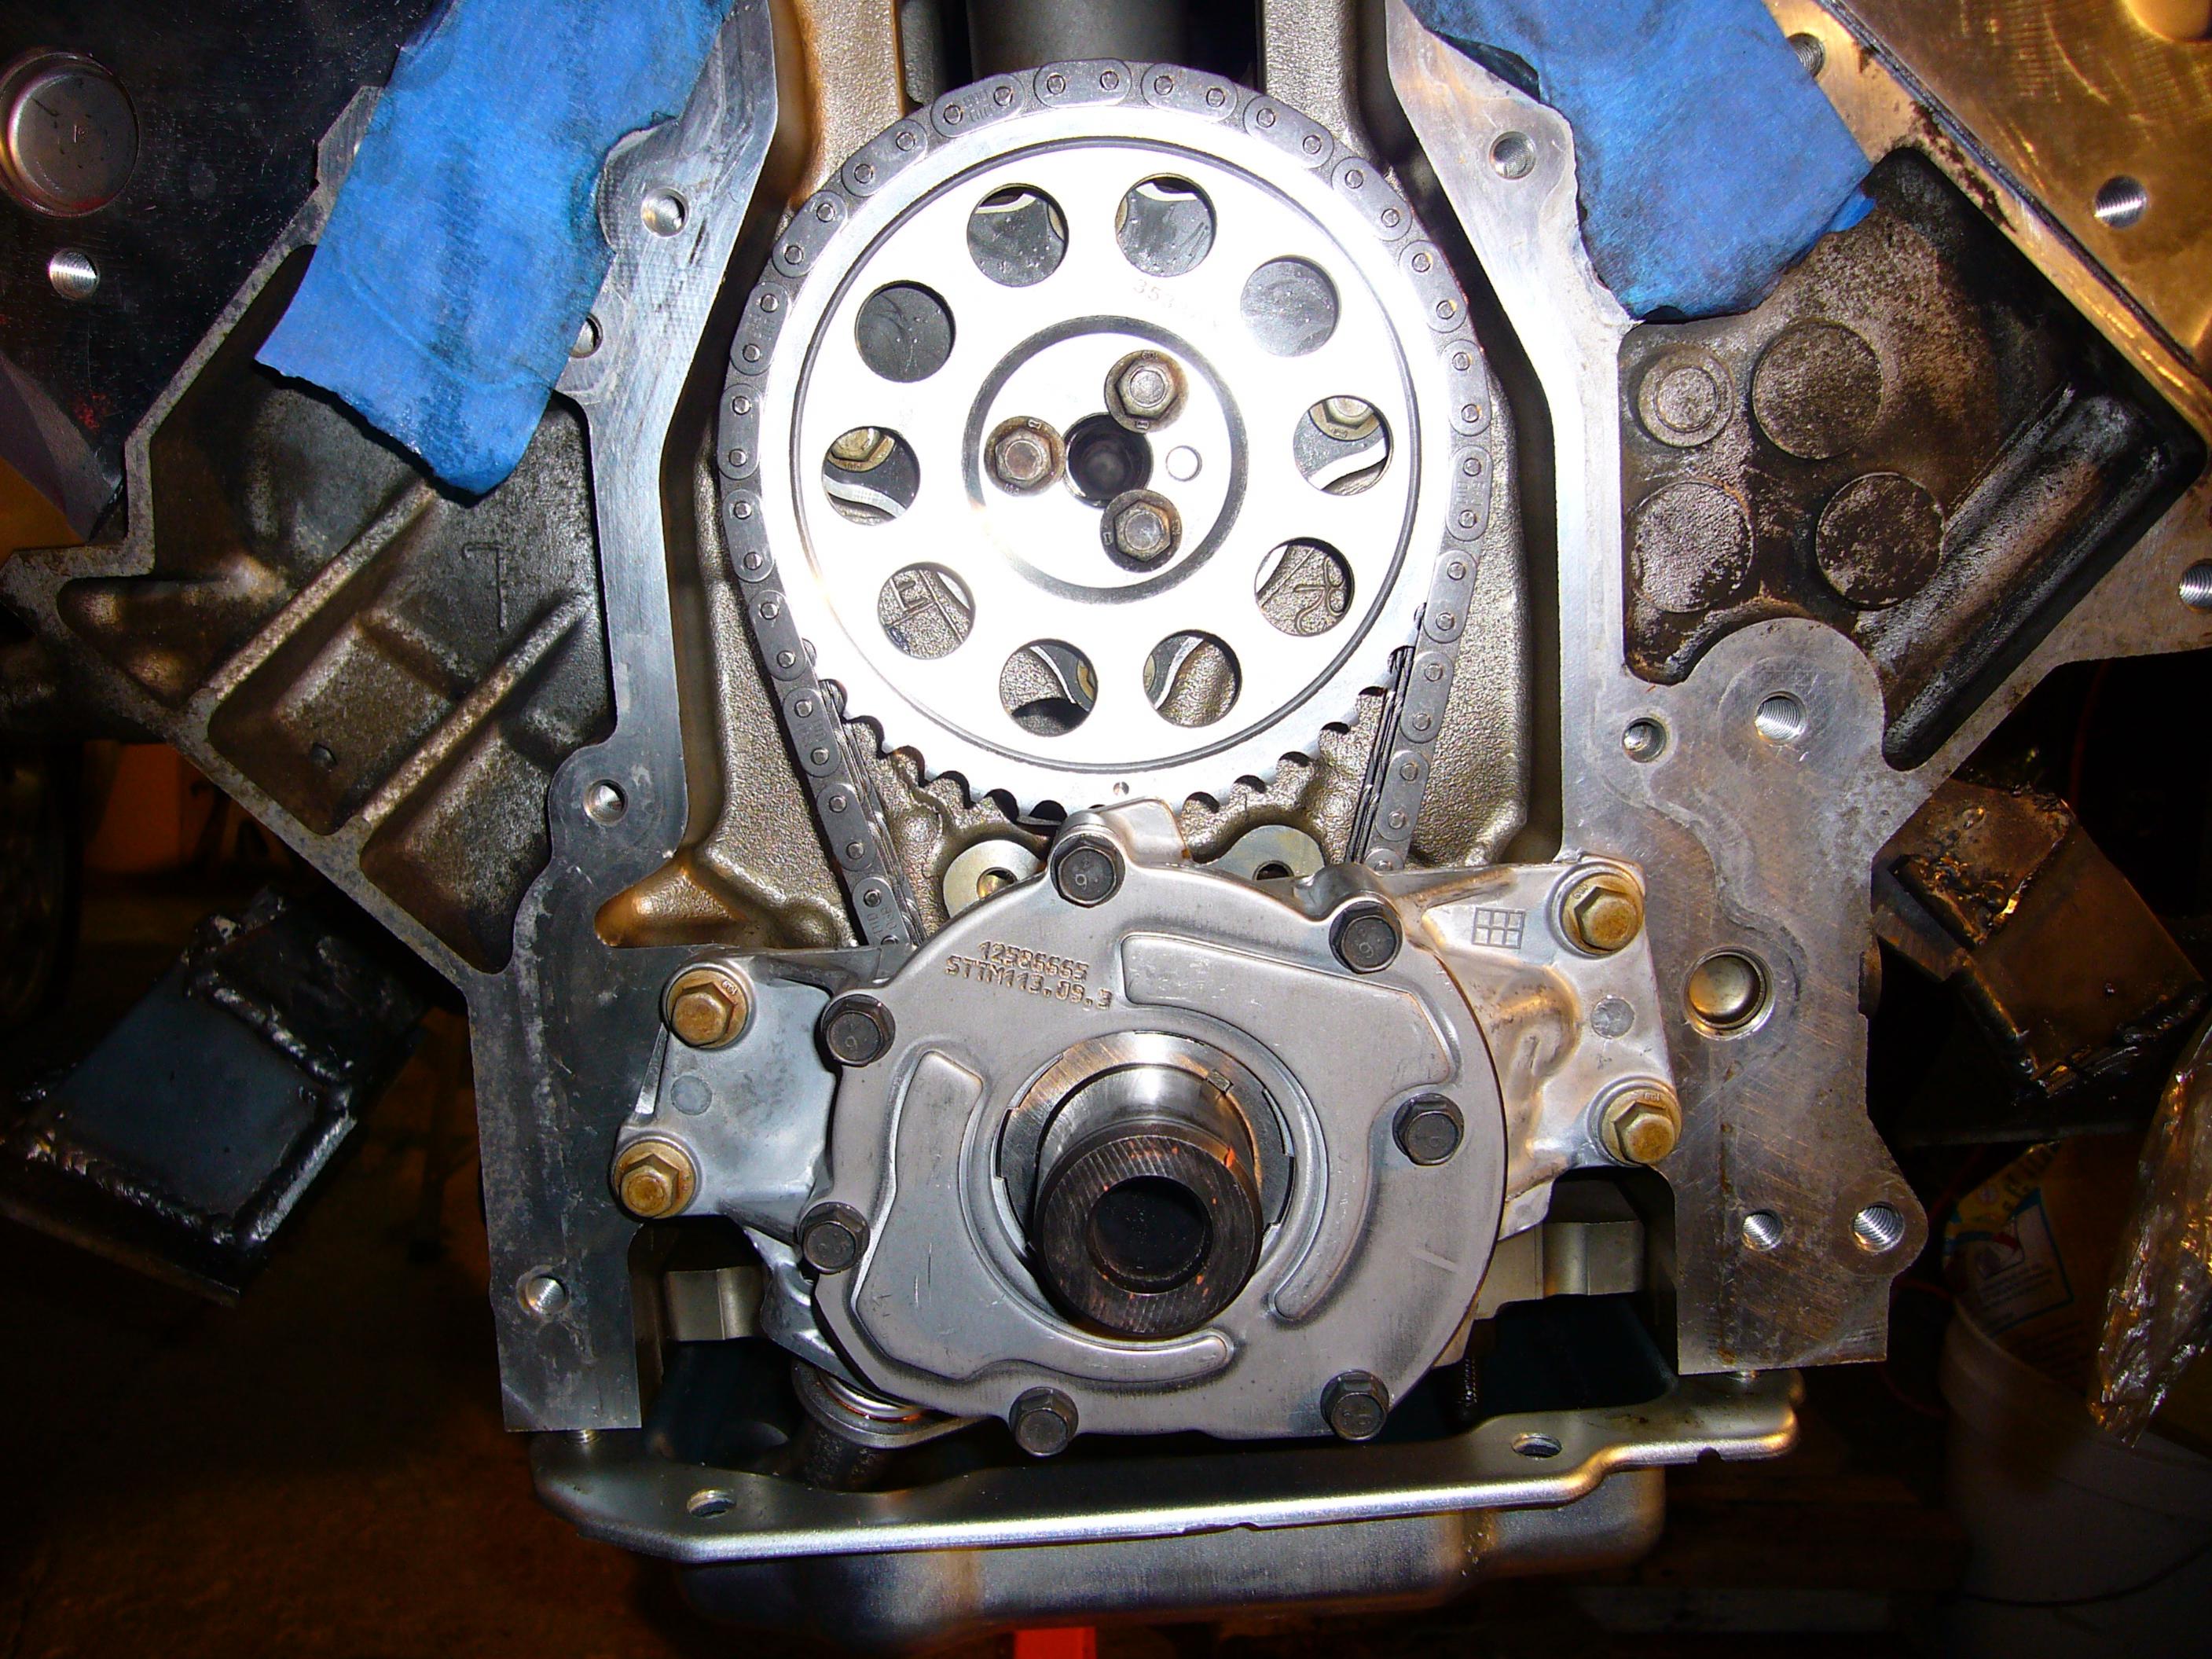
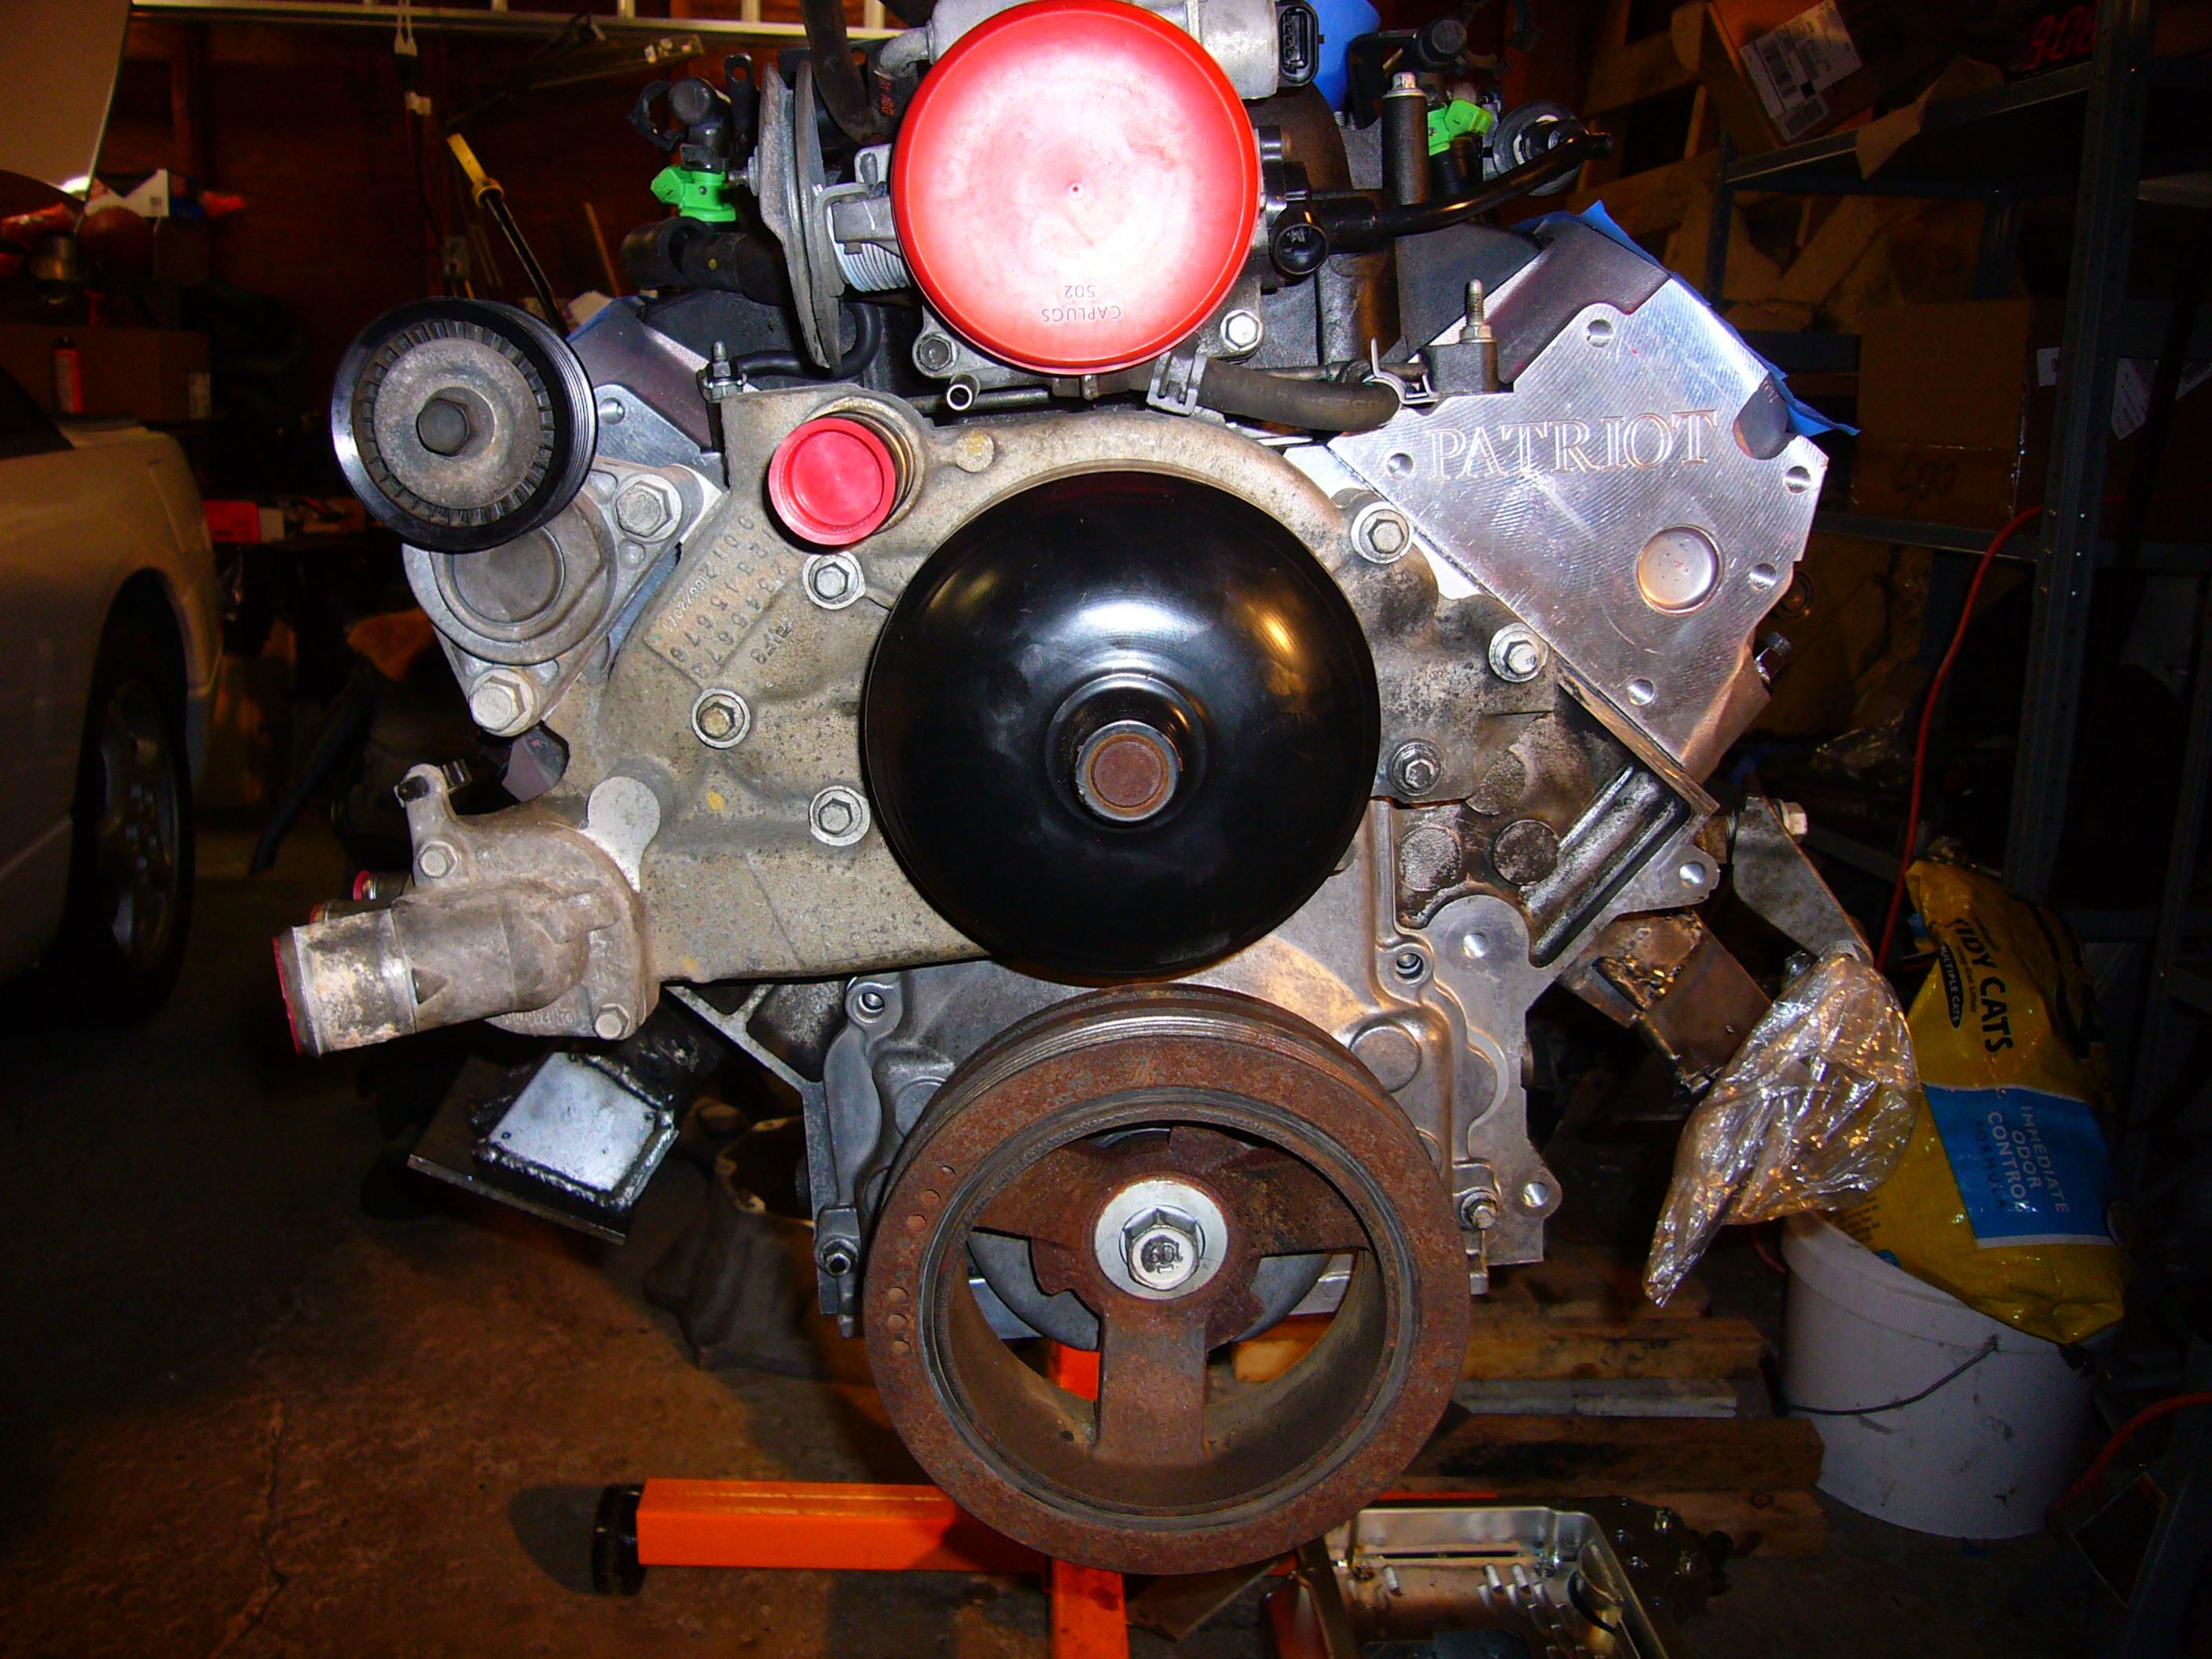
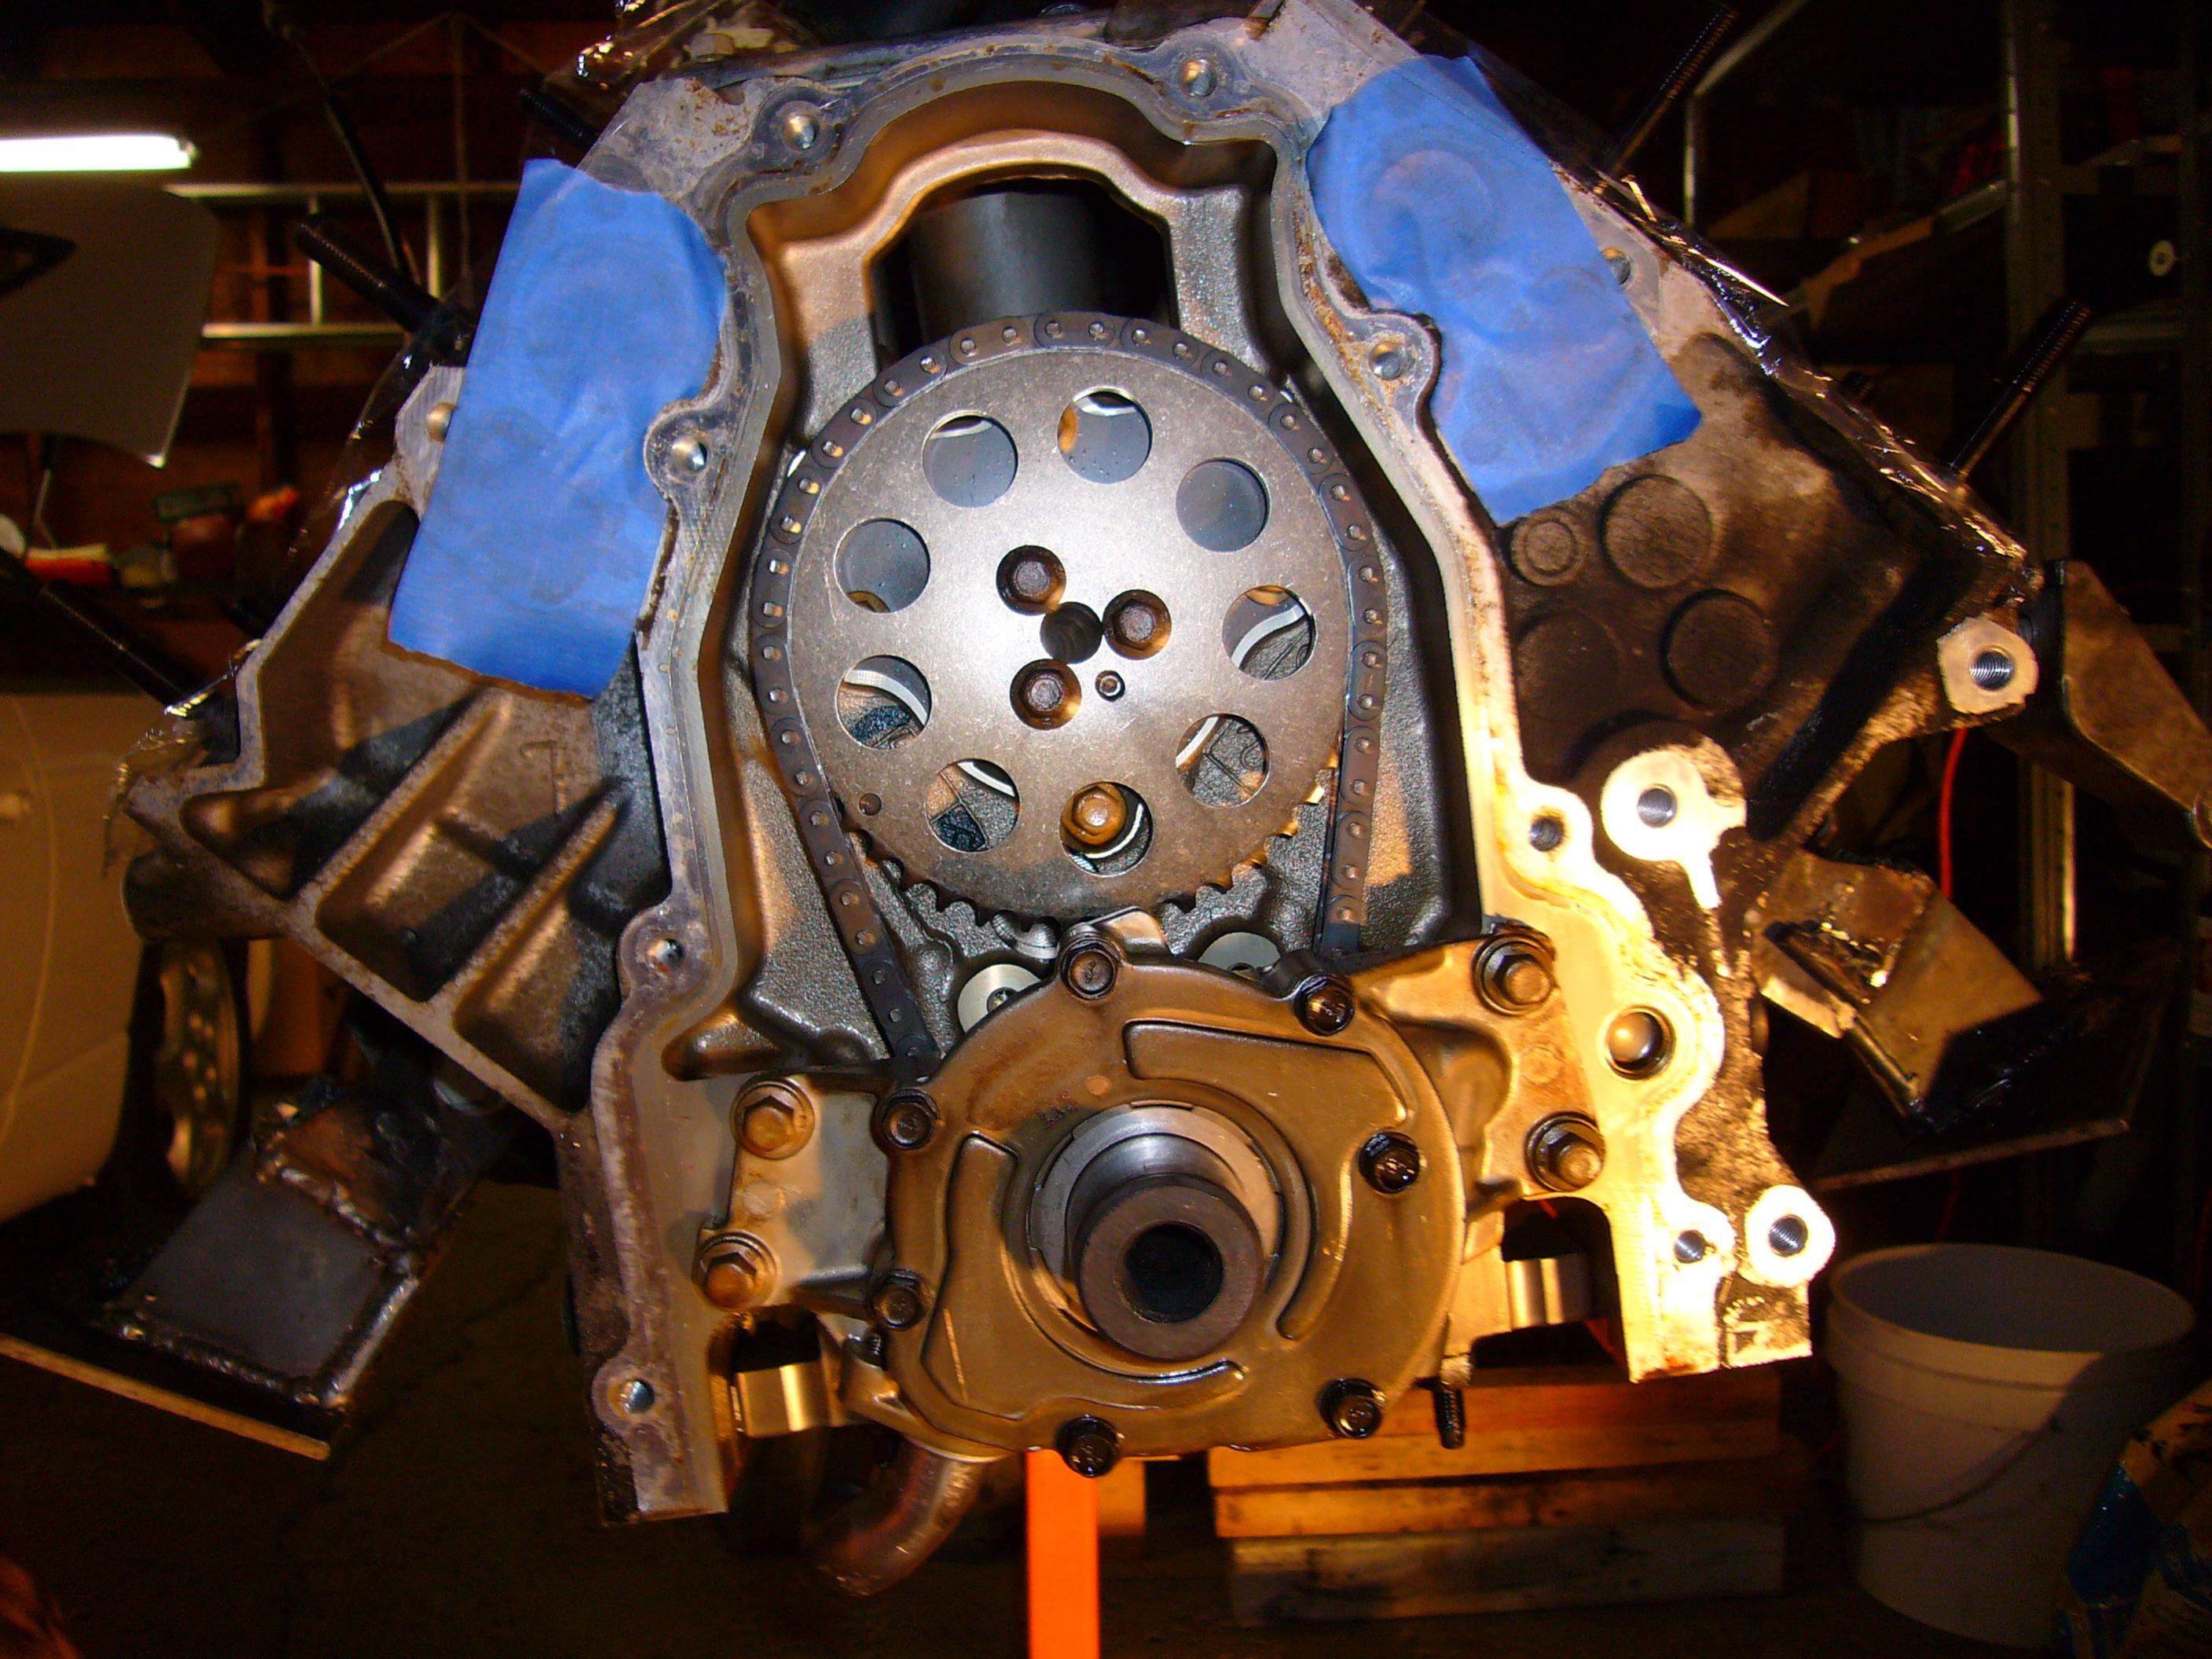
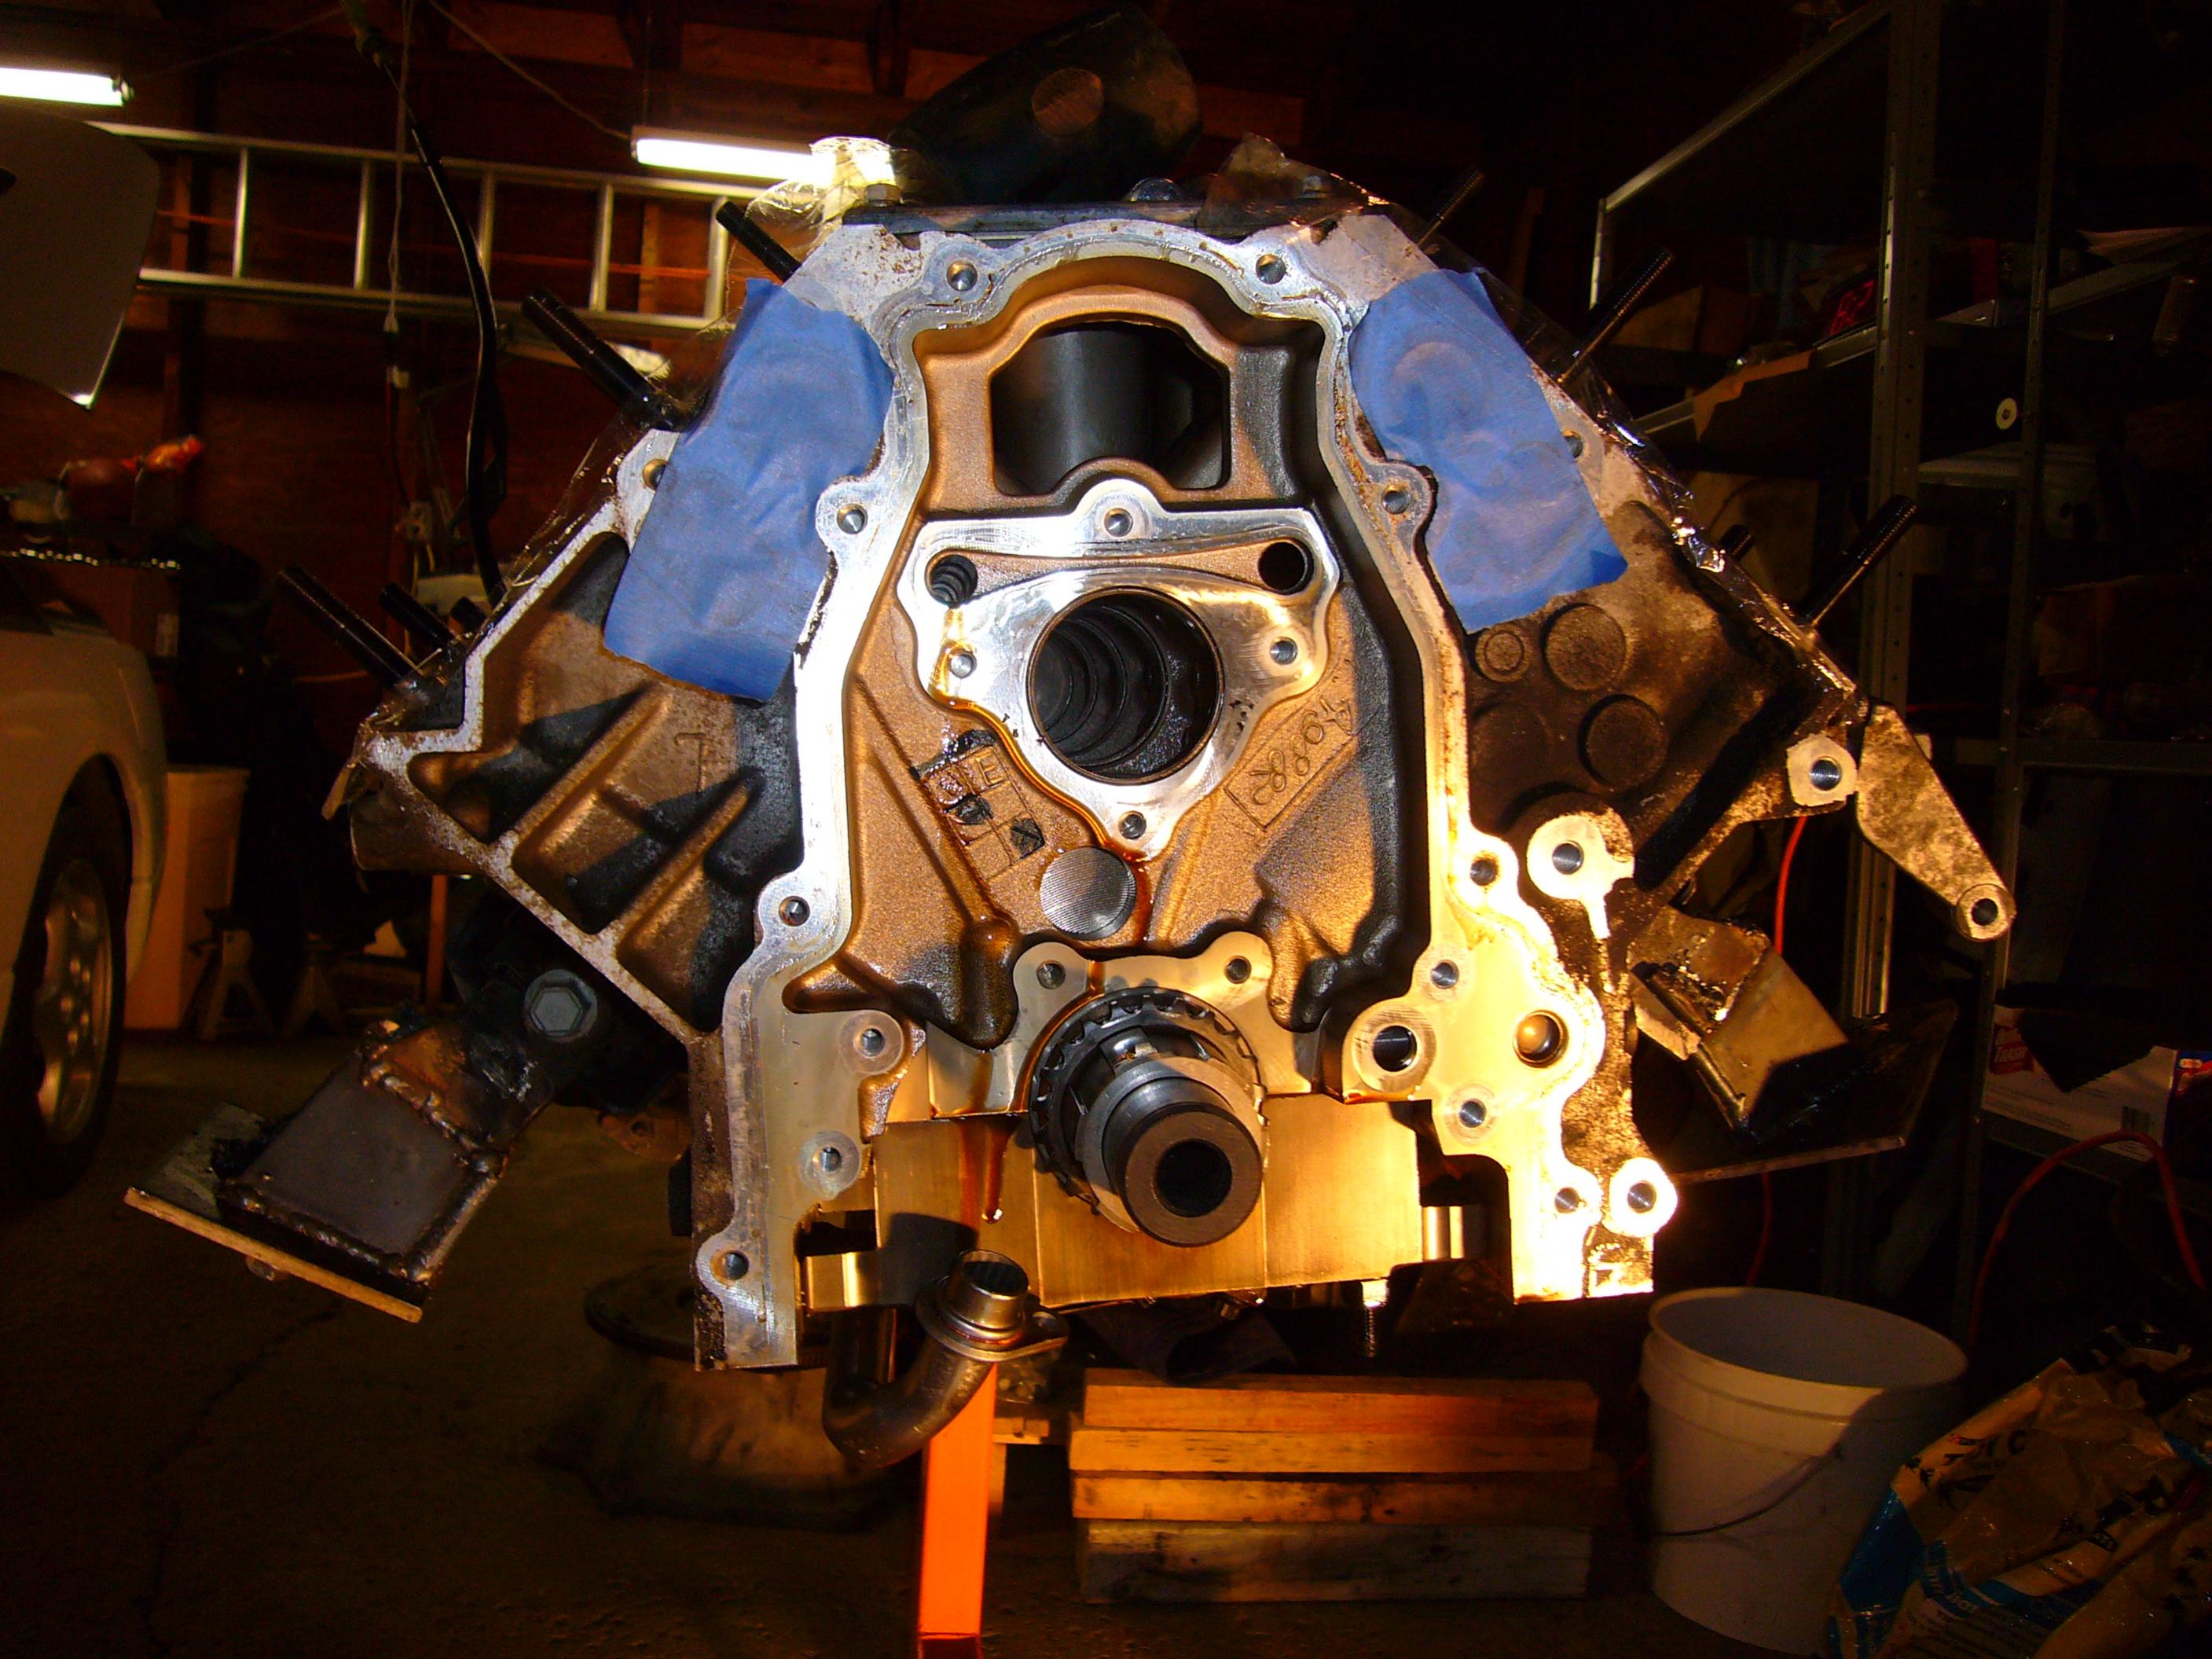
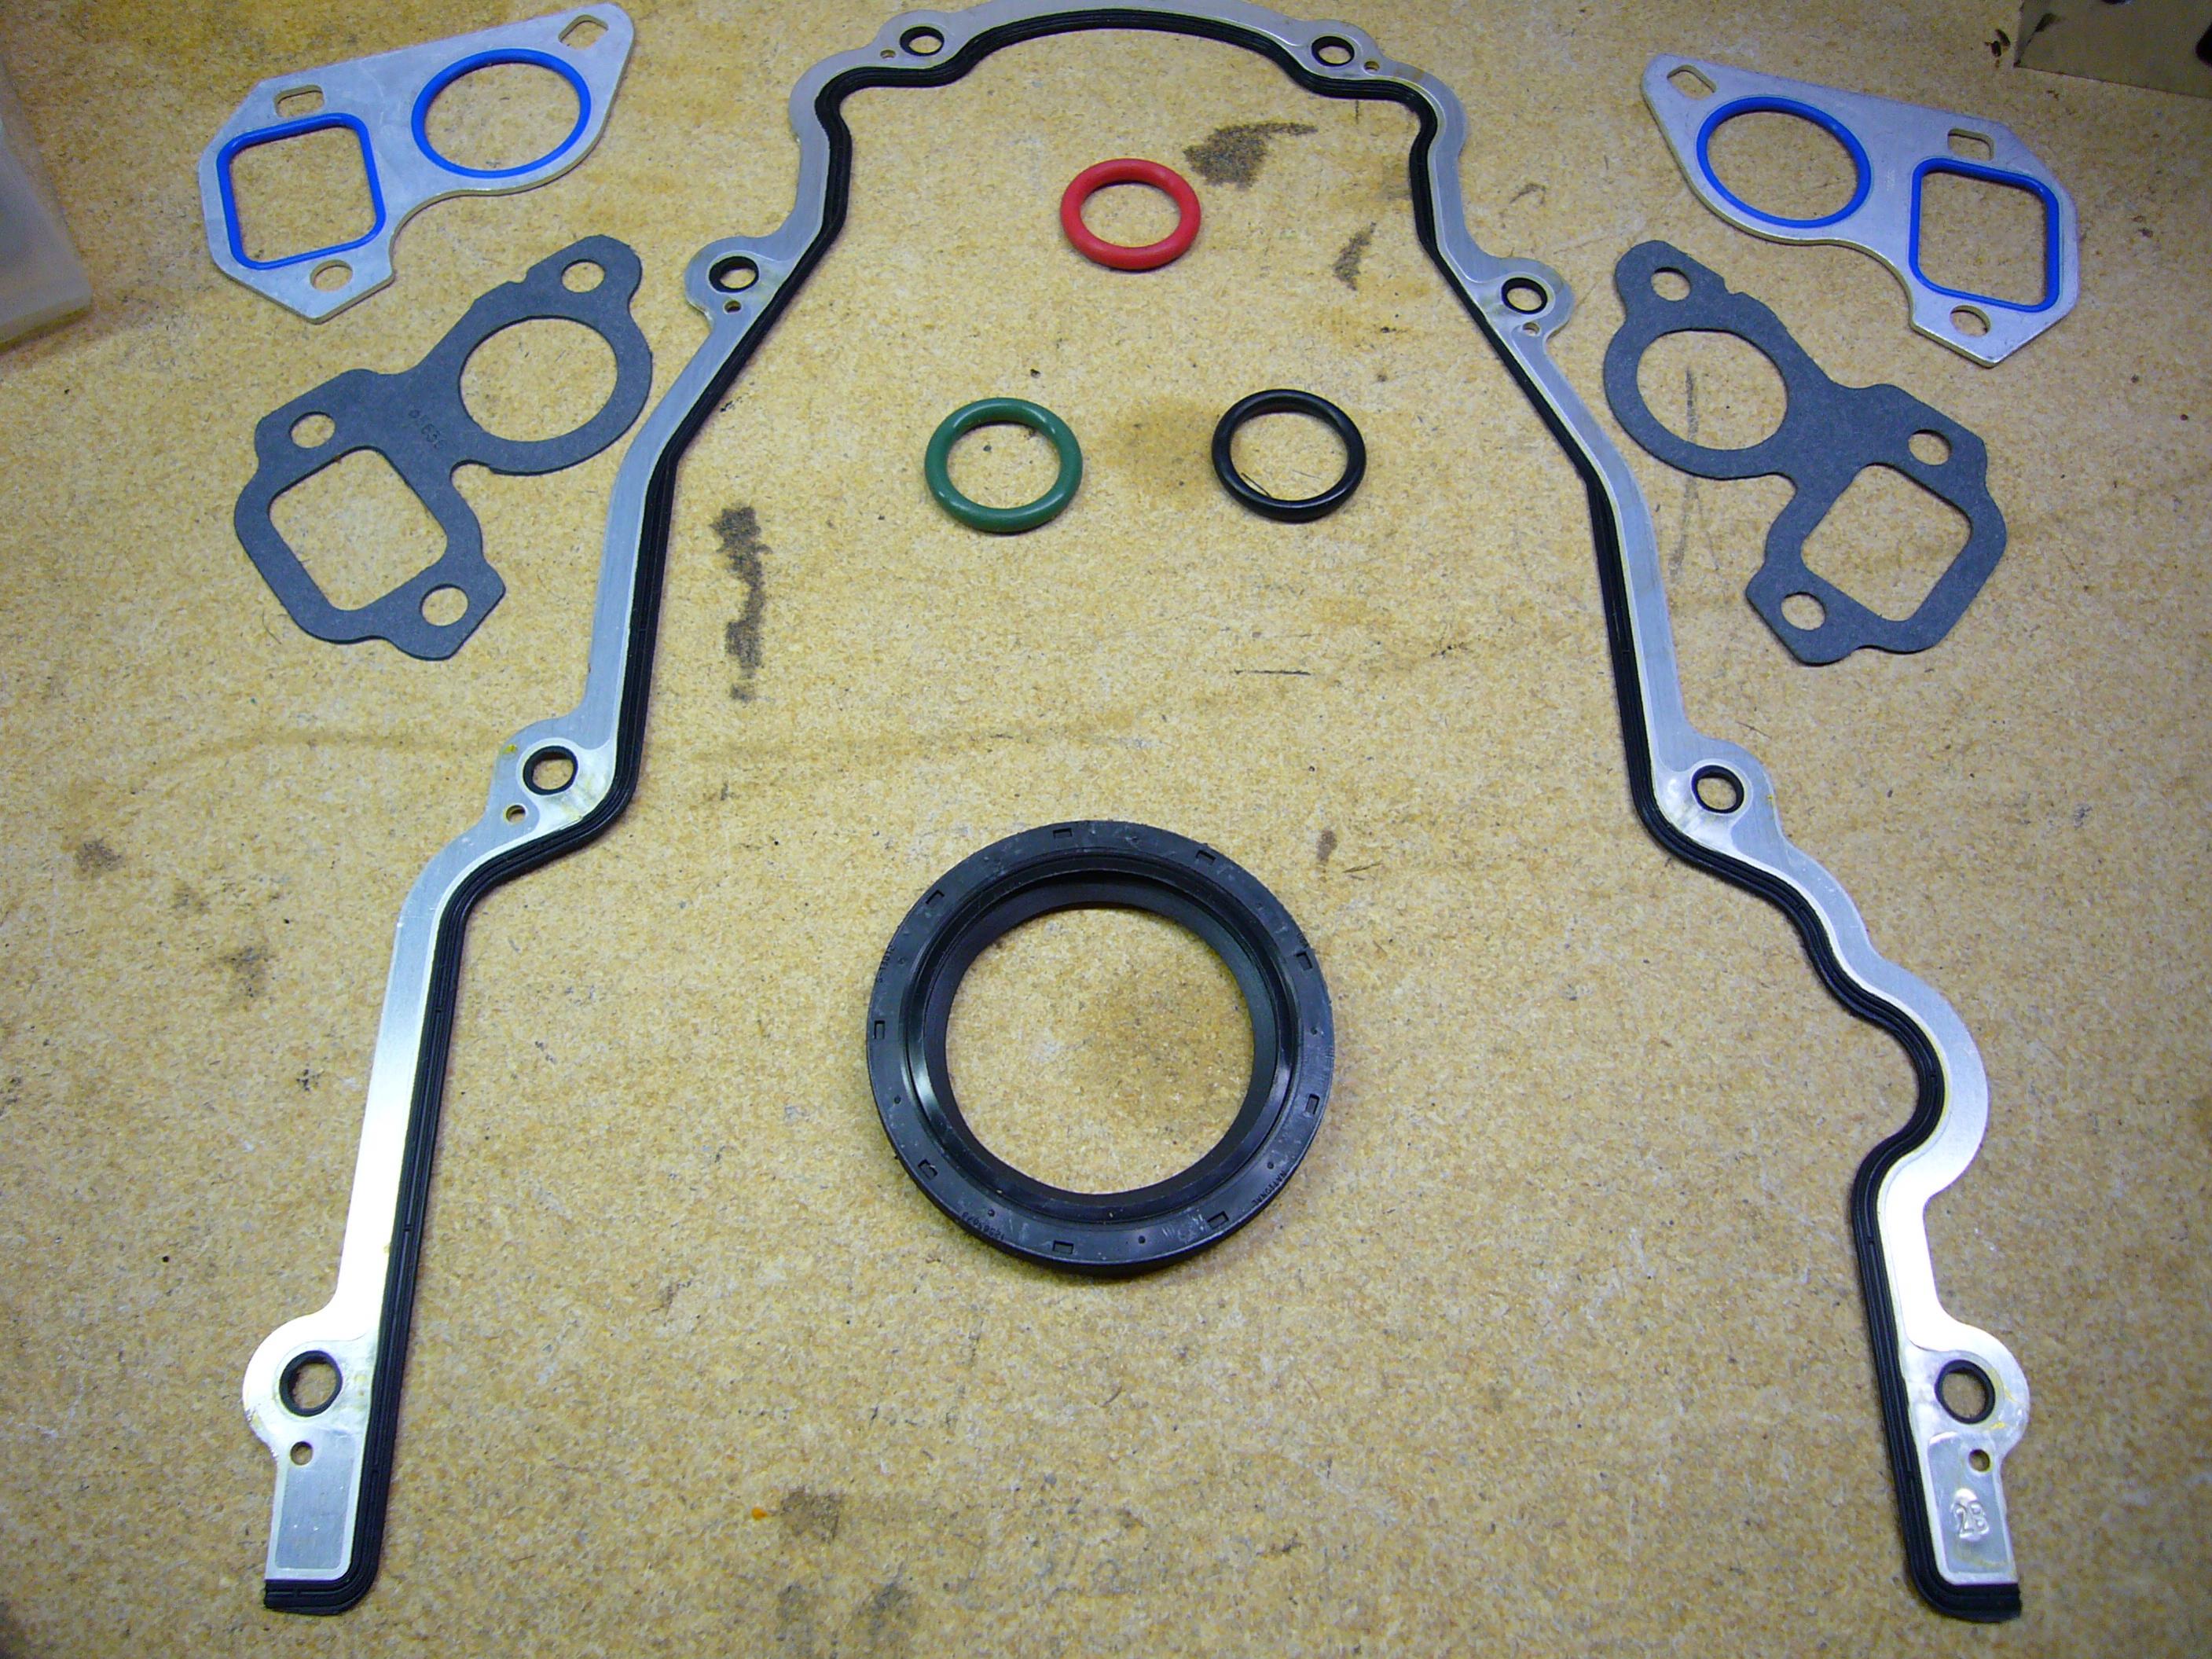
the long awaited (6 weeks) timing chain and ported oil pump arrive. (apparently Manley had a defect in the timing chains and were being sent back so i had to wait) Manley Double Roller Timing Chain LS6 Ported Oil Pump there is also another option for a timing chain / oil pump package: Timing Chain Option basically i followed a nice write up on GMHighTechPerformance.com : How-To my pictures show the progression. since the cam was in already i didnt show that here but i found TDC on piston #1 as per the write-up and then lined up the dots on the pulleys. the oil pump comes with spacers and new bolts that sit nicely. i installed the new timing cover gaskets and replaced the cover followed by the new water pump gaskets and the pump. i mentioned the gasket set a few posts back. ill finish putting the pulley back on when i can find a torque wrench that'll go up to 220 ftlb. i dont want to spend that much $ on a wrench if i can just borrow one from somewhere.
-
LS1 300zx sump issue
chris51881 replied to imported_z32 tt's topic in Gen III & IV Chevy V8Z Tech Board
that Autokraft pan that BRAAP has up here ^^^ gave me a ton of room. i have a few pics in my thread down here vvv -
im pretty sure it's $5,871.13 but close enough.... haha. my engine and tranny (t56) came from an 01 trans am ws6 with ~30k miles and cost me $4200 with the computer, pedals, and clutch reservoir. id start looking in salvage yards or salvage yards with ebay. they usually have them packaged nice on a pallet ready to go. only problem with that is you have no idea how long they have been in the weather. another good way to go is if you know a dealer with a license to get wrecked cars at the auction. see if they can get the whole car with as little front end damage as possible. then you get everything you need for the swap plus lots of extra parts to resell and get most of your $$ back. usually the whole car wont cost much more than just the engine/tranny combo.
-
Z32 LS1 project thread... questions inside
chris51881 replied to fogged306's topic in Z32 Series - 300ZX
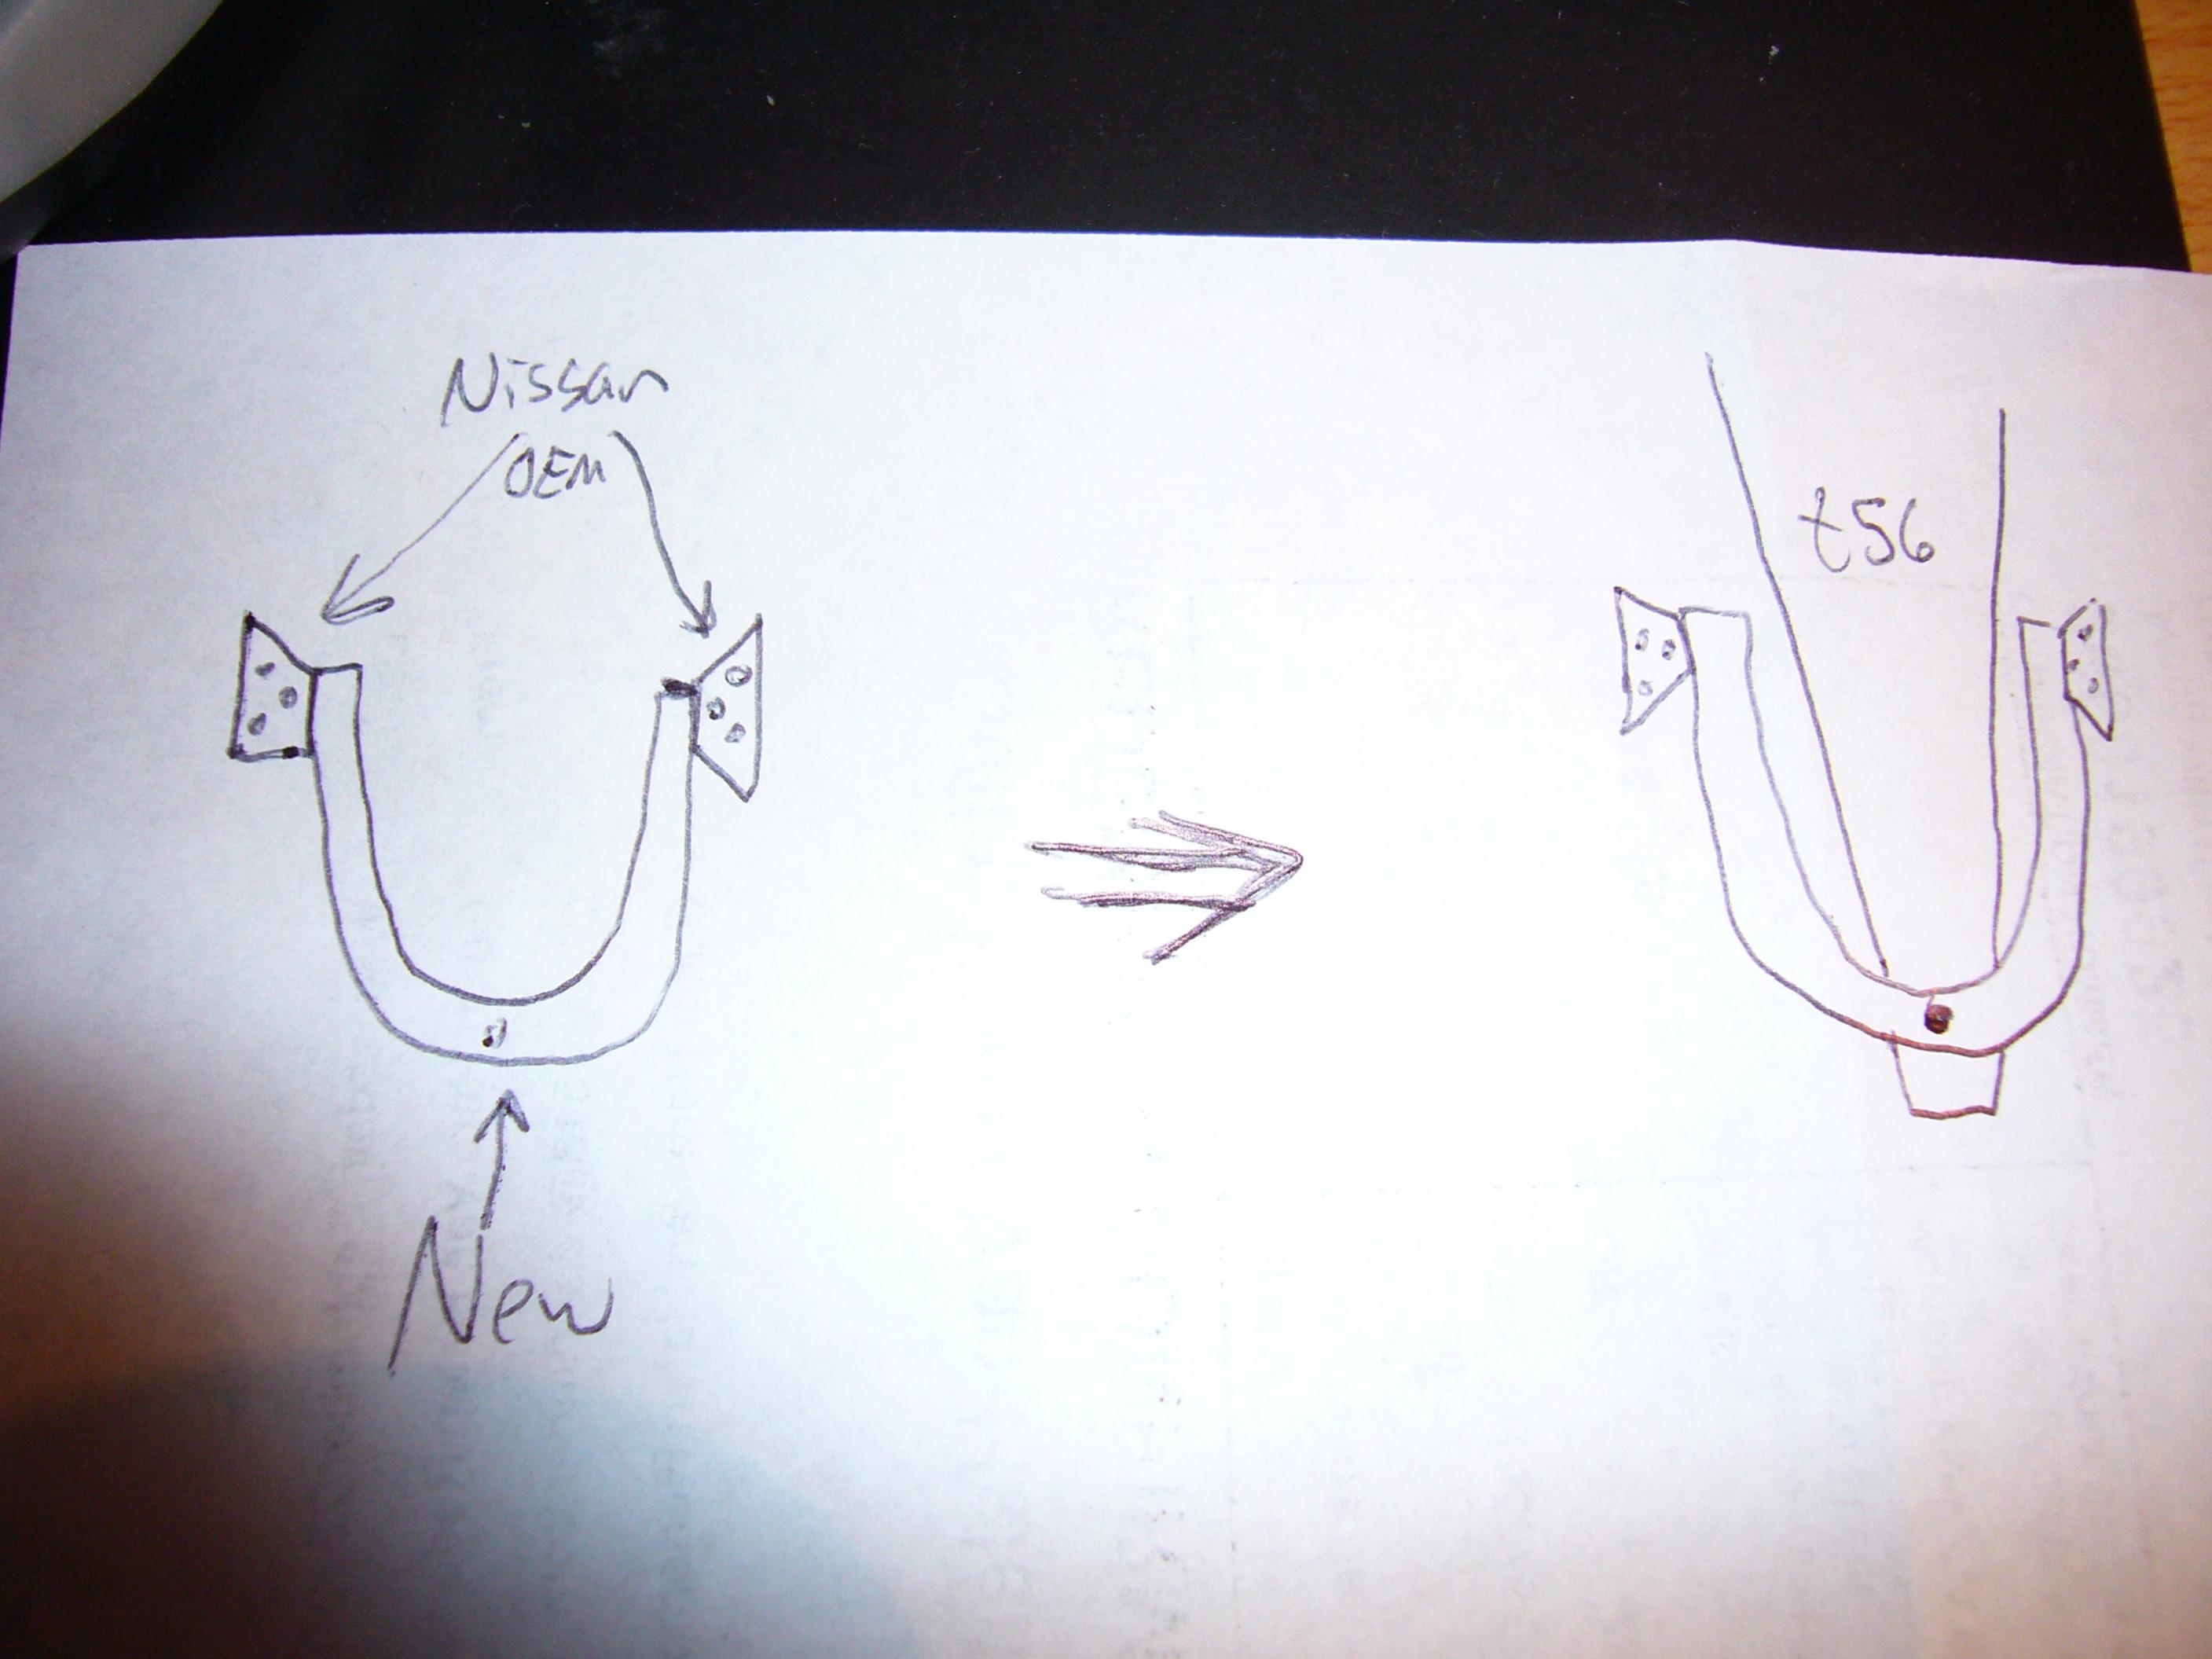
im not sure if this picture helps but when i get there im going to cut the sides off of the stock mounts and put a "u" shaped piece between them. this will go around behind the trans so i can hit the factory t56 bolt.
-
Z32 LS1 project thread... questions inside
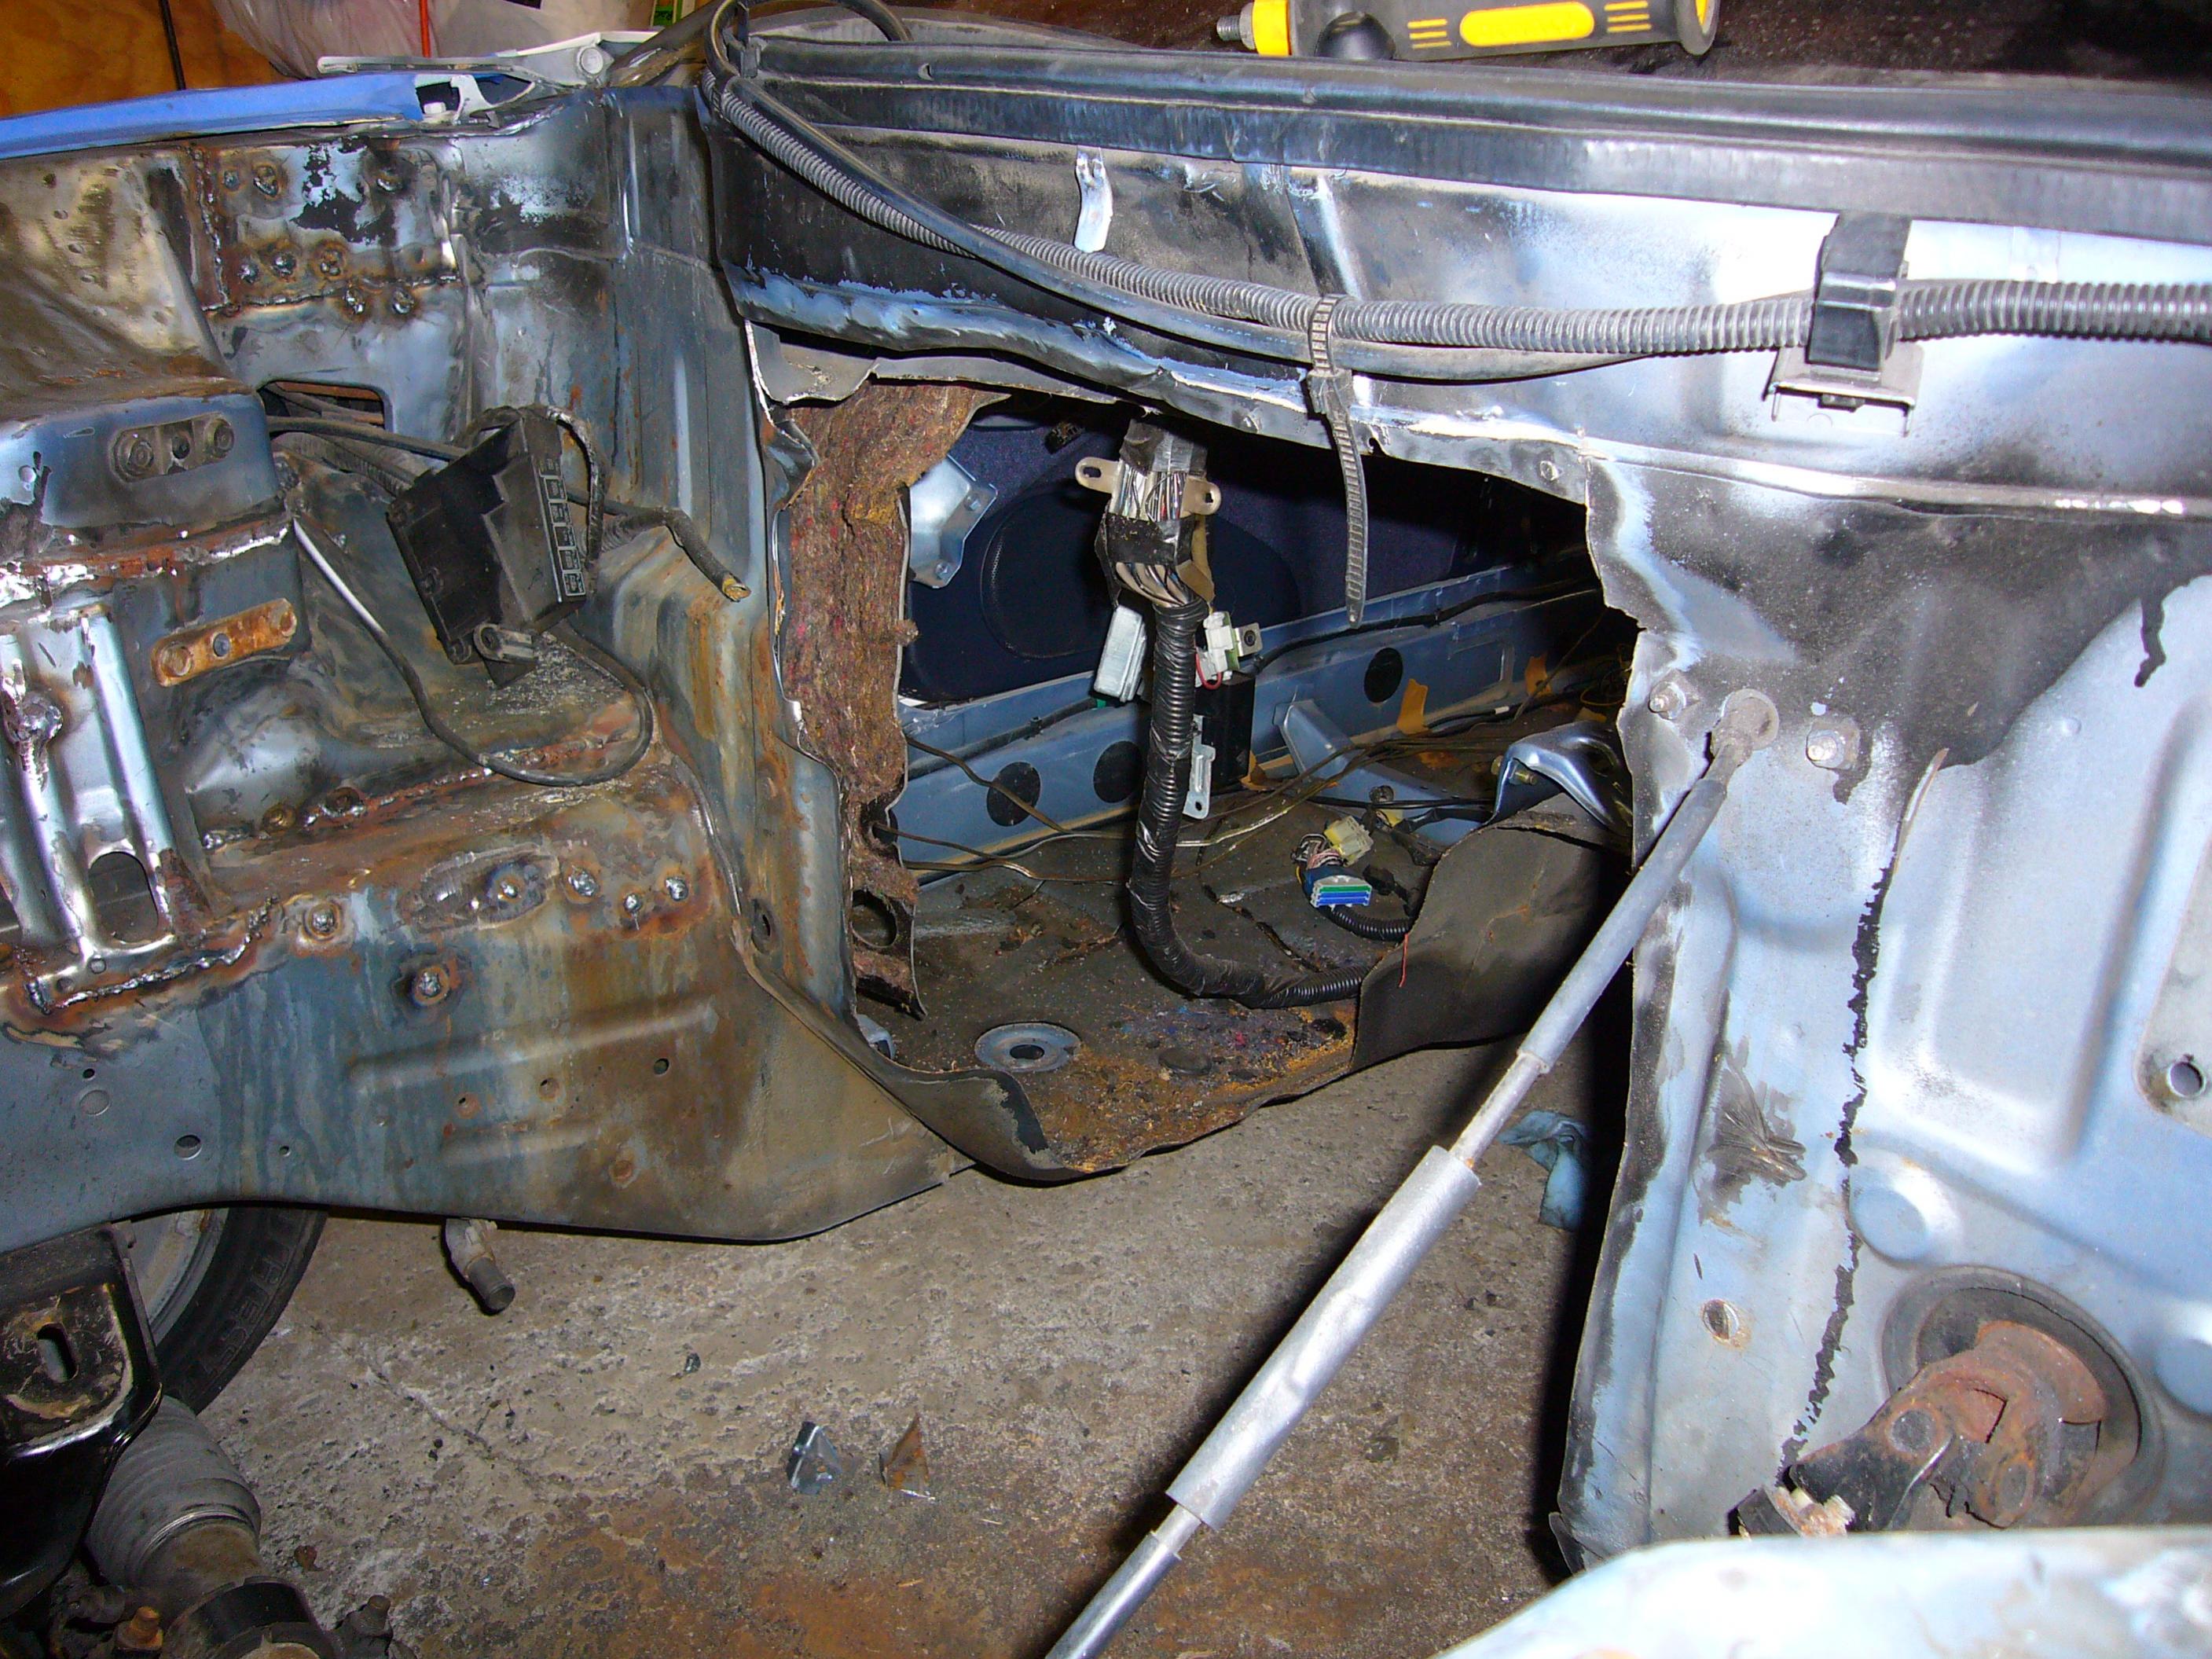
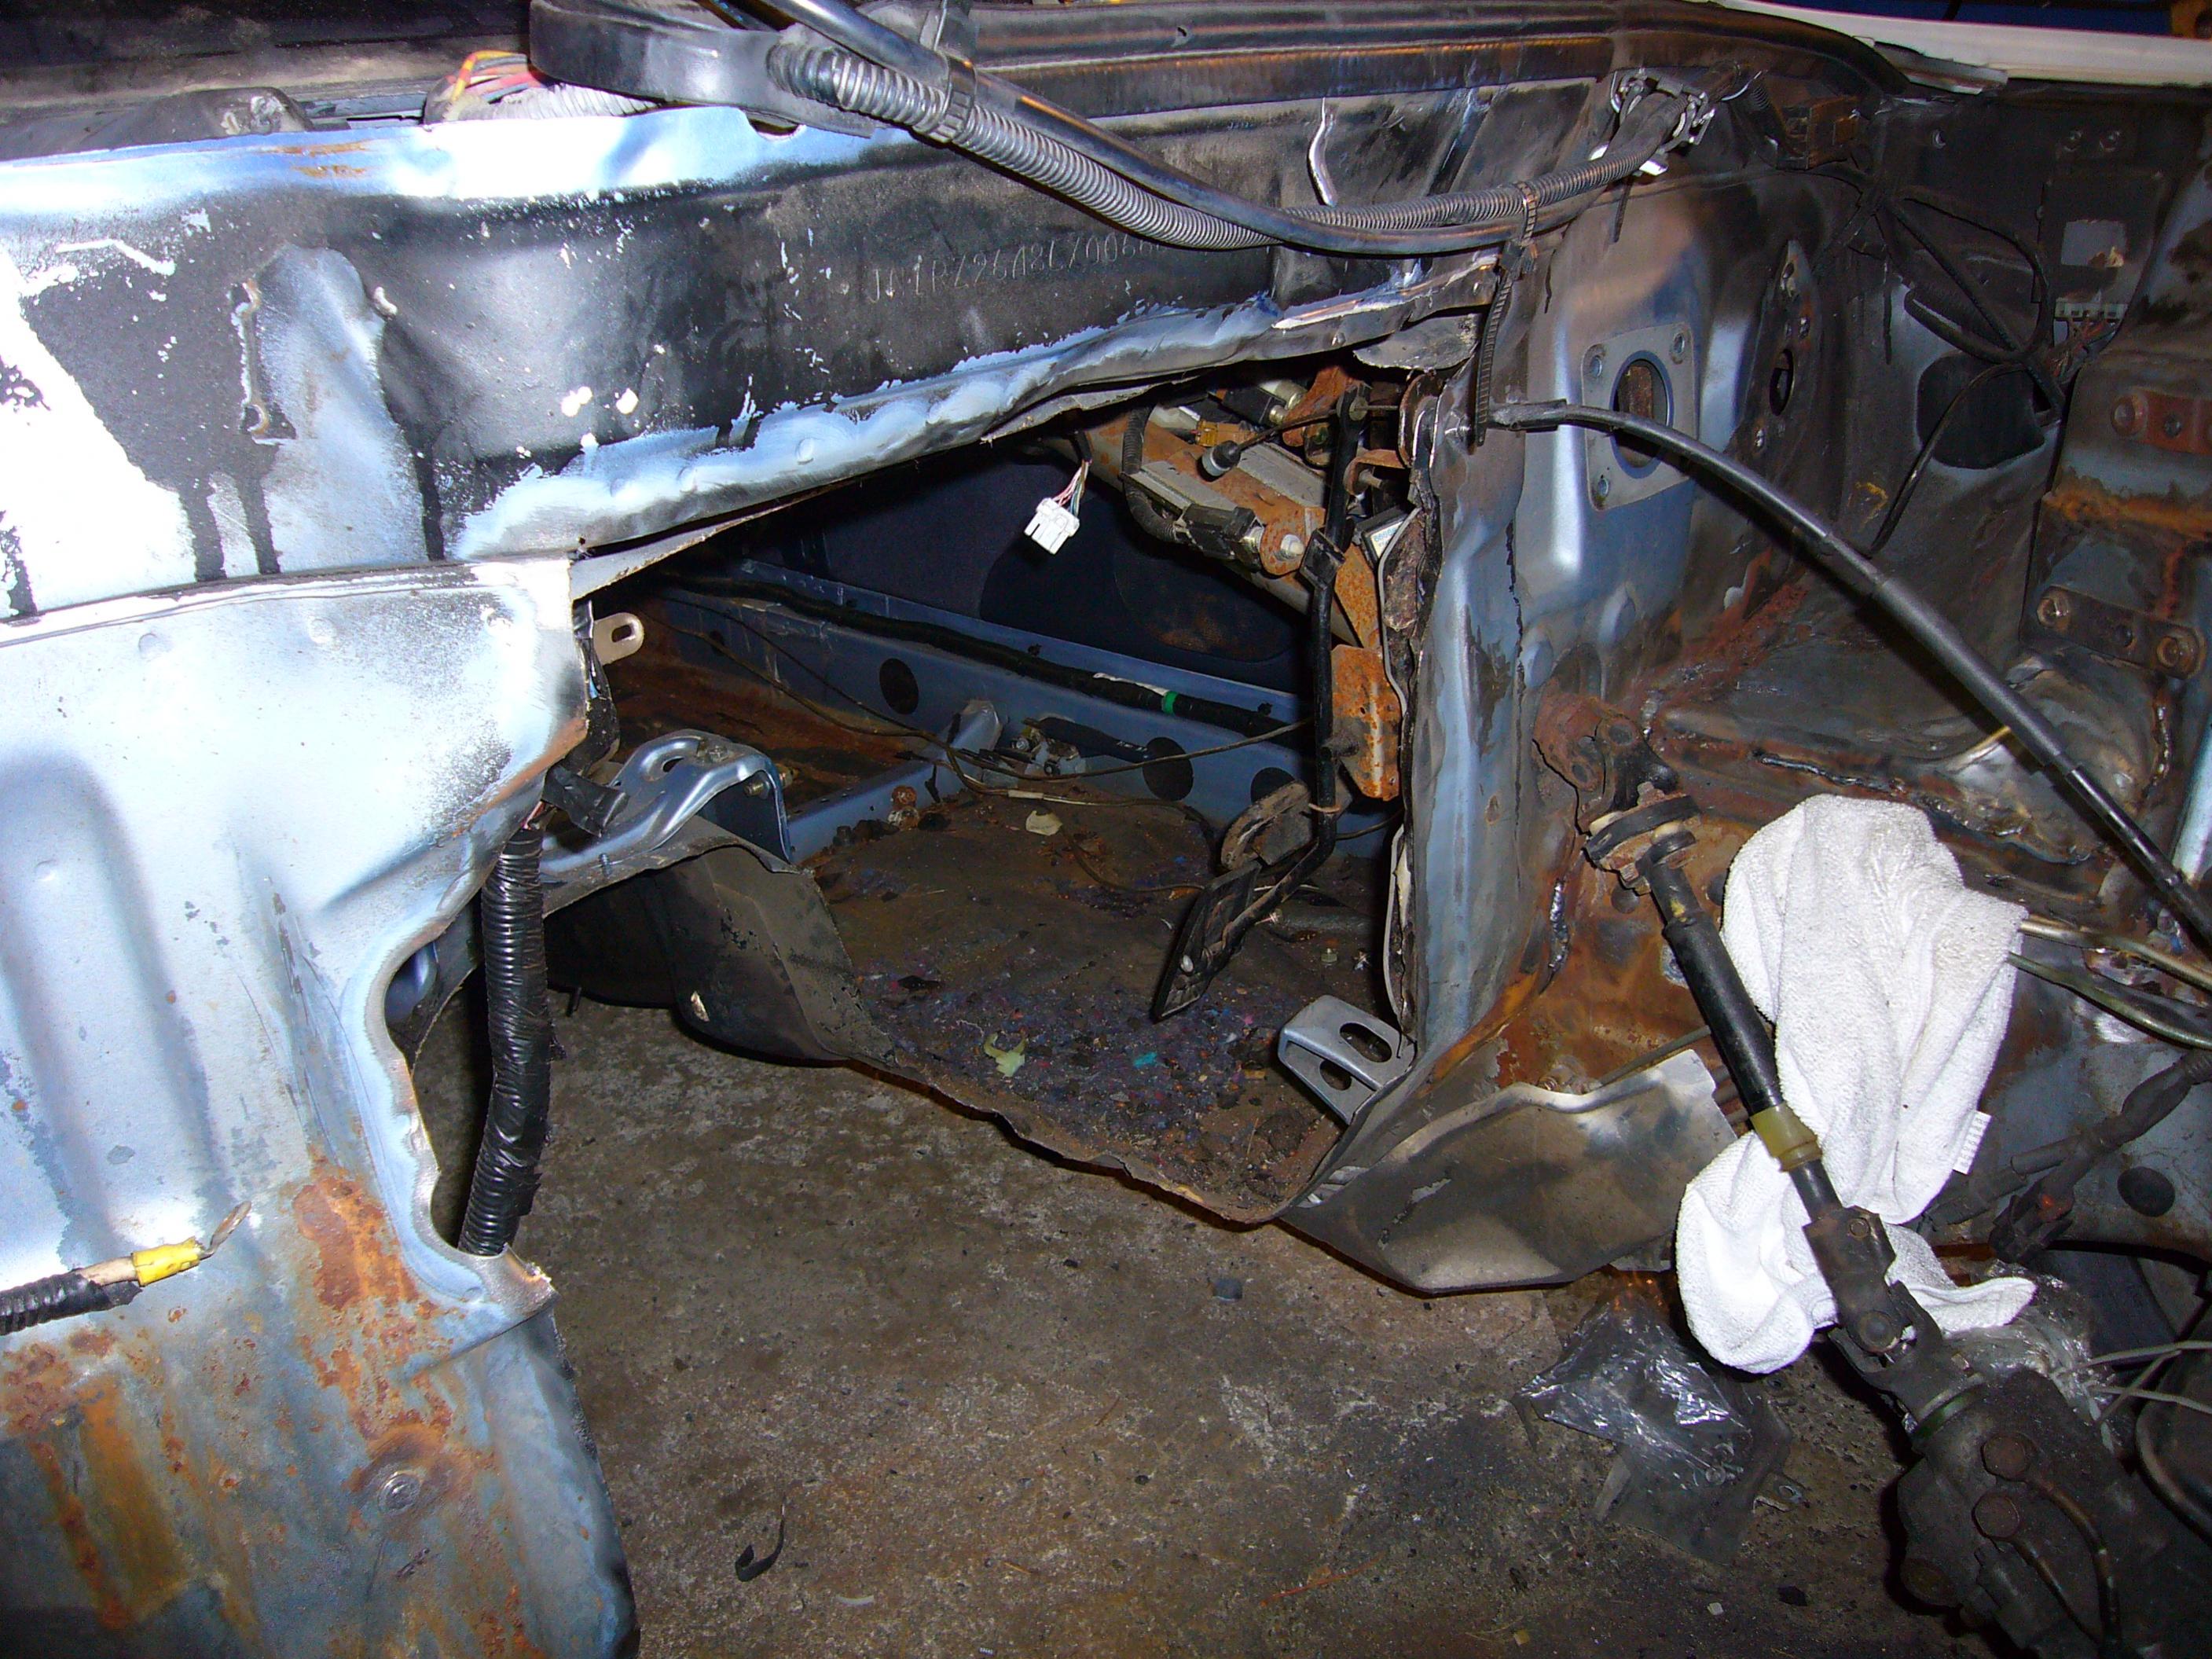
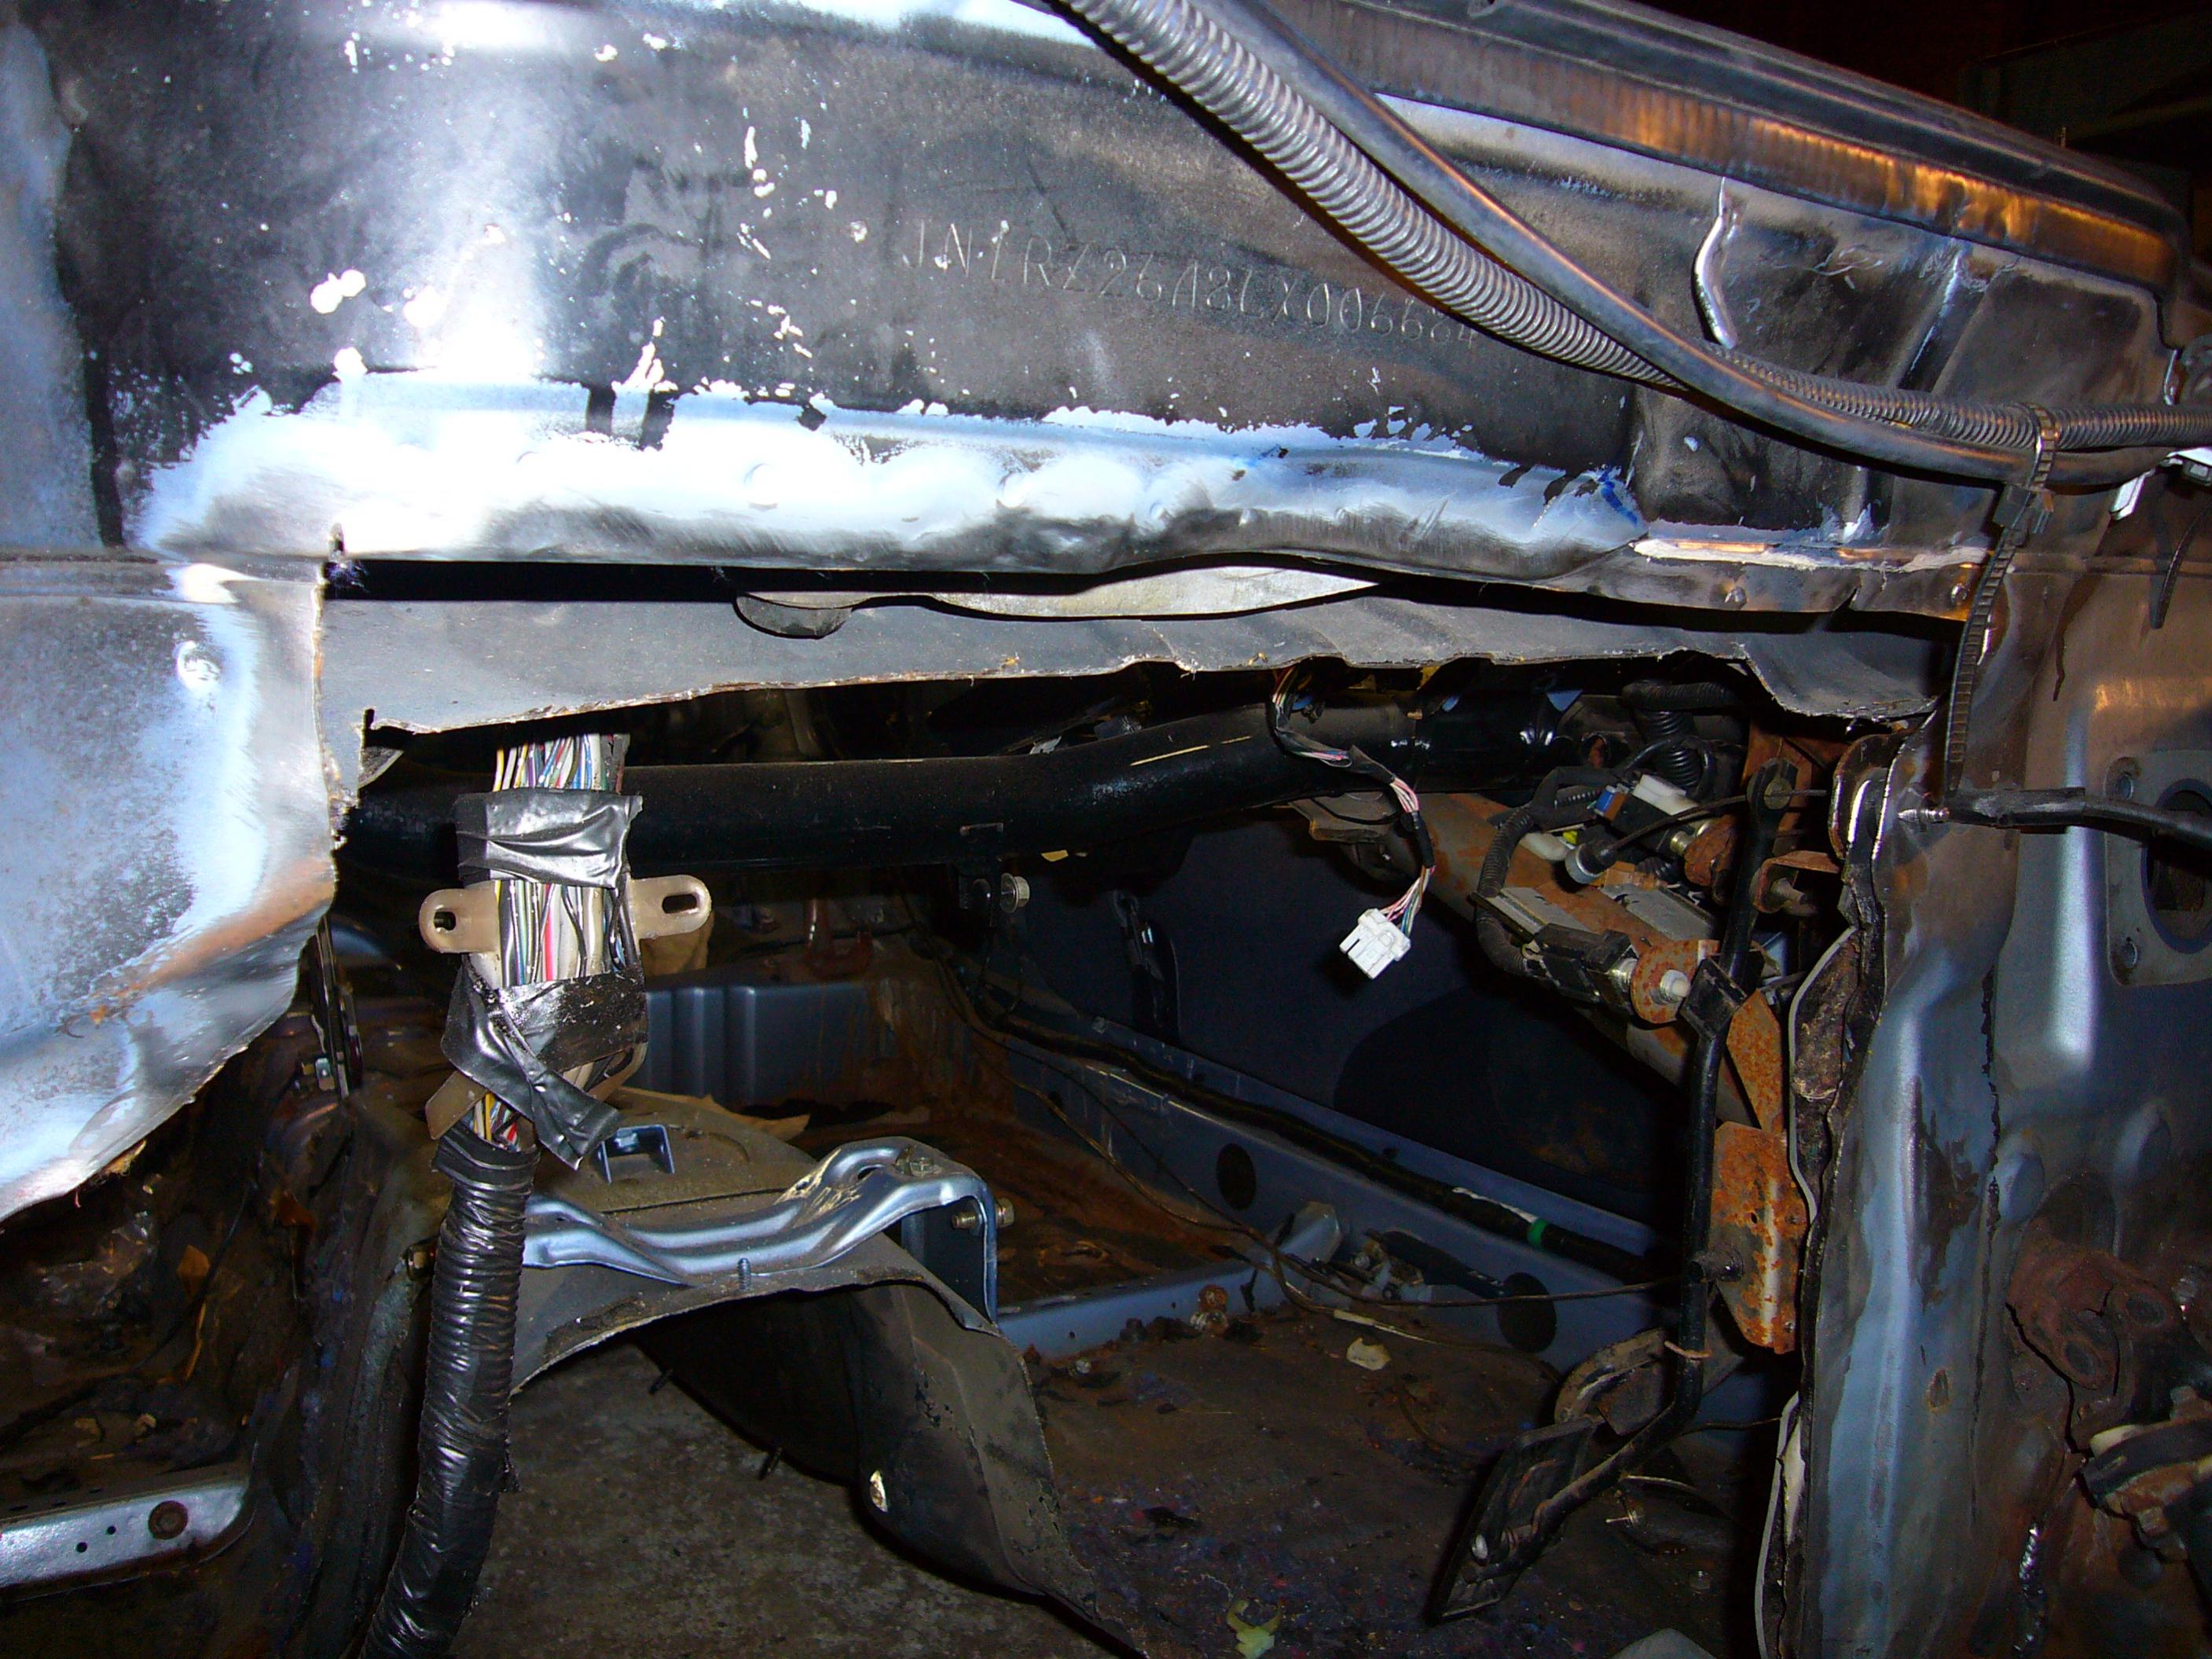
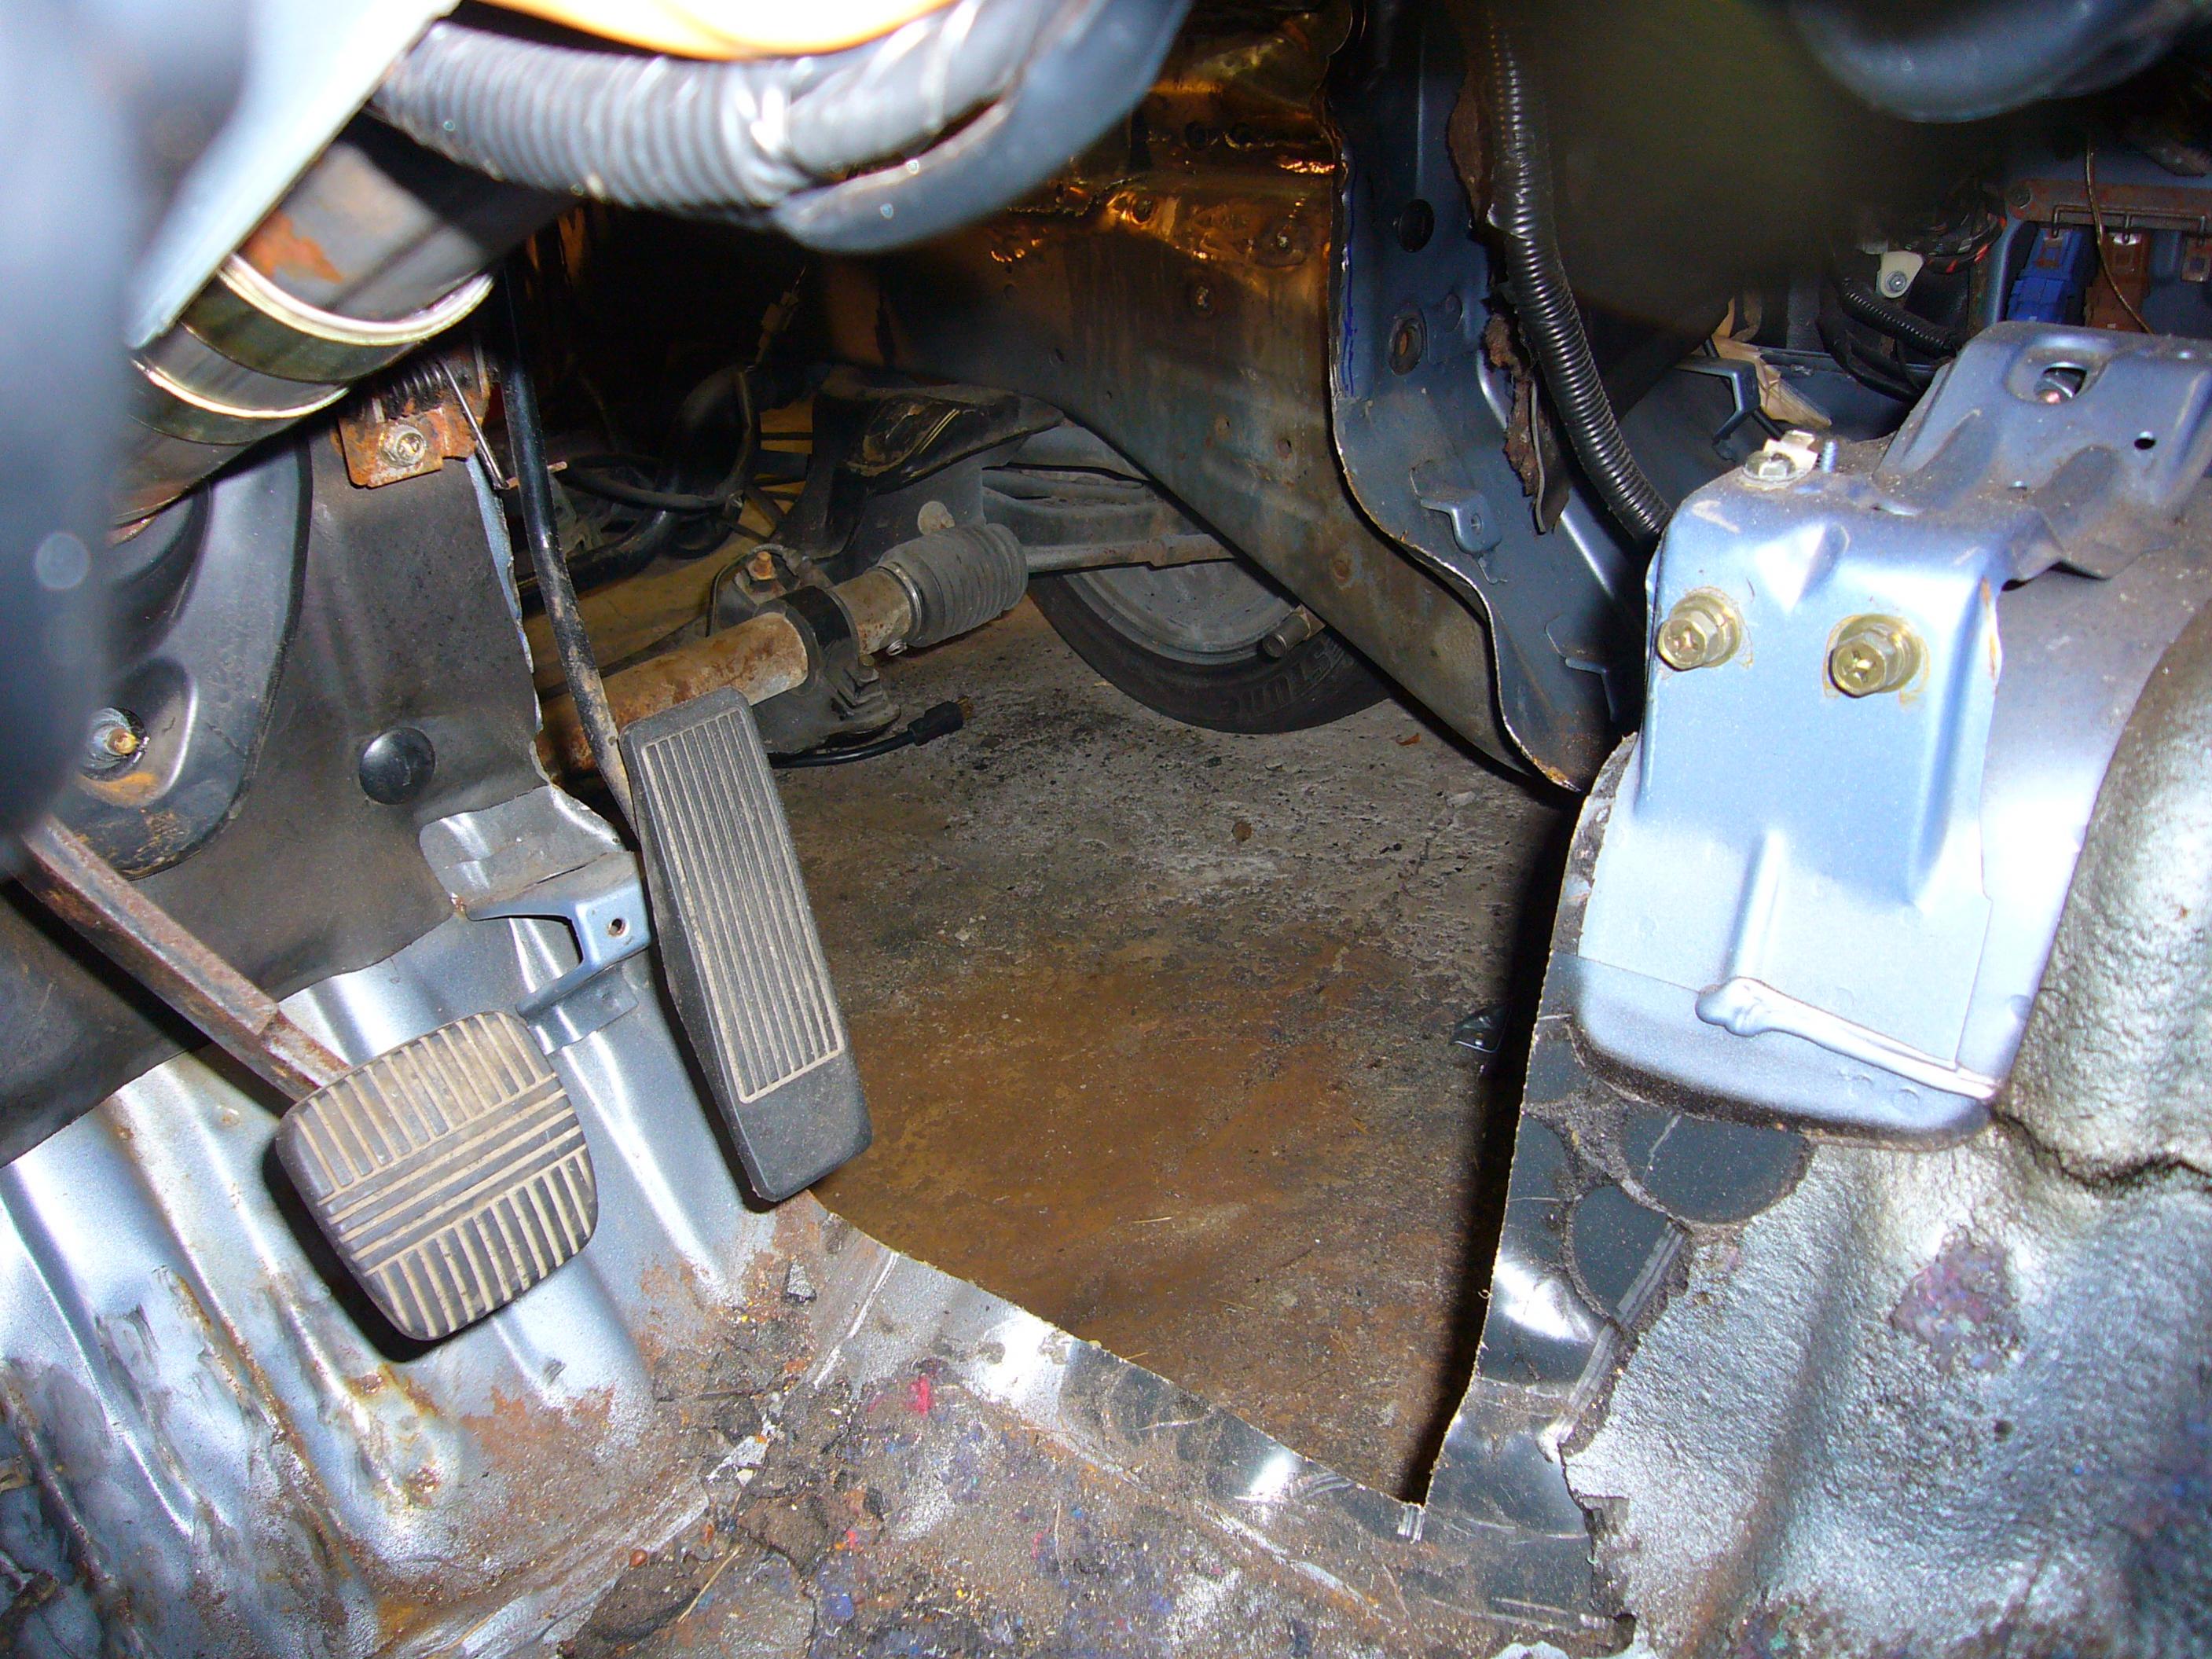
chris51881 replied to fogged306's topic in Z32 Series - 300ZX
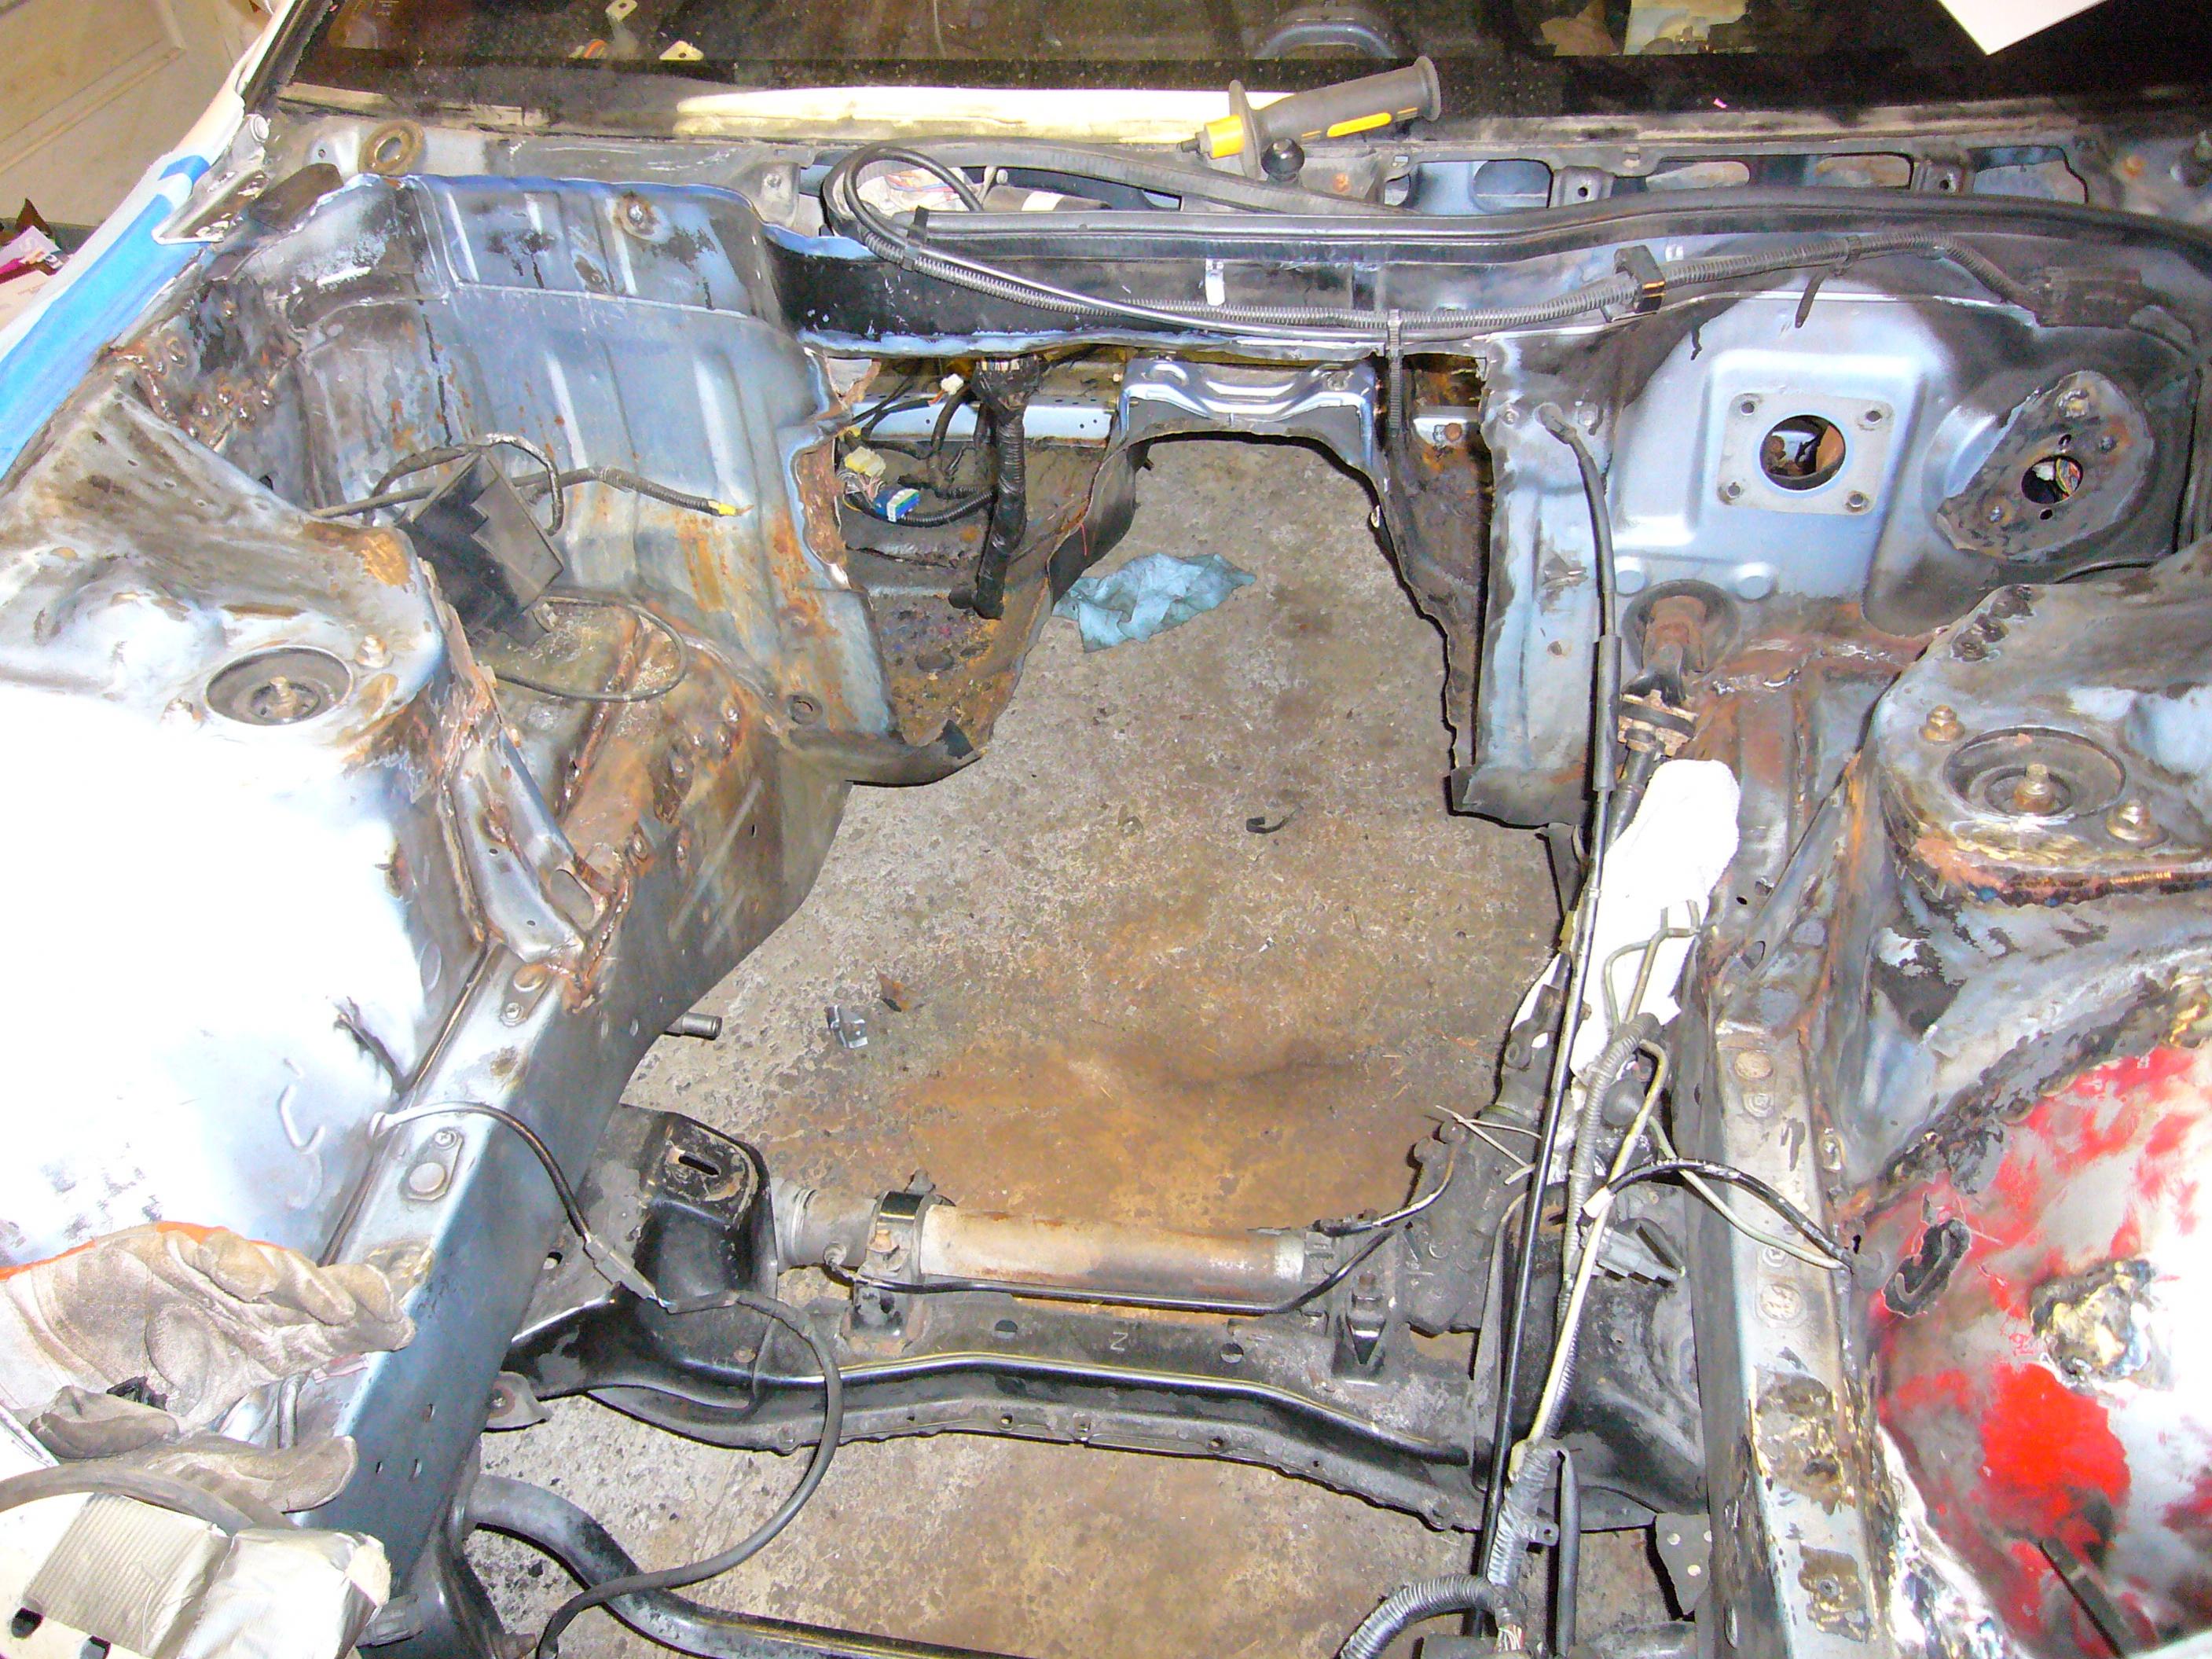
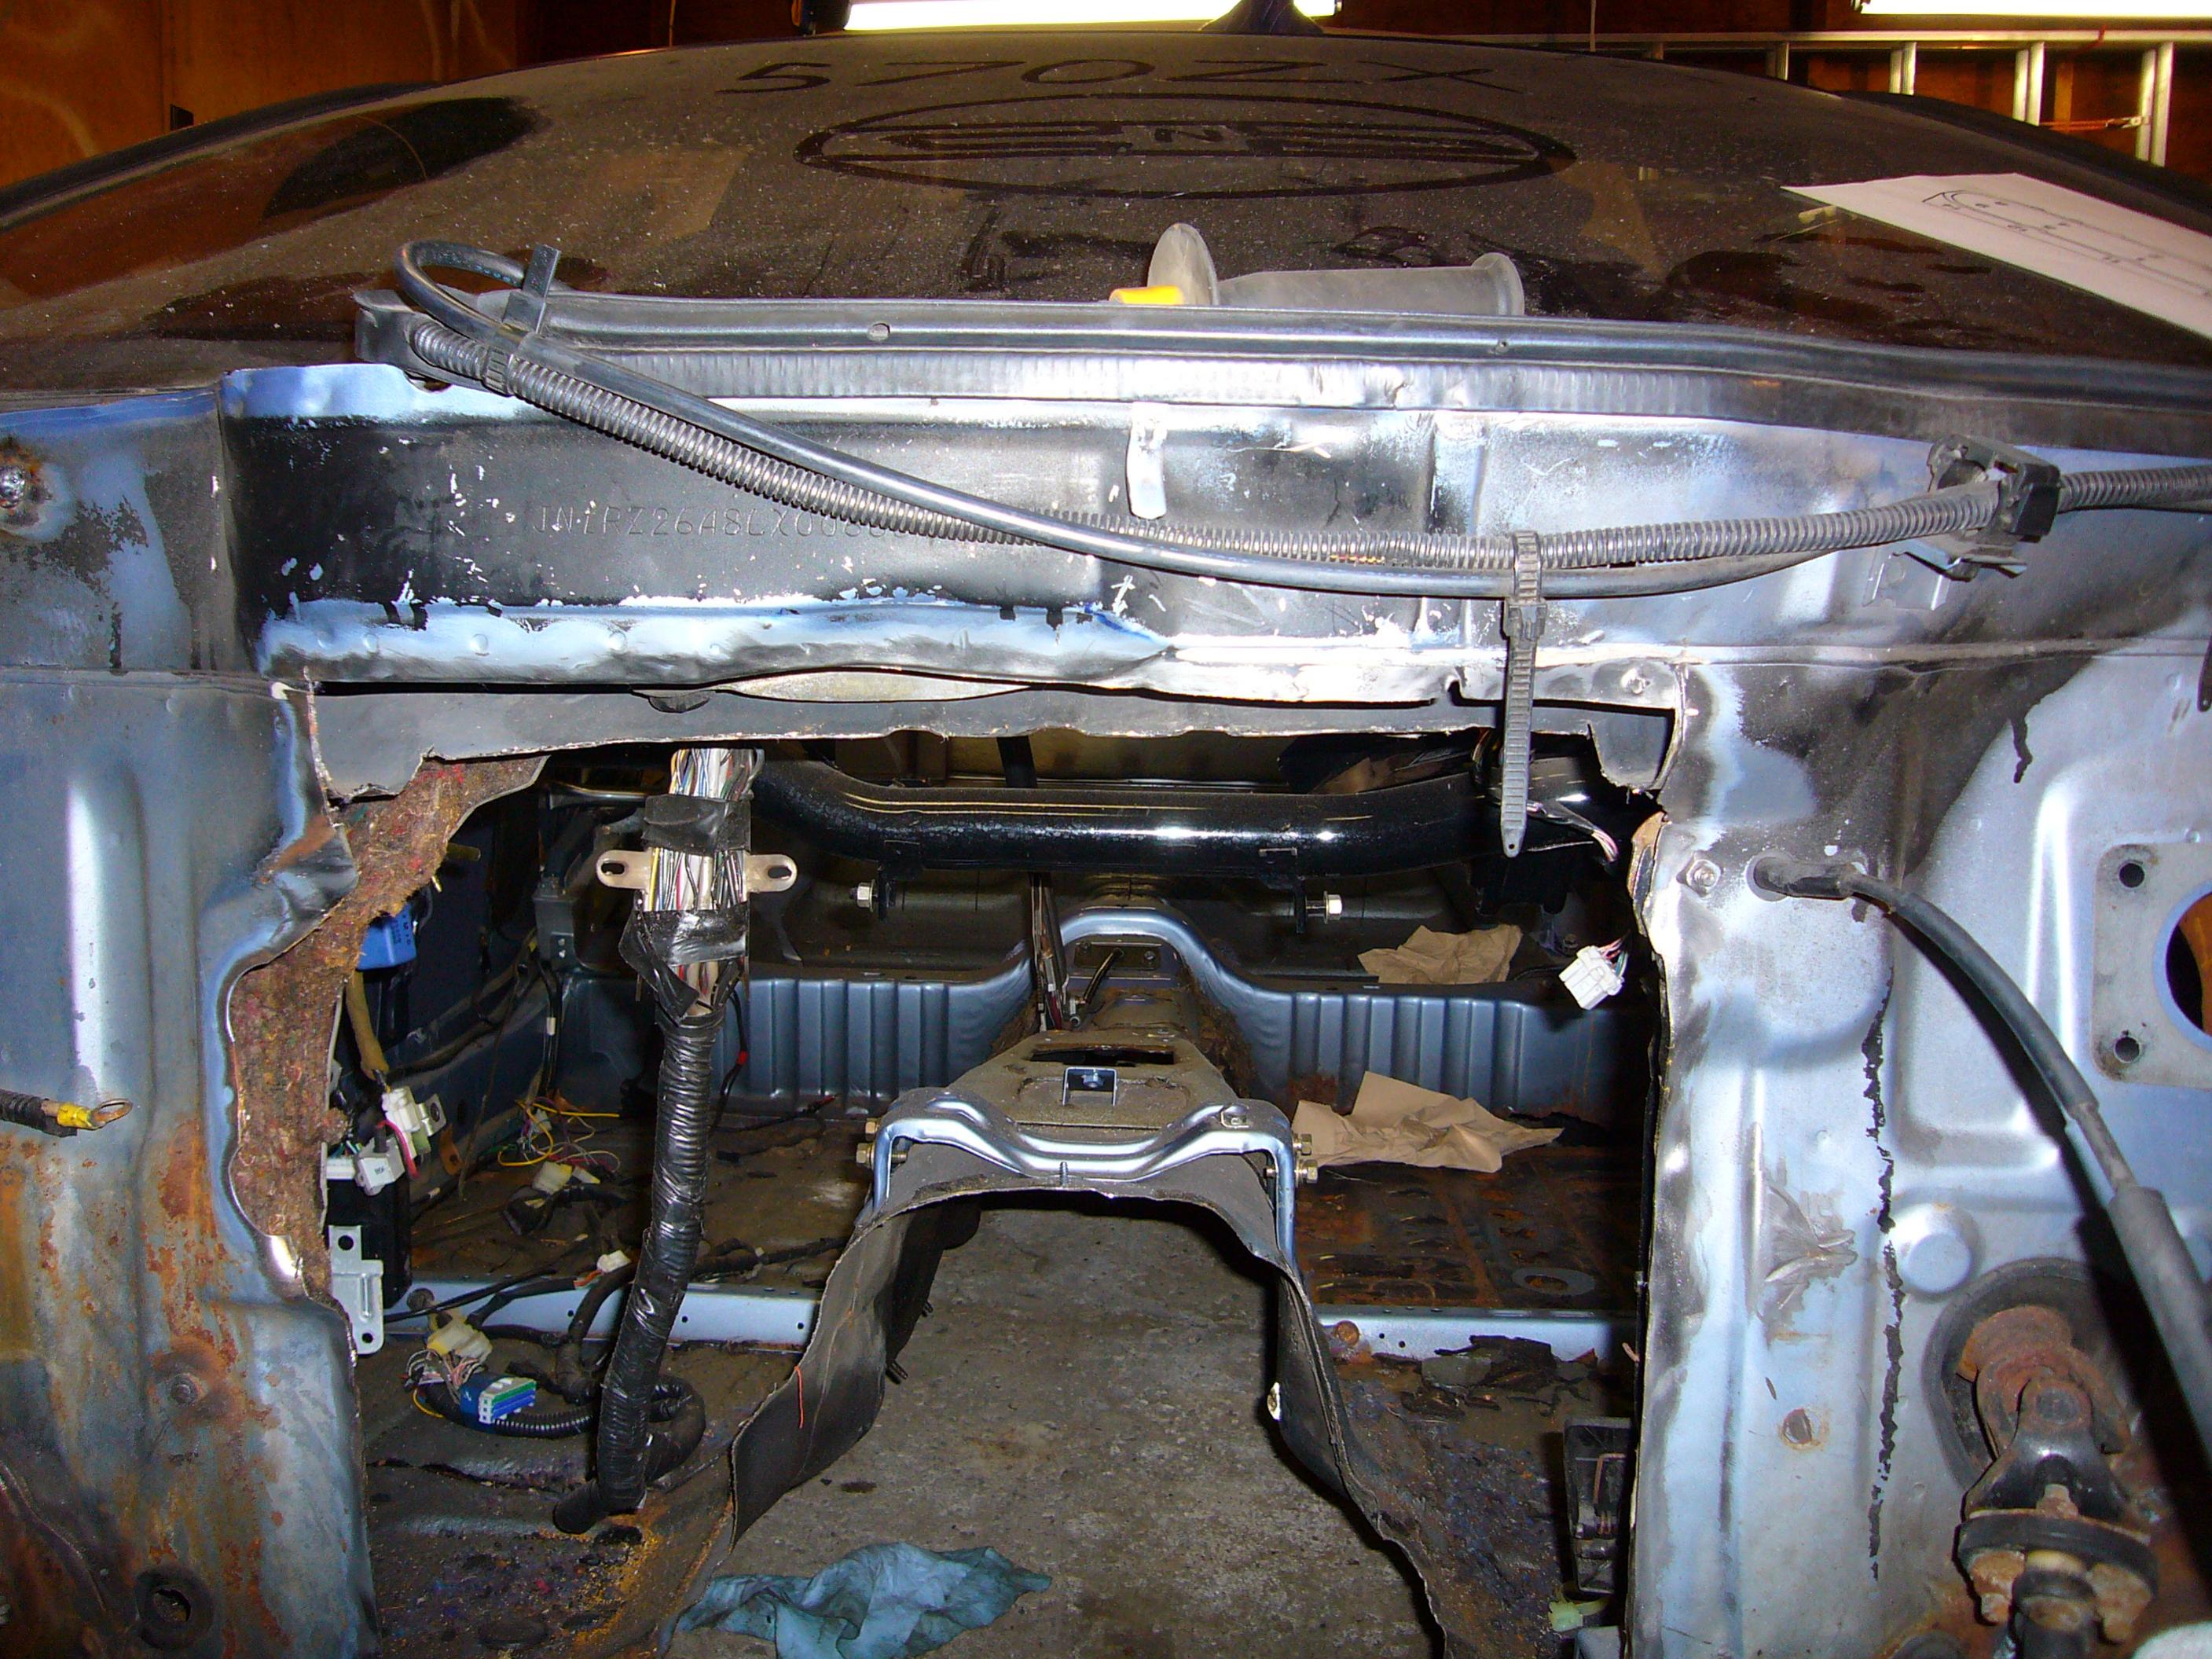
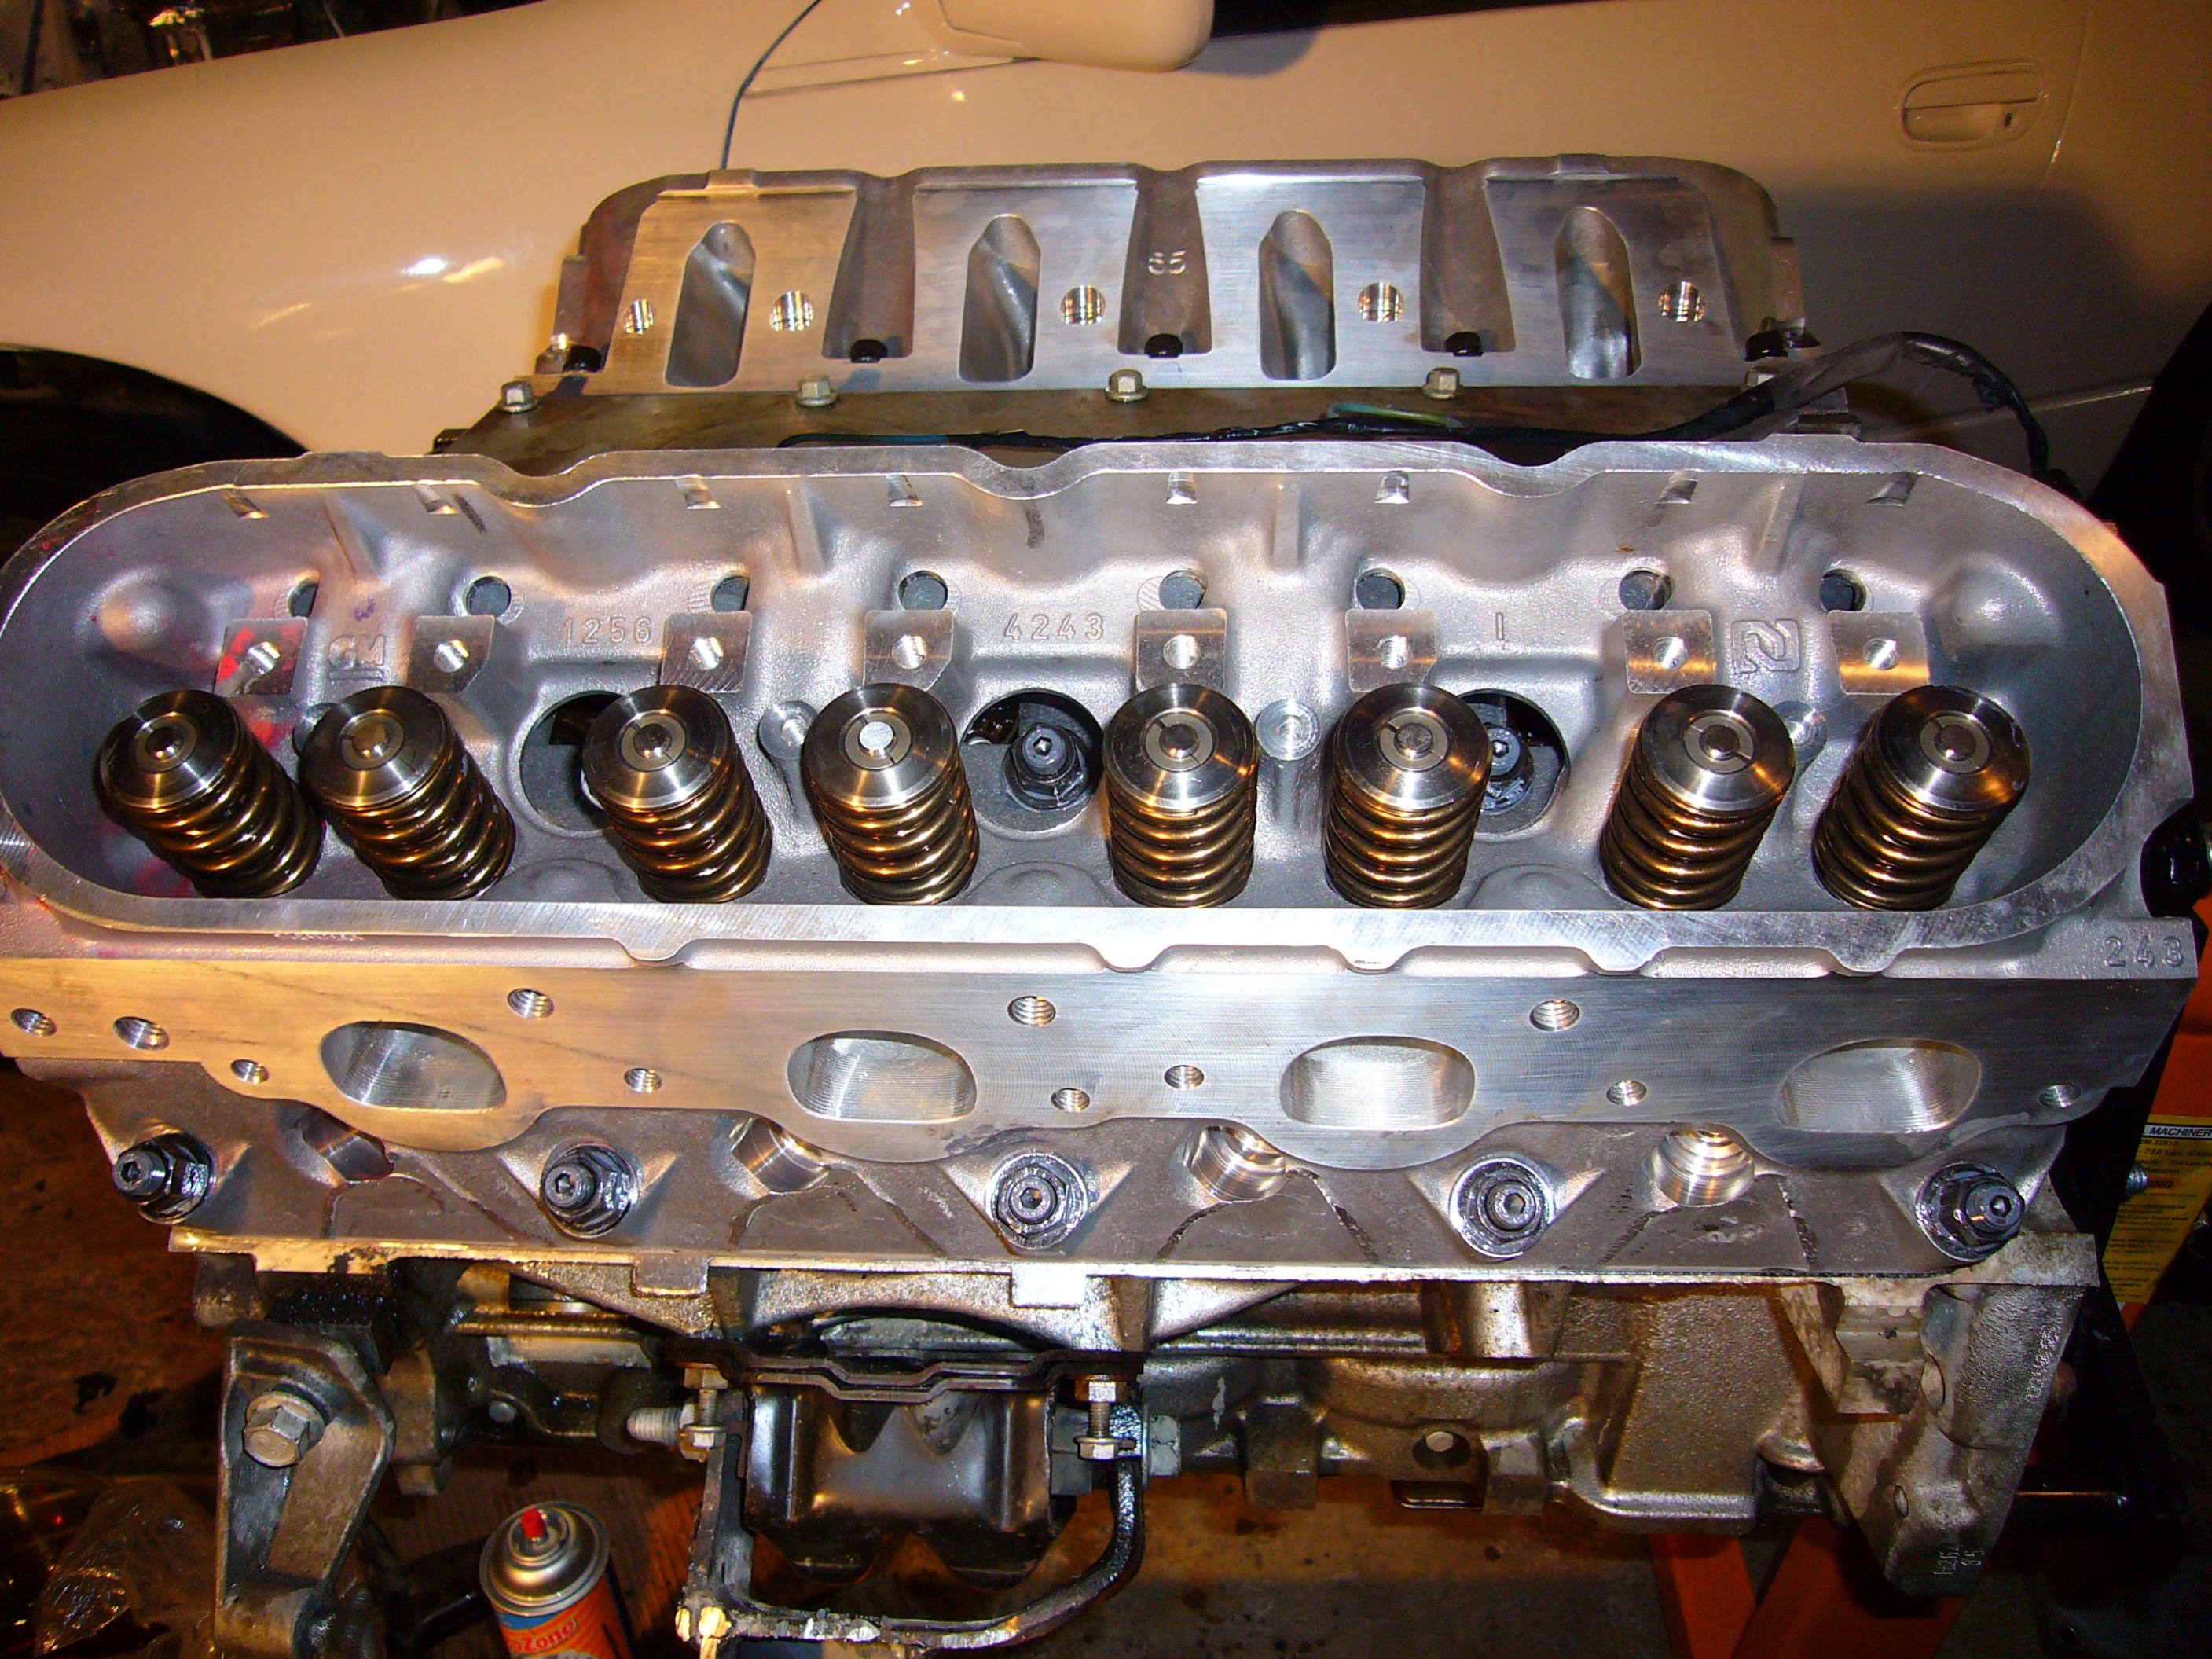
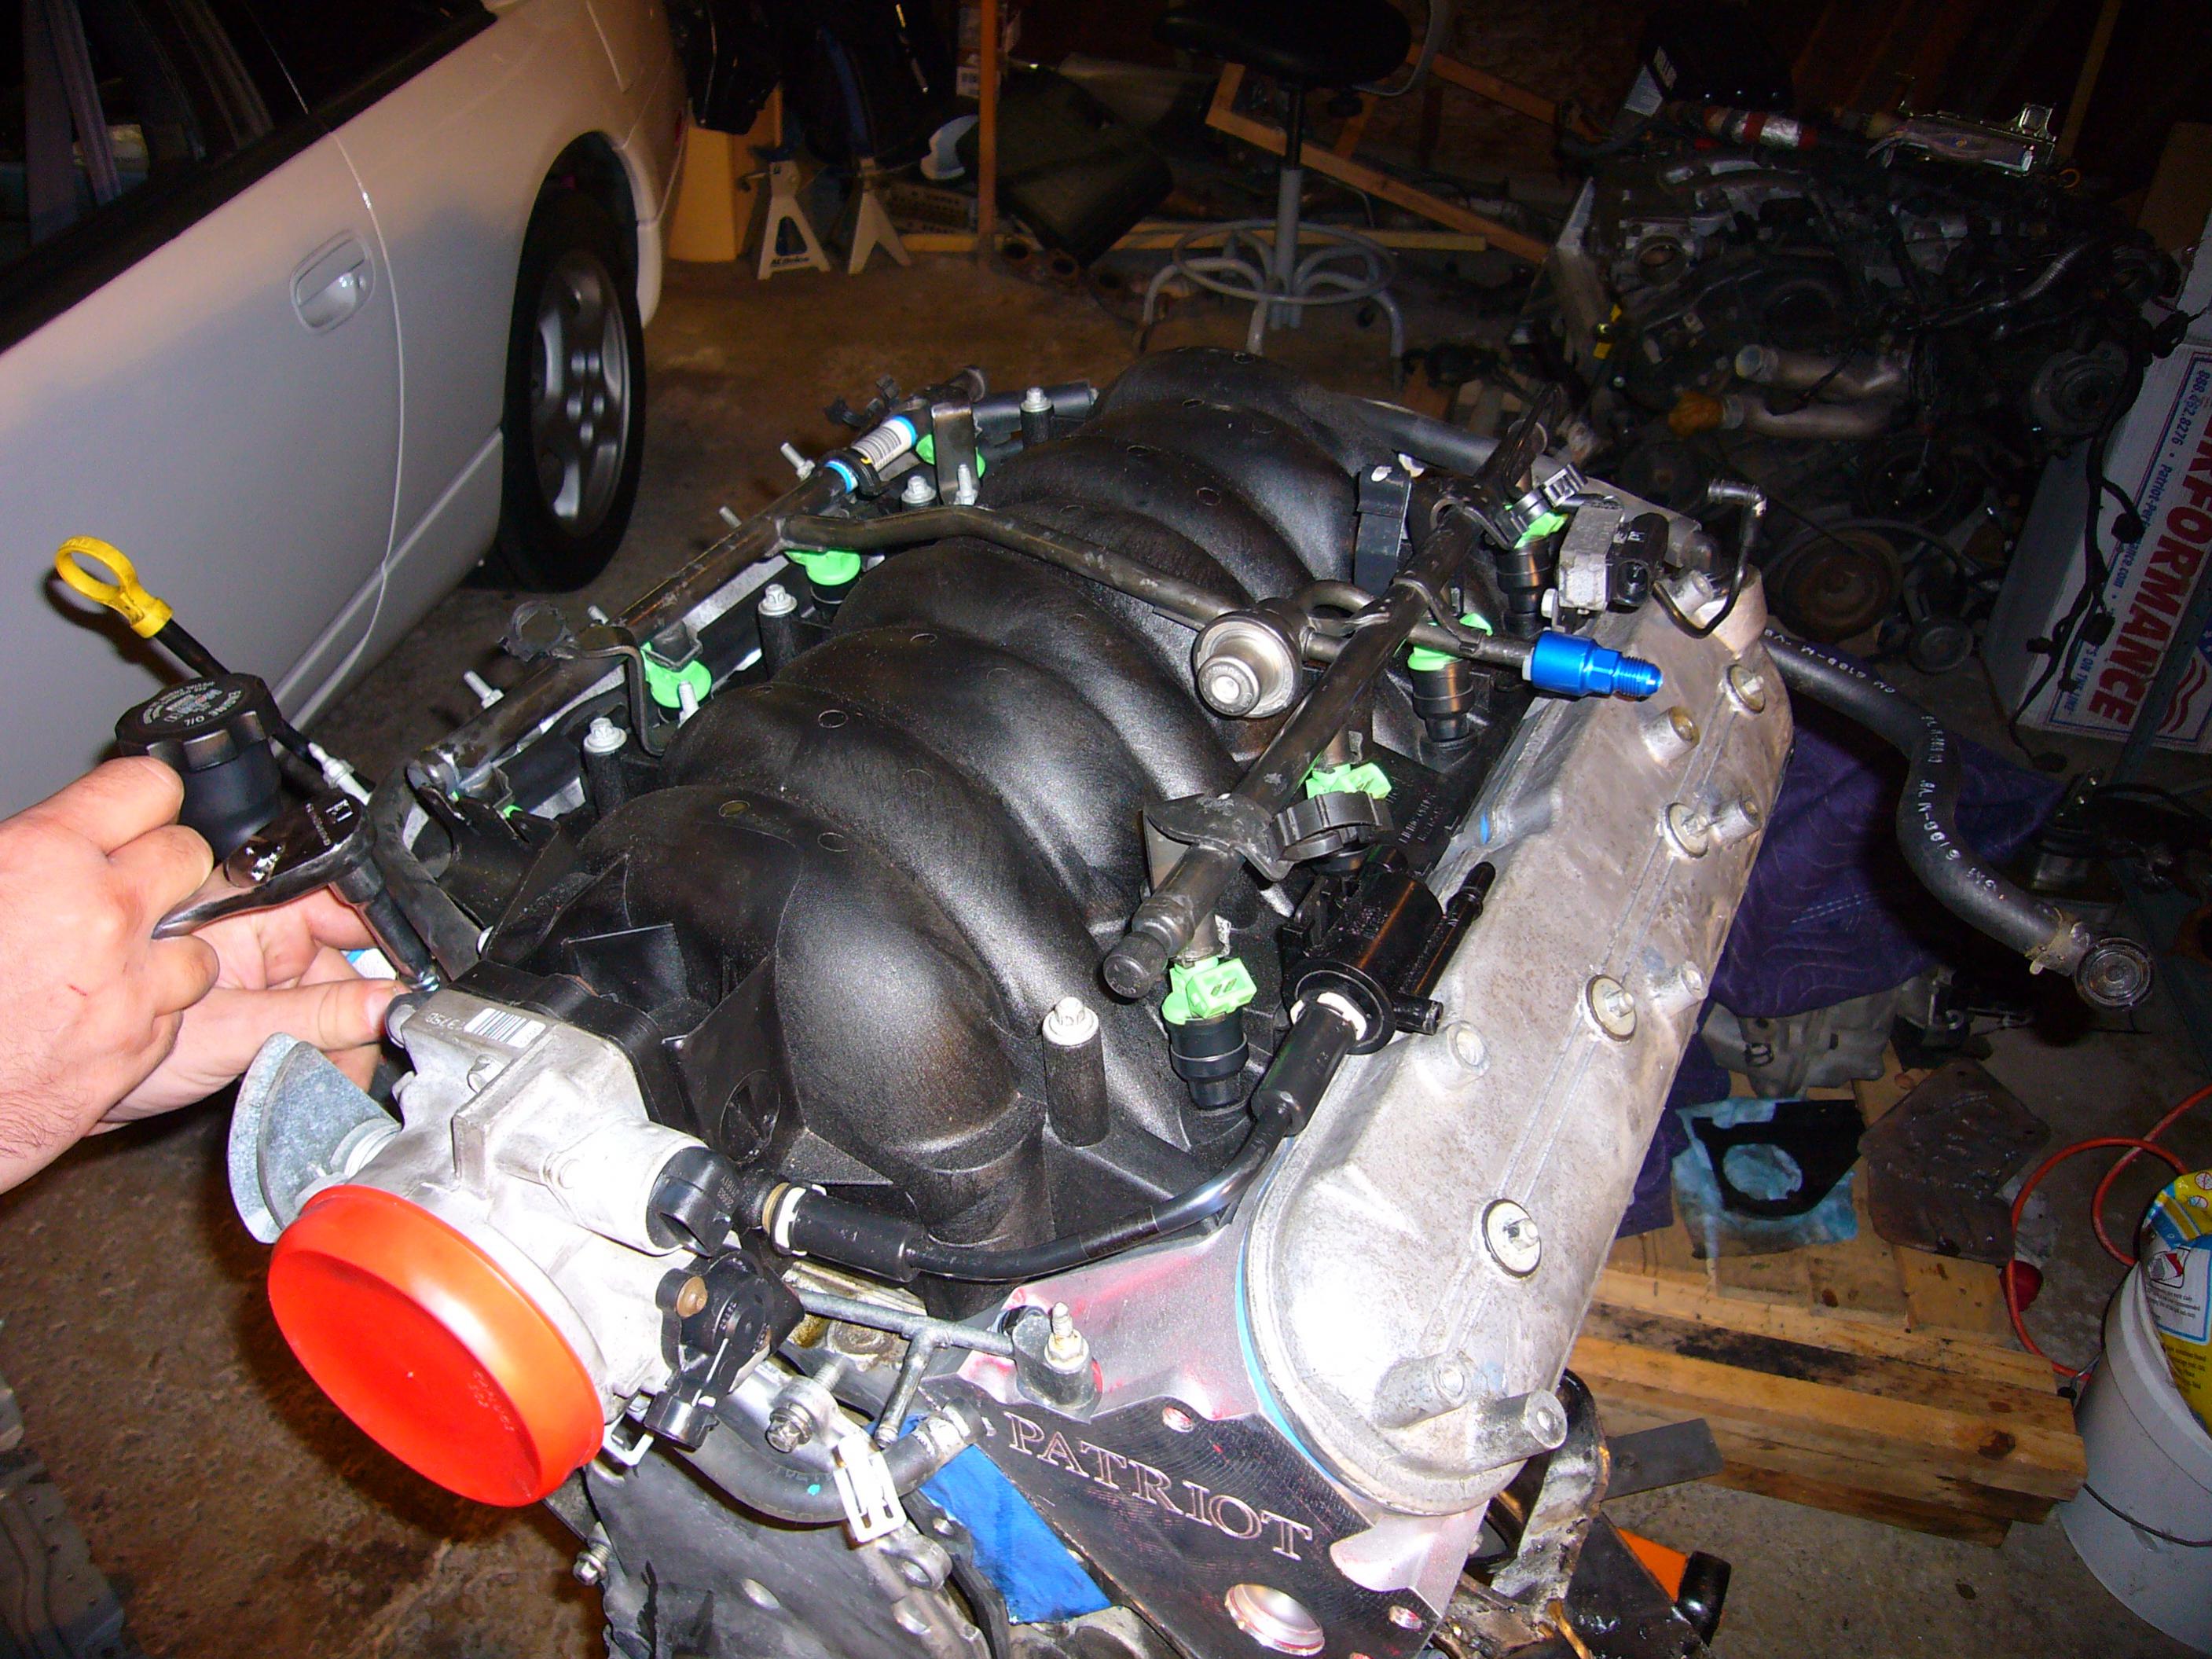
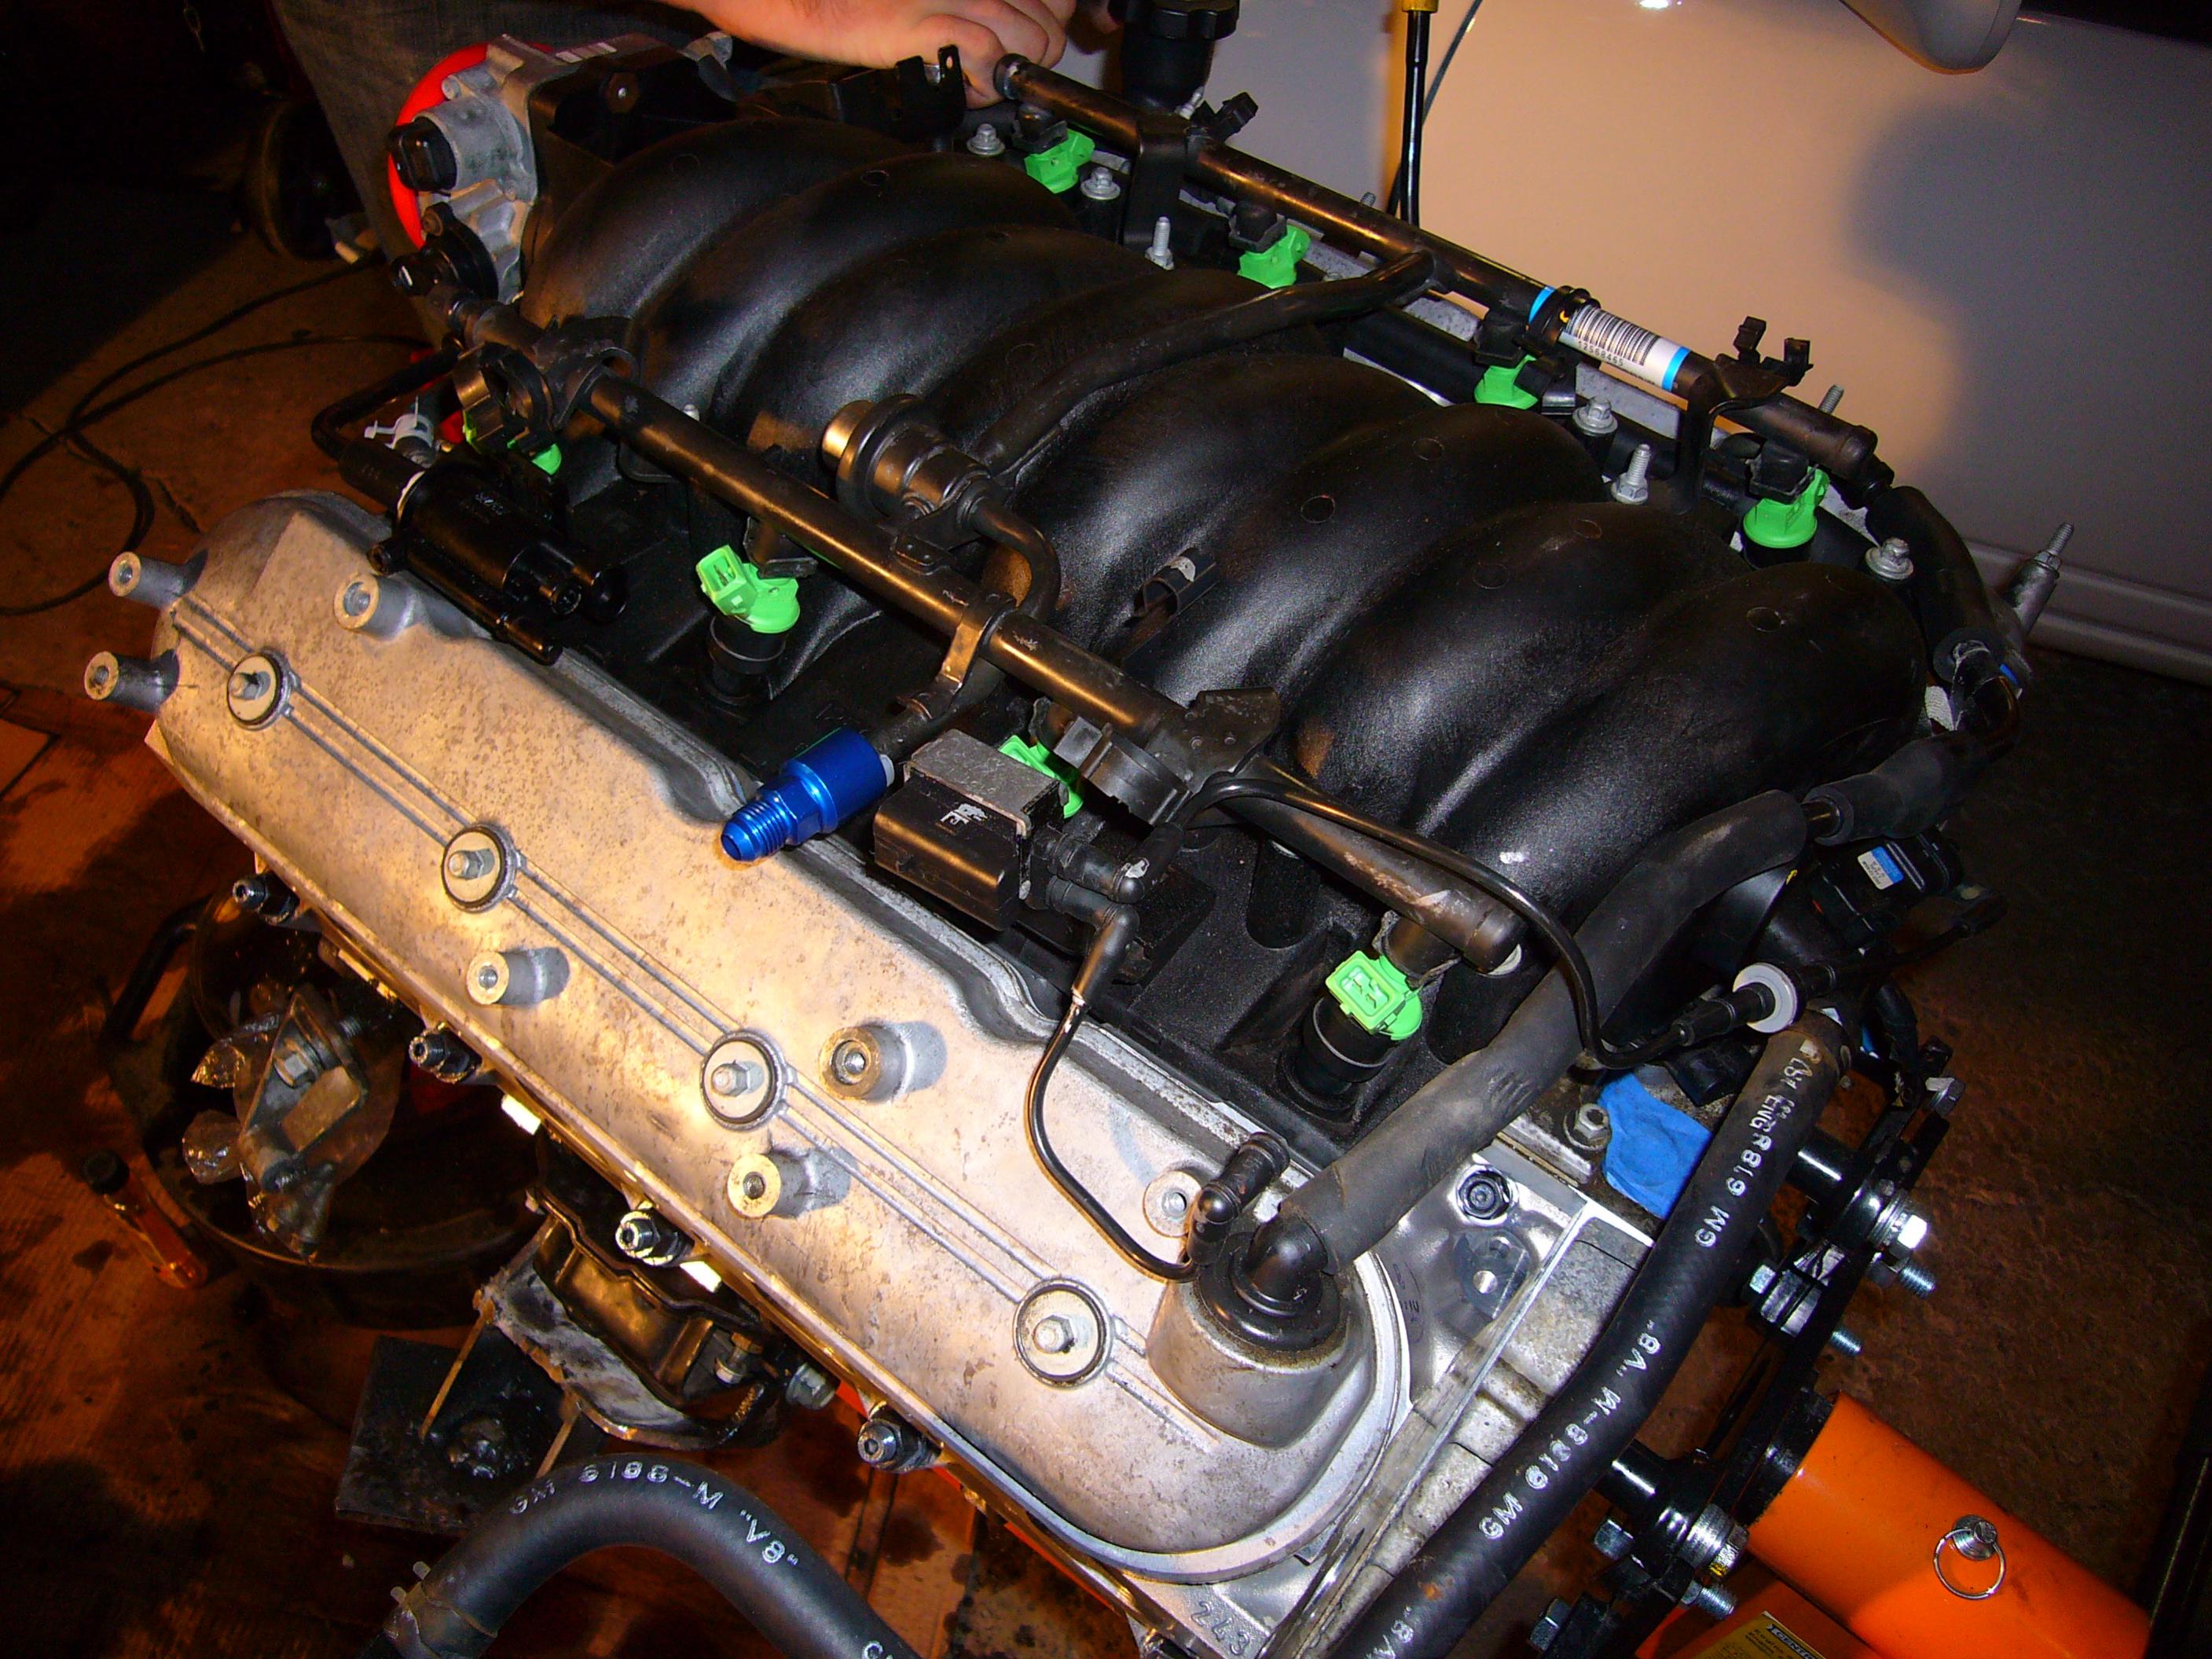
took a few pics today... hope this helps. the 2nd last pic shows how i cut into the wiper tray. not sure this was necessary but it definitely helped with the hood clearance. the LS6 intake i have is right up against it. i dont know if that intake is physically bigger than the standard LS1 intake though.
-
Z32 LS1 project thread... questions inside
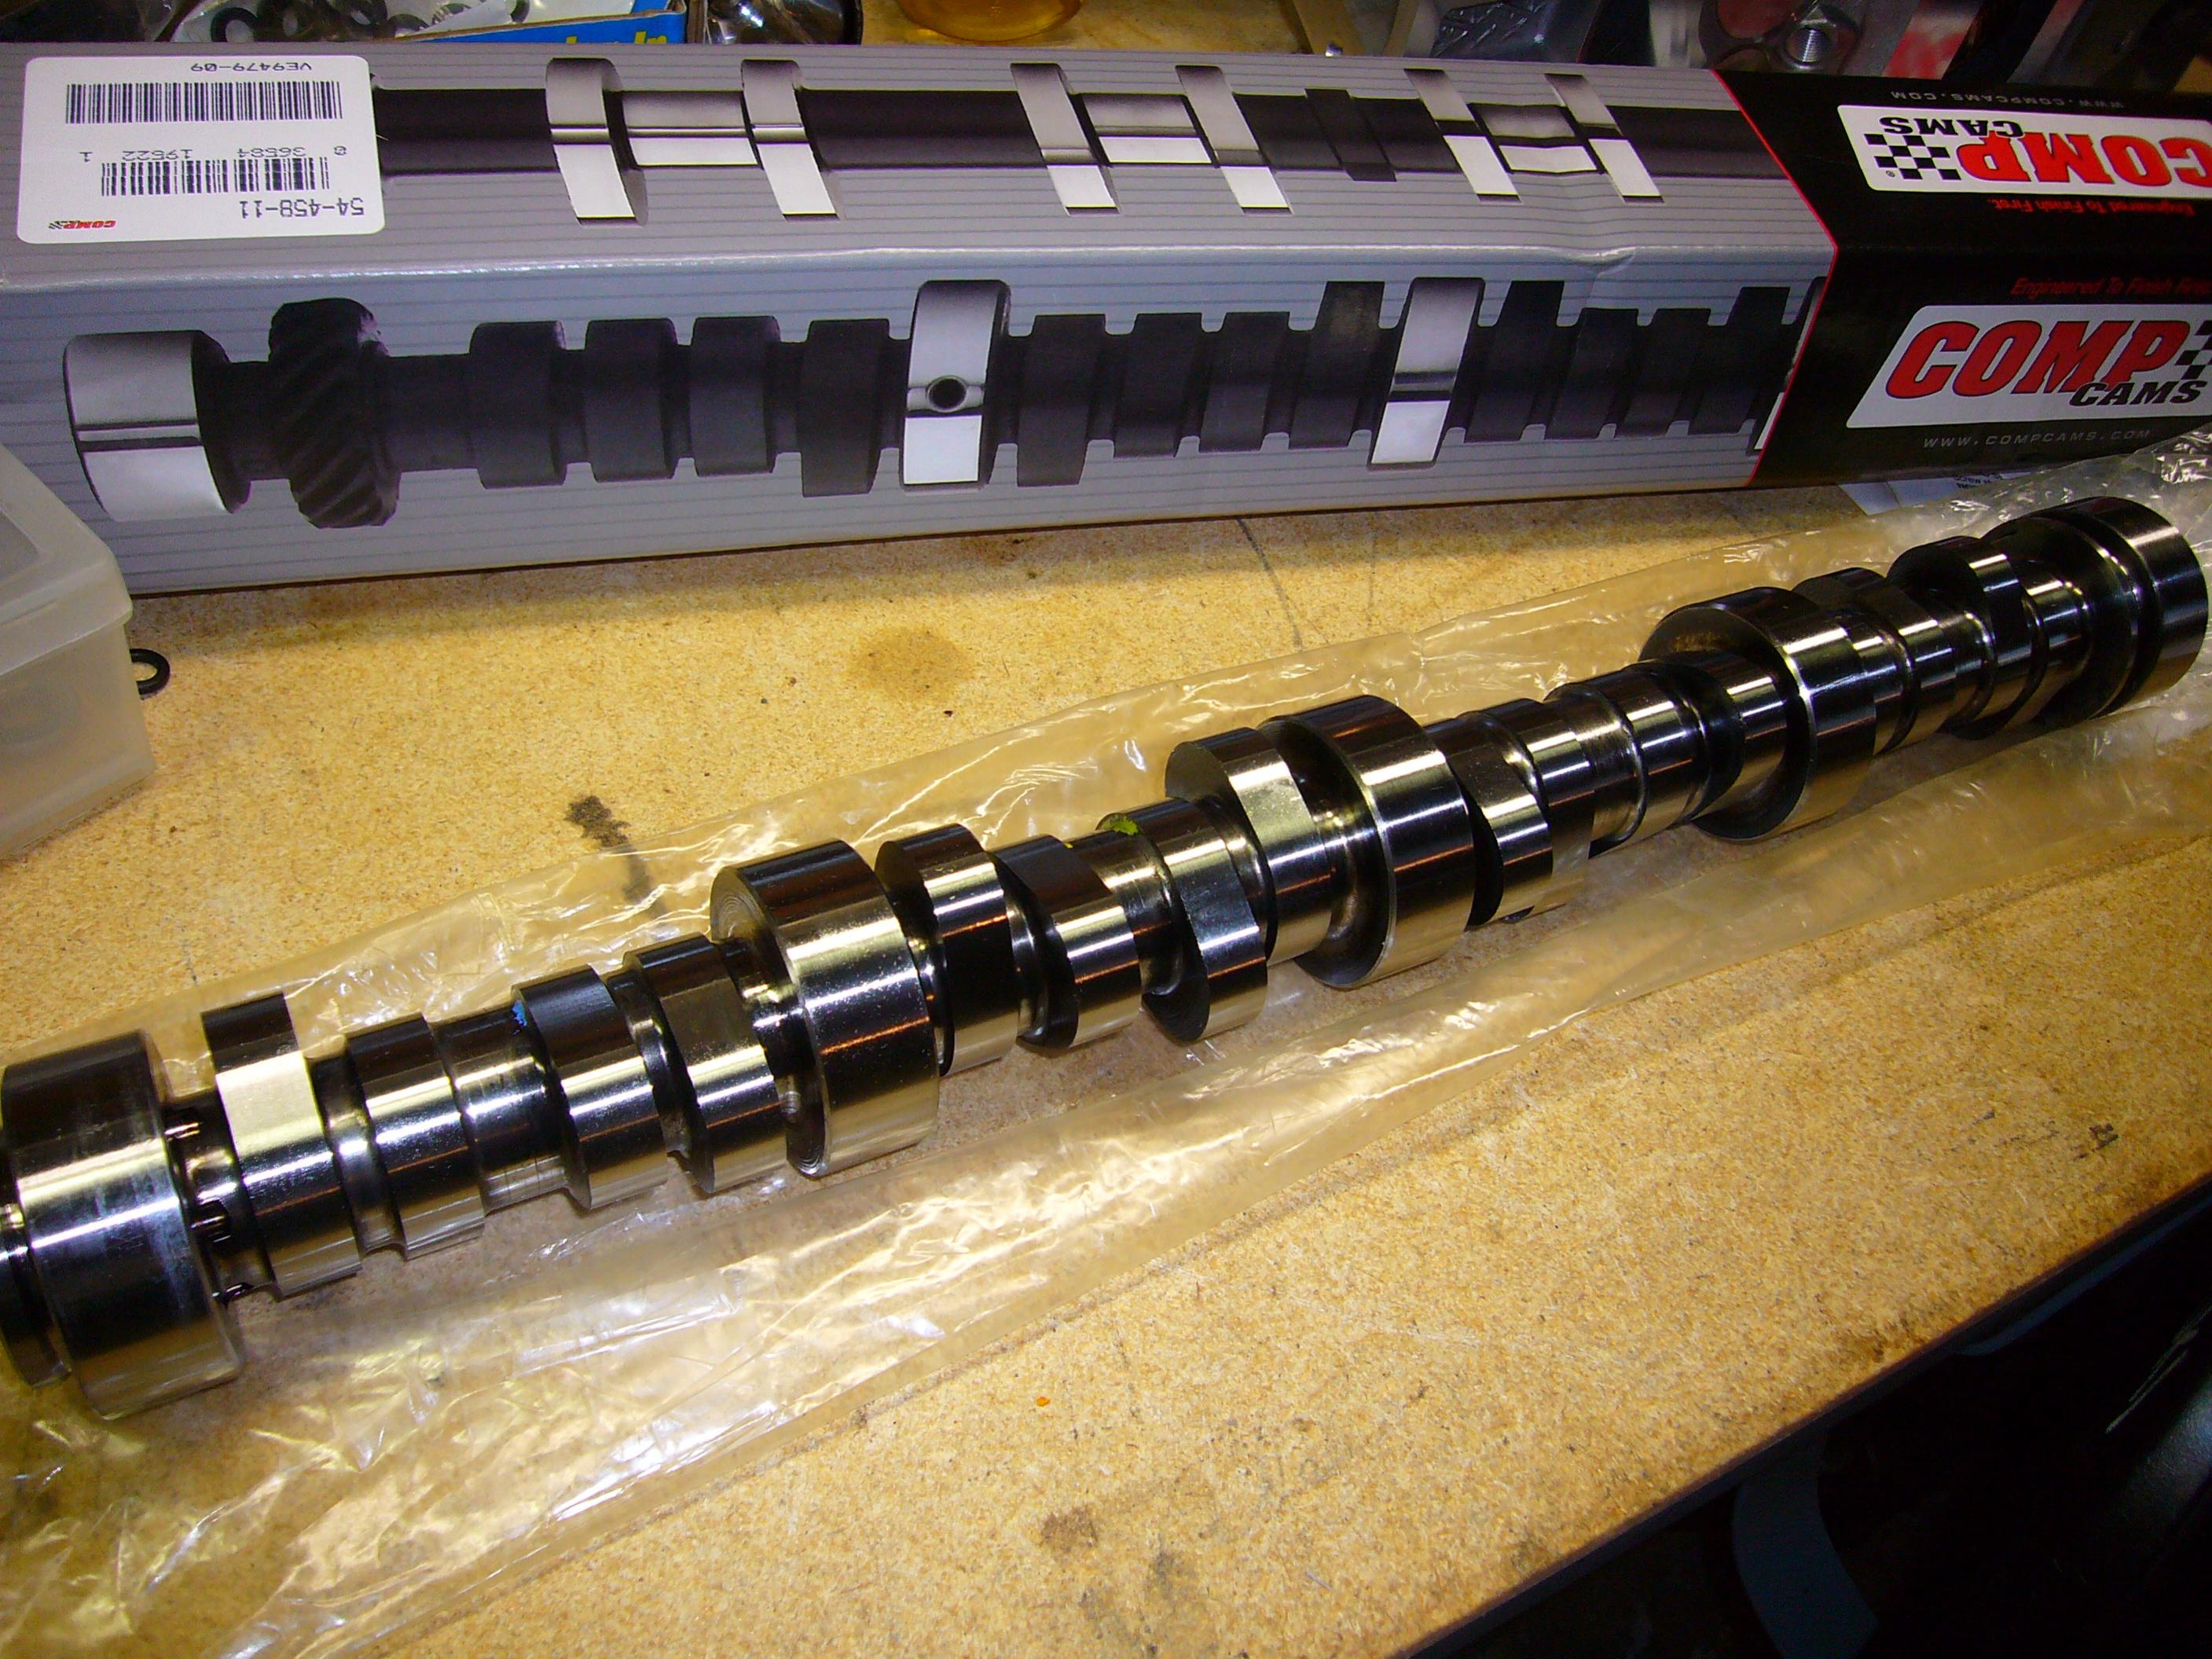
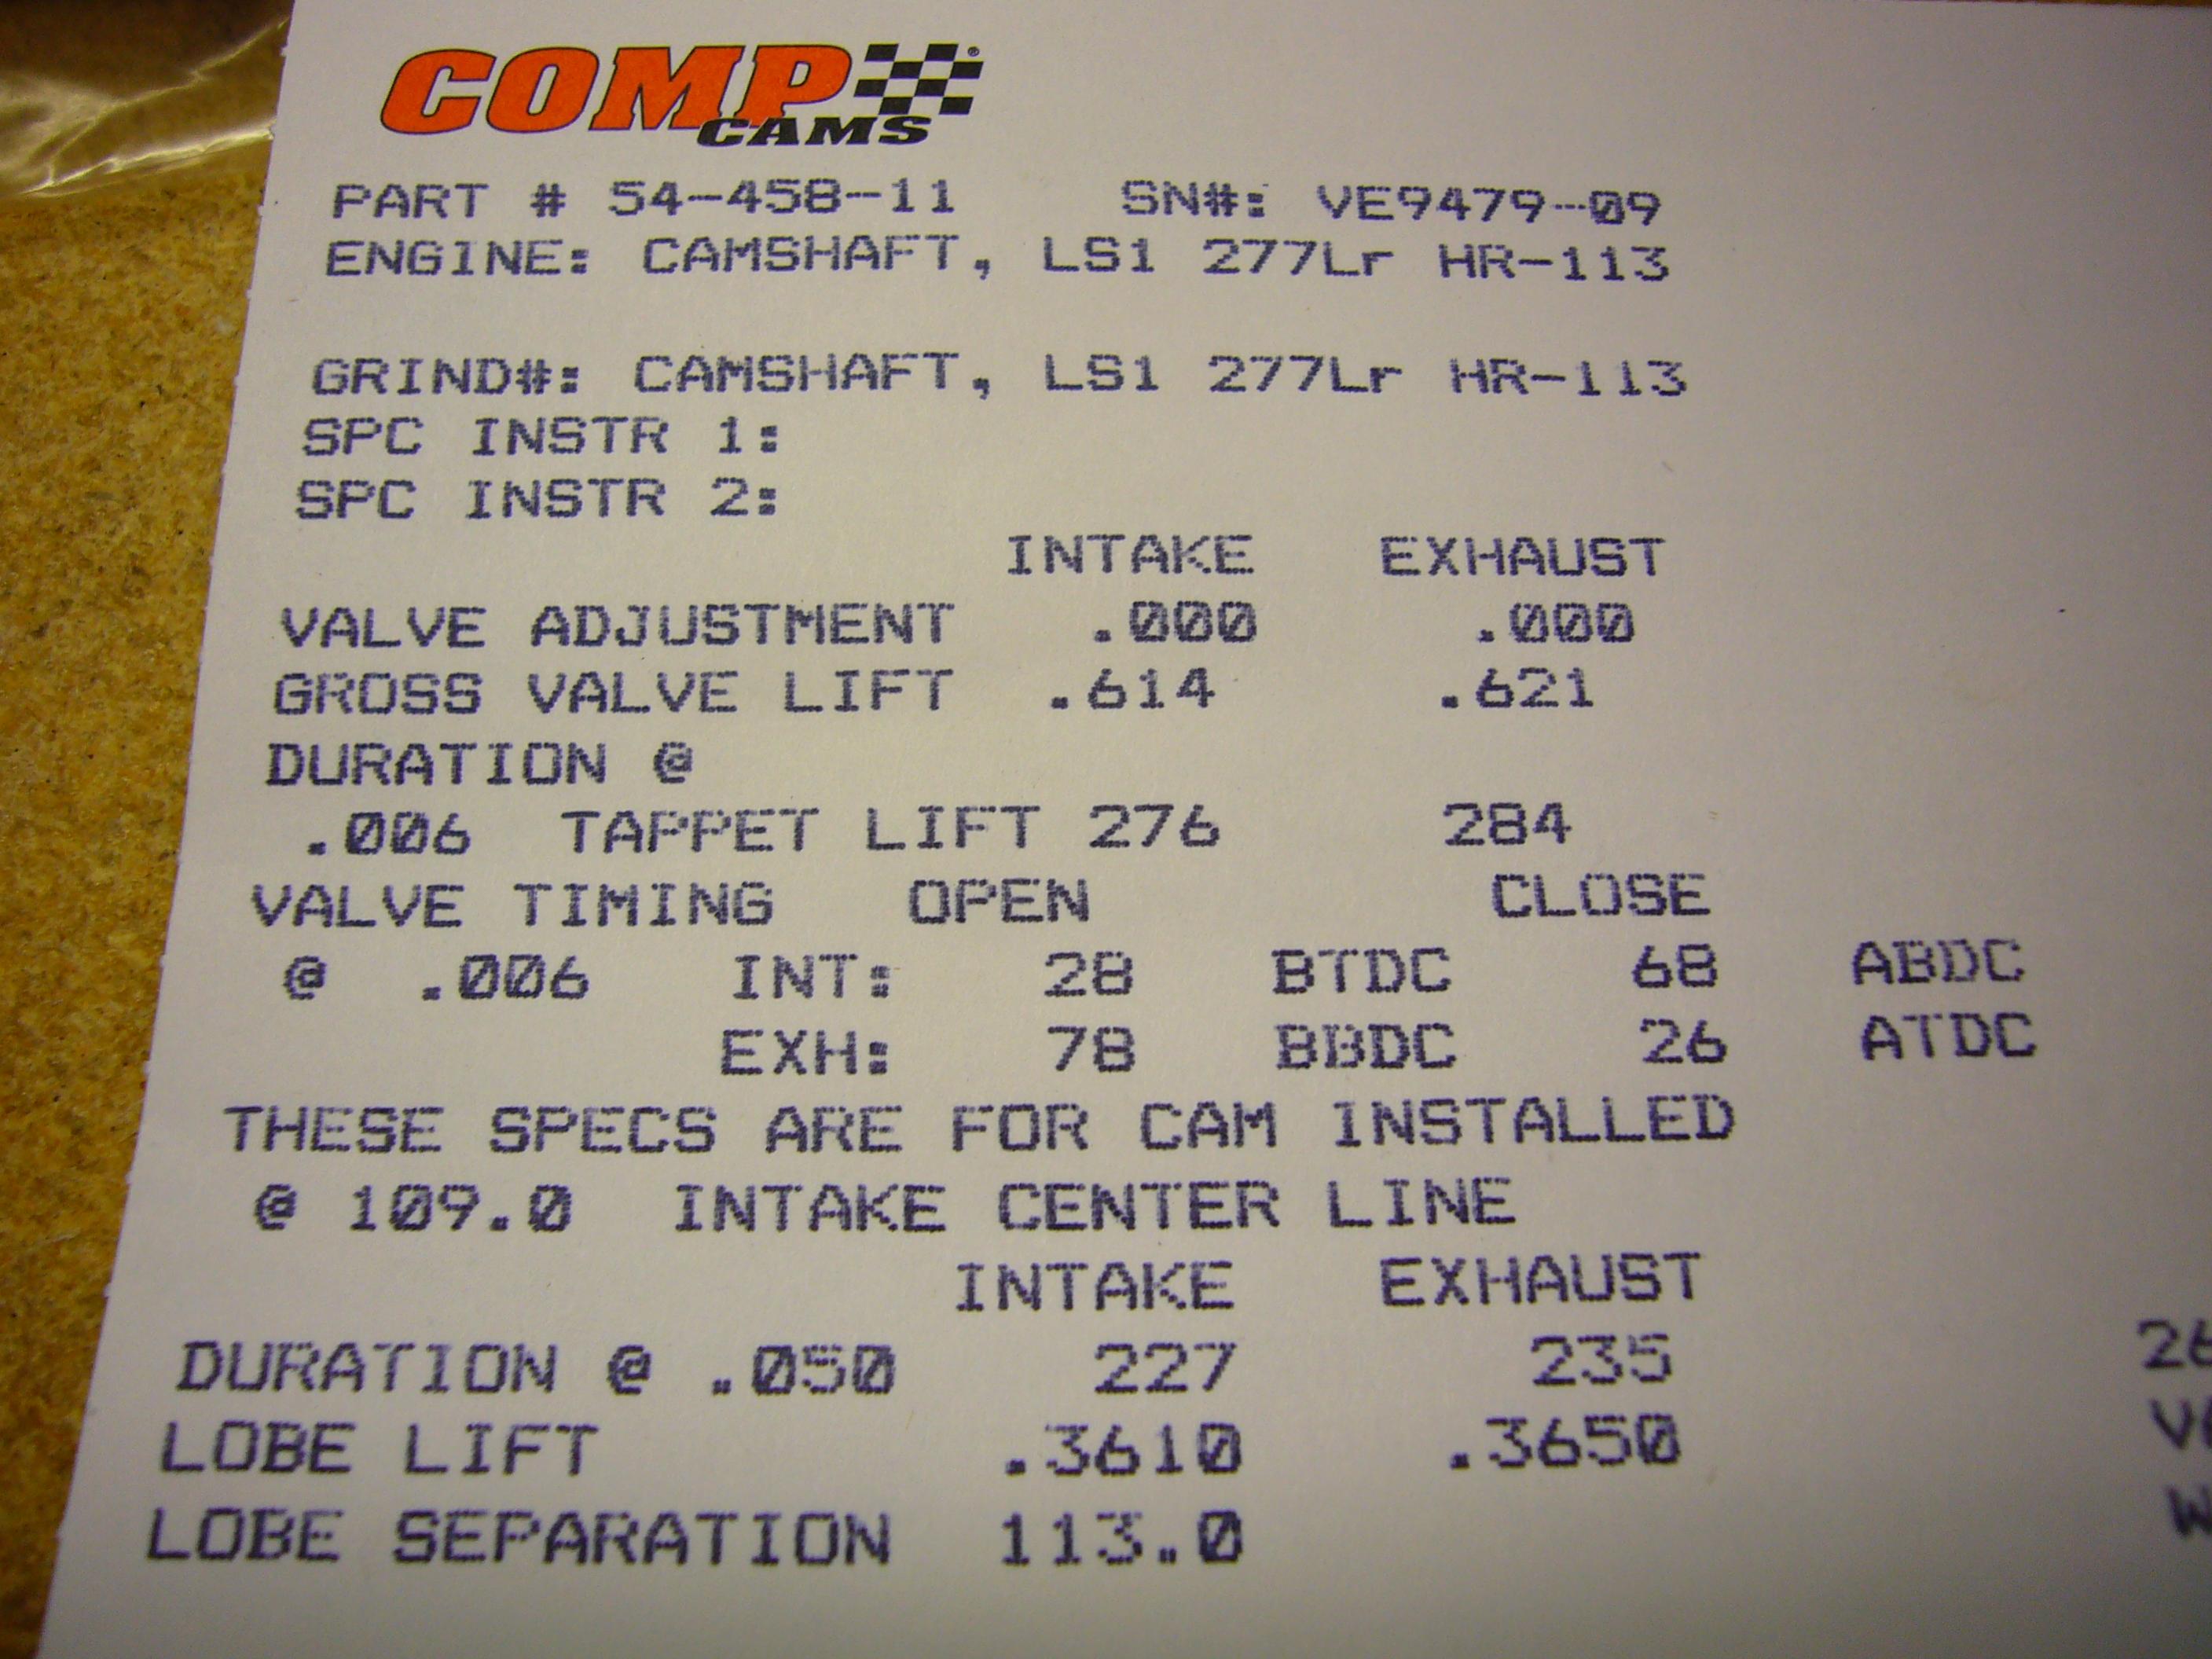
chris51881 replied to fogged306's topic in Z32 Series - 300ZX
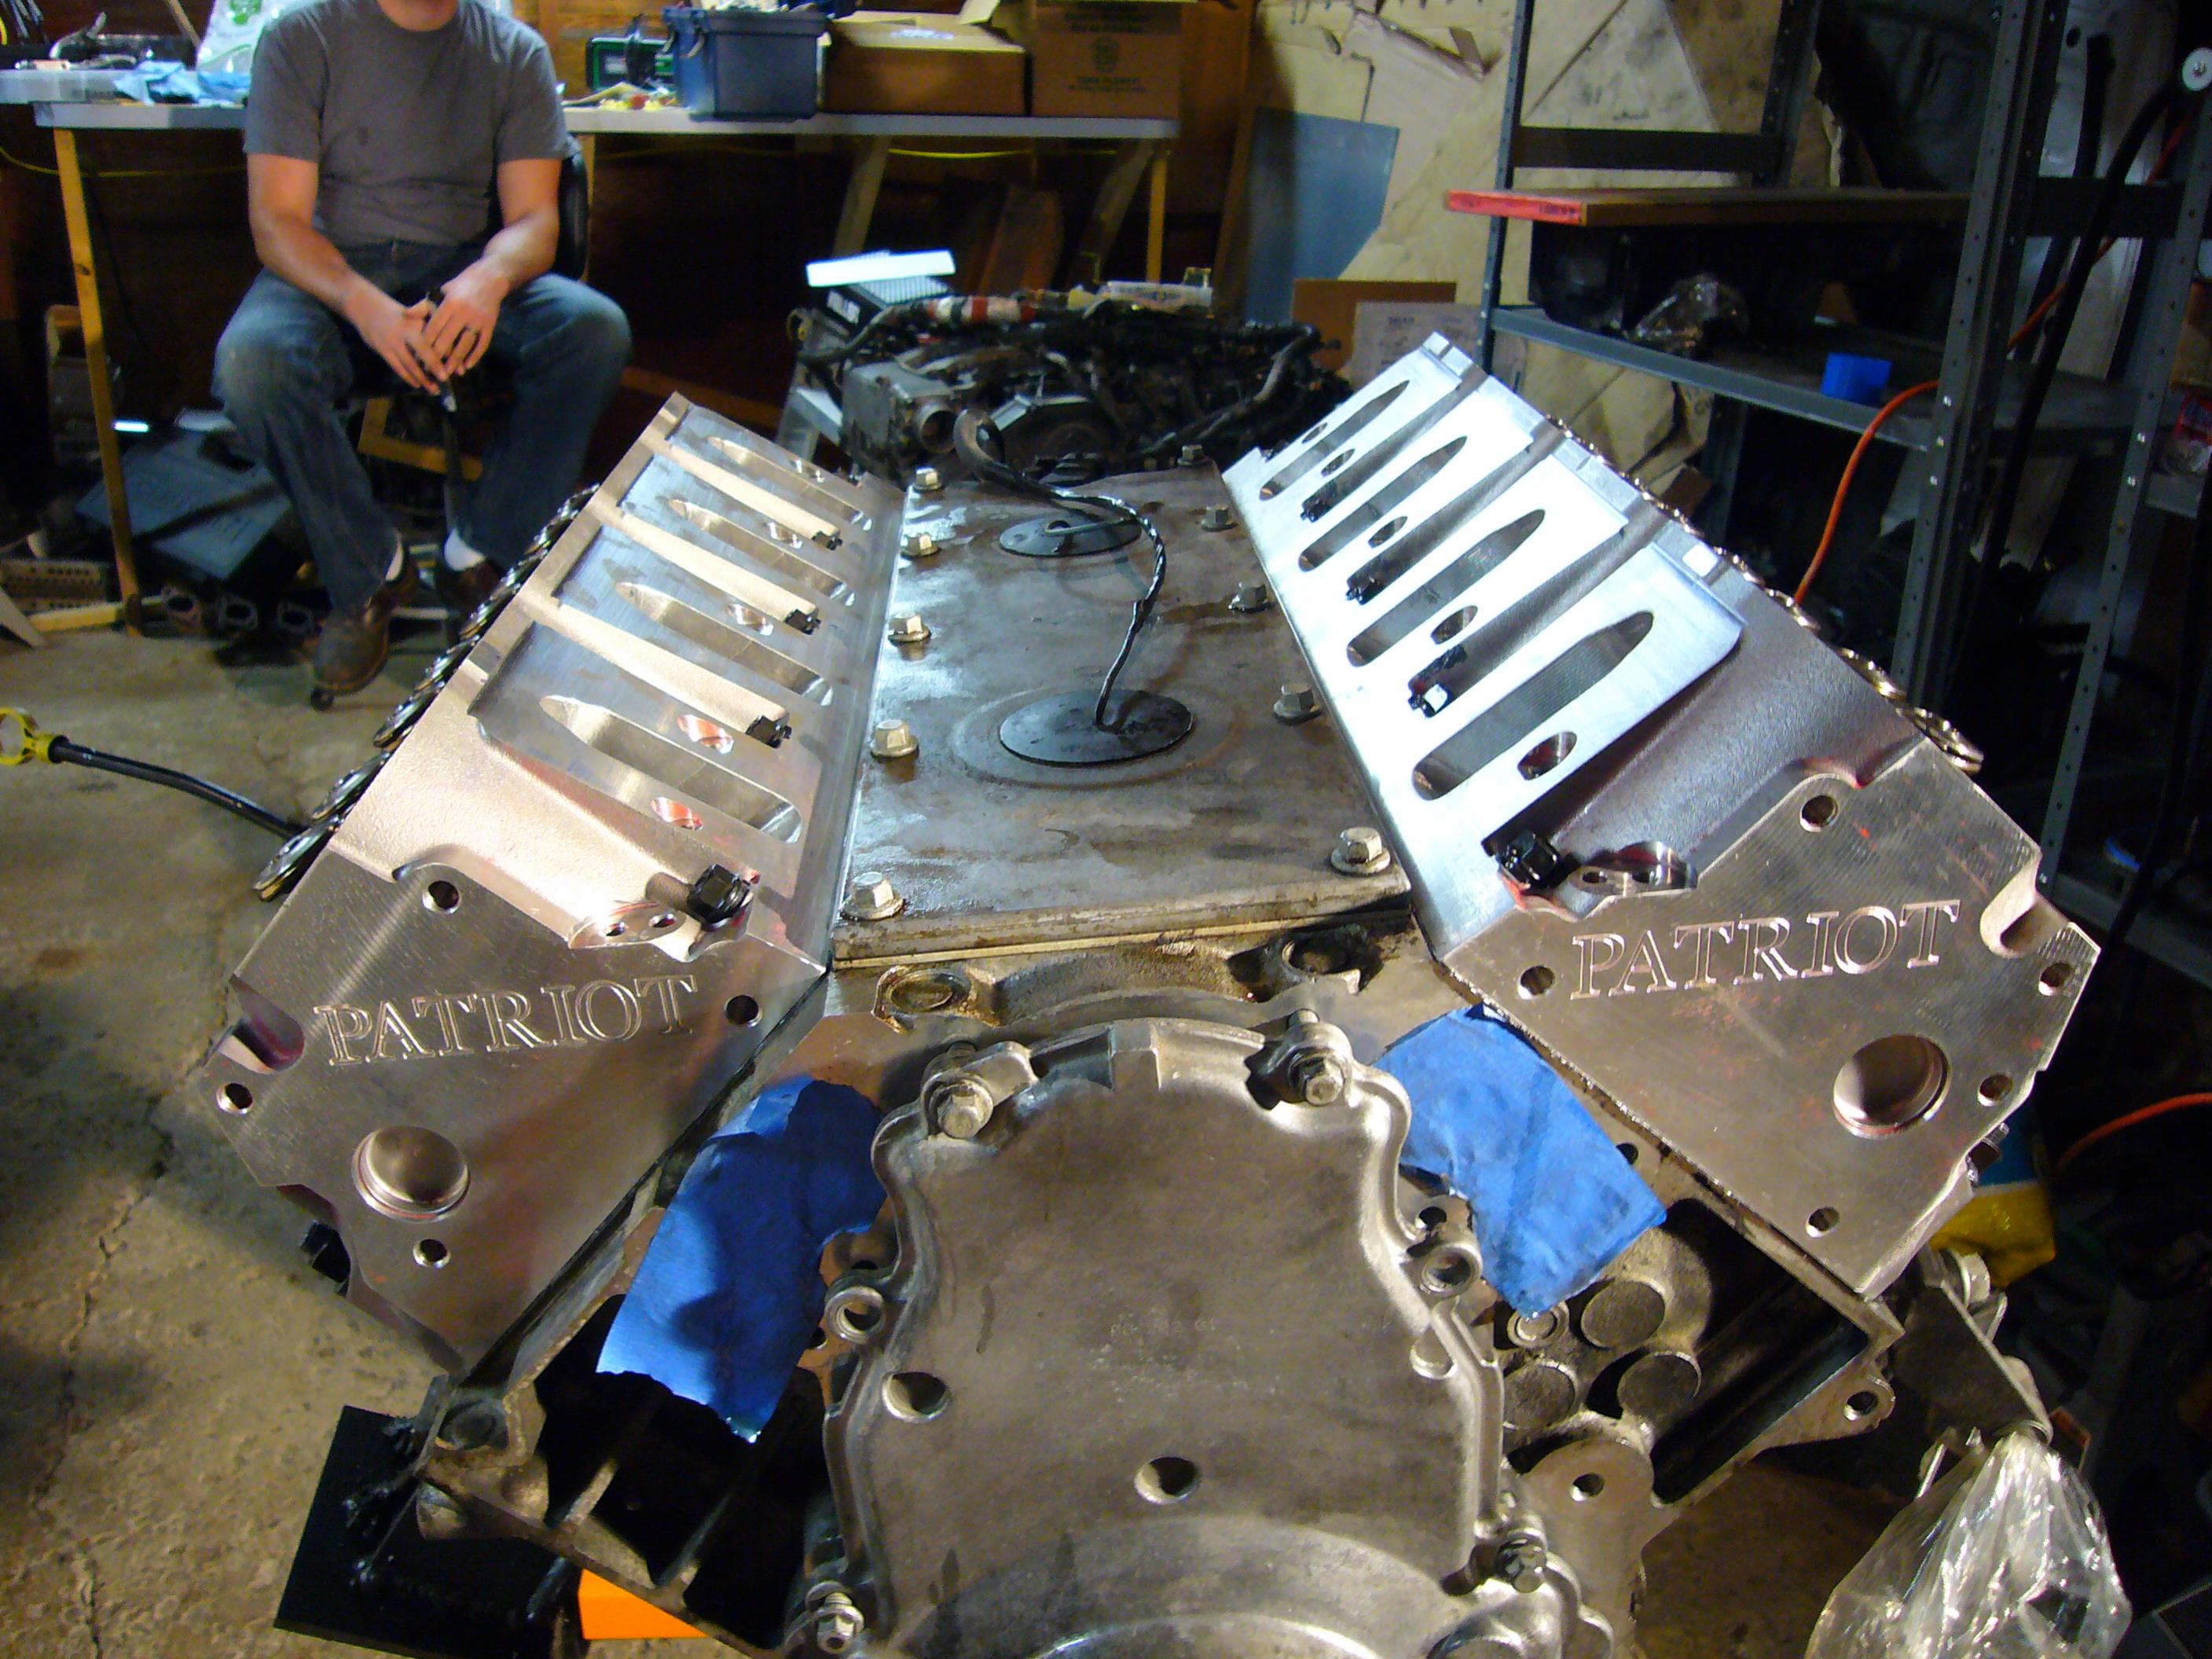
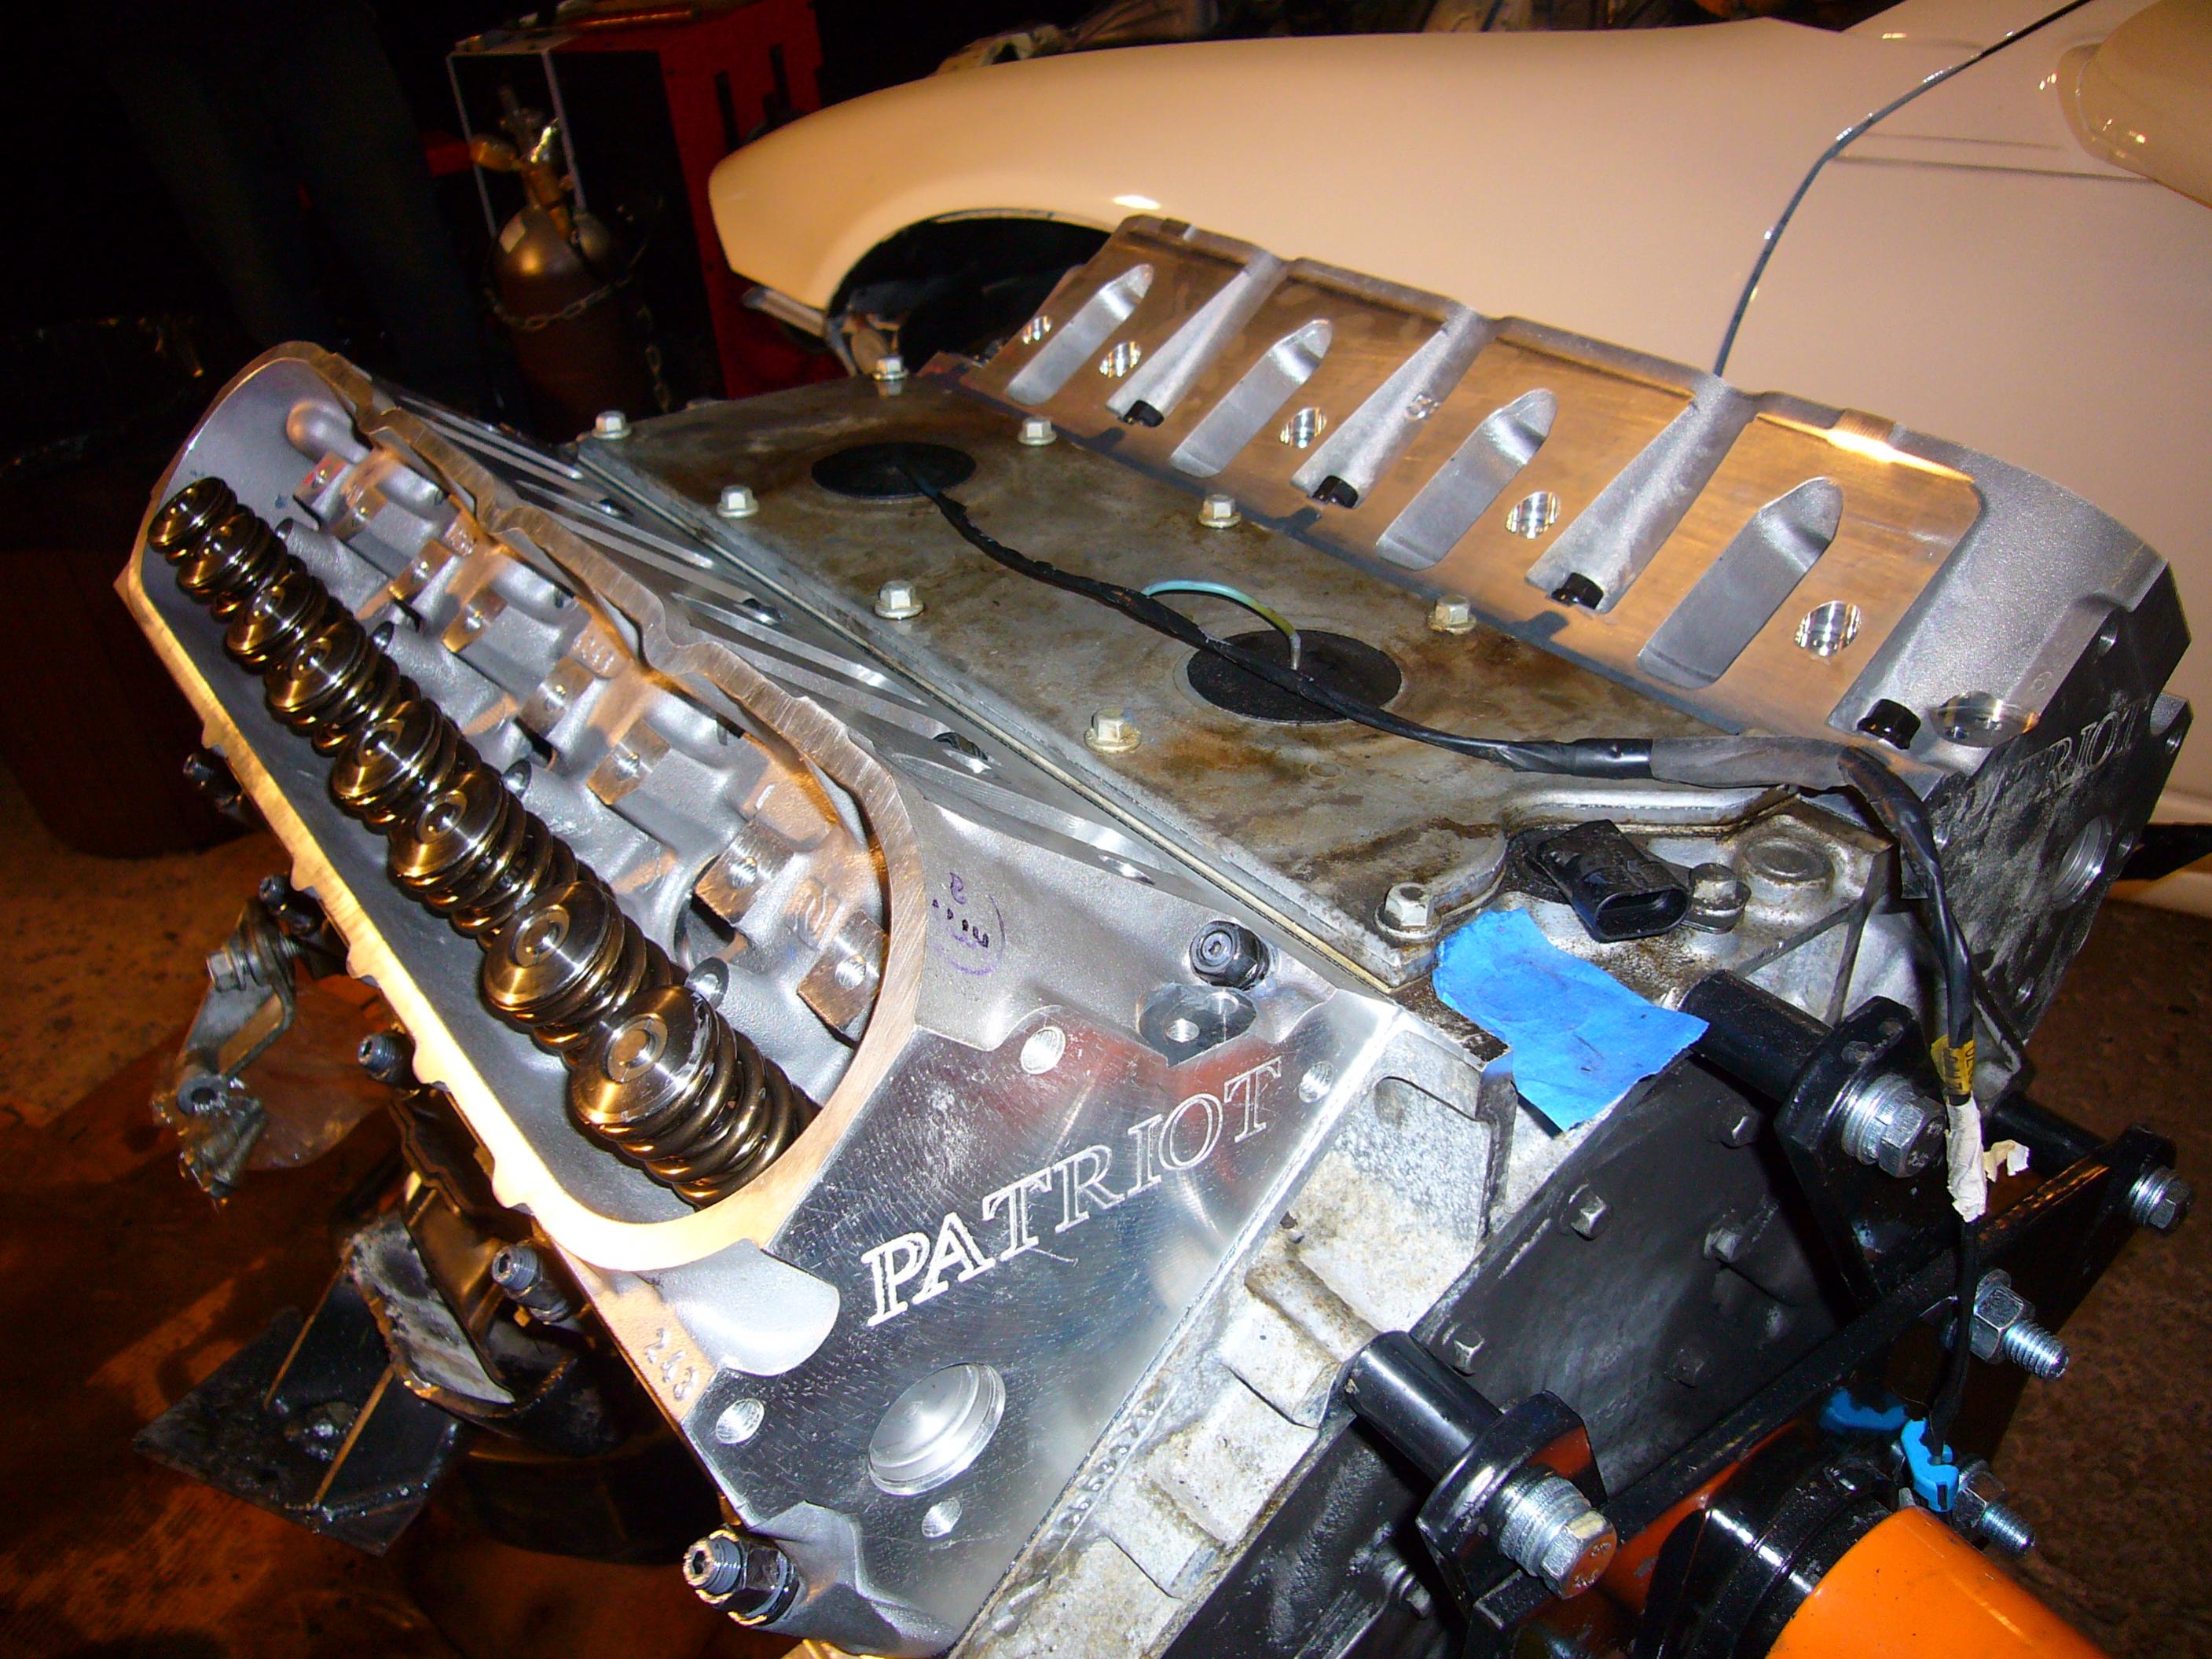
cam install, finally! i went with a custom grind CompCam from ThunderRacing.com based on a few specs and needs i gave them over the phone. there is a picture of the lift/duration specs of the cam. i basically followed a how-to write-up at LS1HowTo.com for an f-body i found. i just skipped the beginning steps because they were working on the engine with it still in the car. Cam How To everything went smoothly with the exception of the crank bolt. you need a lot of force to remove that. make sure you have a 24mm socket on a super long breaker bar (like 6ft or so). since im working on an engine stand i had to bolt a length of metal to where the flywheel was so the engine wouldnt turn while i removed the bolt. the piece was long enough to touch the brackets of the engine stand. once that bolt was out i used a 3-arm puller and removed the pulley. make sure you have a decent pulley puller. i bent both the types AutoZone had to offer. then i removed the water pump, timing cover, oil pump, and timing sprocket. the cam slid right out (since there were no lifters in prior to removal) i cleaned the cam well with brake cleaner (inside and out) and oiled it up good before installing it. it went in easy but just as the how-to says: the cam should go in with no effort, dont force it. turn it as you slide it in. the lifters i got from GMPartsDirect.com were LS7 lifters (part #12499225). i let them soak in oil for a few days first. we put them into the plastic holders before we slid them back into the engine because they are keyed and will stay in the right place when you insert them. sorry no picture there, i was covered in oil at this time. im waiting on my double-roller timing chain and ported oil pump to arrive to finish that up. i did get a set of gaskets from AutoZone though. the picture shows the timing cover gasket, water pump gaskets, oil pickup o-rings and the round gasket the sits behind the crank pulley in the timing cover. $35 for the set. Gasket Set we cleaned the pistons and area around with brake cleaner so the head gasket would sit flush. the ARP head studs called for a different torque than the stock bolts. 80 ft/lbs on the 10 large ones and 22 ft/lbs on the 5 small ones (15 studs per head). there is a picture of the bolt pattern at the bottom of this page: head bolt torque pattern finally we replaced the intake. starting to look like an engine again!!