

J__
-
Posts
235 -
Joined
-
Last visited
Content Type
Profiles
Forums
Blogs
Events
Gallery
Downloads
Store
Posts posted by J__
-
-
WOW! that is awesome work there!
... but is that a good idea though... if u get in a bad accident, ur face will be shredded from teh fiberglass....
-
kcelectronics: thnx for the info! i'll go to the local bike shop and pick up some of that grease. sounds like a good plan to me
veritech: thats a nice read, some interesting mod. but ima go with the easier way lol.
-
i have the energy suspension bushings on the whole car, but the instructions says to grease it twice a year?? thats insane, im not goin to take off all the suspension parts 2x a year to lube em, can i just squirt em with wd40 or will that somehow deteriorate the polyurethane? tia
-
-
what mountain where u hitting?ill be sure to look out for it. I like the seymour run with my cbr
we went up to seymour. once u start UP themountain, there's 4 black strips about 1 feet in width running across the road. they're patches in the road i believe, anyway, the 1st and 2nd r pretty smooth and u can go over them fairly fast and be fine. i think its the 3rd or 4th (pretty sure its the third) that theres a dip after and then an uprise. it's fine if ur goin 80 or something. but anthing over 120km i would slow down. remember this is the 3rd black tar strip goin UP the mountain. be careful of it.
btw where are you located? never seen ur car around i dont think. we should get some datsun ppl together and go for local cruises. not many in vancouver
-
-
when i got my car, it came with 15" enkei meshes, they didnt need hubcentric as they fit snug onto the hub. when i got my new rims, there was about a 1cm difference in diameter between the wheel hub opening and the Zcar hub, i didnt get any hub centric spacers, just used the bolts to center the wheel and it runs prefectly smooth, no vibrations at all. i dunno if u guys really need em, depending on the wheel
-
u can drift better with solid axle

-
oh ok. nice, my wheel well was clean. but then again i had those rubber shields over the struts... but i stuck my finger in there and there was no oils, only a bit of grease on the shaft of the strut. i guess thats a good sign
-
i jacked it up and looked at the bump stops, non of them were torn or anything. still looked good. i dont think anything were bent either. hopefully nothing's messed up lol.
-
so was doing some moutain hill climb driving with my buddies at night last night, goin 160km uphill then all of a sudden there was this HUGE dip that we didnt see, i went over, then BAM, bottomed out the car =( kinda felt like taking a boat over a wave.... i have the tokico springs with illumina shocks... didnt go short stroke...
. do u guys think the shocks are messed because of that 1 time? car still feels the same as it did before. but i dont want to drop the suspension again and test the shocks lol. what r my chances? -
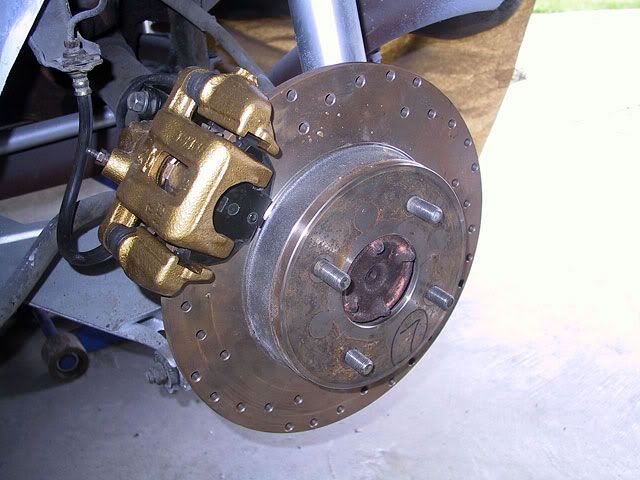
ok i posted my fix that solved my brake porblem already on the other thread. it was because the rear 240sx calipers werent meant for our cars so the bleed nipple isnt 100% at the top. therefore there was still lots of air trapped in it. i just unbolted the bottom bolt, tilted up the calipers so the nipple is at the top, put in a piece of wood between the pads so it can clamp onto something, then bled them again, a few good squirts of air later and the brakes are rock hard and engages right away. try it
-
nice job on the redo, I am looking at shaving the rearend on my 81 , how did you do yours and do you have any pics, did you reinforce under the metal? and how did you get the side into match the new rolled rear?
thanks bob
i didnt take any pix. but after the bumper came off, i just filled up the holes with fiberglass. did about 5 layers of glass, hard as crap. then started to block sand like mad... until only the holes were filled in and get the excess glass off the rest of the body. then layered on fiberglass filler, blocked, repeat, until i was satisfied with the smoothness, finally did a few layers of icing to fill in the rest of the pin holes. try to use as little bondo and icing as possible... it does absorb moisture and eventually will bubble. fiberglass filler doesnt. the sides were easy, i didnt do anything to em, just welded up the 2 bolt holes that were there for the bumpers.
that is an awsome job, big props to you. im painting soon as well. did all the dust an bugs come out after the wetsand?yup they're very easy to sand off. but make sure u sand them off before u do another coat... or it wont be coming off or u'll have an imprint of a bug in the paint. also dont try to pick off the bugs when the paints wet, u'll screw it up even more.
-
wow! great job! i wish i had stripped my Z all the way down like that and sandblasted... but not enough funds and time. keep us updated!
-
I bought a new set from nissan $250. each
thats why they call it the stealership =P my mercedes fenders cost less from teh dealership...
-
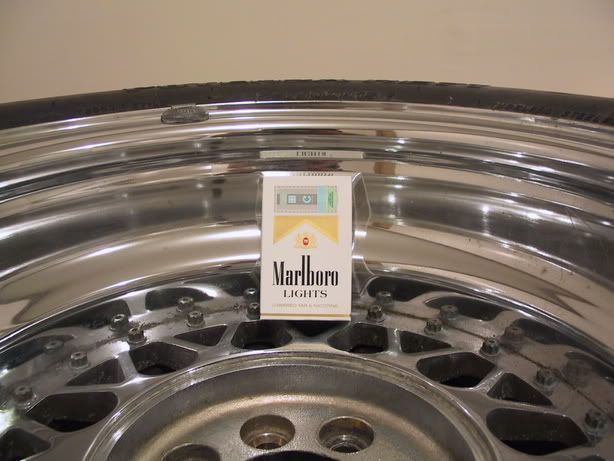
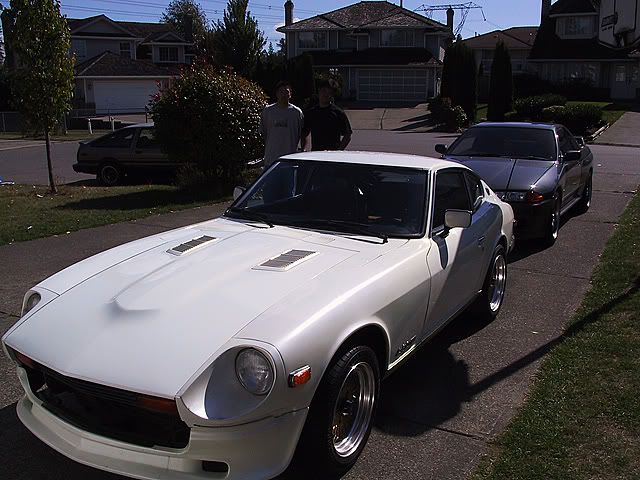
wheels i bought off club4ag from a guy in cali. 15x8 -31 offset. 5 inch lip on all 4 with very little backspacing... makes for horrible handliing but very pimp
im gonna be keeping my old enkeis for track and drive these for daily driving.yea im actually very fortunate for having such a low rust car from vancouver. have to thank the previous owner for taking such good care of it, and thank his garage
i didnt paint it pearl white. it looked nice but will be pain in the ass to match. car is painted Champion white. same color as an integra/civic Type-R. -
thnx guys. i owe my friend big time for sticking with me throughout the project
240hoke, yes originally i was goin to roll the paint so i bought all the paint, mats etc etc. since i didnt have a booth to spray it in, or the "proper" spray environment and i didnt want to build a booth in the middle of my friends back yard. i only sprayed it because i was running outta time and the roller method took too long. so spraying in the open, i had to wetsand watever paint i sprayed on anyway to get smooth from dust, bugs, and dirt particles. the tremclad protects just as well as single stage ppg and easier to work with imo since u can butcher it and touch up, sand, polish, etc etc. After sand and polish, the shine is pretty much like any single stage out there.
-
-
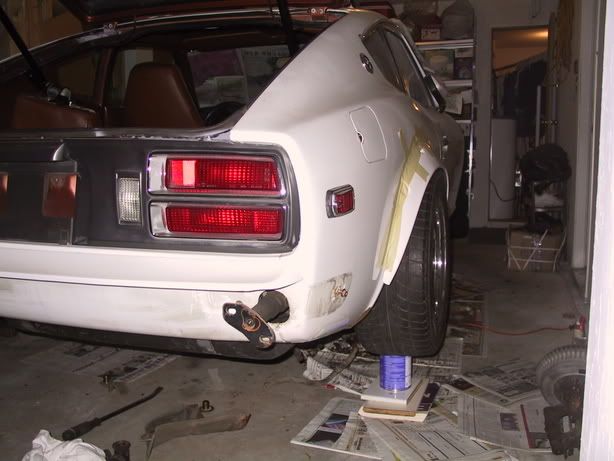
cut out rusted hatch area
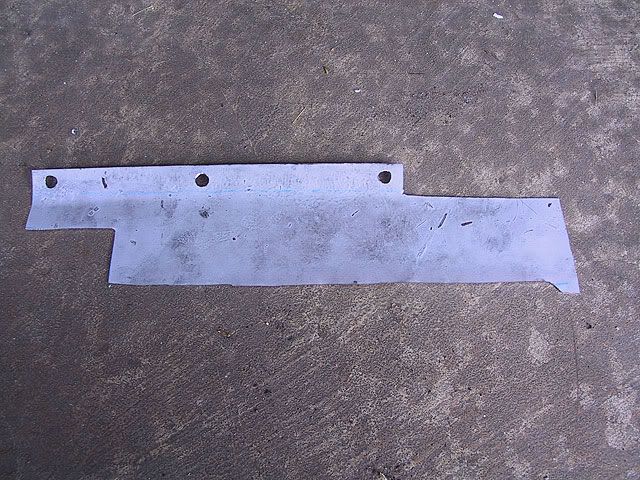
fabricating the patch panel
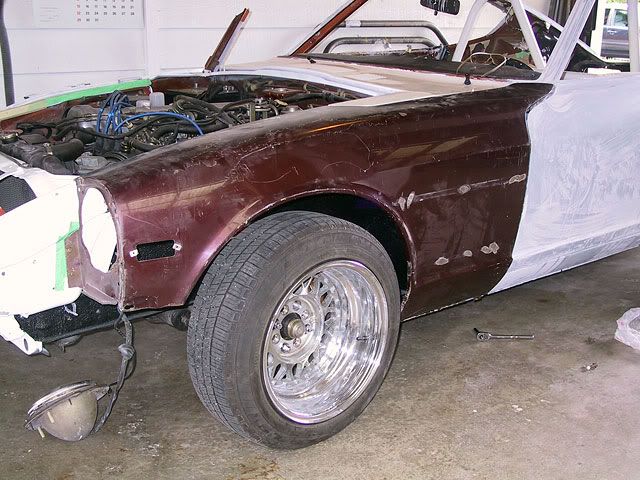
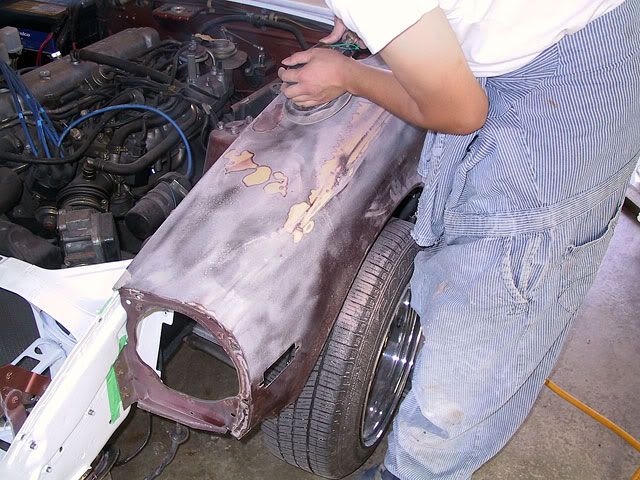
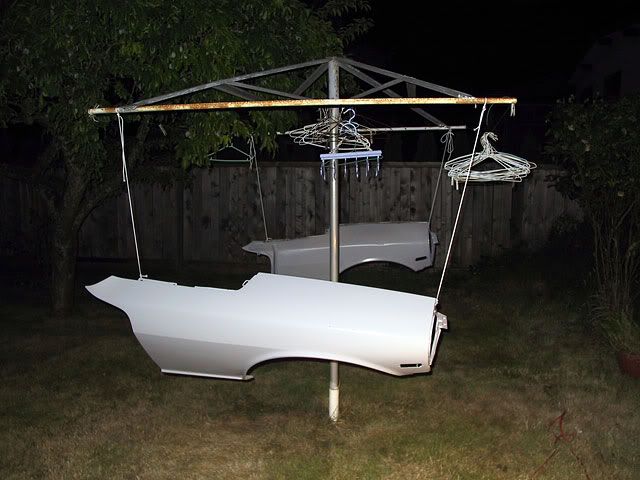
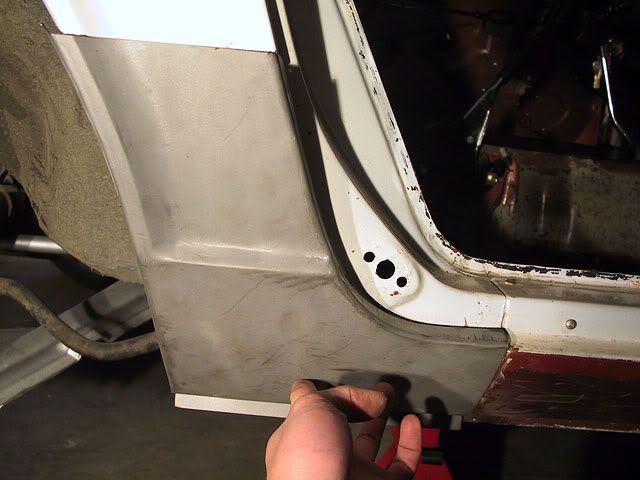
"new" fenders to replaced the rusted old ones. these damned fenders took me 3 weeks and lots of anger lol. you dont want to see the photo with the bondo on em...
shot with epoxy primer
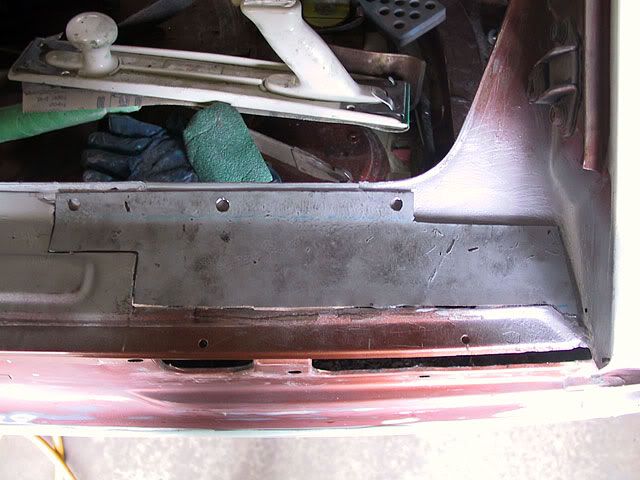
welding up the floorpan drain holes
i purchased fender mirrors so i shaved the door mirrors, and of course that means more welding...
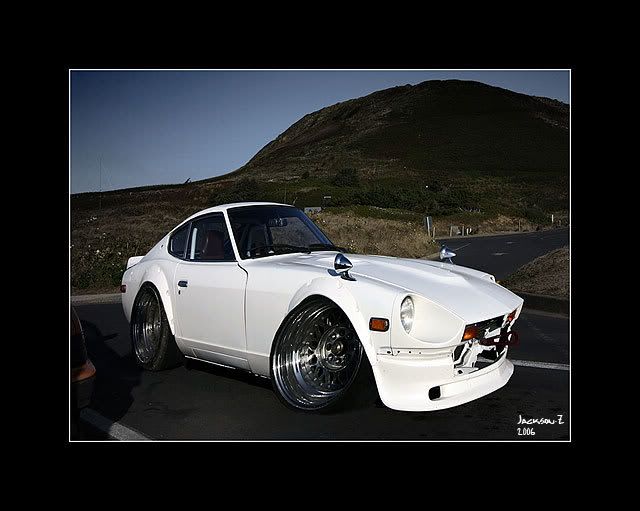
new rims
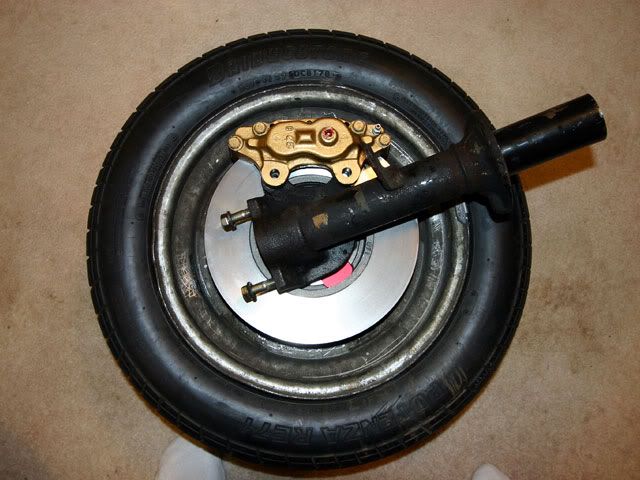
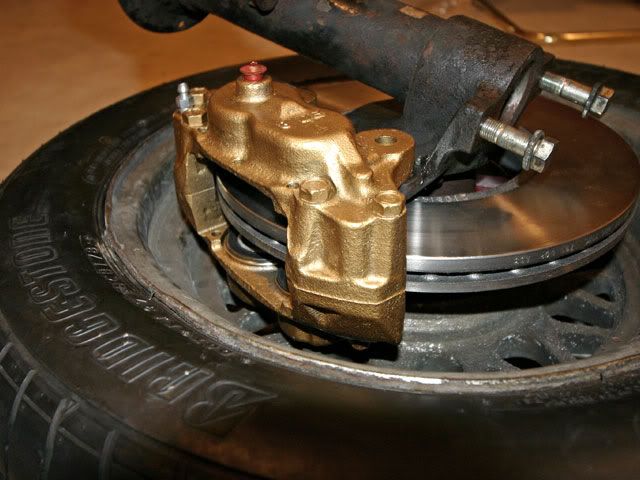
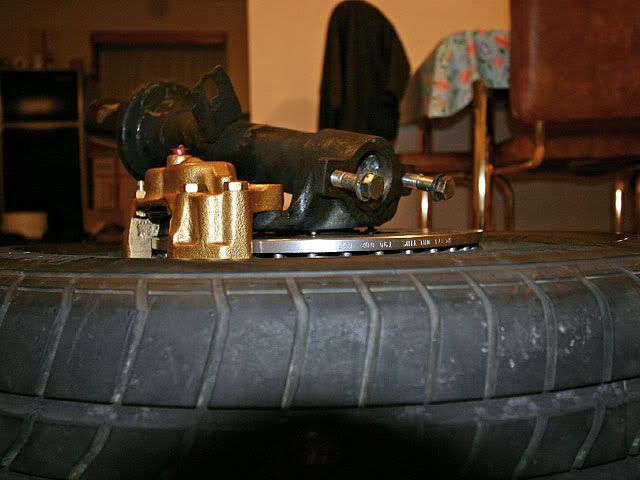
brake upgrades: 4 piston toyota 4x4 front caliper w/ 300zx vented rotor
rear 240sx disk conversion with maxima brackets
test fitting flares + rims
i didnt take any pics of the suspension but i got the tokico springs with illumina 5 way adjustable shocks. i woulda definately gone with the short stroke conversion with coilovers if i didnt already ordered the tokico setup. car's still got too much wheel gap.
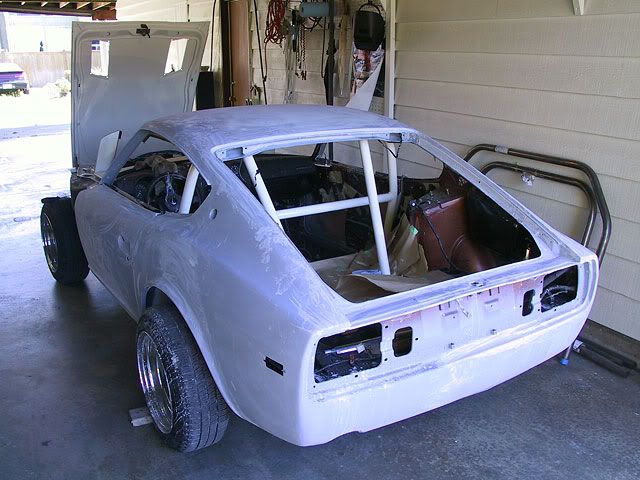
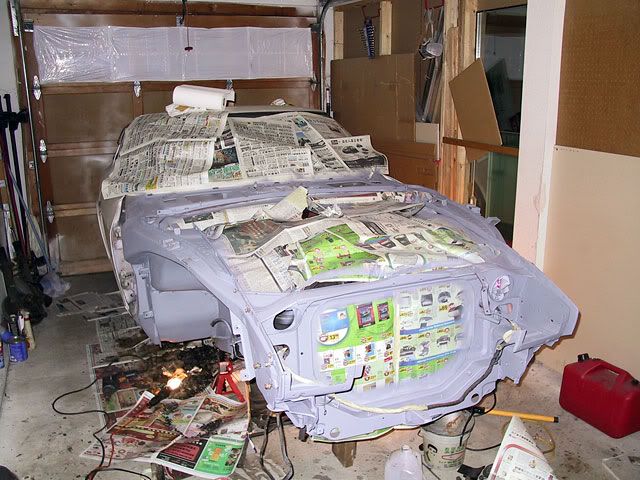
and finally, the shaved ass with the epoxy primered car
and paint... i was originally going to "roll" the paint. some of you might remmeber my post linking the original mopac forum post where the guy painted his beetle and charger with a paint roller and turned out AWESOME. well i did it to my rollcage and surely was thinking "wtf am i doin". But just like the guy said the paint self leveled to an impressively smooth and shiny surface. then after wetsanding and a polish, it was like a $4000 paintjob, well... not that much but u get the point. Although it turned out very nice the process too way too long, 2 thin coats, let dry overnight, wetsand, 2 thin coats, let dry overnight, wetsand, 2 thin coats, let dry overnight, wetsand, polish. I didnt want to spend 12 hours wetsanding the whole car 3 times so went ahead and spray the paint. and yes it was done on the grass in open air
theres a "few" particles and bugs in the paint but cant complain for a $36 dollar paint job with paint from home depot. besides after a wetsand and polish the paint looks pretty much like a single stage job from any shop.
i've yet to install all the interior and new carpets, alarm, and some nice sound system (currently listening to the music of the straight 6). But next on the mod list would definately bew an engine swap. As soon as the stock motor goes (or whenever i have funds) in goes an LSx :high:
finally i'd like to thank ross from modernmotorsports for the sweet brake setup and all the knowledgable advice, ian from ian's auto in coquitlam for finally figuring out the bug in the brake system, my boss for giving me the paychecks to fund this damned thing, and finally my friend that helped me throughout this whole project doin the welding, body work, lending me his garage for 8 months and his life for the whole summer
without you this car woulda never taken shape, you knw who you are. thanks! -
so this started off 11 months ago on sept 11 2005. i decided to pick up a datsun 280z car to save money and "save insurance costs"... well... it DID save insurance costs compared to my merc. but little did i knw it'd cost a hell of alot more than the mear 2 grand i saved on insurance per year as it turned into a project car.....
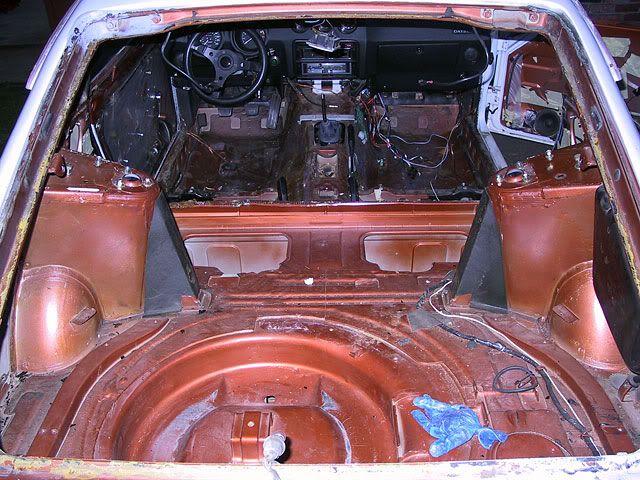
this is what the car looked like when i got it, minus the big ugly chrome bumpers it came with that weighed 50lbs each..
i was quite excited picking the car up that day and eventually my excitement led me to smashing up my driver's side headlamp, turnsignal, and fender on my merc into an oncoming van while goin to pick up the datsun. Im cheap so to this day the front is still taped up and unfixed... i'll fix it eventually.
anyway, after picking up the datsun i was pretty much in love. the interior was mint, paint was prestine. and the thing was fairly fast for a 30 yr old car. the previous owner purchased it second hand, painted it pearl white and garaged it for 15 years, when i got it, it had 11x,xxx kms and was very good running condition, pretty much fired up first turn of the key every time.
After the initial joy and indulgence of excitment, the bad started to eventually show... all the bushings on the car were either worn or non existant. ball joints need replacing, wheel bearing, driveshat, suspension all shot (drove like a boat), the front sway bar wasnt even connected to the control arm on the driver side because the bolt was broken, but worse of all, the RUST. Just before throwing the cash down to buy the car i did see quarter sized bubble in the paint on the driver side fender indicating rust. i thought it wouldnt be tough to fix since it was so small and just a little area, until one day when i for some reason decided to kick the passenger side dogleg. As i drew my foot back and thrusted it at the piece, i was expecting the normal thump of rubber to metal. What i got was quite irritating. CRUNCH, as my foot impacted the "metal" surface, the deafening sound of crunching rust hidden under paint filled the air. The more i kicked it, the louder the crunch and eventually debris started falling off the car and soon i was looking at a 3 inch wide hole. Ouch.
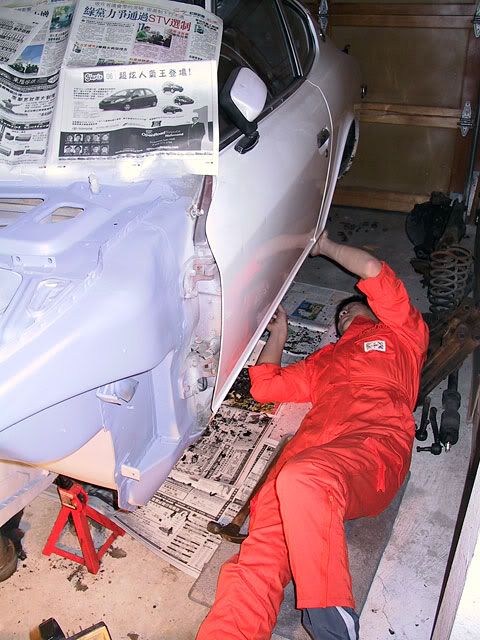
Soon after that ordeal i searched and read up one the wealth of info on Zcar forums about how these cars LOVE TO RUST. i remembered 1 post where a "newbie" asked old timers which areas of the car is prone to rust since he just got one. 1 guy replyed with 1 picture of the car and a red circle around the whole car.... great i thought, this will be fun. I finally decided that i was goin to restore the car, but as a film student, the last thing i knew was car restoration. Fortunately my good buddy who was staying with me at the time was an autobody man with experience in restoration, and with his help, i set off on another long ass project.
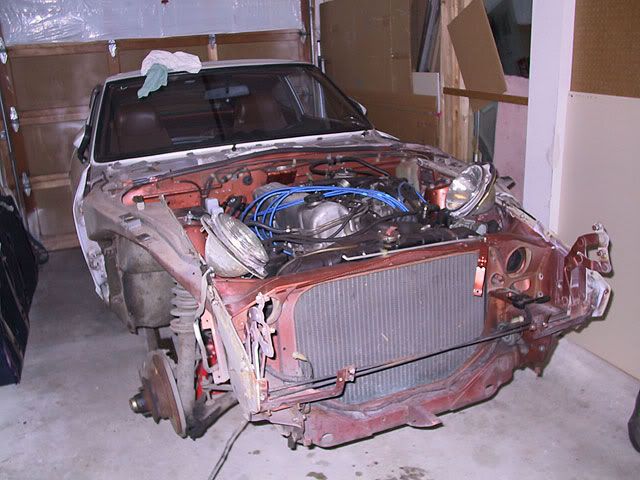
with the fenders and major body panels off and jacked up in my garage ready for work
first thing was to strip off all the damned undercoating... but then again without it the car would probably not have a floor pan to step on...
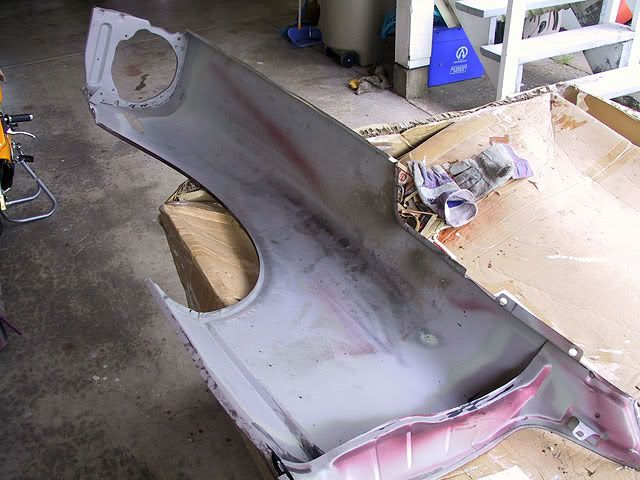
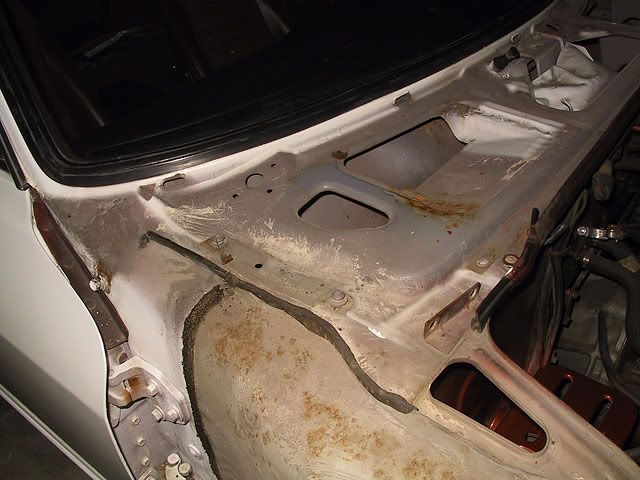
front cowl
fender well
after chipping off all the undercoating with a hammer and chisel and washing off the residue with gasoline, the rust started to show. (this process took me about 4months where it shoulda taken 2 weeks. i got discouraged at times cause the job was so damned anoying and such a pain in the ass)
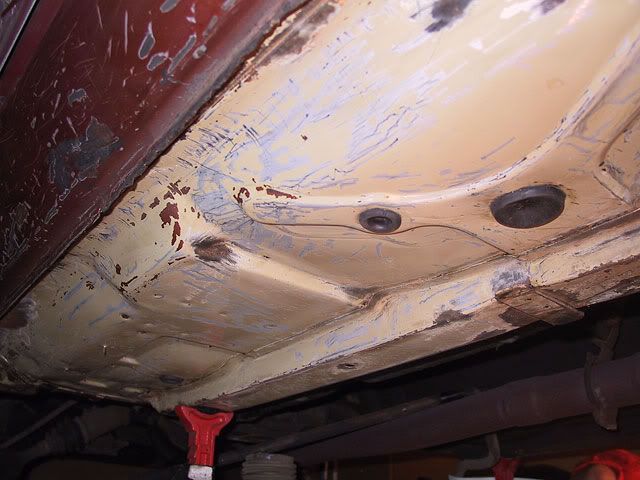
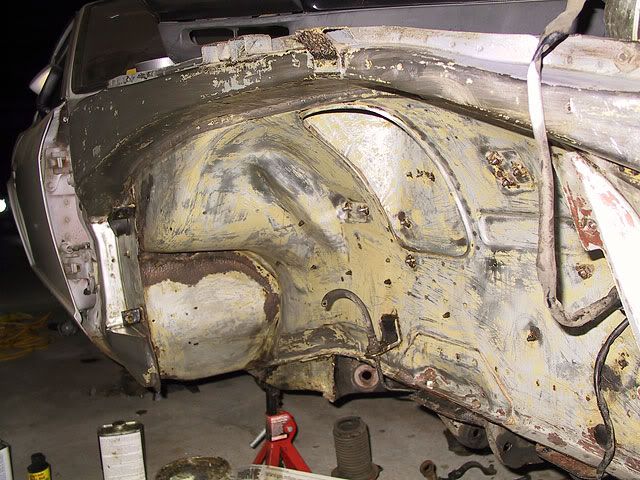
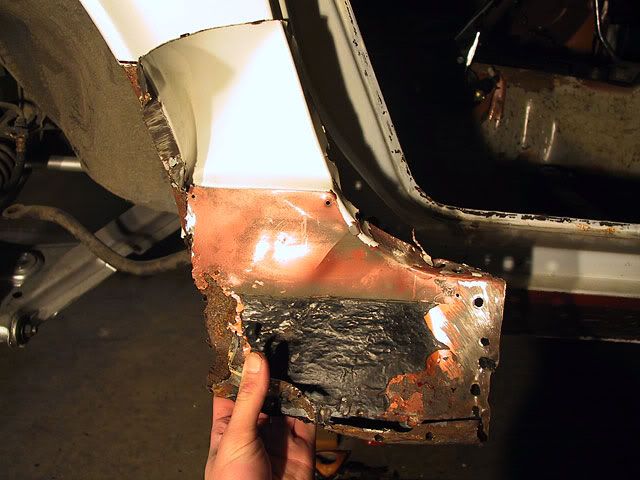
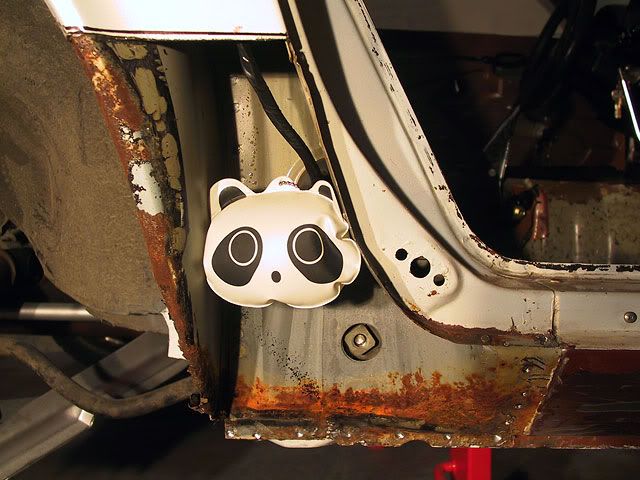
these are the major rusted areas i found
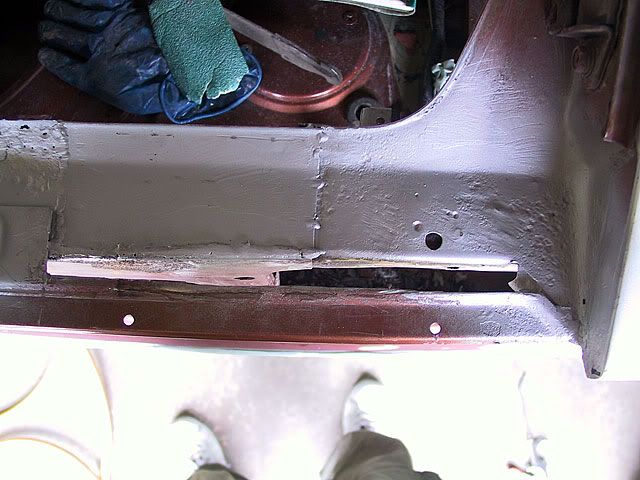
- 3inch hole in front driver side frame rail
- 6inch wide hole around 1 of the drain plugs in the floor pan
- common battery tray rust (20inch hole in firewall)
- common rear hatch area rust
- rusted out inner rear quarter panel (inside by the muffler)
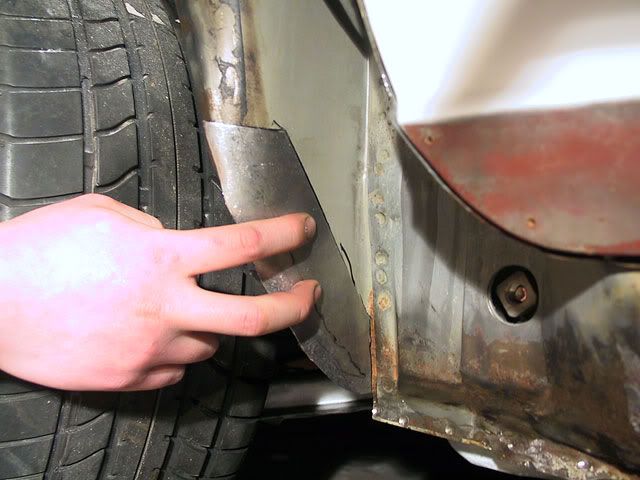
- both bottom fenders rusted out
- minor small rusted areas here and there
after grinding off the minor rust and coating the metal with self etching primer, we were rdy to move onto the next step
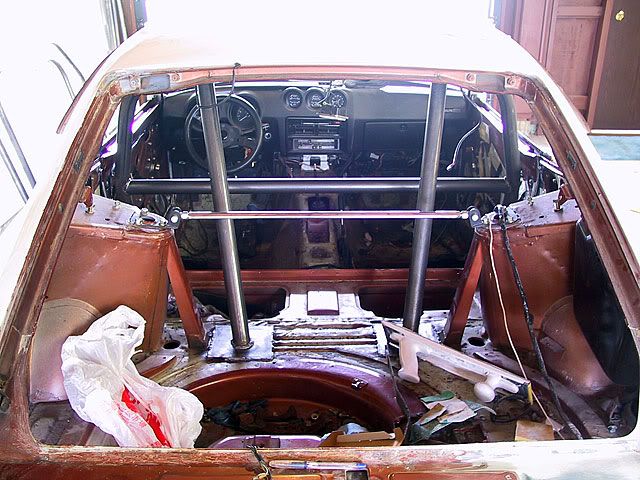
but b4 that can happen, a few major components were needed, voila
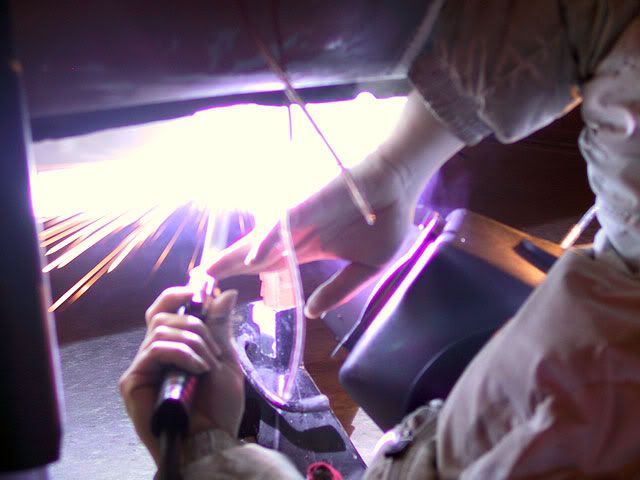
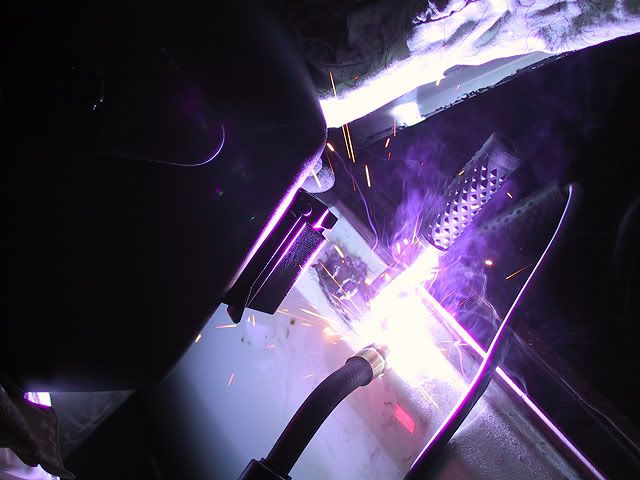
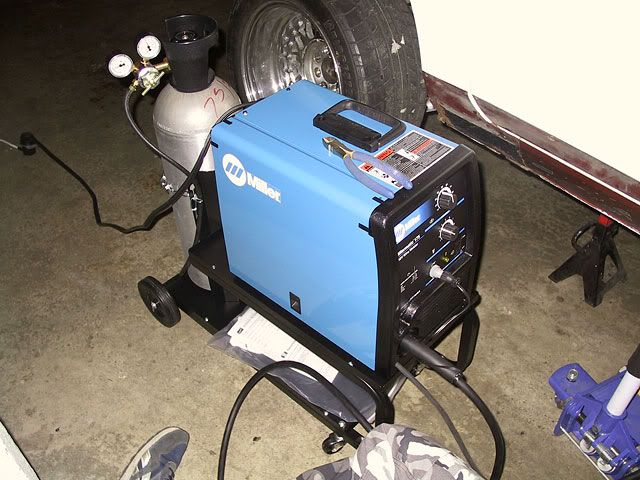
cant afford a tig, so mig will do.
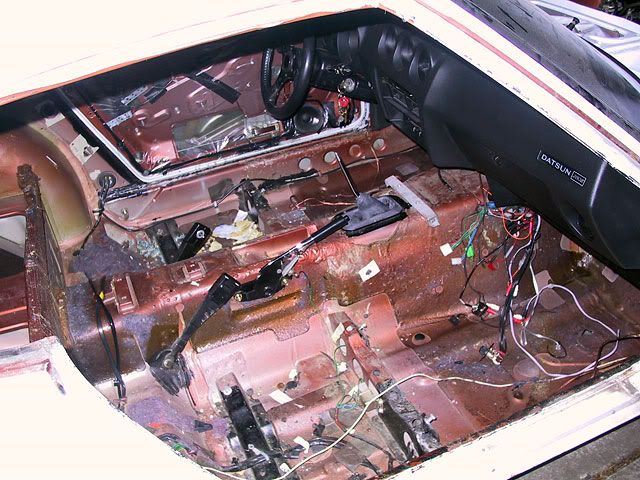
stripped interior
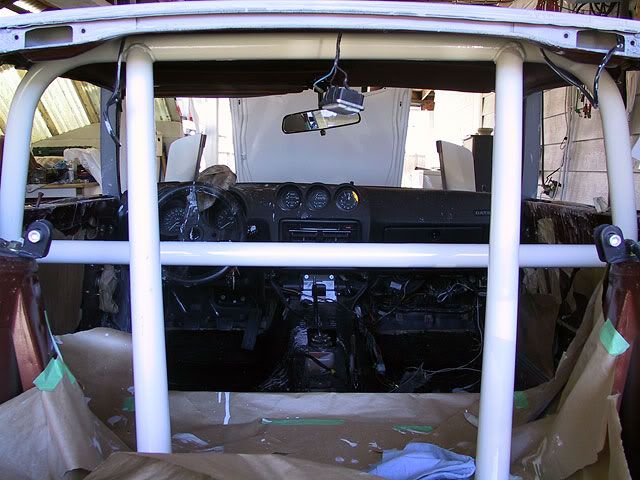
6 point roll cage welded
and painted
cutting out the rusted dogleg
look what i found inside :blueguy:
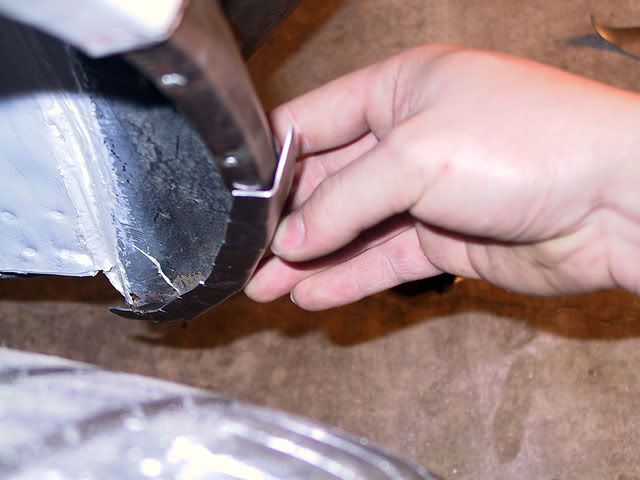
fabricating inner dogleg
and closing up the outta
-
OK!! i think i got the cure for all you guys with the spongy brake, no brake pedal feel symptom! well this seems to be the problem for ppl with rear disk conversion... but those rear calipers BLEED nipple is not 100% at 12 o'clock position... so no matter how much u bleed it like mad, theres still air inside. after spending 2 weeks and 24/7 pulling my hair out and 2 mechanics later after i couldnt figure it out, finally figured out to loosen the bottom bolt and tilt up the rear caliper so the bleed nipple is at 12 o clock... then a couple of pedal presses and burps of air later, voila.. we have brakes. well at least this was my case. try it, if it works, then we'll finally knw wtf was causing all this headache, time and $$$$$ gluck
-
wow! thats ALOT more good info than i was expecting. thnx for all of it. but i have to admit its alot more advanced than both our knwldge is capable of at this moment. im a film student and he's a autobody man, started off working on my Z and decided to build something fun^^ my buddy always loved the lotus super7. there's lots of kits out there thats pretty much the exact car but different name. lo-cost, etc etc. but generally the same car. the kits range from $3000 for the bare frame to $25,000 for a turn key and go kit. there's a wealth of info and blueprints available for the frame online so we downloaded some, picked the best one and drew out the dimensions on a 4x8 foot piece of particle board. put in one the garage floor and started cutting and welding square tubing. the frame took us 3 days and $250 to complete.... non bad from $3000 from the few available manufacturers of these kits. now the suspension... majority of these kits use miata suspension parts, which pretty much includes just the hubs, and steering columns, and whole drivetrain if ur goin with the 4 banger. Now, if you decide to go 4 wheel independent suspension, then u use both front and rear miata hubs? but if u want solid axle in the rear (easier) then u can go front miata, and rear toyota corolla (ae86) rear. With the hubs and miss parts taken care of, now comes the control arms. You can purchase pre-made control arms that everyone uses but its $750 for the front only..... it LOOKS farely easy to make, pretty much like the picture i posted in the other thread asking for the threaded tierod. Although theres lots of info on the frame of this car, there isnt much offered in regards to the dimensions and design of the control arms...... pretty much just pictures. But i'll try to get a hold of that program and play around with it, also do some more research. more info and comments are definately appreciated! tia!
-
ok this question if for all you engineering and race junkies out there. my buddy is building his own rwd kit car and is required to fabricate both the front and rear control arms (upper and lower). now there isnt much posted info or forums about it, majority of the info is on the chassis and frame but not the suspension. the question is that is there a certain length the control arm has to be to be ideal? for example a 10 inch control arm opposed to a 15 or 20 inch one. if the width of the front were 40 inches wheel to wheel (wheel base remaining the same), how would it differ between a 20inch wide subframe and 2 10inch control arms subframcompared to a 10inch wide e and 2 15inch control arms. besides the fact that thewill longer control arm allow for more suspension travel, i want to knw if there is an advantage to performance and handling between one another. also what's the effects of having a wider front than rear wheel base, narrower front than rear, and same front and rear? tia
-
it would be way faster and easier to cut in a new quarter than pull, and bondo....
 . do u guys think the shocks are messed because of that 1 time? car still feels the same as it did before. but i dont want to drop the suspension again and test the shocks lol. what r my chances?
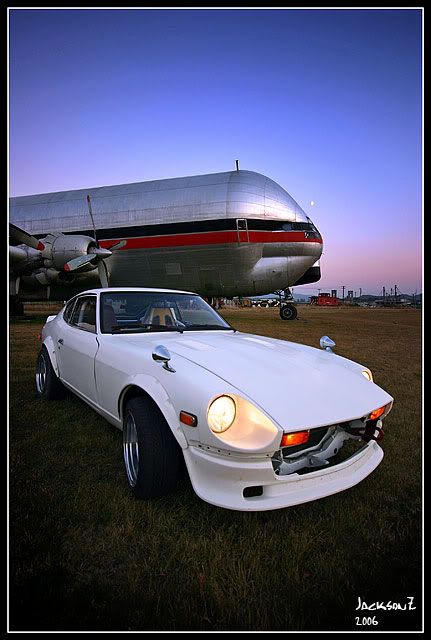


45 min vid on middle east's richest men
in Non Tech Board
Posted
omfg... all i can say is that im so depressed now...
http://video.google.com/videoplay?docid=-6312295472862851569