

nosebleedZ
-
Posts
85 -
Joined
-
Last visited
Content Type
Profiles
Forums
Blogs
Events
Gallery
Downloads
Store
Posts posted by nosebleedZ
-
-
Before you buy or replace anything, crawl under the car w/ an extendable magnet tool. Pop the fork boot loose & slide the magnet into the bottom of the bellhousing. If you feel something "tink" to the magnet then carefully draw it out. The "M" clip that holds the fork to the throw out bearing collar may have popped off. Essentially, what happens is when you come to a stop, you press the clutch, & the bearing stays between fork & the pressure plate on the input shaft. You have the tranny in neutral while you sit there, then go to put it in first, & it does what you describe. Just a thought, but I had this happen once. Good news- it's free to fix yourself! Bad news- you have to pull the tranny to put it back on.
-
Sure, you can keep testing everything, but it sounds like you've been doing that already. From my experience working at Nissan, when you've completed the preliminary checks on sensors, circuits, relays, amplifiers, etc.; & the problem bounces around from system to system, the Nissan FSM suggests to "try another ECU". I found this humorous at first, till I tried it with the "yeah, right" attitude when new to these older EFI cars. When I had an older Z or pre-Max roll in the shop with lots of funky system symptoms, this cured it 75% of the time. With that said, don't let my experiences cancel out systematic process of elimination you have been using. But trust me, the old Datsun/ Nissan ECU's prior to ECCS, would go out all the time without "acts of God" spurring them on.
-
The ECU grounds the fuel pump relay(s) & ultimately the fuel pump, if I remember correctly. The air regulator & the fuel pump get B+ ,constantly, with the key in 'Run" or "Start" ,because of the high amperage draw of the pump & regulator, this was the only way to turn it on & off without burning up the ancient componentry in the ECU. So yes, I would suspect a bad ECU, since you got spark signal & then killed the fuel pump signal & vice versa. The are in correlation w/ one another IMO. Hope that helps.....
-
Before you get roasted, use the search function, especially for a guy Bastaad525 from a few years ago, he was always having electronic "gremlin" trouble it seemed. Yep, probably everyone on here that has ever owned a 75-83 Z-car has had a bad 2 or 3 AFM & connectors...find a better looking one than yours from a junkyard, clean it & the AFM connectors w/ contact cleaner spray, dry with 25PSI compressed air, apply dielectric grease, & strip/ recrimp w/ blue butt connectors. Make sure the AFM housing is still grounded under the mounting plate also. Hopefully that's your problem? Any car info? Symptoms? When & what temp do you have trouble?
-
Yep, that is a realistic new price for an E12-80 module new these days! Imagine what I made off of a gallon jug full of them raped off of a junkyard for $20, ten years ago...LOL! They are a better IC module than the GM HEI inherently, but if you do the conversion, buy a quality one for around $50 as they perform better than the $13 Wells version from AutoZone that makes the tach signal screwy. Search on here for the diagram for the "gravy train simple" mod for this, you can literally do it in under an hour on the first try with average abilities. The best thing is you can remotely mount the GM 4-pin remotely, away from the heat, on an aluminum heat sink & it will last way longer than the dizzy mounted Z module. Best of all, if you break down needing one in any city in the US, they will have it in stock from $13+ up. If you keep the E12-80, you'll have the cost of overnighting the module to parts store $300+ motel room $70+ food +$30 +aspirin $5.....you get the idea my friend, I've been there.
-
PR280Z,
Thanks for noticing the one of the theme cues. It was hard to pull that one off! Ha ha. The three things you should do IMO is this:
1)Invision your car the way YOU wish Datsun/ Nissan could have built it....with parts from every other car in the world, but still unmistakeably a Z!
2)Pick a theme that translates all through the car & matches or compliments groups of components on the car. A Z can never have enough style, power, grip, sound, etc.....unless YOU say it does.
3)Don't make the mistake of doing too much at once, wishing you had more money for this or that, or take other people's opinions as absolute. Let the "project" be an extension of YOU, because it's YOURS! Don't get discouraged because your Z isn't like everyone elses, if it was, this site wouldn't be what it is...DIVERSE & AWESOME! (Yes, I used an 80's word)
-
OK Braap, it gave me an error message in the Garage that said the pic is too big? I know you mentioned about the max size in your earlier post, how do I resize to fit? Thats got to be it. The IMG is set at medium size, & is 1.7 mb. Thanks if you can help.....if not I'll wait for the IT guy.
-
Braap,
I tried the copy/ paste method into my sig as you suggested & it still won't work. I went to edit sig/ change photo/ browse/ choose pic/ upload file (& it actually shows it in the text box)/ hit "save changes" & it either goes to a connection error screen or just simply no pic! What else can you suggest?
-
Thanks Braap & Hugh, I'll give Braap's suggestions a whirl & if it doesn't take it may be a software issue as Hugh has stated....
-
I am having trouble getting my pictures from photobucket into everything except posts & threads. I tried to put some pics in the Garage section by dragging the IMG files to the description box because there was no other logical place I could find, which didn't work. Then it took me to a screen with an IMAGES tab, so I thought I could put them there, but it wouldn't allow it. Also, I tried to do the same thing on my signature, & it loaded OK, but no pics??? I'll admit I'm not the most tech-savvy, but a quick tutorial from somebody would be greatly appreciated! I'm sure I'm not the only person confused on this. Thanks in advance.
-
Sure thing man, bring that thing to TN & I can do it! Believe you me, I started with much worse with mine...LOL!
-
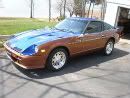
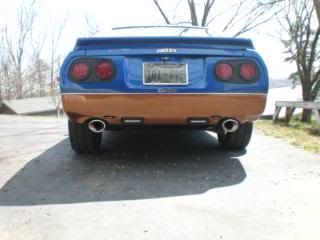
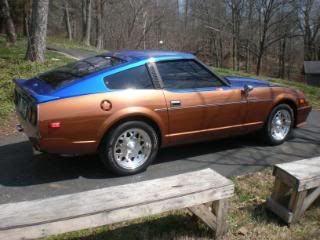
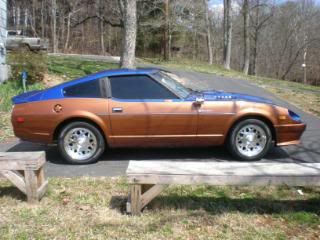
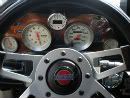
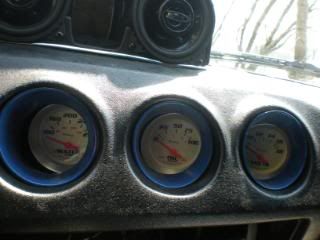
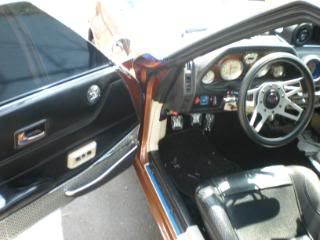
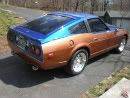
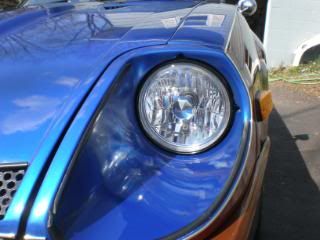
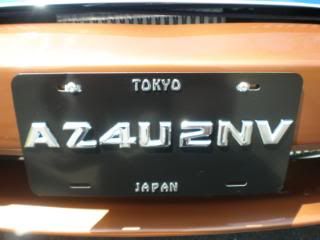
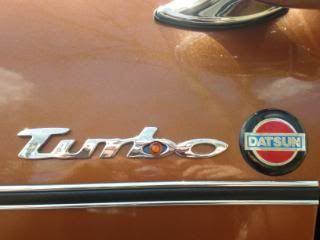
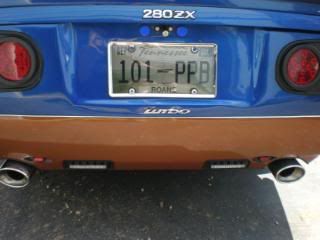
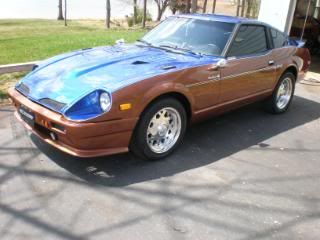
Well, I've been a member of HybridZ for 4 years, & a lurker for 2 years before that, & I realized that I had never posted any pics of my first Z, a 79 zx hardtop coupe, that I still have today...LOL! A little back story on the car: It was a 2 owner when I bought it from my wife's best friend's sometimes boyfriend. He was a heavy partying college kid, that used the car as a DD & for his lawn care service vehicle when he ran outta beer. Well, he let the injector seals rot & it caused a massive engine fire that destroyed most of the wiring underhood, toasted the hood & the tops of the fenders. Prior to this, the clutch was gone, it only had 100 psi of compression on 2 cylinders (40-80 on the others), smoked like frieght train, had terd brown paint that was almost flaked off, roaring diff & wheel bearings, only rear brakes, terminal body cancer, two 6" deep dents on each quarter panel (from getting it stuck between two posts on a drunken joy ride), rotted exhaust system, fluid leaks everywhere, & an interior that looked & smelled like he raised wild boars in it. Needless to say, he was going to sell it to a junk yard for $100 in scrap metal, so I offerd him $150 just to rescue it! And he took it, way back in 1998, & I drove, yes, drove the car home 1.5 miles from his apartment. I wish I had a camera back then to really show everyone that many Z's in the junk yards today looked like show winners next to this thing. But you ask why did I buy it? Well 3 reasons. 1) At 8 years old, in 1982, my next door neighbor drove a spanking new blue/ silver 280ZX-T & he always had hot girlfriends in it. So, I saw that car as a status quo of coolness, not to mention the boosted burnouts he would do for the neighborhood kids on occasion! Loved the ZX from then on. 2) I always loved the hardtop S130's & the shape of the car. Don't get me wrong, the S30's were hot, but the ZX to me was sleeker & turbo, baby! 3) It was really the only Z I could afford being a 24 year old newlywed w/ a 6 month old baby..LOL. But I appreciate this site so much, & I enjoy all you guys keeping the car I loved so much a boy, ALIVE & better than ever with 21st century technology! The pics below are the results of a uni-body off restoration that finished in March 2009. But, being a HybridZ-er, I have a new driveline & motor ready to go in next month...sorry no pics, top secret till then. But, currently this car is a blast to drive, with over 400 turbo boosted rwhp, comfort, great brakes, handling, & looks IMO. BTW, everthing on this car I have done myself- fiberglass, paint, driveline, tuning, etc. So I hope you enjoy it as much as I have over the years! And you young dudes coming up, give the S130 some love, it was the top selling Z of all time, so there are still plenty out there that need a good home.

-
I have a brand new ignition key & lock cylinder set for $25 including the shipping. PM me for PaPal info if you want it.
-
No problem, I'll send you a PM with my PayPal info for when you want the manifold next week, you have dibs my man! Best thing IMO to shave the manifold is a belt sander w/ 120 grit paper & for crevices a high speed rotary tool (15,000+ RPM) w/ various grinding stones, then finish it off by hand ( I know, I know) w/ 320 grit emory paper for best results. Then you can paint or polish the aluminum & it is slick as a minnow's belly!
-
BTW, I have a Non-EGR manifold w/ screw-adjusting idle throttle body for sale for $100+ shipping if you need it....
-
It's been a while since I had a stock setup, but I think I can remember most of it on an N/A car to help you pretty quickly....
1)3/8" hose nipple on top of the throttle body goes to the inlet (toward front of car) of the air regulator
2) 3/8" nipple on bottom of throttle body goes to outlet (toward front of car) of the idle speed adjustment housing on the middle side of the intake
3)One of the 7/64" nipples on bottom front of the throttle body goes to canister purge valve on the passenger side behind the headlight bucket
4) The other 7/64" nipple on the bottom goes to the feed of the ported vacuum switch that is mounted on the thermostat housing between the CTS & thermotime switch
5)The 7/64" nipples on this ported vac switch go to various temperature related vacuum devices like the vacuum tank (passenger side), the BCDD (under the intake), & EGR valve, etc.
6) The 7?64" vac line #2 on the canister behind the passenger headlight bucket goes to the distibutor vacuum advance diaphram with a one way check valve in between
7)5/8" hose connected to the valve cover nipple goes to a 5/8" elbow in the boot between the airflow meter & the TB with a funky metal "tree" in between that connects to inlet of the idle speed adjuster & outlet of the air regulator (both toward rear of car)
8)1" block breather pipe/ hose that tapers to 5/8" connects to PVC valve on the bottom of the intake at the middle
9)On top of the throttle body next to the return spring, is a block that is connected by 2 phillips screws with a 3'8" hose nipple on both sides, this carries collant through the throttle body to warm it up faster
10)The 5'16" hose coming from the fuel rail to the intake device with a "fuel injector" plug is the cold start valve
And as stated by purepontiackid, with a 75 280Z manny (Non-EGR)& throttle body, all that's really needed w/ stock EFI is cold-start valve, air regulator, & a single vac hose to the vac advance & the fuel pressure regulator on the fuel rail. Hope this helps.....
-
That is a pretty good deal @ $450 for basic "correct" assembly, bear in mind what you are going for-ie. street car, double duty, racecar? The difference in "pro assembled" & "pro built" is about $3,500 in labor here. Find a "How To Modify Datsun L Series" book & the "How to Rebuild Datsun L Series" book on Amazon.com and compare the content to the other to see what most of us have done, or have had done to our engines. Happy reading, (spending), same thing....
-
Mike,
I feel for you bud, nothing like electro-gremlins to ruin your fun. You'll love the electronic when you get it workin'! Since I'm on the outside looking in, let me pose a few questions:
1)Have you cleaned the base of the electronic dizzy & the timing cover with a scothbrite pad to remove old oil residue & oxidation?
2)Is the coil you are using an original points system ignition coil, or one for the electronic dizzy?
3)Have you tried a different coil? Checking primary coil winding resistance is not the same thing as secondary high voltage output.
4)Is the HEI module mounted on a separate piece of aluminum with dielectric grease in between, or is E1280 mounting surface cleaned & greased?
5)Vantage is correct with pickup coil resistance looking OK, but a brand spankin' new one can be had at the 'Zone for $13?
6)Are you certain that the ignition switch is making the internal connection between START & RUN?
7)Where the G/W & B/W wires from the ignition switch connect to the module B+, are they the same voltage or not? In START position? In RUN/CRANK position?
8)When you removed the pickup coil & reinstalled the reluctor magnat, did you reset the air gap correctly? Like setting points gap on electro-dizzy.
9)Based on a Haynes/ Chilton/ Datsun FSM, is the air gap too WIDE?
10) Does the tach bounce slightly when you crank the engine, with everything assembled? Ie. Cap, wires to plugs,etc.?
Hope this helps!
-
Man your not far from home at all! Surely your going to Zdayz in may?!? I have to get what i have running like a champ already before i pump much more boost to it!
Yeah, will definitely try to make ZdayZ, got some top secret stuff I'm playing with that hopefully will be dialed in by then. I also need a good wash & wax on the Z before then...LOL..part of it is a show N shine, right?
-
Congrats Lowrider! I'm about 20 minutes from you in Kingston, TN & it's great to see Z boost addicts close to home! As a safe supplement to the 83 NA ECU your using, I am selling an SDS additional injector controller setup you may be interested in to take the boost up 5-7lbs more or so. Good luck in the east TN rainy season...LOL!
-
As far as my memory serves me (& it ain't perfect these days), I think all 70-84 Z & Maxima heads, had the same springs & rates. The differences were in valve stem heighth & face diameter on various heads. The last complete set I bought was from MSA as well. They were roughly $100 shipped to my door for 12 outer & 12 inner springs. If you go aftermarket or race cam, ie. Isky, Comp, Ferrea, etc. you will need to match the springs with "that" manufacturer's recommendations on spring pressures, bind rate, installed & compressed height, blah, blah, blah, to avoid wiping out an expensive setup in the first 30 seconds its fired up. Horsepowerfreaks.com, tomei, & jim wolf technologies among 40 others, have the exotic valvetrain goodies "usually available" Honestly, if you don't plan on revving your motor past 6K it's whole life, stock L6 stuff is great with a few mods (see Dragonfly & Braap's stickys). IMO, most people usually over cam, carb, & rev an engine for the street or weekend warrior, instead of building truly flexible cars. But if you want to move the power curve into a different band, or it's gonna be a mostly racer, open up your wallet & let Ben Franklin rub his light sensitive eyes, if the screamin' sound of a punished L6 what your going for bud!
-
"Don't sweat the petty, pet the sweaty..."
"If you want sympathy, it's in the dictionary between scab & syphilis.."
-
Instead of purchasing all these items & installing them, plus the expense of a $75 7 pin module, wouldn't it just be easier to send the MS1 V2.2 back to Matt & pay him the difference for an MS2 V3.0 like I have in my car? Matt is this a possibility. I & he are looking for the "easiest" route for his car, if there is absolutely no other way to make the 2.2 work w/ the N/A dizzy, besides this, the way Naviathan wired his car w/ MS2V3.0 might be the cheaper & easier option. Whatcha think?
-
Matt, after reading through the second link you posted, I am somewhat getting what to do, but it is mostly internal mods on the V2.2 ECU itself. On the internal mods, it shows a jumpering of several items to accomodate the VR control, but I'm honestly having a hard time understanding some of it. Jumper with what exactly? A small guage wire (24 guage?) that will be soldered? Or a designated clip jumper from you? I'm sure I can figure it out, but there is some discussion of the VB921 & it's Bosch replacement not being reliable enough to directly trigger the coil. Naviathan's solution would be ideal if it could be done with an external resistor mod or another module. Could a single 4 pin GM hei module be used to make this work? In the post above by BLOZUP, it shows a dual setup connected to a MS V3 & using a ECCS dizzy. If you or someone else had a diagram like this that would be the ticket. I tried to find that info (diagram of V2.2 +4 pin HEI module+VR N/A dizzy+external resistors+connections), but didn't see it. I will read through it again until you reply. Thanks again.


78 L28 EFI help...again? :(
in Trouble Shooting / General Engine
Posted
Lord no, you can get an n/a Z car ECU for $30-50 at pull-a-part, private JY, etc. I have a stack of them, but they are for ZX N/a or I'd sell you one. Someone on here probably has one laying around I would think...cheapo....