jimmyjones000
-
Posts
41 -
Joined
-
Last visited
-
Days Won
1
Content Type
Profiles
Forums
Blogs
Events
Gallery
Downloads
Store
Everything posted by jimmyjones000
-
1971 240z Series 1 - "Z-Wolf"
jimmyjones000 replied to jimmyjones000's topic in S30 Series - 240z, 260z, 280z
Installed the MSA airdam yesterday. I gotta say this thing made me do this the whole time...... I couldn't get it to fit, line up, or stay straight. So after an hour, I finally gave up and just said it looks perfect and started drilling some holes. How the heck are these things supposed to mount? Some people say mount in the back of the headlight buckets and others say in the front. I obviously installed it on the back side but its about a quarter inch too wide on each side. Is this so you can install fender flares? Arggggggggg.................................. -
1971 240z Series 1 - "Z-Wolf"
jimmyjones000 replied to jimmyjones000's topic in S30 Series - 240z, 260z, 280z
Honestly it doesnt feel that great right now, but I think that will go away over time. The original steering wheel is about 4.5 inches from the base and the setup I have now is about 7.25 inches out from the base ( 6 inches total from moma base/nrg top ). I ended up just moving my seat back, but it really sucks using the blinkers as you need to remove your hand from the steering wheel to flip it up or down. I was thinking about modifying the blinker lever, maybe cut and weld it angled, or i can just get rid of the nrg quick release haha. Moving to a new steering wheel made a huge difference for me though. If i ended up doing it again i would probably go with the thin profile version. -
1971 240z Series 1 - "Z-Wolf"
jimmyjones000 replied to jimmyjones000's topic in S30 Series - 240z, 260z, 280z
Just got the nrg 2.5 gen quick release......... -
1971 240z Series 1 - "Z-Wolf"
jimmyjones000 replied to jimmyjones000's topic in S30 Series - 240z, 260z, 280z
Looks like they are no longer available?..argg. Just wondering how much they cost when they were around? Thanks for the info though -
1971 240z Series 1 - "Z-Wolf"
jimmyjones000 replied to jimmyjones000's topic in S30 Series - 240z, 260z, 280z
A quick update: Installed my Christmas presents from the wife, a Momo adapter and a NRG 330mm steering wheel. I also have a NRG 2.5 quick release coming in a few days. The new wheel makes a huge difference from the old one, and the depth is pretty similar, but I'm not sure how its gonna feel with the added length of the the quick release. -
1971 240z Series 1 - "Z-Wolf"
jimmyjones000 replied to jimmyjones000's topic in S30 Series - 240z, 260z, 280z
So I installed the coil-overs this weekend....and it seems that going with the stock top hats really doesn't leave much room for lowering ...BOOOOOO. ----- All you really need to do to use the stock hats is to drill out the center so they will fit on the new illumina dampers as they are to big and aren't slotted. Then place the supplied washers and bolt them up. Pretty easy... With coil adjustments this high the car is like a lifted monster truck, haha. With around 3-4 inches of spaces between the fenders and tire but it has almost full travel. If i go this low in the adjustments, I get around 1-1.5 inches of space, but it leaves me with almost no damper travel...argggggg My goal is to get a really nice tight fit between the fenders and tires ( maybe a little roll ) while still maintaining full travel, so it looks like im gonna have to pick some camber plates next week, hopefully that will give me an extra 2 inches of clearance/travel for a perfect fit. Should i go TechnoToy plates or Ground control? ( 15x8s +0 with 205/60/15 tires ) -
1971 240z Series 1 - "Z-Wolf"
jimmyjones000 replied to jimmyjones000's topic in S30 Series - 240z, 260z, 280z
Gotta thank Gabriel & Gia over at Technotoytuning.com. I pick up some of there pre-assembled coilover's with 200 pound springs in the front and decided to stick with the stock top hats for now though, as I really don't want to cut into the frame. Seem like there would be a few options out there for billet top hats that don't require you to cut into the wheel wells thought. I thinking about getting a few of them machined, has anybody had any luck with this? Hopefully its gonna look like this after its done with a little bit of fender rolling ( photoshop ). Also, busted out the rattle can primer, its more of a "ratsun" now i guess hahah The last item on the list i picked up was a NRG steering wheel and the thin profile quick release. This is gonna be good ..... -
hls30-01412 ( 1/1970 ) with only 21k of original miles .
-
1971 240z Series 1 - "Z-Wolf"
jimmyjones000 replied to jimmyjones000's topic in S30 Series - 240z, 260z, 280z
Picked up some XXR 531 rims ( 15x8 0 offset w/ 205-60-15 tires ) for the Datsun. Im only running the lowering springs, so the next step are some coil overs, so i can get about 1-2" more inches of drop to fill out the wheel area. Added on some Muteki Lugs -
Updated factory settings in the first post. My jet settings via Wolf Creek: Mikuni 40 PHH Main Air Jet 180 ( gonna test 200 next week ) Main Jet 150 Pilot Jet 62.5 ( gonna test 65 next week ) 70' 240z L28/N42 mild cam 6-1 Header w/ 2.25 pipe Electronic ignition 3.7 psi fuel pressure ( dead head - no return ) 20 BTDC Timing ( no advance ) 8mm plug cables NGK BPR6ES-11 Short Stacks with mesh caps Installing an AFR gauge next week, Ill post the readings when I get them. Any suggestions?
-
That would be great info! Anyone out there with some AFR info?
-
These are the only ones I know. Ram Tubes / Velocity Stacks https://technotoytuning.com/nissan/610/velocity-stacks-carbs https://www.pegasusautoracing.com/group.asp?GroupID=AIRHORNS http://www.rmcarburetors.net/parts_for_sale.htm ( scroll down ) http://www.datsunparts.com/Carburator-Mikuni-Solex ( scroll down ) http://www.thezstore.com/page/TZS/PROD/PFFC07/11-3013 Red Caps http://www.ebay.com/sch/i.html?_nkw=velocity+stack+weber
-
1971 240z Series 1 - "Z-Wolf"
jimmyjones000 replied to jimmyjones000's topic in S30 Series - 240z, 260z, 280z
Well, I figure out why she started running bad today......broken and mangled pilot screws on the Mikuni's. -
1971 240z Series 1 - "Z-Wolf"
jimmyjones000 replied to jimmyjones000's topic in S30 Series - 240z, 260z, 280z
This was a good idea, thanks @Snailed. While I was fixin' up the cables today, I decided to paint the block. Had to take off the header anyways to weld in an o2 bung, so I figured i'd clean everything up while its off. Ended up just using Chevy Blue Duplicolor, as I didn't want to wait for the custom Datsun color rattle-can to ship out. Before: After: -
I thought it would be a great idea to start a on-going community thread on Triple Mikuni's. A place where new users and active users ( with years of knowledge ) could get/give detailed breakdowns / photos / and tuning configurations for 40 / 44 phh's. When I switched over from SU's, I really had no clue on what things were and how to configure them for my current setup. I would have to say that it's some what a pain to get solid information out on the web in one location or be able to find a detailed manual for specific needs. So I thought I would start this out by taking a couple photos and labeling the main pieces for tuning. DISCLAIMER: I am by no means an experienced carb tuner in any way ( that's why Wolf Creek is around ), mainly looking to get the topic started. It would be great if you guys could give suggestions or show off your setups and tuning info. Any suggestions for diagrams / photos labeling, let me know and ill make them. Based on the info I've read... Factory setting for 40's are: Main Jet 140 Main Air Jet 180 Pilot Jet 57.5 Pilot Air Jet (fixed) 140 Outer Venturi 32 Inner Venturi 12-16 Throttle Plate #165 Jet Block Assembly 5.8 - (6x2.5 & 4x1.5) Bleed Pipe T Fuel Needle & seat 1.5 Pump Jet 40 Idle Mixture/Pilot Screw 1.0 turns Factory setting for 44's are: Main Jet 150 Main Air Jet 200 Pilot Jet 57.5 Pilot Air Jet (fixed) 120 Outer Venturi 342 Inner Venturi 10.5-14 Throttle Plate #175 Jet Block Assembly OA Bleed Pipe n/a Fuel Needle & seat 1.8 Pump Jet 40 Idle Mixture/Pilot Screw 1 1/8 turns Original Manual: http://www.scribd.com/doc/60490072/Mikuni-PHH-Service-Manual ------- Q & A Section: ( help me grow this list ) What fuel pressure do you run? ( based on info read 3.5 - 3.7 psi standard applications ) What jets do you run for an L24/L26/L28? Mild Cam: ?? Hot Cam: ?? What is the timing? Seems like 18-20 BTDC ( plug vacuum advance ) ( Correct?, that's what I'm running ) Do you need to use an electric fuel pump? Most suggest running one, but this might start a post battle...haha Correct afr?: Idle: ?? 2k: ?? 3k+: ??
-
1971 240z Series 1 - "Z-Wolf"
jimmyjones000 replied to jimmyjones000's topic in S30 Series - 240z, 260z, 280z
I wasn't really to concerned at first, but after firing her back up, shes started running a little sloppy. I'm thinking it might be a fuel issue though ( damn Mikuni's and secretive tuning haha ). I've seen a bunch of guys zip tie the cables, so I'm thinking it should be fine. You think it's a bad idea? -
1971 240z Series 1 - "Z-Wolf"
jimmyjones000 replied to jimmyjones000's topic in S30 Series - 240z, 260z, 280z
Found an early "2400" cover and polished it up today. I'm still sportin' the L28 though I wanted to route the cables along side the block to clean up the looks a little, but #5&6 are too short. I wonder if they make long ones? or could I flip the cap? -
1971 240z Series 1 - "Z-Wolf"
jimmyjones000 replied to jimmyjones000's topic in S30 Series - 240z, 260z, 280z
Forgot to add this pic. This is how i found her. Covered in dust and hadn't been moved in 30+ years. -
1971 240z Series 1 - "Z-Wolf"
jimmyjones000 replied to jimmyjones000's topic in S30 Series - 240z, 260z, 280z
This is when you know you have to much Datsun crap. I started to clean out my garage to start my other 240z project. Looking to do a full frame off restore. When you lay everything out, it seems to take up a lot more space. Here's a little sneak peak of "Vuk". -
1971 240z Series 1 - "Z-Wolf"
jimmyjones000 replied to jimmyjones000's topic in S30 Series - 240z, 260z, 280z
Yep, wanted to keep all the original bolts/clips. All new bolts cost too much, but I did replace the lock washers. A tumbler makes the bolts almost brand new. -
1971 240z Series 1 - "Z-Wolf"
jimmyjones000 replied to jimmyjones000's topic in S30 Series - 240z, 260z, 280z
These bad boys.... Should I do 225/50/16 or 205/50/16? I guess whatever one won't rub? -
1971 240z Series 1 - "Z-Wolf"
jimmyjones000 replied to jimmyjones000's topic in S30 Series - 240z, 260z, 280z
She is finally back on her wheels . I ended up just rebuilding the original suspension and will be using the Arizona z stuff for my other 240z. This was a long process for me, haha. Ended up stripping all the parts down to metal and using primer/Eastwoods extreme chassis black paint. All the bolts were in the tumbler for 8+ hour, this made them shiny and new ( triangle media / water / Purple Power degreaser ), then in walnuts + metal polish for 8 hours. New vented rotors, Porterfield brake pads, rebuilt calipers, and all new poly bushings ( these make a huge difference ) Stainless steel brake lines and Eibach Lowering Springs She looks like hell, but she runs Lowering springs didn't really do much, but i guess they are only rated to lower 1-1.5" inches. These are 15x6 rims w/ 205 60 15 tires. I have some XXR 531's on order (16x8 +0), any suggestions on tires? -
That's a great lookin' Z. What's the rim & tire setup?
-
1971 240z Series 1 - "Z-Wolf"
jimmyjones000 replied to jimmyjones000's topic in S30 Series - 240z, 260z, 280z
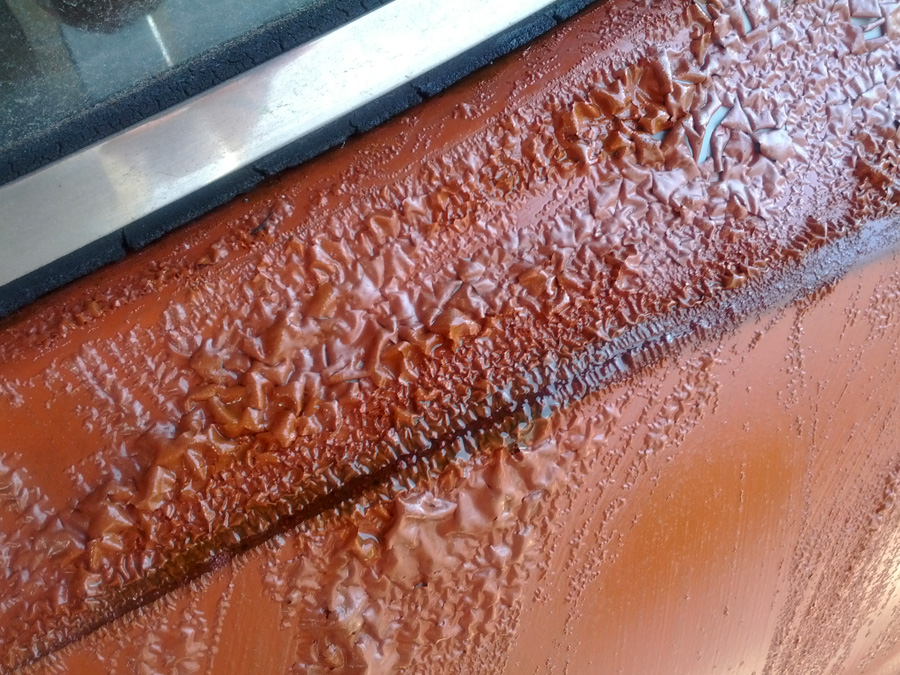
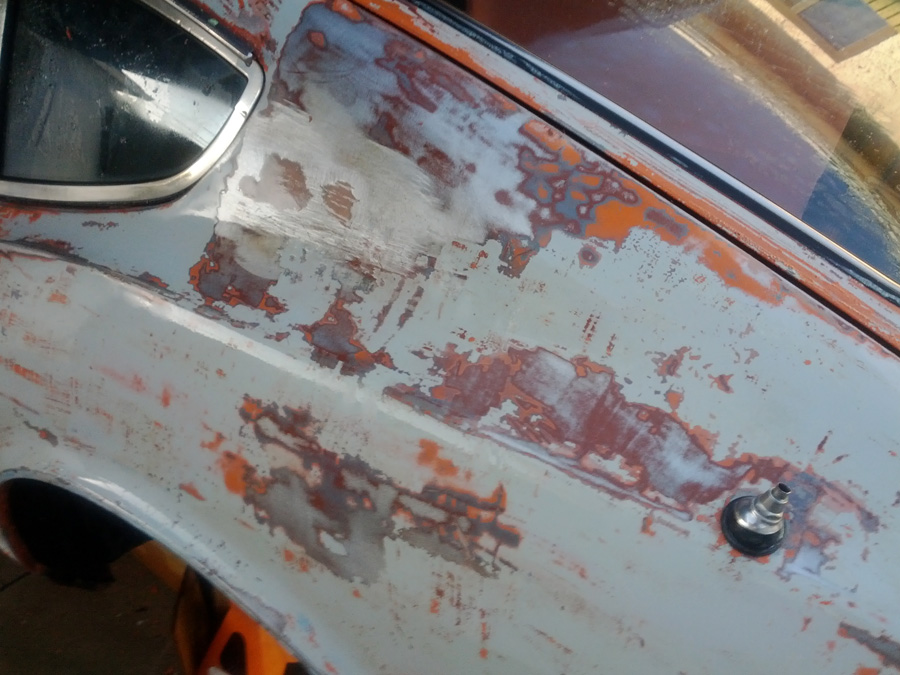
Adding a small update while I wait for the Arizona Z goodies. What is the worst thing to do on a Z? ....wait for it..... Paint stripper and a scrapper, haha. Is there an easier way of stripping a car? I've always used the Jasco stuff, but it would take 2-3 coats to get to bare metal. This time i tried a aircraft stripper, but really its still takes around 2-3 separate coats to through the primer. Any advice?
-
Forgot to add the template