Rayven14
-
Posts
213 -
Joined
-
Last visited
Content Type
Profiles
Forums
Blogs
Events
Gallery
Downloads
Store
Everything posted by Rayven14
-
I also DO NOT pay for the cost of shipping, please write me with your address for a final shipping quote before sending your final payment. Thanks guys
-
Okay here is that list, I used the user name when possible and the first name and last initial if the info wasnt availble. Also, some of these panels already shipped and I have to cross reference my shipping docs with whats listed here. Im having a helluva problem with user names and email addresses and everyting else that goes along with that. ZTR... Your first!!!! HO-Ho is second Yan929 is third William G. (Real name) Martin L. (Real name) DanZman Perin T. (Real Name) Keith P. (Real Name) Rossman Richard M (Real Name) Jagdstealth
-
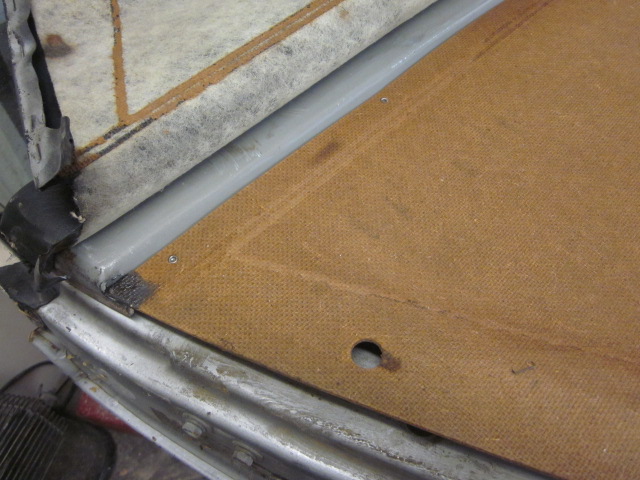
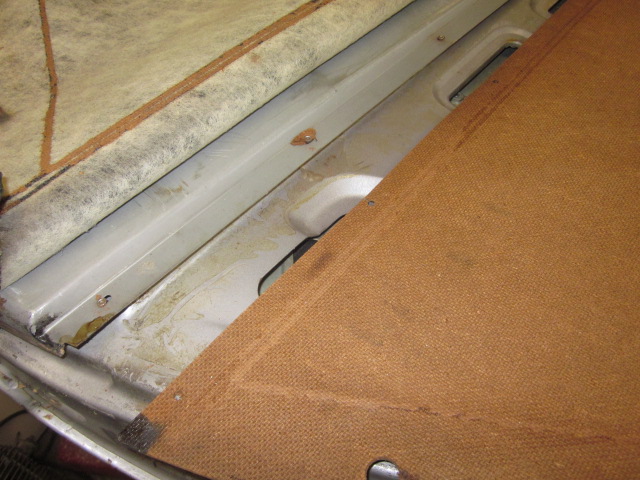
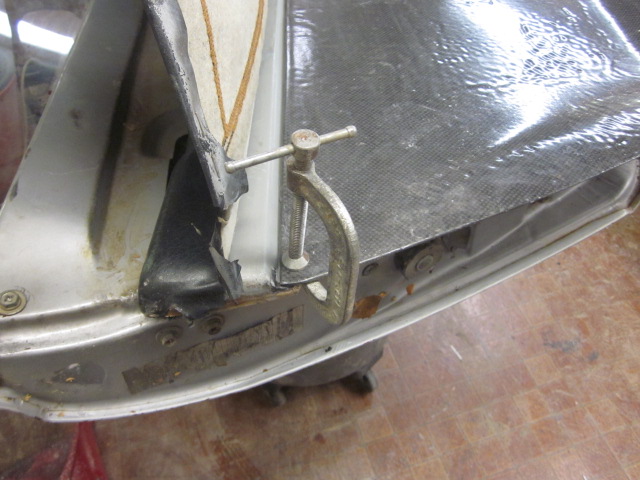
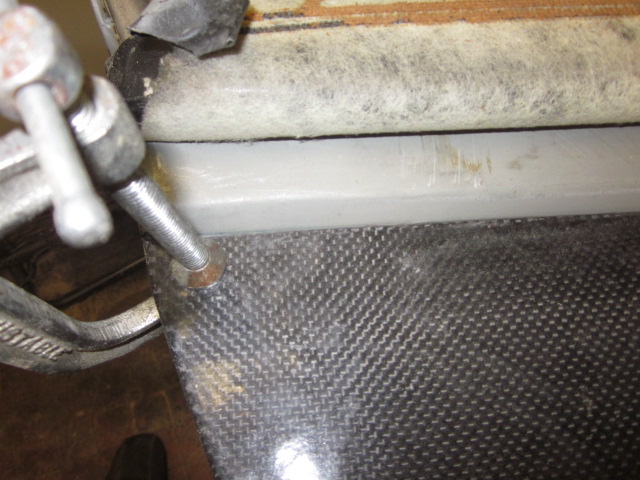
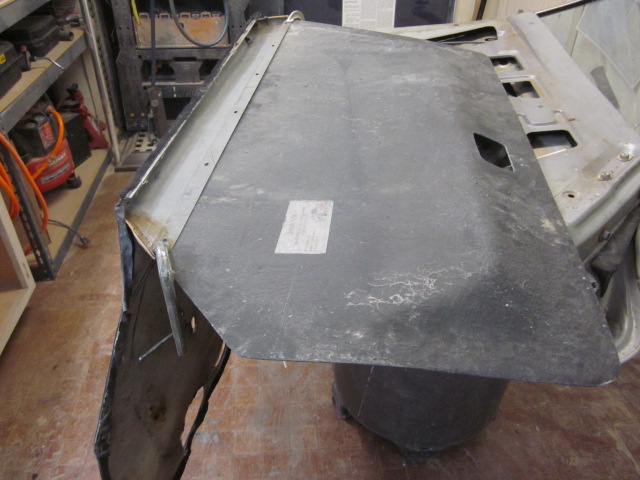
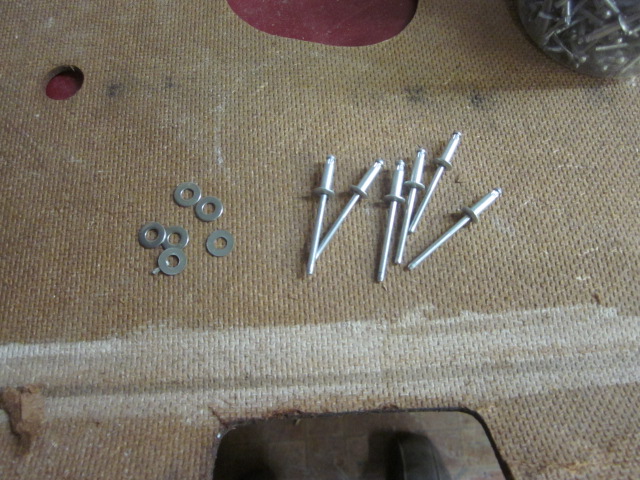
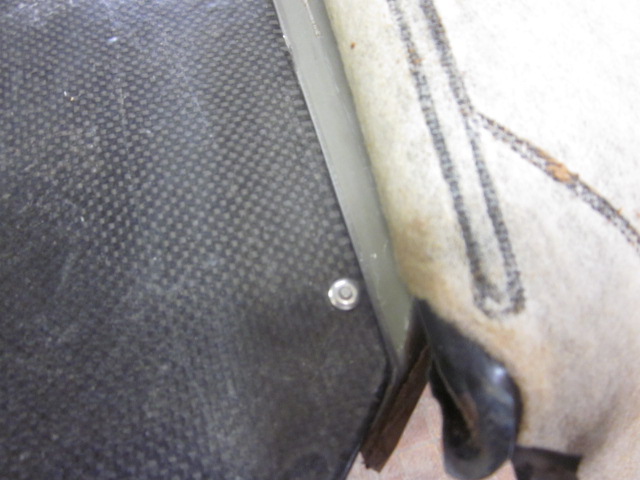
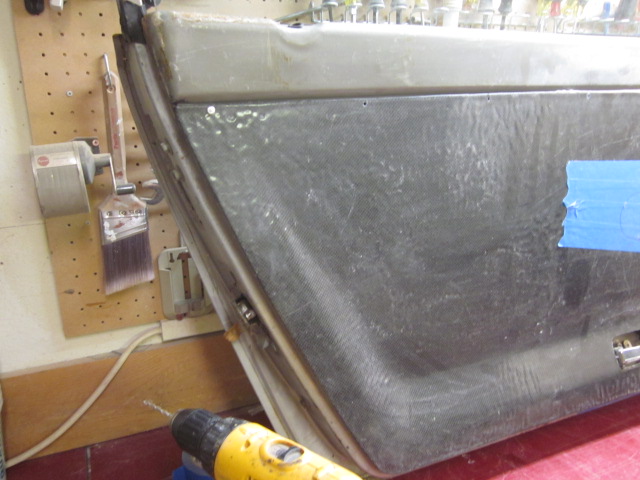
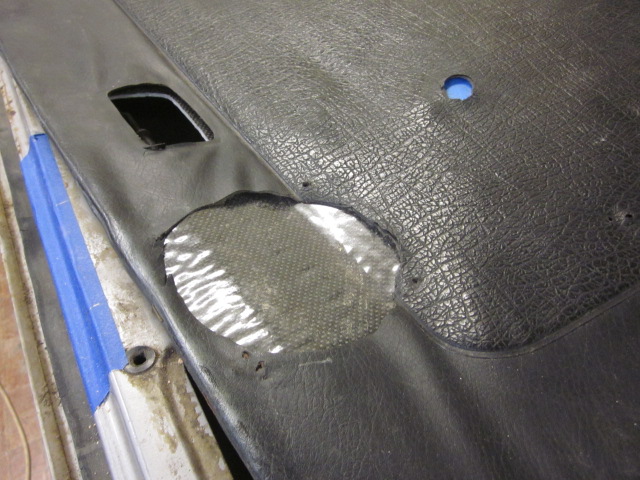
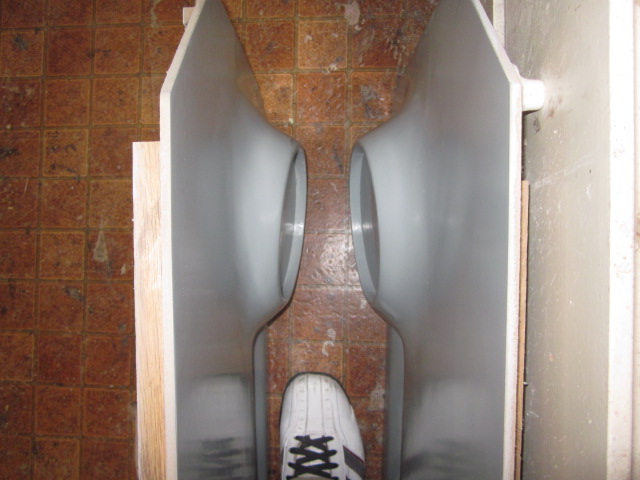
Olkie Dokie folkies, Here is how I attach the panels to the upper panel, sure, theyre are probably a million other ways to do it so think of this as just one example of many. 1st pic:This of course is simply the factory panel with the vinyl pulled back, Note: I did not remove the material from the door upper panel, its still in tact. This of course would only be the case if your vinyl is in good shape and you intend to re-use it. Also Please note the alingment of the door upper and the door card (the corners meet pretty flush... this is important as it is the main point of alingment when installing the panel) 2nd pic: Remove the factory panel, it pops off/away from the rivets pretty easily. No pic shown: Remove the factory rivets from the upper panel. 3rd and 4th Pic: align the rear edge of the new panel to the factory upper metal panel and clamp it into place. (Note: Im using the carbon panels that the painter messed up but the install is of course the same for both applications) 5th and 6th pic: Now flip the panel over to show the oblong holes your going to be drilling through into the panel. Note: your drill bit should not scare or other wise widen the existing hole in the upper panel but should create a clean hole through the new panel. 7th Pic: now drill out the holes and find the corresponding rivet size to snuggly fit the new holes, washers help securing the panel but arent necessary. (Note: for demonstration purposes I used long rivets but shorter ones are required) 8th and 9th Pic: the panel is now securely attached to the door upper 10th Pic: Now just simply glue the panel down, tuck and secure the edges and your done. (Note: I didnt go over the fact that you still have to drill out the provisions for the new pins) Also, you can use staples to attach the new or existing vinyl to the new fiberglass panel I'll go over drilling out for the new pins tommorrow, I knew it was something I forgot!!! Your done! go drive it like you stole it.

-
Well, I'm a little slow on that list but I do have 4 sets of panels and one in the cooker. Hopefully I'll be able to dedicate some time this afternoon and get teh list all sorted out, drop a few emails to some of you and ship some boxes tommorrow. In the mean time here are a few pics, I'm also working on getting that door handle cutout worked in ...
-
YEAH BABYYY!!!!!! the molds are finally done!!!! I test fit the mold to the door and its a perfect fit, If I had to be honest I think the fitment is a little better than the originals I made. The plan is to let them rest/cure for another day or so but start the waxing and buffing process so theyre ready to go for monday morning. I'll start by making three or four sets, cut em sand em make the door holes and keep going from there. As far as order goes, I'd say first come first served, meaning those that gave me deposits first get the panels first. I'll make a list and post it to the forum if thats ok with you guys and check them off as I go... Cool? As usual ..PICS!!!
-
Well since I have a couple of doors laying around I'll probably be cutting the door handle and drilling out the holes to get it mounted to the door. I do however have to get that all dialed in before I make any promises, as far as the pins go I'll order them and ship then with your order if you all decide on an amount for for that, what do they cost anyway?, I forgot.
-
Dan and HoHo, let me drop you a personal once I go to UPS online for the quote Okie dokie folks .... Freakin Finally ... Again!!! got the plugs all cleared and polished and I must say that they're lookin pretty spiffy. Both sides are perfectly matched with a nice butter smooth finish. So, Barring any problems I should have the molds layed up tommorrow and from there I start making parts. Although the molds do have to rest/breathe for a day or two before I can actually start mamking parts, but at this point Im sure another few days won't be that big of a deal.Right? think of it like this; Christmas is coming so you can kinda treat your Z to a gift. Oh and I also accept Christmas gifts lol lol PICS!!!!
-
Who knows? I'll of course keep these molds and barring that idea that I ever have to move and wanna travel lite they'll probably be available. Keep in mind however that its alot easier to make batches instead of one-sie two-sies so that may be an issue.
-
yes sir, this is correct
-
Hey Ragz U got a heat gun? what adhesive are you using? I think the best stuff you could use .... believe it or not! is flooring adhesive. Yes flooring glue. Use a paint brush to apply a thin coat, let it get tacky and apply the vinyl with a heat gun to stretch it (a little) and I think you'll like the result. Be careful with the glue because once the vinyl contacts the fiberglass ... its stuck! literally ... its not coming apart!!!
-
FREAKIN FINALLY!!!!!! I hate Bondo! its not so bad on a flat surface but geez sanding a deep pocket = pain in the (fill in the blank) .... you get it! So the plugs are all but done, another coat of primer a few small holes to fill and a final sanding and they're off to the painter (a different painter) for clear and bada bing bada boom ... molds sometime next week! bout time right? and no one could be happier but me. Now I can get back to my 510 Here are a few pics of the passenger door plug...looks pretty darn good.
-
Clive, Your right! it is rather impressive! considering this was the same guy that painted my 510 and it came out WOW!!!!! Everyone that looks at my car thinks I got a smashing deal for such a great price. Fortunately for me I know more than one painter.
-
Evil,tough to say. My thought was to sand them down to get them smooth (as possible) with maybe some 400 grit (thats the gentle hand Im talking about) and shoot them with some clear. Who knows ... you got a PM
-
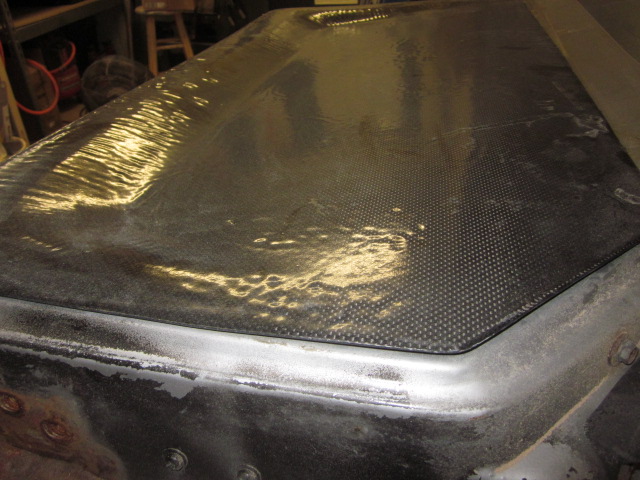
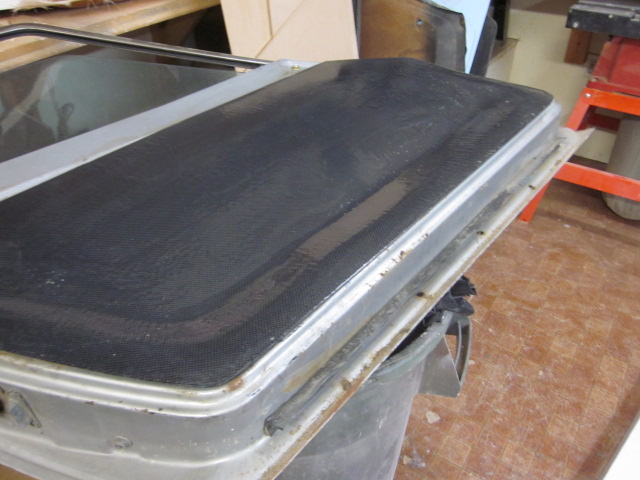
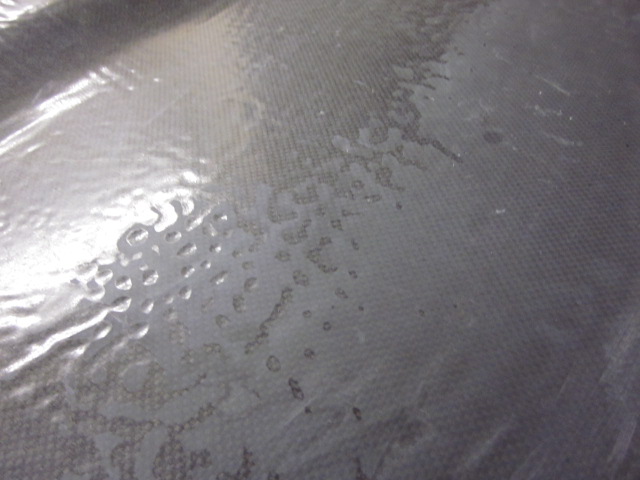
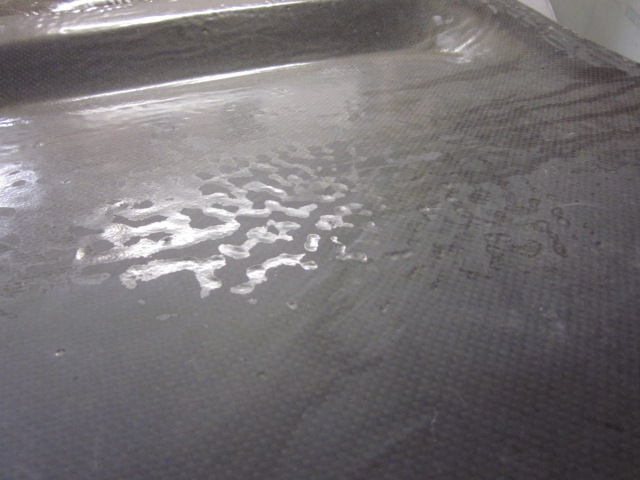
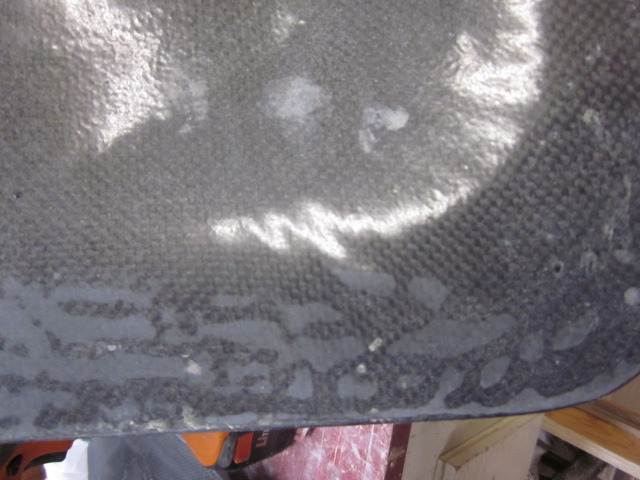
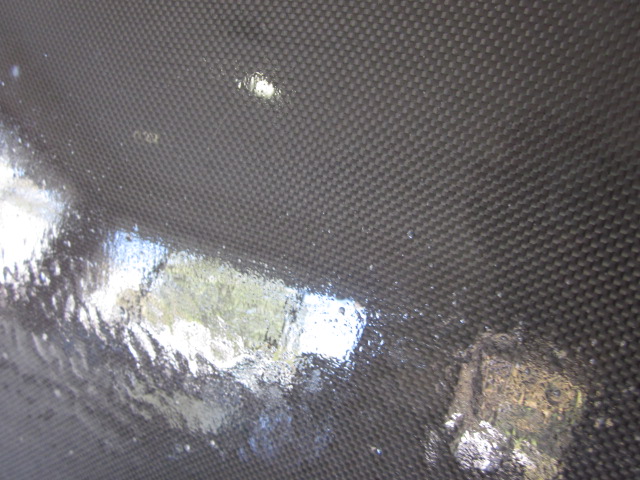
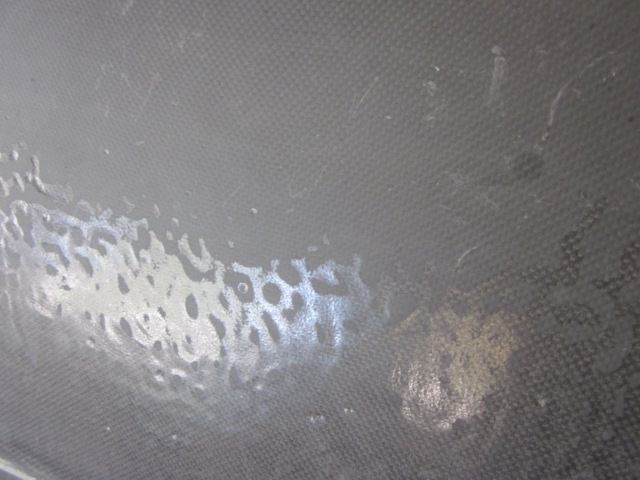
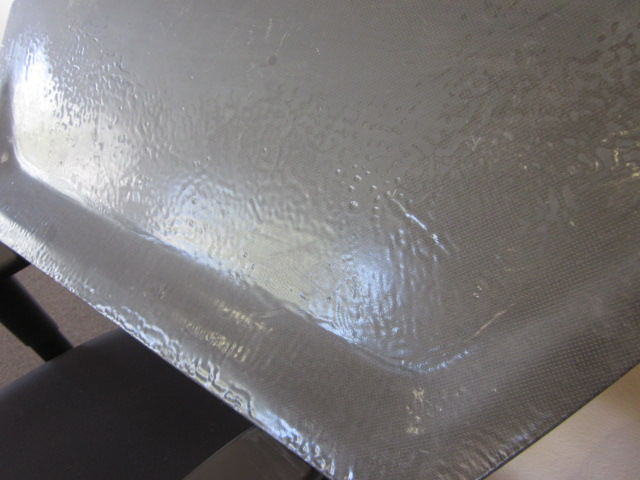
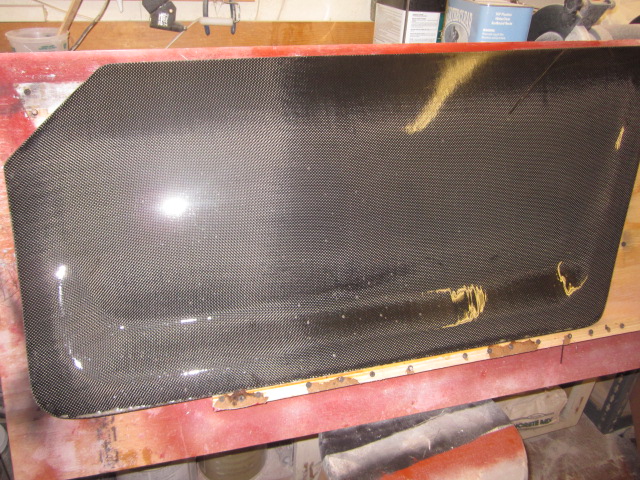
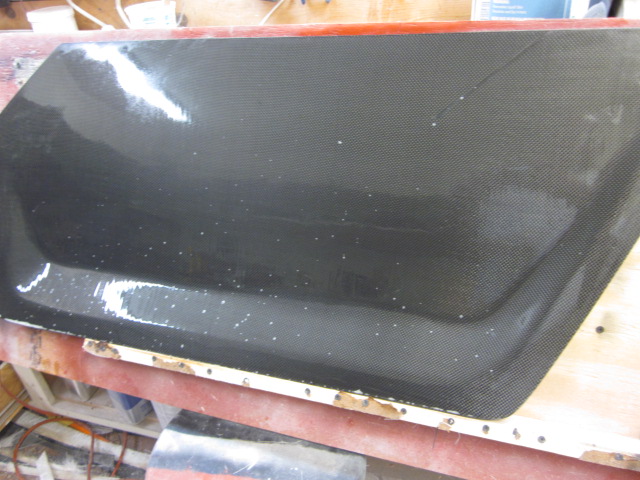
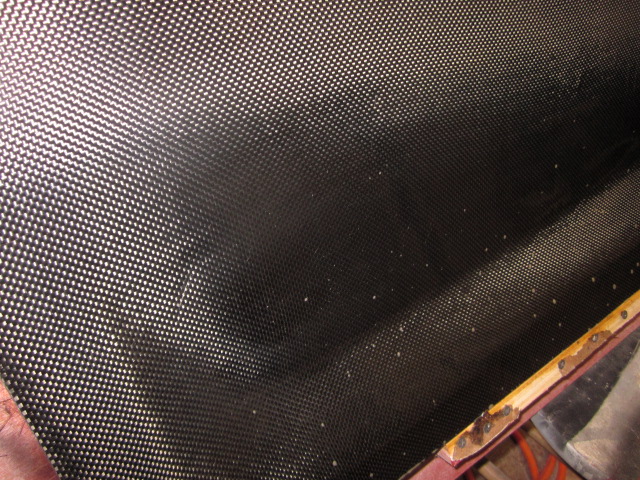
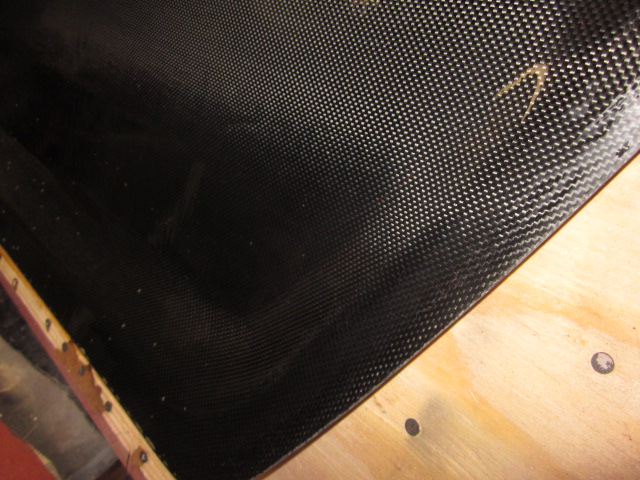
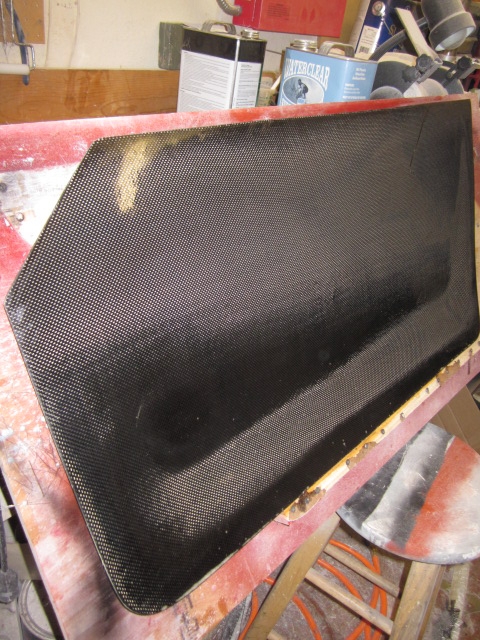
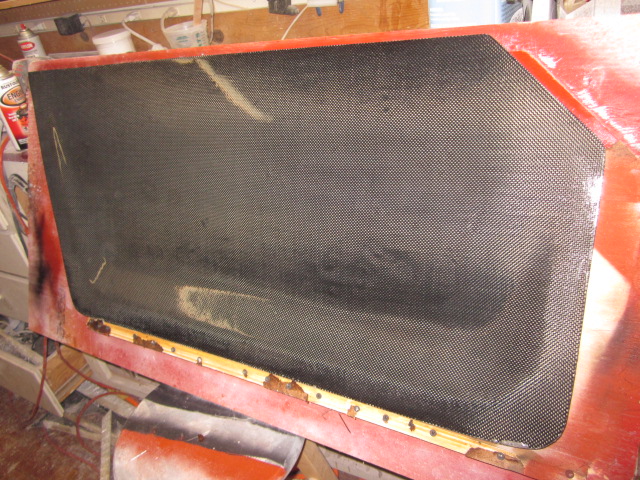
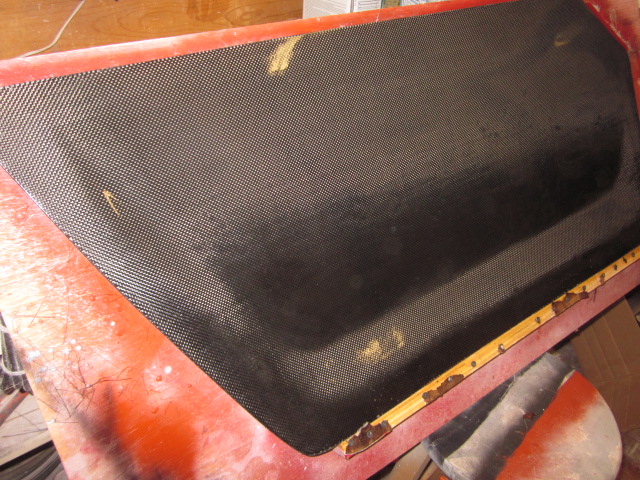
The third and fourth pic show the area that I already sanded, the next few pics show that same area sprayed with windex ..(thats what I had laying around) so you can see the carbon is still there. Again these panels need a gentle hand, a lil patience and some understanding.
-
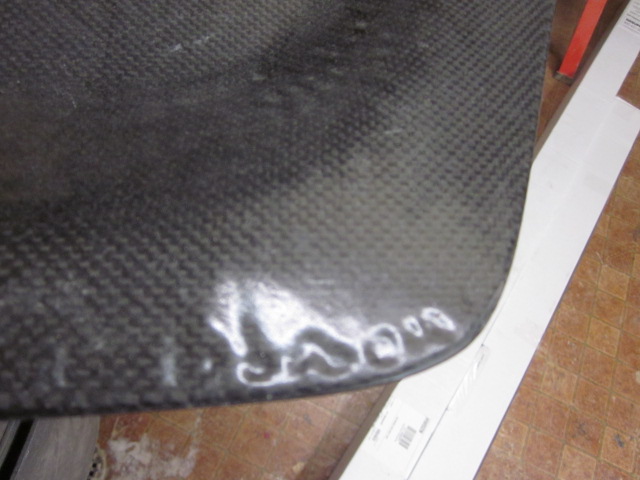
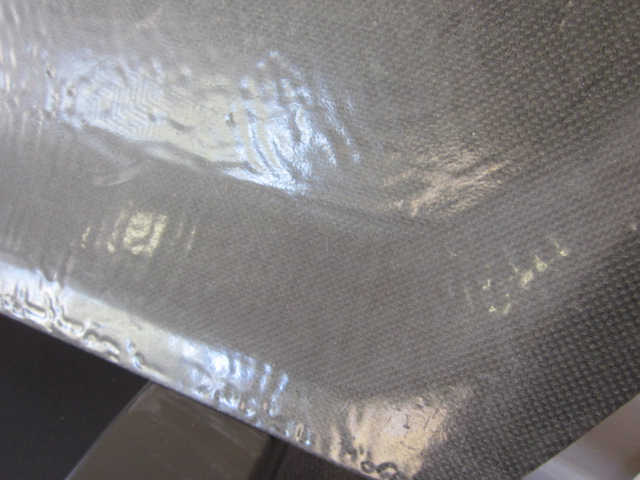
So I feel the need to post a few more pics, while the "Carbon Syrup Panels" are in fact carbon fiber, they're not the quality of work that I stand behind. Im only hoping to recover my lost expense and not make any profit on these, so what you see is what you get. Im hoping to sale them to someone who understands the complexities, willing and capable of bringing them from rags back to riches.
-
Rags, shoot me an email address
-
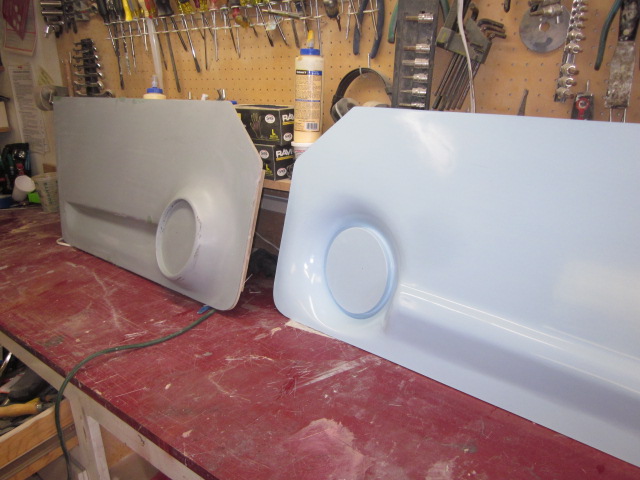
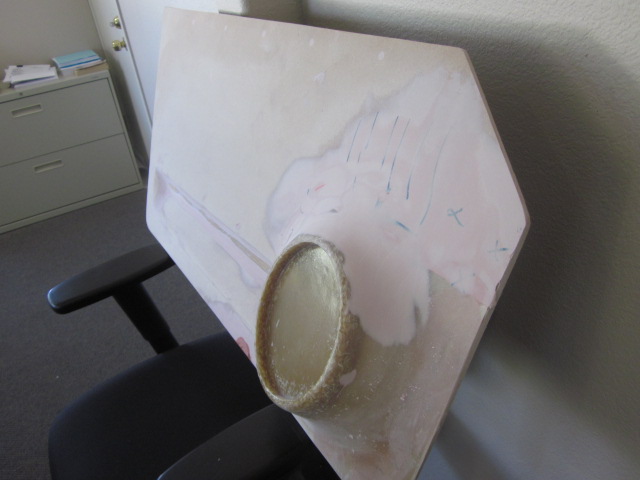
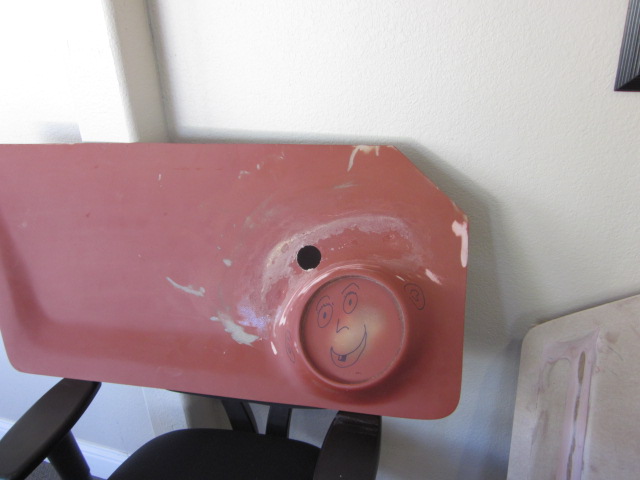
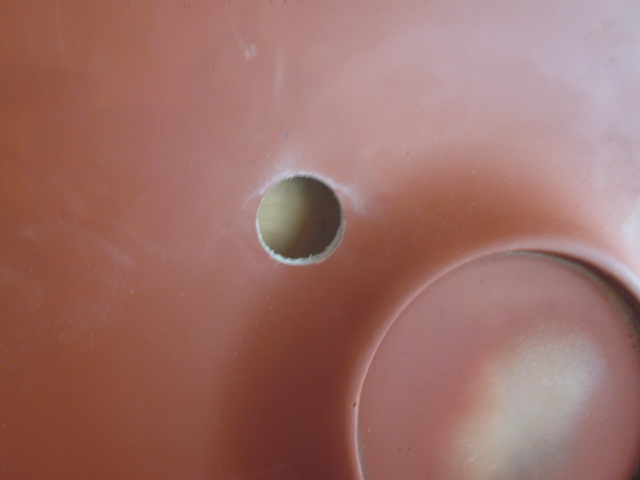
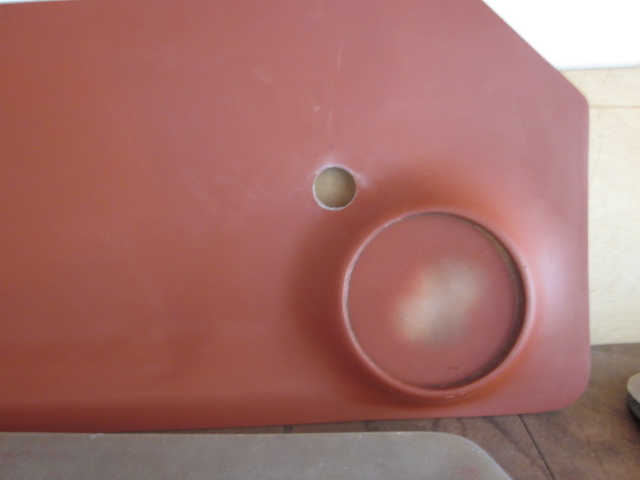
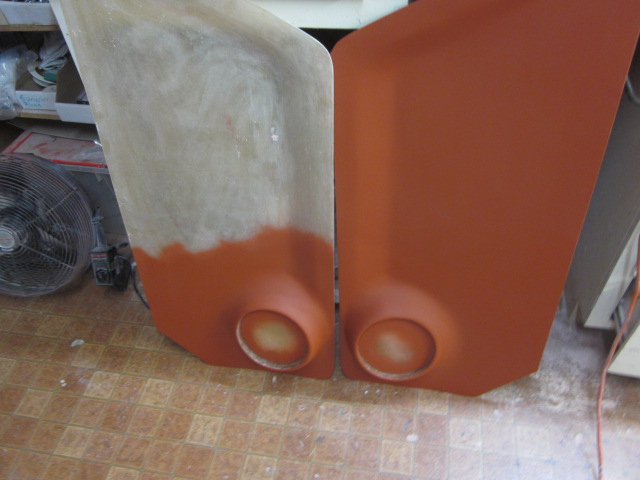
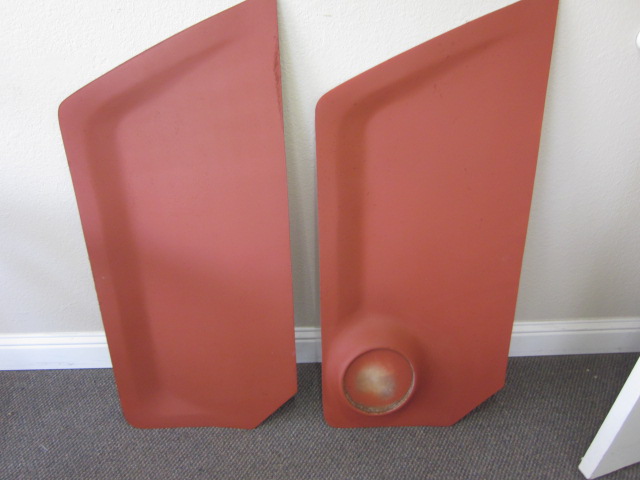
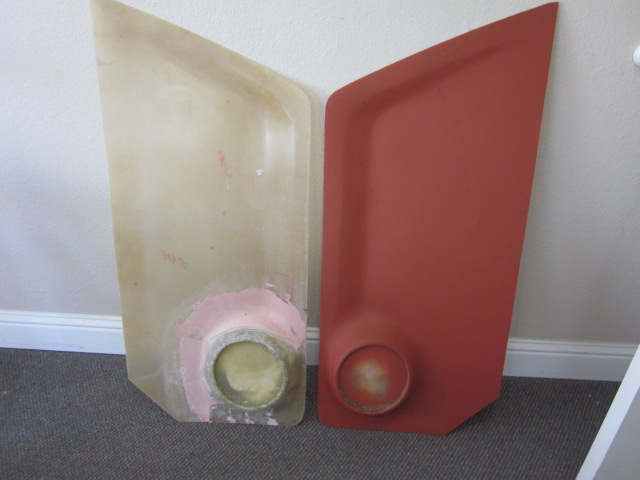
Okie Dokie ... updates,... and boy are there updates! Ok, so the "Speaker door panels".... the plugs are no good!!!!! Turns out I was trying to make a Rootbeer float with chocolate ice cream.... and that's just not gonna work. So, ya see the redish panels with the happy face? they wont work because they're a completely diffrent animal from the original panels I created. The first set of panels were completely flat with the only contures being that for the door release. It took me a while to figure that out .... and I was the one who made em...DUUUU So,... Now I created the second generation panel, which is the same as the first just recreated. (thats the pic with all the bondo) it still needs some finishing sanding and paint but its pretty much there aside from the fact that I have to make the other side match. Hopefully within the next week I will have the other side done and I'll be able to make the molds ...FINALLY!!!!! WHEW!!!! Remember those fancy dancy Oh so Hot Carbon Panels? well the painter completely screwed them up.... pics attached. Needless to say I was not a happy camper!!!! He apparently said the panels were'nt sealed so they developed this thing called fish eyes when he sprayed them with the clear, so he sanded them again with the idea that he would get some clear resin from me and shoot a layer of resin (to seal them??) which makes no sense to me seeing as how the panels are made from Resin. He was then going to follow that process with another coat of clear??? in any event the panels look like a two year old sprayed them with clear syrup.... they have tons and tons and tons of runs in them. I sanded a nice size area and sprayed it with windex for the wet look and the carbon of course is still there. Dont get me wrong they're in perfect condition otherwise, if someone wanted to spend the time sanding (with a delicate hand) they would be good as new... Im not that guy! A couple of forum members showed some interest in them but Im not sure if there still interested in them Ok what else? I redeemed myself and have another set of perfect Carbon panels ready to go. One set of factory panels ready to go and the plugs from the original "speaker door panels" are for sale. The original speaker door panels wont work with the SPAL kit but if you have a differnt application without the window gear sticking out they'd be a perfect match. Theyre all fiberglass with some bondo and theyre a lil heavy maybe 7 pounds per panel And the carbon syrup panels are for sale as well. Pics are always fun
-
Hmmmmmmm Someone explain to me what flocking is, I kinda like that look. Dont get me wrong I know the basic,... some material spread over adhesive = flocking Question is where do I get it.
-
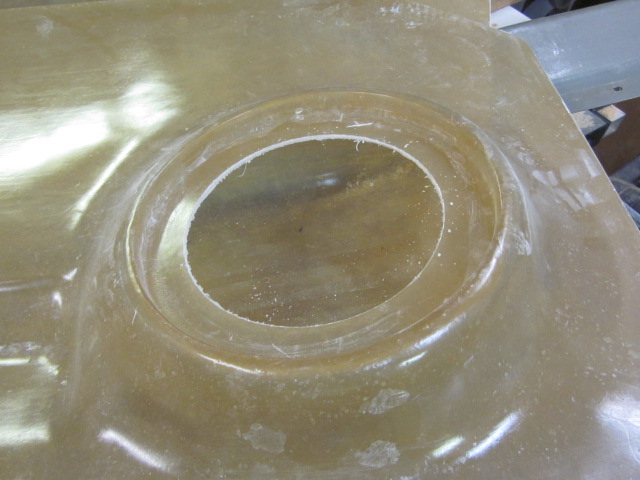
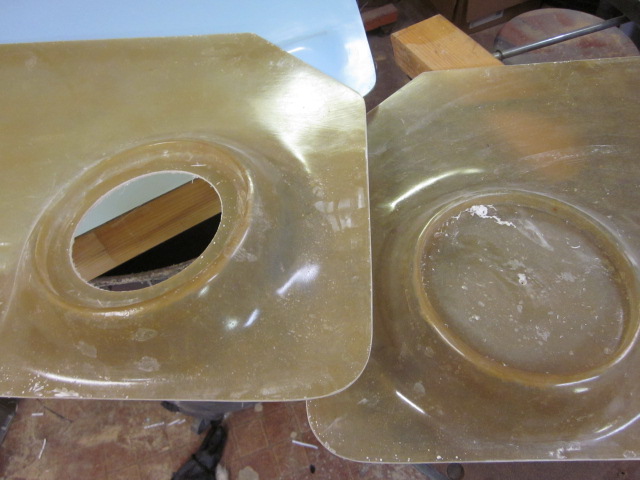
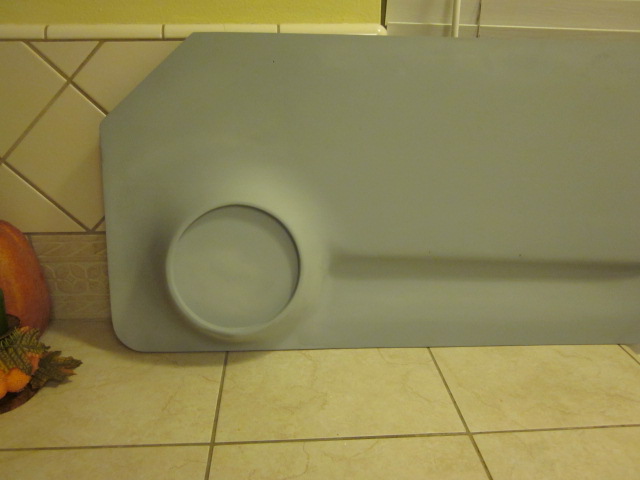
Okie dokie folks, So I went by one of the members house to test fit the panels.... thank my lucky stars cause they dont fit! turns out I need to add another few 8ths or maybe even a quarter to be safe. I had to drill a hole in the panels in order for it to fit flush against the door (These are just a plug so I figured Id have to do that) and just as I suspected ... the regulator stuck out a bit further than the face of the panel. Bottom line that wouldnt work so back to the drawing board. All in all its not a big deal, lil foam, lil bondo some sanding and some finish work = door panel.
-
UPDATES!!!!! YEAH!!!! Ok now that Im done scream typing at all of you, I have both plugs done and Im meeting with one of the members tommorrow to check for fitment and clearance issues. If everything goes ok I'll polish off the little details and start the mold early next week, after that I start the production process and bada bing bada boom you kidz get door panels yaaaaa Pics are always so much fun.
-
ZTR, Gonna be working on getting that done, however, know that the cost of carbon fiber is stupid expensive! Like 85 a yard!!! so with that the cost for any part goes way up.
-
Sure if you guys can come up with an idea that everyone (or most) like, than sure, ...Ill make one for you guys.
-
lol lol lol thats funny! whats wrong with the red? its all I got laying around, plus it shows detail better than black. Ill be sure to primer your set in black ZTR
-
Well I got one of the "speaker" door panels done, now the hard part is making it match the other side. With a few more passes of some 150 grit and a lil more primer it should be perfect.
-
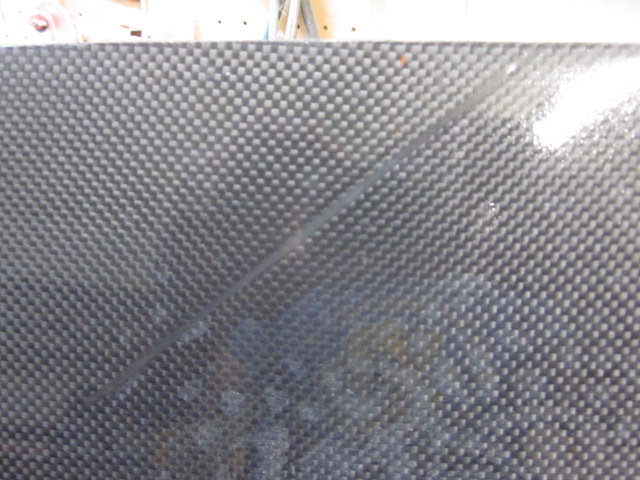
So apparently some days are better than others,... Much to my surprise (after checking and checking and checking my own checking) I thought I was good to go. Notice in the top right side of almost perfectly beautiful panel ... that single strand that is forever sealed in place like a prehistoric mosquito locked away in amber. Needless to say I was NOT FREAKING HAPPY!!!!!!! when I popped it out of the panel. So I was given lemons, guess I gotta make some lemonade, anybody got any sugar. Other than that theyre pretty hot hu? they're going to the painter on wednesday for clear (your looking at soapy water after a sanding with some 2000) In any event they're for sale and if no one bites Ill make them into a very expensive display board with a business card holder attached....ARRRRGHHH!!!! The camera does weird things to carbon fiber or maybe its the soapy water but they dont look wavey in person or blemished with dark spots, in fact the carbon is very straight both horizontally and vertically... hmmm weird.