

Zetsaz
-
Posts
864 -
Joined
-
Last visited
-
Days Won
18
Content Type
Profiles
Forums
Blogs
Events
Gallery
Downloads
Store
Posts posted by Zetsaz
-
-
On 5/31/2024 at 9:47 PM, JCan said:
I am resurrecting this thread.
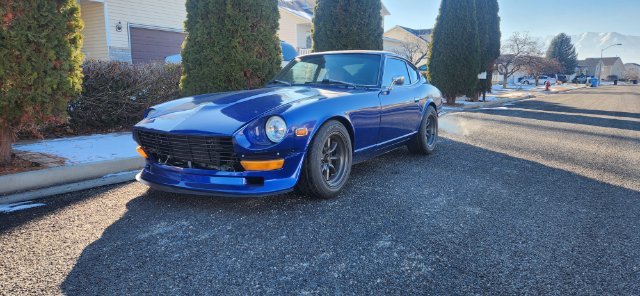
Attached is the picture of the '73 240z in May 2013.
Today after maybe 60k miles, the car still looks the same engine is pulling harder than ever, but we need a new Transmission and Rear end. After consulting with my son, I believe we are going to go the Subaru R180 LSD route for the rear end. For the transmission, we are planning to go to the CD009 or the 240SX FS5W71C depending on what we can find.

If you are still just running a hot L28 the CD009 is probably overkill, and will require drilling into your floorboards or heavy modification.
The FS5W71C transmission is probably enough to handle the power, but if you're set on a 6 speed, the BRZ/FRS engine is becoming more available now as well. A lot has changed since you last posted.
-
Small extra purchases recently to be installed before the annual Cache Cruise-In
-Lonely Driver Co. "Juliet" Oil cap
-New OEM dome lamp - these are unreasonably expensive from US vendors, managed to get one at nearly half price from a Japanese eBay vendor
-Reproduction 5 speed shift knob - I love wood shift knobs, and wanted something original but the datsun thread is smaller than the 240sx shifter, meaning it can't be adapted easily. Bought a reproduction that looks to be decent quality from a woodworker that makes them with your choice of thread. We'll see how it turns out.
Last thing I'm hoping to do before I head home for summer is get the original shifter bag remade in leather. Hopefully this weekend I finally have the mental capacity and energy to go out to the downtown area and get some materials to hand over to an interior specialist at a customs shop near my apartment.
-
0 offset if you're going 8 in wide. Not totally positive that will clear with stock spring perches, but if you go any more negative offset you'll definitely end up rubbing unless you have more aggressive negative camber which isn't ideal.
-
 1
1
-
-
Got the shipping update from PayPal yesterday afternoon. Appreciate you working on all of these!
-
16 hours ago, Jboogsthethug said:
Man I would love to learn 3D printing, that would be awesome! Those T3 Parts are so sweet man!
I honestly haven't done too much. Most of what I've printed so far have been things others have made and made freely available. Usually my cousin or a friend have printed things for me. T3 parts ARE nice. Fitment has occasionally been JUUUUST a bit off but it's almost always when I have to chase some threads or because I have mismatched parts from such a broad range of dates on my stuff. That rear brace on the driver side is unfortunately gonna hit my exhaust so I have a guy that does stainless work checking out the car at some point soon and hopefully redoing some of it to correct things and get better clearances everywhere.
11 hours ago, calZ said:The latest generation of printers has made it pretty dang easy. They're basically as easy to use as paper printers at this point. Learn some basic modeling skills from YouTube and you're off to the races.
I think we're about at the point with 3D printers, in terms of reliability, as home inkjet printers were when I was a kid. Still not quite as mainstream but getting there. I remember inkjet printers being good for getting my homework done when I was still using floppy disks to take my work between home and school, but they were pretty slow, and the ink ran out pretty fast.
I think within the next 10 years we'll be approaching where laser jet printers are now and we'll have reliability and speed in a mainstream consumer level printer.
-
1
-
-
Couple of small things coming up as I prep the car for summer
-Still super unhappy with the fitment on the exhaust, especially after the rear bracing was added. Have gotten in touch with some folks that do stainless about some adjustments.
-New vinyl trim for the rear arrived. Won't be tearing anymore and won't have the holes on top of the strut towers. Should finally be able to start buttoning up the interior.
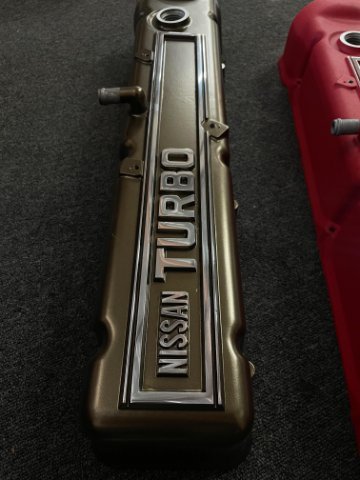
-Purchased a new valve cover. This one came up and seller accepted my offer. Red might have been better, but it was sold. The bronze will sort of match the interior and right now I think it's a good homage to the original brown paint on the first shell I had that was unfortunately beyond saving. I think I'll eventually modify mine to relocate the breather, and shave some of the bits with threaded holes are for the old spark plug cable holders and make it red with polished lettering like the one on the right.
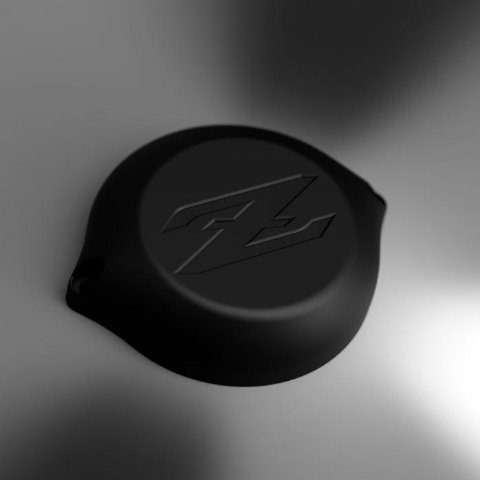
- Also had a friend help with a better design on the distributor cover. The original was just a very plain 3d printed cover. Friend has a nicer printer that can do much smoother work with carbon and started making a better design when I sent him the old one and he didn't like it haha. Should be a fun change.
The plan is to print it in black and maybe fill the Z logo with enamel

-
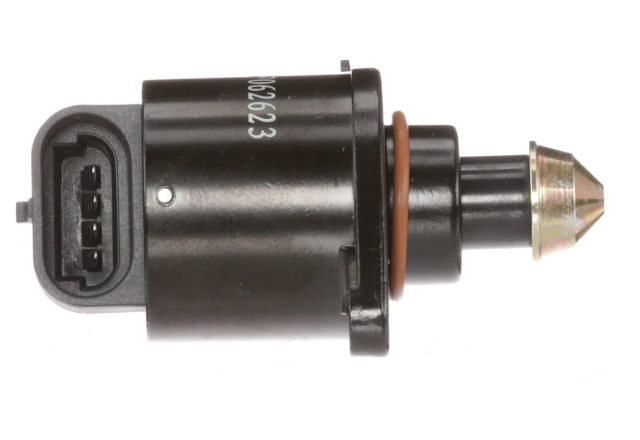
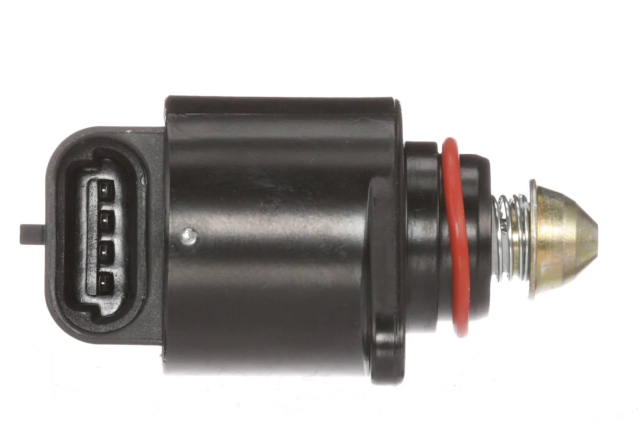
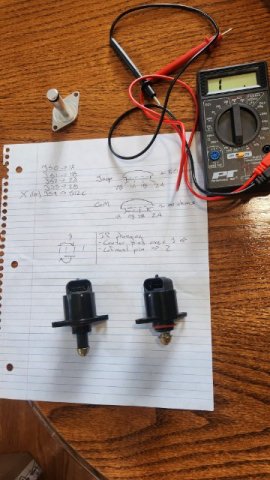
Here's your Jeep Stepper
And a GM Stepper
If it's any help this is the one I'm actually running, which looks closer to what Protunerz lists on their site. The one with the black housing I took a screenshot of technically only shows compatibility with V6 engines but I'm pretty sure it's functionally identical, just has the pins facing a different direction? -
On 4/28/2024 at 5:55 AM, madkaw said:
Still no luck with the stepper IAC . I am going to get a used GM style to replace this Jeep style I have now to see if that helps . It seems that it just decides not to work sometimes . I get zero air at start and have to use the throttle to modulate . I am about ready to ditch the stepper all together and go ole school with a AAR Bosch valve . I have 3 of them laying around . I use them on my truck and never have a start issue .
I've compared them side by side and it's important to note that the Jeep stepper won't open as far as the GM one based on its design. On cold starts it won't bypass nearly as much air.
I have a GM stepper on my protunerz manifold and after re-pinning for it everything has been much better. -
50 minutes ago, Sk8rSeth said:
gotcha, i thought it must be something like that. i also didnt realize T3 sold frame rails lol
thanks
I'm sure they're great parts. Years ago Bad Dog was really your only option. They were decent but I think fitment has gotten a lot better on stuff like this as new people have tried to make them in better volumes
-
1
-
-
They're also the same ones that T3 has. T3 even lists in their description that they're made by Capital Metal Works. Pretty sure cap metal works makes them all and T3 and Apex are just resellers. It happens occasionally.
Same way that T3 has Skillard parts on their storefront
-
 1
1
-
-
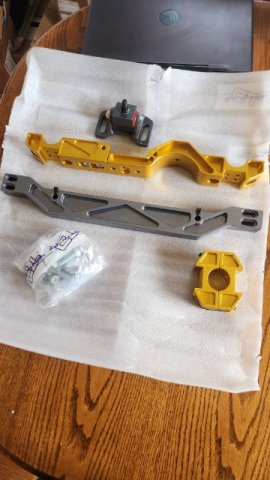
Lots of work this week. Moving from rear end forward:
-Replaced some rear parts with the T3 front diff mount, as well as their fancy rear caps to add their braces. Took forever because I had to chase a couple of the threads and add washers to get clearance. I don't know if my front mount from them was just a bad item or if the fitment is that poor. Diff was touching the center piece that bolts to the crossmember when I first tried to tighten it up, mean it might as well have been hard mounted. Washers helped so I'm moving for now, but I'll report back with what T3 says.
-Had to go without the driver side brace for now due to exhaust clearance. My exhaust is already just okay, so I think sometime soon it'll finally be time to have it professionally adjusted with better mounting.
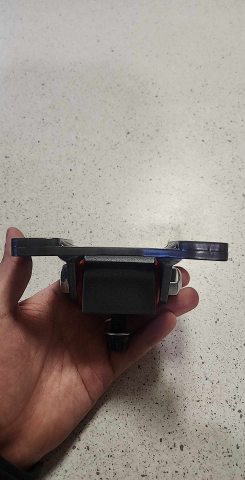
-Replaced the transmission mount with a Kameari reinforced mount. Feels mostly noticeable at higher RPM or when taking off faster. The old one was in good shape so it's probably the only time it was flexing more.
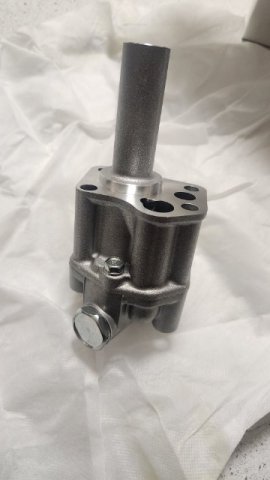
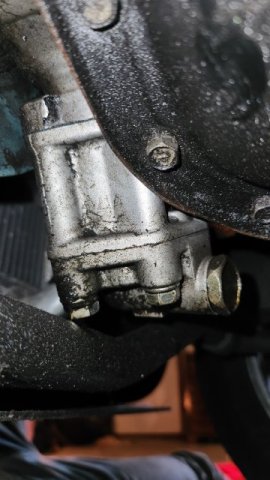
-Took off the old oil pump and went ahead and replaced it with the new Kameari pump. Gasket had failed. I figured if I'm replacing the gasket I might as well throw on the new pump instead of waiting for when I rebuild the engine.
-Finally bothered to figure out my IAC. Turns out my old Jeep stepper required different wiring than the GM. Megamanual shows two different wirings depending on if the center pins have ~50ohms resistance or infinite - sure enough, I had the wiring wrong. Tweaked my settings a bit after confirming it worked and now I have a very steady idle in the low 800s, and starting up with no issues and with no need to press the gas pedal.
-I also degreased a lot of the underside which had gotten caked in grime from the oil pump gasket leak. My rear main seal is still leaking but at least that's more of a drip and not a mist across the entire underside while I'm cruising like the oil pump was causing.
-
I would start by specifically not redoing literally everything. Videos online make people think this is like legos and things can get put together quickly. There are almost always hangups.
Other than the engine rebuild, I would recommend seeing which stock parts absolutely need replacing and start with just that. Get the engine finished and drive as much as you can and see what sticks out that might actually be worth upgrading to you. There's nothing worse than tearing a car down then not getting to drive for several years because you can't keep up with everything you took off.
Unless you have the budget to just dump at everything T3 sells and brand new interior parts all at once, it's just not worth trying to rebuild everything all at once.
-
1
-
-
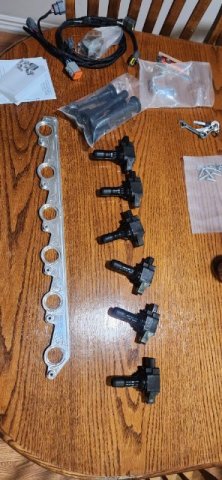
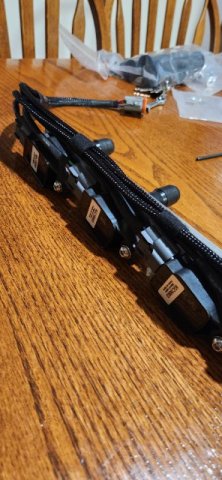
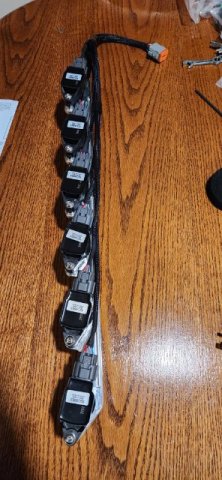
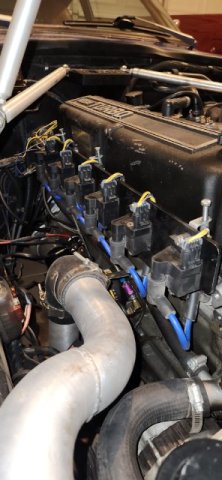
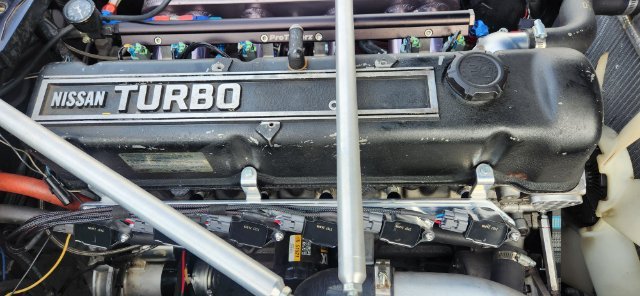
First project now that I'm home is getting the new ignition coils in. Just had to swap out the stalks along with the new spring provided by Duffy. Taped the harness I got in two spots just to keep it a little tighter. I'm not the biggest fan of wiring that branches off in only one section, much prefer it to T off in multiple spots as it goes down the line, but I know that's a lot more time consuming. Regardless I'm actually really happy with the little subharness I got.
A few pics included here show the shorter stalks, taped up, finished fitment and the before and after.
Already got the dwell times adjusted. Updated my megasquirt firmware for the first time in 4 years, and did some very mild adjustments. Feels like it's running much smoother than before - maybe that's full placebo effect happening, but even if the actual performance difference is negligible, I'm WAY happier with how much tidier and more serviceable this is than the previous setup.
Second mini project was just 30 seconds of adjusting the dampers on my coilovers. I softened them up after reading a post. I think I was overdampened for my spring rates, especially at the front and small but abrupt dips and other holes felt like they were pounding the whole car. Feels much smoother now.
I think I'll be doing a lot of small projects again while I'm here, but I think within the next year I want to completely upgrade all my wiring, move to a nexus R3, switch to electric fans and reroute the hot side intercooler piping, and color match the engine bay to the exterior while the engine is out to rebuild with flat top pistons.
In the meantime I'll cleanup major spots that need some attention and tidy up anthing from the transmission back that's causing little rattles or discomfort.
-
1
-
-
I ground down that same section of the diff. Don't think it should cause you any issues
-
Heading back home in just a couple days for easter and passover weeks.
I... mostly... certain I have all the parts I need for the ignition upgrade and some new seals.
As far as planning goes ITM flat tops are back in stock momentarily so I immediately snagged some from Rock Auto. MXN to USD exchange rate is very in my favor right now, the total shipped was about $240. Full $70 or so cheaper than just the list price from other vendors like Z Car Depot and waaaay cheaper than what some people are asking for on ebay or in facebook groups.
Unfortunately swapping the pistons will probably require a full rebuild. Debating if I pull the engine my second week around and just go at it for a couple of 12+ hour days to get it done and back in or if I wait until summer. The other option is pulling the block before I leave and just dropping it off at a decent shop then just have a family member pick up the engine whenever they finish it so it's ready to drop in when I get back this summer.
We'll see... I was excited to just get at it until I remembered I'd also need to pull the timing cover and all that entails, it'll be better to just rebuild when everything is ready to go.
-
Most of this looks pretty great, but that mounting on the camber plate to the strut tower isn't exactly confidence inspiring.
Is there no way to swap out the top of the coils to fit better?
-
17 hours ago, madkaw said:
Im still not keeping up -lol
Now tuning on a Protunerz intake . Not much different than the last intake but the longer runners help the low end .
Something I’ve noticed with ALL these plenum intakes is that the air is not always equal across the cylinders . I am probably one of the very few that has a 6-2 header that continue on to duals AND have a Wideband on each side of the exhaust . The tendacy of these plenums that under high vacuum situations ( idle or lower KPA) , the first 3 cylinders indicate that they run leaner - as if they are stealing the air out of the room . As soon as KPA gets above idle the AFR’s start to even up quickly . Not sure if you could detect this on the plugs unless you ran your engine very lean .
The Megasquirt 3X allows for injector trim which I have been adjusting . To get AFR’s to match up between the two banks I add as much as 20% to high vacuum cell areas . It also can be felt by a smoother engine operation . Now this is mostly over- run conditions and light throttle modulation during highway cruise .
I’ve checked calibration on my Spartan 14.7 wideband and they seem correct .
I have my ego sensors separated by banks . I guess I also wonder why tuner analyze won’t pull in more fuel in these situations , I use the same AFR table for both ego sensors .
Just thought this was interesting and most won’t see this with their 6-1 header where it all averages out
Good stuff to know! Once I get spark fixed with my new coils I might toy with the trim for the first 3 at idle and see if it helps even more. Idle/cold starts/warm up enrichment always feel like a mess to me
-
On 1/27/2024 at 11:31 PM, 1969honda said:
Forget the epoxy, come use the metal glue gun when you get back in town.
I will take you up on that!
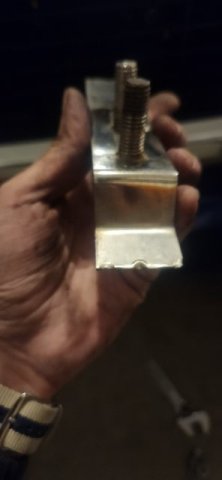
Small update: Slowly purchasing little things here and there again. I'm not happy with my LS coils slowly going out and even less happy with my bracket. Granted the placement is better than most i've seen. I REALLY don't like how high up on the valve cover the Protunerz one is. Mine normally goes where one of the heater hoses is, but I'm retaining stock function and moved it.
Between those problems and having to buy new coils soon I chose to upgrade to Nissan coils. Got the bracket from @DuffyMahoney and ordered the Hitachi coils from RockAuto. In a few weeks I'll hopefully get a chance to work on it again.
-
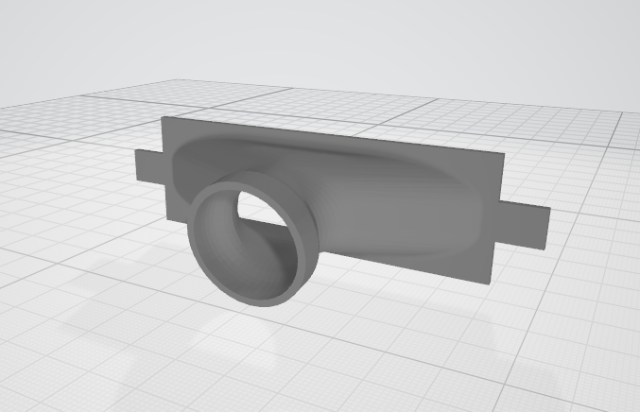
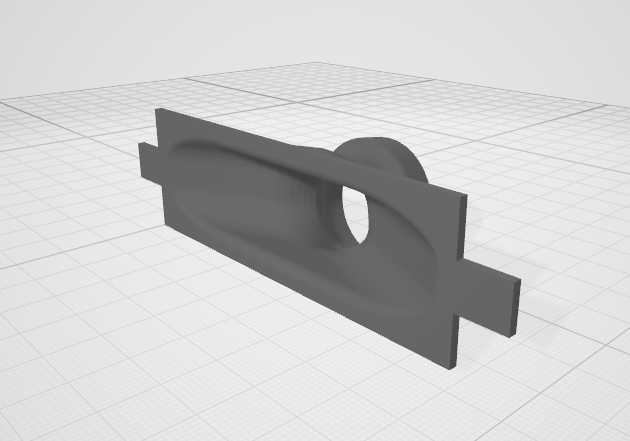
I did something very similar a few years ago, but I had the tabs to bolt it in in the same location as the original, and I kept the same angle on the rear inlet as the stock piece.
It flows okay as well, but it tends to flow mostly out the center. I had some help with this design since I'm a complete novice with 3D modeling software, but if I could do it again, I would add some kind of center diverter to prevent the air from just flowing into the center and actually directing it slightly to the side to each vent.
-
On 1/23/2024 at 4:42 PM, madkaw said:
Are you sure you didn't have a Jeep stepper? Looks almost identical but the pattern isn't the same. I had both on hand and realized the bolts don't line up on a Jeep stepper despite being a nearly identical part.
-
I think he might have short injectors on there. The protunerz page specifically says not to use those. He's testing the clearance with the injectors instead of the supplied brackets which would have clued him in to why it's too close to the thermostat.
Not to knock on the guy, I'm sure he got it figured out, but definitely seems like typical videos people post hoping to get some internet clout instead of spending their time actually working things out.
A lot of folks on youtube and other social media tend to post these long videos before even asking the supplier about their issue, instead of posting the result then mentioning the problems they ran into and how they were solved.
-
What was painful to watch about the videos? I feel like this intake is not that much different from installing a different oem one. Only thing you have to change is where some vacuum is going to.
Well, I guess other than the cable throttle needing to be installed. -
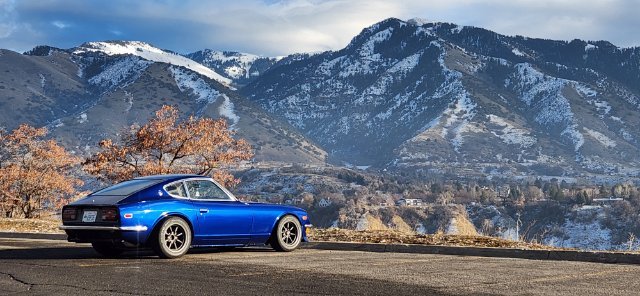
Didn't do a whole lot while I was home for Christmas like I was hoping. Since the weather was so unusually warm and no much snow (and consequently not much salt on the roads) I couldn't pass up the opportunity to take the car out for some cruising. Here are just a few of the updates
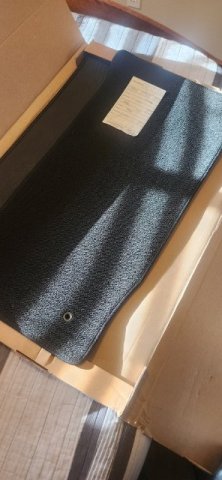
Found the mats I thought were missing!
DID replaced the horn retaining ring, but not sure how I feel about how tight it is. Don't want to glue the horn pad to it just yet in case something chips. Already has some small bits if it flake off when removing the original ring, but at least now it doesn't fall every time I hit a bump.
Installed only a small handful of shims. Realized most of them are still good. I think if I visit this spring the big work will be finally fixing the seals on the hatch and adjusting it properly. Right now it tends to pull back on the seal. Ugly and makes it inconvenient to use since I have to tuck it back.
Also broke my IAC valve running it through test mode in tunerstudio somehow... woops haha. Blew the end off. Put it back together but now it won't go in or out.
Also bought a proper reproduction windshield washer bottle
Biggest mishap... found out one side of the bumper hasn't been hanging on to the brackets at all. Probably broke early on. It's just a few tacks holding it on
 Gonna fix with epoxy when I get back.
-
On 12/26/2023 at 6:17 PM, AydinZ71 said:
I have done a complete chassis resto. Took me 3 years… oooof. Let us know if you have any questions.
#1 take away: it is more expensive, more time consuming, and more tedious than one would possibly imagine, especially if you are stiffening the chassis and replacing rust along the way.
absolutely, positively 100% worth the time and effort to find a body you can build from that does not require a full bare-metal resto. You will never get your time and money back, haha. Maybe for a rare European, but not a Z.
Also, as popular as the rotisserie is, it can be done without. You wire-wheel the underside on your back wearing proper PPE, and use a brush to apply the epoxy sealer.
Even my "rust free" 280z had the floors replaced at some point (poorly, I might add).
I'll agree with you here, it's so worth it to find a body that needs as little work as possible. His example in the videos is FAR better than most and still required some patching to get it to a high standard. Very impressed with his videos and the work on the hood though.
It's almost motivating me to replace my floors properly, now with properly reproduced seat supports that weren't available when I made mine out of square tubing... slightly less tempting now that it's painted though haha.


A musician's therapist (The $300 Z)
in S30 Series - 240z, 260z, 280z
Posted
Friend in Washington printed the new distributor cover for me yesterday. Way bigger than he expected haha. The turbo dizzy was a much bigger diameter than the NA one.
Here's hoping it fits! A mutual friend up there has a turbo Z we were hoping to test fit a cheap print with, but apparently he sold the turbo dizzy when he went with a OneSix CAS.
If this doesn't fit we'll be reprinting when I'm up in Washington this summer.
Still undecided if I want to do red or white enamel in the Z logo and smooth out the print