

grannyknot
-
Posts
729 -
Joined
-
Last visited
-
Days Won
30
Content Type
Profiles
Forums
Blogs
Events
Gallery
Downloads
Store
Posts posted by grannyknot
-
-
-
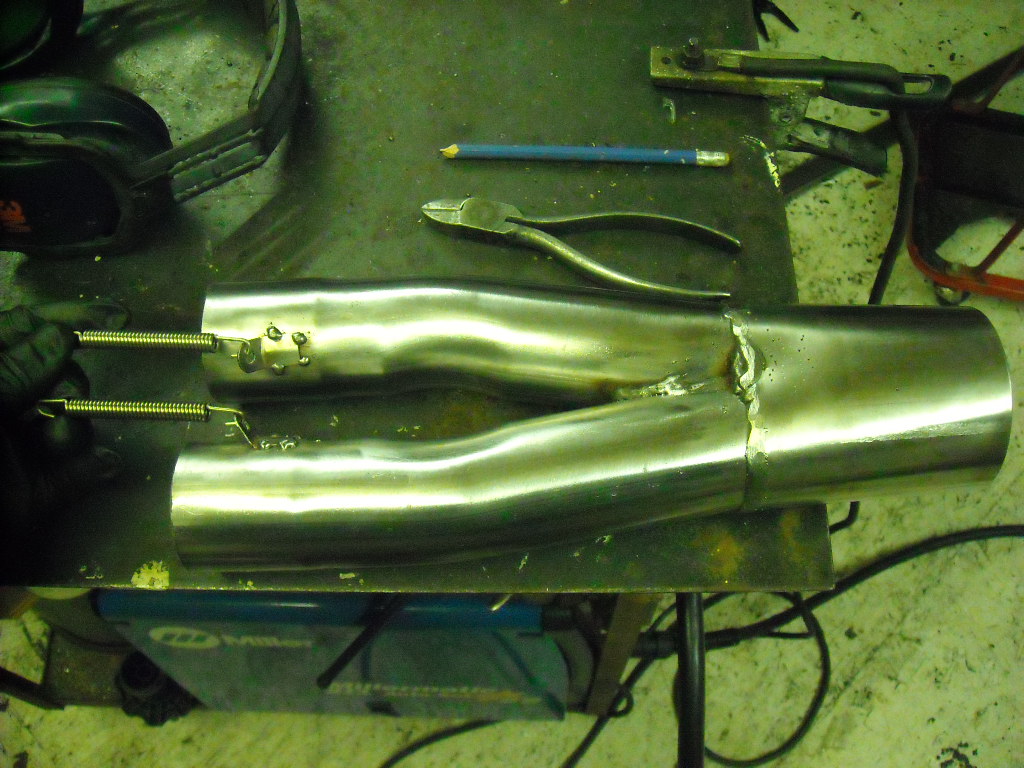
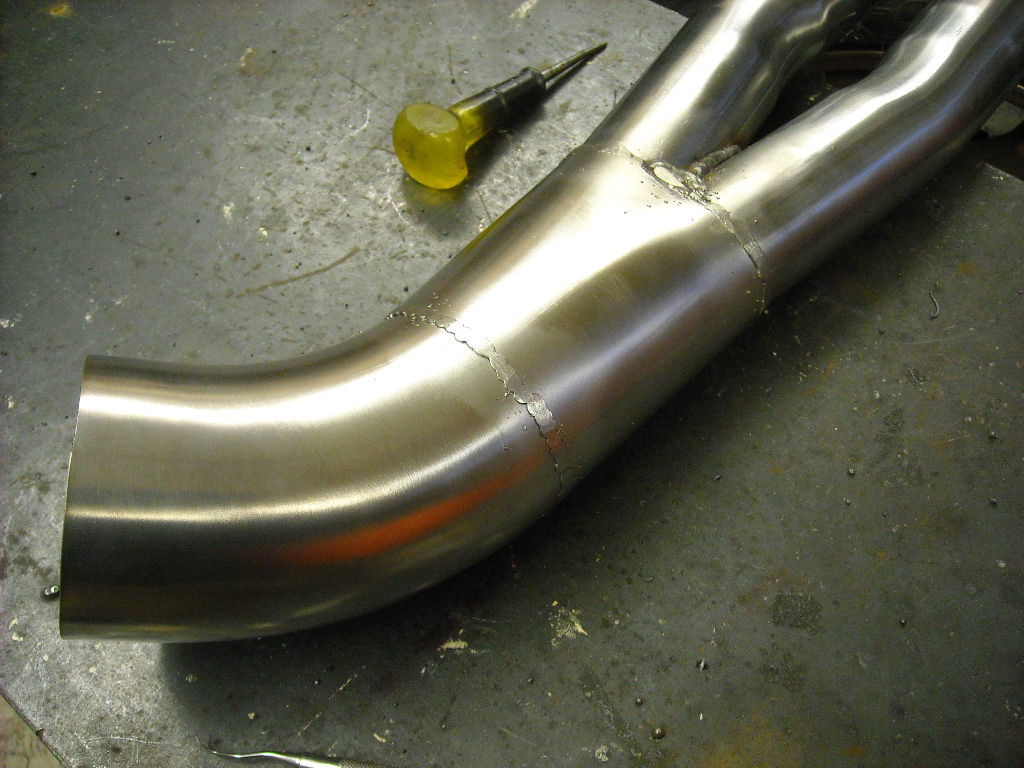
I forgot about this thread, I went ahead using the 75/25 with SS wire, completely different animal then welding carbon steel, took some playing around to keep from blowing holes.

-
The search function is your friend, there are at least 2 recent threads that cover everything.
-
Im going to remove mine SOON because of axle slop issues. I am thinking along the same lines as mightymaxx on this one a die spring would be ideal with a hardened washer on the ends. Im working with a local engineering/machine shop that know there stuff to locate a spring that will fill the void and have around 200lb or higher spring rate with in a 3mm compression.
Can you post the part number if you find a spring that will do the job? There are a lot of OBX owners that might benefit from this.
Thanks
-
Litman, your most welcome and thanks, how are yours holding up, it's been a couple of years if I remember right? Any problems to report?
-
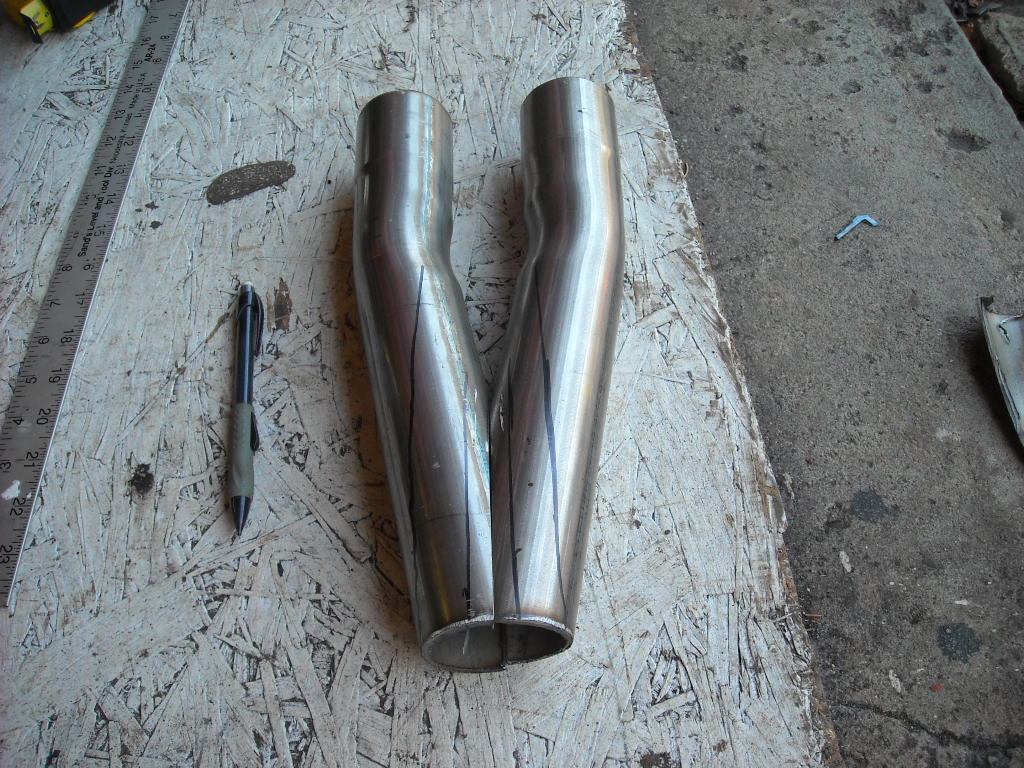
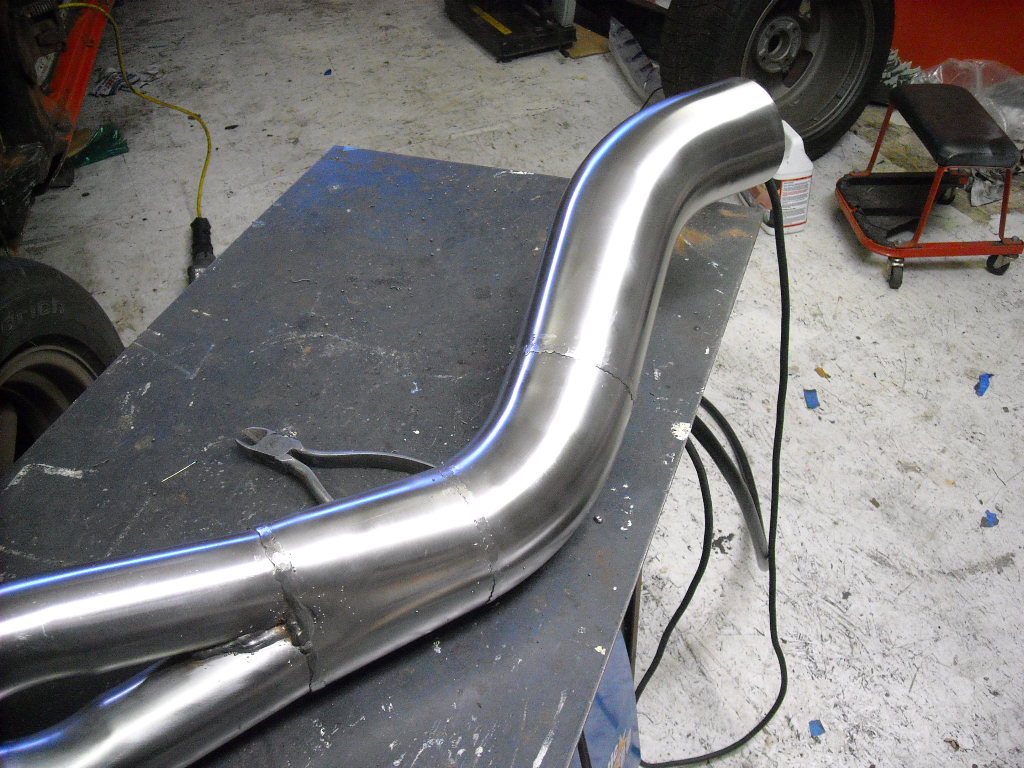
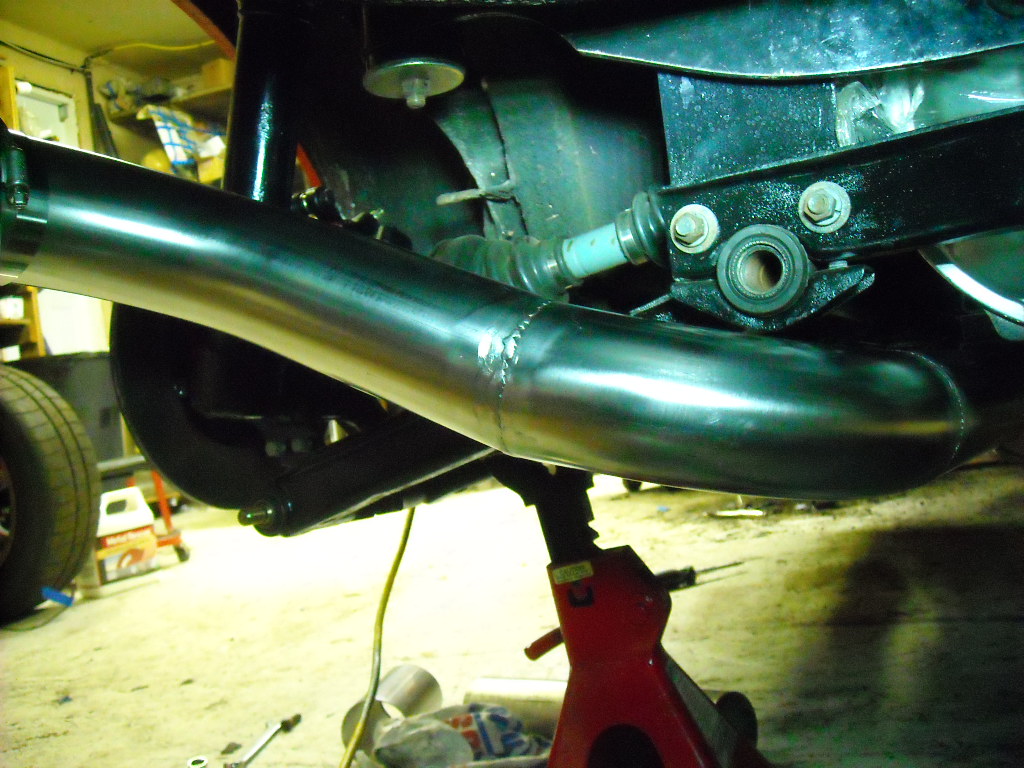
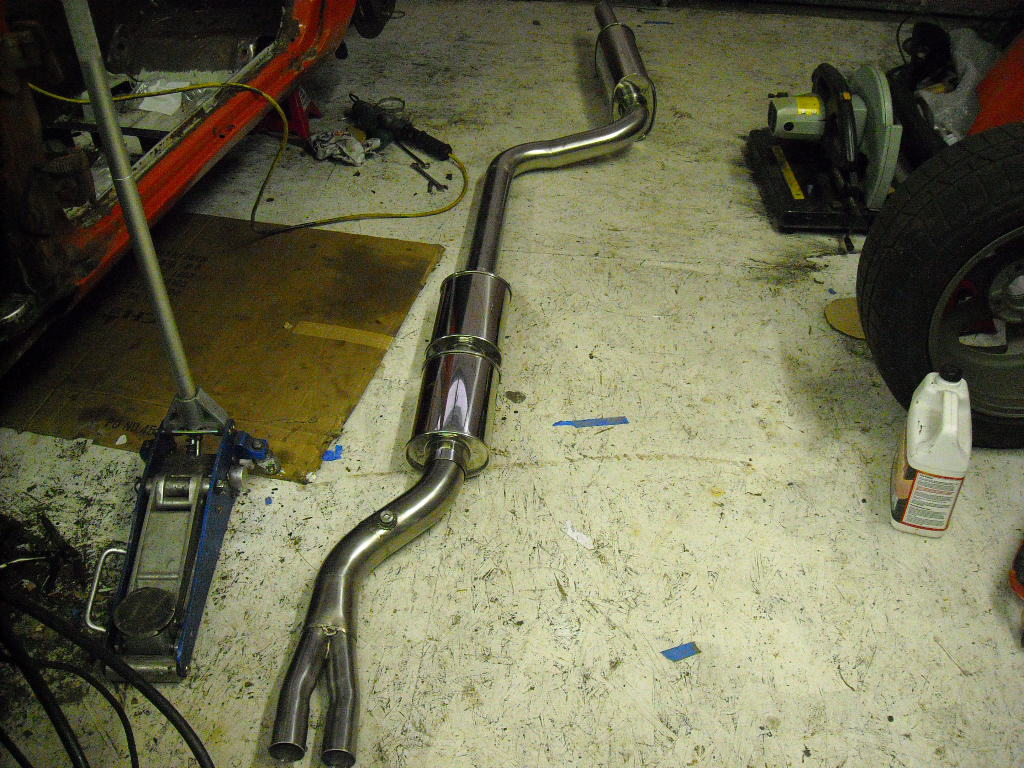
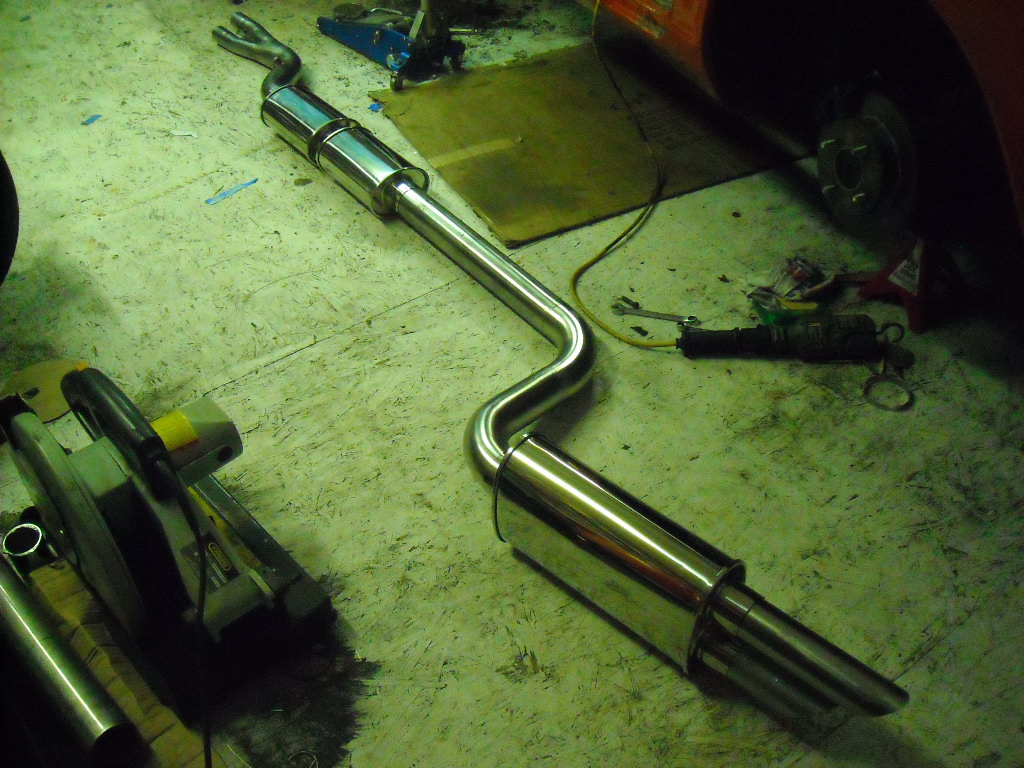
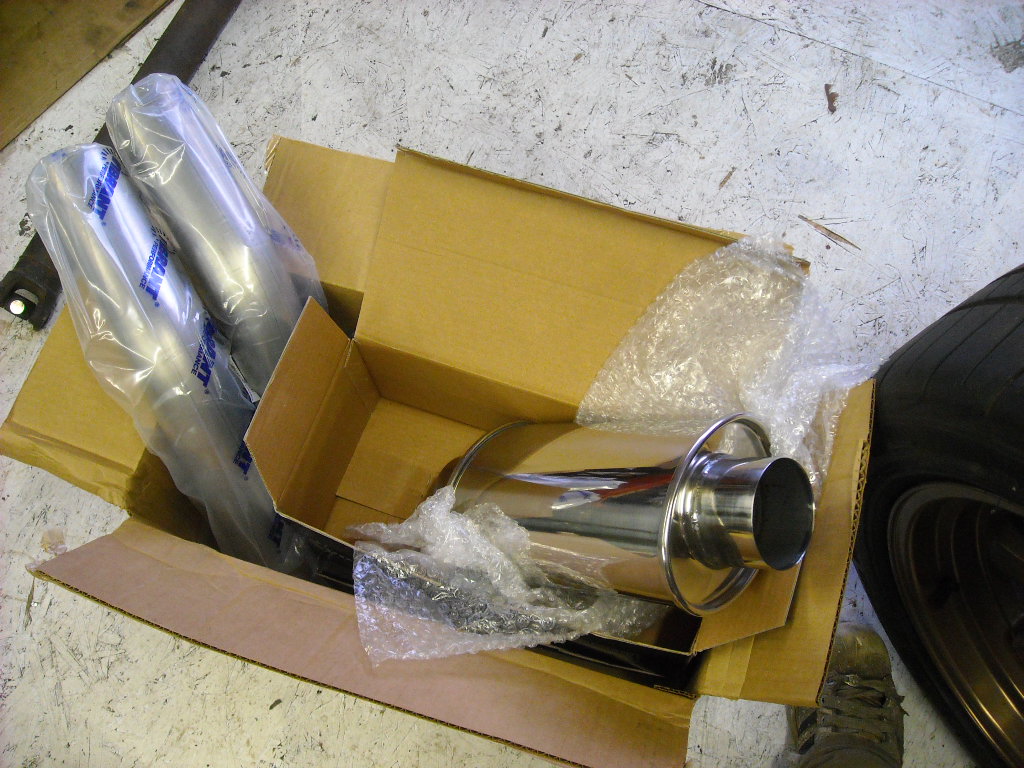
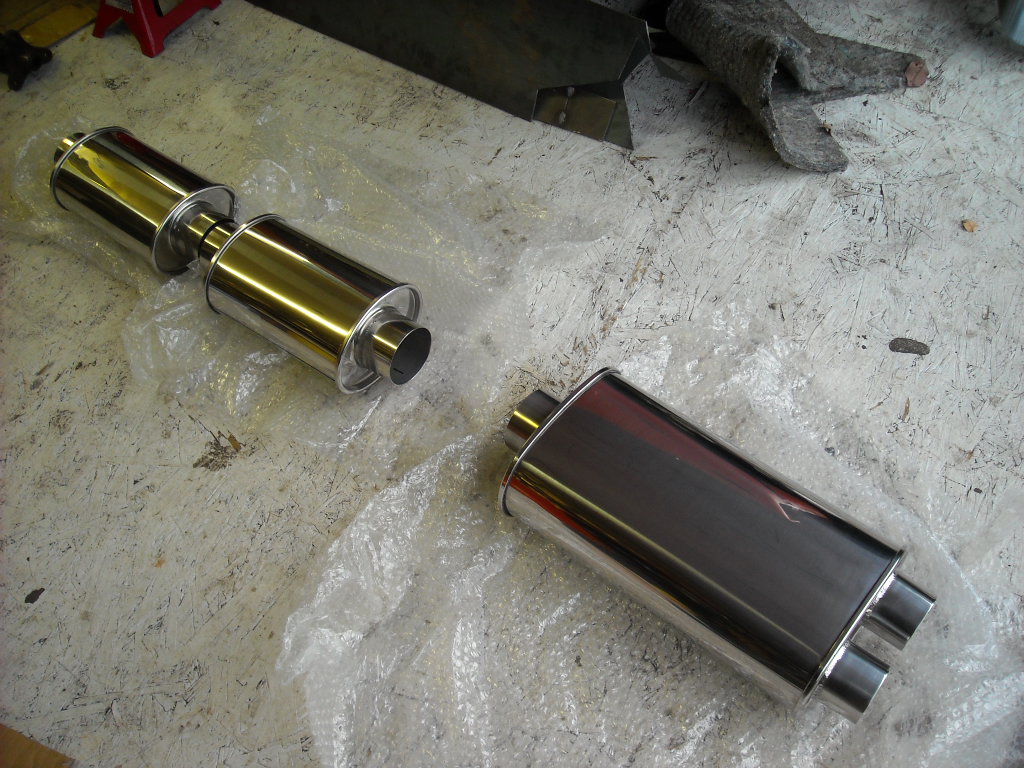
Got the exhaust system built, welded and hung last week, hopefully it won't be too loud but I really wanted to eliminate the back pressure that the stock exhaust had.
The whole system is from Vibrant, 2 Ultra quiet straight through resonators welded together, 1in 2out ultra quiet straight through muffler, 4 mandrel bent 3" pipes and the collector I made.
-
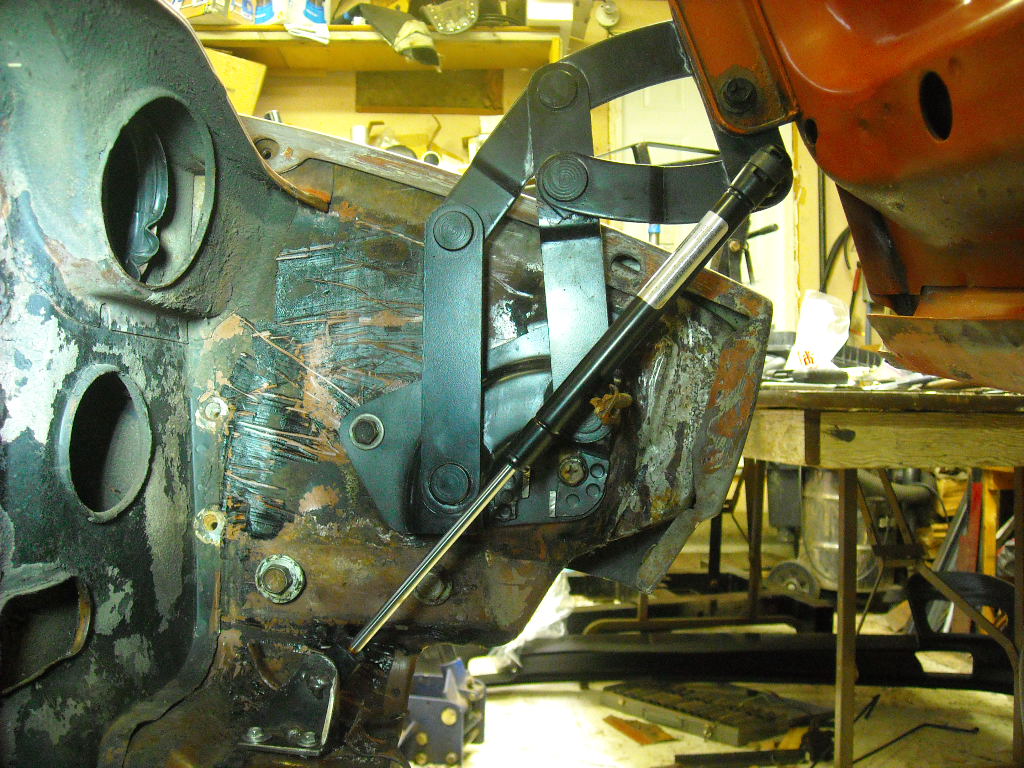
great build journal so far. awesome idea with the lift supports.
Thanks, I appreciate it but I stole the idea from Litman who did it a few years back.
-
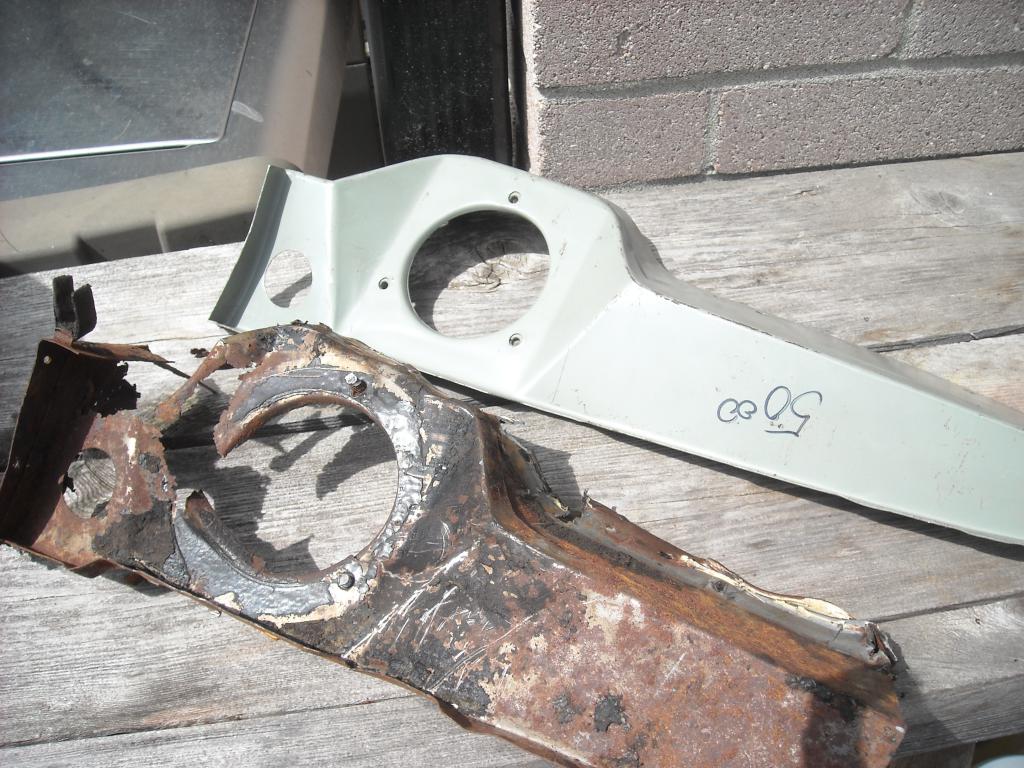
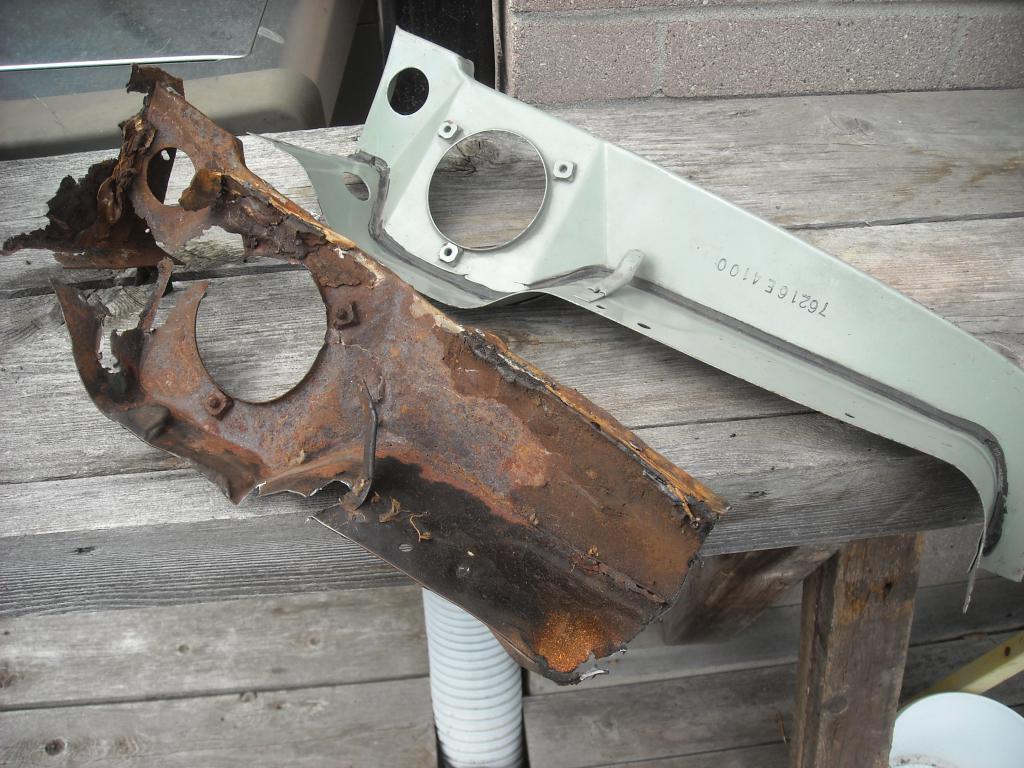
Just for reference, here is that same panel NOS from Nissan, looks like your guy nailed it.
-
I know how to mig weld carbon steels and my gas tank is 75% Argon 25% CO2 but I thought I would try my hand at welding together a new SS exhaust system for the Z. I have the ER308L stainless steel wire already, do I have to change the tank over to 98% Argon/2% CO2 or can I get by with the 75/25 ?
Thanks,
Chris
-
Someone was asking for pics of the shifter are bushing so I'll just add them here,
-
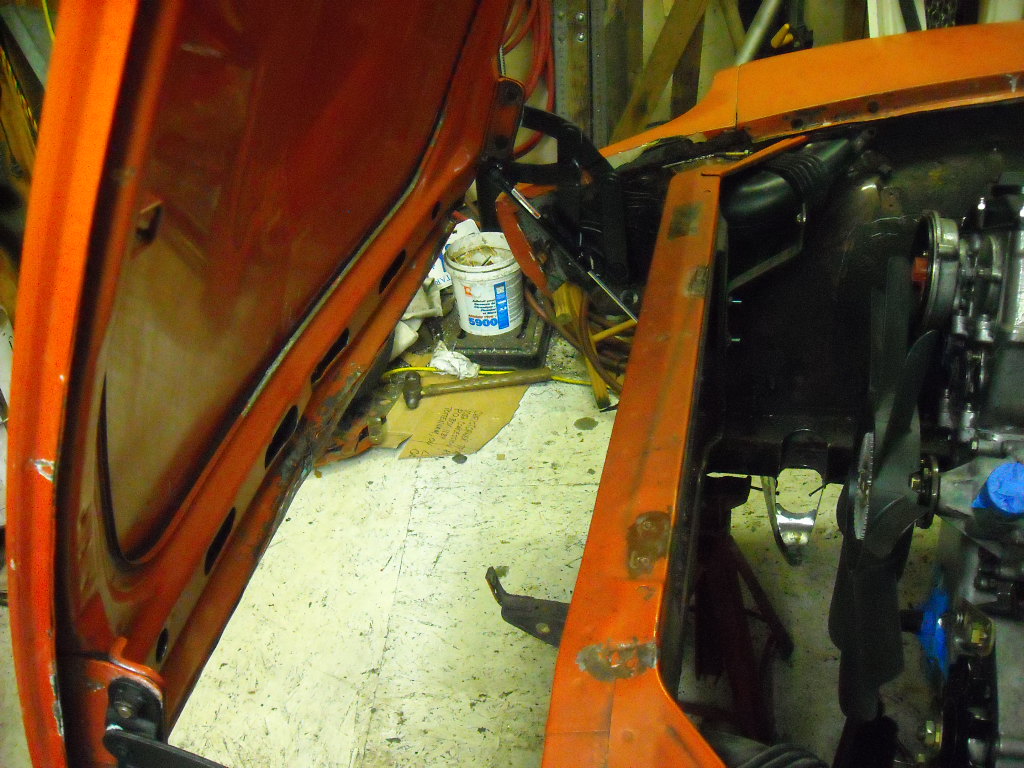
Strong Arm 4477N10 Gas Charged Lift Support 10176N10W
I ordered 2 of these from these guys, https://www.liftsupportsdepot.com/strong-arm-4477n10-gas-charged-ball-socket-lift-struts-supports-10176n10w/ and a pak of 4 ball studs, the struts are 43lb and hold the hood any position 16" or higher, below that and the weight of the hood takes over and it closes. I'm pretty happy with it, here are a few more pics,
-
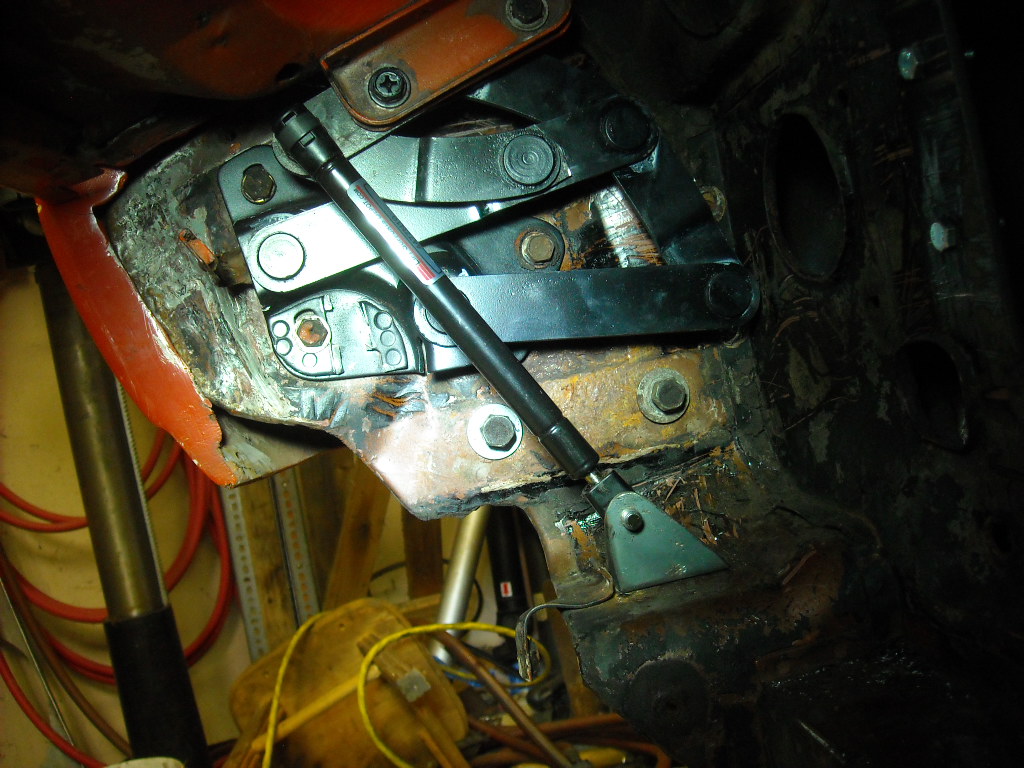
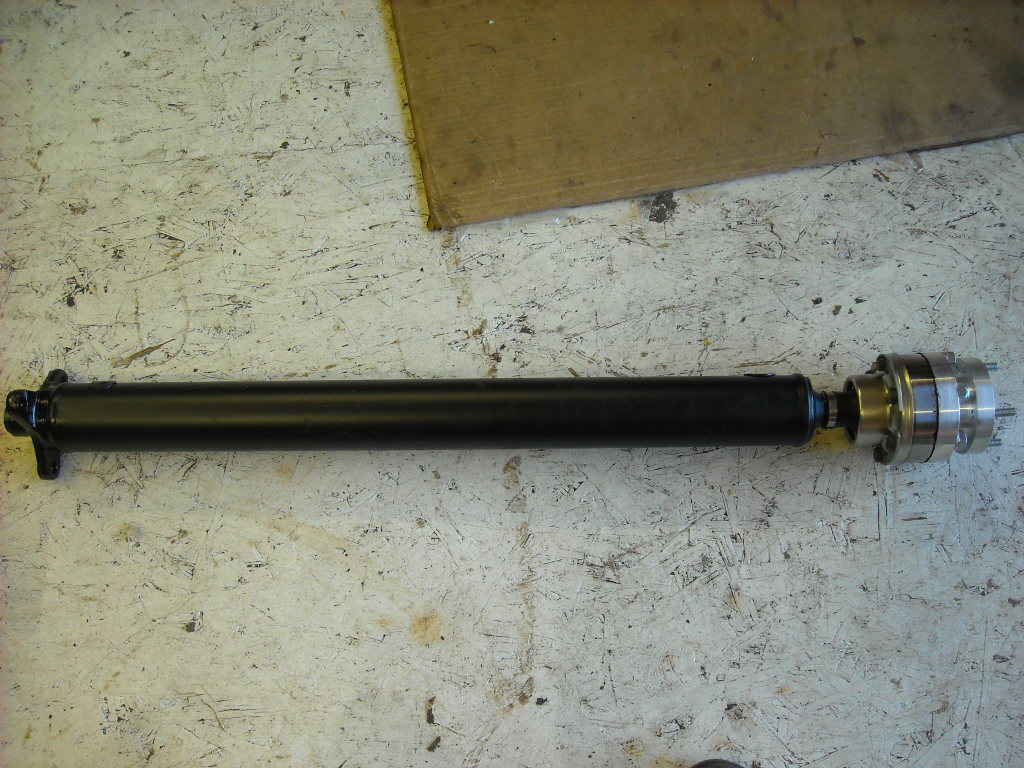
Well I have finally finish installing the drive line, engine mounts, transmission mount, drive shaft and diff are all in and I think, are perfectly a lined. As best as I can measure it I think I'm within half a degree in both axis. So hopefully the drive line will be vibration free
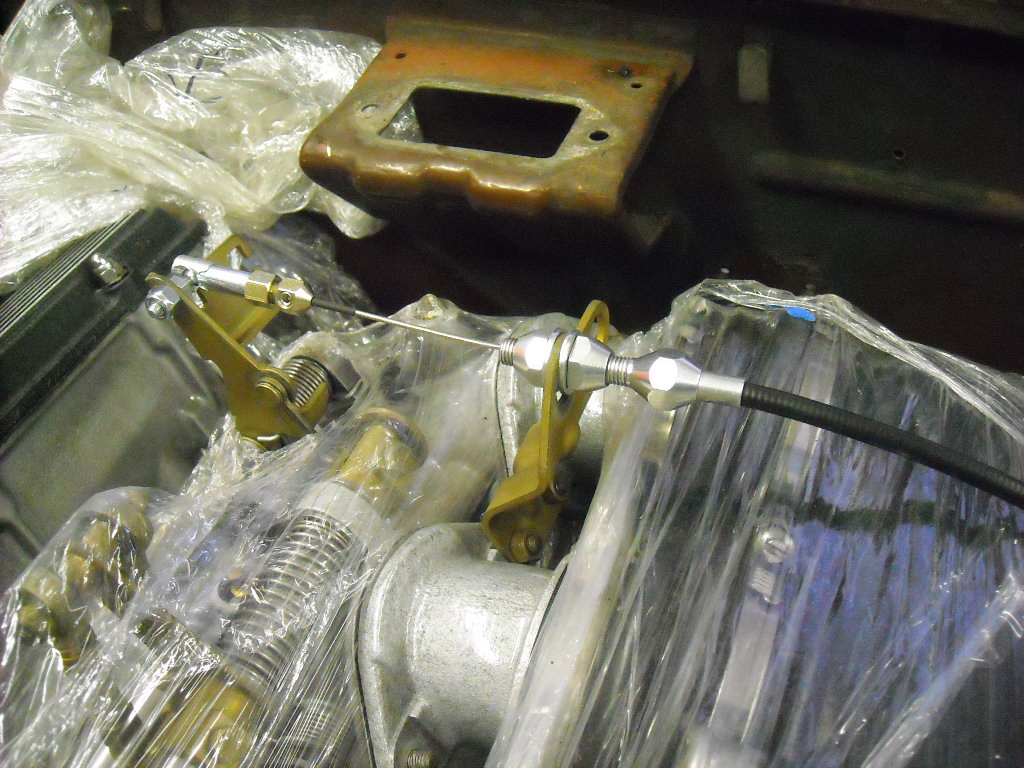
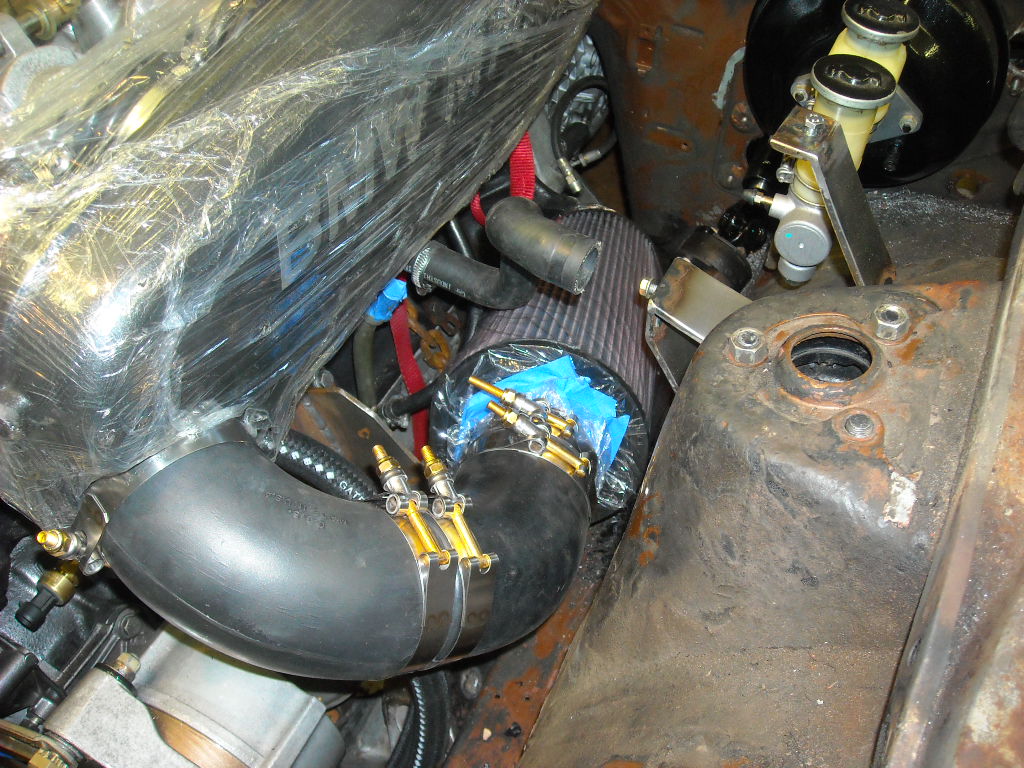
Also got the oil cooler plumbed in, the accelerator linkage installed and air filter sorta finished. As much as I hate K&N filters I bought one anyway, after spending lots of money and time trying build or adapt a paper filter airbox that just didn't work.The K&N filter will get me on the road until I can figure something else out.
This is the adapter I built to join the bmw drive shaft/CV joint to the Nissan rear end and it is as near a copy as I could make to the one Ron Taylor amde for his bmw/datsun swap.
Lokar cable,
Got all of the fixings for a 3" SS Vibrant exhaust system,
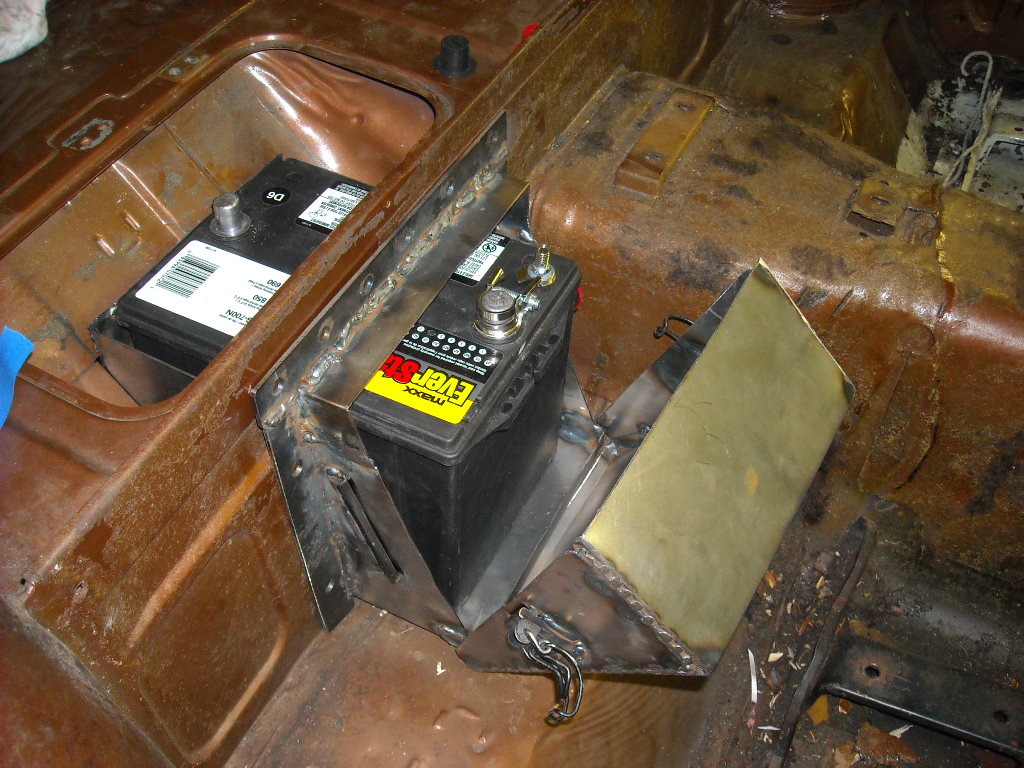
Finished building the battery box,
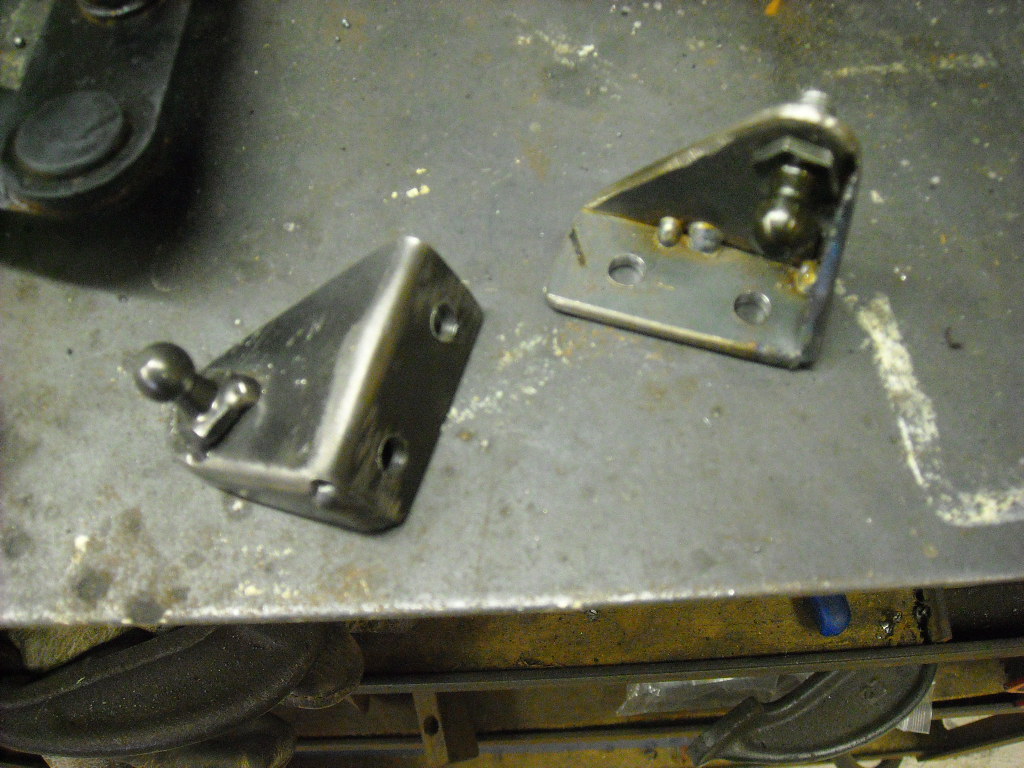
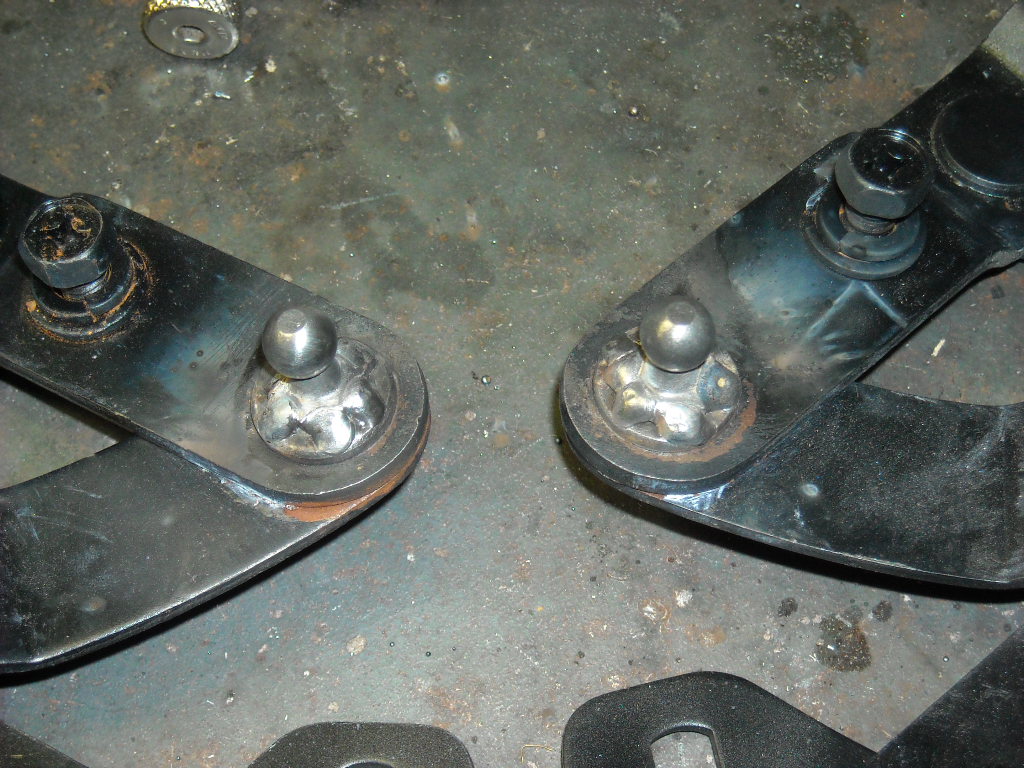
Got rid of the torsion spring hood opener and installed hydraulic springs,
-
I think you are a little low on the head price. The last I heard they were 26,000-28,000 USD.
If they were only $10,000.00 I doubt there would be much interest in my head:)
Which begs the question, have you figured out yet what the magic number will be yet?
-
Once you get the frame off the gasket you may find some thin rubber shims glued to the gasket on the back two corners, the rounded corner and the sharp corner at the top, SAVE THOSE SHIMS and make note of which corner they came off of. You may find none or as many as 3, make sure they go back in the same place when you go to re install the new gasket with a layer of weather strip sealant between each one. Well actually a layer of sealant between everything, I can tell you what a pain in the ass it is to have to take those windows out after everything has been put back together because you skipped a step. Driving rain storms and the carwash find every little gap.
-
You and everyone else, hard items to find. I think someone makes new aftermarket covers now, I`ll have a look and see if I can find them.
-
These are the guys I ordered my rebuild kit from, http://www.drivetrain.com/parts_catalog/manual_transmission_overhaul_kits/nissan_f5w71_overhaul_kit.html
It was a good quality kit but as New Zed says you might want to try some of the different oils first, they can make a big difference.
The guy I bought my 5 spd from said that it had to be rebuilt, so I rebuilt it but I found nothing that needed to be replaced. Bearings were good, so were the syncros.
-
Have you got a friend or a friends Dad who could go by the yard and strike a deal with him? Having explosive anger myself I know how both of you feel, he probably regretted immediately. Or he could just be a dick.
-
Grind them flat, drill them out and replace with a bolt with a head not a stud. Weld the head on the inside of the sugar scoop.
-
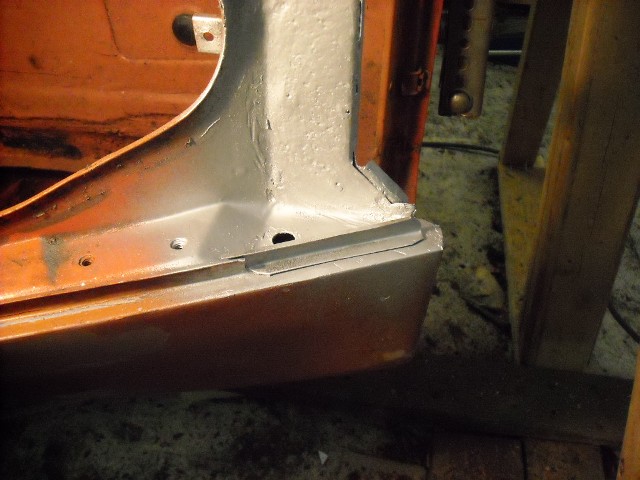
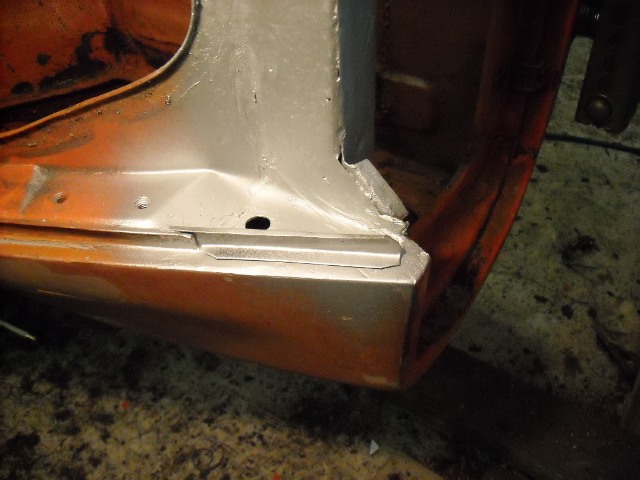
Looks like you found a real body guy, that's getting harder. While you are getting all the rust repaired you might want to add two of these little channels that take the run off water from the edge of the hatch and dump it off the car instead of that water dumping onto the back sill. If Datsun had put done this there would be a lot less rust in that area.
Oh the car is tipped on its side on a rotisserie in those pics.
-
Beautiful work as always, would mind mentioning what you Mig set up is, wire size, settings and that sort of thing?
Thanks
-
Great work on fabricating everything up, great build so far.
the gauges in that dash fit perfectly. Did you use 4.5" and 2 5/8"? Did you end up buying an electric power steering kit or did you find bits and parts, what made you want to go electric power steering?
Thanks, so far I'm really happy with the Speedhut gauges, they are 4.5" and 2 5/8th.
I built the power steering up out of parts from the wreckers and 1/8th steel plate, I have a detailed DIY description here,
http://www.classiczcars.com/forums/topic/56267-new-power-steering-option/
The bmw engine is about 90lbs more than the L engine so I thought it would be nice for parking lots and if I can get my wife to drive it.
-
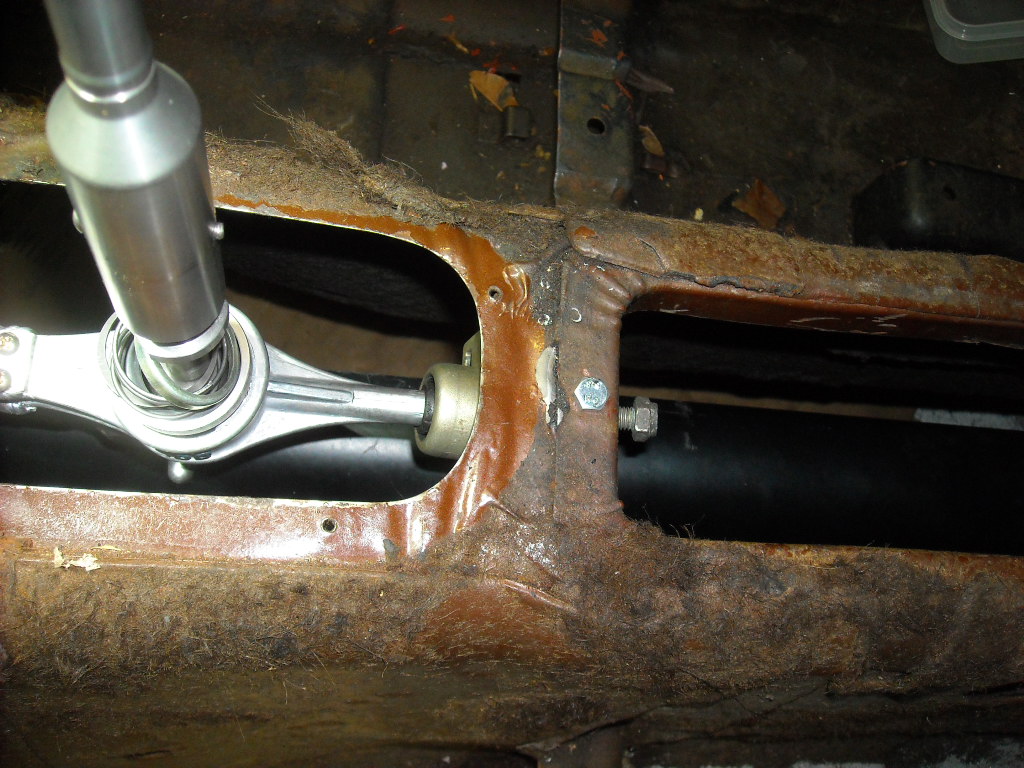
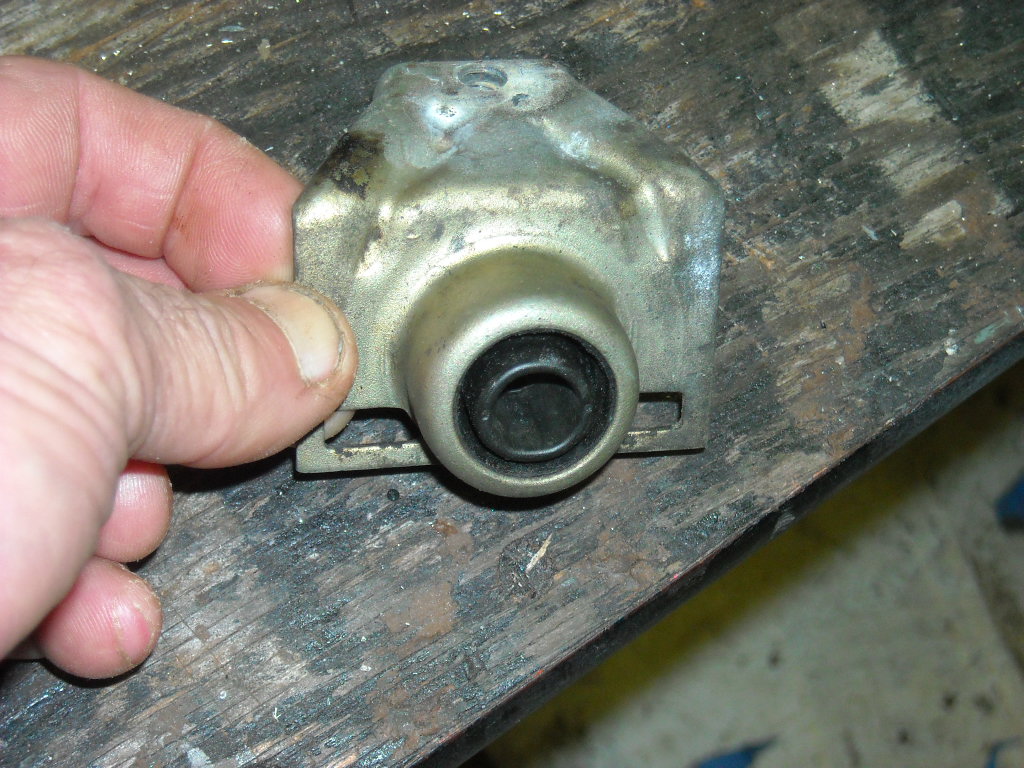
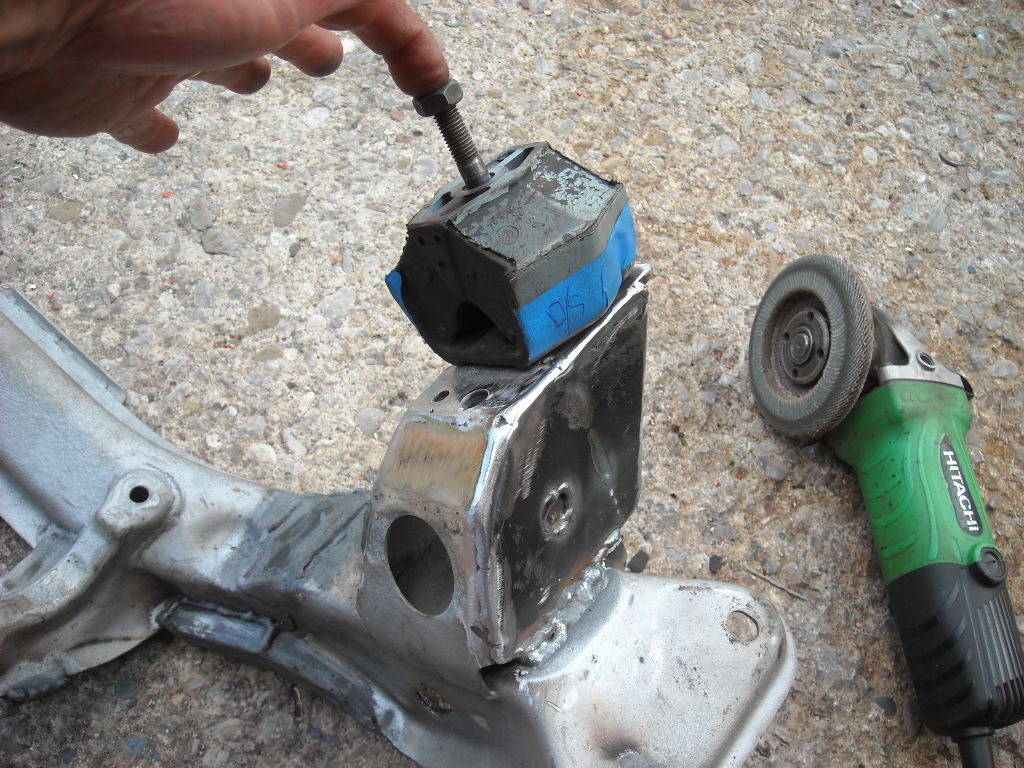
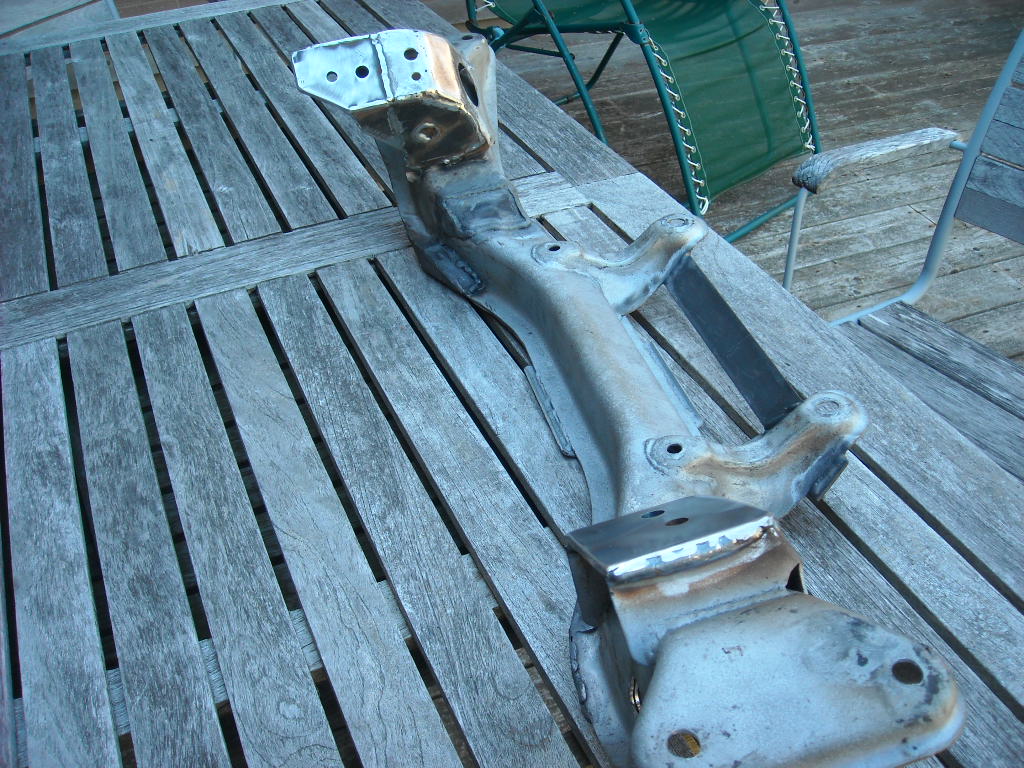
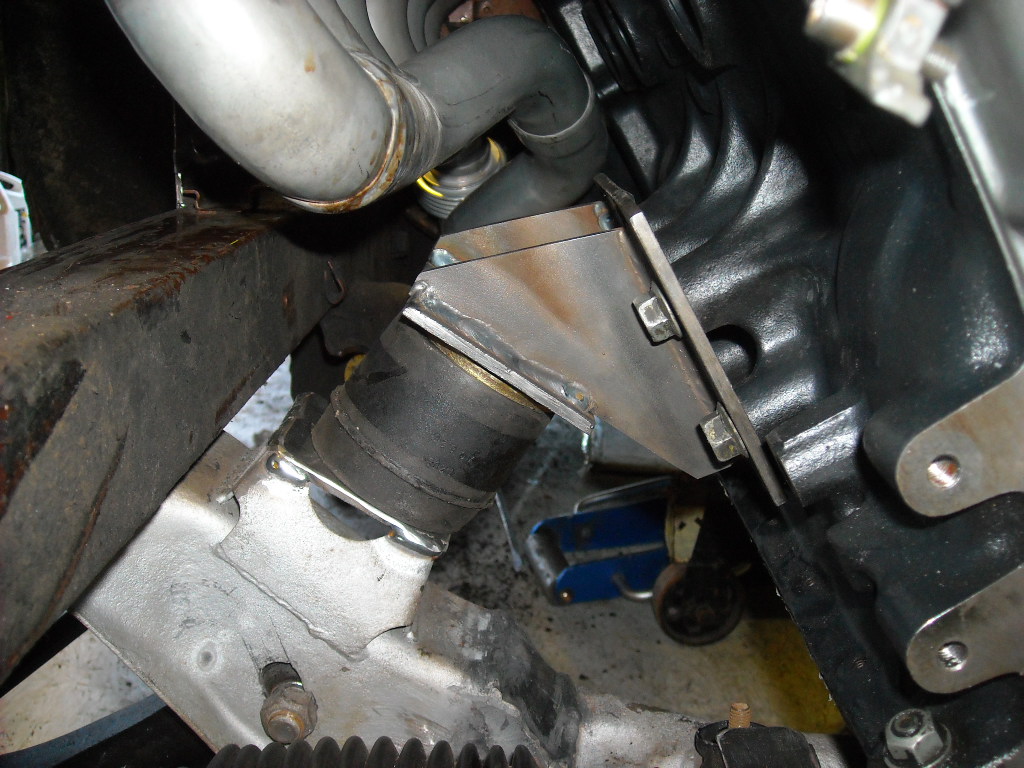
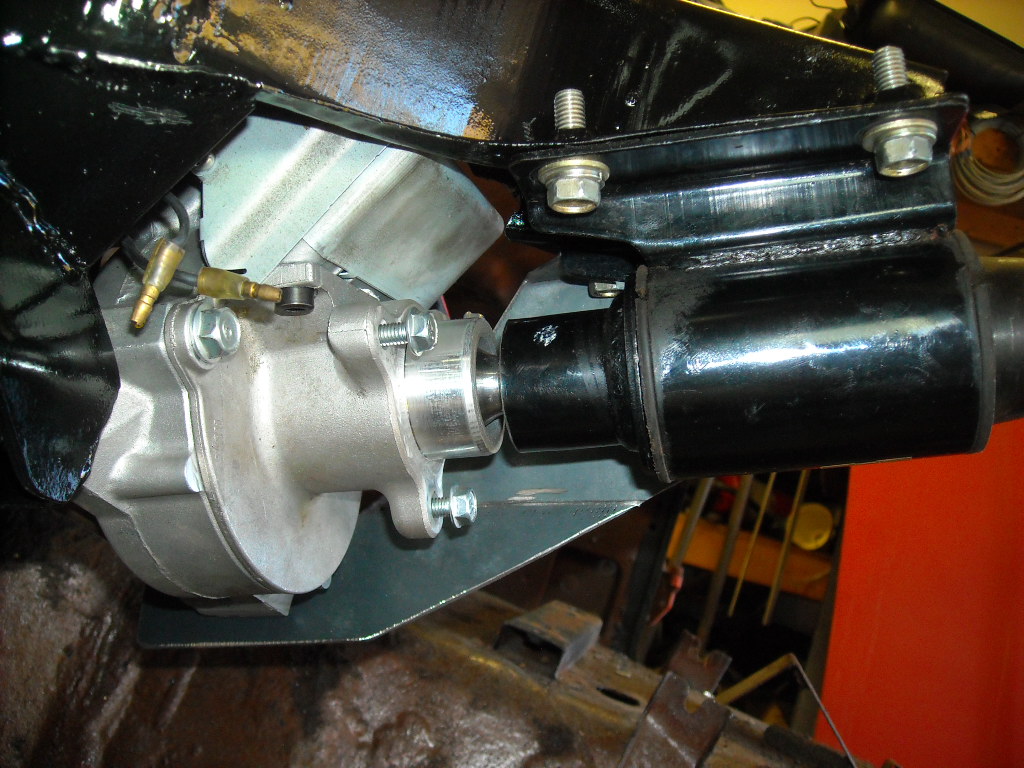
Have got a bunch of stuff done since my last post, installed the TTT offset tierods to compensate for the the lowered steering rack,
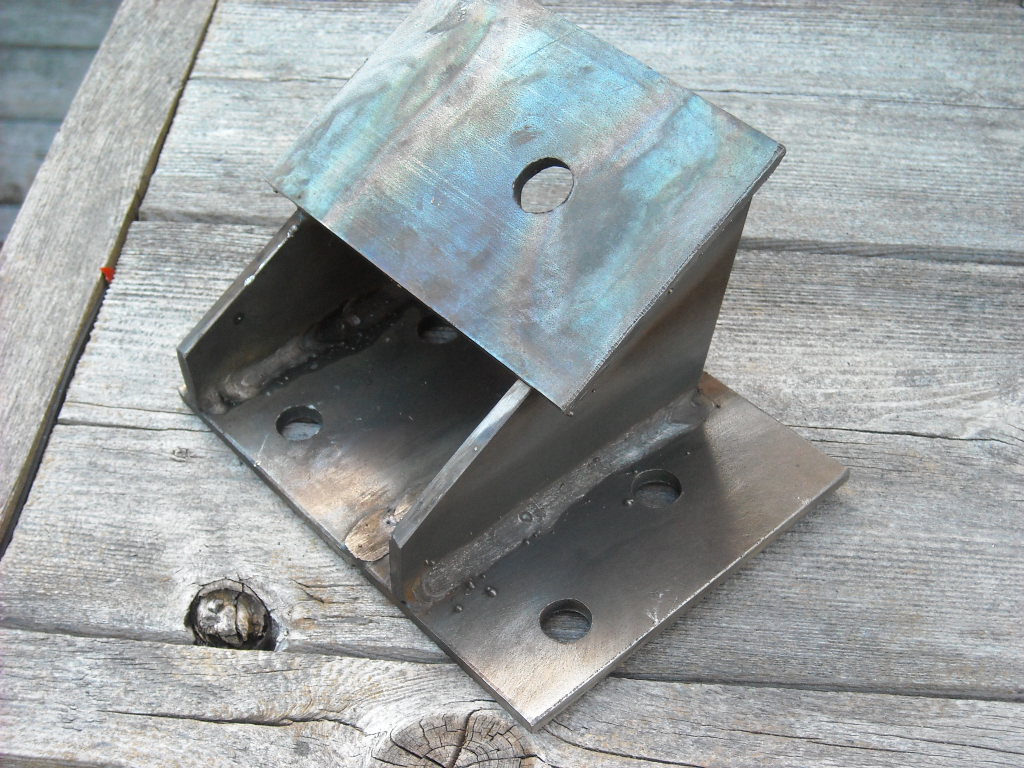
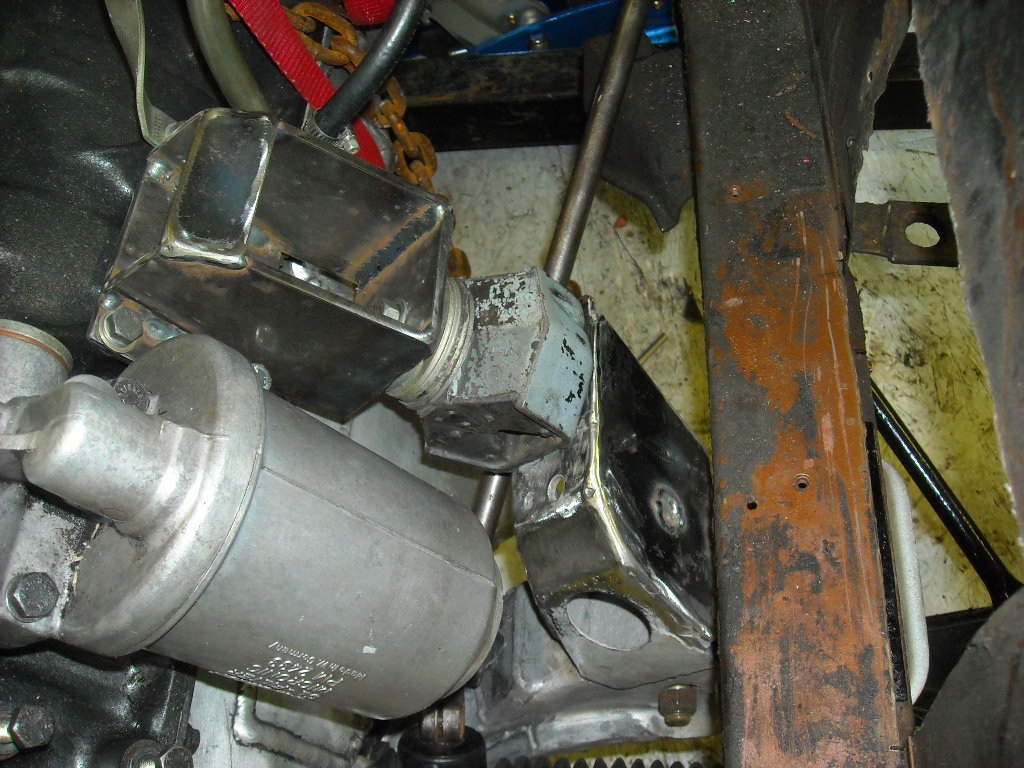
Built the engine and transmission mounts and modified the crossmember,
So here is the room left to play with, about a 1/2" between the top of the engine and the hood and about the same with the oil pan and Xmember,
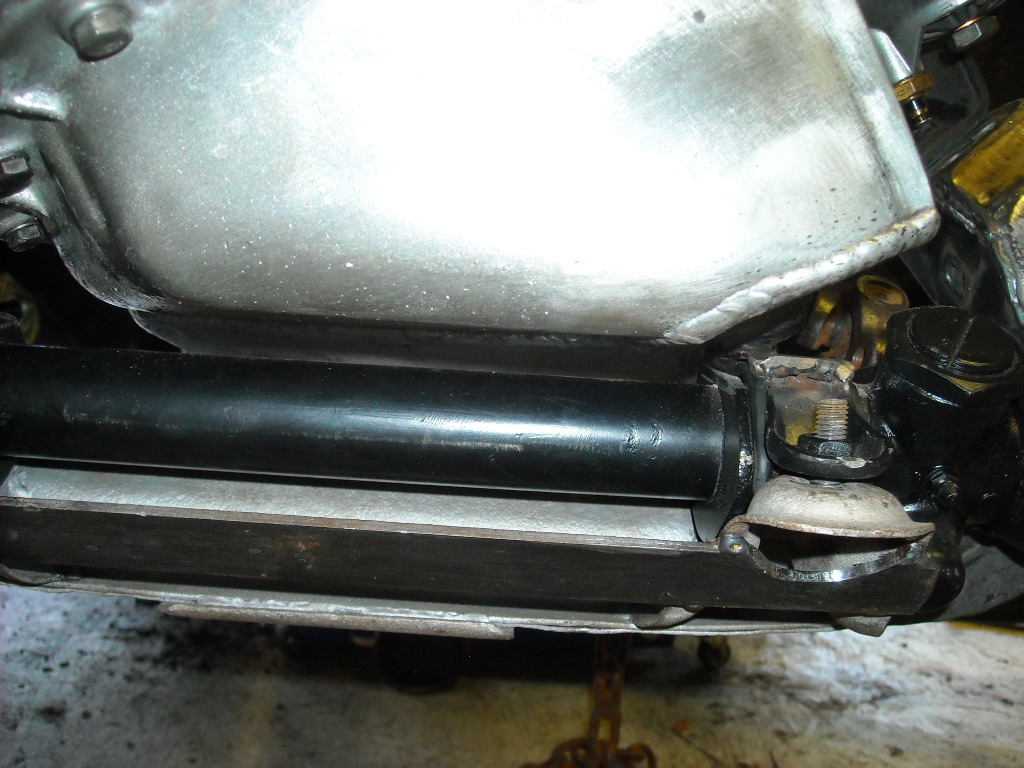
Built a skid plate to protect the oil pan,
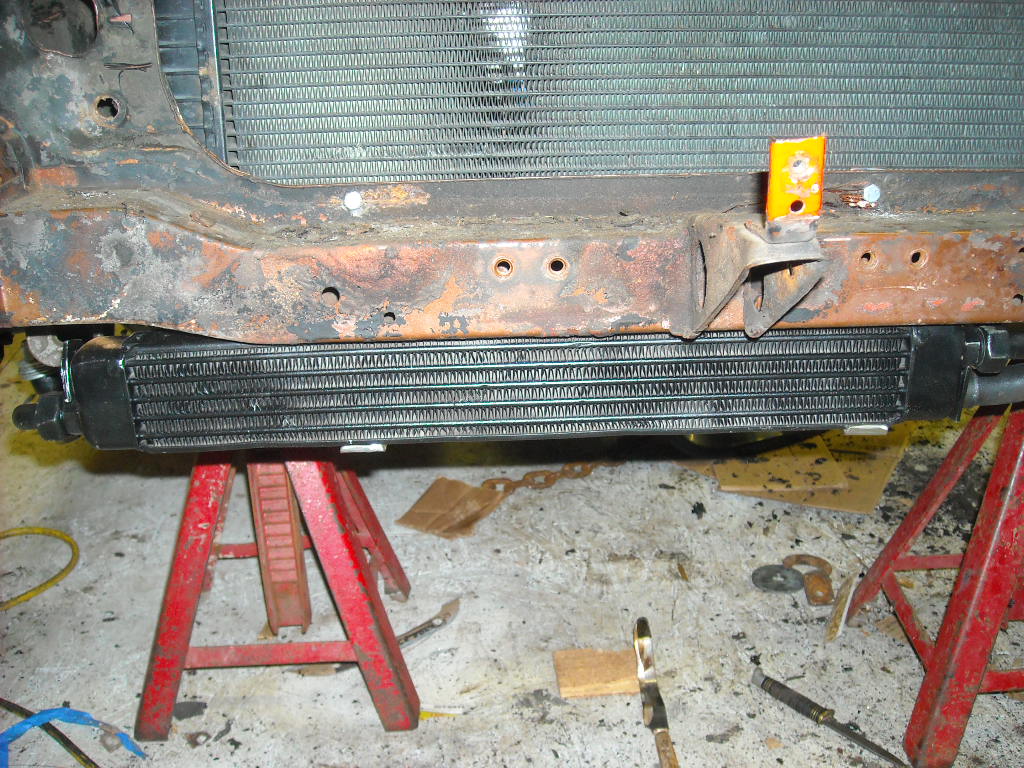
Lower radiator mounts are finished,
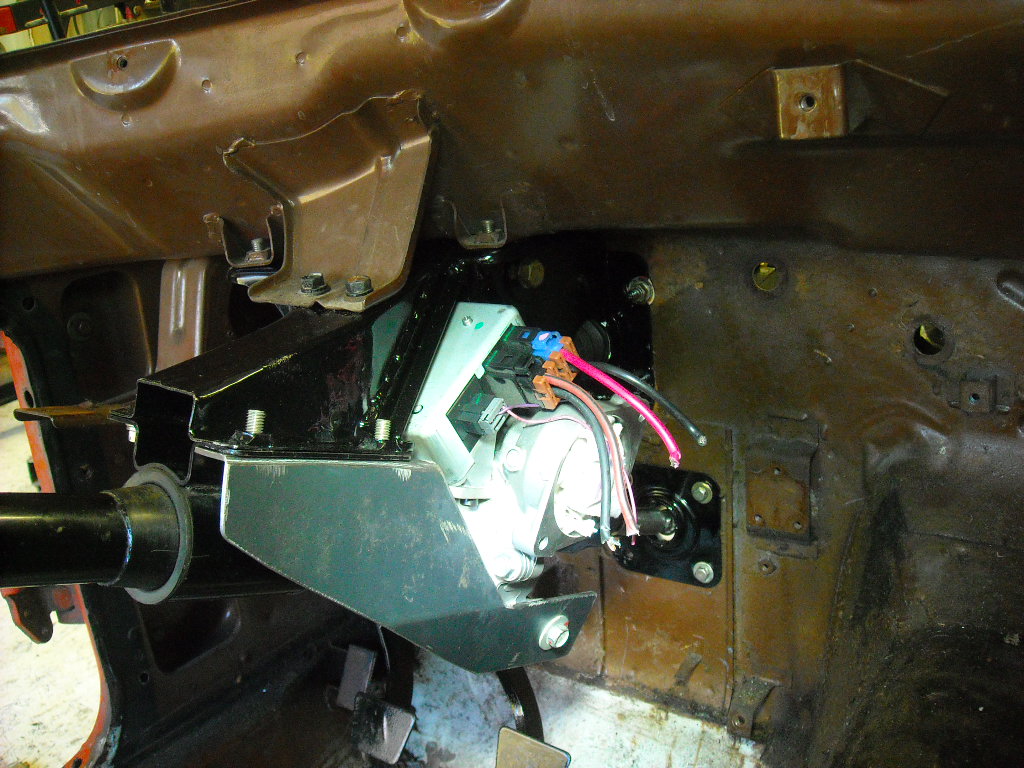
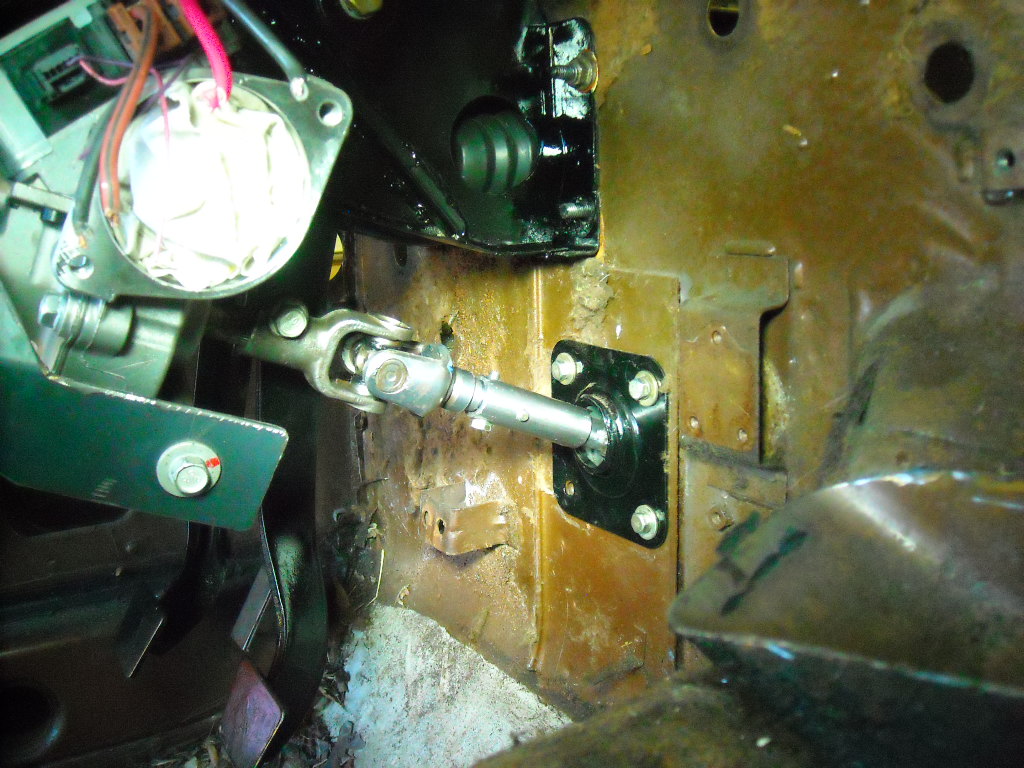
and have finished installing the electric power steering,
-
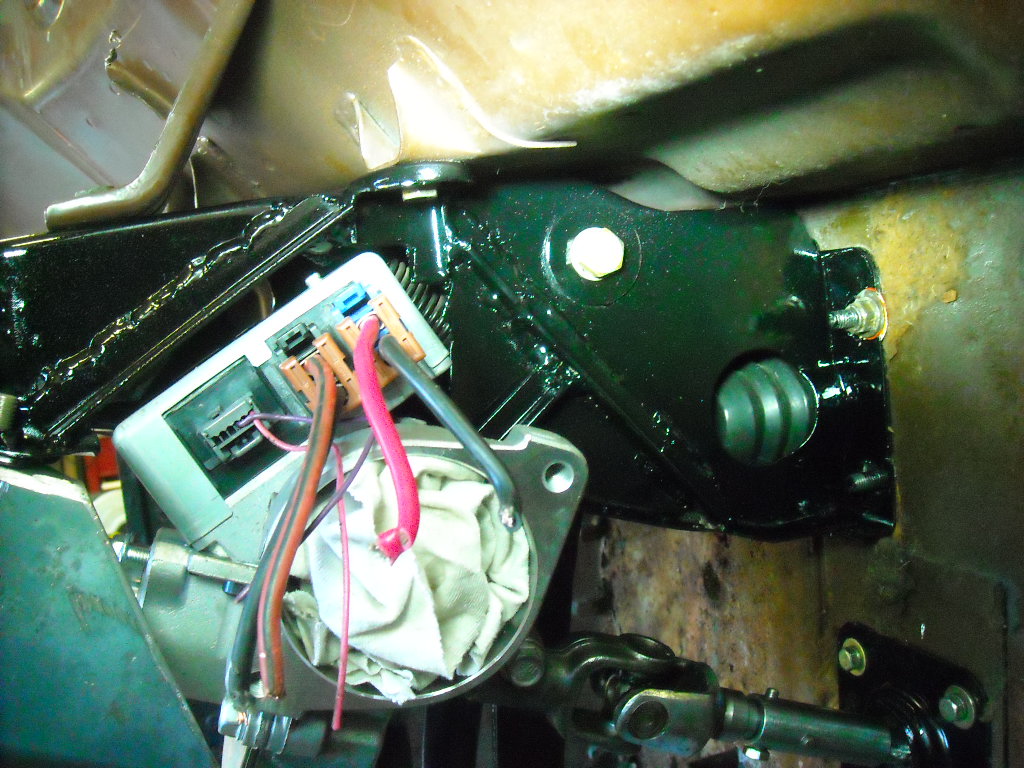
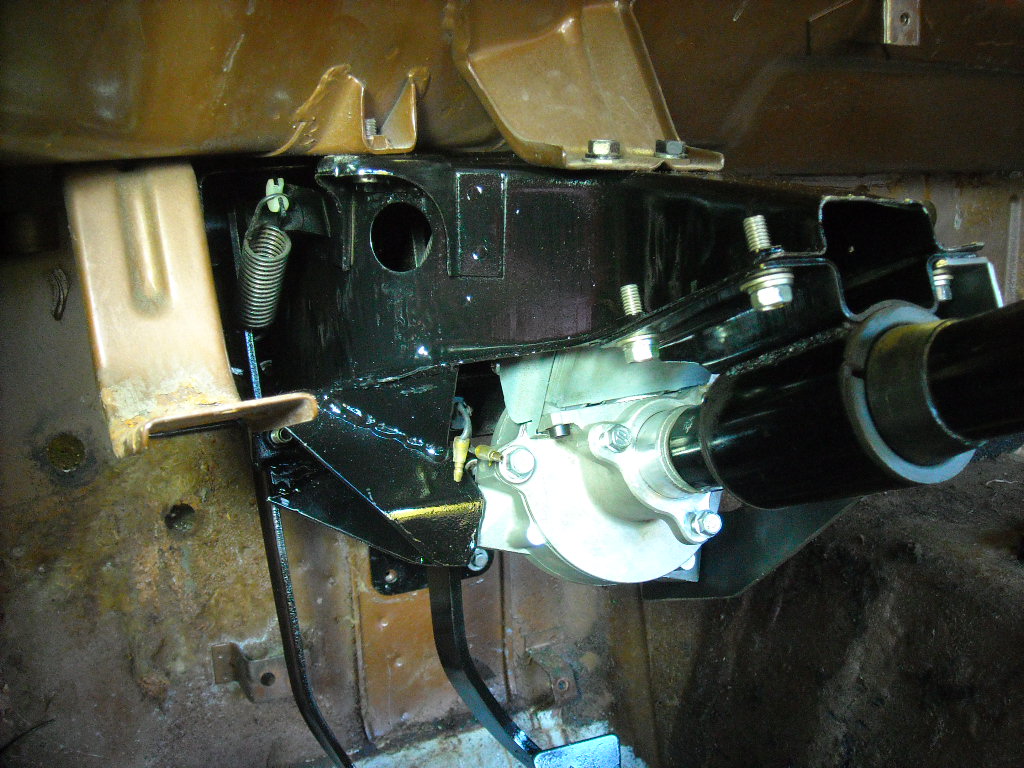
Holy crap, very very smart idea fitting it inside that box. I wish you could show some photos of how you cut and reinforced the steering box.
Also, what adapters for input/output and all that did you use? I'm about to start mine really soon.
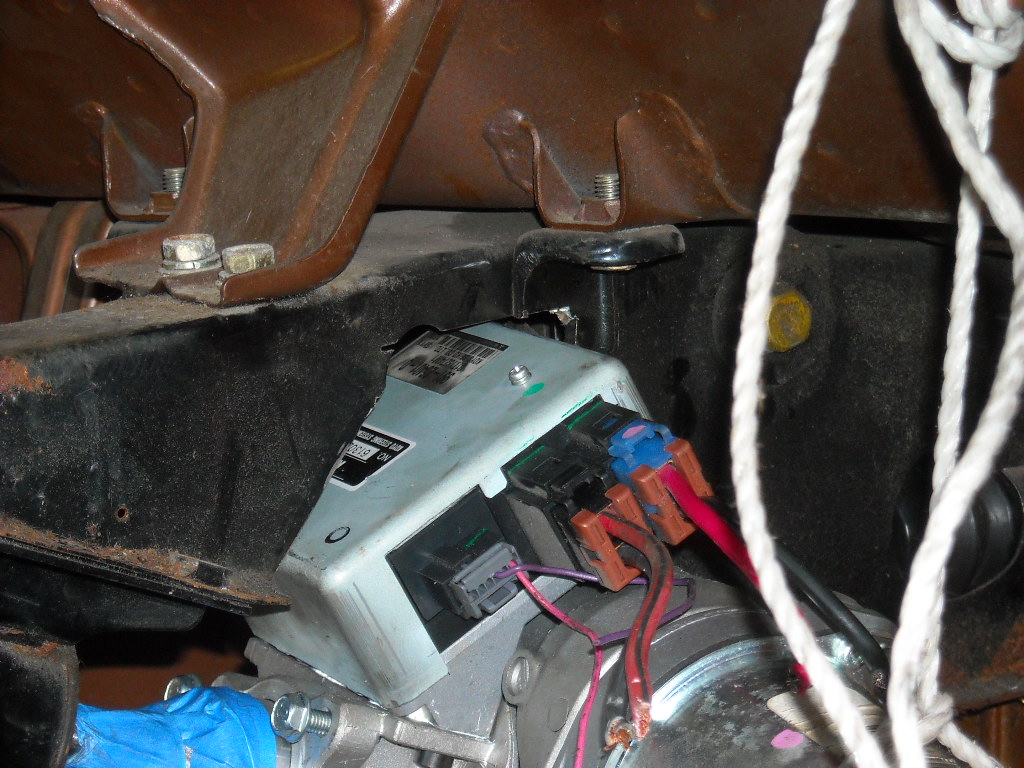
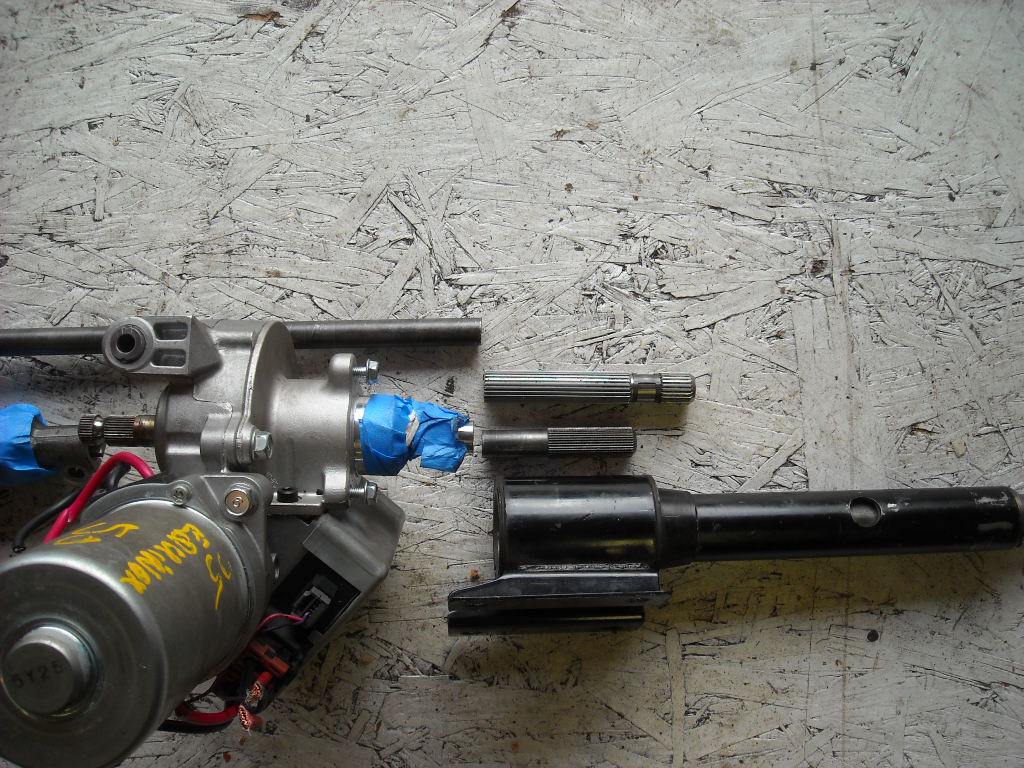
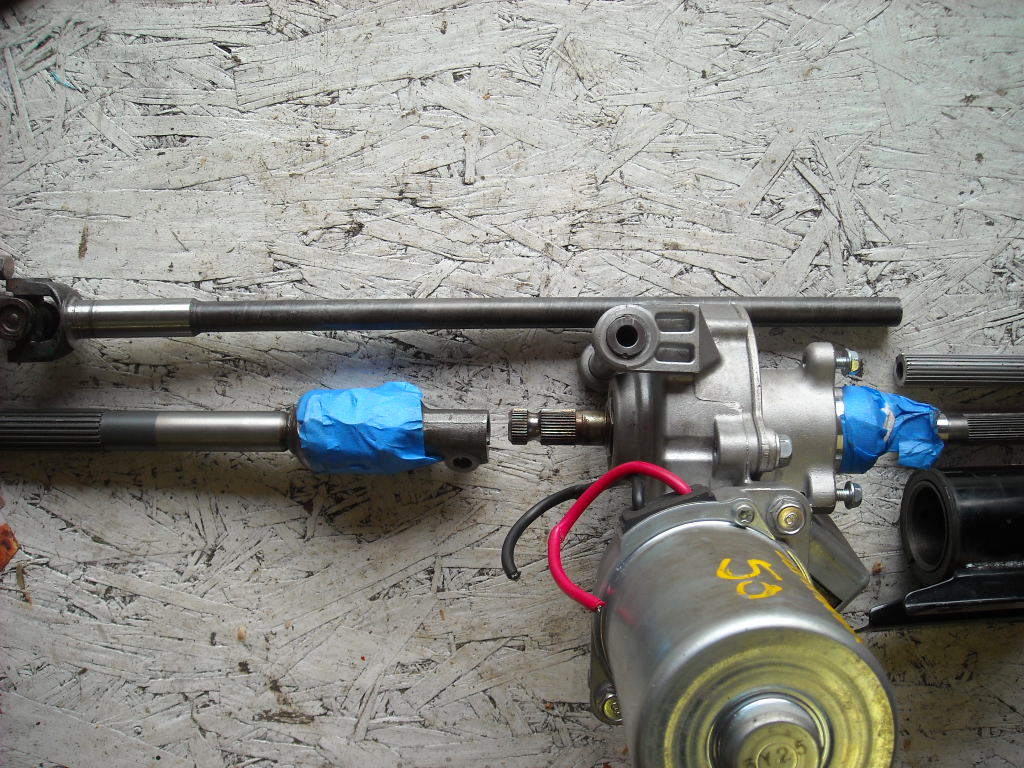
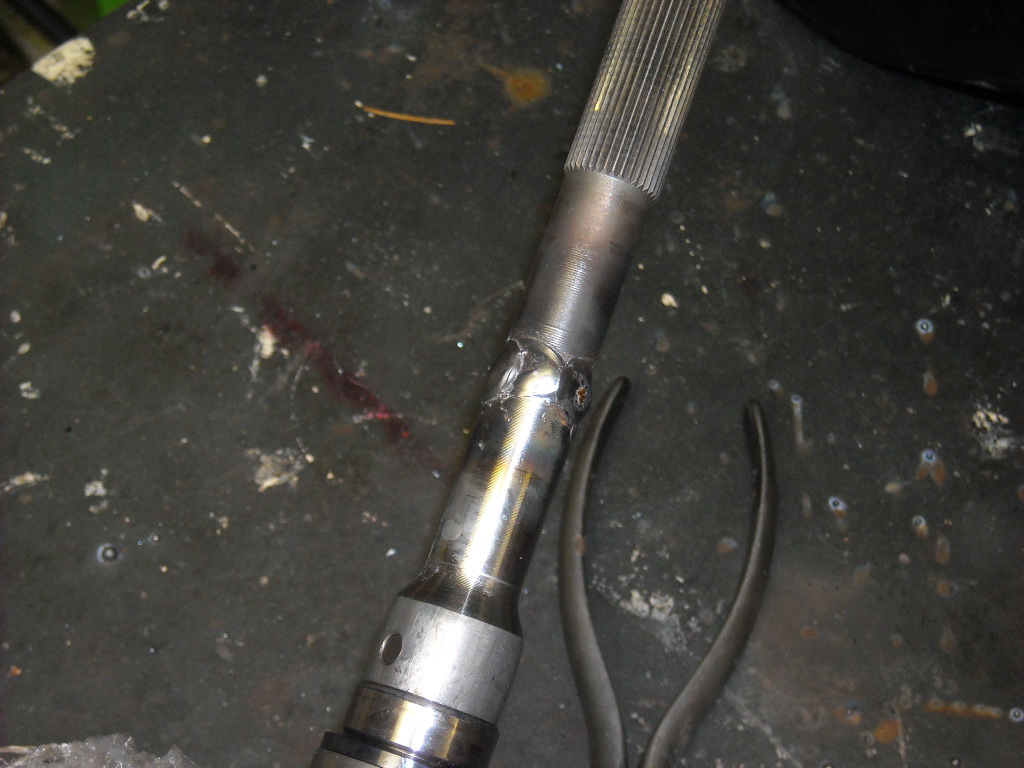
The 1st pic is what was cut out of the steering/pedal box, 2nd is the bracing around the hole that I added, while the paint was off I also added some key welds where previously there was only spot welds. There is a middle shaft on the 240's, I used the splined section of that to weld onto the Saturn input shaft, the Saturn output shaft is coupled with a simple sleeve and 4 grade 8 bolts to the cut off end of the stock middle steering shaft. Once you get down to your steering/pedal box come back and have a look at the pics in post #27 again, it will make a lot more sense.
-
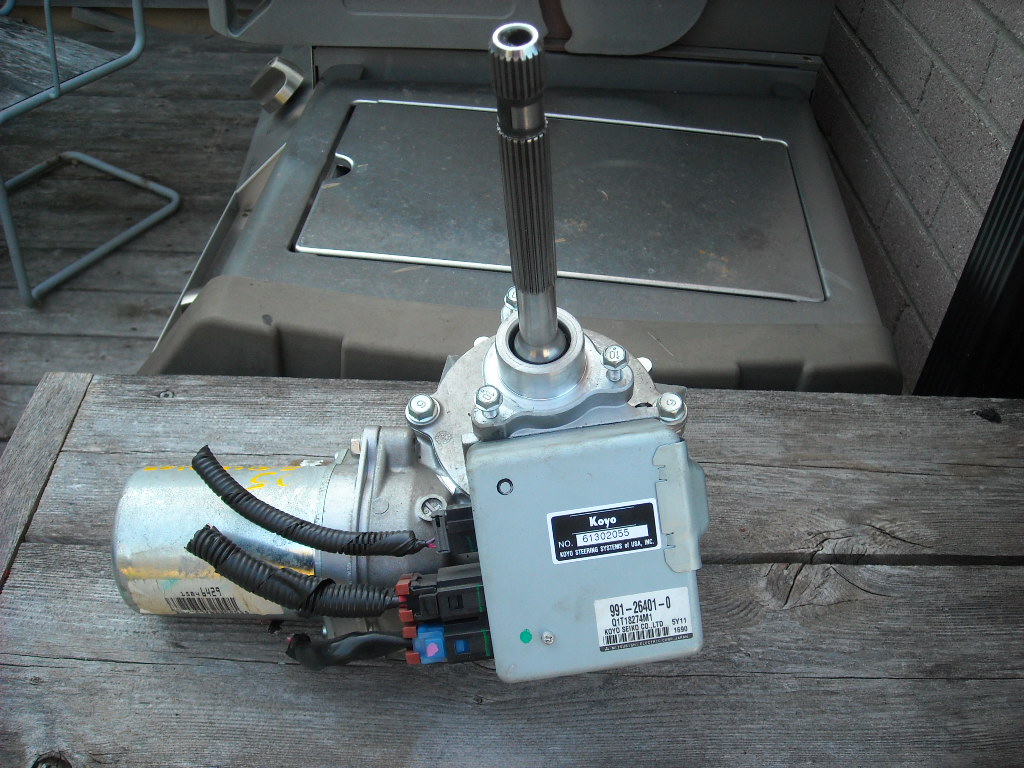
I have almost completed the Saturn Vue electric assist steering in my 240Z, just waiting on the wiring kit from ebay Bruno, I had to cut and modify the steering shaft/pedal box to fit it in and then reinforce the box to stiffen it back up, the pics will explain it better then me. The unit weighs 14lbs and then add a couple more for bracing and a u joint, so far I have $144.00 in to it, looking forward to trying it out in parking maneuvers.


 Also got the oil cooler plumbed in, the accelerator linkage installed and air filter sorta finished. As much as I hate K&N filters I bought one anyway, after spending lots of money and time trying build or adapt a paper filter airbox that just didn't work.
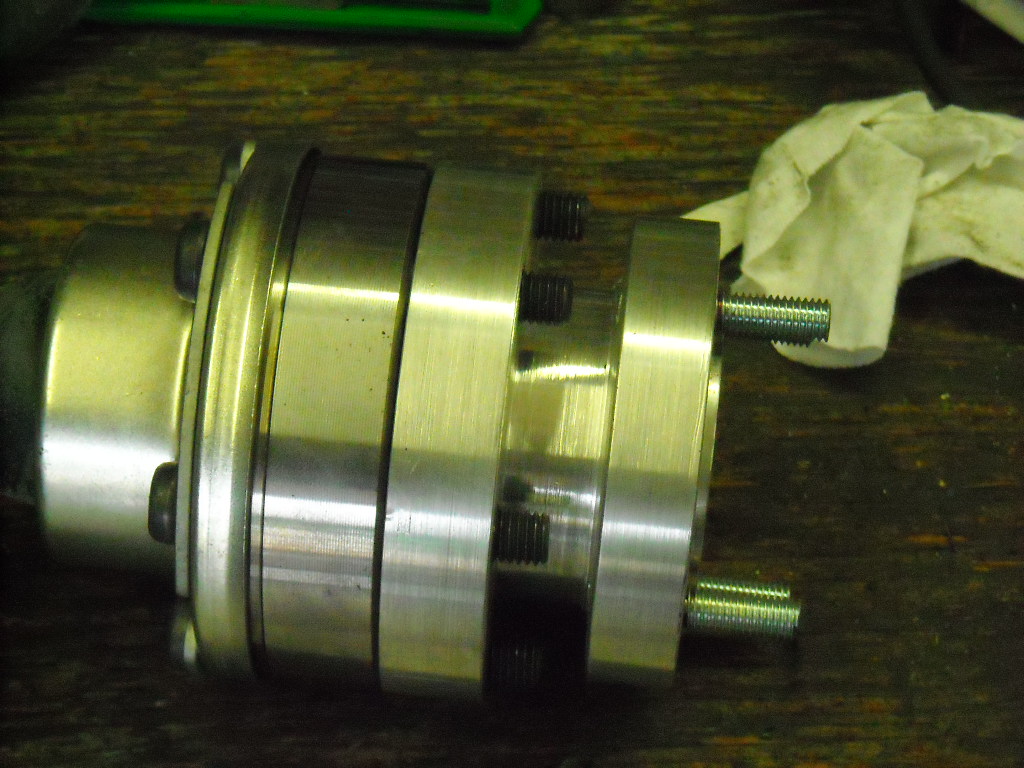


Wtb: 240z shifter, not the straight one.
in Parts Wanted
Posted
Well I looked where I last put them but they are not there, I know I have them just can't locate them at the moment.
Sorry