
yellowoctupus
-
Posts
419 -
Joined
-
Last visited
-
Days Won
2
Content Type
Profiles
Forums
Blogs
Events
Gallery
Downloads
Store
Posts posted by yellowoctupus
-
-
Just some quick data on the 5.0: http://phystutor.tripod.com/stang/engines/50.html
(Clicking on 'Engines' at the top of the page navigates you back to other Ford V8's. )
-
Brian Laine's got a great website, he built an awesome 5.0 240z (maybe as good / better than the JTR??)
He also has drawings of his mounts online, and sells them as well.
There's lots of documented sbf swaps here, with the 302/5.0 and 289's being the most popular of course.
-
boo sbc... 302's a plenty in the yard in Lincolns....
-
http://grassrootsmotorsports.com/forum/grm/homemade-bellhousing-project/31440/page1/
Depends on just how balls to the walls you are. This guy did an awesome job making his own bellhousing. I'm not sure how it lasted in the long run, but it looks like a serious quality part when he got done.
-
Have you found a good way to mechanically couple the two assuming the 5r55e's physically robust enough? (Bellhousings, flywheel to input shaft mating, etc?)
-
Depends on where your weakest link is. I left my weakest link at tires, I'm hoping running high pressure will let them break loose before U joints etc.
-
D'oh! You crazy Aussies! I should have known, that's probably what Mad Max had tucked under the bonnet of his XB.
 I would love to get a hold of one of those inline 4.0's for my '65 Mustang. I thought they came in our Explorers and Rangers...as it turns out they're a completely different V6....
 -
FYI, it's a 302W (Windsor, Ontario, not Cleveland). Here are the basic SBF/BBF family classifications:
1962–2000 Windsor V8—small-block (221/255/260/289/289HP/302/351W/Boss 302)
1968–1997 385 V8—big-block (370/429/Boss 429/460/514)
1970–1982 335/Cleveland V8— small-block (351 Cleveland/400/351M/Boss 351
I've heard the 400M engines are boat anchors, as they're truck engines meant for torque not high revs, so just my 2¢, but I'd probably do the 302. I did a 4.6 swap becaust nobody else does them, and it was a steep learning curve. TONS of people here have done the 302/5.0 swaps. If you quick n easy, go 302, if you want to be different and be able to pull out bulldozers stuck in the mud, then... Drop er in!!!!
-
This PDF is from a Lexus training manual, it's got GREAT explanations of brake boosters etc. I really tried to put my tandem Dodge Viper booster in, but it majorly interferes with the valve cover.
This is the reason I'm slow with my Z project --> my wife's 65 that we just finished a complete resto on this month.
-
Well, I've had the car up on jackstands the last two weeks on my original quest to find a rear end vibration which has led itself into a quest for giant brakes. Hmph. In the meantime, I found some interesting things while digging into the brake system.
My booster was full of brake fluid. Like, there was over a cup in there. It's been in there for the last 5 years, as I replaced the MC back in 2007. The insides are nice and clean (and paint free). I would not recommend taking one of these suckers apart, as they're a PITA to put back together properly, and not have any leaks where the two halves come together. I ended up (after the third try with these tiny vacuum leaks on the seam) putting it together with a bead of RTV on the diaphragm edge. I let it sit for two days, and it seems to have fixed the problem. I haven't had the car fired up again to see if the booster is good to go now. I think the only other problem I might have is if the air valve isn't unseating for some reason (old, swollen rubber or something) then I'm getting no pressure differential ie, no power brakes.
Front Discs. I'm sure the concours guys know this, but I hadn't noticed it before; the calipers are painted half yellow, half black.
I decided to do a brake swap up front, using the four piston Toyota 4x4 brakes. Instead of the S12W variants, I got mine off a 1994 4Runner, which are S13WB calipers. They look similar, and bolt right up to the mount in the same manner. However, as has been mentioned before in the FAQ section, they are different (Overall wider, and also require a wider rotor). I'm using the 84ZX vented front rotors.
I had to grind down the cooling fins a bit to clear one of my sets of wheels. I also have to run 3/16" wheel spacers, and I will be using the Dorman PN 610-403 Nissan Quest rear wheel stud. (I have attached a three page PDF of the Dorman catalog with this info in it.)
I'm thinking of making some 'pad spacers' to reduce this gap instead of finding/ machining another rotor.
Making the rotor spacer, I somehow already had discs cut the right OD and thickness laying around the shop. Odd, but convenient. The tool I used isn't the best quality, but I replaced the crappy keystock cutter with a HSS flycutter, and it will do some rudimentary machining.
Spacer mounted.
Rear Discs:
I have slightly loose rear wheel bearings, which I'm planning on replacing. While I have the rear end apart, I have decided to go to discs too. I have a late 80's Maxima caliper bracket I'll probably use, not sure which rotor/ caliper yet.
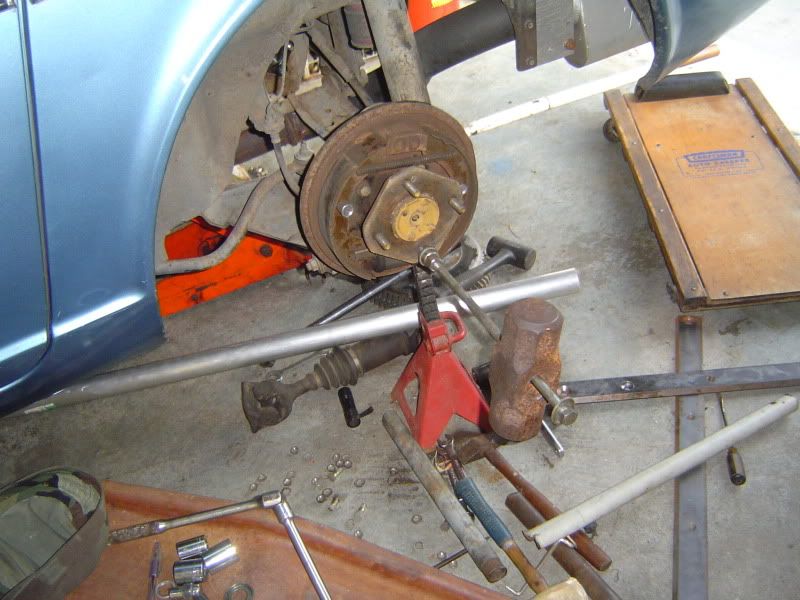
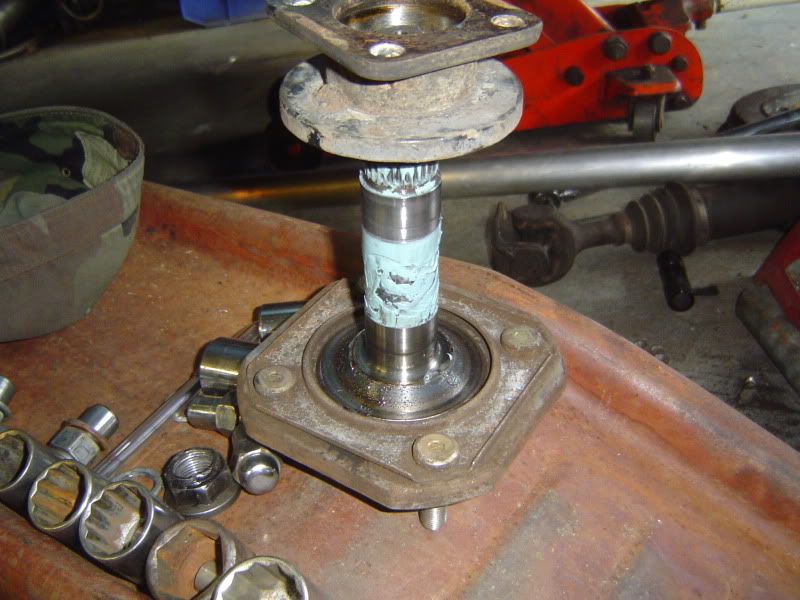
Pulling the rear stub axle was tricky, but I made do with my homemade puller. I had a front motorcycle axle laying around (81 CB650??) that has the same M12x1.25 thread, and I pulled the top cap off an extra lug nut to make this puller. Worked great, but still took a lot of hammering.
Has anyone seen this grease before?? It's blue!
-
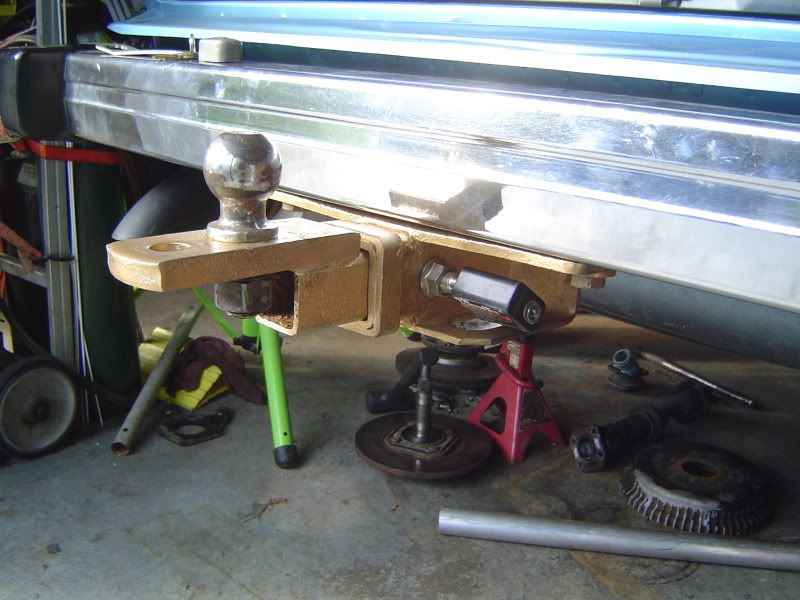
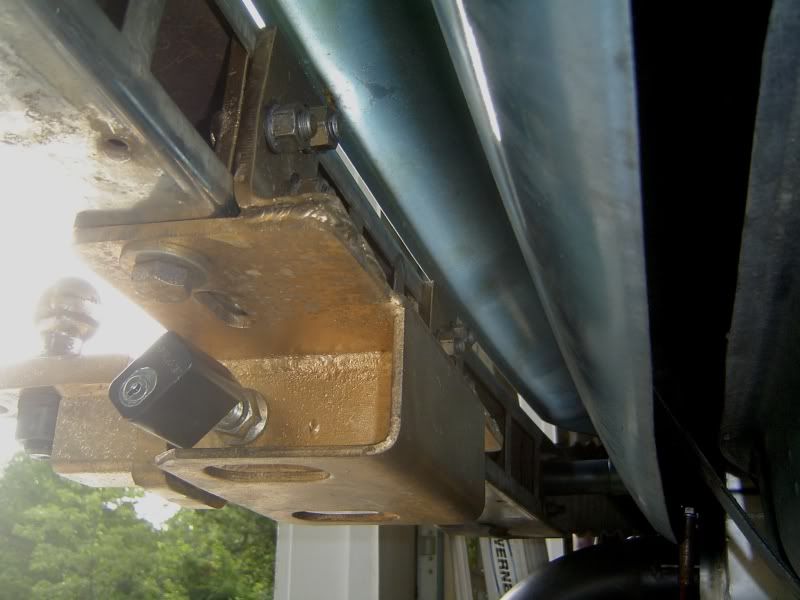
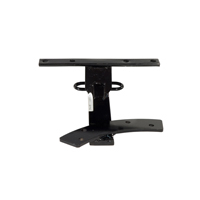
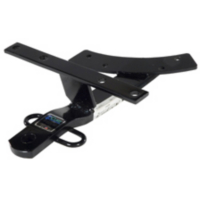
Here's your non fixed hitch:
I'm still not sure if I need to have a stabilizer bar going into the spare tire well or the rear diff mount or something. I can put my weight on my receiver and it seems pretty sturdy, but you can feel the smallest bit of flex at the bumper mounts. Mounting to the wheelwell puts some goofy bends in the bracket, (giving it a prime place to bend/ flex), and so does going to the rear diff mount. (besides the fact that is has to be super long to make it under the gas tank, etc)
It does look like the purely 'pulling' load is almost directly centered on the bumper (ie, no flex if there's no moment). I also drilled a closer hole in the hitch to reduce the moment from the tongue weight.
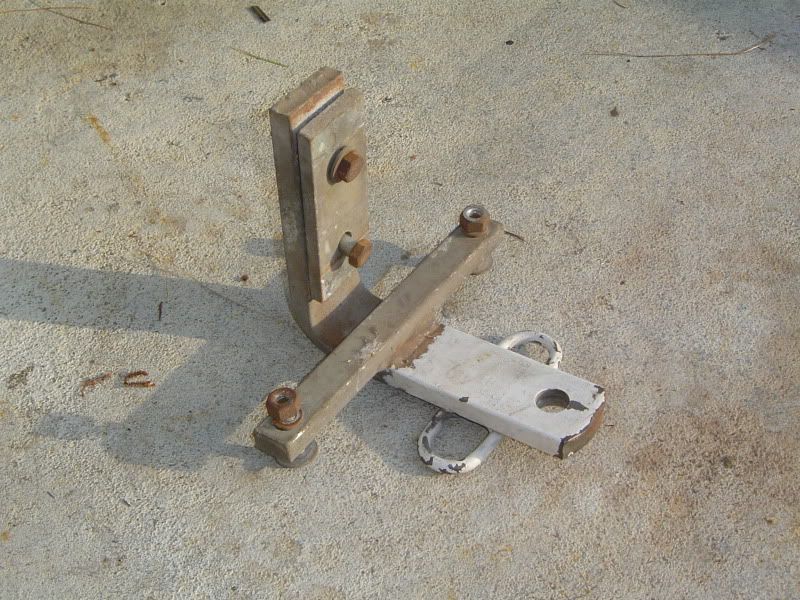
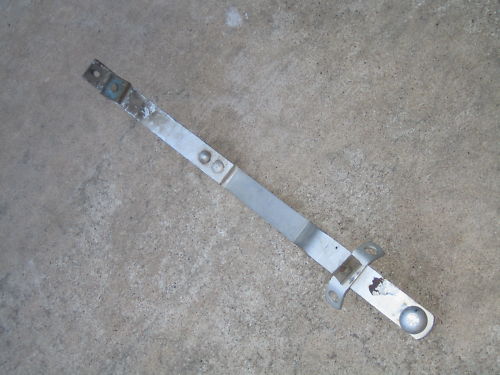
This came off my 1980 Mustang, it only mounted to the bumper. I used this model for my reciever hitch setup.
I'm still not sure if I need to have a stabilizer bar going into the spare tire well or the rear diff mount or something. I can put my weight on my receiver and it seems pretty sturdy, but you can feel the smallest bit of flex at the bumper mounts. Mounting to the wheelwell puts some goofy bends in the bracket, (giving it a prime place to bend/ flex), and so does going to the rear diff mount. (besides the fact that is has to be super long to make it under the gas tank, etc)
It does look like the purely 'pulling' load is almost directly centered on the bumper (ie, no flex if there's no moment). I also drilled a closer hole in the hitch to reduce the moment from the tongue weight.
-
The reason I posted this information on such an old thread is that this thread was most closely related to the Dorman PN and extended 'oem' replacements. Most of the newer wheel stud threads that are out there are focused on ARP or Nismo studs, with only confusing information about OEM replacements.
I'm going to give those Rear Quest studs a try, it looks like the rear Z studs would work, but I like the fact that the Quest studs are closer on the knurl diameter. $1.70 at the local parts store. They have 260 in stock. Why would you need so many in stock???
-
FYI: Dorman's catalog lists this info additionally: (also attached to this post as a PDF, only three pages long with the pertinent info for this post)
Z stock front stud : 610-240
13mm knurl
32mm long
10mm shoulder
Z stock rear stud : 610-320
12.83mm knurl
41.5mm long
14mm shoulder
THEN they list 610-403 as the 'overlength stud' for the 610-240!!
12.9mm knurl
45.5 long
15mm shoulder
Detailed Applications for the 610-403
Year Make Model Engine Application Notes
1998 NISSAN QUEST: GXE V6 - 3.0L (2960 CC): GAS: FI: N: VG30E
• Rear
1998 NISSAN QUEST: XE V6 - 3.0L (2960 CC): GAS: FI: N: VG30E
• Rear
1997 NISSAN QUEST: GXE V6 - 3.0L (2960 CC): GAS: FI: N: VG30E
• Rear
1997 NISSAN QUEST: XE V6 - 3.0L (2960 CC): GAS: FI: N: VG30E
• Rear
1996 NISSAN QUEST: GXE V6 - 3.0L (2960 CC): GAS: FI: N: VG30E
• Rear
1996 NISSAN QUEST: XE V6 - 3.0L (2960 CC): GAS: FI: N: VG30E
• Rear
1995 INFINITI J30 V6 - 3.0L (2960 CC): GAS: FI: N: VG30DE
• Front
1995 NISSAN QUEST: GXE V6 - 3.0L (2960 CC): GAS: FI: N: VG30E
• Rear
1995 NISSAN QUEST: XE V6 - 3.0L (2960 CC): GAS: FI: N: VG30E
• Rear
1994 INFINITI J30 V6 - 3.0L (2960 CC): GAS: FI: N: VG30DE
• Front
1994 NISSAN QUEST: GXE V6 - 3.0L (2960 CC): GAS: FI: N: VG30E
• Rear
1994 NISSAN QUEST: XE V6 - 3.0L (2960 CC): GAS: FI: N: VG30E
• Rear
1993 INFINITI J30 V6 - 3.0L (2960 CC): GAS: FI: N: VG30DE
• Front
1993 NISSAN QUEST: GXE V6 - 3.0L (2960 CC): GAS: FI: N: VG30E
• Rear
1993 NISSAN QUEST: XE V6 - 3.0L (2960 CC): GAS: FI: N: VG30E
• Rear
1988 NISSAN VAN L4 - 2.4L (2389 CC): GAS: FI: N: Z24i
• Front; From 1/88
1987 NISSAN VAN L4 - 2.4L (2389 CC): GAS: FI: N: Z24i
• Front; From 1/88
-
I ended up making a bastardized spacer today out of 0.4" and then had to space the caliper back to get it centered correctly. I'm also using a S13Wxxx caliper, so I'm not sure how that differs from the S12 ... Had to grind down the 'cooling fins' on the caliper to get it to clear one of my wheels though. Mesh knockoffs needed the grinding, my turbines did not. Just has to do with the cutaway profile of the rim.
Spacer thickness:
-
Speaking of the Vented Rotor conversion, does anyone have dimensions/ a picture of the rotor spacer? I'm a diy'er with access to most anything I need to make my own, and can figure out what I THINK it should be, but if somebody has the 280z spacer thickness etc, that would certainly cut the chase for me.
-
And.....I just found my answer... good thing I dug up this 4+ year post. Grr..
The VENTED 4 piston caliper: This is the same as above, but uses an '84 300ZX vented rotor and a different caliper from a 89-95 4wd pickup or 4/89-91 4 Runner. This caliper is an S12W and is stamped as such. These parts do not just bolt on unfortunately. A spacer is needed between the rotor and the hub to line the rotor up with the caliper correctly. This spacer is available from www.modern-motorsports.com and is a different thickness for 240 and 280 hubs (260s as usual have 240 hubs in the early part of the year and 280 hubs in the latter part). This is a substantial upgrade from the solid rotor 4 piston caliper upgrade because the vented rotor can shed a lot more heat than the solid rotor. Fits most 14" rims.On the FAQ sticky. --> Brakes
-
Post GRAVEDIGGER!!
What is the skinny on the aluminum spacers you mention here?? I'm doing the Toyota swap, the calipers bolt right on, but the offset of the rotors is about 3/8" ?? Are you using the spacer to get the rotor centered in the caliper? Thanks!
-
Got it out. Although I knew how it was put in, with that 'stop lip' keeping the bearing in the hub bore, I think I may have been beating on the machined lip, not the bearing itself. D'oh. BTW, this is what I used as a slide hammer to pull the stub axle out, as my bodywork slide hammer was not up to the job. It's a motorcycle axle with the same thread as the wheel studs. Many lug nuts are not made from a solid piece of steel, but they are rather 'capped'. You can just squish the cap off in a vice, then thread on the lug nut 3/4" and still have 3/4" of threads to put the mtcy axle in.
Has anyone else noticed the factory grease is a light blue?? What is up with that?
And an FYI for folks painting things all 'superstock' like. Only the front half of the caliper is painted yellow from the factory. Weird. Like yellow paint is so expensive they could only do one side.
-
Wow. That's what I'm trying now. Can't wait to try putting the new one in from the inside.
-
So...I got the axle nut off no problem, made a puller to get the stub out, and have the outer bearing out. What's the trick to getting that inner bearing out?? I've been beating the daylights out of that silly thing and have gotten to move maybe 3/16"! I'm doing wheel bearings all around, as the fronts never stay in adjustment (races shot) and the rears have play too.
Thanks!
-
The first two are Curt Mfg Hitches, which are available today, for around $130. Looks like it bolts up to the rear bumper and the spare tire well. Probably have to drop the gas tank to drill holes and install.
The third is one that ebay member Reddat sold back in October '11. I like the idea that it doesn't require new holes in the spare tire well, and actually attaches to something solid. I think it bolts up to the rear differential hanger (the 'framework' that the mustache bar/differential carrier mounts up to. It should provide the support to keep the hitch from pivoting (swinging up and down due to tongue weight) and should take tensile loads from the actual pulling.
-
I know there are mixed feelings floating around about hitches on Z's, but personal bias aside, can we get some good hitch pictures posted? I want to use a 2" receiver hitch for my bike rack, and I want to see how other hitches are supported/mounted. I have it on the car now, and it's probably good enough for the bike rack, but I wouldn't feel great towing cross country with a trailer yet (which I'm doing in August!). Thanks!!
-
2> Do I need a balancer on the front, since they're internally balanced, so I can just run a pulley?
YES!!! Definitely run a balancer. There is no advantage to NOT running one. Refer to the attached PDF on why you have to run a dampener:
-
Right around 1k for mine. Not too hard to keep it under 1500 for a budget swap, SBC / SBF would be pretty easy methinks. I lost my link but somewhere on hybridz there's a great post that everybody posts what their conversion costs. It's titled something like "How much did everybody spend on their conversions" or something like that.
 I would love to get a hold of one of those inline 4.0's for my '65 Mustang. I thought they came in our Explorers and Rangers...as it turns out they're a completely different V6....


mckinney texas, good mechanic?
in Ford V8Z Tech Board
Posted
Sweet! Glad to hear that's all it was. My Dad still thinks it's funny that his last 69 Mustang has a funny firing order. It was a 302 with a mild 351 cam in it (or vice versa, I really don't remember) which swaps a few wires. Hope the next guy to change wires does it one at a time!