Stephonovich
-
Posts
22 -
Joined
-
Last visited
Content Type
Profiles
Forums
Blogs
Events
Gallery
Downloads
Store
Everything posted by Stephonovich
-
 Thanks for the answer, John. I definitely need to get it up in the air and take a good look. I crawled under it a couple days ago and it looks like maybe there's brake fluid, or at least something shiny around the right rear wheel cylinder. I haven't had the time this week to do more than slightly educated guessing.
 -
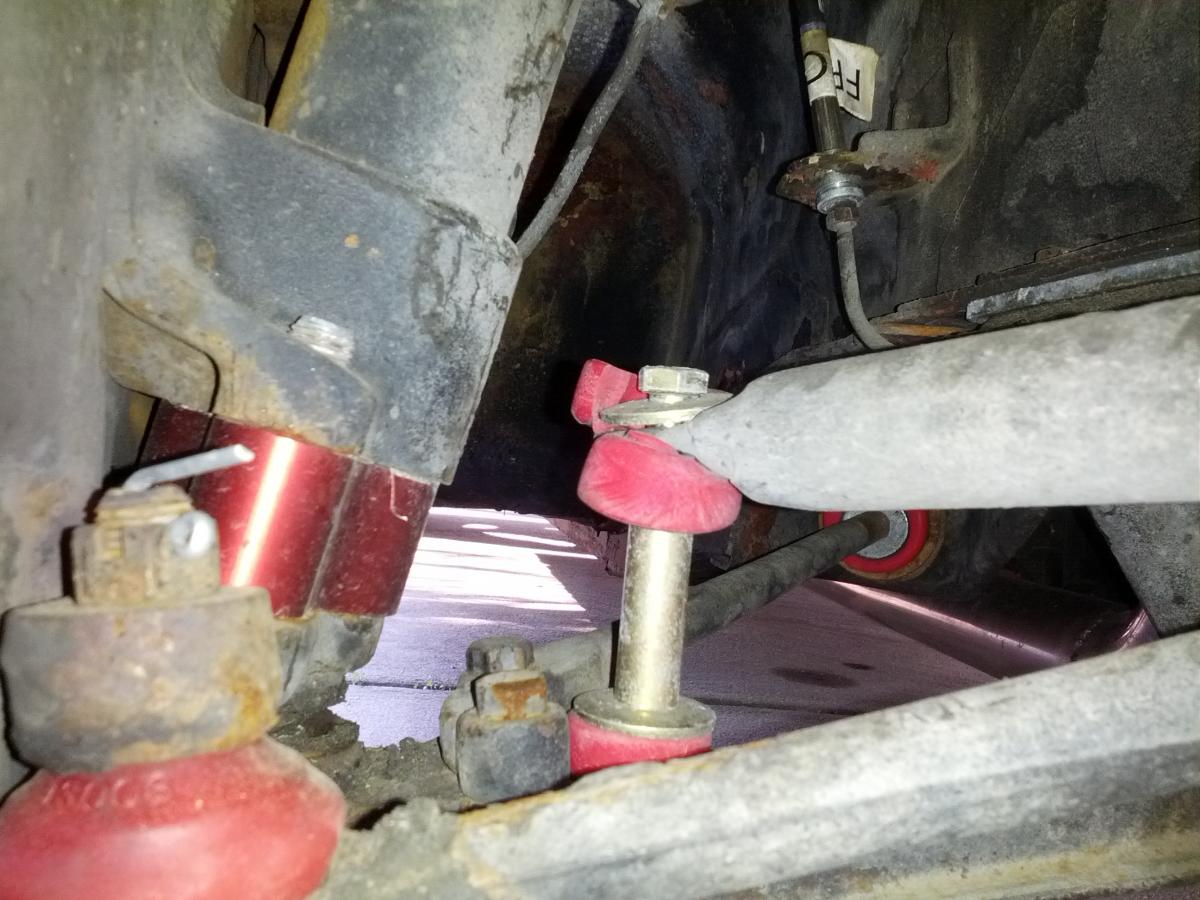
For what it's worth, I replaced the broken set, and took apart and re-greased the other. The other side appeared to be massive over-torqued, severely squishing the bushings. I read 15 ft lbf as a torque spec somewhere. Unfortunately, I was unable to get a torque wrench up there and see it, so I went with the "feels about right" method. The pulling is diminished. I think after re-checking torque (one side seems a little low based on thread protrusion through the nut) and letting everything settle, it might disappear entirely.
-
Yesterday my '75 280 started pulling to the right under braking. This morning I did some troubleshooting. No wheel appears to be not contributing to braking, although it's possible there's a blockage not permitting full force on a wheel - my crude method was just to jam the brake pedal and turn the wheel. Increased effort = OK. When I looked at the suspension, though (suspecting tension control rod), I found this on the right sway bar. It has some play in it. Could a blown sway bar bushing cause a braking pull? Googling was ambiguous; some said yes, some no. I plan on replacing it in any case; they're only $16 EDIT: Sway bar end link, to be precise. My mistake.

-
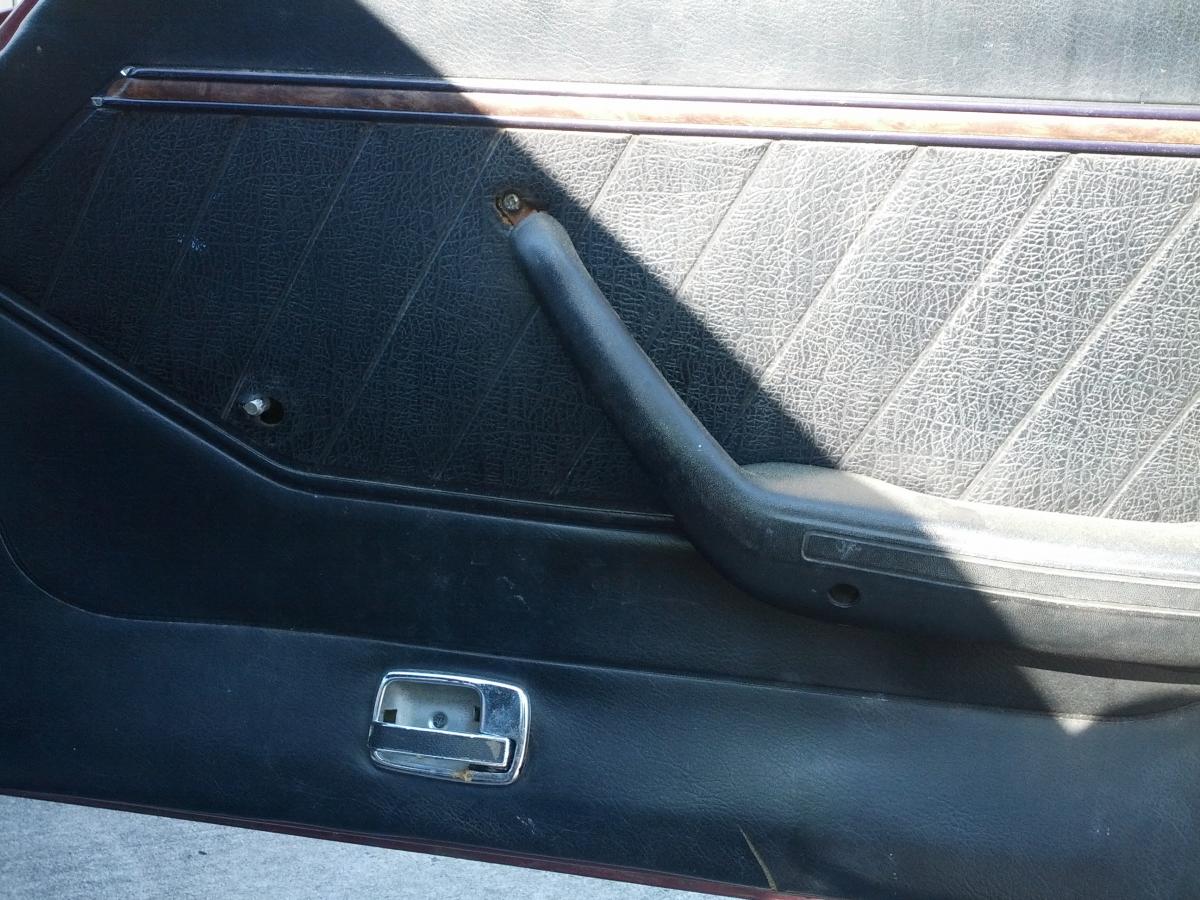
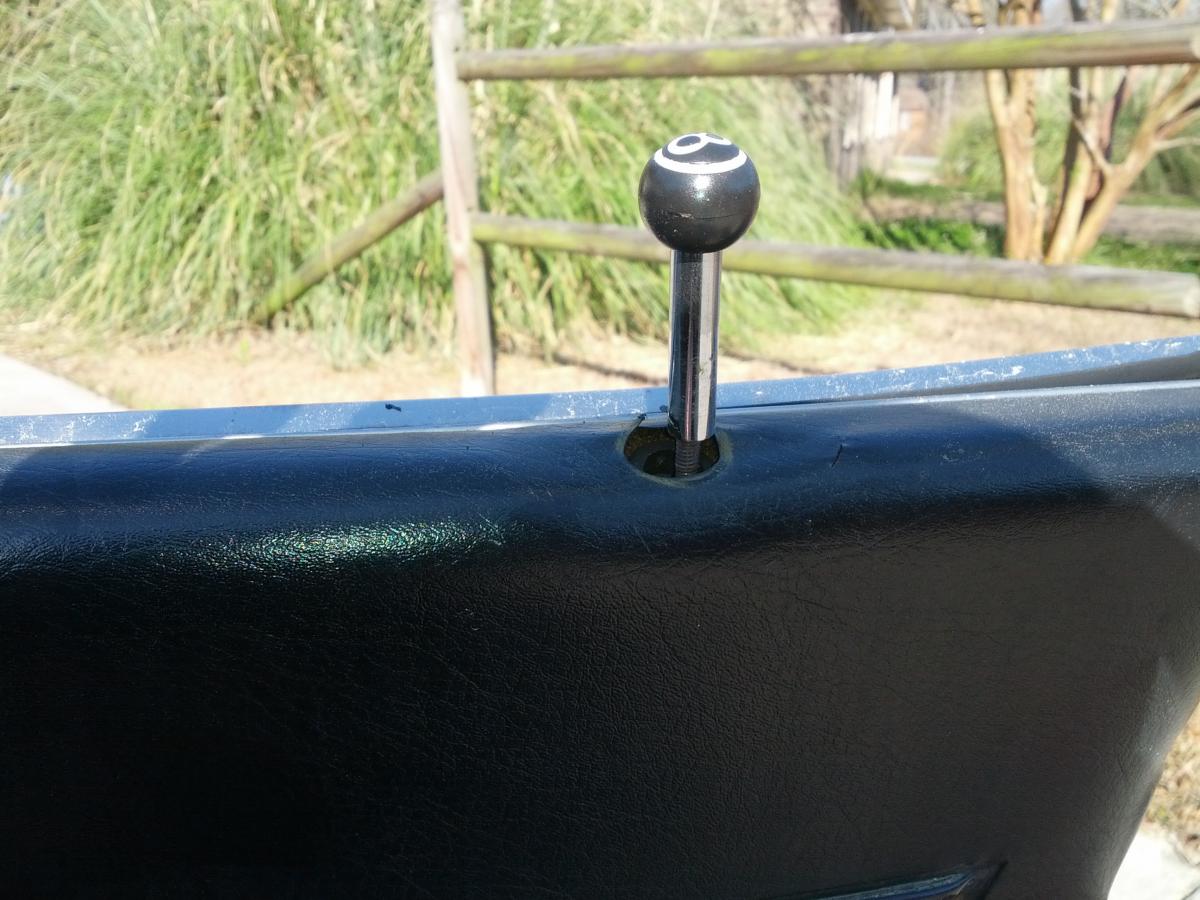
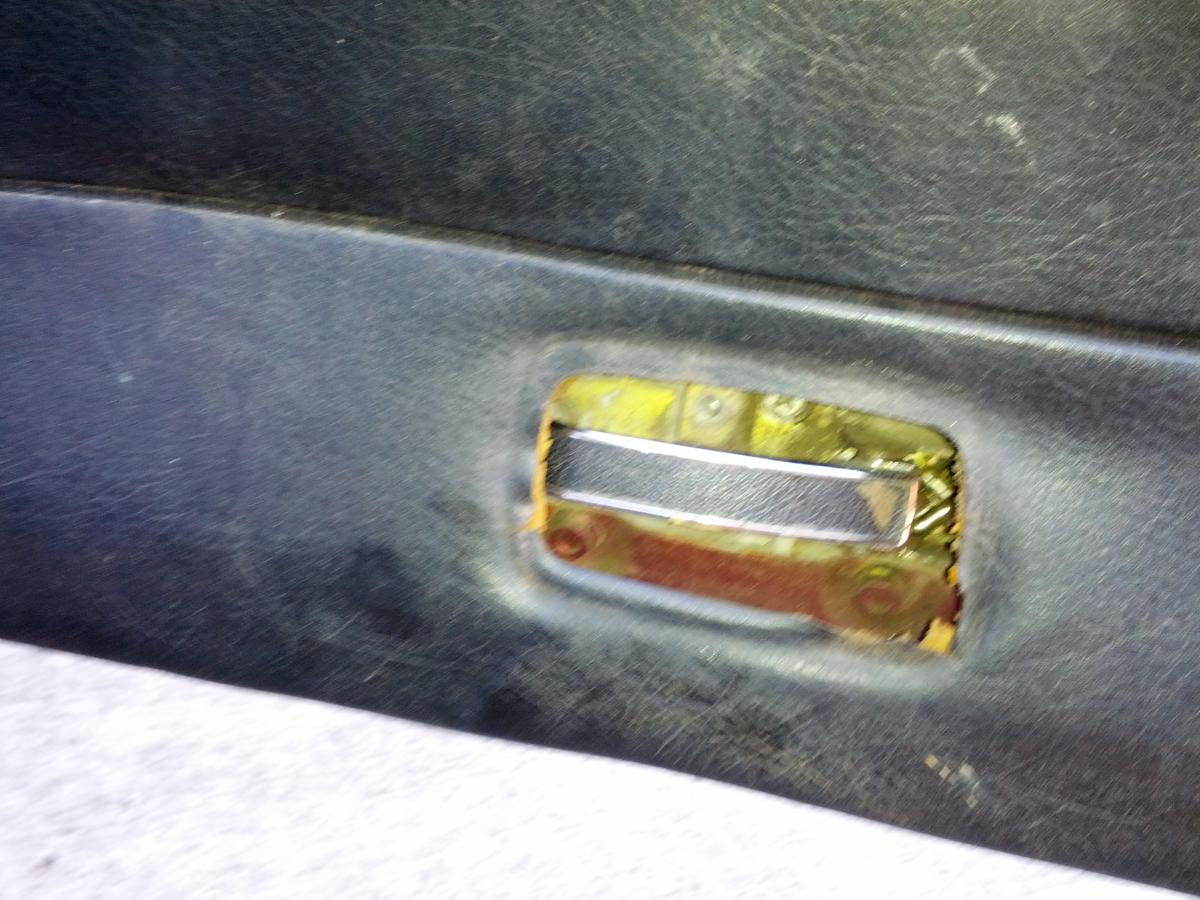
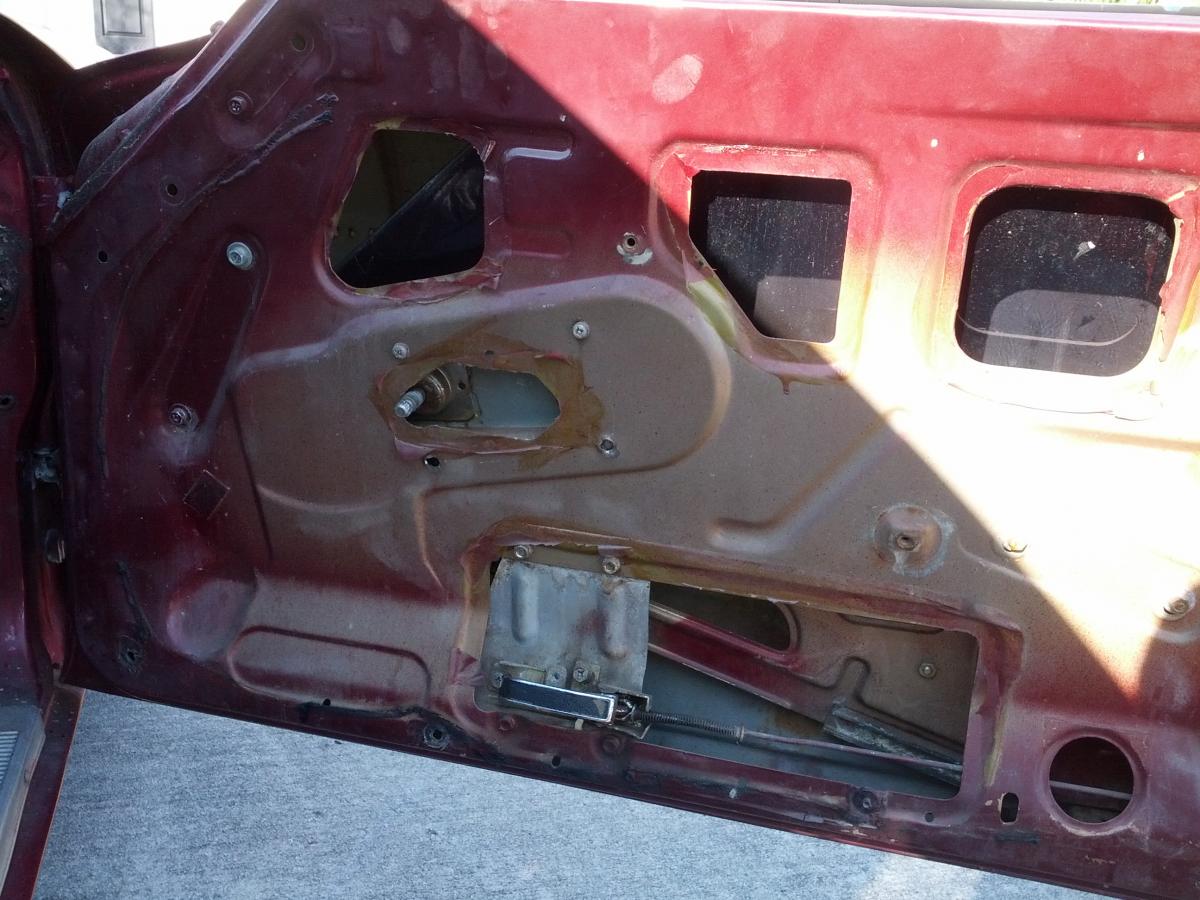
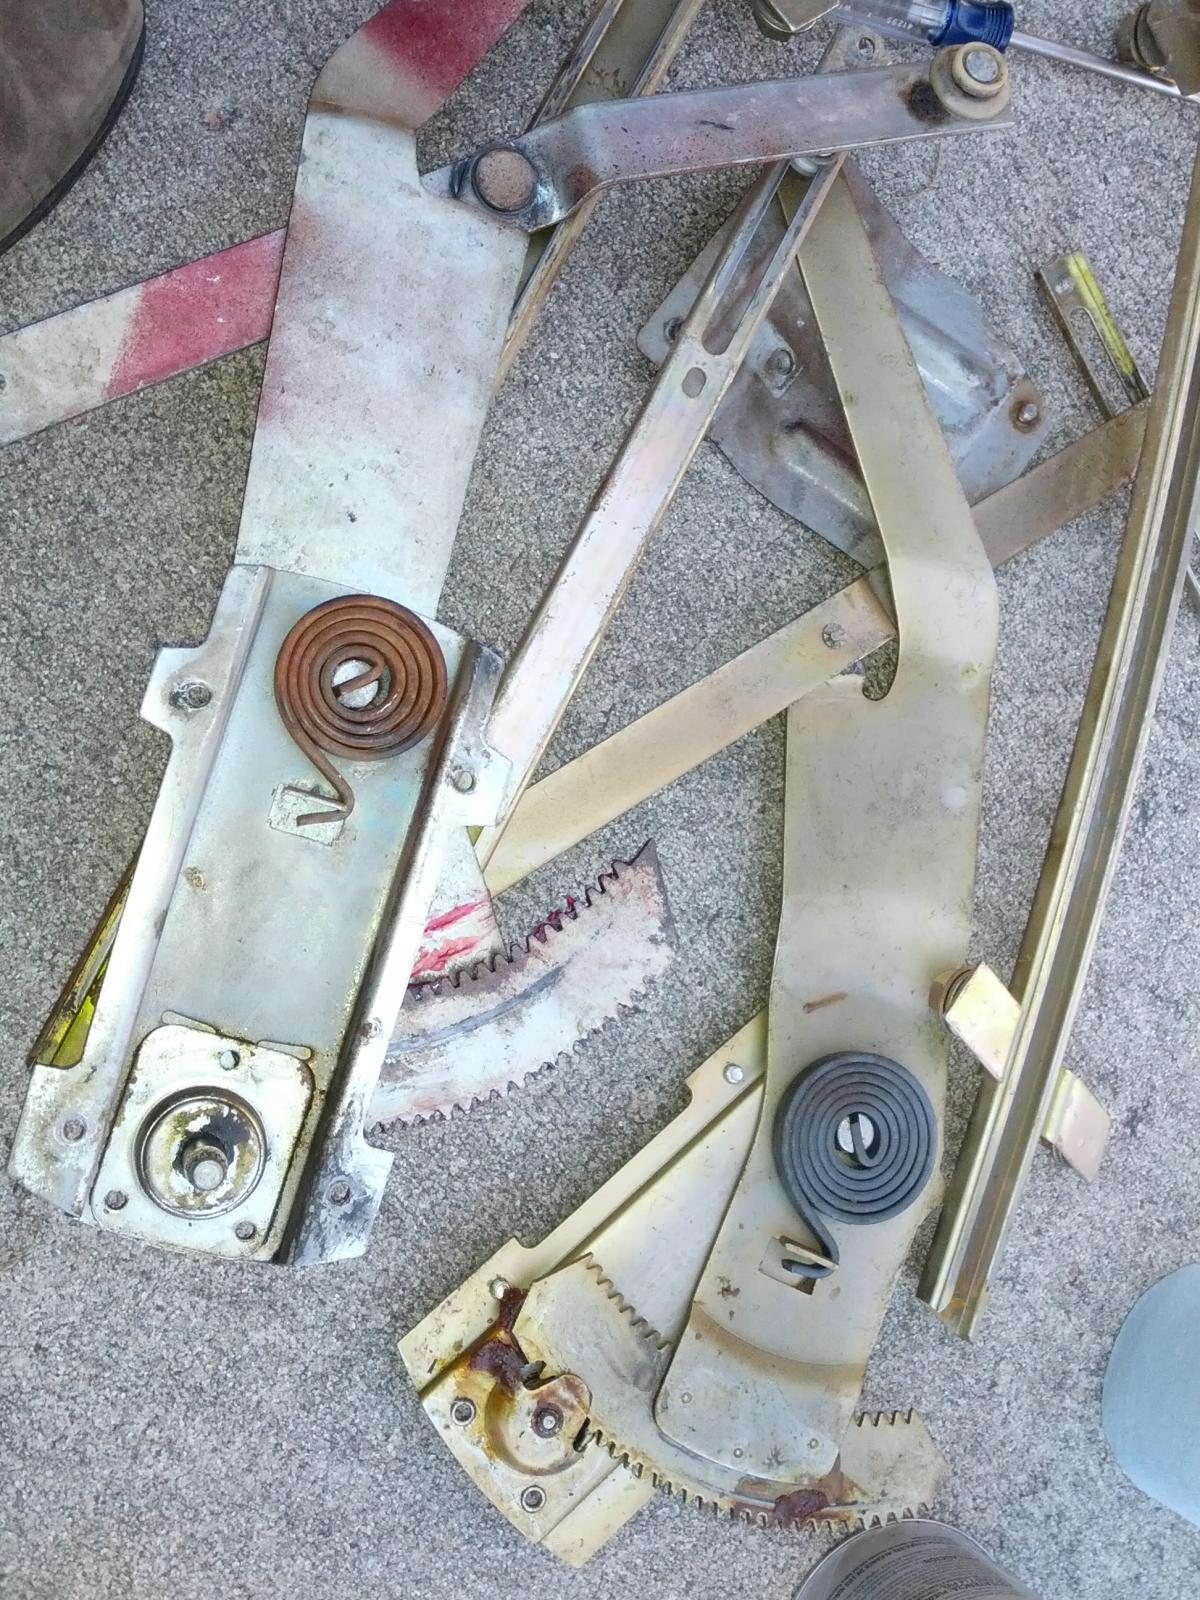
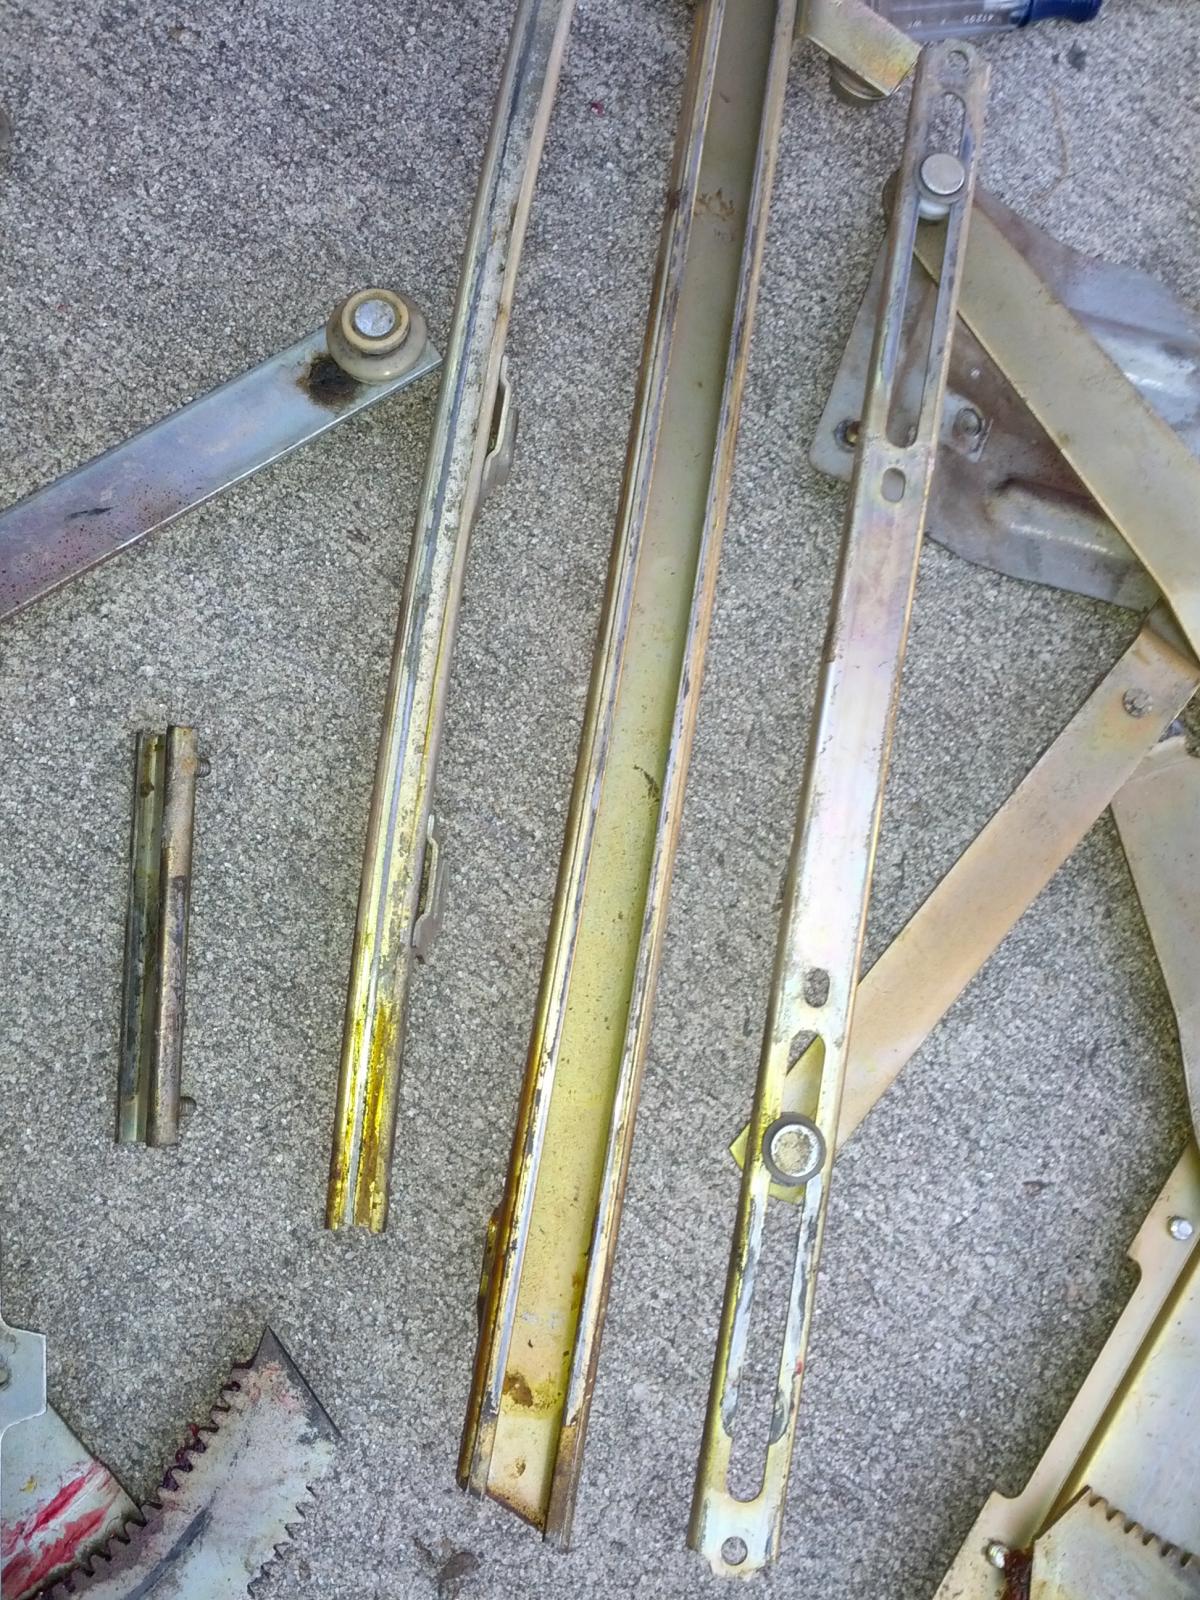
Since I got my '75 280Z, the passenger window hasn't worked. Once it came down, it stayed down. I figured some part of the regulator was broken, and decided to try to fix it. I found very few threads discussing it anywhere; the best I found was a service manual at XenonS30. This is also where I discovered that they changed the regulator design in '77, making the pieces way beefier. Oops. I ended up just re-greasing mine and putting it back together, worked like a champ. I took what pictures I could; I apologize that everything isn't documented. As the afternoon drew longer I got tired of taking off gloves to snap a picture. Side note on that, I strongly recommend you wear Mechanics Gloves during this. You'll be reaching inside the door a lot, and while the metal is rolled, it'd be quite easy to slice your finger. You will need: Optional: A new regulator set for a '75/'76 280Z. I imagine the procedure is pretty similar for the 240Z and later years of 280Z (2+2 has more parts involved, sorry guys), so do what you can. Not optional: Lithium grease - I recommend the white spray variety, but I used high temperature goop because it's what I had. Large Philips head screwdriver 10mm wrench/socket - almost all the bolts are 10mm with an integral Philips head. Wrenches/sockets have a lot more torque potential than the screwdriver, but use what you want. Start by removing the door trim. Mine was held on by three screws; one clearly visible on the upper left of the armrest (I assume there's a cover over it normally), and the other two sunk into the lower part of the armrest. There are also some plastic snap-in pieces on the perimeter. My interior is in pretty bad shape overall, so these popped out quite easily for me. YMMV. Note that you have to pull off the following two pieces to get the door trim off. Clearly aftermarket (previous owner), these just unscrew. No idea about stock. The silver plate that covers the door latch is held on by a single black screw. OK, pull the trim piece off! It should look like this when you pull the trim off. The two screws/bolts on the far left center hold the front guide channel (called a front sash in the manual) in place. The two screws in the middle (yep, there should be four - that's how I found it) hold the crank assembly in place. Kind of washed out, but the two nuts in the oval indentation, right side, above the hole - those hold the rear guide channel in place. It has studs attached to it, which protrude through the door. There are two screws/bolts holding the door handle to that metal plate at the bottom. Remove them, and wiggle the cable off the handle. The four nuts holding that metal plate in place come off, which allows you to pull the plate out. You'll need all that room, believe me. You also need to pull the window trim (the metal runner along the top of the door, parallel to the ground) and the door sash (metal trim that the window rolls up into) before you can remove the regulator and glass. The trim just pops off; the door sash has screws/bolts - two on the leading edge, on the first angle going forward from the flat; three on the trailing edge, where it meets the door jam (one at the bottom, two near the top). You also need to remove the window crank - mine was already off, as it was broken. From what I've read, there's a C-clip you have to pull off with needle nose pliers. There's probably a better way to remove the assembly; I unbolted everything (supporting the window) and then pulled it out one by one. The window comes up through the top with some trouble, and the crank assembly comes up with a lot of trouble. The manual states it can go through the holes in the door, but I wasn't able to do that. Pull everything out however you can. These two demonstrate the year differences. The newer looking stuff is froma '77. Not only is it beefier, the arrangement of the spring and gear is different. And, this is where the pictures stop. Not much to it after this. If you have a new set, make sure the guides are well greased. If you're re-using your set, as I did, clean everything off well, and re-grease. I used PB Blaster to get the old gunk off everything. For re-installation, the easiest way I found was to install the front sash first, but only secured with one bolt. Angle the window towards the front of the car and slide it down, then line up the guide rail on the window with the front sash and partially slide it in. Use the window crank to raise/lower the regulator until the rollers are near the guide rails on the window. Use force, coercion, and magic dances to line them up. It took me about 10 minutes to get all three of them aligned. Note, you can pop the long gear off the crank if you force it past its normal range of motion. If you do that, you'll have to pull the regulator out and push the gear against the tension spring to get it to re-engage the crank. Once they're all in place and tightened, raise and lower the window, making sure all the moving parts are greased as you do so. Replace the door sash. When you roll the window up, you will probably notice that it's cockeyed in some way. If it's wrong parallel to the top of the door sash, loosen and adjust the front sash (the long guide near the front of the door). If it's cockeyed fore or aft, loosen and adjust the guide channel (the small one to the rear of the door) - specifically, if it angles to the rear of the car, move the guide channel up; if it angles to the front of the car, move the guide channel down. Once the window is aligned, replace all trim, and hope you don't have extra or missing bolts.
-
I had heard bad things about rebuilt Z MCs. Not sure how much truth there is to that (I've bought reman parts with no problems), but I was basing my pricing on a new MC. Wilwood 1" is cheaper than a new OEM. I concur, especially after I drove it today - started pulling like crazy to the right under braking. With luck, the two are related, but I highly doubt it. Pull was too strong for it to be a rear brake, if it's a brake issue at all. Could also be a tension rod. Sigh. Thank you all for the advice. I'll get it sorted out one way or another.
-
As a bump, and also some more info, I do plan on honing the cylinder while I'm at it. I know throwing new rubber into a possibly scored cylinder is useless.
-
Several months ago, my brake pedal went to the floor when I was backing out of my driveway. It had some stopping force, but barely. Determined that the rear-most cylinder on the MC was empty. Refilled it, and eventually got pressure back. I never got around to bleeding the system or doing any more troubleshooting because I was moving soon. I decided to try a rebuild kit, on the basis that it's the original MC, and the seals are probably shot. I haven't taken it apart yet to check the piston. I found this page, which mentions the two brands being Tokico and Nabco. Mine is a Tokico. Well, I ordered a rebuild kit, which is Beck Arnley, and the interior package says Seiken on it, with a P\N of 071-3511. Googling hasn't turned up very much about Seiken. Does anyone know if this is compatible with a Tokico MC? Also, I found this thread, which holds the opinion that it's a waste of time to rebuild a MC, and also discusses the difficulty with the vacuum booster. I don't intend to touch the booster - when you unbolt the MC from the booster, is the spring referenced in the thread exposed? Bottom line, if this isn't worth the time or energy, I'm probably going to do the Wilwood 1" swap. Otherwise, I was perfectly happy with my braking system when it was working (Brembo front rotors/calipers, stock drums rear).
-
Gas pedal won't fully open throttle
Stephonovich replied to Stephonovich's topic in Gen III & IV Chevy V8Z Tech Board
Thanks for all the help, guys - as it turned out it was a combination of the cable sticking and the nut (which I removed). Ended up not having to bend the shaft. -
Gas pedal won't fully open throttle
Stephonovich posted a topic in Gen III & IV Chevy V8Z Tech Board
I realized today while looking under the hood that my gas pedal only opens the throttle about half-way. I destroyed some throttle cable (lucky there's a lot) re-mounting it to the throttle body before I realized there's an adjustable nut beneath the gas pedal, on the floor. I completely removed that nut, and then found out that I was still getting the same amount of throttle travel - there's increased stress that can be felt after some pedal travel, but the throttle does not open any more. Pushing the cable through the guide results in the same, as if there's an internal stop. I'm using the stock pedal, stock LS1 throttle, and a Lokar throttle cable. -
Wheel rubbing, help! ***PICS***
Stephonovich replied to jacob80's topic in Brakes, Wheels, Suspension and Chassis
I have Centerline 16x8 +0, with Dunlop Direzza Sport Z1 Star Spec 225/50R16. I had horrendous rubbing on the rears until I got the fenders rolled. I suspect they still do a bit, but as others mentioned, it's very difficult to prove. My only other recourse would be to tighten the suspension more, but it's already at 3 out of 5 (Tokico Illuminas). Alternately, I could go with small tires. Nah. Besides, the only other size for Star Specs in 16" are 205. I'm afraid that might not be enough for the LS1. 225 is already pushing it; traction is really only solid once you hit 3rd. -
Just put in some fuel stabilizer, since it won't be driven much for awhile. The bottle said to run the engine for 5 minutes after. Seemed reasonable. Dry roads and daylight proved beneficial. Wound the motor up to near readline (at least, the torque tapered off - still no tach) in 2nd and 3rd this time. Got going way too fast, discovered something: the rear tires are too wide for the fenders, even after being rolled. Result is they are being shaved at a disturbing rate. I'm wondering if I stiffened the suspension (on all 4 wheels, naturally) if that would help; the Tokico Illuminas have 5 settings, and it's currently on 1 [Lowest]. Only other alternative is, of course, fender flares, which I am loathe to do.
-
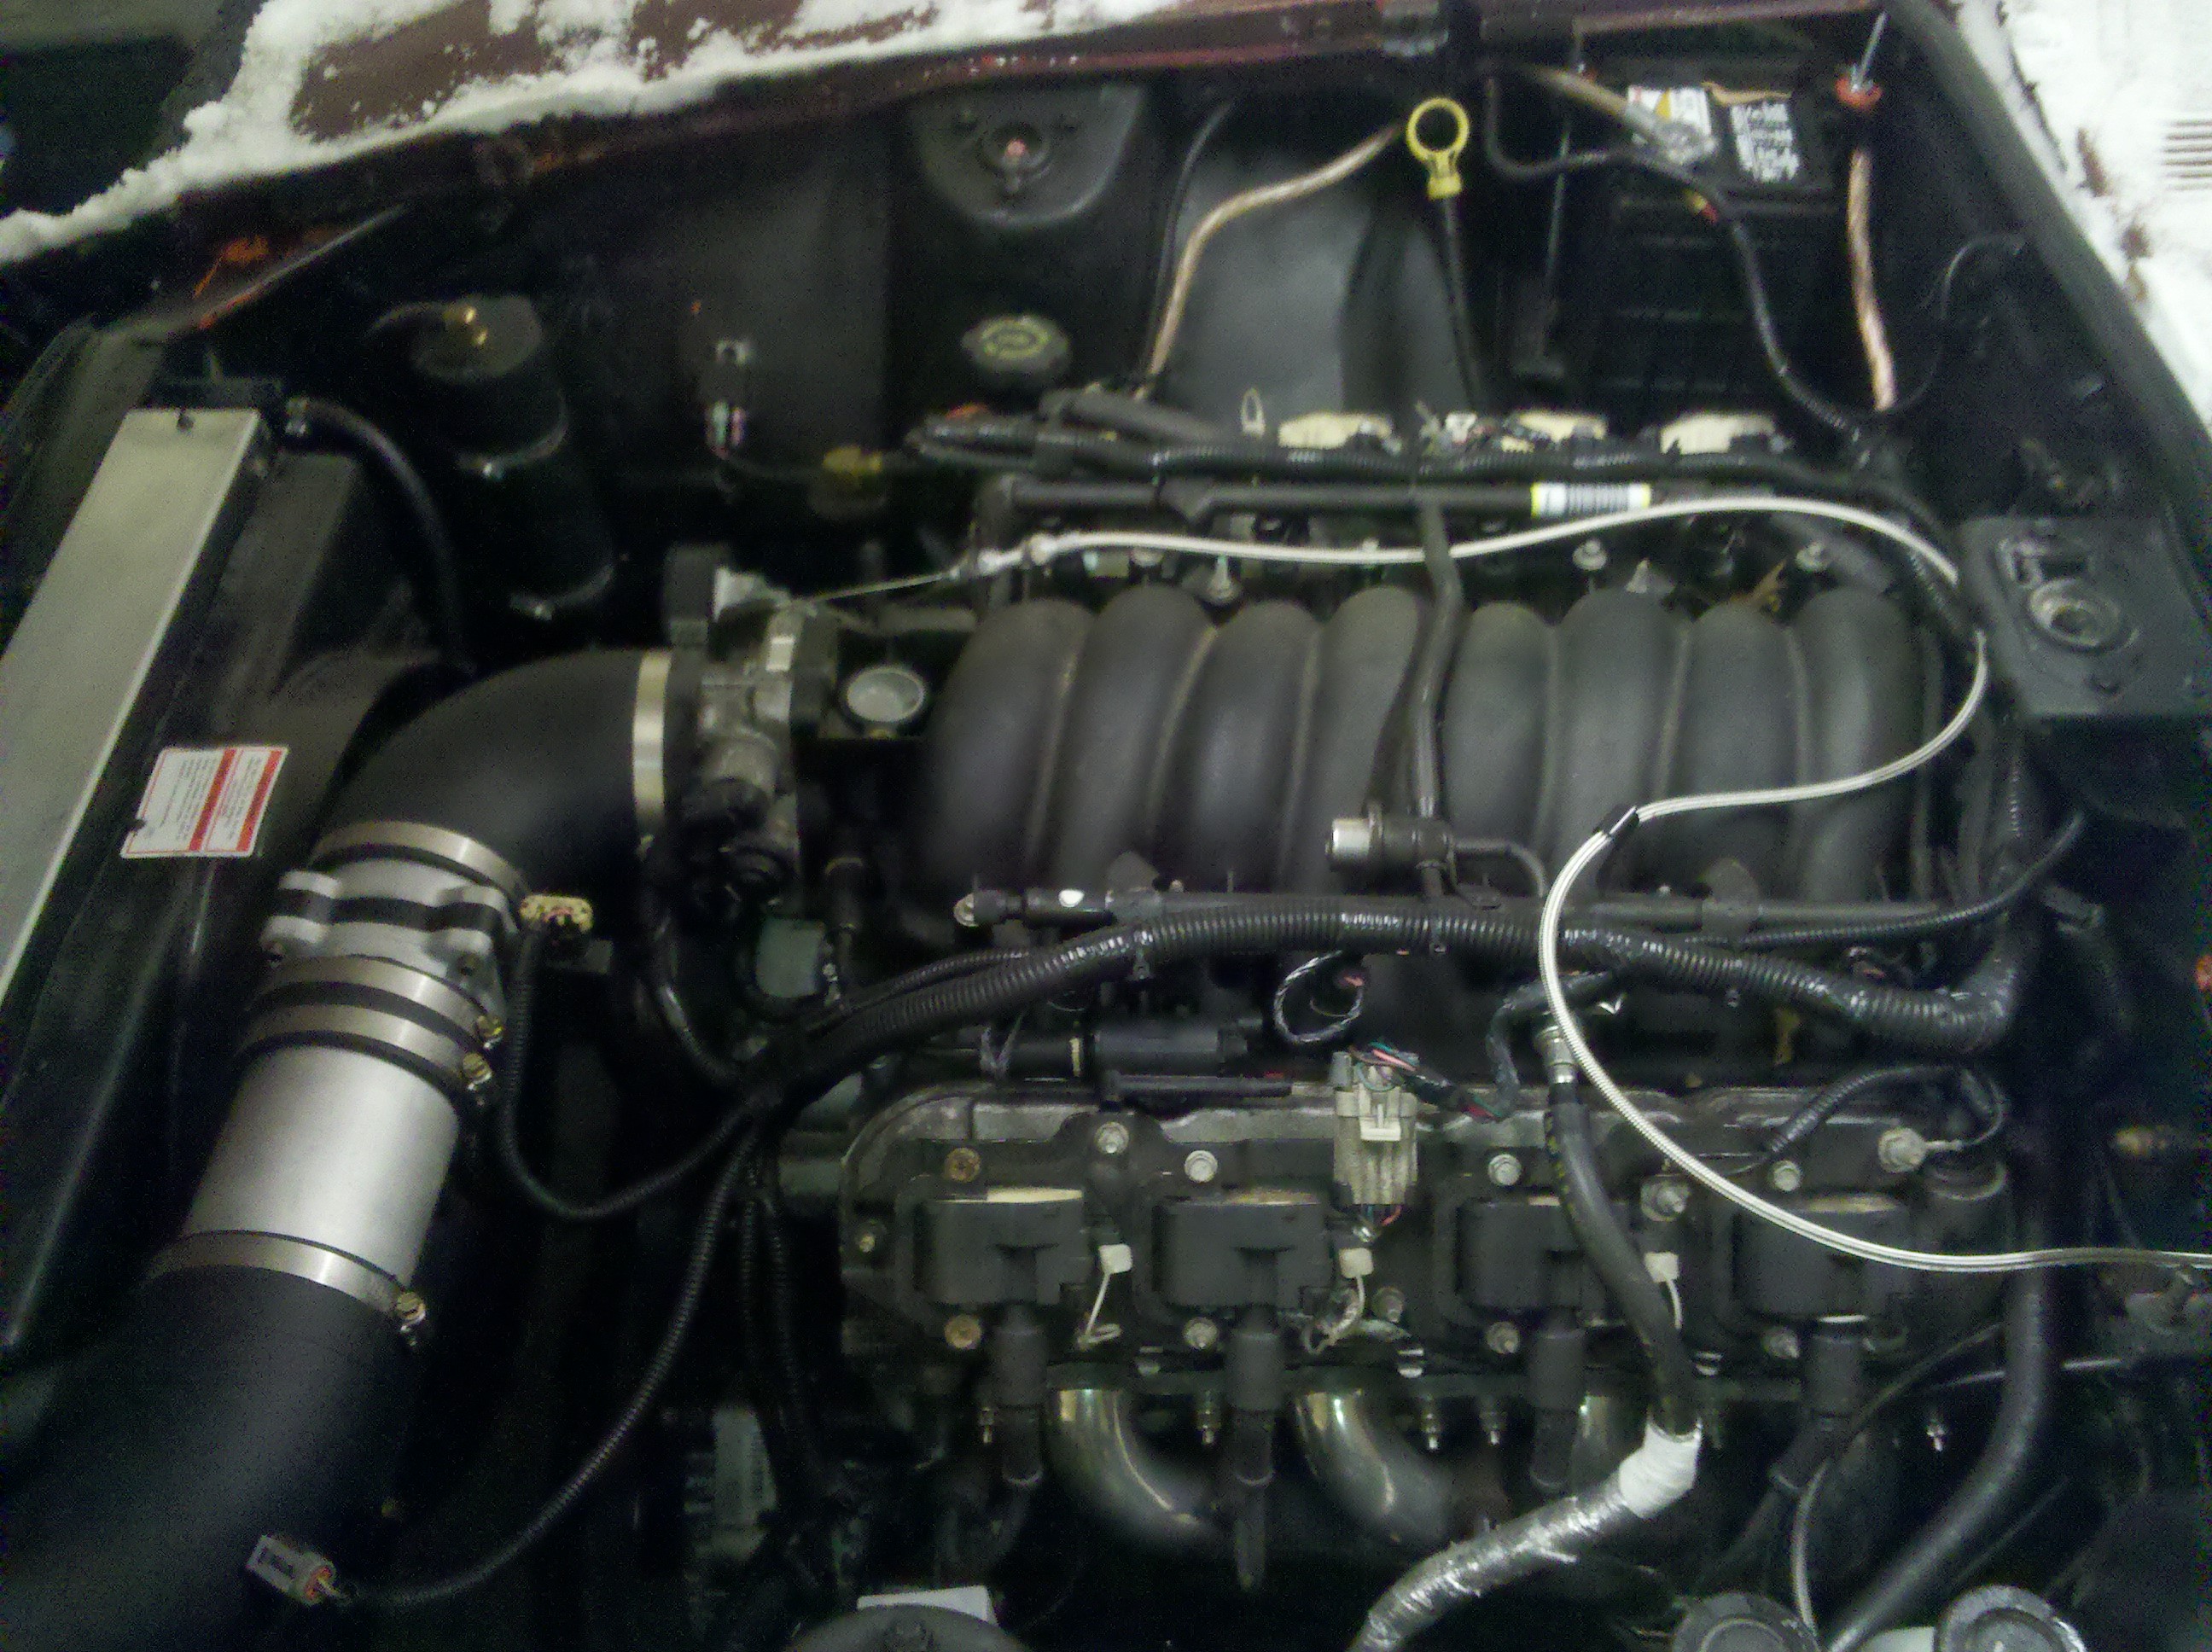
First of all, here's a video of it revving, and two more pictures (because everyone does). The "HEY!" at the end is my wife coming out to yell at me for making the house rattle:D Quick idle rev As to the clutch, from what little I've driven it so far, I like it. It's quite grabby (550 lb-ft max rating), but smooth engagement. Not abrupt at all. No more difficulty in clutch feel than stock 280Z (never driven an F-body, so I can't comment on its feel).
-
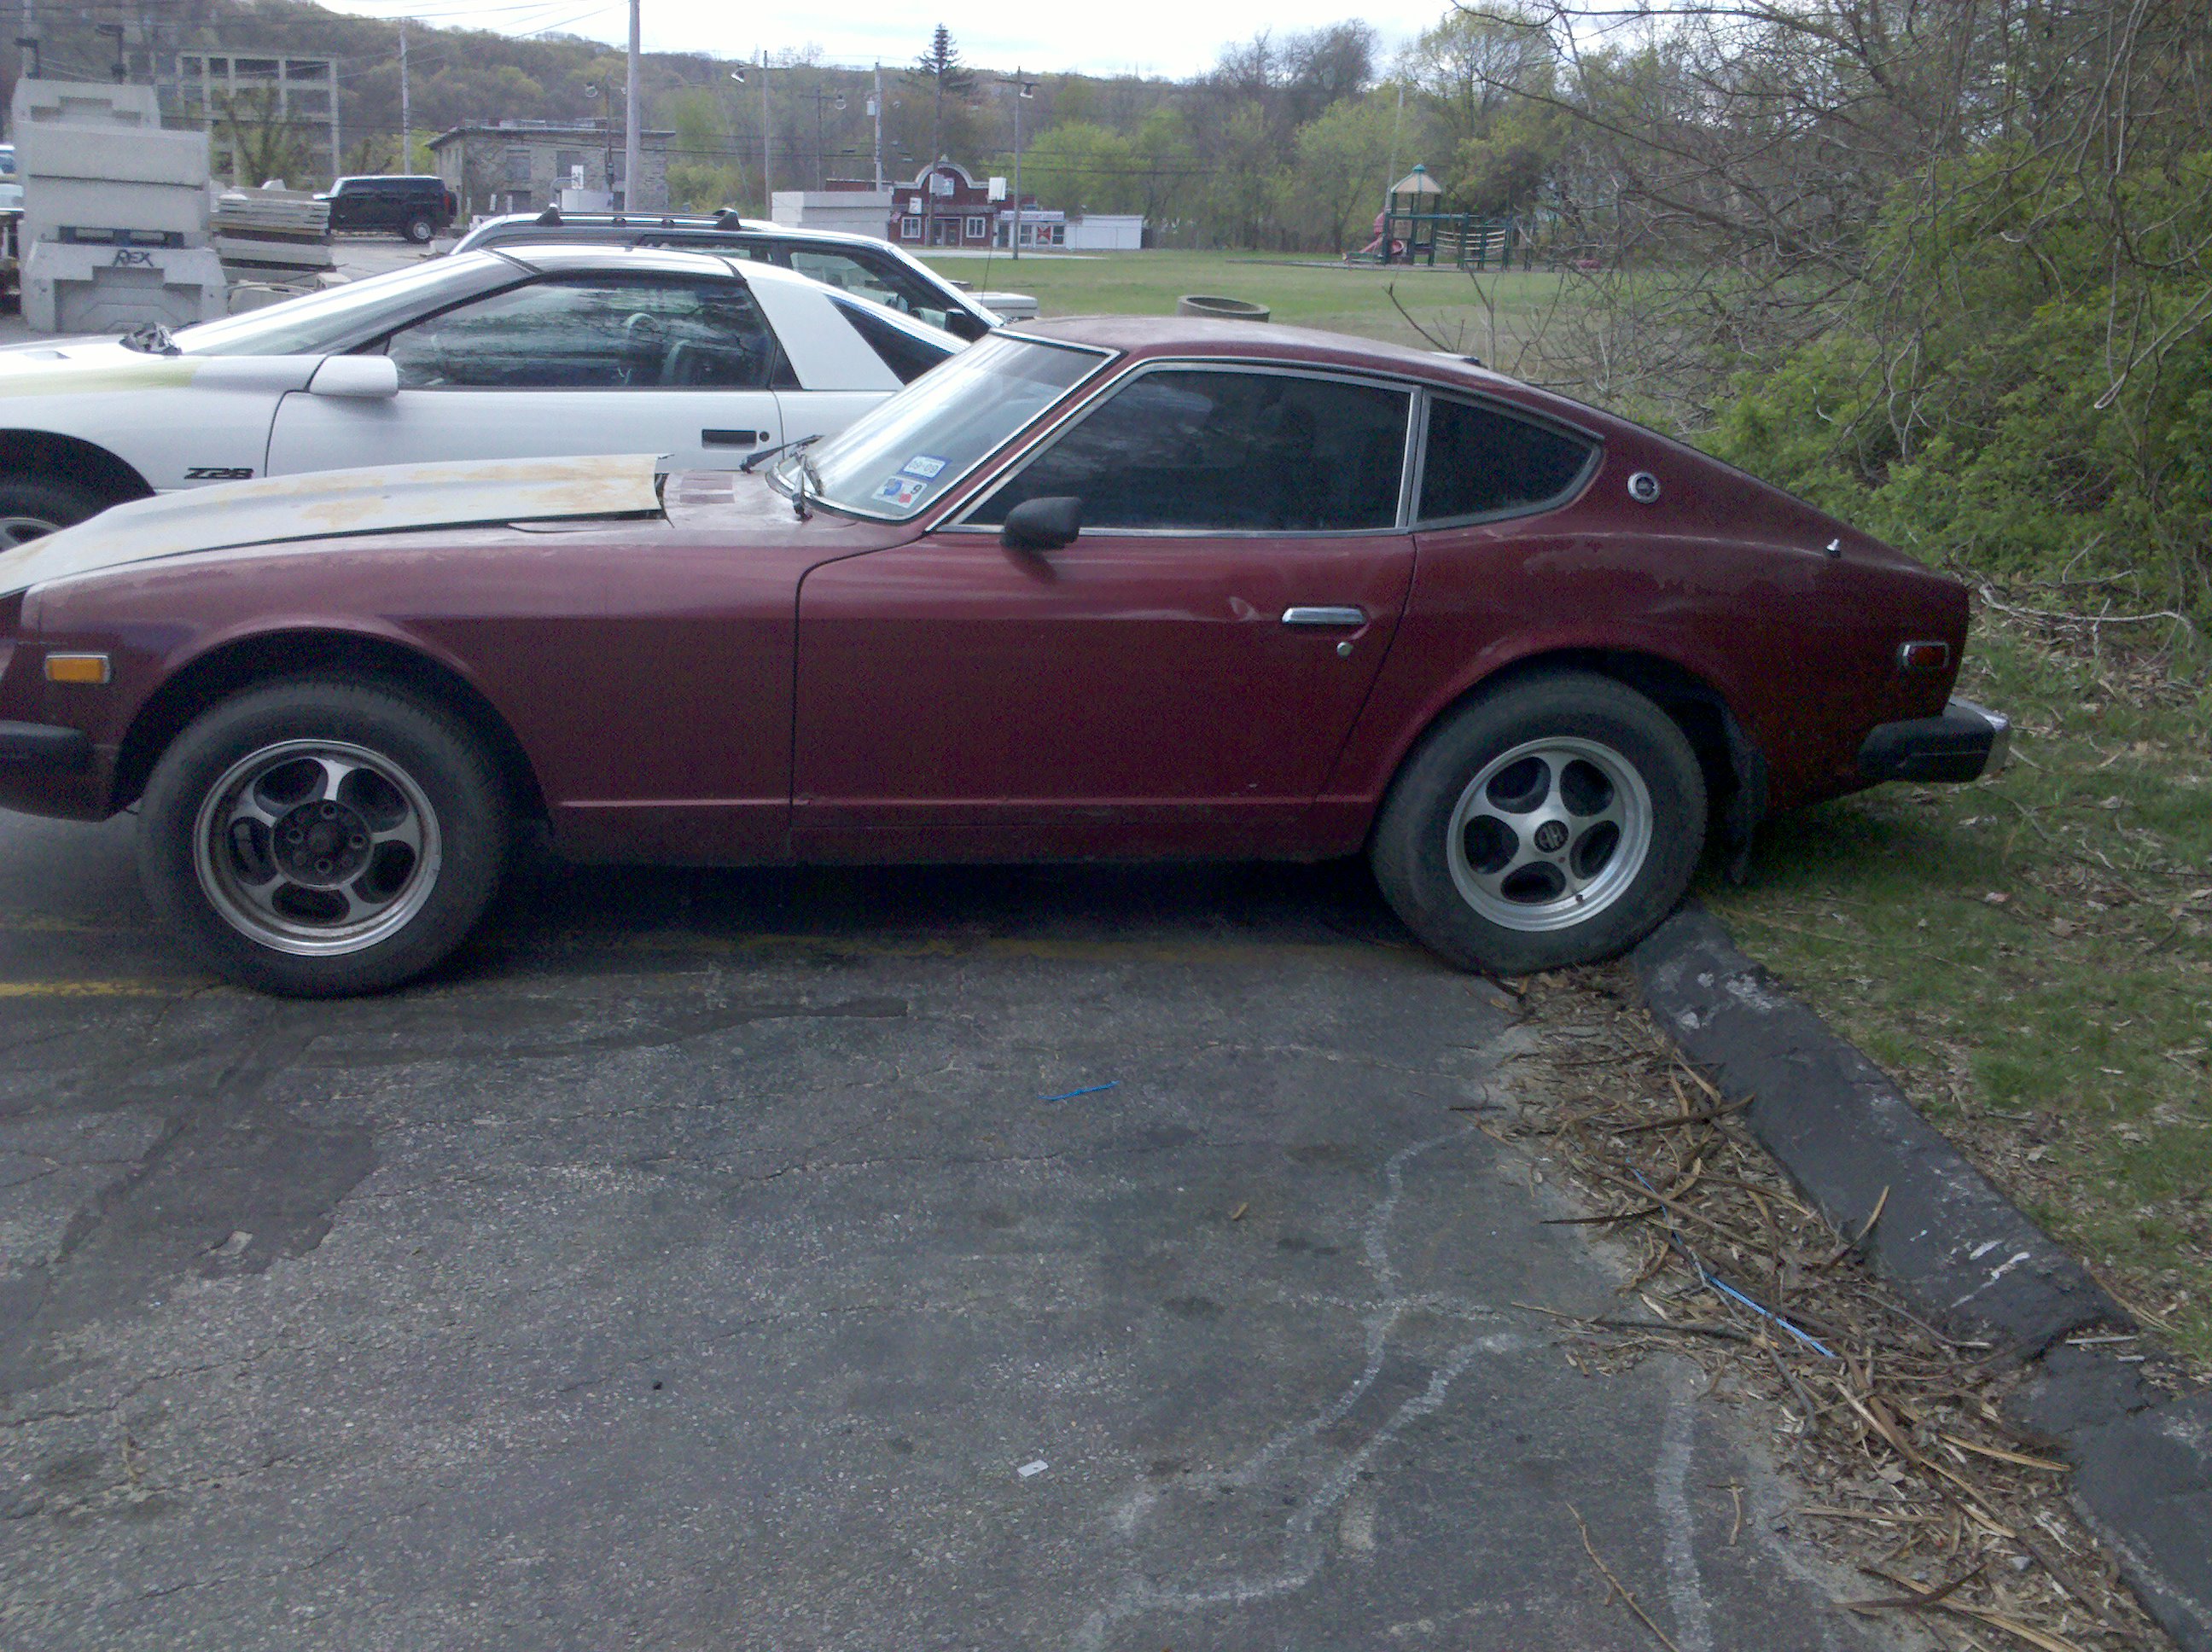
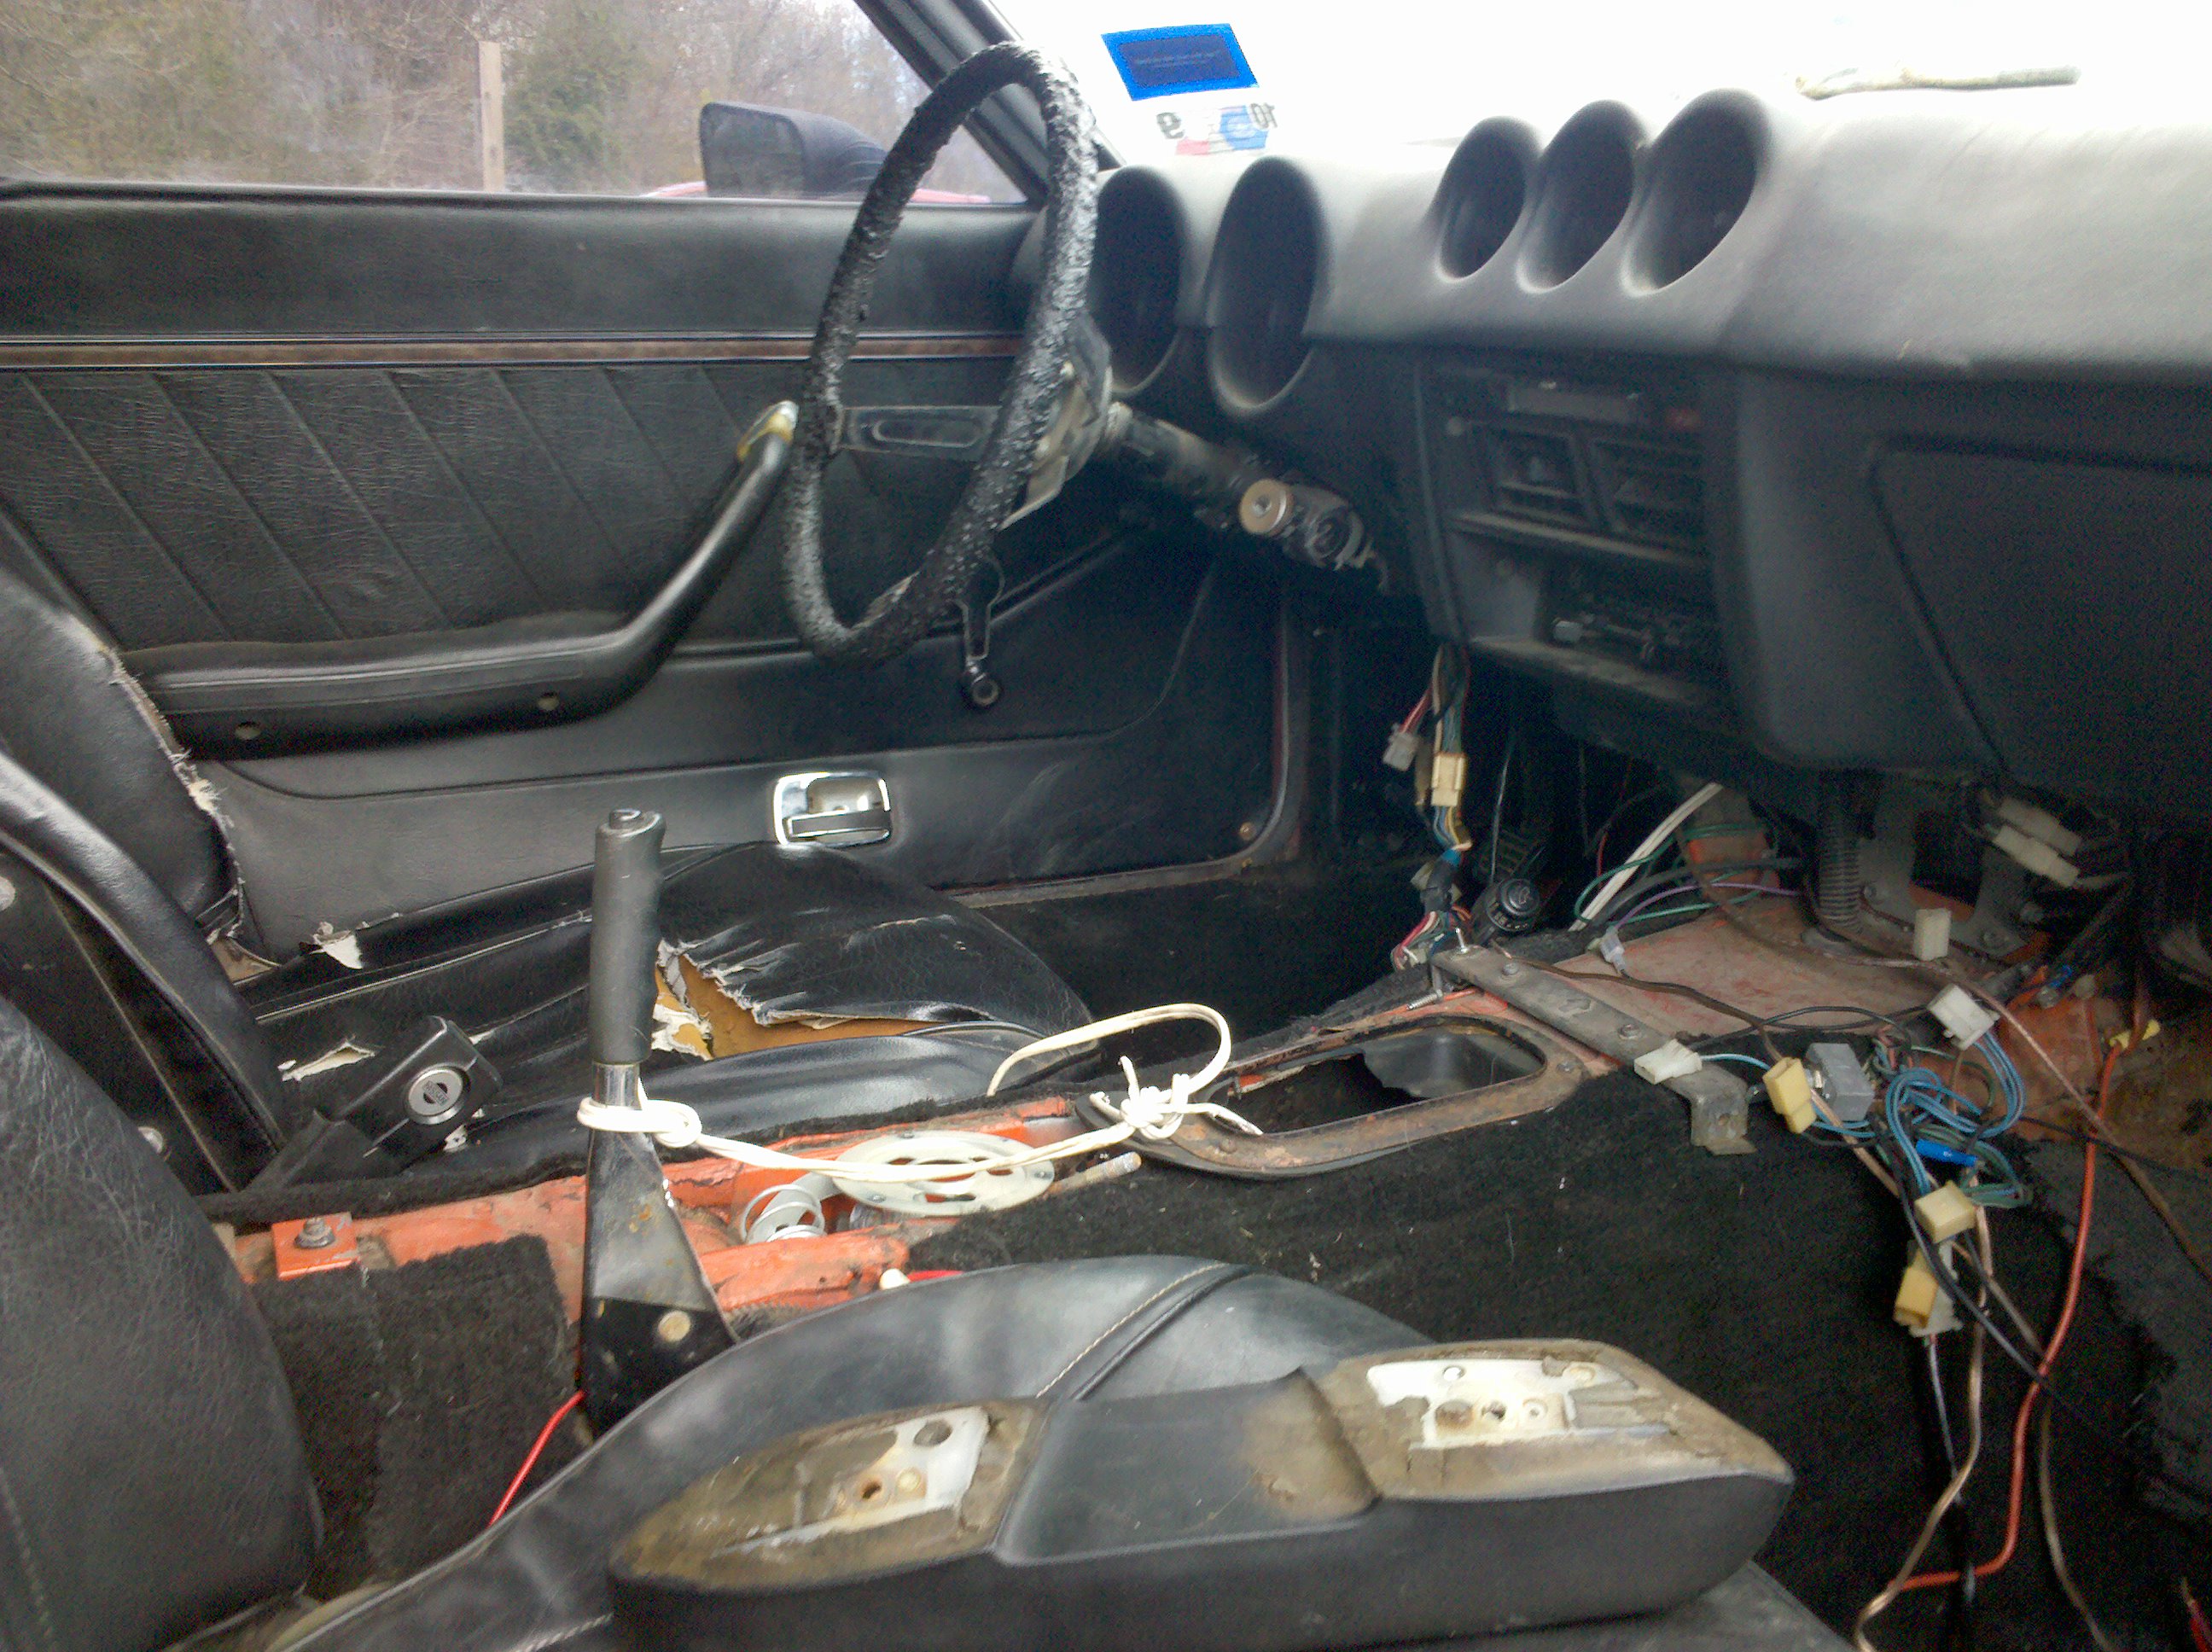
My original Z, a '78 in beautiful factory metallic blue, suffered a fatal electrical fire (internal battery short, fire investigator said) in October of '09, so eventually, a replacement was had. A fellow in TX had a "mostly rust free" '75 in Maroon. Shell only, with aftermarket wheels. For $500, why not? It was a real doozy. There was also a hole in the passenger footwell (which he had alluded to), some minor rust on the front right quarter panel, and as it turned out, all over the seams for the floorpans. Also, the rear strut braces. Due to my boat (USS MISSOURI) being gone for most of the year, I gave the car up to a local speed shop and waited. And waited. And waited. Nine months later, I finally took delivery. The tach isn't in, the speedo sending unit isn't working, the heater doesn't work, the turn signals don't work, and it goes like a bat out of hell Drove it home tonight in the brisk New England air, ambient temperature 14F. Surprisingly, the Dear-God-These-Are-Summer-Only (Dunlop Direzza Sport Z1 Star Spec) tires actually bit around 3rd gear. Didn't do any hell runs to avoid attracting imperial attention, but anything below 5th pushes you back, and past what I assume is about 3K RPM, glorious, glorious noises ensue. Fine, I lied... on the onramp I nailed it in 2nd and after it decided to go straight, I snagged 3rd (traction, yay!) and watched as headlights behind me disappeared. Probably only about 80 MPH or so if I had to guess, but getting there is such a rush. So now, specs: '99 LS1 w/ T56 JTR CAI Sanderson shorty headers Texas Speed ported LS6 oil pump South Bend Stage II clutch Stock rearend, w/ RT Diff mount JTR radiator w/ Lincoln MK VIII fan Stock ECU w/ Wait4Me Performance tune Speartech reworked harness Stock rear brakes, Brembos in front w/ Hawk HPS pads, Russell braided brake lines Painless 18 circuit wiring harness Tokico Illuminas Urethane bushing kit Camaro fuel tank, with Racetronix kit Centerline 16x8 +0 offset (those also took about 6 months to snag...) Total price was, um... probably pushing $11K all said and done. (and it still needs paint!) I love it!
-
How much did your salvage yard LS1/T56 cost?
Stephonovich replied to kce's topic in Gen III & IV Chevy V8Z Tech Board
1999 LS1 ~35K miles, T56, ECU, all accessories - $2500 (also a "I spent 6 months perusing forums for this" steal) In fairness, it was missing three coilpacks, the MAF, and the clutch was smoked. So that was another $870 for everything. Did get a South Bend Stage II clutch, though, so it wasn't all bad. -
American Racing Wheel ID
Stephonovich replied to Stephonovich's topic in Brakes, Wheels, Suspension and Chassis
Quick poke to revive this topic... my swap is done, and these will soon be available for sale. It'd be great to know what they are/what they're worth. -
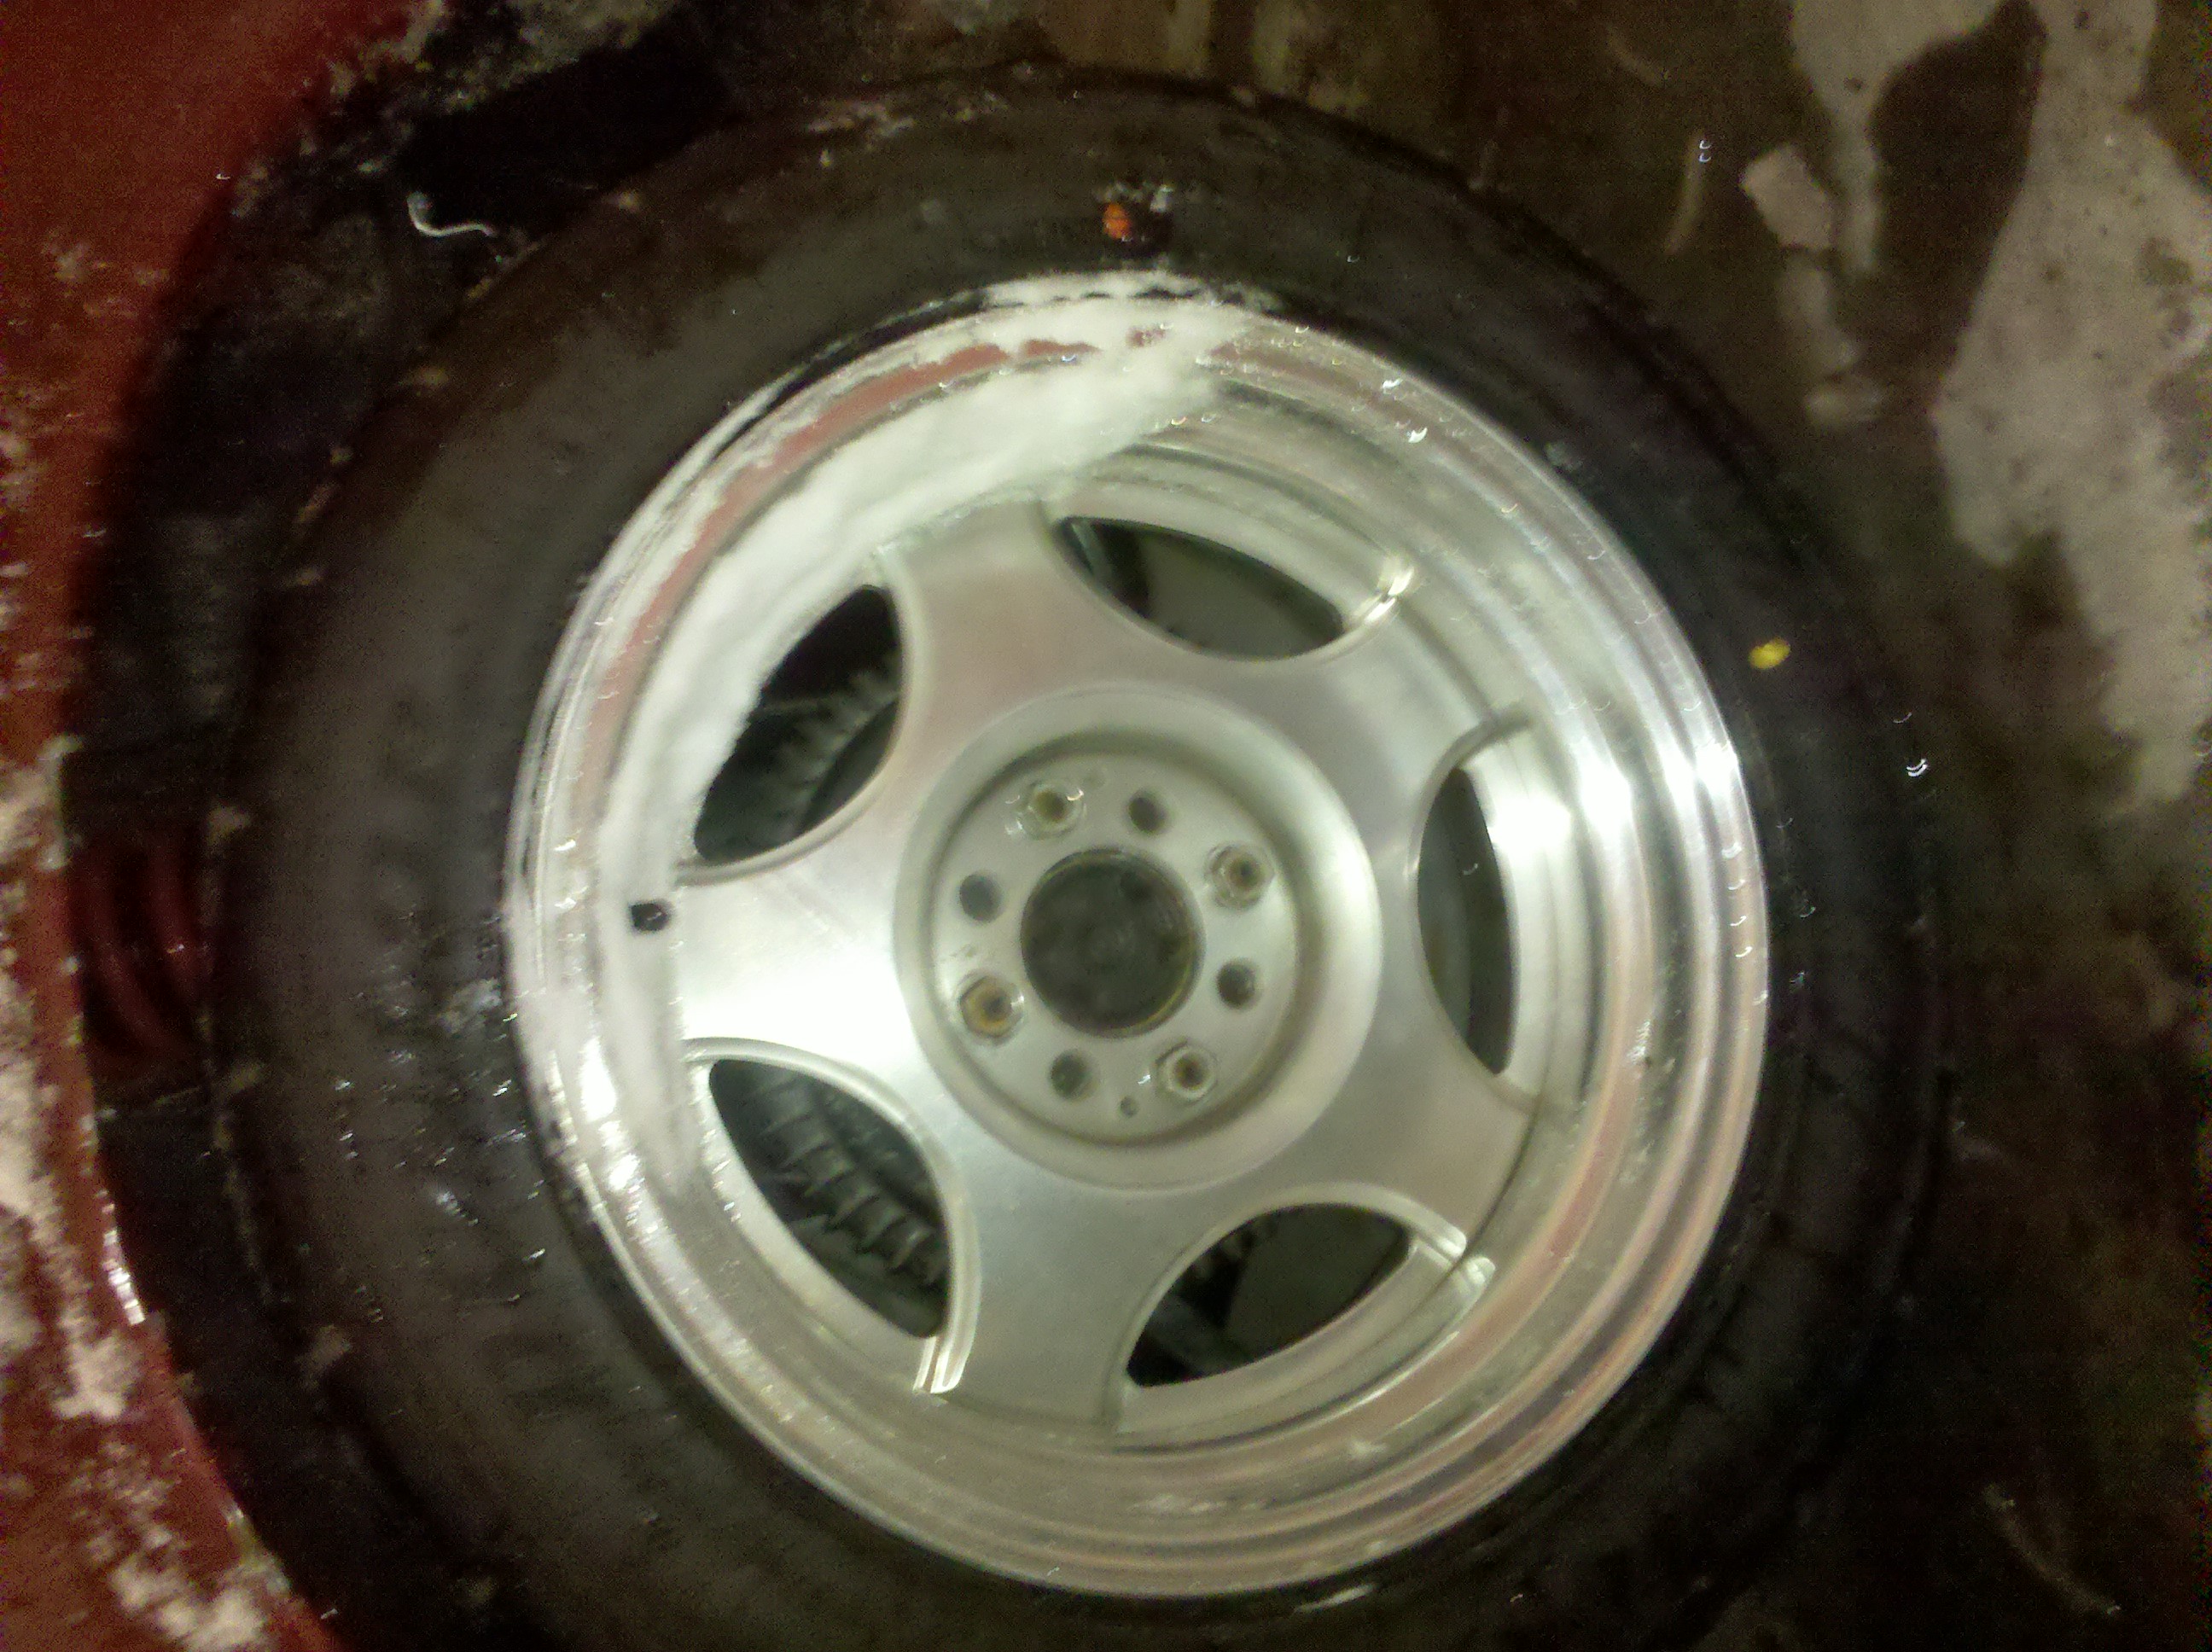
These are the wheels on my 280Z currently; I know they're 15" American Racing, but very little else. I couldn't find any comprehensive vintage wheel websites with pictures, and nothing on these in the forums. I was wondering if anyone could help ID them; and maybe give me an idea on their worth. As you can see they're peeling a little bit, but it's not horrible. http://picasaweb.google.com/stephonovich/280Z#5468431791992868450
-
I finally have all the parts for my '75 280Z together. LS1 + T56, JCI kit, Tokico reds, Sanderson shorty headers, JTR radiator, Lincoln MK VIII fan, LS1 fuel tank, Racetronix fuel pump, Centerline 16x8 +0 w/ Dunlop Direzza Z1 Star Specs... so sweet. Picture album here Having Swift Performance Automotive in Norwich, CT put it together for me. Going to get a complete chassis re-wiring, and mandrel bent SS dual exhaust for it. Interior and paint will come later, unfortunately. I would be doing this myself, but I'm in the Navy, and have very little spare time.
-
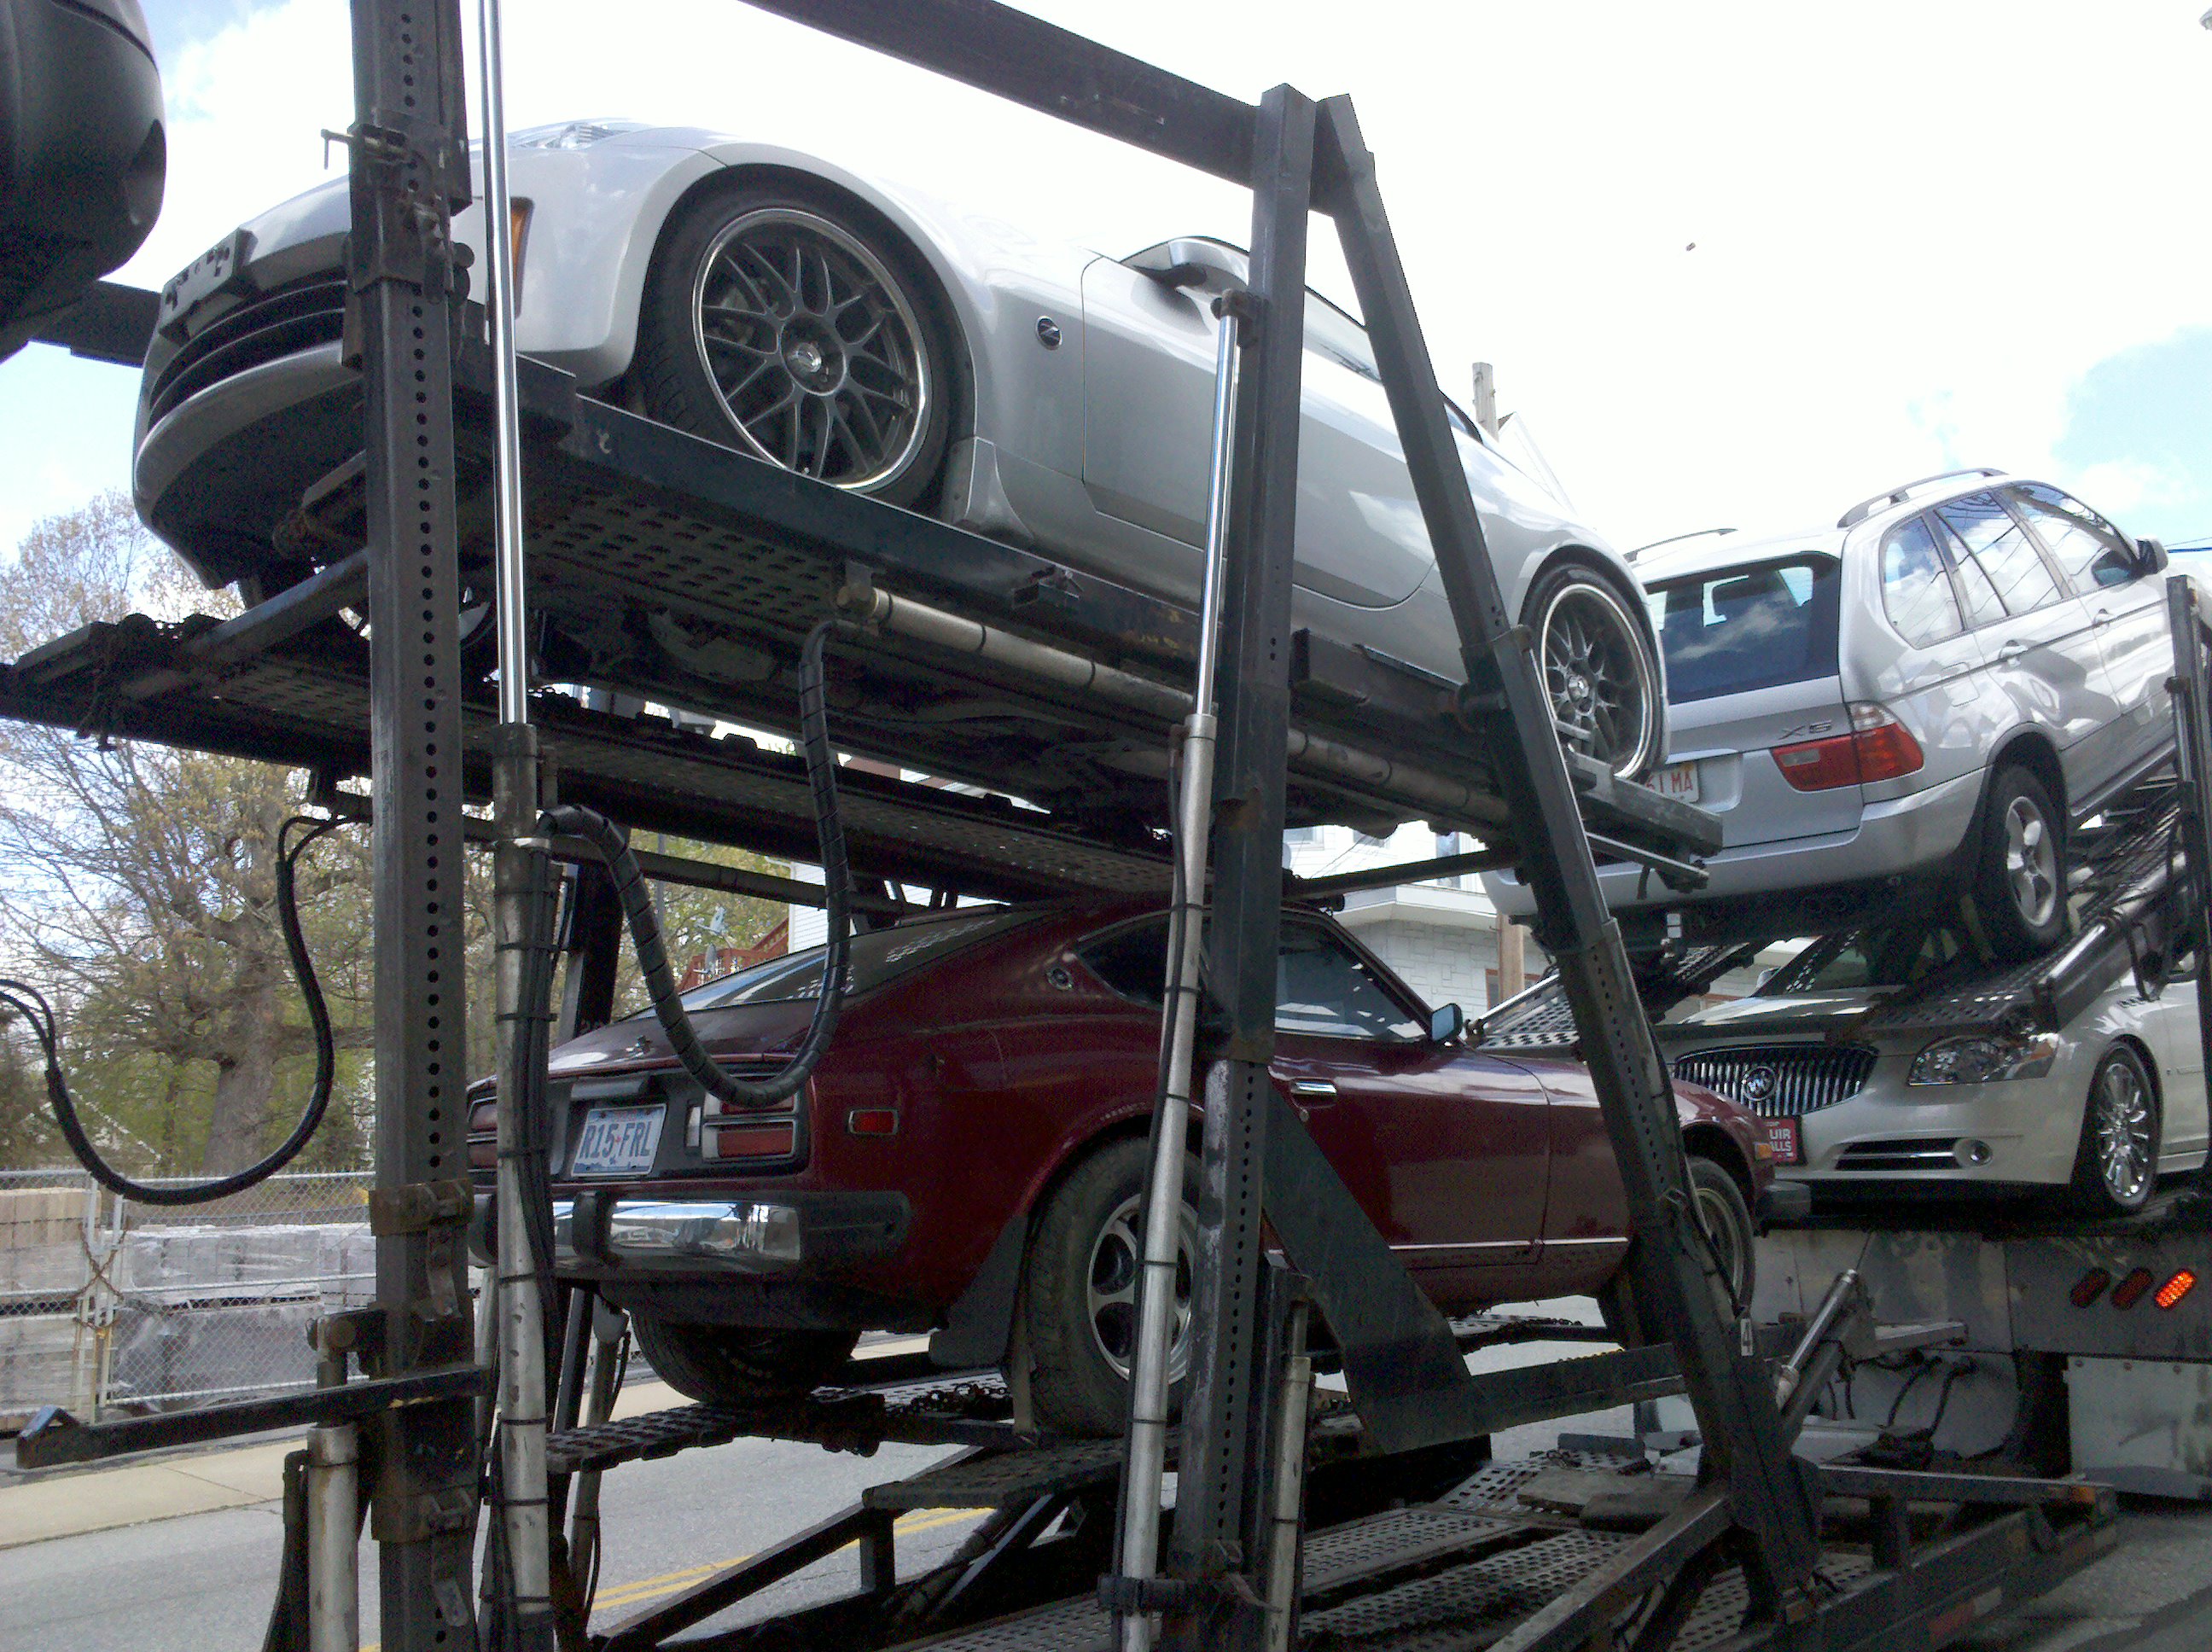
Since the unfortunate demise of my beloved 280Z (caught on fire after not having run it for a month - probable cause battery short), I am in need of a new Z. Luckily, my insurance company is awesome and they are giving me more than enough money to cover my loss. I have an LS1 + T56, JCI Kit, and new Tokico suspension waiting to go in. Realistically I'd prefer a 240Z, but seeing as all the parts I have fit a 280Z, I'm kind of stuck. I would like to buy a well-running, nearly rust free, overall good condition vehicle. Mine was pretty good, but had a few electrical issues and a couple rust spots. I'm thinking around the $5K range. It doesn't have to be a showcar, but I should not have to do anything to the car if I don't want to. Alternately, if someone has an LS1 built 240/260/280Z they are wanting to get rid of, I will consider it (obviously more than $5K would be in order). I'm in the Navy and have very little free time, so realistically I'll be paying someone to install my parts anyway. I just want to have a car to drive. If you are outside of the NE area, I'd have to look at transportation costs, as taking leave to drive the car home is out of the question. If it's within a day's drive, that may be possible. Please help me get another Z!
-
This. My beloved 280Z caught on fire today. I had parked it in preparation for conversion to an LS1 (all the fun parts in the garage), and I decided to take it out one last time. Did a quick check of wires, fluid levels, any leaks, etc., and then put a battery in it. Took a bit to start, which I assumed was normal for a car sitting for a month. Backed it out to the driveway, let it idle, then went inside to let it warm up. Heard it die two minutes later, and when I went out, there were flames coming out of the hood. "OH S***, where's the fire extinguisher?!" Uh, yeah, didn't have one. Realistically, I'm not sure I could have put it out anyway. It got big very quickly. Called 911, and they arrived very fast. Sadly, the hood release latch had melted, so they had to pickaxe the hood and windshield cowl to get access to it. From the looks of the damage, the battery started it somehow. I dunno. Looked fine to me when I put it in. Never had any issues before. Insurance says it'll probably be totaled. I had 100% Comprehensive with $0 deductible, but it's not "Classic Car" insurance. Hopefully they cover the $3K I spent on it. Lesson learned - buying 3 fire extinguishers today! (House upstairs, downstairs, garage) - Mourns for Z.
-
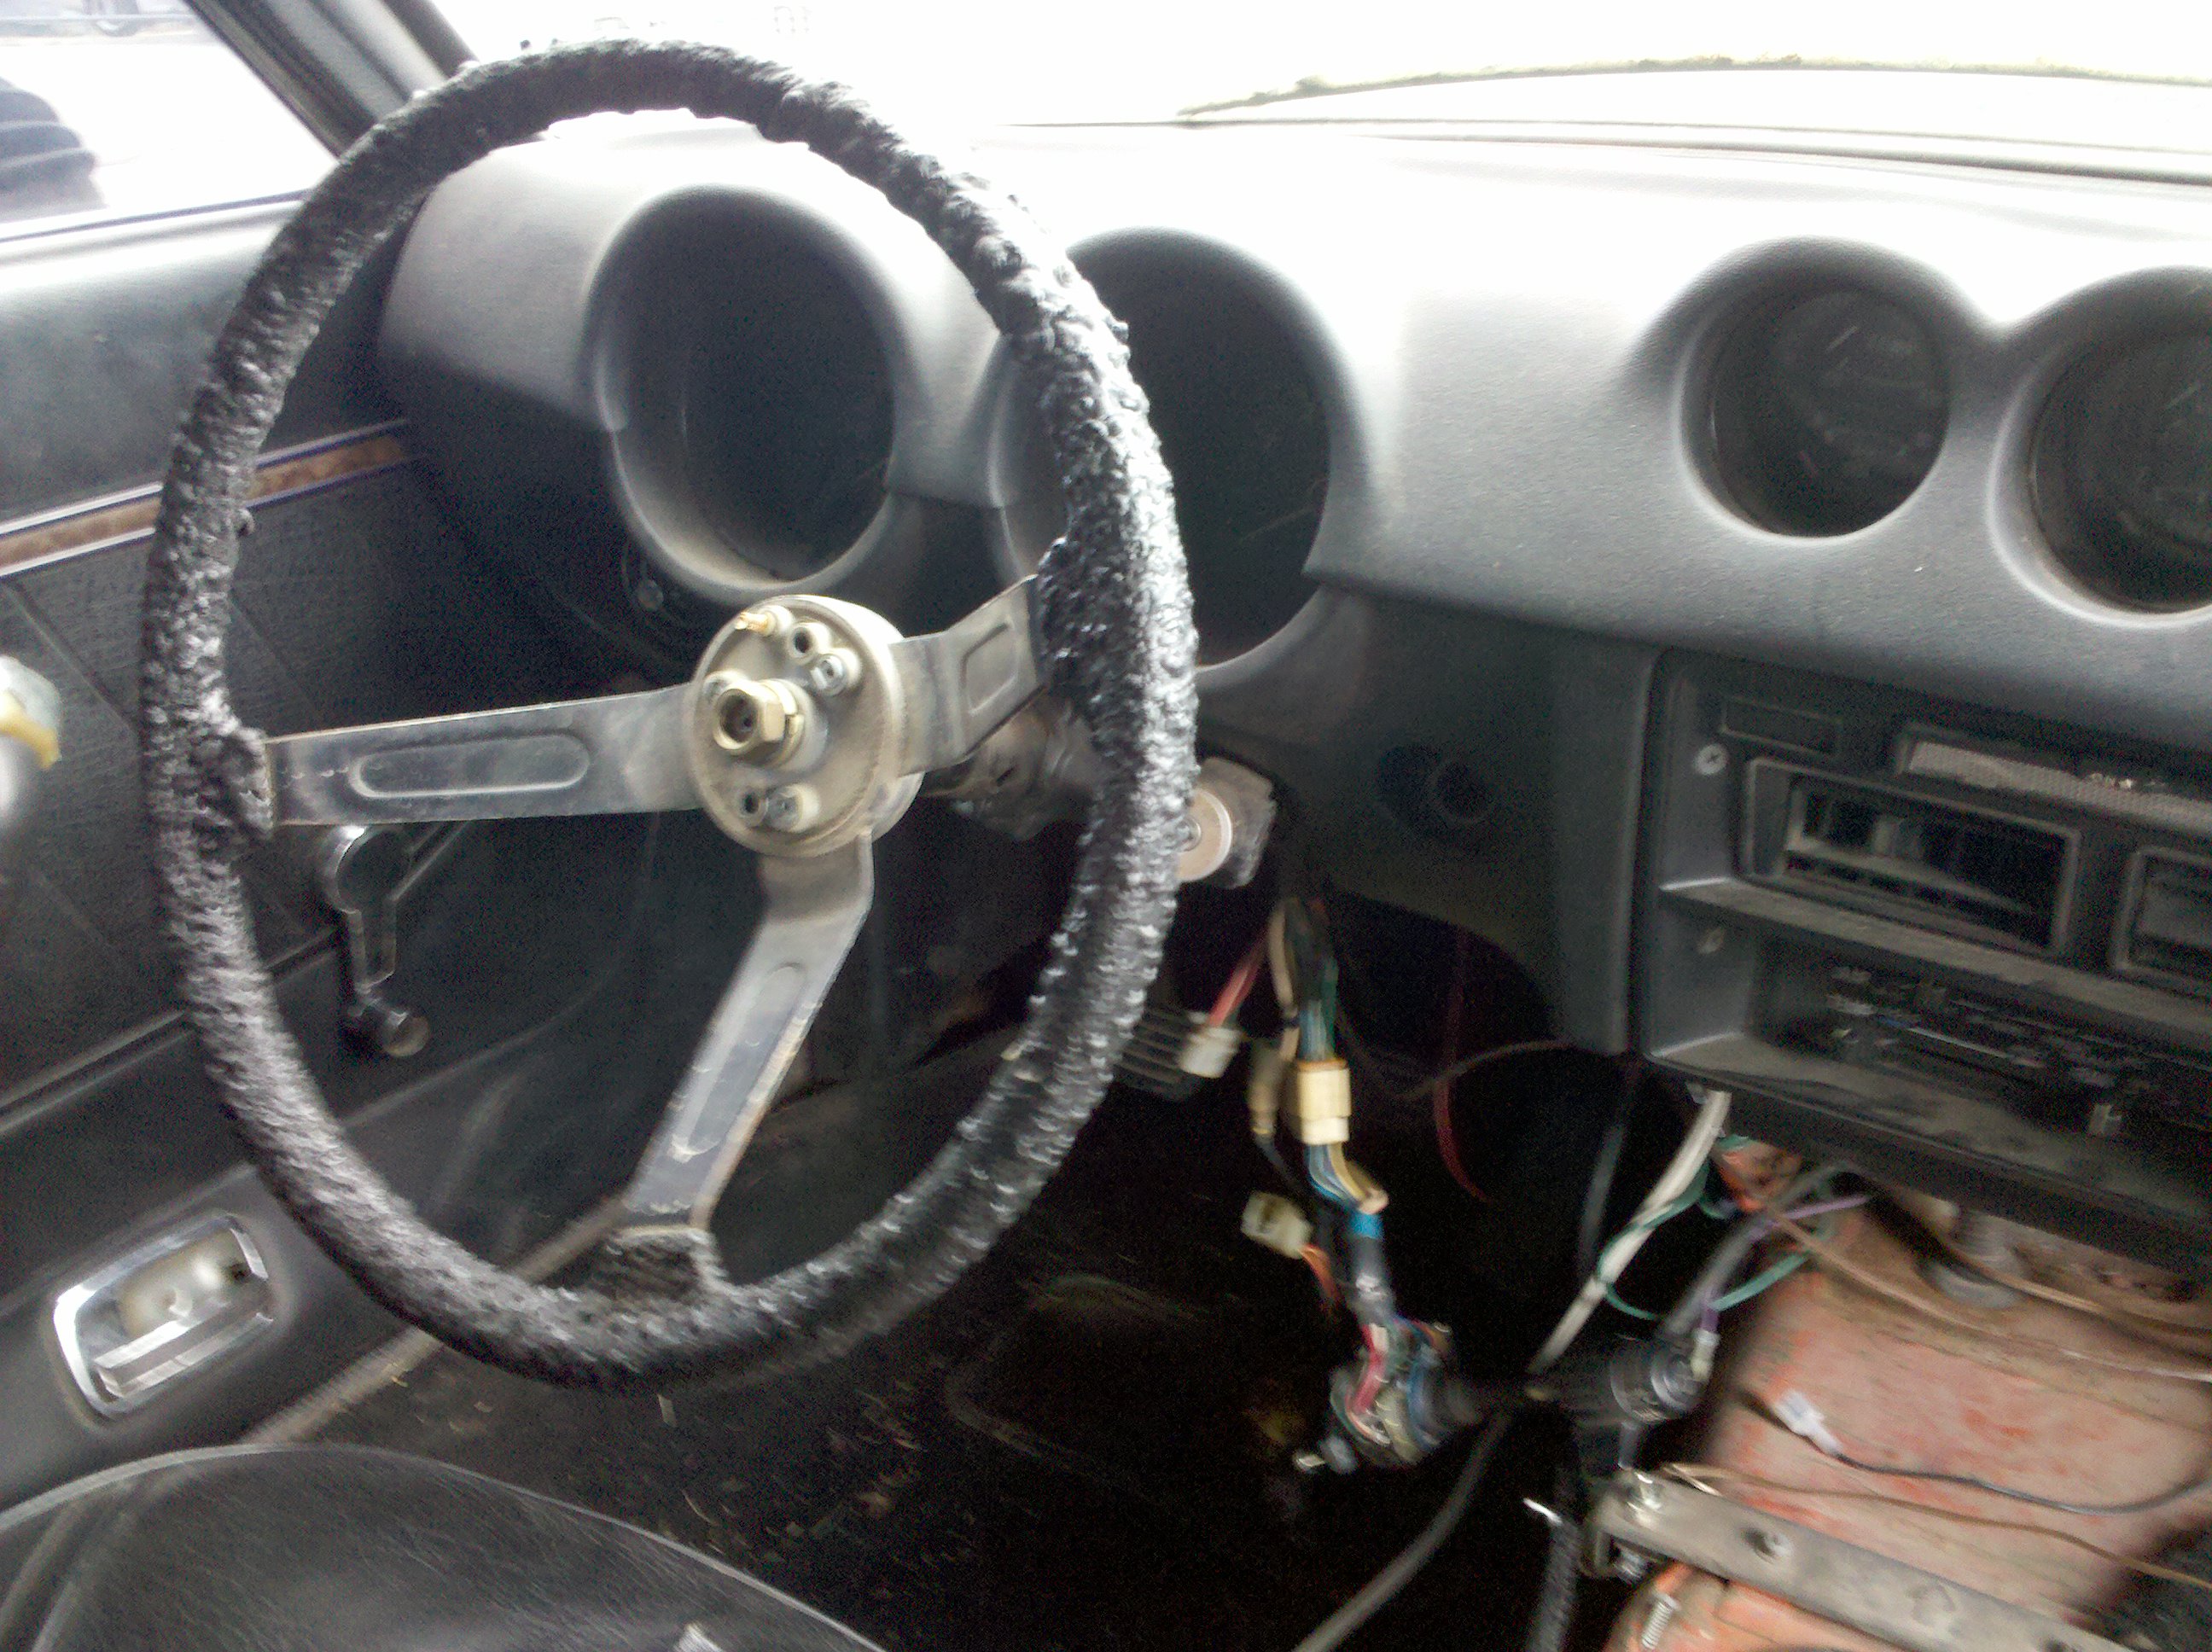
I have a '78 280Z with turn signals that refused to work correctly. Most of the time they'd engage, but then the retaining mechanism did not work, so that you had to hold the switch in place for the duration of the turn. I found a guy on Craigslist in Middletown RI who had "Z Parts". Emailed and asked if he had turn signals, among other things. Said he did, so I headed out for a little road trip. Incidentally, it was also the first time I'd taken the Z out on anything resembling a road trip (about 1.25 hour drive). Handled it beautifully, and discovered even completely stock, it is capable of 130+ MPH. Surprised me, anyway. So, picked up two turn signal/combo switches for $20; one off a '76 and one from a '78. The '78 mechanism wasn't nearly as good as the '76, but those two have different connectors. Took it home, and after much tearing apart, determined many subtle differences between the two. If I had a soldering iron, I would have been able to keep the good mechanism of the '76 with the stock wiring of my '78. Ended up cleaning the '76 mechanism out and squirting copious amounts of WD-40, which worked fairly well. I kept all the spare parts from the project, so one day I'll get around to doing it right. Without further ado, pictures (apologies for the blur): There are 6 screws to remove the plastic cover. The 4 at the corners are all the same. The one in the center is the big wide one, and the one closest to the ignition is the one with the washer. When you go to re-install it, I'd recommend getting the 4 corners torqued about 3/4 of the way down, then the center, then the ignition side, and then torque the corners fully. The upper shell slips out. Pull the part covering the ignition cylinder out first, it makes things easier. This shows one of the large screws on the side which hold the two sides together and onto the steering column. This is the connector on a '78. 6 pins, which combines the high beam switch and turn signal switch. These are the two connectors on a '76. The narrow yellow-ish one is the turn signal switch, the white one is for the high beams. The wire color coding is exactly the same between the two years. Based on this, one option would be to remove these connectors and crimp them onto a '78 style connector (or vice-versa). This is the inside of the turn signal switch on a '78. There is a metal contact which brushes against one of three contacts. Fairly simple. This is another way to mix parts between the two - desolder the three wires on the brown board, resolder them to the brown board on the other year housing, and connect the wires. Easier than removing and crimping 6 wires, provided you can solder. This is the same switch, but minus the copper contact. Turns out it falls out. Which may or may not lead to much confusion and cursing upon reassembly. Said copper contact. Make sure it is securely in place before you reassemble everything. This is the inside of the '76 turn signal switch. The next picture shows the part which connects to the plastic piece, which engages its own switch. Not sure if the pictures show it well, but the metal housing is also completely different. The '76 does not have a raised metal bit where the handle goes into the housing; the next piece instead acts in its place. The piece on the right is common to both years, and is the high beam switch. The metal part is the switch which connects to the plastic part on the handle. Better shot of the switch on the '76. Completed assembly, cleaned up and a little black paint. There are 6 screws you need to re-attach everything. Two on the turn signal switch, two for the high beam switch, one for the long metal arm that runs in a groove on the back of the steering wheel, and one for the grounding wire. Sorry, I don't have pictures of those two. Make sure all your connections are tight, and test it out before you tighten everything down. Also, there isn't really any guide as to where on the steering column the switch housings should be. Use the metal arm which contacts the steering wheel as a guide - it should touch the wheel, but not be bent too much. Also, the wheel should reset the switch to neutral, but not be overly noisy while doing so. If the assembly is too close to the wheel, it will make rather loud clunks while engaging.
-
I remember reading in one of the many LS1 Swap Guides floating around that someone had trouble with that adapter bumping into the JTR headers. Did you have to do anything special to get it to work?
-
Bought a new complete fan motor with housing and resistor pack, supposedly off of a 78 280Z (eBay). Got it and it looked fine. Pulled my old one off and after dumping a metric butt-ton of leaves, rust, and assorted debris onto the floor, I compared it to my new one. Uh-oh. Unless Datsun decided half-way through the 280Z cycle to make a new connector for the resistors, I got something that is decidedly NOT from a 280Z. 280s have a 5-pin, 6-hole connector on the resistors, with two little plastic tabs on the sides. The one I got only has 4 pins, 4 holes, and no tabs. Looked at it for awhile, figured the circuit should work outside of the fan housing, so I unscrewed my old resistor pack, which was actually in *better* condition than the new one, and hooked it up. So, summary: new motor was hooked up to power, old resistor pack was hooked up, left dangling. No go. Nothing at all. So all I can figure is that the fan motor is not getting power. Unfortunately, I don't have a DMM, so I can't verify that right now. Does anyone have any other ideas? The only thing I didn't do is actually start the car. I figured with the key turned to On, everything in the car should have power. (buzzer sounded, gauges reacted, etc.) Am I mistaken in this?
-
Hope 6 months old isn't a big no-no; figured since the 2nd post is 5 years after OP, I'd be OK... (I searched, I promise!) I have a '78 280Z and the heater fan won't turn on via the switch. I've checked all fuses and replaced ones that looked dodgy, cleaned contacts, took off plastic panels and done hand-over-hand on wiring going to the heater and switch, etc. The mechanical action of the lever to the switch works fine, and it sounds like the contacts inside have positive engagement. If I hook 12v from the battery directly to the motor, it fires up. As near as I can tell from wiring diagrams and descriptions, all the switch does is ground the fan; is this true? In that case, I might just do as the above quoted poster suggested and just put my own switch in. I'd like to fix it correctly, though. Has anyone ever pulled the switch out and replaced it? It looks like it'd be a huge PITA to me. The plastic panel is easy enough to remove, but the switch seems to be bolted very securely in place, buried behind the metal frame. Any help would be appreciated. -Stephan
-
-
Depends on what the car has done to it and the condition. A stock, in good condition Z, probably around $5000. If it has some parts in it, maybe a bit more. If that's laughable, let me know and I can adjust it. I don't think it's an entirely unreasonable amount though.