
Smokescreen
-
Posts
102 -
Joined
-
Last visited
Content Type
Profiles
Forums
Blogs
Events
Gallery
Downloads
Store
Everything posted by Smokescreen
-
Here are the pics you wanted Silver.

-
I have broken two bolts in two seats '79 as well as'83. same symptoms....sleep mode in the seatback. Pretty easy fixes both times though. Where does he get these wonderful toys???
-
The front strut tower brace is only connected to the inner two tower bolts is that enought contact to maintain integrity? I'm asking because I am probably going to "Fab" my own and this looks like ot would be easier to do. I was looking at my car (79 ZX) and I was contemplating the need to have the brace connect to all three bolts on the tower, any input would be appreciated. Thanks.
-
I hear ya. I'm gonna push my way through the suspension set up then go full assault on my power plant.You're a little ahead of me on that count I believe..or alot lol. I sent you a pm.....of course I don't know why since we seem to have this thread to ourselves hehe. I just didnt want to go off topic mid-thread I guess.
-
Thanks Shady.
-
Disregard this thread. I have answered my own question.
-
Niku, That Z looks very straight and I like the mirror concept. you may have just "talked" me into painting mine black. I'm thinking black hood to match maybe?. Are you planning to paint the front chrome piece as well? Keep up the good work.
-
Nice wheels Pontiac, Another Slicktop joining the party. Good looking car, keep the pics coming.Are those '79 tail lights???
-
Point taken. I will probably order the rubber parts and do the 50/50 thing to prevent breakage. Thanks Jon.
-
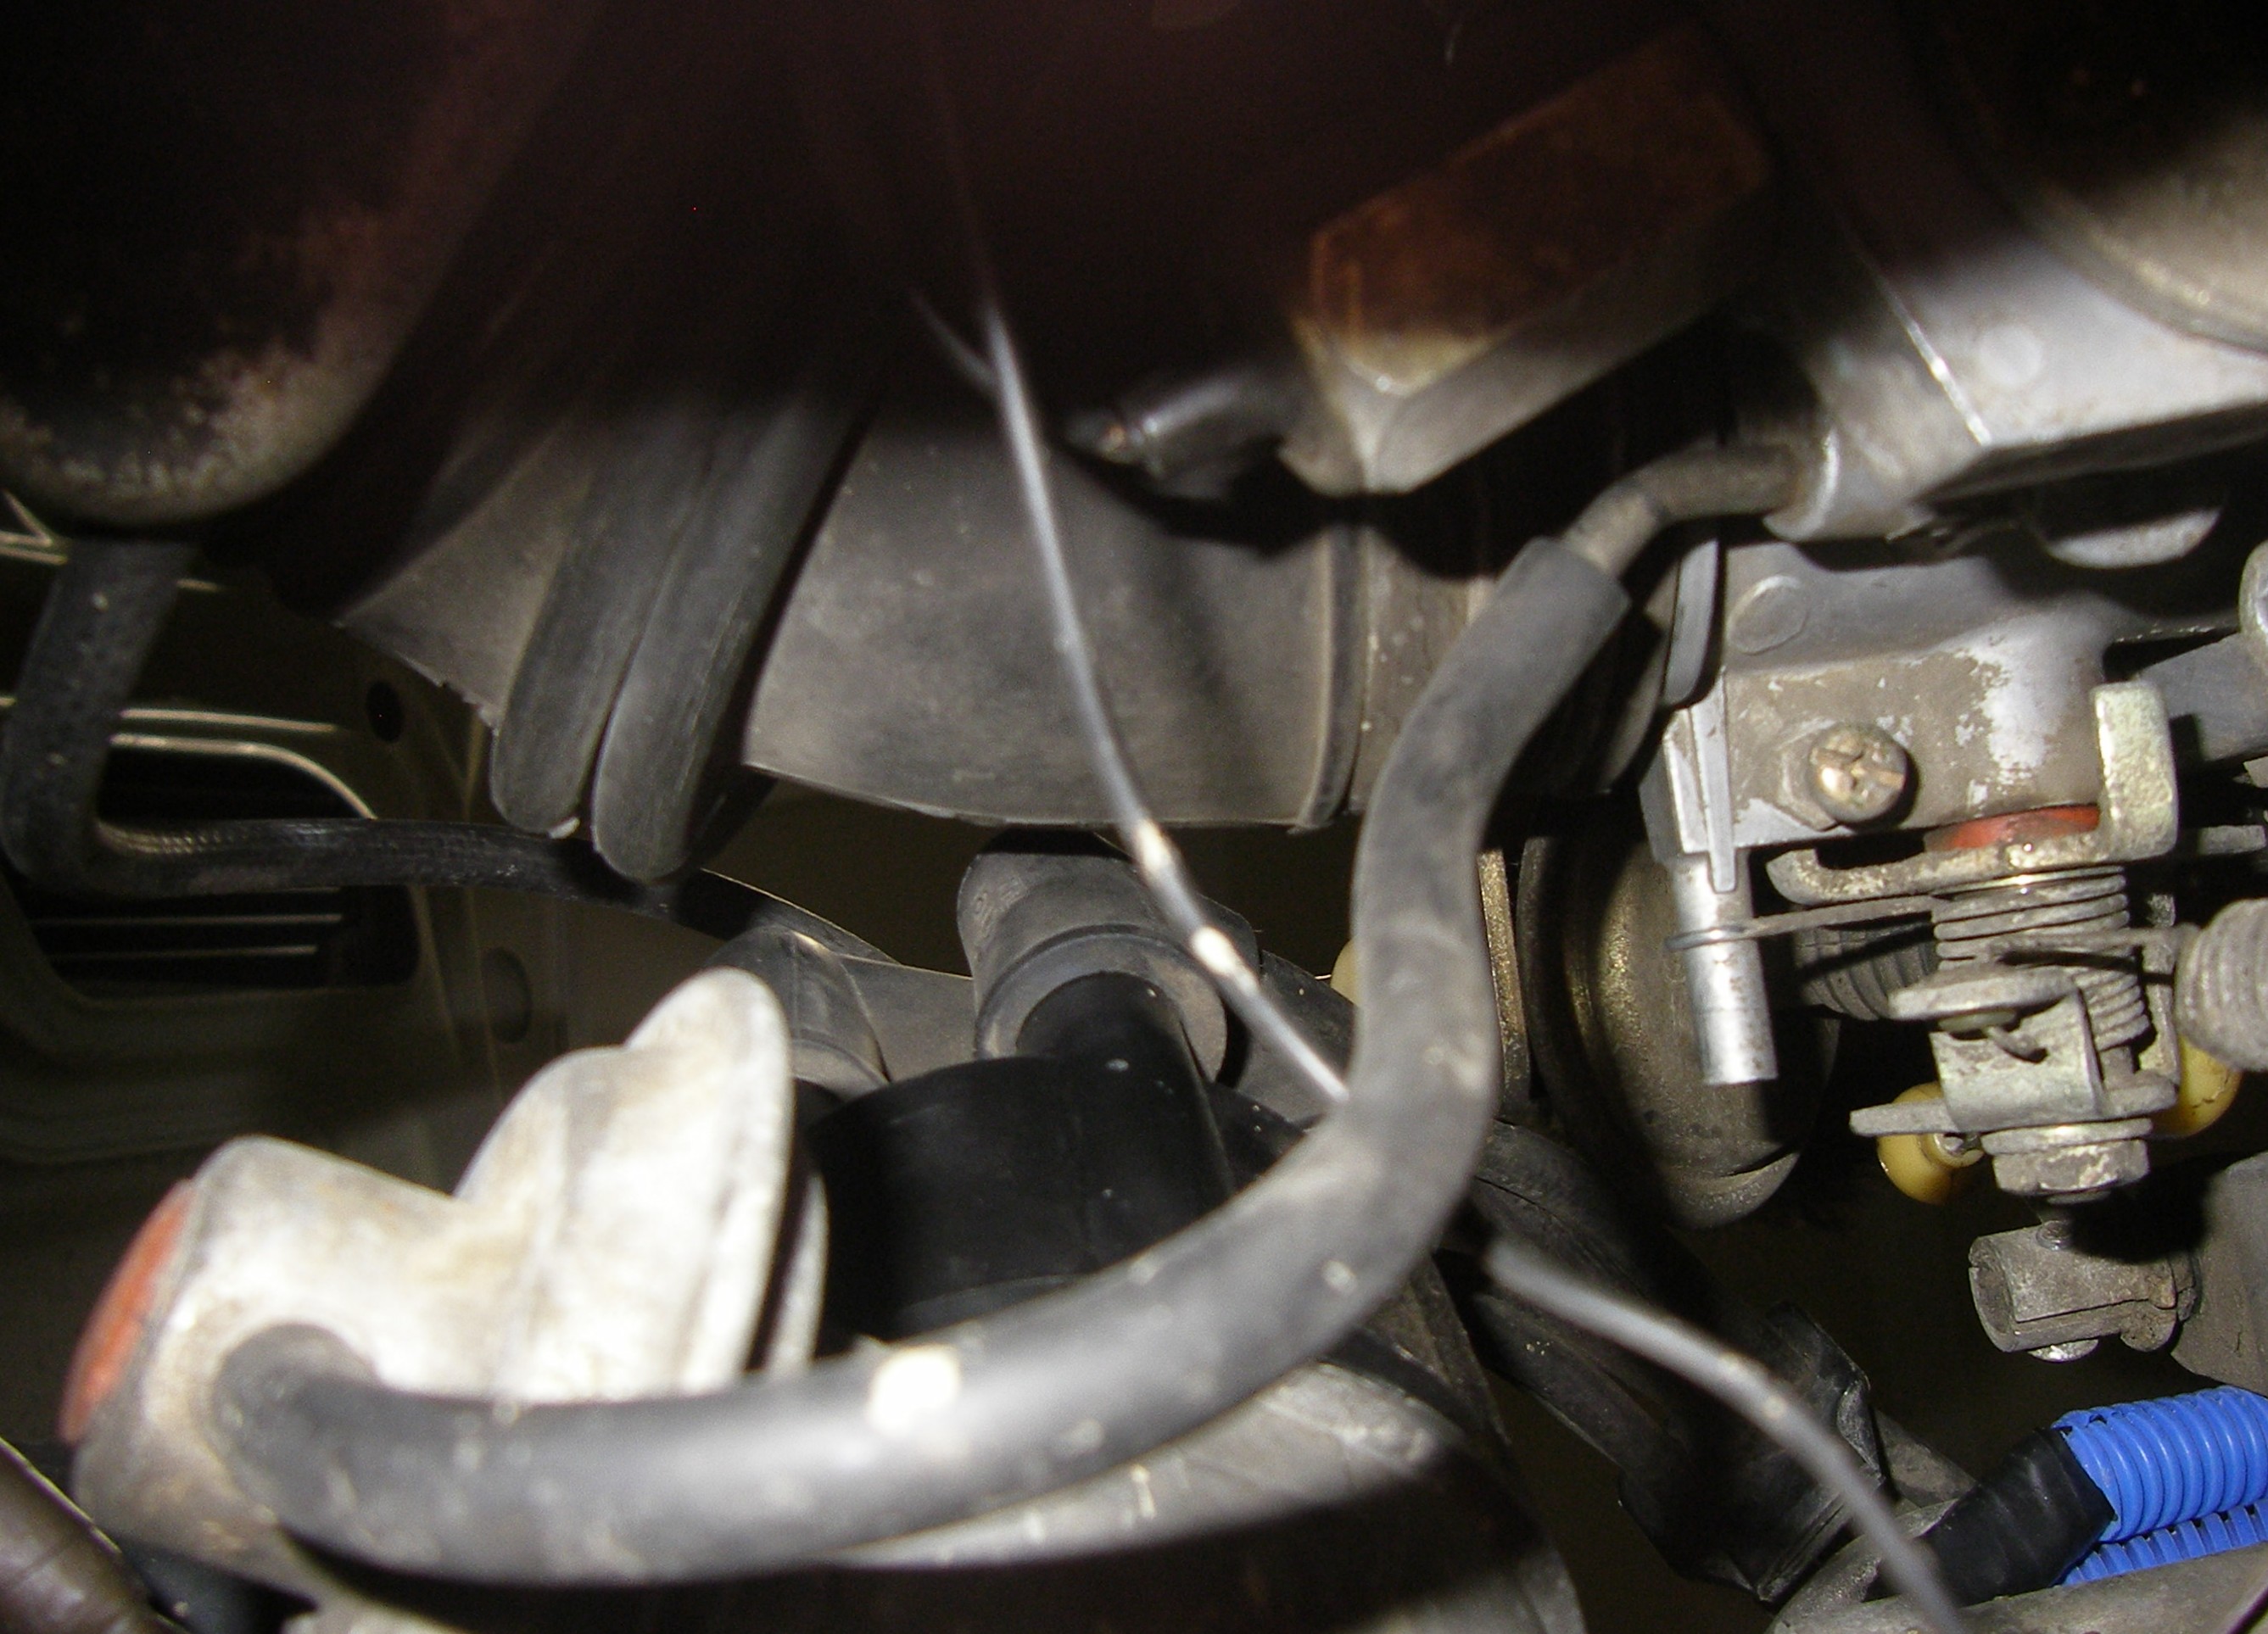
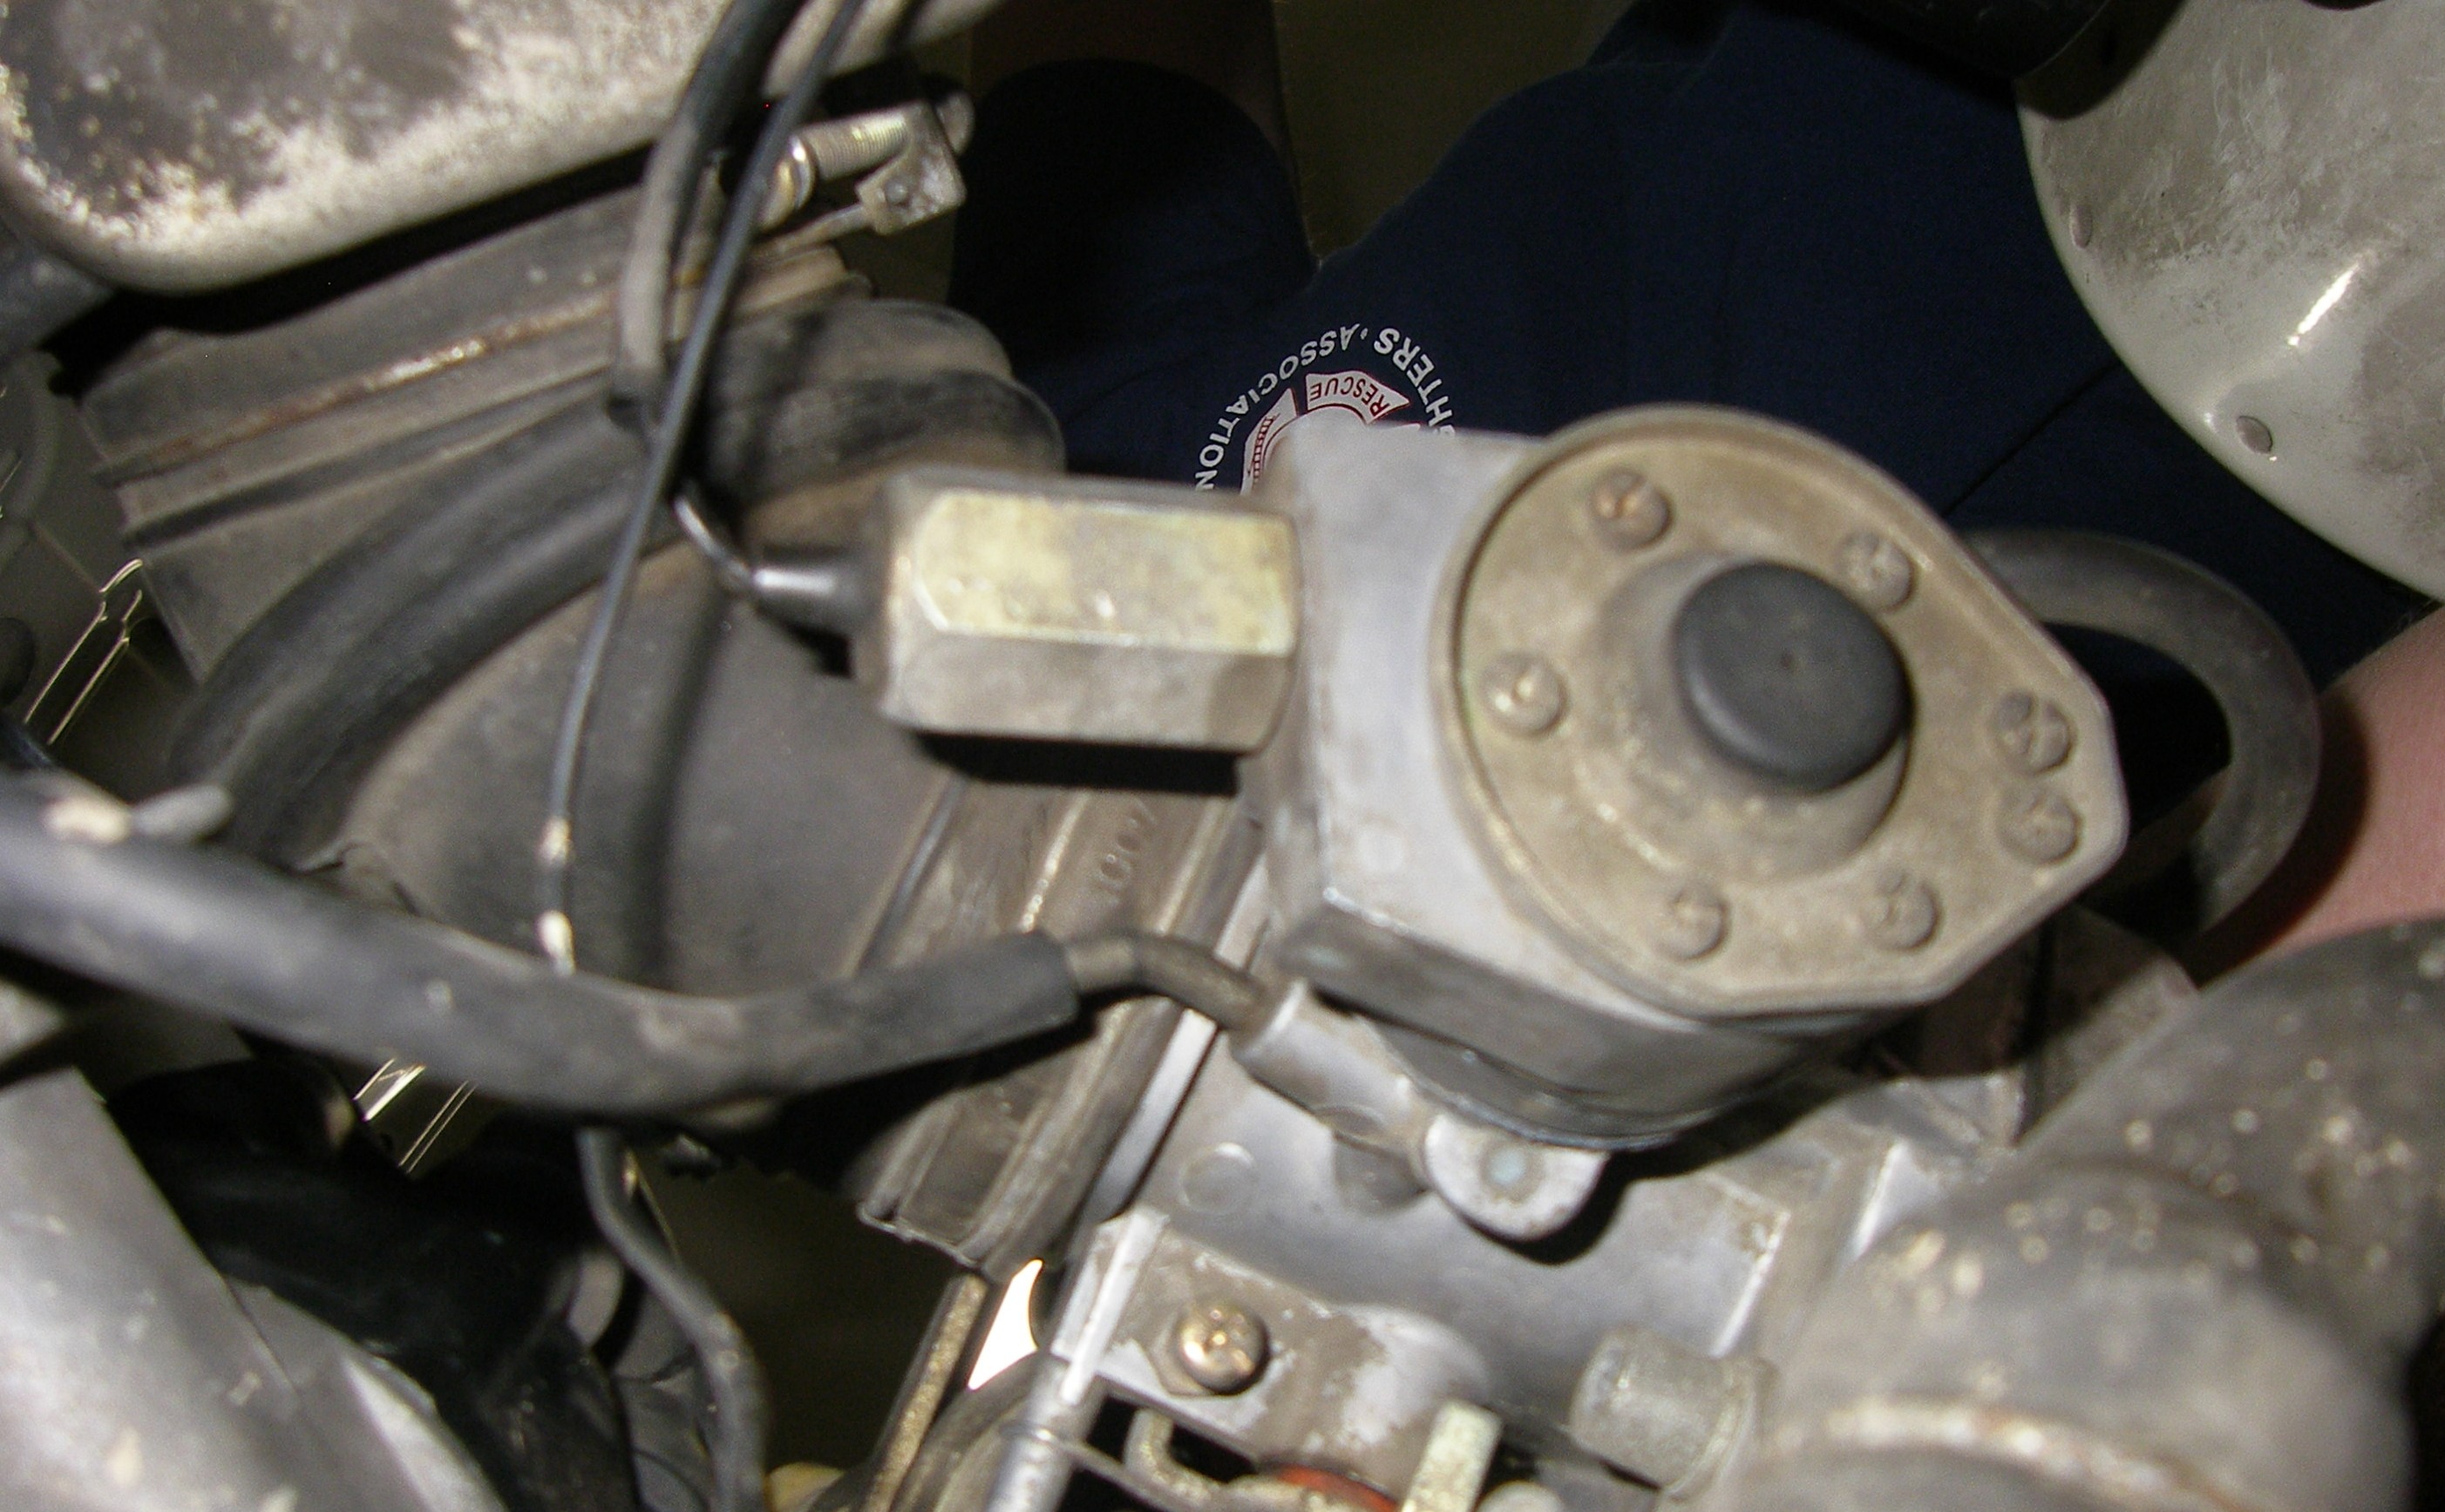
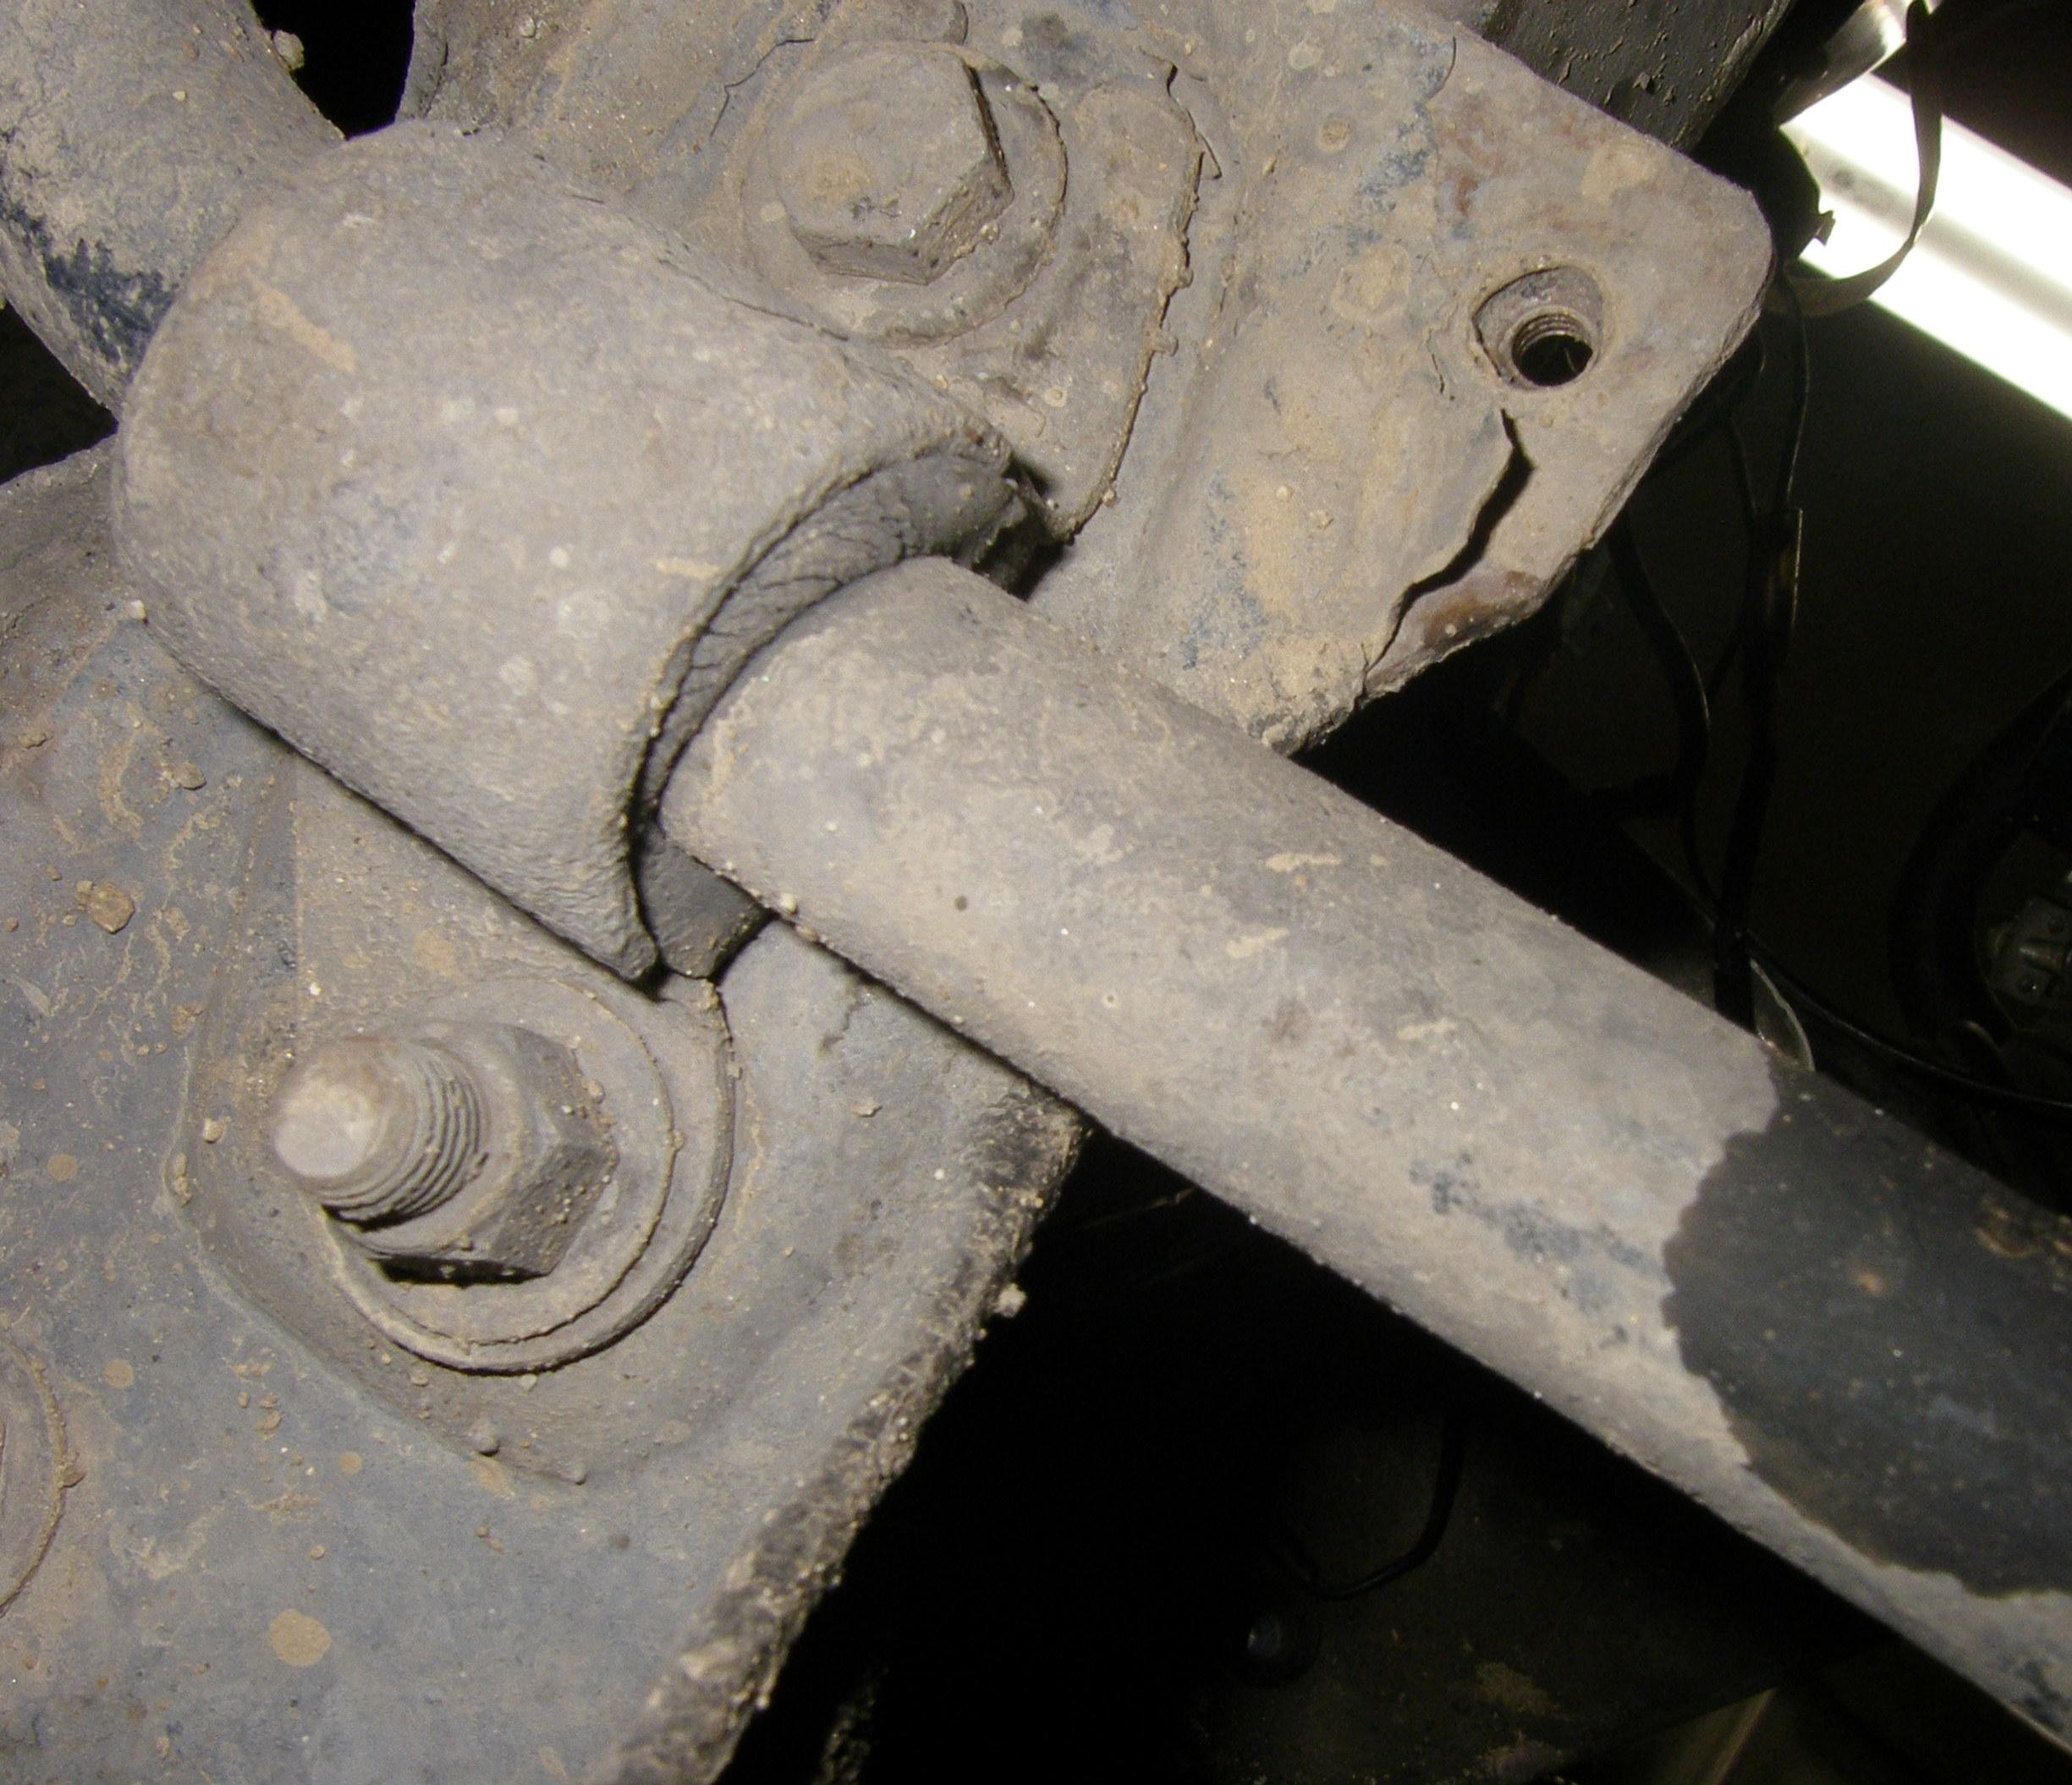
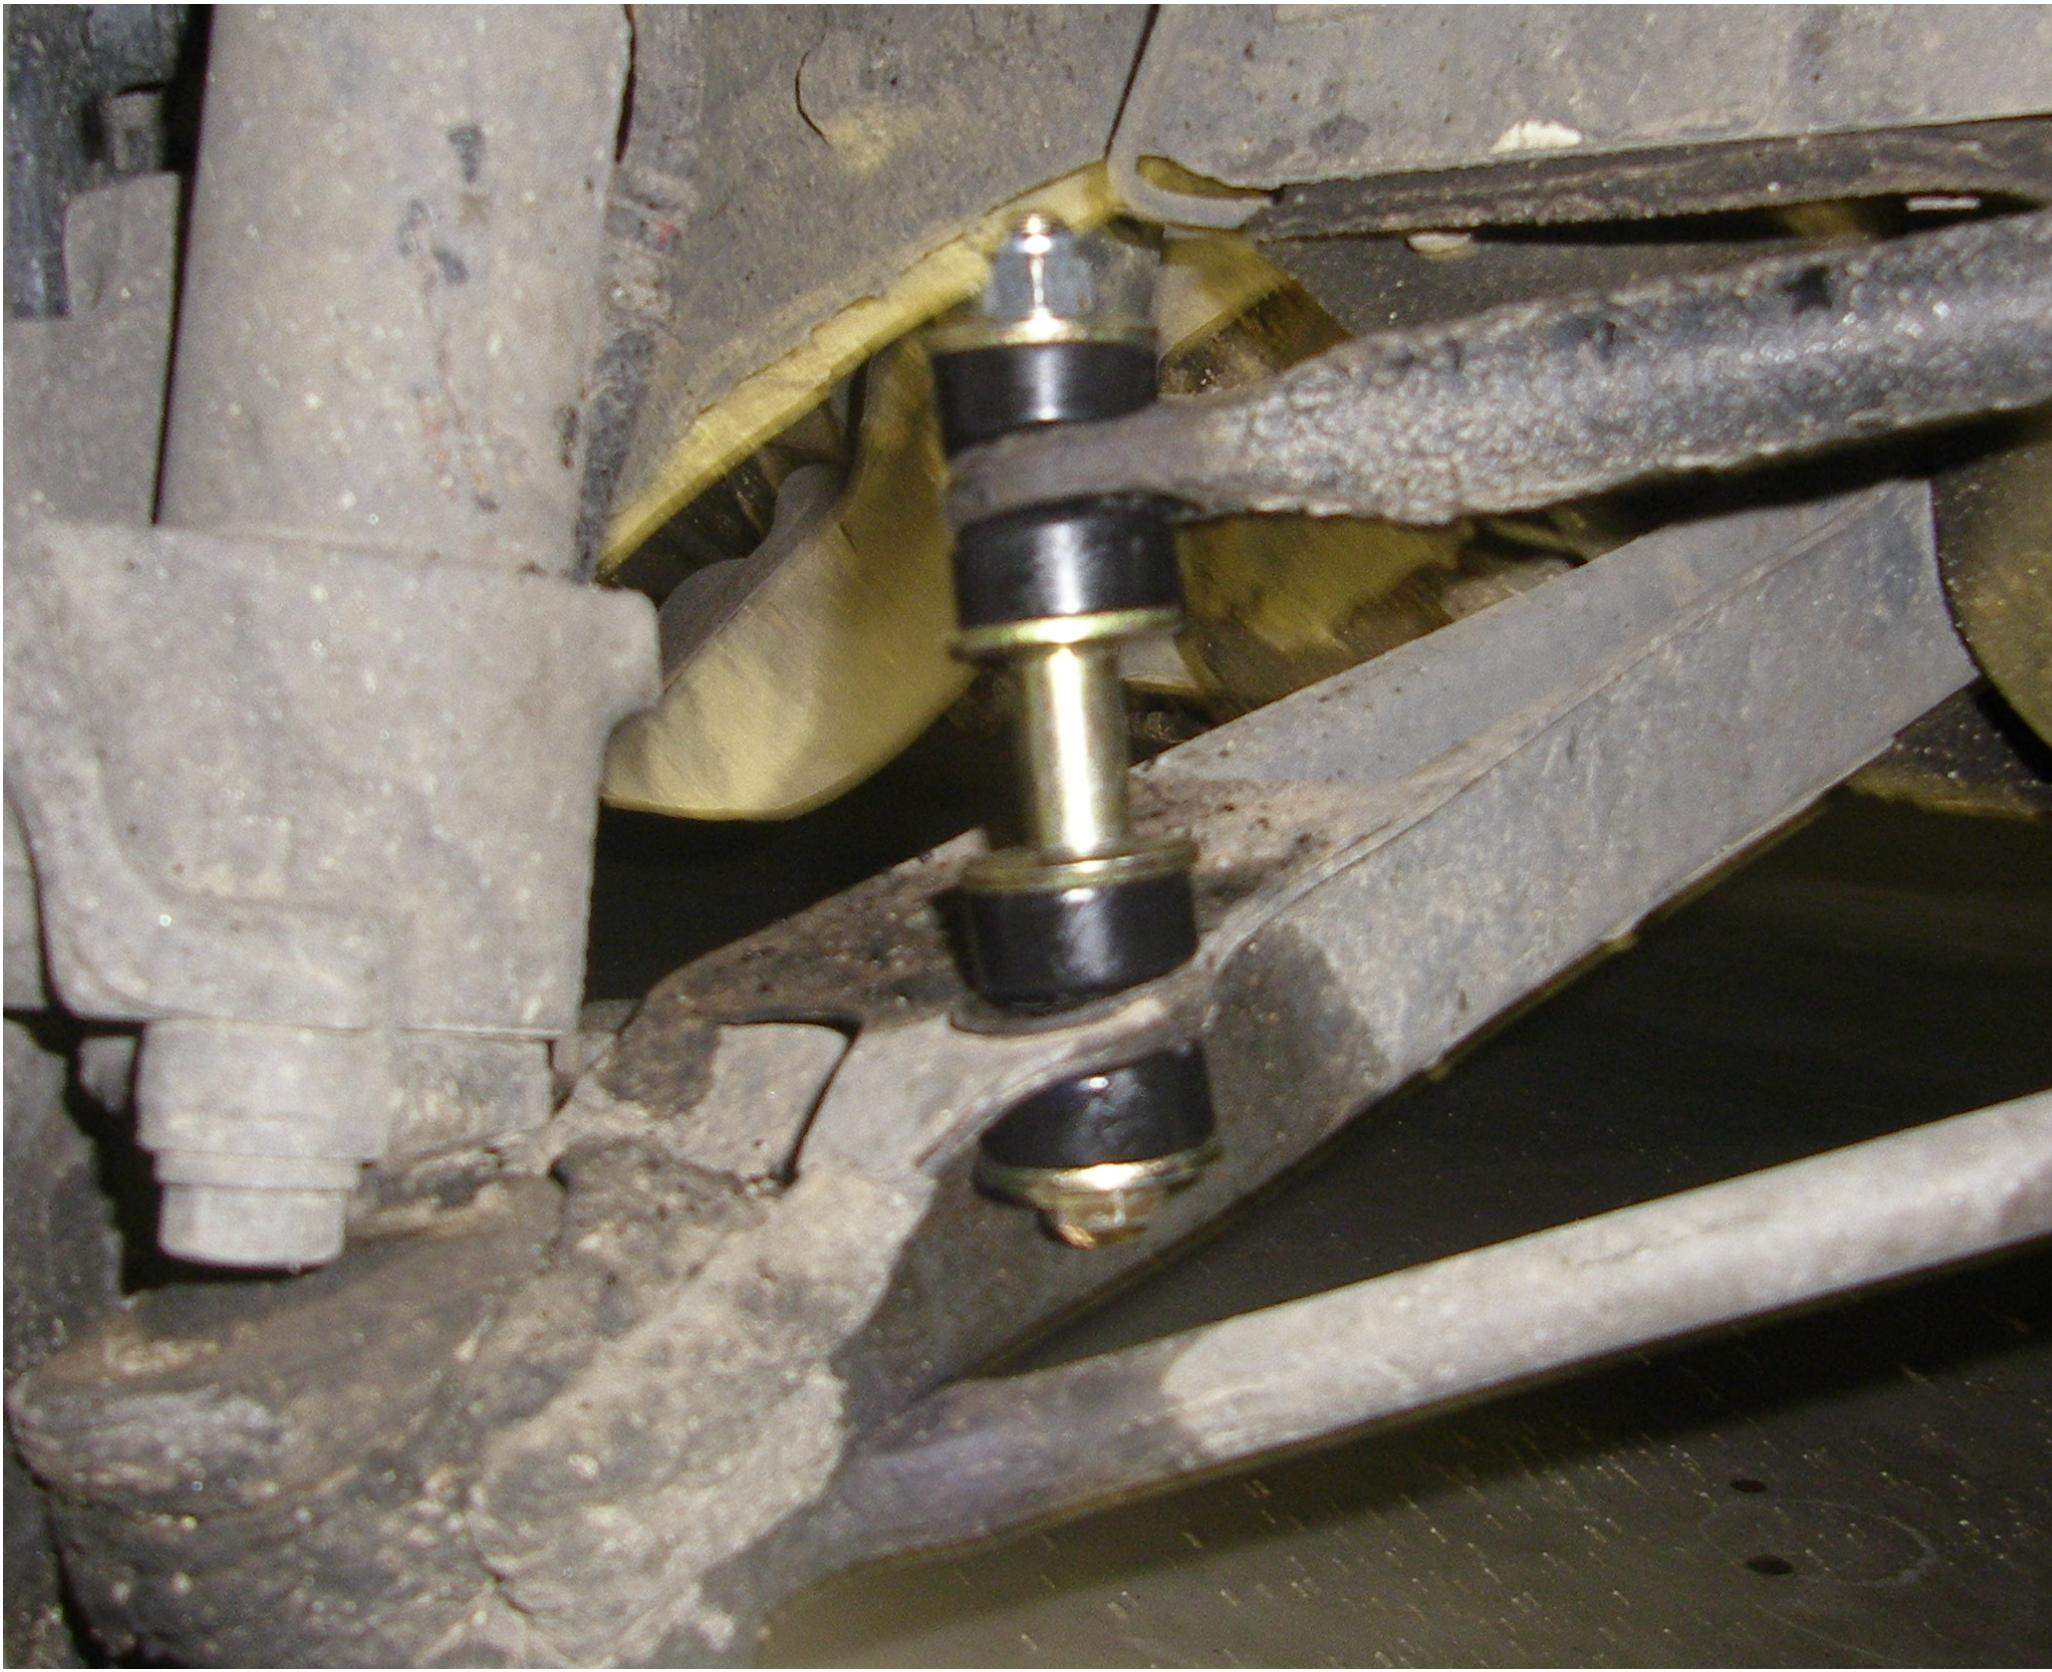
Hi everyone, I know I"m a few weeks late and I'm really only covering the front sway bar End links and front strut rod bushings(The rest will follow I promise), but Here goes. I'll start with the Part numbers for the 1979 280ZX. All parts are Energy Suspension Polyurethane replacement bushings. You can find the Energy Suspension brand by googling it. Sway Bar End Link set:9.8122g Front Stabalizier bushings: 7.5104g Front Strut Rod bushings: 7.7102g Now, with that out of the way we will cover the tools needed to remove the front sway bar and its associated hardware. All you need is : 1: 3/8 drive ratchet with extensions. 2: 14MM shallow and deep well sockets. 3: lube to break up old bolts.( I"ve learned that while mechanically sound in the engine department the bolts around the engine tend to loose their integrity after 30 years;) 4: 14mm box end/ open end wrench. I'll show some pics of the 2 sets of mounts they are easily accessible. The strut rod ends are a little more difficult to get to but it can be done with a 17MM box end. Also they can be reached with a socket of the same size but it's a little tricky.(Mine wasn't bad due to the fact that I removed my A/C compressor.[Note:The lower control arm will drop back after you disconnect the Strut Rod. This is no big deal. You can manhandle the wheel/control arm back into position. I did it by myself but I stuggled for a second trying to start the bolt while pulling the wheel into alignment .] This one is for you Philbert. Feel free to hit me up if you need any explaining. So far this bushing setup is very easy.
-
Thats what I thought. I was beginning to question my sanity. Thanks for confirming the facts.
-
Ok, before everyone slays me for covering ground that has already been covered, let me say that I did use the search feature but I could not find difinitive answers. I appreciate your patience. 1:Does my 1979 280ZX (stock) have an o2 sensor? 2:My car has a few labels under the hood relating to "Non-Catalyst" does this mean that it doesn't have a cat?
-
TP, I'll get some of those pics. I didnt use 300 panels. I used 300 seats. The interior looks pretty stock ( cracked dash and all). Also I did not get the bushings installed this weekend. but I am expecting rain this week and therefore May have a few days off. If I do I'll try to get it done then, if not I'll work this weekend. Sorry guys:(
-
A little time and a little effort and I'm sure she'll come about. Cant wait to see the pics.
-
The dynamics of the L series and how they interfere with the timing gear set up make sense and as for me, I am running nothing but stock so fancy "cool" parts are not for me:). Thanks for the clarification Dragonfly. Yeah DNM, I totally got a suprise when this car fired up. Obviously 170k ain't nuthin to a Z!! I came from muscle but I sold it all when gas prices went astronomical.... Now I own a true coupe, no back seat and plenty of potential.
-
I would be interested as well. I also come from more of a muscle car back ground and have wondered why there aren't any timimg gear set ups for the L28's. Now to hear that somebody offers one I would like to hear if it has been tried and blah,blah,blah:wink:
-
Hey phil, I used basic high gloss( Krylon)black spraypaint, primer and some good clearcoat.( use at least 5 coats of the clear stuff). Also I kept everything taped during the clearcoating so I could use mothers to shine the Aluminium later. Photos of the Bushing project should be no problem. And pressure??? I love pressure. LOL
-
Thanks a ton guys, S130 Not doubt about the tint but thats a new project in itself. I want to replace my windshield and I need to repaint my valance while the windshield is out. Found a guy local that will 3M tint all my glass and replace my winshield( warrantied) for $500, does that sound right? Anyhow It's on my list which is loooong..lol. Zeero ,I like the style with the red and black your ZXT looks way clean, how does it perform with the current set up? I'm thinking of going Turbo in the future. Are you running the Borg/Warner t-5 with that tri-ax?? Just curious.
-
Phil I will let you know about that bushung project soon. The rims were pretty strait forward. I used Laquer thinner and my wire wheel attachment on my compressor to really get the old "paint"??? off. then I went in with a 3m pad to get in there and clean out those hard to get areas. Next I used my finer wire wheel to really buff out the areas that I intended to leave unpainted. I highly recommend that you use the Blue painter tape to cover the polished areas. I taped over the raised areas and used the side of a 3/8 retchet extension to cut the tape. I just rubbed the extension along the edges to keep my lines strait. I couldnt imagine trying to keep everything lined up right by using a box knife or a blade. This rubbing technique takes a little more time but it is worth it in the long run. imho. As far as taking the wheels off there is no need just use newspaper and tape around the rim and cover your tires. I wish I had taken some pics of this process. In the future I will document things like this better. Thanks Woldson;)
-
J. Soileau. That Z is amazing, your car sets the standard for restoration as far as I'm concerned. Great car.
-
Thanks Guys, thats my goal, I wanna remove my side marker lights, accent strip and shave the doorhandles before it goes to paint to complete the sleek look. The only thing I may want to stand out is the fuel lid. Thats if I can find a nice billet or even chrome AC Cobra style external gas cap. One question though, are there any fender flares available for the S130's?
-
So far I got the door panels and seats from my local junkyard. We have a pretty nice pick-n-pull not far from my house. Everything is pretty much stock except the seats, they are out of a 300Zx. But they are temporary. Not much to look at really; just more comfortable than the stockers. Someday they will be Corbeau.
-
I'll let you know about the bushings next sunday "I hope". As for the rims I'll show you what they look liked before I stripped buffed and repainted them. Took FOREVER to tape them to get the look I wanted but I'm happy.
-
Hi everyone, I thought I would upload some new pics of the Z after some clean up work. The rims came out better than I had planned and I may go later and have them powdercoated. I finished the brakes and installed the new clutch kit and everything is running great. About ten minutes before I was going to take the car off the jackstands after finishing the clutch the Fedex guy shows up..... He has all of my new bushings from energy.LOL I guess I got next weekend planned out. This car cost me $500 and I drove it home. It was alot uglier then though. I have some older pics of it if anyone would like to see the difference. I repainted the hood vents candied the side markers and the tail lights, also I put in some 300Zx seats and new door panels.
-
Hey, thanks. The picture is a bit decieving. White hides alot of the imperfections, I think.


.jpg)


