

DuffyMahoney
-
Posts
496 -
Joined
-
Last visited
-
Days Won
14
Content Type
Profiles
Forums
Blogs
Events
Gallery
Downloads
Store
Posts posted by DuffyMahoney
-
-
Kind of ghetto, but I am proud of it.

-
On 1/16/2026 at 2:25 PM, cgsheen said:
Very interested to see. Jim's Swiss 240Z (stock internals except for a mild cam) with ITB's and a Holley ECU tuned by our local legend - Tony at UMS - made about 183 RWHP. Jim was a bit disappointed (he was thinking 200ish) but we all thought that was pretty amazing for just ITB's and a good tune!
It would be nice to see what all your engine work will accomplish. In ANY case it'll be a blast to drive!
I wish I would have dynoed my 2.4L with ITB, but sadly I broke my oil pressure bung mount. I will be taking that block, stripping it down and finding an expert to weld it.
-
On 1/10/2026 at 11:18 AM, MONZTER said:
Looks nice, Im guessing 260hp at 6500 to 7000k Do you plan on dyno testing it? Seems like it will be a super fun street car. Realy clean but not so over the top that you cant drive it everyday and enjoy it. Looking forward to more.
Gosh it better be more then 260hp.
I will eventually dyno test, but we don't have one close to me. I live in a tiny town in Northern Idaho.
Its a very clean z, but sadly painted in the 70s- early 80s and the owner danced on the roof. Lol
-
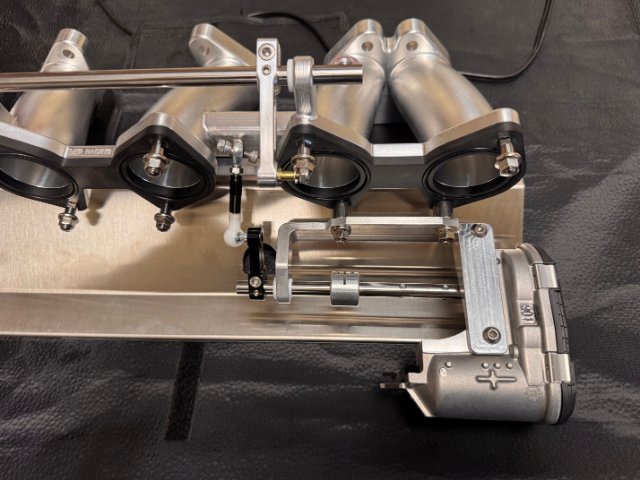
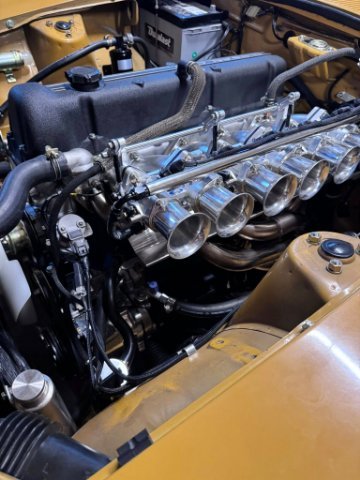
For you that have been following along. My 3.12L is finally in my car and home. Gosh it looks so good I’m just going to stare at it! Amazing work by Andrew Kazanis!This engine was built and done prior to a shop fire. So it’s been through a lot!I love the contrast of the stock blue block and gold zinc and black.It features.My 3.1L10.2:1 compression ratio88.5mm bore. N42 block. Sonic tested.LD crank by marine crankshaft. Crank �Off-set grind to 84.6 stroke�Finish rod journals @ 1.8889"Thrust Finish 1.27”�R & R plugs with threaded plugs�Dynamic Balance�Ion-Plasma nitride, straighten & micro-Micro polish all journalsE31 head. Port work by Andrew KazanisDsi valves Diameter: 45/36.5mm Length: 118mm, titanium retainers. Isky springs.Bonk cam. Roughly stock exhaust and intake port sizes. Vapor honed inside and out.Rebello JE Eagle pistons and toyota rods221 CFM flow at .45-.5 lift.Mine is 88.5x88.5x.25x3.14159x 84.6x6 /1000 = 3122ccIt is showing off my intake design and Efi throttle bodies as well as a bunch of my small parts.
-
 2
2
-
-
Thanks for posting, pretty amazing sheet metal work.
-
They make bronco bodies, and a bunch of people have complained about how crappy they actually are. Fit, overall shape, poor paint etc..
I guess still better then a rusted out junk car.
-
A fun z video I just was sent. It has my R35 coil bracket on it and has over a 1/4 million views! How cool is that.
-
Working on PCV again, I am going to try for the exhaust. My basic plan is, valve cover to stock pcv valve, to a catch can, then block to the catch can, catch can to the exhaust.
-
I really think you should move to an overhead bar.
-
Linkage is what I am calling the small arms between throttle bodies and the shafts.
You need to remove everything connecting each throttle to the overhead bar. Then sync. Then check again once hot.
Also blip each throttle, see if they stick or bind once hot.
You should have the cable going to a cam on the overhead bar. If that isn't what you are doing, I would highly suggest that route.
Setting butterflys is extremely difficult to do perfectly. I would print the 3D file I posted for syncing, then set each off the car. Then put each in an oven to 185 and check each again.Do you have an injector company in your town? Have them checked for flow matching?
-
How close are they synced now? Are you removing linkage to do that? Are dog bones the exact same lenght?
-
man, how cool is that!
-
Have you tried clocking it any? There is an area of the stroke that it won't work in.
-
1
-
-
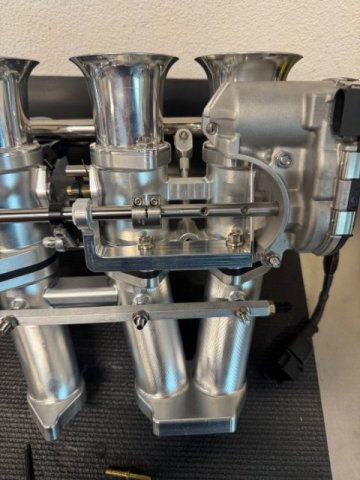
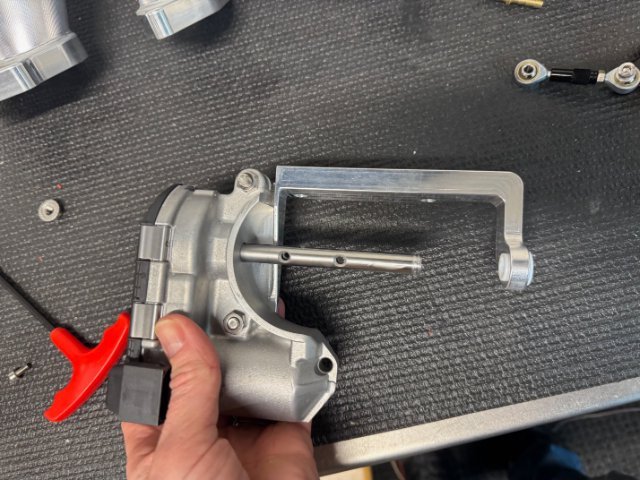
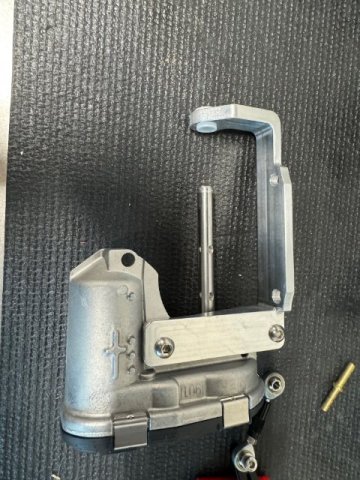
I am designing a DBW actuator for this DOHC now!
-
1
-
-
On 5/13/2025 at 7:38 PM, zboi said:
Don't worry PAMS is already testing a real DOHC head on cars and you will actually be able to buy it. I expect prices to be better and unlike this head it will install without a headache and an engineering team.
Its now my least favorite looking DOHC, but it's pretty darn cool technology.
-
Used ITBS seem to be very rare. HKS,
I would stay away from the full chinese DCOE ones. KMS takes the chinese bodies and retrofits them with better butterflies and such.
https://en.kms.vankronenburg.nl/products/throttle-bodies/bodies/throttlebody-twin
Then there are
Jenvy
EFI Hardware (probably the best designed out) Throttle blades open the opposite way, tapered bore, better throttle blade angles
Borla
OER(I would stay away from these)
ETC....
A common issue with ITB is when the engine is hot on a hot day, they tend to stick slightly open and having them return to idle doesn't work. I believe the bodies expand and cause pinching, but who knows.
-
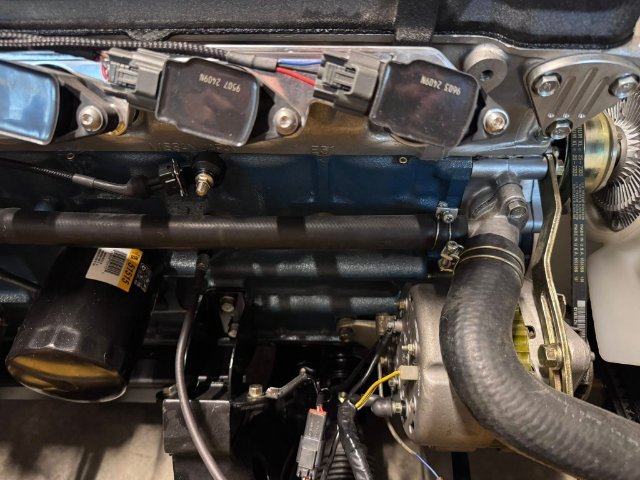
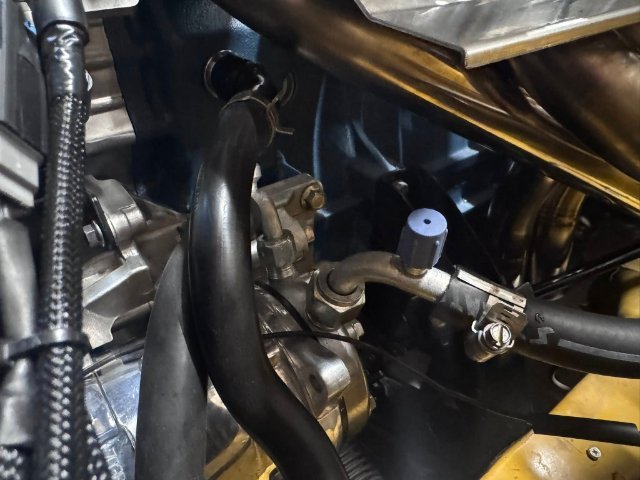
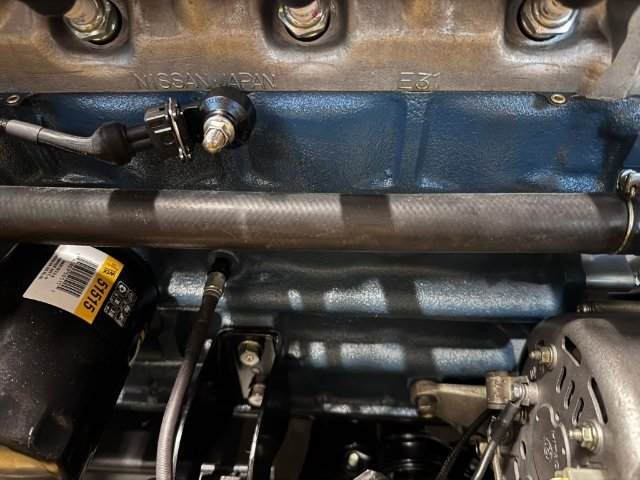
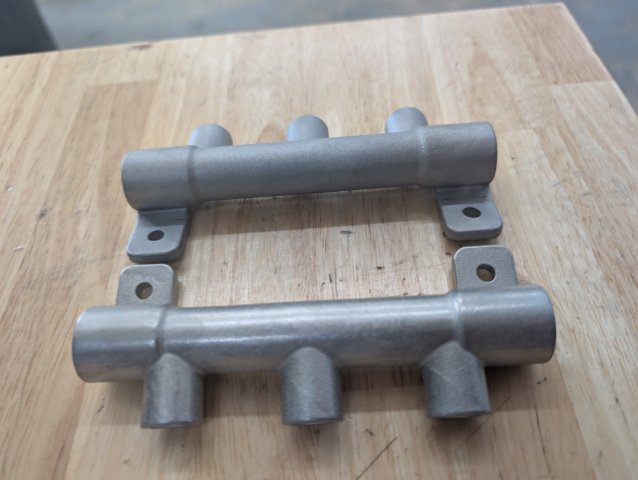
I got my Datsun Z Car Series Oil Sending Unit Relocation / Remote Block done! I have only one for sale now, but more are on order. I am pretty proud of this design.
Three outlet remote oil sending unit block. Metal 3D printed out of aluminum to look stock and mimics the 240z, 260z and 280z brake proportioning block design.
Block has 3 outlets, all are 1/8 NPT. Comes with a custom length -3AN hose and one 1/8 NPT -3AN fitting and either a 1/8 BSPT or 1/8 NPT for the engine block side of the hose.
Stock sending unit on a 240z is BSPT, this will require a NPT sending unit like this. [https://zcardepot.com/products/oil-pressure-gauge-sender-240z-260z-280z-70-77?variant=32184292737137](https://zcardepot.com/products/oil-pressure-gauge-sender-240z-260z-280z-70-77?variant=32184292737137)
No sending units come with this order. Pictures of sending units are just for reference.
Link: https://www.m2racing.com/shop/p/datsun-z-car-series-oil-sending-unit-relocation-remote-block-
1
-
-
15 hours ago, madkaw said:
Reducing vacuum line size seems to have helped the MAP reading. Looks like I might even get 60kpa at idle too!
First drive was interesting for sure. Almost stalled pulling out in traffic and rich and lean mixtures all over the table-lol. The autotune was trying to correct but some of my settings were off. I didnt stay out long because it was Little 5 in Bloomington and too many crazy kids out . Monday when everyone is at work Ill do some more tuning,
Idle seemed to increase as the engine got hotter. No heat shield yet so that is an issue
Idle increase while hot is the same issue most of us ITB guys are dealing with, I hope a heat shield fixes it.
-
Here is something fun/ silly I have been thinking of and finally made. It’s a remote oil pressure distribution block made to look like the stock 240z brake prop valve. I previously had a steel T In the block, that broke off and then when I was using an easy out I cracked my stock block bung. I said never again!3D metal printing is neat stuff. I had it tumbled to look even more cast.I run stock gauges and my ecu needs its own signal. This location allows stock wiring to also work.
-
On 4/15/2025 at 3:42 AM, Derek said:
Man that is so cool. Not as cool as a DOHC though. 😀 I'm for sure going to do this mod at some point especially after seeing how responsive it is. Great job!
I don't have DOHC type funds:)
-
-
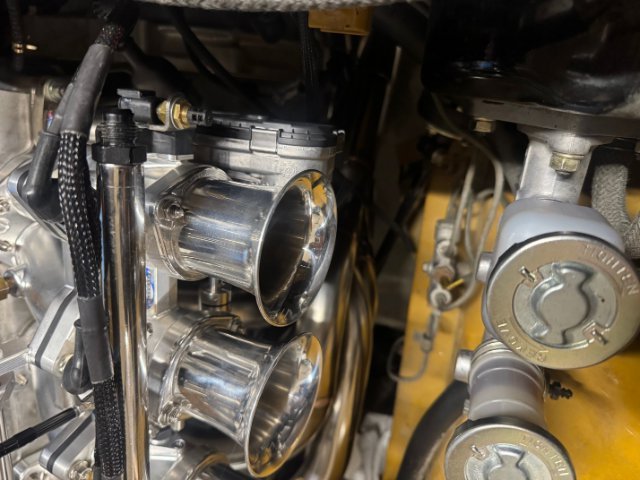
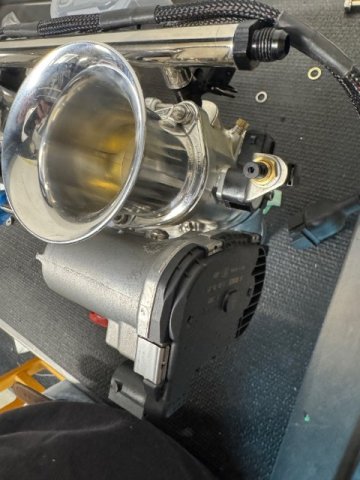
I love it when a plan comes together!Fully operational below dcoe throttle body actuator for DBW ITB. Mostly hidden!
-
Gonna have to use the internet for that one then.
-
6 hours ago, madkaw said:
Okay - you would think they are the same . Were you able to specify sizes ?
Yep, I bought a few.

.jpg.974573a127dd54bbf8b722aab9f79c98.jpg)
.jpg.196687cbbc10601f19beb7d7d158337b.jpg)
.jpg.a83ea2aecb39645f3032c7054981e0a9.jpg)
.jpg.5edf1f185591b77dda8d2be033453d58.jpg)
.jpg.9924b03cd2b0735a43453d090ad7812d.jpg)


.jpg.bd4fc860299858aa36cb8b5ee110fa77.jpg)

1971 240z ITB install
in Nissan L6 Forum
Posted
Well look at this snazzy haltech s3 ecu mount by Galgo! All I can say is wow.
I guess this means it’s time to finish my wiring from my 750 to my new S3.
This is for the passenger kick panel on a 240z.