dmoralesbello
-
Posts
255 -
Joined
-
Last visited
-
Days Won
3


dmoralesbello's Achievements
")


-

280Z Restomod Progress
dmoralesbello replied to dmoralesbello's topic in S30 Series - 240z, 260z, 280z
Hello again forum friends. It's been a good while since I've posted, basically because I've just been enjoying my amazing Zcar and only doing basic maintenance. However, I think the time has come to consider moving on and letting someone else (very lucky) enjoy this wonderful vehicle and all my work and effort. I have contacted BAT to put my 280Z up for auction. If anyone is seriously interested in the car before it goes to auction, please let me know. It would be great if a fellow forum member would be the next owner. -
280Z Restomod Progress
dmoralesbello replied to dmoralesbello's topic in S30 Series - 240z, 260z, 280z
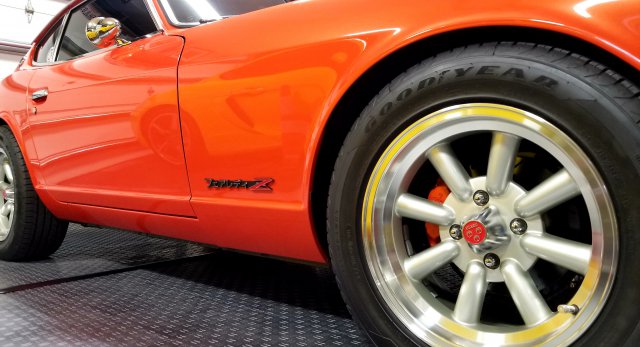
I came across an IG post that caught my eye in which a fellow 280Z owner had LED lighting behind the Z emblems rearward of the quarter windows. Turns out a garage in Las Vegas that does a lot of Datsun work (Harmon Restoration) had done the work for him and would sell a kit with an amber LED bulb for each side which included all wiring with proper Datsun plug connectors for a seamless installation onto the rear lights harnesses. Since I love LEDs and this looked like a novel idea I ordered one such kit which I received a couple of weeks later. Their original kit was meant to work as an auxiliary turn signal light but I didn't like that idea, doubting it's legality and usefulness. I asked them to wire my connectors so they would work in conjunction with the parking lights, which they did. First I checked the lights by plugging them into both tail light harnesses (all good), then I loosened the interior plastic panels so I could run the new wire harnesses forward. After prying the Z emblems off, I carefully drilled 5/8" holes at the center of the vent holes and a second steel panel immediately behind it. I lightly sanded and repainted (satin black) the vent holes making sure the raw metal edges were covered inside and out. After applying a generous quantity of black silicone sealant around the light stalk, I installed it from outside and secured it with the included nut from inside the cabin. I finally put my interior panels back in place and reinstalled the Z emblems. When I tested the installed light the LED was way too bright, even brighter than the parking lights, and the glaring bulb was very visible in many angles! Not what I had hoped for at all! After some thought I came up with 2 light diffuser ideas. The first was a simple circle of "frosted" .5mm thick white plastic glued to the back of the emblem. It looked great when illuminated (although still too bright for me) but the white plastic was plainly visible when the light was off. Additionally, this option may have obstructed the air exiting the cabin to a certain degree. My final option was to construct a cylindrical "diffuser" which would hide the LED, direct light to the back of the emblem, reduce the intensity of the light, not obstruct airflow, and be pretty much invisible when the lights were off during daylight. I used a 3/4" amber translucent plastic tube (small prescription container), cut out to the correct length and angle. I then introduced a piece of the frosted white plastic inside the cylinder to diffuse the light, but covered 2/3 of the inside of this plastic with black duct tape allowing light to exit only at the end immediately behind the Z emblem. Lastly, I covered the outside of the tube with a layer of mirrored tinted window film so it would allow light to exit but reflect the black paint from the vent holes on the outside, rendering it close to invisible once installed. The diffuser was then hotglued to the back of the Z emblem and reinstalled on the car. It worked as intended and I now have subtle amber indirect illumination behind the Z vent emblems that don't telegraph any alterations during daylight or when the lights are off. I really like the cool factor on my restomodded 280Z. -
280Z Restomod Progress
dmoralesbello replied to dmoralesbello's topic in S30 Series - 240z, 260z, 280z
Good to hear from you again! Thanks for the nice comment. I started doing all the smaller details once the big stuff was done (body and paint, steering, suspension, A/C, etc...) but I feel I'm getting to the finish line with my Z. It's very satisfying to see the car as I imagined it 6 years ago, but at the same time I regret not having additional projects to complete on it. My Z has kept me sane during this darn pandemic and I love it now even more! I'm sure maintenance issues will always come up and that'll keep me busy. I'm also looking forward to some local car shows as soon as "social distancing" rules allow. I hope you continue to enjoy your Z just as much and keep posting pics of your progress. -
280Z Restomod Progress
dmoralesbello replied to dmoralesbello's topic in S30 Series - 240z, 260z, 280z
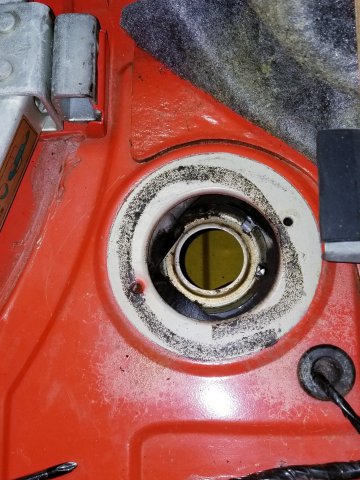
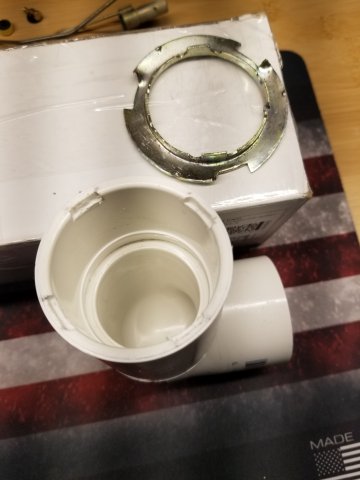
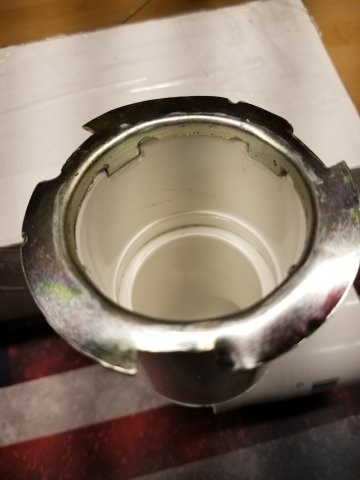
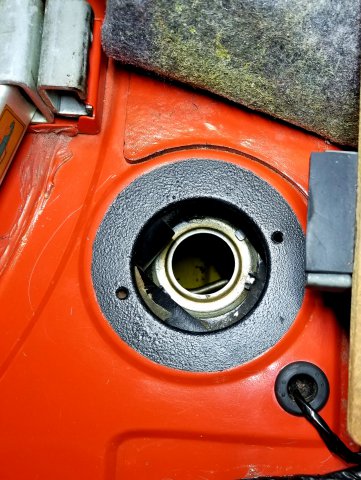
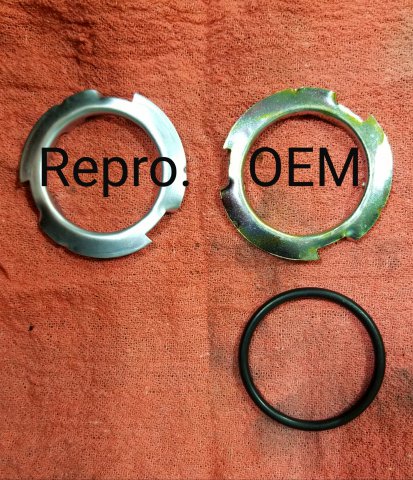
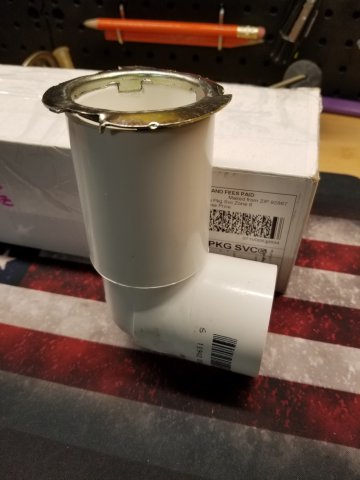
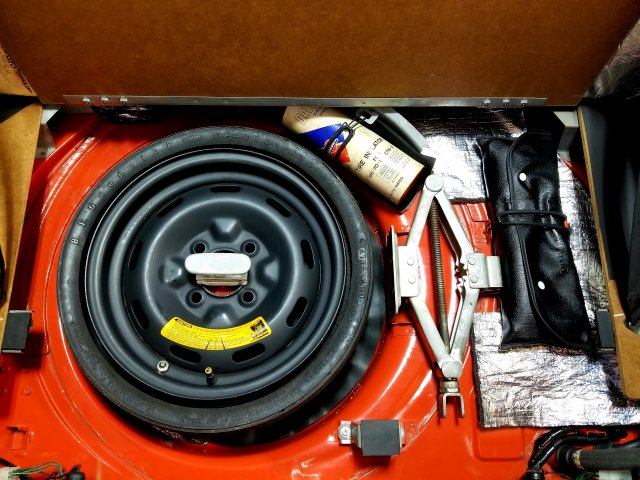
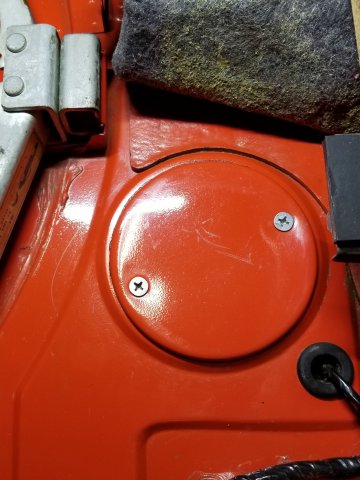
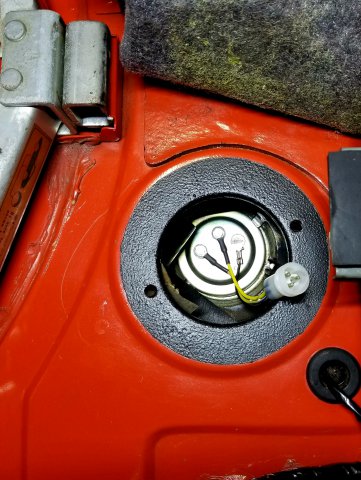
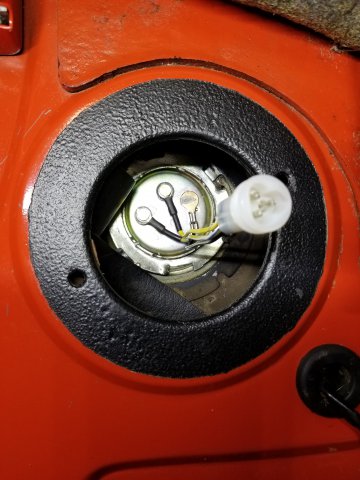
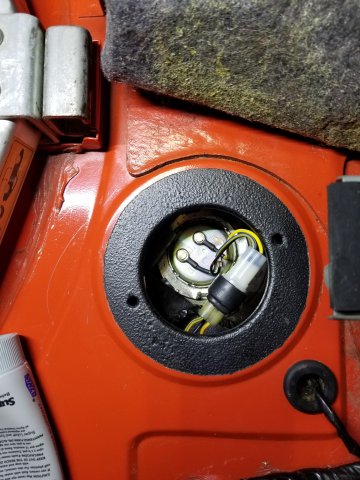
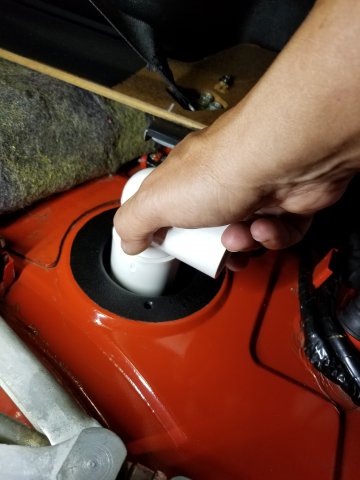
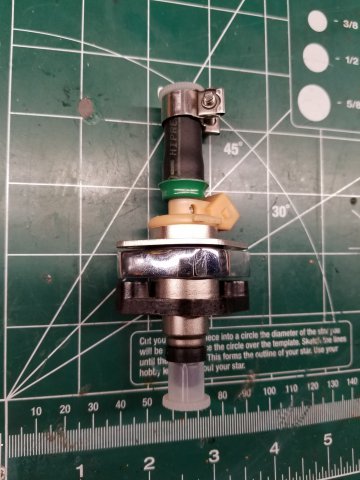
Fuel reserve warning light stopped working a while back so (after confirming continuity of the yellow/blue wire from the sender to the light) I changed the sender and the issue has been resolved. I used a replacement unit from @zcardepot.com which is of excellent quality, has the exact same factory connections and cost $78 (compared to the unit offered by MSA at $200 plus you need to splice in a different connector!!!). I made a wrench out of 2" PVC pipe to turn the lock ring very easily, which makes the whole job a breeze. With a Dremel, I made 4 slots on the inside edge of one end of a 6" section of straight pipe to coincide with the 4 crests that jut out from the top of the lock ring. A 90 degree elbow at the other end of the pipe makes for easy turning. I also cleaned up and painted the edges of the access port with bed liner, and replaced the weatherstripping foam on the inside of the cover. Pics below.
-
280Z Restomod Progress
dmoralesbello replied to dmoralesbello's topic in S30 Series - 240z, 260z, 280z
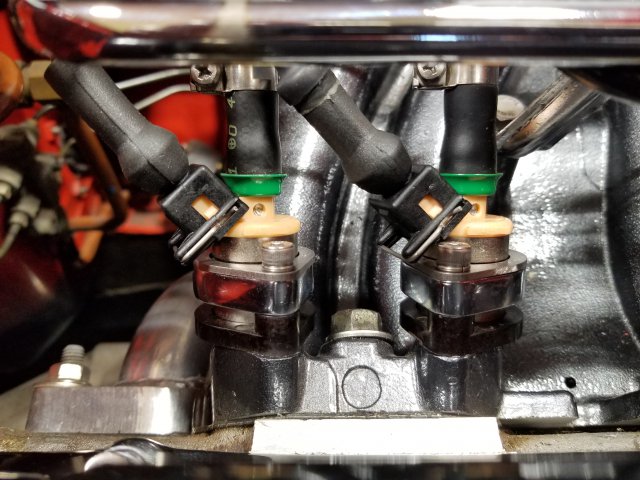
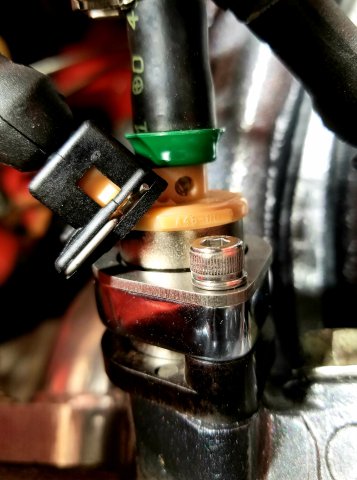
After installing new fuel injector plugs and boots the number 3 cylinder injector started to act up and wouldn't fire consistently. I was lucky to source a NOS set of Bosch injectors from Motor Man Fuel Injection Parts at a great price so instead of waiting for other 42 year old injectors to eventually fail, I opted to replace all 6 injectors once I lifted the fuel rail. After a minor adjustment to the AFM the engine runs very smoothly and with plenty of power once again.
-
280Z Restomod Progress
dmoralesbello replied to dmoralesbello's topic in S30 Series - 240z, 260z, 280z
I had forgotten to post this great artwork by Tito Gonzalez that I received late last week. I love it.
-
280Z Restomod Progress
dmoralesbello replied to dmoralesbello's topic in S30 Series - 240z, 260z, 280z
I'm sorry to say I don't know the supplier of the boots and plugs I installed. I received these from the previous owner of the car 6 years ago and he had them for a couple of years previous to that so they might not even be available currently. -
280Z Restomod Progress
dmoralesbello replied to dmoralesbello's topic in S30 Series - 240z, 260z, 280z
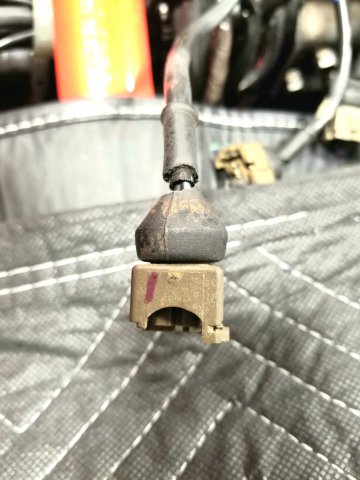
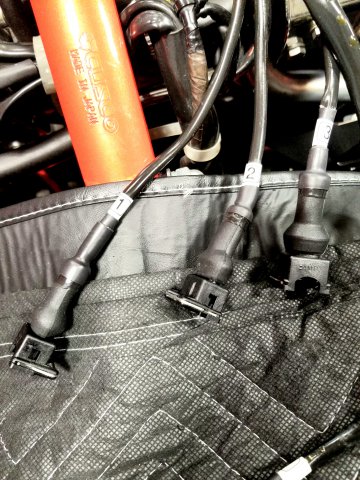
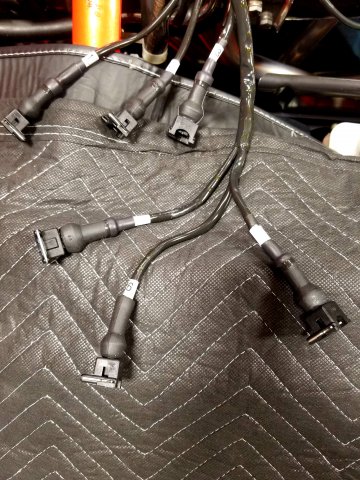
I hope everyone is safe at home in these terrible times. With very little else to do I decided to entertain changing the original 42 year old plastic fuel injector plugs and and rubber boots, which were literally disintegrating. I received a set of new plugs and boots from the p.o. with 6" pigtails attached but I didn't want the harness to look altered so I cut down the pigtails to 1.5" and placed the solder points so they would be hidden under the new boots, very close to the plugs themselves. Labeled the harness as well to prevent confusion, cleaned up the male contacts, and polished the screws. I also applied dielectric grease to the female contacts before reassembly. Started and ran the engine and all looks good! Tip: make sure you label the wire that lies more forward in the plug before cutting them. That way you will make sure to reassemble that wire in the same position in the new plugs. Everything else is very straight forward although time consuming. BTW, I first tried using the original connectors inside the old plugs (which were in excellent shape) but they didn't fit inside the new plugs. Had it worked I would have saved hours of work and not had to solder anything at all. Old plugs and boots: New plugs, boots and refreshed harness without visible solder bulges:
-
280Z Restomod Progress
dmoralesbello replied to dmoralesbello's topic in S30 Series - 240z, 260z, 280z
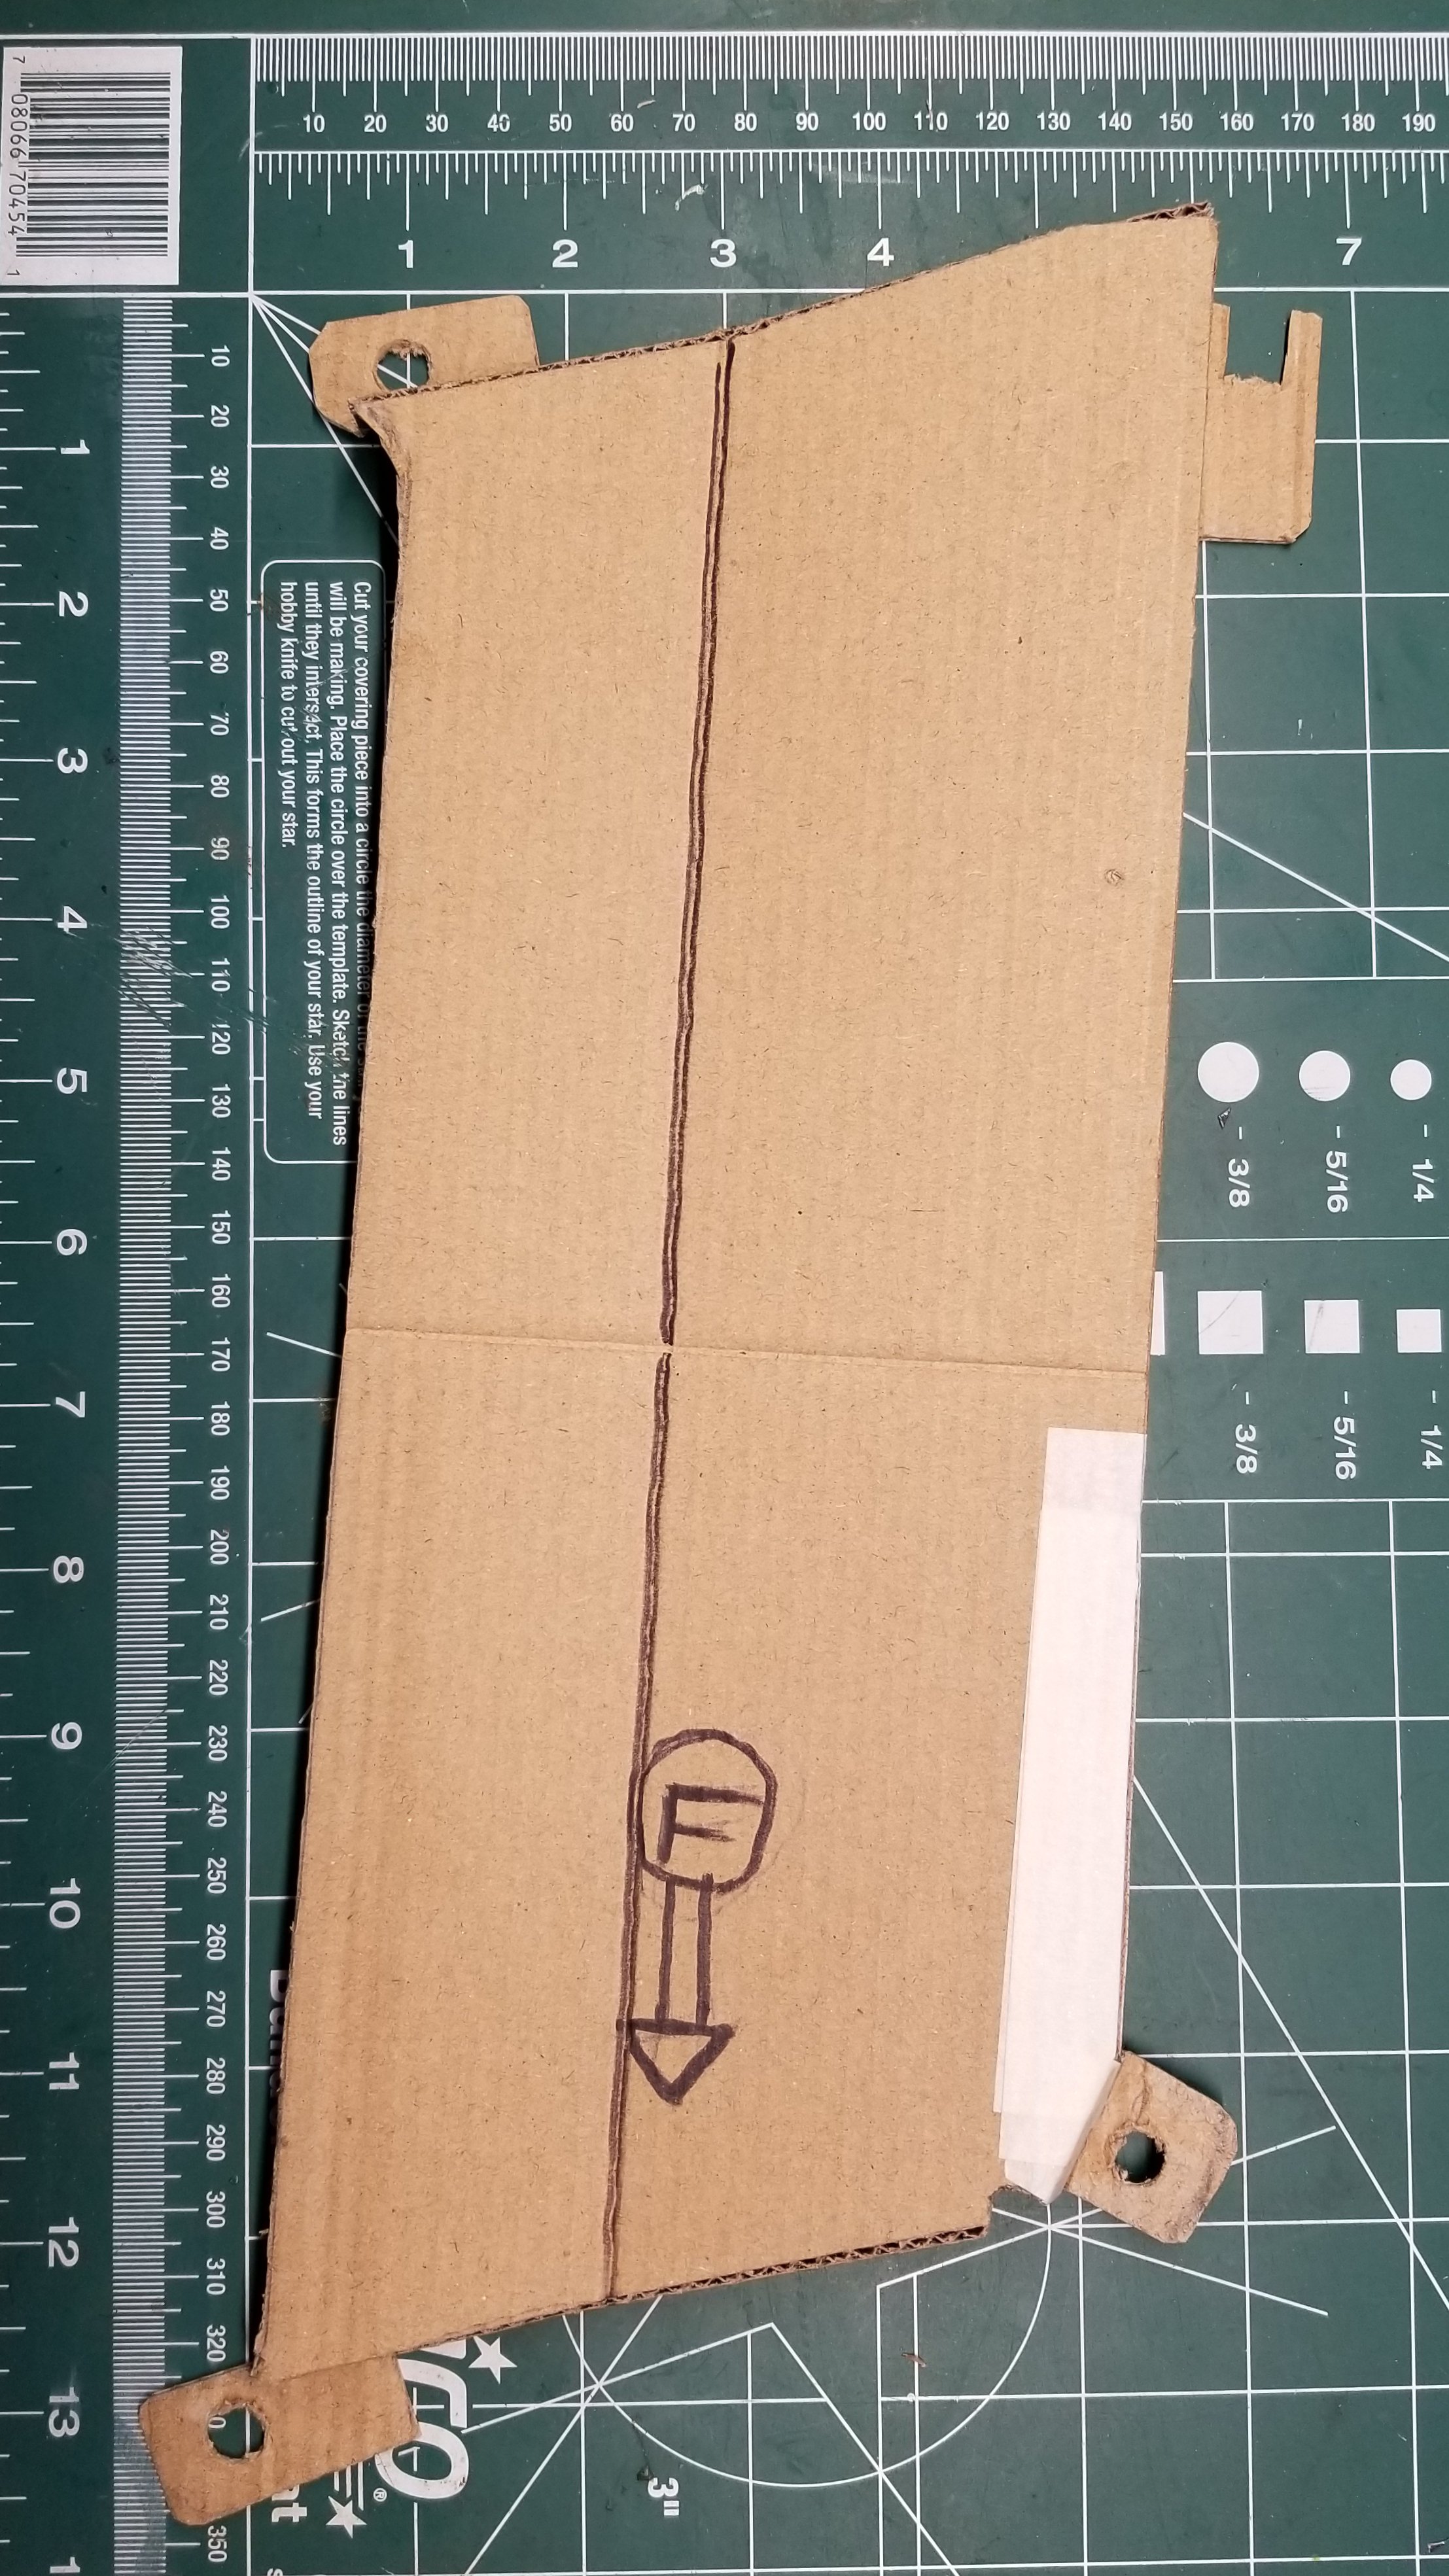
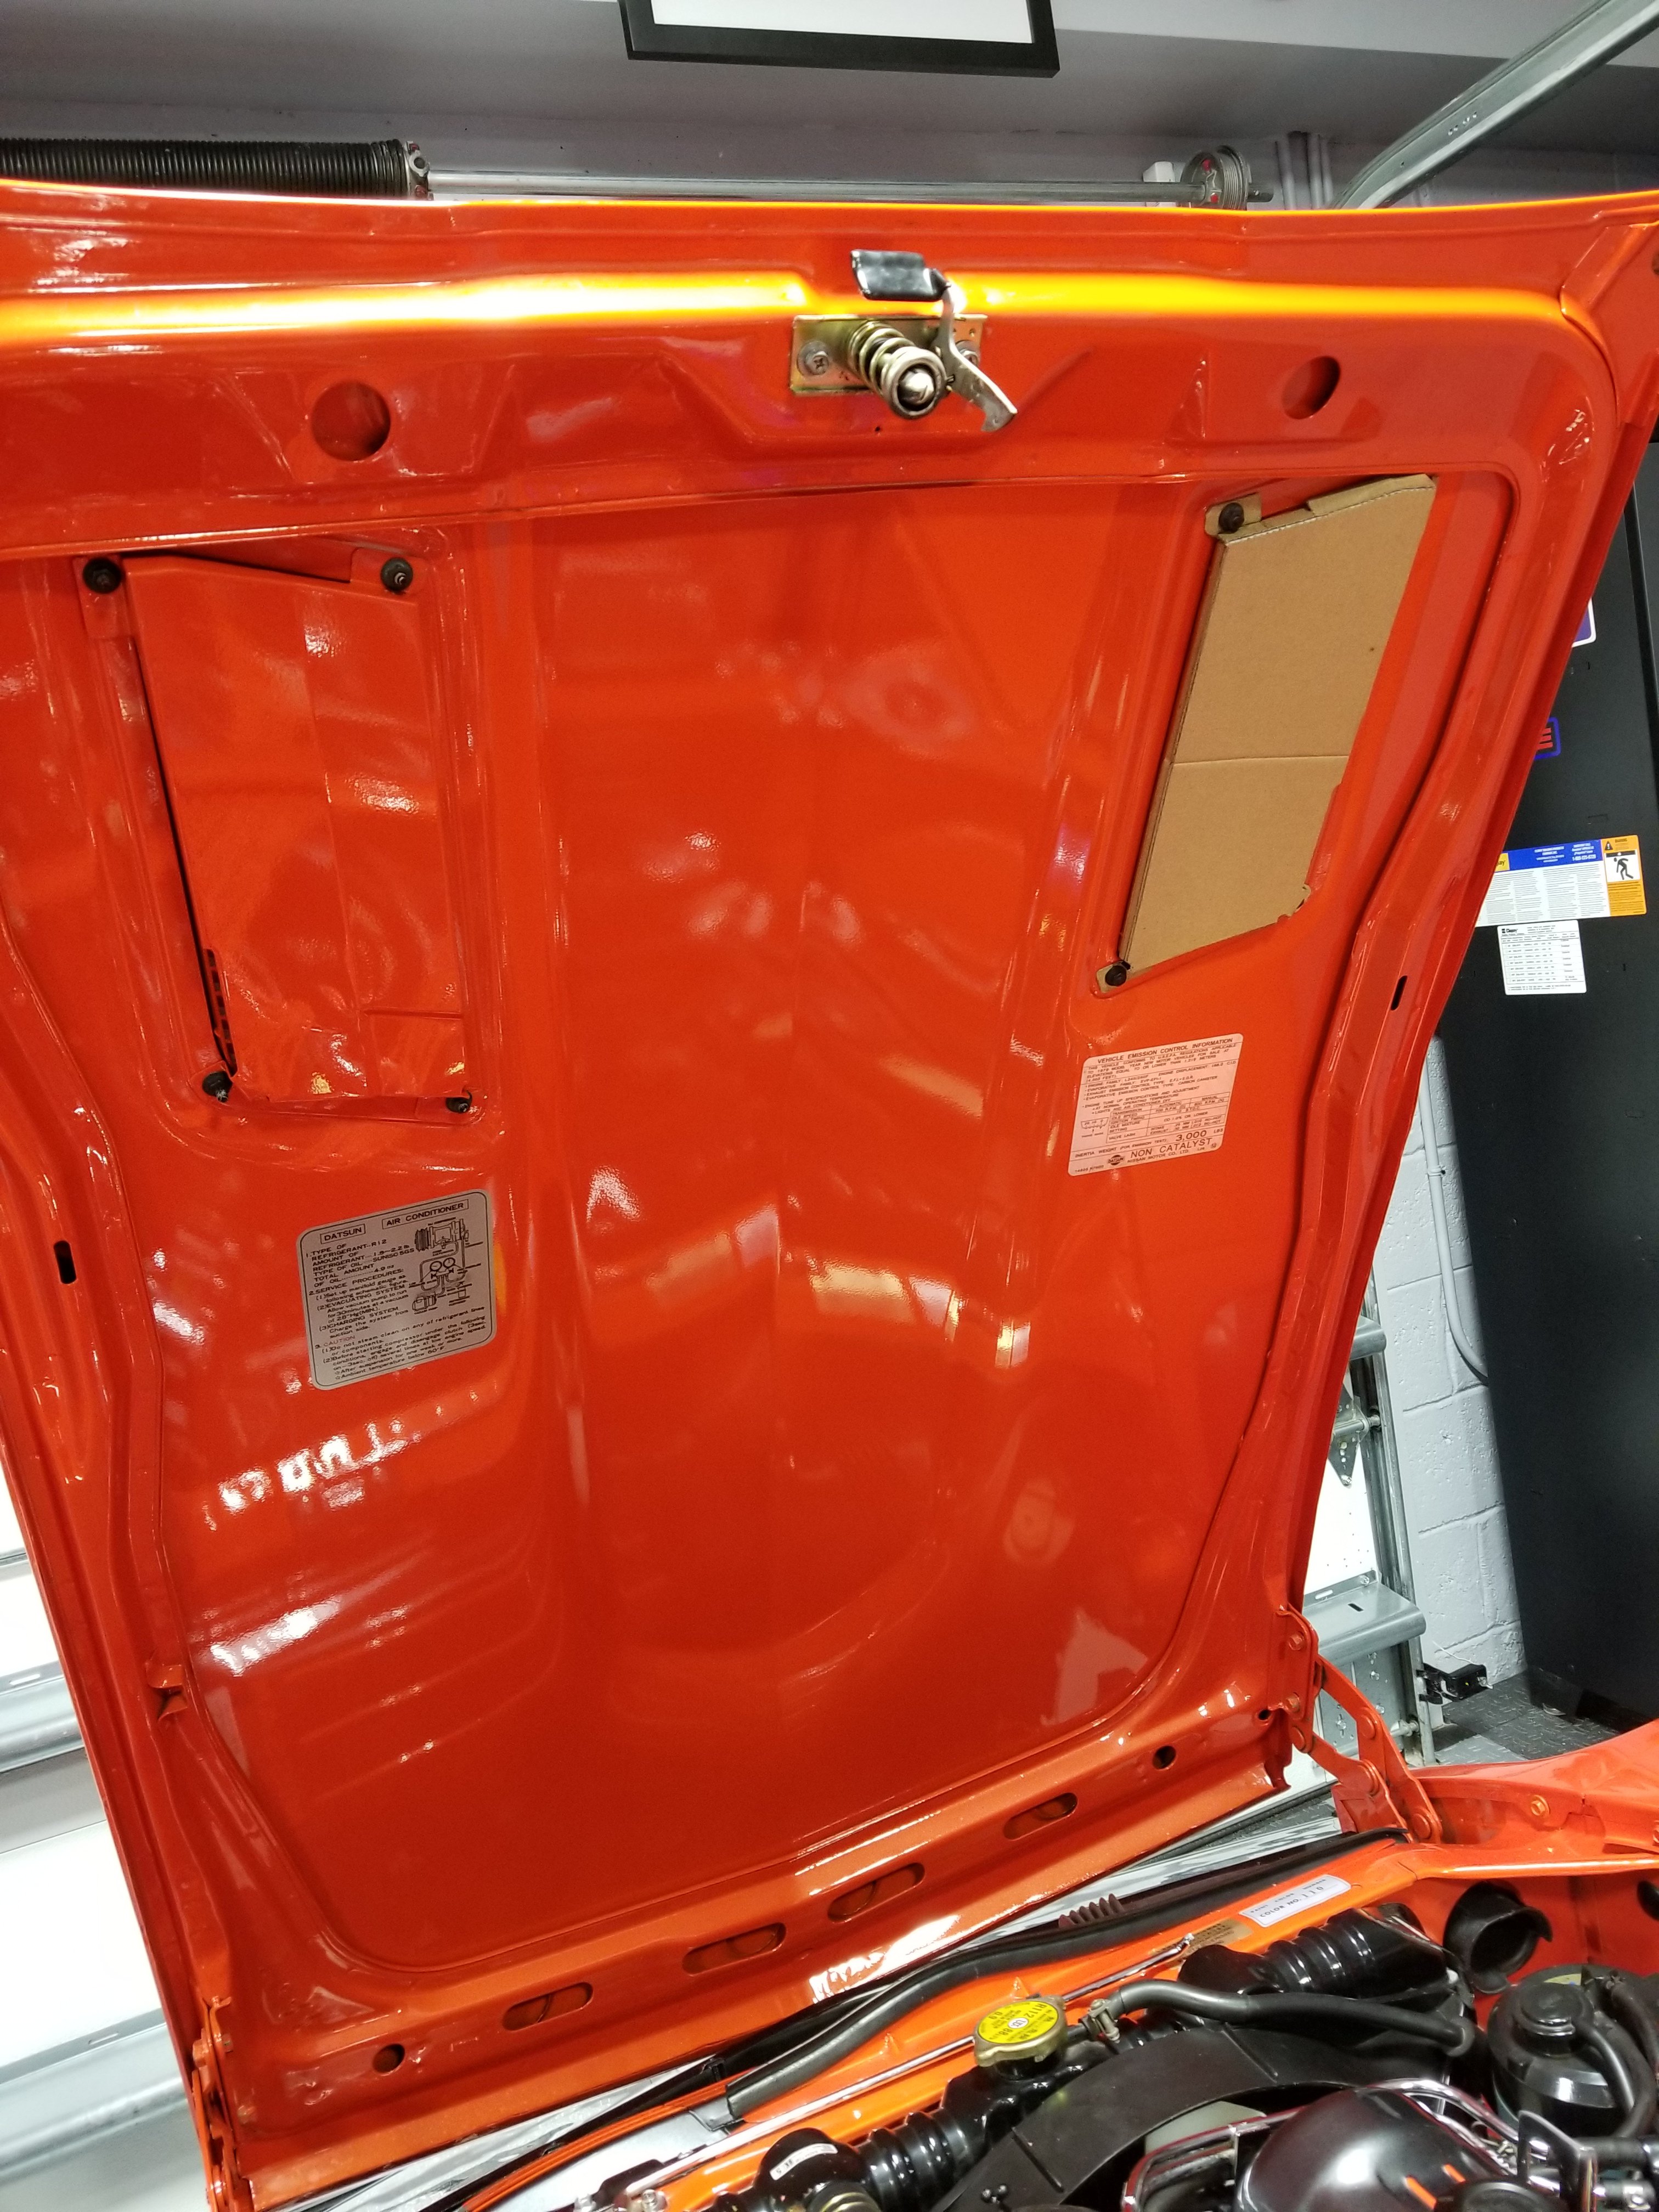
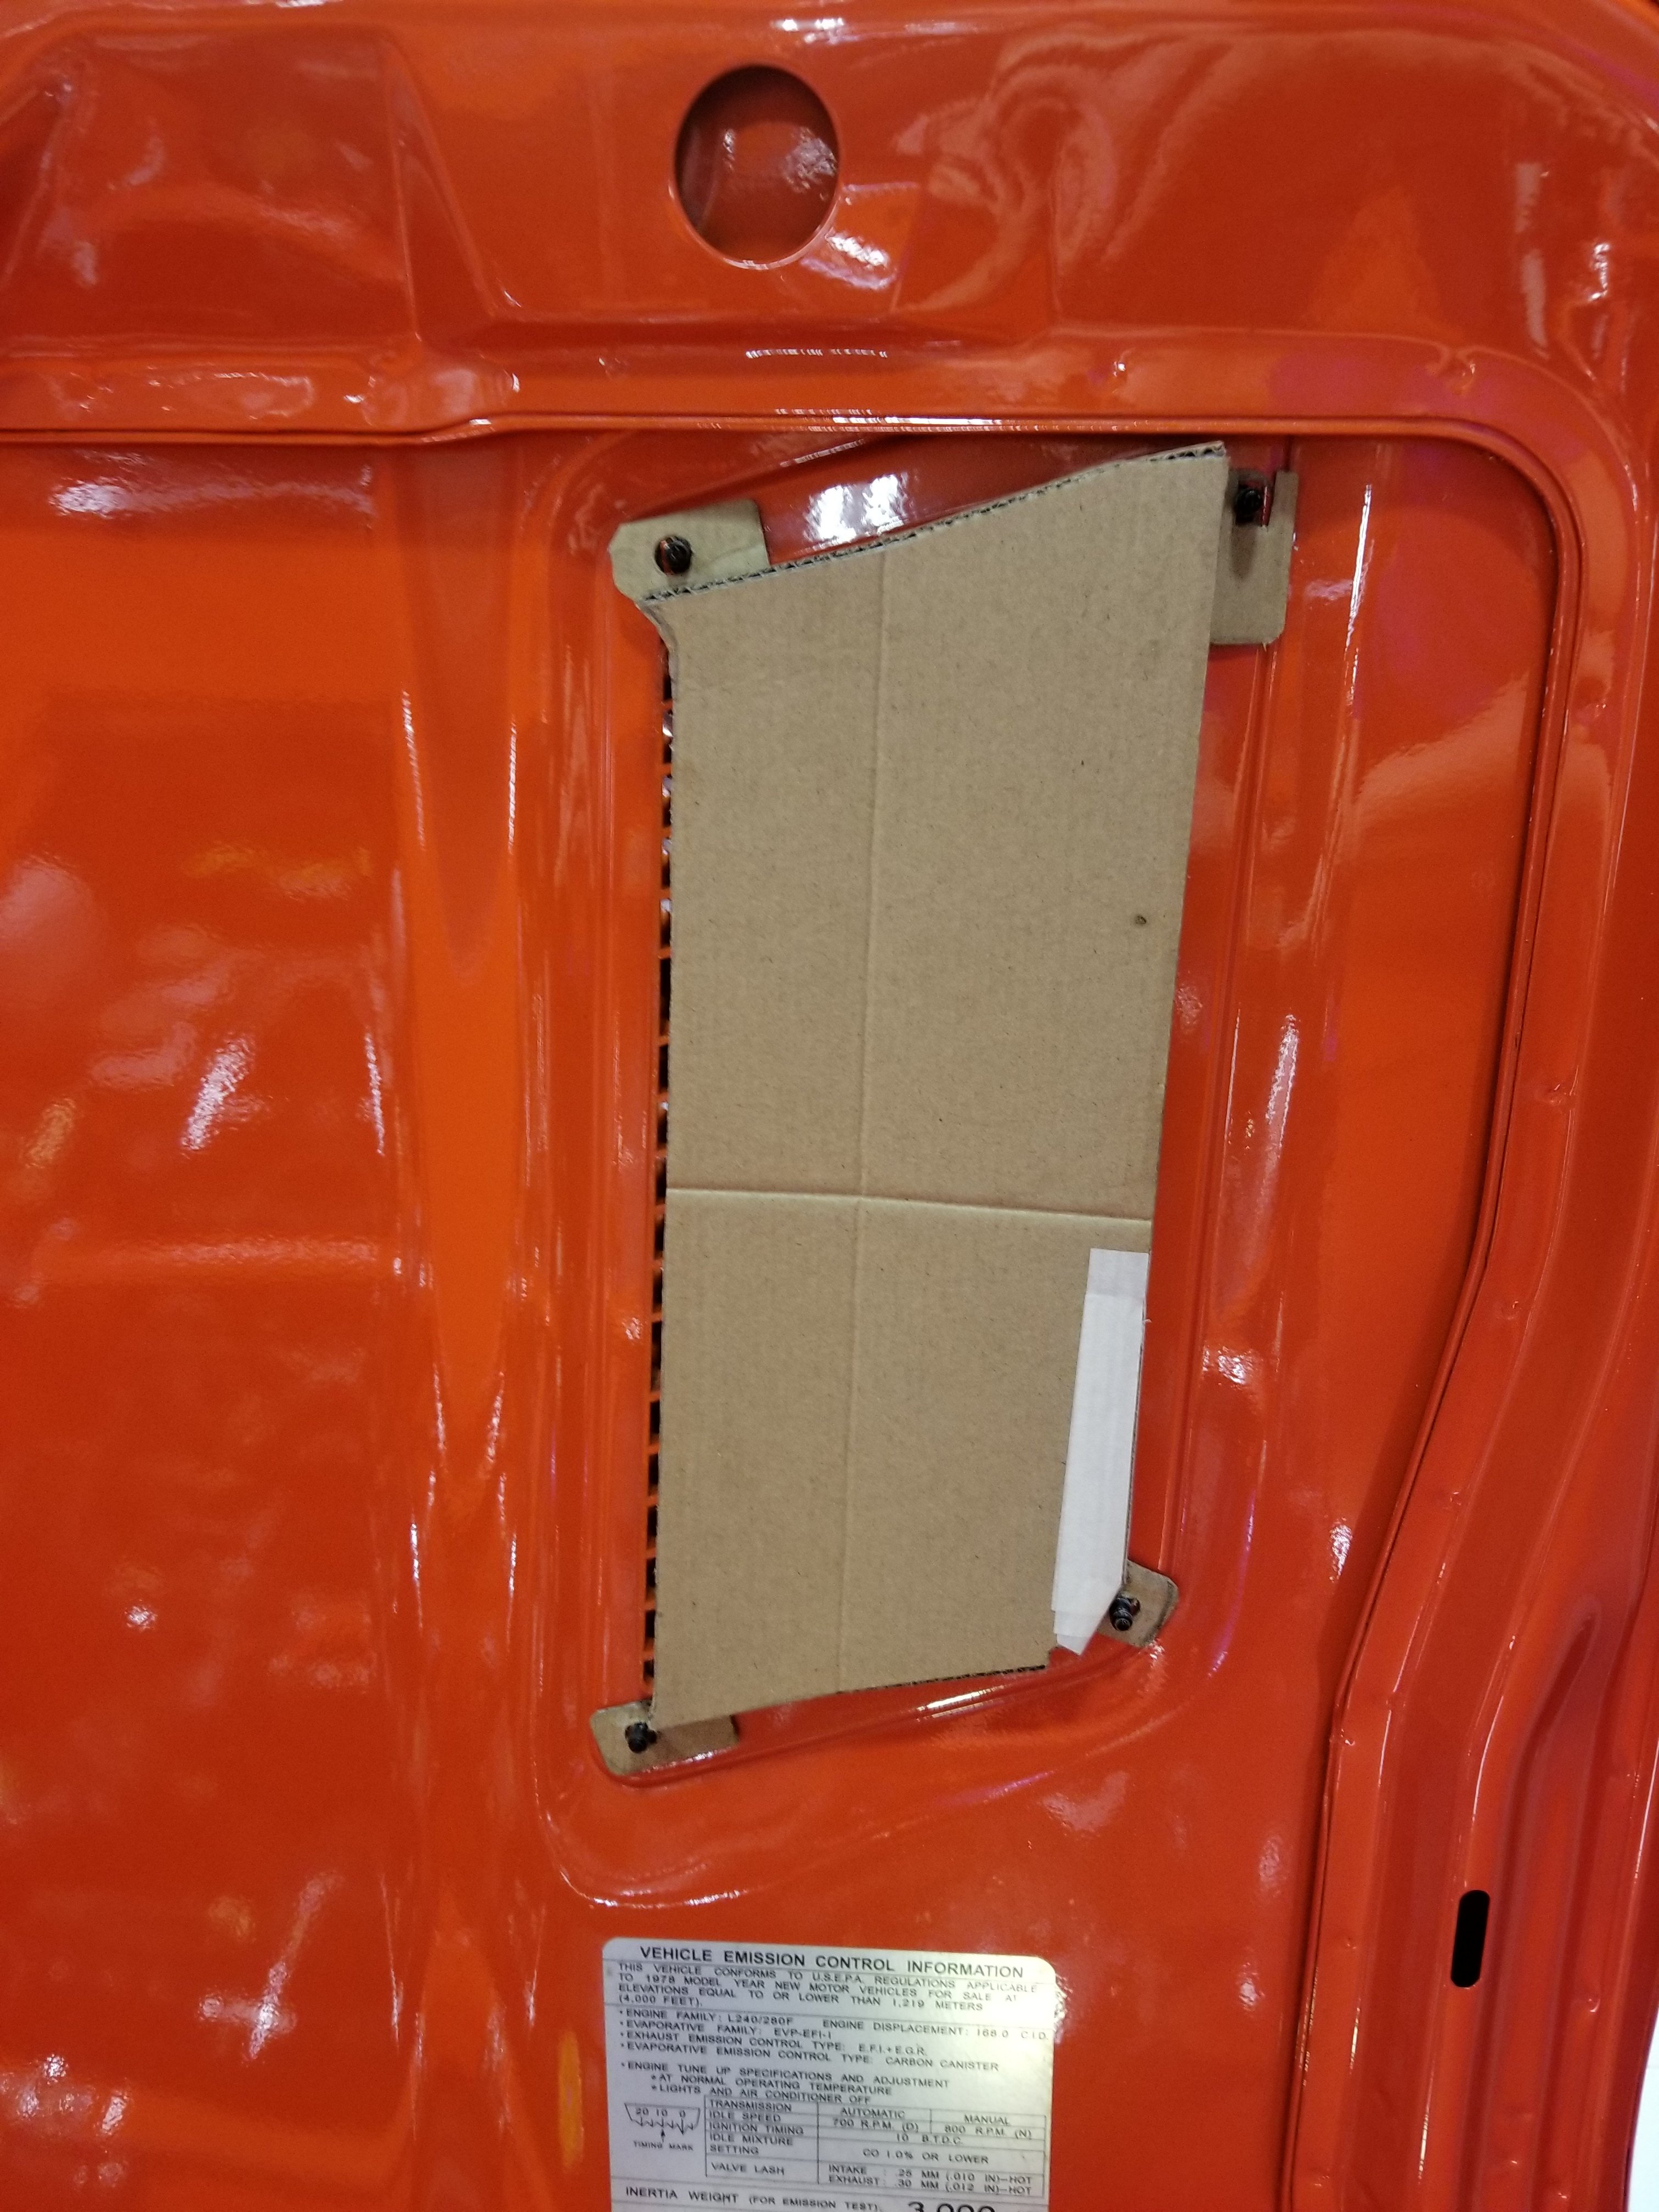
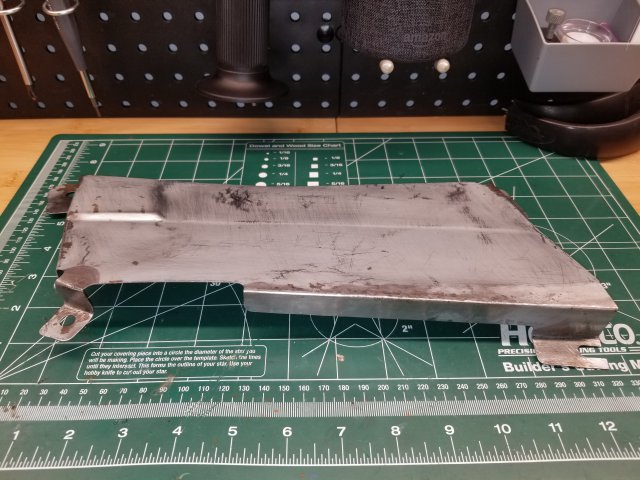
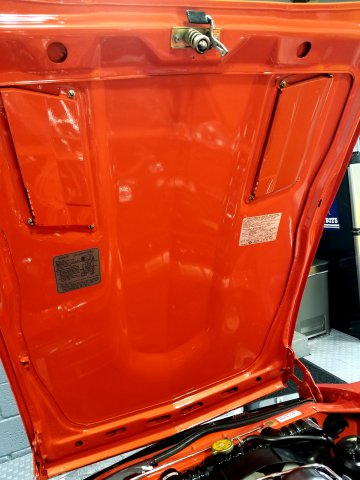
I finally got around to finishing this drip tray for the passenger side hood vent. I was fortunate to locate a used driver side drip tray on Ebay and flattened it out, reversed the form and drain slots before prepping and painting to match. The new slot configurations are mirror image of the driver side drip tray and will still allow hot air to exit the engine bay and water to drip away from the fuse block... and still looks "factory" !!
-
280Z Restomod Progress
dmoralesbello replied to dmoralesbello's topic in S30 Series - 240z, 260z, 280z
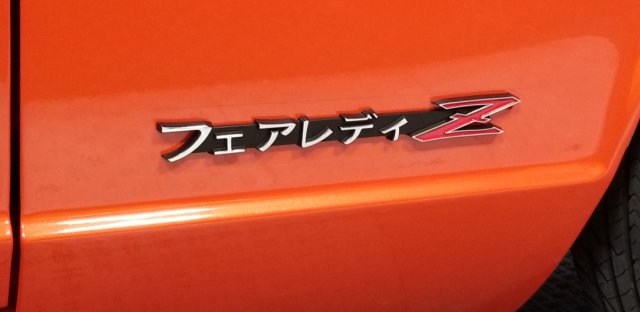
They're $50 each plus shipping from DPAN GT. They have their own site but I got them through Ebay. Look for "DPAN GT Fairlady Z Katakana Badge Emblem 240Z 280Z 280ZX 300Z 350Z 370Z JDM S30". -
280Z Restomod Progress
dmoralesbello replied to dmoralesbello's topic in S30 Series - 240z, 260z, 280z
A fellow member at the Classic Z forum turned me on to these very cool Katakana logos for the Zs. They apparently read "Fairlady Z" but I just really like the look of these instead of the standard "280 Z" logos.
-
280Z Restomod Progress
dmoralesbello replied to dmoralesbello's topic in S30 Series - 240z, 260z, 280z
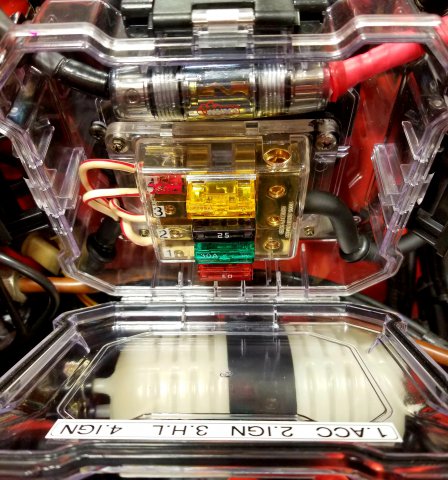
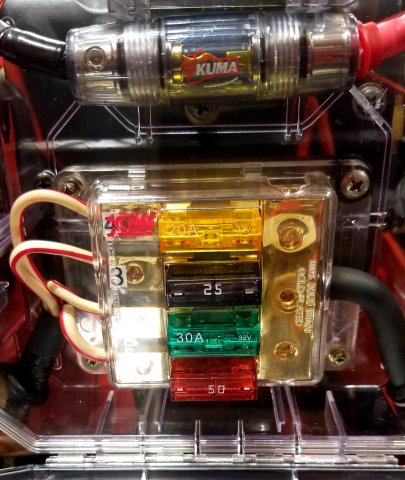
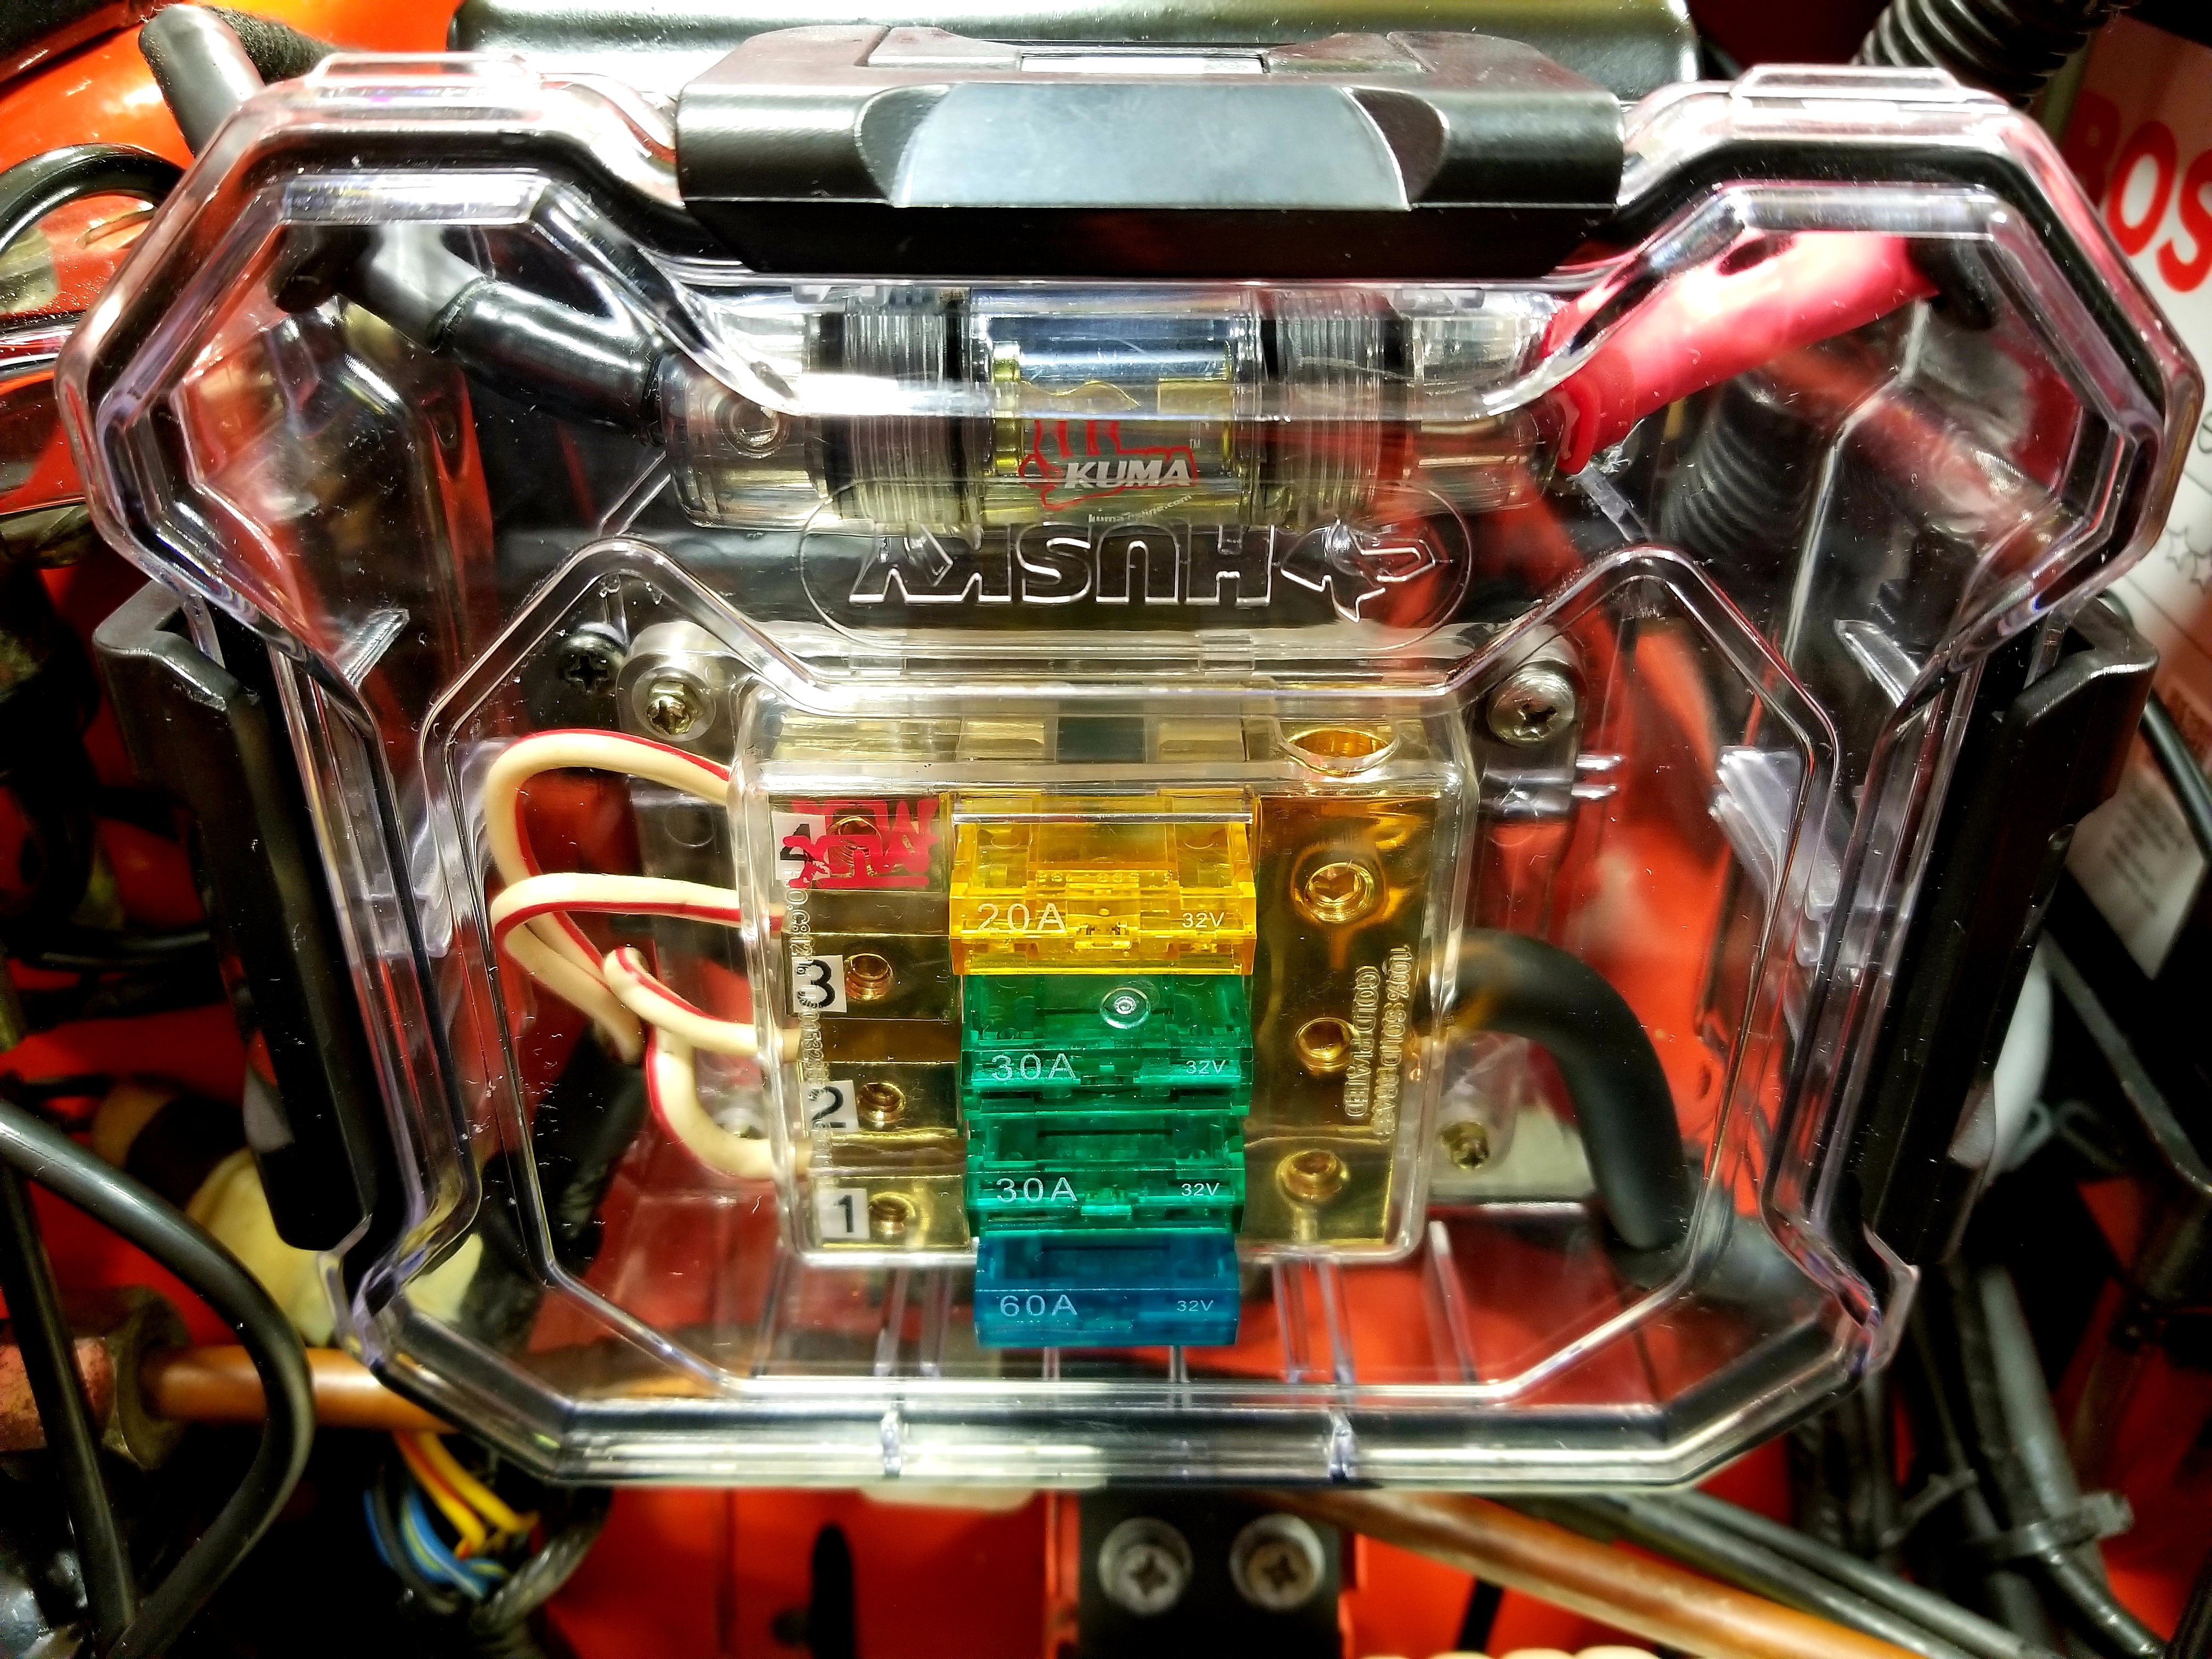
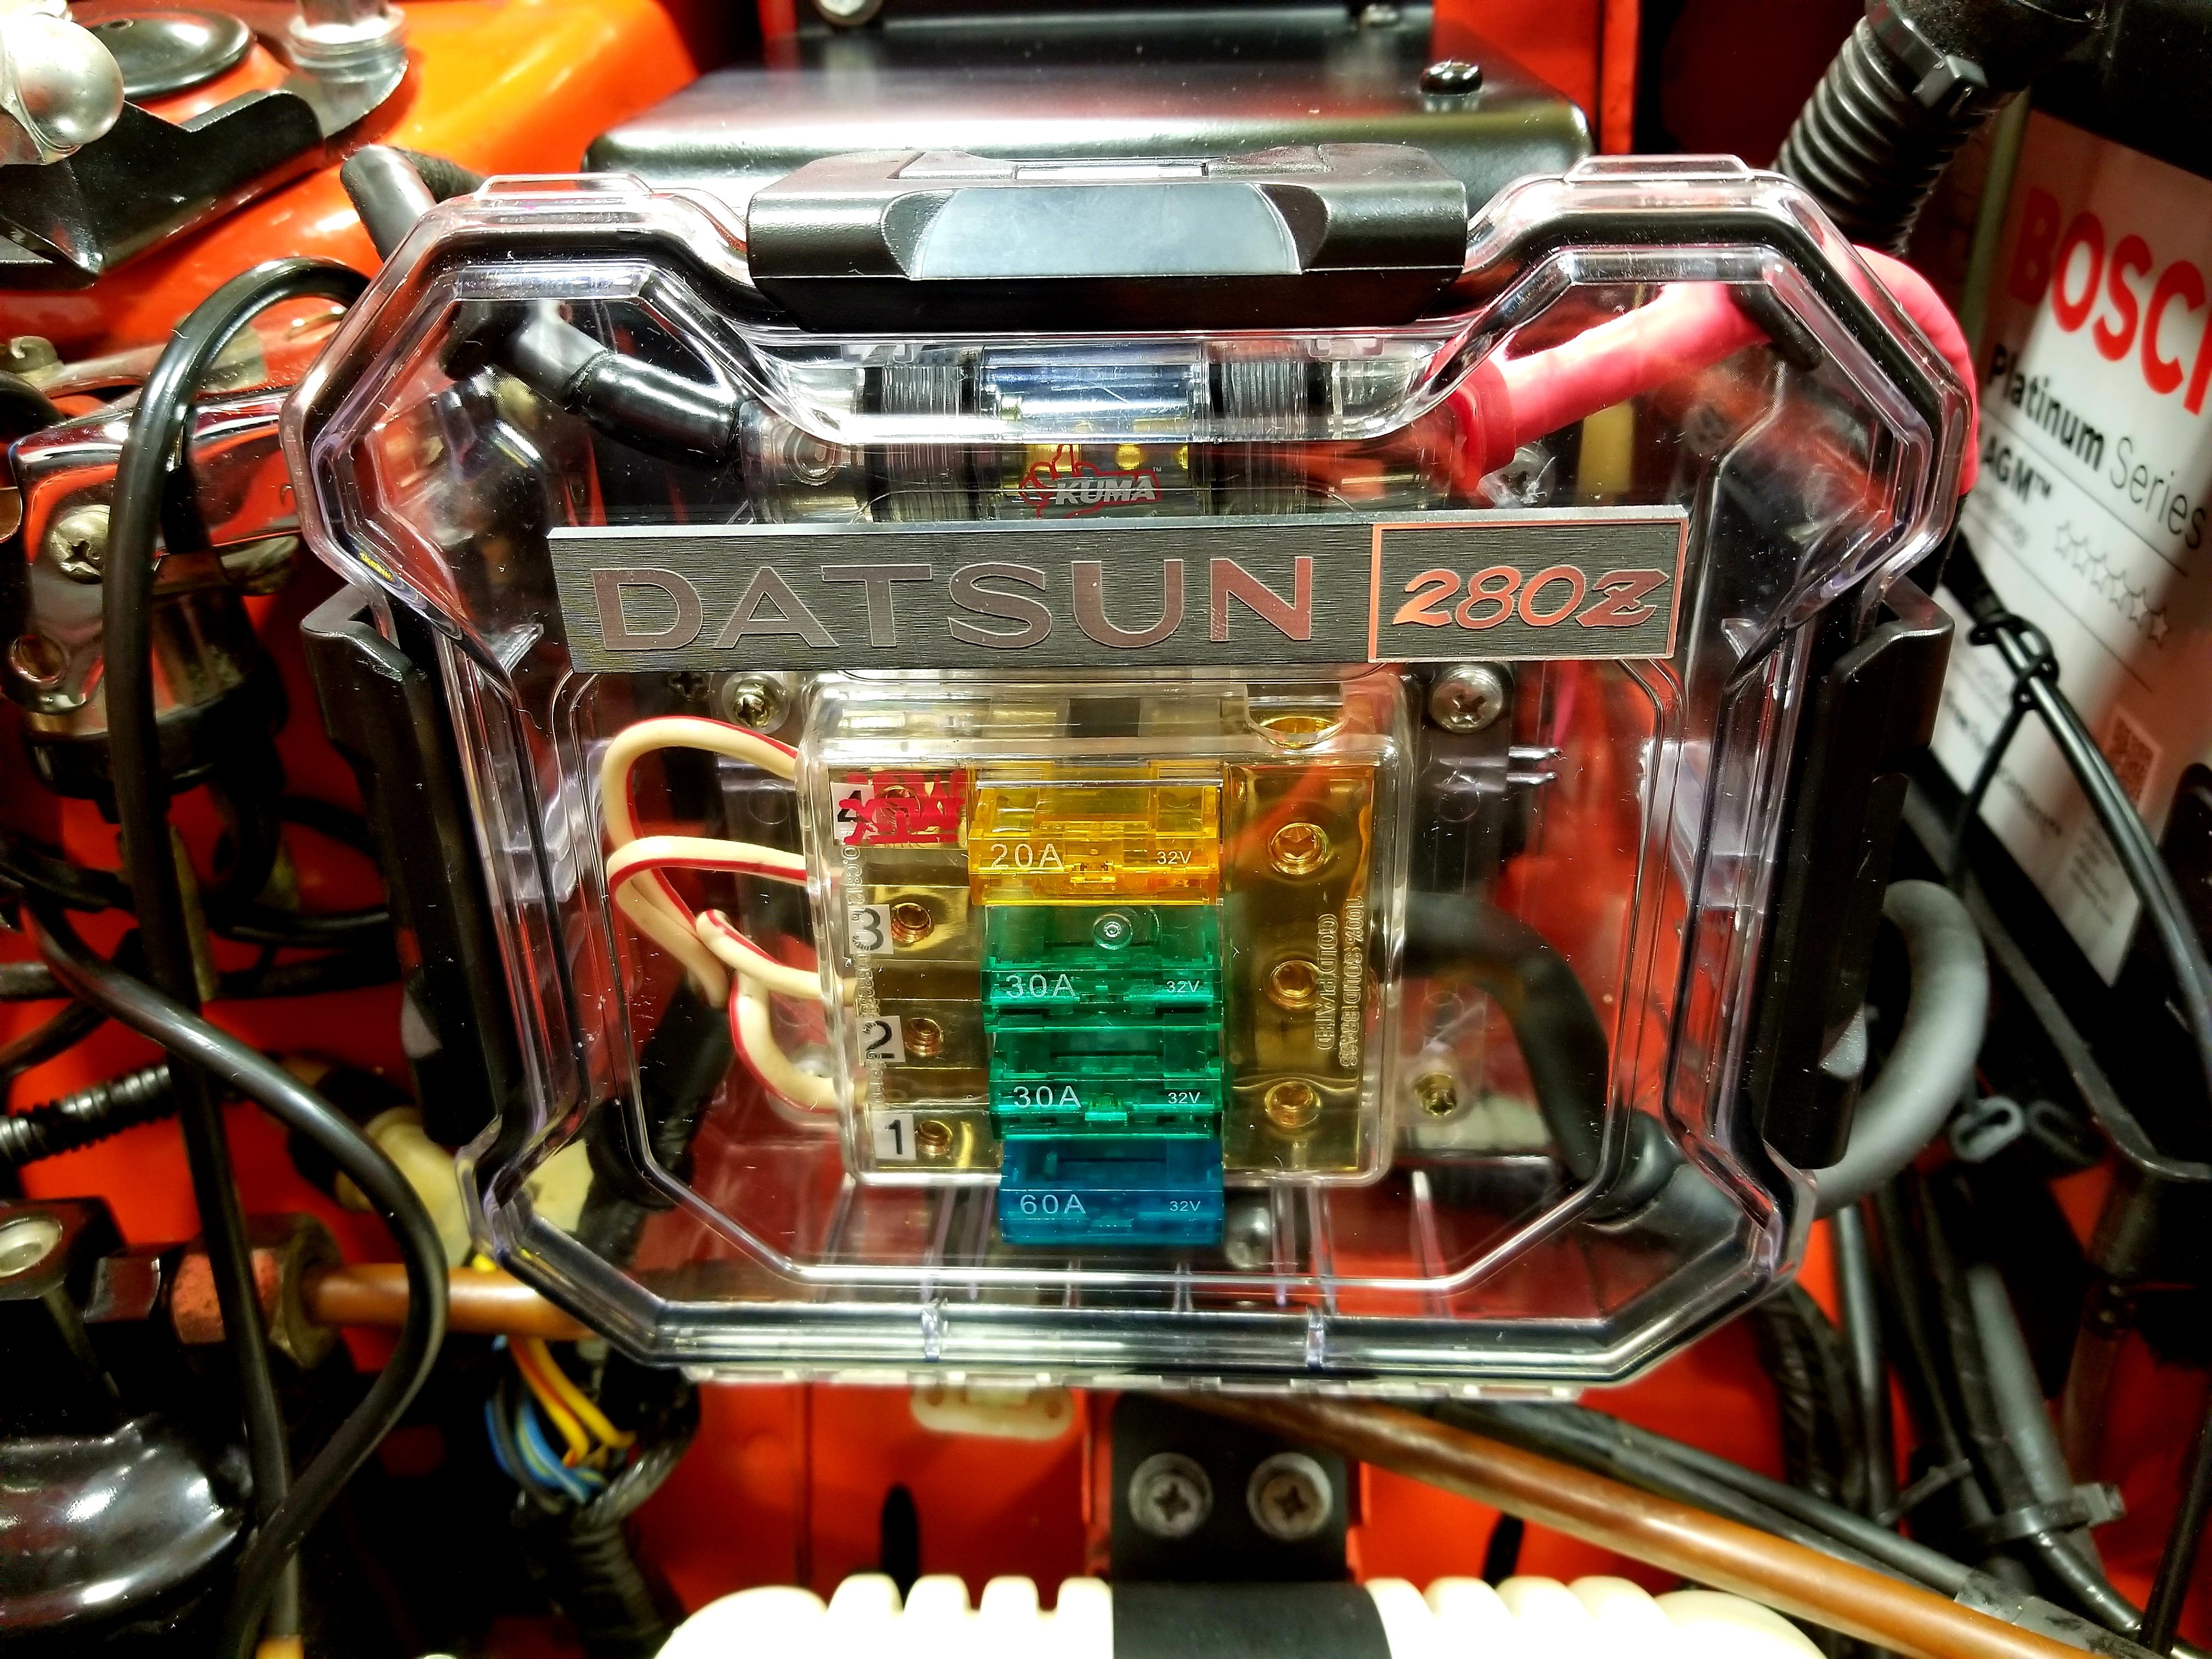
I was committed to updating the information pertaining the amp rating for the Maxifuses I used in the fuse block that replaced the fusible links OEM set-up so here's the update. I have been running this set-up (pics below) for a couple of months without issues. The consensus was to decrease the amp rating of the fuses used as much as was logically possible to test how well they protected each circuit. I've made a point of driving with as much electrical draw as possible with the AC, headlights, sound system, turn signals when necessary, hazard lights and horn when possible. The only system I haven't used simultaneously is the windshield wipers/washer because I don't take the car out in the rain. The circuits have been identified on the decal on the inside of the case cover. Despite the information on the Atlantic Z page regarding amp ratings for the different color fusible links, my current (no pun intended) set-up is much lower and, as stated previously, seems to be working well. Circuit 1 (ACC): 50 amps, Circuit 2 (IGN): 30 amps, Circuit 3 (H.L.) 25 amps, Circuit 4 (IGN) 20 amps
-
280Z Restomod Progress
dmoralesbello replied to dmoralesbello's topic in S30 Series - 240z, 260z, 280z
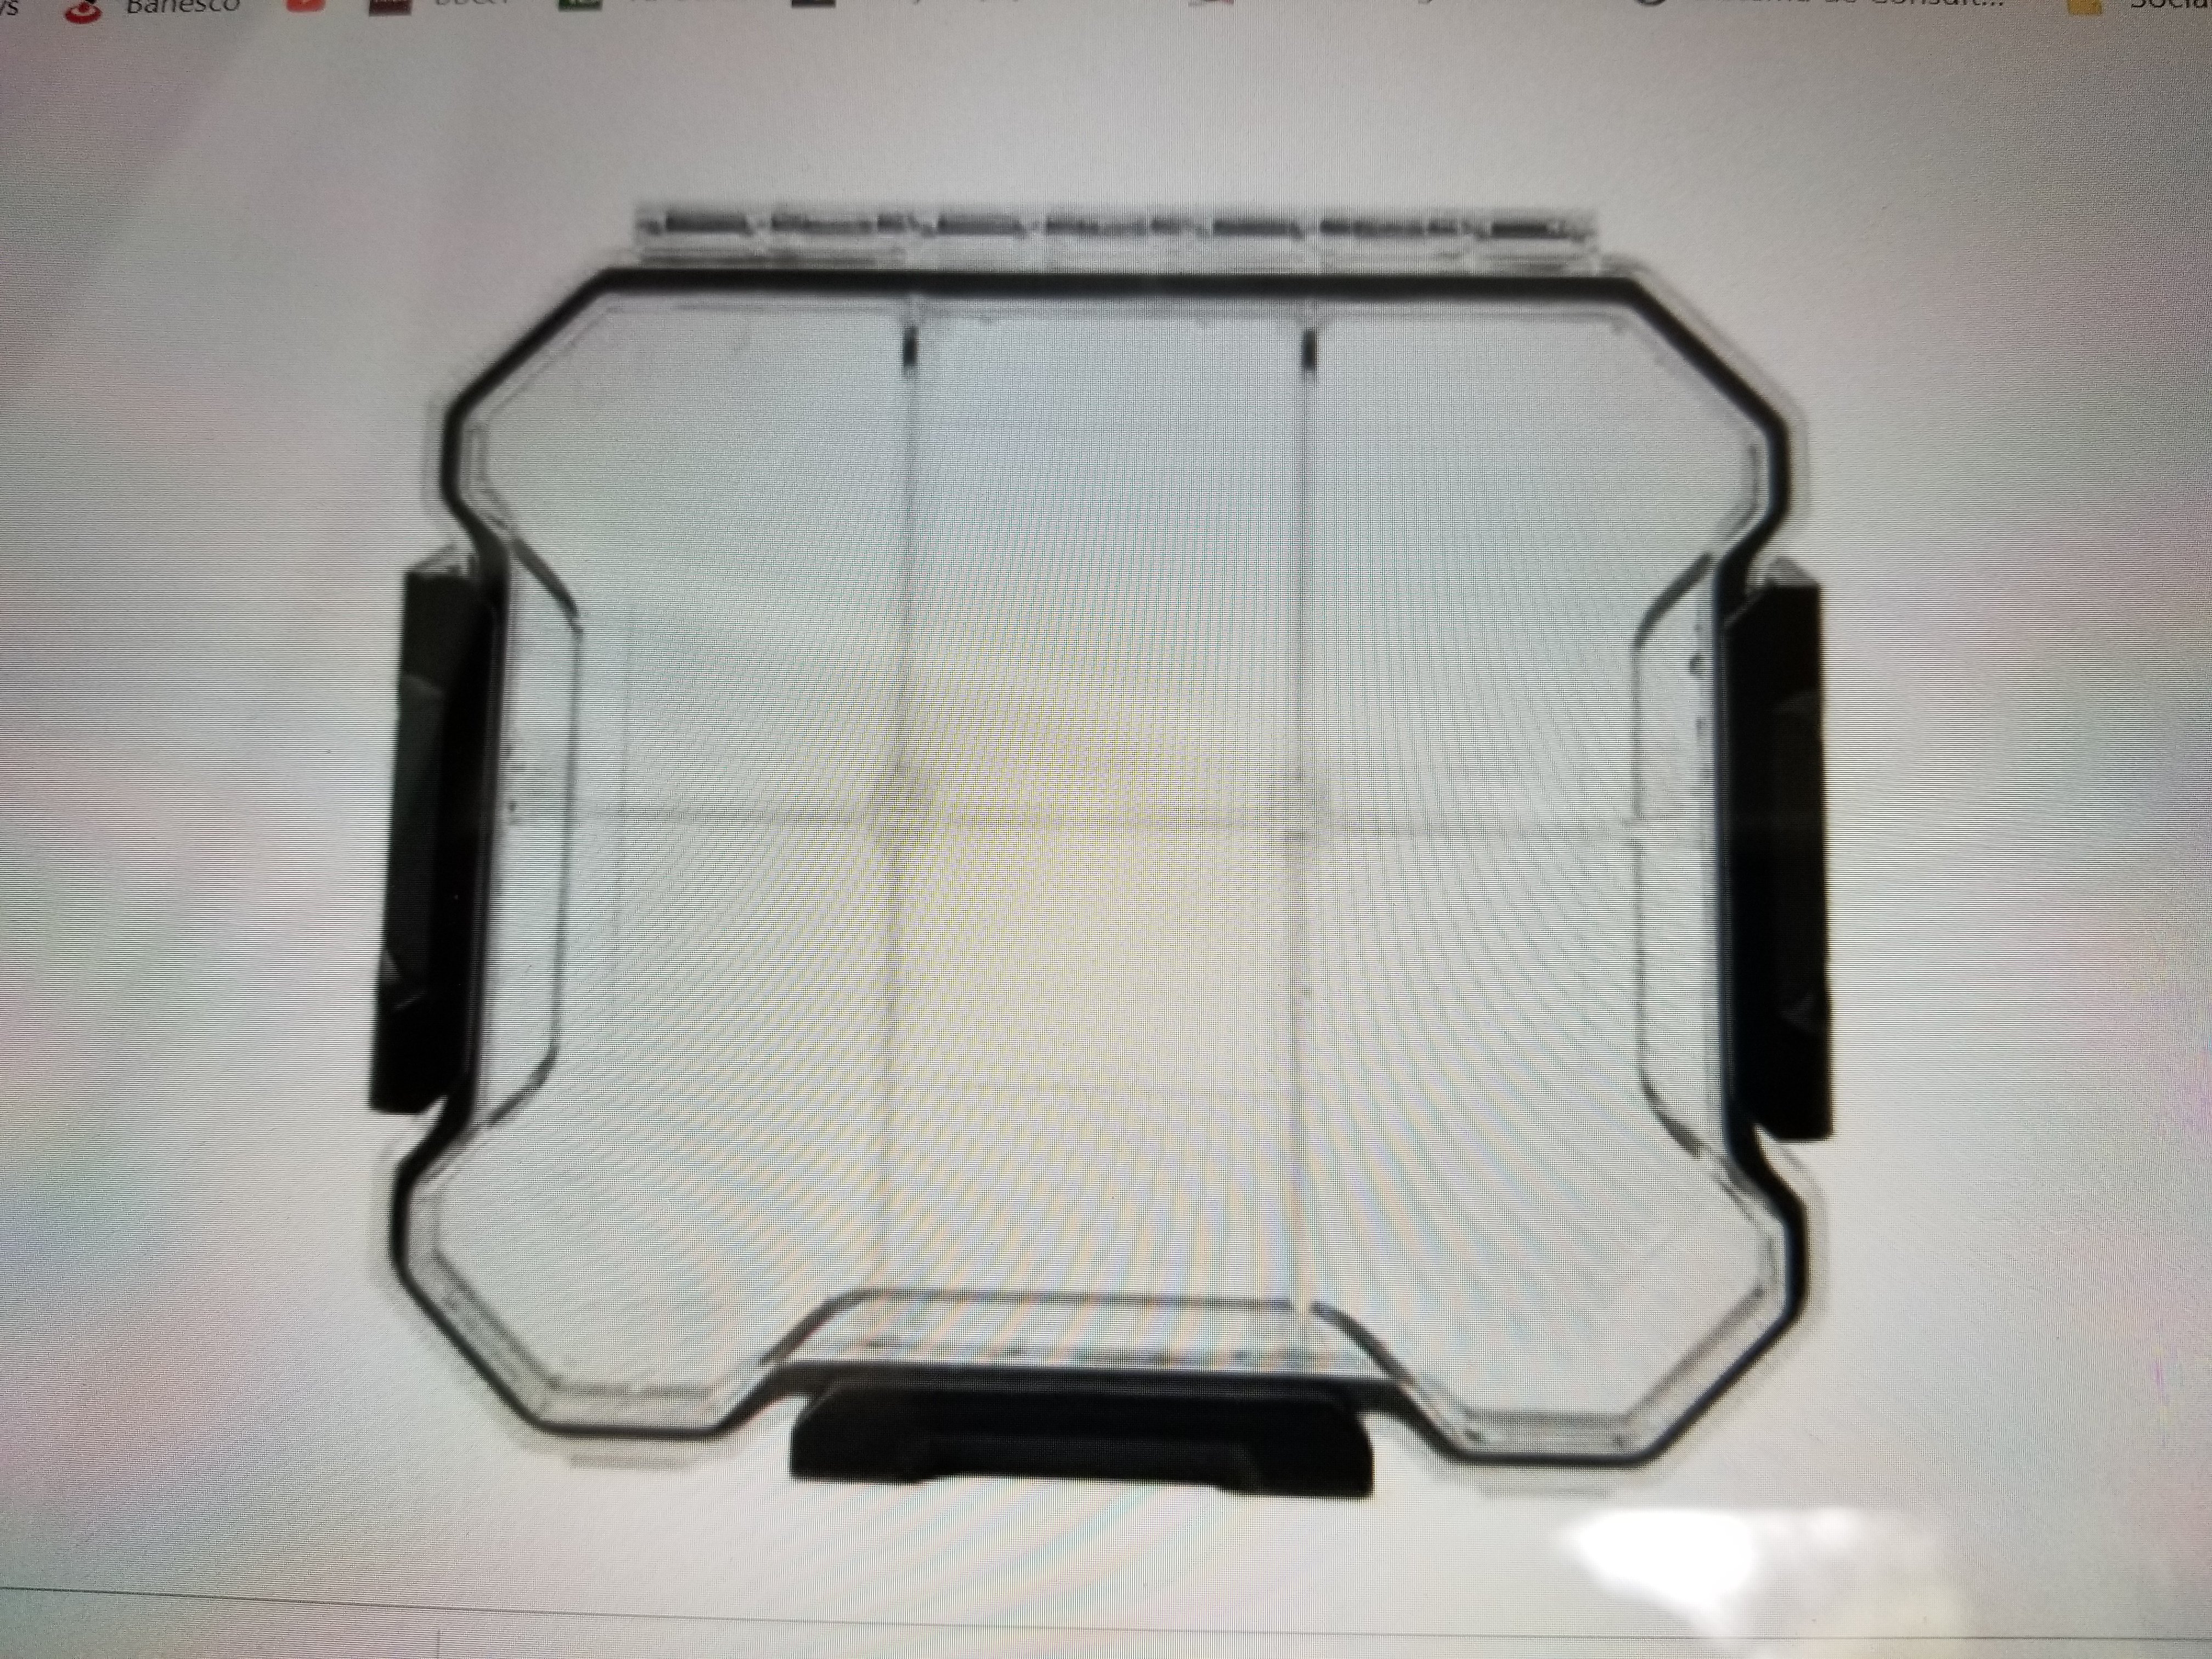
I've been running my Maxifuse 4 circuit fuse block for a few months (replacement for the old fusible link set up) and all the electricals are working well. My worry has been the fact that the set up is definitely not water resistant (much less water proof) which could be a huge problem if I get caught in rain or simply carelessly wash my car. I like the fact that it's a simple 4 circuit system with readily available fuses so I found a way to put it inside a Husky brand (Home Depot) WATERPROOF 6" small parts box ( measures exactly 6"x6"x2") made of hard clear plastic. It looks like acrylic but I'm not sure. I pulled out all the partitions, opened 4 holes (one in each angled corner) and fit them with rubber grommets for all the input and output cables. Fixed the fuse block inside with rivnuts placed on the bottom of the case (as well as the sound system fuse holder) and attached the set up back again in place of the old fusible link holders. Oh yeah, and I covered up the inverted "husky" logo with a spare 3D printed 280Z logo I had laying around. All the electricals tested well. I will run this for a while to test the durability of the clear plastic but I think it'll fare very well considering the fuse block itself was exposed to the heat of the engine bay for months without issue and this plastic seems very similar to that. I'll report long term findings if any. Pics below.
-
I think you should be considering LED upgrades for your headlights rather than HID bulbs, the main reason being that your power consumption will be very considerably less with the LEDs. Your electrical system will appreciate the load reduction greatly. Definitely go with Dave's harness upgrades with relays and that will complete your upgrade.
-
280Z Restomod Progress
dmoralesbello replied to dmoralesbello's topic in S30 Series - 240z, 260z, 280z
Excellent info. I will go on their site and find the unit that best suits my needs which is basically to substitute the original fusible links with a more current and safe alternative. Thanks again.