zdlite
-
Posts
47 -
Joined
-
Last visited
Content Type
Profiles
Forums
Blogs
Events
Gallery
Downloads
Store
Everything posted by zdlite
-
Need help selecting NEW CLUTCH
zdlite replied to RebekahsZ's topic in Gen III & IV Chevy V8Z Tech Board
Yep. Probably run you $1500 to two grand to fix too. Looks through some of the older posts both here and on ls1tech. Shift forks are a common problem on the early T56's (Google it or see here). In fact, the problem is so prevalent that most guys won't buy an early F body trans that hasn't been rebuilt and upgraded. Tremec redesigned the transmissions to make them more reliable. I'm not sure when they started doing that or when they made it into production, but it was after the GTO's first started coming out. As you are finding out the hydraulic systems just aren't that complicated. Not trying to be an ass, just want to help. Good luck whatever the solution is. -
Need help selecting NEW CLUTCH
zdlite replied to RebekahsZ's topic in Gen III & IV Chevy V8Z Tech Board
you know I hate to say this but when T56's get hard to power shift it is usually because they need to be rebuilt. The ones from the early F bodies in particular had issues with the 3-4 shift forks. The clutch could be fully disengaged and it wouldn't surprise me if the clutch plate was still sliding against a moving disc. If you put a clutch MC on with a larger stroke and bore and the problem still persists then the only thing left is rebuilding the tranny. -
Anybody having trouble with T56 shifting?
zdlite replied to RebekahsZ's topic in Gen III & IV Chevy V8Z Tech Board
GM put a small restriction in the stock clutch line feeding the HTOB to slow the release of fluid in an effort to force people to shift more slowly. This reduces stress on the stock drivetrains improving the warranty situation. The "drill mod" is pretty common over on ls1tech to restore power shifting performance. If you truly have a "100% Stock" clutch system then you might try doing this mod. -
Please post 2 into 1 LS exhaust pictures
zdlite replied to RebekahsZ's topic in Gen III & IV Chevy V8Z Tech Board
http://www.mandrelbend.com/gallery.asp?ContentId=70 They put it together in two pieces that are pretty easy to pull out. The tapered it from 3" to 2.5" to 2.25" so they could get both smaller diameter pipes to bend for the dual inlet magnaflow muff. Seems to take the carb'd LS2 pretty well. I did cut and weld a second exhaust cut out in the front diff cross member. Only has two hangers, one mounted to the front diff cross member and the second hooking into the stock hanger point at the back of the muff. With air tools it comes out in only a few minutes. The thing looks pretty stock from the outside. Not overly loud, but a nice, deep, mean growl under WOT -
Woodward power steering project
zdlite replied to JMortensen's topic in Brakes, Wheels, Suspension and Chassis
You don't have to go into the fire wall. If you raise the motor a bit you should be able to get over the top of that rack. Going with an undersized damper will reduce how much you need to raise the front of the motor. Depending upon your rear pinion angle you can work some tilt into the motor. Titling the motor front to back will help lower the overall engine CG an extra 1/8 if that is what you are after. My motor sits pretty level. To get it that way I leveled the rear diff as much as I could. I did the JTR mod of drilling out the rear mustache bar bushings and lowered the front of the diff when I put in a Ron Tyler style diff mount. I even “clearanced†the front diff cross member to keep the driveshaft from hitting it. If your diff is anywhere near stock inclination than you will have a few degrees tilt on the motor anyway. If I were you I would mount the rack where you think it will do the most good then hang the motor in the bay and start looking at geometry. One idea I did have, the vette crank pulley has two belt grooves. The back one is for the AC on a stock vette. I wonder if there is some way to get a pulley with just the back grooves and fashion an alternator mount off of that. That would buy you a couple inches in length. Not sure if you could ever find a damper like that or if it would work to cut down a stocker. -
Woodward power steering project
zdlite replied to JMortensen's topic in Brakes, Wheels, Suspension and Chassis
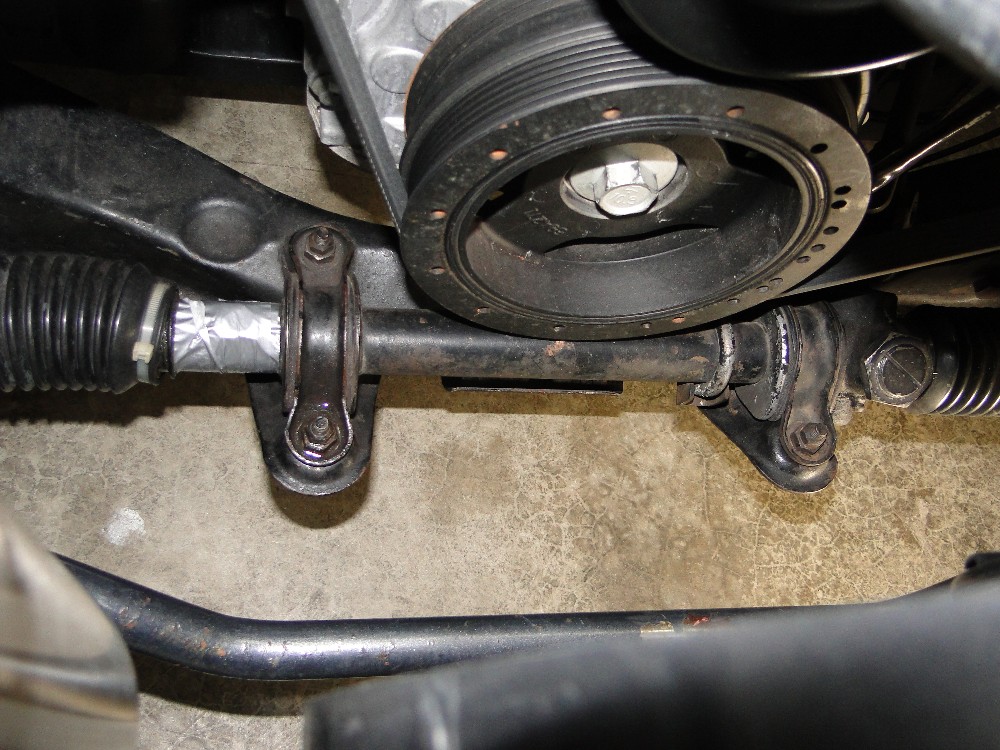
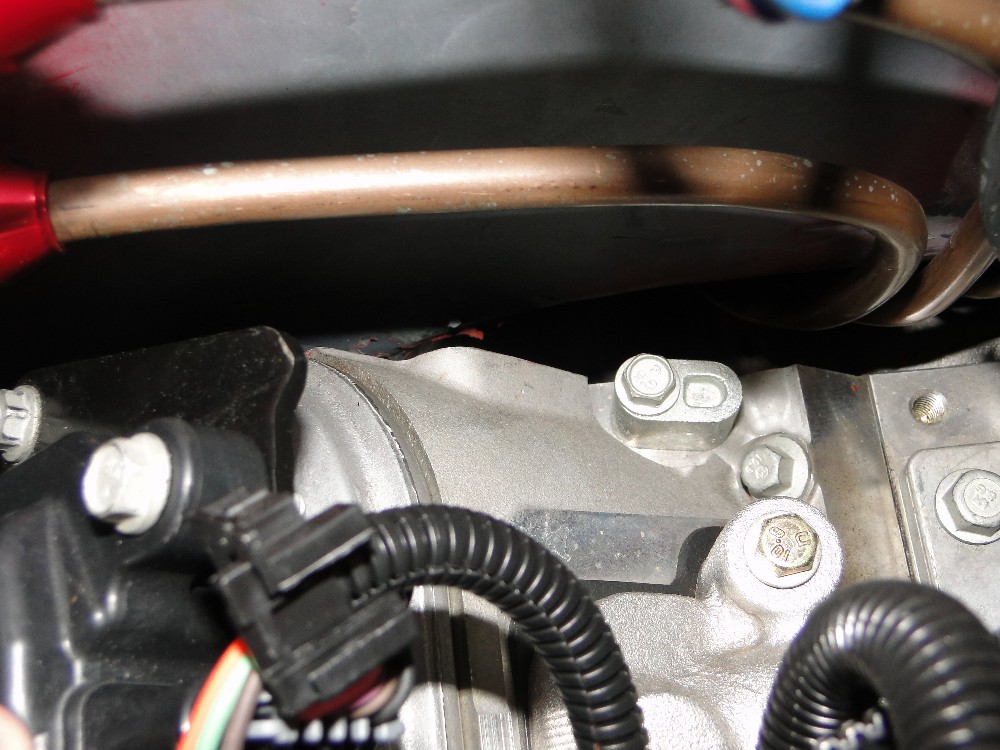
Boy, hard to imagine how you will get an LS motor behind that. I am running vette accesories which means the pulley is running closer to the block than the F body or truck. I have my engine back with less than a half inch clearance between the passenger side head and the fire wall. Even with that you can see the front of the crank pulley sits a little more than half way over the stock 240 rack. The rim of the crank pulley is about a belt tickness above the rack. I have my motor down pretty far to get hood clearance for the carb. The trans sits pretty low in the tunnel, lots of up room. You could probably go as far back but you may need to raise the motor to put the crank pulley above the rack. I also have a 3/16 inch shim between the cross member and the body (ala JTR), so the motor is low. On the plus side the motor doesn't move the way it is mounted. I am using S&P bisquit mounts and a urethane trans mount. Even an eighth of an inch of clearance is good.
-
Brake booster and Master cylinder upgrade
zdlite replied to milesz's topic in Brakes, Wheels, Suspension and Chassis
$35 at Autozone. If it is bad rebuild it your self. Not hard to do. Sure beats paying two bills for a new one. http://www.autozone.com/autozone/parts/1979-Nissan-Datsun-280ZX/Master-Cylinder-Brake-System/_/N-imgvtZ8kn47 When you put this on your car you will need to swap the front and rear lines front to back. The 240 MC is swapped from the ZX one. There is enough slack in the stock lines to do it. As for booster, I installed an 8.5" booster in my 70 240z. The larger ZX ones won't clear the clutch MC. I had to drill new holes in the firewall, I think 10 mm farther out. I have the same brakes as you, works fine. The attached file has a bunch of notes and part numbers I collected about boosters and MC's. There is a 1" option out there. Z car brake boosters.doc -
The stock radiator is a solid option, just heavy compared to an aluminum one. I was going to go that way but the L6 water pump let loose taking out the stocker just before I did my swap. I would add that the early 240's had known cooling problems related to turbulence under the front end. On later years they added a chin pan to smooth out airflow through the rad. My stock L6 had cooling issues on hot days until I added a chin pan and upgraded to a 2 core radiator. Worked fine after that. I have zero cooling issues with a JTR radiator and Taurus fan. Like most guys I didn't need to hook up the high speed setting on the fan. I also had to leave off the chin pan due to the JTR rad being too tall. LS swaps are not hard to cool. Your cooling system as it sits should be pretty bulletproof, fan life not withstanding. My guess is the fan won't even run as long as the car is moving. I wouldn't hesitate to run it like you have it. Hard to believe the fan would just up and quit with zero warning. If it did you could probably drive it home as long as you keep moving.
-
Just want to point out that stainless steel doesn't conduct heat anywhere near as well as plain steel. http://www.engineeringtoolbox.com/thermal-conductivity-d_429.html I would also warn that this may be a matter of perspective. You are gathering different opinions, what is good to one guy may still be unacceptable to you.
-
I really like that MADD electrical site. They have a lot of good information and ideas. Also want to echo what BJ is saying about 240’s. I did basically what he is saying but want to add a couple of ideas. First buy a fused distribution block and second a voltmeter from a 280Z attaches right to the back of the 240Z front bezel. Car stereo places sell fused distribution blocks that are perfect for what is being done. They allow you to attach a 4 gauge cable from the alternator to the distribution block. You then have up to 4 fused circuits to wire the rest of the car. Some of them even have built in digital voltmeters, how cool is that for a quick under hood check? http://www.hifisoundconnection.com/Shop/Control/fp/tcat/28049/SFV/30046 I have an 85 amp Denso alternator. I put a 4 fuse block up near the radiator and connected it to the alternator with a 4 gauge wire and 85 amp in line fuse. On the back side I used a 40 amp fuse in one of the fuse lines to route a 10 gauge wire to the battery, I hooked the two power wires from the two sides of the fuse box to the second fuse (I forget what amps I used there, either 20 or 40), then used the third fuse to power the electric fan. Instead of using a brass nut to connect the ammeter wires together I spliced, soldered and heat shrinked a connection. The 280 voltmeter has a charge indicator light. I hooked that to the Denso alternator. I then hooked the voltage sensing wire into the fuse box. The voltmeter and charge light give positive indication of the charging system health. They both came in handy when my car threw a belt the other day. Kept me from overheating it.
-
3 Wire Alternator Question, 1971 240z
zdlite replied to 510can's topic in Gen I & II Chevy V8 Tech Board
Maybe I misunderstood you. What I meant was running the main power lug from the alternator to the battery bypassed the ammeter, or at least makes it work backwards from the way it was intended. It also sent all the current for the fuse box through the ammeter. Maybe had something to do with it burning up? Or maybe I still don't understand the hook up. At anyrate glad you are happy. Look into putting a 280 volt meter in. You will get the dummy light that way (BTW, the bulb is what acts as the resistor). It is a simple swap, the 240 front bezel screws right to the 280 back end. Looks dead stock, the 280 fuel gauge works with the 240 sender. -
3 Wire Alternator Question, 1971 240z
zdlite replied to 510can's topic in Gen I & II Chevy V8 Tech Board
When you ran a wire from the alternator to the battery you effectively bypassed the ammeter anyway. In the original set up for current to get from the alternator to the battery it first had to run into the left side of the fuse box, up through the ammeter, back to the right side of the fuse box then to the battery. If I read what you wrote correctly you have the alternator output hooked directly to the battery. Thus you have all the electrical load flowing backwards from the way it was originally wired. Also the red wire is the voltage sensing wire. Wherever you connect that wire, that is the point where the voltage will be regulated. If you ran it to the main starter lug, that is the same as hooking it to the battery. Thus you are regulating your battery voltage to 14 V, then suffering a voltage drop through the rest of the wiring. I can see why the alternator is confused and your lights are dimmed. If you want the system to regulate properly, you need to hook the voltage sensing wire to somewhere more suitable. I would also NOT connect the alternator output directly to the battery. This link explains why http://www.madelectrical.com/electricaltech/chevymain1.shtml Instead of using a splice like described in the link above, I hooked my alternator output up to a power distribution block up near the radiator. I got it from a car stereo place. It has a 4 gauge lug on one side and 4 fuses on the other. I ran a 4 gauge wire from the alternator to the distribution block. I ran a single 10 gauge wire from one of the fuses to the battery. I replaced the 240 ammeter with a voltmeter from a 280Z, splicing together the big wires that use to hook to the ammeter. I then hooked the two large wires running to the fuse box and ammeter to the second fuse on my distribution block up near the radiator. This way there is no battery charging current running through the dash, and I have two 10 gauge wires feeding the fuse box instead of one. I used a third fuse on the distribution block to power the electric radiator fan. The important thing I did was to run the voltage sensing wire straight to the fuse box (not the starter lug) and the field wire to the charge indicator light on the 280 voltmeter. This way the regulator maintains a constant voltage at my fuse box, not the battery, the voltmeter tells me the health of the alternator and as an added bonus I have a charge idiot light. Everything works perfectly. If you want a quick fix on your set up, try hooking the red wire into the fuse box and not to the starter lug. See what that does. -
Drive shaft bolts for JCI driveshaft
zdlite replied to RebekahsZ's topic in Gen III & IV Chevy V8Z Tech Board
Yes, using both. good catch. -
Boy, not much love left on the forum anymore. Three weeks and not so much as a bump. I wouldn't worry about it. If it burns up then go with a different fan. LS motors aren't difficult to cool. For as much as SPAL fans cost I can't believe how many threads I read where people are having cooling problems. That looks like a nice set up you have. You should be good. By the way, what accessory set up are you running? Looks really clean.
-
Drive shaft bolts for JCI driveshaft
zdlite replied to RebekahsZ's topic in Gen III & IV Chevy V8Z Tech Board
The best bolt to use on the drive shaft is AN5 bolts with matching nylon locknuts. The fit is near perfect and they are much stronger than the other stuff you are looking at. http://www.aircraftspruce.com/catalog/hapages/an5.php -
Yikes.
-
JTR LSx Header Installation Questions...
zdlite replied to Cable's topic in Gen III & IV Chevy V8Z Tech Board
I put in an LS2 crate motor and the stock plugs had no chance of clearing the JTR headers. MSD makes a set of LS wires with adjustable boots. Slightly longer than the stockers and allows each plug to be adjusted to clear the headers. Look them up on JEGS or Summit. -
For those w/ rear disc conversions
zdlite replied to xShodaimex's topic in S30 Series - 240z, 260z, 280z
Deleted. figured it out -
I fit a mechanical secondary Holley 750 DP and GMPP intake under the stock hood of my 240. I made my own mounts so I was able to get the engine pretty far back and low. Most people think that is a good thing. I have pretty good hood clearance with a full size Moroso drop base air cleaner with a 3 inch element. I did move the stock hood latch since the air cleaner base gets within an inch or so of the firewall. Don’t believe all the smack about carbs. This isn’t the 1970’s anymore. Tune the carb with a wideband O2 and you will have good mileage and excellent throttle response. You have to adjust air bleeds to get the most out of a carb on an LS motor, especially with the open plenum manifolds that come with these motors. Once you get the carb set up right the these cars are amazing. Most people set carbs up too rich to cover up other problems. That is where the poor mileage gripe comes from. Go the Innovate site forums or the conversion section at LS1tech to get some good info about carbs. I drilled out all the press in bleeds and idle feed restrictors and replaced them with brass set screws that I hand drill to whatever size I want. Lots of info on the Innovate site about doing that. I can set the cruise AFR pretty much anywhere I want it. That is the key to good mileage. The part about carbs doing a poor job of metering fuel when cold is absolutely true. EFI is one of the big reasons modern motors live longer than the old carb days. But if you are like me and the car only sees a few thousand miles a year of summer time driving then cold starts are a huge don’t care. Besides, motor oils are so much better than they were even a couple of decades ago. If you change it at least yearly (Mobil 1 says every 6 months) and don’t neglect your engine like an old station wagon then IMO it isn’t the same worry it use to be. One last thing, carbs should be sized base on airflow (i.e. HP), not displacement. Thus the old first gen rules really don’t apply to the better breathing LS motors. Most guys go with a 750 on the 6.0/5.7 motors. GM recommends a 750 for their LS2 crate motors. That 850 would work well with a 402 stroker motor. Also IMO mechanical secondary is the way to go on Zed. These cars are light, don’t give up on the top end HP.
-
I just live near the shop. Found out about them through a local newspaper article. Paid like $1200 to have them custom build this. One of the few things in my swap I didn't do myself. I wanted the car on the road so this was worth the price. Copying the set up exactly may not work since I made my own mounts. I used a TKO trans so had to put the engine pretty far back and low. I am sure it could be reproduced but it may need to be modified slightly for other mounts. I also put a second exhuast cut out in the rear cross member for the dual exhuast. Not sure what car you have but 240's sit pretty low. I couldn't find a place for cats, let alone resonators. Maybe a good shop could work something up for you. The car isn't quiet but it isn't that loud either. And that is with zero sound deadening right now. Like I said, a nice mean sound to it.
-
I am using JTR headers on my 240. I had a shop bend up a dual system merging into a single duel inlet Magnaflow muff in the stock location. Here are two pictures of the set up. Not too loud. Definitely a mean sound to it. http://www.mandrelbend.com/gallery.asp?ContentId=69 http://www.mandrelbend.com/gallery.asp?ContentId=70
-
No one has a set laying around? Someone save me from having pull a set in the JY
-
Looking for a pair of 280Z stub axles and companion flange. Must have good threads.