Search the Community
Showing results for tags 'hawks'.
-
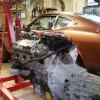
I've never seen a thread where someone documented how hawks mounts actually mount up and are installed. So I took a bunch of pics when I did mine for all to enjoy. Chassis Mounts Here's how the mounts look in your hand. I'll explain what each location really does as we move along. And here is the back of the plate that you must weld onto the frame. As you can see, you must clearance the frame in order for the plate to site flush again your frame rails. But before we get into that, lets see how we locate the bracket (front to back). So here is the mount just resting on the frame rail, without the backing plate, You can see now that the lower location of the bracket lines up perfectly with the lower control arm bolt. Now all you have to do is loosen the LCA bolt, remove the nut, and thread the bolt into the bracket (yeah its threaded down there). Once you have it threaded in and snugged (not tight), you've got it located front to back. So then I attached the backing plate to the bracket and swung it back into place on the frame rail. Obviously the backing plate wont sit flush until you clearance the frame. So now, mark the front and back of the backing plate on the frame like so. Now remove the backing plate from the main bracket, also remove the main bracket from the LCA bolt. Place the backing plate on the frame and mark the hole locations. Note that they will be off because you still cant set the bracket flush. So here are my marks. Let me save you some time and suggest that you cut the frame like the pic below. I tried counterboring the holes to make room for the tacked on nuts, but its harder to get the position correct. Notching the frame is easier and much faster. Now you can check to see if the bracket will sit flush. It might not sit perfectly flush, but pretty close. Heres how mine looked. If its good enough for your taste, put the main bracket on the LCA bolt and bolt it back to the backing plate. This will ensure that when you weld it, it is in fact correctly positioned. You probably want to go ahead and grind off the paint on the frame as well, I dont have a pic of that but you get the idea. Now your ready to weld. Just for reference, the side of the frame rail is twice as thick as the top. So you can get a little more heat into that side. Here's my ugly flux core madness, but it will get the job done. The second one turned out much prettier after I found a rhythm. And here is the finished product. Engine Mounts The mounts on the motor are fairly straightforward but I figured I'd show them for documentation purposes. Here is where the original mount goes. And here is the backing plate for the new Hawks mount. Dont put that lower right bolt in though, that comes later with the actual mount. And here is it all bolted together. At this point, I dropped the motor in to position the trans mount. I'll write more on that in the Trans Mount section. Here, its just to show you how the motor sits in the bay.
- 51 replies
-
- swap
- motor mounts
- (and 8 more)
