Search the Community
Showing results for tags 'rear disc'.
-
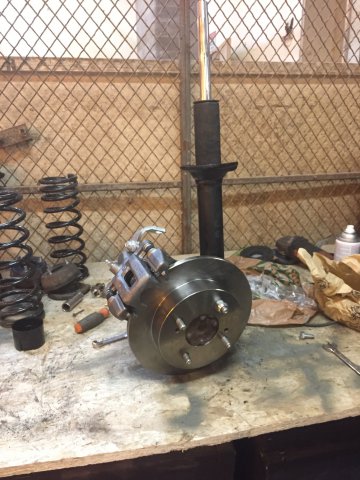
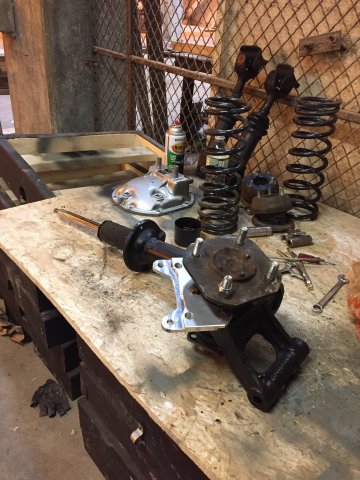
So I purchased these rear brackets from MSA, I installed everything they said to use , 85’ maxima calipers/pads(rear) , 82’ 280zx rotors(rear). It all mounts up fine, but the pads are only using about half, they don’t seem to fit all the all the way down using up all the rotor surface?? Has anyone else experienced this issue?
-
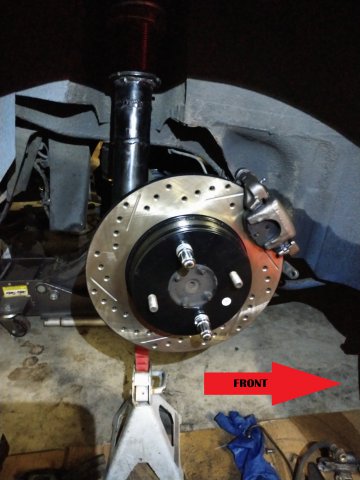
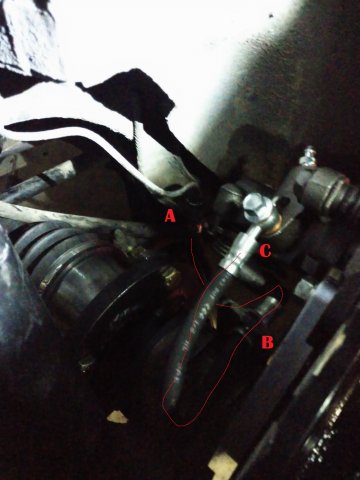
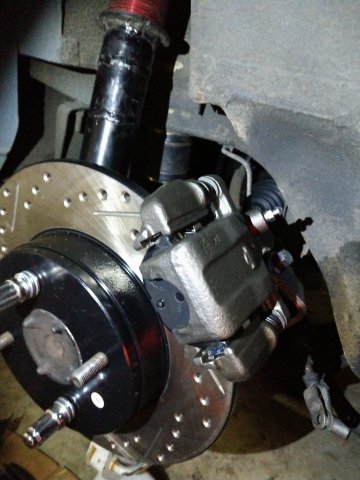
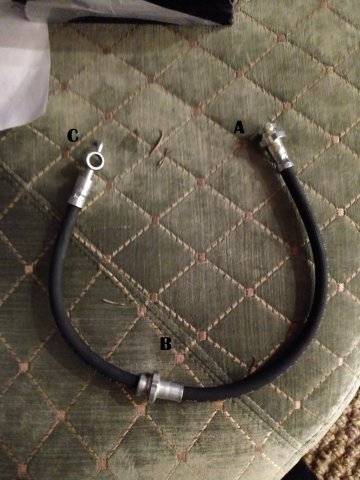
Hey guys, Sorry about posting this in the FAQs first, didn't see what category I was in. I recently got the Zcardepot.com Rear disc brake conversion kit, the sport one with the drilled and slotted discs. It uses a maxima caliper. They didn't send me any install information, just a box of parts. I have searched around and haven't found anyone who has documented the install. I did my best to install it how it makes sense, but I want to make sure that it is correct before I bleed the system and drive the car. I've posted some pictures below of my install, sorry for the lighting. I usually do all my work with a headlamp on, so pictures are either too bright or too dark..... I posted a picture of the brake line included, as well as letters showing where they are located on the installed caliper. I used the factory bracket to hold the middle of the brake line fitting. I also used the caliper with the R for right side on the right side of the car. I literally couldn't even find info on how the pads are supposed to be installed. They seem to be left/right specific, as the pad touching the caliper piston has a large tab off the back of it that sticks out. Mostly I am wondering: 1. Is the caliper even in the right position? 2. Is the brake line routed correctly? 3. I read that to make the hand brake cables work, i should swap them across the car so they are short enough to use them on the front of the disc. That is my plan, but have yet to do it. Is it correct? 4.Is there anything I am missing documentation-wise? I can't even find a maxima caliper swap guide. The one I found has broken picture links, so it isn't much use. Thanks in advance!
- 5 replies
-
- brake conversion
- rear disc
-
(and 2 more)
Tagged with:
-
Hey HybridZ crew! So I finally decided that after upgrading nearly every other component on the chassis of my Datsun, and a couple really lack luster performances, it was time to do the brakes! I was suitably frustrated with their lack of grab that I started to look into other options. Since this is primarily an auto-x car, I wasn't too concerned with heat dissipation and brake fade like on a serious wheel to wheel machine, and I was more concerned with keeping my weight down. Here's the car, zooming around at Nissanfest this year at Evergreen Speedway. With those factors in mine I went shopping and settled on the Silvermine Motors "Small" wilwood kit. It has the forged 4 piston Dynalite calipers up front and the billet 2 piston dynalite in the rear and traditional drilled and slotted rotors, rather than 2 piece rotors The kit also comes with all the lines needed to connect to the factory fittings. It even has the little retaining clips that always shoot off and get lost under work benches when you pull the stock lines! Edan at Silvermine was excellent to work with and guided me in the right direction on a couple things. Fastest shipping I've ever had on a part. Think he put them in the mail Thursday afternoon, and I had them in my hands on a Monday! Boxes contents all laid out! Well packaged, and everything in its place! Comes with some awesome 10.9 grade hardware, the only bolts you reuse are the front brake caliper bolts, which hold on the new brackets. Really well made and well thought out kit. The rear install is a breeze, once the drum backing plates are out of the way, and the ebrake cables are gone! Hey, its dead weight right? Since the Silvermine kit uses a 3 bolt rear bracket, I didn't need to pull the whole rear assembly apart, so I just turned the rear drum plates into pizzas! Just cut to the bolt holes and then flex them a few times, and they snap right out. The whole rear install probably took about 40 minutes start to finish. For my method, you don't need any really crazy tools or huge breaker bars, just a reasonable quality angle grinder! You could absolutely take the stub axles out (and it would be a perfect time to do rear wheel bearings) if you wanted to keep sparks to a minimum. Part of me wanted thought to see if it was possible without removing the axles, which makes this job MUCH less of an endeavor. The caliper mounts at the 10 o'clock position, keeping its minimal weight inside the axle line of the car. The front kit goes on super nicely. Remove and save the caliper bolts, and then remove the hub/rotor assembly. Why Datsun did it this way is a mystery to me, but oh well. I wire wheeled the mounting surface on the hub and the rotor, as well as chamfered the mounting edge of the bore on the rotor to ensure a solid mount. Bolt the hub back together and then put your new rotor on! Bleed and you're done! Overall impressions, these were really well made, I give them 2 wrenches out of 5 for installing. Depending on how you decide to remove your drum backing plates, it goes up to a 3 or 4 out of 5, particularly for a new to Datsun mechanic. I'm racing the car this weekend, so hopefully I'll have developed an opinion about the brakes this time next week!
- 12 replies
