

240Z Turbo
-
Posts
1081 -
Joined
-
Last visited
-
Days Won
1
Content Type
Profiles
Forums
Blogs
Events
Gallery
Downloads
Store
Posts posted by 240Z Turbo
-
-
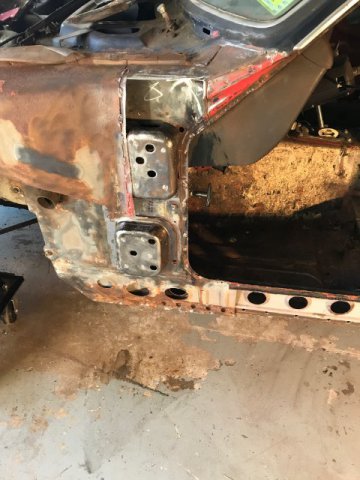
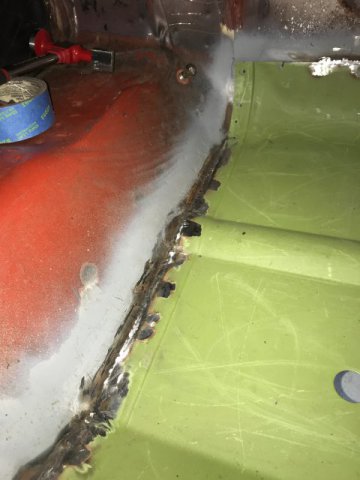
Deja Vu....I only thought the driver's side was better. The only thing better is it looks like the frame rail has a good rust free connection with the firewall. However, I have to replace all the same parts as I did on the passenger side, but doing it a second time is definitely much faster because I'm not guessing what to do. I'm going to remove the inner rocker with the floor pan in place this time to see if the car is more aligned. The back portion of the inner rocker is significantly more rusted vs the passenger side and the seat belt bracket that holds the nut is about 1/3 rusted so I'm going to have to figure out how to replace that because I don't see that it is offered anywhere.
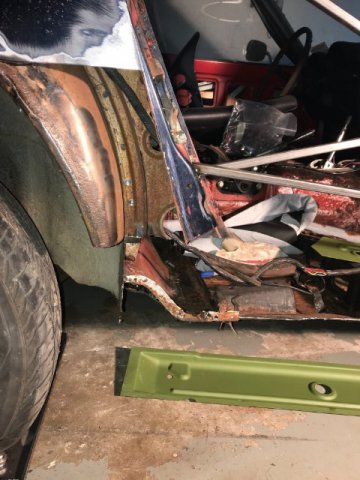
Of course I had to remove the hinge cover because it had a lot of surface rust and although a PIA to remove and replace, I think it's worth the extra work. The upper fender nut typically welded on the backside of the cover towards the top was gone and a big hole was torn into the metal. I'll post some pics later, but it will be a simple fix.

-
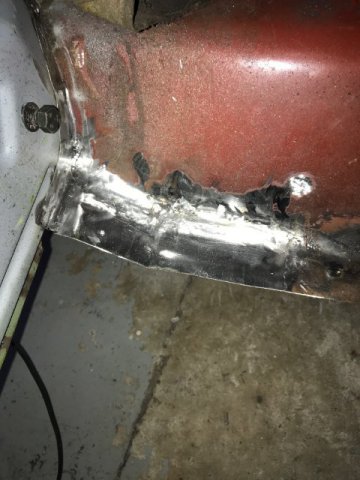
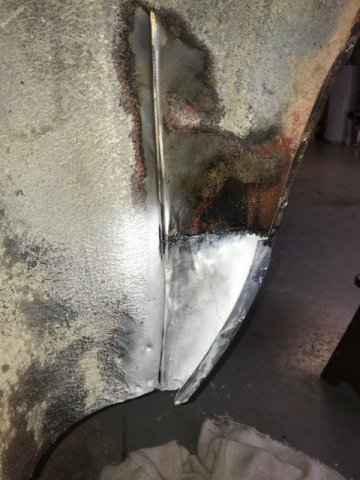
I was bored so I decided to TIG braze a small section under the fender that has an exposed seam from the factory. I used silicone bronze, which doesn't require that you melt the parent metal, but hot enough to melt the silicone bronze and it fills the seam nicely. I forgot to take a pic of it after minor grinding, but it makes the seam perfectly smooth and with no ability for water to enter the seam. When I remove the fender and door again I'll snap a picture.
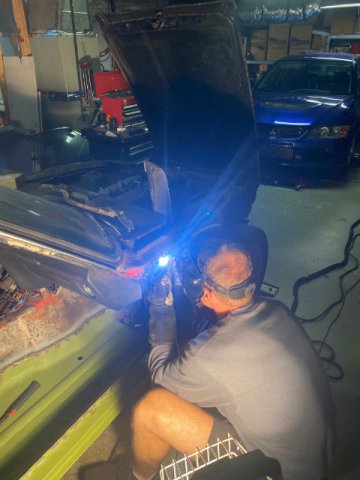
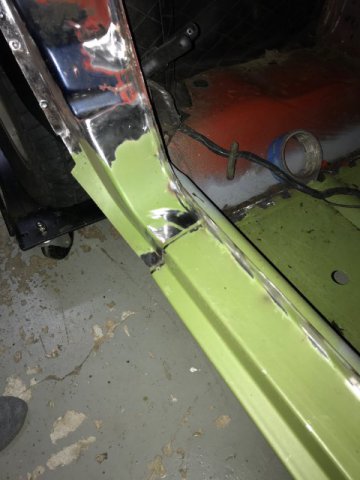
The next task was to weld in the new lower b pillar that was rusted out and tie into the new outer rocker.
After a few test fits followed by a bit of grinding, I was able to get the new lower b-pillar replacement mocked up.
And the finished results.
The door is actually pushed back further than it would normally be, but the gap is pretty close so I can manipulate that once I put on the fender and get the gaps perfect.
-
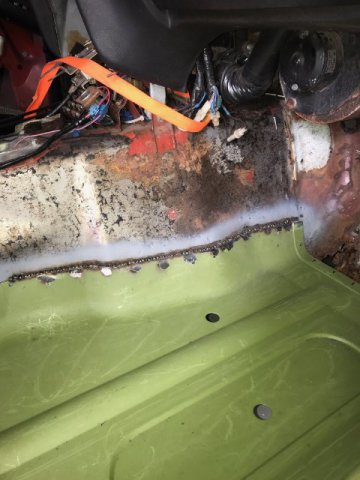
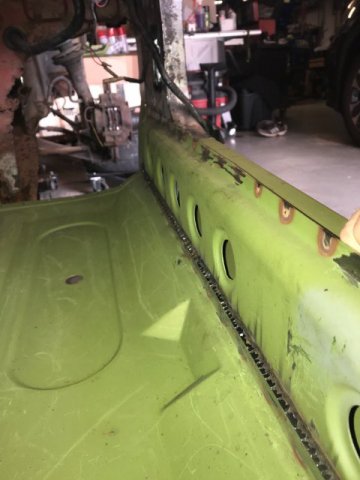
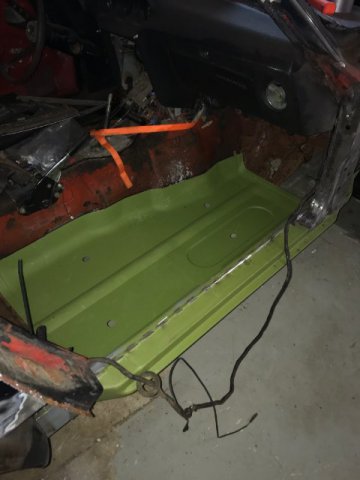
I refocused on the floor pans to stitch weld the outer edges.
There were a few areas that required me to pull the pan and trans tunnel together prior to welding through the 3/16" hole so I used some 1/8" bolts. When finished you just remove and MIG weld the hole.
There is an area in the back of the pan towards the trans tunnel that had a feature in the pan that did not exist on my car. This weird hump would not allow me to properly fit the pan to the trans tunnel. I ended up cutting out that portion of the pan and reshaping it to the car. You can look at previous pics I posted to see that weird hump in the pan, which is how it came from KF Vintage. Not a big deal and took about 45 minutes to correct.
-
Replaced another rusted area so getting closer each day.
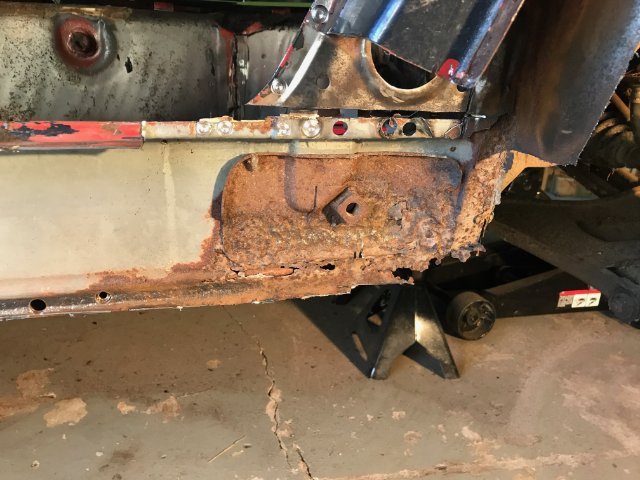
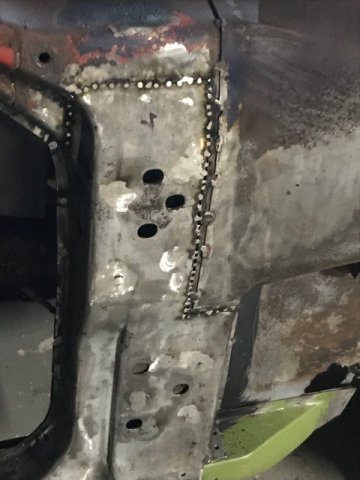
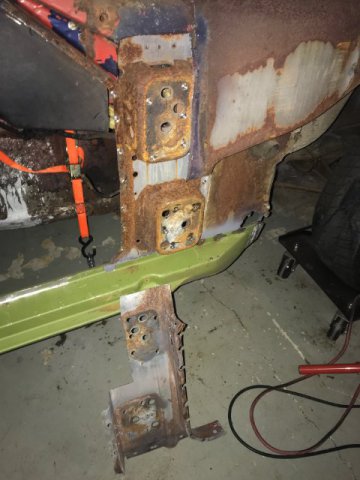
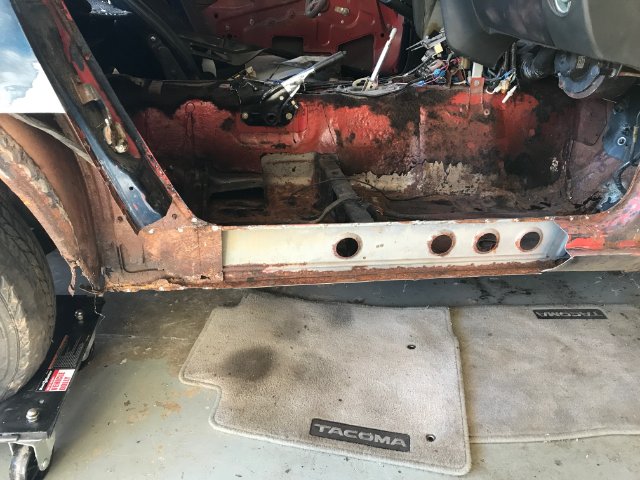
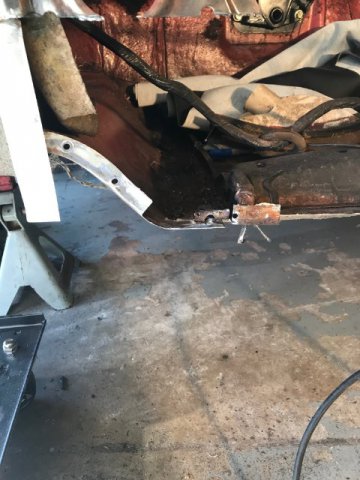
The next item on the punch list is the lower B-pillar, which I hope to knock out in the next 2 days. Following that I have a major challenge ahead of me so any thoughts are appreciated. The frame rail, battery area, and firewall are all rusted as you can see from the picture below. What order should I approach this to ensure it stays aligned?
-
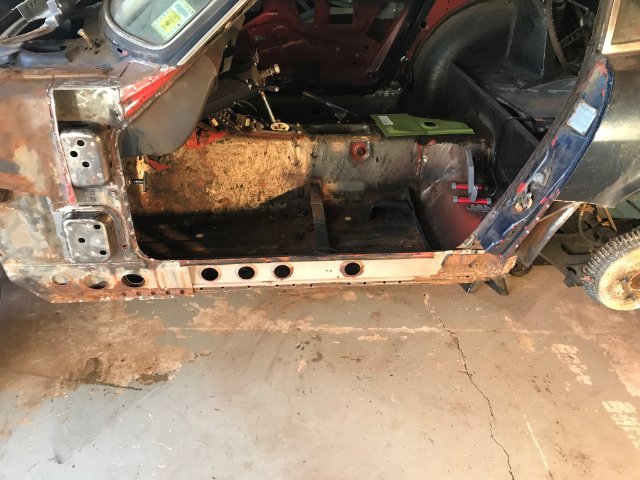
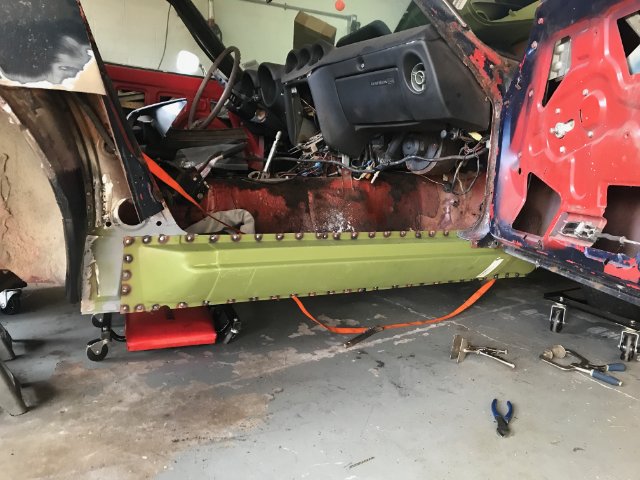
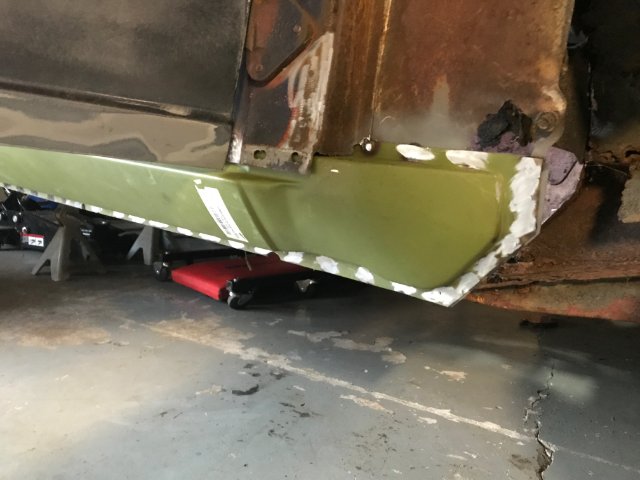
The passenger side pan was installed and I'm about 80% complete. I purchased an air powered tool I saw another member using that can punch 3/16" holes in the metal and also offset the edge of the metal to create a smooth lap joint. I spaced the 3/16" holes every 2" and locked the pan in place with some clecos and then MIG welded the pan through the 3/16" to the body. I have a few of the holes that I need to somehow pull the trans tunnel metal to the new pan so there is not gap prior to welding. At some point I will TIG the edges in 1" lengths every 2" for increased strength, but not sure if I want to do that now or wait until I have it on the rotisserie where I can get better access.
-
In preparation for installing the floor pans I had to cut out a portion of the rear floor towards the outside of the car. There were a few spots the metal had rusted through so I cut out the old piece and spent about 30 minutes hammering out a new piece of similar dimensions. Although it had a few compound bends I was able to get a close match.
-
2 hours ago, Exposed said:
Great progress and quality of work. Enjoying the build, keep it up
Thanks and I have some more pictures to share. The DCT trans arrived at my buddies shop and this is the trans just placed behind his VR38 engine for giggles. He already has the VR38 CAD file for the bellhousing so he just needs to create the DCT pattern and then overlay them. The other challenge will be coupling the crank with the DCT input shaft, but should not be too difficult. Is it me or is this a marriage made in heaven?
-
I finished the door hinge cover and it actually turned out very nice considering I've never done this before. Just taking my time and not over grinding the metal gives a nice result. You can barely tell where I stitch welded across the top, but once the body work is done it will be perfect.
Moved on to mocking up the new floors on the passenger side. I really like how the KFV pans go up the wall of the trans tunnel. Gonna take my time fitting it in place, but I hope to have it knocked out this weekend if possible.
-
Got the door hinge cover back on with everything rust treated underneath. I mocked up the door with the fender and the alignment looks great. I even coated the inside of the window pillar with rust treatment using a long tube so it would reach up to the roof area. Just need to finish stitch welding and then I will move on to replacing the passenger side floor.
-
^
I'm not opposed to doing butt joints and in many cases that is the only option. However, a lap joint will be stronger than a butt joint so I prefer to use this approach when possible.
-
15 hours ago, AydinZ71 said:
I have replaced 30% of the steel on the race car. The issue I see is all the unprotected lap joints. There are many that are facing areas that would naturally have water splashed onto them in wet weather, or drip-down through them like the cowl. Once water gets ON a lap joint, it gets INTO the overlapping steel by capillary action (like a wick) where it "sits" and starts rusting the steel. All it takes is for the primer to fail at the lap joint, which is very common with overlapping steel that is only being held-together by spot welds. Rust needs a steady feed of moisture and O2 to continue deteriorating. The problem is the more it rusts, the more porous the surface becomes. This accelerates the oxidation over time. Once rust is formed, it will "hold" moisture like a sponge and keep feeding the raw steel the steady diet it needs to turn from grey to red.
If it makes you feel any better, It has been one full-year of rust repair on this car, with around 4-6 hours spent per week. Then you have to replace all the fastener attachment points and check fitment, which takes several months as well. The one lesson I have learned over and over = Just remove everything and methodically plan ahead. I have tried to "limit" the scope of repair/work multiple times before realizing it is a huge loss in efficiency. If it is bad enough to damage multiple surface is several directions, just cut it all out, start from scratch, and consider primer-ing the whole area when done.
you can scroll the progress on IG @240z_restomod or scroll through my dedicated thread on this forum, if you are looking for ideas on tackling a similar repair
Thank you and I will check out your thread for different ideas. As you mentioned, part of the challenge when removing the panels with the spot weld cutter is that you have a big gaping hole in the panel. My cutter is slight under 3/8" so I purchased box of 100 #8 washers that are 3/8" OD and 20g thickness from Lowes. I used a step drill to slightly enlarge the hole and then pressed the washer into place, which then allowed me to easily TIG weld the washer to the panel and grind it smooth.
This was after hitting the metal with a wire wheel and neutralizing the rust with the POR-15 spray. I also sand blasted the hinge cup prior to spraying on the rust neutralizer.
-
16 hours ago, Alexander240z said:
Ah man I know the pain. Are you planning to work on the upper rails that run along the engine bay (I think they are called horns? correct me if I'm wrong)? The corner where the driver side fire wall meets the shock tower support sheet and the sheet of metal that connects the door hinges was completely rusted out for me. PO did some botched work that you guessed it made the rust worse. Then the car sat on the side of the road in Chicago 👌. I didn't go as far as you did for the piece that you just took off. (I just POR-15 and let the paint spill towards the bottom). You are doing the better route. Keep it up.
I didn't like how Nissan didn't include a weep hole (at least I didn't see one and no, open seem welds don't count as weep holes!). They did for the front where your hood hinges bolt on to. This made is so that the water would just go down the horns and into the seams where it meats the column that supports the door hinges and then straight down into the inner and outer rocker! Water also came In through the top and along the seam where the weather strip is supposed to be. So much for that 😕
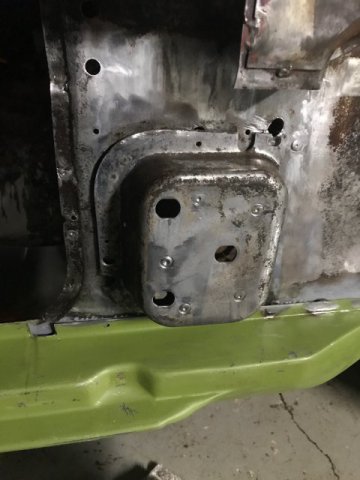
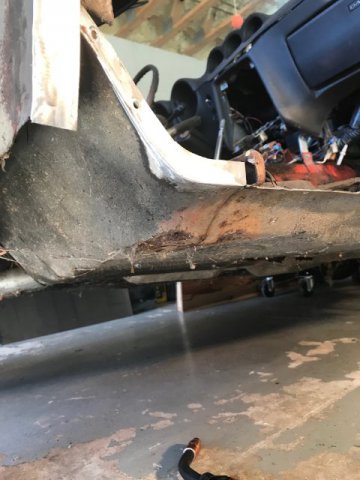
The driver's side, in general, is in pretty good shape so the only things I see that need to be replaced are the outer rocker, lower b pillar, dog leg and the bottom portion of the outer wheel well. As best I can tell the inner rockers, floor pan, firewall and "horns" are in good shape. For some reason it is mostly the passenger side that took a beating due to rust.
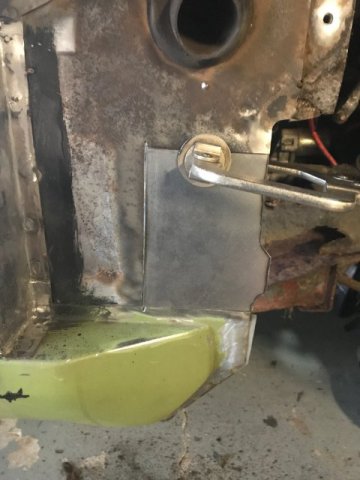
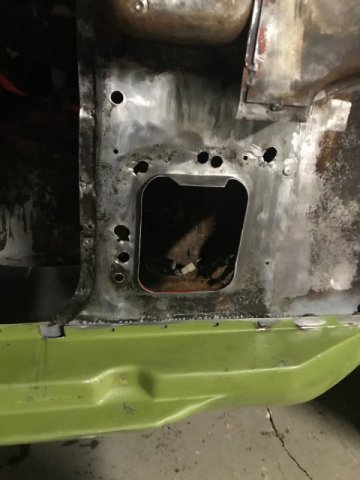
The horns on the passenger side appear to be in good shape, but I do have to replace the lower firewall, battery tray, battery area outer wall, and frame rail. However, I need to get the structural issues on the front pillar addressed along with the installation of the floor pan before I can stick the car on the dolly and start addressing the other rust I discuss above.
If you have rust that is hard to access and you don't want to open up a can of worms, you can purchase "cavity wax" that you can spray into hard to acess places and liberally coat the entire area to neutralize the rust. I did consider this, but the surface rust appeared excessive so I took the next step to address.
-
19 hours ago, AydinZ71 said:
100%. even if you are less concerned with the primary purpose of the cage (safety), strengthening the chassis is a must at the torque you are looking at. To be clear, the torque is the “problem”, but everyone just asssociates HP with torque 🤷🏽♂️. Close enough I guess.the 240z chassis is one of the lightest (and flimsiest) Nissan has made since. I saw significant body flex even at 300ft-lbs. the sheet metal is nearly 20-gauge, which you can “tin can” with your bare fingers. I agree with @calZ that you should absolutely look at opportunities to stiffen the chassis. I have some ideas if you need help getting started.
My previous twinturbo L28 setup made 509ft-lbs@wheels without the 125 shot of nitrous. It was a stock unibody with frame rails connecting the front and rear along with an 8pt cage, which didn't seem to have any structural issues. Therefore, I don't think 600ft-lbs@wheels will be a problem based on my approach.
-
When do you say enough is enough? I guess the answer depends on how much time and effort you want to put into the project to treat the rust. My next step will be removing the door hinge mounts because they are rusted on both sides. This requires that I remove the dash so I can drill out the spot welds from the inside of the car. I will sandblast them and then treat them with POR-15 before welding them back into the car. It looks pretty bad, but it's mostly surface rust.
-
6 hours ago, Alexander240z said:
Amazing work. I have yet to put in my outer rocker. I need to fix my firewall first. Im worried that the rocker won't have the proper angle if it isn't welded to the firewall first. (Maybe they won't?) let me know. The Tabco panels do suck quite a bit. I especially wasn't fond of their quarter panel replacement pieces due to the dogleg not sitting properly. Protrudes out way too much. KF vintage on the other hand I have never had an issue with fitment. Keep up the good work!
Thanks for the kind words. The outer rocker is independent of the firewall because both the outer rocker and firewall attach to the inner rocker so I don't think the order matters. I am no expert and this is the first time I have done such work, but you should clamp or cleco the new panels in place and then attach all of the surrounding panels to make sure they align prior to welding. It's a tedious process and I've had the door and fender off an on many times thus far.
-
6 hours ago, calZ said:
What's your plan for chassis stiffening?
For new panels I am welding in 2" increments for increased rigidity. I also plan to add additional welds to the lap joints as well as TIG braze the seams with silicone bronze. Once the unibody is finished with all of the patch metal repair I plan to have a custom cage built.
-
On 2/2/2022 at 7:17 AM, mr.mike said:
Please stay old school! 🙂
I purchased a DCT transmission today from a 2014 BMW M6 that is being shipped to my buddies machine shop. He already created the CAD file for the GTR bellhousing so I am having him make an adapter to fit the BMW trans to the GTR engine. Cost wise, it is cheaper for me to run the GTR engine since I am building a forged motor and will have the spare stock motor. My current stock motor makes 749hp@wheels on 93pump so I will dial it down to about 600hp@wheels for the 240Z.
-
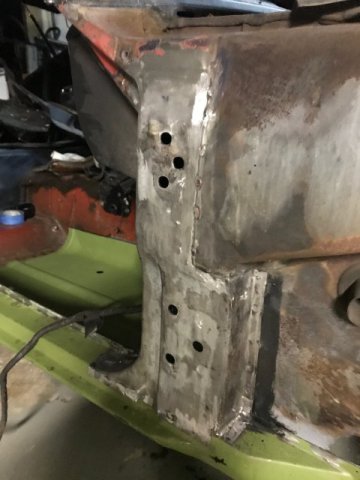
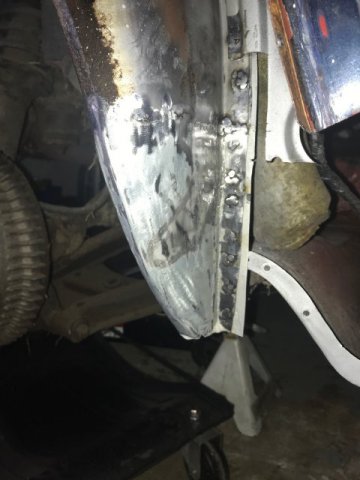
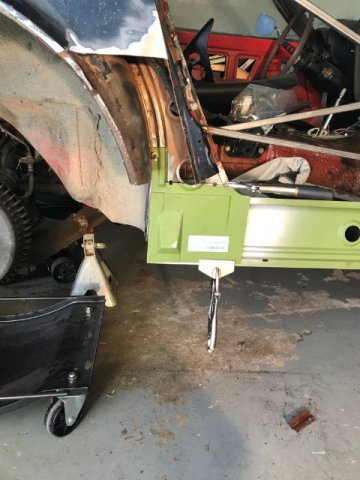
Passenger side inner rocker, middle rocker and outer rocker completed.
-
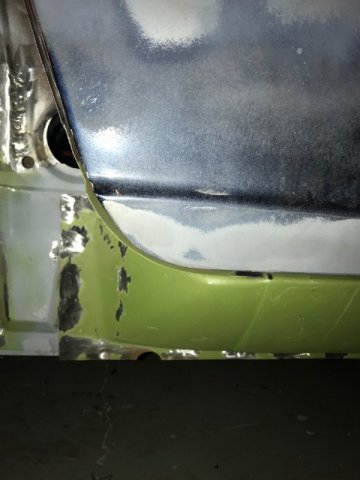
I was able to get the outer fender patch panel by the door installed today. I spent about 2hrs modifying the Tabco piece to make it properly fit because the flange finish is garbage. The picture below was prior to all of the necessary changes to get it to fit at the bottom without the 1/4" gap.
After a round of stitch welding and grinding it is now done. I'm going to TIG braze the entire wheel well joint between the inner and outer fender and perhaps tomorrow do the bottom portion as a test.
-
17 hours ago, calZ said:
I'm always impressed by how nice the KF Vintage panels look. Hopefully the fit just as nicely.
Have you seen the finger controls you're able to get for TIG welders? Might be worth picking one up if you prefer to TIG with how many panels you'll be replacing.
The KF Vintage panels are indeed top notch and the fit so far is spot on. In contrast, the Tabco panels have horrible finishing around the edges so it will take some manipulation and hammer work to make them fit. When I get to that point I'll post pics so you can see what I mean.
I have no desire to change my torch and once I get the rotisserie setup I will be in a more comfortable position to manage the foot pedal. If my son was home I would have asked him to run the foot pedal because he's done it in the past. I prefer to use the MIG to tack up the panels and after grinding the welds, do a finish pass with the TIG. I also plan on TIG brazing the seams with Silicone bronze for added strength and impede water from penetrating, but that will be more of a last step prior to primer. I TIG brazed my oil pan on the EVO so I suspect the 240Z seams should be pretty straight forward.
-
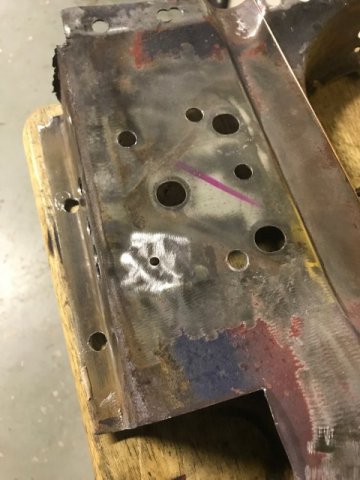
I'm having some fun now that my panels showed up. It took Tabco 10 days to ship me the panels that were in stock after payment, but the parts from KF Vintage showed up in a week shipped from South America. These are just a few of the new panels and will definitely be ordering more from KF Vintage.
I finally got the passenger rocker removed, which was an interesting learning experience. I wanted to keep the damage to a minimum, which I was successful although there were several pieces that needed to be cutout due to rust.
This is with all the old rusted panels removed.
Remaking the inner wheel well flange.
I had to also remake another flange using my MIG Welder. I would normally use my TIG welder for this because it is cleaner and you can make a continuous bead, but I was by myself and needed someone to control the foot pedal since I was laying on my back.
I still have to install the inner fender, but I wanted to mockup the inner b-pillar to just to make sure it fit.
-
On 2/4/2022 at 4:25 PM, Dat73z said:
Welcome back! Looking good 👍
Thanks...
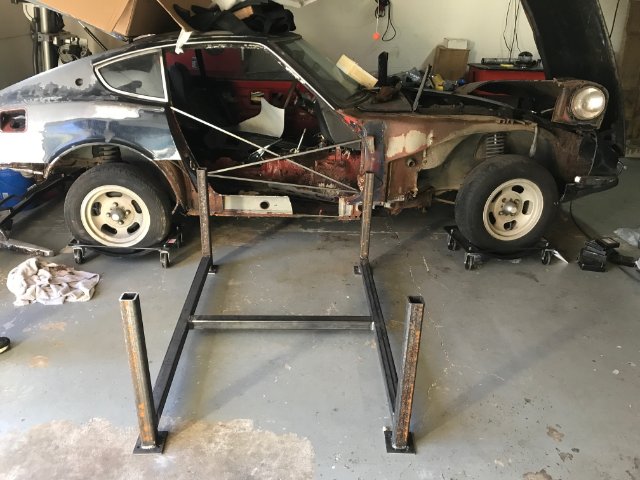
I mostly finished the car dolly so just waiting on the heavy duty casters and also need to terminate the vertical posts with some type of pad to hold the car at the jack points. I'll probably cut a notch in 4x short pieces of square tubing to simulate the end of the OEM jack and then place them between the 240Z on the car dolly pads. I can then just tack weld the square tubing to the pads and the car will be secure. For extra security I'll probably strap the car to the dolly through the shifter hole.
Everything is 2" square tubing, but the 4x vertical pieces (24") are 1/4" wall and the remaining tubing is 1/8" wall. The bottom plates are just 4"x4"x1/4" and the dimensions between jack points (front to rear) is 36.00" and (side to side) is 51.25".
-
Prior to placing the car on the rotisserie, I have much work that needs to be done to ensure the car has enough structural rigidity. Specifically, the passenger side frame rail has significant rust where it joins the lower firewall. It is much easier to work on the car if its on a dolly/cart and I was going to purchase an auto body dolly from Redline for $600, but decided to just make one myself for ~$330.
I had the local metal supermarket cut all the metal and ordered some heavy duty casters online. I'll pick up the metal tomorrow morning and the casters should arrive early next week so I'll post some pics of the cart once it's finished.
-
Today I ordered about $1500 worth of body panels from KF Vintage after getting a coupon to help offset shipping costs. This should allow me to fix everything on the passenger side excluding the front frame rail, which I need to assess it's shape when I get the engine out and the area sufficiently cleaned.
- PS - Dog leg, b-pillar, floor pan, inner rocker, outer rocker, front sandwiched rocker, firewall panel behind battery, entire battery tray area with battery tray
- DS - b-pillar, dog leg, outer rocker
I also ordered a rotisserie today from the following company. I selected the "unibody brackets" for the rear and the "Redline Front Mopar Mounting Brackets" for the front.
The parts from Tabco should arrive late next week
- rear quarters L/R
- outer wheel wells L/R
- rear panel slam


I'm Back, 1971 240Z and Yes, it will be TurboCharged
in S30 Series - 240z, 260z, 280z
Posted
The process of repairing the door hinge cover will take about 5 hrs as I have to TIG weld in washers where the spot welds were removed in preparation for welding back to the car. The first thing I do is fuse the washers in place and then clean the surface to eliminate the zinc coating on the washer and prep the metal for welding. On the inner door edge you can't just weld in washers so I have to cut out the metal completely and weld in new metal and then drill new 3/16" holes for welding back to the car. It's tedious work, but it was worth pulling the cover to clean out and treat all the rust underneath.