

X64v
-
Posts
543 -
Joined
-
Last visited
-
Days Won
1
Content Type
Profiles
Forums
Blogs
Events
Gallery
Downloads
Store
Posts posted by X64v
-
-
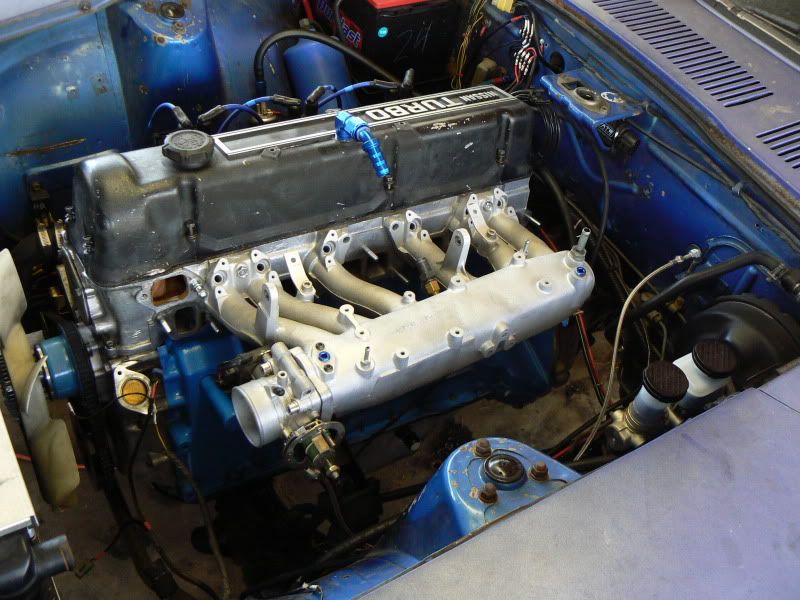
Cylinder head on, intake on for mock-up.

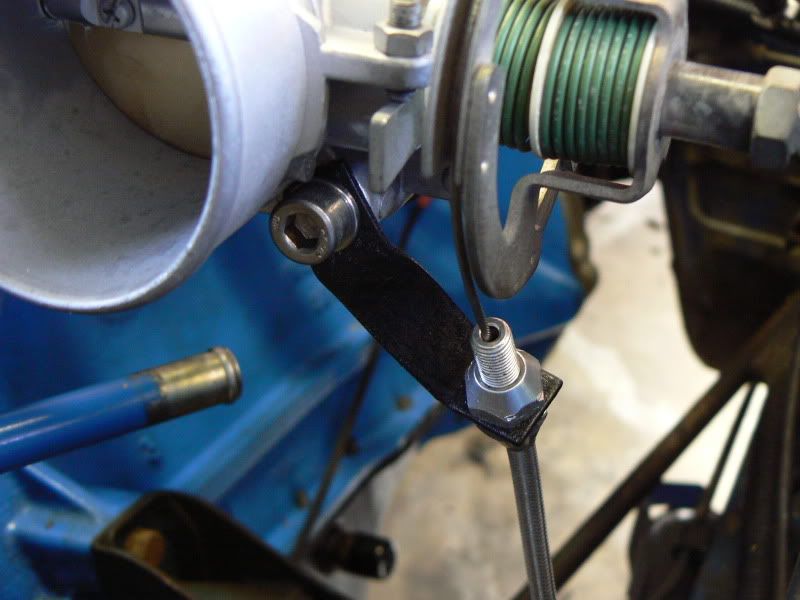
Bracket for the Lokar throttle cable. Everyone else seems to get the 24" cable, but this throttle body needed the end of the cable pointed up, closer to the body, so I opted for the 36" cable in order to not short myself.
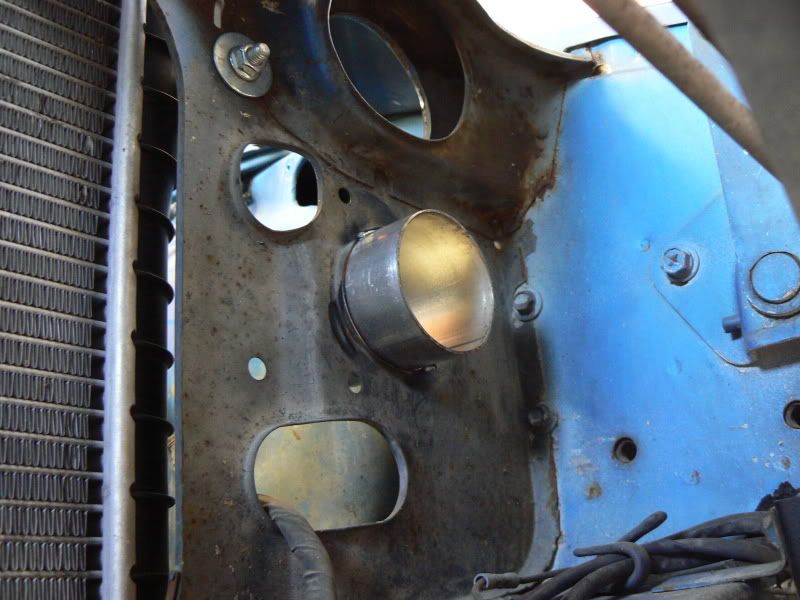
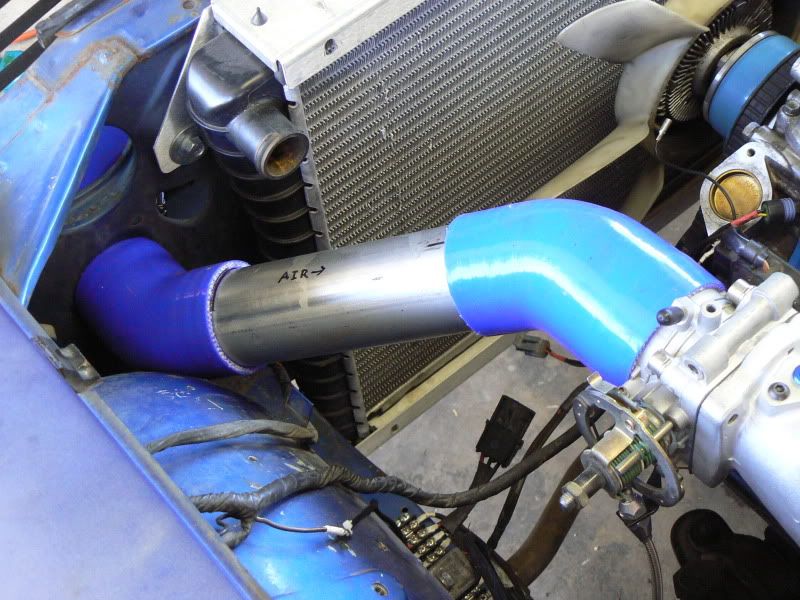
My biggest pet peeve with the the intercooler setup I ran was the 2.5" pipe rubbing on the core support, causing a squeaking noise at start-up, idle, and shut-down. I decided to fix this once and for all by tack-welding a short section of 2.5" pipe to the core support as sort of a pass-through.
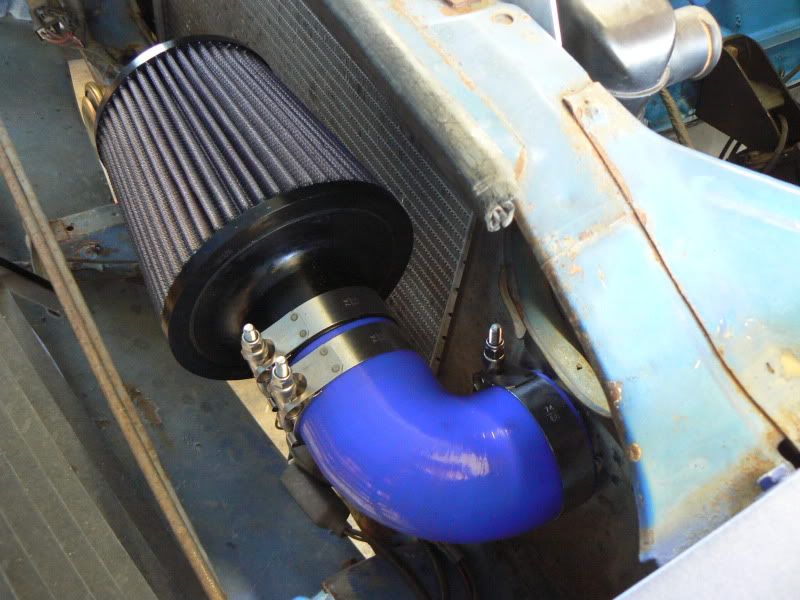
I fell so much in love with silicone bends and SS T-Bolt clamps doing my intercooler that I decided to use more for my cold air intake. I get all of mine from Silicone Intakes. The pass-through also lets my air filter be installed separately from the rest of the intake.
Piping mock-up. Note that the 45° bend on the TB is actually 2.75" ID on the TB side and 2.5" ID on the other.
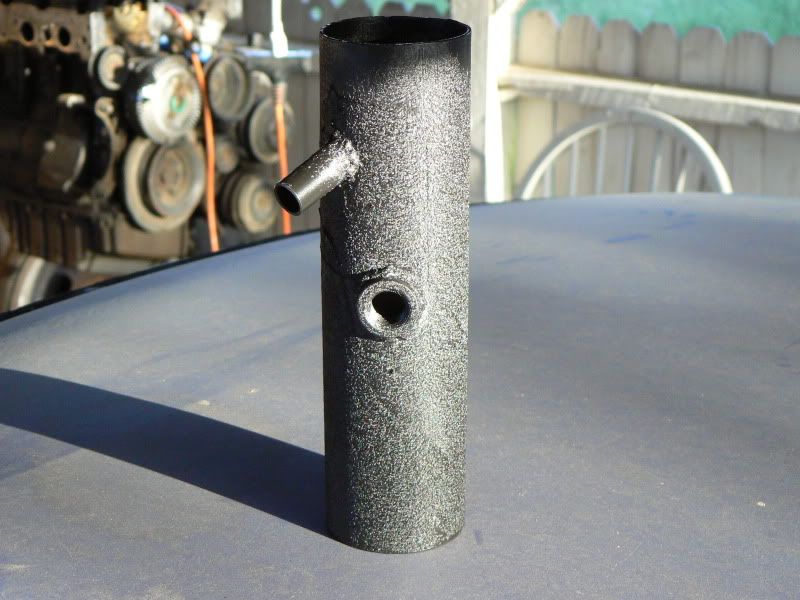
Pipe finished, with a 3/8" NPT bung for the IAT sensor and a 5/8" OD steel sleeve for a PCV hook up.
-
Mine started puking out the breather after my turbo swap, too. My solution was similar to BJ's, tap the vent hole to 1/4" NPT, coil of hose off the barb.
Haven't tested it with the 4.38 though, I'll get back to you in a few weeks on that.
-
I agree with Jacob, there's definitely a difference in the 240 dashes v. 280z. The 'eyebrows' over the tach/speedo are much stubbier. I like the 240 dash better.
-
I just made friends with the owner of my machine shop. $10 lets me use their glass bead cabinet, blast as many parts as I want each time I go. Wouldn't help with an entire car but I can do anything smaller than a door/fender/engine block.
Definitely interested in your review though.
-
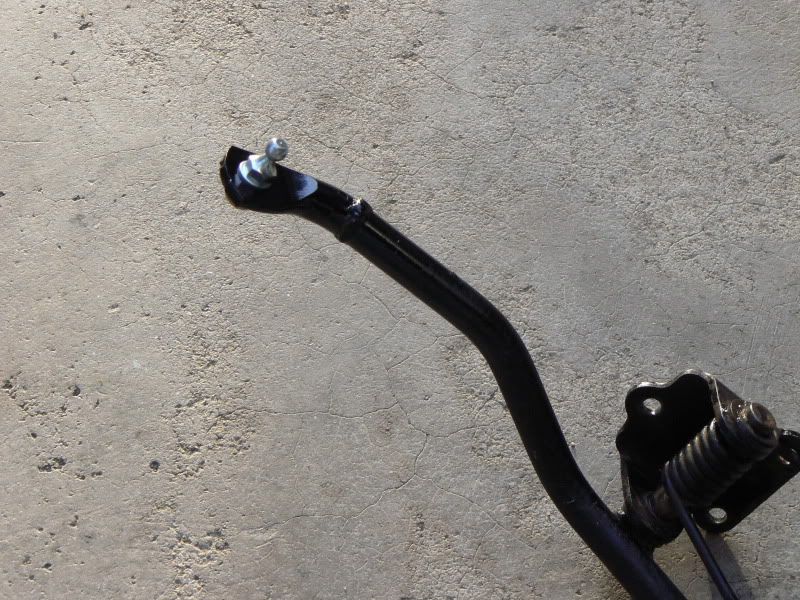
Modified the throttle pedal for the Lokar cable. The only reason you really have to change anything (move the pivot ball rewards about 2.5") is so that there's enough room for the supplied clevis to have enough room to exist.
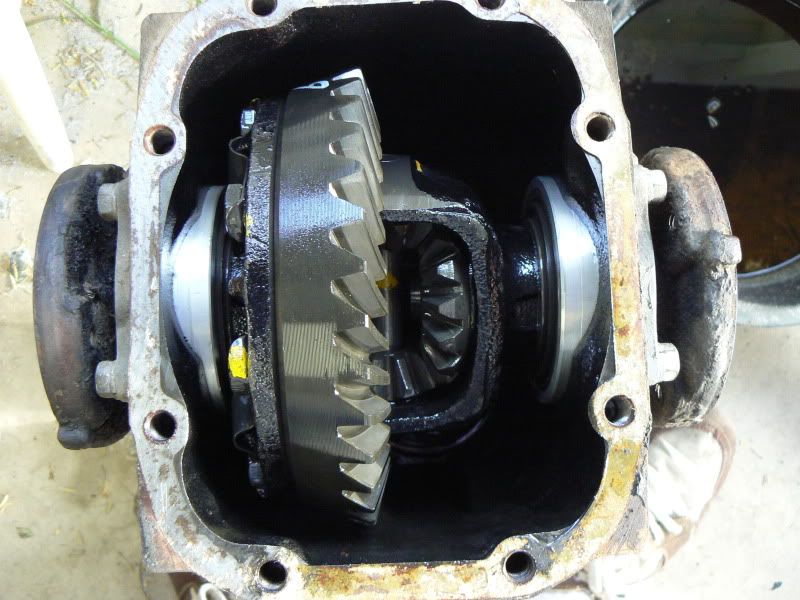
In other news, picked up a 4.38 R180 for $40. I decided to stay with an R180 after talking to someone whose advice I take seriously, who says he's blown up more than one open R160 at less than 200ft.lbs. torque, and for only a 12lb weight difference I decided not to risk it. Plus a 4.38 just makes me giddy. This one's out of the front of an '81 720 4wd. Guy said it had been sitting for quite a while...
Surprise! The innards are immaculate. I'm betting these diffs remain in great shape because everyone drives their trucks around in 2H with the front hubs unlocked all the time, so even though the truck could have 200k miles on it, the front diff has literally just been sitting there, not turning, not racking up more than maybe 5k miles or something silly low. Note the funky clip-in flying-saucer-like side shafts.
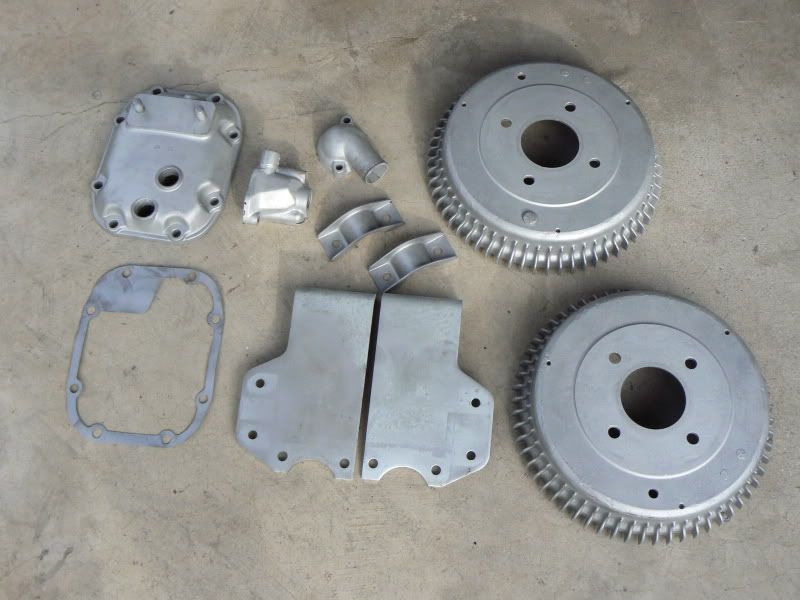
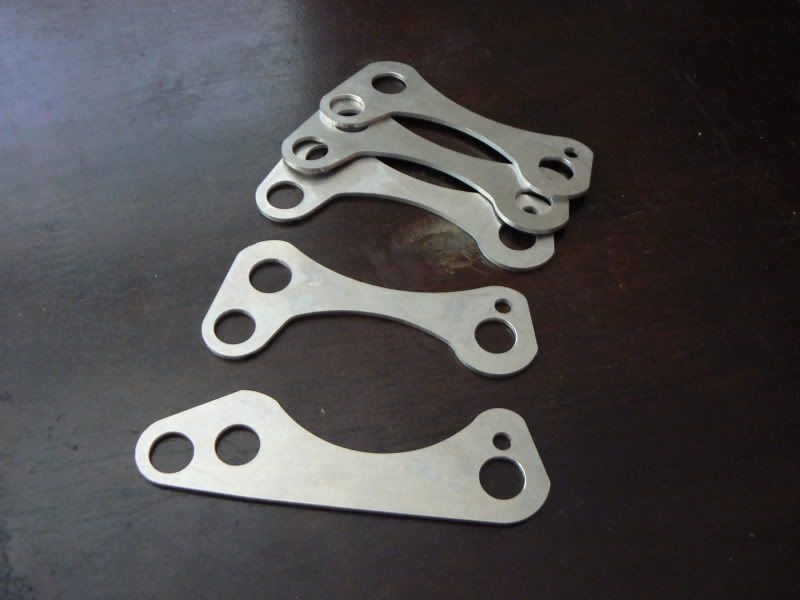
More parts back from the media blaster:
See that gasket-like metal piece below the diff cover? Found it sandwiched between two fiber gaskets in the diff; the tab portion shields the breather vent from flying gear oil. I thought it was pretty neat so I re-used it.
Tapped the vent hole to 1/4" NPT (no need to drill, it's already about the right size). More on this later.
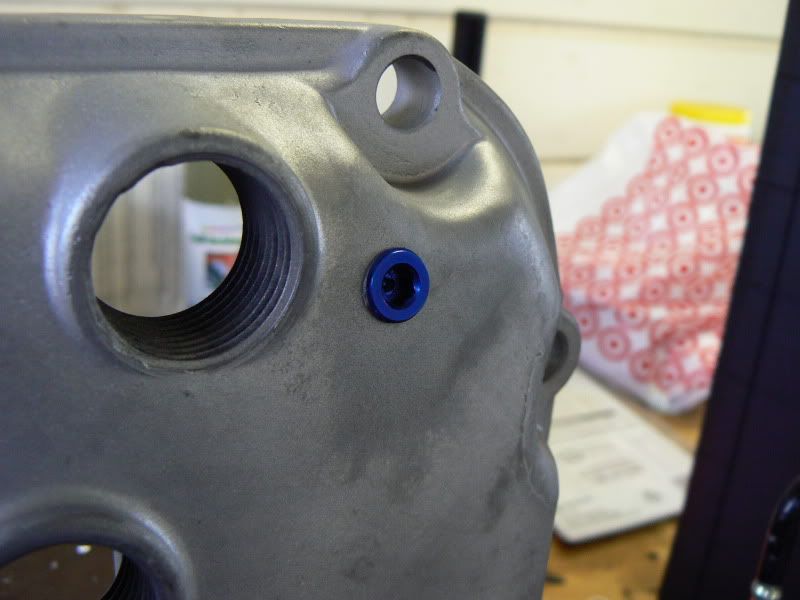
One gauge I'd love to have, and will be installing in the future, is a differential temperature gauge. I planned ahead for it by tapping a 1/8" NPT hole in the cover while it was already off, and plugging it.
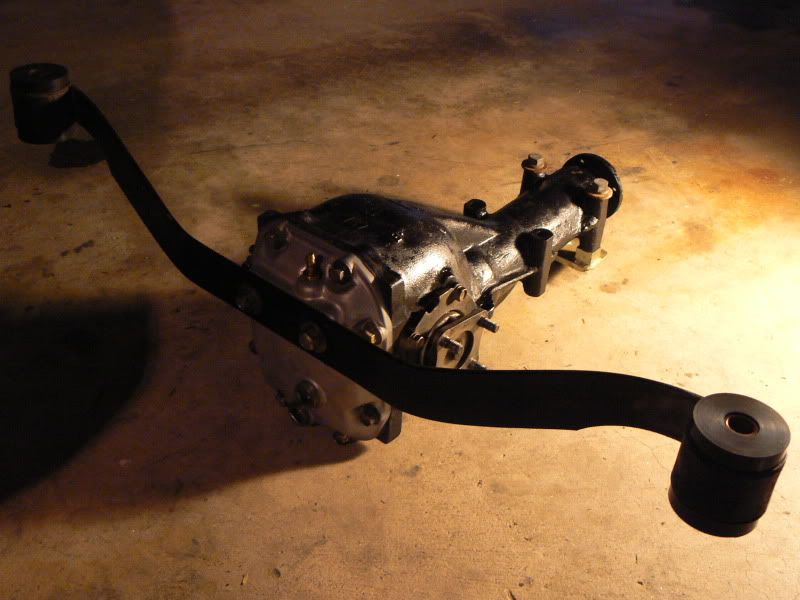
Hit the case with a couple heavy coats of graffiti-special black, popped in some of John Coffey's modded clip-in side axles (which I got second-hand from Dtsnlvrs just the other day), and it was ready to throw in. I'd heard rumors that the input flange would need to be changed, but this one (while round) was the correct pattern to mate with my original '73 drive shaft.
Finished (except for the rear sway bar. Are those aftermarket brackets with the sway-bar mounting tabs built in rare, or common? '70s/'80s vintage? I never even realized they weren't stock until I looked at my '72 this past weekend). Too bad my stripped/painted parts now make the rest of my suspension look like it's made of dog poop.
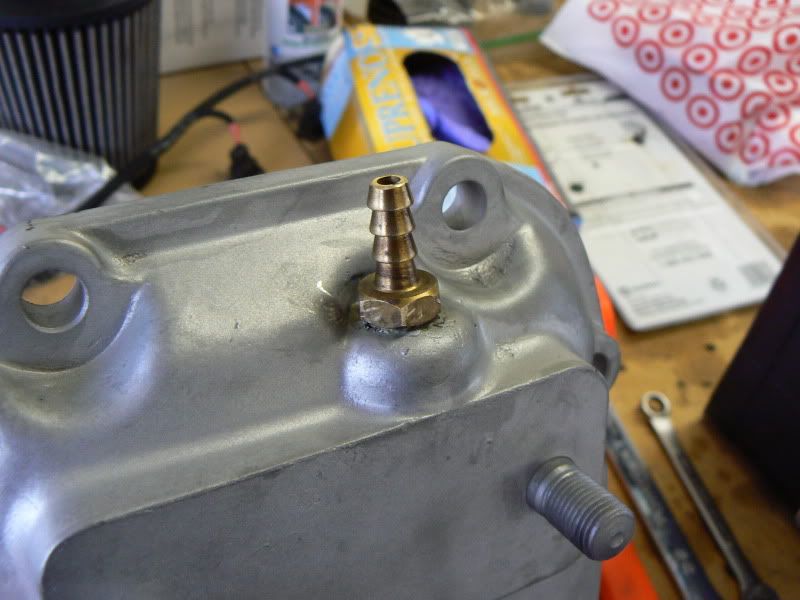
My old diff loved to puke up oil when I ran it hard, so I followed some others' leads and coiled some hose (about 18" of 7/32" vacuum line, just what I had laying around) and attached it to the barbed fitting I installed earlier. I took some air-filter foam from one of my Nitro RCs and glued about an inch of it into the end of the hose to act as a nice filter to keep dust from contaminating my gear oil.
-
Found a 4.38 R180 locally out of the front of a 720 for $40
-
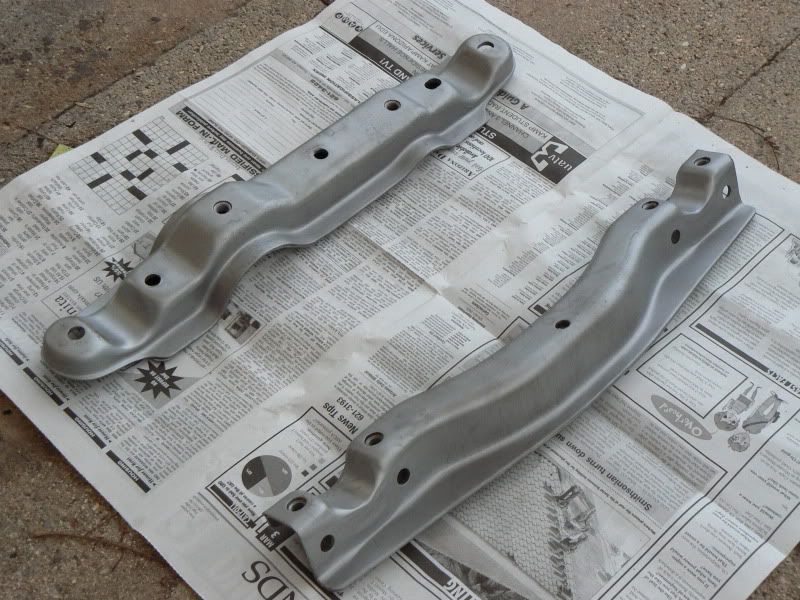
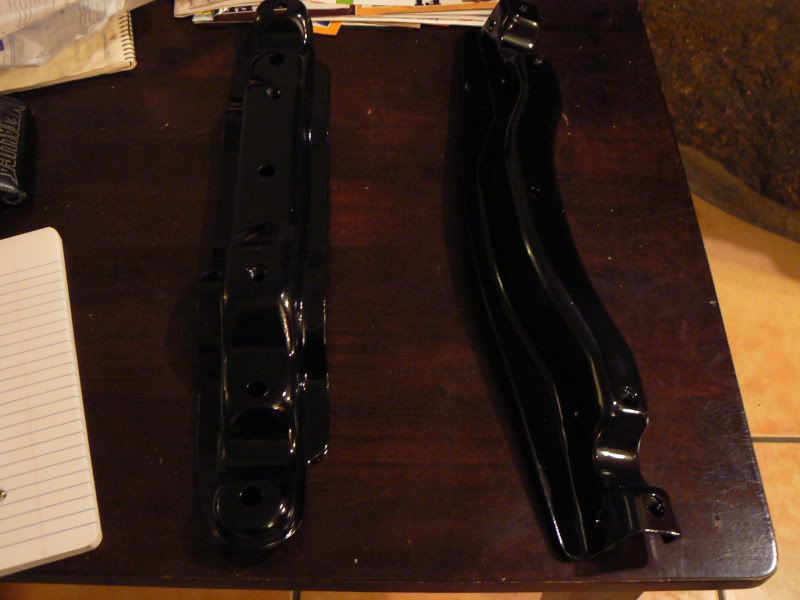
Hit the front diff crossmember and rear suspension crossmember with a healthy dose of glass bead...
...and then two coats of self-etching primer followed with three coats of gloss black.
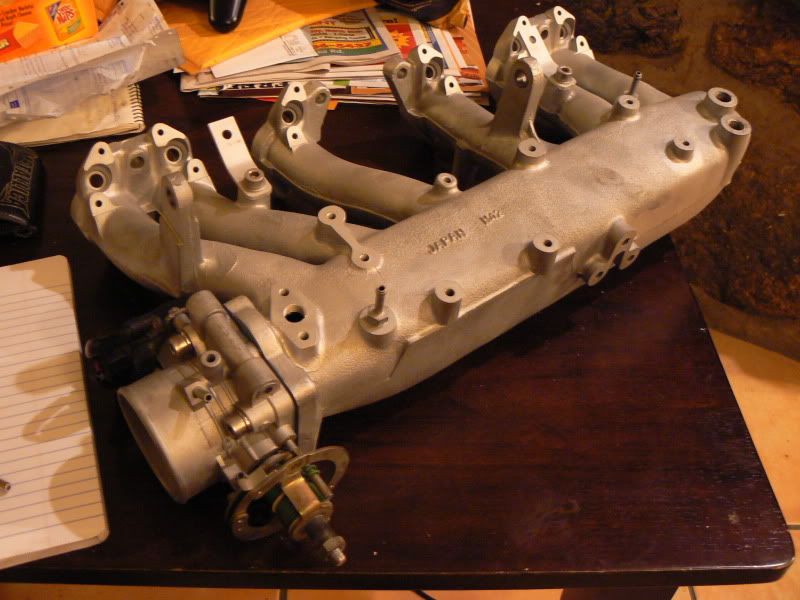
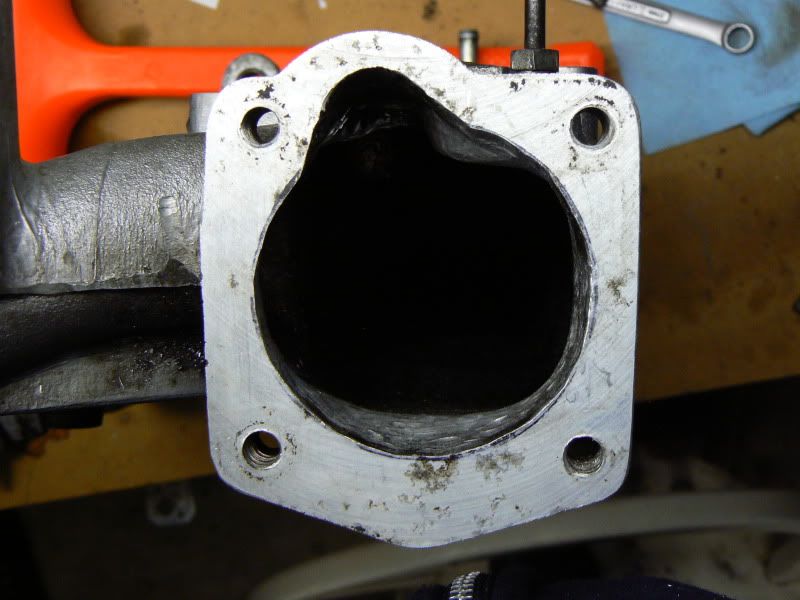
Also media blasted the intake manifold
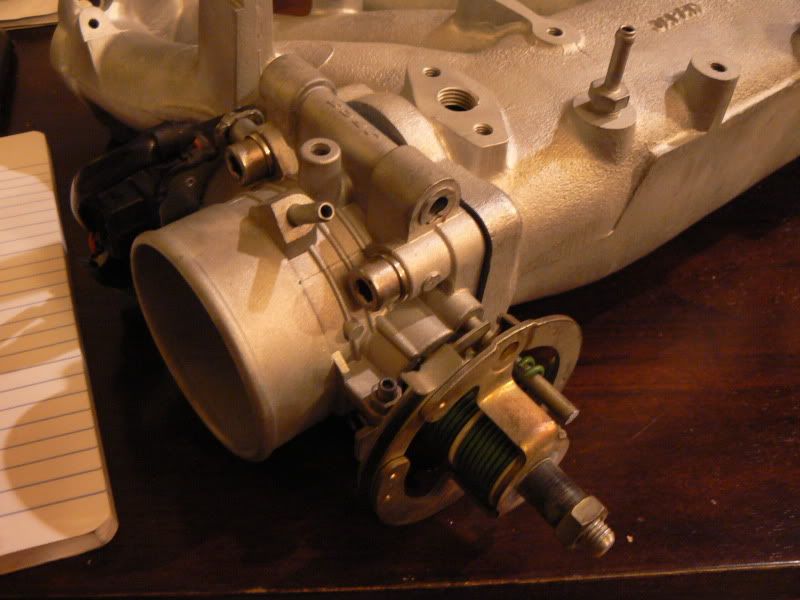
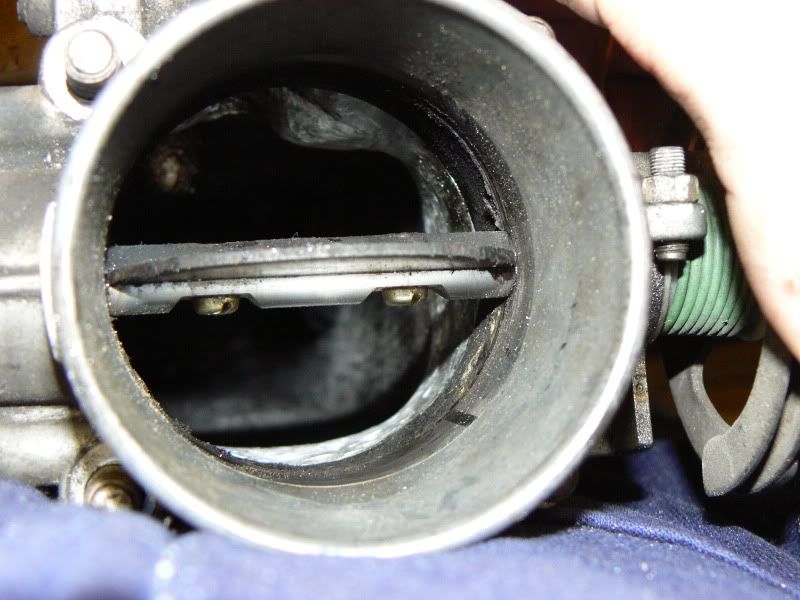
and KA24 60mm throttle body.
NB: When using this TB in this orientation with an N42 manifold, one MUST install the TPS onto the TB before bolting the TB to the intake. There's not enough room to slide it on otherwise. -
Thank you, Russ.
Still looking for any 4.11 R180, K housing or not, converted to bolt-in flanges or not.
-
Cool write-up! Seems like a very high-quality installation.
-
As titled, I'm looking for an R180 in good usable shape with the 4.11:1 gear set. A stock open diff is fine. PM me.
Edit: I'll also take just a ring and pinion set if you've only got that.
-
If there's no compressor (i.e. hoses just bare-ended where the compressor would be), there's definitely no freon in the A/C system.
Vacuum-operated systems are run by engine manifold vacuum; removing the (normally pressurized) A/C lines will not affect your heat/defrost operation.
In short, have at it.
-
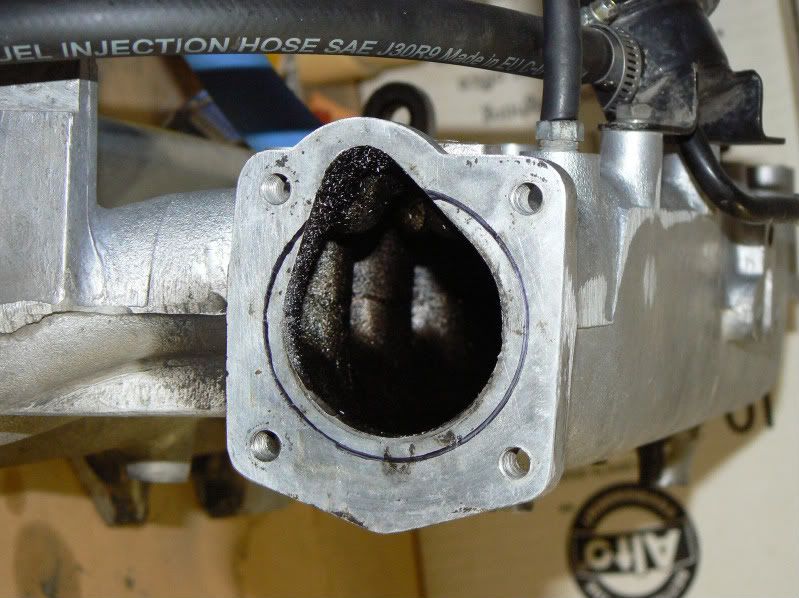
I made quick work of the intake.
Don't let the lighting fool you: the silver area that's been ported extends about 35mm back into the plenum, and is dead straight back, no taper to a smaller bore. The plenum now lines up perfectly flush with the walls of the 60mm throttle body.
I also completely removed the hump blocking airflow into the No. 1 runner and made as much of a radius as I could on that inner wall to help direct air into that runner.
I also removed the (rather large) injector mount casting bumps in all six runners, but that wasn't worth picturing.
-
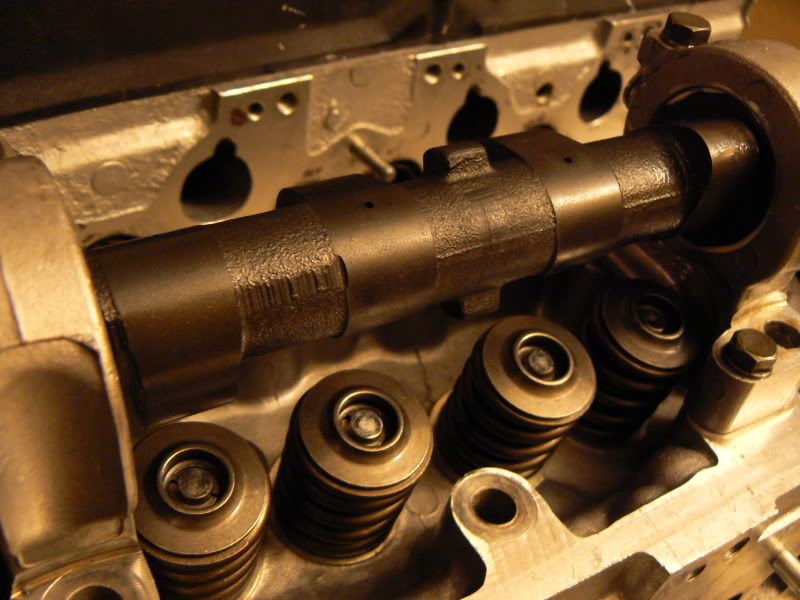
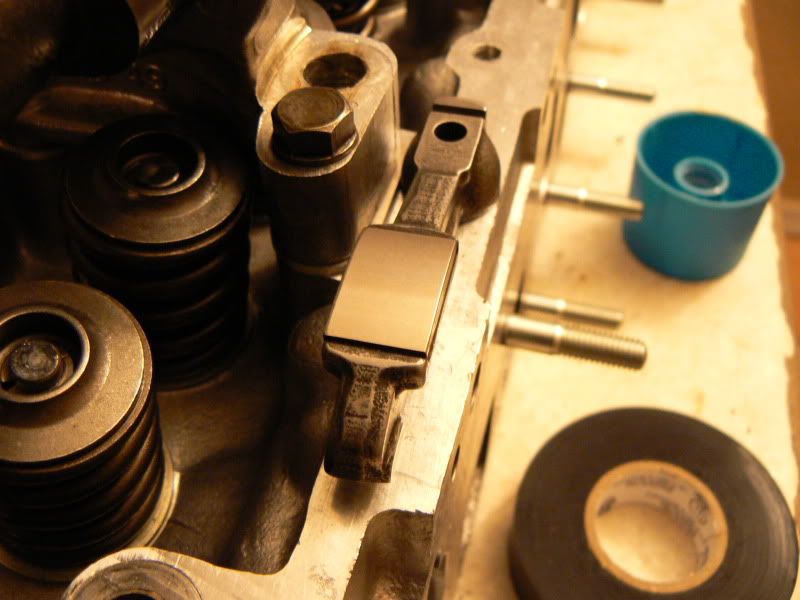
Got my cam today. Cam card says it came out to .504" intake .503" exhaust. Fine with me.
Delta Camshaft also did a beautiful job cleaning and resurfacing my rocker arms. They were very friendly and helpful on the phone, they turned everything around in one day, the quality of workmanship is excellent, and the price I got by talking to the guy for a few minutes is unbeatable. I highly recommend them.
Also gonna start on some light intake work, will detail after I finish.
-
Are you gonna use a lonewolf intake for your N/A Build, or go with ITB's
I'm gonna stick with the N42 manifold I've been running, just open it up a tad and slap on a 60mm throttle body. I'll eventually have the head ported and change the intake at once.
_____________________
Got a set of .080" aluminum cam tower shims from Derek:
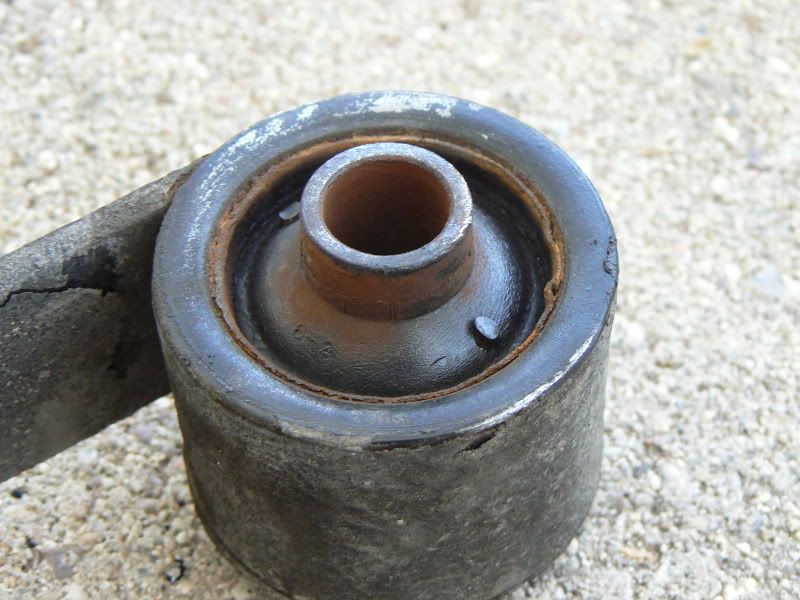
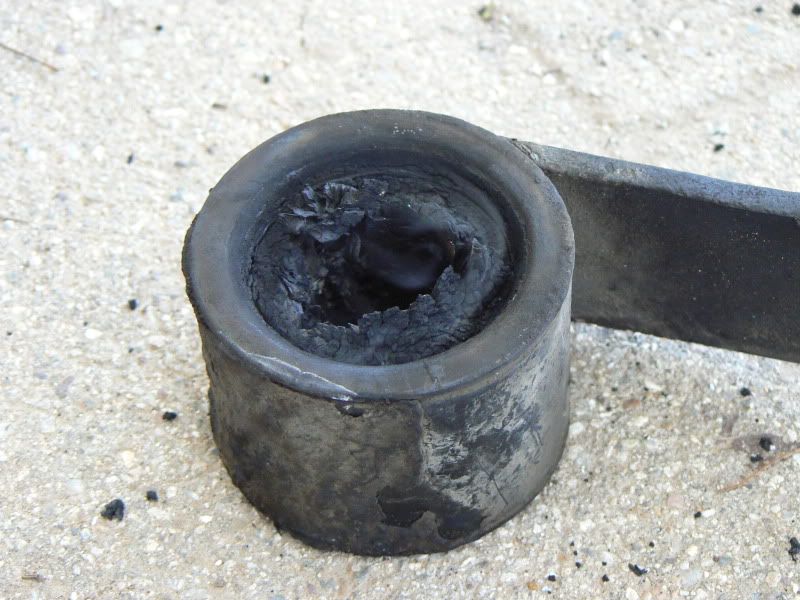
Also burned out the stock rubber bushings in the mustache bar and installed urethane ones. I took some pictures of the process since I couldn't find any running around. The stock bushing:
Use a propane torch to burn both exposed sides. They won't really want to burn, just char; keep at it. After about five minutes you'll be able to push/pull the center sleeve out with pliers:
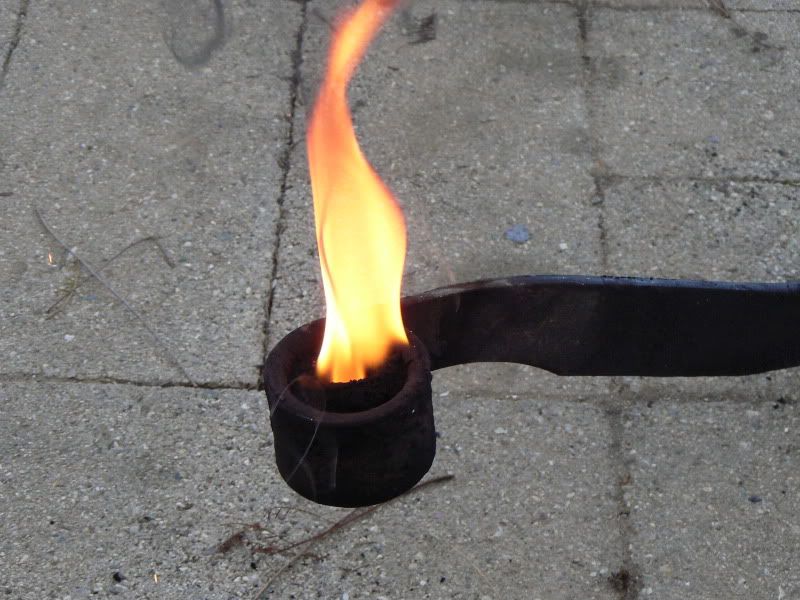
Once it's out, hit it with the propane again and the thing will light up like a torch. Let it burn all the way out, knocking the ash out every few minutes to expose new rubber:
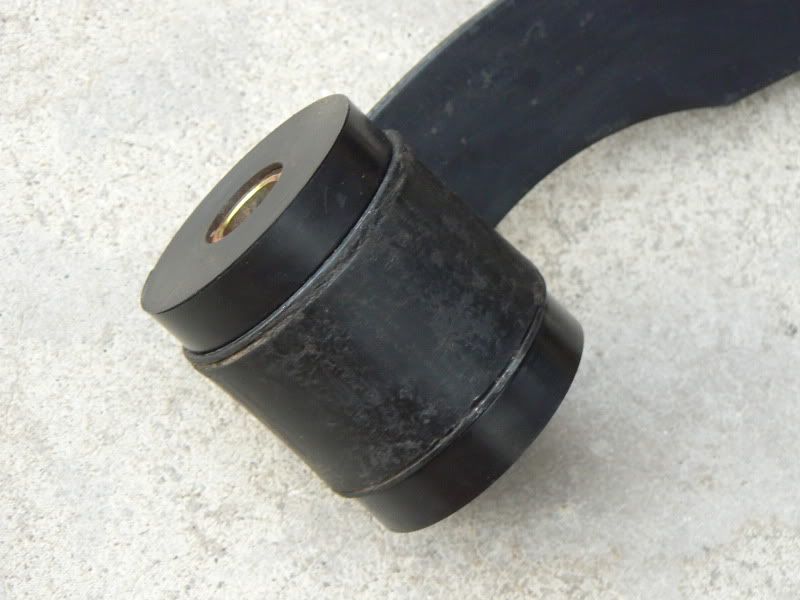
You don't need to remove every last little piece of rubber, thin strips of it along the inside of the metal sleeve are fine. The new bushings slide right in with minimal help from a vice.
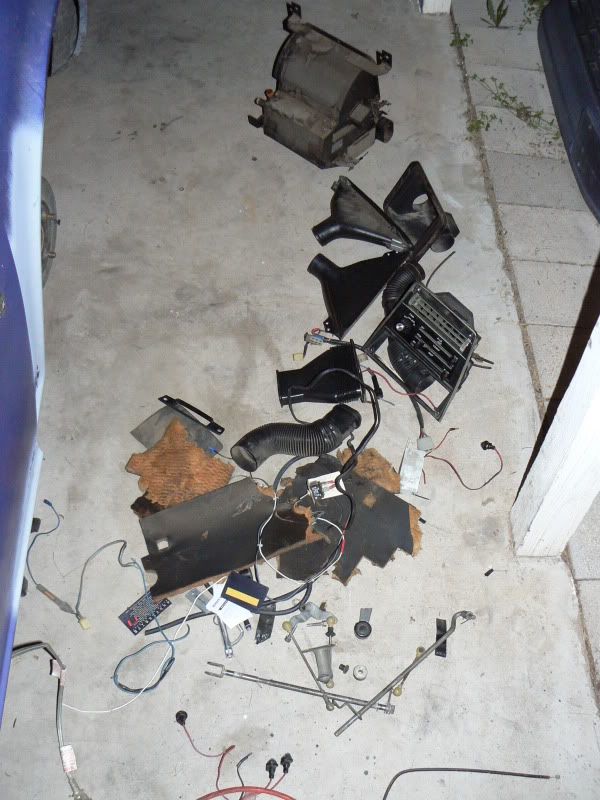
Also continued removing now-useless things from under the dash. 22lbs of dead weight here:
I've been keeping records of the weight I've removed from the car since getting a cushier daily driver. As follows:
A/C evaporator, blower motor + housing - 17lbs
Spare tire, jack, tool kit - 43lbs
Stereo head unit, rear speakers + panel, power antenna - 15lbs
Intercooler + piping - 26lbs
Turbo + Manifold - 37lbs
Headers - +18lbs (expected)
R180 (wet) - 60lbs
R160 (wet) - +48lbs (expected)
Diff snubber strap + brackets - 2lbs
HVAC core + controls, misc. wiring, throttle linkage - 22lbs
Total = 156lbs.
That is a very significant amount of weight. I'm hoping for the car to be under 2200lbs wet by the time I'm done.
-
Got mine. Great product Derek, thanks!
-
I also think my truck is worth about twice what he posted his car at.
Pretty sure you just answered your own question.
-
Where did you get the wrap for your wiring harness?
McMaster part No. 9284K412 for the 1/4". I also use 1/8" and 3/8".
_____________________
Engine bay devoid of any/everything turbo-related (except for that drain tube I just noticed):
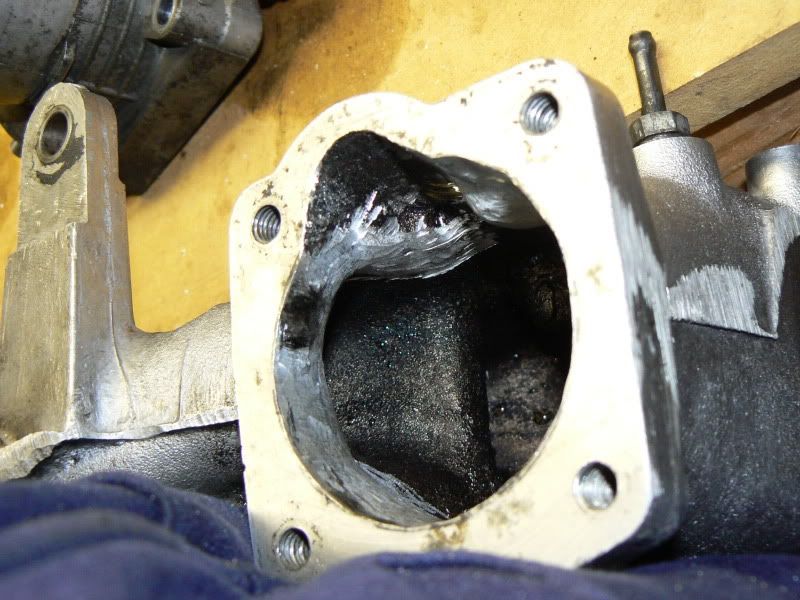
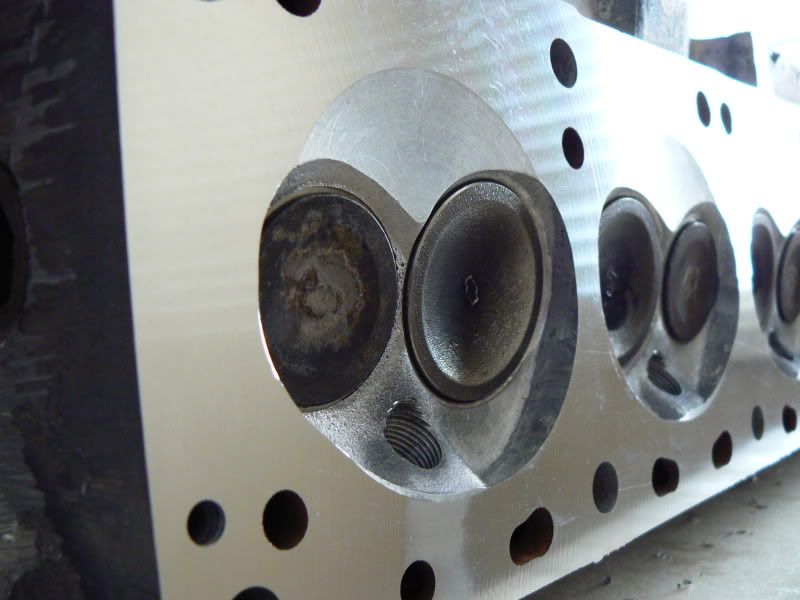
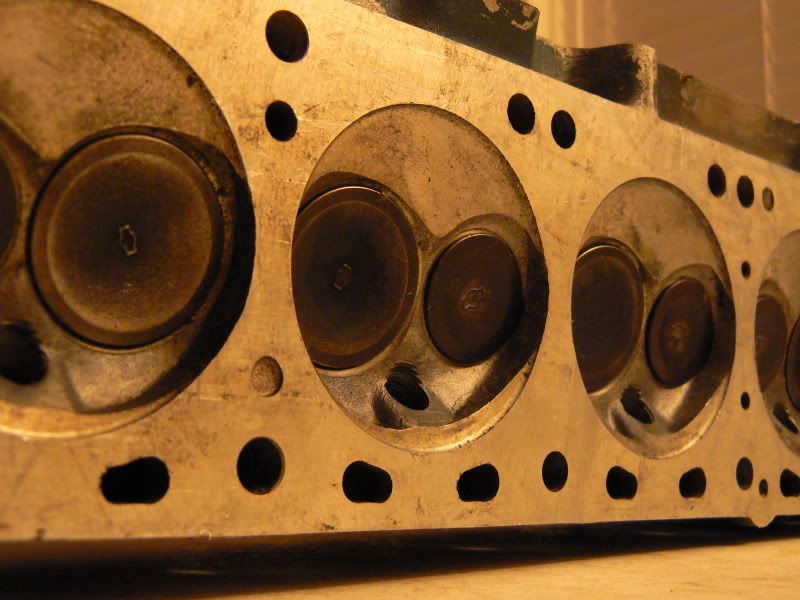
Ever seen an N42 shaved .080"? This is what the chambers look like:
They measured in at 34cc on the dot. That, combined with a stock 1.25mm head gasket, my slight deck skim, and 86.5mm turbo dished pistons, yields a 9.9:1 static compression ratio. Perfect for an N/A street motor on premium. I'll be shimming the cam towers up with Derek's aluminum .080" cam tower shims, and using thicker lash pads since I've gotta reset the lash for a new cam anyways. I sent my internally drilled Nissan 'A' cam out to Delta Camshaft to be reground to .495" at 290° total duration. I swapped the Rebello valve springs over from my P79, and had the machine shop use the Felpro viton valve stem seals as per the sticky in the L6 section.
The turbo was really a lot of fun, but I found I spent more of my time worrying about pinging and blowing things up than I did enjoying full throttle. That's why I decided to become one of the few traitors that go back to normal aspiration. I'm looking forward to beating the crap out of this new motor setup without worrying if I'll blow a head gasket from pinging I can't hear.
-
Ahaha that missed shift and the way he portrayed the huge turbos the Supra guys run was absolutely classic.
-
because a large rotating drum requires less force to rotate the faster it goes?
It does not require less force. It takes the same amount of force to add, say, 50rpm to the drum in 1 second, whether the drum was already spinning 2rpm or 200,000rpm.
-
Hoov, that's incorrect. Just as F = MA,
, where Tau is torque, I is the mass moment of inertia, and alpha is angular acceleration.In short, the force it takes to accelerate the drum does not depend on the drum's speed.
-
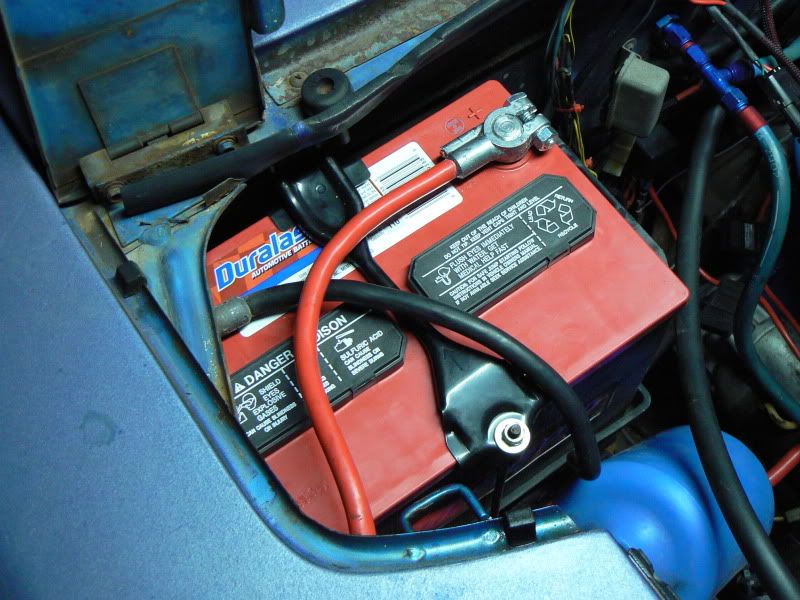
Forgot to post the battery hold-down strap I made. Took something like a 2000ish Maxima or Altima bracket and bent it to fit.
Also, I've started selling off my turbo stuff; I'm going N/A. I'll detail the elaborate plan soon but here's the first piece of the puzzle:
-
Might have a line on one locally. I'll let you know.
-
I just didn't want people to get the wrong impression about the L28ET swap. Â It can be very reliable.Â
Me neither, I don't mean to badmouth the setup at all. I absolutely enjoyed the motor and used it as a DD for over 20k miles.
An N/A motor is simply going to be better suited to this car's purpose at the moment and create a more conducive environment in which for me to hone my driving skills.
-
Sounds just like my car. I'd be willing to bet that's an L28et with either a fully open exhaust, or some sort of small, straight-through muffler.
Mine, for comparison:
http://www.youtube.com/watch?v=fUmhNmQuZx4
L28et, stock T3 turbo, 3" mandrel downpipe, 3" mandrel open exhaust.


 , where Tau is torque, I is the mass moment of inertia, and alpha is angular acceleration.
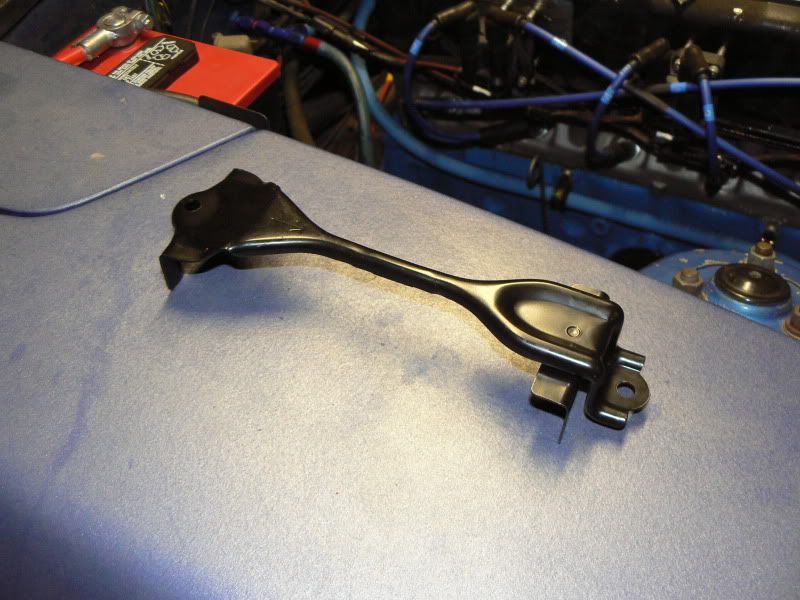

Noob Arp head stud install question
in Nissan L6 Forum
Posted
That's how they are on mine, too. It's fine, don't force them.
This pic is pretty dark in the stud area but you can see on those first two on the passenger side of the block where the threads are sticking up above the deck.