Dershum
-
Posts
147 -
Joined
-
Last visited
Content Type
Profiles
Forums
Blogs
Events
Gallery
Downloads
Store
Everything posted by Dershum
-
I didn't have any on the underside. The only thing under there was crud, gunk, grease, mud, rust, and more crud. Media blaster took care of those for me.
-
Show Off Your Engine Bay! Pics Wanted, L-series
Dershum replied to philipl's topic in Nissan L6 Forum
Any more of this one? (drool) -
Now I'm all jealous. I've had the two rear quarters and inner wheel arches on back order from MSA for almost a month now...
-
A guy at work that I showed the pics to said that I should have just used freon. I think he was kidding...at least I hope he was.
-
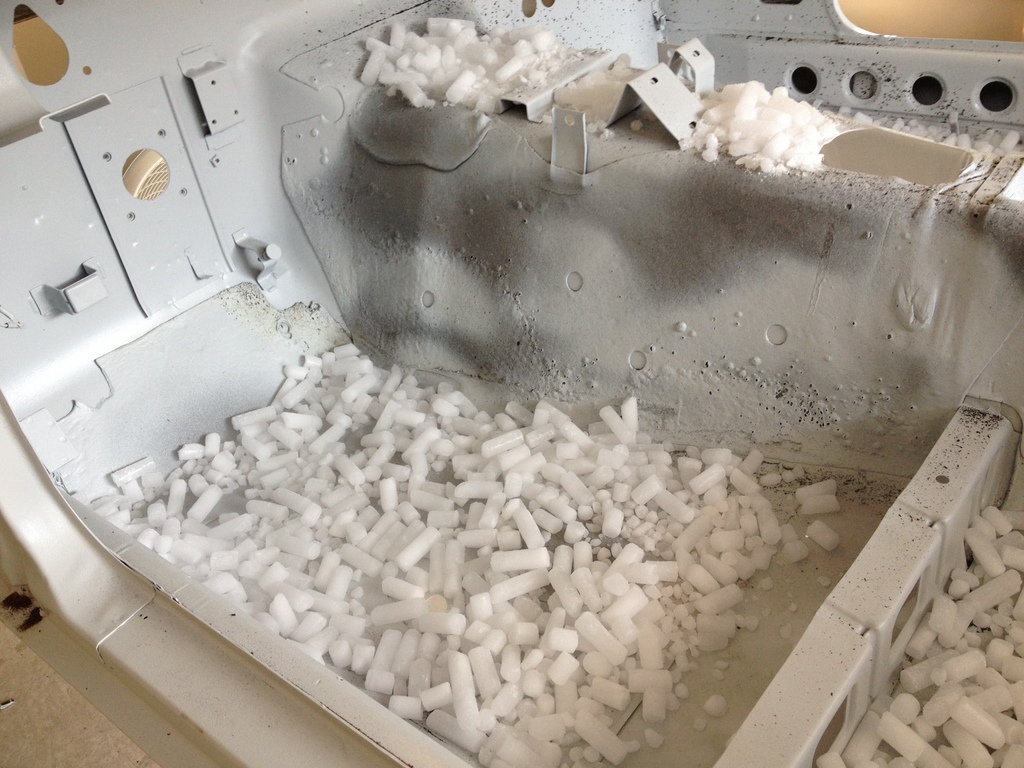
Did you just use it on one small area, or did you do the whole interior? I probably could have gotten away with 30lb or so, but I can't imagine having done the whole interior with any less than that, especially without reusing it a few times on different areas. I particularly had problems in the front inside corners of the footwells next to the trans tunnel. The characteristics of the "rubber" had changed quite a bit in those areas. It was a lot harder and had a lot of bubbles in it. Even with the freezing, I had to do a lot of chiseling to get the pieces off...it didn't want to stay together in one piece.
-
I'm not so sure I'd use that body to learn how to repair rust. I'm sort of in the same boat; still improving my welding skills, and learning how to do rust repair. But looking at that it looks like more rust than metal. I'd look for something that has distinctly "fixable" areas. Stuff that I can look at and go "ok, I can trim this part of the panel out, make a repair panel, and weld it in". Looking at that body, I wouldn't even know where to start on some of those areas. If you're really gung-ho about going forward with it though, good luck with it! And make sure to post lots of pics, so I can see how you're attacking some of those spots and steal your ideas
-
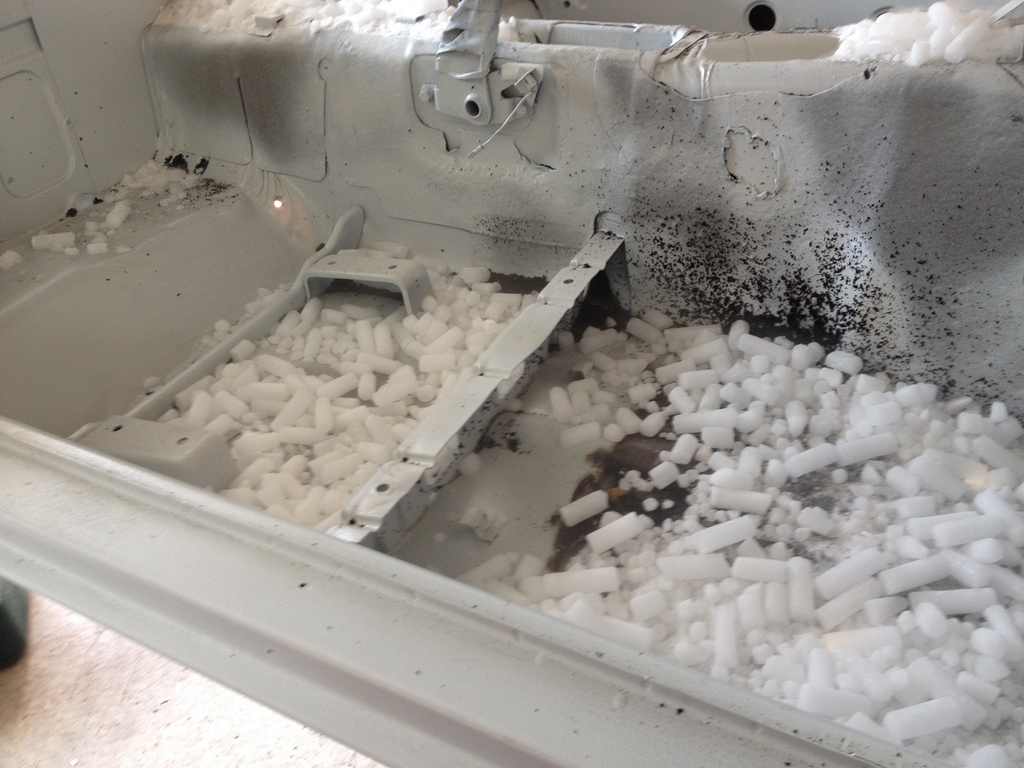
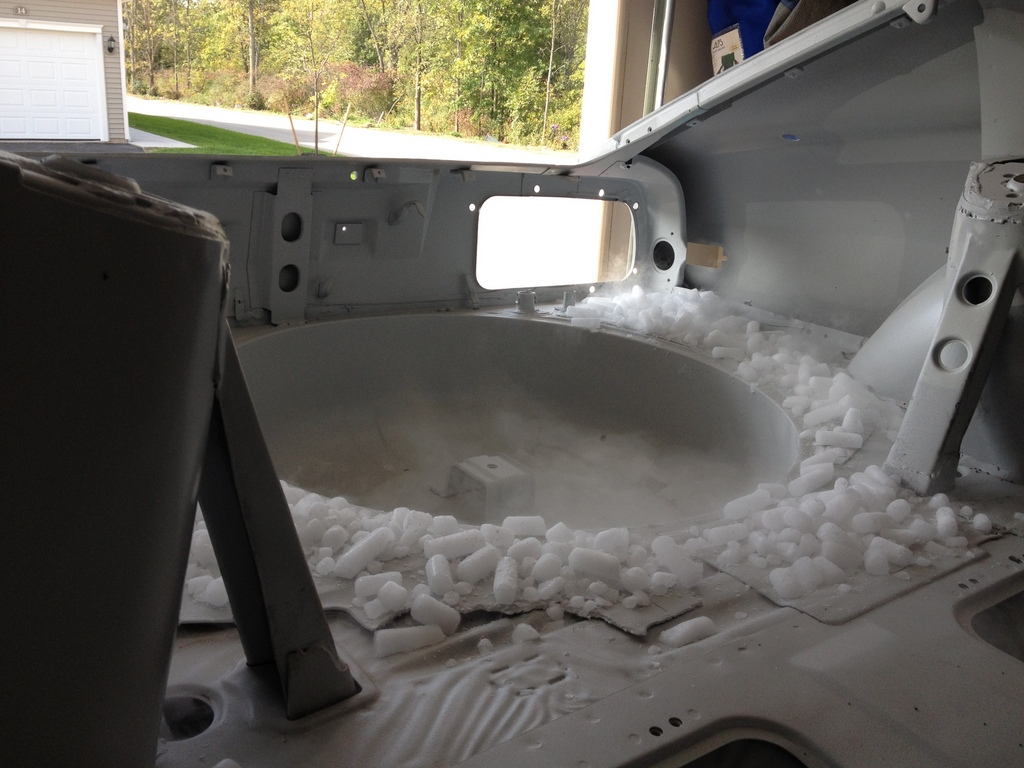
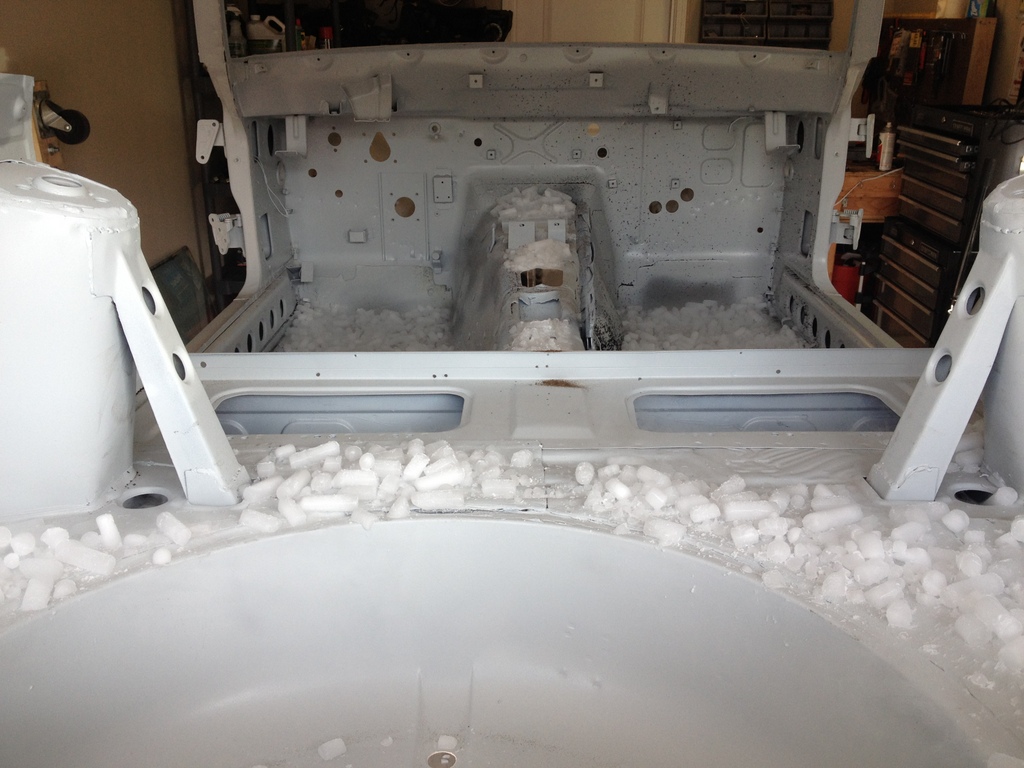
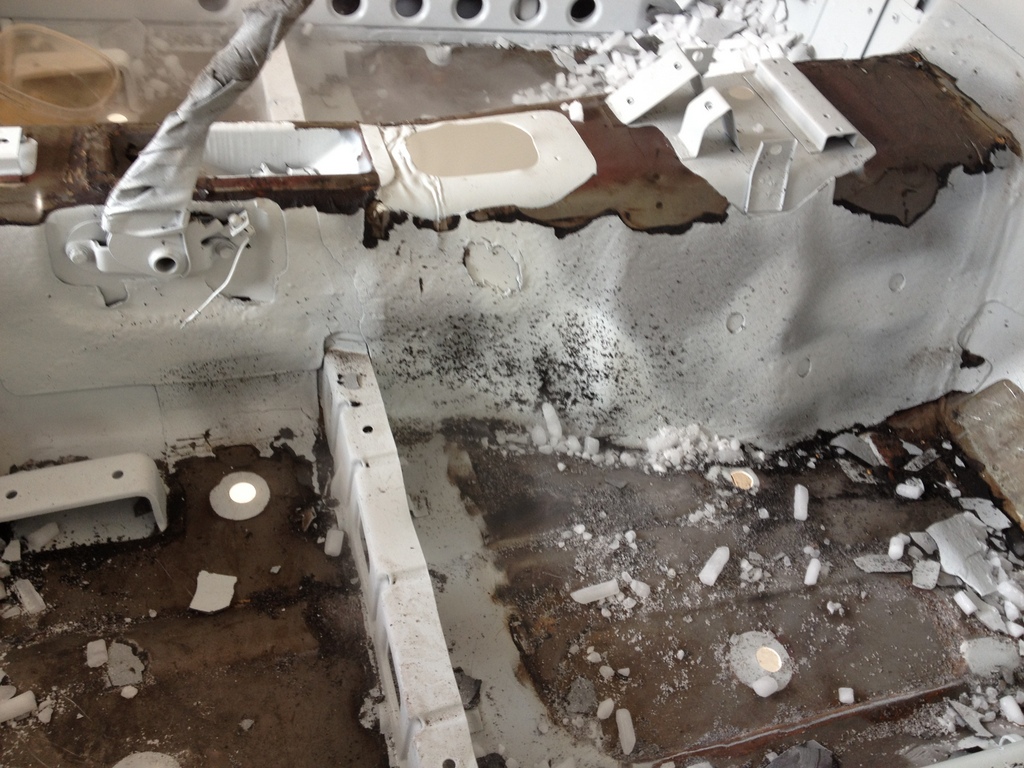
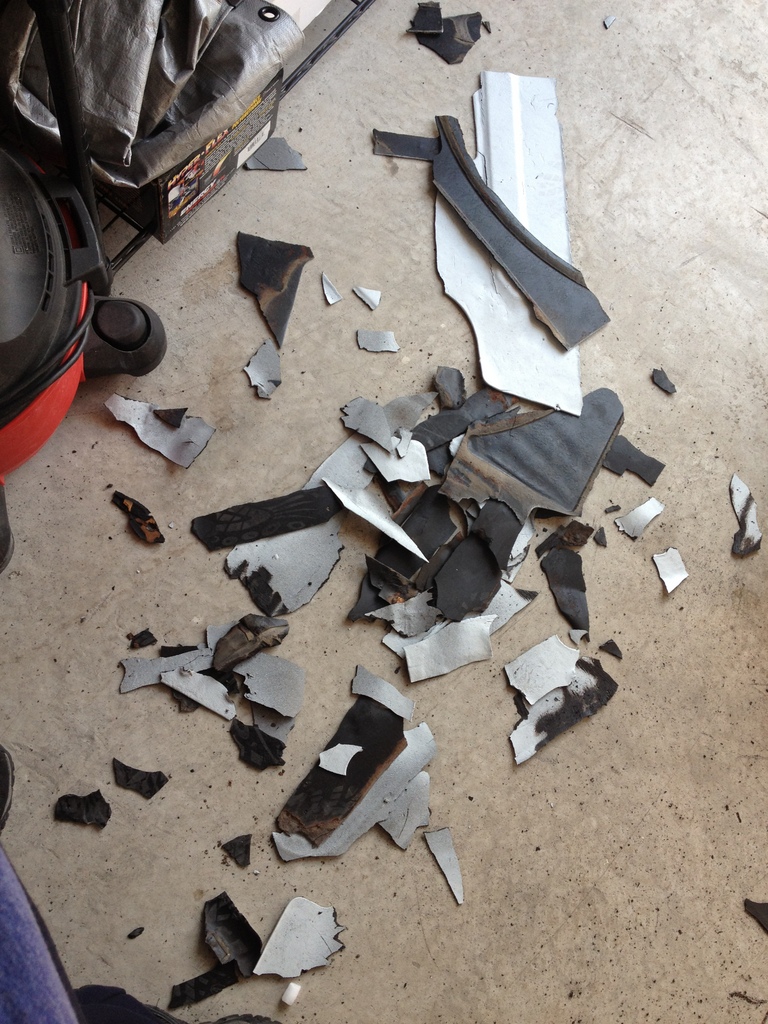
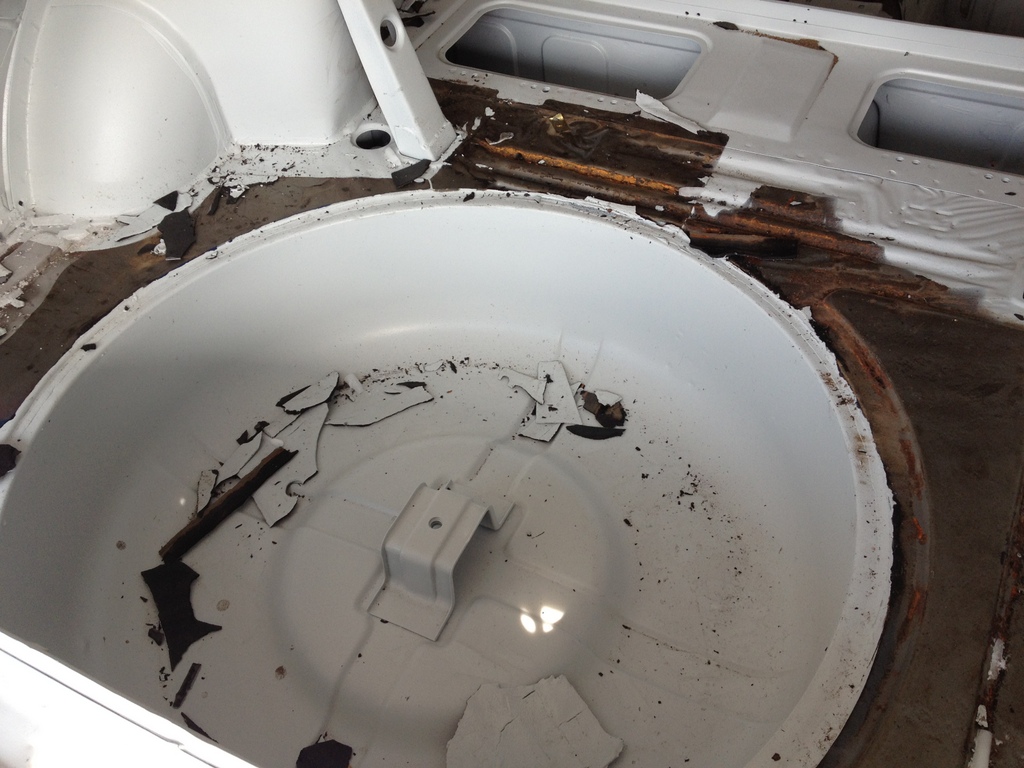
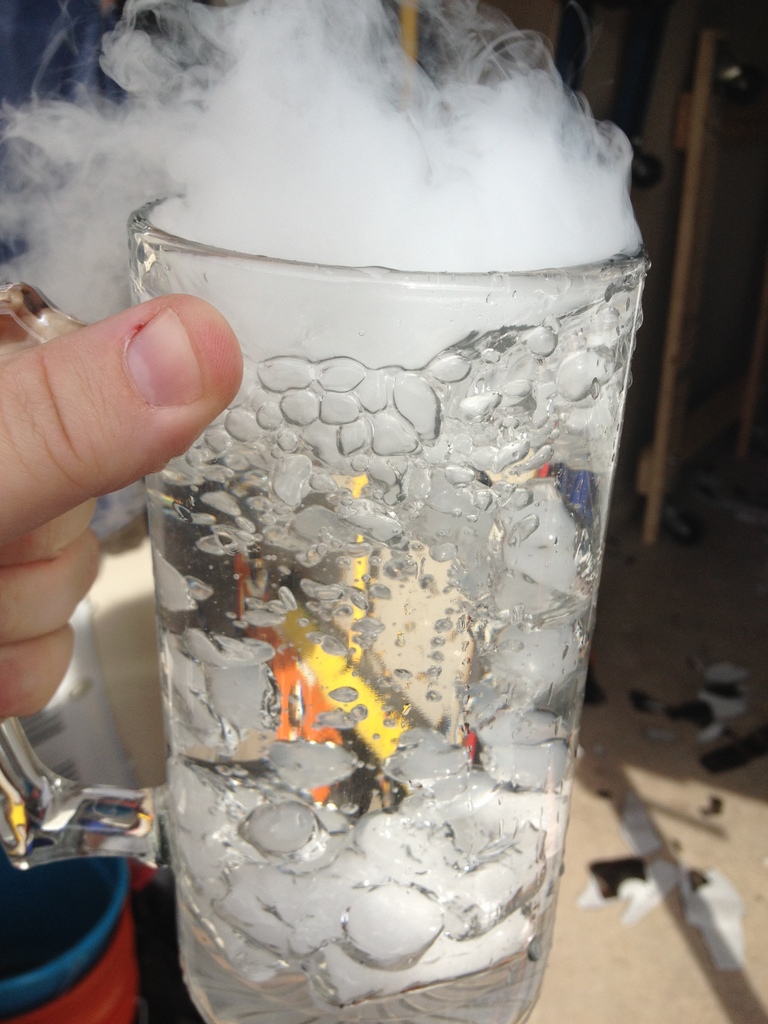
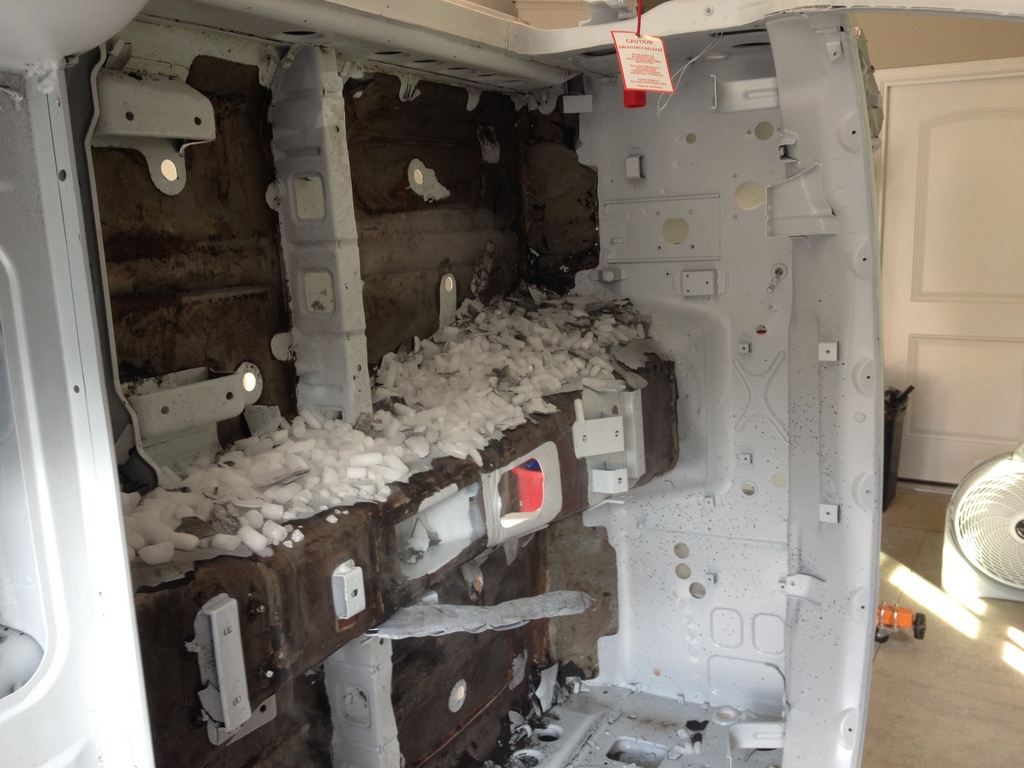
Lots of other folks have done it, but I decided to give dry ice a try to remove the insulation on the interior of my body shell. The media blaster couldn't touch the stuff, so I decided to take matters into my own hands. The process was fairly straightforward. Take a container (I used a bucket), fill it about half way with dry ice, and distribute liberally upon the surface of the insulation you want to remove. Wait about 20 minutes or so (you can listen to the insulation cracking lose, it's kind of cool), and then go at it with a hammer and a chisel. I used a gasket scraper...probably won't be using it for it's original purpose again, but it was all I had handy. Just a few particulars that I learned during the process that I hope can help the next person who tries it. 1) Wear gloves. I used my welding gloves. I didn't have to learn this the hard way, but I wanted to point it out. 2) Spread out the dry ice liberally, but only work on a small area at a time. I found that it chips off best if you keep the ice on it as long as possible, and only move the ice off just before you're going to chisel. I would just brush the ice aside, chisel, and keep moving along. 3) If you move fairly quickly, you can save some of the ice for later re-use. I ended up re-using about 1/3 of the ice I bought. I started with 40 pounds, but if you don't re-use, I could see it taking 60. 4) If you're going to do this, having it on a rotisserie helps IMMENSELY. I can't imagine how you'd get the sides of the trans tunnel without being able to spin it. I suppose a frame could be placed around it to hold the ice along side, but it seems like it would require a lot of extra ice. 5) Make sure you get a glass of water and put some dry ice in it. It's just fun to do when you're waiting for insulation to freeze All in all, I'm tickled pink at just how well this method worked. 3-4 hours of labor, and the insulation is all out. Now on to rust repair.

-
Thanks, but I really can't take credit...a bunch of others have done similar things, I just did my own version of it. Check out the Welding forum...there's a bunch there, and the guys at Atlantic Z Car club have a whole tips section full of em. Atlatic Z Car Club Body Section on Rotisseries
-
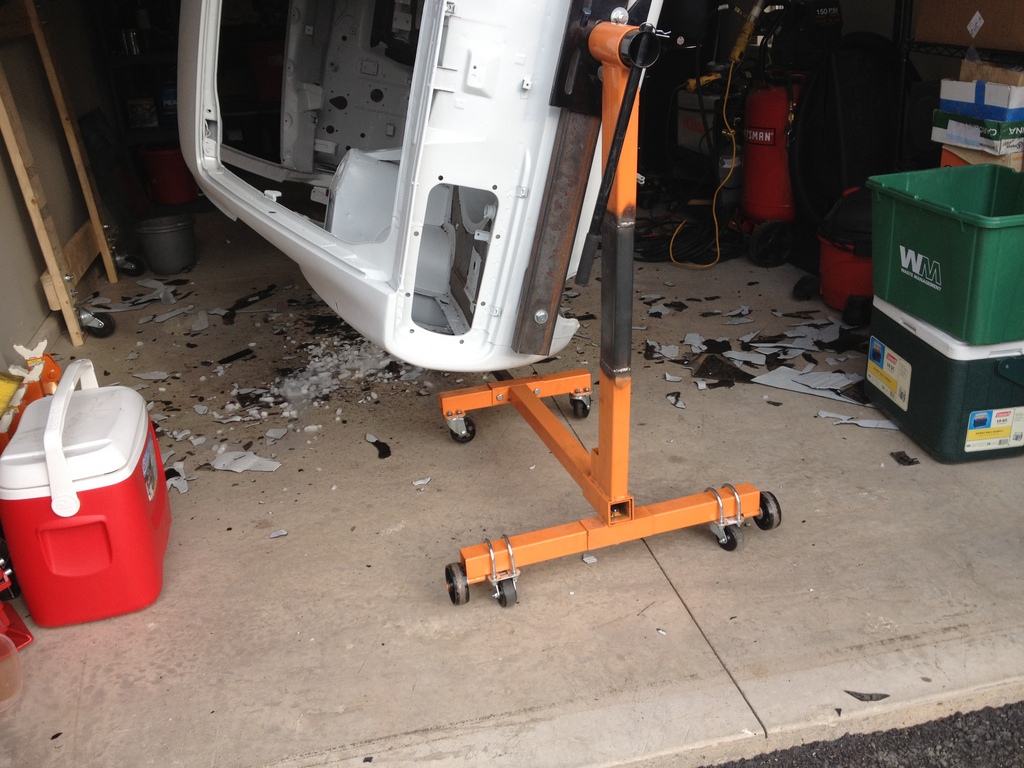
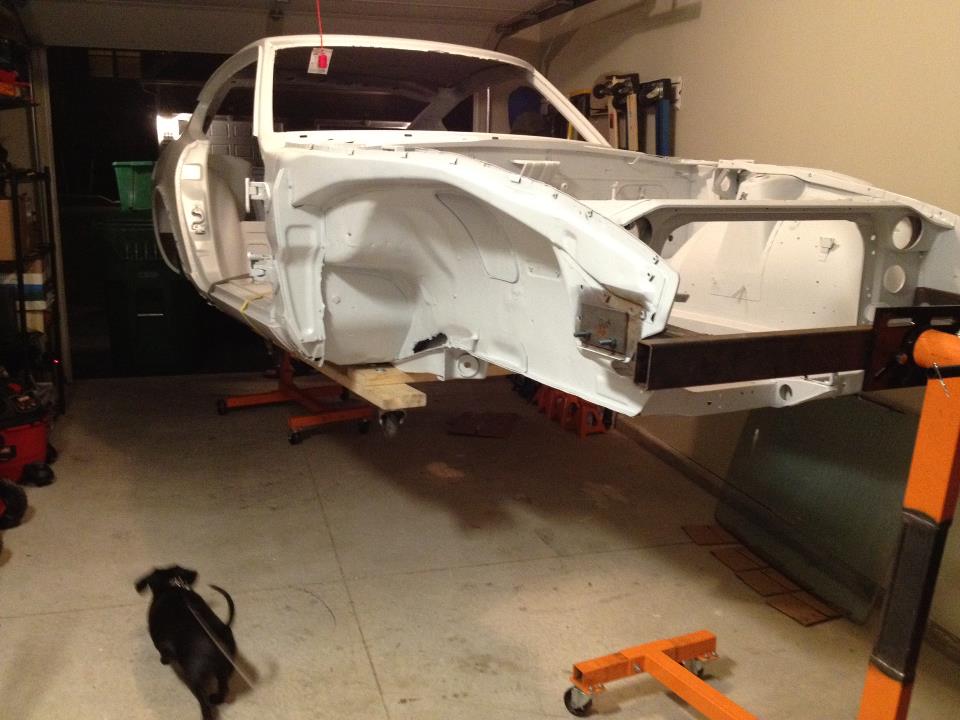
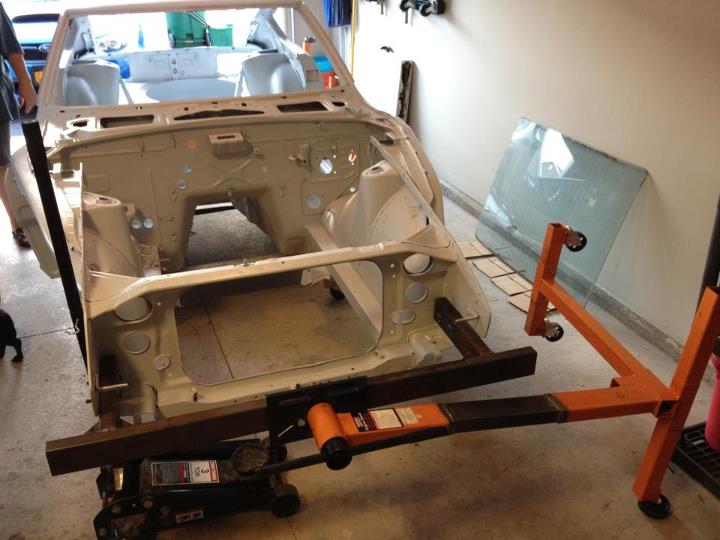
I've got the shell of my 71 torn down completely and "spitted" on a pair of 1,000 lb engine stands from harbor freight. No problems with it so far. All I did was cut the uprights in half and weld in about a foot of square tube on each upright to extend the "height" on it. Initially, I didn't have the stands connected other than by the body, but I'm adding a bar that connects the stands so that it's more stable. I'm a sucker for over-engineering and not having any wiggle when moving the stands around. Optionally, you can also add a couple of caster wheels in place of the rear wheels on the stands...it makes moving the car around on the stands MUCH easier if you're tight on space.
-
I kinda thought that would be the case, but since I wasn't sure I didn't want to say anything. That being said, I don't suppose anyone knows what the going cost of the panels from Tabco is? in everything I've read, the prices on their website are really out of date, and I keep meaning to call during business hours, but I've been so damned busy at work I just never get the chance.
-
Awesome...thanks for the quick reply. Let me tack on an additional question. In terms or repair panel quality (for things like wheel arches and the such) I'm really looking for opinions on patch panel manufacturers. I've done a bunch of research online, and it seems like opinions vary wildly between who produces the better patch panels. I've heard tabco is pretty good, but I've seen opinions where items like rear doglegs tend not to match up at all. But I've heard similar stories about MSA's patch panels and BlackDragon's. I realize this is probably going to open a can of worms, but I'm looking for opinions/personal experiences so I can source some patch panels.
-
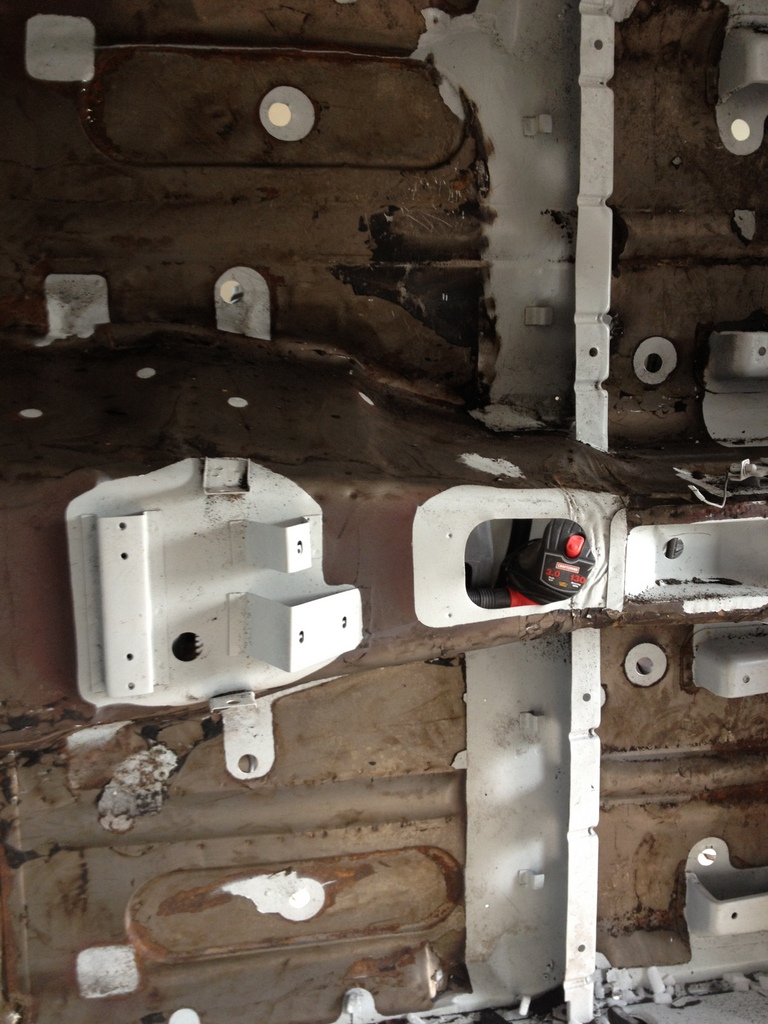
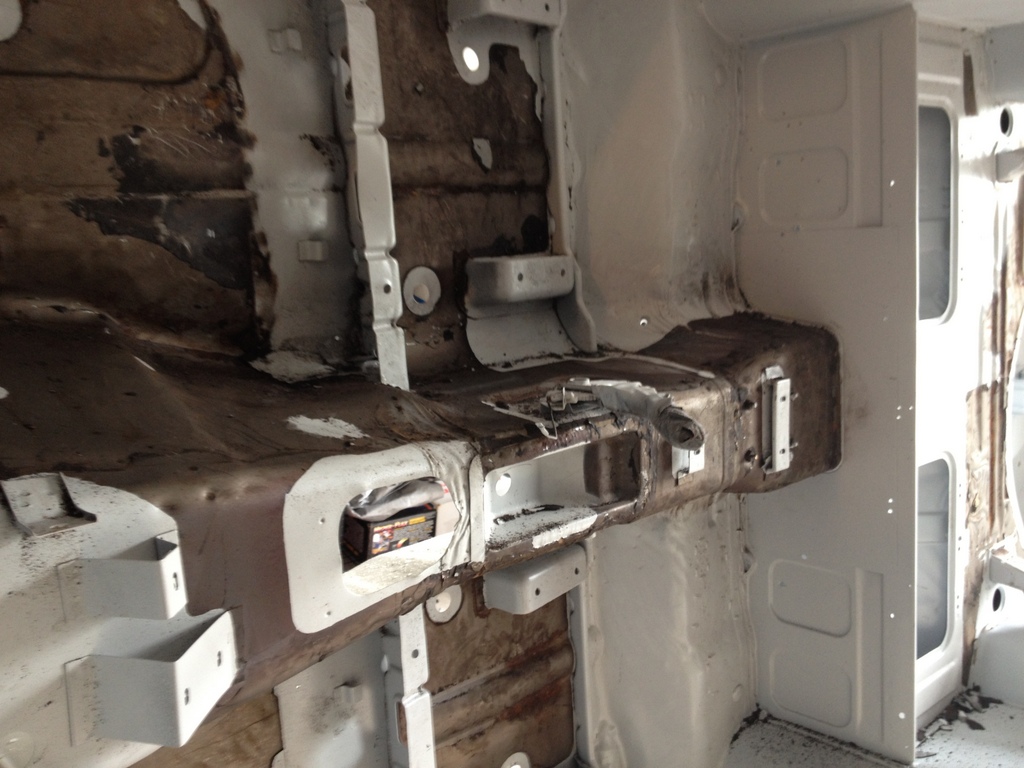
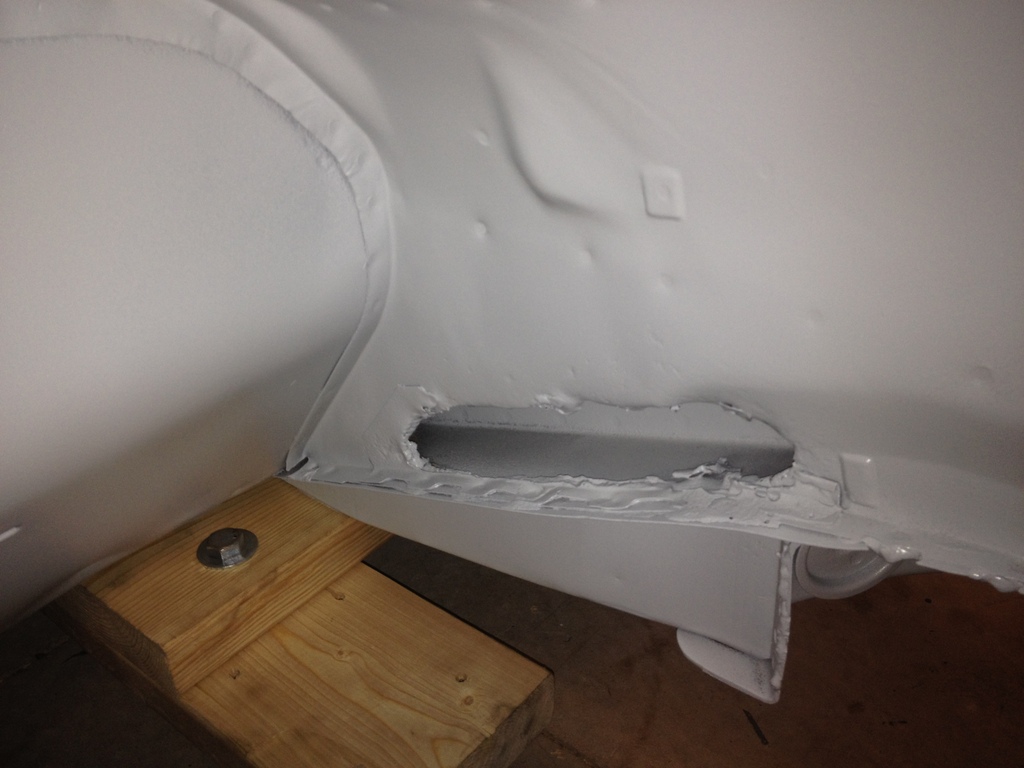
This one's got me stumped. After blasting/priming, we've exposed this rather oddly shaped hole in the back of the passenger front fender well (there's an identical one on the other side). There's some rather odd plating that looks intentional; either replace a previous rust hole, or was the original panel that was there and has simply rusted through? Either way, I'm not quite sure what to make of it. I'm assuming these holes aren't supposed to be there, but since they're kind of symmetrical and identical on each side, I figured I'd ask if these are supposed to be there and it's something I need to simply repair but leave open (not even sure why). Hoping for some thoughts.
-
I've already done a chunk of the upgrades, but since I've got everything pretty much torn apart, I figured it was worth the effort. And I have to admit burning the rubber bushings out of the front LCA's was kind of fun. I'm looking forward to the rears...not the spindle-pin so much tho.
-
I may have to try that... Seriously though, thanks for the feedback!
-
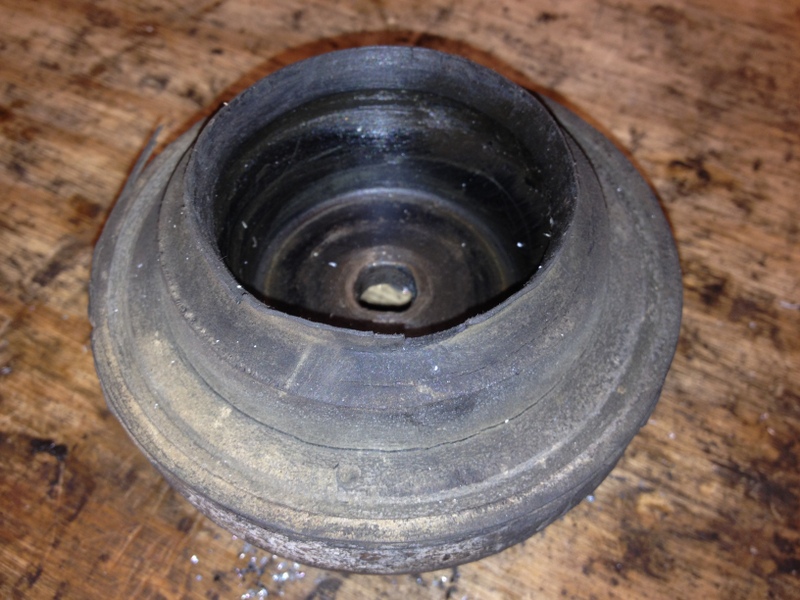
Hey guys, I'm working on rebuilding my front suspension (going to start the rears as soon as I get the fronts torn down), and wanted some opinions on how serviceable this strut mount insulator is. It seems relatively sound, but the bearing just flopped right out of it when I turned it over and the rubber "boot" seems to be getting pretty worn. I'm not a terribly good judge of how much wear on these sorts of thing is acceptable, and I'd rather not drop $240 on a set of four of them if I don't have to. Here are some pics of one of them. They're all of a similar wear level.
-
I got mine from Craigslist. You could try eBay, but they tend to be overpriced. Also, try to find a CA or AZ car. Mine was in Jersey, but it was out of AZ just a year or two prior, so very little rust. If you try Craigslist for southern CA or AZ you might be able to find one and have it shipped. Of course there's also the want-ads part of this site (and other Z enthusiast sites) that you could keep an eye on or post a "wanted" ad. Can't hurt. A little patience will go a long way. Good luck!
-
So how did you manage to blend the headlight buckets so seamlessly into the front quarters? My buckets are fiberglass...did you just fill the gap with body filler? Or did you find metal headlight buckets somewhere?
-
Thanks everyone for the info and opinions....looks like I'll be skipping the primer coat and leaving it in bare metal. Thanks again!
-
Since I recently moved and I haven't had a lot of time to spend working on my Z since then (still unpacking!) I've been in discussions with a local place about soda blasting the body. One of the things I've been trying to decide on is if I should have the shell shot with epoxy primer after the soda blasting to seal it up, or if I should leave it bare so I can identify any problem spots (rust) and fix them first. So I'm hoping for some opinions from folks who have done this or have experience with this. Should I leave it bare, or primer it after blasting? Thanks!
-
That's an absolutely gorgeous color, but I'd imagine the materials cost a fortune. How much did they run?
-
A rather long and heavy one? Sounds like something out of Monster Garage...
-
I'd like to get this information as well...but maybe a little more detailed. I'm moving, but leaving my motor with the machine shop here to do the full rebuild. I'll be headed back down in a few months to pick it up, and I was going to build a wooden support to set it in while moving it and keep it in until I'm ready to put it back on an engine stand. I was thinking of a "sling" underneath the oil pan and up/around the sides of the block (nothing will be attached to the block so it'll be bare) that I can just drop it into here, put it on a truck, and leave it there for a while until I'm ready for it. Has anyone done something like this and/or know the dimensions I'd be dealing with?
-
Awesome...thanks for the direction I'll hit up Advance Auto today so hopefully they'll have them.
-
So I'm packing up my garage and getting my Z rolling so I can roll it onto a trailer. Suspension is back on. Garage is almost ready. Trailer is coming Saturday. I went to put the wheels on this evening so I could get it off the jackstands, and lo and behold... ...I've packed my lug nuts. So, does a local place like Autozone or Advanced Auto sell lug nuts that might work? From what I recall they're 12mm x 1.25 or 1.5 thread, correct? But I seem to recall them being strangely shaped. The pic below shows the wheels I have...if anyone can point me at a quick and cheap option so I don't have to unpack half of my garage, I'd really really appreciate it. Thanks in advance, from your local moron.
-
Very nice...this is the exact same route I'm planning to go with. Did you get temp/oil press gauges for the other pods?