Kclank
-
Posts
110 -
Joined
-
Last visited
Content Type
Profiles
Forums
Blogs
Events
Gallery
Downloads
Store
Everything posted by Kclank
-
to whom are you addressing this question?
-
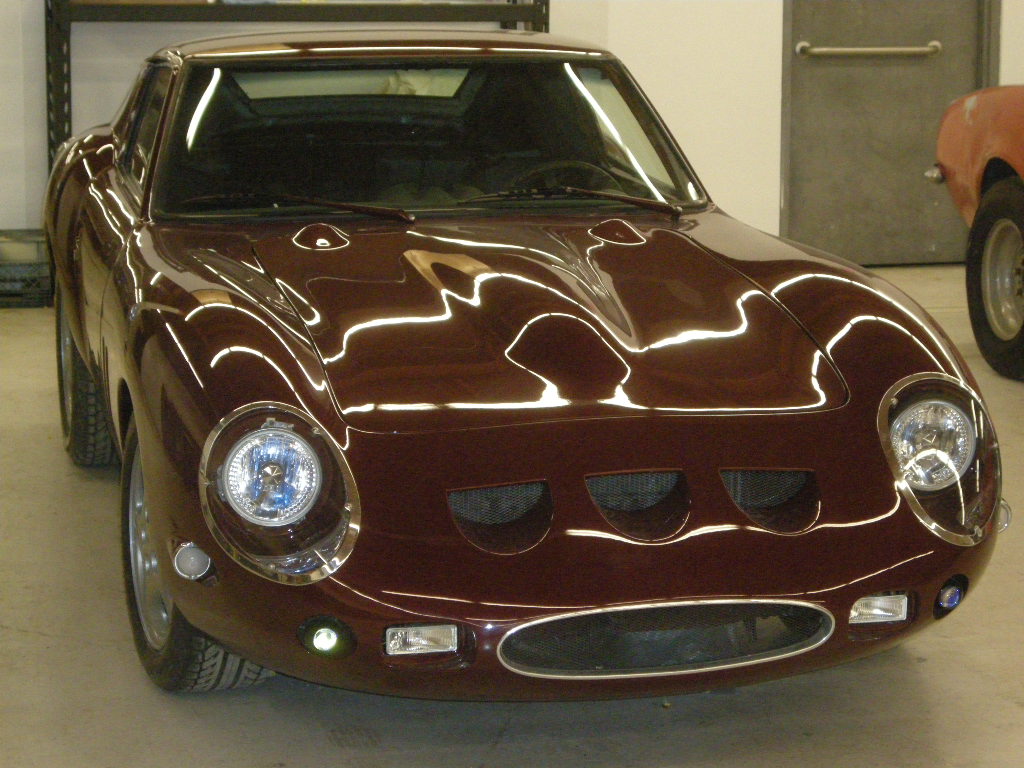
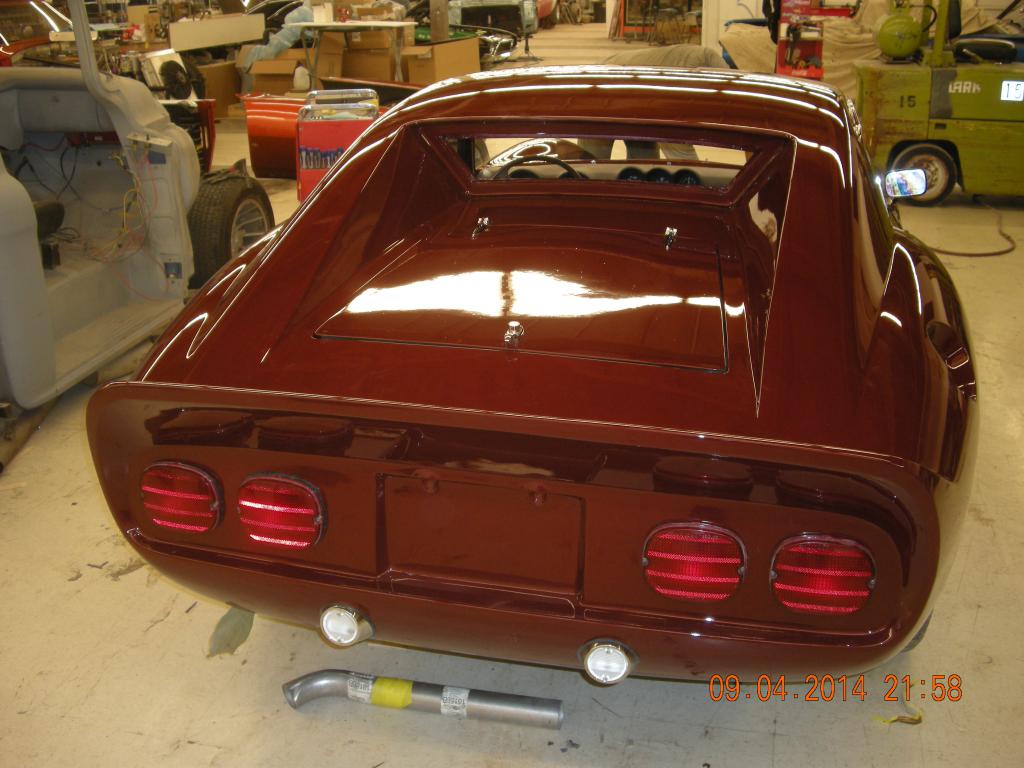
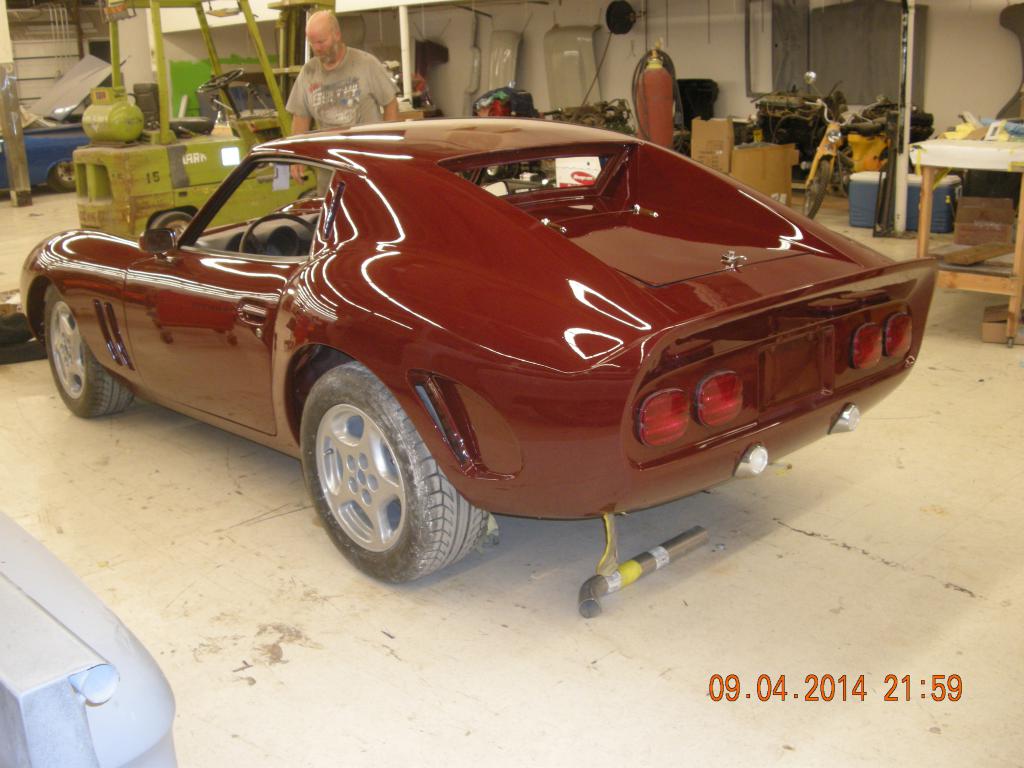
Thanks for the kudos Wes. The back up lights are from a Mustang, don't know the year. The round valence lights are projector driving lights from Autozone, . The are mounted to float in the opening to allow air to flow around them, for cooling the lights, and so residual air can pass to the brakes, The vent and grill material was specified and purchased by me then installed by the body shop at my direction. The mesh and black trim comes from a company called "customcargrills.com". The shiney metal headlight, grill and trim pieces came from Thunder Ranch back when people answered the phone and emails. Lotsa luck now unless you walk into their shop and tell them they have them. Only cost 2 small children and a goat. The metal hinges and latch button on the rear hatch were provided by John Washington. At least you can drive your car until you finish the pretty parts. I went the other road of finishing the chassis and body first. I realy love your Rota wheels but I wanted to stay with a narrow wheel on the front (7"). The engine/trans/interior work is going to keep me off the road for many months. Oh well I can stare at it in my shop and dream. I am going to be tearing down and building a house over the next year so I expect my car work will slow down. That and my shop is very cold (Port Angeles, Wa. ), so that slows an old man like me since when the temps are in the 30's I don't move so well.
-
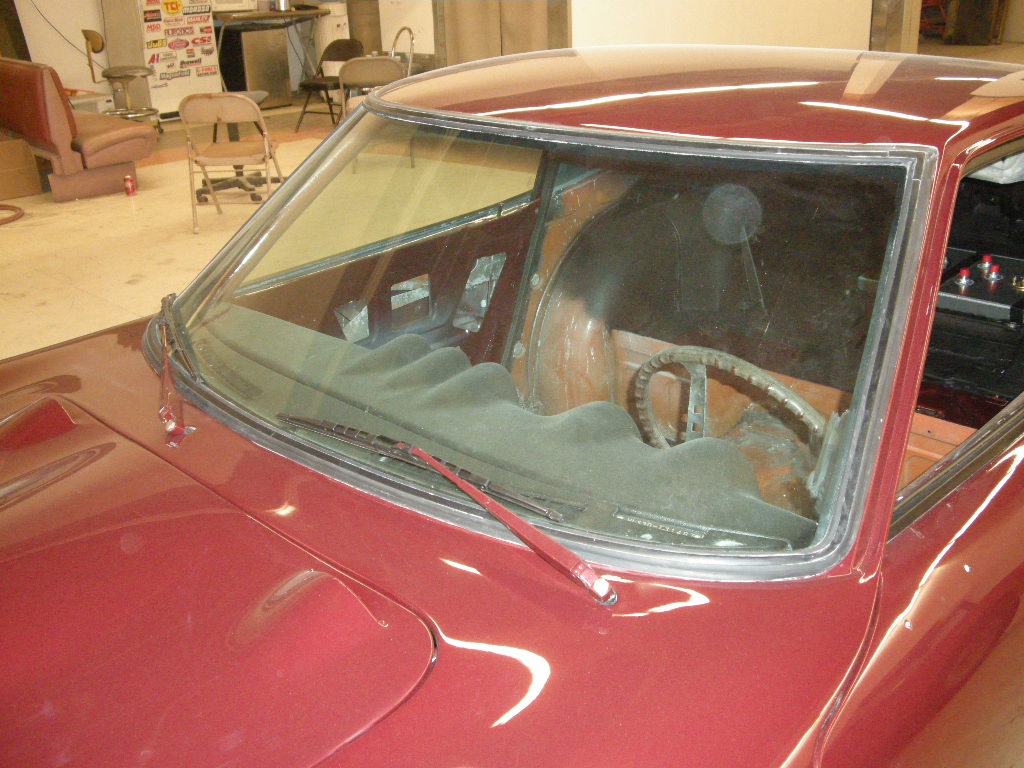
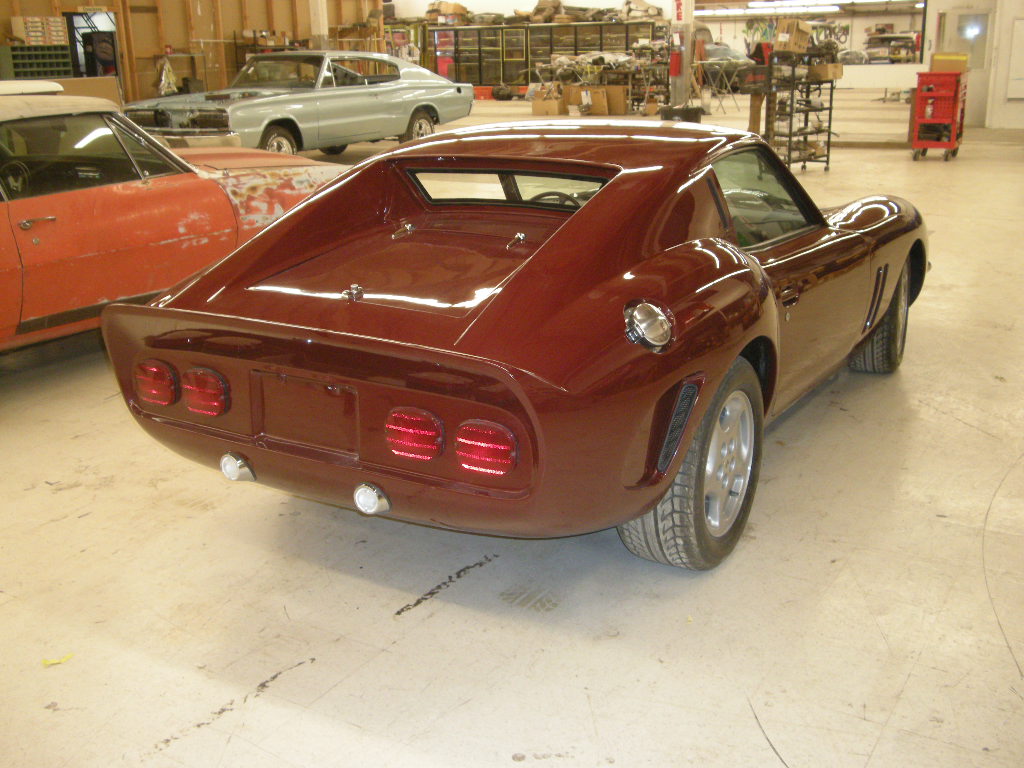
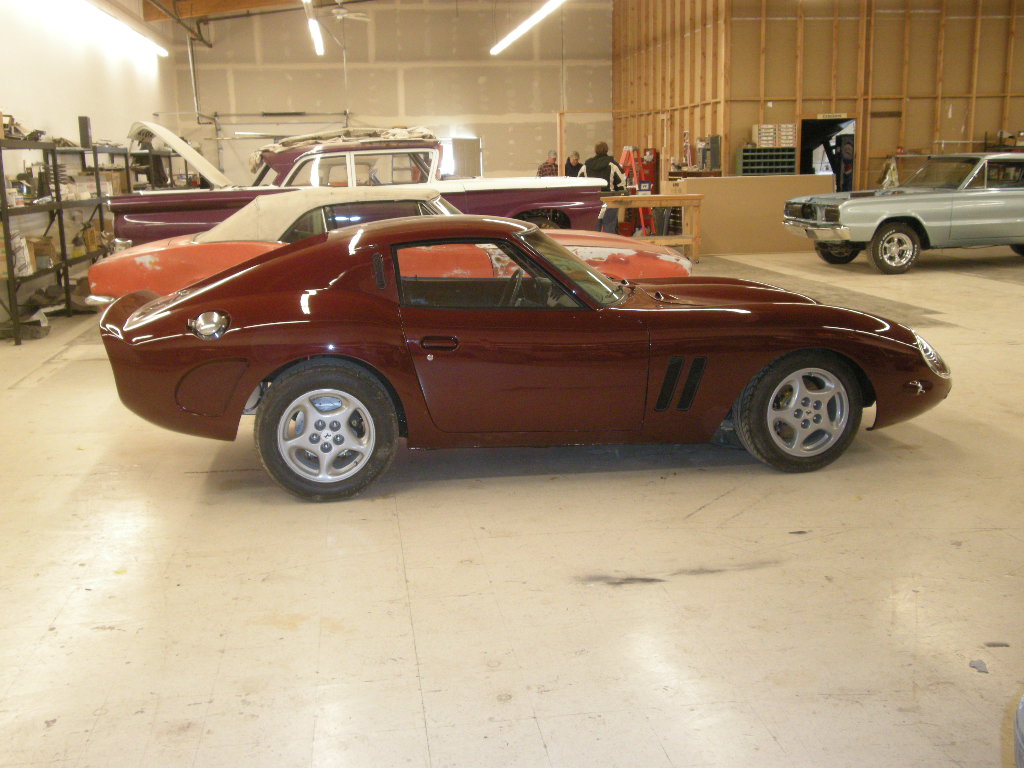
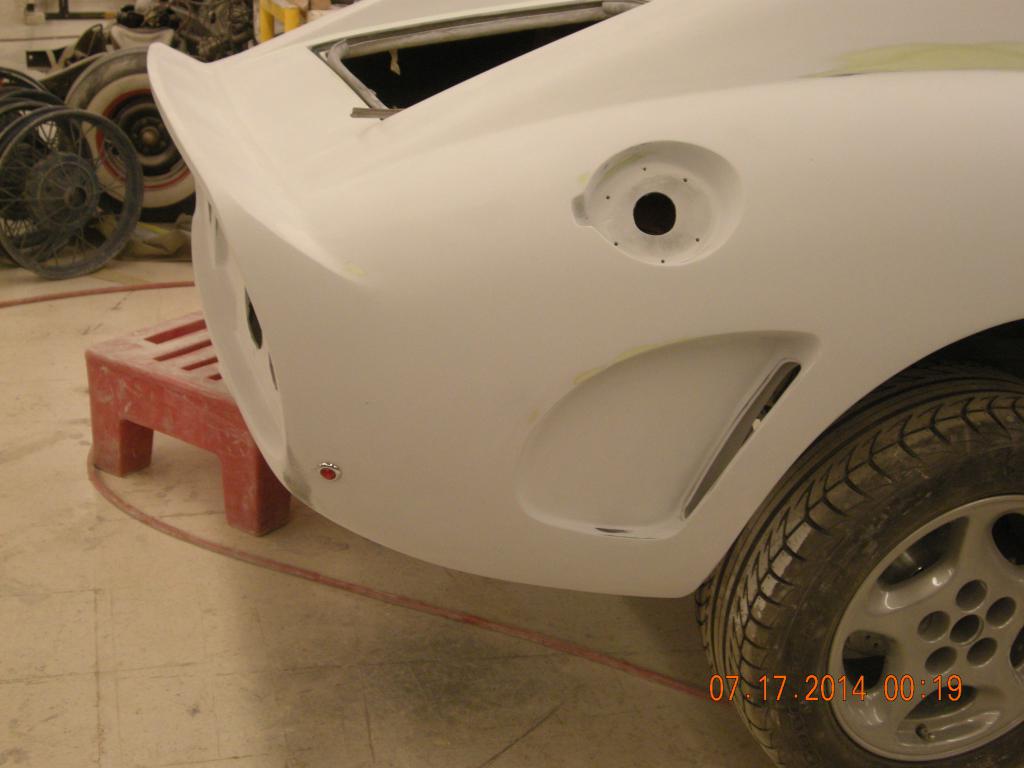
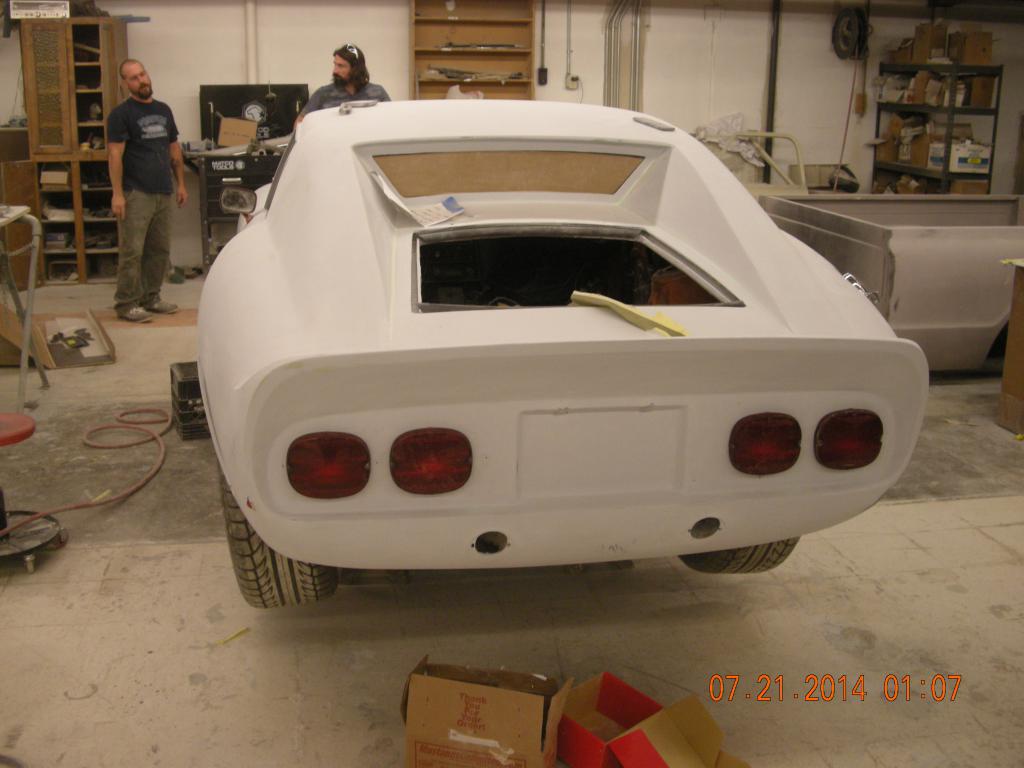
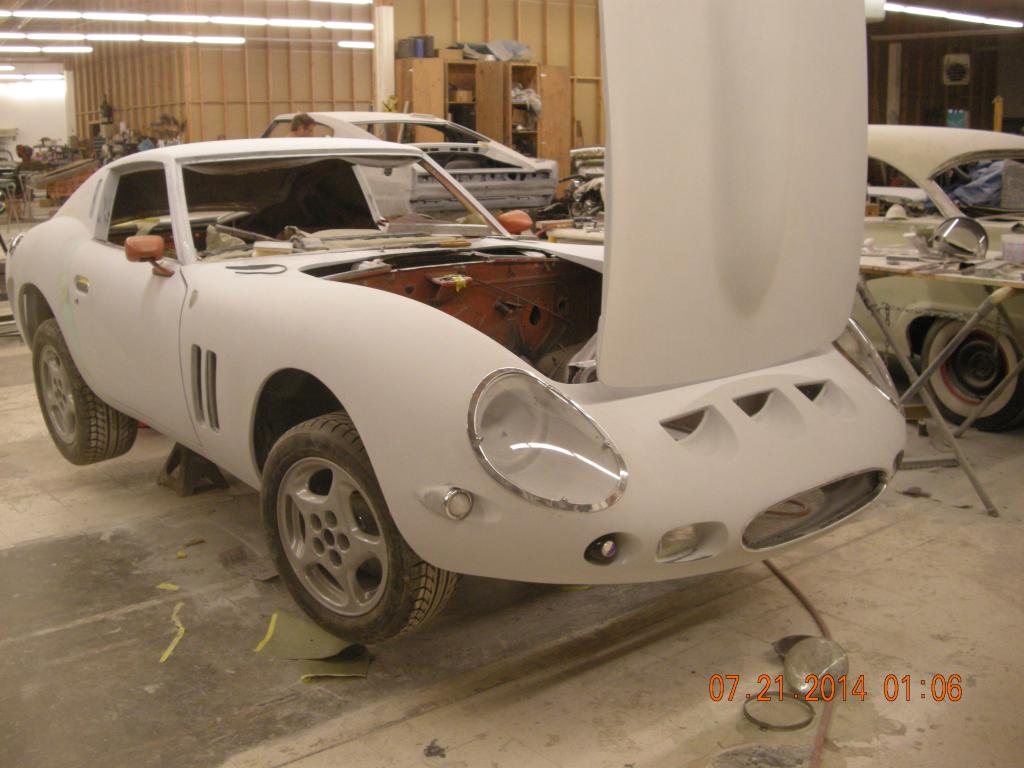
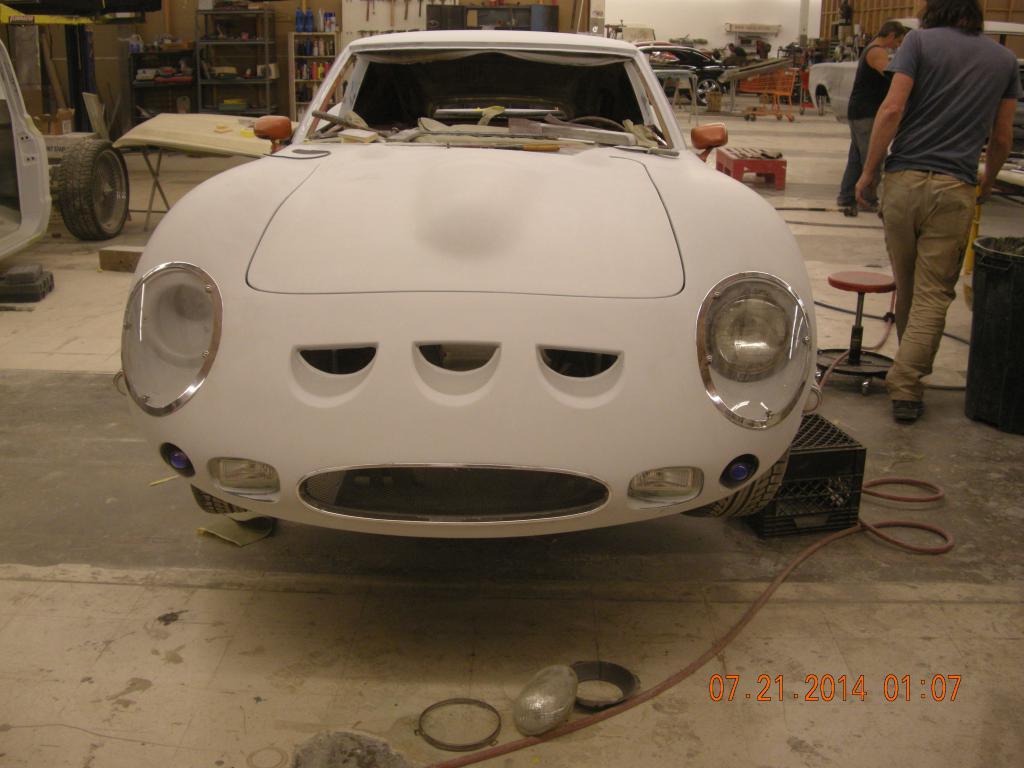
More small steps forward. Only a few more body shop details to mount and final polish.

-
Ross at SDS told me that some of the later 74 & up tach "might" work with SDS EMS. Anyone done this? I am trying to keep a stock appearing dash but if a later year Datsun tach can work I am ok with that. Any input?
-
Wes; I was fortunate to be able to spend a concentrated amount of time working on this. When I get the car back from the body shop I will need to install hydraulics, interior, electrical and engine systems. A lot done but a lot more to do. Hang in there your car was looking pretty good the last I saw it. Keep me up to speed.
-
thanks Wes,1/3rd the way there. BTW I don't think I saw yours painted. Are you there yet? I know your streetable.
-
The butterfly emerges
-
The butterfly emerges
-
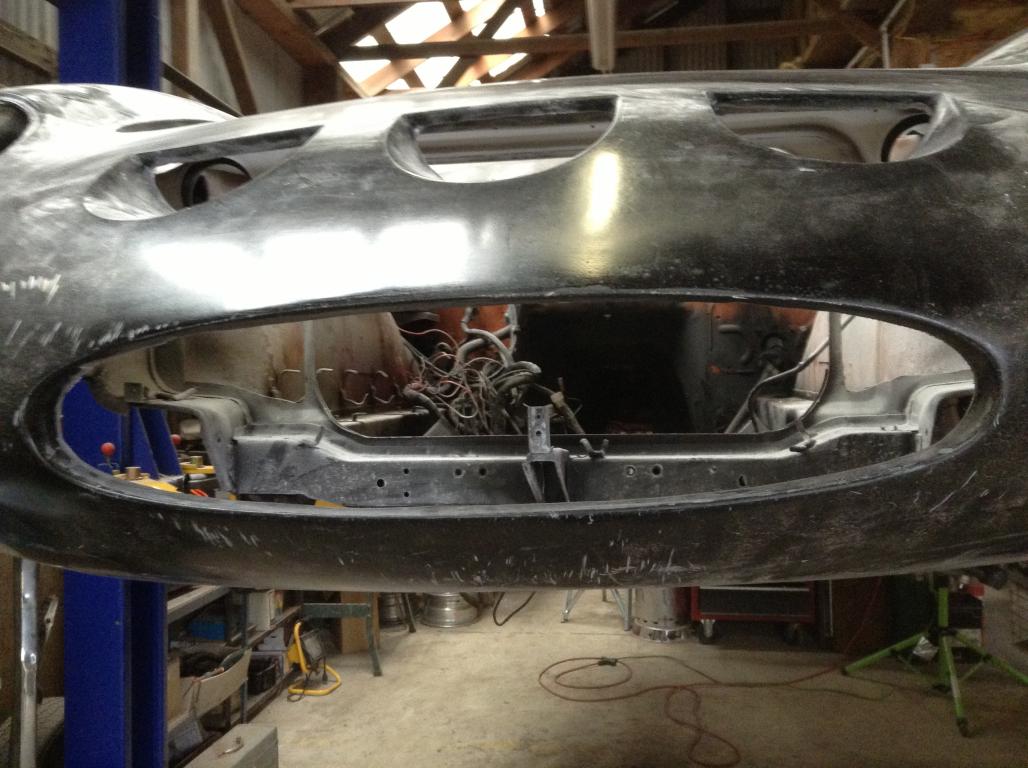
Call me blind or dense, but i do not see any air dams, diffusers, splitters, underbody spoilers,etc. I see a body pan that has a few cutouts that may be intakes for cooling, air routing, or mechanical,clearance. It would be neat to see a factory delivered vehicle clearly from the bottom but that probably will not happen. Any racing team could add spoilers, etc, and probably did. However, neat photo and does add info to my limited data base. Thanks. BTW not trying to be combative just don't see it.
-
Any pictures of those air dams?
-
Nice find! I did not even look.
-
I can send you pics of these items after they have been installed, but i do not have the details of alignments and trial fitting. I have the installation manual from John Washington's VR and I could give/send you and I have a copy of what was Thunder Ranch's 250 GTO manual which is attached in PDF format. The VR manual is more detailed and the better guide but I would offer that if you want a real nice car that you have or can obtain professional auto body technician skills. INHO a layman with good mechanical ability and the ability to work with fiberglass and auto body fillers can do it but it will take a lot longer to obtain nice results (a bazzilion hours of sanding, filling, etc). If you are building a racer or just a toy, and don't require a showy fit and finish then it probably be thrown together in 100-150 hours (not counting mechanical work on the car). Its the final finish that takes much more time. The VR has a nice option for the tilt front end like a corvette or XKE. I am using the fixed front with normal hood opening. I have a few pics in this thread and lots of other folks do also. if you want the documentation I offered PM me with your address. I do not want to scan and send. In all honesty the only thing in the manual(s) that did me any good was methods of bonding and filling and the cutting out of the rear wheel well lips. Other then that it is more of fit, trim/fill, sand, fit, etc intil you are saticfied. Most of this is on the front end, and substantially on the door skins.. the rear clip (TR kit) was a pretty good fit for contour and only required moderate fitting. of course you have to decide on lights which to need to layout for position and trim. The front clip takes a lot of fitting not because the kit front ends are bad, but more because of variations in the 240/260/280 chassis around the cowl and front edges of doors. Hood hinges are dependent on which type of front end you choose. In theory you use the stock front fender fastener locations for the fixed front but transferring the hole pattern is problematic. i had mine bonded on by the shop that has done much of my body work. I used a Pantera style hatch instead of the stock Datsun hatch so I have no experience with the stock hatch fitment to the new aft skin. My biggest issue was locating window/door seals that fit since new replacements are either thicker or harder so getting the seals to relax properly takes some time with heat. The upper window seals have a wiper lip that is hardest to replace. Save all old parts until to are finished reassembling. Even old dried seals can often be reinvigorated by soaking in silicon oils. Door hinges stay in factory locations and do not change due to kit however shimming may be necessary to help alignment to fit gaps to front fenders and rear clip. It's an interesting journey so hang in there thru any frustrating times. Lots of help and suggestions on this site and a bit on "Mad Mechanics". Keep a positive attitude and have fun. Hope what I am sending helps ya. GTO PAGE 1.pdf GTO PAGE 2 PARTS PACKING LIST.pdf 250 Manual.pdf Weatherstrip1.pdf
-
Do you have belly pan (s)?
-
What size are they? I might be interested in trade or purchase. PM me with pics if interested.
-
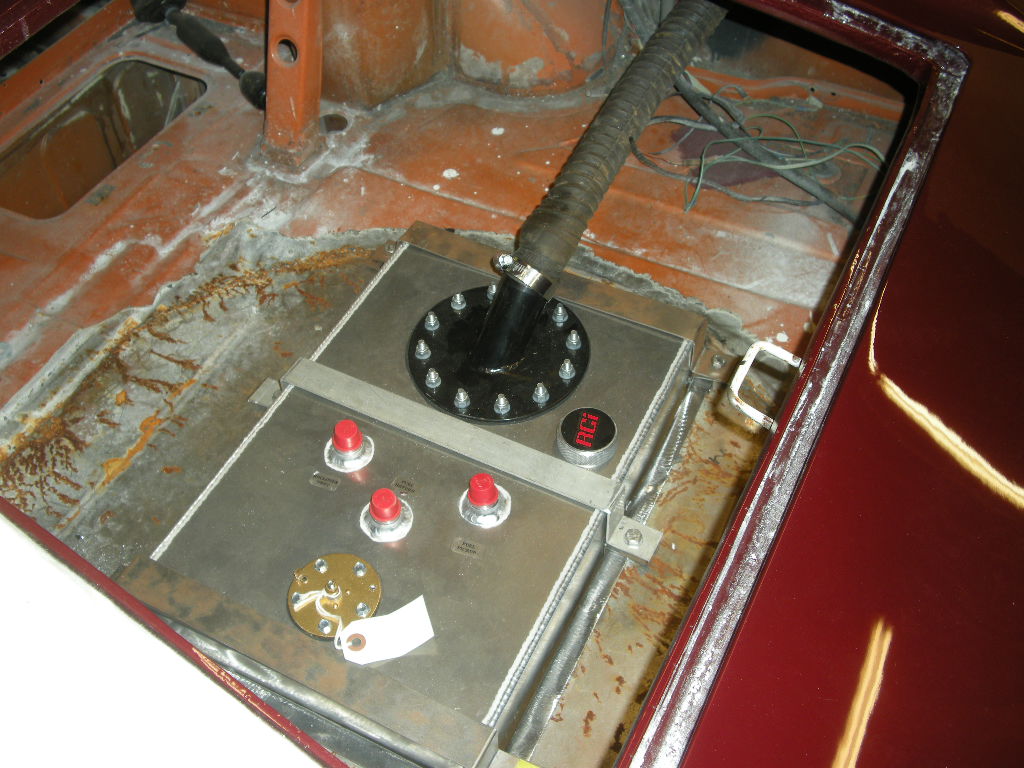
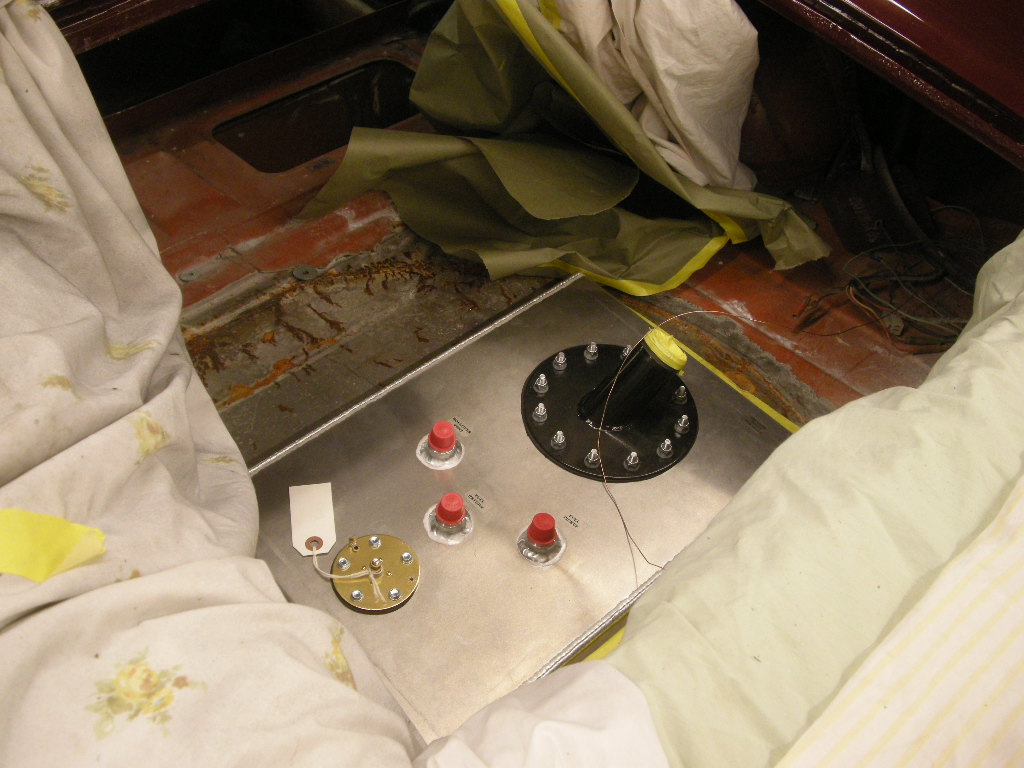
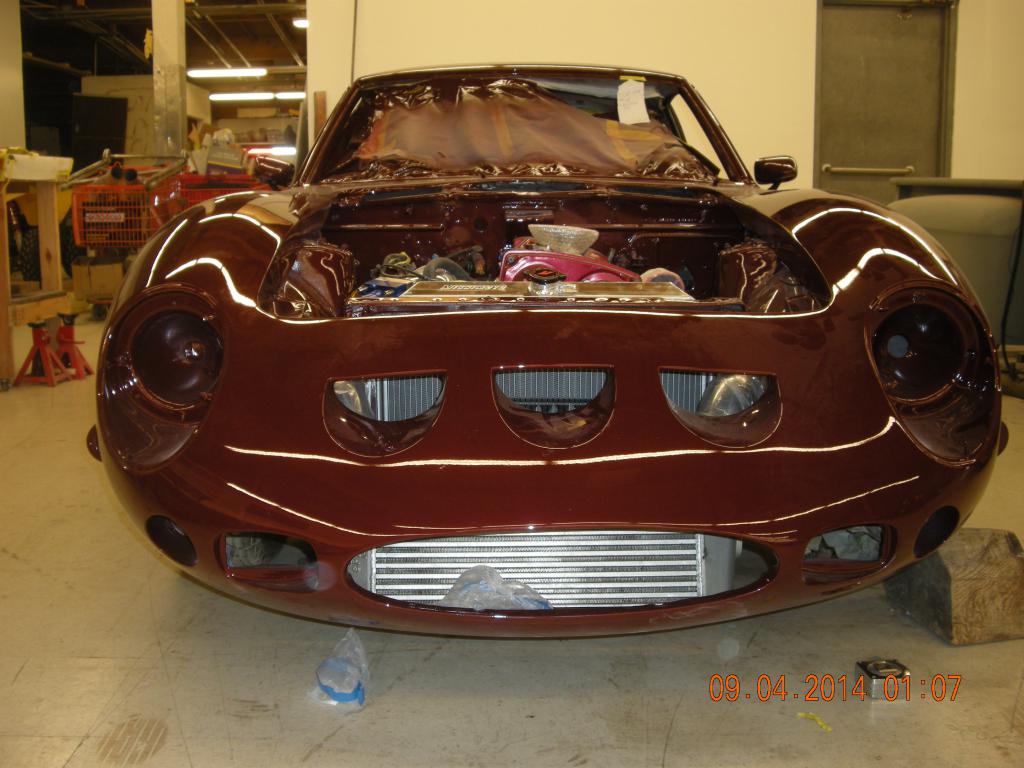
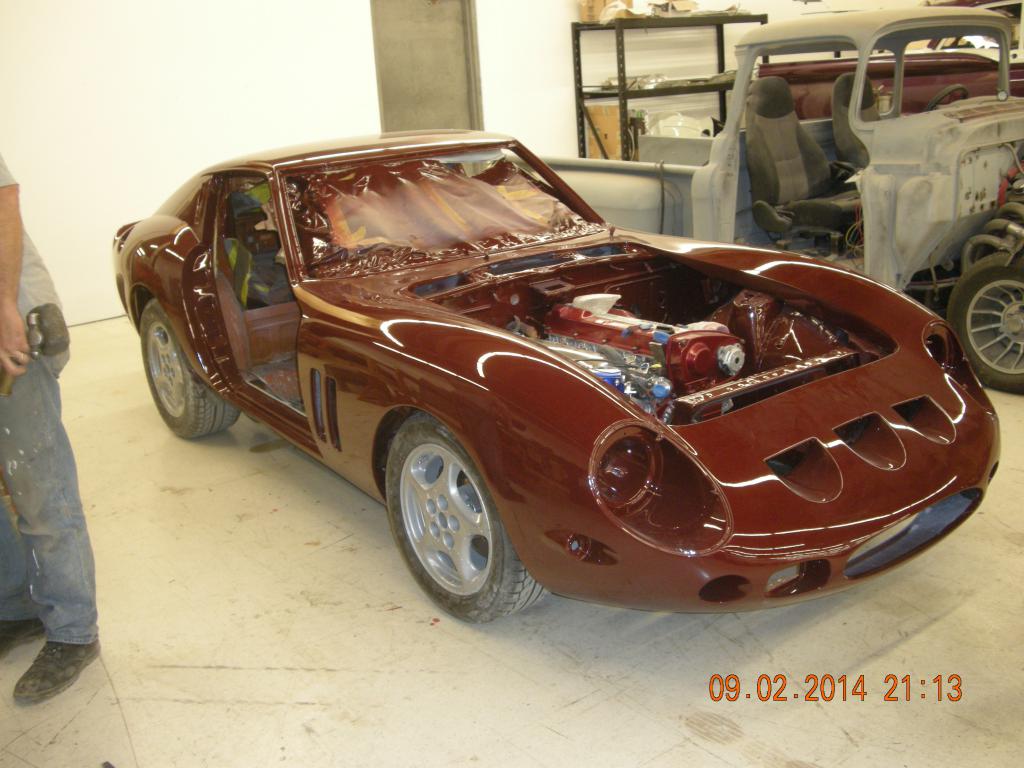
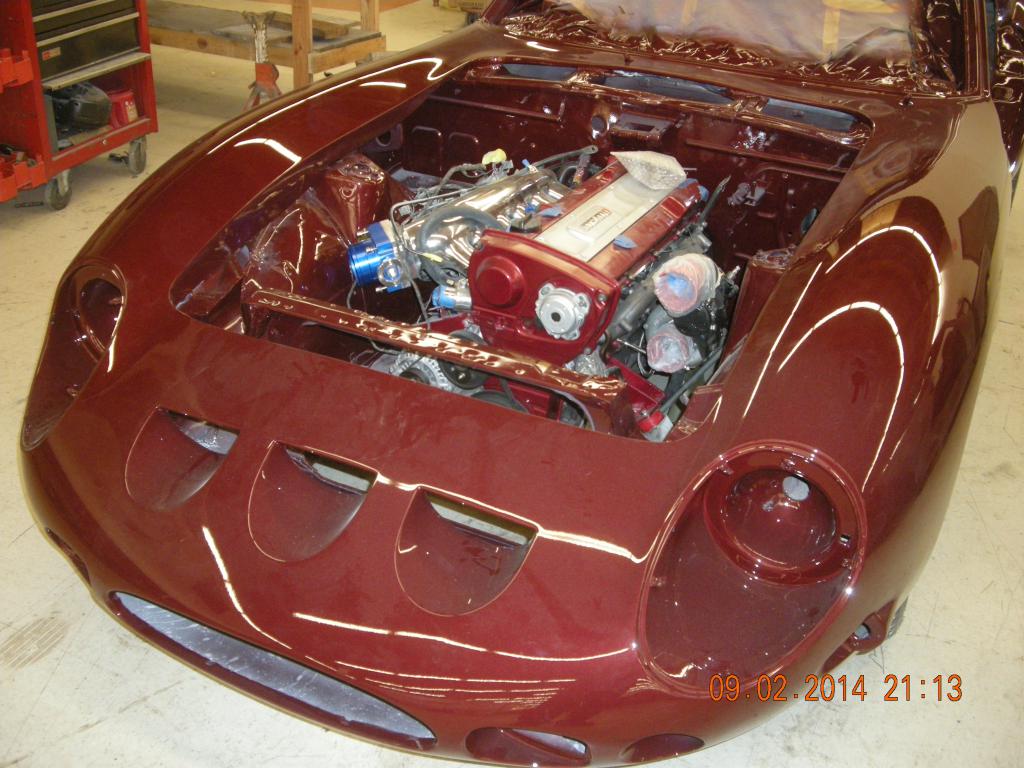
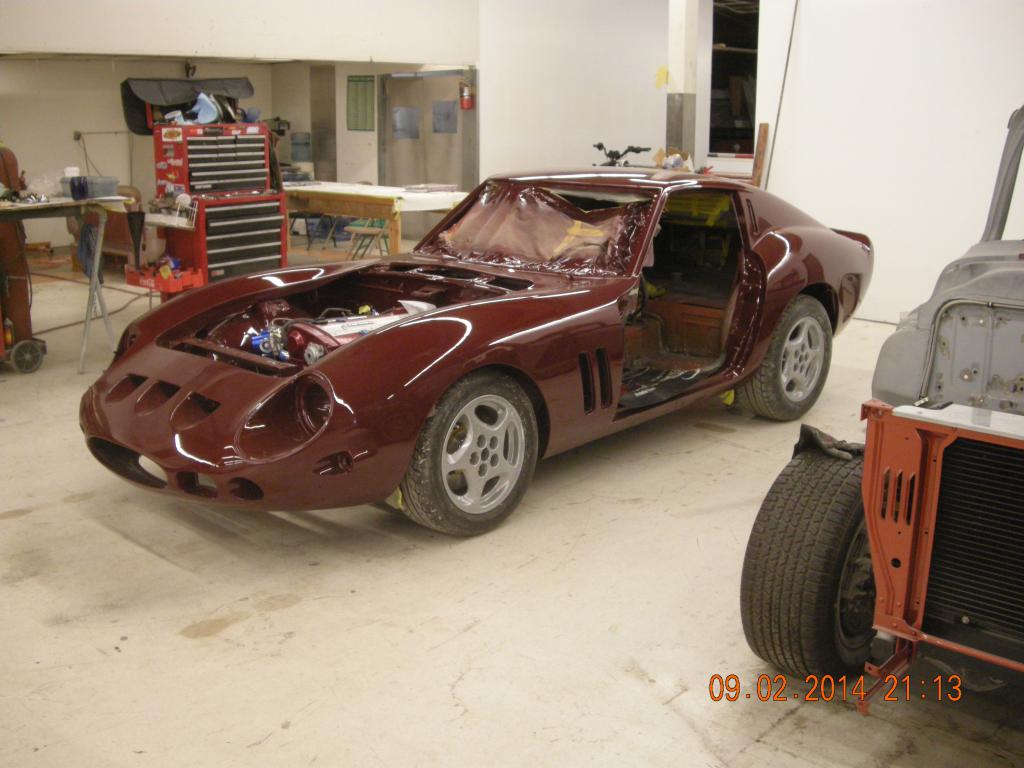
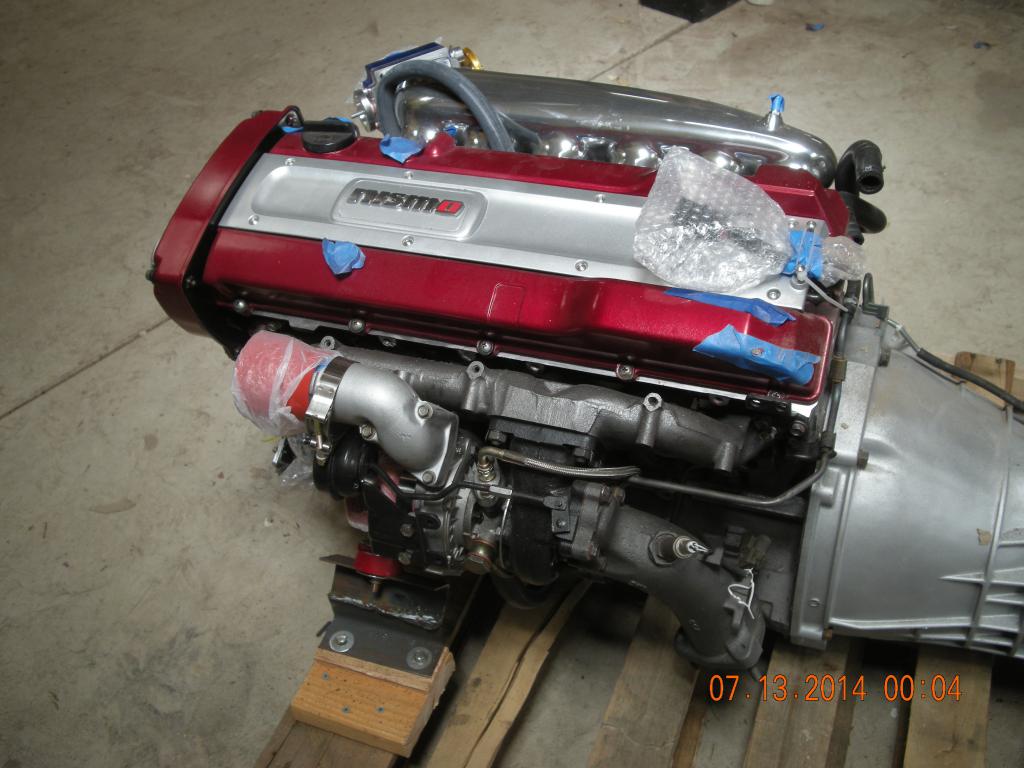
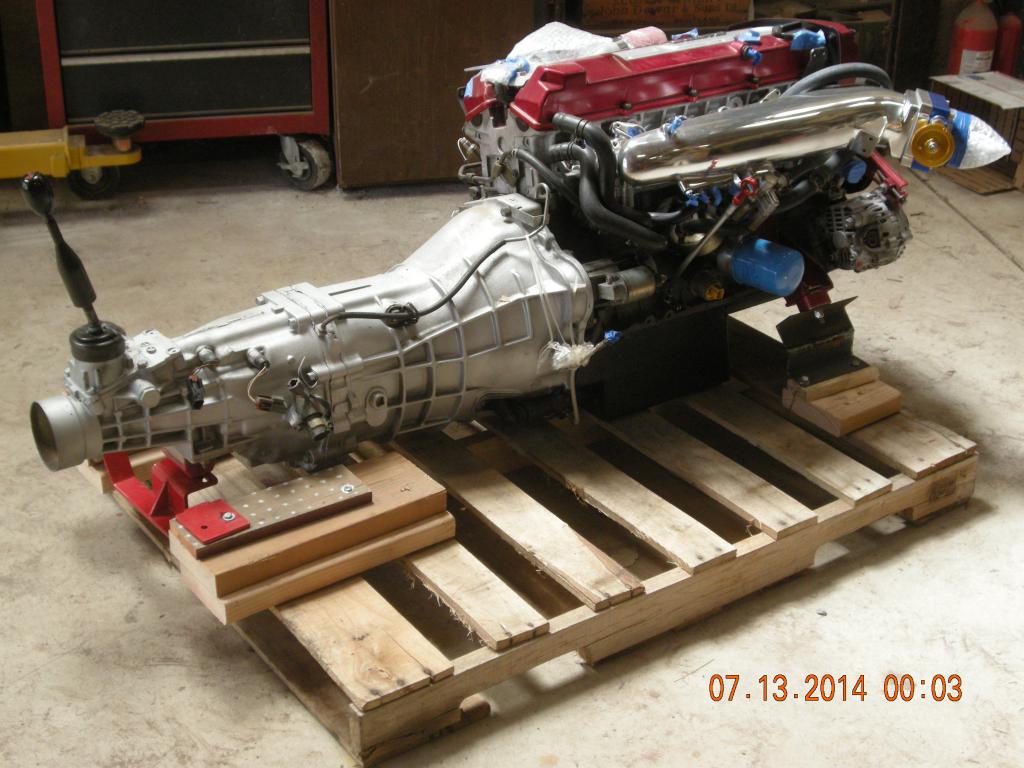
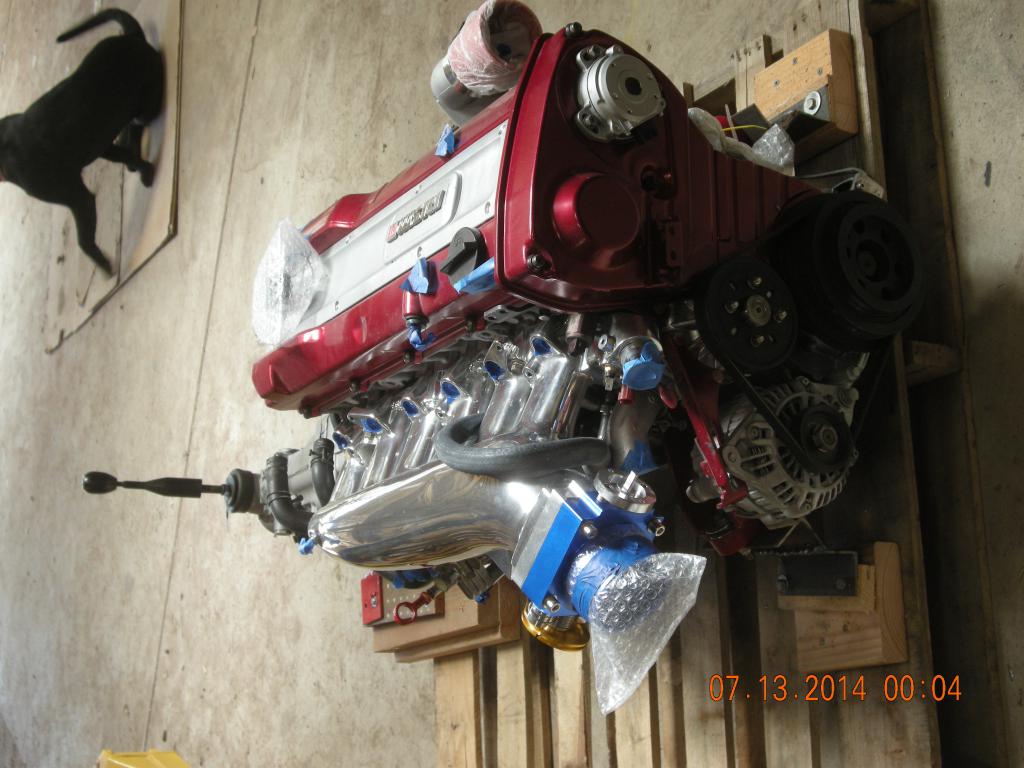
A few updates for my project car. The intercooler is just sitting there not in final position.
-
I wonder what happened to my last 3 postings and 10 pictures. Hey web master Gods what's up with that. Site acting very wierd.
-
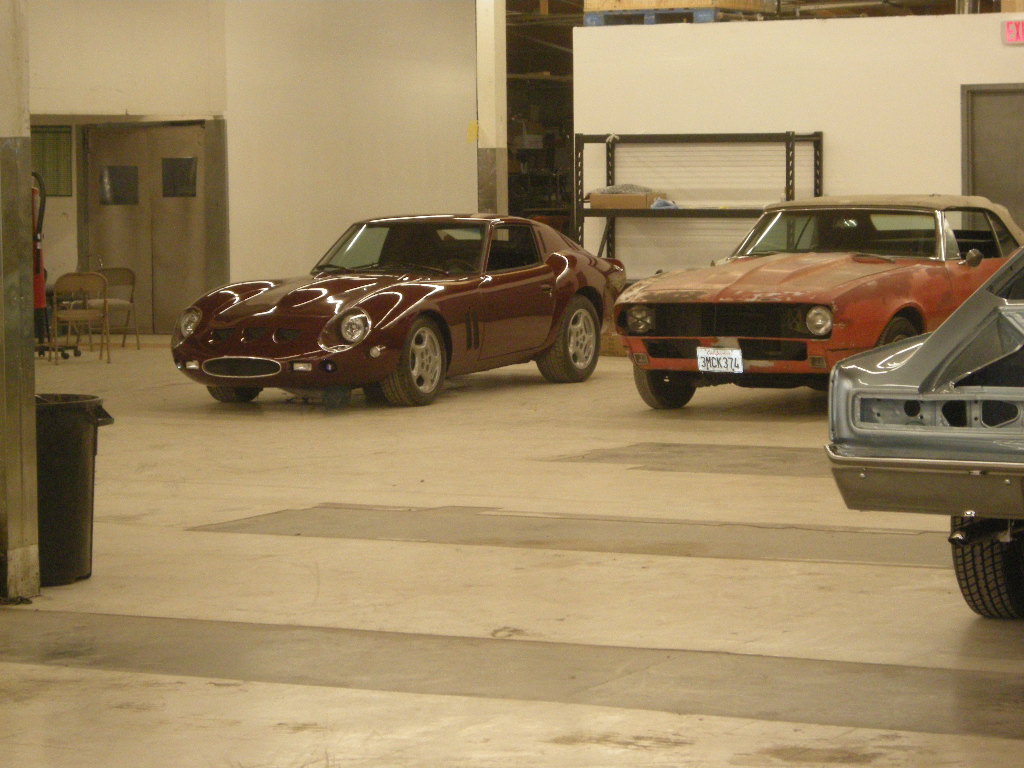
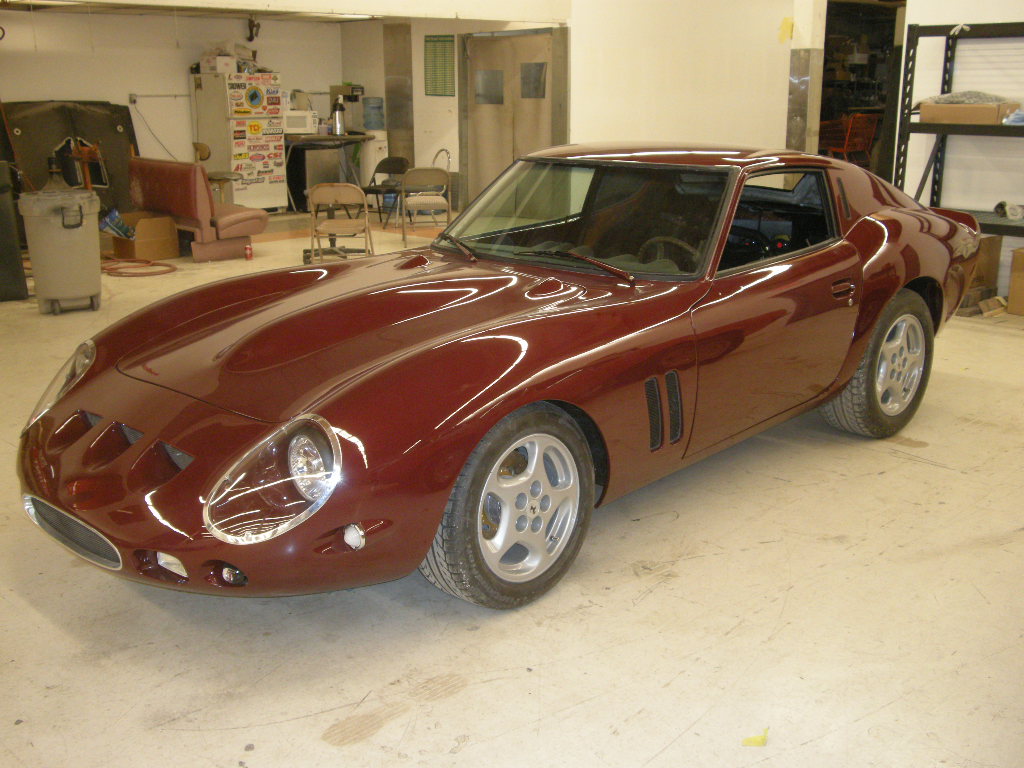
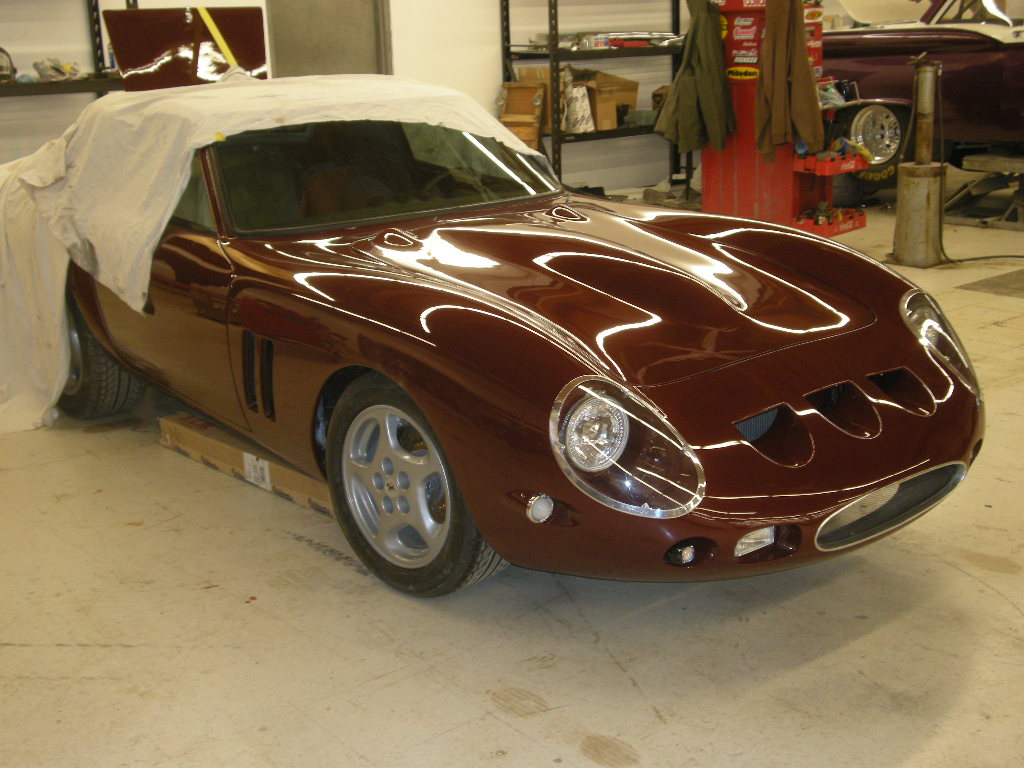
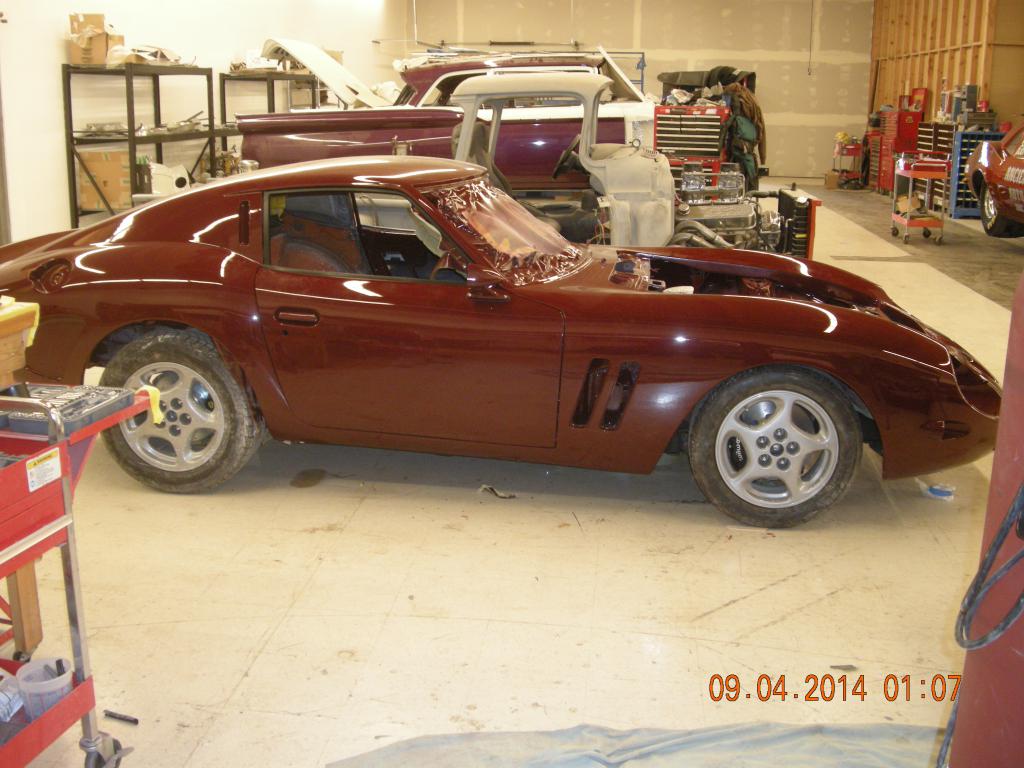
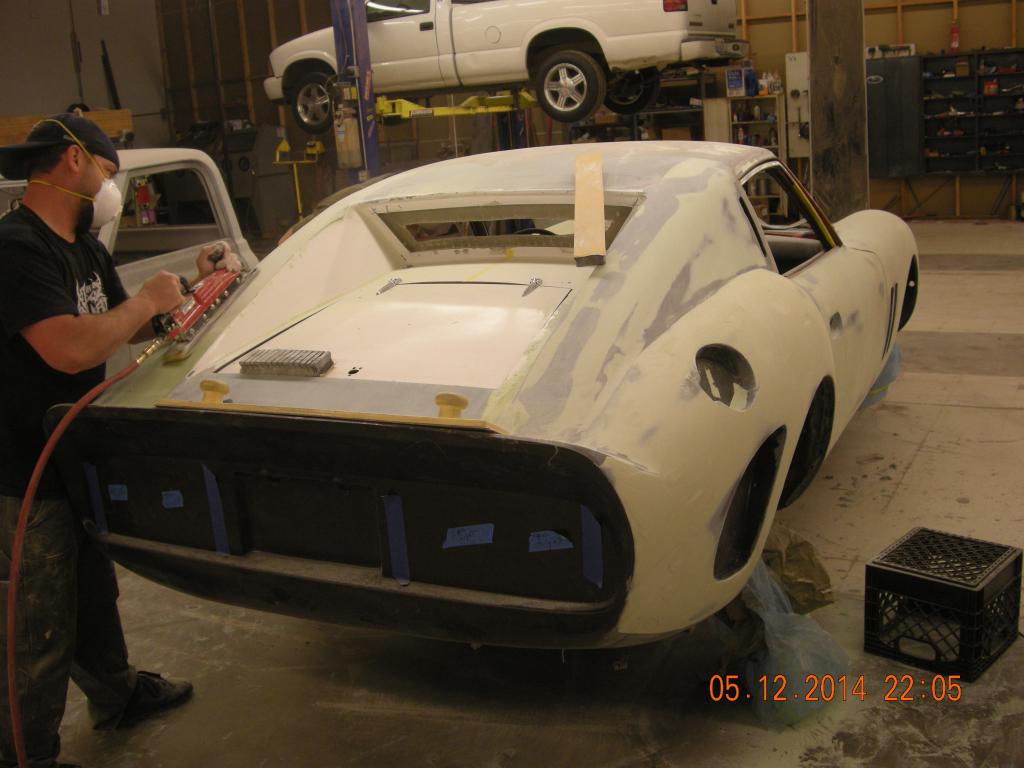
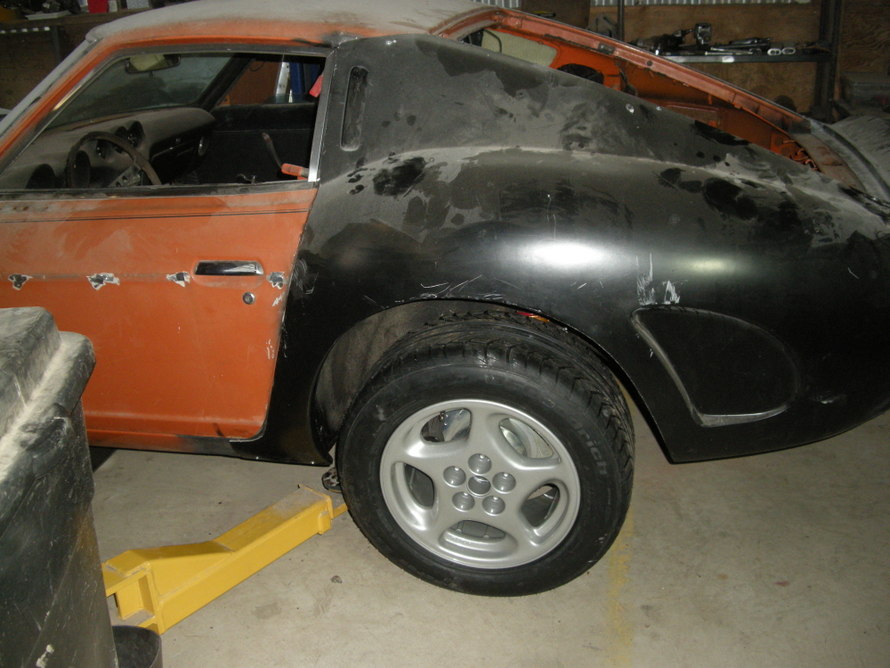
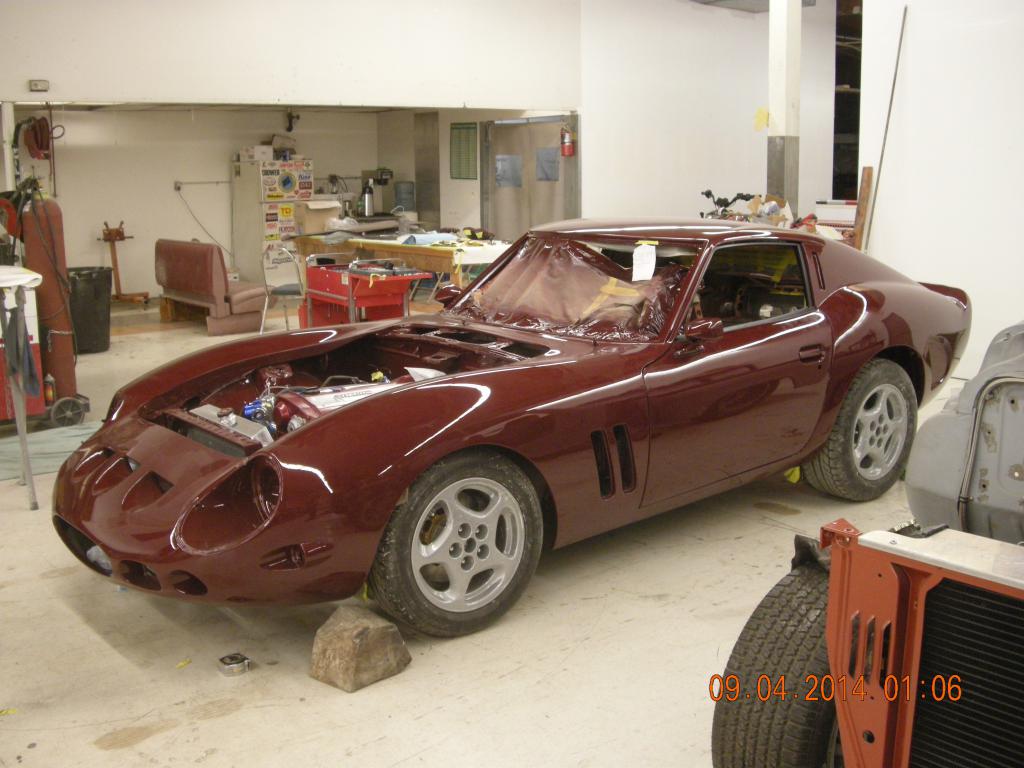
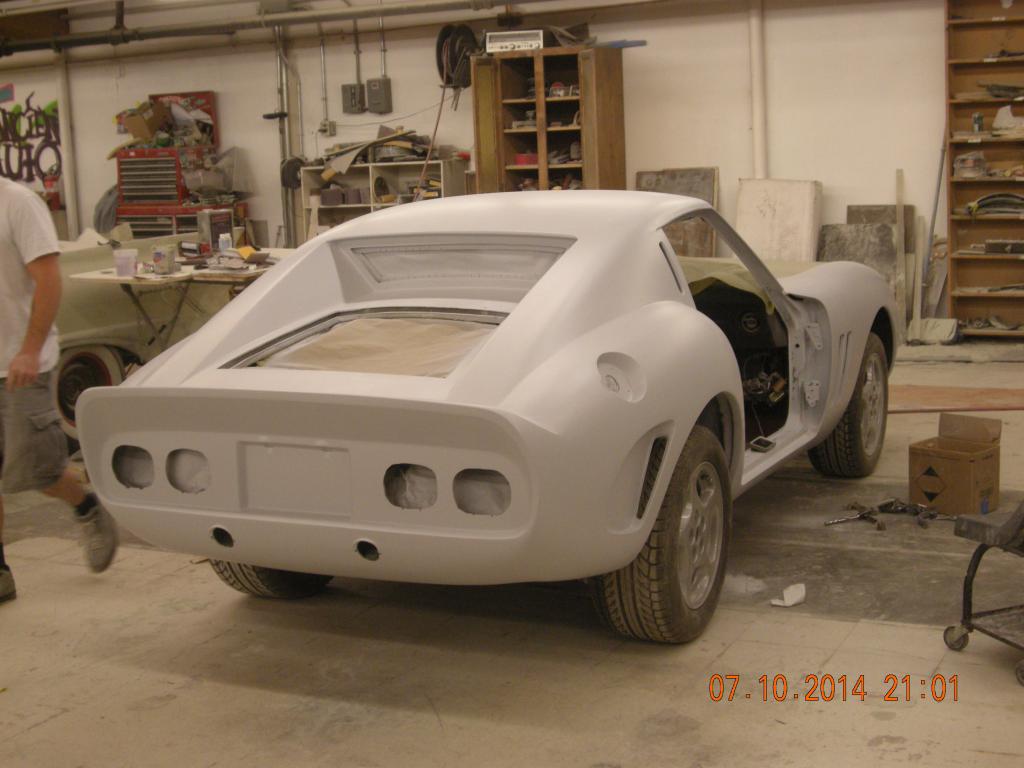
The project is moving along. Fresh from the paint booth this morning. The pictures do not do it justice. Up close this fiberglass looks as straight as metal where a lot of Fiberglas bodies tend to be wavy. Thumbs up to Ancient Auto body and a fantastic team of anal retentive technicians (in a good way) who have taken this project as if it was their own. Lot's more to do, but the engine should be in soon so the car can begin to sit as it should. More to follow as the build continues. Doors and hood are in wet sanding now and will probably be painted today. sorry the picture files became corrupted and i did not have backups.
-
I only wish I had that little in mine. Thanks for the note
-
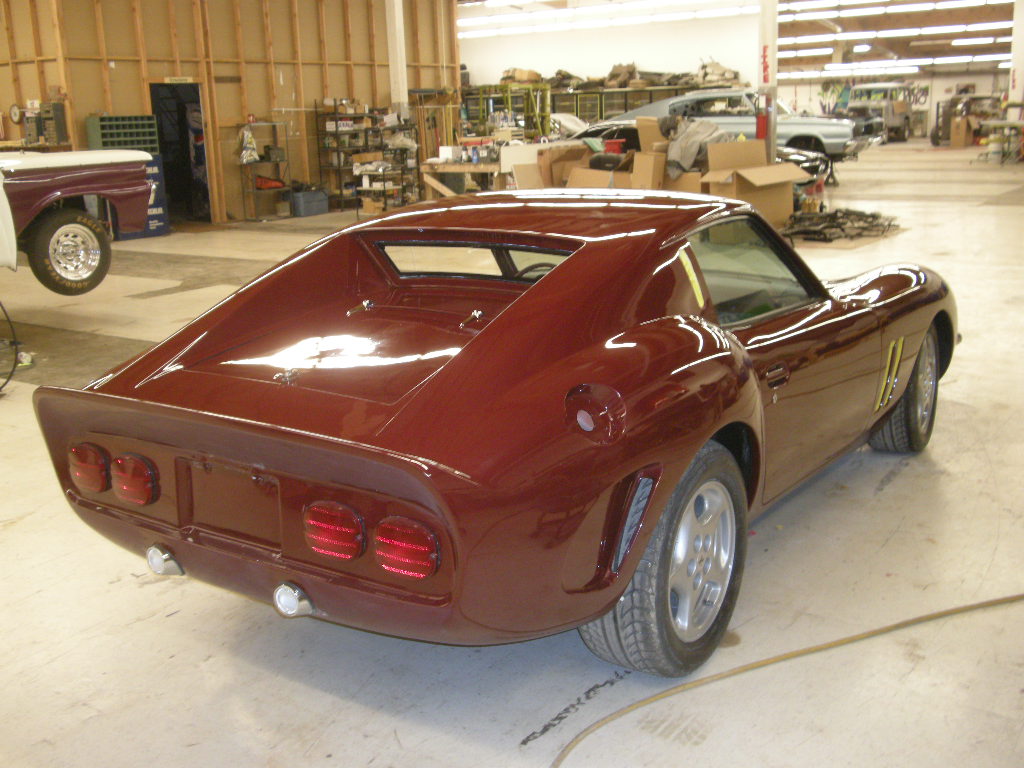
That wiper arm idea is being considered. If you look at pictures of my car you will see that I have the cowl scoops backwards from the prototype, as I am using them for cabin air. I can mount the nozzles in the cowl well just underneath them and shoot water right to the window. Anyway no big panic and thx for valuable input.
-
Is there a local collage or school that has an auto-body or mechanical arts curriculum in your area? You might be able to have them made for a song there. For the headlight trim. Wrap some drafting paper or wrapping over the headlight area. Use the indentation around the headlight as a tracing ling. Draw the line. Remove paper from car. layout flat and draw or have someone draw the inner line and locate tabs where you want. Take to a local sheet metal/air conditioning shop and have a couple made to your drawings. You can use the lens to guide the rolled shape and they normally have hand rollers at those shops. Take them home and polish or have plated. Make it thick enough to dimple or countersink your fastener holes and keep it thin as you can. The intake lip is a bit more of a problem although I think one of the Ford Taurus models (first or second model year change) had a very similar trim piece. luck
-
SR thanks. It is fair to have personal likes and dislikes, There are funny shadows in the photos that make the hatch/window look weird but in life it is killer (to me) no foul, no error. Trim rings came from http://www.thunderranch.com /gto.html (when McBurnie was still the owner)The owner/providers have been changed to either Red Rock Racing or Carrera CoachWerks (might have split into two businesses)., which ever name they are using now. Not fun to deal with. Hey Speed just found this, yikes hold on to your wallet and first born kid These guys are friggen bonkers or do not ever want to sell any, same with grill. they also reduced the parts supplied in the GTO kit while increasing the price. I think I paid about $500 for all and a good sheet metal guy could to layout, trim roll and polish in 2-4 hours
-
 Here are a couple of shops you might try. If you don't see your need listed, call them and ask. Even if they don't have they may know a source. I actually saw a pattern to make that bracket somewhere on this site or Zdriver.com Gia & Gabriel Tyler www.TechnoToyTuning.com Great folks to deal with and they make most of their stuff ArizonaZ.com lot's of neat stuff but have no experience dealing with them. McKinneymotorsports.com Expensive, but good stuff
 -
Well it's not much use to post here and not have conversations so I'm out of here
-
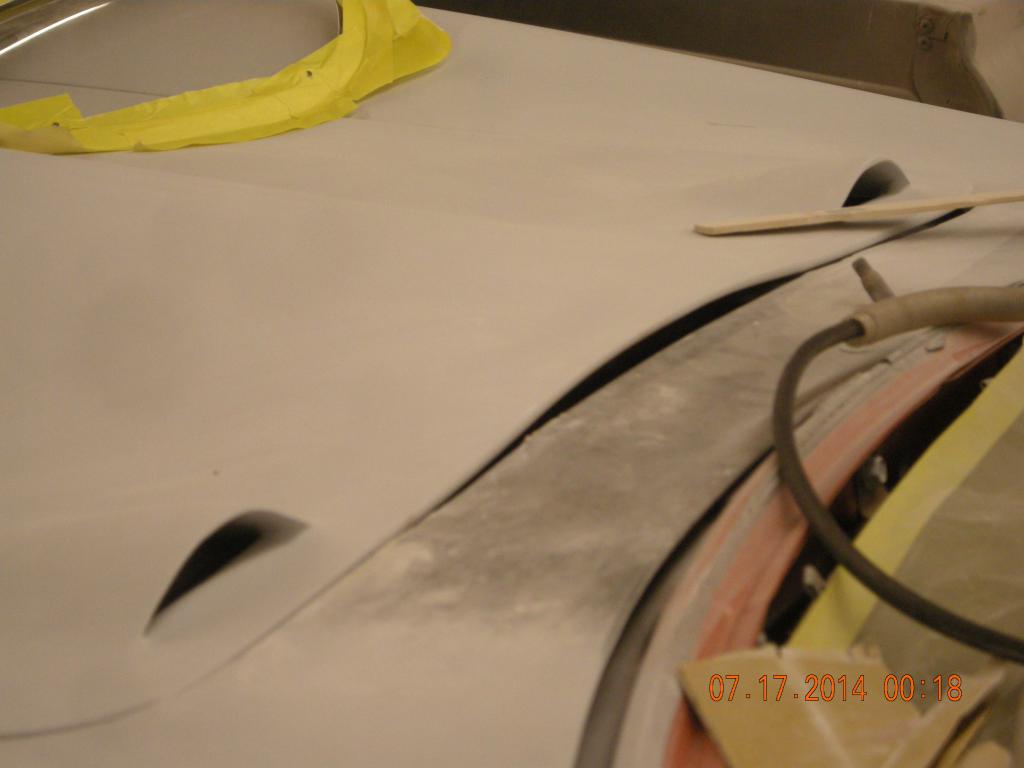
Well it did not get final paint. a second primer sealer has been applied, pin holes to be sealed and then into paint. A good thing with delays is that flashes of " I forgot" happen. In this case I and the shop guys had forgotten a provision for the windshield washer nozzles. So a mod. needs to made for those. Perhaps a couple of slots in the hood, trimmed nicely of course. There some older kits out there that have a cowl but the Thunder Ranch kit only has a cowl 2" wide and the hood covers the stock Datsun washer locations. I think John Washington's kit has similar issues as I, having that nice full tilt hood. Anybody with these kits that did keep functional washers please chime in.
-
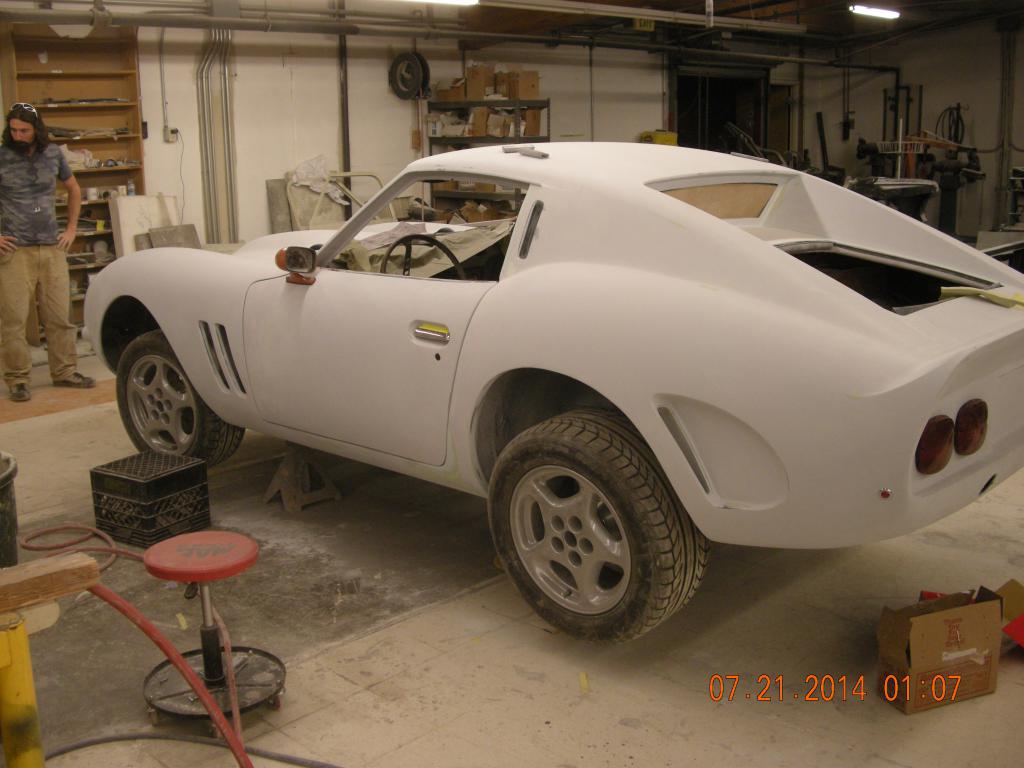
My engine ready to meet the body This was the stage of body work as of 7-21 Hope to be in final paint this week